

Page 1
OPERATOR’S MANUAL
RICOH FAX3700L
Please read all of these instructions and keep this manual by your machine.
Page 2

Optional Equipment
Memory (FEATURE EXPANDER TYP E 100 2M, FEATURE EXPANDER TYPE
100 4M)
Either a 2-Mbyte memory card or a 4-Mbyte memo ry ca rd can be added.
PC Printer Interface Kit (PRINTER INTE RFACE TYPE 100)
This allows you to use the machine as a lase r print er fo r a n IBM1 or compatible
personal computer.
PAPER CASSETTE TYPE 100
This gives this machine addit ional 100 sheet paper capacit y with the single
bypass.
PAPER FEED UNIT TYPE 140F
500 sheet paper feed un it can be adde d to the base machin e.
PC-FAX EXPANDER TYPE 100
This allows use of this machine as a scanner, PC Fax modem and convenient
200dpi printer.
COUNTER TYPE 100
1
Copyright Notice
IBM is a registered trademark of Int ern at ion al Bu sine ss Machin es Corporation.
Page 3

IMPORTANT SAFETY INSTRUCTIONS
1. Read all of these instructions.
2. Save these instruction s for lat er use .
3. Follow all warnings and instructions marked on the product .
4. Unplug this product from the wall outlet before cleanin g. Do not use liqu id
cleaners or aerosol cleaners. Use a damp cloth for cleaning.
5. Do not use this product near water.
6. Do not place this product on an unstable cart, stand, or tab le. The product
may fall, causing serious dama ge to th e pro du ct or inju ring the user.
7. Slots and openings in th e cab inet and the back or botto m are provided for
ventilation; to ensure reliab le op era tio n of the prod uct and to pro tect it from
overheating, th ese openings must not be blocked or covered. The opening s
should never be blocked by placin g th e product on a bed, sofa, rug, or oth er
similar surface. This product should not be placed in a built-in installa tion
unless proper ventilation is provided.
8. This product should be oper at ed from th e type of power source indicated on
the marking label. If you are no t sure of th e typ e of power available, consult
an authorized sales person or your local power company.
9. This product is equipped with a 3-wire groun din g typ e plu g, a plug ha ving a
third (grounding) pin. This plu g will only fit into a grounding-type power outle t.
This is a safety feature. If you are unable to insert the plu g int o th e ou tlet,
contact your electrician to replace your obsolete outlet. Do not defeat the
purpose of the grounding type plug. (This do es no t apply in cou nt ries in which
the 2-wire, non-grounded type of plug is used .)
10. Do not allow anything to rest on th e power cord . Do no t loca te this pro du ct
where persons will walk on the cord.
11. If an extension cord is u sed with this product, make sure that the tot al of the
ampere ratings on the prod uct s plug ge d int o the extension cord does not
exceed the extension cord ampere rating. Also, make sure that th e t ot al o f a l l
products plugged into the wall outlet does not exceed 15 amperes.
12. Never push objects of an y kind int o th is p rod uct through cabinet slots as they
may touch dangerous voltage poin ts or sho rt out pa rts th at could result in a
risk of fire or electric shock. Never spill liquid of any kind on the pro du ct.
13. Do not attempt to service th is prod uct yourself, as opening or removing covers
may expose you to dangerous voltage points or ot her risks. Refer all servicing
to qualified service personnel.
14. Unplug this product from the wall outle t and ref er servicin g to qualifie d service
personnel under the fo llowing conditions:
A. When the power cord or plug is damag ed or f raye d.
B. If liquid has been spilled into the product .
C. If the product has been exposed to rain or water.
D. If the product does not operate normally when the ope rat ing instru ctio ns
are followed. Ad just only those controls th at are covered by the o pe rating
instructions since improper a dju stme nt of ot her controls may result in
damage and will often required extensive work by a qualifie d techn ician
to restore the produ ct to norma l ope ration.
E. If the product has been dropped or the cabinet has been damaged.
F. If the product exhibits a distinct change in performance, indicating a need
for service.
Page 4

Table of Contents
INTRODUCTION 1
SOME OF THE THINGS THAT THIS MACHINE CAN DO 2
HOW TO USE THIS MANUAL 4
MANUAL OVERVIEW 4
CONVENTIONS 5
Keynames 5
Displays 5
Symbols 6
GENERAL PRECAUTIONS 7
POWER AND GROUNDING 7
COLD WEATHER POWER-UP 8
THUNDERSTORMS 8
COPY PAPER 9
TONER CARTRIDGES 9
OPERATING PRECAUTIONS 9
GENERAL 10
GUIDE T O COMPONENTS 11
1. MAIN BODY 11
2. OPERATION PANEL 12
ROUTINE OPERATION 14
SENDING A FAX MESSAGE 14
Precautions Con cerning Unacceptable Docu ment T yp es 14
Tra nsmissio n Pro ced ure at a Glance 16
Sending a Page with Very Fine Detail 23
Dialing with the Telephone Directory 27
Optional Features fo r Transmission 28
Sending Quickly 33
Changing T ransmission Mode 33
Using the Stamp 34
Redialing 35
RECEIVING FAX MESSAGES 37
Selecting the Rece pt ion Mode 37
Receiving Fax Messages When The re I s a P rob lem 38
TELEPHONE CALLS 40
Making a Telephone Call 40
Answering the Telephone 42
Page 5

Phoning and Faxing on the Same Call 42
Speaker and Buzzer Volume Adjustments 43
ADVANCED FEATURES 44
TRANSMISSION 44
Tra nsfer Request 44
Programming Keystrokes 49
Sending Confid en tia l Me ssag es 52
Storing an Often Used Document (Auto Documen t) 55
Restricting Access to the Ma chin e 58
Tonal Signals 62
Storing Part of a Number 64
Printing Your Personal Identification at the Other E nd 65
Closed Network (Transmission) 66
Preventing Transfer to a Wrong Connections 67
ECM (Error Correction Mode) and Page Retransmission 68
Batch T ra nsmissio n (Feat ure Exp an der Req uire d) 69
Well Log Transmission 70
RECEPTION 71
Receiving Confidential Messages (Feature Expander Re quired ) 71
Locking Incoming Messa ges (Memory Lo ck) 74
Rejection of Messages from Unid en tif ied Sende rs 78
Authorized Reception 79
Forwarding (Feature Expander Required) 82
Specified Cassette Select ion (O ptional Lower Cassette or
Removable Cassette Required) 88
Wild Cards 91
Reverse Order Printing (Feature Expander Required) 92
Multi-copy Document Rece pt ion (Feat ure Expander Required) 93
Printing a Center Mark 96
Checkered Mark 97
Reception T ime 98
Reducing the Page Length 98
Two in One 99
Closed Network (Reception) 100
Entering a List of Sende rs to Treat Differently 101
OTHER 104
Calling to Request a Message (Polling) 104
File Management 111
Saving Energy 113
Night Time r 115
Counters 118
Entering PC Printer Mode (Printer In terface Required) 119
Copying 1 19
Dual Access 120
Page 6

RDS (Remote Diagnostic System) 121
AI Short Protocol 122
Copying 122
REPORTS 123
AUTOMATICALLY PRINTED REPORTS 123
Descriptions of the Available Reports 123
Switching Reports On/Off 125
Printing a Sample of Data on the Rep ort s 126
Report Formats 127
USER-INITIATED REPORTS 129
Descriptions of Ava ilable Report s 129
LOOKING AFTER THE MACHINE 132
REPLACING PAPER 132
REPLACING THE TONE R CASS ETTE AND CLEANI NG PAD 133
Replacement Procedure 133
REPLACING THE STAMP 135
CHANGING THE PAPER SIZE
(MAIN CASSETTE AND OPTIONAL PAPER FEED CASSETTE ) 136
(OPTIONAL REMOVABLE CASSETTE) 136
USER MAINTENANCE PROCEDURES 139
Cleaning Re fe rence Table 139
Cleaning Procedure 140
Cleaning the Corona Wire 144
Replacing the A DF Roller Asse mbly and th e S eparatio n Pad 145
Replacing the Photoconductor 147
SOLVING PROBLEMS 150
DOCUMENT JAMS 150
Clearing a Document Jam 150
Adjusting the Docu men t Feeder 151
COPY JAMS 152
Cassette Entrance 152
Copy Feed Area 154
Copy Jams When You Use the Optional Re movable Cassette 157
COMMUNICATION PROBLEMS 158
OPERATING DIFFICULTI ES 158
DISPLAYED ERROR MESSAGES 162
ERROR CODES 163
CALLING THE SERVICE STATION 163
DEDICATED TRANSMISSION P ARAME TERS 163
TECHNICAL REFERENCE 164
Page 7

STORING TELEPHO NE NUMBERS 164
STORING NAMES AND LABELS 164
Punctuation Marks and Symbols 165
Editing with the Clea r K ey and Cursor 165
IF YOU MAKE A MISTAKE 165
ON/OFF SWITCHES AND USER PARAMETERS 166
On/Off Swit che s 166
User Parameter Settings 167
SPECIFICATIONS 172
APPENDIX
INSTALLATION AND INITIAL SETT INGS 173
LOCATION 173
ATTACHING THE DOCUMENT TABLE AND DOCUMENT TRAY 174
INSTALLING THE PHOTOCONDUCTOR, TO NER CAS SETTE AND
CLEANING PAD 175
CONNECTING THE MACHINE 177
LOADING PAPER IN THE CASSETTE 178
INSTALLING REMOV ABLE CAS SE TTE AND LO ADING PAPER 180
INSTALLING THE OPTIONAL FEATURE EXPANDER 183
A TTACHING THE OPTIONAL HANDSET 183
USING MANUAL FEE D 184
Using Manual Feed with the Removable Cassett e (Op tio n) 184
SOME ITEMS MUST BE PROGRAMMED FIRST 185
Overview 185
Selecting the Display Language Select ion 185
Setting the Date and Time 186
Daylight Saving T ime 186
Setting Your Machine’s Id entification 187
Pulse Dial or Tone Dial? 190
QUICK DIAL, SPEED DIAL, AND GRO UP DIAL 191
Three Convenient Ways to Dial 191
Programming Quick Dials 193
Programming Speed Dials 196
Programming Groups 199
Storage C a pacity for Telephone Number s 203
DEALING WITH JUNK FAX MAIL 204
OTHER ITEMS TO PROGRAM AT YOUR LEISURE 204
GLOSSARY 205
Page 8
INTRODUCTION
Transmit
Thank you for purchasing this product. This multi-function office machine offers a
wide range of fax, cop ier, printer, and conve nient features.
What Does a Fax Machine Do?
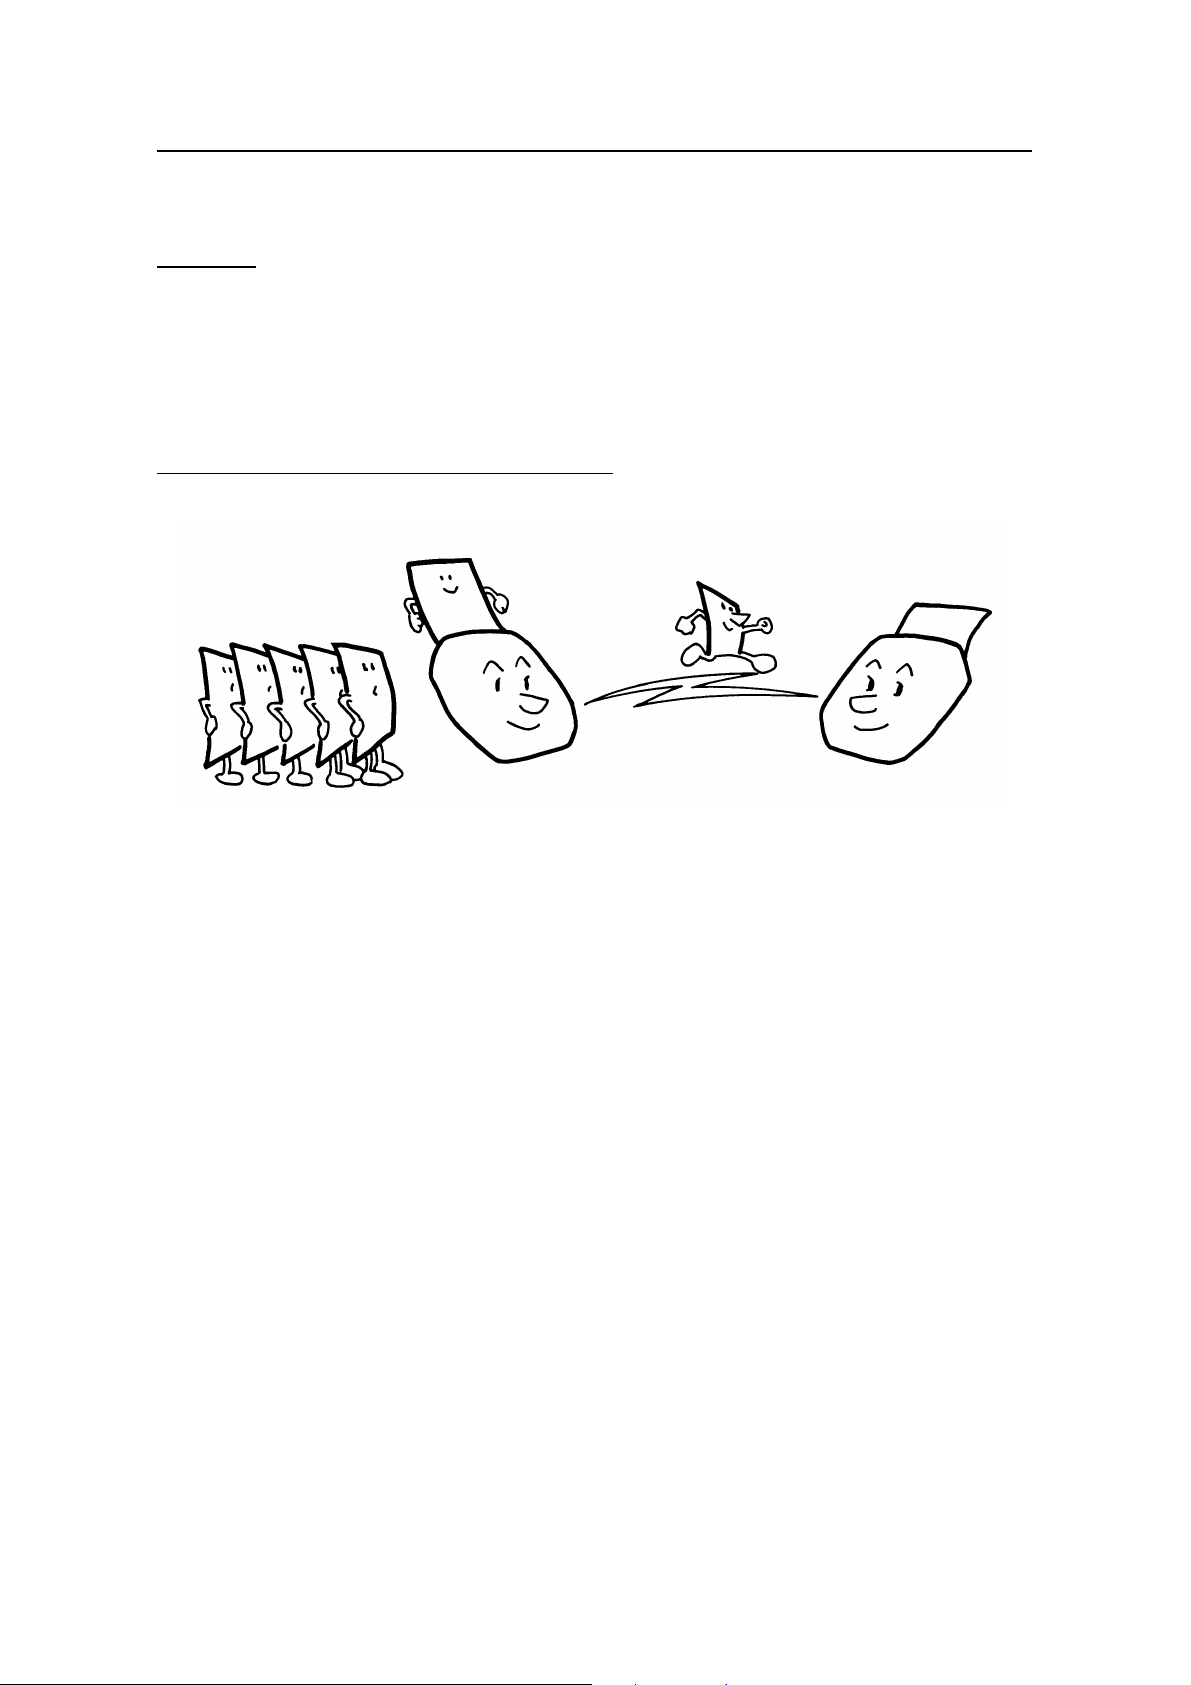
The fax machine scans your letter, and converts it into a series of black and white dots (the
number of dots that there are across and down the page depends on the resolution that you
selected; refer to the specifications section of this manual for details). This series of dots is
transformed into an electrical signal and sent out over the telephone line to the destination fax
machine.
The receiving fax machine reconstructs your letter from the incoming signal, and prints it.
If you are worried about whether the message arrived at the destination, you can check a report
called the Journal (Transaction Confirmation Report). When you print this report, you will see the
results of the most recent fax communications made by your machine.
You can use your fax machine to send and receive many types of documents, even photographs.
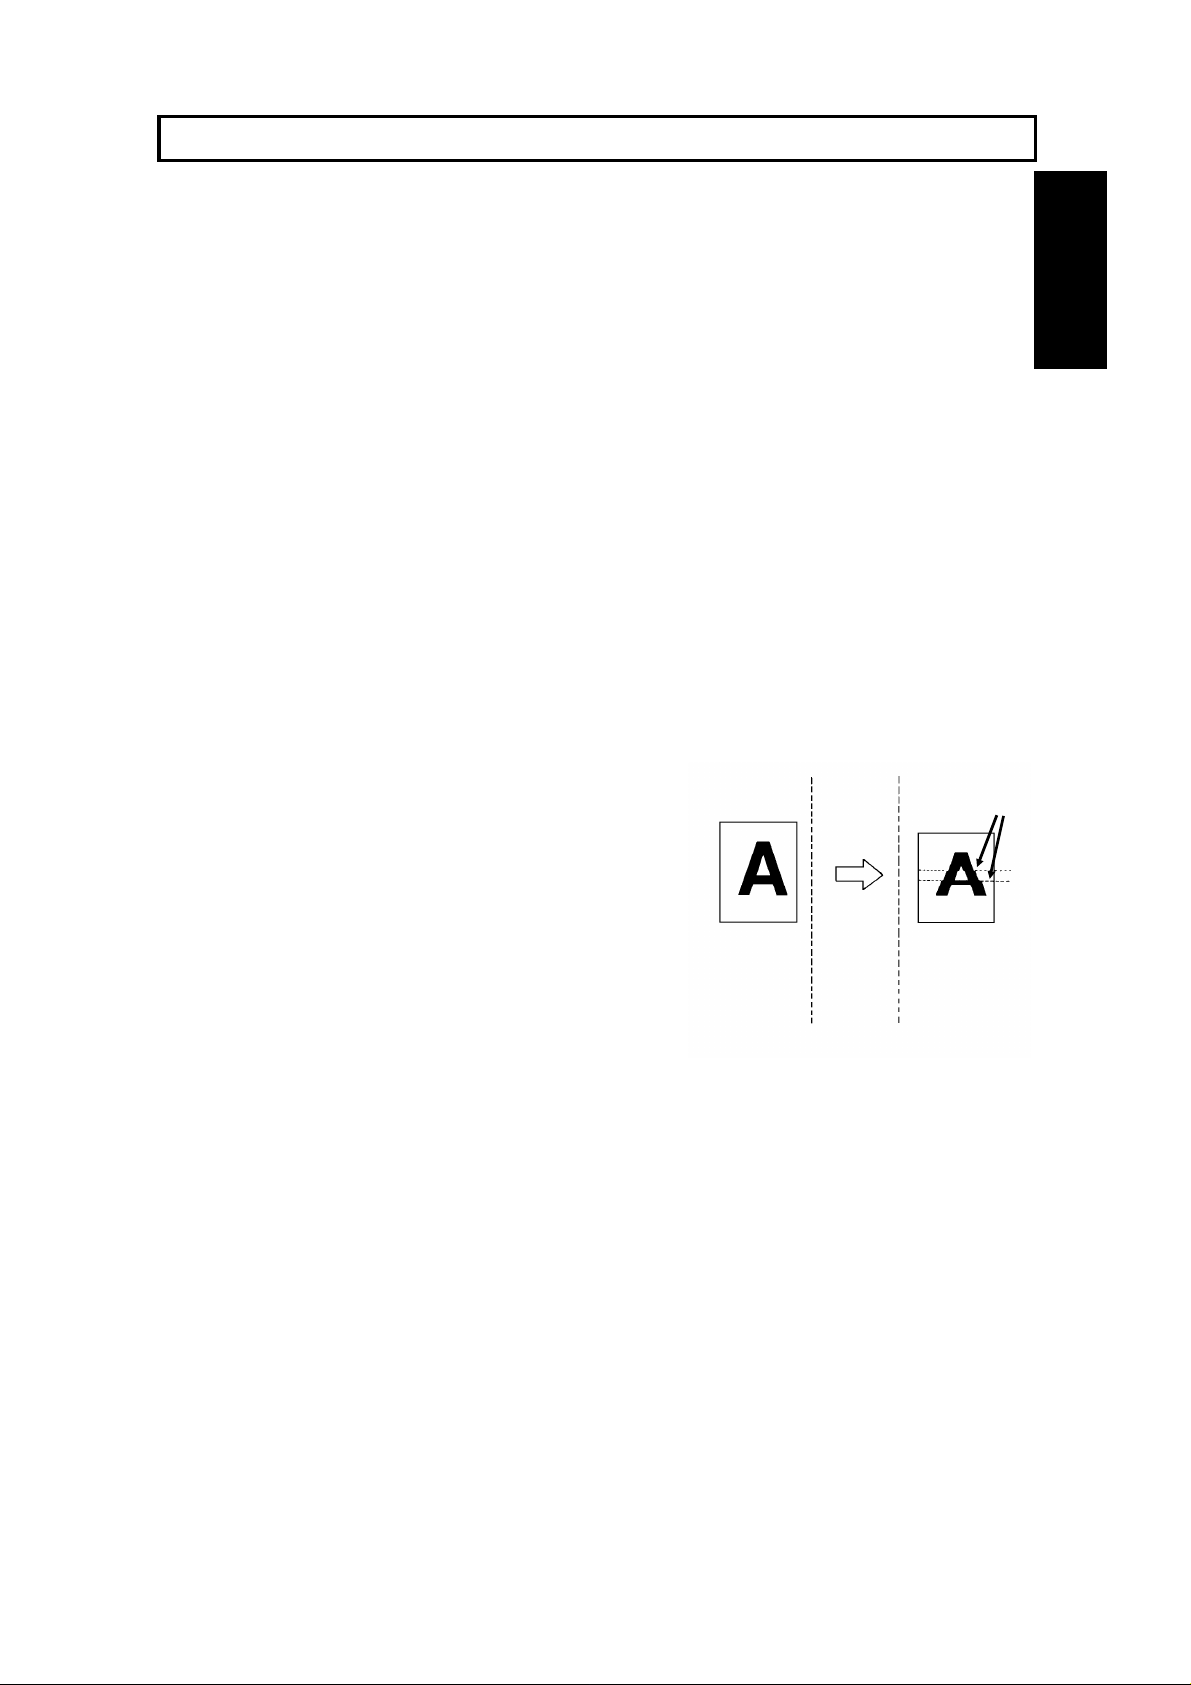
Telephone Line Problems Affect Fax Communication
Quick and accurate transmission of fax messages depends
on the condition of the telephone line. If the line condition is
very good, this machine will transmit a letter-size page in
about 6 seconds. However, if the line is noisy, the speed
may be reduced significantly, and the data may be
damaged.
The symptoms of data loss caused by a noisy telephone
line are seen on the printouts of received messages. An
example is shown opposite. Note that lines are missing
from the page at the indicated locations. ECM (Error
Correction Mode) is an effective countermeasure against
this type of error; you have the choice of having the ECM
feature switched on or off. It is switched on before the
machine leaves the factory (refer to page 68 for more
information about ECM).
Document
Received
Message
Errors
INTRODUCTION
The line condition is affected by the weather;
thunderstorms can cause electrical noise on telephone lines.
In addition, the quality and condition of switching equipment used by your phone company can
affect fax communication.
1
Page 9
See page 191.
INTRODUCTION
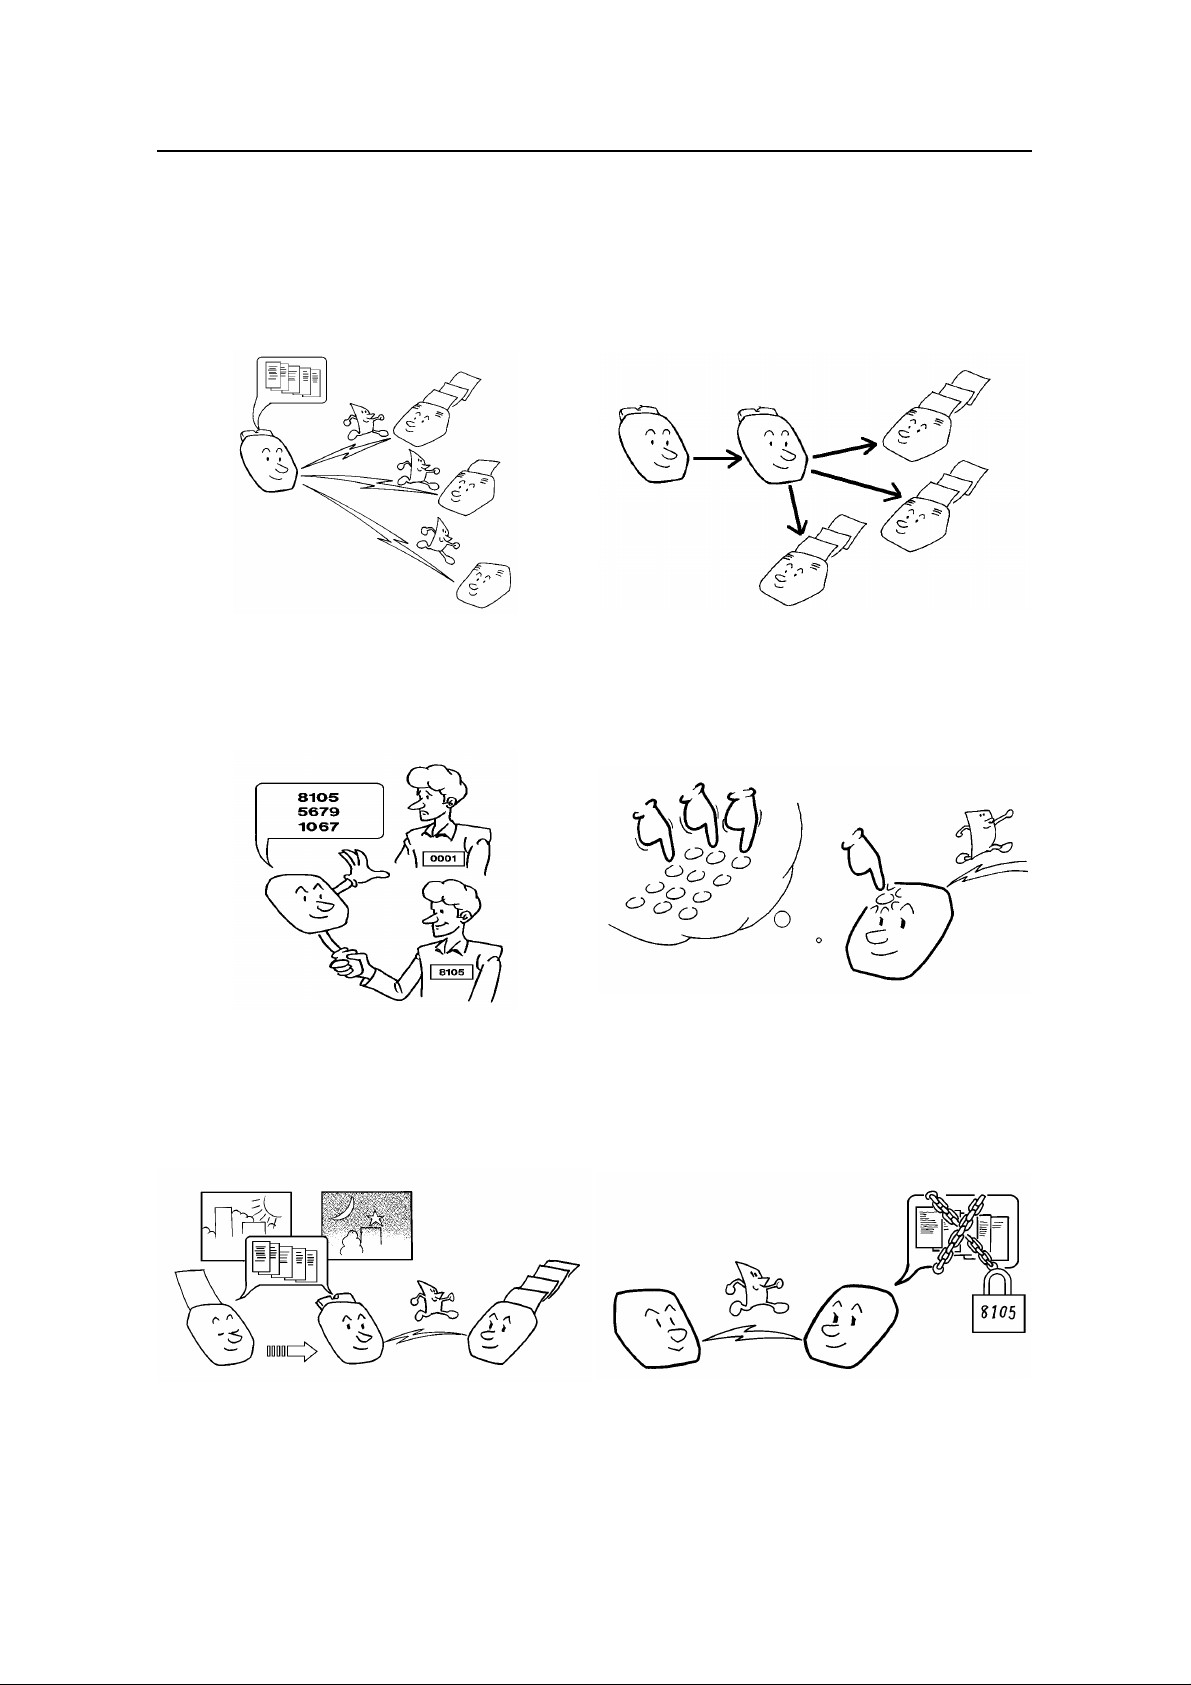
SOME OF THE THINGS THAT THIS MACHINE CAN DO
This machine has many feat ures. Here is a sample of what the machin e can do.
Sending a Fax to More Than One Location
See page 20.
Restricting Access to the Machine
Network Feature (Transfer Request)
See page 44.
Quick Dial, Speed Dial, and Group Dial
See page 58.
See page 29.
2
Sending a Fax Later
Confidential Communication
See pages 52 and 71.
Page 10
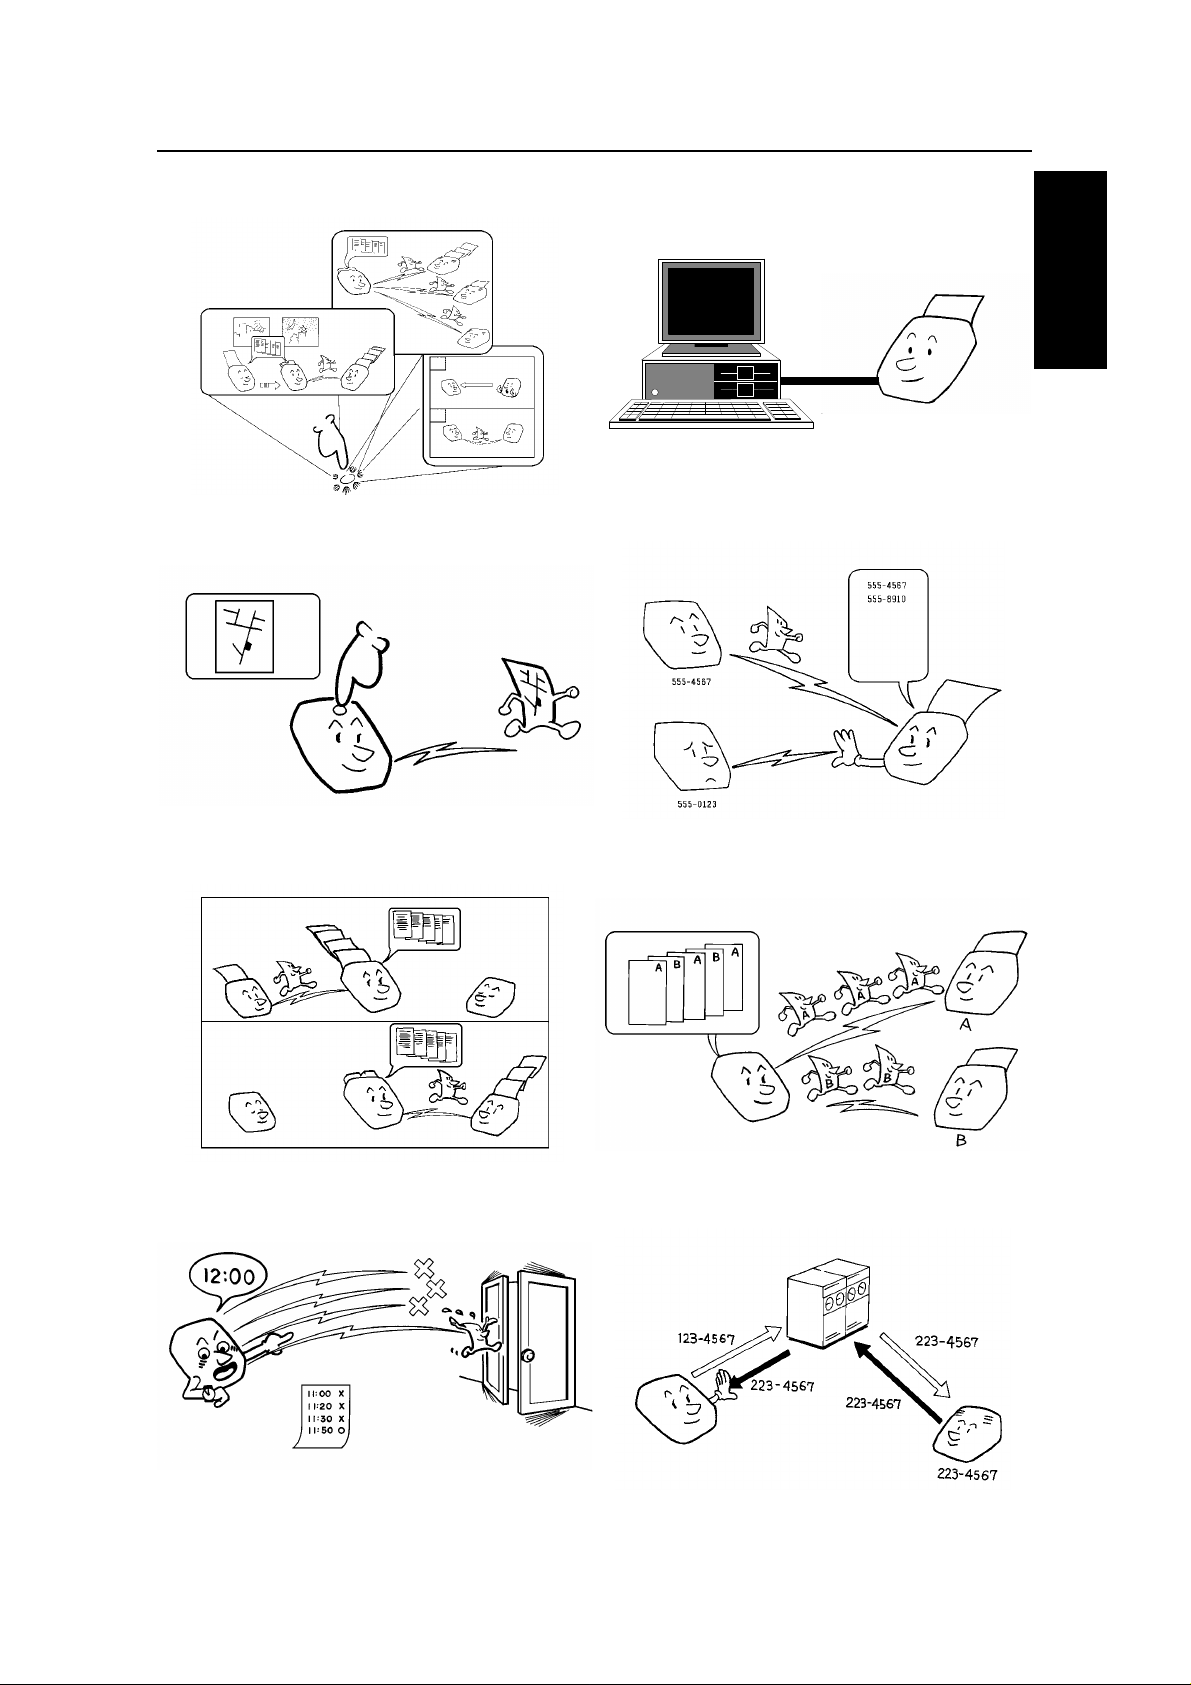
Keystroke Programs
INTRODUCTION
Printer Interface
INTRODUCTION
See page 49.
Auto Document (sends a commonly
transmitted page with one touch)
See page 55.
Forwarding
See page 119.
Authorized Reception (cuts out junk fax mail)
See page 79.
Batch Transmission
See page 82.
Transmission Deadline
See page 30.
See page 69.
Protection against Wrong Connections
See page 67.
3
Page 11

HOW TO USE THIS MANUAL
MANUAL OVERVIEW
Your facsimile machine is equip ped with a wide ran ge of labor-saving and
cost-saving features. This manual explains each of these features, and how you
can put them to use. No te tha t th e external appearance of th e mach ine in some
illustrations may be slightly different from the actual mach ine.
The manual consists of th e fo llowing sections.
❐ How to Use this Manual - This is the section that you are now rea ding. It
contains an overview of the manual and the conve nt ion s used by the authors. It
also contains quick refere nce sections on how to input telep ho ne numb ers and
names, and how to correct errors that you may inadverte ntly make whe n
operating the machine.
❐ General Precautions - This se ctio n lists preca ut ions that you should keep in
mind when operating the machine. Read this section before you begin to use
your machine.
❐ Guide to Components - This contains a diagram th at shows whe re th e main
components of your machine are situated.
❐ Operation Panel - This de scribe s the functio ns of the variou s but tons an d
indicators that are on your mach ine ’s operation panel.
❐ Routine Operation - This section describes the features and settings that you
will normally be using every day.
❐ Advanced Features - This section expla ins how t o ta ke advantage of the
special features of you r f ax mach ine , including how to set up networks for
economical distribution of fax messages over long distances.
❐ Reports - This section explains the reports that the machine generates.
❐ Looking After the Machine - This section shows you what to do when
consumable supplies run out . The user maintenance procedure in this section
should be done every six months if you want to keep your machine in top
condition.
❐ Solving Problems - If your machine cannot communicate, or if it generates
error codes or experiences paper ja ms, ref er to this sect ion . Man y routine
problems can be solved without a service call.
❐ Specifications - This is a list of tech nica l capa bilit ies of your machine.
❐ Technical Reference - Inputting characters, sett ing up the use r swit che s,
specifications and othe r tech nical information.
❐ Appendix (Installing the Machine) - The best pla ce to install your machine is
described here. Please also re fe r to it whe n you plan to move the machine to
another location . It also exp lain s the thin gs you have to do before you can send
your fax message, and lists important featu res th at will make faxin g more
convenient.
❐ Quick Reference Guide - This indicates how to use th is machin e at a glan ce.
4
Page 12
HOW TO USE THIS MANUAL CONVENTIONS
CONVENTIONS
The following conventio ns were used when writing this man ua l.
Keynames
These have been prin te d in a bo ld typeface.
For example: When you see a command in bold such as "Start" means "Press
the Start key on the operation panel".
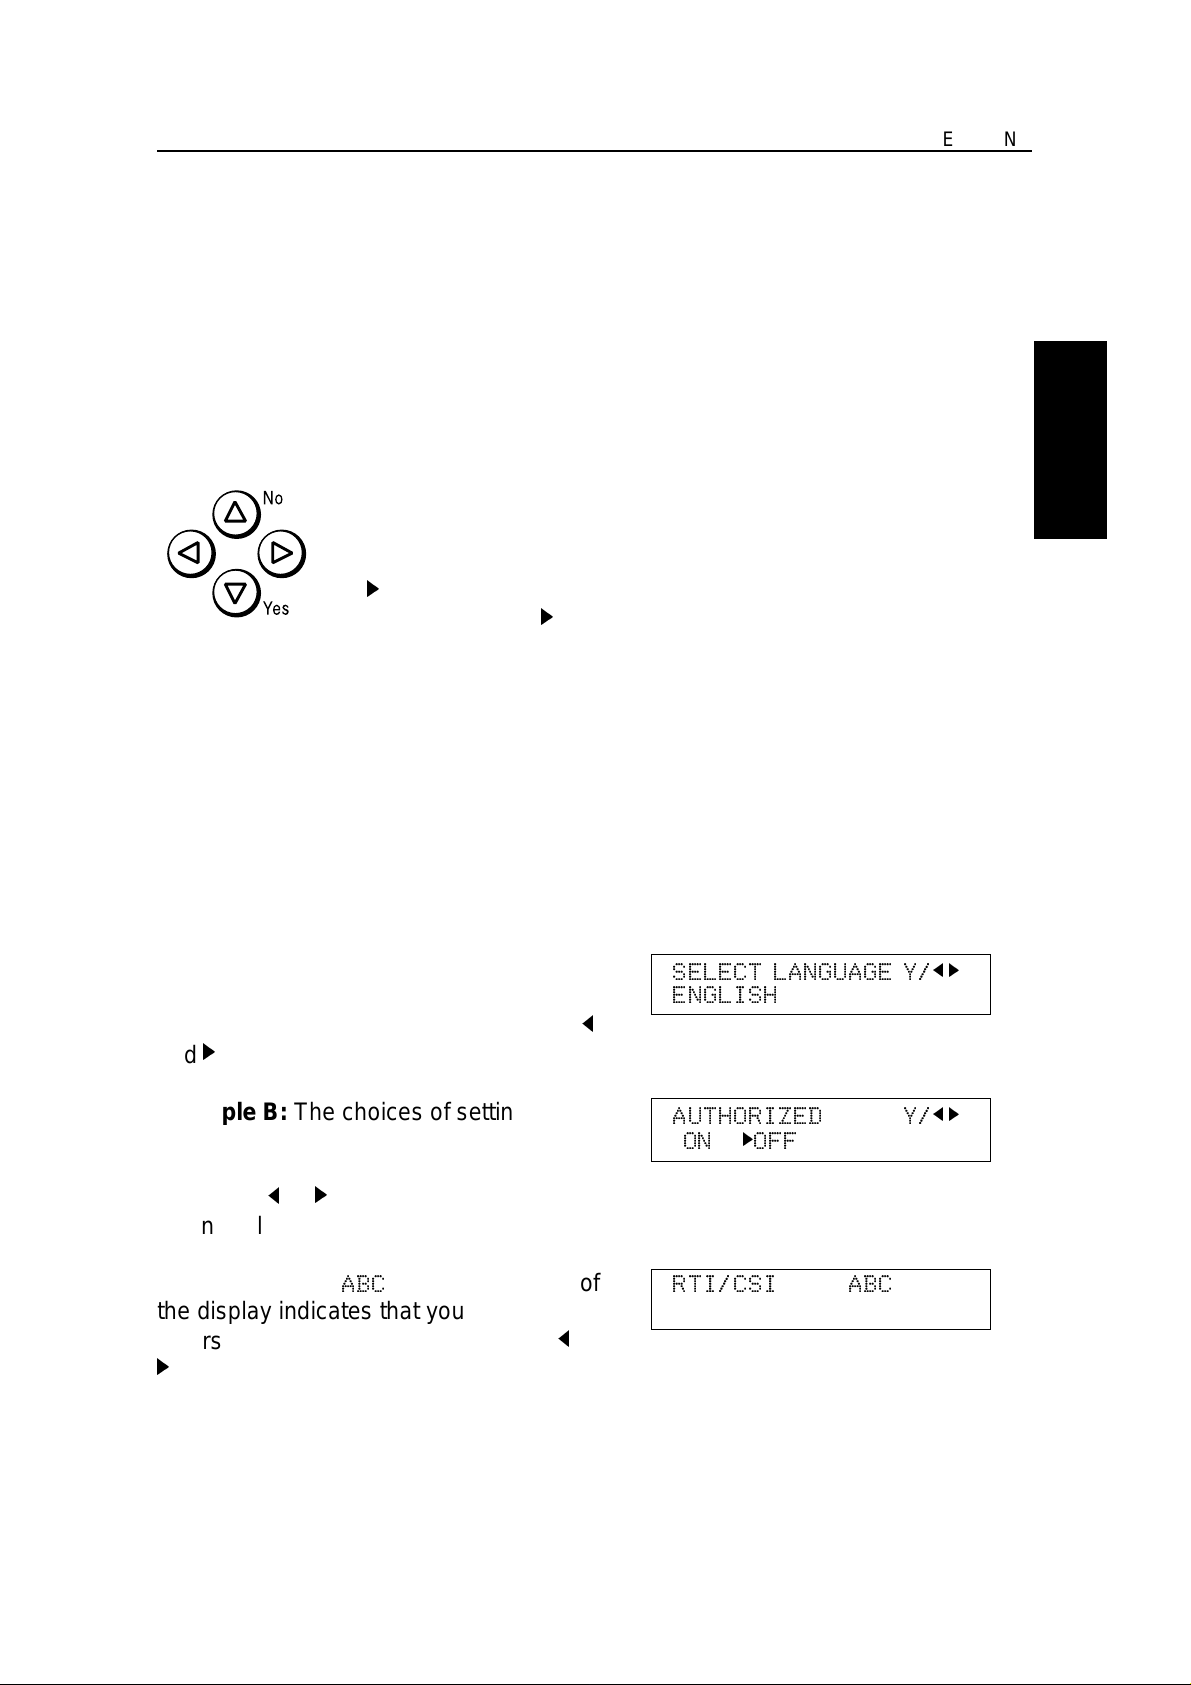
On the operation panel, the re are four arrow keys (up, down, left,
right). This is the scroll key. It is often used in the operatin g
procedures to gain access to various features. For example, if you
see k in the manual, you are being asked to press the
right-pointing arrow (k) on the scroll key.
HOW TO USE
THIS MANUAL
Displays
Messages seen on the display are sho wn in a larger box, normally on the right
hand side of the page, directly op posite the step that brought it up on the screen.
After following a step in a proce dure, check th e display to see if it corresponds to
the one in the manual. This ma y help you to check whether you are following the
procedure successfully. The following examples show three common types of
display.
Example A: The keys th at can be presse d
are shown on the upper right of the displa y.
In this example, you can press Yes and
j
and k on the scroll key.
Example B: The cho ices of sett ing s f or a
feature are shown on th e scree n. The
current setting is indica te d (it is set to ON). If
you press j or k on the scroll key , the
setting will be changed to OFF.
Example C: The
ABC
in the upper right of
the display indicate s tha t you can inp ut
letters using the Quick Dial keys, and j and
k
on the scroll key.
SELECT LANGUAGE Y/
ENGLISH
AUTHORIZED Y/
ON kOFF
RTI/CSI ABC
t t t t t t t t t t t t t t t t t t t t
j k
j k
5
Page 13

CONVENTIONS HOW TO USE THIS MANUAL
Most procedures start from sta nd by mod e,
that is, when the disp lay is as shown on th e
right. The value after "
READY
" shows how
READY 100% 10:00
SET DOC. OR DIAL NO.
much memory space is remaining.
NOTE: If you start a procedure and do not enter anything at the operation panel for more than
5 minutes, the machine returns to standby mode.
Symbols
The text contains a few symbols that high ligh t impo rta nt poin ts or dire ct you
towards other part s of th e manual that are related to the feature currently being
described.
indicates a hint (for examp le, giving a page numbe r where
related informatio n can be found).
6
Page 14

GENERAL PRECAUTIONS
WARNING: Do not attempt any maintenance or troubleshooting other than
that mentioned in this manual. This machine contains a laser
beam generator and direct exposure to laser beams can cause
permanent eye damage.
POWER AND GROUNDING
Pay attention to the following.
Power Supply
1. Power requirements: 220-24 0 V, 50 Hz
2. Insert the power plu g secu rely int o the
wall socket.
3. Make sure that the wall outlet is nea r the
machine and readily accessible.
GENERAL
PRECAUTIONS
4. Do not connect other equipment to the
same socket.
5. Do not step on or set anything on the
power cord.
6. Do not connect other equipment to the
same extension cord.
7. Be sure that the power cord is not in a
position where it would trip someo ne .
8. The wall outlet must be easily accessible.
Grounding
Ground the machine and the light nin g pro te ctio n circuit in accord an ce with
regulation s. Do no t gro und to gas or water pipes, or to a telephone ground plug .
Proper grounding is to the grou nd terminal of the power outlet. Be sure tha t th e
ground terminal of the power outlet is properly grounded.
The lightning prot ection circuit for the machine req uire s the machine to be
properly grounded. If pro pe r grou nd ing is provided, about 90% of light nin g
damage can be prevent ed . For saf ety , be sure to conn ect the machine to a
three-prong gro un de d outlet.
7
Page 15

COLD WEATHER POWER-UP GENERAL PRECAUTIONS
COLD WEATHER POWER-UP
Avoid raising the room temperature abruptly
when it is below 14°C, or condensation may
form inside the machine .
1. Raise the room temp era tu re to 20°C at less
than 10°C per hour.
2. Wait fo r 30 to 60 minu te s.
3. Turn the power on.
Do not use the machine near a humidifier.
THUNDERSTORMS
With proper grounding, about 90% of lightning
damage can be prevent ed . Howe ver, if
possible, during severe ele ctric storms turn
the power switch off and disconnect the power
cord and telephone line cord.
NOTE:
All fax messages stored in the memory
may be erased if power is switched off for
more than an hour.
8
Page 16

GENERAL PRECAUTION COPY PAPER
COPY PAPER
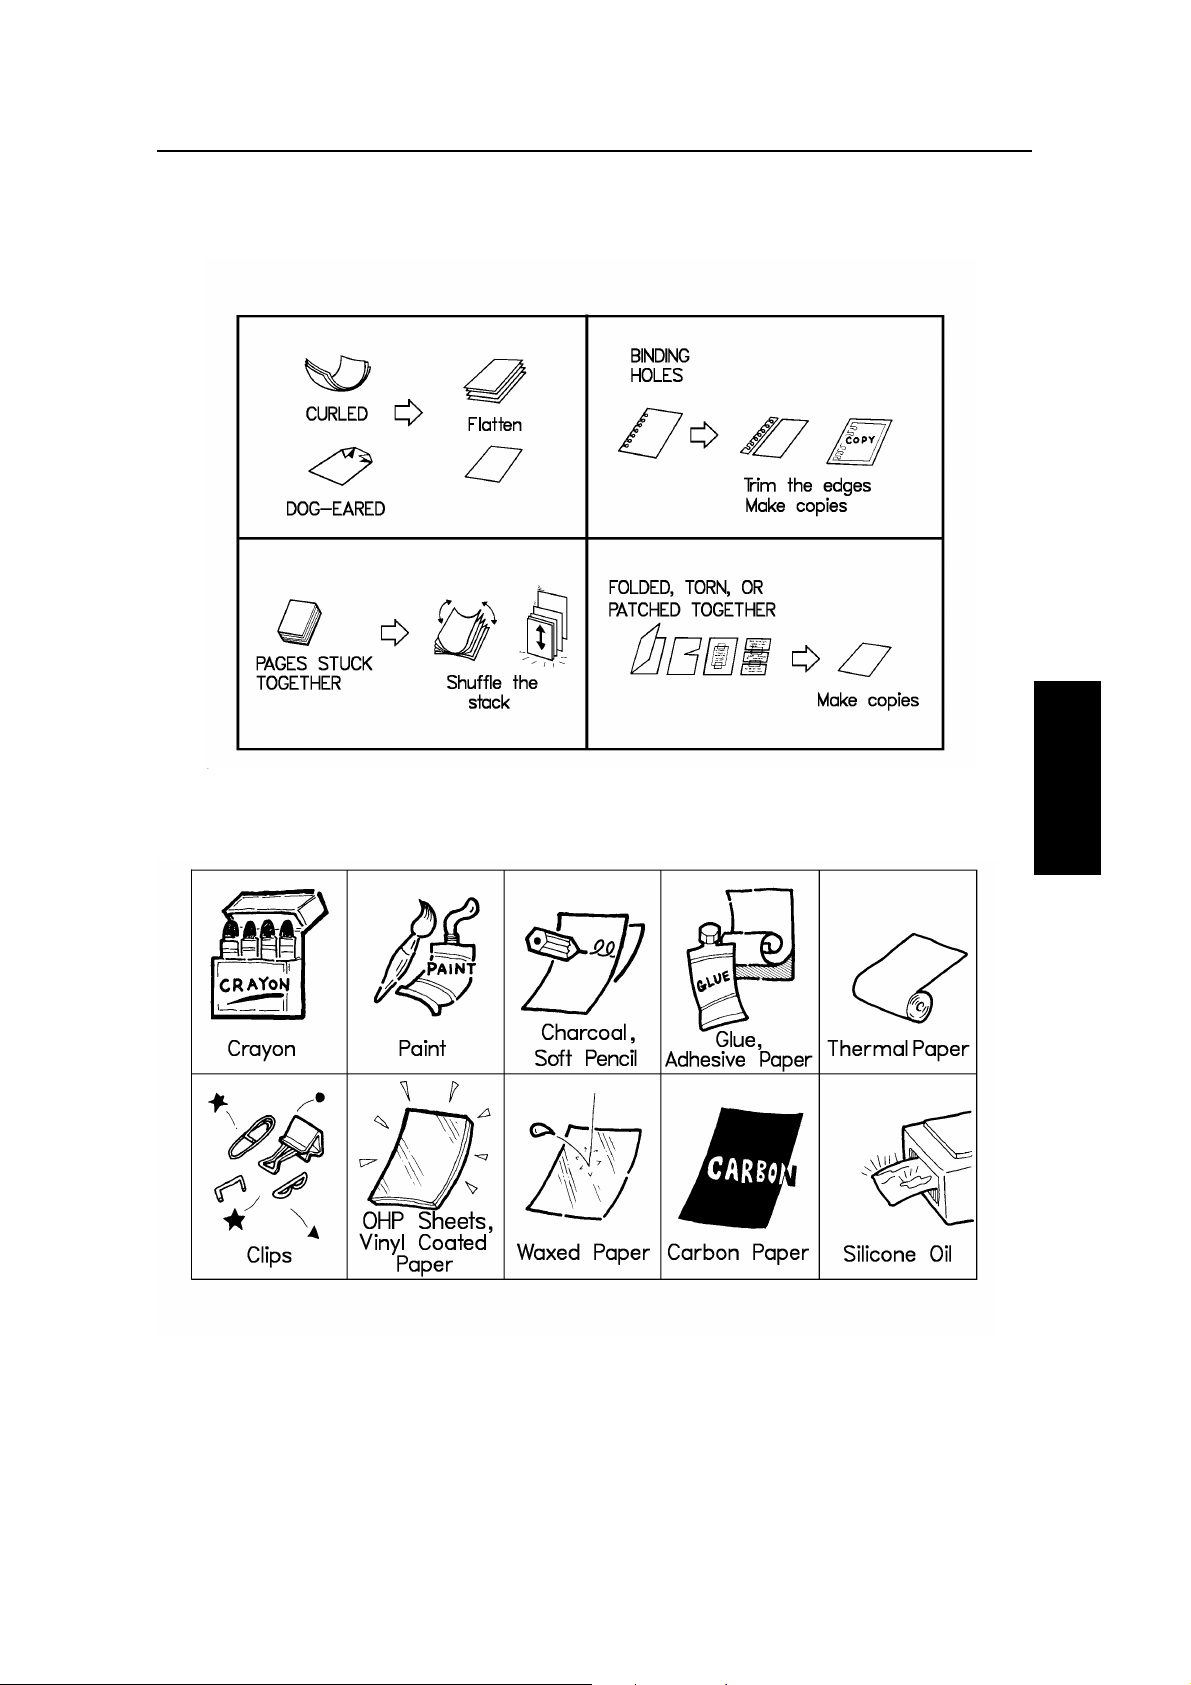
❐ 45-90g/m2 copy paper is recommended: letter or legal size s are the most
commonly used.
❐ Do not use damp paper, or copies will be defective.
❐ Do not touch copy paper if your fing ers are wet or oily; fing erprints may appear
on the copy.
❐ Keep paper in a vinyl bag if it will not be used for a long time.
❐ Store in a cool dry place.
❐ Store flat. Do not sta nd uprig ht .
❐ The following materia ls ca nnot be used in the paper trays: Post card s, tra cing
paper, OHP sheets, adhesive labels
❐ Do not overload the paper trays.
❐ If multi-sheet feeding occurs or dog-eared copie s are mad e whe n using
recycled paper in the paper tray, fan the recycled paper and load it in the paper
tray again.
TONER CARTRIDGES
❐ Store in a cool, dark place.
❐ Never store where they may be expo sed to he at .
❐ Keep out of the reach of children.
❐ Do not eat toner.
❐ Do not lay heavy objects on toner cartridges.
❐ Do not incinerate toner or t oner containers. Toner dust may cause flashback
when exposed to an open flame.
OPERATING PRECAUTIONS
❐ While the machine is in operation , do not turn off the main switch or unplug th e
power cord.
❐ Keep corrosive liquids, such as acid, off the machine.
❐ Do not allow paper clips, staples, or other small metallic o bje cts to fall insid e
the machine.
❐ The fusing unit may be very ho t. Be caref ul whe n ha nd ling it.
GENERAL
PRECAUTIONS
9
Page 17
GENERAL GENERAL PRECAUTIONS
GENERAL
❐ Read the Important Safety In fo rmat ion at the fro nt of this manu al.
❐ Since some parts of the mach ine are sup plied with high voltage, make sure
that you do not attempt any repairs or att empt to access any part of the
machine except those described in this manual.
❐ Do not make modificatio ns or rep lacements other than those ment ioned in this
manual.
❐ When not using the machine for a lon g pe riod , disconnect the power cord.
OZONE
The machine genera te s ozon e du ring ope rat ion . Normally, the ozone level is
safe for operators. Howe ver, durin g a long cop y run or while print ing a long
message, ozone od or may appe ar; in such a case, ventilate the room.
WARNI NG:
This symbol is intended to alert the user to the prese nce of
important operating and maintenance (servicing)
instructions in the litera ture accompanying the mach ine .
This symbol is attached to some compo ne nts to ale rt th e
user not to touch them, beca use they may be very hot.
10
Page 18
GUIDE TO COMPONENTS
6
4
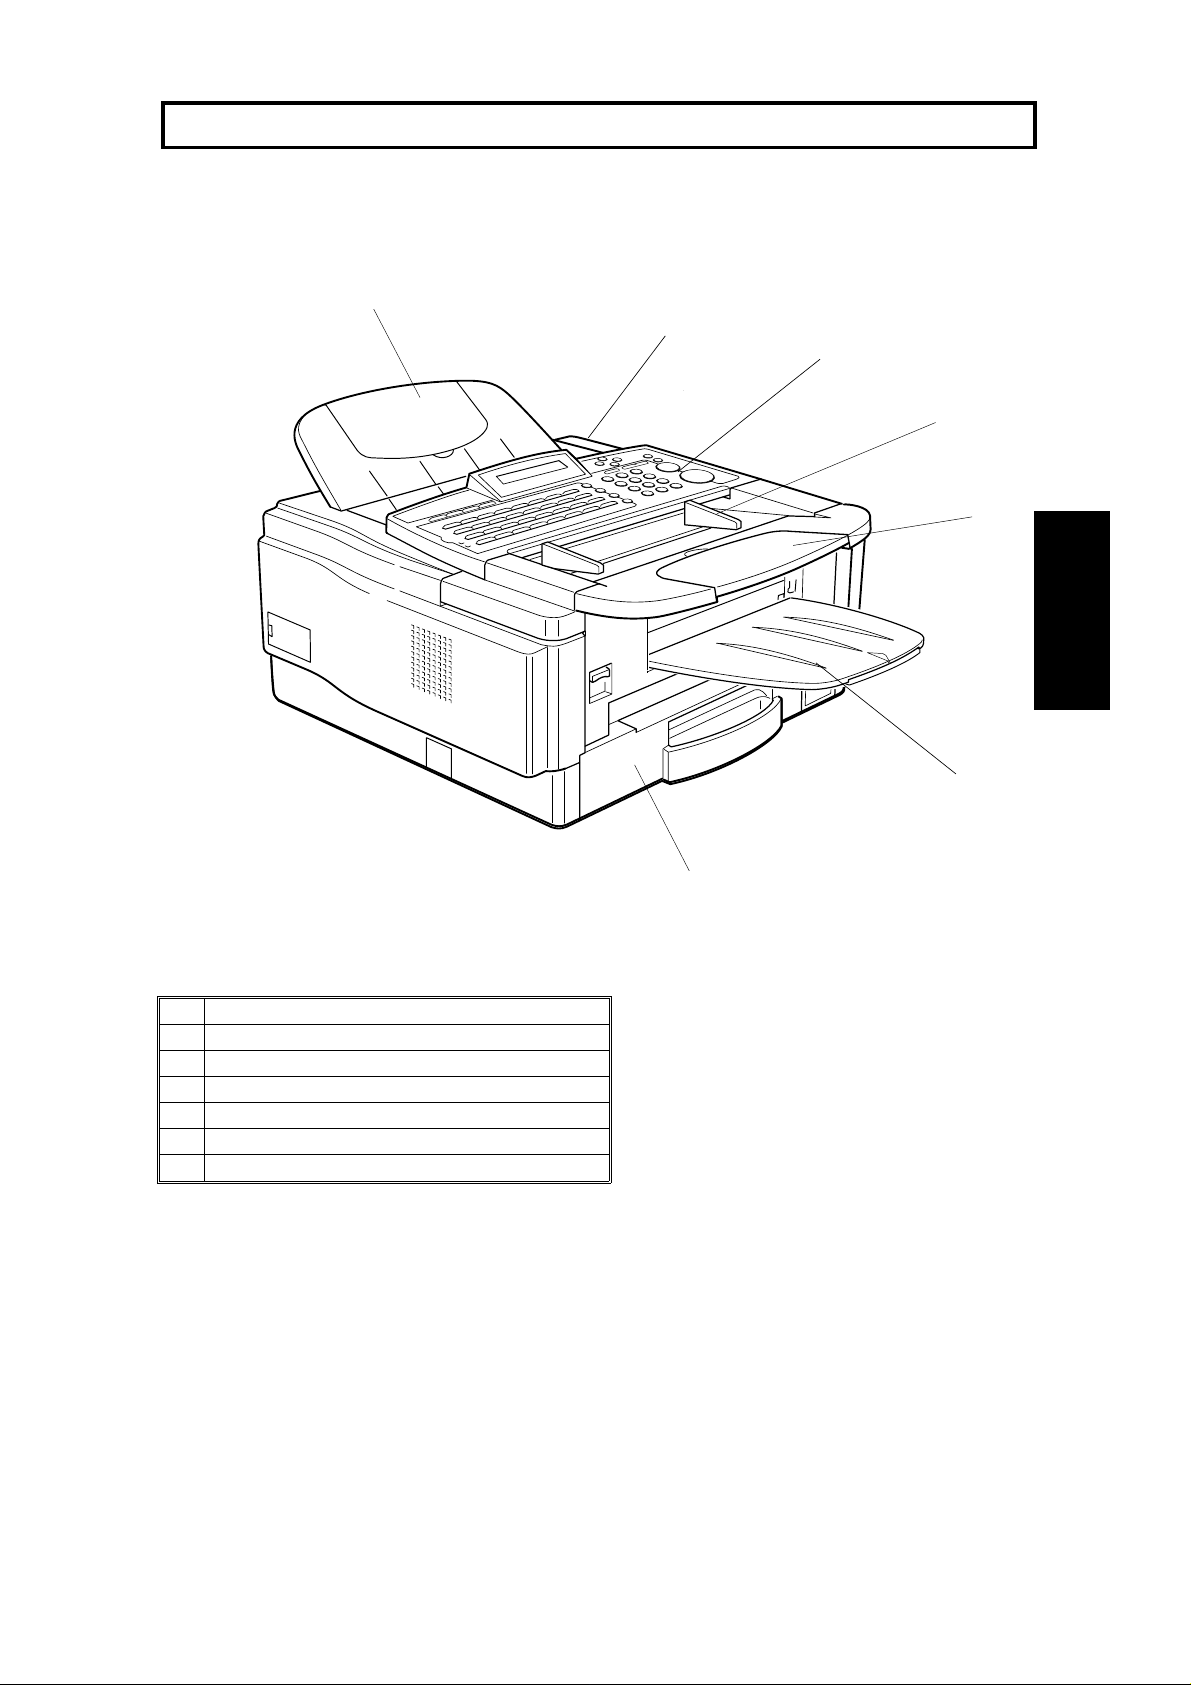
1. MAIN BODY
5
3
2
1
GUIDE TO
COMPONENTS
1 Document Table
2 Document Guide
3 Operation Panel
4 Power Switch
5 Document Tray
6 Paper Cassette
7 Copy Tray
7
11
Page 19
OPERATION PANEL GUIDE TO COMPONENTS
2. OPERATION PANEL
1
2
3
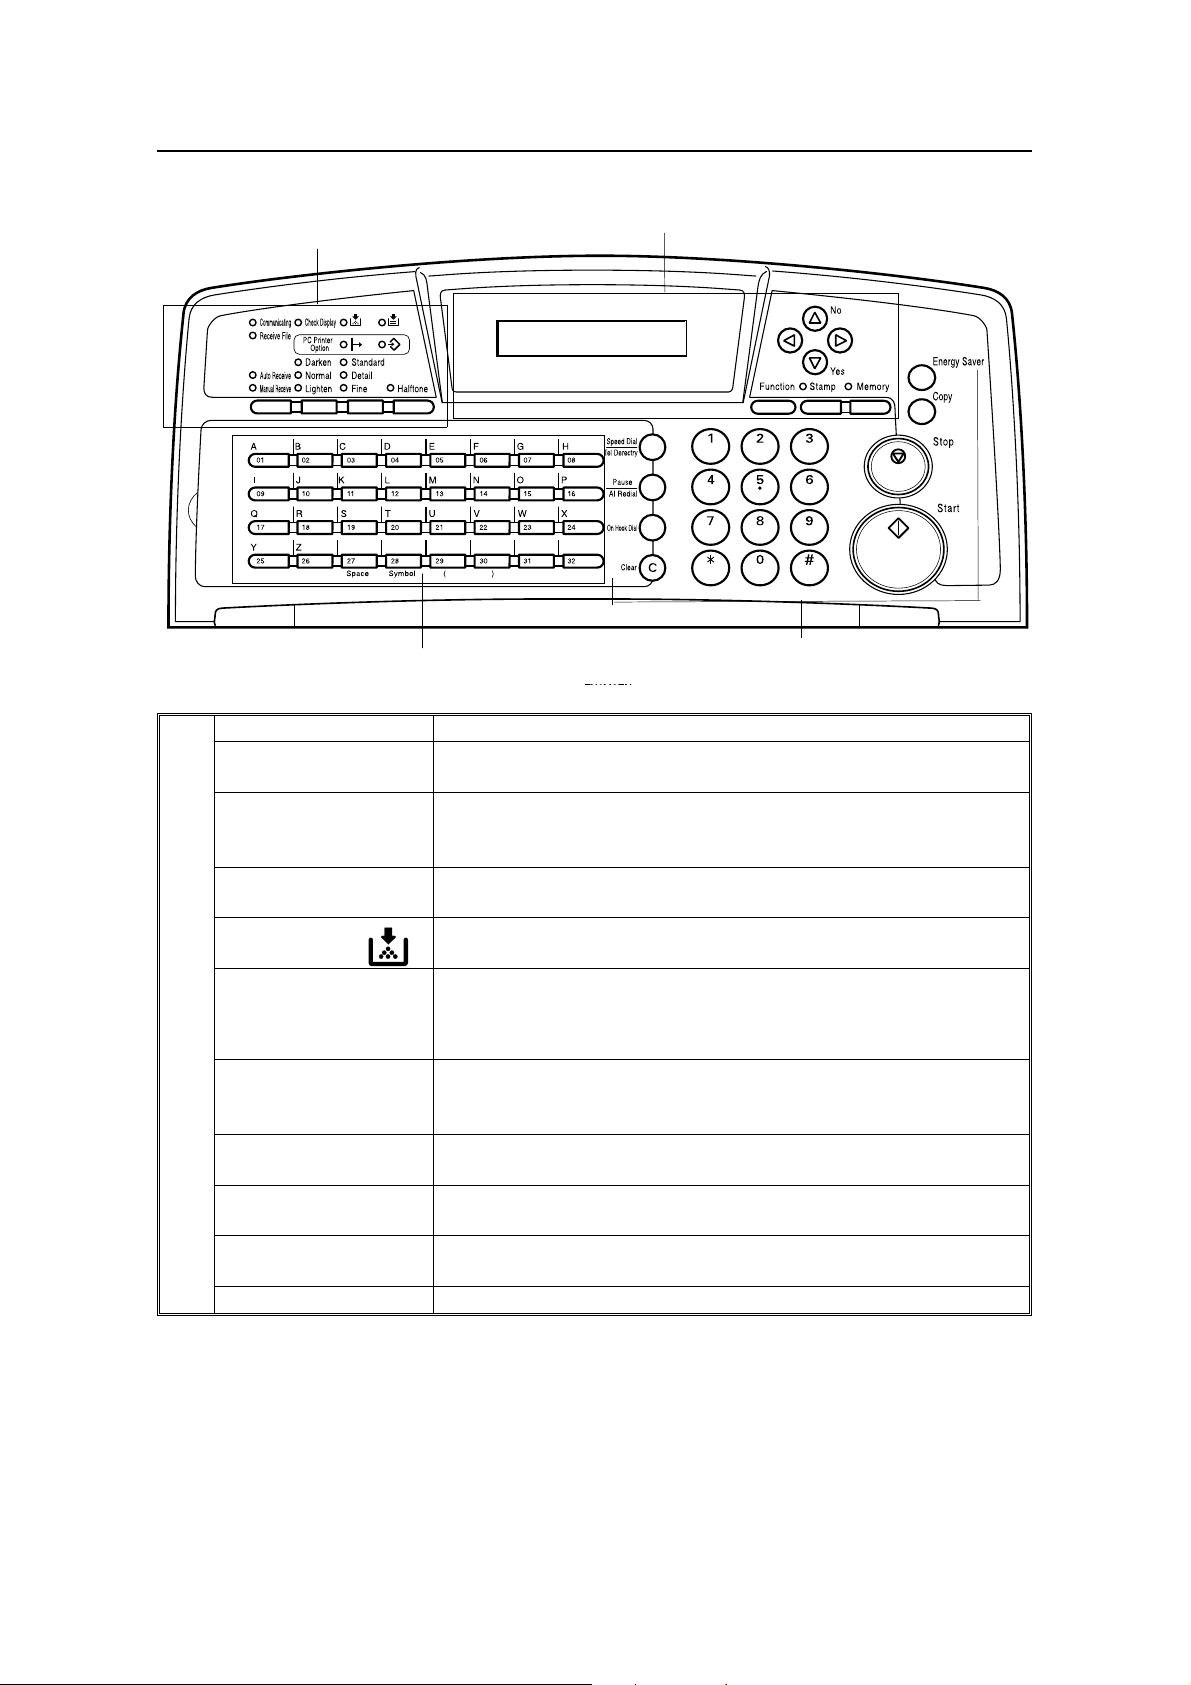
1.
Communicating
Indicator
Receive File
Indicator
Check Display
Indicator
Add Toner
Indicator
Add Paper Indicator
Lights when a fax message is being transmitted or received.
Lights when an incoming message was received into memory.
Blinks when a confidential reception file or memory lock file has
been stored in the memory.
Lights when some error occurs. See the instruction that appears
on the display.
Blinks when the toner cartridge is almost empty, and lights when
it is empty.
Lights when a cassette is empty.
d
PC Printer Option
Indicators
Reception Mode
Selector Key
Contrast
Selector Key
Resolution Selector
Key
Halftone Key Press this to use halftone transmission mode.
These indicators are only used when the optional Printer
Interface Kit is installed. See the operation manual for the Printer
Interface Kit for full details.
Press to select Auto Receive or Manual Receive.
Press this to select either Darken, Normal or Lighten.
Press this to select either Standard, Detail, or Fine transmission
mode.
4
12
Page 20

GUIDE TO COMPONENTS OPERATION PANEL
2. Display Displays prompts, warnings, and selected modes.
Stamp Key Press this to enable or disable the stamp feature.
Function Key Press to use one of the numbered functions explained in this
manual.
Yes/No Keys Use to answer questions on the display.
Scroll Key When an arrow is shown on the display, use these keys to
access the options, items, or functions shown by the arrow. Also
use them to move the cursor when programming or editing a
displayed item.
Memory Key If the indicator above it is lit, your document will be stored before
transmission. If it is not lit, your document will be sent
immediately without being stored. Press this key to change the
mode.
3. Quick Dial Keys Each of these can be programmed with a telephone number, a
group, or a keystroke program. You can also use these keys to
enter names and labels such as the RTI and TTI.
4. Speed Dial/Tel
Directory Key
Pause/AI Redial Key Press this key to insert a pause when dialing or programming a
On Hook Dial Key Press this to dial without picking up the handset.
Clear Key Use this as a backspace key during programming.
Ten Keypad Use this as a telephone keypad to access user functions, or to
Energy Saver Key Hold this down for a few seconds to start or end the energy
Copy Key Press this to copy the document now in the feeder.
Stop Key Press this to stop the machine and return it to standby mode.
Start Key Press this to start fax communication.
Press this to dial using the Speed Dial feature, or the Telephone
Directory feature.
number. Also use it to redial a previously dialled number (the
machine remembers the last 10).
enter Speed Dial codes.
saver mode.
GUIDE TO
COMPONENTS
13
Page 21

ROUTINE OPERATION
SENDING A FAX MESSAGE
Precautions Concerning Unacceptable Document Types
Before you send your docume nt, make sure that it meets the follo wing
requirements.
Caution: Documents that do not meet these requirements can cause your
machine to jam or may cause some components of the machine to become
damaged or dirty.
Correct Size for the Document Feeder
Maximum
Minimum
105mm
148mm
* The shaded part will not be scanned, because it is outside the maximum scanning
width range.
Thickness: 0.05 to 0.2 mm (80g/m2)
Length and Width: See the above diagram.
If the page is too short, put it inside a document carrier or enla rge it with a copier.
If the page is too long, divide it into two or more sheets.
Clearly Written
Small faint characters may no t be tran smitt ed clearly.
Uniform Page Size
Do not use differe nt sizes of docume nt in the same transmission.
1200mm
256mm
304mm
Dry Ink
All ink must be dry before you place the docu men t in th e feeder .
14
Page 22
ROUTINE OPERATION SENDING A FAX MESSAGE
Page Condition
Do not place damaged pages in the automatic document feeder.
Originals that conta in th e following materials should not be place d in th e
document feeder. Make copies of these originals and scan the copie s.
ROUTINE
OPERATION
NOTE: Copies made with a copier that uses silicone oil may cause a misfeed. To
avoid this, do not scan such copies until five or ten minutes aft er cop ying .
15
Page 23
SENDING A FAX MESSAGE ROUTINE OPERATION
Transmission Procedure at a Glance
Overview
There are two ways to send a fa x message:
❐ Immediate T ra nsmissio n
❐ Memory Transmissio n
Sending Quickly (Immediate Transmission)
This feature is known as Immediate Transmission.
This is convenient when:
❐ You wish to send a message immed iat ely.
❐ You quickly wish to check whether yo u have succe ssfully connected with the
other party.
❐ Your machine’ s memo ry is gett ing full.
The machine dials immediat ely af te r you pre ss Start (o r at th e spe cifie d lat er time ,
if you used a time-delay fe ature like Send Later). The message is scanne d an d
transmitted page by page without being sto red in memory.
16
Page 24
ROUTINE OPERATION SENDING A FAX MESSAGE
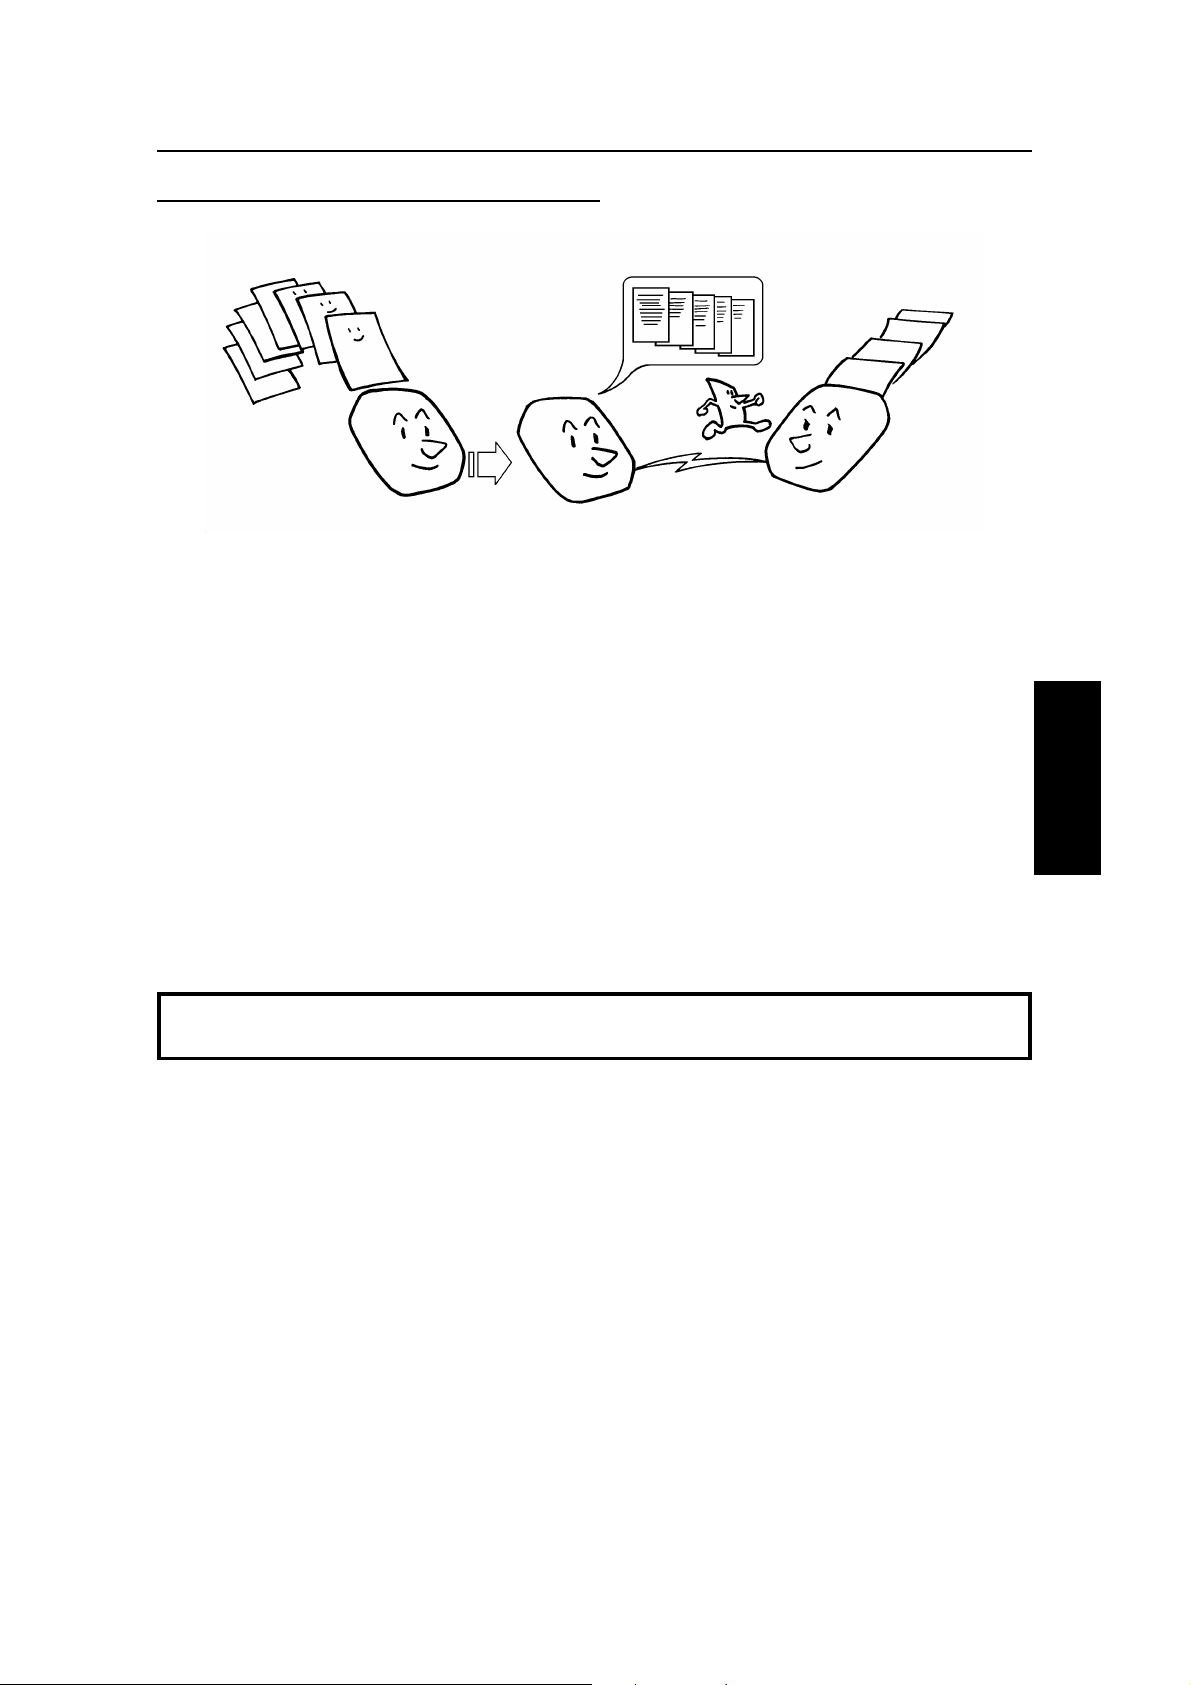
Scanning Quickly (Memory Transmission)
This feature is known as Memory Transmission.
This is convenient because:
❐ Fax messages can be scanne d much more qu ickly (you can take your
document away from the fax machine without waiting to o lon g).
❐ While your fax message is bein g sen t, ano th er use r can op era te the machine
(people will not have to wait by the fax machine too long).
❐ You can send the same messa ge to more tha n one place with the same
operation.
After you press Start, the machine doesn’t dial until all th e page s of you r f ax
message have been store d in the memory.
The default mode of this ma chin e is Memory Transmission, so the proce dures
described in this manual will be based on the assump tio n th at you are using
Memory Transmissio n. Immed iat e Transmission is described in a separate
section (see page 33).
Cross-references
Send Later: see page 29.
ROUTINE
OPERATION
17
Page 25
SENDING A FAX MESSAGE ROUTINE OPERATION
Sending to Just One Location
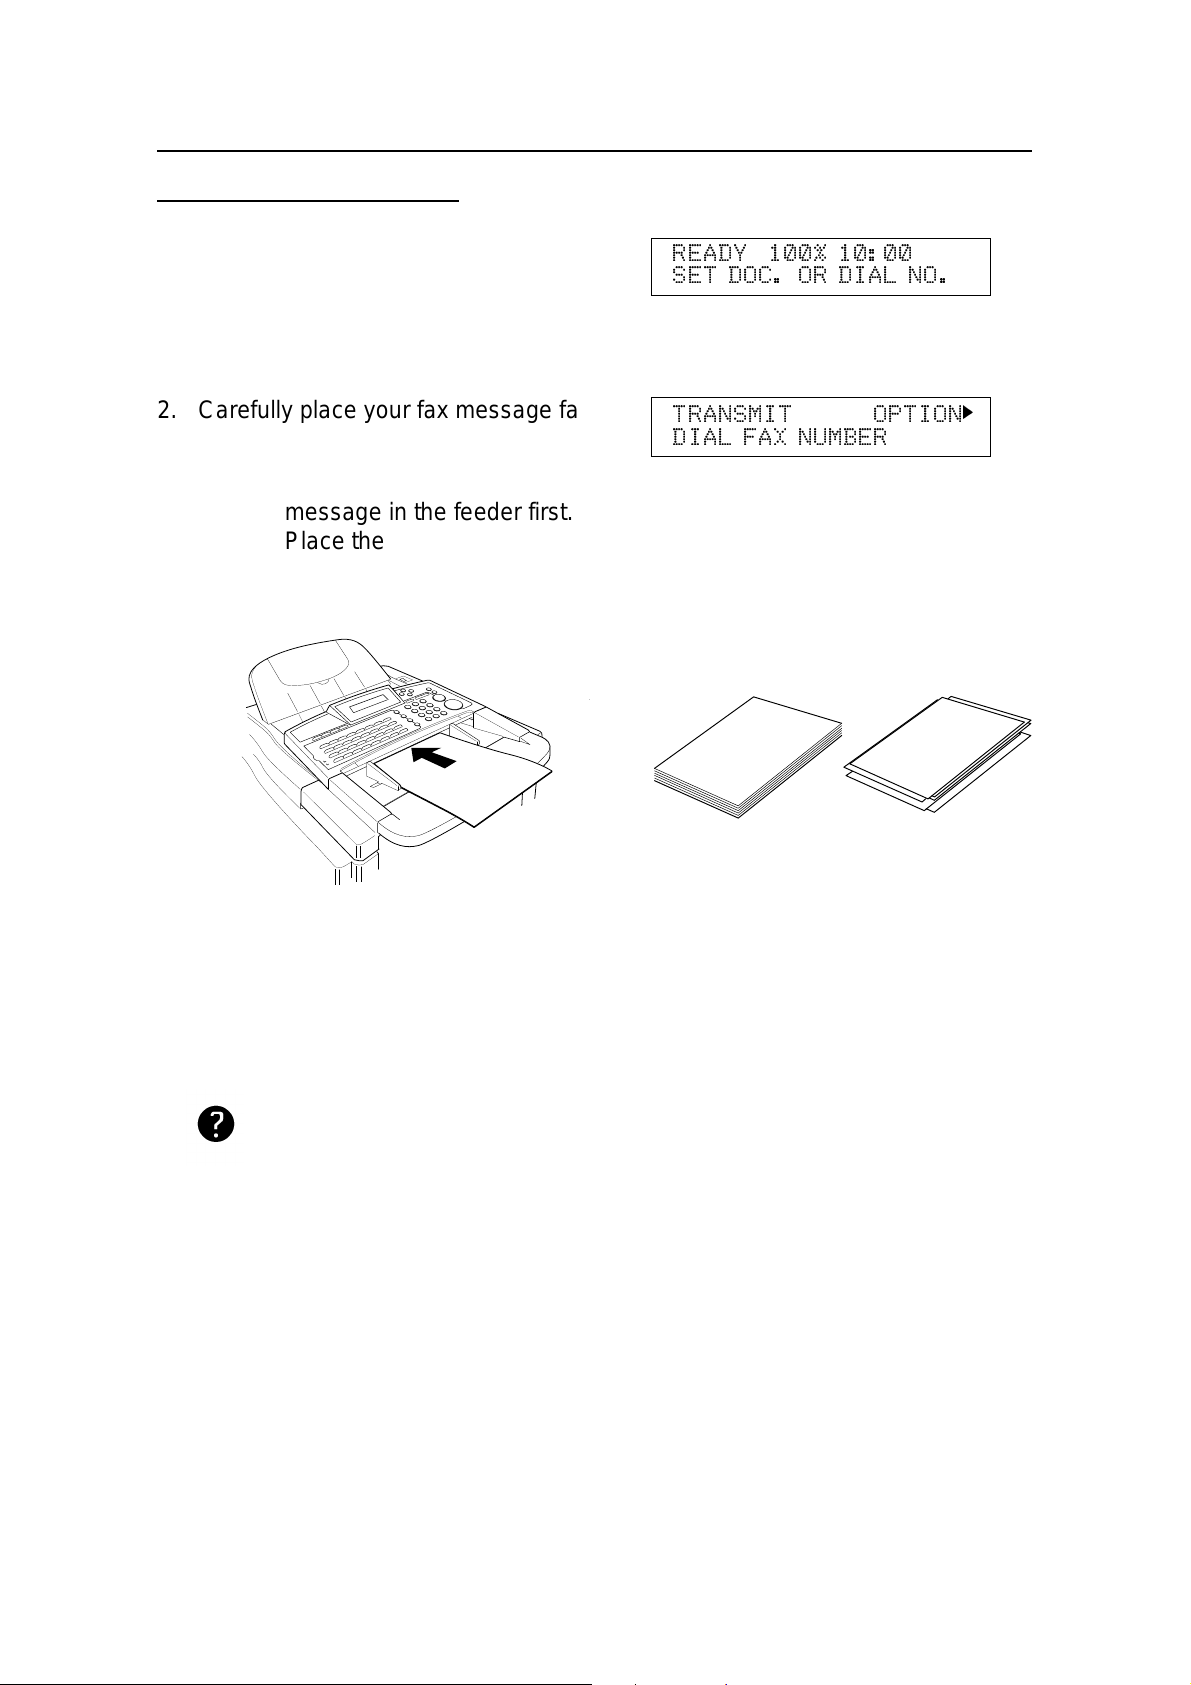
1. Make sure that the machin e is in stan db y
mode:
The display on the operation panel must
be as shown on the right.
2. Carefully place your fa x me ssag e fa ce
down into the auto document feeder.
NOTE: You can dial without placin g th e
message in the feeder first.
Place the document after you
dial the number and go to step 4.
READY 100% 10:00
SET DOC. OR DIAL NO.
TRANSMIT OPTION
DIAL FAX NUMBER
k
❐ The pages must be placed face down in the
feeder, with the first page at the bottom of the
stack.
❐ Feed the pages in so that the top edge goes in first.
❐ Do not feed in mo re than 30 pages.
❐ Do not use unsuitable types of original (see pages
14 and 15).
❐ Adjust the document guides to fit the width of the
pages.
Selecting Cont rast and Resolution: See page 23.
Options for Sending a Message: See page 28.
GOOD
❐ Do not use pages of different sizes.
❐ The pages sh ou ld be arranged loose ly, but
the leadin g edges should be tidy , a s sh own
above.
BAD
18
Page 26
ROUTINE OPERATION SENDING A FAX MESSAGE
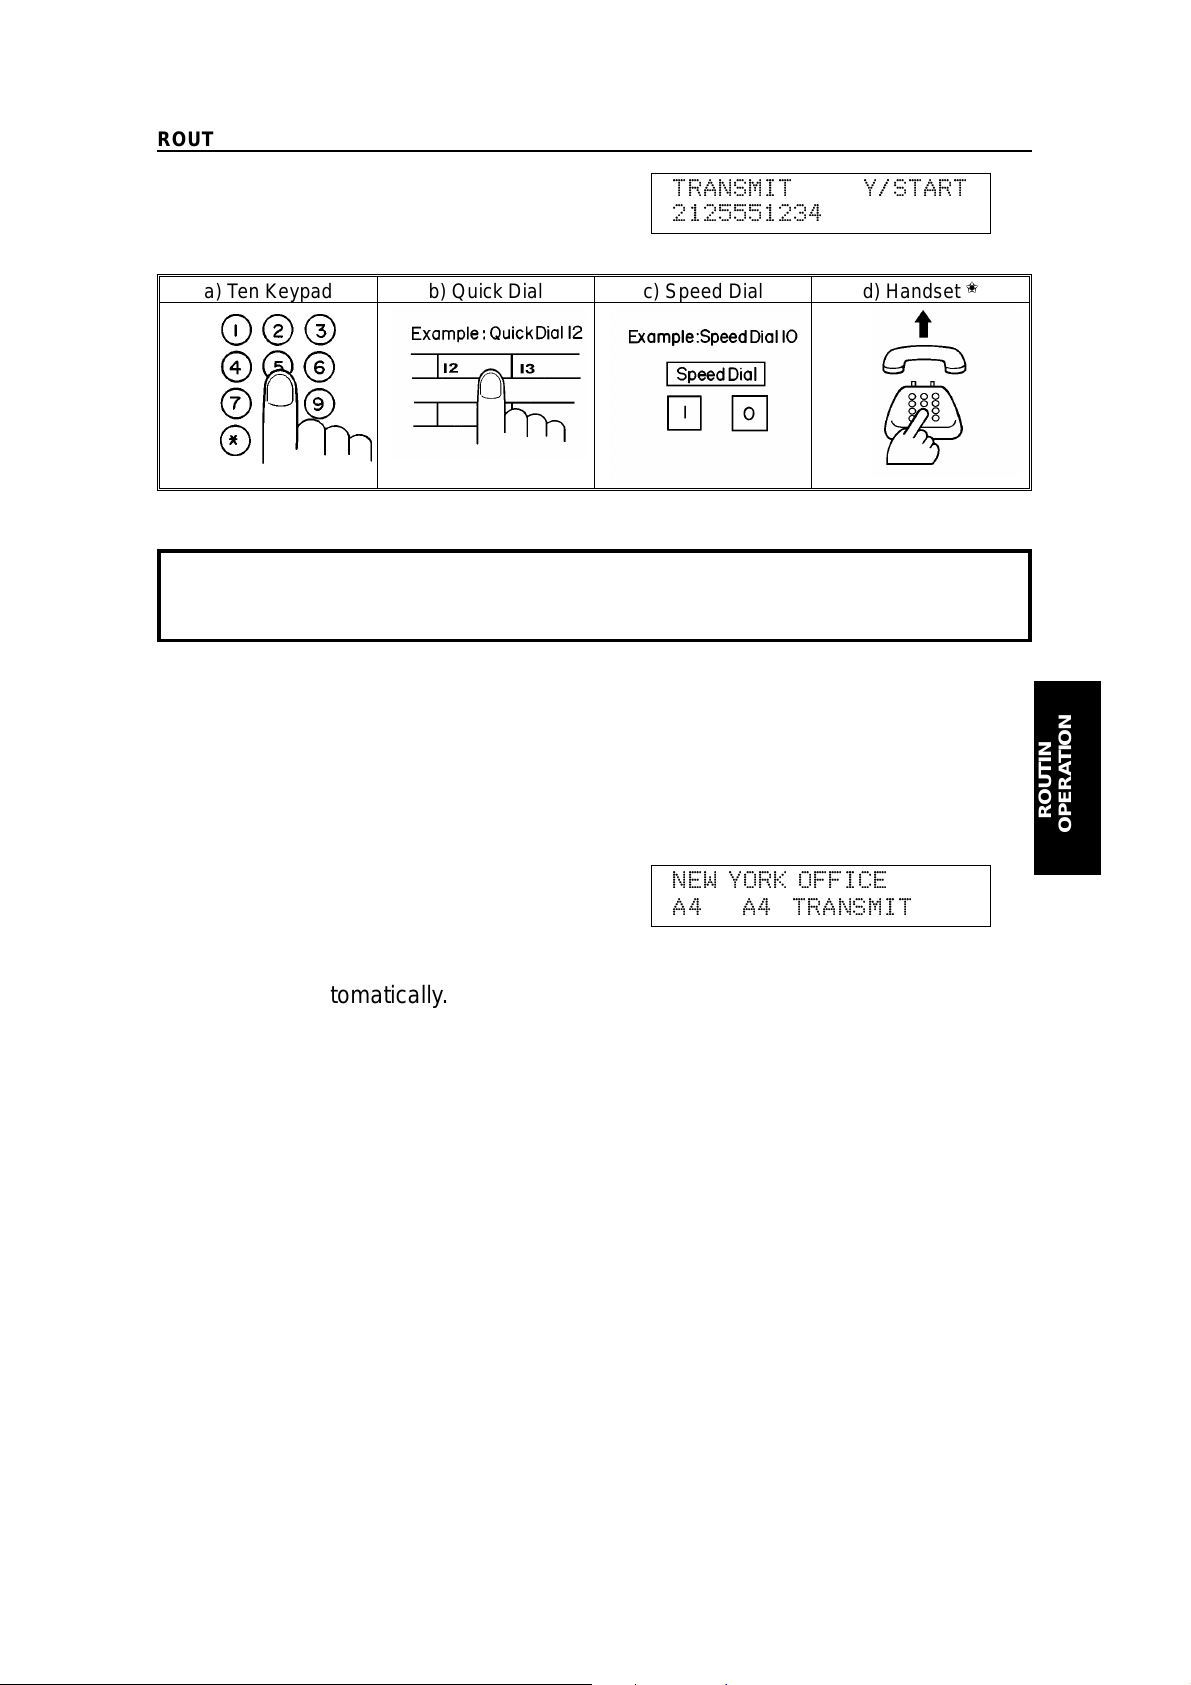
3. Dial in one of the following ways.
a) Ten Keypad b) Quick Dial c) Speed Dial d) Handset
✬ : Only if the telephone handset is installed.
If your machine is behind a PBX, dial the access code, then a pause, then the telephone
number.
For an international number, press the Pause key after entering the country code.
TRANSMIT Y/START
2125551234
t t t t t t t t t t
4. Start.
5. The machine stores you r fax messa ge .
✬
6. The machine dials, and the line to the
other party is connected.
NOTE: Watch th e disp lay. The
identification of the other party
will appear.
7. After sending the message, the machine
hangs up automatically.
NEW YORK OFFICE
A4 → A4 TRANSMIT
ROUTINE
OPERATION
19
Page 27
SENDING A FAX MESSAGE ROUTINE OPERATION
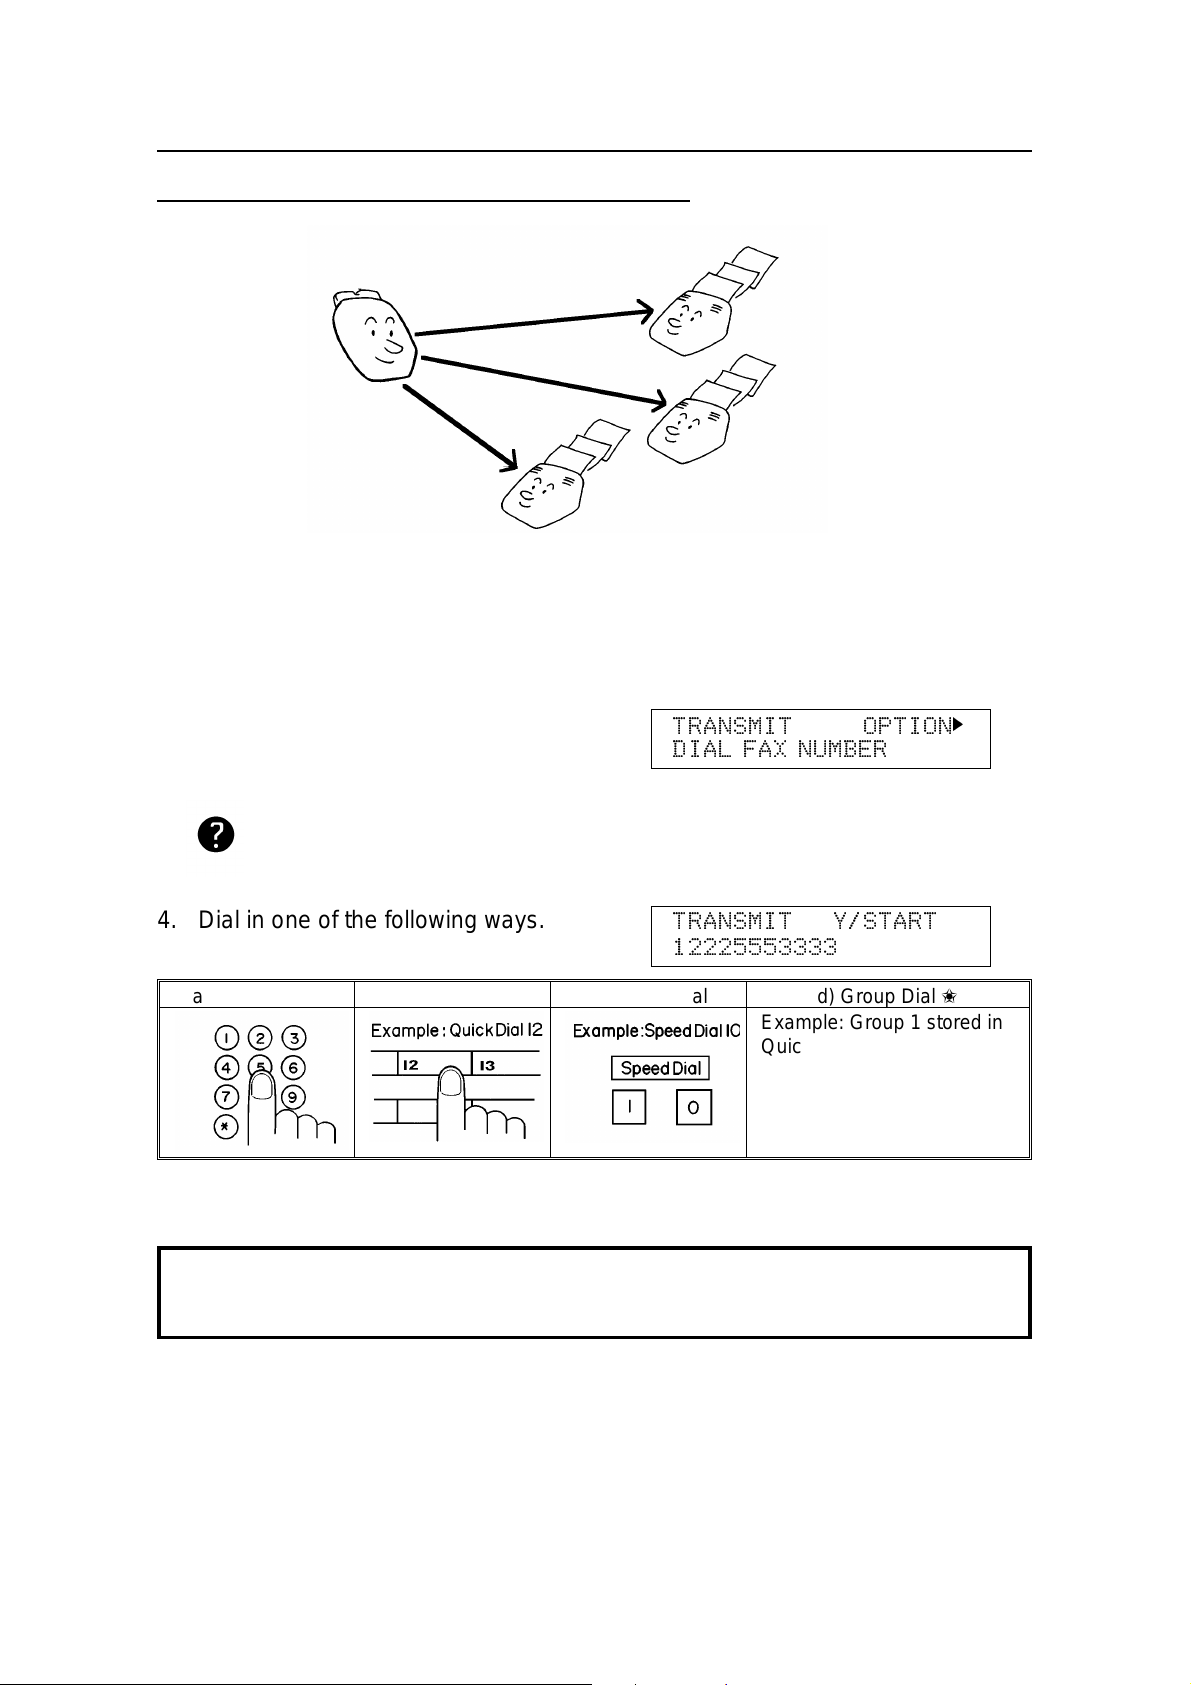
Sending to More Than One Location (Broadcasting)
1. Make sure that the machine is in standby mode (see page 18).
2. Make sure that the Memory ind icat or is lit. If it is not, press Memory.
3. Place your fax message face down into
the feeder.
❐ You can dial without placing the message in
the feeder f irs t. Place the docume nt after you
dial the number and go to step 5.
Selecting Contrast and Resolution:
See page 23.
Options for Sending a Message:
See page 28.
4. Dial in one of the following ways.
a) Ten Keypad b) Quick Dial c) Speed Dial d) Group Dial ✬
✬ : Method: Press the Quick Dial key the Group is stored in (in the example, press key 08).
If your machine is behind a PBX, dial the access code, then a pause, then the telephone
number. For an international number, place a pause after the country code. To input a pause,
press the Pause key.
TRANSMIT OPTION
DIAL FAX NUMBER
TRANSMIT Y/START
12225553333
Example: Group 1 stored in
Quick Dial key 08
Quick Dial key 08
t t t t t t t t t
k
20
Page 28
ROUTINE OPERATION SENDING A FAX MESSAGE
5. Yes.
TRANSMIT OPTION
DIAL NEXT NUMBER
k
6. Either:
❐ Dial another number: Go to step 4.
❐ Press Start.
The machine will dial the first destinatio n (or, if you selected Send Later, it will
return to standby mod e and th e fax message will be sent at the time that you
selected).
NOTE: In theory, you can send the same fax message to up to 132 different
destinations using the above procedure. However, this number
depends on how many numbers are currently waiting in memory to be
dialed. See the table on page 203 for more information concerning the
limitations of this feature.
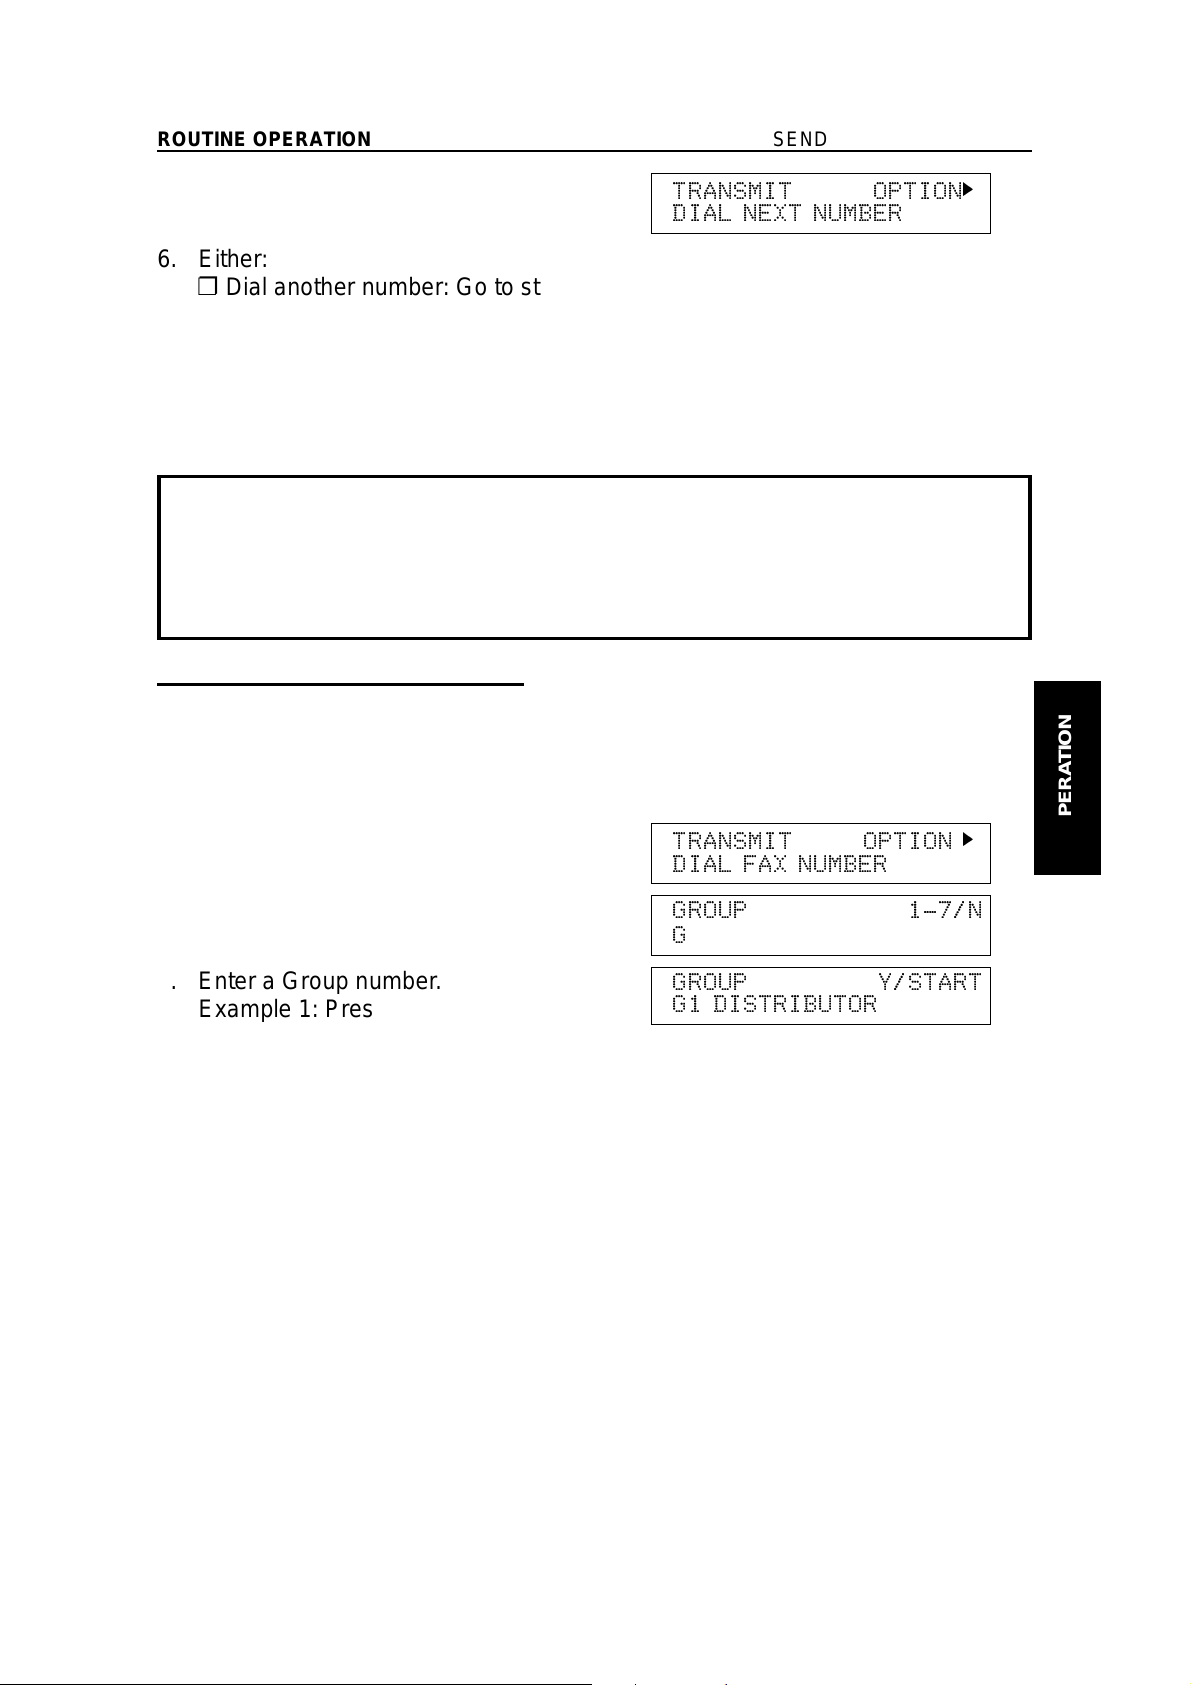
Transmission Using the Group key
Outlined below is the pro ced ure for using the Group key. Yo u have to program the
Group key into the Quick Dial 32 key. (Programming the Group key - see page
202.)
1. Place a documen t int o the feeder.
TRANSMIT OPTION
DIAL FAX NUMBER
k
ROUTINE
OPERATION
2. Press Quick Dial ke y 32 (Group key).
3. Enter a Group nu mber.
Example 1: Press 1 on the ten keyp ad.
4. Start.
GROUP 1-7/N
G
t
GROUP Y/START
G1 DISTRIBUTOR
21
Page 29
SENDING A FAX MESSAGE ROUTINE OPERATION
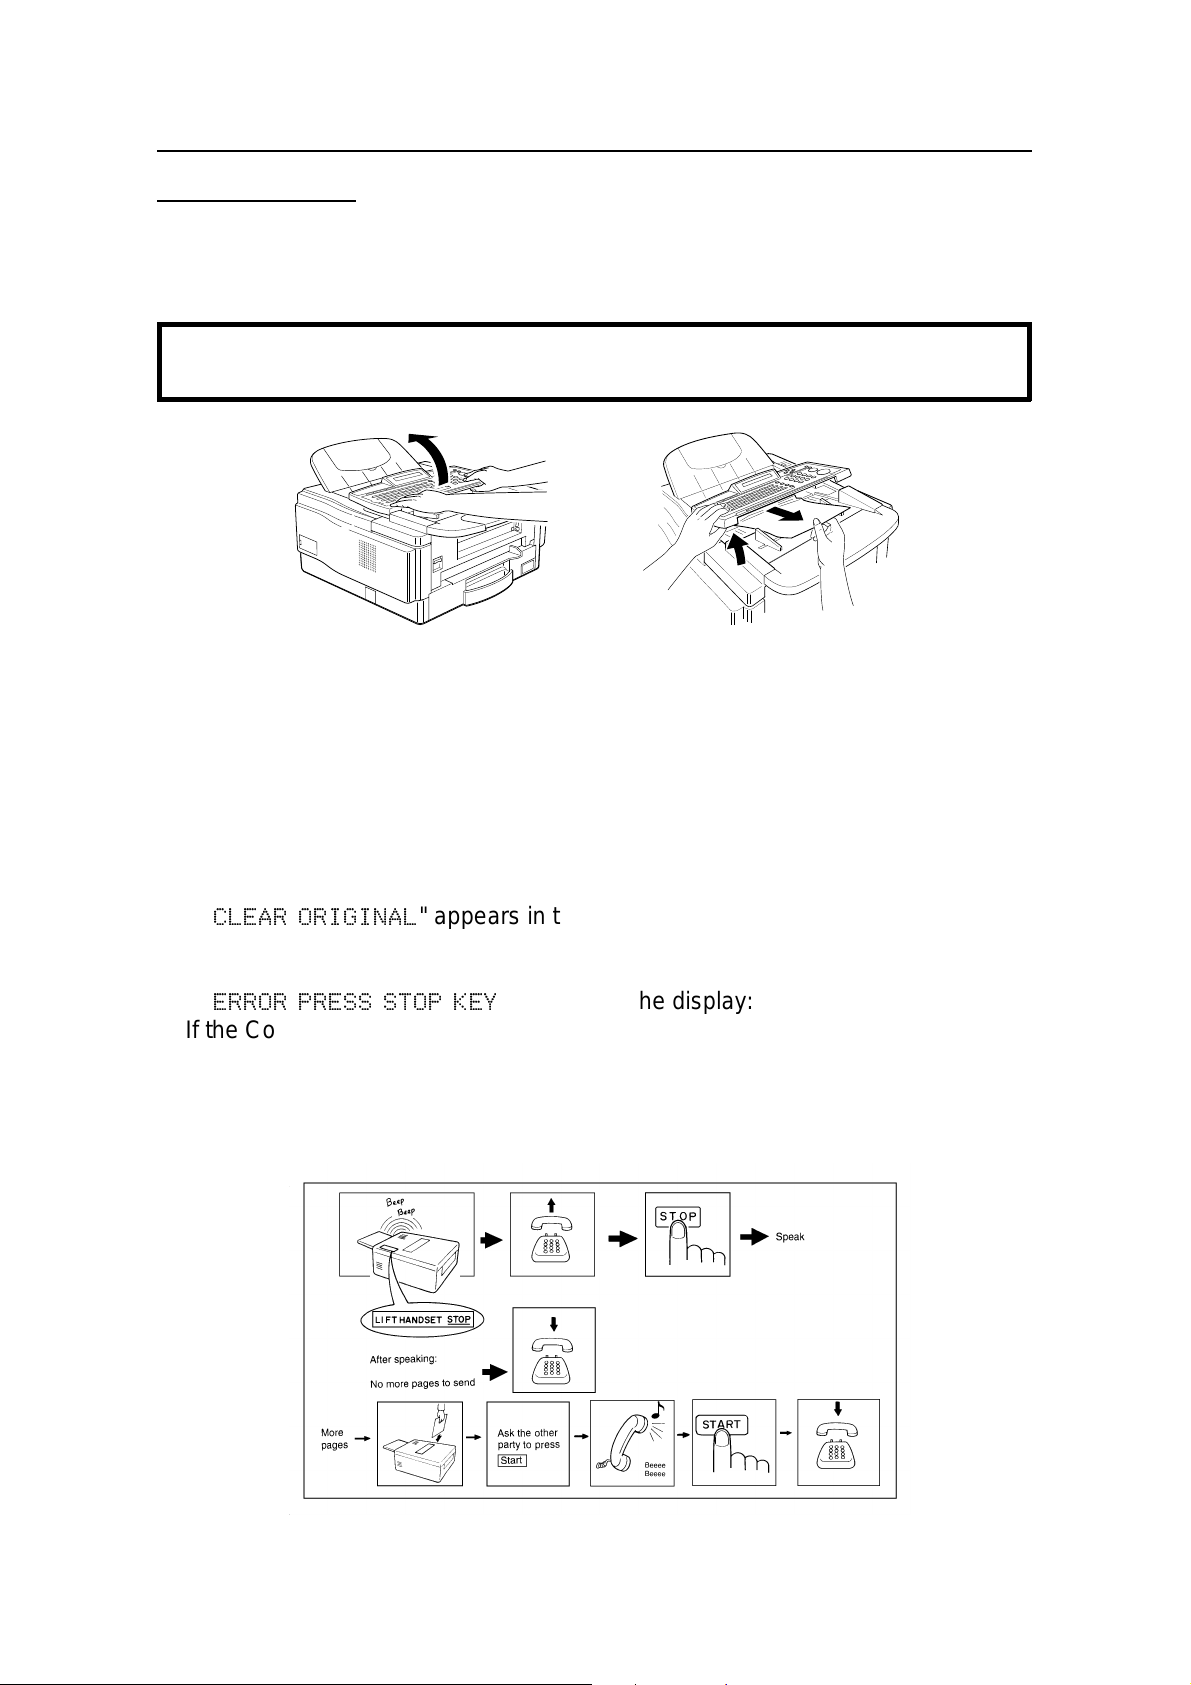
Possible Problems
You want to take out the document
Open the scanner, and take out the document.
Caution: Do not pull out the document without opening the scanner, or you
will damage the machine.
You want to send more than 30 pages
While the last page is being fed in, place more pages (up to 30) in the feeder .
You made a mistake while dialing
If you already pressed Start, pre ss Stop immed iat ely.
If you haven’t pressed Start yet, press either:
❐ No. The entire number is deleted. Enter a new number.
❐ Clear . Only the last digit is deleted.
Check Display Indicator is blinking
❐ If "
CLEAR ORIGINAL
" appears in the display:
Take out the document (see page 150). Then redial the destination.
❐ If "
ERROR PRESS STOP KEY
" appears in the display:
If the Communicating lamp is not lit, press Stop.
If the Communicating lamp is lit, wait until it goes out, then press Stop.
The buzzer is Ringing
The other party wishes to spea k with you. Proceed as shown below.
22
Page 30

ROUTINE OPERATION SENDING A FAX MESSAGE
Sending a Page with Very Fine Detail
You may wish to send many different types of fa x message. Some of these may
be difficult to rep rod uce at the other end. However, your machine has three
settings that you can adjust to help you transmit your documen t with the best
possible image quality.
If you are not sure whether your settings are suitable, make a copy of the
document using these settings. The printout gives an indication of how the fax
message will look when it is printed at the other end.
❐ If your fax message has more tha n on e page , you can select different settings
for each page. For examp le, if you wish to use a different resolutio n just for
page 2, change the reso lut ion setting while page 1 is being scanned. The n,
while page 2 is being scanned, you can return the resolution sett ing to the
original setting.
ROUTINE
OPERATION
23
Page 31

SENDING A FAX MESSAGE ROUTINE OPERATION
Contrast
The text and diagrams in your docume nt must stand out clearly from the paper
they are written on. If your docu men t has a darke r backg rou nd than no rmal (fo r
example, a newspaper clipping), or if the writing is faint, adjust the contra st.
There are three grades.
Normal: Suitable for mo st docume nts.
Darken: Use for documents with faint writing (such as th ose writte n in pencil).
Lighten: Use for documents th at have a dark or patchy background.
Resolution
If your document con tains fine print or detailed diag rams, use a hig he r re solu tio n
setting.
Standard: Suitable for most typ ewrit te n do cume nt s.
Detail: Use for documents with small print or fine details.
Fine: Use this for high qualit y repro duction.
Halftone
If your document con tains a ph otog rap h, or diag rams with comple x shad ing
patterns or grays, switch Halft on e Mod e on to ach ieve optimum image quality.
24
Page 32

ROUTINE OPERATION SENDING A FAX MESSAGE
Selecting the Halftone Type
This model has two types of Halfto ne : th e Dith er Proce ss and the high er qu alit y
Error Diffusion Proce ss. To change the currently used Halftone type, perform the
following procedure.
1. Function 6 2 2 2 2 6 3 and Yes.
2. Yes.
The settings for switch 00 are now
SETTING Y/
PRINT LIST
KPAD/Y/
SWITCH 00 : 0000 0000
j
j k
shown on the bottom line of the displa y.
3. Press k until the settings for switch 10 are
shown. You need to change digit 7.
KPAD/Y/
SWITCH 10 :1000 0000
j k
If you wish change the setting pre ss 7
on the ten keypad.
Speed mode: The machine will use the Basic Halftone P rocess. (Digit 7 is 1)
Standard mode: The machine will use the higher qualit y Error Diffusion Process. (Digit 7 is 0)
4. Finish: Yes and Function.
Halftone Mode slows down the transmission speed, and may increase your
communication costs, esp ecia lly if you use the Error Dif f usio n process. Higher
resolutions also do this. This is becau se th ese sett ing s cre at e larg er amo un ts
of data to be sent.
Messages are transmitted the fastest if you use the standard resolution
setting, and keep Halftone off.
j
ROUTINE
OPERATION
Home Position Setting Adjustments
For the contrast, reso lution, and halftone, you can select whether the settings
return to home posit ion at th e en d of transmission (in a new machine, they do).
Also, you can change th e ho me po sitio ns of the se set tin gs.
If you need other adjustme nts, contact a service representative.
The procedure is as follows (see page 166 if you need more informat ion abo ut the
User Parameter settings adjustment procedure).
1. Function 6 2 2 2 2 6 3 and Yes.
❐ At this time, you can print a User Parameter
List if you press j and Start.
2. Yes.
SETTING? Y/j
PRINT LIST j
KPAD/Y/
SWITCH 00 : 0000 0000
j k
25
Page 33

SENDING A FAX MESSAGE ROUTINE OPERATION
3. The settings for switch 00 are now sho wn
on the bottom line of the display.
SWITCH00:0000 0000
Digit 7 6 5 4 3 2 1 0
The digits are numbered from 7 to 0;
the setting of digit 7 is shown at the left
side of the display and digit 0 is at the
right.
The settings that you may need to change are those for digits 0, 1, 2, 4, 5, 6,
and 7. The functions of these are as follows.
Digit Purpose
0 Stamp 0: Off 1: On
Contrast home position
1
2
3 Do not change this setting.
Resolution home position
4
5
6
7 Halftone on/off home position 0: Off 1: On
Tramsmission mode home position
0: Memory Transmission* 1: Immediate Transmission
Digit 2 Digit 1 Setting
0 0 Normal
0 1 Lighten
1 0 Darken
Digit 5 Digit 4 Setting Digit 5 Digit 4 Setting
0 0 Standard 1 0 Fine
0 1 Detail 1 1 Do not change these
settings.
3. If you wish to change on e of the settings, press the key on th e ten keypad that
corresponds to the digit that you wish to chan ge.
Example: 2 on the ten keypad . The value of digit 3 changes.
4. Finish: Yes and Function.
26
Page 34

ROUTINE OPERATION SENDING A FAX MESSAGE
Dialing with the Telephone Directory
This can be done for any number that you have stored as a Speed Dial code with
a label programmed for it.
Example: You wish to Dial "XYZ CO. LONDON".
1. Make sure that the machin e is in stan db y
mode.
2. Carefully place your fa x me ssag e int o the
auto document feeder.
3. Press Speed Dial/Tel Directory.
4. Press the first letter of the name.
5. If the label you want does not appear,
scroll through the labels using j and
k
until you find it.
6. Press Yes to dial the number you want.
7. Either:
❐ Dial more numbers.
❐ Press Start.
Cross-references Speed Dial: see page 191.
READY 100% 10:00
SET DOC. OR DIAL NO.
TRANSMIT OPTION
DIAL FAX NUMBER
SPEED DIAL 0-4
PUSH NUM OR ABC
TEL DIR. Y/
N
01 XA COMPANY
TEL DIR. Y/
N
01 XYZ COMPANY
j k
j k
k
ROUTINE
OPERATION
27
Page 35

SENDING A FAX MESSAGE ROUTINE OPERATION
Optional Features for Transmission
When you make a routine transmissio n, you can access a few opt ion al fe at ure s.
These options are only available if "
OPTION
k" can be seen in the top right corner
of the display.
Personal Code
Personal Codes do the following .
❐ They allow you to keep track of machin e usage (for example, for billing
purposes). If everybo dy use s a Person al Cod e when they use the fax machine,
the codes, or the names programme d int o th e codes, will be printed on the
report that is called the Journal (Transaction Confirmatio n Report). This will
help you to check on who has been using the machin e, and how often.
❐ They allow personalization of documents and printed reports. For examp le, if
you use Label Insertion an d sto re your name with your Personal Code, the
receiver of your fax message will se e you r name at th e top of the printout. This
eliminates the need for a cover page.
❐ They allow you to restrict use of the machine to authorized personnel on ly. If
you switch the Restricted Access fe at ure on, users have to enter their personal
code before they can use th e mach ine. The personal code must have alre ady
have been stored in the mach ine. This may deter unauthorized perso nn el from
casually using the machine .
Cross-references
Programming Personal Codes: see page 58.
Label Insertion: see page 65.
Restricted Access: see page 58.
Journal: see page 123.
28
Page 36

ROUTINE OPERATION SENDING A FAX MESSAGE
If you input your Person al Cod e, your na me will a ppea r o n th e Jou rna l and
Transmission Result Report.
1. Press k and make sure that the display is
as shown opposite.
2. Yes.
3. Enter the pe rsonal code.
Example: 7 3 6 2
4. Yes.
See page 59 for details on how to program the Personal Codes an d th eir labels.
Sending at a Specific Time
SET OPTION Y/
SET PERSONAL CODE?
SET OPTION KPAD
PERSONAL CODE:
SET OPTION Y/N
PERSONAL CODE:7362
t t t t
k
ROUTINE
OPERATION
This feature is call Send Later.
Using this feature, you can instruct the machine to delay transmissio n of your fax
message until a later time, which you specify. This allows you to take advanta ge
of off-peak telephone line charges witho ut havin g to be by the machine at the time.
CAUTION
If your machine’s memory is full, you will have to keep the message in the
document feeder. This me ans that nobody can us e the doc ument fe eder
unless they remove your document. This would automatically cancel the Send
Later operation.
1. Press k until the display is as shown
opposite and Yes.
SET OPTION Y/
SEND LATER?
k
29
Page 37

SENDING A FAX MESSAGE ROUTINE OPERATION
2. Example: Send at 11:30.
1 1 3 0 from the ten keypad.
SET OPTION KPAD/Y
TIME 11:30 10:00
3. Yes.
❐ The Send Later time cannot be more than 24
hours into the future.
TRANSMIT OPTION
DIAL FAX NUMBER
Sending by a Specific Time (TRD) (Feature Expander Required)
k
This feature is called Transmission Deadline.
If your message has to be sent to the other end before a certa in time , use the
Transmission Deadline option and input this deadline.
If the line is busy, the machine will redial at set interva ls eith er until th e messa ge
gets through or until th e de ad line passe s. Before the deadline passes, the re is no
limit to the number of times that the machine can redial.
This feature is only available with Memory Transmission.
1. Press k until the right display appears.
2. Yes.
3. Example: The dead line is 12:5 0.
1 2 5 0
❐ The TRD time cannot be more than 24 hours in to
the future.
4. Yes.
SET OPTION Y/
SET TRD?
SET OPTION */#/Y
TIME 12:00 10:00
SET OPTION KPAD/Y
TIME 12:50 10:00
TRANSMIT OPTION
DIAL FAX NUMBER
k
k
30
Page 38

ROUTINE OPERATION SENDING A FAX MESSAGE
Printing the Page Number (Immediate Transmission only)
When your fax message is printed at the other end, page numbe rs will be printed
on the top of each page. Using the Page Count fea ture, you can select the format
in which the page numbers are printed.
If you use Page Count:
❐ Page numbers will be printed in batch -nu mbe ring forma t (for example, p1/3,
p2/3, and p3/3 for a th ree -page message). This makes it easy for th e ot he r
party to see how many pages you sen t, and if any are missing. However , you
have to input th e number of pages at th e keypad before sending.
If you do not use Page Count:
❐ Page numbers will be printed only as a sequen ce (fo r examp le, p1, p2, p3).
This makes it difficult fo r the oth er pa rty to tell at a glance whe ther any pages
are missing (for example, due to a doub le feed in your machine’s docume nt
feeder).
NOTE: If you do not select Immediate T r a nsmissio n, Page Coun t is aut oma tica lly
switched on, and the pages are counted automatically.
1. Press k until the right display appears.
2. Yes.
3. Example: 10 pages.
1 0
SET OPTION Y/k
SET PAGES?
SET OPTION KPAD
PAGES:
SET OPTION Y/N
PAGES:10
t t
4. Yes.
ROUTINE
OPERATION
31
Page 39

SENDING A FAX MESSAGE ROUTINE OPERATION
Sending Your Identification at the Top of Your Message
Normally, the TTI programmed in your machine is print ed at the top of each of the
pages you transmit when they are receive d at the oth er end. The top of the image
will be overprinted if there is no margin at the top of the transmitte d page.
In some cases, you may wish the ot he r part y to rece ive an unma rked copy of your
original. In this case, you can swit ch TTI of f .
NOTE: If you switch TTI off, make sure that La bel I nse rtio n is also off if you want
the image received at th e ot he r end to be unma rked .
Cross-reference
TTI: see page 188. Label Insertion: see page 65
1. Press k until the right display appears.
2. Yes.
3. If you wish to change the
TTI
setting,
press j or k until the displayed setting is
correct.
4. Yes when you have finished.
SET OPTION Y/
TTI PRINT?
SET OPTION Y/j
kON OFF
SET OPTION Y/j
ON kOFF
k
k
k
32
Page 40

ROUTINE OPERATION SENDING A FAX MESSAGE
Sending Quickly
Procedure
If you do not wish to store the fax message in memory befo re sen ding it out, use
the following procedure.
❐ The advantages and drawbacks of Immediat e Transmission and Memory
Transmission are discusse d on pages 16 and 17.
1. Make sure that the machine is in standby mode (see page 18).
2. Make sure that the Memory ind icat or is out . If it is lit, press Memory .
3. Place the documen t face down into the
feeder.
4. Dial (only one destina tio n).
TRANSMIT OPTION
DIAL FAX NUMBER
TRANSMIT Y/START
2125551234
t t t t t t t t t t
k
See page 19 for how to dial.
5. Start.
2125551234
DIALING
6. The machine dials and th e line to th e ot he r part y is con nected. The number that
you dialed is displayed (or if you used Quick Dial or Speed Dial, the Quick
Dial or Speed Dial Label stored for that number is displayed).
Changing Transmission Mode
Converting Immediate Transmission to Memory Transmission
If there is a message still waitin g in the document feeder, you can convert it into a
memory file if you press Memory and Start. The docume nt will be scanned and
stored into memory, leaving the document feed er fre e fo r oth ers to use.
ROUTINE
OPERATION
33
Page 41

SENDING A FAX MESSAGE ROUTINE OPERATION
Immediate Transmission as Your First Choice
The default mode of your ma chin e is Memory Transmission. If you wish , you can
change this home position to Immediate Transmission.
The procedure is as follows (see page 166 if you need more informat ion abo ut the
User Parameter settings adjustment procedure).
1. Function 6 2 2 2 2 6 3 and Yes.
❐ At this time, you can print a User Parameter
List if you press j and Start.
SETTING? Y/j
PRINT LIST j
2. Press Yes.The settings for switch 00 are
now shown on the bottom line of th e dis-
KPAD/Y/
SWITCH 00 :0000 0000
j k
play.
The setting that you need to change is
that for digit 6.
3. If you wish to change the setting, press 6
SWITCH 00 :0000 0000
on the ten keypad.
Digit 6 (Double underlined)
0: Memory Transmission
1: Immediate T ran smission
4. Finish: Yes and Function.
Using the Stamp
Press the Stamp key to achieve the transmission verification stamp. When the
Stamp indicator is lit, the machine stamps a small mark on the bottom of each
page. During memory transmission, the stamp indicates that the page was
successfully stored. For immediat e tra nsmissio n, it shows that the page was sent
successfully. You must swit ch the sta mp on before you pre ss Sta rt, or th e
machine will not stamp the first page.
Changing the Stamp Home Position Setting
If you wish to change the Stamp defa ult sett ing , do the follo wing.
(See page 166 if you need more information about the User Para met er settings
adjustment procedure).
1. Function 6 2 2 2 2 6 3 and Yes.
At this time, you can print a User Pa-
SETTING? Y/j
PRINT LIST
j
rameter List if you press j and Start.
34
Page 42

ROUTINE OPERATION SENDING A FAX MESSAGE
2. Press Yes. The settings for switch 00 are
SWITCH 00 : 0000 0000
now shown on the bottom line of th e display. The setting that you need to
change is that for digit 0.
Digit 0(Double underlined)
0: Ve rifica tio n sta mp of f
1: Ve rifica tio n sta mp on
3. If you wish to change the setting, press 0
on the ten keypad.
4. Finish: Yes an d Function.
Redialing
If a message was not transmitted successf ully, that does not mean that you have
to enter the telephone numbe r aga in. In man y cases, the machine will redial the
destination automatically . Or, with the Redial key , you can red ial with just a few
keystrokes.
Automatic Redialing
The machine will automatically redial th e other part y if any of the follo wing
conditions occurred.
❐ The other party was busy.
❐ There was no reply from the other part y.
❐ The message was rejected by the machine at the other end because of
excessive errors (in this case, redialin g will only ta ke place if Memory
Transmission was use d).
Redialing is done 4 times at 5 minute int ervals (for a memory transmission) or 2
times at 5 minute interva ls (for an imme dia te tran smission ).
❐ The number of redials and th e red ial int erva l may be ad just ed by a service
technician.
During redialing, the number being dialed is
displayed as shown on the right.
21255551234
DIALING
ROUTINE
OPERATION
35
Page 43

SENDING A FAX MESSAGE ROUTINE OPERATION
Using the AI Redial Key
The machine remembers the last 10 telephone number th at you input. If you have
to redial one of these numbers, just press th e AI Redial key, until the required
telephone numbe r or na me is displaye d, then press the Start key.
This feature has the following uses:
❐ If the machine is waiting to red ial th e other party, you do not have to wait for t he
redialing interval to exp ire. Press AI Redial until the required telephone
number or name is displayed, then press Start.
❐ If you wish to send anothe r message to the same address that you sent one to
recently, you don’t have to dial the full number again if it is still in the Redial
memory. Place the message in th e fe ed er, then press Start.
NOTE: The AI Redial key employs the AI Short Protocol feature.
1. Follow both steps in any order.
❐ Press the Pause/AI Redial key un-
til the required number appe ars in
REDIAL Y/
n
08 ATLANTA OFFICE
j k
the display, then press the Yes key
twice.
❐ Carefully place your fax message
into the auto document feeder.
TRANSMIT OPTION
DIAL FAX NUMBER
k
2. Either:
❐ Select another number. (Broadcast-
ing)
❐ Start the transmission: Press the
Start.
36
Page 44

ROUTINE OPERATION RECEIVING FAX MESSAGES
RECEIVING FAX MESSAGES
Selecting the Reception Mode
There are two ways to set up your machin e to receive fax messa ge s.
❐ Auto Receive Mode
❐ Manual Receive Mode
Press the reception mode key to switch be twe en the mode s.
Auto Receive Mode
This mode is selected when th e Aut o Rece ive ind icat or is lit.
Incoming faxes are rece ived aut oma tically. You do not have to be by the mach ine
if the power switch is kept on. Use this mode whe n you must lea ve th e machine.
1 2
Communicating
1. The telephone ring s once .
2. The machine automat ically sta rts to re ceive the messag e.
Manual Receive Mode
This mode is selected when th e Man ual Re ceive indica to r is lit.
This setting is conven ien t if you wish to use your fax machine’s handset to answe r
telephone calls coming in on the same line as fax messa ges. Howe ver, your fax
machine cannot automatically receive fax messages; you ha ve to be by th e
machine if a fax message comes in.
The machine operat es as fo llows:
1 2
3
4
ROUTINE
OPERATION
Communicating
37
Page 45

RECEIVING FAX MESSAGES ROUTINE OPERATION
1. The machine rings contin uo usly un til you answe r the call. Pick up th e ha ndset.
2. If you hear a voice from the other end, speak in reply.
If you hear a tone every few seconds, the other en d is a fax termina l.
NOTE: Remove any documents that are in th e fe ed er.
3. If the person at th e ot he r end wish es to send you a fax message,
press Start to receive the message . The n ha ng up th e ha nd set.
4. The machine start s to rece ive th e messa ge .
The Communicating indicator lights.
Receiving Fax Messages When There Is a Problem
Overview
This feature is called Substitute Reception.
If the printer is jammed or out of supplies, you will still be able to receive fax
messages; any messages coming in will be store d in th e mach ine ’s memory.
If the "Receive File" indicat or is lit , a messa ge has be en store d in the memory
using the Substitute Reception feature.
Check the following:
❐ The printer paper may be used up. If so, add paper: see page 132.
❐ The toner may have run out. If so, add toner: see page 133.
❐ The printer paper may have jamme d. If so, remove the jam: see pag e 152.
❐ If there appears to be no proble m, some bo dy may be making copies while a
fax message is coming in.
The messages received into memory will be printed and erased afte r the machin e
has been returned to norma l ope rat ion.
38
Page 46

ROUTINE OPERATION RECEIVING FAX MESSAGES
Switching Substitute Reception On or Off
There are two conditions unde r which you may wish to disable this fe ature.
❐ If you do not like keeping received fax messa ge s in memory: Afte r yo ur
machine has received a fax message to memory, it sends an OK signal to the
other end. However, if something happens to your machine and you lose the
fax message before you have a chan ce to read it, th e sender will not be
informed. Therefo re, you may not wish to use the Substitut e Rece ption feature.
❐ If you do not wish to have your memory full of ma il from unknown senders: If
you have not enable d th e Authorized Reception fe at ure, you can receive fax
messages from anybody. However, you can see who they are because their
identifier (the TTI) is printed at the top of each page. If the other party ha s not
programmed their identif iers (pe rha ps in an attempt to hide their identity), you
may not wish to receive their messages int o memo ry, which would take up
valuable space.
Cross-reference
ECM: see page 68. Authorized Reception: see page 79.
If you wish to switch Substitute Recep tio n on or off, do the following procedure .
(See page 166 if you need more information about the User Para met er settings
adjustment procedure).
1. Function 6 2 2 2 2 6 3 and Yes.
❐ At this time, you can print a User Parameter
List if you press j and Start.
2. The settings for switch 00 are now sho wn
on the bottom line of the display.
3. Press k until the settings for switch 05 are
shown.
The settings that you need to change
SETTING? Y/j
PRINT LIST
KPAD/Y/
SWITCH 00 :0000 0000
j
SWITCH 05 :0000 0000
Digit 0 (Underlined)
Digit 1 (Double underlined)
are those for digits 0 and 1.
The meanings of these settings are as follows.
Digit Purpose
0 Substitute Reception 0: Off 1: On
Reception to memory (including Substitute Reception, Memory Lock and Forwarding
1
from another station) when no RTI or CSI identifiers were received from the other
party. 0: Enabled, 1: Disabled
4. If you wish to change the setting, press 0 or 1 on the ten keyp ad .
5. Finish: Yes and Function.
j k
ROUTINE
OPERATION
39
Page 47

TELEPHONE CALLS ROUTINE OPERATION
TELEPHONE CALLS
A handset is required to execu te the proce dures in this section.
You can use your fax machine for dialing in the same way as you would use a
telephone. This is usefu l when calling fax mach ine s that are usua lly kept in
Manual Receive Mode, as well as for te lep ho ne conve rsat ion s.
❐ You can dial using Quick Dial keys or Speed Dial Code s.
❐ With the On Hook Dial feature, you do not ha ve to pick up th e handset before
dialing.
❐ You can send a fax message aft er fin ishing the conversation, witho ut havin g to
make a new call.
Cross-reference Manual Receive Mode: see page 37.
Making a Telephone Call
Using On Hook Dial
Using On Hook Dial is like using the hand set (se e th e ne xt page ), except that you
do not have to pick it up before dia ling. Just press the On Hook Dial key, and dial
the number. When you hear the other party on the fax machin e’s built-in speaker,
you can pick up the handset. This keeps bo th hands fre e for re ferring to
telephone numbers while you are dialing.
1. Press the On Hook Dial key.
ON HOOK MODE
t t t t t t t t t t t t t t t t t t t t
2. Dial.
See page 19 for how to dial.
Do not use the handset.
NOTE: Do not press Start.
If you wish to cancel the call, press the
ON HOOK MODE
2125551234
t t t t t t t t t t
On Hook Dial key.
3. Listen to your machine’s built-in speaker.
When the other party answers, pick up
the handset .
4. Replace the handset when you have finished.
40
Page 48

ROUTINE OPERATION TELEPHONE CALLS
Using the Handset
Using the fax machine’s built-in or optional handset, you can use the fax machin e
in the same way as a normal telephone. Pick up the ha ndset and dial on the fax
machine’s ten-keyp ad (or use a Quick Dial key or Spe ed Dial Code if you wish).
1. Pick up the handset .
HANDSET MODE
t t t t t t t t t t t t t t t t t t t t
2. Dial.
See page 19 for how to dial.
NOTE: Do not press Start.
HANDSET MODE
2125551234
t t t t t t t t t t
3. Continue as for a norma l telephone conversation.
Using Redial
Use Redial if you wish to redial a number that you dialed recently.
1. Press the On Hook Dial then the Redial
key.
REDIAL Y
2125551234
The number will be dialed immediately.
ROUTINE
OPERATION
41
Page 49

TELEPHONE CALLS ROUTINE OPERATION
Answering the Telephone
If the telephone rings just once:
A fax is coming in. Do not pick up the handset.
If the telephone rings continuously:
1
1. Pick up the handset and speak to the other party.
If you hear a high-pitch ed tone, a fax is coming in.
Press Start then hang up.
2. If the caller wants to sen d you a fax, press Start after speaking. Then hang up.
If nothing happen s aft er you press Start th e power may be switche d of f or the
telephone may not be properly connected.
2
Phoning and Faxing on the Same Call
To Talk Before Sending a Fax (On Hook Dial)
1. Press the On Hook Dial key.
2. Dial.
NOTE: Do not use the handset.
Do not press Start.
3. If you hear a voice from the machin e’s built-in speaker, pick up the handset and
speak to the other party.
❐ If you hear a high-pitched tone instead of a voice, place your fax message in the feeder, then press
Start.
4. When you are ready to send your fa x messag e, place your message in the
feeder, then ask the other party to press Start.
5. When you hear a high-pitched to ne, pre ss Start.
.
42
Page 50

ROUTINE OPERATION TELEPHONE CALLS
6. Replace the handset.
Do not replace the handset if you wish to speak to the other party again.
When your machine emits a tone, press Stop then speak.
Speaker and Buzzer Volume Adjustments
Your machine has a built in speaker. With this speaker, you can listen to th e
telephone line without picking up the handset . The speaker will be auto mat ically
switched off just before th e start of facsimile data communica tion.
When you are sending a fa x message, you will be able to hear the line af te r t he
machine has dialed. If th e line is busy, you can press the Stop key and start
another operatio n without having to wait for the mach ine to disco nn ect the line.
The volumes you can adjust are:
Transmitting monitor (TRANS MONITOR): The sound you hear in transmission.
Receiving monitor (RECV MONITOR): The sound you he ar in rece ption.
Dialing monitor (DIAL MONITOR): The sound you he ar after pressing the Start key.
Buzzer tone(BUZZER): The volume of th e bu zzer whe n you ope n a cove r and so
on.
Key tone (KEY): The sound you hear when you press a key on the operation
panel.
ROUTINE
OPERATION
If the speaker volume is not satisfactory, you can adjust it.
1. Function 6 2 2 2 2 9 2 and Yes.
2. Either:
❒ To increase: k.
TRANS MONITOR Y/
MIN
TRANS MONITOR Y/
MIN
k k
k k k k
❒ To decrease: j.
❒ To accept: Yes.
3. Repeat step 2 for each adjustment that appears on the screen.
4. Finish: Function.
j k
MAX
j k
MAX
43
Page 51

ADVANCED FEA TURES
TRANSMISSION
Transfer Request
Transf er Requ est help s you save costs when you send the same messa ge to
more than one place in a dista nt area. You send your message once, to a
machine referred to as a Transfer Station. In turn, this machine sends on th e
message to local machines (referred to as End Receivers). After the Transfer
Station has broad cast ed the me ssage to all End Rece ivers in the sequence, it
sends your machine a T ran sf er Result Repo rt to tell you if these were an y
problems with the communicat ion.
NOTE: ❐ This feature can only be used if th e Transfer Station was made by the
same maker as your mach ine .
❐ The ID Code of your machine must be the same as the ID Code of the
Transfer Station.
❐ Your fax machine’s telephone number must have been programmed in
advance.
❐ The Transfer Stat ion must have memory space available, an d must be
able to act as a T ran sf e r Stat ion (some machines cannot do this, or
can but the capability has been s witched off).
You cannot specify the End Receivers as full numbers on your ten-key pad, and
you cannot use your own store d Speed Dials, Quick Dials, and Group s. You must
use the numbers that are store d as Quick Dials, Spee d Dials or Grou ps in th e
Transf er Station. Always keep a copy of the Transf er Station’s Telephone Lists
(Quick Dial, Speed Dial, and Group List s) nea r the machin e if you plan to use
Transfer Request.
NOTE: This machine cannot be a Transfer Statio n.
Cross-reference
Quick Dial and Speed Dial: see pages 191. Groups: see page 192.
ID Code: see page 46.
44
Page 52

ADVANCED FEATURES TRANSMISSION
Before you can star t to se t up tran sf e r re qu est, there are some item s that you
have to program in your machine . The se are as follo ws.
❐ Your Fax Machine’ s O wn Telephone Number
❐ The ID Code
Storing your Machine’s Own Telephone Number
Store your fax terminal’s telephone number using this feat ure . If you do not do
this, you will not be able to use the Tra nsf er Reque st feat ure .
If your fax machine’s telephone number changes, do not forget to change the
stored tel ephone nu mber da ta.
1. Function 6 2 2 2 2 6 1.
2. Yes. Make sure that the opposite display
appears, then press Yes.
3. Input y ou r f ax terminal’ s telephone number.
❐ The format of the number must be
as follows:
International Dial Prefix, Your Country
Code, Your Area Code, then you
must add a Pause, followed by your
telephon e number.
Check the Interna tio na l Dialing Prefix
and the Country Code with your loca l
telecommunica tio ns op era tor. The e xample shown is for the USA; the
codes to add are 011 and 1.
INITIAL MODE Y/NEXT
61 INITIAL SET
Y/NEXT
SET OWN NUMBER
OWN NO. KPAD/Y/N
0111212-5551 23 4
t t t t t
k
k
FEA TURES
ADV ANCED
NOTE: Use the Pause key to add a pause .
4. Yes and Function.
45
Page 53

TRANSMISSION ADVANCED FEATURES
Storing the ID Code
Before programming the ID Code, confe r with othe r users in your fa x net work to
agree on an ID Code. This is because com mu nica tions using ID Codes will fail if
the codes are no t the same.
The ID Code can be any four-digit code (using digits 0 to 9 and letters A to F),
except 0000 and FFFF.
In addition to the net working f ea tures de scribe d in th is se ctio n, ID Code s are use d
with the following communication features. The same code must be used by all
members of your fax network and all people you wish to communicate with using
these features.
❐ Polling: see page 104.
❐ Closed Network: see pages 66 and 100.
Features using ID Codes can onl y be used bet ween term in als mad e by the same
maker .
46
Page 54

ADVANCED FEATURES TRANSMISSION
Programming the ID code
To store an ID Code, do the following.
1. Function 6 2 2 2 2 6 1 and Yes.
2. Press k until the opposite display appears.
3. Yes.
4. Input th e ID Cod e that you will be using.
Example: 4 3 6 3
❐ Do not use 0000 or FFFF.
Y/NEXT
SET OWN NUMBER
Y/NEXT
SET POLLING ID
POLLING ID KPAD
t t t t
POLLING ID Y/N
4363
5. Yes and Function.
Editing the ID Code
If you want to change the ID code, do the following.
1. Function 6 2 2 2 2 6 1 and Yes.
Y/NEXT
SET OWN NUMBER
k
k
k
2. Press k until the opposite display appears.
3. Yes.
4. Yes and No.
5. Inpu t a ne w ID .
Example: 5 4 3 3
Y/NEXT
SET POLLING ID
POLL. ID CHANGE? Y/N
1234
POLLING ID KPAD
t t t t
POLLING ID Y/N
5433
k
6. Yes and Function.
Making a Transfer Request
After you have stored your machine’s own telephone number and ID code you
can do the transfer request using the following procedure.
1. Make sure that the machin e is in st andb y mode (see pa ge 18).
2. Place your docum e nt in the fee de r.
TRANSMIT OPTION
DIAL FAX NUMBER
k
FEATURES
ADVANCED
47
Page 55

TRANSMISSION ADVANCED FEATURES
3. Function 1 3 and Yes.
4. Input the telephone num b er of the Tran sfer Station, then press Yes.
❐
This machine must be of the same
manufacturer as yours, and it must be able to
act as a Transfer Station.
5. Input the End Receivers for this Transfer
Station.
You must use Quick Dials, Speed Dials,
or Groups that are stored in the Transfer
Station. There is a shorthand notation
for this purpose. See the following examples:
❐ Quick Dial key 01: 0 1 Yes.
❐ Speed Dial Code 10: ∗ 1 0 Yes .
❐ Group 01: ∗ ∗ 0 1 Y e s.
Example: Speed Dial Code 10.
TRANSFER OPTION
DIAL FAX NUMBER
TRANSFER */KPAD
DESTINATION #
TRANSFER Y/N
DESTINATION #* 00
ll
k
NOTE: You can select one Transfer Station, and up to 30 End Receivers for
this Transfer Station.
6. Yes.
7. Either:
❐ Enter more End Receivers for this
Transfer Station, then go to step 5.
TRANSFER */KPAD
DESTINATION #
ll
❐ Start the Transf er Request: Start.
NOTE: You may use some transmission options, such as Send Later.
See page 29.
48
Page 56

ADVANCED FEATURES TRANSMISSION
Programming Keystrokes
Overview
If you regularly transmit to a particular destinat ion or set of destinations using the
same features, you can save a lot of repetitive key pad operations by storing the
features and destinat ion s in a Keystro ke Program .
Keystroke Programs are stored in Quick Dial keys.
❐ If you store a Keystroke Program into a Quick Dial key, that Quick Dial key
cannot be used for any other purpose.
❐ Be sure to store your Keystroke Progra m in a vacan t Quick Dial key.
Example: Let us say that you normally send a daily report to locations A, B, and
C at 11 pm (using Send Later). Store these instru ctio ns as a Keystroke Program.
Then every day, you will only have to place the report in the document feeder,
then press that key to set up the transm ission .
Cross-reference Send Later: see page 29.
FEATURES
ADVANCED
49
Page 57

TRANSMISSION ADVANCED FEATURES
Storing a Keystroke Program
1. Make sure that the machin e is in st andb y
mode (see page 18).
2. Place a sheet of paper in the feeder.
❐ Skip step 2 if you are making a Polling
Reception program.
3. Select all required features (such as Transfer Request) and telephone numbers as
you would normally do.
❐ Contrast, resolution, and halftone cannot be
stored in a keystro ke program.
4. Press the Quick Dial key that you wish to
store the program in.
Example: Quick Dial key 01.
❐ Make sure that this key is vacant.
5. To complete the progra m : Yes.
NOTE: The procedure that yo u just
stored will now begin. If you do
not wish to use the proced ure
now, press Stop immediately.
READY 100% 10:00
SET DOC. OR DIAL NO.
TRANSMIT OPTION
DIAL FAX NUMBER
PROGRAM Y/N
PROGRAM?
k
Labeling a Program
If you store a label for your keystroke pro grams, the label will appear on the
display when you use the program.
1. Function 3 4 and Yes.
If you press k and Start, a Program List
n t
QUICK/
PRINT LISTj/ SEARCH
j k
will be printed.
2. Press the Quick Dial key that holds the
program that you wish to label.
n
01 Y/N
PROGRAM LABEL?
Example: Quick Dial key 01 and Yes.
3. To program a label for this program; Yes.
4. Input your label, usin g the Quick Dial keys.
n
01 ABC/Y/N
t t t t t t t t t t t t t t t t t t t t
n
01 ABC Y/N
DAILY REPORT
t t t t t t t t
How to enter the label: see page 164.
k
50
Page 58

ADVANCED FEATURES TRANSMISSION
5. Yes.
n t
QUICK/
PRINT LISTj/SEARCH
j k
k
6. Either:
❐ Label another program: Go to step 2.
❐ Return to standby: Function.
Using a Program
Before using a progra m , make sure th at the machine is in standby mode (see
page 18 for details).
Transmission Program
1. Place your document in the feeder.
2. Press the programmed Quick Dial key.
❐ The program begins at once, or at the later
time specified by the program.
TRANSMIT OPTION
DIAL FAX NUMBER
Free Polling Reception Progra m
k
1. Press the programmed Quick Dial key.
❐ The program begins at once, or at the later
time specified by the program.
Cross-reference
Polling Reception: see page 109.
2125551234
SET DOC. OR DIAL
FEATURES
ADVANCED
51
Page 59

TRANSMISSION ADVANCED FEATURES
Erasing a Program
When you wish to delete a Keystroke program, do the following.
1. Function 3 4 and Yes.
2. Press the Quick Dial key that holds the
program that you wish to erase, or scroll
the Quick Dials using j and k.
Example: Quick Dial key 08.
3. Press Yes.
4. No.
5. To delete the progra m : Yes.
6. Either:
❐ Edit or erase another program: Go to step 2.
❐ Return to standby: Function.
Sending Confidential Messages
n t
QUICK/
PRINT LISTj/ SEARCH
n
08 CHANGE? Y/
USED AS PROGRAM
n
08 Y/N
PROGRAM LABEL?
n
08 Y/N
PROGRAM CLEAR?
n t
QUICK/
PRINT LISTj/ SEARCH
j k
j k
k
j k
k
Overview
This feature is called Confidential Transmission.
Use this feature if you do not want your message to be picked up casually by
anybody at the other end. The message will be stored in the memory at the other
end. It will not be printed until an ID known as the Confiden tia l ID is entered .
52
Page 60

ADVANCED FEATURES TRANSMISSION
NOTE: ❐ The machine at the other end must ha ve enough memo r y space avail-
able and it must have the Confidential Reception fe ature.
❐ This is a proprietary feature , and as such it only functions with ma-
chines produced by the same manu facturer that have this feature.
❐ Before sending a confident ial messa ge , it is recom m end ed that you
call the receiver and advise them that you are sending a fax message
in this manner.
There are two types of Confidential Transmission.
1. Normal Confidential Transmission
The other party can print the message by entering th e ID that was previously
stored using the Confident ial ID feat ure .
2. Confidential ID Override
If you wish to send a confidential message to a part icula r person at the other
end, you can specify the Confidential ID th at person has to enter to see tha t
message. Anybody entering th e mach ine ’s Confidential ID will not be able to
see the message. Before you send the message, don’t forget to tell the
intended recei ver what cod e must be entered to print the message.
NOTE: The receiving machine’ s Confidential ID is not changed by this
process.
If the intended receiver has a Personal Code with a Confidential ID stored with it,
you can override the rece iving machine’s ID with th at Confidential ID. Then:
❐ The receiver can print the message b y inp ut tin g the Confidential ID that is
stored with that perso n’s Personal Code.
❐ The intended recei ver will also be info rm ed perso na l l y by a Confident ial File
Report; this report will have the name of th e rece iver on it, if the name was
stored with the Perso na l Code .
Cross-references
Confidential ID: see page 72. Personal Codes: see page 58.
Confidential File Report: see page 124. Journal: see page 123.
Confidential Reception: see page 71.
FEATURES
ADVANCED
53
Page 61

TRANSMISSION ADVANCED FEATURES
Procedure
To set up a confidential transmission, do the following.
1. Place your docum e nt in the fee de r.
2. Function 1 2 and Yes.
3. Dial then press Yes.
TRANSMIT OPTION
DIAL FAX NUMBER
CONFID,L TRANS OPT
DIAL FAX NUMBER
CONFID,L TRANS Y/STA
2125551234
CONFID,L TRANS D/STA
DIAL NEXT FAX NUMBER
t t t t t t t t t t
4. Either:
❐ Dial another number: Go to step 3.
❐ Press Start.
Confidential ID Override Option
This procedure will override the Con fidential ID stored in the other part y’s
machine. The override is only effective for this one transmission.
If
OPTION
1. Press k until the opposite display appears.
k is displayed:
SET OPTION Y/
SET CONFIDENTIAL ID?
k
k
k
2. Yes.
3. Enter the Confidential ID that you wish to
use for this message.
Example: 2 5 6 7 on the ten keypad and
press Yes.
4. Press Start.
SET OPTION KPAD
ID:
t t t t
SET OPTION Y/N
ID:2567
54
Page 62

ADVANCED FEATURES TRANSMISSION
Storing an Often Used Document (Auto Document)
Overview
If you often find that you have to sen d a particu lar page to peop le (fo r examp le, a
map, a standard attachment , or a set of inst ruct ion s), sto re th at page in the
memory as an Auto Document, usin g a Quick Dial key.
This feature is called Auto Document.
Then, when you need to send that page to somebody, press the Quick Dial key
that you stored it in, place an y othe r pages that you wish to send into the fee de r,
dial, and press Start. At the other end, the Auto Document will be printed first.
You can also program a destination for each Auto Document into the same Quick
Dial key.
The Auto Document is transmitted as it is; you cannot write anything on it like
you can with a cover sheet. If you wish the machine to place your name on
your transmitted documents, try using the Label Insertion feature (see page
65).
Storing an Auto Document
1. Take the document that you want to be an
Auto Document and place it into the
TRANSMIT OPTION
DIAL FAX NUMBER
k
feeder.
2. Function 3 5 and Yes.
3. Press the Quick Dial key that you wish to
n
QUICK/
PRINT LISTj/SEARCH
n
08 PROGRAM? Y/
j k
j k
store the Auto Documen t in.
Example: Quick Dial key 08.
FEA TURES
ADVANCED
4. Yes.
n
08 Y/N
PROG. AUTO DOCUMENT?
55
Page 63

TRANSMISSION ADVANCED FEATURES
5. Yes.
The document is scanned.
6. Either:
If you label this document: Yes.
If no: No and go to step 9.
7. Input a label using the Quick Dial keys.
8. Yes.
9. Either:
❐ Program another Auto Document;
place the document th at you wan t to
be an Auto Document and go to step
3.
❐ Finish: Function.
NOTE:
You can program a Quick Dial number
and an Auto Document in the same
Quick Dial key . If you program th e key
as a Quick Dial before programming the
Auto Document, the display below will
appear in step 3. If you pre ss the Yes
key , whene ver you press the Quick Dial
key the Auto Document will be attache d
to that transmission. Press Yes. And
conitnue the procedure from step 4.
n
08 ABC
t t t t t t t t t t t t t t t t t t t t
n
08 ABC Y/N
OFFICE LOCATION MAP
n
QUICK/j
PRINT LISTj/SEARCH
n
08 PROGRAM? Y/
USED AS DIAL
k
k
j k
Using an Auto Document
1. Make sure that the machin e is in st andb y mode (see pa ge 18).
2. If you wish to attach a fax message to
your Auto Document, place the fax face
TRANSMIT OPTION
DIAL FAX NUMBER
down into the fe eder .
3. Press the Quick Dial key that contains the
Auto Document that you need.
TRANSMIT OPTION k
OFFICE LOCATION MAP
Example: Quick Dial key 08.
4. Dial the destination(s), and press Yes.
TRANSMIT DIAL/START
DIAL NEXT FAX NUMBER
56
k
Page 64

ADVANCED FEATURES TRANSMISSION
5. Either:
❐ Dial another number: go to step 4.
❐ No more destinations: press Start.
NOTE: If you send th e message to more than one location, and you enter
the Quick Dial key which contains the Auto Document, it will be attached to all destinations.
Printing the Contents of an Auto Document
If you need to remind yourself of what one of your stored Auto Documents looks
like, do the following procedure.
1. Function 5 3 and Yes.
2. Press the Quick Dial key that holds the
Auto Document that you wish to see.
n l
QUICK/
PRINT LIST j /SEARCH k
n
08 START/N
OFFICE LOCATION MAP
Example: Quick Dial key 08 and Yes.
3. Start.
Erasing an Auto Document
If you wish to delete an Auto Document, do the following.
1. Function 3 5 and Yes.
2. Press the Quick Dial key that contains the
Auto Document that you wish to erase .
n t
Y/j
PRINT LIST
n
08 CHANGE? Y/
USED AS AUTO DOC.
Example: Quick Dial key 08.
3. Yes.
n
08 Y/N
PROGRAM LABEL?
j
/SEARCH k
j k
k
j k
FEATURES
ADVANCED
4. No.
5. To erase the Auto Document: Yes.
6. Either:
❐ Erase another Auto Document: Go to
step 2.
❐ Return to standby mode: Function.
n
08 Y/N
AUTO DOC. CLEAR?
n l
QUICK/
PRINT LIST j /SEARCH
j k
k
57
Page 65

TRANSMISSION ADVANCED FEATURES
Restricting Access to the Machine
Overview
When your machine arrives from the fa cto r y and is installe d fo r the first tim e ,
anybody can use it. Ho wev er, using a system of Personal Codes, the machine
can be set up to prevent unauthorized persons from using the machine. The
necessary procedures are given in the following section s.
❐ Programming the Personal Codes: see pa ge 58.
❐ Switching Restricted Access On: see pa ge 61.
Programming the Personal Codes
The main advantage of Person al Codes is that they allow you to track mach ine
usage and restrict access to the mach ine . If you do not wish to rest rict acce ss to
the machine, you can still use Personal Code s to person alize your fax messages,
by using the Label Insertion feature.
The Personal Code is a four digit code. It can ha ve an y value from 0001 to 9999.
58
Page 66

ADVANCED FEATURES TRANSMISSION
Each user can be given a Person al Code. While programming, you can store the
following items with each Person al Cod e:
❐ A name: This will be printed on reports, such as the Journ al, to ide nt if y th e
users of the machine. It is also used with the Label Inse rtio n fe at ure .
❐ A Confidential ID: This must be different for each Personal Code , and different
from your machine’s Confidential ID. If somebody sends you a confidential
message, they can override you r machine’s Confidential ID with the
Confidential ID stored with your Personal Code, if you inform them of this ID. If
so, the machine will print a Confide nt ial File Rep ort tha t will info rm you when
the message has arrived. Then, you must input this Con fid en tia l ID to prin t th e
message.
You can only store Confide ntial ID’s if you have an option al fe at ure expander.
NOTE: You cannot register more than 30 Person al Cod es with Names and Confi-
dential ID’s in this machine. This means th at if you switch Restrict ed Access on, onl y 30 pe op l e can use the machine.
Cross-references
Using Personal Codes: see pages 28, 53, 61, and 73.
Label Insertion: see page 65.
Journal: see page 123. Confidential File Report: see page 124.
Confidential ID: see page 72. Confidential Reception: see page 71.
Storing a Personal Code
1. Function 6 2 2 2 2 7 2 and Yes.
2. Yes.
3. Input a Personal Code that you want to
store in your machine for late r use.
Example: 5 4 7 7 from the ten keypad.
❐ If you input the wrong code, press No.
4. Store the code: Yes.
5. Either:
❐ Yes to store the label for this per-
sonal code.
❐ If you do not program for this per-
sonal code; No and go to ste p 8.
SETTING? Y/j
PRINT LISTj /SEARCH k
PERS. CODE KPAD/
t t t t
PERS. CODE Y/N
5477
PERSONAL CODE Y/N
PROGRAM LABEL?
PERSONAL ABC
t t t t t t t t t t t t t t t t t t t t
k
j k
FEA TURES
ADV ANCED
59
Page 67

TRANSMISSION ADVANCED FEATURES
6. Input a name for this Personal Code
using the Quick Dial keys or the ten keypad.
Example: JOHNSON
How to enter the label; see page 164.
❐ If you so not wish to store an ID: No. Go to step 8.
7. Store the name: Yes.
Either:
❐ If you do not have an optional feature
expander, go to step 8.
❐ If you want to program the Confiden-
tial ID for this user: Press Yes. And input a Confidential ID for the perso nal
code used by this user. Then press
Yes.
8. Either:
❐ Enter another code: Go to step 3.
❐ Finish: Function.
PERSONAL ABC Y/N
JOHNSON
PERSONAL CODE KPAD/
t t t t
t t t t t t t t t t t t t
j k
Editing or Erasing a Personal Code
1. Function 6 2 2 2 2 7 2 and Yes.
2. Scroll through the personal codes using
k
.
3. Yes.
4. Either:
❐ Erase this Personal Code: No and Yes.
Go back to step 2.
❐ Edit the contents of this code: Yes.
Go to step 5.
5. Either:
❐ If you edit th e lab el; Yes and go to
step 6.
❐ If you don’t edit the label; No and go
to step 2 to edit ano th er pe rsonal
code.
6. Edit the name stored with this code.
When the name is correct, press Yes.
SETTING? Y/
PRINT LISTj/SEARCH
PERSONAL CHANGE? Y/N
5474
PERSONAL CODE Y/N
5474
PERSONAL Y/N
PROGRAM LABEL?
LABEL CHANGE? Y/N
MARY
PERSONAL CODE Y/N
SET CONFIDENTIAL ID
j
k
60
Page 68

ADVANCED FEATURES TRANSMISSION
7. Either:
❐ If you do not have an optional feature
expander, go to step 8.
❐ Edit the Confidential ID sto red wit h
this code; press Yes then input the
PERS. CODE KPAD/
t t t t
j k
ID.
When the ID is correct, press Yes.
8. Either:
❐ Enter or edit another code: Go to step 2.
❐ Finish: Function.
Switching Restricted Access On
Restricted Access allows you to keep a closer track of machine usage, and deters
passers-by from casually using your machine.
If this feature is switched on , use rs ha ve to ente r the ir Person al Cod e be fo re th e y
can use the machine. The Personal Code must have already been sto red in the
machine.
However , the user can ent er cod es dire ctly at the key pad. Theref ore , if you are
serious about using this fe at ure to stop casual users from opera ting the machine,
you must allocate relatively obscure codes to all authorized users, and try to avoid
obvious numbers such as 0001.
To switch Restricted Access on or off, do the following:
If you wish to switch Restricted Access on or off, do the follo wing proce du re. (See
page 166 if you need more information about the User Paramete r sett ings
adjustment procedure).
1. Function 6 2 2 2 2 6 3 and Yes.
2. Yes.
3. The settings for switch 00 are now shown
SETTING? Y/
PRINT LIST
KPAD/Y/
SWITCH 00 :0000 0000
j
j
j k
SWITCH 05 :0000 0000
on the bottom line of the display.
Digit 4 (Double underlined)
4. Press k until the settings for switch 05 are
shown.
The setting that you need to change is
digit 4.
FEATURES
ADVANCED
Digit Purpose
4 Restricted Access 0: Off 1: On
61
Page 69

TRANSMISSION ADVANCED FEATURES
5. If you wish to change the setting, press 4 on the ten keypad.
6. Finish: Yes and Function.
Operating the Machine with Restricted Access Switched On
If you have switched Rest ricte d Access on , th e disp lay is as sho wn belo w when
the machine is in standby mode.
Before you can use the machine, you must enter your persona l code tha t you
have already registered in the machine. See page 58 for how to store Personal
Codes.
READY 100% 10:00
PERSONAL CODE:
t t t t
1. Enter your personal code.
Example: 7 3 6 2 from the ten keypad .
2. Press Yes. After a second, the norm al standby display will appear, and you can
use the machine. If the normal standby displa y does no t ap pe ar, you entered
a personal code that is not sto red in the machine.
If you decide that you do not wish to use the machine now , yo u sho uld return the
machine to Restricted Access stan dby mode . To do this, either:
❐ Insert a page into the document feeder and rem o v e it im m ed iat e l y.
Press Function twice.
Tonal Signals
Some organizations offer you special service s by tele phone, which you can
access by transmittin g Touch Tone or DTMF tones. If your phone service provide s
only pulse dialing, or if you are calling over a digital network, the ability to
generate Tonal Signals will allow you to access these services.
First, dial the other party. When you are through to the other end, press the tone
dial key and enter the code number th at is needed to acce ss the requ ired featu re
at the othe r t erm inal.
You do not need to press the to ne dial key if your machin e is se t up for dia ling in
Tone Dial (DTMF) mode.
Before you can use this feature , you must pro gra m Quick Dial key 31 as the
Tone key.
62
Page 70

ADVANCED FEATURES TRANSMISSION
Program the Tone Key
1. Function 3 1 and Yes.
2. Press the Quick Dial key 31.
3. Yes.
n t
QUICK/
PRINT LISTj/SEARCH
n
31 PROGRAM? Y/
n
31 Y/N
PROGRAM TONE KEY?
j k
k
j k
4. Yes. The Quick Dial key 31 is programme d as the Tone key.
Operating the Tone Key
1. Make sure that the machine is in stand b y mode, and that th ere is no docu ment
in the feeder.
2. Pick up the telephone handse t, or press On Hook Dial.
3. Dial the remote facility. Do not press Start.
4. After your line is connected to the remote facility, do the following:
❐ If your telephone line type is DTMF (Tone Dial): Go to step 5.
❐ If your telephone line type is Pulse Dial: Press Quick Dial key 31. A dot ap-
pears on the displa y.
5. Input the digits that you need to use the remote facilit y. These digits will depend
on the remote facility.
NOTE: Do not press Start.
6. After you have finished your busine ss with th e rem o te facilit y, hang up.
FEATURES
ADVANCED
Cross-reference
Tone Dial (Telephone Line Type): see page 190.
63
Page 71

TRANSMISSION ADVANCED FEATURES
Storing Part of a Number
This feature is called Chain Dialing.
It allows you to compose a telep ho ne numb er fro m variou s part s, som e of which
may be stored as Quick Dial keys or Speed Dial codes, and some of which may
be input at the key pad.
For example, you can program commonly used area or country codes into Speed
Dial codes or Quick Dial keys.
This feature is convenient if:
❐ You often commu nica te wit h man y term in als fo r which the area code, or
international code is the same.
❐ You often make international calls.
For example, if you often call Tokyo, Japan, program 011813 (Overseas to
Tokyo from the USA) as Quick Dial key 01. This will save work at the operation
panel when dialing a Tokyo number.
❐ Your PBX requires an ID code before the dest ina tio n nu mber.
For example, if your ID is 1234567, and the destinatio n is store d in Quick Dial
key 01, enter 1234567 at the key pad, press Pause, then press Quick Dial key
01.
NOTE: Do not store any labels with the Quick Dials and Speed Dials that you
are using with Chain Dialing. This is because Label Insertion does not
work with Chain Dialing.
Cross-reference
Quick Dial and Speed Dial: see page 191.
Label Insertion: see page 65.
Example: 01133-1-5553333 (From the USA to Paris).
Assuming that the following Quick Dial and Speed Dial numbers have already
been programmed:
❐ Quick Dial 01 = 01133 (Overseas to France )
❐ Quick Dial 02 = 1 (Paris)
❐ Speed Dial 10 = 555
When the machine asks you to dial:
On Hook Dial or Handset Mode:
Press the Quick Dial key 01, next press the Quick Dial key 02. Then press the
Speed Dial key and 1 then 0 using the ten keypad. After press 3, 3, 3, 3 using
the ten key pad.
Other:
Press the Quick Dial key 01 and Pause, Quick Diak key 02 and Pause, then
press the Speed Dial key and 1 then 0 using the ten keypad and then the Paus e.
After that press 3, 3, 3, 3 using the ten keypad.
64
Page 72

From: JOHNSON
ADVANCED FEATURES TRANSMISSION
Printing Your Personal Identification at the Other End
This feature supplemen ts th e TTI. It uses the Person al Cod e and th e Quick Dial
or Speed Dial Label to inform the other party who is sending the message, and to
state who the message is for.
To use this feature, you must:
❐ Switch Label Insertion on for each Quick Dial and Speed Dial that you wish to
use this feature with (see the proce dures starting on pages 193 and 196).
❐ Program the Personal Codes of the machine’s users, and store their names
with their codes (see page 58).
❐ Program labels with the Speed Dial and Quick Dial numbers (see the
procedures starting on pages 193 and 196).
❐ When you make a transmission, use a Quick or Spe ed Dial, an d sele ct the
Personal Code option (see page 28).
Note: TTI on/off has no effect on this feature.
Example:
Your fax message as received at the other end
Date and Time TTI (32 characters)
To: MR SMITH
From the
Quick/Speed
Dial Label
From the
Personal
Code
In the above example, the message was sent using Johnson’s personal code.
The Quick Dial or Speed Dial used to dial the destina tion had MR SMITH as the
label.
NOTE:
If you later reprogram the Speed/Quick Dial, be sure to reprogram or delete
the label as well.
The top of the image will be overprinted if there is no margin at the top of the
transmitted page (this is also true for the TTI).
FEATURES
ADVANCED
Cross-reference
Quick Dial and Speed Dial: see page 191.
Personal Codes: see pages 28 and 58.
65
Page 73

TRANSMISSION ADVANCED FEATURES
Closed Network (Transmission)
This feature helps avoid accid enta l l y sending a fa x message to a terminal that is
outside your fax network.
The ID Codes of the communicating ma chin es are checked. If they are not the
same, the communication is stopped.
1. Press Function 6 2 2 2 2 6 3 and Yes.
2. Yes.
3. Press k until the settings for switch 06 are
SETTING? Y/
PRINT LIST
KPAD/Y/
SWITCH 00 : 0000 0000
j
j
j k
SWITCH 06 : 0000 0100
shown. The set tin g that you need to
change is digit 2.
Digit 2 (Double underlined)
0: Off
1: On
4. If you wish to change the set tin g, press 2
of the ten keypad.
5. Finish: Yes and Function.
NOTE: This feature may not be reliable if you are communicating with a termina l
produced by a different manufacturer.
Cross-references
ID Code: see page 46 . Closed Network (Reception): see page 100.
66
Page 74

ADVANCED FEATURES TRANSMISSION
Preventing Transfer to a Wrong Connection
This feature prevents th e au to mat ic switchin g equip men t in th e te lep ho ne net work
from accidental l y connect ing you to the wro ng f a x term ina l.
However, it does not help you if you dialed the wrong number yourse lf . So, e ven if
this feature is switched on, you sho uld still check your operation panel display to
check whether you have reached the correct terminal, and be ready to press Stop
if the wrong terminal’s RTI or CSI is displayed.
Your machine compares the number tha t you diale d with the CSI received from
the other end. (Onl y the la st 8 digits are checke d, and space s and pau ses in th e
telephone numbe r are i gnore d.) If the CSI is not the same as the telephone
number, the transmission is stoppe d.
This feature has to be s wit che d on by a service technician.
NOTE: If you cannot send a messa ge to a certain location using this feature , con -
tact the other end and make sure that they have stored their CSI correct ly .
(If the other party is using a machin e mad e b y anot her ma ker, they may
not be familiar with the term CSI. E xpla in th at you are inte rested in the
telephone numb er th at they stored in the mach ine for identification pu r poses.)
Cross-references
CSI: see pages 187 and 189.
FEATURES
ADVANCED
67
Page 75

TRANSMISSION ADVANCED FEATURES
ECM (Error Correction Mode) and Page Retransmission
ECM is a signaling system that greatly reduces the chance of data being lost
because of a bad telep ho ne line. ECM is useful if you frequently communicate
over poor telephone lines.
With ECM switched on, the communication cost will increase if the line is bad, but
the data will be sent much more reliably.
If ECM is switched off, Page Retransmission will be used. The whole page will be
resent (unless you used Immediate Transmissio n, in which case damaged data
cannot be resent at all). ECM is more efficient, because it only resends the
damaged parts of the data, and the maximum possible number of retransmission
attempts is much higher, and it also works with Immediate T ra nsmissio n.
If you prefer reliable commun icat ion over com mu nica tio n costs, keep ECM
switched on. If you however prefer to be cost ef fe ctive, ask the service tech nicia n
to switch ECM off.
Pages can be sent up to 3 tim es be fo re th e machine gives up. If you wish to
change the number of retries, contact a service tech nicia n.
ECM is switched on in your machine when it leaves the factory, to provide you
with the ability to send accurate and complete documents as relia bly as possible .
68
Page 76

ADVANCED FEATURES TRANSMISSION
Batch Transmission ( Feature Expander Required)
Overview
This feature will save comm u nica tio n costs if you often send more tha n one
message to the same location.
Example:
If various people in your of fice send messages to the Tokyo branch of fice , sending
all these messages on separate calls can be expensive. It is cheap er to send
them all together on the same call. You can further cut costs by sending ou t
batches during of f -pe ak hours. To do so, simply create Keystroke Progra m s that
use Send Later to sen d to those common destin at ion s.
Instruct people in your office to store all faxes for the Tokyo branch in the memory,
using Send Later. The selected time of transm ission must be the same fo r each
message that you wish to includ e in the batch. Then, when that tim e comes, the
messages will all be sent out on the same call, or ’batched’.
You can set up more than one batch. In the example sho wn in the diagram ab o ve,
you have set up two batche s; on e is f or de stin at ion A and on e is f or destination B.
In another example, you could set up a batch for Tokyo at, say, 1 am, a batch for
Hong Kong at 2 am, a batch for London at 3 am, and so on.
Also, when you send a fax message, if th ere is a message in the memory waiting
for transmission to the same te lep hone numb er, it will be sent out with your
message. This will only happen if the message already in the memo r y is waiting
for retransmission (f or exam ple , be cau se th e line was busy on the first atte mpt ).
NOTE: You can have up to 35 fa x messa ge s in the same batch.
Messages using Confidential Transmission cannot be put into a batch.
FEATURES
ADVANCED
Cross-reference
Send Later: see page 29.
69
Page 77

TRANSMISSION ADVANCED FEATURES
Turning the Batch Transmission On/Off
In a new machine, this set tin g is "Off". If you wish to change this it, use th e
following procedure. (See pa ge 166 if you ne ed more information about th e User
Parameter settings adjustment procedure).
1. Function 6 2 2 2 2 6 3 and Yes.
2. Yes.
3. The settings for switch 00 are now shown
on the bottom line of the display.
4. Press k until the settings for switch 06 are
shown.
The setting that you need to change is
digit 4.
5. If you wish to change the set ting, press 4
of the ten keypad.
6. Finish: Yes and Function.
Well Log Transmission
SETTING? Y/j
PRINT LIST
KPAD/Y/
SWITCH 00 :0000 0000
j
j k
SWITCH06 : 0001 0000
Digit 4 (Double underlined)
0: Batch Tr a nsm isio n off
1: Batch Tra nsm issio n on
Using this feature, you can transmit a document that is longer than the maxim um
limit, without having to cut it up into sep ara te shee ts. Howe ver, you must contact a
service technician to have this feature switched on. The na me of this fe at ure is
taken from oil well borehole surveying. A well log is a vertical profile of a borehole,
drawn to scale, showing import an t data . A well log can be several yard s long.
Caution
If this feature is switched on permanently, users must stay by the machine while their
documents are being scanned. This is because, if the document jams, the machine may ta ke
much longer than usual to recognize the jam; this could result in excessive wear and tear of
the mechanical components of the scanner.
If a jam does occur, press the Stop key immediately.
70
Page 78

ADVANCED FEATURES RECEPTION
RECEPTION
Receiving Confidential Messages (Feature Expander Required)
Overview
This feature is called Confidential Reception.
If the other part y sent you a message using Confidential Transmissio n, the
message is stored in the memory, and not printed. The "Receive File" indicator on
the operation panel blinks to inform you when a confidential message has come
in. Also, if you have switched Conf ide nt ial File Rep ort on, the machine will print a
report whenever a confid entia l me ssage com e s in.
There is no need to do anything immediately. When you want to print the
message, input the Confidentia l ID using Funct ion 61 described in th is sectio n.
NOTE: ❐ For this feature to work properly, you must have stored a Confidentia l
ID in advance.
❐ If the machine’ s Conf ide ntial ID does not have any effect, contact the
sender and check whether they used Confident ial ID O verride to override your ID. Print the Journ al to find out who the sender is, if necessary.
❐ If you have forgotten the machin e’s Confidential ID, print a User Pa-
rameter List, or call a service technician for assistance .
Cross-references
Confidential ID: see page 72. Journal: see page 123.
Confidential File Report: see page 124.
Confidential Transmission: see page 52.
Confidential ID Override: see page 53.
User Parameter List: see page 131.
71
FEATURES
ADVANCED
Page 79

RECEPTION ADVANCED FEATURES
Storing a Confidential ID
This can be any four-digit code (using digits 0 to 9). It must be used to print an y
confidential messages that you r machin e has received.
1. Function 6 2 2 2 2 6 1 and Yes.
2. Press k until the screen is as shown opposite.
3. Yes.
4. Input the Confidential ID tha t you will be
using.
Y/NEXT
SET OWN NUMBER
Y/NEXT
SET CONFID,L ID
CONFID,L ID KPAD
t t t t
CONFID,L ID Y/N
6754
Example: 6 7 5 4 from th e te n k e yp ad .
5. Yes and Function.
If you do not store a Confidential ID, you will not be able to receive
confidential messages.
Editing the Confidential ID
1. Function 6 2 2 2 2 6 1 and Yes.
2. Press k until the screen is as shown opposite.
Y/NEXT
SET OWN NUMBER
Y/NEXT
SET CONFID,L ID
k
k
k
k
3. Yes.
4. Yes.
5. No and input a new confidential ID code.
Example : 8352.
6. Yes and Function.
72
POLL. ID CHANGE? Y/N
6754
POLLING ID Y/N
6754
POLLING ID Y/N
8352
Page 80

ADVANCED FEATURES RECEPTION
Printing a Confidential Fax Message
If the Receive File indicator is blinking, do the following to print the message.
1. Function 5 4 and Yes.
2. Input the ID.
Example: 6 7 5 4 from the ten keypad .
CONFID,L ID KPAD
t t t t
CONFID,L ID START/N
t t t t
If you cannot output a confidential file
with this ID, you have input the wrong ID
or the sender may have over-ridden
your ID.
Contact your sender.
3. Start.
NOTE: If the Receive File indicator is blinking, an incoming fax message has
been stored in the memory using the Memory Lock feature or
Confidential Reception feature.
To print the message which is Memory Locked, see page 77.
Confidential File Report
This report informs you when a confidential messa ge has been received.
You can store a separate Confidential ID wit h ea ch of the Person al Codes. If the
sender of the message uses Confide ntial ID Override, the sender can specif y one
of these IDs. If so, the Confid en tia l File Repo rt will cont ain the name store d with
that Personal Code, drawing the attentio n of the inte nded receiver to the
confidential messa ge .
You can switch this report on or off using Fun ction 63. In a new machine, it is
switched on at the factory.
1. Function 6 2 2 2 2 6 3 and Yes.
2. Yes.
SETTING? Y/
PRINT LIST
KPAD/Y/
SWITCH 00 :0000 0000
j
j k
j
3. The settings for switch 00 are now shown
on the bottom line of the display.
4. Press k until the settings for switch 04 are
SWITCH 04 :0000 0000
shown.
The setting you need to change is digit
0.
Digit 0 (Double underlined)
0: Confidential file report is
switched off.
1: Confidential file report is
switched on.
FEATURES
ADVANCED
73
Page 81

RECEPTION ADVANCED FEATURES
5. If you wish to change the setting p ress 0.
6. Finish: Yes and Function.
Cross-reference
Personal Codes: see page 58.
If you wish, you can prevent unidentified senders from sending you confidential messages.
See page 78.
Locking Incoming Messages (Memory Lock) (Feature Expander Required)
Overview
If Memory Lock is switched on, the mach ine will not prin t an y incomin g fa x
messages. They will be kept in memory until you enter the Memory Lock ID that
you previously stored in the machine. Messages received by Confidential
Reception will not be prin te d whe n you in put the Memory Lock ID.
To use Memory Lock, you must first:
❐ Store a Memory Lock ID. (Function 61)
❐ Switch Memory Lock on. (Function 62)
To make Memory Lock more versatile you may choose to receive messages from
select locations into me mor y or execlud e certain select locations from coming into
memory. You may:
❐ Specify the senders who se m essa ge s you want to be lock in memory (Special
Terminal). Do this by programming the RTI’s or CSI’s of these senders
(Function 81)
❐ Select the messages to store in memory (Function 63):
a) Only messages from Special Terminals.
b) All messages except those fro m Specia l Terminals.
Cross-reference Confidential Reception: see page 71.
74
Page 82

ADVANCED FEATURES RECEPTION
Storing a Memory Lock ID
This can be any four-digit code (using digits 0 to 9), except 0000 .
1. Function 6 2 2 2 2 6 1 and Yes.
2. Press k until the screen is as shown opposite.
3. Yes.
4. Input the Memory Lock ID that you will be
using.
Example: 6 7 5 4 from the te n k e ypad.
5. Store the ID: Yes and Function.
Editing the Memory Lock ID
1. Function 6 2 2 2 2 6 1 and Yes.
2. Press k until the screen is as shown opposite.
SYSTEM SET Y/NEXT
SET OWN NUMBER
Y/NEXT
SET MEMORY LOCK ID
LOCK ID KPAD
t t t t
LOCK ID Y/N
6754
SYSTEM SET Y/NEXT
SET OWN NUMBER
Y/NEXT
SET MEMORY LOCK ID
k
k
k
k
3. Yes.
4. Yes.
5. No and input a new number.
6. Yes and Function.
LOCK ID CHANGE? Y/N
5477
LOCK ID Y/N
5477
LOCK ID Y/N
5478
FEA TURES
ADV ANCED
75
Page 83

RECEPTION ADVANCED FEATURES
Switching Memory Lock On/Off
Before you can use Memory Lock, you have to s witch it on using Fun ctio n 62 .
After you switch Memory Lock on,
(MEMORY LOCK)
will appear on the display
when the machine is in standby mode.
NOTE: If you switch Memory Lock on, Forwarding will be automatically disabled.
1. Function 6 2 2 2 2 6 2 and Yes.
2. Scroll through the features with k until the
screen is as shown opposite.
3. Yes.
4. Change the on/off setting by pressing
j
or k.
Y/NEXT
SELECT LINE
Y/NEXT
MEMORY LOCK ON/OFF
MEMORY LOCK Y/
ON kOFF
MEMORY LOCK Y/
k
ON OFF
j k
j k
k
k
5. Finsh: Yes and Function.
If you wish, you can prevent unidentified senders from sending you messages while Memory
Lock is on. See page 78.
Programming Special Terminals for Memory Lock
If you would like to receive information from only select locations int o Memory
Lock, you can program the RTI codes or CSI codes of those locations. A terminal
sending an incoming message always id entifies itself to your terminal. The
identificat ion consists of an RTI or a CSI. When you specify the senders for
Memory Lock, you must program a list of th ese codes. Program the list using
Function 81 called "Sp ecia l Terminal" (see page 101).
Selecting Which Messages to Lock in Memory
You have to select either to:
❐ Only Lock messages from Special Terminals.
❐ Lock all messages except th ose from Special Terminals.
1. Function 6 2 2 2 2 6 3 and Yes.
At this time, you can print a User Pa-
SETTING? Y/
PRINT LIST
j
j
rameter List if you press j and Start.
2. Yes.
KPAD/Y/
SWITCH 00 :0000 0000
j k
76
Page 84

ADVANCED FEATURES RECEPTION
3. The settings for switch 00 are now shown
on the bottom line of the display.
4. Press k until the settings for switch 09 are
shown.
KPAD/Y/
SWITCH 09 : 0000 0000
j k
5. The setting that you need to change is
that for digit 1 (double underlined).
Set as shown opposite.
If you want to lock messages in memory
only from special terminals:
SWITCH 09 :0000 0001
If you want to lock all incoming messages,
nals:
except those from special termi-
SWITCH 09 :0000 0011
6. Finish: Yes and Function.
List of Special
Terminals
(Function 81)
Empty On ✕ All messages are
Empty/Not empty Off ✕ No messages are
Not empty On 0 Only messages from
Not empty On 1 All messages are
Memory Lock on/off
(Function 62)
Switch 09
Digit 7
(Function 63)
Result
locked in memory.
locked in memory.
special terminals are
locked in memory.
locked in memory
except those from
special terminals.
Printing a Memory-Locked Message
If the Receive File indicat or is blinking, a message has been stored using Memory
Lock. Print it using the following procedure .
1. Function 5 5 and Yes.
LOCK ID KPAD
llll
2. Input the Memory Lock ID.
Example: 4 6 3 3 from the te n k eyp ad .
LOCK ID START/N
4633
3. Start.
NOTE: If the Receive File indicator is blinking, an incoming fax message has
been stored in the memory using the Memory Lock feature or
Confidential Reception feature.
To print the message using the Confidential Reception, see page 71.
77
FEATURES
ADVANCED
Page 85

RECEPTION ADVANCED FEATURES
Rejection of Messages from Unidentified Senders
If you wish, you can make the machine reject incoming messages that require
storage to your machin e’s memory, if they are not accom panied with an identifier
such as the RTI or CSI. Fea tu res that would be affect ed are Sub stit ut e Rece ption,
Memory Lock, and Confidentia l Re cep tio n, Forwarding, and Action as a Tra nsf er
Station.
The procedure is as follows (see page 166 if you need more information about the
User Parameter settings adjustment procedure).
1. Function 6 2 2 2 2 6 3 and Yes.
❐ At this time, you can print a User Parameter
List if you press j and Start.
SETTING? Y/
PRINT LIST
j
j
2. Press Yes. The settings for switch 00 are
now shown on the bottom line of th e dis-
KPAD/Y/
SWITCH 00 :0000 0000
play.
3. Press k until the settings for switch 05 are
SWITCH 05 : 0000 0000
shown.
The setting that you need to change is
that for digit 1.
Digit 1 (Double underlined)
0: Messages are not rejected.
1: Messages are rejected.
4. If you wish to change the set tin g, press 1
on the ten keypad.
5. Finish: Yes and Function.
Cross-references
Substitute Reception: see page 38. Confidential Reception: see page 71.
Memory Lock: see page 74. Forw arding: see page 82.
j k
78
Page 86

ADVANCED FEATURES RECEPTION
Authorized Reception
Overview
This feature helps you to reject jun k fa x mail. It let s you specif y which terminals
you wish to receive fax messages from; all others will be shut out.
To authorize reception from a particular sender:
❐ Switch Authori zed Recep tion on. (Function 62)
❐ Specify the send ers who se messages you want to shut out (Function 81). Do
this by programming the R TI ’s or CSI’s as Special Terminals. (Ask the sending
party what their RTI/CSI is. Or make a communication with that term in al, print a
Journal and read off the RTI/CSI.)
If the other party is using a machine mad e by anot he r ma ker, they may not be
familiar with the terms RTI or CSI. Explain th at you are interested in the
telephone number that they stored in the machine fo r ide nt if ica tio n pu rpo ses.
❐ Select whether to acce pt : (Function 63)
a) Only Messages from Special Terminals.
b) All Messages except those from Specia l Terminals.
If the RTI/CSI is not the same as any of those th at yo u have programmed into this
feature, the message will not be accepted.
FEATURES
ADVANCED
The number of RTI /CSI ’s that you can store for use wit h th is f ea tu re is limit ed to
30. However, you can use Wild Cards to extend the number of RTI/ CSI’s that you
can specify.
NOTE: If you turn Authori zed Recep tion on and you do not program any Special
Terminals, your machine will not accept any messa ge s.
If one of the Special Terminals changes th eir RTI/CSI, you have to
change the stored R T I/ CSI also . Otherwise, your machine can no t ide nt if y
the sender as a Special Terminal. So, you will not be able to accept any
more messages from that sender an y more under the curren t mach ine
setting.
Cross-references
RTI and CSI: see page 187. Wild Cards: see page 91.
Journal: see page 123.
79
Page 87

RECEPTION ADVANCED FEATURES
Switching Authorized Reception On/Off
Before you use Authorized Receptio n, you have to switch it on using Funct ion 62.
If it is switched off, th e mach ine will acce pt an y incoming f a x messa ge .
1. Function 6 2 2 2 2 6 2 and Yes.
2. Scroll through the list of features with
until the screen is as shown opposite.
3. Yes.
k
Y/NEXT
SELECT LINE
Y/NEXT
AUTHORIZED ON/OFF
AUTHORIZED Y/
ON kOFF
j k
k
k
4. Change the on/off setting by pressing j or k.
5. Finish: Yes and Function.
Programming the Special Terminals for Authorized Reception
A terminal sending an incoming m e ssage al ways id entifies itself to your terminal.
The identification con sists of an RT I code or a CSI code. Wh en you spe cif y th e
senders for memory lock, you must program a list of the se cod es. Program the list
using Function 81 called "Specia l Terminal" (see page 101).
Selecting Whether to Accept or Reject Messages from Special Terminals
You can select either to:
❐ Only accept messages from Spe cial Terminals (i.e. reject all others).
❐ Accept all messages except those from Special Terminals (i.e. reject Special
Terminals).
1. Function 6 2 2 2 2 6 3 and Yes.
2. Yes.
The settings for switch 00 are now
SETTING? Y/j k
PRINT LIST
KPAD/Y/
SWITCH 00 :0000 0000
j
j k
shown on the bottom line of the displa y.
3. Press k until the settings for switch 08 are
shown.
KPAD/Y/
SWITCH 08 :0000 0000
j k
The setting that you need to change is
digit 3 (double underlined).
80
Page 88

ADVANCED FEATURES RECEPTION
4. Set as shown opposite.
Press 3 on the ten keypad to change
the setting of digit 3.
If you only want to accept incom ing messages from th e Special
Terminals:
SWITCH 08 : 0000 0100
If you want to accept all in com ing
messages except those from the
Special Terminals:
SWITCH 08 : 0000 1100
5. Finish: Yes and Function.
List of Special
Terminals
(Function 81)
Empty On ✕ No messages are
Empty/Not empty Off ✕ All messages are
Not empty On 0 Only messages from
Not empty On 1 All messages are
Authorized
Reception on/off
(Function 62)
Switch 08
Digit T3
(Function 63)
Result
received.
received.
Special Terminals are
accepted.
accepted
those from Special
Terminals.
except
81
FEATURES
ADVANCED
Page 89

Forwarding
Station
RECEPTION ADVANCED FEATURES
Forwarding ( Feature Expa nder Required)
Overview
Using this feature, you can send fax messages coming in from certain locations
on to another fax machin e. The terminals that recei ve your fo r warde d m essa ge s
are called "Forward ing Terminals".
If other fax mach ine s in yo ur organ ization have this feature , you can use
Forwarding to set up distributio n chains fo r incomin g fa x messages.
Your Machine
Specified
Sender
To set up Forwarding, program your machine as follo ws:
❐ Switch Forwarding on (Function 62).
❐ Program the phone numbers of the For ward ing Terminals that you will pass on
messages to, togethe r wit h th e list of sp ecified senders for each number.
(Function 82)
❐ Specify the send ers whose messages you want to fo r ward. (Ask the sending
party what their RTI/CSI is. Or make a communication with that term in al, print a
Journal and read off the RTI/CSI.)
If the other party is using a machine mad e by anot he r ma ker, they may not be
familiar with the terms RTI or CSI. Explain th at you are interested in the
telephone number that they stored in the machine fo r ide nt if ica tio n pu rpo ses.
(Function 87)
❐ Select the messages to forward (Fun ctio n 63 ):
a) All messages from specified senders.
b) All messages except those from specified senders.
❐ Decide whether you wan t your ma chin e to automatically print messages that it
forwards (Function 63).
❐ Select whether or not your machine tran sm its a fo r ward ing ma rk to be print ed
at the other end on the top of each page of the print out.
82
Page 90

ADVANCED FEATURES RECEPTION
If the RTI/CSI of th e mach ine send ing you a fax is not the same as an y of those
that you have programmed into this feature, the message will not be for warded .
Cross-references
RTI and CSI: see page 187. Wild Cards: see page 91.
Journal: see page 123.
Programming the Forwarding Feature
This section shows you how to set up your machin e to fo r ward inco ming f a x
messages to another location or locations.
1. Function 6 2 2 2 2 8 2 and Yes.
To print a list, press k.
2. Yes.
3. Store a forwarding station number.
Example: 2 1 2 5 5 5 1 2 3 4
If your machine is be hin d a PBX, ad d
the access code before the number, unless this forwarding station is an extension connected to the same PBX as
your machine. Press Yes.
4. Either:
❐ If you wish all incoming messages
to be forwarded to this sta tion: No.
Do not store any RTIs/CSIs for it.
❐ If you only wish messages from
certain senders to be fo r warded to
this station:
Input their RTI’s or CSI’s (messages from senders other than
these will not be forwarded to this
station): Yes and go to step 5.
5. Type in an RTI or CSI.
For how to enter characters, see page 164.
SETTING? Y/j k
PRINT LIST j /SEARCH
FORWARD KPAD/
t t t t t t t t t t t t t t t t t t t t
FORWARD KPAD/Y/N
2125551234
FORWARD Y/N
SET RTI/ CSI?
RTI/CSI ABC Y/N
t t t t t t t t t t t t t t t t t t t t
RTI/CSI ABC Y/N
XYZ COMPANY
t t t t t t t t t t
t t t t t t t t t t
k
j k
FEA TURES
ADV ANCED
6. Yes.
7. Either:
❒ Store this RTI as a wild card: Yes.
❒ Otherwise: No.
RTI/CSI Y/N
STORE AS WILD CARD?
FORWARD Y/N
SET RTI/ CSI?
83
Page 91

RECEPTION ADVANCED FEATURES
8. Either:
❐ If you want to store another RTI/CSI,
press Yes and go to step 5.
❐ Otherwise: No and go to step 9.
9. Either:
❐ Store another fo r wardin g station;
go to step 3.
FORWARD KPAD/
t t t t t t t t t t t t t t t t t t t t
j k
❐ Finish: Function.
Editing or Deleting the Forwarding Feature
1. Function 6 2 2 2 2 8 2 and Yes.
2. Press k until the forwarding station number you wish to edit appears. Then
press Yes.
3. Either:
❐ Erase this forwarding station ’s num-
ber and all RTI’s/CSI’s stored with
it:
Press No, then Yes to erase. Then
press Function.
❐ If you change the for warding sta-
tion’s telephone number; Edit this
forwarding statio n’s telephone number and press Yes. Then go to step
4.
❐ If this forwarding station’s tele-
phone number is correct: Yes. Go
to step 4.
4. Either:
❐ If you want to change the R T I/ CSI;
Yes and go to step 5.
SETTING? Y/j
PRINT LIST
FORWARD KPAD/Y/N
2125551234
FORWARD Y/N
SET RTI/ CSI?
FORWARD KPAD/Y/N
2125552234
FORWARD Y/N
SET RTI/CSI?
RTI/CSI ABC
t t t t t t t t t t t t t t t t t t t t
j
t t t t t t t t t t
t t t t t t t t t t
k
j k
❐ If you don’t wa nt to cha nge the
RTI/CSI: No and go to step 2 to edit
another forwarding num b er. (If you
have finished editing, press Func-
tion.)
5. Either:
❐ To add RTIs/CSIs to this number:
Input an RTI/CSI and press Yes.
Then go to step 7.
84
RTI/CSI ABC Y/N
XYZ COMPANY
Page 92

ADVANCED FEATURES RECEPTION
❐ To edit RTI’s/CSI’s allocated to this
number: press k until the RTI/CSI
RTI/CSI CHANGE ? Y/
XYZ COMPANY
you wish to edit appears. Then
press Yes. Go to step 6.
6. Either:
❐ Edit the RTI/CSI an d pre ss Yes.
Then go to step 7.
RTI/CSI Y/N
STORE AS WILD CARD?
❐ To delete the RTI/CSI: No and Yes.
Then go to step 5.
Caution: If you delete all the RTI’s and CSI’s for a forwarding station, you
must also delete the forwarding station (see step 3). If you do not
do this, all incoming messages will be forwarded to that station.
7. To store it as a wild card: Yes.
Otherwise: No.
FORWARD Y/N
SET RTI/CSI?
8. Either:
❐ Edit or input another RTI/CSI for this
forwarding statio n: Press Yes and
Go to step 3.
❐ To work on another forwarding sta-
tion: press No. Go to step 2.
❐ Finish: Function.
j k
NOTE: If you switch the forwarding on and program no RTI’s/CSI’s, all
incoming messages are forwarded.
Switching Forwarding On/ Off
Before you use Forwarding, you have to switch it on using Function 62. If it is
switched off , th e mach ine will not fo r ward any inco ming f ax messa ge s.
After you switch Forwading on,
(FORWARD)
is displayed on the operation panel
when the machine is in standby mode.
NOTE: Forwarding cannot be switched on if Memory Lock is switched on. If you
wish to use Forwarding, you must switch Memory Lock off.
1. Function 6 2 2 2 2 6 2 and Yes.
2. Scroll through the list of features with
until the screen is as shown as opposite.
3. Yes.
k
Y/NEXT
SELECT LINE
Y/NEXT
FORWARDING ON/OFF
FORWARDING Y/
ON k OFF
j k
k
k
FEATURES
ADVANCED
85
Page 93

RECEPTION ADVANCED FEATURES
4. Change the on/off setting by pressing j or
k
.
5. Finish: Yes and Function.
Selecting which Messages to Forward
You have to select one of the following two things.
❐ Forward messages onl y from spe cified senders.
or
❐ Forward messages except those from specified senders.
1. Function 6 2 2 2 2 6 3 and Yes.
2. Yes.
The settings for switch 00 are now
shown on the bottom line of the displa y.
3. Press k until the settings for switch 08 are
shown.
The settings that you need to change is
digit 7 (double underlined).
4. Set o as shown opposite.
Press 7 of the ten keypad to change the
setting of digit 7.
5. Finish: Yes and Function.
Switching Local Printing On/Off
SETTING? Y/
PRINT LISTj
KPAD/Y/
SWITCH 00 : 0000 0000
j
j k
If you want to forward all incoming messages from special terminals.
SWITCH 08 :0100 0000
If you want to forward all incoming messages except those from
special terminals.
SWITCH 08 :1100 0000
When you first switch Forwarding on, messages th at your machine passes on are
not printed by your machine. If you turn this f un ctio n on however, they will be
printed.
1. Press Function and 6, 2, 2, 2, 2, 6, 3 us-
ing the ten keypad, then press Yes.
2. Press Yes, then press j and k until the
settings for Switch 11 are displayed.
SETTING? Y/
PRINT LIST
KPAD/
SWITCH 11: 0000 0000
j
j k
j k
Change the setting of di git 6.
86
Page 94

ADVANCED FEATURES RECEPTION
3. If you wish to change the sett ing, pre ss 6
SWITCH 11 : 0100 0000
using the ten keypad.
Digit 6 (Double underlined)
0: Local Printing Off
1: Local Printin On
4. Finish: Press Yes, then press Function.
Enabling and Disabling the Forwarding Mark
The forwarding mark is printed at the receiving end on the top of each page of the
fax messages that are for warde d fro m your mach ine . This mark will help the
operator at the other end to recognize messages that have been for warded . If you
wish, you can switch this mark off .
To switch the Forwarding Mark on or off, do the following procedure. (See page
166 if you need more inf orm a tio n ab ou t th e User Parameter settings adjustmen t
procedure).
1. Function 6 2 2 2 2 6 3 and Yes.
SETTING? Y/
PRINT LIST
j
j
2. Yes.
The settings for switch 00 are now
shown on the bottom line of the displa y.
3. Press k until the settings for switch 02 are
shown.
The setting that you need to change is
digit 0.
4. If you wish to change the set ting, press 0
on the ten keypad.
5. Finish: Yes and Function.
KPAD/Y/
SWITCH 00 : 0000 0000
j k
SWITCH02 : 0000 0001
Digit 0 (Double underlined)
0: Forwarding Mark is Off.
1: Forwarding Mark is On.
FEA TURES
ADV ANCED
87
Page 95

RECEPTION ADVANCED FEATURES
Specified Cassette Selection (Optional Paper Feed Cassette Required)
Overview
This feature is only availab le if you r ma chin e ha s the Lo wer Cassette or the
Optional Removable Casset te . Using t his feature, you can select fax messages
from certain send ers to be printed from a specified cassette.
Example:
Put yellow paper in the spe cif ie d cassette. Then, messages f rom th e he ad office
can be printed out on yellow paper; this will make it easy for you to see when a
message from head office has arrived.
❐ Program the senders you want to print from the specified cassette (Function
81). Do by this by programming the R T I ’ s or CSI’s as Special Terminals. (Ask
the sending part y what their RTI/CSI is. Or make a communication with th at
terminal, print a Jou rnal, and read off the R T I/ CSI. )
If the other party is using a machine mad e by anot he r ma ker, they may not be
familiar with the terms RTI or CSI. Explain th at you are interested in the
telephone number that they stored in the machine fo r ide nt if ica tio n pu rpo ses.
❐ Switch Specifie d Casse tt e Selection on. (Function 62)
❐ Select which messages to prin t usin g pa pe r f rom th e specified cassette:
a) Only messages from special term ina ls.
b) All messages except those fro m Specia l Terminals.
NOTE: If one of the senders chan ge s the ir RTI/CSI, you have to change the
stored RTI/ CSI also . Oth e r wise , messa ge s from that sender will no longer
be sent to the required casse tt e.
Cross-references
RTI and CSI: see page 187. Wild Cards: see page 91.
Journal: see page 123.
NOTE: ❐ Messages from senders that ha ve RTI/CSIs that match tho se th at
were input using the ab ove proce dure will b e prin te d usin g the specified paper cassette .
❐ First of all, you must programming Special Terminals for cassette selec-
tion. (Function 81)
88
Page 96

ADVANCED FEATURES RECEPTION
Switching Cassette Selection On or Off
Before you can print messa ge s from specified cassett e, yo u have to switch it on
using Function 62
1. Function 6 2 2 2 2 6 2 and Yes.
2. Scroll through the list of features with
k
until the screen is as shown opposite.
3. Yes.
4. Change the on/off setting by pressing j or
k
.
Y/NEXT
SELECT LINE
Y/NEXT
CASSETTE SLCT ON/OFF
CASSETTE SELECT Y/
ON kOFF
CASSETTE SELECT Y/
k
ON OFF
j k
j k
k
k
5. Finish: Yes and Function.
Programming the Special Terminals for Cassette Selection
To program the list of senders, see "Entering a List of Senders to Treat Differen t ly
(Function 81 Special Terminals )" on page 101.
89
FEA TURES
ADVANCED
Page 97

RECEPTION ADVANCED FEATURES
Choosing how to Treat the Special Terminals
You have to select one of the following two things
❐ Only messages to print using paper from the specified cassette
or
❐ All messages except those from special terminals.
1. Function 6 2 2 2 2 6 3 and Yes.
2. Yes.
The settings for switch 00 are now
SETTING? Y/
PRINT LIST
KPAD/Y/
SWITCH 00 : 0000 0000
j
shown on the bottom line of the displa y.
3. Press k until the settings for switch 08 are
shown.
The settings that you need to change is
KPAD/Y/
SWITCH 08 : 0000 0000
SWITCH 08 0001 0000
digit 5 (double underline).
Press 5 of the ten keypad to change the
setting of digit 5.
When you want to print fax messages from special terminals us-
ing the main cassette.
4. Choose the setting you need (see opposite).
SWITCH 08 0011 0000
When you want to print fax messages except those from special
terminals using th e main cassette.
5. Finish: Yes and Function.
List of Special
Terminals
(Function 81)
Empty On Either Print all incoming fax
Empty/Not empty Off Either Print all incoming fax
Not empty On 0 Print special terminals’
Not empty On 1 Don’t print special
Specified
Cassette Selection
(Function 62)
Switch 08
Digit 5
(Function 63)
Result
messages using
specified cassette.
messages using
normally used
cassette.
messages using the
main cassette, but
don’t print any others
with the cassette.
terminals’ messages
using the main
cassette, but print all
others with the
cassette.
j
j k
j k
90
Page 98

ADVANCED FEATURES RECEPTION
Wild Cards
This feature greatl y enhances the effectiveness of the follo wing f eatu res:
❐ Authorized Reception
❐ Forwarding
❐ Memory Lock
❐ Multi Copy
❐ Specified Cassette Selection
In each of these features, you have to store the RTI or CSI of vario us terminals
that you normally receive fax messages from. Then, whe n your machin e detects
an incoming call, it checks the RTI or CSI of the oth er te rm ina l, an d act s
accordingly .
When you program RTI’ s for t hese fe at ure s, you can pro gra m wild cards to
greatly expand the number of terminals that you can specif y.
Example:
If you wish to accept messages from all 150 bran ches of XYZ Company (using
Authorized Reception), and forward them on to head office (using Forwarding),
you don’t have to store the RTI of each branch of XYZ Company. Program "XYZ"
as a wild card for each of these functions. If the RT I s of all XYZ b ran che s co nt ain
an "XYZ" somewhere in the RTI, messages com in g in fro m them will be accepted,
and sent on to head office.
CAUTION
This feature cannot recognize spaces.
Example:
If you store MAN as a wild card, and a terminal with an RTI that includes
MANCHESTER, HUMAN, or HUMANE calls you, your machine will recognize
MAN as a wild card and accept and/or forward the message.
Cross-references
Authorized Reception: see page 79. Forwarding: see page 82.
RTI and CSI: see page 187.
FEATURES
ADVANCED
91
Page 99

RECEPTION ADVANCED FEATURES
Reverse Order Printing (Feature Expander Required)
Normally, the machine prints the pages of received messages in the order that
they were received uncollat ed .
However, with Reverse Order Printing, the machine will collate the sequence by
printing the message from the last page first colla ted. This will make it easier to
distribute the rece ived fax messages, and more convenie nt for reading them.
Reverse Order Printing will not take place unless you switch it on before ha nd.
To switch this feature on or off, do the following procedure . (See page 166 if you
need more information about the User Parameter settings adjustment procedure).
1. Function 6 2 2 2 2 6 3 and Yes.
2. Yes. The settings for swit ch 00 are now
shown on the bottom line of the displa y.
3. Press k until the settings for switch 10 are
shown.
4. The setting that you need to change is
SETTING? Y/
PRINT LIST
KPAD/Y/
SWITCH 00 : 0000 0000
KPAD/Y/
SWITCH 10 : 0000 0000
j
j
j k
j k
SWITCH 10 :0000 0001
digit 0 (double underlined).
Digit 0 (Double underlined)
0: This feature is Off.
1: This feature is On.
5. If you wish to change the set tin g, press 0
on the ten keypad.
6. Finish: Yes and Function.
92
Page 100

ADVANCED FEATURES RECEPTION
Multi-copy Document Reception (Feature Expander Required)
Using this feature, mo re th an one copy of each in comin g fa x message can be
printed. You may also choose to have more than one copy from only select
senders. This featu re elim inates the extra steps need ed to have someone make
photocopies.
For example, if you switch this feature on overnight, you will not have to make
distribution copie s of the messages that came in durin g th e night. However, the
paper in the cassett e will be use d up much fa ste r.
To use Multi-copy Document Reception, you must first:
❐ Switch Multi-copy on. (Function 62)
❐ Set the number of copies. (Function 83)
❐ Switch reverse order printin g on . (See page 92.)
If you wish to specify the sende rs whose messages are Mu lti-co pie d:
❐ Specify the senders whose messa ge s you want to Multi-co p y (Special
Terminals). Do this by programming the RTI’s or CSI’s of these senders
(Function 81).
❐ Select the messages to Multi-copied: (Function 63)
a) All messages from Special Terminals.
b) All messages except those from Special Terminals.
Cross-reference
Reverse Order Printing: see page 92. Copying an Original: see page 119.
FEATURES
ADVANCED
93
 Loading...