

Page 1
OPERATOR’S MANUAL
RICOH FAX5600L
Please read all of these instructions and keep this manual by your machine.
Page 2

Optional Equipment
Memory (Fax Memory Type 30 1MB-II, Fax Memory Type 30 2MB)
Either a 1-Mbyte memory card, a 2-Mbyte memory card, or a 40-Mbyte hard disk
can be added.
ISDN G4 Kit (ISDN Option Type 90)
This allows you to send and receive messages using the ISDN (Integrated
Services Digital Network).
PC Printer Interface Kit (Printer Interface Type 60)
This allows you to use the machine as a laser printer for an IBM1 or compatible
personal computer.
High Resolution Printer Memory Card (400 dpi Option Type 90)
This allows you to print received fax messages at high resolution when the other
party transmits them at Super Fine (400 x 400 dpi) resolution. Note that even if
you install this option, the maximum resolution is 300 x 300 dpi when printing from
the computer using the PC Printer Interface.
Paper Feed Unit (Paper Feed Unit Type 30)
Up to four 500-sheet paper feed units can be added to the base machine, for a
total capacity of 2,250 sheets.
Telephone Handset (Handset Type 20/30)
This permits voice communication (over the PSTN).
Cabinet (Cabinet Type 40)
This provides a base with wheels for you to move the machine around easily.
Note
The PC Printer Interface kit and the 40 Mb hard disk cannot both be installed together on the
same machine.
The PC Printer Interface kit and the ISDN G4 kit cannot both be installed together on the
same machine.
1
Copyright Notice
IBM is a registered trademark of International Business Machines Corporation.
Page 3

US
WARNING: This equipment has been tested and found to comply with the
limits for a Class A digital device, pursuant to Part 15 of the FCC Rules.
These limits are designed to provide reasonable protection against harmful
interference when the equipment is operated in a commercial environment.
This equipment generates, uses, and can radiate radio frequency energy and,
if not installed and used in accordance with the instruction manual, may cause
harmful interference to radio communications. Operation of this equipment in a
residential area is likely to cause harmful interference in which case the user
will be required to correct the interference at his own expense.
✬
CAUTION: Use of control or adjustments or performance of procedures
other than those specified herein may result in hazardous radiation exposure.
Class A
This Digital Apparatus does not exceed the Class A limits for Radio noise
emissions from Digital Apparatus as set out in the Interference-causing
equipment entitled "Digital Apparatus", ICES-003 of the Department of
Communications.
Cet appareil numérique respecte les limites de bruits radioélectriques
applicables aux appareils numériques de classe A prescrites dans la norme
sur le matériel brouilleur : "Appareils Numériques", NMB-003 édictée par le
ministre des Communications.
Page 4

Notice about the Telephone Consumer Protection Act (Valid in the USA only)
Attention please!
The Telephone Consumer Protection Act of 1991 among other things makes it
unlawful for any person to send any message via a telephone fax machine
unless such message clearly contains in a margin at the top or bottom of each
transmitted page or on the first page of the transmission, the date and time it
is sent and an identification of the business or other entity, or other individual
sending the message and the telephone number of the sending machine or
such business, other entity, or individual. This information is transmitted with
your document by the TTI (Transmit Terminal Identification) feature.
In order for you to meet the requirement, your machine must be programmed
by following the instructions in the accompanying Operation Manual. In
particular, please refer to the "Getting Started" and/or "Programming" sections.
Also refer to the TTI (Transmit Terminal Identification) programming procedure
to enter the business identification and telephone number of the terminal or
business. Do not forget to set the date and time.
Thank you
Page 5

IMPORTANT SAFETY INSTRUCTIONS
1. Read all of these instructions.
2. Save these instructions for later use.
3. Follow all warnings and instructions marked on the product.
4. Unplug this product from the wall outlet before cleaning. Do not use liquid
cleaners or aerosol cleaners. Use a damp cloth for cleaning.
5. Do not use this product near water.
6. Do not place this product on an unstable cart, stand, or table. The product
may fall, causing serious damage to the product or injuring the user.
7. Slots and openings in the cabinet and the back or bottom are provided for
ventilation; to ensure reliable operation of the product and to protect it from
overheating, these openings must not be blocked or covered. The openings
should never be blocked by placing the product on a bed, sofa, rug, or other
similar surface. This product should not be placed in a built-in installation
unless proper ventilation is provided.
8. This product should be operated from the type of power source indicated on
the marking label. If you are not sure of the type of power available, consult
an authorized sales person or your local power company.
9. This product is equipped with a 3-wire grounding type plug, a plug having a
third (grounding) pin. This plug will only fit into a grounding-type power outlet.
This is a safety feature. If you are unable to insert the plug into the outlet,
contact your electrician to replace your obsolete outlet. Do not defeat the
purpose of the grounding type plug. (This does not apply in countries in which
the 2-wire, non-grounded type of plug is used.)
10. Do not allow anything to rest on the power cord. Do not locate this product
where persons will walk on the cord.
11. If an extension cord is used with this product, make sure that the total of the
ampere ratings on the products plugged into the extension cord do not
exceed the extension cord ampere rating. Also, make sure that the total of all
products plugged into the wall outlet does not exceed 15 amperes.
12. Never push objects of any kind into this product through cabinet slots as they
may touch dangerous voltage points or short out parts that could result in a
risk of fire or electric shock. Never spill liquid of any kind on the product.
13. Do not attempt to service this product yourself, as opening or removing covers
may expose you to dangerous voltage points or other risks. Refer all servicing
to qualified service personnel.
14. Unplug this product from the wall outlet and refer servicing to qualified service
personnel under the following conditions:
A. When the power cord or plug is damaged or frayed.
B. If liquid has been spilled into the product.
C. If the product has been exposed to rain or water.
D. If the product does not operate normally when the operating instructions
are followed. Adjust only those controls that are covered by the operating
instructions since improper adjustment of other controls may result in
damage and will often required extensive work by a qualified technician
to restore the product to normal operation.
E. If the product has been dropped or the cabinet has been damaged.
F. If the product exhibits a distinct change in performance, indicating a
need for service.
Page 6

CONTENTS
IMPORTANT SAFETY INSTRUCTIONS
INTRODUCTION
WHAT DOES A FAX MACHINE DO? 1
TELEPHONE LINE PROBLEMS AFFECT FAX COMMUNICATION 1
SOME OF THE THINGS THAT THIS MACHINE CAN DO 2
HOW TO USE THIS MANUAL
MANUAL OVERVIEW 4
CONVENTIONS 5
STORING TELEPHONE NUMBERS 7
STORING NAMES AND LABELS 7
IF YOU MAKE A MISTAKE 8
ON/OFF SWITCHES AND USER PARAMETERS 9
GENERAL PRECAUTIONS
POWER AND GROUNDING 14
COLD WEATHER POWER-UP 15
THUNDERSTORMS 15
COPY PAPER 16
TONER CARTRIDGES 16
OPERATING PRECAUTIONS 16
GENERAL 17
GUIDE TO COMPONENTS
COMPONENT DIAGRAM 18
OPERATION PANEL
OPERATION PANEL DIAGRAM 19
INSTALLING THE MACHINE
LOCATION 21
CONNECTING THE MACHINE 22
Page 7

BEFORE YOU SEND YOUR FIRST FAX
SOME ITEMS MUST BE PROGRAMMED FIRST 23
Overview 23
Language Selection 23
Date and Time 24
Daylight Saving Time 24
Terminal Identification 25
RTI (Remote Terminal Identification) 26
TTI (Transmit Terminal Identification) 26
CSI (Called Subscriber Identification) 27
Telephone Line Type 28
QUICK DIAL, SPEED DIAL, AND GROUP DIAL 29
Three Convenient Ways to Dial 29
Quick Dial and Speed Dial 29
Groups 30
Programming Quick Dial 31
Programming a New Quick Dial 31
Editing a Quick Dial 32
Erasing a Quick Dial 33
Programming Speed Dials 34
Programming a New Speed Dial 34
Editing a Speed Dial 36
Erasing a Speed Dial 37
Programming Groups 38
Entering Group Programming Mode and Selecting a Group 38
Storing Numbers in a Group 39
Checking Which Numbers are Already in the Group 40
Storing a Label for this Group 40
Storing a Group Transfer Station 41
Erasing the Group 42
Limits on the Use of Stored Telephone Numbers 43
DEALING WITH JUNK FAX MAIL 44
OTHER ITEMS TO PROGRAM AT YOUR LEISURE 44
ROUTINE OPERATION
SENDING A FAX MESSAGE 45
Precautions Concerning Unacceptable Document Types 45
Transmission Procedure at a Glance 47
Overview 47
Immediate Transmission 47
Memory Transmission 48
Sending to Just One Location 49
Sending to More Than One Location (Broadcasting) 51
Check your Destinations Before Dialing 52
Possible Problems 53
Page 8

Contrast, Resolution, and Halftone Modes 54
Contrast 55
Resolution 55
Halftone 55
Selecting the Halftone Type 56
Home Position Setting Adjustments 57
Dialing with the Telephone Directory 58
Optional Features for Transmission 59
Personal Code 59
Send Later 60
Transmission Deadline (TRD) 61
Page Count (Immediate Transmission only) 62
Auto Reduce 63
On/Off Selection Switch 63
Auto Reduce Home Position Adjustment 64
TTI 64
ID Transmission 65
Economy Transmission 66
On/Off Selection Switch 67
Storing the Economy Transmission Time 67
Voice Request (This feature requires a handset) 67
Direct Fax Number Entry 68
Immediate Transmission 69
Procedure 69
Converting Immediate Transmission to Memory Transmission 69
Transmission Mode Home Position Adjustment 70
Using the Stamp 71
Changing the Stamp On/Off Home Position Setting 71
Redialing 72
Automatic Redialing 72
Using the AI (Artificial Intelligence) Redial Key 73
RECEIVING FAX MESSAGES 74
Selecting the Reception Mode 74
Manual Receive Mode 74
Auto Receive Mode 75
Substitute Reception 75
Overview 75
Switching Substitute Reception On or Off 76
TELEPHONE CALLS 77
Making a Telephone Call 77
Using On Hook Dial 77
Using the Handset 78
Using AI Redial 78
Answering the Telephone 79
Phoning and Faxing on the Same Call 79
To Talk Before Sending a Fax (On Hook Dial) 79
To Talk After Sending a Fax 80
Page 9

Speaker and Buzzer Volume Adjustments 80
ADVANCED FEATURES
NETWORKING 81
Overview 81
What Networking Features Does This Machine Have? 82
Preparing the Machine for Networking Operations 83
Storing the Country Code 83
Storing your Machine’s Own Telephone Number 84
Storing your Area Code Prefix 84
Storing the ID Code 85
Groups 86
Transfer Request 87
Combining Transfer Request with Broadcasting 90
Two-step Transfer 91
Digital Link 91
Analog Link 92
Multi-step Transfer 93
Your Machine as a Transfer Station
(Memory Card or Hard Disk Required) 94
Transfer Request by Tonal Signals 94
Setting the Machine up for Transfer Request by Tonal Signals 94
Storing the Remote ID 95
Switching Transfer Request by Tonal Signals On/Off 95
Procedure for Transfer Request by Tonal Signals 96
Full Procedure 96
Example Procedure (for Quick Reference) 97
Beep Tones 98
TRANSMISSION 99
Keystroke Programs 99
Overview 99
Storing a Keystroke Program 100
Labeling a Program 101
Using a Program 102
Transmission Program 102
Free Polling Reception Program 102
Erasing a Program 103
Confidential Transmission 104
Overview 104
Procedure 105
Confidential ID Override Option 105
Auto Document 106
Overview 106
Storing an Auto Document 107
Labeling an Auto Document 107
Page 10

Using an Auto Document 108
Printing the Contents of an Auto Document 108
Erasing an Auto Document 109
Restricting Access to the Machine 110
Overview 110
Programming the Personal Codes 110
Storing a Personal Code 111
Editing or Erasing a Personal Code 112
Switching on Restricted Access 113
Operating the Machine with Restricted Access Switched On 114
Tonal Signals 115
Chain Dialing 116
Secure Transmission 117
Overview 117
Changing the Secure Transmission On/Off Home Position Setting 117
Making a Secure Transmission 118
Specified Image Area 118
Overview 118
Changing the Specified Image Area On/Off Home Position Setting 119
Specifying an Image Area 119
Label Insertion 120
Closed Network (Transmission) 121
Protection Against Wrong Connections 122
ECM (Error Correction Mode) and Page Retransmission 123
Batch Transmission 124
Overview 124
Changing the Batch Transmission On/Off Home Position Setting 125
Well Log Transmission 125
RECEPTION 126
Confidential Reception (Memory Card or Hard Disk Required) 126
Overview 126
Storing a Confidential ID 127
Printing a Confidential Fax Message 127
Confidential File Report 128
Memory Lock (Memory Card or Hard Disk Required) 129
Overview 129
Storing a Memory Lock ID 129
Switching Memory Lock On/Off 130
Printing from Memory Lock (Memory Card or Hard Disk Required) 130
Rejection of Messages from Unidentified Senders 131
Authorized Reception 132
Overview 132
Programming the Authorized Senders 133
Switching Authorized Reception On/Off 134
Forwarding (Memory Card or Hard Disk Required) 134
Overview 134
Programming the Forwarding Feature 136
Page 11

Editing the Forwarding Feature 138
Switching Forwarding On/Off 140
Enabling and Disabling the Forwarding Mark 140
Specified Cassette Selection (Optional Paper Feed Unit Required) 141
Overview 141
Programming the Specified Cassette Selection Feature 142
Switching Specified Cassette Selection On/Off 143
Wild Cards 144
Reverse Order Printing (Memory Card or Hard Disk Required) 145
Multi-sort Document Reception (Memory Card or Hard Disk Required) 146
Center Mark 147
Checkered Mark 148
Reception Time 149
Length Reduction 150
Two in One 151
Closed Network (Reception) 152
OTHER 153
Polling 153
Overview 153
Polling Transmission 154
Free Polling 154
Secured Polling 155
Stored ID Override 156
Polling Reception 158
Operating Procedure 158
Stored ID Override Option 159
Continuous Polling Reception 159
File Management 160
File Retention Time and File Retransmission 160
File Retransmission 160
Erasing a File from Memory 161
Printing a File 162
User Function Keys 163
User Function Codes 163
Function Programs 164
Storing a Function Program 164
Using a Function Program 165
Deleting a Function Program 165
OMR Sheets 166
Introduction 166
Using an OMR Sheet 166
Completing an OMR Sheet 167
The Five Types of OMR Sheets 170
User Parameter Program Sheet 170
Quick/Speed Dial Program Sheet 170
Group Program Sheet 171
Transmission Program Sheet 172
Page 12

Transfer Request Program Sheet 173
Procedures 174
To Print an OMR Sheet 174
Using an OMR Sheet to Send a Fax Message 174
Using an OMR Sheet to Program the Machine 175
Errors 175
Power Saver 176
Overview 176
Programming Procedure 177
Switching the Power Saver On or Off 178
Counters 179
Communication Result Display 179
Entering PC Printer Mode (Printer Interface Required) 180
Selecting the Paper Feed Cassette for Printer Mode
(Printer Interface and Paper Feed Unit Required) 180
Copying 181
Dual Access 182
Inch-to-millimeter Conversion 182
RDS (Remote Diagnostic System) 183
Overview 183
Switching RDS On/Off 183
Short Preamble 184
AI Short Protocol 184
REPORTS
AUTOMATICALLY PRINTED REPORTS 185
Descriptions of the Available Reports 185
TCR (Transmission Confirmation Report) 185
Transmission Result Report 185
Error Report 185
Communication Failure Report 185
Memory Storage Report 185
Power Failure Report 186
Transfer Result Report 186
Polling Reserve Report 186
Polling Result Report 186
Polling Clear Report 186
Confidential File Report (Memory Card or Hard Disk Required) 186
Transmission Deadline Report/Polling Confirmation List 187
Switching Reports On/Off 187
Printing a Sample of Data on the Reports 188
Report Formats 189
USER-INITIATED REPORTS 191
Descriptions of Available Reports 191
TCR 191
File List 191
Page 13

Quick Dial List 192
Speed Dial List 192
Group Dial List 192
Program List 192
User Function List 192
Personal Code List 192
Authorized Reception List 192
Forwarding List 193
Specified Cassette Selection List 193
User Parameter List 193
LOOKING AFTER THE MACHINE
REPLACING PAPER 194
REPLACING THE TONER CASSETTE 195
Replacement Procedure 195
Ordering Toner 197
Switching the Ordering Toner Feature On/Off 197
Ordering Toner Procedure 198
REPLACING THE STAMP 199
CHANGING THE PAPER SIZE OF THE CASSETTE 200
Upper Cassette 200
Lower Cassette(s) 202
USER MAINTENANCE PROCEDURES 203
User Maintenance Table 203
User Maintenance Procedure 204
Scanner 204
Main Body 208
Lower Paper Feed Unit(s) (If one or more are installed) 212
SOLVING PROBLEMS
DOCUMENT JAMS 213
Clearing a Document Jam 213
Adjusting the Document Feeder 214
COPY JAMS 215
Cassette Entrance 215
Inside the Machine 216
Copy Feed-out Area 217
Lower Cassette Entrance 218
COMMUNICATION PROBLEMS 218
OPERATING DIFFICULTIES 219
DISPLAYED ERROR MESSAGES 223
ERROR CODES 225
CALLING THE SERVICE STATION
Switching Service Report Transmission On/Off 227
Sending a Service Report 228
DEDICATED TRANSMISSION PARAMETERS 228
(SERVICE REPORT TRANSMISSION) 227
Page 14

SPECIFICATIONS
TABLE OF SPECIFICATIONS 229
APPENDIX
APPENDIX A. PAPER FEED UNIT 230
Operation 230
Maintenance 230
Copy Jams 230
APPENDIX B. FAX MEMORY TYPE 90 40 MB HD 231
General 231
Operation 231
APPENDIX C. ISDN G4 OPTION TYPE 90 232
Introduction 232
Setting up the Group 4 Interface 233
Subaddress Key 233
Own ISDN-G4 Number 233
Own ISDN-G3 Number 234
Next Transfer Station 235
Operation 236
Dialing and Storing Telephone Numbers 236
Overview 236
Transmission Procedure 237
Storing a Telephone Number 238
Automatic Fallback from Group 4 Mode to Group 3 Mode 240
Terminal ID 240
Explanation of the Items in the Group 4 Identifier 241
Transmitter and Receiver Terminal IDs 241
Date and Time 241
Page Number 241
Switching the Command Information Line On/Off 242
Terminal ID Verification 243
Troubleshooting 243
Call Progress Signals (CPS) 243
GLOSSARY 244
INDEX
OFFICIAL NOTICE TO USERS
FUNCTION LIST
Page 15
INTRODUCTION
INTRODUCTION
Thank you for purchasing this product. This multi-function office machine offers a
wide range of fax, printer, and convenience features.
WHAT DOES A FAX MACHINE DO?
When you write a letter, you normally seal it in an envelope, attach a stamp, and post it in the
nearest mail box. Then, in a few days, depending on the postal service, the letter will arrive at its
destination. However, you may not be aware of its arrival until you get a return letter.
A fax machine speeds up this process. After you have written your letter, place it face down in your
fax machine’s document feeder, dial the destination’s fax number, then press the Start key.
The fax machine scans your letter, and converts it into a series of black and white dots (the
number of dots that there are across and down the page depends on the resolution that you
selected; refer to the specifications section of this manual for details). This series of dots is
transformed into an electrical signal and sent out over the telephone line to the destination fax
machine.
The receiving fax machine reconstructs your letter from the incoming signal, and prints it.
If you are worried about whether the message arrived at the destination, you can check a report
called the TCR (Transaction Confirmation Report). When you print this report, you will see the
results of the most recent fax communications made by your machine.
You can use your fax machine to send and receive many types of document, even photographs.
TELEPHONE LINE PROBLEMS AFFECT FAX COMMUNICATION
Quick and accurate transmission of fax messages depends
on the condition of the telephone line. If the line condition is
very good, this machine will transmit a letter-size page in
about 6 seconds. However, if the line is noisy, the speed
may be reduced significantly, and the data may be
damaged.
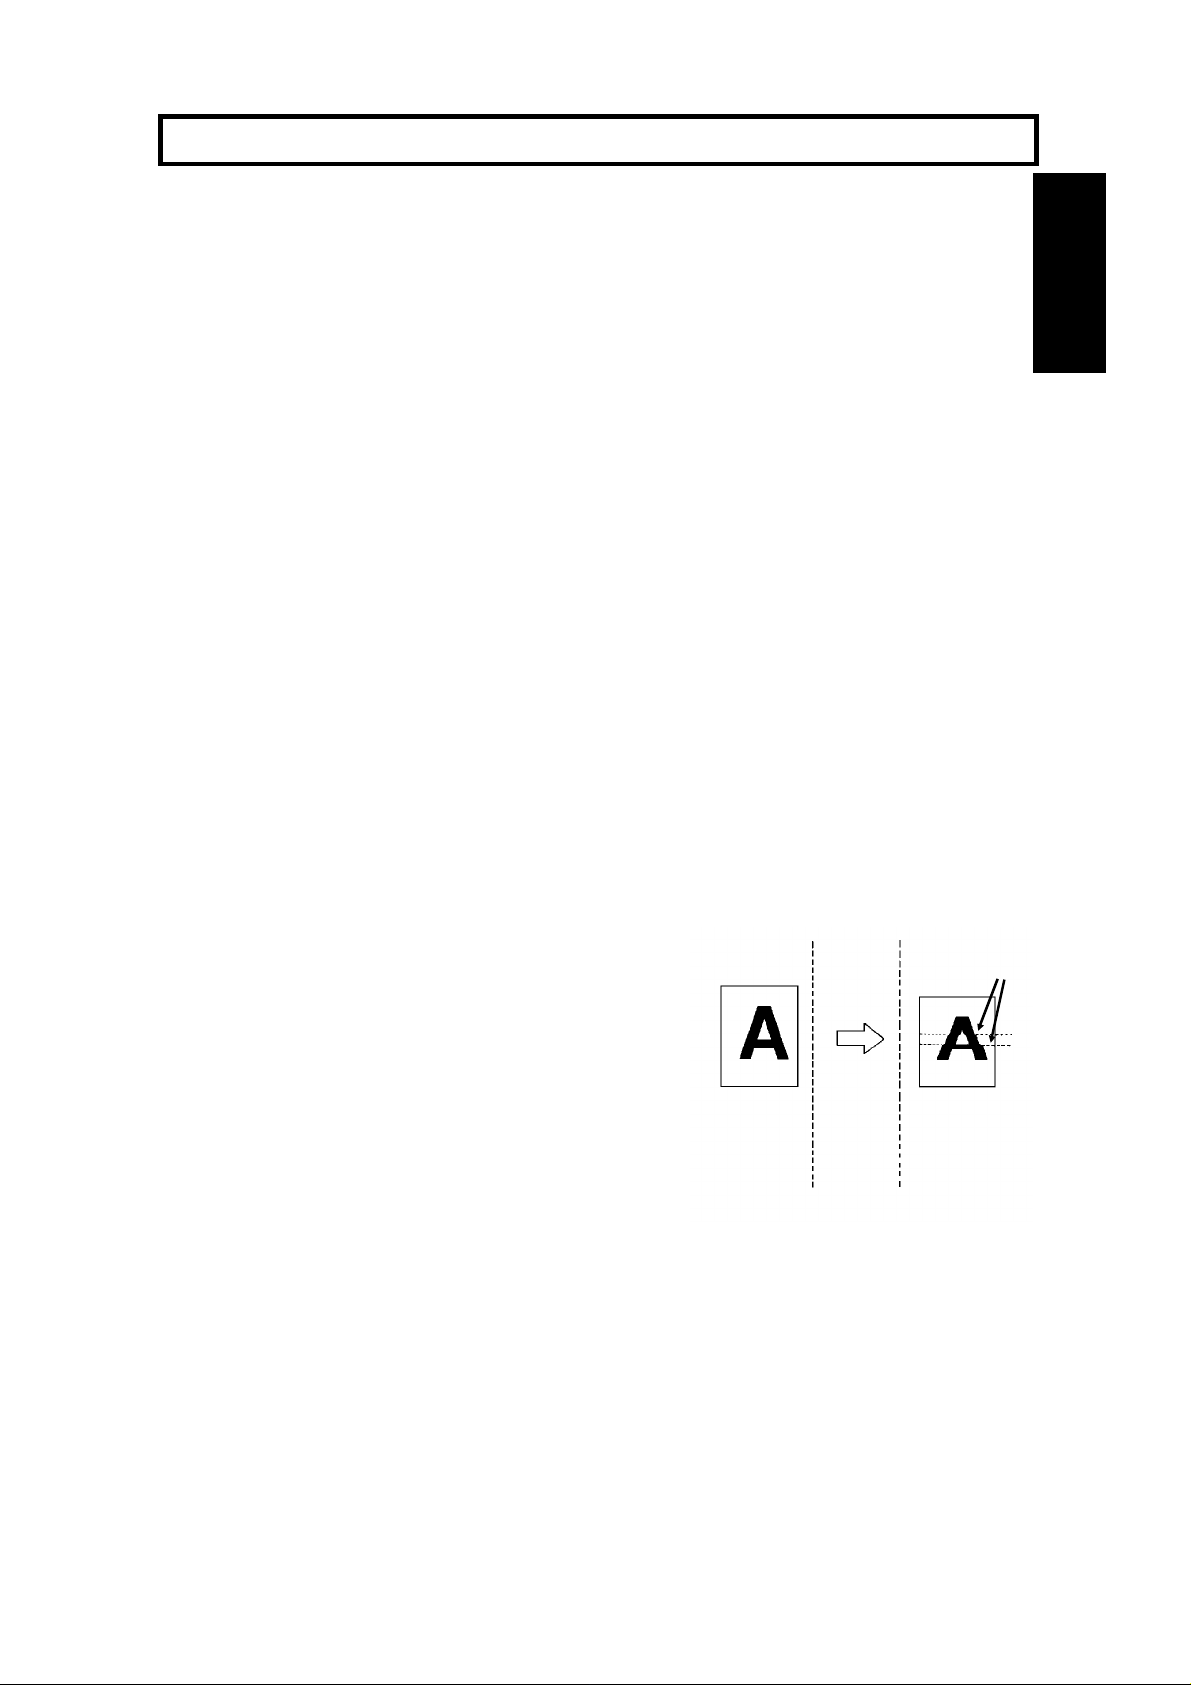
The symptoms of data loss caused by a noisy telephone
line are seen on the printouts of received messages. An
example is shown opposite. Note that lines are missing
from the page at the indicated locations. ECM (Error
Correction Mode) is an effective countermeasure against
this type of error; you have the choice of having the ECM
feature switched on or off. It is switched on before the
machine leaves the factory. (Refer to page 123 for more
information about ECM).
The line condition is affected by the weather;
thunderstorms can cause electrical noise on telephone lines.
In addition, the operation of the equipment in the
telephone company’s control office can also cause noise
on the line.
Document
Transmit
Received
Message
Errors
1
Page 16
INTRODUCTION
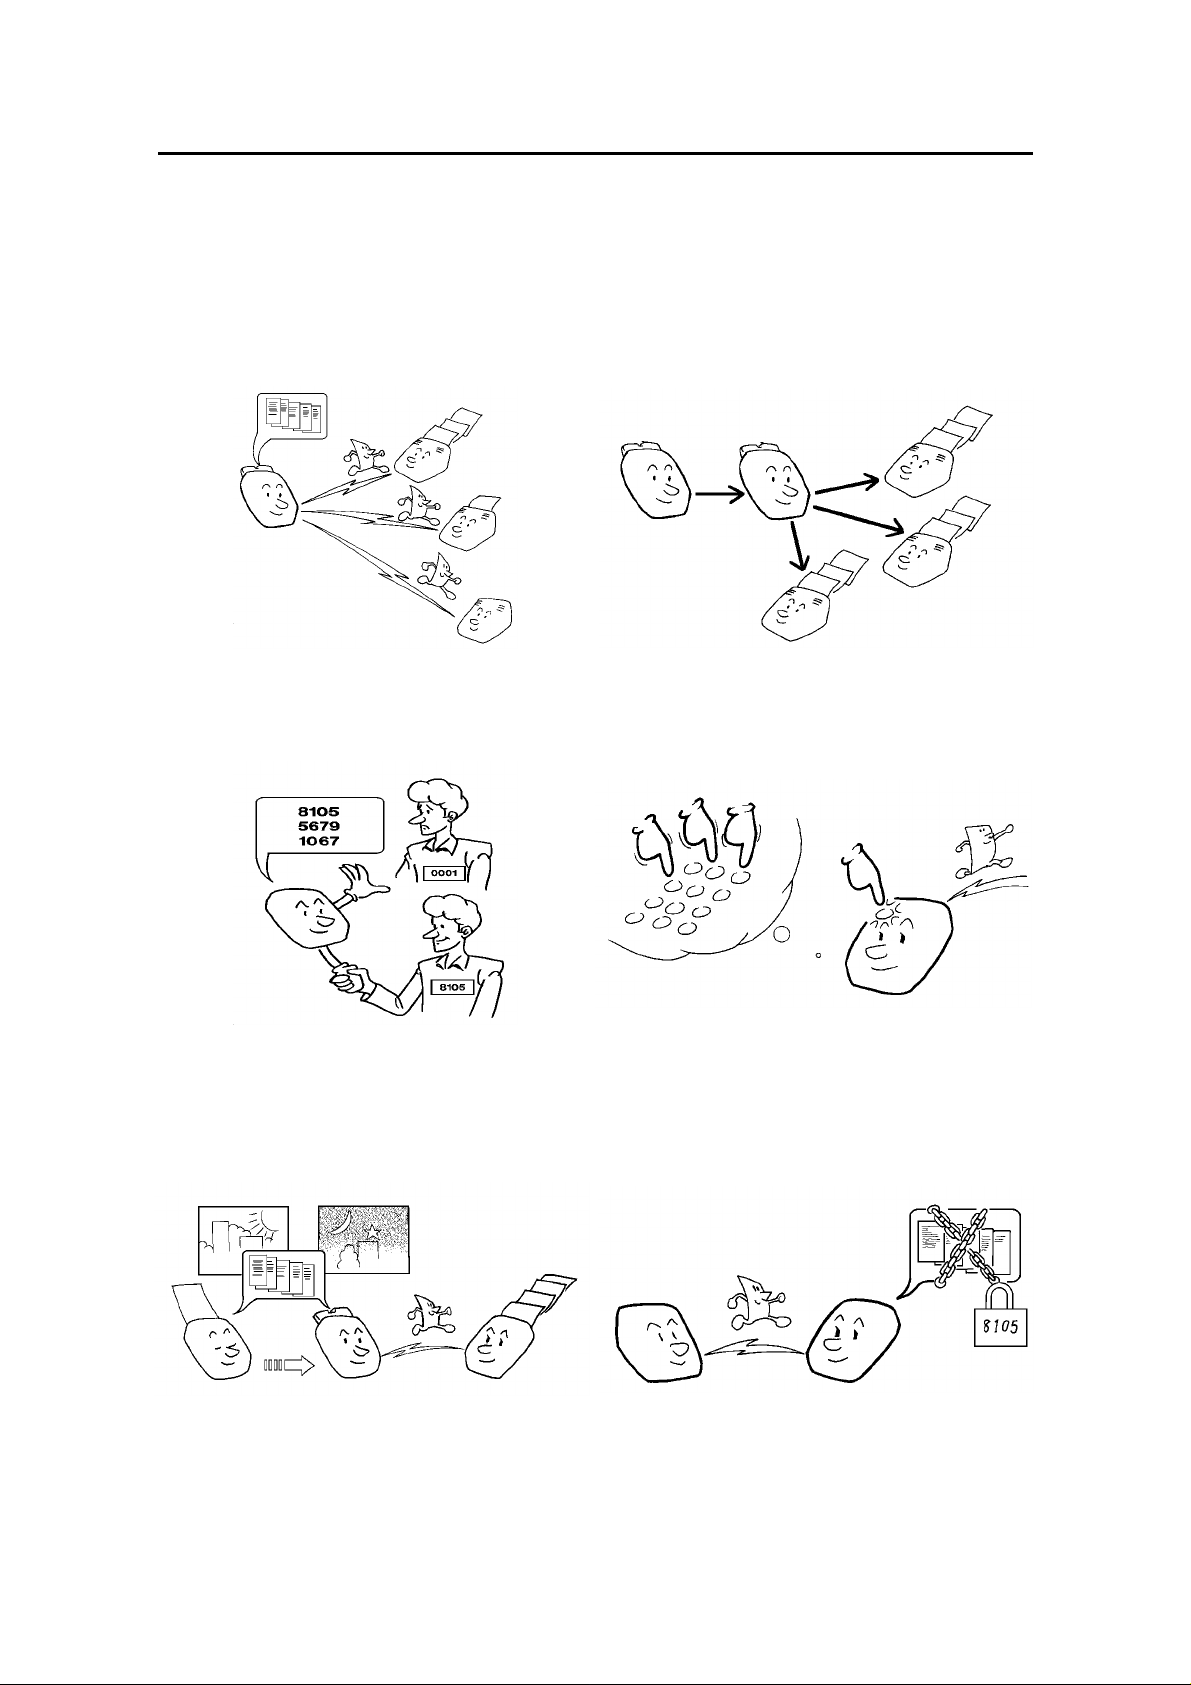
SOME OF THE THINGS THAT THIS MACHINE CAN DO
This machine has many features. Here is a sample of what the machine can do.
Sending a Fax to More Than One Location
See page 51.
Restricting Access to the Machine
Network Features, including Transfer Request
See page 81.
Quick Dial, Speed Dial, and Group Dial
See page 110.
2
Sending a Fax Later
See page 60.
See page 29.
Confidential Communication
See pages 104 and 126.
Page 17
INTRODUCTION
INTRODUCTION
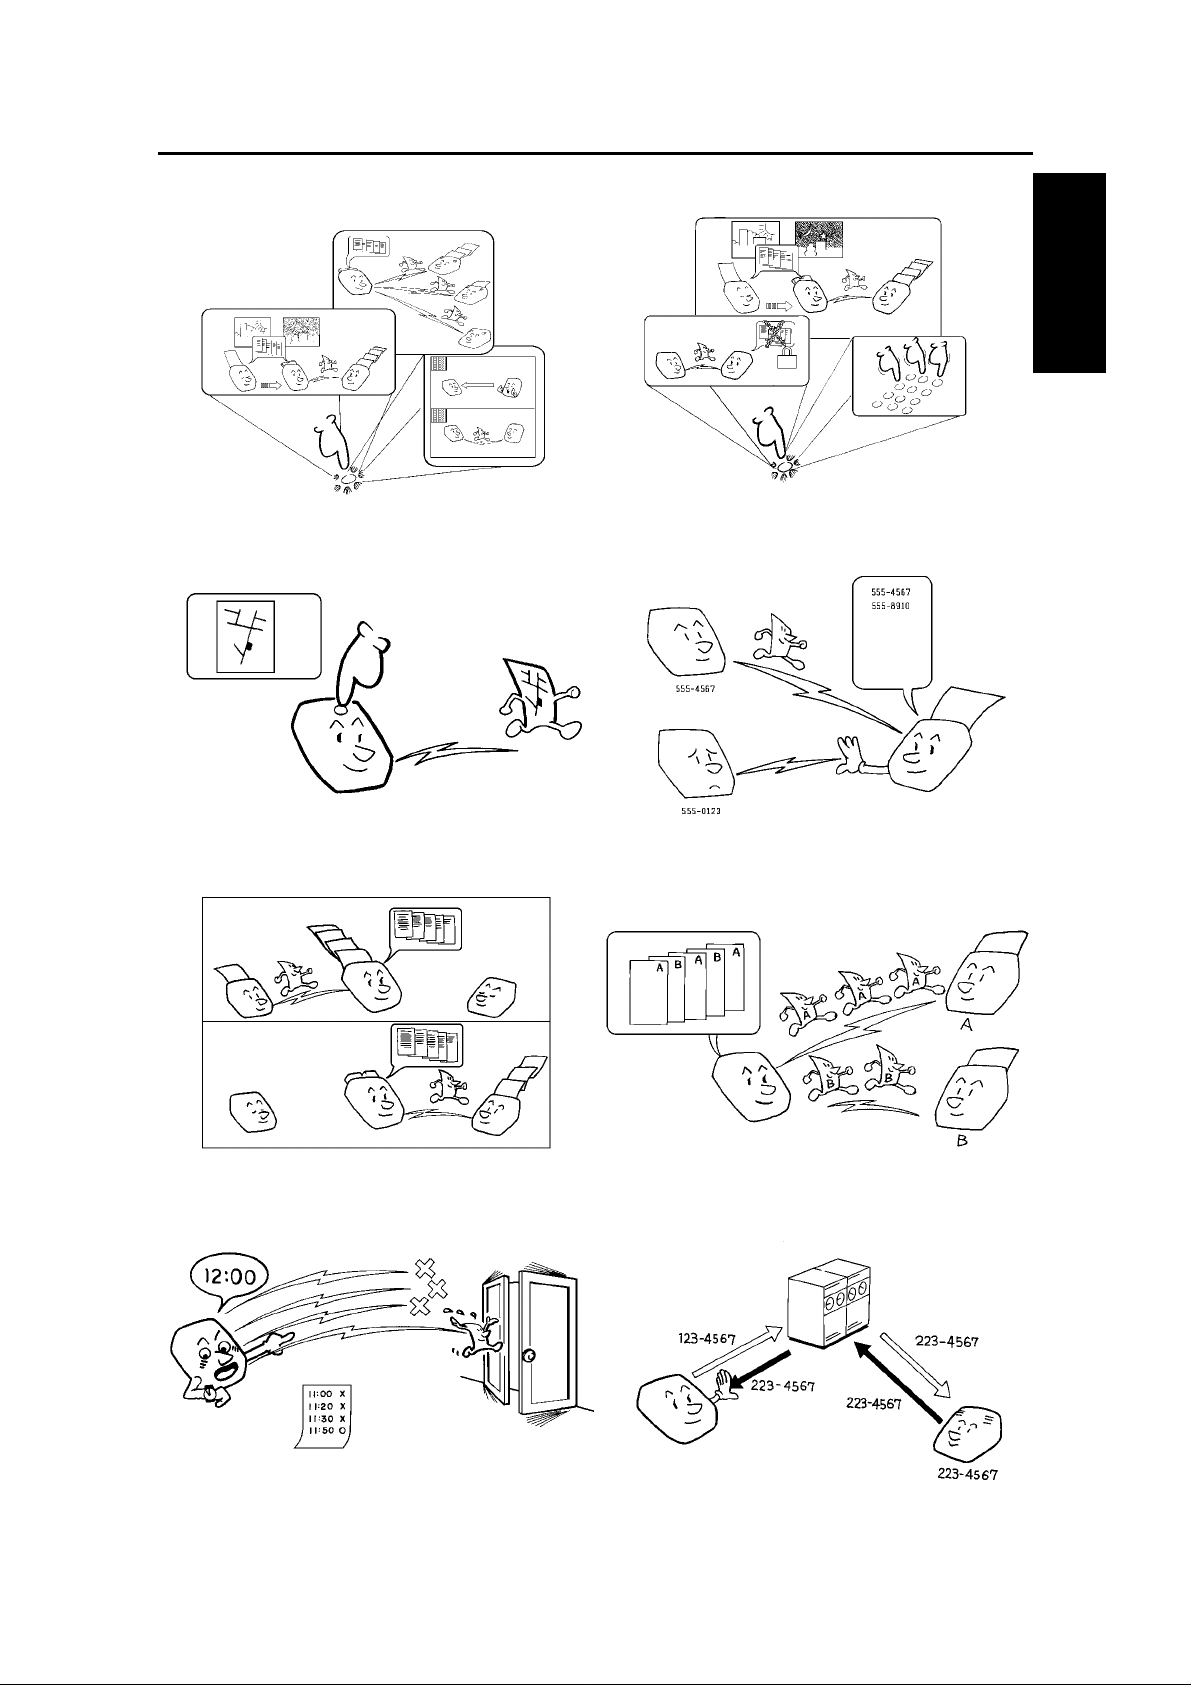
Keystroke Programs
See page 99.
Auto Document (sends a commonly
transmitted page with one touch)
User Function Keys
See page 163.
Authorized Reception (cuts out junk fax mail)
See page 106.
See page 134.
Transmission Deadline
Forwarding
See page 132.
Batch Transmission
See page 124.
Protection against Wrong Connections
See page 61.
See page 122.
3
Page 18

HOW TO USE THIS MANUAL
MANUAL OVERVIEW
Your facsimile machine is equipped with a wide range of labor-saving and
cost-saving features. This manual explains each of these features, and how you
can put them to use. Note that the external appearance of the machine in some
illustrations may be slightly different from the actual machine.
The manual consists of the following sections.
❐ How to Use this Manual - This is the section that you are now reading. It
contains an overview of the manual and the conventions used by the authors. It
also contains quick reference sections on how to input telephone numbers and
names, and how to correct errors that you may inadvertently make when
operating the machine.
❐ General Precautions - This section lists precautions that you should keep in
mind when operating the machine. Read this section before you begin to use
your machine.
❐ Guide to Components - This contains a diagram that shows where the main
components of your machine are situated.
❐ Operation Panel - This describes the functions of the various buttons and
indicators that are on your machine’s operation panel.
❐ Installing the Machine - If you are setting up your machine for the first time, a
service technician will do the physical installation, so that is not described here.
However, this section tells you the best type of place to install your machine.
So, please refer to it when you plan to move the machine to another location.
❐ Before you Send your First Fax - This section explains the things that you
have to do before you can send your first fax message and lists important
features that will make faxing more convenient.
❐ Routine Operation - This section describes the features and settings that you
will normally be using every day.
❐ Advanced Features - This section explains how to take advantage of the
special features of your fax machine, including how to set up networks for
economical distribution of fax messages over long distances.
❐ Reports - This section explains the reports that the machine generates.
❐ Looking After the Machine - This section shows you what to do when
consumable supplies run out. The user maintenance procedure in this section
should be done every six months if you want to keep your machine in top
condition.
❐ Solving Problems - If your machine cannot communicate, or if it generates
error codes or experiences paper jams, refer to this section. Many routine
problems do not need to be solved by an experienced technician.
❐ Specifications - This is a list of technical data you might like to refer to
occasionally.
❐ Appendix - This describes the optional hard disk, paper feed unit, and ISDN
Group 4 kit. The PC Printer Interface Kit comes with a separate manual.
❐ Quick Reference Guide - This indicates how to use this machine at a glance.
4
Page 19
HOW TO USE
THIS MANUAL
HOW TO USE THIS MANUAL
CONVENTIONS
The following conventions were used when writing this manual.
Keynames
These have been printed in a different typeface and enclosed by a box.
For example: " Start " means "Press the Start key on the operation panel".
If you see something like " # x 3", this means that you have to press
the # key 3 times.
On the operation panel, there is a circular key with four arrows (up,
down, left, right) printed on it. This is the scroll key. It is often used
in the operating procedures to gain access to various features. For
example, if you see ← in the manual, you are being asked to
press the left-pointing arrow on the scroll key.
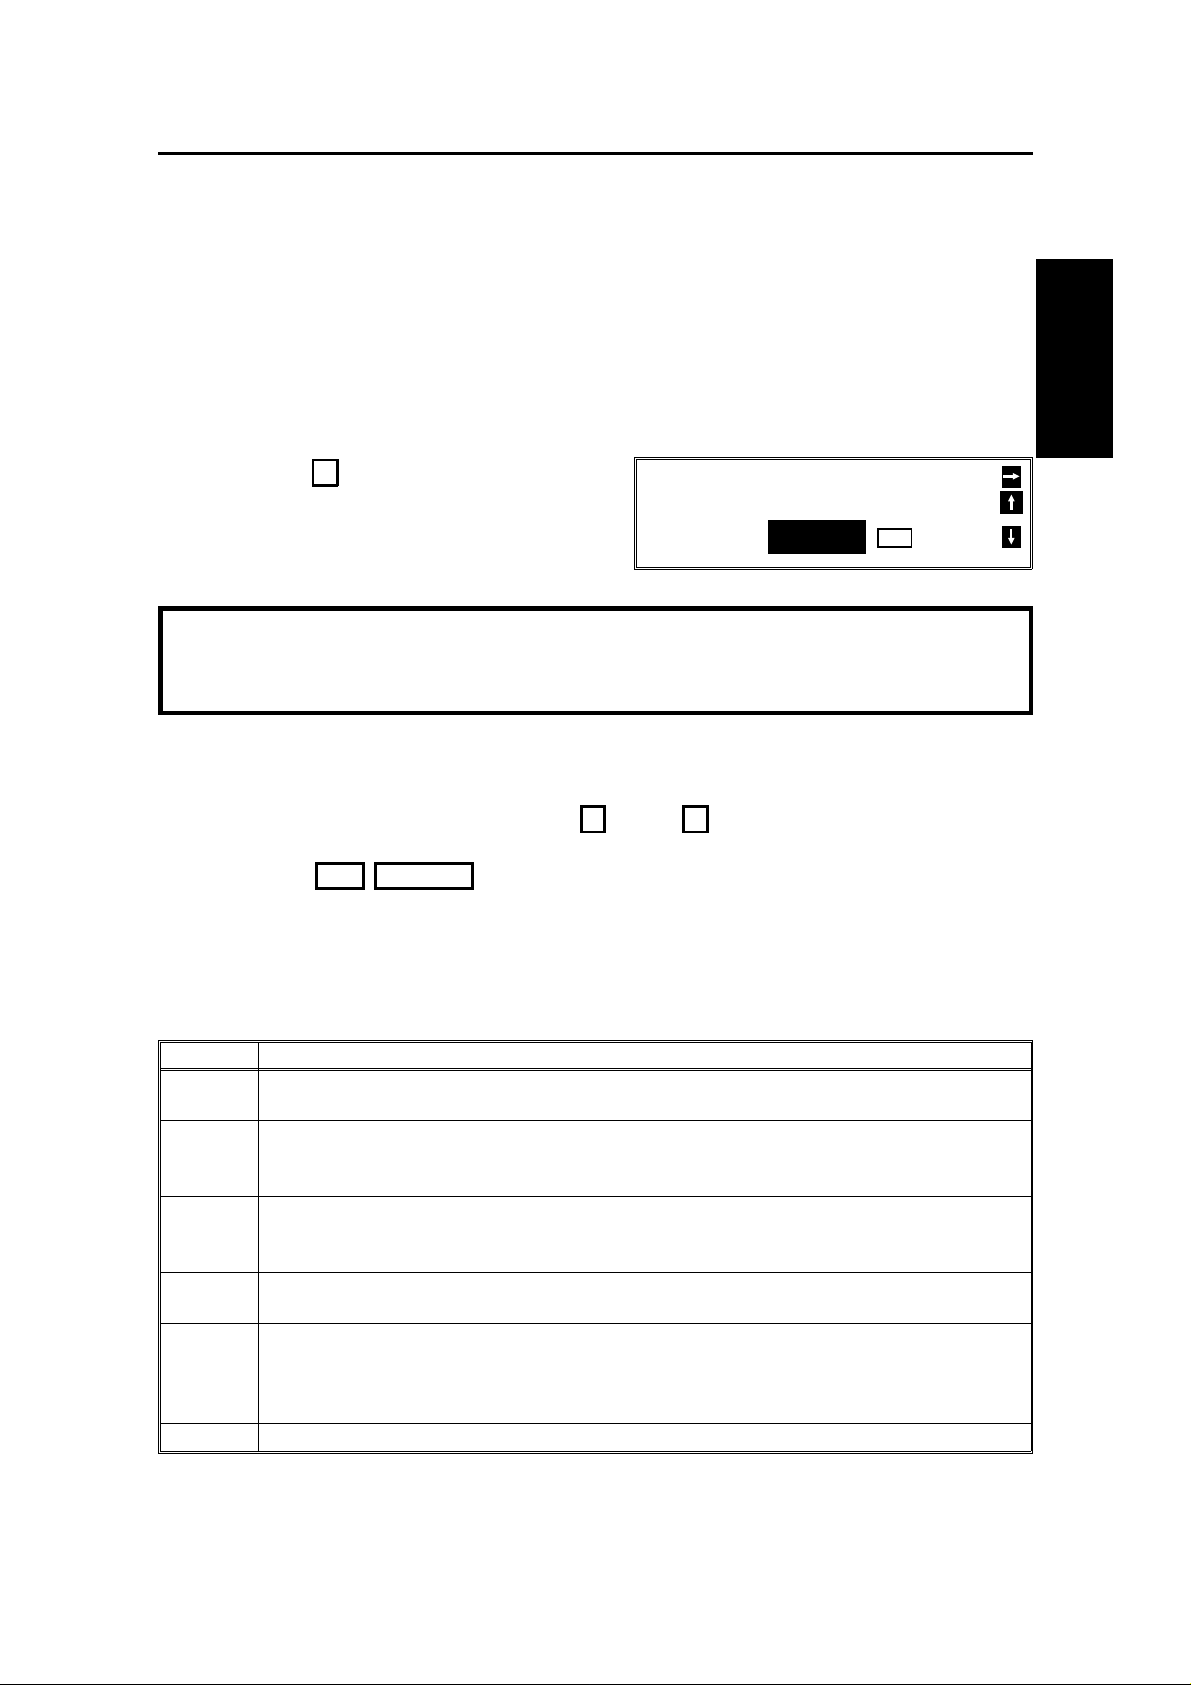
Displays
Messages seen on the display are shown in a larger box, normally on the right
hand side of the page, directly opposite the step that brought it up on the screen.
After following a step in a procedure, check the display to see if it corresponds to
the one in the manual. This may help you to check whether you are following the
procedure successfully. The following examples show three common types of
display.
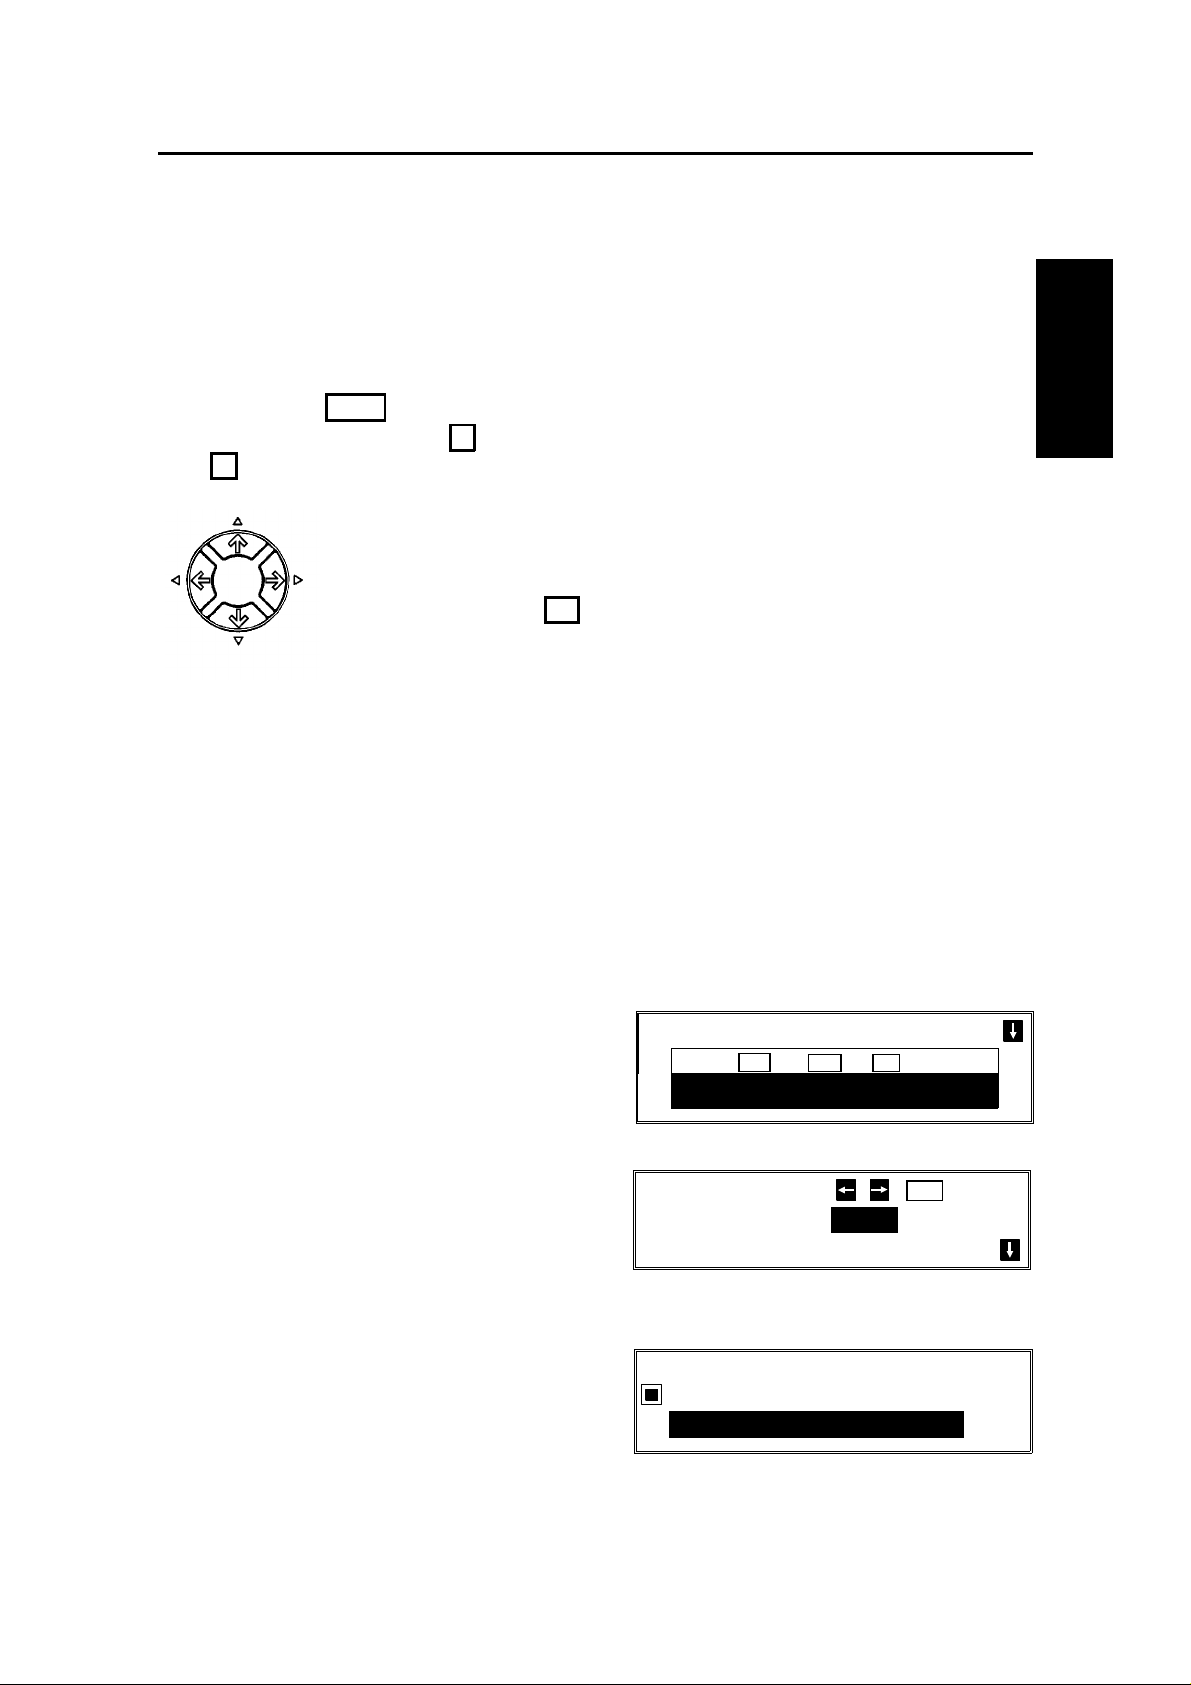
Example A: The keys that can be pressed
are shown on the screen in small boxes. In
this example, you can press the Yes, No, or
Clear keys, or the down arrow on the scroll
key (see the arrow at the top right).
Example B: The choices of settings for a
feature are shown on the screen. The
current setting is highlighted (white on
black). If you press the right-pointing arrow
on the scroll key, the setting will be changed
to OFF.
MEMORY TRANS. OPTIONS
PRESS YES OR CLR
2125551234
OPTION SELECT
AUTO REDUCE ON OFF
TTI
.
NO
_
YES
TO END
Example C: The ABC in the bottom right of
the display indicates that you can input
letters using the Quick Dial Keys, and
QUICK DIAL ENTER LABEL
01
_
ABC
numbers using the ten-key pad on the
operation panel.
5
Page 20

HOW TO USE THIS MANUAL
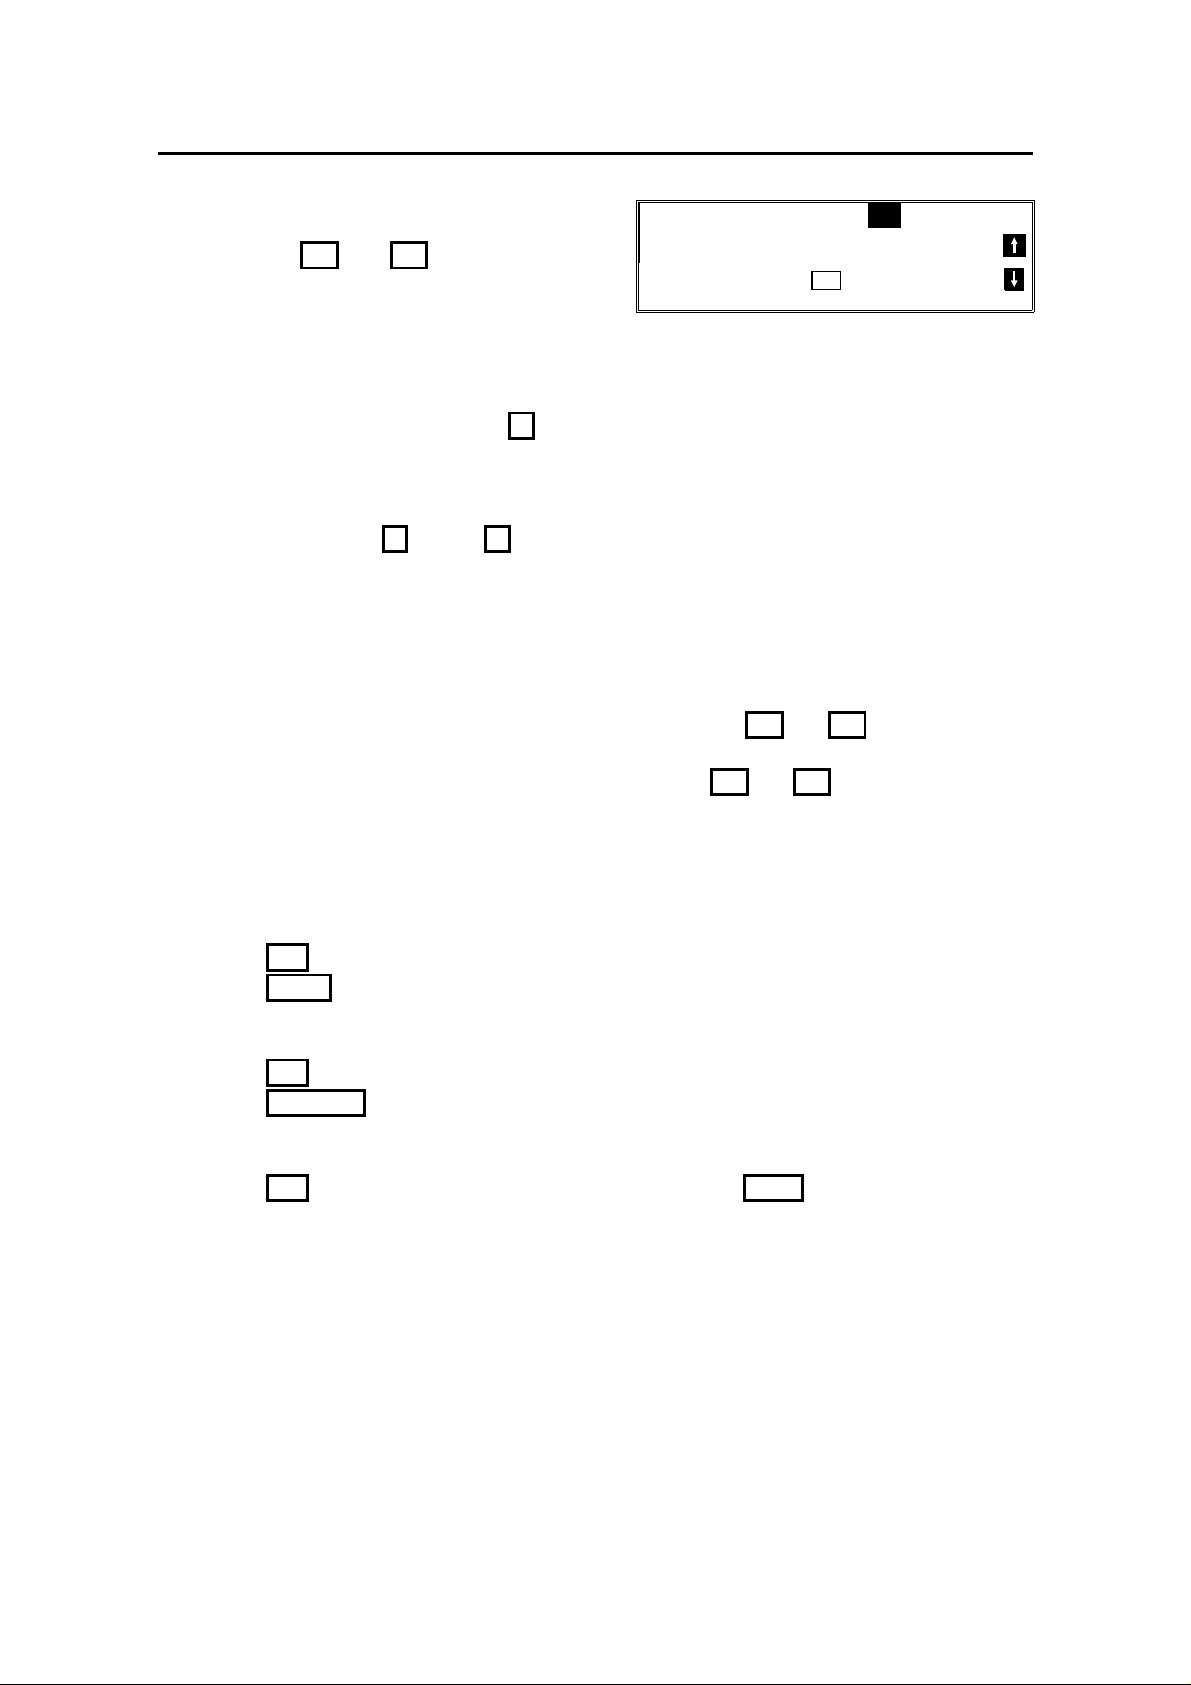
Most procedures start from standby mode,
that is, when the display is as shown on the
right. The value after "MEMORY" shows how
MEMORY TRANS. APR. 4. 12:25PM
SET DOCUMENT
MEMORY 100%
much memory space is remaining.
NOTE: If you start a procedure and do not enter anything at the operation panel for more than
5 minutes, the machine returns to standby mode.
Symbols
The text contains a few symbols that highlight important points or direct you
towards other parts of the manual that are related to the feature currently being
described.
indicates a hint (for example, indicating a page number where
related information can be found).
indicates that you can access the current feature by pressing a
User Function Key provided, if you have already programmed a User
Function Key to perform a particular function.
Using Function 35, you can program User Function Keys as
short cuts to access some features. (See page 163 for more about
programming the User Function Keys).
indicates that you can switch the current feature on or off using
Function 81 or Function 91. Some features must be switched on
before they will work.
indicates that you can operate this feature with an OMR Sheet as
well as from the operation panel. (See page 166 and the pages
following for full details concerning OMR Sheets.)
6
Page 21

HOW TO USE
THIS MANUAL
HOW TO USE THIS MANUAL
STORING TELEPHONE NUMBERS
To dial a telephone number or store it as a Quick Dial or Speed Dial, type it into
the machine at the ten-key pad on the operation panel.
STORING NAMES AND LABELS
You can enter names using the Quick Dial Keys. Use Quick Dial Keys 01 to 26 for
the letters of the alphabet (or 33 to 58 if the quick dial label plate on the operation
panel is flipped over to the right), and use Quick Dial 30 (or 62) as a spacebar.
The letters are printed on the surface of each key. If you wish to enter a digit from
0 to 9, use the ten-key pad.
The cursor appears on the screen as a black dash below the cursor position. If
you wish to move the cursor while editing a name or number, press the ←
and → arrows on the circular scroll key on the operation panel.
If you wish to enter a punctuation mark or symbol, use Quick Dial 31 (or 63). See
"Punctuation Marks and Symbols" on the next page for more details.
Quick Dial 32 (or 64) can be used as a Shift key, to select upper or lower case
letters.
KEY DESCRIPTION KEY DESCRIPTION KEY DESCRIPTION
01/33 A 12/44 L 23/55 W
02/34 B 13/45 M 24/56 X
03/35 C 14/46 N 25/57 Y
04/36 D 15/47 O 26/58 Z
05/37 E 16/48 P 27/59
06/38 F 17/49 Q 28/60
07/39 G 18/50 R 29/61
08/40 H 19/51 S 30/62 Space
09/41 I 20/52 T 31/63 Punctuation Marks
10/42 J 21/53 U and Symbols
11/43 K 22/54 V 32/64 Shift key (see p. 8)
Not used
7
Page 22
HOW TO USE THIS MANUAL
Punctuation Marks and Symbols
SELECT P 1/5
If you press 31 or 63 while entering a
label, a menu of symbols will appear, as
1! 2" 3# 4$ 5% 6&
7’ 8( 9)
NO
shown on the right.
❐ To select a symbol, press the required key on the ten-key pad. For example, if
you wish to enter a ’#’, press 3 . Then move the cursor forward with the
scroll key so that you can enter the next letter, digit, or symbol in the item that
you are typing into the display.
❐ If the symbol that you need is not on the screen, scroll through the pages of
symbols with the ↑ and ↓ keys.
_
TO CANCEL
Shift Key
As shown in example C on page 5, ’ABC’ can be seen in the bottom right of the
display while you are inputting a label. This indicates that upper case letters will
be stored. If you wish to input lower case letters, press 32 or 64 . The ’ABC’
will change to ’abc’, and the letters that you type in will be stored as lower case
letters. To change back to upper case letters, press 32 or 64 again.
IF YOU MAKE A MISTAKE
If you make a mistake when inputting a name or number, either:
❐ Press No to erase the entire name or number and start again.
❐ Press Clear to erase the last letter or digit that you entered.
If you enter the wrong function number, either:
❐ Press No then input the correct function number.
❐ Press Function to return to standby mode and start again.
If you dialed the wrong number, either:
❐ Press No . If scanning has already begun, press Stop .
❐ If you already programmed the number into the machine by pressing Yes,
remove the document from the document feeder and start again, or use the
destination reviewing feature (option 08) to cancel that particular destination
only (see page 52).
8
Page 23
HOW TO USE
THIS MANUAL
HOW TO USE THIS MANUAL
ON/OFF SWITCHES AND USER PARAMETERS
Some of the features in this machine can be switched on or off, and some of them
do not work unless they are switched on first. Other features can be adjusted in
various ways. Each adjustment or on/off switch is explained in the relevant
sections of the manual.
There are two user functions to help you adjust these features and switch them
on/off.
❐ Function 81 (On/Off Switches)
❐ Function 91 (User Parameters)
On/Off Switches
This feature allows you to switch some of the major features of the machine on or
off. The overall procedure is explained below. However, each of the adjustments
that can be made using this procedure are explained in the relevant parts of the
manual.
As well as a series of on/off switches, Function 81 allows access to the following
features.
❐ Telephone Line Type
DP: Pulse Dial
TT: Touch Tone
❐ Halftone Type
SPD MODE: The machine will use the Basic Halftone Process
STD MODE: The machine will use the higher quality Error Diffusion Process.
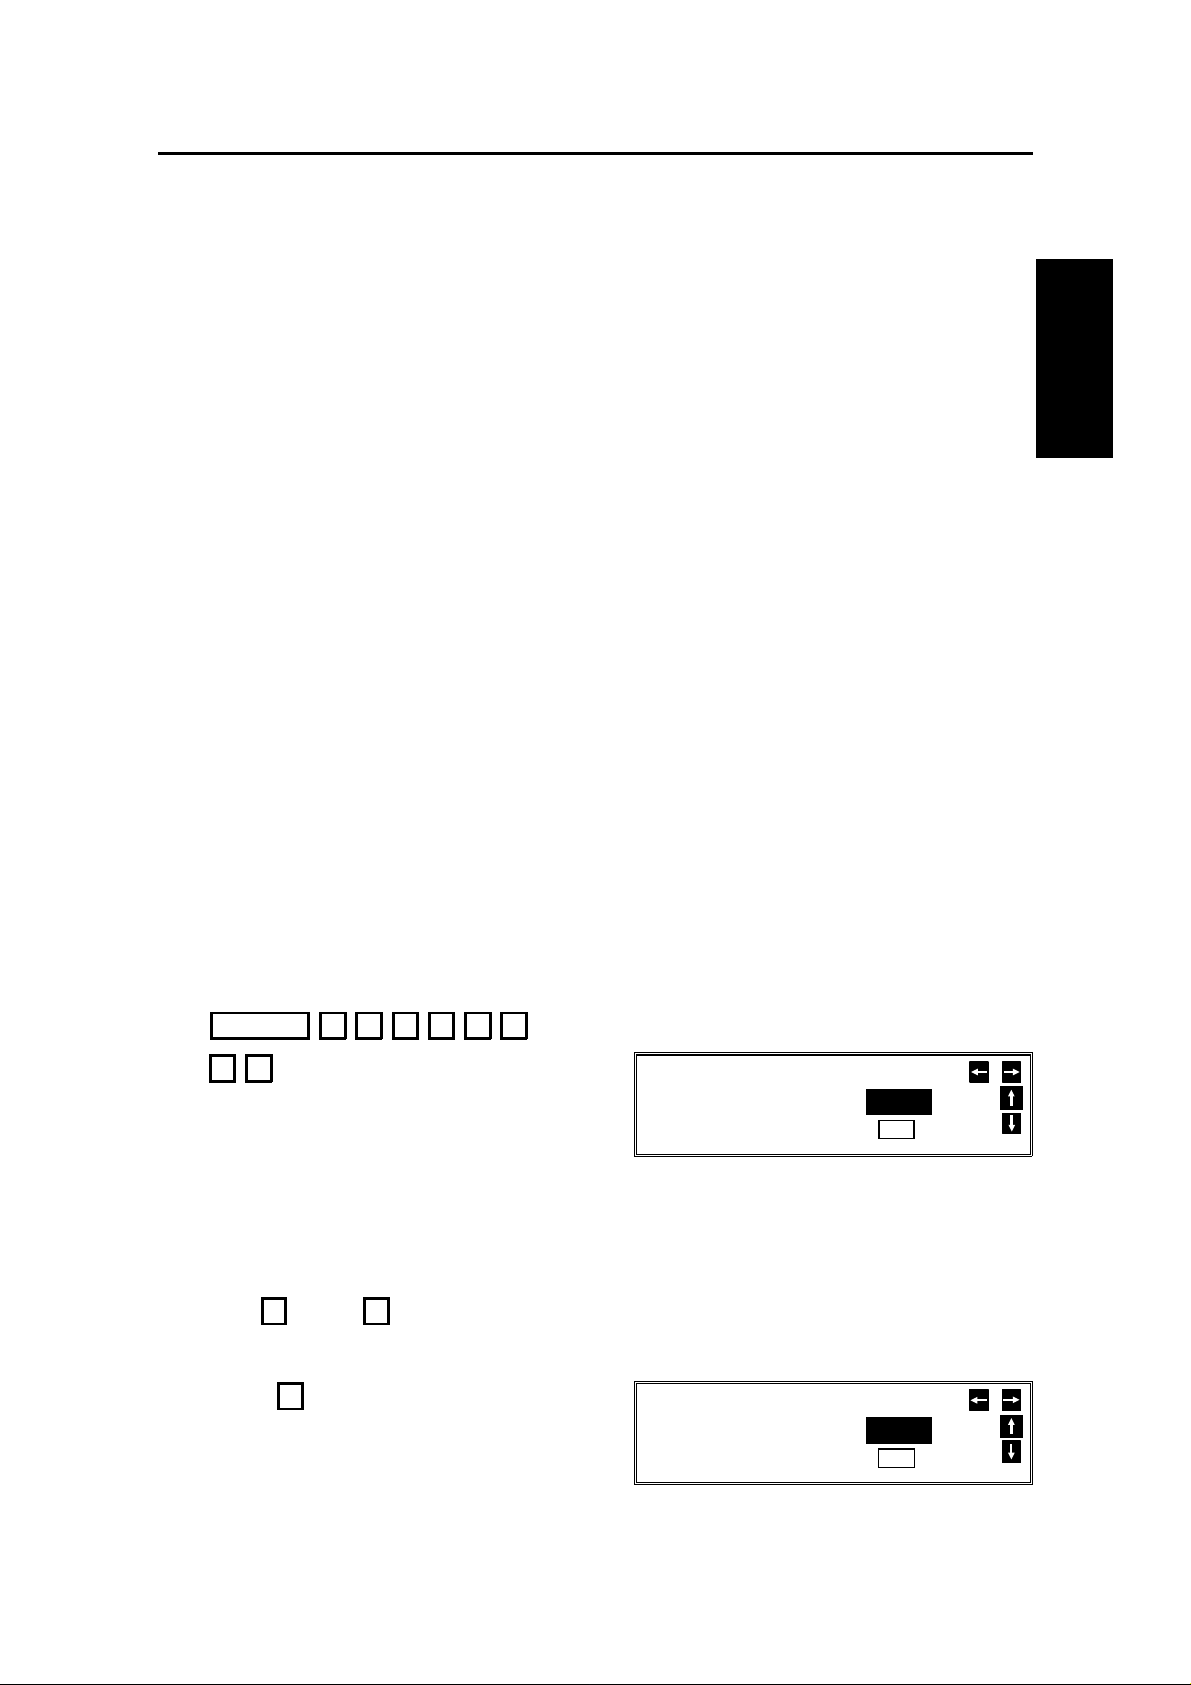
1. Function 6 0 2 2 2 2
8 1
PSTN LINE TYPE SELECT
DP TT
YES
TO END
The first displayed item is the telephone line
type: DP = Pulse Dial, TT = Touch Tone. In
the above display, TT is currently selected.
2. Scroll through the list of features
with ↑ and ↓ until the required fea ture appears.
Example: Authorized Reception press ↓ once.
AUTHORIZ.RX SELECT
ON OFF
YES
TO END
9
Page 24
HOW TO USE THIS MANUAL
3. Change the setting by using ←
or → .
AUTHORIZ.RX SELECT
ON OFF
YES
TO END
4. Either:
❐ Change another setting: Go to step 2.
❐ Finish: Yes Function
A table showing the order of appearance of the switches is given below. Some of
these switches may not be seen depending on the options that you have installed
with the machine (1:Optional Memory or hard disk required, 2: Optional paper
feed unit required, 3: Optional printer interface kit required).
*:This only appears if you have asked a service technician to switch RDS on.
Feature
Telephone Line Type None Halftone Type 8 times
Authorized Reception Once Daylight Saving Time/Summer Time 9 times
Memory Lock
Forwarding
Specified Cassette Selection
Power Saver 5 times
RDS * 6 times
Confidential File Report
1
1
2
1
↓
Twice File Retention Time 10 times
3 times Cassette used for Printer Mode
4 times
7 times
Feature
↓
3
11 times
User Parameter Settings
A wide range of features can be switched on or off by using the User Parameters.
However, this feature is more difficult to use than the On/Off Switches. The
switches and adjustments are presented on the screen as rows of digits. Each
digit can be either 0 or 1. Each feature is allocated one or more digit. The value of
the digit determines the status of the feature.
The overall procedure is explained below. However, each of the adjustments that
can be made using this procedure are explained in the relevant parts of the
manual.
1. Function 6 0 2 2 2 2
9 1
❐ At this time, you can print a User
Parameter List if you press → Start .
10
USER PARAMETER PRINT LIST
DEFAULT: 01000000
SWITCH00: 01000000
YES
TO END
Page 25
HOW TO USE
THIS MANUAL
HOW TO USE THIS MANUAL
2. The current settings for switch 00 are now displayed on the bottom line of the
display. If the settings for this switch are the way that you want them, go to
step 4.
❐ The top line shows the settings normally seen in a machine just delivered
from the factory.
3. To change the required setting, press a
number from 0 to 7 corresponding to the
digit that you wish to change.
Example: 0 . The value of the digit
changes, in this case from 0 to 1.
USER PARAMETER PRINT LIST
DEFAULT: 01000000
SWITCH00: 01000001
YES
TO END
Each switch contains 8 digits, which act as on/off switches for various
features. The digits are numbered from 7 to 0; the setting of digit 7 is shown
at the left side of the display and digit 0 is at the right.
4. Either:
❐ Scroll through the switches with ↑ and ↓ until the required switch
appears. Then go to step 3.
❐ Finish: Yes Function
The user parameter switches are outlined below.
Switch 00 - Home position settings
Digit Purpose
0
1
2
3
4
5
6
7 Halftone 0: Off 1: On
Stamp 0: Off
1: On (successfully scanned documents will be marked)
Resolution Digit 2 Digit 1 Setting Digit 2 Digit 1 Setting
0 0 Normal 1 0 Darken
0 1 Lighten 1 1 Do not use this.
Resolution Digit 4 Digit 3 Setting Digit 4 Digit 3 Setting
0 0 Standard 1 0 Super Fine
0 1 Detail 1 1 Do not use this.
Transmission mode 0: Memory transmission
1: Immediate transmission
If you change any of the contrast, resolution, transmission mode, stamp, or halftone
settings before making a transmission, then:
0: The setting(s) will not return to the home position after the transmission.
1: The setting(s) will return to the home position after the transmission.
11
Page 26
HOW TO USE THIS MANUAL
Switch 01 - Printing of various items on received messages
Digit Purpose
Mark to be printed at the receiving side to distinguish messages that are sent from
your machine when it is acting as a forwarding station (Memory card or hard disk
0
required)
0: Off 1: On
Forwarding mark:
1
2 Reception time 0: Off 1: On
3 TSI printing 0: Off 1: On
4 Checkered mark 0: Off 1: On
5
6, 7 Do not change these settings.
Center mark 0: Off 1: On
The center mark is not printed when the machine is used for making copies
Printing of the Command Information Line (ISDN kit required)
0: Off 1: On
This has the same effect as the TTI On/Off setting.
Switch 02 - Automatic printing of reports
Digit Purpose
0
1 Do not change this setting.
2 Memory storage report 0: Off 1: On
3 Polling reserve report (polling reception) 0: Off 1: On
4 Polling result report (polling reception) 0: Off 1: On
5
6 Polling clear report 0: Off 1: On
7 TCR 0: Off 1: On
Transmission result report (memory transmission)
0: Off 1: On
Transmission result report (immediate transmission)
0: Off 1: On
Switch 03 - Automatic printing of reports, Various
Digit Purpose
Inclusion of part of the image on the following reports: Transmission Result Report,
0
1 Do not change this setting.
2 Transfer Request by Tone Dial 0: Disabled 1: Enabled
3 Secure Transmission home position 0: Off 1: On
4 Batch Transmission home position 0: Off 1: On
5 Specified Image Area home position 0: Off 1: On
6 to 7 Do not change these settings.
Memory Storage Report, Polling Clear Report, Communication Failure Report,
Transfer Result Report, Transmission Deadline Report, Polling Confirmation List
0: No 1: Yes
12
Page 27

HOW TO USE
THIS MANUAL
HOW TO USE THIS MANUAL
Switch 04 - Various
Digit Purpose
0
1
2 Auto reduce 0: Off 1: On
3 Do not change these settings.
4
5 Restricted Access 0: Off 1: On
6
7
Do not change these settings.
Service Report Transmission 0: Disabled 1: Enabled
If this is set to 1, store your dealer’s fax number in Quick Dial Key 63. Then, when
you need to order toner, use the procedure on page 227.
If you wish to use Quick Dial 63 for a number other than that of your dealer, set this
bit to 0. Quick Dial Key 63 can now be programmed in the same way as other Quick
Dial Keys. However, you will not be able to use the Service Report Transmission
feature.
Ordering Toner 0: Disabled 1: Enabled
If this is set to 1, store your dealer’s fax number in Quick Dial Key 64. Then, when
you need to order toner, use the procedure on page 197.
If you wish to use Quick Dial 64 for a number other than that of your dealer, set this
bit to 0. Quick Dial Key 64 can now be programmed in the same way as other Quick
Dial Keys. However, you will not be able to use the Ordering Toner feature.
Switch 05 - Various
Digit Purpose
0 Substitute reception 0: Off 1: On
1
2 Two in One 0: Off 1: On
3 Memory reception if no RTI or CSI received 0: Possible 1: Not possible
4 to 7 Do not change these settings.
Reverse order printing (Memory card or hard disk required)
0: Off 1: On
Switches 06 and 07 - Do not use
13
Page 28
GENERAL PRECAUTIONS
WARNING: Do not attempt any maintenance or troubleshooting other than
that mentioned in this manual. This machine contains a laser
beam generator and direct exposure to laser beams can cause
permanent eye damage.
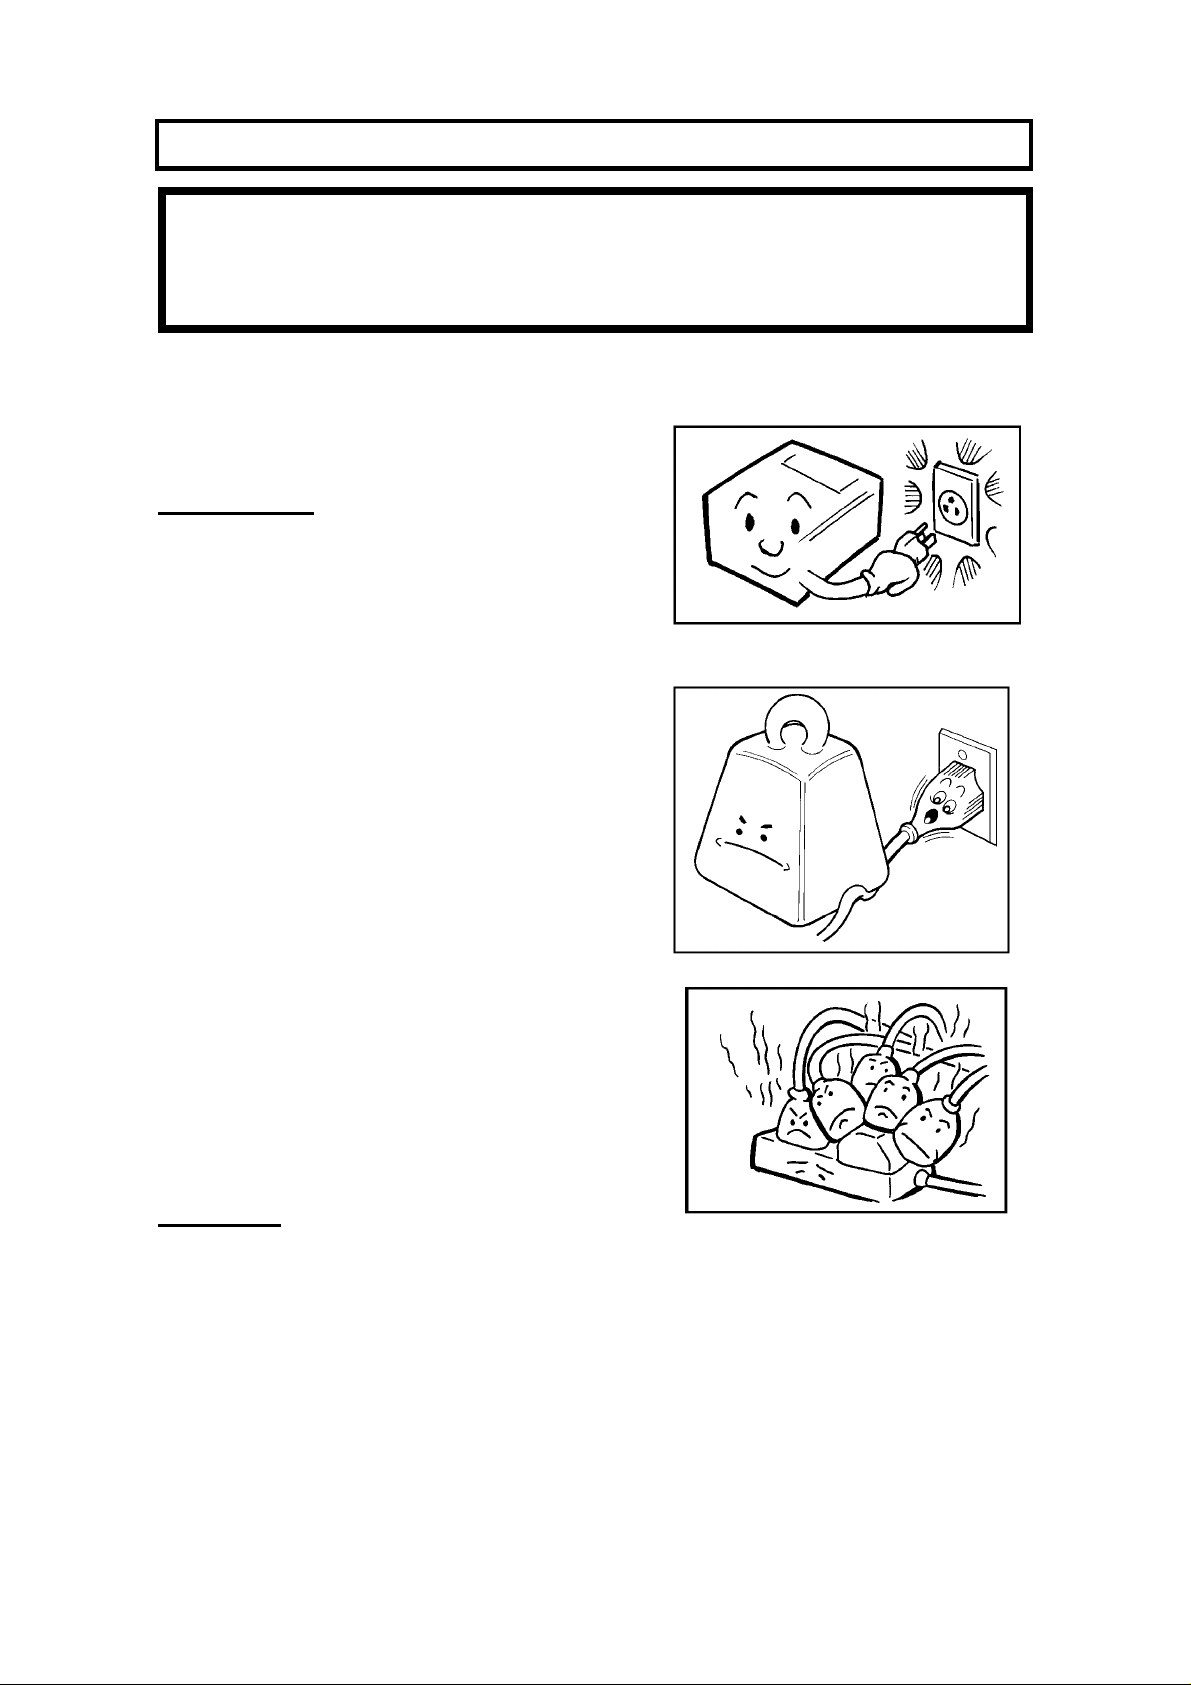
POWER AND GROUNDING
Pay attention to the following.
Power Supply
1. Power requirements: 115 V, 60 Hz
2. Insert the power plug securely into the wall
socket.
3. Make sure that the wall outlet is near the
machine and readily accessible.
4. Do not connect other equipment to the
same socket.
5. Do not step on or set anything on the
power cord.
6. Do not connect other equipment to the
same extension cord.
7. Be sure that the power cord is not in a
position where it would trip someone.
8. The wall outlet must be easily accessible.
Grounding
Ground the machine and the lightning protection circuit in accordance with
regulations. Do not ground to gas or water pipes, or to a telephone ground plug.
Proper grounding is to the ground terminal of the power outlet. Be sure that the
ground terminal of the power outlet is properly grounded.
The lightning protection circuit for the machine requires the machine to be
properly grounded. If proper grounding is provided, about 90% of lightning
damage can be prevented. For safety, be sure to connect the machine to a
three-prong grounded outlet.
14
Page 29
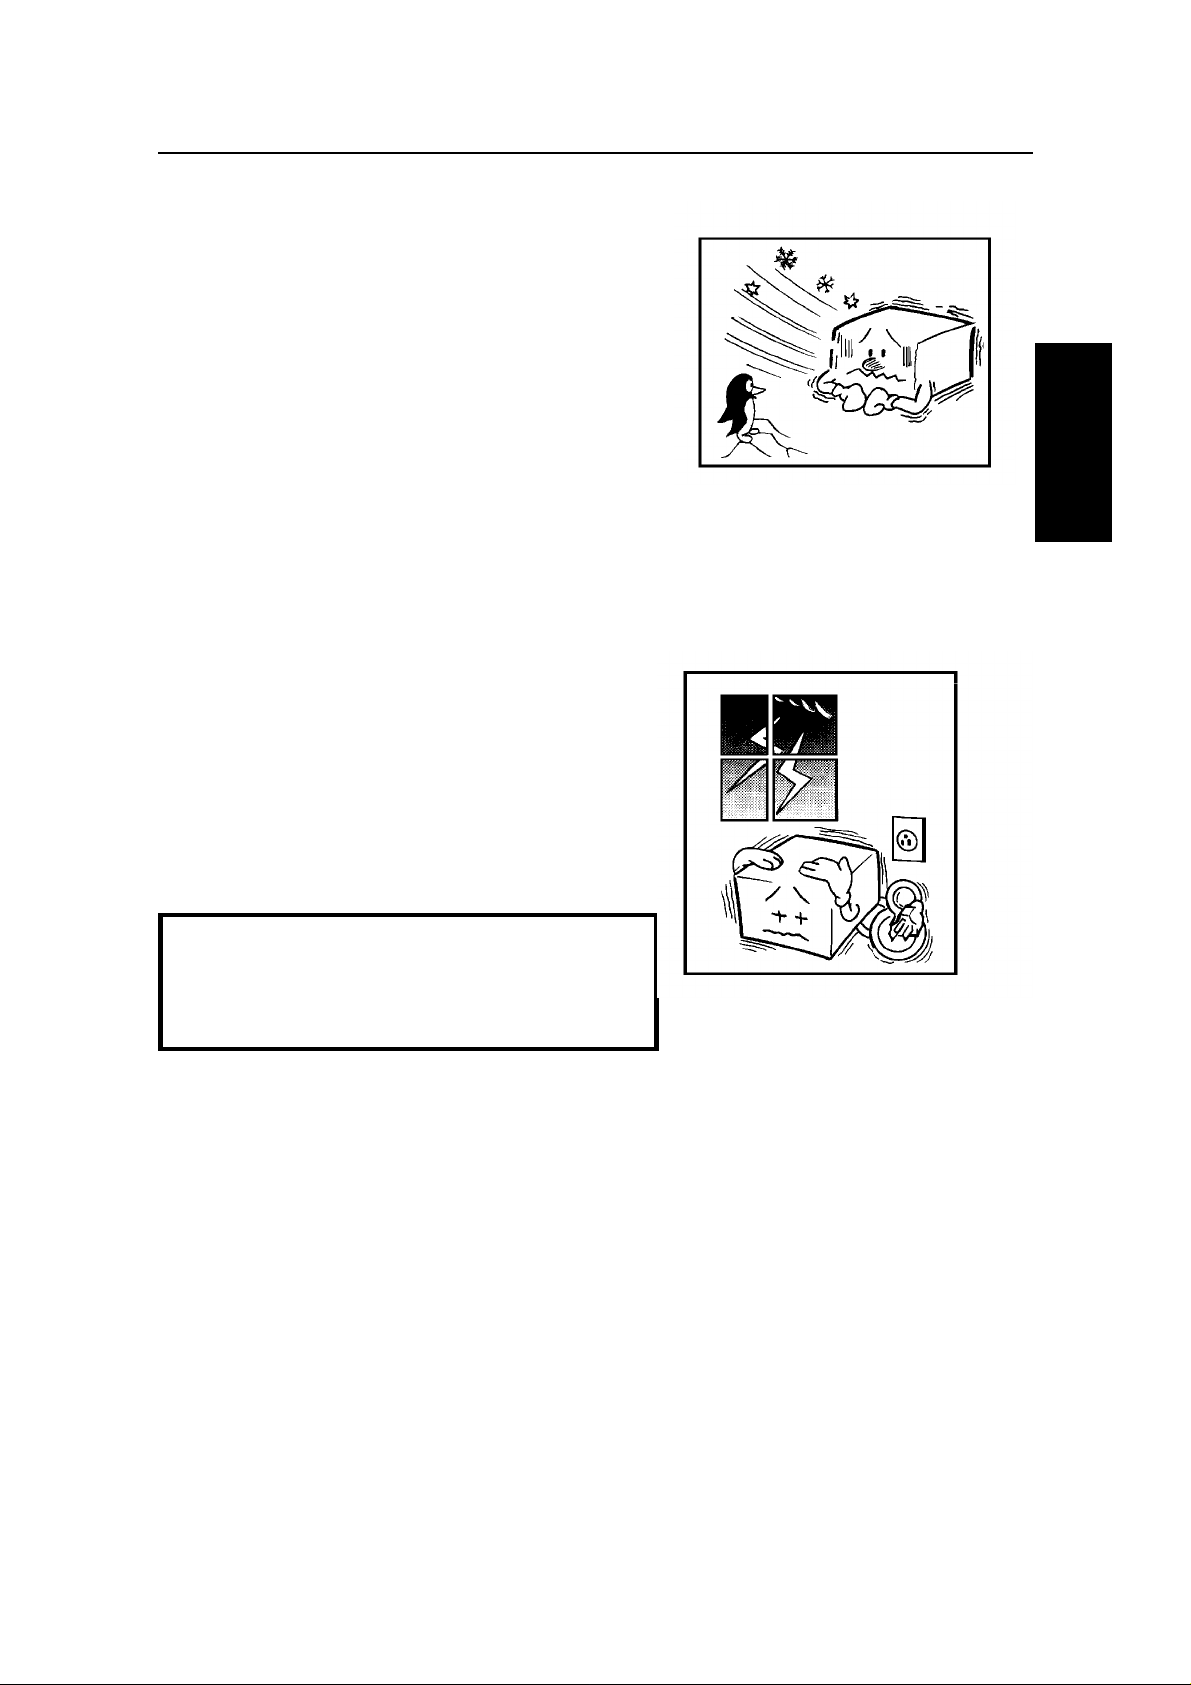
COLD WEATHER POWER-UP
GENERAL
PRECAUTIONS
Avoid raising the room temperature abruptly
when it is below 57°F, or condensation may
form inside the machine.
1. Raise the room temperature to 68°F at
less than 18°F per hour.
2. Wait for 30 to 60 minutes.
3. Turn the power on.
Do not use the machine near a humidifier.
THUNDERSTORMS
GENERAL PRECAUTIONS
With proper grounding, about 90% of lightning
damage can be prevented. However, if
possible, during severe electric storms turn
the power switch off and disconnect the power
cord and telephone line cord.
Note for users with no hard disk
All fax messages stored in the memory
may be erased if power is switched off for
more than an hour.
15
Page 30

GENERAL PRECAUTIONS
COPY PAPER
❐ 15-20 lb. copy paper is recommended: letter or legal sizes are the most
commonly used
❐ Do not use damp paper, or copies will be defective.
❐ Do not touch copy paper if your fingers are wet or oily; fingerprints may appear
on the copy.
❐ Keep paper in a vinyl bag if it will not be used for a long time.
❐ Store in a cool dry place.
❐ Store flat. Do not stand upright.
❐ The following materials cannot be used in the paper trays: Post cards, Tracing
paper, OHP sheets, Adhesive labels
❐ Do not overload the paper trays.
❐ If multi-sheet feeding occurs or dog-eared copies are made when using
recycled paper in the paper tray, fan the recycled paper and load it in the paper
tray again.
TONER CARTRIDGES
❐ Store in a cool, dark place.
❐ Never store where they may be exposed to heat.
❐ Keep out of the reach of children.
❐ Do not eat toner.
❐ Do not lay heavy objects on toner cartridges.
❐ Do not incinerate toner or toner containers. Toner dust may cause flashback
when exposed to an open flame.
OPERATING PRECAUTIONS
❐ While the machine is in operation, do not turn off the main switch or unplug the
power cord.
❐ Keep corrosive liquids, such as acid, off the machine.
❐ Do not allow paper clips, staples, or other small metallic objects to fall inside
the machine.
❐ The fusing unit may be very hot. Be careful when handling it.
16
Page 31

GENERAL
PRECAUTIONS
GENERAL PRECAUTIONS
GENERAL
❐ Read the Important Safety Information at the front of this manual.
❐ Since some parts of the machine are supplied with high voltage, make sure
that you do not attempt any repairs or attempt to access any part of the
machine except those described in this manual.
❐ Do not make modifications or replacements other than those mentioned in this
manual.
❐ When not using the machine for a long period, disconnect the power cord.
OZONE
The machine generates ozone during operation. Normally, the ozone level is
safe for operators. However, during a long copy run or while printing a long
message, ozone odor may appear; in such a case, ventilate the room.
WARNING:
This symbol is attached to some components to alert the user
not to touch them, because they may be very hot.
This symbol is intended to alert the user to the presence of
important operating and maintenance (servicing) instructions in
the literature accompanying the machine.
17
Page 32

GUIDE TO COMPONENTS
4
3
5
6
7
2
1
8
12
9
13
10
14
11
1 Document Table 8 Scanner Release
2 Document Guide 9 Lifting Handle
3 Operation Panel 10 Front Cover Release
4 Telephone : optional 11 Cassette
5 Manual Feed Button 12 Copy Tray
6 Document Tray 13 Lower Cassette(s) or Drawers: optional
Up to 4 units can be added below the
upper cassette
7 Power Switch (on the rear) 14 Base : optional
(labelled Cabinet Type 40 on the carton)
18
Page 33

OPERATION PANEL
OPERATION
PANEL
1
4
1. Power Indicator Lights when the power switch is on. To use the machine, turn the
switch to ’On’.
Communicating
Indicator
Receive File
Indicator
Confidential File
Indicator
Reception Mode
Selector Key
Stamp Key Press to enable or disable the stamp feature.
Line Fail
Indicator
Clear Copy
Indicator
Add Toner
Indicator
Call Service
Indicator
Clear
Original
Indicator
Add Paper
Indicator
Close
Cover
Indicator
Lights when a fax message is being transmitted or received.
Lights when an incoming message was received into memory
because the machine was out of paper or jammed.
Lights when a confidential file has been received and stored in
the memory. Blinks when a message has been stored using
Memory Lock, if no confidential files are present.
Press to select Auto Receive or Manual Receive.
Blinks when transmission fails.
Blinks when paper has jammed in the printer.
Blinks when the toner cartridge is almost empty, and lights when
it is empty.
Blinks when the machine diagnostics detect a problem that
requires service.
Blinks when a document has jammed in the scanner.
Lights when a cassette is empty.
Blinks when a cover is open.
2
3
5 6
19
Page 34

OPERATION PANEL
2. Display Displays prompts, warnings, and selected modes.
Function Key Press to use one of the numbered functions.
Yes/No Keys Use to answer questions on the display.
Scroll Key When an arrow is shown on the display, use this key to access
the options, items, or functions shown by the arrow. Also use it to
move the cursor when programming or editing a displayed item.
3. PC Printer Option
Indicators
Halftone Key Press this to use halftone mode.
Contrast
Selector Key
Resolution Selector
Key
Memory Key If the indicator is lit, your document will be stored before
G4/G3 Selector Key When dialing, press this key to light the indicator that
4. Quick Dial Keys Each of these can be programmed with a telephone number, a
These indicators are only used when the optional Printer
Interface Kit is installed. See the operation manual for the Printer
Interface Kit for full details.
Press this to select either Darken, Normal, or Lighten.
Press this to select either Standard, Detail, or Super Fine.
transmission. If it is not lit, your document will be sent
immediately without being stored. Press the key to change the
mode.
corresponds with the type of network that you wish to
communicate on. The G4 setting is only available if you have
installed the optional ISDN Interface Kit.
group, or a keystroke program. You can also use these keys to
type names and labels such as the RTI and TTI.
To access keys 01 to 32, flip the number plate over to the right.
To access keys 33 to 64, flip the number plate over to the left.
5. User Function Keys Each of these can be programmed for rapid access to frequently
used features. If the light under a key is on, the feature can be
used.
6. Speed Dial/Tel
Directory Key
AI Redial Key Press this to redial one of the last ten numbers that was dialed.
On Hook Dial Key Press this to dial without picking up the handset.
Pause Key Press this if you need to insert a pause when dialing.
Clear Key Use this as a backspace key during programming.
Ten Key Pad Use this as a telephone keypad, or to enter Speed Dial codes.
Stop Key Press this to stop the machine and return it to standby mode.
Start Key Press this to start fax communication.
Copy Key Press this to copy the document now in the feeder.
Press this to dial using Speed Dial or the Telephone Directory
Feature.
20
Page 35

INSTALLING THE MACHINE
INSTALLING THE
MACHINE
LOCATION
For the best possible performance, install your machine in a place which satisfies
the following conditions.
❐ Not exposed to direct sunlight
❐ Well ventilated (air turnover at least three times per hour); to avoid the build-up
of ozone, make sure to locate the machine in a large well-ventilated room
which has an air turnover of more than 30 yd3/hr per person.
❐ Level
❐ Not subject to vibration
❐ Away from other electronic equipment, to avoid interference
❐ Away from areas containing corrosive gas
❐ Dust-free
❐ Condensation-free
❐ Temperature 63 to 82°F
❐ Humidity 40 to 70% RH (do not install near a humidifier)
❐ Away from heaters and air conditioners, to avoid sudden changes of
temperature
❐ Within 5 yards of a three-pin grounded power outlet (115 Volts, 60 Hz)
❐ With the clearance as shown on the right
4 "
4"
NOTE: This machine generates a certain amount of ozone. Although the
amount generated is within safety requirements, it is recommended
that, to avoid ozone buildup, you install the machine in a room which
can be air-conditioned or well ventilated.
4"
21
Page 36

INSTALLING THE MACHINE
CONNECTING THE MACHINE
A service technician will install the machine.
Before using the machine:
❐ Make sure that it is properly connected to the telephone line and the power
outlet, as shown below.
CAUTION
Do not switch on until everything is connected properly.
If you wish to move the machine to a new location, contact a service
technician.
❐ Program the Telephone Line Type setting (use Function 81; see page 28). If
your telephone normally sends out tones when dialing, use the TT setting; if it
normally sends out pulses, use the DP setting. Also, make sure that the switch
on the handset is set up correctly.
IMPORTANT POINTS ABOUT POWER CONNECTION
❐ The wall outlet supply must not vary more than 20 V either side of 115 Vac.
❐ The power cord should not be laid in a place where it might trip somebody.
❐ Do not lay anything on the power cord.
❐ If you have to use an extension cord, make sure that it is capable of carrying
125V/15A, and that your facsimile terminal is the only piece of equipment
connected to that cord.
22
Page 37

BEFORE YOU SEND YOUR FIRST FAX
BEFORE YOU SEND
YOUR FIRST FAX
SOME ITEMS MUST BE PROGRAMMED FIRST
Overview
After you have installed your new machine and connected it to the telephone line,
there are a few things that you have to do before you start to send fax messages
from your new machine.
You should set up your machine’s clock and identification. In fact, for faxes sent to
from, or within the United States, the United States’ Federal Communications
Commission (FCC) states that the fax message must contain header information
that identifies the sender (or the sender’s organization), and the date and time
that the fax was sent. To do this, program the following features.
❐ Date and Time/Daylight Saving Time: see page 24.
❐ RTI (Remote Terminal Identification): see page 26.
❐ TTI (Transmit Terminal Identification): see page 26.
❐ CSI (Called Subscriber Identification): see page 27.
In addition, you also have to make sure that the fax machine’s dialing circuits are
set up correctly. There are two settings: Pulse Dial, and Tone Dial. If you select
the wrong setting, your machine will not be able to dial fax numbers. If you are not
sure which setting to use, contact your telephone company. To change this
setting, see the following section of the manual.
❐ Telephone Line Type: see page 28.
Also, if you have a handset attached to your fax machine, make sure that its
dialing circuit is also set up correctly (there is probably a switch on the side of the
handset).
Language Selection
If your native language is Spanish or French, you can have the machine display
instructions and print reports in either of these languages instead of in English.
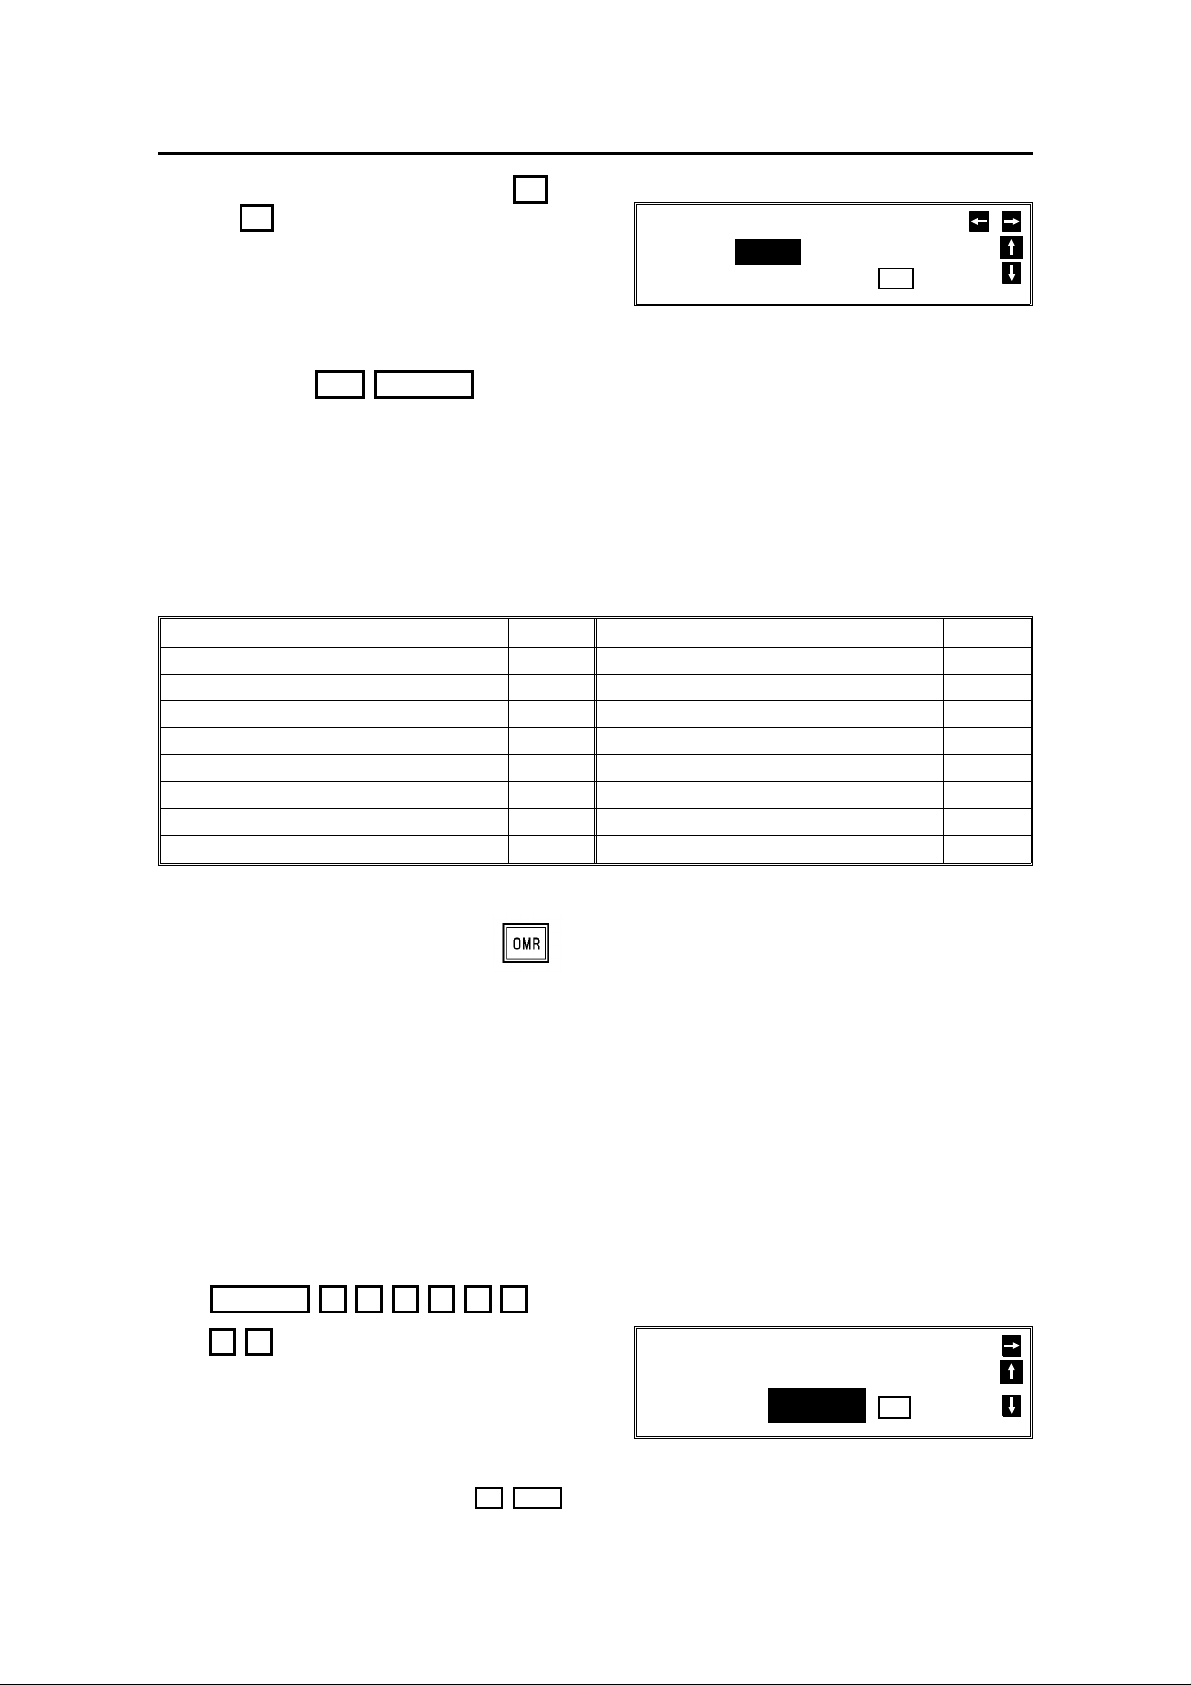
1. Function 6 0 2 2 2 2
9 4
LANGUAGE SELECT
ENGLISH FRENCH SPANISH
YES
TO END
2. Use the ← and → arrows on the
scroll key to move the cursor to the cor rect language. Press Yes Function to finish.
❐ Once you have done this, all displays and reports will be in the selected language.
23
Page 38

BEFORE YOU SEND YOUR FIRST FAX
Date and Time
Your fax machine has an internal clock. It controls the following features.
❐ The time display on the operation panel while the machine is idle.
❐ Operation of time-delay features like Send Later.
❐ The date and time that is printed out on pages that you receive, if Reception
Time is switched on.
❐ The date and time that is printed out at the other end on pages received from
your machine.
Program the correct date and time when you install the machine.
Cross-references:
Send Later: see page 60. Reception Time: see page 149.
Economy Transmission: see page 66.
1. Function 6 0 2 2 2 2 9 2
CLOCK INPUT DATE/TIME
FEB 01 1992 (SAT) 01:56PM
YES
TO END
2. Use the ← and → arrows on the scroll key to move the cursor across
the display. Use the keypad to correct the individual elements.
❐ To change the month, move the cursor to the month and scroll through the
months with the ↑ and ↓ keys.
❐ To change from AM to PM and vice versa, move the cursor to the time, and
press
or # .
*
❐ Press Yes Function when the display is correct.
Daylight Saving Time
Whenever local custom requires advancing the clock or setting the clock back,
use this feature. You can easily move the clock forwards when daylight saving
time begins, and back when it ends.
❐ When you install the machine for the first time, take care that the setting is
correct before you set the date and time.
1. Function 6 0 2 2 2 2 8 1
then ↓ until the screen is as shown
opposite.
24
DAYLIGHT SAVING TIME SELECT
ON OFF
YES
TO END
Page 39

BEFORE YOU SEND
YOUR FIRST FAX
BEFORE YOU SEND YOUR FIRST FAX
2. Use the ← and → arrows on the
scroll key to switch this feature on or off.
3. To store your setting: Yes
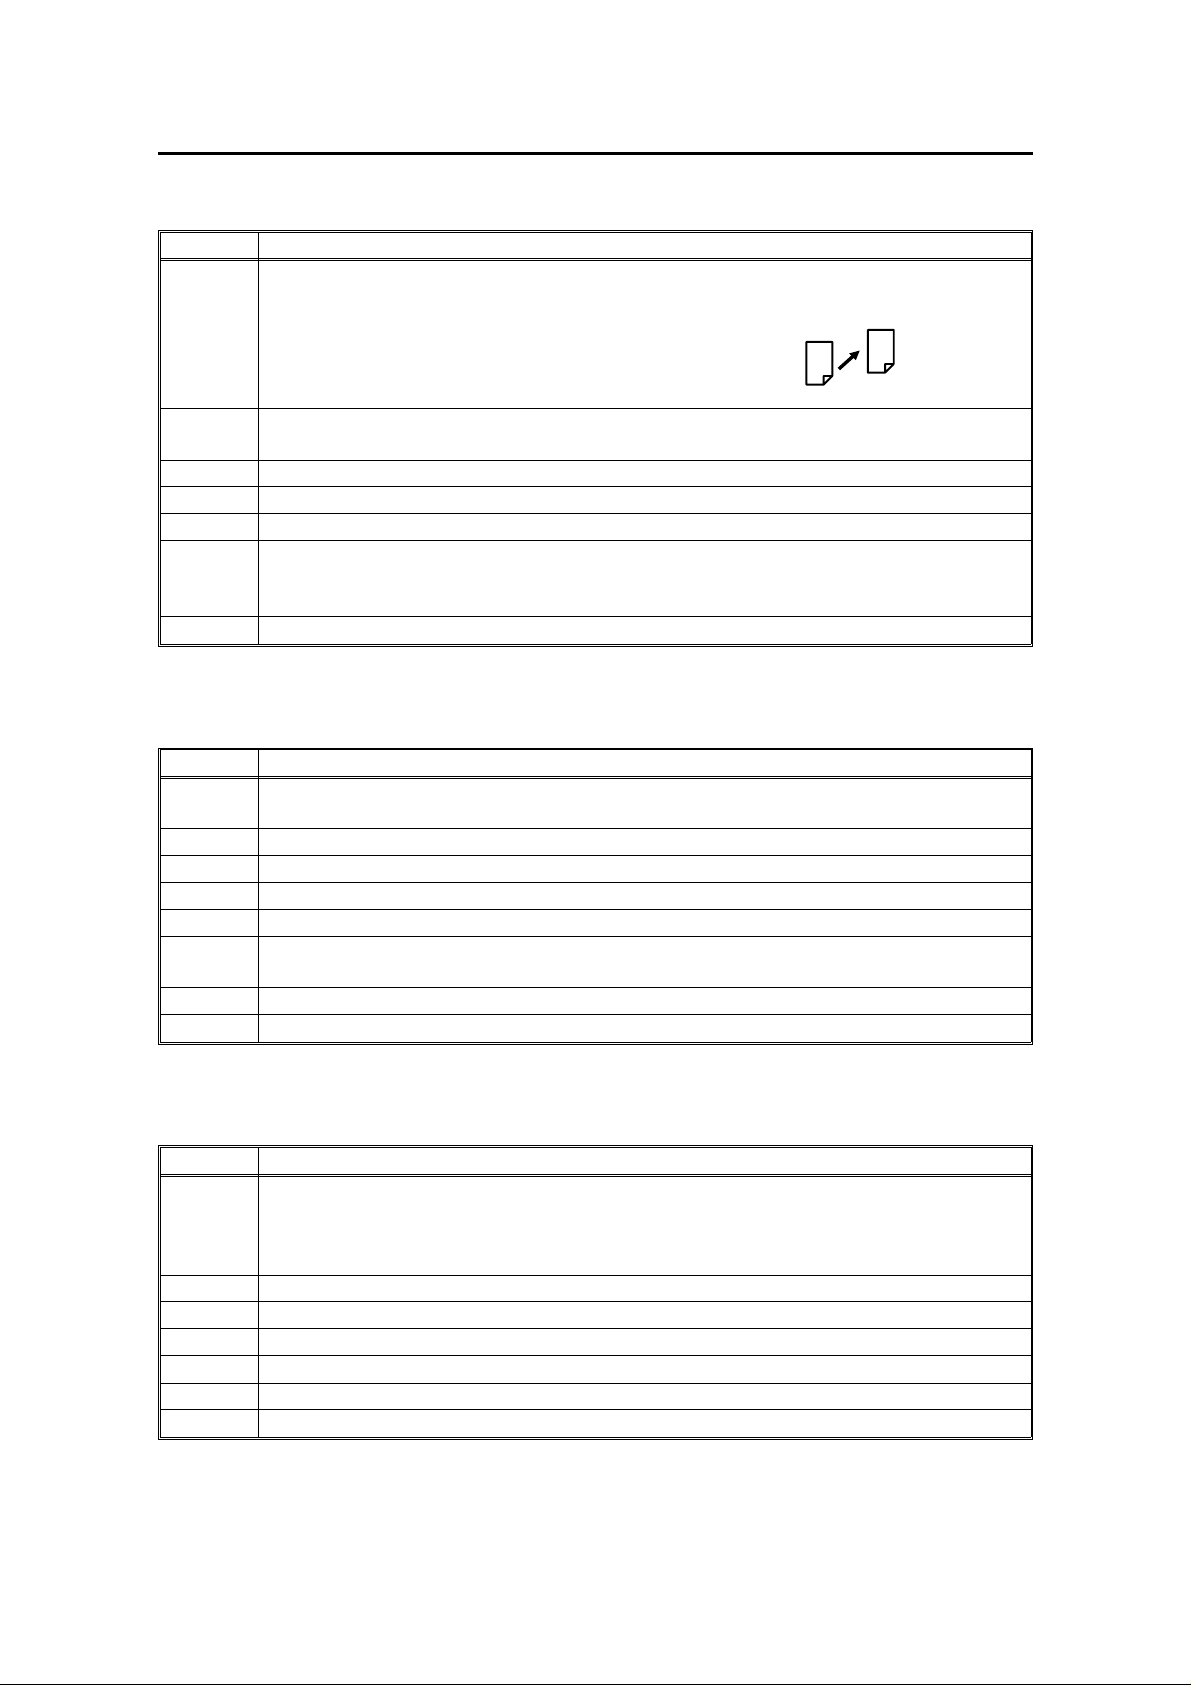
Terminal Identification
There are three labels which identify yourself to the operator at the other end.
These labels are called the RTI, the TTI, and the CSI.
❐ RTI (Remote Terminal Identification) and CSI (Called Subscriber
Identification): These appear at the other end in the display on the operation
panel during communication, and on reports after communication.
❐ TTI (Transmit Terminal Identification): This is printed at the other end at the
top of each page received from your machine.
You can see the RTI, TTI, and CSI of the other party during the communication
(see the following diagram) and on reports printed by the machine later.
RTI or CSI
TTI
Some machines may reject your transmitted fax messages if you have not
stored the RTI, TTI, or CSI in advance.
Note: You can switch the TTI off for a particular transmission if you do not wish
it to be printed on your pages as they are printed at the other end. See
page 64.
25
Page 40

BEFORE YOU SEND YOUR FIRST FAX
RTI (Remote Terminal Identification)
Your RTI appears on the other party’s operation panel during communication, if
the other machine was made by the same manufacturer as yours. The RTI can
have up to 20 characters (numbers and letters can be used, along with some
punctuation marks). Program something easy to recognize, such as your name,
company name, or department name within the company.
1. Function 6 0 2 2 2 2
6 1 then ↓ until the screen is as
shown opposite.
2. Yes
3. Input the RTI that you will be using.
Example: XYZ COMPANY
Note: Not more than 20 characters.
Input and editing are
explained on page 7.
4. Yes Function
TTI (Transmit Terminal Identification)
RTI
YES
TO SET PREVIOUS
NO
RTI
TO CANCEL NEXT
NO
TO CANCEL
_
RTI
XYZ COMPANY ABC
YES
_
CLR . NO
OR
ABC
Your TTI is printed at the other end on the top edge of each page that you send.
The TTI can have up to 32 characters (numbers and letters can be used, along
with some punctuation marks). Program something easy to recognize, such as
your name, company name, or department name within the company.
1. Function 6 0 2 2 2 2
6 1 then ↓ until the screen is as
shown opposite.
2. Yes
TTI
YES
TO SET PREVIOUS
NO
TTI LABEL INSERTION
1. INPUT 2. COPY RTI
TO CANCEL NEXT
SELECT
_
YES
TO END
26
Page 41

3. Either:
BEFORE YOU SEND
YOUR FIRST FAX
❐ Copy the RTI across and store that
as the TTI: 2 . Then go to step 5.
(Or, if you wish to edit the TTI: ↑ Yes )
❐ Input a new TTI or edit the TTI that
is already there: 1 . Go to step 4.
4. Input the TTI that you will be using.
Example: XYZ COMPANY HEAD OFFICE
BEFORE YOU SEND YOUR FIRST FAX
TTI
NO
TO CANCEL
_
ABC
Note: Not more than 32 characters.
Input and editing are
explained on page 7.
TTI
XYZ CO. HEAD OFFICE ABC
YES
OR
_
CLR . NO
5. Yes Function
CSI (Called Subscriber Identification)
Your CSI appears on the other party’s operation panel during communication
instead of your RTI, if the other party’s machine is another manufacturer’s
product. The CSI can have up to 20 characters (only numbers and spaces can be
used). Enter your fax machine’s telephone number, because some features of
your machine may not work if the CSI is not the same as the telephone number.
1. Function 6 0 2 2 2 2
6 1 then ↓ until the screen is as
shown opposite.
CSI
YES
TO SET PREVIOUS
NO
TO CANCEL NEXT
2. Yes
CSI
YES
TO END
_
3. Input your telephone number.
Note: Not more than 20 digits.
❐ If you wish to input a "+" sign, to signify
your international dial access code (this is
a common practice in Europe): 31
CSI
212-555-6789
_
YES
CLR . NO
OR
4. Yes Function
27
Page 42

BEFORE YOU SEND YOUR FIRST FAX
Telephone Line Type
If the setting of this feature is incorrect, you will not be able to dial using the
machine’s keypad or automatic dialer.
There are two basic types of telephone company exchange:
❐ Exchanges using Tone Dialing (also known as DTMF, TT, or sometimes PB)
❐ Exchanges using Pulse Dialing (also known as PD or DP)
The telephone line type setting in your fax machine must match the type of
exchange that you are connected to. If you are not sure what type your local
exchange is, ask the telephone company.
Note: If there is a handset connected to your fax machine, make sure that it is
also set up in the correct dialing mode.
Change the setting for the fax machine using Function 81.
1. Function 6 0 2 2 2 2 8 1
The first displayed item is the telephone line
type: DP = Pulse Dial, TT = Touch Tone. In
the above display, TT is currently selected.
2. Change the setting by using ←
or → .
3. Finish: Yes Function
PSTN LINE TYPE SELECT
DP TT
YES
TO END
28
Page 43

BEFORE YOU SEND
YOUR FIRST FAX
BEFORE YOU SEND YOUR FIRST FAX
QUICK DIAL, SPEED DIAL, AND GROUP DIAL
Three Convenient Ways to Dial
Instead of dialing the full number on the fax machine’s keypad, you can use
Speed Dial, Quick Dial or Group Dial.
These features allow you to store telephone numbers in your machine’s memory.
(A stored number will remain in the memory, and you can use it as many times as
you wish without having to reprogram it.)
Then, when you need to dial a number, just call it up (for example, by pressing the
required Quick Dial Key).
Quick Dial and Speed Dial
Quick Dial and Speed Dial are very convenient for dialing numbers that you often
call, especially if these numbers are very long (like international numbers).
These features greatly improve the convenience of operating your machine.
However, first, you have to program the telephone numbers that you need into the
Quick Dial Keys and Speed Dial Codes in your machine.
After programming your Quick Dials and Speed Dials, you can dial a telephone
number with very few keystrokes.
❐ For Quick Dial, just press a Quick Dial Key then press Start.
❐ For Speed Dial, press the key on the operation panel labeled "Speed Dial",
enter a two-digit Speed Dial Code, then press Start.
You can also access Speed Dial codes using the Telephone Directory feature
(see page 58).
29
Page 44

BEFORE YOU SEND YOUR FIRST FAX
You can store up to 64 Quick Dial Keys and 100 Speed Dial Codes in this model.
When you store a Quick Dial or Speed Dial, you can also store the name of the
other party as a quick reference (this name will be displayed on the operation
panel before you press the Start key, so you can check whether you have
selected the correct number). This label is used with features such as Telephone
Directory or Label Insertion.
For the Quick Dial Keys, you can also attach adhesive labels to the quick dial
plate.
Cross-references
Telephone Directory: see page 58. Label Insertion: see page 120.
Groups
If you frequently send the same message at the same time to more than one
place, program these telephone numbers into a group. Then you can send the
messages to all the addresses in that group with just a few keystrokes.
You can also program a name for that group (for example, "Branch Offices"),
which will be displayed before you press the Start key. This helps you to check
whether you selected the correct group.
You can store up to 10 Groups in this machine.
Groups can be used with the following features.
❐ Sending to More Than One Location (Broadcasting); see page 51.
❐ Transfer Request; see page 87.
❐ Polling Reception; see page 158.
Caution: There are limits on the number of addresses that can be dialed with
each of these features. Do not store more numbers in the group
than the capacity of the feature that you plan to use it with. These
limits are:
Broadcasting: 200 addresses
Transfer Request: 30 addresses
Polling Reception: 200 addresses
30
Page 45

BEFORE YOU SEND
YOUR FIRST FAX
BEFORE YOU SEND YOUR FIRST FAX
Programming Quick Dial
This machine has 64 Quick Dial Keys (01 to 64), each of which can be
programmed as one of the following: Quick Dial Key, Group, Auto Document, or
Keystroke Program. The page number in the following table shows the location of
the programming procedure.
1 Quick Dial A fax or telephone number This page
Group A set of fax numbers that you often wish to
2
Keystroke Program A program of settings, features, and
3
4 Auto Document A page that you often send, such as a map. Page 106
send the same fax to at the same time.
destinations.
Using the following procedure, you can store telephone numbers as Quick Dials.
You can also store a label with each number for use with the Label Insertion
feature.
Cross-reference Label Insertion: see page 120.
Page 38
Page 99
Note: You cannot use the following procedure to store Groups, Keystroke Pro -
grams or Auto Documents.
Programming a New Quick Dial
1. Function 3 1
❐ At this time, you can print a Quick Dial
List if you press → Start .
QUICK DIAL CHOOSE KEY
_
PRINT LIST
NO
TO CANCEL
2. Press the Quick Dial Key that you wish
to program. Example: 01
❐ If you pressed the wrong key,
press No .
3. Yes
QUICK DIAL
01
QUICK DIAL ENTER FAX NUMBER
01
YES
NO
OR
NO
TO CANCEL
_
4. Enter the telephone number at the op eration panel’s ten key pad.
QUICK DIAL
01
2125551234
_
YES
OR
CLR
.
NO
If your machine is behind a PBX, include the access code and a pause before the tel. number.
For an international number, place a pause after the country code. To input a pause, press the
Pause key.
31
Page 46

BEFORE YOU SEND YOUR FIRST FAX
5. Yes
6. Either:
❐ Input a label using the Quick Dial
keys. Then press Yes .
Inputting and editing labels: see page 7.
❐ Do not program a label:
Press Yes .
7. Switch Label Insertion on or off.
Use the ← and → arrows on the
scroll key to select the required setting.
Then: Yes
QUICK DIAL ENTER LABEL
01
_
QUICK DIAL OPTION SETTING
LABEL INSERTION ON OFF
SELECT
QUICK DIAL CHOOSE KEY
_
YES
PRINT LIST
NO
TO CANCEL
ABC
TO END
8. Either
❐ Program another: Go to step 2
❐ Finish: Function
Editing a Quick Dial
1. Function 3 1
2. Press the Quick Dial key that you wish
to edit. Example: 01
❐ If the wrong number is displayed, use
the ↑ and ↓ keys to scroll through
the Quick Dial Keys on the screen.
3. Yes
4. Edit the number.
❐ Use ← and → to move the cursor, and
use Clear to delete the character at the
cursor.
After entering the new number,
press Yes .
QUICK DIAL CHOOSE KEY
_
QUICK DIAL
01 XYZ CO. NEW YORK
2125551234
QUICK DIAL
01
2125551234
_
QUICK DIAL
01
XYZ CO. NEW YORK ABC
_
PRINT LIST
NO
TO CANCEL
YES
OR
YES
OR
YES
CLR . NO
OR
NO
CLR
.
NO
32
Page 47

5. Either
BEFORE YOU SEND
YOUR FIRST FAX
❐ Change the label: Edit the existing
label, then press Yes .
❐ Keep the label as it is: Yes
Inputting and editing labels: see
page 7.
6. Switch Label Insertion on or off.
Use the ← and → arrows on the
scroll key to select the required setting.
Then: Yes
BEFORE YOU SEND YOUR FIRST FAX
QUICK DIAL OPTION SETTING
LABEL INSERTION ON OFF
SELECT
QUICK DIAL CHOOSE KEY
YES
TO END
7. Either
❐ Program another: Go to step 2.
❐ Finish: Function
Erasing a Quick Dial
1. Function 3 1
2. Press the Quick Dial key that you wish
to erase. Example: 01
❐ If the wrong number is displayed, use
the ↑ and ↓ keys to scroll through the
Quick Dial Keys on the screen.
_
QUICK DIAL CHOOSE KEY
_
QUICK DIAL
01 XYZ CO. NEW YORK
2125551234
PRINT LIST
NO
TO CANCEL
PRINT LIST
NO
TO CANCEL
YES
OR
NO
3. Yes
4. Erase the number: No .
QUICK DIAL
01
2125551234
QUICK DIAL ENTER FAX NUMBER
01
YES
OR
_
NO
.
CLR
TO CANCEL
NO
_
After erasing a number, you may store a new one to replace it if you wish.
If you do not wish to store a new number, press No again. Then go to step 2
to continue or press Function if you have finished.
33
Page 48

BEFORE YOU SEND YOUR FIRST FAX
Programming Speed Dials
Using this feature, you can store telephone numbers as Speed Dial Codes. You
can also store a label with each telephone number for use with the Telephone
Directory and Label Insertion features.
Telephone Directory
This makes using Speed Dial Codes more convenient.
When you program a Speed Dial Code, you can program a name and a telephone number.
Then, instead of having to refer to the latest Speed Dial Code list when you want to dial that
number, you can type in the first letter of the name, and scroll through the list of names that
begin with that letter until you find the right one.
You may also program the letter under which you wish to file the label. For example, if a
Speed Dial Code has the label HOTEL NEW YORK, you may wish to file this label under N
instead of under H if your Telephone Directory contains a lot of hotels. This would make it
easier to find using the Telephone Directory feature; type in N instead of H, then scroll through
the N’s until you find the HOTEL NEW YORK.
Cross-reference
Label Insertion: see page 120. Telephone Directory: see page 58.
Programming a New Speed Dial
1. Function 3 2
❐ At this time, you can print a Speed Dial
List if you press → Start .
2. Input the Speed Dial Code that you wish
to program (from 00 to 99).
Example: 0 0
❐ If you input the wrong code,
press No .
3. Yes
4. Enter the telephone number at the op eration panel’s ten key pad.
SPEED DIAL ENTER SPEED CODE
_
SPEED DIAL
00
SPEED DIAL ENTER FAX NUMBER
00
PRINT LIST
NO
TO CANCEL
YES
NO
OR
NO
TO CANCEL
_
SPEED DIAL
00
01144715551234
YES
_
OR
CLR
.
NO
If your machine is behind a PBX, include the access code and a pause before the telephone
number.
For an international number, place a pause after the country code. To input a pause, press the
Pause key.
34
Page 49

BEFORE YOU SEND
YOUR FIRST FAX
BEFORE YOU SEND YOUR FIRST FAX
5. Yes
SPEED DIAL ENTER LABEL
00
_
6. Either:
❐ Input a label using the Quick Dial
keys (such as XYZ CO. LONDON).
Then press Yes .
Inputting and editing labels: see
page 7.
SPEED DIAL
00
INPUT: X ABC
YES
OR
CLR
.
❐ Do not program a label for this
number: Press Yes . Go to step 9.
7. The letter shown next to " INPUT" will be used with the Telephone Directory
feature when searching for a name.
Either:
❐ Do not change the letter : press Yes .
❐ If you wish to use another letter, input the letter.
Example: Change to "L" for London;
Clear L Yes
SPEED DIAL OPTION SETTING
LABEL INSERTION ON OFF
SELECT
YES
TO END
ABC
NO
8. Switch Label Insertion on or off.
Use the ← and → arrows
on the scroll key to select the required
setting. Then: Yes
9. Either:
❐ Program another: Go to step 2.
❐ Finish: Function
SPEED DIAL ENTER SPEED CODE
_
PRINT LIST
NO
TO CANCEL
35
Page 50

BEFORE YOU SEND YOUR FIRST FAX
Editing a Speed Dial
1. Function 3 2
2. Input the Speed Dial Code that you wish
to edit. Example: 0 0
❐ If the wrong number is displayed, press No
or use the ↑ and ↓ keys to scroll
through the Speed Dial Codes on the screen.
3. Yes
4. Edit the number.
❐ Use ← and → to move the cursor, and
use Clear to delete the cursor character.
After entering the new number,
press Yes .
SPEED DIAL ENTER SPEED CODE
_
SPEED DIAL
00 XYZ CO. LONDON
01144715551234
SPEED DIAL
00
01144715551234
_
SPEED DIAL
00
XYZ CO. LONDON ABC
_
PRINT LIST
NO
TO CANCEL
YES
OR
YES
OR
YES
CLR . NO
OR
NO
CLR
.
NO
5. Either
❐ Change the label: Edit the existing
label, then press Yes .
❐ Keep the label as it is: Yes
Inputting and editing labels: see
page 7.
6. Either:
❐ Change the letter in the INPUT col -
umn (for example, to P): Clear P Yes
❐ Do not change the letter: Yes .
SPEED DIAL
00
INPUT: X ABC
SPEED DIAL OPTION SETTING
LABEL INSERTION ON OFF
SELECT
YES
OR
CLR
YES
TO END
.
NO
36
Page 51

7. Switch Label Insertion on or off. Use the
BEFORE YOU SEND
YOUR FIRST FAX
← and → arrows on the scroll key
to select the required setting.
Then: Yes
8. Either
❐ Program another: Go to step 2.
❐ Finish: Function
Erasing a Speed Dial
BEFORE YOU SEND YOUR FIRST FAX
SPEED DIAL ENTER SPEED CODE
_
PRINT LIST
NO
TO CANCEL
1. Function 3 2
2. Input the Speed Dial Code that you wish
to erase. Example: 0 0
❐ If the wrong number is displayed, press No
or use the ↑ and ↓ keys to scroll
through the Speed Dial Codes on the screen.
3. Yes
4. Erase the number: No .
SPEED DIAL ENTER SPEED CODE
_
SPEED DIAL
00 XYZ CO. LONDON
01144715551234
SPEED DIAL
00
01144715551234
_
SPEED DIAL ENTER FAX NUMBER
00
PRINT LIST
NO
TO CANCEL
YES
YES
NO
OR
CLR
OR
NO
TO CANCEL
.
NO
_
After erasing a number, you can store a new one to replace it.
If you do not wish to store a new number, press No again, then go to step
2 to continue or press Function if you have finished.
37
Page 52

BEFORE YOU SEND YOUR FIRST FAX
Programming Groups
Groups allow you to combine some numbers into one group, for easy sequential
transmission to all the numbers in that group. These numbers can be selected
from those already stored in Quick Dial Keys or Speed Dial Codes, or you can
select other numbers by entering them at the keypad.
You can also store a label with each Group. This label will be displayed when you
select the Group.
Note: See page 51 to see how to dial a group.
The Group programming procedure has several modules. Entering Group
Programming mode will be explained first, followed by each of the modules.
Entering Group Programming Mode and Selecting a Group
1. Function 3 3
❐ At this time, you can print a Group List if
you press → Start .
2. Input the number of the group that you
wish to program.
❐ There are 10 groups, from 01 to 10.
Example: Group 01, 0 1 Yes
❐ If this group already exists, go to step 4.
❐ If you input the wrong group number,
press No .
3. Press the Quick Dial Key in which you
wish to store this new group.
Example: 08
❐ If you pressed the wrong key: No
GROUP DIAL GROUP SETTING
G PRINT LIST
_
GROUP DIAL CHOOSE KEY
G 01
GROUP DIAL
G 01 08
_
NO
TO CANCEL
YES
NO
YES
TO SKIP
TO CANCEL
NO
OR
4. Yes
GROUP DIAL SELECT
G 01 08 DEST. 0
1. ADDRESS 2. CHECK 3. LABEL
YES
TO END
_
You are now ready to access one of the five Group Programming Modules. These
are explained on the following pages.
38
Page 53

BEFORE YOU SEND
YOUR FIRST FAX
BEFORE YOU SEND YOUR FIRST FAX
Storing Numbers in a Group
First, enter Group Programming mode as explained on page 38. Then:
1. Press 1 .
2. Input the number that you wish to store
in the group. For example:
❐ Quick Dial 25: 25
❐ Speed Dial 00: Speed Dial 0 0
❐ Full number: Input at the keypad
on the operation panel.
GROUP DIAL ENTER FAX NUMBER
G 01 08 DEST. 0 NO TO CANCEL
_
GROUP DIAL
G 01 08 DEST. 0
25 XYZ COMPANY ROME
GROUP DIAL
G 01 08 DEST. 0
00 XYZ COMPANY PARIS
GROUP DIAL
G 01 08 DEST. 0
011-44-21-5842261
YES
YES
YES
_
OR
OR
OR
CLR
CLR
CLR
.
.
.
NO
NO
NO
3. Store the number in the group: Yes
❐ The number after DEST has increased by 1.
The number after DEST shows how many
telephone numbers are stored in the group.
GROUP DIAL ENTER FAX NUMBER
G 01 08 DEST. 1 NO TO CANCEL
_
NOTE: Do not store more than 200 numbers in a Group. If you plan to use
this Group for Transfer Requests, do not store more than 30 in it.
4. Either:
❐ Input another number: Go to step 2.
❐ Finish storing numbers in this
group: No .
GROUP DIAL SELECT
G 01 08 DEST. 0
1. ADDRESS 2. CHECK 3. LABEL
YES
TO END
Now, you can either:
❐ Use another module (press a key from 1 to 5).
❐ Start working on another Group (press Yes then go to step 2 of the
procedure on page 38).
❐ Return to standby mode by pressing Function .
_
39
Page 54

BEFORE YOU SEND YOUR FIRST FAX
Checking Which Numbers are Already in the Group
First, enter Group Programming mode as explained on page 38. Then:
1. Press 2 .
GROUP DIAL NO TO CANCEL
G 01 08 DEST. 1/25 CLR:
XYZ COMPANY ROME
2. Press ↓ to scroll through the numbers
on the display.
❐ To erase the displayed number:
Clear .
❐ When you have finished checking
this group: No .
3. Now, you can either:
❐ Use another module (press a key
GROUP DIAL SELECT
G 01 08 DEST. 0
1. ADDRESS 2. CHECK 3. LABEL
YES
from 1 to 5).
❐ Start working on another Group
(press Yes then go to step 2 of the procedure on page 38).
❐ Return to standby mode by pressing Function .
Storing a Label for this Group
First, enter Group Programming mode as explained on page 38. Then:
CLR
_
TO END
1. Press 3 .
GROUP DIAL ENTER LABEL
G 01 08
2. Input a label for the group using the Quick Dial keys.
Example: EUROPE BRANCHES
Inputting and editing labels: see
page 7.
3. Press Yes .
GROUP DIAL
G 01 08
EUROPE BRANCHES ABC
GROUP DIAL SELECT
G 01 08 DEST. 0
1. ADDRESS 2. CHECK 3. LABEL
YES
CLR . NO
OR
_
YES
Now, you can either:
❐ Use another module (press a key from 1 to 5).
❐ Start working on another Group (press Yes then go to step 2 of the
procedure on page 38).
❐ Return to standby mode by pressing Function .
ABC
_
TO END
40
Page 55

BEFORE YOU SEND
YOUR FIRST FAX
BEFORE YOU SEND YOUR FIRST FAX
Storing a Group Transfer Station
The Group Transfer Station is one of the features of this machine that allows you
to set up fax transmission networks.
Briefly, the Group Transfer Station allows another party to send you a fax
message and instruct your machine to send it to each number in the same Group,
through the Group Transfer Station, which acts as a broadcaster. This means that
your machine will relay the fax message to the Group Transfer Station, and that
station will then send it on to each of the numbers stored in that Group. All this will
be done automatically, without requiring your presence at the machine.
D
C
E
F
A
B
Your Machine
Group:
Group Transfer Station: C
End Receivers: D, E, and F
The use of the Group Transfer Station is described in more detail in the section
entitled "Networking".
To store a Group Transfer Station for a particular Group, first, enter Group
Programming mode as explained on page 38. Then:
1. Press 4 .
GROUP DIAL ENTER TRANSF. STN
G 01 08 DEST. 0 NO TO CANCEL
_
2. Store the telephone number of the termi nal that you wish to act as the Group
Transfer Station for this group.
❐ Input the number as a Quick Dial, Speed Dial,
or full number at the keypad.
Example: Quick Dial 15, press 15 .
GROUP DIAL
G 01 08 DEST. 0
15 XYZ COMPANY LONDON
YES
OR
CLR
.
NO
41
Page 56

BEFORE YOU SEND YOUR FIRST FAX
3. Yes
GROUP DIAL SELECT
G 01 08 DEST. 0
1. ADDRESS 2. CHECK 3. LABEL
YES
TO END
Now, you can either:
❐ Use another module (press a key from 1 to 5).
❐ Start working on another Group (press Yes then go to step 2 of the
procedure on page 38).
❐ Return to standby mode by pressing Function .
Erasing the Group
This procedure deletes this Group and all the numbers stored in it. The Speed
Dial Codes and Quick Dial Keys that you used in this Group will not be deleted
from the memory; you can continue to use them for other purposes.
First, enter Group Programming mode as explained on page 38. Then:
1. Press 5 .
GROUP DIAL
G 01 08 WILL BE ALL CLEARED
.
CLEAR?
YES
NO
_
2. Either:
❐ To delete the group: Yes
❐ To keep the group: No
GROUP DIAL SELECT
G 01 08 DEST. 0
1. ADDRESS 2. CHECK 3. LABEL
YES
Now, you can either:
❐ Use another module (press a key from 1 to 5).
❐ Start working on another Group (press Yes then go to step 2 of the
procedure on page 38).
❐ Return to standby mode by pressing Function .
_
TO END
42
Page 57

BEFORE YOU SEND
YOUR FIRST FAX
BEFORE YOU SEND YOUR FIRST FAX
Limits on the Use of Stored Telephone Numbers
When you use the three features listed in the following table, you can dial more
than one number. However, there are some limitations, as explained on this page.
COMMUNICATION
FEATURE
Broadcasting 51 200
Transfer Request
(✬1)
Polling Reception
PAGE MAX. NUMBER OF
ADDRESSES/FAX
MESSAGE
87 30
158 200
TOTAL
FAXES
200
TOTAL
ADDRESSES
FOR ALL
FAXES
500
(Note: Any
fax number
can be used
for more than
one fax
message at
the same
time)
MAX. STORED
PAGES
1200 (✬4)
The following table shows how many telephone numbers you can store in the
machine.
Quick Dials 64
Speed Dials 100
Ten Key Pad (✬2) 65
Groups (✬3) 10
✬1 The limitations on this feature are imposed by the capacity of the broadcasting
machine.
✬2 This is the number of full telephone numbers that can be input into the
machine at any one time. For example, if there is a broadcasting operation in
memory using 64 full numbers, you can only input one more full number for
any operation, including storage in groups, until the broadcast has finished.
Also, if you have stored, say, 30 numbers at the ten key pad into your groups,
then you will only be able to input 35 full dial numbers at any one time for
other operations, such as broadcasting.
✬3 You can program up to 10 groups. Each group can contain up to 200
numbers; however, if you plan to use a Group for Transfer Request, make
sure that this group does not have more than 30 numbers.
You can store any Quick Dial or Speed Dial number in a group. You may also
store up to 65 numbers that are not programmed as Quick or Speed Dials;
see Note 2 above for the restrictions on the use of these numbers.
✬
4 This is the theoretical maximum number of pages that can be stored. In
practice, you will only be able to store this number of pages if you install the
optional hard disk unit.
43
Page 58

BEFORE YOU SEND YOUR FIRST FAX
DEALING WITH JUNK FAX MAIL
The following features will help you to reject unwanted junk fax mail.
❐ Authorized Reception: see page 132.
❐ Closed Network (Reception): see page 152.
❐ Rejection of messages from unauthorized senders: see page 131.
OTHER ITEMS TO PROGRAM AT YOUR LEISURE
The following features will help you use the machine more quickly and efficiently.
❐ Auto Document: see page 106.
❐ User Function Keys: see page 163.
❐ Function Programs: see page 164.
❐ Keystroke Programs: see page 99.
❐ Chain Dialing: see page 116.
❐ Ordering Toner: see page 197.
To use the full range of features provided by this fax machine, you need to
program other items. These procedures are all given in the relevant sections of
the manual.
44
Page 59

ROUTINE OPERATION
ROUTINE
OPERATION
SENDING A FAX MESSAGE
Precautions Concerning Unacceptable Document Types
Before you send your document, make sure that it meets the following
requirements.
Caution: Documents that do not meet these requirements can cause your
machine to jam or may cause some components of the machine to become
damaged or dirty.
Correct Size for the Document Feeder
Thickness: 2 to 8 mils (20 lb paper)
Length and Width: See the above diagram.
If the page is too short, put it inside a document carrier or enlarge it with a copier.
If the page is too long, divide it into two or more sheets.
Clearly Written
Small faint characters may not be transmitted clearly.
Uniform Page Size
Do not use different sizes of document in the same transmission.
Dry Ink
All ink must be dry before you place the document in the feeder.
45
Page 60

SENDING A FAX MESSAGE ROUTINE OPERATION
Page Condition
Do not place damaged pages in the automatic document feeder.
Originals that contain the following materials should not be placed in the
document feeder. Make copies of these originals and scan the copies.
Note: Copies made with a copier that uses silicone oil may cause a misfeed. To
avoid this, do not scan such copies until five or ten minutes after copying.
46
Page 61

ROUTINE
OPERATION
ROUTINE OPERATION SENDING A FAX MESSAGE
Transmission Procedure at a Glance
Overview
There are two ways to send a fax message.
❐ Immediate Transmission
❐ Memory Transmission
Immediate Transmission
Immediate Transmission is convenient when:
❐ You wish to send a message immediately
❐ You quickly wish to check whether you have successfully connected with the
other party
❐ Your machine’s memory is getting full
The machine dials immediately after you press Start (or at the specified later time,
if you used a time-delay feature like Send Later). The message is scanned and
transmitted page by page without being stored in memory.
47
Page 62

SENDING A FAX MESSAGE ROUTINE OPERATION
Memory Transmission
Memory Transmission is convenient because:
❐ Fax messages can be scanned much more quickly (you can take your
document away from the fax machine without waiting too long).
❐ While your fax message is being sent, another user can operate the machine
(people will not have to wait by the fax machine too long).
❐ You can send the same message to more than one place with the same
operation.
After you press Start, the machine doesn’t dial until all the pages of your fax
message have been stored in the memory.
The default mode of this machine is Memory Transmission, so the procedures
described in this manual will be based on the assumption that you are using
Memory Transmission. Immediate Transmission is described in a separate
section.
Cross-references
Send Later: see page 60. Economy Transmission: see page 66.
48
Page 63

ROUTINE
OPERATION
ROUTINE OPERATION SENDING A FAX MESSAGE
Sending to Just One Location
1. Make sure that the machine is in standby mode:
❐ The display on the operation panel must
be as shown on the right.
MEMORY TRANS. APR. 4. 12:25PM
SET DOCUMENT
MEMORY 100%
2. Carefully place your fax message into
the auto document feeder.
❐ To dial without placing the message in the
feeder first, see Direct Fax Number Entry on
page 68.
❐ If you only wish to scan a part of the
document, use the Specified Image Area
feature. See page 118 for details.
❐ The pages must be placed face down in the
feeder, with the first page at the bottom of the
stack.
❐ Feed the pages in so that the top edge goes in
first.
❐ Do not feed in more than 50 pages.
❐ Do not use unsuitable types of original (see
pages 45 and 46).
❐ Adjust the document guides to fit the width of
the pages.
MEMORY TRANS. OPTIONS
ENTER FAX NUMBER
_
❐ Do not use pages of different sizes.
❐ The pages should be arranged loosely,
but the leading edges should be tidy, as
shown above.
Selecting Contrast and Resolution: See page 54.
Options for Sending a Message: See page 59.
Scanning only a part of the document (Specified Image Area): See page 118.
49
Page 64

SENDING A FAX MESSAGE ROUTINE OPERATION
3. Dial in one of the following ways.
a) Ten Key Pad b) Quick Dial c) Speed Dial d) Handset
If your machine is behind a PBX, dial the access code, then a pause, then the telephone
number.
For an international number, press the Pause key after entering the country code.
MEMORY TRANS. OPTIONS
PRESS YES OR CLR
2125551234
✬ : Only if the telephone handset is installed.
.
NO
_
✬
4. Start
The machine stores your fax message.
STORING MEMORY 99%
PAGE 1
FILE NO. 0056
5. The machine dials, and the line to the other party is connected.
Note: Watch the display. The identification of the other party will appear.
6. After sending the message, the machine hangs up automatically.
50
Page 65

ROUTINE
OPERATION
ROUTINE OPERATION SENDING A FAX MESSAGE
Sending to More Than One Location (Broadcasting)
1. Make sure that the machine is in standby mode (see page 49).
2. Make sure that the Memory indicator is lit. If it is not, press
Memory .
3. Place your fax message face down into the feeder.
If you only wish to scan a part of the
❐
document, use the Specified Image Area
feature. See page 118 for details.
To broadcast without placing the
message in the feeder first, see page 68.
MEMORY TRANS. OPTIONS
ENTER FAX NUMBER
_
Selecting Contrast and Resolution: See page 54.
Options for Sending a Message: See page 59.
Scanning only a part of the document (Specified Image Area): See page 118.
4. Dial in one of the following ways.
You can program a User Function Key
for use with Group Dial. See below.
a) Ten Key Pad b) Quick Dial c) Speed Dial d) Group Dial ✬
MEMORY TRANS. OPTIONS
PRESS YES OR CLR
2125551234
.
NO
_
✬ : Method 1: Press the Quick Dial Key the Group is stored in (in the example, press key 08).
Method 2: If you do not know which Quick Dial Key the Group is stored in but you do know
the Group number, use Method 2. You must have programmed one of the User Function
Keys in advance with code 02 (Group Dial), using Function 35 (see page 163). In the above
example, F4 has been made the Group Dial key; press F4 then input the Group number.
If your machine is behind a PBX, dial the access code, then a pause, then the telephone
number. For an international number, place a pause after the country code. To input a pause,
press the Pause key.
51
Page 66

SENDING A FAX MESSAGE ROUTINE OPERATION
5. Yes
Here, DEST: 2 indicates that the machine is
asking you to input the second telephone
number in your list of destinations for this fax
message.
MEMORY TRANS. OPTIONS
ENTER NO. OR
START
DEST: 2
_
6. Either
❐ Dial another number: Go to step 4.
❐ Press
Start .
STORING MEMORY 99%
PAGE 1
FILE NO. 0056
The machine will dial the first destination (or, if you selected Send Later, it will
return to standby mode and the fax message will be sent at the time that you
selected).
NOTE: In theory, you can send the same fax message to up to 200 different
destinations using the above procedure. However, this number
depends on how many numbers are currently waiting in memory to be
dialed. See the table on page 43 for more information concerning the
limitations to this feature.
Check your Destinations Before Dialing
If you wish to send a fax message to more than one location, you can scroll
through the list of telephone numbers that you have input so far to check whether
you have missed any out or entered any wrong numbers.
This feature is useful when using features such as Broadcasting, Transfer
Request, and Polling Reception.
Cross-reference
Broadcasting: see page 51. Transfer Request: see page 87.
Polling Reception: see page 158.
1. Press ↓ 0 8
❐ The number after DEST shows how
many numbers you have input so far.
CHECK DEST. PRESS
01 XYZ CO. NEW YORK
DEST.: 2
YES
OR
NO
2. Use the ↓ arrow to scroll through the list of destinations that you have
already input.
❐ To cancel a destination that you have input by mistake:
No
❐ To finish checking: Yes
52
Page 67

ROUTINE
OPERATION
ROUTINE OPERATION SENDING A FAX MESSAGE
Possible Problems
You want to take out the document
Press the scanner release button, open the scanner, and take out the document.
Caution: Do not pull out the document without opening the scanner, or you
will damage the machine.
You want to send more than 50 pages
While the last page is being fed in, place more pages (up to 50) in the feeder.
You made a mistake while dialing
If you already pressed
If you haven’t pressed
No . The entire number is deleted. Enter a new number.
❐
Clear . Only the last digit is deleted.
❐
Start , press Stop immediately.
Start yet, either:
Indicators are blinking
❐ If the Clear Original indicator ( ) is blinking:
Take out the document (see page 213). Then redial the destination.
❐ If the Line Fail indicator ( ) on the operation panel is blinking:
If the Communicating lamp is not lit, press
Stop .
If the Communicating lamp is lit, wait until it goes out, then press
The buzzer is ringing
The other party wishes to speak with you. Proceed as shown below.
Stop .
53
Page 68

SENDING A FAX MESSAGE
ROUTINE OPERATION
Contrast, Resolution, and Halftone Modes
You may wish to send many different types of fax message. Some of these may
be difficult to reproduce at the other end. However, your machine has three
settings that you can adjust to help you transmit your document with the best
possible image quality.
CONTRAST
Orgnal A
1
1
TYPEWRITi
Contras! Normal
Darken
Contrast
I
R - Black
+
RESOLUTION
Or[gmal B
+
Resolukm Standard
+
Resolullon
EIetall
,——
I
1
I
If you are not sure whether your settings are suitable, make a copy of the
document using these settings The printout shows how the fax message will
look when it is printed at
#
If your fax message has more than one page, you can select different settings
the other end.
for each page. For example, if you wish to use a different resolution just for
page 2, change the resolution setting while page 1 is being scanned. Then,
while page 2 is being scanned, you can return the resolution setting to the
original setting.
54
Page 69

ROUTINE OPERATION SENDING A FAX MESSAGE
Contrast
The text and diagrams in your document must stand out clearly from the paper
they are written on. If your document has a darker background than normal (for
example, a newspaper clipping), or if the writing is faint, adjust the contrast.
There are three grades.
Normal: Suitable for most documents
Darken: Use for documents with faint writing (such as those written in pencil)
Lighten: Use for documents that have a dark or patchy background
Resolution
If your document contains fine print or detailed diagrams, use a higher resolution
setting.
Standard: Suitable for most typewritten documents
Detail: Use for documents with small print or fine details
Fine: Use this for high quality reproduction
Super Fine: 400 dpi memory option required
Note: Super fine is available when the sender and receiver each have the 400 dpi
option.This machine has 4 resolution modes, but there are 3 resolution indicators
on the operation panel. So, when you would like to know which mode you are
using, see the mode column on the TCR report.
Halftone
If your document contains a photograph, or diagrams with complex shading
patterns or grays, switch Halftone Mode onto achieve optimum image quality.
‘—-1
Without Halftone
With Halftone
-–1
55
Page 70

SENDING A FAX MESSAGE ROUTINE OPERATION
Selecting the Halftone Type
This model has two types of Halftone, the Dither Process, and the higher quality
Error Diffusion Process. To change the currently used Halftone type, perform the
following procedure.
Function 6 0 2 2 2 2 8 1
1.
PSTN LINE TYPE SELECT
DP TT
YES
TO END
2. Scroll through the list of features with
↑ and ↓ keys until SELECT
the
HALFTONE appears.
SELECT HALFTONE SELECT
SPD MODE STD MODE
YES
TO END
3. Change the setting by using
SPD MODE: The machine will use the Basic Halftone Process.
STD MODE: The machine will use the higher quality Error Diffusion Process.
← or → .
4. Finish: Yes Function
Halftone Mode slows down the transmission speed, and may increase your
communication costs, especially if you use the Error Diffusion process. Higher
resolutions also do this. This is because these settings create larger amounts of
data to be sent.
Messages are transmitted the fastest if you use the standard resolution
setting, and keep Halftone off.
56
Page 71

ROUTINE
OPERATION
ROUTINE OPERATION SENDING A FAX MESSAGE
Home Position Setting Adjustments
For the contrast, resolution, and halftone, you can select whether the settings
return to home position at the end of transmission (in a new machine, they do).
Also, you can change the home positions of these settings.
If you need other adjustments, contact a service representative.
The procedure is as follows (see page 10 if you need more information about the
User Parameter settings adjustment procedure).
Function 6 0 2 2 2 2 9 1
1.
❐ At this time, you can print a User
Parameter List if you press
→ Start .
USER PARAMETER PRINT LIST
DEFAULT: 01000000
SWITCH00: 01000000
YES
TO END
2 17 4 36
2. The settings for switch 00 are now
shown on the bottom line of the display.
The settings that you may need to change are those for digits 1, 2, 3, 4, 6, and 7.
The functions of these are as follows.
Digit Purpose
Resolution home position
1
2
Resolution home position
3
4
If you change any of the contrast, resolution, transmission mode, stamp, or halftone
6
7 Halftone on/off home position 0: Off 1: On
settings before making a transmission, then:
0: The setting(s) will not return to the home position after the transmission.
1: The setting(s) will return to the home position after the transmission.
Digit 2 Digit 1 Setting Digit 2 Digit 1 Setting
0 0 Normal 1 0 Darken
0 1 Lighten 1 1 Do not use this.
Digit 4 Digit 3 Setting Digit 4 Digit 3 Setting
0 0 Standard 1 0 Super Fine
0 1 Detail 1 1 Do not use this.
3. If you wish to change one of the settings, press the key on the ten key pad
that corresponds to the digit that you wish to change.
Example:
4. Finish:
3 . The value of digit 3 changes.
Yes Function
57
Page 72

_
_
SENDING A FAX MESSAGE ROUTINE OPERATION
Dialing with the Telephone Directory
This can be done for any number that you have stored as a Speed Dial Code with
a label programmed for it.
Example: You wish to dial "XYZ CO. LONDON".
1. Make sure that the machine is in standby mode (see page 49).
2. Place your document in the feeder.
Speed Dial/Tel Directory
3.
4. Press the first letter of the name: X
(Quick Dial Key 24 or 48 )
Press
X repeatedly until the correct
number is displayed.
Yes
5.
MEMORY TRANS. OPTIONS
ENTER FAX NUMBER
MEMORY TRANS. OPTIONS
ENTER FAX NUMBER
TELEPHONE DIRECTORY
.
YES
NO
SCROLL: X PRESS
01 XYZ CO. LONDON
MEMORY TRANS. OPTIONS
PRESS
YES
01 XYZ CO. LONDON
OR
CLR
OR
NO
6. Yes again.
7. Either:
❐ Dial more numbers.
❐ Press
Start .
Programming Speed Dial Codes: See page 34.
58
MEMORY TRANS. OPTIONS
ENTER NO. OR
START
DEST: 2
_
Page 73

ROUTINE
OPERATION
ROUTINE OPERATION SENDING A FAX MESSAGE
Optional Features for Transmission
When you make a routine transmission, you can access a few optional features.
These options are only available if "
OPTIONS " can be seen in the top right
corner of the display.
Personal Code
Personal Codes do the following.
❐ They allow you to keep track of machine usage (for example, for billing
purposes). If everybody uses a Personal Code when they use the fax machine,
the codes, or the names programmed into the codes, will be printed on the
report that is called the TCR (Transaction Confirmation Report). This will help
you to check on who has been using the machine, and how often.
❐ They allow personalization of documents and printed reports. For example, if
you use Label Insertion and store your name with your Personal Code, the
receiver of your fax message will see your name at the top of the printout. This
eliminates the need for a cover page.
❐ They allow you to restrict use of the machine to authorized personnel only. If
you switch the Restricted Access feature on, users have to enter their personal
code before they can use the machine. The personal code must have already
been stored in the machine. This may deter unauthorized personnel from
casually using the machine.
Cross-references
Programming Personal Codes: see page 110.
Label Insertion: see page 120.
Restricted Access: see page 110.
TCR: see page 185
59
Page 74

SENDING A FAX MESSAGE ROUTINE OPERATION
If you input your Personal Code, your name will appear on the TCR and
Transmission Result Report.
1. Either:
❐ Press
❐
↓ 0 1
If you have programmed one of the
User Function Keys to activate this
feature, just press that key and go
to step 2.
PERSONAL CODE ENTER CODE
_
NO
TO END
2. Example:
❐ The display shows the name that was
stored with the code that you selected. In
this example, it is SMITH.
7 3 6 2
3. Yes
❐ See page 110 for details on how to program
the Personal Codes and their labels.
Send Later
PERSONAL CODE PRESS
7362 SMITH
MEMORY TRANS. OPTIONS
ENTER FAX NUMBER
YES
OR
_
NO
Using this feature, you can instruct the machine to delay transmission of your fax
message until a later time, which you specify. This allows you to take advantage
of off-peak telephone line charges without having to be by the machine at the time.
CAUTION
If your machine’s memory is full, you will have to keep the message in the
document feeder. This means that nobody can use the document feeder
unless they remove your document. This would automatically cancel the Send
Later operation.
60
Page 75

ROUTINE
OPERATION
ROUTINE OPERATION SENDING A FAX MESSAGE
1. Press ↓ 0 2
2. Example: Send at 11:30 pm
1 1 3 0
❐ To change AM to PM or the other way
around, press
Yes
3.
❐ The Send Later time cannot be more
than 24 hours into the future.
# .
Transmission Deadline (TRD)
SEND LATER ENTER START TIME
: AM/PM: #
NOW 12:15 PM NO TO END
SEND LATER PRESS
TODAY 11:30 PM AM/PM: #
MEMORY TRANS. OPTIONS
ENTER FAX NUMBER
_
YES
OR
NO
_
If your message has to be sent to the other end before a certain time, use the
Transmission Deadline option and input this deadline.
If the line is busy, the machine will redial at set intervals either until the message
gets through or until the deadline passes. Before the deadline passes, there is no
limit to the number of times that the machine can redial.
After the deadline passes, the machine will print a report which indicates whether
or not your message was sent within the deadline. Then, the message will be
erased from memory.
This feature is only available with Memory Transmission.
Cross-reference
Transmission Deadline Report: see page 187.
61
Page 76

_
SENDING A FAX MESSAGE ROUTINE OPERATION
1. Press ↓ 0 3
2. Example: The deadline is 12:50 pm.
1 2 5 0
❐ The TRD time cannot be more than 24 hours
into the future.
❐ To change AM to PM or the other way
3.
around, press
Yes
# .
Page Count (Immediate Transmission only)
TRD ENTER TRD TIME
: AM/PM: #
NOW 12:15 PM NO TO END
TRD PRESS
TODAY 12:50 PM AM/PM: #
MEMORY TRANS. OPTIONS
ENTER FAX NUMBER
_
YES
OR
NO
When your fax message is printed at the other end, page numbers will be printed
on the top of each page. Using the Page Count feature, you can select the format
in which the page numbers are printed.
If you use Page Count:
❐ Page numbers will be printed in batch-numbering format (for example, p1/3,
p2/3, and p3/3 for a three-page message). This makes it easy for the other
party to see how many pages you sent, and if any are missing. However, you
have to input the number of pages at the keypad before sending.
If you do not use Page Count:
❐ Page numbers will be printed only as a sequence (for example, p1, p2, p3).
This makes it difficult for the other party to tell at a glance whether any pages
are missing (for example, due to a double feed in your machine’s document
feeder).
Note: If you do not select Immediate Transmission, Page Count is automatically
switched on, and the pages are counted automatically.
62
Page 77

_
ROUTINE
OPERATION
ROUTINE OPERATION SENDING A FAX MESSAGE
1. Press ↓ 0 4
PAGE COUNT SET COUNT
PAGE(S)
_
NO
TO END
2. Example: 10 pages
1 0
3. Yes
PAGE COUNT PRESS
10 PAGE(S)
MEMORY TRANS. OPTIONS
ENTER FAX NUMBER
YES
OR
NO
Auto Reduce
If the fax message that you are sending is wider than the printer paper in the
receiving machine, the condition of the printout at the other end depends on
whether or not Auto Reduce is switched on. (It is switched on in a new machine at
the factory.)
If Auto Reduce is on:
❐ Your machine will reduce the image so that it will fit on the printer paper.
❐ During transmission, the display panel will inform you of the type of reduction
that is being done. For example, "
B4 TO A4 TRANSMIT" means that your
B4-width [10.1"] original is being reduced to A4-width [8.3"] before being sent
out.
If you have switched Auto Reduce off:
❐ Your machine will not reduce the image. Parts of your image at the left and
right edges will not be printed at the other end. However, the central part of the
document will be printed without any reduction.
On/Off Selection Switch
1. Press
↓ 0 7
OPTION SELECT
AUTO REDUCE ON OFF
TTI
YES
TO END
2. If you wish to change the AUTO REDUCE setting, press ← or → until the
displayed setting is correct.
Yes when you have finished.
3.
63
Page 78

SENDING A FAX MESSAGE ROUTINE OPERATION
Auto Reduce Home Position Adjustment
You can change the home position of the Auto Reduce setting if you wish. Do not
do this unless the current home position is inconvenient for you, and you often
find yourself having to change the Auto Reduce setting before sending a fax.
The procedure is as follows (see page 10 for more information about the User
Parameter settings adjustment procedure).
Function 6 0 2 2 2 2 9 1
1.
❐ At this time, you can print a User
Parameter List if you press
→ Start .
USER PARAMETER PRINT LIST
DEFAULT: 01000000
SWITCH00: 01000000
YES
TO END
2. The settings for switch 00 are now
shown on the bottom line of the display.
3. Press
↓ until the settings for switch 04
are shown. You need to change digit 2.
Digit 2
4. If you wish to change the setting, press
2 .
0: Auto Reduce is Off
1: Auto Reduce is On.
5. Finish:
Yes Function
TTI
Normally, the TTI programmed in your machine is printed at the top of each of the
pages you transmit when they are received at the other end. The top of the image
will be overprinted if there is no margin at the top of the transmitted page.
In some cases, you may wish the other party to receive an unmarked copy of your
original. In this case, you can switch TTI off.
Note: If you switch TTI off, make sure that Label Insertion is also off if you want
the image received at the other end to be unmarked.
Cross-reference
TTI: see page 26. Label Insertion: see page 120
1. Either:
❐ Press
❐
↓ 0 7
If you have previously
programmed this feature as a
User Function Key, press that
key.
OPTION SELECT
AUTO REDUCE ON OFF
TTI
YES
TO END
64
Page 79

ROUTINE
OPERATION
ROUTINE OPERATION SENDING A FAX MESSAGE
2. Press ↓ until "TTI ON OFF"is displayed.
If you wish to change the
TTI setting, press ← or → until the displayed
setting is correct.
Yes when you have finished.
3.
ID Transmission
You must have stored an ID Code before you can use this feature; see page 85.
If you switch ID Transmission on, transmission will only take place if the other
terminal’s ID Code is the same as yours. This feature can stop you from
accidentally sending information to the wrong place, if you co-ordinate ID Codes
with the other party.
This feature works in the same way as Closed Network. To enable Closed
Network, you must have it switched on by a service technician; it then stays on for
all communications until you have it switched off. However, you can use ID
Transmission for whichever transmissions you like. For receptions, ID
Transmission does not work; you will have to use Closed Network if you wish to
use this type of feature for your received fax messages.
ID Transmission may not be reliable when communicating with terminals
produced by another maker.
Cross-reference
ID Code: see page 85. Closed Network: see page 121.
1. Press ↓ 0 7
OPTION SELECT
AUTO REDUCE ON OFF
TTI
YES
TO END
2. Press ↓ until "ID TRANSMIT ON OFF"is displayed.
If you wish to change the
ID TRANSMIT setting, press ← or → until the
displayed setting is correct.
65
Page 80

SENDING A FAX MESSAGE ROUTINE OPERATION
3. Yes when you have finished.
Economy Transmission
This feature is similar to Send Later. However, it has the added bonus of
automatically combining two cost-saving features: use of off-peak rates, and
Batch Transmission. Also, you do not have to input the required transmission time
every time, like you do with Send Later. However, with Send Later, you can input
a different time of transmission for each fax message.
If you select Economy Transmission, your fax message will be sent at the time
that you previously stored for this feature using Function 74 (see the next page).
Also, all messages that were stored for sending to the same destination using this
feature will be batched automatically.
Cross-reference
Send Later: see page 60. Batch Transmission: see page 124.
On/Off Selection Switch
1. Either:
❐ Press
❐
2. Press
If you wish to change the
↓ 0 7
If you have previously
programmed this feature as a
User Function Key, press that
key.
↓ until "ECONOMY TRANS. ON OFF" is displayed.
ECONOMY TRANS. setting, press ← or → until
OPTION SELECT
AUTO REDUCE ON OFF
TTI
YES
TO END
the displayed setting is correct.
Yes when you have finished.
3.
66
Page 81

ROUTINE
OPERATION
ROUTINE OPERATION SENDING A FAX MESSAGE
Storing the Economy Transmission Time
Before using Economy Transmission, you must use Function 74 to program a
time for Economy Transmissions to start. This should be the start of the off-peak
rate period for your area. After you have stored this, you will not need to change it
again until your telephone company changes the starting time of the off-peak rate
period.
Function 6 0 2 2 2 2 7 4
1.
ECONOMY TX
TIME= 11 :00AM
2. Input the time that you always wish Economy Transmissions to start.
❐ To change from AM to PM and vice versa, press
3. Press
Yes Function when the display is correct.
* or # .
Voice Request (This feature requires a handset)
YES
TO END
Using this feature, you can have a telephone conversation with the other party, on
the same call, after your fax message has been sent out. This is useful if you wish
to discuss the contents of the fax message with the other party.
You can save overall telephone line costs because you don’t have to redial the
other party to have the conversation.
Note: This feature cannot be used with Memory Transmission.
The following procedure tells you how to set up a Voice Request. However, refer
to "Talk After Sending a Fax" on page 80 for details on how to answer the phone
when it rings.
67
Page 82

_
SENDING A FAX MESSAGE ROUTINE OPERATION
1. Press ↓ 0 7
OPTION SELECT
AUTO REDUCE ON OFF
TTI
YES
TO END
2. Press ↓ until "VOICE REQUEST ON OFF" is displayed.
If you wish to change the
VOICE REQUEST setting, press ← or → until
the displayed setting is correct.
Yes when you have finished.
3.
Direct Fax Number Entry
This feature allows you to input destination fax numbers before placing the
document in the feeder. This is useful when you would like to read the destination
fax number off the document without having to write it down on the reverse side or
on another scrap of paper.
1. Either:
Function 1 6
❐
❐
If you have previously
programmed this feature as a
User Function Key, press that
key.
MEMORY TRANS. OPTIONS
ENTER FAX NUMBER
_
2. Input the destination telephone number(s).
3. Place your document in the feeder and
press
Start .
MEMORY TRANS. OPTIONS
PRESS YES OR CLR
2125551234
.
NO
68
Page 83

_
ROUTINE
OPERATION
ROUTINE OPERATION SENDING A FAX MESSAGE
Immediate Transmission
Procedure
If you do not wish to store the fax message in memory before sending it out, use
the following procedure.
❐ The merits and demerits of Immediate Transmission and Memory Transmission
are discussed on pages 47 and 48.
1. Make sure that the machine is in standby mode (see page 49).
Memory
2.
❐ The Memory indicator should go out.
3. Place the document face down into the
feeder.
4. Dial (only one destination).
See page 50 for how to dial.
5. Start
IMMEDIATE TX OPTIONS
ENTER FAX NUMBER
IMMEDIATE TX OPTIONS
YES OR CLR . NO
PRESS
2125551234
DIALING
2125551234
FILE NO. 0046
_
6. The machine dials and the line to the other party is connected. The number
that you dialed is displayed (or if you used Quick Dial or Speed Dial, the
Quick Dial or Speed Dial Label stored for that number is displayed).
Converting Immediate Transmission to Memory Transmission
If there is a message still waiting in the document feeder, you can convert it into a
memory file if you press
Memory Start . The document will be scanned and
stored into memory, leaving the document feeder free for others to use.
69
Page 84

SENDING A FAX MESSAGE ROUTINE OPERATION
Transmission Mode Home Position Adjustment
The default mode of your machine is Memory Transmission. If you wish, you can
change this home position to Immediate Transmission.
The procedure is as follows (see page 10 if you need more information about the
User Parameter settings adjustment procedure).
Function 6 0 2 2 2 2 9 1
1.
❐ At this time, you can print a User
Parameter List if you press
→ Start .
USER PARAMETER PRINT LIST
DEFAULT: 01000000
SWITCH00: 01000000
YES
TO END
2. The settings for switch 00 are now
shown on the bottom line of the display.
The setting that you need to change is
that for digit 5.
3. If you wish to change the setting, press
4. Finish:
Yes Function
Digit 5
0: Memory Transmission
1: Immediate Transmission
5 .
70
Page 85

ROUTINE
OPERATION
ROUTINE OPERATION SENDING A FAX MESSAGE
Using the Stamp
If press the Stamp key to light the Stamp indicator, the machine stamps the
bottom of each page. During memory transmission, the stamp indicates that the
page was successfully stored. For immediate transmission, it shows that the page
was sent successfully. You must switch the stamp on before you press
the machine will not stamp the first page.
❐ If you wish the stamp to be at the top of each page instead of at the bottom,
contact your service representative.
Changing the Stamp Home Position Setting
If you wish to change the Stamp home position setting, do the following.
(See page 10 if you need more information about the User Parameter settings
adjustment procedure).
Function 6 0 2 2 2 2 9 1
1.
USER PARAMETER PRINT LIST
DEFAULT: 01000000
SWITCH00: 01000000
Start , or
YES
TO END
❐ At this time, you can print a User
Parameter List if you press
→ Start .
2. The settings for switch 00 are now
shown on the bottom line of the display.
The setting that you need to change is
that for digit 0.
3. If you wish to change the setting, press
4. Finish:
Yes Function
0 .
Digit 0
0: The stamp home position is "Off".
If you press the Stamp key to use
the Stamp, the Stamp will be
disabled at the end of the
transmission.
1: The stamp home position is "On".
After the transmission, the Stamp
will stay enabled.
71
Page 86

SENDING A FAX MESSAGE ROUTINE OPERATION
Redialing
If a message was not transmitted successfully, that does not mean that you have
to enter the telephone number again. In many cases, the machine will redial the
destination automatically. Or, with the AI Redial key, you can redial with just a few
keystrokes.
Automatic Redialing
The machine will automatically redial the other party if any of the following
conditions occurred.
❐ The other party was busy
❐ There was no reply from the other party
❐ The message was rejected by the machine at the other end because of
excessive errors (in this case, redialing will only take place if Memory
Transmission was used)
Redialing is done 4 times at 5 minute intervals (for a memory transmission) or 2
times at 2 minute intervals (for an immediate transmission).
❐ The number of redials and the redial interval may be adjusted by a service
technician.
During redialing, the number being dialed is
displayed in brackets at the top of the
screen, as shown on the right.
If redialing fails for an immediate
transmission, the display appears as shown
opposite. You can convert this
communication to a memory transmission to
free up the machine for other users.
Press Memory then Start.
[ 2125551234]
MEMORY TRANS. APR. 4. 12:25PM
SET DOCUMENT
MEMORY 99%
REDIAL STANDBY
OR SELECT MEMORY MODE
(PRESS MEMORY + START)
72
Page 87

ROUTINE
OPERATION
ROUTINE OPERATION SENDING A FAX MESSAGE
Using the AI (Artificial Intelligence) Redial Key
The machine learns and remembers the last 10 telephone numbers that you
input. Then, if you have to redial one of these numbers, just press the AI Redial
key until the number or name of the party you wish to redial is displayed, then
press the Start key.
This feature has the following uses.
❐ If the machine is waiting to redial the other party, you do not have to wait for the
redialing interval to expire.
Press the AI Redial key until the required telephone number or name is
displayed, then press the Start key.
❐ If you wish to send another message to the same address that you just sent
one to recently, you don’t have to dial the full number again if it is still in the AI
Redial memory.
Place the message in the feeder, then press the AI Redial key until the required
telephone number or name is displayed, then press the Start key.
Notes: ❐ Using AI Redial, you cannot retry a failed Memory Transmission.
However, you can redial the telephone number, as explained above.
❐ AI Redial employs the AI Short Protocol feature.
❐ The AI Redial key does not work if you used the handset to dial.
Cross-reference AI Short Protocol: see page 184.
To send a fax using AI Redial, do the following:
1. Make sure that the machine is in standby mode (see page 49).
2. Place your document into the feeder.
3.
AI Redial
AI REDIAL NO. DIRECTORY
1 SCROLL PRESS
01 XYZ CO. NEW YORK
4. Scroll through the numbers in the AI
Redial memory using the
↑ and ↓
arrows of the scroll key.
❐ To select a number:
Yes x 2
MEMORY TRANS. OPTIONS
ENTER NO. OR
START
_
5. Either
❐ Select another number: go to step 4.
❐ Start the transmission:
Start
YES
OR
DEST: 2
NO
73
Page 88

RECEIVING FAX MESSAGES ROUTINE OPERATION
RECEIVING FAX MESSAGES
Selecting the Reception Mode
There are two ways to set up your machine to receive fax messages.
❐ Auto Receive Mode
❐ Manual Receive Mode
Press the reception mode key to switch between the modes.
Manual Receive Mode
This mode is selected when the Manual Receive indicator is lit.
This setting is convenient if you wish to use your fax machine’s handset to answer
telephone calls coming in on the same line as fax messages. However, your fax
machine cannot automatically receive fax messages; you have to be by the
machine if a fax message comes in.
The machine operates as follows.
1 2
1. The machine rings continuously until you answer the call. Pick up the handset.
2. If you hear a voice from the other end, speak in reply.
If you hear a tone every few seconds, the other end is a fax terminal.
Note: Remove any documents that are in the feeder.
3. If the person at the other end wishes to send you a fax message,
press
Start to receive the message. Then hang up the handset.
3
4
4. The machine starts to receive the message.
The Communicating indicator lights.
74
Page 89

ROUTINE
OPERATION
ROUTINE OPERATION RECEIVING FAX MESSAGES
Auto Receive Mode
This mode is selected when the Auto Receive indicator is lit.
Incoming faxes are received automatically. You do not have to be by the machine
if the power switch is kept on. Use this mode when you must leave the machine.
1
1. The telephone rings once.
2. The machine automatically starts to receive the message.
2
Substitute Reception
Overview
If the printer is jammed or out of supplies, you will still be able to receive fax
messages; any messages coming in will be stored in the machine’s memory.
If the "Receive File" indicator is lit, a message has been stored in the memory
using the Substitute Reception feature.
Check the following:
❐ The printer paper may be used up. If so, add paper: see page 194.
❐ The toner may have finished. If so, add toner: see page 195.
❐ The printer paper may have jammed. If so, remove the jam: see page 215.
❐ If the Call Service indicator is lit, your machine needs to be repaired.
❐ If there appears to be no problem, somebody may be making copies while a
fax message is coming in.
The messages received into memory will be printed and erased after the machine
has been returned to normal operation.
75
Page 90

RECEIVING FAX MESSAGES ROUTINE OPERATION
Switching Substitute Reception On or Off
There are two conditions under which you may wish to disable this feature.
❐ If you do not like keeping received fax messages in memory: After your
machine has received a fax message to memory, it sends an OK signal to the
other end. However, if something happens to your machine and you lose the
fax message before you have a chance to read it, the sender will not be
informed. Therefore, you may not wish to use the Substitute Reception feature.
❐ If you do not wish to have your memory full of mail from unknown
senders: If you have not enabled the Authorized Reception feature, you can
receive fax messages from anybody. However, you can see who they are from
because their identifier (the TTI) is printed at the top of each page. If the other
party has not programmed their identifiers (perhaps in an attempt to hide their
identity), you may not wish to receive their messages into memory, which
would take up valuable space.
Cross-reference
ECM: see page 123. Authorized Reception: see page 132.
If you wish to switch Substitute Reception on or off, do the following procedure.
(See page 10 if you need more information about the User Parameter settings
adjustment procedure).
Function 6 0 2 2 2 2 9 1
1.
❐ At this time, you can print a User Parame-
ter List if you press
→ Start .
2. The settings for switch 00 are now
shown on the bottom line of the display.
3. Press
↓ until the settings for switch 05
are shown.
The settings that you need to change
are those for digits 0 and 3.
The meanings of these settings are as follows.
Digit Purpose
0
3
Substitute Reception under all circumstances (for example, if you have limited
memory space) 0: Disabled, 1: Enabled
Reception to memory (including Substitute Reception, Memory Lock, Forwarding,
and Transfer Requests from another station) when no RTI or CSI identifiers were
received from the other party 0: Enabled, 1: Disabled
USER PARAMETER PRINT LIST
DEFAULT: 01000000
SWITCH00: 01000000
YES
TO END
3 0
4. If you wish to change the setting, press 0 or 3 .
5. Finish:
Yes Function
76
Page 91

_
ROUTINE
OPERATION
ROUTINE OPERATION TELEPHONE CALLS
TELEPHONE CALLS
A handset is required to execute the procedures in this section.
You can use your fax machine for dialing in the same way as you would use a
telephone. This is useful when calling fax machines that are usually kept in
Manual Receive Mode, as well as for telephone conversations.
❐ You can dial using Quick Dial Keys or Speed Dial Codes.
❐ With the On Hook Dial feature, you do not have to pick up the handset before
dialing.
❐ You can send a fax message after finishing the conversation, without having to
make a new call.
Cross-reference Manual Receive Mode: see page 74.
Making a Telephone Call
Using On Hook Dial
Using On Hook Dial is like using the handset (see the next page), except that you
do not have to pick it up before dialing. Just press the On Hook Dial key, and dial
the number. When you hear the other party on the fax machine’s built-in speaker,
you can pick up the handset. This keeps both hands free for referring to telephone
numbers while you are dialing.
On Hook Dial
1.
ON HOOK MODE
Note: Do not pick up the handset.
2. Dial.
See page 50 for how to dial.
Do not use the handset.
Note: Do not press Start .
❐ If you wish to cancel the call,
press
On Hook Dial .
ON HOOK MODE
PRESS
2125551234
START
AFTER TONE
_
3. Listen to your machine’s built-in speaker. When the other party answers, pick
up the handset.
4. Replace the handset when you have finished.
77
Page 92

_
TELEPHONE CALLS ROUTINE OPERATION
Using the Handset
Using the fax machine’s built-in or optional handset, you can use the fax machine
in the same way as a normal telephone. Pick up the handset and dial on the fax
machine’s ten-key pad (or use a Quick Dial Key or Speed Dial Code if you wish).
1. Pick up the handset.
HANDSET MODE
2. Dial.
See page 50 for how to dial.
Note: Do not press Start .
HANDSET MODE
PRESS
2125551234
START
AFTER TONE
_
3. Continue as for a normal telephone conversation.
Using AI Redial
Use AI Redial if you wish to redial a number that you dialed recently.
On Hook Dial AI Redial
1.
AI REDIAL NO. DIRECTORY
1 SCROLL PRESS
YES
OR
NO
2. Scroll through the numbers in the AI
Redial memory using the
↑ and ↓
arrows of the scroll key.
When the correct number is displayed,
press
❐ The number will be dialed immediately.
Yes .
01 XYZ CO. NEW YORK
ON HOOK MODE
PRESS
2125551234
START
AFTER TONE
_
78
Page 93

ROUTINE
OPERATION
ROUTINE OPERATION TELEPHONE CALLS
Answering the Telephone
If the telephone rings just once:
A fax is coming in. Do not pick up the handset.
If the telephone rings continuously:
1
2
1. Pick up the handset and speak to the other party.
❐ If you hear a high-pitched tone, a fax is coming in.
Press
Start then hang up.
2. If the caller wants to send you a fax, press Start after speaking.
Then hang up.
❐ If nothing happens after you press Start , the power may be switched off or the
telephone may not be connected up correctly.
Phoning and Faxing on the Same Call
To Talk Before Sending a Fax (On Hook Dial)
On Hook Dial
1.
2. Dial.
Note: Do not use the handset.
Do not press
Start .
3. If you hear a voice from the machine’s built-in speaker, pick up the handset
and speak to the other party.
❐ If you hear a high-pitched tone instead of a voice, place your fax message in the feeder,
then press
Start .
4. When you are ready to send your fax message, place your message in the
feeder, then ask the other party to press
5. When you hear a high-pitched tone, press
Start .
Start .
79
Page 94

TELEPHONE CALLS ROUTINE OPERATION
6. Replace the handset.
❐ Do not replace the handset if you wish to speak to the other party again.
When your machine emits a tone, press
Stop then speak.
To Talk After Sending a Fax
Use the Voice Request option (see page 67). Then, during transmission:
1. When your machine emits a tone, pick up the handset, press
Stop and
speak.
❐ If the machine did not emit a tone, the other party did not answer the call.
2. After speaking, hang up.
❐ Do not hang up if you have more pages to send. Instead:
1. Place the pages into the feeder.
2. Ask the other party to press
3. When you hear a high-pitched tone, press
Start .
Start .
Speaker and Buzzer Volume Adjustments
Your machine has a built in speaker. With this speaker, you can listen to the
telephone line without picking up the handset. The speaker will be automatically
switched off just before the start of facsimile data communication.
When you are sending a fax message, you will be able to hear the line after the
machine has dialed. If the line is busy, you can press the Stop key and start
another operation without having to wait for the machine to disconnect the line.
If the speaker volume is not satisfactory, you can adjust it.
Function 6 0 2 2 2 2 9 3
1.
MONITOR VOLUME SET VOLUME
TRANSMISSION: >>>>
PRESS
2. ❐ Increase: →
❐ Decrease: ←
❐ Test the current setting: Start .
Press
Stop when you have
finished the test.
❐ Accept:
Yes
MONITOR VOLUME SET VOLUME
RECEPTION: >>>>
PRESS
3. Repeat step 2 for each adjustment that
appears on the screen.
80
START
START
YES
TO END
YES
TO END
Page 95

ADVANCED FEATURES
ADVANCED
FEATURES
NETWORKING
Overview
This section explains how you can use this machine to distribute fax messages
over networks of fax machines.
As we have seen (Sending to More Than One Location, page 51), you can send
the same fax message directly from your machine to more than one location. The
diagram in that section shows your machine sending the same fax to three
locations. This feature is commonly known as Broadcasting.
However, with Broadcasting, you or your organization has to pay for three fax
calls. If these are all long distance calls, that can be quite expensive. If you use
the networking features provided with this machine, you will be able to reduce
costs by sending the fax message only once, to a Transfer Station, and that
Transfer Station will distribute your fax message.
Networking using a
Broadcasting
Transfer Station
(Transfer Request)
You can take advantage of your machine’s Group Dial, Broadcasting, and
Transfer Request features to set up extensive facsimile networks. Such networks
can save time and cost if you set them up to perform commonly-used
broadcasting operations, especially if long-distance communications are involved.
Cross-references
Groups: see page 30.
Broadcasting: see page 51.
Transfer Request: see page 87.
81
Page 96

NETWORKING ADVANCED FEATURES
What Networking Features Does This Machine Have?
The machine’s networking features are summarized below.
❐ Transfer Request: This allows you to send a fax message to a number of
destinations via a single Transfer Station (see page 87). Transfer Request can
be combined with Broadcasting to set up more complex networks (see page
90).
❐ Two-step Transfer: This process adds a Relaying Terminal between you and
the Transfer Station. The Relaying Terminal could be a machine in your area
that has access to a long-distance high-speed digital link, which would pass on
your fax message to the Transfer Station, which would then distribute your fax
message over low-speed local lines. See page 91 for details on this feature.
❐ Multi-step Transfer: This allows you to set up a string of Transfer Stations in
different areas. The Transfer Station in each area would distribute your
message to destinations in the same area, and pass on your message to the
next Transfer Station in the chain. See page 93 for more on this feature.
When you look at these procedures later in this section, they may seem rather
complex. However, once you have decided upon a certain operation, and if you
plan to use it frequently, program it as a Keystroke Program. Next time, this will
allow you to start the operation with only one keystroke.
Note
Your sales or service representative will be able to help make all the necessary group and
transfer station number programming in the various broadcasting terminals throughout your
proposed network. Please co-ordinate with your sales representative to obtain correct
programming at the time of installation.
Cross-references
Transfer Request: see page 87.
Transfer Request combined with Broadcasting: see page 90.
Two-step Transfer: see page 91.
Multi-step Transfer: see page 93.
Keystroke Programs: see page 99.
82
Page 97

ADVANCED
FEATURES
ADVANCED FEATURES NETWORKING
Preparing the Machine for Networking Operations
Before you can start to set up fax communication networks, there are some items
that you have to program in your machine. These are as follows.
❐ Your Country Code
❐ Your Fax Machine’s Own Telephone Number
❐ Your Area Code Prefix (normally not necessary in the USA)
❐ The ID Code (the ID Code of your machine and all the Relaying Terminals and
Transfer Stations must be the same)
If you install the optional Group 4 ISDN kit, there are some other items that you
will have to program. These are dealt with in Appendix C, which covers the ISDN
kit.
You will also have to plan how you program your Groups (in co-ordination with
other people at other locations who will use your machine as a Transfer Station),
and you must also know how all the Relaying Terminals and Transfer Stations
have programmed their Groups.
Storing the Country Code
The Country Code is the code that callers in other countries have to input when
dialing a number inside your own country. For the USA, this code is ’1’.
1. Function 6 0 2 2 2 2 6 1
2. Yes
COUNTRY CODE
YES
TO SET PREVIOUS
NO
COUNTRY CODE
ID SETTING
TO CANCEL NEXT
_
YES
TO END
3. Input only your country code. Do not in put your international dial access code.
Example: USA - 1
COUNTRY CODE
YES
1
_
CLR . NO
OR
4. Yes Function
83
Page 98

NETWORKING ADVANCED FEATURES
Storing your Machine’s Own Telephone Number
Store your fax terminal’s telephone number using this feature. If you do not do
this, you will not be able to use the Transfer Request feature.
If your fax machine’s telephone number changes, do not forget to change the
stored telephone number data.
1. Function 6 0 2 2 2 2
6 1 ↓
2. Yes
OWN ANALOG NUMBER
OWN ANALOG NUMBER
3. Input your fax terminal’s telephone number.
❐ The format of the number must be as follows:
International Dial Prefix, Your Country Code, Your Area Code, then you
must add a Pause, followed by your telephone number.
Check the International Dialing Prefix and the Country Code with your local
telecommunications operator. The example shown is for the USA; the
codes to add are 011 and 1.
NOTE: Use the Pause key to add a
pause.
OWN ANALOG NUMBER
YES
TO SET PREVIOUS
NO
TO CANCEL NEXT
YES
_
YES
0111212-5551234
CLR . NO
OR
_
TO END
4. Yes Function
Storing your Area Code Prefix
The Area Code Prefix is the digit that is added to area codes when you dial
another area within your own country. In many countries, this code is just a zero.
In Spain, a ’9’ is used, and in the USA, the setting is just left blank.
1. Function 6 0 2 2 2 2
6 1 ↓ ↓
AREA CODE PREFIX
YES
TO SET PREVIOUS
NO
TO CANCEL NEXT
84
Page 99

ADVANCED
FEATURES
ADVANCED FEATURES NETWORKING
2. Yes
3. Input the area code prefix.
4. Yes Function
Storing the ID Code
AREA CODE PREFIX
212-5551234
_
:0 - 9
YES
TO END
Before programming the ID Code, confer with other users in your fax network to
agree on an ID Code. This is because communications using ID Codes will fail if
the codes are not the same.
The ID Code can be any four-digit code (using digits 0 to 9 and letters A to F),
except 0000 and FFFF.
In addition to the networking features described in this section, ID Codes are used
with the following communication features. The same code must be used by all
members of your fax network and all people you wish to communicate with using
these features.
❐ Polling: see page 153.
❐ Closed Network: see pages 121 and 152.
❐ ID Transmission: see page 65.
Features using ID Codes can only be used between terminals made by the same maker.
85
Page 100

NETWORKING ADVANCED FEATURES
To store an ID Code, do the following.
1. Function 6 0 2 2 2 2
6 1 then ↓ until the screen is as
shown opposite.
2. Yes
ID CODE
YES
TO SET PREVIOUS
NO
ID CODE
ID SETTING
TO CANCEL NEXT
_
YES
TO END
3. Input the ID Code that you will be using.
Example: 4 3 6 3
❐ Do not use 0000 or FFFF.
ID CODE
YES
4363
CLR . NO
OR
4. Yes Function
Groups
The way to program a Group has already been explained and will not be repeated
here. See page 38 and the pages following that for all the procedu res. However,
there are two points to keep in mind when you are setting up Groups for
networking operations.
Limitations on the size of a Group: You can store up to 200 destinations in a
Group. However, the networking features can only handle Groups that have up to
30 destinations. If you are programming a Group for networking purposes, do not
put more than 30 numbers in that Group.
Group Transfer Station: You can specify a Group Transfer Station for each of
your Groups. Then another party can send you a fax message and instruct your
machine to send it to each number in a Group, through the Group Transfer
Station, which acts as a broadcaster. Your machine will then relay the fax
message to that group’s Group Transfer Station, which will then send the fax
message to each of the numbers stored in that Group. You should store Group
Transfer Stations for Groups that you wish to use with the Two-step and Multi-step
Transfer features. For instructions on how to store a Group Transfer Station for a
Group, see page 41.
86
 Loading...