

Page 1
PC INTERFACE KIT TYPE 180
OPERATOR'S MANUAL
BEDIENUNGSANLEITUNG
MANUALE OPERATORE
MANUAL DE INSTRUCCIONES
MANUEL D'UTILISATION
BRUKSANVISNING
BEDIENINGSHANDLEIDING
BRUKERVEILEDNING
MANUAL DO OPERADOR
TSTH120E
Page 2

Read this manual carefully before you use this product and keep it handy for future reference.
For safety, please follow the instructions in this manual.
Lesen Sie diese Bedienungsanleitung sorgfä ltig durch, ehe Sie dieses Ge rät in Einsatz bringen ; halten
Sie die Anleitung griffbereit, um in Zukunft bei Bedarf leicht nachschlagen zu könn en.
Zum sicheren Umgang mit dem Gerät befolgen Sie bitte die Anweisungen in dieser Bedienungsanleitung.
Prima di utilizzare il prodotto, leggere attentamente il presente manuale e tenerlo a portata di mano per
poterlo consultare in futuro.
Per garantire la sicurezza, seguire le istruzioni contenute nel presente manuale.
Lea cuidadosamente este manual antes de utiliza r este produc to y téngalo a mano para futuras con-
sultas.
Por razones de seguridad, sigas las instrucciones de este manual.
Lisez ce manuel attentivement avant d’utiliser l’appareil et conservez-le à portée de la main pour pouvoir vous y référer ultérieurement.
Pour votre sécurité, suivez les instructions figurant dans ce manuel.
Läs denna bruksanvisning noga innan du använder produkten och förvara den inom räckhåll för fram-
tida bruk.
Följ anvisningarna i denna bruksanvisning för säker drift.
Lees deze handleiding aandachtig voor d at u dit a pp ar a at in ge br uik neemt en bewaar hem zorgvuldig
om later, indien nodig, te kunnen raadplegen.
Volg, voor uw eigen veiligheid, de aanwijzingen in deze handleiding.
Les denne manualen nøye før du bruker dette produktet. Legg den på et lett tilgjengelig sted for senere
oppslag.
Følg instruksjonene i manualen for å unngå skader på personell eller utstyr.
Antes de utilizar este produto leia este manual com atenção e mantenha-o à mão para uma futura consulta.
Para sua segurança, por favor siga as instruções deste manual.
Page 3

Page 4

PC INTERFACE KIT TYPE 180 OPERATOR'S MANUAL
Printed in Japan
GB D I E F S NL N P
H545-7214
Page 5

Contents
EnglishDeutschItalianoEspañolFrançaisSvenskaNederlandsNorskPortuguês
1. English
2. Deutsch
3. Italiano
4. Español
5. Français
6. Svenska
7. Nederlands
8. Norsk
9. Português
English
German
Italian
Spanish
French
Swedish
Dutch
Norwegian
Portugues
Page 6

Introduction
This manual contains detailed instructions on th e operation a nd maintenanc e of this machine . To get
maximum versatility from this machine all operators sho uld carefu lly read and fo llow the inst ruction s in
this manual. Please keep this manual in a handy place near the machine.
Please read the Safety Information before u sing this machin e. It contain s important info rmation relate d
to USER SAFETY and PREVENTING EQUIPMENT PROBLEMS.
Important
Parts of this manual are subject to change without prior notice. In no event will the company be liable
for direct, indirect, special, incidental, or consequ ential damages as a result of han dling or operating
the machine.
Trademarks
®
Microsoft
States and/or other countries.
Hewlett-Packard, HP, LaserJet, and PCL are registered trademarks of Hewlett-Packard Company.
Other product names used herein are for identification purposes only and might be trademarks of their
respective companies. We disclaim any and all rights in those marks.
Warning:
Use of controls or adjustment or performance of procedures other than those specified in this manual
might result in hazardous radiation exposure.
Notes:
Some illustrations might be slightly different from your machine.
Certain options might not be available in some countr ies. Fo r det ails, pleas e conta ct your lo cal deal er.
, Windows®, and MS-DOS® are registered trademarks of Micr osoft Corpo ration in the Unite d
PC INTERFACE KIT TYPE 180
This option can be installed in the following model.
[H545]
Declaration of Conformity
“The Product complies with the requirements of the EMC Directive 89/336/EEC and the Low Voltage
Directive 73/23/EEC.”
Copyright © 1999
ii
Page 7

Manuals for This Machine
The Operator's Manual for this machine is composed of the following 2 manuals.
A Facsimile Operator's Manual
B PC INTERFACE KIT TYPE 180 Operator's Manual (this manual)
First, read the A Facsimile Operator's Manual. It contains important information for your safety.
This manual B explains the operation of this machine when it is connected to
your computer as a PC-Printer.
When using this machine as a printer for your computer, please refer to this
manual for the operation and refer to the other manual for information on
MAINTENANCE or TROUBLESHOOTING.
When using this machine as a standalone Facsimile, please refer to the separate
A Facsimile Operator's Manual.
----
Using Online Help
Online Help is automatically installed with the WinStyler T180 software.
Online Help contains detailed procedures to help you use the WinStyler T180 for
a variety of tasks.
How to Read This Manual
English
Symbols
In this manual, the following symbols are used:
Note
This symbol indicates precautions for operation, or actions to take after misoperation.
Limitation
This symbol indicates numerical limits, functions that cannot be used together,
or conditions in which a particular function cannot be used.
Reference
This symbol indicates a reference.
[]
Keys and buttons that appear on the computer's display.
{}
Keys built into the machine's operation panel.
Keys on the computer's keyboard.
iii
Page 8

TABLE OF CONTENTS
1.OVERVIEW
Features...................................................................................................... 1
Setting up — Machine............................................................................... 2
Installing the PC Interface............................................................................. 2
Connecting the Machine ............................................................................... 3
Making the Multipurpose Feeder for Printer Only ......................................... 5
2.Setting up — Software
System Requirements............................................................................... 7
Operating System ........................... ........ ........ ........ ...................................... 7
PC.......................................................................................................... ....... 7
I/O ................................... ........ ........ ........ ........ ........ ...................................... 7
Memory.................................................................................................. ....... 7
Disk Space.................................................................................................... 7
Allocating Virtual Memory ............................................................................. 8
Installing the WinStyler T180 Software ................................................... 9
Windows 95/98/NT 4.0— How to Install the WinStyler T180 Software......... 9
Uninstalling the WinStyler T180 Software............................................. 10
Windows 95/98/NT 4.0 — How to Uninstall theWinStyler T180 Software
3.PC-PRINTING
..... 10
Printing the Test Page............................................................................. 11
How to Print the Test Page Using the Printer Console ............................... 11
Windows 95/98/NT 4.0– Printing a Document from Windows............. 12
Windows 95/98 — Printing from a DOS Application............................ 13
How to Access the PCL Control Panel from Windows................................ 13
How to Enable the PCL Interpreter from Windows ..................................... 14
4.PC-SCANNING
Scanning from a Windows Application................................................. 15
5.PC-FAXING
About PC-FAXING ................................................................................... 17
Sending and Receiving Faxes................................................................ 17
Turning PC Reception on ....................................................................... 18
COM-Redirector....................................................................................... 18
iv
Page 9

6.FAX REMOTE SETUP UTILITY
About Fax Remote Setup Utility............................................................. 19
How to select the Fax Remote Setup Utility.......................................... 19
Things You can Do with Fax Remote Setup Utility .............................. 19
7.TROUBLESHOOTING
Installing the WinStyler T180 Software ................................................. 21
PC-Printing............................................................................................... 21
PC-Scanning............................................................................................ 22
PC-Faxing................................................................................................. 23
8.SPECIFICATION
Interface.................................................................................................... 25
Printer....................................................................................................... 25
Scanner .................................................................................................... 27
PC-FAX..................................................................................................... 27
English
v
Page 10

Page 11

1. OVERVIEW
Features
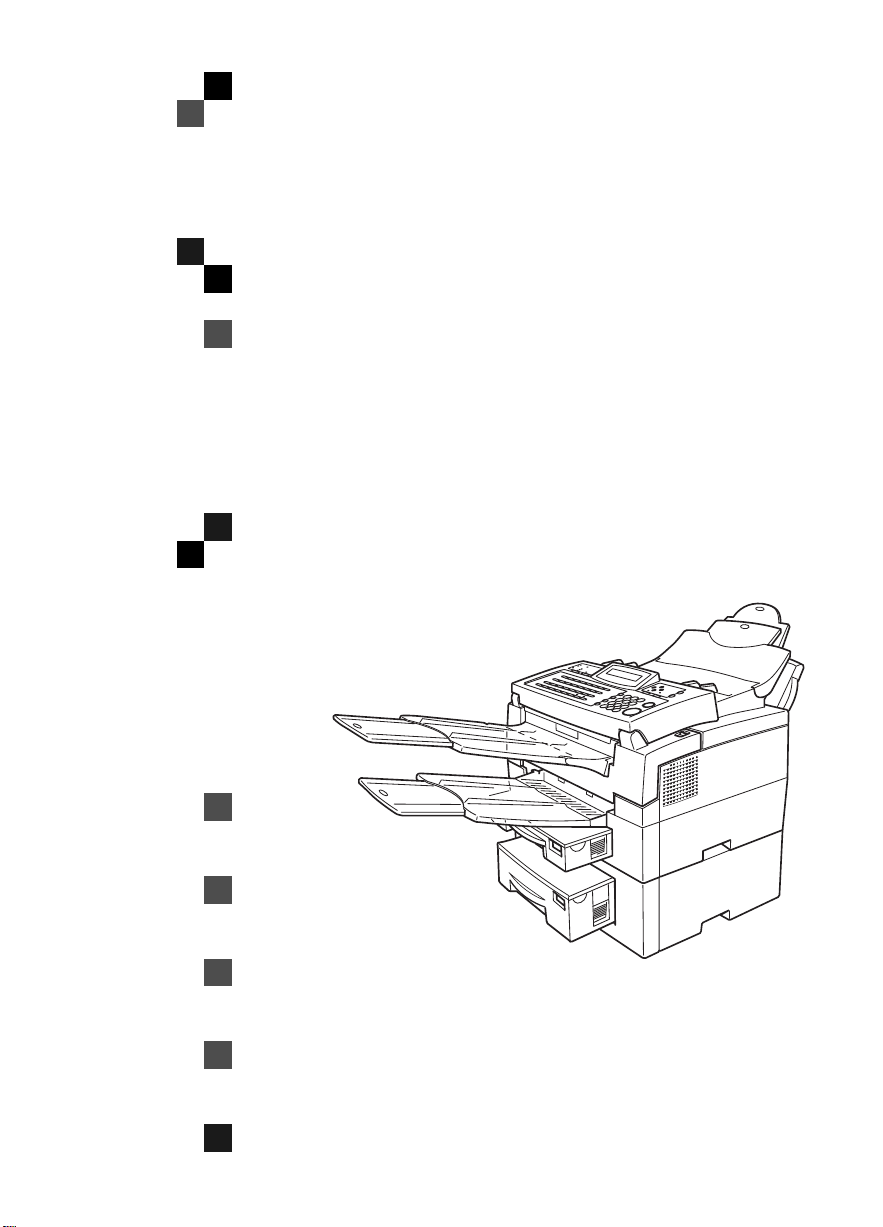
Included with the WinStyler T180 is the PC INTERFACE KIT TYPE 180. After
installing this software the following features will be available.
❖❖❖❖
PC-Printer
It operates as a printer with print resolutions of 300/600 dpi (dots per inch) in
Windows printing mode and 300 dpi in PCL emulation mode for DOS printing.
Edge Enhancement Technology makes text appear sharp and clear.
The engine speed is 6 A4 pages at 600 dpi resolution per minute.
❖❖❖❖
PC-Scanner
Using specified scanner software is installed, this machine becomes a scanner
for TWAIN applications.
❖❖❖❖
PC-FAX
Using specified FAX software is installed, this machine makes it possible to
send and receive FAX messages through your personal computer. This feature is available for Windows 95/98 only.
❖❖❖❖
Setup Utility
The Remote Setup Utility lets you view and edit various fax machine settings
from your PC via an easy-to-use graphical interface.
❖❖❖❖
Status Monitor
The Status Monitor gives you an on-screen graphical representation of the
machine status. It also provides animations explaining common problems
and how to solve them.
English
1
Page 12
OVERVIEW
Setting up — Machine
Installing the PC Interface
Note
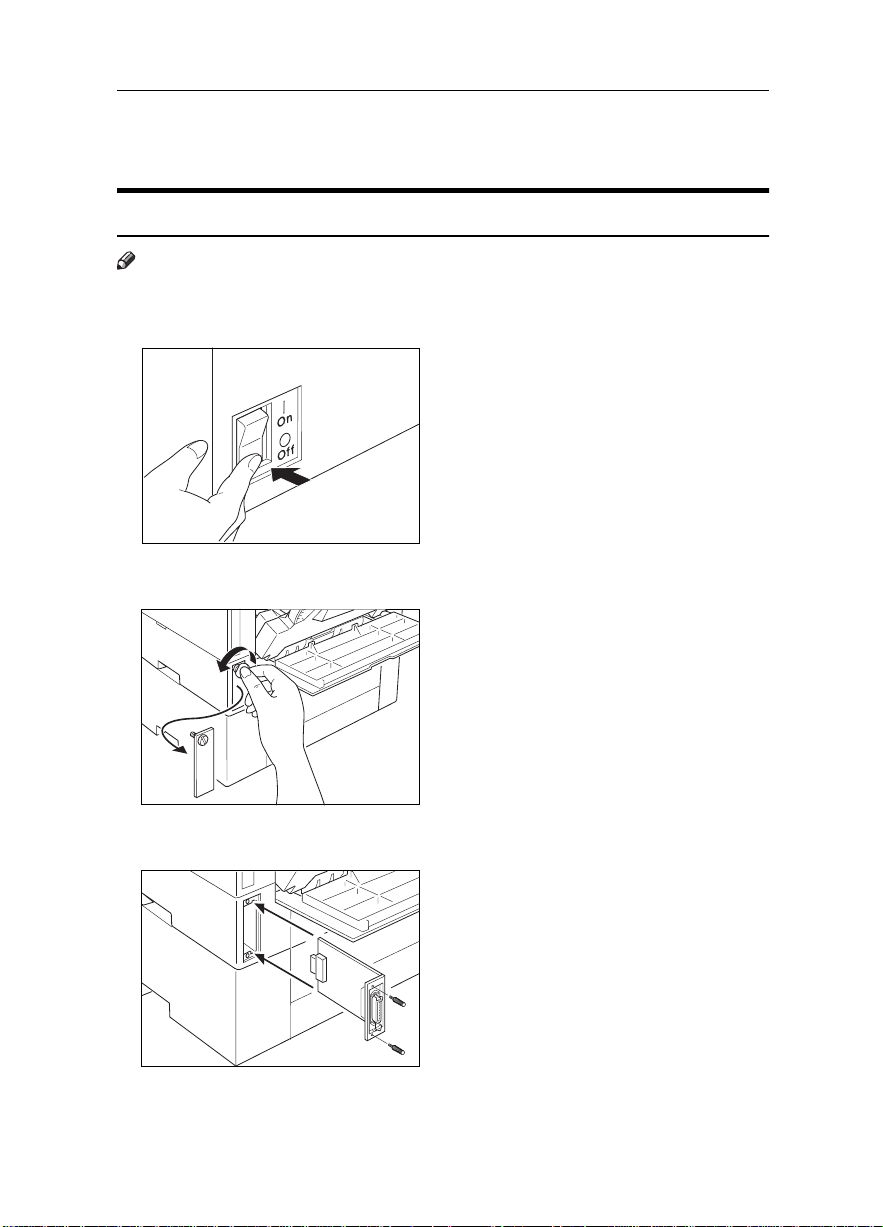
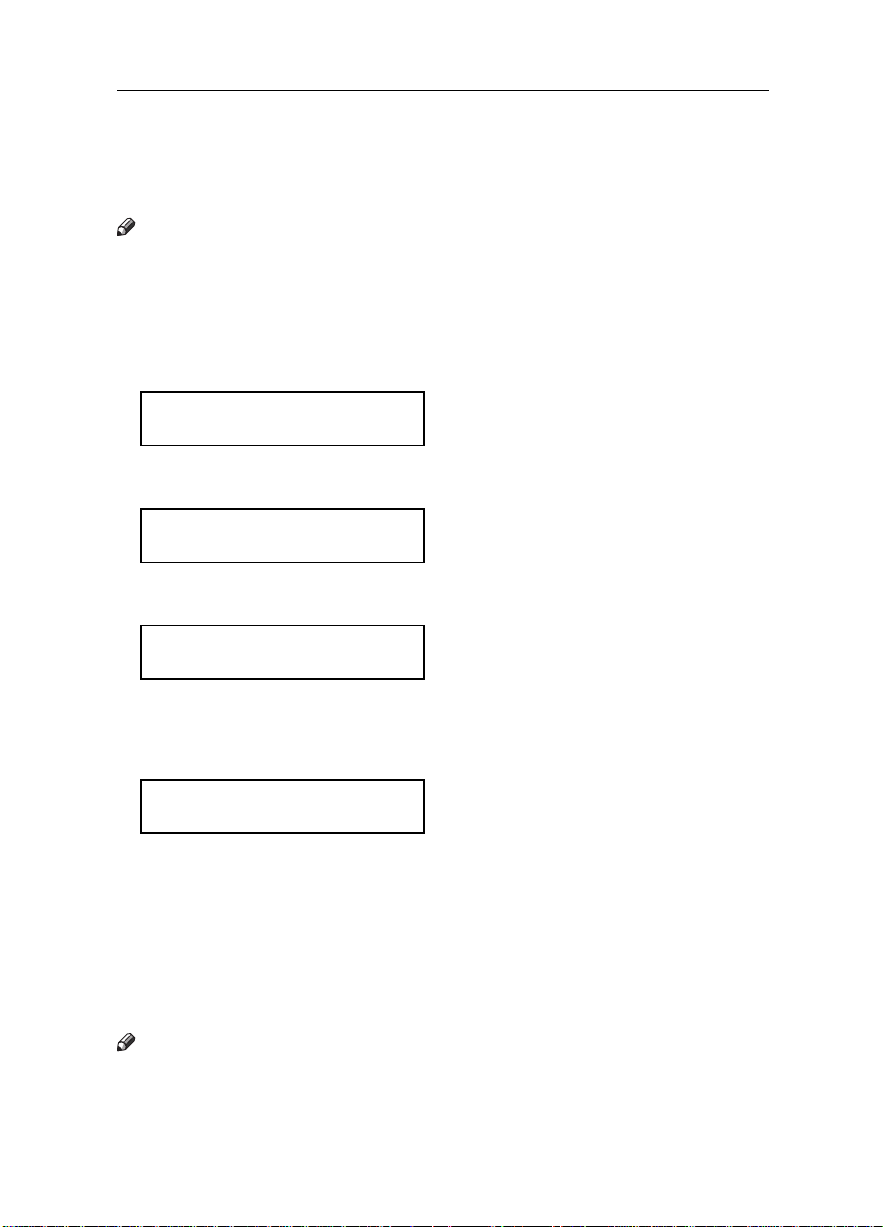
❒ Make sure the SW1 switch on the PC interface board is turned ON.
Turn off the power switch.
A
TSTP040N
Remove the plastic cover on the right of the machine at the rear.
B
TSTP010N
Hold the interface board as shown and slide it carefully into the slot.
C
TSTP020N
2
Page 13
Setting up — Machine
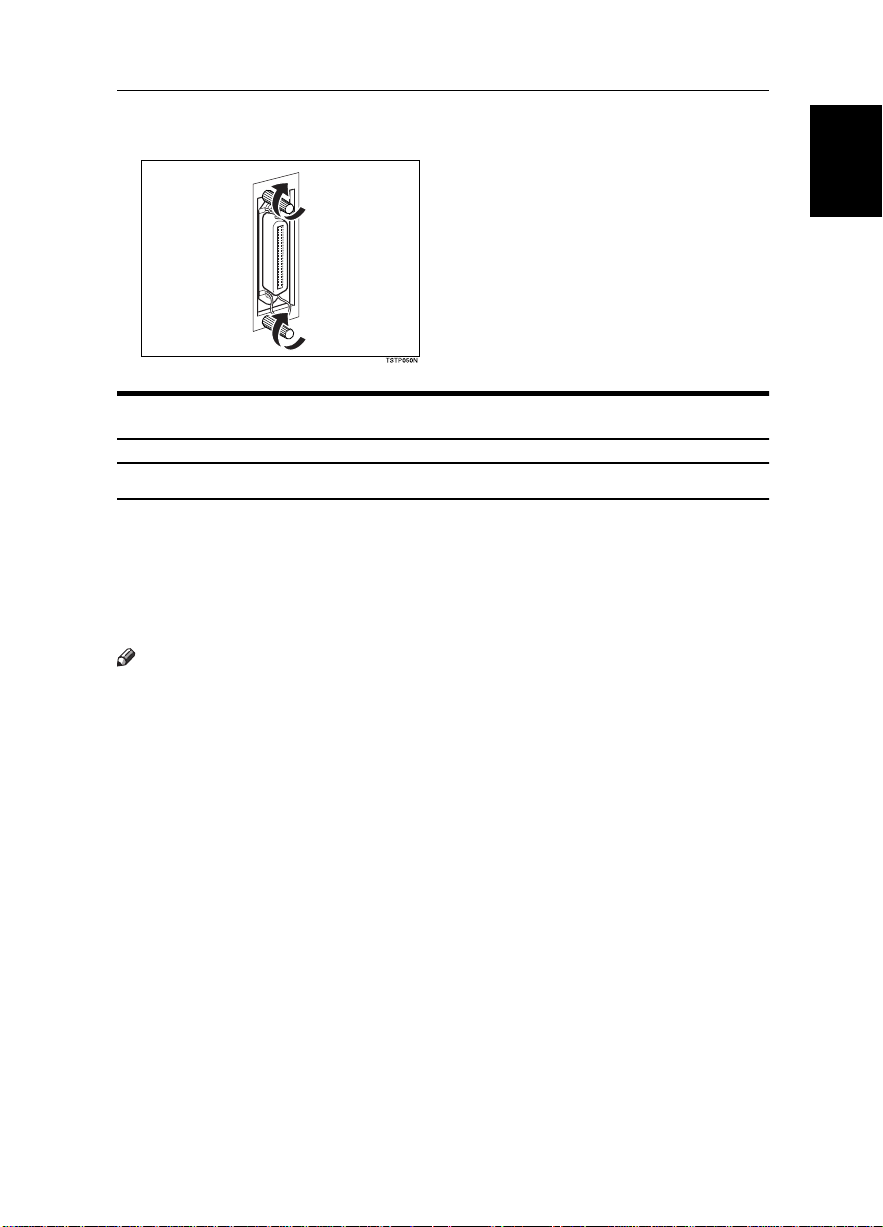
Fix the two screws to secure the board in place.
D
Connecting the Machine
Parallel Cable Requirements
The PC INTERFACE KIT TYPE 180 connects to a computer via a parallel port
and a parallel cable. It is your responsibility to provide the cable necessary for
the interface between the computer and the PC INTERFACE KIT TYPE 180. This
cable is not provided with the machine. The machine’s parallel connection is a
standard bi-directional parallel interface. It requires a standard 36-pin parallel
cable compliant with IEEE P1284 and a parallel port available on the computer.
English
Note
❒ Do not use a parallel cable longer than 3 meters (10 feet).
❒ Connector type 57–30360 (AMPHENOL) or equivalent.
❒ “IEEE Std 1284–1994 compliant” is printed on a P1284 compliant cable.
3
Page 14
OVERVIEW
How to Connect to a Computer
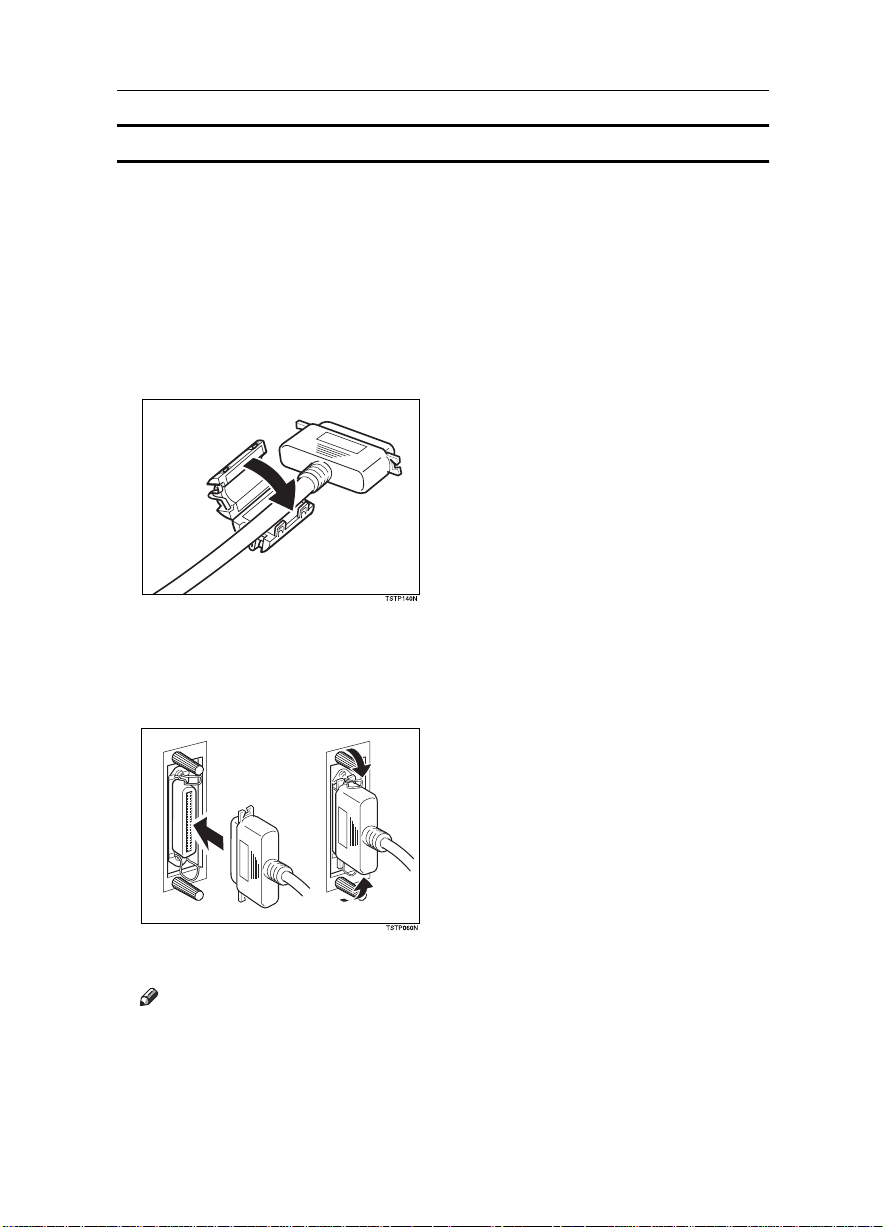
Connect the machine to a computer using a parallel cable compliant with IEEE
P1284 (supplied by you).
Follow these steps to connect the machine to the computer:
Make sure you have the correct cable.
A
Make sure both the machine and the computer are turned off.
B
Attach the ferrite core provided with the PC INTERFACE KIT TYPE 180 to the
C
printer cable. The ferrite core should be attached to the cable close to the parallel port.
Plug the 36–pin end of the parallel cable into the parallel port on the left side
D
of the controller cover on the back of the machine.
Squeeze the wire clips on each side of the connector together until they snap
E
into place. The clips hold the cable securely in place.
Plug the end of the parallel cable into the computer's parallel port.
F
Note
❒
The WinStyler T180 uses the bi-directional data transfer mode through the
LPT port of your PC. Consult your PC owner's manual to find out how to see
if the LPT port is set for bi-directional data transfers.
Turn on the machine and then the computer.
G
4
Page 15

Setting up — Machine
Making the Multipurpose Feeder for Printer Only
Reference
Refer to the “User Parameters (function 63)” in the Facsimile Operator's Manual. (SW10, Digit5 1; for Printer Only)
Note
❒ Due to the heat used in fixing toner, postcards come out slightly curled. Be-
fore you print on the opposite side, either straighten the postcards out or introduce a curl in the opposite direction.
❒ When loading A5 paper into the multipurpose feeder, set the paper so that the
long-edges are parallel with the side fences. Set the size for the multipurpose
feeder to “OTHER SIZE” using the operation panel. You can set “A5 (210 x
148 mm)” only for receiving faxes.
English
5
Page 16

OVERVIEW
6
Page 17

2. Setting up — Software
System Requirements
Operating System
Windows 95/98, Windows NT 4.0
PC
Any computer which meets with the requirements specified by Microsoft for
running Windows 95/98 or Windows NT 4.0, can support the WinStyler T180.
For optimal performance, the following CPU's are recommended.
Windows 95/98 Pentium 120 MHz
Windows NT 4.0 Pentium 166 MHz
Note
❒ The WinStyler T180 cannot run on a 286 or earlier system.
I/O
Standard PC parallel printer port and cable.
Memory
English
Check the amount of memory of your PC. Adding more memory to your PC will
increase overall system and printer performance.
Recommended memory:
Windows 95/98 32MB
Windows NT 4.0 64MB
Disk Space
About 4 MB disk space for files, and up to approximately 12 MB disk space for
virtual memory. You can access Virtual Memory settings through the System
utility in the Control Panel.
If you have more than 8 MB RAM, you won't need all 12 MB of virtual memory.
Total PC RAM plus virtual memory should add up to at least 16 MB.
7
Page 18

Setting up — Software
Allocating Virtual Memory
It is recommended to let Windows 95/98 or Windows NT 4.0 automatically handle virtual memory. If not, you can allocate virtual memory by yourself via the
System utility in the Control Panel. The WinStyler T180 software requires 16 MB
of total memory, divided between your PC memory (a minimum of 8 MB) and
Windows virtual memory. If your system has 8 MB of PC RAM, then you must
allocate at least 8 MB of virtual memory. If you have 5 MB of RAM, then you
need at least 11 MB of virtual memory, and so on.
Reference
Refer to the online Help on Windows 95/98/NT 4.0 for information on allocating virtual memory.
8
Page 19

Installing the WinStyler T180 Software
Installing the WinStyler T180 Software
The WinStyler T180 includes a software installation program to make setting up
easier. The installation program analyzes the system configuration, installs the
WinStyler T180 software, and makes the necessary changes to Windows startup
files.
Note
]
❒ If “New Hardware found” dialog appears, click on [Cancel
❒ To install the WinStyler T180 in Windows NT 4.0, you must have Administra-
tor privileges.
.
Windows 95/98/NT 4.0— How to Install the WinStyler T180
Software
Note
❒ If the Regional Settings (sec. Control Panel ) are set for a language that the
WinStyler T180 supports, this language will be the default selection during
installation.
Follow the steps below to install the WinStyler T180 driver software:
Insert the WinStyler T180 CD-ROM in the CD-ROM drive.
A
Close all the applications that are currently running.
B
]
[
Click on
C
Click on
D
on the Task bar.
Start
]
[
.
Run
English
In the “Run” window, click on
E
Select the CD-ROM drive.
F
Select the file titled
G
Note
❒ If the language of the OS that you are using is not recognized, the installa-
tion program will offer the English version of the WinStyler T180 software.
]
Note
[
OK
Click on
H
Follow the instructions on the screen.
I
❒ This printer is automatically set as the default printer.
[
SETUP.EXE
.
[
]
]
Browse
and click on
.
[
Open
]
.
9
Page 20

Setting up — Software
----Creating Floppy Disks from the CD-ROM
If you do not have a CD-ROM installed on your computer but have access to an
IBM-compatible computer with one, you can make a set of software installation
disks from the CD-ROM. You need at least 2 blank, formatted 1.44–MB floppy
disks.
Follow the steps below to make installation disks:
Insert the CD-ROM into the CD-ROM drive.
A
Click on [
B
Click on [
C
Type
D
Click on [OK].
E
Follow the instructions on the screen.
F
Start
Run
{{{{
X:makedisk
] on the Task bar.
].
}}}}
, replacing “X” with the letter of your CD-ROM drive.
Uninstalling the WinStyler T180 Software
Note
❒ When uninstalling the WinStyler T180 software, it is strongly recommended
that you change the WinStyler T180 printer sharing setting to “Not Shared”.
❒ Before uninstalling the WinStyler T180 software you should close all applica-
tions and restart Windows.
Windows 95/98/NT 4.0 — How to Uninstall theWinStyler T180
Software
Follow the steps below to delete the WinStyler T180 software:
Click on [
A
Point to [
B
Start
] on the Task bar.
Programs
].
10
Point to [
C
Click on [
D
Follow the instructions on the screen.
E
WinStyler T180 Tools
Uninstall Utility
].
].
Page 21

3. PC-PRINTING
Printing the Test Page
How to Print the Test Page Using the Printer Console
Follow the steps below to print the Test Page using the Printer Console:
Click on [
A
Point to [
B
Point to [
C
Click on [
D
Click on [
E
modes work correctly.
Click on [
F
The test utility will print a configuration page containing information about
your system and printer.
Note
❒ Click on [No] to close the dialog box without printing it.
Reference
If you can't print the Test Page, make sure that the cable connecting the machine to the printer is firmly attached at both ends. Refer to “Connecting
the Machine”.
] on the Task bar.
Start
Programs
WinStyler T180 Tools
Printer Console
TEST
Yes
].
].
].
] to have the WinStyler T180 check to make sure all the print
].
English
11
Page 22

PC-PRINTING
Windows 95/98/NT 4.0– Printing a
Document from Windows
The procedure for printing is different for each application. For full details on
printing, see the online Help that comes with your application.
12
Page 23

Windows 95/98 — Printing from a DOS Application
Windows 95/98 — Printing from a DOS
Application
The WinStyler T180 was designed to print from DOS applications as well as
from Windows applications. The WinStyler T180 also provides a PCL Control
Panel for DOS PCL printing. This allows you to change the printer settings of
DOS print jobs.
Note
❒ This function only works in Windows 95/98.
❒ Some DOS applications may override these settings.
❒ No cartridges required
• Some conventional printers include cartridge slots that allow you to install
additional fonts into the printer. Since the WinStyler T180 creates printer
page images on your system before downloading to the printer, installing
a cartridge could not affect the final printout. Instead, the WinStyler T180
uses the fonts installed in your Windows system.
❒ The WinStyler T180 PCL is compatible with PCL4.5.(HP LASER JET IIP)
How to Access the PCL Control Panel from Windows
Adjustments made to the PCL Control Panel will have no affect on print jobs
made from Windows applications. These settings will only affect print jobs that
are made with applications running in DOS.
]
[
Click on
A
on the Task bar.
Start
English
Point to
B
Point to
C
Click on
D
Click on
E
[
Programs
[
WinStyler T180 Tools
[
Printer Console
[
PCL
]
.
]
.
]
on the Printer Console.
]
.
13
Page 24

PC-PRINTING
How to Enable the PCL Interpreter from Windows
The PCL Interpreter must be enabled, or turned on before the PCL Control Panel
can be used to adjust the settings of a print job. Adjustments made to the PCL
Control Panel will have no affect on print jobs made from Windows applications. These settings will only affect print jobs that are made with applications
running in DOS.
Click on [
A
Point to [
B
Point to [
C
Click on [
D
Click on [
E
Click on [
F
Click on [OK].
G
----Downloading Macros and Fonts
• The PCL Interpreter must be enabled, or turned on before macros and fonts
can be installed and used.
• The WinStyler T180 will preserve downloaded macros and fonts until the
printer is turned off.
Note
❒ The macros and fonts must be compatible with PCL4.5.
❒ You can get more information about PCL4.5 from the User's Manual for HP
LASER JET IIP.
] on the Task bar.
Start
Programs
WinStyler T180 Tools
Printer Console
DOS
Enable PCL Interpreter
].
].
] on the Printer Console.
].
] in the Printing Mode drop-down list box.
14
Page 25

4. PC-SCANNING
Scanning from a Windows Application
Scanning is available through any Windows application that supports a TWAIN
interface.
This section provides simple explanations about scanning from a Windows application. The actual procedure you need to perform differs somewhat depending on the application you are using. For full details on scanning, refer to the
manual for the application.
Note
❒ It functions as a scanner for TWAIN applications compliant with Windows
95/98 and Windows NT 4.0.
Set the document to be scanned.
A
Reference
For details, refer to “Faxing” in Facsimile Operator's Manual.
Access the WinStyler T180 Scanner Options from your Scanner Software.
B
Adjust the settings for this type of scan.
C
Note
❒ The settings that can be used are Scan mode, Resolution and Brightness.
❒ Depending on the application being used, you may not have access to all
these settings.
]
[
Click on
D
to scan the document.
OK
English
Note
❒ After starting to enter a telephone number, the PC Scan function cannot be
used.
❒ When you scan the document from the Auto Document Feeder and your doc-
ument is longer than the scan size length dimension, the entire length of the
document will be scanned in, and the resulting image will be taken from a
longer region than specified.
15
Page 26

PC-SCANNING
16
Page 27

5. PC-FAXING
About PC-FAXING
Limitation
❒ This feature is available for Windows 95/98 only.
By installing the provided faxing software on your PC, you can send and receive
fax messages directly from your computer by using your fax machine as a faxmodem.
Here is a brief summary of the major features:
• Fax transmission and reception from Windows 95/98
• Class 2 compatible control commands
• 14400, 12000, 9600, 7200, 4800, 2400 bps transmission speeds
The following software fax applications are supported:
Note
❒ Availability of some options may depend on your locale.
• WinFax PRO
•MS-FAX
• BitWare
•SopWith
• BVRP WinFax
❒ For how to install and setup these applications, please refer to the manual
supplied with the appropriate product.
❒ Be sure to install the WinStyler T180 software before you install your pre-
ferred fax application.
❒ When PC reception is turned on, manual reception by PC-FAX application is
not possible.
English
Sending and Receiving Faxes
For information on sending and receiving faxes from your PC, please refer to the
fax application manual provided.
To get the system up and running, you need to do the following (if you have not
already):
• Configure COM-Redirector (see the following section)
• Install faxing software (refer to the separate software manual for details)
• Turn PC Reception on (see followings)
17
Page 28
PC-FAXING
Turning PC Reception on
In order to receive messages with your PC, you need to turn this feature on.
Note
❒ If PC reception mode is turned off, incoming fax messages are received by the
fax machine hardware and not uploaded to the PC.
❒ If your PC is turned off, you can not receive any fax messages.
On the fax machine operation panel, press the {{{{
A
2
}}}} {{{{2}}}} {{{{2}}}} {{{{2}}}} {{{{6}}}} {{{{2}}}} on the numeric keypad.
{{{{
Function
INITIAL MODE Y/NEXTi
62 SELECT FUNCTION
Press the {{{{
B
Yes
}}}} key.
Y/NEXTi
SELECT LINE
Press the VVVV key until the display following appears.
C
Y/NEXTi
PC RECEPTION ON/OFF
Press the {{{{
D
Use the WWWW or VVVV key to turn PC Reception on, then press the {{{{
E
Yes
}}}} key.
PC RECEPTION Y/hi
iON OFF
Press the {{{{
F
Function
}}}} key to return to standby mode.
COM-Redirector
}}}} key and enter {{{{6}}}}
Yes
}}}} key.
COM-Redirector is a software that redirects data from your PC's serial port to a
parallel port for use with your PC Fax package. To set the COM port, refer the
online Help.
Note
❒ If a free port is available, it will be selected automatically.
❒ Using port number 5 and above may cause difficulties with some 16-bit fax
applications.
18
Page 29

6. FAX REMOTE SETUP UTILITY
About Fax Remote Setup Utility
The Remote Setup Utility lets you view and edit various fax machine settings
from your PC via an easy-to-use graphical interface.
How to select the Fax Remote Setup Utility
Click on the [
A
Point to [
B
Point to [
C
Click on [
D
Start
] button on the Task bar.
Programs
WinStyler T180 Tools
Remote Setup
].
].
].
Things You can Do with Fax Remote Setup
Utility
• View and edit Quick Dials, Speed Dials and Groups
• View and edit your fax machine identification
• Selecting Energy Saving Mode
• Program User Function Keys
• Set up Personal Codes
• Set up the Power Saving Timer
• Make backups of dial data to your PC hard drive
• Print out various lists and labels
English
Reference
Refer to the online Help for a detailed summary of the options, features available and operations.
19
Page 30

FAX REMOTE SETUP UTILITY
20
Page 31

7. TROUBLESHOOTING
Installing the WinStyler T180 Software
❖❖❖❖
Different Language Printer Driver was Installed
Cause Solution
The Regional Settings is not the same as
the language of the OS that you are using.
Check the Regional Settings and set it to
the preferred language. Uninstall the
WinStyler T180. Reinstall the WinStyler
T180.
PC-Printing
If there is a problem, the WinStyler T180 Status Display will often provide information about the nature of the problem and also offer technical advice on how
to fix it.
❖❖❖❖
Machine does not Print
Cause Solution
Is the power on? Turn on the machine.
Is the interface cable properly connected? Connect the interface cable properly. If
there any connectors or screws, make sure
they are fastened securely.
Are you using the correct interface cable? Be sure to use the correct one. If the cable
is damaged or worn, replace it with a new
one.
Did you connect the interface cable after
turning on the main switch?
Can you print a test page? If you can't, your machine might be out of
The "Printer is busy" message appears on
your display.
Make sure to connect the interface cable
before turning on the main switch.
order. Consult your local service personnel.
Wait a few minutes before attempting to
print again.
English
21
Page 32

TROUBLESHOOTING
❖❖❖❖
Print Quality Problems
Problem Solution
Printed pages appear dirty (dirty background/white spots in black image areas
or characters)
Refer to the Facsimile Operator's Manual.
PC-Scanning
❖❖❖❖
Stopping the Documents in the Middle of Scanning
Cause Solution
The document is longer than the maximum length, or is shorter than the minimum length.
Use a document that is the proper size and
scan it again.
22
Page 33

PC-Faxing
PC-Faxing
Limitation
❒ This feature is available for Windows 95/98 only.
❖❖❖❖
You cannot send fax messages from your PC-FAX application.
Cause Solution
The external line is ringing. Wait until the line becomes free, then try
The line is busy.
The Com-Redirector port setting is
wrong.
❖❖❖❖
Fax transmission begins, but nothing happens
Cause Solution
The fax machine is busy sending another
fax message.
The machine is printing reports.
❖❖❖❖
You cannot receive faxes at your PC
Cause Solution
The machine power is off. Turn the machine on.
The cables are not connected correctly. Connect the cables correctly.
Your PC-FAX application is not running. Launch your PC-FAX and put it in recep-
Your fax machine is not in PC Reception
mode.
Someone picked up the external handset
when the call came in.
sending again.
Specify the correct port.
Wait until the current operation has finished, then try sending again.
tion mode.
Turn on PC Reception mode with Func-
tion 62.
Do not pick up the handset when fax calls
come in. If you already have and can hear
a fax machine tone, press the Stop key to
have the fax machine receive and print the
message. If you ask the sender to send
again, do not pick up the external telephone handset before PC-FAX reception.
English
❖❖❖❖
Incoming fax messages are printed by the fax machine and not uploaded to your PC
Cause Solution
Your fax machine is not in PC Reception
mode.
Turn on PC Reception with Function 62.
23
Page 34

TROUBLESHOOTING
Cause Solution
The PC-FAX application remains permanently in the receiving status.
You cannot set the PC-FAX application to
the reception mode.
❖❖❖❖
You cannot change the fax machine speaker volume from your PC-FAX application.
Cause Solution
This function is not supported by your
PC-FAX application.
Cancel the operation and return the PCFAX application to reception mode.
Turn the fax machine off and then on
again. Then set your PC-FAX application
to reception mode.
Adjust the speaker volume from the fax
machine operation panel (Function 92).
24
Page 35

8. SPECIFICATION
Interface
Bi-directional parallel (IEEE P1284)
Printer
❖❖❖❖
Resolution
600dpi or 300dpi (GDI)
300dpi (PCL)
❖❖❖❖
Print Speed
6ppm
❖❖❖❖
RAM
512KB
❖❖❖❖
Emulation
Host based GDI
Host based PCL
❖❖❖❖
Paper Weight
60 to 90 g/m2 (16 to 24 lb)
English
25
Page 36

SPECIFICATION
❖❖❖❖
Paper Size
Paper Cassette Paper Size
Main Cassette Letter (8 1/2 x 11 in)
2nd Cassette A4 (210 x 297 mm)
Legal (8 1/2 x 14 in)
F4 (210 x 330 mm)*1
Multipurpose Feeder Letter (8 1/2 x 11 in)
A4 (210 x 297 mm)
Legal (8 1/2 x 14 in)
F4 (210 x 330 mm) *1
A5 (148 x 210 mm)
Executive (7 1/4 x 10 1/2 in)
HLT (5 1/2 x 8 1/2 in) *1
B5 (182 x 257 mm) *1
Envelope DL (110 x 220 mm)
Envelope C5 (162 x 229 mm)
Envelope C6 (114 x 162 mm) *1
Envelope Monarch (3 7/8 x 7 1/2 in)
Envelope #10 (4 1/8 x 9 1/2 in)
Post Card (100 x 148 mm) *1
Custom Size *1 *2
26
*1 Not supported by PCL Interpreter.
*2 Width 100~190 mm (3.94~7.48 in), Length 148~355 mm (5.83~13.98 in)
Page 37

Scanner
Scanner
Note
❒ WinStyler T180 scanner driver is TWAIN 1.7 compliant.
❖❖❖❖
Application
TWAIN 1.7
❖❖❖❖
Resolution
200 x 200 dpi
300 x 300 dpi (with software interpolation)
400 x 400 dpi (with software interpolation)
❖❖❖❖
Scan Size
Minimum 105 mm x 148 mm (4.1 x 5.8 in)
Maximum 218 mm x 600 mm (8.5 x 23.6 in)
PC-FAX
Limitation
❒ This feature is available for Windows 95/98 only.
❖❖❖❖
API
Class 2
❖❖❖❖
Modem Speed
14,400 bps (Maximum)
English
27
Page 38

Page 39

2. Deutsch
Deutsch
Page 40

Einleitung
Diese Bedienungsanleitung enthält detaillierte Erläuterungen zur Bedienung und Wartung dieses Geräts. Um den maximalen Nutzen aus diesem Gerät zu ziehen, sollten alle Bediener die Erläuterungen
in dieser Bedienungsanleitung sorgfältig lesen und befolgen. Halten Sie die Anleitung griffbereit.
Bitte lesen Sie die Sicherheitshinweise, bevor Sie das Gerät einsetzen. Sie enthalten wichtige Informationen zur ANWENDERSICHERHEIT und zur VORBEUGUNG VON GERÄTEPROBLEMEN.
Wichtiger Hinweis
Bei Teilen dieses Handbuchs sind Änderungen vorb ehalten. Das Unternehmen ka nn auf keinen Fall
für direkte, indirekte, spezielle, beiläufige oder Folgeschäden im Zusammenhang mit der Bedienung
oder dem Betrieb des Geräts haftbar gemacht werden.
Warenzeichen
®
Microsoft
den USA und/oder anderen Ländern.
Hewlett-Packard, HP, LaserJet, und PCL sind eingetragene Warenzeichen der Hewlett-Packard Company.
Andere in der vorliegenden Bedienungsanleitung verwendete Produktnamen dienen ausschließlich zu
Identifikationszwecken und sind möglicherweise Warenzeichen der jeweiligen Unternehmen. Wir erheben keinerlei Rechte an diesen Warenzeichen.
Achtung:
Zur Vermeidung gefährlicher Strahlung Steuerung, Einstellungen und Anwendungen ausschießlich
nach der vorliegenden Bedienungsanleitung vornehmen.
Hinweise:
Ihre Maschine kann sich in manchen Details von den Abbildungen unterscheiden.
Manche Optionen sind unter Umständen in manchen Ländern nicht erhältlich. Erkundigen Sie sich be-
züglich der Einzelheiten bitte bei Ihrem Händler.
, Windows®, und MS-DOS® sind eingetragene Warenzeichen der Microsoft Corporation in
ii
Page 41

PC INTERFACE KIT TYPE 180
Diese Option läßt sich in folgendes Modell installieren.
[H545]
Deutsch
iii
Page 42

Konformitätserklärung
“Das Produkt entspricht den Anforderungen der EMV—Richtlinie 89/336/EEC und der Niederspan-
nungsrichtlinie 73/23/EEC.”
Copyright © 1999
iv
Page 43

Handbücher zu diesem Gerät
Die Bedienungsanleitung für dieses Gerät umfaßt die folgenden beiden Handbücher.
A Bedienungsanleitung - Faxgerät
B
Bedienungsanleitung PC INTERFACE KIT TYPE 180 (das vorliegende Handbuch)
Lesen Sie sich zunächst die A Bedienungsanleitung für das Faxgerät durch. Es enthält wichtige Sicherheitshinweise.
Dieses Handbuch
ker an Ihren Computer angeschlossen ist.
Verwenden Sie dieses Gerät als Drucker für Ihren Computer, so finden Sie alle erforderlichen Bedienungshinweise im vorliegenden Handbuch. Nähere Informationen zur WARTUNG oder FEHLERSUCHE erhalten Sie in dem anderen Handbuch.
Möchten Sie dieses Gerät als eigenständiges Faxgerät verwenden, so finden Sie alle
erforderlichen Informationen im
----
Verwendung der Online-Hilfe
Die Installation der Online-Hilfe erfolgt automatisch mit der WinStyler T180-Software.
In der Online-Hilfe finden Sie detaillierte Beschreibungen für die Ausführung ver-
schiedener Aufgaben mit Hilfe der WinStyler T180-Software.
erläutert, wie das Gerät zu bedienen ist, wenn es als PC-Druk-
B
Handbuch zum Faxgerät.
A
Hinweise zur Verwendung dieses Handbuchs
Deutsch
Symbole
Im vorliegenden Handbuch werden folgende Symbole verwendet:
Hinweis
Dieses Symbol markiert Vorsichtsmaßnahmen für den Betrieb, oder Handlungen,
die nach einer Fehlbedienung durchgeführt werden sollten.
Einschränkung
Dieses Symbol markiert Informationen über Bereichsgrenzen, inkompatible Funktionen, oder
über Bedingungen, unter denen eine bestimmte Funktion nicht ausgeführt werden kann.
Referenz
Dieses Symbol markiert einen Querverweis.
[ ]
Tasten und Regler, die auf dem Bildschirm des Computers erscheinen.
{
}
Tasten auf dem Bedienfeld des Gerätes.
Tasten auf der Computertastatur.
v
Page 44

INHALTSVERZEICHNIS
1.ÜBERBLICK
Funktionen................................................................................................. 1
Einrichten — Gerät.................................................................................... 2
Installieren der PC-Schnittstelle.................................................................... 2
Anschließen des Geräts................................................................................ 3
Ausschließliche Verwendung des Universaleinzugs im Druckermodus........ 5
2.Einrichten — Software
Systemanforderungen .............................................................................. 7
Betriebssystem........................................ ........ ........ ........ ....... ........ ............... 7
PC.......................................................................................................... ....... 7
E/A .......................................... ........ ........ ........ ........ ...................................... 7
Speicher.. ....................................................................................... ........ ....... 7
Festplatte ................................................ ........ ........ ........ .............................. 7
Zuweisung des virtuellen Speichers.............................................................. 8
Installieren der WinStyler T180-Software................................................ 9
Windows 95/98/NT 4.0— Installation der WinStyler T180-Software............. 9
Entfernen der WinStyler T180-Software................................................ 10
Windows 95/98/NT 4.0 — Entfernen der WinStyler T180 -Software .......... 10
3.DRUCKEN ÜBER DEN PC
Drucken der Testseite............................................................................. 11
Drucken der Testseite mit Hilfe von Druckerkonsole .................................. 11
Windows 95/98/NT 4.0– Drucken eines Dokuments in Windows........ 12
Windows 95/98 — Drucken in einer DOS-Anwendung. ....................... 13
Zugriff auf das PCL-Bedienpanel ausgehend von Windows....................... 13
Aktivierung des PCL-Interpreter ausgehend von Windows......................... 14
4.SCANNEN ÜBER DEN PC
Scannen in einer Windows-Anwendung............................................... 15
5.FAXEN ÜBER DEN PC
Hinweise zum FAXEN PER PC............................................................... 17
Senden und Empfangen von Faxnachrichten ...................................... 17
Einschalten der Funktion "PC-Empfang".............................................. 18
COM-Redirector....................................................................................... 18
vi
Page 45

6.FAX-DIENSTPROGRAMM REMOTE-SETUP
Hinweise zum Fax-Dienstprogramm Remote-Setup............................ 19
Wählen des Fax-Dienstprogramms Remote-Setup.............................. 19
Was das Fax-Dienstprogramm Remote-Setup Ihnen alles erlaubt..... 19
7.FEHLERSUCHE
Installieren der WinStyler T180-Software.............................................. 21
Drucken über den PC.............................................................................. 21
Scannen über den PC ............................................................................. 22
Faxen über den PC.................................................................................. 23
8.SPEZIFIKATIONEN
Schnittstelle............................................................................................. 25
Drucker..................................................................................................... 25
Scanner .................................................................................................... 27
PC-FAX..................................................................................................... 27
Deutsch
vii
Page 46

Page 47

1. ÜBERBLICK
Funktionen
Zusammen mit dem PC INTERFACE KIT TYPE 180 erhalten Sie die WinStyler
T180-Software. Nach Installation dieser Software stehen folgende Funktionen
zur Verfügung:
❖❖❖❖
PC-Drucker
Im Windows-Druckmodus bietet das Gerät eine Auflösung von 300/600 dpi
(Dots per Inch) und im PCL-Emulationsmodus zum Drucken unter DOS eine
Auflösung von 300 dpi. DOS
Die "Edge Enhancement Technology" sorgt für eine klare, deutliche Wiedergabe des Textes.
Das Gerät druckt bei einer Auflösung von 600 dpi mit einer Geschwindigkeit
von 6 A4-Seiten pro Minute.
❖❖❖❖
PC-Scanner
Ist die Scanner-Software installiert, kann das Gerät bei TWAIN-Anwendungen als Scanner eingesetzt werden.
❖❖❖❖
PC-FAX
Ist die FAX-Software installiert, können Sie über Ihren PC Faxnachrichten
senden und empfangen. Diese Funktion steht für Windows 95/98 zur Verfügung.
Deutsch
❖❖❖❖
Setup-Programm
Mit Hilfe des Remote-Setup-Programms können Sie verschiedene FaxgerätEinstellungen auf Ihrem PC aufrufen und editieren (über eine bedienerfreundliche Grafikschnittstelle).
❖❖❖❖
Statusanzeige
Die Funktion "Statusanzeige" liefert Ihnen eine grafische Darstellung des Gerätestatus auf Ihrem PC-Bildschirm. Darüber hinaus bietet sie Ihnen Animationsanzeigen zur Erläuterung und Lösung häufig auftretender Probleme.
1
Page 48

ÜBERBLICK
Einrichten — Gerät
Installieren der PC-Schnittstelle
Hinweis
❒ Sicherstellen, daß der Schalter SW1 auf dem "PC-Interfaceboard" eingeschal-
tet ist.
Den Netzschalter ausschalten.
A
TSTP040N
Die Kunststoffabdeckung auf der rechten Geräteseite (hinten) entfernen.
B
TSTP010N
Das "Interfaceboard" wie abgebildet festhalten und vorsichtig in den
C
Schlitz schieben.
TSTP020N
2
Page 49

Einrichten — Gerät
Die beiden Schrauben anbringen, um das "Board" zu sichern.
D
Anschließen des Geräts
Parallelkabel
Das PC INTERFACE KIT TYPE 180 wird über einen Parallelanschluß und ein
Parallelkabel mit dem Computer verbunden. Das für die Schnittstelle zwischen
Computer und PC INTERFACE KIT TYPE 180 erforderliche Kabel müssen Sie
sich selbst besorgen. Dieses Kabel ist im Lieferumfang nicht enthalten. Bei dem
Parallelanschluß des Geräts handelt es sich um eine bidirektionale StandardParallelschnittstelle. Für diese Schnittstelle ist ein 36-poliges Standard-Parallelkabel gemäß IEEE P1284 und ein Parallelanschluß am Computer erforderlich.
Deutsch
Hinweis
❒ Das Parallelkabel darf nicht länger als 3 m sein.
❒ Steckertyp 57–30360 (AMPHENOL) oder etwas entsprechendes.
❒ Geeignete P1284-Kabel tragen den Aufdruck “IEEE Std 1284–1994. ”
3
Page 50

ÜBERBLICK
Anschluß an einen Computer
Schließen Sie das Gerät mit einem IEEE P1284 entsprechenden Parallelkabel
(von Ihnen bereitzustellen) an einen Computer an.
Zum Anschließen des Geräts an den Computer sind folgende Schritte durchzuführen:
Sicherstellen, daß ein geeignetes Kabel zur Verfügung steht.
A
Sicherstellen, daß sowohl das Faxgerät als auch der Computer ausgeschal-
B
tet sind.
Den im Lieferumfang des PC INTERFACE KIT TYPE 180 enthaltenen Fer-
C
ritkern am Druckerkabel befestigen, und zwar in der Nähe des Parallelanschlusses.
Das 36–polige Ende des Parallelkabels in den Parallelanschluß auf der lin-
D
ken Seite der Controller-Abdeckung an der Geräterückseite stecken.
Die Drahtklemmen auf den beiden Seiten des Steckers zusammendrük-
E
ken, bis sie einrasten. Die Klemmen sorgen für eine sichere Befestigung
des Kabels.
Das Ende des Parallelkabels in den Parallelanschluß des Computers stek-
F
ken.
4
Page 51

Einrichten — Gerät
Hinweis
❒ Die WinStyler T180-Software verwendet den bidirektionalen Datenüber-
tragungsmodus über den LPT-Anschluß Ihres PC. Wie Sie herausfinden
können, ob der LPT-Anschluß auf bidirektionale Datenübertragung eingestellt ist, erfahren Sie in der Bedienungsanleitung Ihres PC.
Schalten Sie zuerst das Gerät und dann den Computer ein.
G
Ausschließliche Verwendung des Universaleinzugs im
Druckermodus
Referenz
Siehe “Anwenderparameter (Funktion 63)” in der Bedienungsanleitung des
Faxgeräts (Schalter SW10, Stelle 5 1; nur für den Druckermodus).
Hinweis
❒ Aufgrund der hohen Temperatur bei der Fixierung des Toners sind Postkar-
ten nach dem Druck leicht gewellt. Vor Bedrucken der Rückseite die Postkarten entweder glattstreichen oder in die entgegengesetzte Richtung wölben.
❒ Beim Einlegen von A5-Papier in den Universaleinzug darauf achten, daß die
Längsseiten parallel zu den Seitenausrichtern liegen. Den Universaleinzug
über das Bedienfeld auf “ANDERES FORMAT ” einstellen. Das Format “A5
(210 x 148 mm)” kann nur für den Faxempfang verwendet werden.
Deutsch
5
Page 52

ÜBERBLICK
6
Page 53

2. Einrichten — Software
Systemanforderungen
Betriebssystem
Windows 95/98, Windows NT 4.0
PC
Jeder Computer, der die Anforderungen von Microsoft für Windows 95/98 oder
Windows NT 4.0 erfüllt, eignet sich für die WinStyler T180-Software. Um optimale Ergebnisse zu erzielen, empfehlen wir die folgenden CPUs.
Windows 95/98 Pentium 120 MHz
Windows NT 4.0 Pentium 166 MHz
Hinweis
❒ Auf einem 286er oder älterem System läßt sich die WinStyler T180-Software
nicht ausführen.
Deutsch
E/A
Standard-PC-Parallelanschluß und -kabel.
Speicher
Überprüfen Sie die Speicherkapazität Ihres PC. Speichererweiterungen erhöhen
die gesamte System- und Druckerleistung.
Empfohlene Speicherkapazität:
Windows 95/98 32MB
Windows NT 4.0 64MB
Festplatte
Ca. 4 MB für Dateien und bis ca. 12 MB für virtuellen Speicher. Die Einstellungen des virtuellen Speichers sind über die Leistungsmerkmale in der Systemsteuerung zu wählen.
7
Page 54

Einrichten — Software
Wenn Sie mehr als 8 MB RAM haben, benötigen Sie nicht die gesamten 12 MB
des virtuellen Speichers. PC RAM und virtueller Speicher sollten eine Gesamtkapazität von mindestens 16 MB haben.
Zuweisung des virtuellen Speichers
Wir empfehlen eine automatische Zuweisung des virtuellen Speichers über
Windows 95/98 oder Windows NT 4.0. Darüber hinaus haben Sie die Möglichkeit, virtuellen Speicher sind über die Leistungsmerkmake in der Systemsteuerung selbest zuzuweisen. Die WinStyler T180-Software benötigt eine
Speicherkapazität von insgesamt 16 MB, aufgeteilt zwischen Ihrem PC-Speicher
(mindestens 8 MB) und dem virtuellen Speicher von Windows. Verfügt Ihr System über 8 MB RAM, müssen Sie mindestens 8 MB für virtuellen Speicher zuweisen. Verfügen Sie über 5 MB RAM, dann benötigen Sie mindestens 11 MB
virtuellen Speicher usw.
Referenz
Näheres über die Zuweisung von virtuellem Speicher erfahren Sie in der Online-Hilfe von Windows 95/98/NT 4.0.
8
Page 55

Installieren der WinStyler T180-Software
Installieren der WinStyler T180-Software
Die WinStyler T180 -Software enthält ein Software-Installationsprogramm, um
die Einrichtung zu erleichtern. Das Installationsprogramm analysiert die Systemkonfiguration, installiert die WinStyler T180-Software und nimmt die erforderlichen Änderungen in den Windows -Startdateien vor.
Hinweis
❒ Erscheint die Meldung “Neue Hardware erkannt ”, klicken Sie auf [Abbre-
]
.
chen
❒ Um die WinStyler T180-Software in Windows NT 4.0 zu installieren, müssen
Sie über Administratorrechte.
Deutsch
Windows 95/98/NT 4.0— Installation der WinStyler T180-Software
Hinweis
❒ Wurde in den Ländereinstellungen (Abschnitt Systemsteuerung) eine Spra-
che gewählt, die die WinStyler T180-Software unterstützt, erfolgt die Installation in dieser Sprache.
Zur Installation der WinStyler T180-Treibersoftware sind folgende Schritte erforderlich:
Die WinStyler T180-CD-ROM in das CD-ROM-Laufwerk einlegen.
A
Alle momentan aktivierten Anwendungen schließen.
B
]
[
In der Task-Leiste
C
[
Ausführen
D
Im Fenster “Ausführen” die Option
E
Das CD-ROM-Laufwerk wählen.
F
Die Datei mit dem Namen
G
]
anklicken.
anklicken.
Start
[
SETUP.EXE
[
Durchsuchen
]
wählen und
]
anklicken
[
Öffnen
]
anklicken.
Hinweis
❒ Wird die Sprache des von Ihnen verwendeten Betriebssystems nicht er-
kannt, bietet das Installationsprogramm die englische Version der WinStyler T180 -Software an.
[OK]
anklicken.
H
Die Anweisungen auf dem Bildschirm befolgen.
I
Hinweis
❒ Dieser Drucker wird automatisch als Standarddrucker eingestellt.
9
Page 56

Einrichten — Software
----Erstellung von Disketten mit Hilfe der CD-ROM
Wenn in Ihrem Computer kein CD-ROM-Laufwerk installiert ist, Sie aber Zugriff auf einen IBM-kompatiblen Computer mit installiertem CD-ROM-Laufwerk haben, können Sie mit Hilfe der CD-ROM einen Satz SoftwareInstallationsdisketten erstellen. Sie benötigen mindestens zwei leere, formatierte
1,44–MB-Disketten.
Zur Erstellung von Installationsdisketten sind folgende Schritte erforderlich:
Die CD-ROM in das CD-ROM-Laufwerk einlegen.
A
In der Task-Leiste [
B
Die Option [
C
{{{{
X: makedisk
D
ROM-Laufwerks ersetzen.
Die Option [OK] anklicken.
E
Die Anweisungen auf dem Bildschirm befolgen.
F
}}}}
Start
] anklicken.
Ausführen
eingeben, und dabei “X” durch den Buchstaben Ihres CD-
] anklicken.
Entfernen der WinStyler T180-Software
Hinweis
❒ Beim Entfernen der WinStyler T180-Software empfiehlt es sich, die WinStyler
T180-Druckereinstellung "Shared" in “Nicht freigegeben”zu ändern.
❒ Vor Entfernen der WinStyler T180-Software sollten Sie sämtliche Anwendun-
gen schließen und Windows neu starten.
Windows 95/98/NT 4.0 — Entfernen der WinStyler T180 -Software
Zum Löschen der WinStyler T180-Software sind folgende Schritte durchzuführen:
In der Task-Leiste [
A
Start
] anklicken.
10
Die Option [
B
Die Option [
C
Die Option [
D
Die Anweisungen auf dem Bildschirm befolgen.
E
Programme
WinStyler T180 Programme
Deinstallationsprogramm
] anklicken.
] anklicken.
] anklicken.
Page 57

3. DRUCKEN ÜBER DEN PC
Drucken der Testseite
Drucken der Testseite mit Hilfe von Druckerkonsole
Zum Drucken der Testseite mit Hilfe von Druckerkonsole sind folgende Schritte
erforderlich:
Deutsch
Auf der Task-Leiste [
A
Die Option [
B
Die Option [
C
Die Option [
D
Die Option [
E
rekte Funktionsweise sämtlicher Druckmodi überprüft.
Die Option [Ja] anklicken.
F
Das Testprogramm druckt eine Konfigurationsseite mit Informationen über
Ihr System und Ihren Drucker.
Hinweis
❒ Die Option [
zu drucken.
Referenz
Läßt sich die Testseite nicht ausdrucken, überprüfen, ob das Verbindungskabel zwischen Gerät und Drucker an beiden Enden richtig angeschlossen
ist. Siehe Abschnitt “Anschließen des Geräts”.
Programme
WinStyler T180 Programme
Druckerkonsole
] anklicken, damit die WinStyler T180-Software die kor-
TEST
Nein
] anklicken.
Start
] anklicken.
] anklicken.
] anklicken.
] anklicken, um das Dialogkästchen zu schließen, ohne es
11
Page 58

DRUCKEN ÜBER DEN PC
Windows 95/98/NT 4.0– Drucken eines
Dokuments in Windows
Das Druckverfahren ist für jede Anwendung unterschiedlich. Ausführliche Informationen über das Drucken entnehmen Sie bitte der Online-Hilfe Ihrer Software.
12
Page 59

Windows 95/98 — Drucken in einer DOS-Anwendung.
Windows 95/98 — Drucken in einer DOSAnwendung.
Die WinStyler T180-Software wurde so konzipiert, daß sowohl in DOS- als auch
in Windows-Anwendungen gedruckt werden kann. Die WinStyler T180-Software bietet auch ein PCL-Bedienpanel zum Drucken in DOS PCL. Damit können
Sie die Druckereinstellungen von DOS-Druckaufträgen ändern.
Hinweis
❒ Diese Funktion steht nur in Windows 95/98 zur Verfügung.
❒ Einige DOS-Anwendungen setzen diese Einstellungen unter Umständen au-
ßer Kraft.
❒ Keine Karten erforderlich
• Einige konventionelle Drucker verfügen über Kartensteckplätze, so daß
Sie zusätzliche Schriften installieren können. Da die WinStyler T180-Software die Druckbilder vor der Übertragung zum Drucker im System erstellt, hätte die Installation einer Karte keinen Einfluß auf den endgültigen
Ausdruck. Die WinStyler T180-Software verwendet statt dessen die in Ihrem Windows-System installierten Schriften.
❒ Die WinStyler T180 PCL-Software ist kompatibel mit PCL 4.5 (HP LASER JET
IIP)
Deutsch
Zugriff auf das PCL-Bedienpanel ausgehend von Windows
Auf dem PCL-Bedienpanel vorgenommene Änderungen haben keinen Einfluß
auf Druckaufträge, die in Windows-Anwendungen erteilt wurden. Diese Einstellungen haben lediglich Einfluß auf Druckaufträge, die in DOS-Anwendungen erteilt werden.
]
[
In der Task-Leiste
A
Die Option
B
Die Option
C
Die Option
D
Die Option
E
[
Programme
[
WinStyler T180 Programme
[
Druckerkonsole
]
[
auf der Druckerkonsole anklicken.
PCL
anklicken.
Start
]
anklicken.
]
anklicken.
]
anklicken.
13
Page 60

DRUCKEN ÜBER DEN PC
Aktivierung des PCL-Interpreter ausgehend von Windows
Der PCL-Interpreter muß aktiviert bzw. eingeschaltet werden, bevor mit Hilfe
des PCL-Bedienpanel die Einstellungen eines Druckauftrags geändert werden
können. Im PCL-Bedienpanel vorgenommene Änderungen haben keinen Einfluß auf Druckaufträge, die in Windows-Anwendungen erteilt werden. Diese
Einstellungen beeinflussen lediglich Druckaufträge, die in DOS-Anwendungen
erteilt werden.
In der Task-Leiste [
A
Die Option [
B
Die Option [
C
Die Option [
D
Die Option [
E
Die Option [
F
dus anklicken.
Die Option [OK] anklicken.
G
----Laden von Makros und Schriften
• Bevor Makros und Schriften installiert und verwendet werden können, muß
der PCL-Interpreter aktiviert bzw. eingeschaltet werden.
• Die WinStyler T180-Software hält die geladenen Makros und Schriften bereit,
bis der Drucker ausgeschaltet wird.
Hinweis
❒ Die Makros und Schriften müssen mit PCL4.5 kompatibel sein.
❒ Näheres über PCL4.5 erfahren Sie im Benutzerhandbuch für HP LASER JET
IIP.
Programme
WinStyler T180 Programme
Druckerkonsole
DOS
PCL-Interpreter aktivieren
] anklicken.
Start
] anklicken.
] anklicken.
] anklicken.
] auf der Druckerkonsole anklicken.
] im Drop-Down-Menü des Druckmo-
14
Page 61

4. SCANNEN ÜBER DEN PC
Scannen in einer Windows-Anwendung
Die Scan-Funktion steht in jeder beliebigen Windows-Anwendung zur Verfügung, die eine TWAIN-Schnittstelle unterstützt.
Dieser Abschnitt erläutert in allgemeiner Form das Scannen aus einer WindowsAnwendung. Das konkrete Verfahren kann je nach Anwendungsprogramm geringfügig abweichen. Genaue Informationen über das Scannen entnehmen Sie
bitte dem entsprechenden Software-Handbuch.ber das Scannen entnehmen Sie
bitte dem entsprechenden Software-Handbuch.
Hinweis
❒ Das Gerät kann in TWAIN-Anwendungen, die unter Windows 95/98 und
Windows NT 4.0 laufen, als Scanner eingesetzt werden.
Das abzutastende Dokument einlegen.
A
Referenz
Einzelheiten siehe Abschnitt “Faxbetrieb ” in der Bedienungsanleitung des
Faxgeräts.
In der Scanner-Software auf die WinStyler T180-Scanner-Optionen zugrei-
B
fen.
Deutsch
Die Einstellungen für dieses Scanverfahren vornehmen.
C
Hinweis
❒ Sie können folgendes festlegen: Abtastmodus/Auflösung/Kontrast.
❒ Je nachdem, mit welchem Programm Sie arbeiten, können Sie unter Um-
ständen nicht alle dieser Einstellungen vornehmen.
]
[
Die Option
D
Hinweis
❒ Sobald eine Rufnummer eingegeben wird, steht die PC-Scan-Funktion nicht
mehr zur Verfügung.
❒ Wird das Dokument über den Automatischen Dokumenteneinzug abgetastet
und überschreitet die Länge des Dokuments das für die Abtastung spezifizierte Maß, wird das Dokument über die gesamte Länge abgetastet und das
resultierende Bild einem größeren als dem spezifizierten Bereich entnommen.
anklicken, um das Dokument abzutasten.
OK
15
Page 62

SCANNEN ÜBER DEN PC
16
Page 63

5. FAXEN ÜBER DEN PC
Hinweise zum FAXEN PER PC
Einschränkung
❒ Diese Funktion steht nur in Windows 95/98 zur Verfügung.
Wenn Sie die Fax-Software in Ihrem PC installieren, können Sie Faxnachrichten di-
rekt über Ihren Computer senden und empfangen (Verwendung des Faxgeräts als
Fax-Modem).
Nachfolgend eine kurze Zusammenfassung der wichtigsten Funktionen:
• Senden und Empfangen von Faxnachrichten über Windows 95/98
• Steuerbefehle, die mit Klasse 2 kompatibel sind.
• Übertragungsgeschwindigkeit: 14.400, 12.000, 9.600, 7.200, 4.800 und 2.400 Bit/s
Die folgenden Software-Faxanwendungen werden unterstützt:
Hinweis
❒ Die Verfügbarkeit einiger Optionen hängt von Ihren örtlichen Gegebenheiten ab.
• WinFax PRO
•MS-FAX
• BitWare
• SopWith
• BVRP WinFax
Wie diese Anwendungen installiert und eingerichtet werden, erfahren Sie im zugehörigen Produkthandbuch.
Stellen Sie sicher, daß die Software WinStyler T180 vor Ihrem Fax-Programm installiert wird.
Bei Aktivierung der Funktion "PC-Empfang" ist kein manueller Empfang über das
PC-FAX-Programm möglich.
Deutsch
Senden und Empfangen von
Faxnachrichten
Informationen zum Senden und Empfangen von Faxnachrichten über Ihren PC erhalten Sie im Handbuch der jeweiligen Faxanwendung.
Um das System starten zu können, sind folgende Schritte durchzuführen (falls nicht
bereits geschehen):
• COM-Redirector konfigurieren (siehe folgenden Abschnitt).
• Die Fax-Software installieren (Einzelheiten siehe separates Software-Handbuch).
• Die Funktion "PC-Empfang" einschalten (siehe folgenden Abschnitt).
17
Page 64

FAXEN ÜBER DEN PC
Einschalten der Funktion "PC-Empfang"
Wenn Sie mit Ihrem PC Faxnachrichten empfangen möchten, müssen Sie diese
Funktion einschalten.
Hinweis
❒ Ist die Funktion "PC-Empfang" ausgeschaltet, werden ankommende Faxnach-
richten vom Faxgerät empfangen und nicht zum den PC übertragen.
❒ Bei abgeschaltetem PC können keine Faxnachrichten empfangen werden.
Auf dem Bedienfeld des Faxgeräts die Taste {{{{
A
der Zehnertastatur {{{{
6
}}}} {{{{2}}}} {{{{2}}}} {{{{2}}}} {{{{2}}}} {{{{6}}}} {{{{2}}}} eingeben.
INST.MODUS J/WEITERi
62 FUNKTIONSWAHL
Die Taste {{{{Ja}}}} drücken.
B
J/WEITERi
WÄHLVERFAHREN
Funktion
}}}} drücken und mit Hilfe
Die Taste
C
VVVV
drücken, bis nachstehende Anzeige erscheint.
J/WEITERi
PC EMPFANG EIN/AUS
Die Taste {{{{Ja}}}} drücken.
D
Mit Hilfe der Taste
E
dann die Taste {{{{
WWWW
Ja
}}}} drücken.
oder
VVVV
die Funktion "PC-Empfang" einschalten und
PC EMPFANG J/hi
iEIN AUS
Die Taste {{{{
F
Funktion
}}}} drücken, um zum Bereitschaftsmodus zurückzukehren.
COM-Redirector
COM-Redirector ist eine Software, die Daten vom seriellen Anschluß Ihres PC zu einem Parallelanschluß umleitet (wird für Ihr PC-Faxpaket verwendet). Wie sich der
COM-Anschluß einstellen läßt, erfahren Sie in der Online-Hilfe.
Hinweis
❒ Ist ein freier Anschluß verfügbar, wird dieser automatisch gewählt.
❒ Verwendung von Anschluß N
u.U.Probleme verursachen.
18
°5 oder höger kann bei einigen Fax-Anwendungen
Page 65

6. FAX-DIENSTPROGRAMM
REMOTE-SETUP
Hinweise zum Fax-Dienstprogramm
Remote-Setup
Das Dienstprogramm Remote-Setup erlaubt Ihnen, verschiedene Faxgerät-Einstellungen an Ihrem PC aufzurufen und (über eine bedienerfreundliche Grafikschnittstelle) zu editieren.
Wählen des Fax-Dienstprogramms
Remote-Setup
In der Task-Leiste die Schaltfläche [
A
Die Option [
B
Die Option [
C
Die Option [
D
Programme
WinStyler T180 Programme
Remote-Setup
] anklicken.
] anklicken.
Start
] anklicken.
] anklicken.
Was das Fax-Dienstprogramm RemoteSetup Ihnen alles erlaubt
• Anzeigen und Editieren von Zielwahlen, Kurzwahlen und Gruppen
• Anzeigen und Editieren Ihrer Faxgerät-Kennung
• Aktivieren des Energiesparmodus
• Programmieren der Anwenderfunktionstasten
• Eingeben von Abteilungscodes
• Einstellen der Nachtzeitschaltung
• Sichern der gewählten Nummern in Ihrem PC
• Ausdrucken verschiedener Listen und Kennungen
Deutsch
Referenz
Eine detaillierte Aufstellung der Optionen, Funktionen und Bedienungsabläufe finden Sie in der Online-Hilfe.
19
Page 66

FAX-DIENSTPROGRAMM REMOTE-SETUP
20
Page 67

7. FEHLERSUCHE
Installieren der WinStyler T180-Software
❖❖❖❖
Es wurde ein Druckertreiber in einer anderen Sprache installiert.
Ursache Lösung
Die im Rahmen der Ländereinstellungen
gewählte Sprache entspricht nicht der von
Ihrem Betriebssystem verwendeten Sprache.
Drucken über den PC
Tritt ein Problem auf, liefert das WinStyler T180 Statusanzeige häufig Informationen über die Art des Problems und bietet darüber hinaus technische Unterstützung zur Problembeseitigung.
❖❖❖❖
Das Gerät druckt nicht.
Ursache Lösung
Ist das Gerät eingeschaltet? Das Gerät einschalten.
Ist das Schnittstellenkabel ordnungsge-
mäß angeschlossen?
Wird das richtige Schnittstellenkabel verwendet?
Wurde das Schnittstellenkabel nach Einschalten des Hauptschalters angeschlossen?
Kann eine Testseite ausgedruckt werden? Wenn nicht, ist Ihr Gerät möglicherweise
Die Meldung "Drucker ist belegt" erscheint im Display.
Die Ländereinstellungen überprüfen und
die gewünschte Sprache wählen. Die
WinStyler T180-Software entfernen. Die
WinStyler T180-Software wieder installieren.
Das Schnittstellenkabel ordnungsgemäß
anschließen. Sicherstellen, daß alle Stekker fest angeschlossen und alle Schrauben
fest angezogen sind.
Darauf achten, daß das richtige Kabel verwendet wird. Ist das Kabel beschädigt
oder verschlissen, ein neues verwenden.
Sicherstellen, daß das Schnittstellenkabel
vor Einschalten des Hauptschalters angeschlossen wird.
defekt. Den zuständigen Kundendienst
verständigen.
Ein paar Minuten warten und dann einen
neuen Druckversuch starten.
Deutsch
21
Page 68

FEHLERSUCHE
❖❖❖❖
Probleme mit der Druckqualität
Problem Lösung
Die gedruckten Seiten sind schmutzig
(verschmutzter Hintergrund/weiße Flekken in schwarzen Bildbereichen oder Zeichen).
Siehe Bedienungsanleitung des Faxgeräts.
Scannen über den PC
❖❖❖❖
Die Dokumente werden mitten im Abtastvorgang gestoppt.
Ursache Lösung
Das Dokument überschreitet die zulässige Maximallänge bzw. ist kürzer als die
Mindestlänge.
Ein Dokument mit geeignetem Format
verwenden und einen neuen Scan-Versuch starten.
22
Page 69

Faxen über den PC
Faxen über den PC
Einschränkung
❒ Diese Funktion steht nur in Windows 95/98 zur Verfügung.
❖❖❖❖
Über die PC-Faxanwendung können keine Faxnachrichten versendet werden.
Ursache Lösung
Das externe Telefon klingelt. Warten, bis die Leitung frei ist, und dann
Die Leitung ist besetzt.
Es wurde der falsche COM-Redirector-
Anschluß gewählt.
❖❖❖❖
Die Faxübertragung beginnt, aber es geschieht nichts.
Ursache Lösung
Das Faxgerät überträgt gerade eine andere Nachricht.
Das Gerät druckt Berichte aus.
❖❖❖❖
An Ihrem PC können keine Faxnachrichten empfangen werden.
Ursache Lösung
Das Gerät ist nicht eingeschaltet. Das Gerät einschalten.
Die Kabel sind nicht richtig angeschlos-
sen.
Ihre PC-Faxanwendung läuft nicht. Die PC-Faxanwendung starten und den
Ihr Faxgerät befindet sich nicht im PCEmpfangsmodus.
Beim Ankommen des Rufs hat jemand
den externen Handapparat abgenommen.
einen neuen Sendeversuch starten.
Den richtigen Anschluß wählen.
Warten, bis der Übertragungsvorgang abgeschlossen ist, und dann einen neuen
Sendeversuch starten.
Die Kabel richtig anschließen.
Empfangsmodus wählen.
Den Modus "PC-Empfang" mit Hilfe der
Funktion 62 einschalten.
Beim Eintreffen von Faxnachrichten nicht
den Handapparat abnehmen. Ist es bereits
geschehen und Sie hören ein Fax-Signal,
die Taste "Stop" drücken, damit das Faxgerät die Nachricht empfangen und ausdrucken kann. Haben Sie den Absender
um erneute Übertragung gebeten, vor
dem PC-Empfang nicht den Handapparat
des externen Telefons abheben.
Deutsch
23
Page 70

FEHLERSUCHE
❖❖❖❖
Eintreffende Faxnachrichten werden vom Faxgerät ausgedruckt und nicht zum PC
übertragen.
Ursache Lösung
Ihr Faxgerät befindet sich nicht im PCEmpfangsmodus.
Die PC-Faxanwendung verharrt im Empfangsstatus.
Die PC-Faxanwendung läßt sich nicht in
den Empfangsmodus schalten.
❖❖❖❖
Die Lautstärke des Faxgerätelautsprechers läßt sich über die PC-Faxanwendung
Den Modus "PC-Empfang" mit Hilfe der
Funktion 62 einschalten.
Den Vorgang abbrechen und die PC-Faxanwendung wieder in den Empfangsmodus schalten.
Das Faxgerät aus- und dann wieder einschalten. Anschließend die PC-Faxanwendung in den Empfangsmodus
schalten.
nicht regeln.
Ursache Lösung
Diese Funktion wird von Ihrer PC-Faxanwendung nicht unterstützt.
Die Lautstärke des Lautsprechers über
das Bedienfeld des Faxgeräts regeln
(Funktion 92).
24
Page 71

8. SPEZIFIKATIONEN
Schnittstelle
Bidirektionale Parallelschnittstelle (IEEE P1284)
Drucker
❖❖❖❖
Auflösung
600 oder 300 dpi (GDI)
300 dpi (PCL)
❖❖❖❖
Druckgeschwindigkeit
6 Seiten/Minute
❖❖❖❖
RAM
512KB
❖❖❖❖
Emulation
GDI auf Host-Basis
Host-Basis PCL
❖❖❖❖
Papiergewicht
60 bis 90 g/m2
Deutsch
25
Page 72

SPEZIFIKATIONEN
❖❖❖❖
Papierformat
Papierkassette Papierformat
Standardkassette Letter (8 1/2 x 11 in)
Zusatzkassette A4 (210 x 297 mm)
Legal (8 1/2 x 14 in)
F4 (210 x 330 mm)*1
Universaleinzug Letter (8 1/2 x 11 in)
A4 (210 x 297 mm)
Legal (8 1/2 x 14 in)
F4 (210 x 330 mm) *1
A5 (148 x 210 mm)
Executive (7 1/4 x 10 1/2 in)
HLT (5 1/2 x 8 1/2 in) *1
B5 (182 x 257 mm) *1
Umschlag DL (110 x 220 mm)
Umschlag C5 (162 x 229 mm)
Umschlag C6 (114 x 162 mm) *1
Umschlag Monarch (3 7/8 x 7 1/2 in)
Umschlag #10 (4 1/8 x 9 1/2 in)
Postkarte (100 x 148 mm) *1
Kundenspezifisches Format *1 *2
26
*1 Vom PCL-Interpreter nicht unterstützt.
*2 Breite 100 ~ 190 mm (3,94 ~ 7,48 in), Länge 148 ~ 355 mm (5,83 ~ 13,98 in)
Page 73

Scanner
Hinweis
❒ Der WinStyler T180-Scannertreiber ist kompatibel mit TWAIN 1.7.
❖❖❖❖
Anwendung
TWAIN 1.7
❖❖❖❖
Auflösung
200 x 200 dpi
300 x 300 dpi (interpoliert)
400 x 400 dpi (interpoliert)
❖❖❖❖
Abtastformat
Mindestformat: 105 mm x 148 mm (4,1 x 5,8 in)
Maximalformat: 218 mm x 600 mm (8,5 x 23,6 in)
PC-FAX
Einschränkung
❒ Diese Funktion steht nur in Windows 95/98 zur Verfügung.
❖❖❖❖
API
Klasse 2
Scanner
Deutsch
❖❖❖❖
Modemgeschwindigkeit
14.400 Bit/s (Maximal)
27
Page 74

Page 75

3. Italiano
Italiano
Page 76

Introduzione
Questo manuale contiene delle istruzioni dettagliate sul funzionamento e sulla manutenzione dell’ apparecchio. Per ottenere la massima funzionalità dell’ apparecchio, tutti gli utenti devono leggere attentamente e osservare le istruzioni fornite in questo manuale. Conservare questo manuale vicino
all’apparecchio.
Leggere le Informazioni sulla Sicurezza prima di us are que sto apparec chio. Conte ngono de lle importanti informazioni per la SICUREZZA DELL’UTENTE e per la PREVENZIONE DEI PROBLEMI.
Importante
Alcune parti di questo manuale sono soggette a modifica senza preavviso. In nessun caso la società
potrà essere ritenuta responsabile per danni diretti, indiretti, speciali, incidentali o conseguenziali derivanti dall’uso o dal funzionamento di questo apparecchio.
Marchi
®
Microsoft
e/o in altri paesi.
Hewlett-Packard, HP, LaserJet e PCL sono marchi registrati della Hewlett-Packard Company.
Gli altri nomi di prodotti sono utilizzati in questo documento esclusivamente a scopo identificativo e po-
trebbero essere marchi delle rispettive case produttrici. La società non riconosce espressamente alcun
diritto su tali marchi.
Avvertenza:
L'impiego di comandi, regolazioni o proced ure diverse da quelle indica te nel presente manuale può
provocare l'emissione di pericolose ra dia zioni.
Note:
Alcune illustrazioni possono essere leggermente differenti dalla propria macchina.
Alcune opzioni non sono disponibili in determinati paesi. Per ulteriori dettagli contattare il proprio con-
cessionario.
, Windows® e MS-DOS® sono marchi registrati della Microsoft Corporation negli Stati Uniti
ii
Page 77

PC INTERFACE KIT TYPE 180
Questa opzione può essere installata sul seguente modello.
[H545]
Italiano
iii
Page 78

Dichiarazione di conformità
“Il Prodotto è conforme ai requisiti della Direttiva EMC 89/336/EEC e alla Direttiva sulla Bassa Tensio-
ne 73/23/EEC.”
Copyright © 1999
iv
Page 79

Manuali per questo apparecchio
Il Manuale Operatore di questo apparecchio è composto dai seguenti 2 manuali.
A Manuale Operatore Fax
B PC INTERFACE KIT TYPE 180 Manuale Operatore (questo manuale)
Leggere innanzitutto il Manuale Operatore Fax A . Esso contiene informazioni
importanti per la sicurezza dell'utente.
Questo manuale B spiega l'uso dell'apparecchio quando viene collegato al com-
puter per utilizzarlo come stampante per PC.
In caso di utilizzo dell'apparecchio come stampante per computer, consultare
questo manuale di istruzioni per l'uso e l'altro manuale per informazioni sulla
MANUTENZIONE o sulla LOCALIZZAZIONE DEI GUASTI.
In caso di utilizzo dell'apparecchio come unità fax autonoma, consultare il Manuale Operatore Fax A .
----
Uso della Guida in linea
La Guida in linea viene installata automaticamente con il software WinStyler T180.
La Guida in linea contiene istruzioni dettagliate per assistere l'utente nell'utiliz-
zo di WinStyler T180 durante le varie attività.
Informazioni sul manuale
Italiano
Simboli
In questo manuale vengono utilizzati i seguenti simboli:
Nota
Questo simbolo indica precauzioni per il funzionamento o azioni da eseguire in caso
di funzionamento errato.
Limitazione
Questo simbolo indica limiti numerici, funzioni che non possono essere usate insieme o condizioni in cui non è possibile usare una determinata funzione.
Riferimento
Questo simbolo indica un riferimento.
[ ]
Tasti e pulsanti che compaiono sullo schermo del computer.
{
}
Tasti che fanno parte del pannello operativo dell’apparecchio.
Tasti sulla tastiera del computer.
v
Page 80

SOMMARIO
1.PANORAMICA DEL SISTEMA
Caratteristiche ........................................................................................... 1
Installazione — Apparecchio.................................................................... 2
Installazione dell'interfaccia PC.............................................. ....................... 2
Collegamento dell'apparecchio..................................................................... 3
Impostazione dell'alimentatore multi-uso riservato alla stampante............... 5
2.Installazione — Software
Requisiti di sistema................................................................................... 7
Sistema operativo ......................................................................................... 7
PC.......................................................................................................... ....... 7
I/O ................................... ........ ........ ........ ........ ........ ...................................... 7
Memoria........................................................................................................ 7
Spazio su disco....... ........ ........ ........ ........ ...................................................... 7
Allocazione della memoria virtuale................................................................ 8
Installazione del software WinStyler T180.............................................. 9
Windows 95/98/NT 4.0— Installazione del software WinStyler T180 ........... 9
Disinstallazione del software WinStyler T180....................................... 10
Windows 95/98/NT 4.0 — Disinstallazione del software WinS ty ler T180.... 10
3.STAMPA DA PC
Stampa della pagina di prova................................................................. 11
Stampa della pagina di prova utilizzando la Console stampante................ 11
Windows 95/98/NT 4.0– Stampa di un documento da Windows......... 12
Windows 95/98 — Stampa da un'applicazione DOS ............................ 13
Accesso al Pannello di controllo PCL da Windows..................................... 13
Attivazione dell'Interprete PCL da Windows ............................................... 14
4.SCANSIONE DA PC
Scansione da un'applicazione Windows............................................... 15
5.GESTIONE FAX DA PC
Informazioni sulla gestione fax da PC................................................... 17
Invio e ricezione di fax............................................................................ 17
Attivazione della Ricezione PC .............................................................. 18
COM-Redirector....................................................................................... 18
vi
Page 81

6.UTILITY DI OPERAZIONE REMOTA FAX
Informazioni sull'utility di Operazione remota fax ............................... 19
Selezione dell'utility di Operazione remota fax .................................... 19
Operazioni possibili con l'utility di Operazione remota fax ................ 19
7.LOCALIZZAZIONE DEI GUASTI
Installazione del software WinStyler T180............................................ 21
Stampa da PC .......................................................................................... 21
Scansione da PC ..................................................................................... 22
Gestione fax da PC.................................................................................. 23
8.SPECIFICHE TECNICHE
Interfaccia................................................................................................. 25
Stampante................................................................................................ 25
Scanner .................................................................................................... 27
PC-FAX..................................................................................................... 27
Italiano
vii
Page 82

Page 83

1. PANORAMICA DEL SISTEMA
Caratteristiche
Insieme al software WinStyler T180 è incluso il PC INTERFACE KIT TYPE 180.
Dopo l'installazione di questo software, saranno disponibili le seguenti funzioni.
❖❖❖❖
Stampante per PC
L'apparecchio funziona come una stampante con risoluzione di 300/600 dpi
(punti per pollice) in modalità di stampa Windows e di 300 dpi in emulazione
PCL per la stampa DOS.
La tecnologia di miglioramento bordi (Edge Enhancement Technology) fornisce al testo un aspetto nitido e chiaro.
La velocità del motore di stampa è di 6 pagine A4 al minuto con una risoluzione di 600 dpi.
❖❖❖❖
Scanner per PC
Utilizzando il software per scanner specificato, questo apparecchio diventa
uno scanner per applicazioni TWAIN.
❖❖❖❖
PC-FAX
Utilizzando il software di gestione fax specificato, questo apparecchio consente di trasmettere e ricevere messaggi fax attraverso il proprio personal
computer. Questa funzione è disponibile solo in Windows 95/98.
Italiano
❖❖❖❖
Utility di configurazione
L'Utility di Operazione remota consente di visualizzare e modificare varie
impostazioni del fax dal PC tramite un'interfaccia grafica facile da usare.
❖❖❖❖
Monitor di stato
Il Monitor di stato fornisce una rappresentazione grafica a video dello stato
dell'apparecchio. Esso visualizza inoltre animazioni che illustrano i problemi
più comuni e spiegano come risolverli.
1
Page 84

PANORAMICA DEL SISTEMA
Installazione — Apparecchio
Installazione dell'interfaccia PC
Nota
❒ Assicurarsi che l'interruttore SW1 sulla scheda di interfaccia PC sia sulla po-
sizione ON.
Spegnere l'apparecchio.
A
TSTP040N
Rimuovere il coperchio di plastica posto sul lato posteriore destro dell'ap-
B
parecchio.
TSTP010N
2
Page 85

Installazione — Apparecchio
Tenere la scheda di interfaccia come mostrato e inserirla accuratamente
C
nell'alloggiamento.
TSTP020N
Stringere le due viti per fissare la scheda in posizione.
D
Italiano
Collegamento dell'apparecchio
Requisiti del cavo parallelo
Il PC INTERFACE KIT TYPE 180 deve essere collegato al computer tramite una
porta parallela ed un cavo parallelo. L'utente deve procurarsi il cavo necessario
per l'interfacciamento del computer al PC INTERFACE KIT TYPE 180 poiché
tale cavo non viene fornito con la macchina. La connessione parallela dell'apparecchio consiste in un'interfaccia parallela standard bidirezionale. È richiesto un
cavo parallelo standard a 36 pin conforme alle specifiche IEEE P1284 ed una porta parallela disponibile sul computer.
Nota
❒ Non usare cavi paralleli di lunghezza superiore a 3 metri.
❒ Il connettore deve essere di tipo 57–30360 (AMPHENOL) o equivalente.
❒ I cavi conformi allo standard P1284 recano il contrassegno “IEEE Std 1284–
1994 compliant”.
3
Page 86

PANORAMICA DEL SISTEMA
Collegamento al computer
Collegare l'apparecchio al computer utilizzando un cavo parallelo conforme alle
specifiche IEEE P1284 (fornito dall'utente).
Per collegare l'apparecchio al computer, eseguire la procedura indicata di seguito:
Assicurarsi di disporre del cavo di tipo corretto.
A
Assicurarsi che l'apparecchio e il computer siano entrambi spenti.
B
Applicare l'anello di ferrite fornito con il PC INTERFACE KIT TYPE 180 al
C
cavo della stampante. L'anello di ferrite deve essere fissato in prossimità
della porta parallela.
Inserire l'estremità a 36 pin del cavo parallelo nella porta parallela sul lato
D
sinistro del coperchio della scheda controller posta dietro l'apparecchio.
Premere le clips metalliche situate ai due lati del connettore finché non
E
scattano in posizione. Queste clips servono per fissare il cavo in posizione
corretta.
Inserire l'altra estremità del cavo parallelo nella porta parallela del compu-
F
ter.
4
Page 87

Installazione — Apparecchio
Nota
❒ WinStyler T180 utilizza il metodo di trasferimento dati bidirezionale tra-
mite la porta LPT del PC. Consultare il manuale d'uso del PC per verificare
se la porta LPT è configurata per il trasferimento dati bidirezionale.
Accendere l’apparecchio e quindi il computer.
G
Impostazione dell'alimentatore multi-uso riservato alla
stampante
Riferimento
Consultare la sezione “Parametri utente (funzione 63)” nel Manuale Operatore Fax (interruttore SW10, cifre 5 1; Solo stampante).
Nota
❒ A causa del calore impiegato per il fissaggio del toner, i fogli fuoriescono leg-
germente ondulate. Prima di stampare sull'altra facciata di un foglio, raddrizzarlo o introdurre il lato ondulato nella direzione opposta.
❒ Quando si carica carta formato A5 nell’alimentatore multi-uso, inserire la car-
ta in modo che il bordo lungo sia parallelo alle guide laterali. Impostare il formato per l’alimentatore multi-uso su “OTHER SIZE” utilizzando il pannello
operativo. È possibile impostare “A5 (210 x 148 mm)” solo per la ricezione di
fax.
Italiano
5
Page 88

PANORAMICA DEL SISTEMA
6
Page 89

2. Installazione — Software
Requisiti di sistema
Sistema operativo
Windows 95/98, Windows NT 4.0
PC
WinStyler T180 può essere supportato da qualunque computer corrispondente
ai requisiti specificati da Microsoft per l'esecuzione di Windows 95/98 o Windows NT 4.0. Per prestazioni ottimali, si raccomanda l'uso delle seguenti CPU.
Windows 95/98 Pentium 120 MHz
Windows NT 4.0 Pentium 166 MHz
Nota
❒ WinStyler T180 non può essere eseguito su un sistema con processore 286 o
precedente.
I/O
Porta e cavo per stampante parallela standard per PC.
Memoria
Controllare la quantità di memoria installata nel PC. L'aggiunta di altra memoria nel PC aumenterà le prestazioni complessive del sistema e della stampante.
Capacità di memoria raccomandata:
Windows 95/98 32 MB
Windows NT 4.0 64 MB
Spazio su disco
Italiano
Circa 4 MB di spazio su disco disponibile per i file, e fino a circa 12 MB di spazio
su disco per la memoria virtuale. È possibile accedere alle impostazione di Memoria virtuale scegliendo l'icona Sistema nel Pannello di Controllo.
7
Page 90

Installazione — Software
Se il computer dispone di più di 8 MB di RAM, non saranno necessari tutti i 12
MB di memoria virtuale. La RAM totale installata nel PC sommata alla memoria
virtuale dovrà corrispondere almeno a 16 MB.
Allocazione della memoria virtuale
Si raccomanda di far gestire automaticamente a Windows 95/98 o Windows NT
4.0 la memoria virtuale. In alternativa, è possibile allocare manualmente la memoria virtuale scegliendo l'icona Sistema nel Pannello di Controllo. Il software
WinStyler T180 richiede 16 MB di memoria complessiva, suddivisa tra memoria
del PC (minimo 8 MB) e memoria virtuale di Windows. Se il proprio sistema dispone di 8 MB di RAM installata nel PC, è necessario allocare almeno 8 MB di
memoria virtuale. Se il computer dispone di 5 MB di RAM, è necessario in questo caso riservare almeno 11 MB di memoria virtuale, e così via.
Riferimento
Consultare la Guida in linea di Windows 95/98/NT 4.0 per informazioni
sull'allocazione della memoria virtuale.
8
Page 91

Installazione del software WinStyler T180
Installazione del software WinStyler T180
WinStyler T180 comprende un programma di installazione che facilita l'installazione del software. Il programma di installazione analizza la configurazione del
sistema, installa il software WinStyler T180 ed esegue le modifiche necessarie ai
file di avvio di Windows.
Nota
❒ Se appare la finestra di dialogo “Nuovo componente hardware individuato”,
Annulla
]
.
Italiano
scegliere
❒ Per installare WinStyler T180 in Windows NT 4.0 è necessario possedere pri-
vilegi di amministratore.
[
Windows 95/98/NT 4.0— Installazione del software WinStyler
T180
Nota
❒ Se si sono specificate le impostazioni internazionali (dal Pannello di Control-
lo) per una lingua supportata da WinStyler T180, questa lingua sarà la selezione predefinita durante l'installazione.
Per installare il software del driver WinStyler T180, eseguire la procedura indicata di seguito:
Inserire il CD-ROM di WinStyler T180 nell'unità CD-ROM.
A
Chiudere tutte le applicazioni in esecuzione in quel momento.
B
]
[
Fare clic sul pulsante
C
]
Scegliere
D
Nella finestra di dialogo “Esegui”, fare clic su
E
Selezionare l'unità CD-ROM.
F
Selezionare il file
G
❒ Se la lingua del sistema operativo in uso non viene riconosciuta, il pro-
Fare clic su
H
Seguire le istruzioni visualizzate sullo schermo.
I
[
Nota
gramma di installazione proporrà la versione inglese del software WinStyler T180.
Esegui
[
OK
.
[
SETUP.EXE
]
.
sulla barra delle applicazioni.
Avvio
]
e fare clic su
[
Apri
[
Sfoglia
]
.
]
.
9
Page 92

Installazione — Software
Nota
❒ Questa stampante viene automaticamente impostata come stampante pre-
definita.
----Creazione di floppy disk dal CD-ROM
Se sul proprio computer non è installata un'unità CD-ROM ma si ha accesso ad un
computer compatibile IBM che ne dispone di una, è possibile creare un set di dischetti di installazione del software dal CD-ROM. Sono necessari almeno 2 dischetti
vuoti da 1,44 MB formattati.
Per creare i dischetti di installazione, eseguire i sequenti passi:
Inserire il CD-ROM nell'unità CD-ROM.
A
]
[
Fare clic sul pulsante
B
Scegliere
C
[
Esegui
]
.
sulla barra delle applicazioni.
Avvio
Digitare
D
Fare clic su
E
Seguire le istruzioni visualizzate sullo schermo.
F
{{{{
X:makedisk
[
OK
}}}}
, sostituendo la “X” con la lettera dell'unità CD-ROM.
]
.
Disinstallazione del software WinStyler T180
Nota
❒
Durante la disinstallazione del software WinStyler T180, si consiglia di cambiare
l'impostazione di condivisione stampante di WinStyler T180 in “Non condividere”.
❒
Prima di disinstallare il software WinStyler T180, si consiglia di chiudere tutte le
applicazioni attive e di riavviare Windows.
Windows 95/98/NT 4.0 — Disinstallazione del software WinStyler
T180
Per rimuovere il software WinStyler T180, eseguire la procedura indicata di seguito:
]
[
Fare clic sul pulsante
A
Scegliere
B
Scegliere
C
Fare clic su
D
[
Programmi
[
Strumenti WinStyler T180
[
Utilità di rimozione
]
.
sulla barra delle applicazioni.
Avvio
]
.
]
.
10
Seguire le istruzioni visualizzate sullo schermo.
E
Page 93

3. STAMPA DA PC
Stampa della pagina di prova
Stampa della pagina di prova utilizzando la Console stampante
Per stampare la pagina di prova utilizzando la Console stampante, eseguire la
procedura indicata di seguito:
Fare clic sul pulsante [
A
Scegliere [
B
Scegliere [
C
Fare clic su [
D
Fare clic su [
E
rificare che tutte le modalità di stampa funzionino correttamente.
Fare clic su [Sí].
F
L'utility di test stamperà una pagina di configurazione contenente informazioni sul sistema e sulla stampante.
Nota
❒ Fare clic su [No] per chiudere la finestra di dialogo senza far eseguire la
stampa.
Riferimento
Se non si riesce a stampare la pagina di prova, assicurarsi che il cavo di collegamento dell'apparecchio al computer sia ben inserito su entrambe le
estremità. Consultare la sezione “Collegamento dell'apparecchio”.
Programmi
Strumenti WinStyler T180
Console stampante
TEST
].
] per eseguire tramite WinStyler T180 un controllo per ve-
] sulla barra delle applicazioni.
Avvio
].
].
Italiano
11
Page 94

STAMPA DA PC
Windows 95/98/NT 4.0– Stampa di un
documento da Windows
La procedura per la stampa varia da applicazione ad applicazione. Per informazioni dettagliate sulla stampa, consultare la Guida in linea dell’applicazione.
12
Page 95

Windows 95/98 — Stampa da un'applicazione DOS
Windows 95/98 — Stampa da
un'applicazione DOS
WinStyler T180 è stato progettato per permettere la stampa sia da applicazioni
DOS che da applicazioni Windows. WinStyler T180 dispone inoltre di un Pannello di controllo PCL per la stampa in modalità PCL DOS che consente all'utente di modificare le impostazioni della stampante per i processi di stampa DOS.
Nota
❒ Questa funzione può essere eseguita solo in Windows 95/98.
❒ Alcune applicazioni DOS potrebbero ignorare queste impostazioni.
❒ Non è necessario installare alcuna cartuccia
• Alcune stampanti convenzionali dispongono di alloggiamenti per cartucce
per permettere l'installazione di caratteri aggiuntivi nella stampante. Poiché WinStyler T180 genera l'immagine della pagina di stampa all'interno
del sistema prima di trasferirla alla stampante, l'installazione di cartucce
potrebbe non avere alcun effetto sul risultato finale. WinStyler T180 utilizza al loro posto i tipi di carattere installati nel sistema Windows.
❒ L'interprete PCL di WinStyler T180 è compatibile con il PCL 4.5 (HP LASER
JET IIP).
Accesso al Pannello di controllo PCL da Windows
Italiano
Le modifiche effettuate nel Pannello di controllo PCL non influiranno sui lavori
di stampa eseguiti da applicazioni Windows. Queste impostazioni influiranno
solo su lavori di stampa inviati da applicazioni eseguite in modalità DOS.
]
[
Fare clic sul pulsante
A
Scegliere
B
Scegliere
C
Fare clic su
D
Fare clic su
E
[
Programmi
[
Strumenti WinStyler T180
[
Console stampante
[
PCL
]
.
]
nella Console stampante.
sulla barra delle applicazioni.
Avvio
]
.
]
.
13
Page 96

STAMPA DA PC
Attivazione dell'Interprete PCL da Windows
Prima di poter utilizzare il Pannello di controllo PCL per modificare le impostazioni di un lavoro di stampa, è necessario attivare l'Interprete PCL. Le modifiche
effettuate nel Pannello di controllo PCL non influiranno sui lavori di stampa eseguiti da applicazioni Windows. Queste impostazioni influiranno solo su lavori
di stampa inviati da applicazioni eseguite in modalità DOS.
Fare clic sul pulsante [
A
Scegliere [
B
Scegliere [
C
Fare clic su [
D
Fare clic su [
E
Fare clic su [
F
Fare clic su [OK].
G
----Trasferimento di macro e di caratteri
• Prima di poter installare e utilizzare le macro e i tipi di carattere, è necessario
attivare l'Interprete PCL.
• WinStyler T180 manterrà in memoria le macro e i caratteri trasferiti fino allo
spegnimento della stampante.
Nota
❒ Le macro e i tipi di carattere devono essere compatibili con il PCL 4.5.
❒ Per ulteriori informazioni sul PCL 4.5, consultare il Manuale d'uso della HP
LASER JET IIP.
Programmi
Strumenti WinStyler T180
Console stampante
DOS
Attiva interprete PCL
].
] nella Console stampante.
] sulla barra delle applicazioni.
Avvio
].
].
] nell'elenco a discesa (Mode d'impression).
14
Page 97

4. SCANSIONE DA PC
Scansione da un'applicazione Windows
La funzione di scansione è disponibile all'interno di qualunque applicazione
Windows in grado di supportare un'interfaccia TWAIN.
Questa sezione fornisce alcune semplici spiegazioni su come eseguire scansioni
da un’applicazione Windows. La procedura effettiva da eseguire può essere leggermente diversa a seconda dell’applicazione che si sta utilizzando. Per informazioni dettagliate sulla scansione, consultare il manuale dell’applicazione.
Nota
❒ L'apparecchio funziona come uno scanner per applicazioni compatibili con lo
standard TWAIN in ambiente Windows 95/98 e Windows NT 4.0.
Posizionare sull'alimentatore il documento da sottoporre a scansione.
A
Riferimento
Per informazioni più dettagliate, consultare il capitolo “Fax” nel Manuale
Operatore Fax.
Richiamare le Opzioni scanner WinStyler T180 dal proprio software per
B
scanner.
Specificare le impostazioni per il tipo di scansione desiderato.
C
Nota
❒ Le impostazioni che è possibile utilizzare sono: Modo scansione, Risolu-
zione e Luminosità.
❒ A seconda dell’applicazione che si sta utilizzando, queste impostazioni po-
trebbero non essere tutte disponibili.
]
[
Fare clic su
D
Nota
❒ Dopo aver iniziato a comporre un numero di telefono, non è possibile utiliz-
zare la funzione di scansione da PC.
❒ Quando si acquisisce un documento dall'alimentatore automatico e il docu-
mento è più lungo della lunghezza massima di scansione, lo scanner leggerà
l'intera lunghezza del documento, e l'immagine risultante verrà acquisita da
un'area di lunghezza superiore a quella specificata.
per acquisire il documento.
OK
Italiano
15
Page 98

SCANSIONE DA PC
16
Page 99

5. GESTIONE FAX DA PC
Informazioni sulla gestione fax da PC
Limitazione
❒ Questa funzione è disponibile solo in Windows 95/98.
Installando sul PC il software di gestione fornito è possibile inviare e ricevere
messaggi fax direttamente tramite il proprio computer utilizzando l'unità fax
come fax modem.
Di seguito è riportato un breve riepilogo delle caratteristiche principali:
• Trasmissione e ricezione di fax da Windows 95/98
• Comandi di controllo compatibili Classe 2
• Velocità di trasmissione di 14400, 12000, 9600, 7200, 4800, 2400 bps
Sono supportate le seguenti applicazioni fax:
Nota
❒ La disponibilità di alcune opzioni può dipendere dal sistema locale in uso.
• WinFax PRO
•MS-FAX
• BitWare
•SopWith
• BVRP WinFax
Per informazioni sull'installazione e sulla configurazione di queste applicazioni,
consultare il relativo manuale fornito insieme al prodotto.
Assicurarsi di installare il software WinStyler T180 prima di installare l’applicazione fax desiderata.
Se il modo Ricezione PC è attivato, non è possibile effettuare la ricezione manuale tramite l’applicazione PC-FAX.
Italiano
Invio e ricezione di fax
Per informazioni sull'invio e sulla ricezione di fax dal proprio PC, consultare il
manuale dell'applicazione fax.
Per mettere in funzione il sistema, eseguire le seguenti operazioni (se non lo si è
già fatto):
• Configurare COM-Redirector (vedere la sezione successiva)
• Installare il software di gestione fax (consultare il relativo manuale del software per informazioni dettagliate)
• Attivare il modo Ricezione PC (vedere alla pagina seguente)
17
Page 100

GESTIONE FAX DA PC
Attivazione della Ricezione PC
Per poter ricevere messaggi tramite PC, è necessario attivare questa funzione.
Nota
❒
Se il modo Ricezione PC è disattivato, i messaggi fax in arrivo vengono ricevuti
dall'unità fax e non vengono caricati via software sul PC.
❒
Se il PC è spento, non è possibile ricevere alcun messaggio fax.
Sul pannello operativo del fax, premere il tasto {{{{
A
{{{{
2
}}}} {{{{2}}}} {{{{2}}}} {{{{2}}}} {{{{6}}}} {{{{2}}}} sulla tastiera numerica.
Funzione
}}}} e immettere {{{{6}}}}
MODO INIZIAL.S/SUCCi
62 SELEZ. FUNZIONE
Premere il tasto {{{{Si}}}}.
B
S/SUCC.i
SELEZIONE LINEA
Premere il tasto VVVV finché non appare il seguente display.
C
S/SUCC.i
RICEZIONE PC ON/OFF
Premere il tasto {{{{Si}}}}.
D
Usare i tasti WWWW o VVVV per attivare la Ricezione PC, quindi premere il tasto {{{{Si}}}}.
E
RICEZIONE PC S/hi
iON OFF
Premere il tasto {{{{
F
Funzione
}}}} per tornare al modo di attesa.
COM-Redirector
Il COM-Redirector consiste in un software che reindirizza i dati dalla porta seriale
del PC ad una porta parallela da utilizzare con la propria applicazione PC Fax. Per
informazioni sull'impostazione della porta COM, consultare la Guida in linea.
Nota
❒
Se nel sistema è disponibile una porta libera, questa verrà selezionata automaticamente.
°
5 o più alta si potrebbero incontrara difficultà con qualche ap-
18
❒
Usando la porta n
plicazion fax a 16-bit.
 Loading...