

REVELL NASA Lunar Landing User Manual [en, fr, nl, it, gr, da, no, fi, sv, es, pt, de, en, hr, et, fi, hu, lv, lt, nl, pl, ro, ru, sr, sk, sl, cs, tr, gr, bg, uk, ch, he, ar, ja, ch, ch, ko, hi, id, kk, ms, fa, pt, es, th, vi, sq, mk]
Page 1
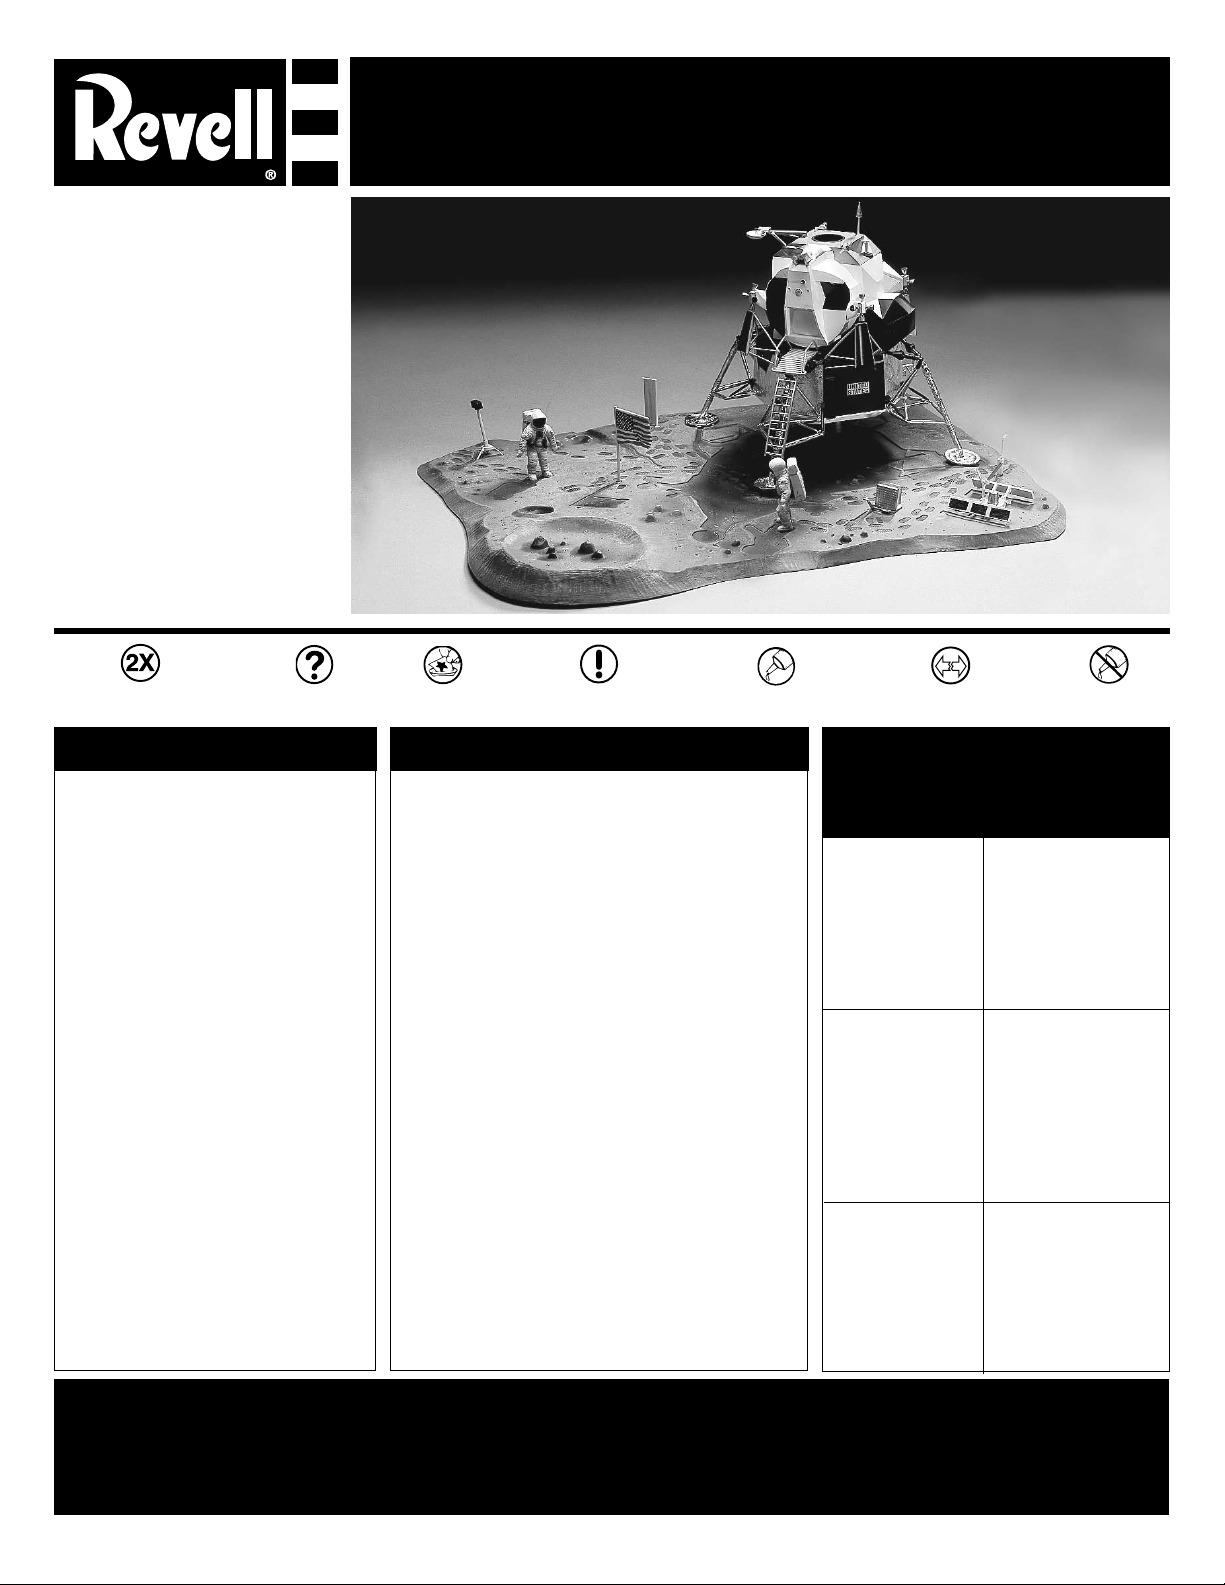
The world listened with awe and
wonderment to those famous words that
crackled over the radio waves "That's
one small step for man,.. One giant leap
for mankind." On July 20, 1969, after a
three-day, quarter-million mile journey
from earth, Neil A. Armstrong and Col.
Edwin (Buzz) Aldrin, Jr. became the first
humans to set foot on the moon while
Lt. Michael Collins remained in the orbiting command module "Columbia".
Your Revell kit contains 1:48 scale
models of the astronauts dressed in
their moon-walking suits, their photographic and scientific equipment, the
American flag which they placed on
the surface of the moon, which they
named Tranquility Base", the lunar
module "Eagle" and a detailed display
base molded to simulate the moon's
dusty surface, complete with footprints.
KIT 5087 85508700200
FIRST LUNAR LANDING
* REPEAT SEVERAL TIMES
* A REPETER PLUSIEURS FOIS
READ THIS BEFORE YOU BEGIN LIRE CE QUI SUIT AVANT DE COMMENCER
* Study the assembly drawings.
* Each plastic part is identified by a number.
* In the assembly drawings, some parts will be
marked by a star (★) to indicate chrome
plated plastic.
* For better paint and decal adhesion, wash
the plastic parts in a mild detergent solution.
Rinse and let air dry.
* Check the fit of each piece before
cementing in place.
* Use only cement for polystyrene plastic.
* Scrape plating and paint from areas
to be cemented.
* Allow paint to dry thoroughly before
handling parts.
* Any unused parts may be discarded.
DECAL APPLICATION INSTRUCTIONS
1. Cut desired decal from sheet.
2. Dip decal in water for a few seconds.
3. Place wet decal on paper towel.
4. Wait until decal is movable on paper backing.
5. Place decal in position on model, face up and
slide backing away.
6. Press out air bubbles with a soft damp cloth.
7. Milkiness that may appear is for better decal
adhesion and will dry clear. Wipe away any
excess adhesive.
8. Do not touch decal until fully dry.
9. Allow the decals 48 hours to dry before
applying clear coat.
NOTE: Decals are compatible with
setting solutions or solvents.
* OPTIONAL PARTS
* PIECES EN OPTION
* DECAL
* DECAL COMANIE
* Etudier les schémas de montage.
* Chaque pièce en plastique est identifiée par un numéro.
* Sur les schémas de montage, certaines pièces sont
marquées d'une étoile (★) pour indiquer qu'elles sont en
plastique chromé.
* Pour une meilleure prise de la peinture et des autocollants,
laver les pièces en plastique avec une solution détergente
peu concentrée. Les rincer et les laisser sécher à l'air.
* Vérifier que chaque pièce s'ajuste bien avant
de la coller en place.
* N'utiliser que de la colle pour polystyrène.
* Gratter les parties à coller pour enlever le chrome et la peinture.
* Laisser la peinture bien sécher avant de manipuler les pièces.
* Toute pièce inutilisée peut être jetée.
DIRECTIVES D'APPLICATION DES AUTOCOLLANTS
1. Découper l'autocollant désiré de la feuille.
2. Tremper l'autocollant dans de l'eau pendant quelques secondes.
3. Placer l'autocollant mouillé sur une serviette en papier.
4. Attendez que l'autocollant puisse être déplacé sur son support
en papier.
5. Mettre l'autocollant en position sur le modèle face sur
le dessus et faire glisser le support pour l'enlever.
6. Appuyer avec un chiffon doux humide pour éliminer les bulles d'air.
7. La substance laiteuse qui peut apparaître est destinée à
améliorer l'adhésion de l'autocollant et devient incolore au
séchage. Essuyer pour enlever tout excédent d'adhésif.
8. Ne pas toucher l'autocollant tant qu'il n'est pas bien sec.
9. Laisser l'autocollant sécher pendant 48 heures avant
d'appliquer une couche transparente.
REMARQUE: Les autocollants sont compatibles avec
* ALTERNATIVE ASSEMBLY
* ENSEMBLAGE ALTERNATIVE
les solutions de fixage ou les solvants.
* CEMENT TOGETHER
* A COLLER
* REMOVE AND THROW AWAY
* A RETIRER ET JETER
* DO NOT CEMENT
* NE PAS COLLER
This optional paint guide is provided if
you choose to detail paint your model.
Ce guide de peinture vous sera fourni si vous choisissez
de peindre votre modèle en détail.
Flat black
Gold
Silver
Noir matte
Dore
Argent
If you have any questions or comments, call our hotline at: (800) 833-3570
or, please write to:
Revell Inc Consumer Service Department, 1850 Howard Street Unit A, Elk Grove Village, Illinois 60007
Be sure to include the plan number (85508700200), part number, description, your return address and phone number.
Visit our website: www.revell.com
Revell Inc Elk Grove Village, IL. Copyright © 2009. All rights reserved.
Page 2
“K”“A” “B”“A” “C”“A”
“D”
“A”
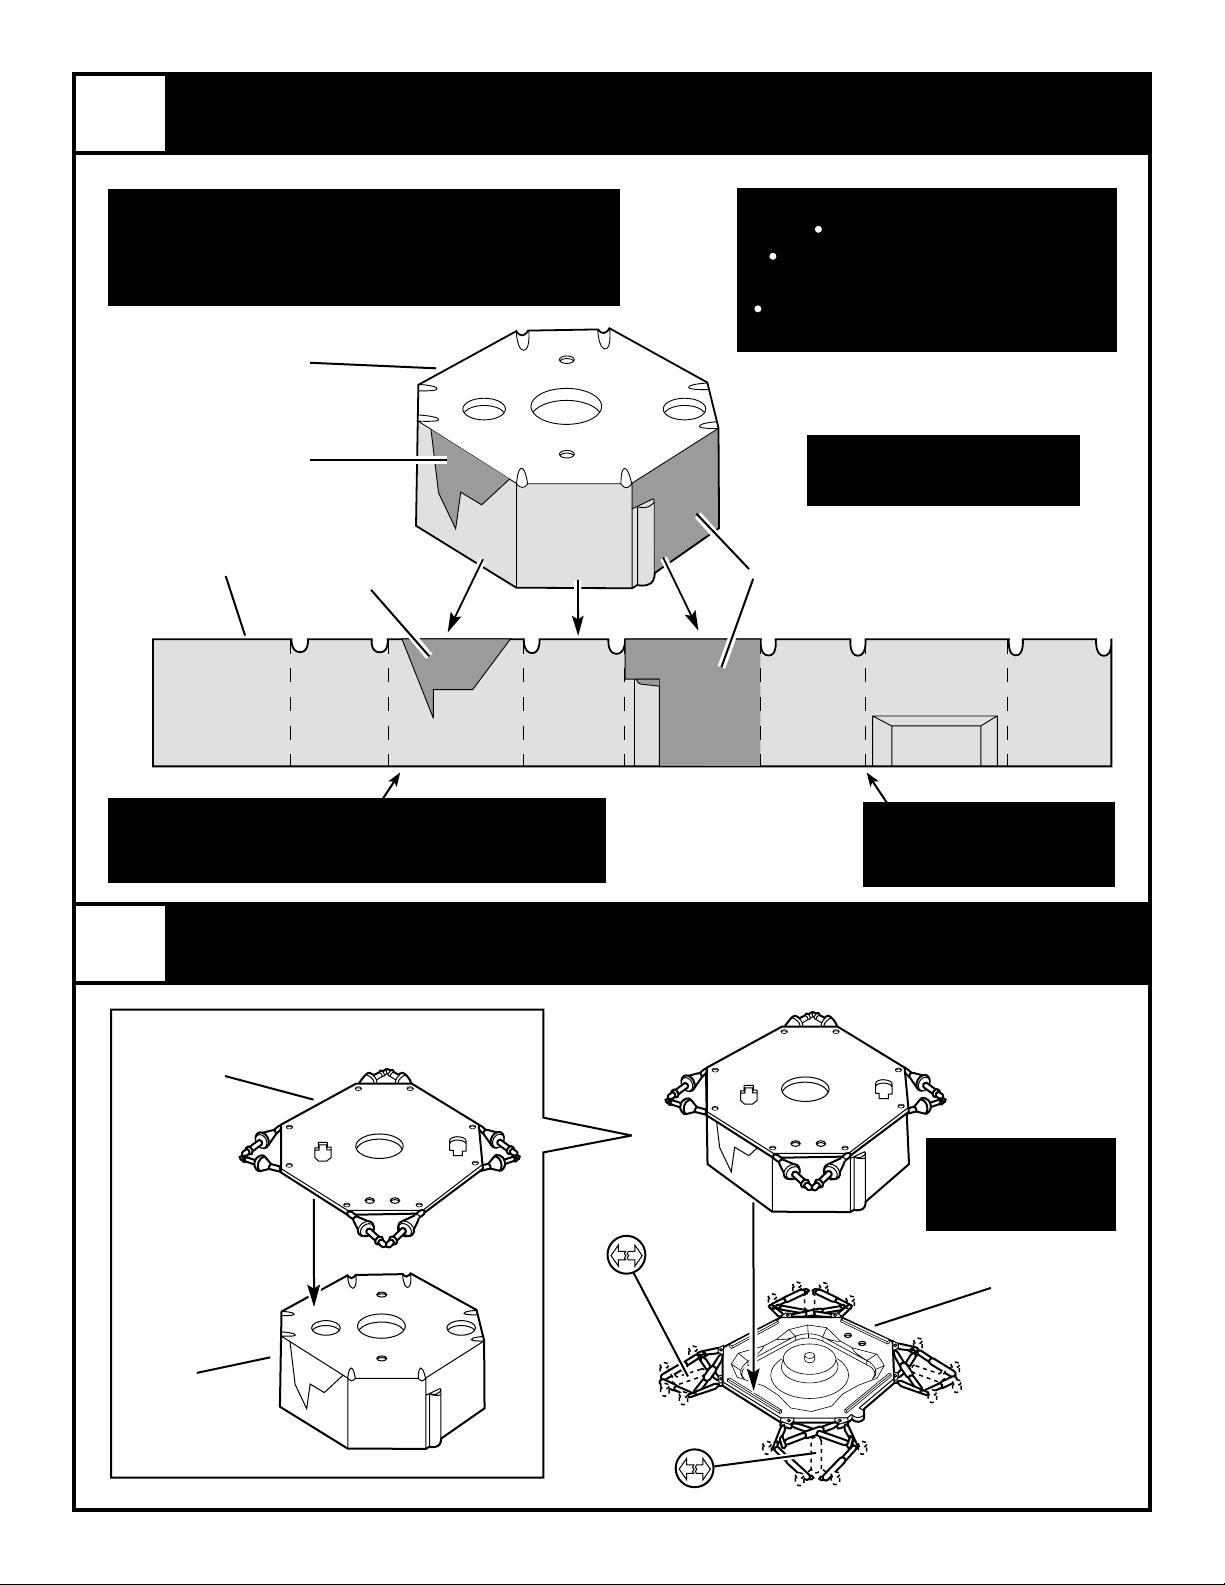
1
DESCENT BODY FOIL ASSEMBLY
TO REPRESENT THERMAL INSULATING BLANKETS ( WHICH
HAVE UNEVEN OR WRINKLED SURFACES) FIRST CRUMBLE THE
SHEET, THEN FLATTEN THE SHEET.
FLAT BLACK
FOIL
GOLD FOIL SHEET:
2
DESCENT
BODY
FLAT BLACK
TO APPLY FOIL:
.
CUT REQUIRED PATTERN
.
APPLY CEMENT TO MODEL SURFACE
AND ATTACH FOIL
.
PATTERNS ARE OVERSIZE - TRIM EDGES
ATTACH GOLD FOIL TO MODEL
AS INDICATED ON ILLUSTRATION
FLAT BLACK
PATTERNS ARE PRINTED AND LETTER CODED ON THE BACK
OF SHEET TO CORRESPOND WITH LETTERS SHOWN IN THE
2
1
DESCENT
TOP PLATE
FLAT BLACK
2
ASSEMBLIES
DESCENT BODY ASSEMBLY
Kit 5087 - Page 2
SHOWING ALL SIDES OF
BODY ( PART 2 )
WHEN COMPLETED ,
PAINT BLACK ALL
AREAS WITH NO FOIL
✱
✱
✱
✱
✱
✱
✱
✱
✱
✱
3
DESCENT
BOTTOM PLATE
GOLD
✱
✱
✱
✱
✱
✱
✱
Page 3
2
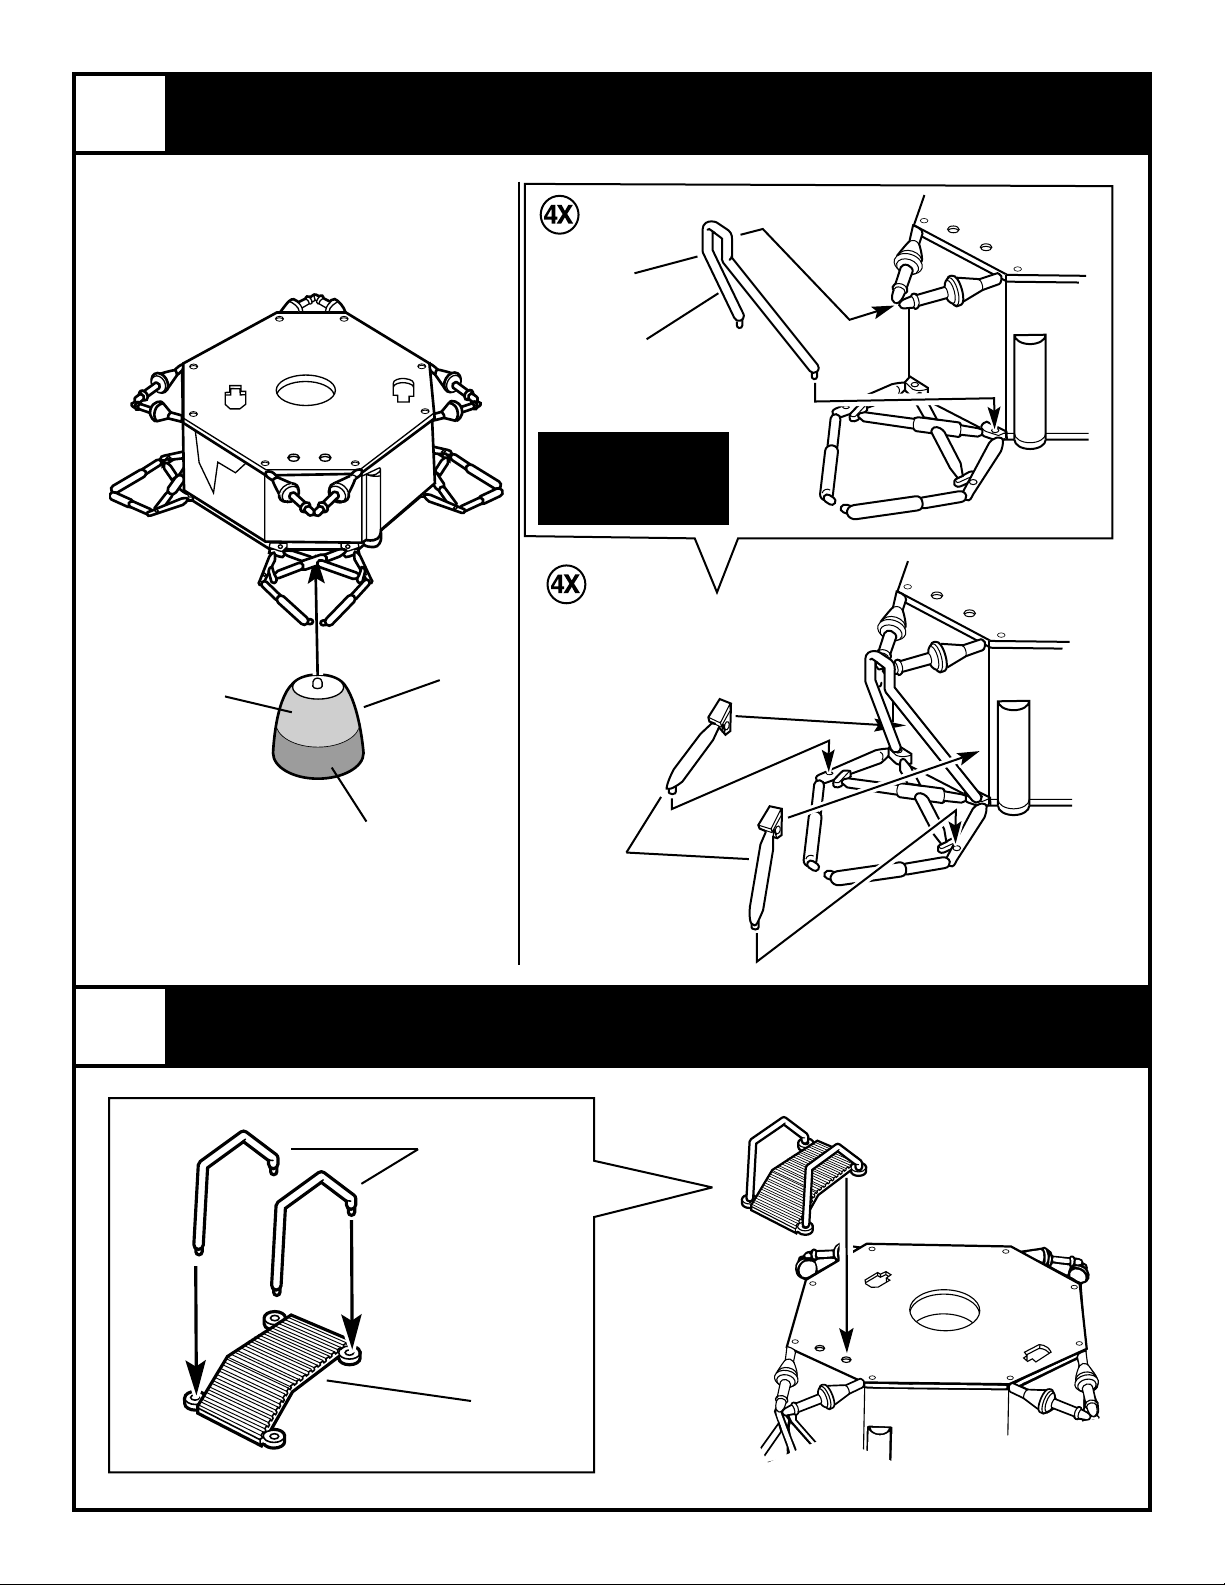
DESCENT BODY ASSEMBLY CONTINUED
9
LANDING GEAR
BRACE
"F"
FOIL
SCRAPE AWAY FOIL
BEFORE CEMENTING
PARTS TOGETHER
4
DESCENT
SILVER
ENGINE
3
FLAT BLACK
10
SUPPORT
ARMS
FLAT BLACK
BRIDGE ASSEMBLY
11
RAILINGS
SILVER
EGRESS PLATFORM
12
SILVER
Kit 5087 - Page 3
Page 4

4
LEG / BODY ASSEMBLY
DO NOT COVER SLOT WITH FOIL
5
LANDING GEAR
LEGS
GOLD
7
PAD
SCRAPE
AWAY FOIL
BEFORE
CEMENTING
PARTS TO-
GETHER
"L"
FOIL
"N"
FOIL
"M"
FOIL
8
LADDER
SILVER
13
LANDING
RADAR
SILVER MESH WITH
BLACK BACK AND
EDGES
FOIL LEG
BEFORE
ATTACHING
LADDER
6
LANDING GEAR
LEG
7
PAD
14
PLuME
DEFLECTOR
SEMIGLOSS BLACK
Kit 5087 - Page 4
15
PLuME
DEFLECTOR
ARM
SILVER
THERMAL GENERATOR
16
SILVER
Page 5

5
MODULE ASSEMBLY
18
ASCENT
SECTION #1
SILVER
THRUSTER
ARM
SILVER
REMOVE WINDOWS
FROM THIN PLASTIC
SHEET
WINDOWS
CLEAR
17
19
FLAT BLACK
RENDEZVOUS
RADER
SILVER
20
THRUSTER
ARM
SILVER
21 AND 52
THRUSTER
CLUSTERS
SILVER
FLAT BLACK
FLAT BLACK
FLAT BLACK
GOLD
FLAT BLACK
GOLD
23
ASCENT SECTON
#2
SILVER
21
THRUSTER
CLUSTER
21
THRUSTER
CLUSTER
FRONT ENGINE HOUSING
LEFT PLATE
ASCENT SECTON #4
ASCENT SECTON #4
24
ROD
SILVER
29
SILVER
SILVER
22
PLATE
SILVER
27
ASCENT SECTON #4
28
RIGHT PLATE
SILVER
Kit 5087 - Page 5
Page 6

5
MODULE ASSEMBLY CONTINUED
ASCENT SECTION
52
THRUSTER
CLUSTER
ASENT SECTION
27
#4
52
THRUSTER
CLUSTER
25
#3
SILVER
REAR ENGINE HOUSING
26
PLATE
SILVER
SILVER
30
ASCENT TOP
SILVER
31
INFLIGHT
ANTENNA "A"
GOLD
36
ANTENNA PROBE
FLAT BLACK
SILVER
35
S - BAND
ANTENNA
GOLD
32
INFLIGHT
ANTENNA "B"
GOLD
FLAT BLACK
33
VHF / EVA
ANTENNA
SILVER
DOCKING
TARGET
FLAT BLACK
34
SILVER
6
FLAT BLACK
Kit 5087 - Page 6
FINAL MODULE PAINTING
WHEN COMPLETED SCRAPE OR PAINT WHITE, EDGE LINES WHERE TWO BLACK AREAS TOUCH
FOIL "E" ON BOTH SIDES
"O"
FOIL "E" ON BOTH SIDES
FRONT LEFTRIGHT
Page 7

6
FINAL MODULE PAINTING CONTINUED
FLAT BLACK
GOLD
"G"
"J"
"G"
7
LASER EXPERIMENT EQUIPMENT SEISMIC EXPERIMENT EQUIPMENT
MOON sUrFACE EQUIPMENT AssEMBLY
WHEN COMPLETED SCRAPE OR PAINT WHITE, EDGE LINES WHERE TWO BLACK AREAS TOUCH
"P"
"J"
"H"
BOTTOM TOPREAR
44
RETRO
REfLECTOR
46
SEISMIC
ANTENNA
TV CAMERA
41
TV
CAMERA
SOLAR WIND
43
LASER
EXPERIMENT BASE
SIDE VIEW
fLAG
49
fLAG
GOLD
45
SEISMIC
EXPERIMENT
42
FLAT BLACK
ASTRONAUTS ARMSTRONG & ALDRINCAMERA
fLAG
3
TRIPOD
40
BACK PACK
HALf
47
SOLAR WIND
EXPERIMENT
4
fLAG ON
SHOULDER
48
STEREO
CAMERA
NASA PATCH
6
5
39
BACK PACK
HALf
ASTRONAUTS
Kit 5087 - Page 7
Page 8

7
BASE ASSEMBLY
ATTACH THE SMALLER COMPONENTS INTO POSITION,
THE DESCENT STAGE MAY BE PLACED OR CEMENTED
TV CAMERA
51
BASE
TO THE BASE
37
ASTRONAUT
ARMSTRONG
SOLOR WIND EXPERIMENT
FLAG
2
"SHADOWS" ON THE BASE
ARE TO BE PAINTED A
FLAT BLACK
1
50
PROBE
STEREO CAMERA
SEISMIC EXPERIMENT EQUIPMENT
THE ASCENT STAGE HAS LOCKING
BUTTONS ON THE BOTTOM. TO JOIN
THE TWO STAGES. FIT THE BUTTONS
INTO KEYED HOLES IN THE DESCENT
STAGE, TURN THE ASCENT STAGE
CLOCKWISE TO LOCK. TO SEPARATE,
TURN IN OPPOSITE DIRECTION
LASER EXPERIMENT EQUIPMENT
38
ASTRONAUT
ALDRIN
ASCENT STAGE
DECENT
STAGE
Kit 5087 - Page 8
LUNAR BASE
 Loading...