

REVELL Hummer User Manual [en, fr, nl, it, gr, da, no, fi, sv, es, pt, de, en, hr, et, fi, hu, lv, lt, nl, pl, ro, ru, sr, sk, sl, cs, tr, gr, bg, uk, ch, he, ar, ja, ch, ch, ko, hi, id, kk, ms, fa, pt, es, th, vi, sq, mk]
Page 1
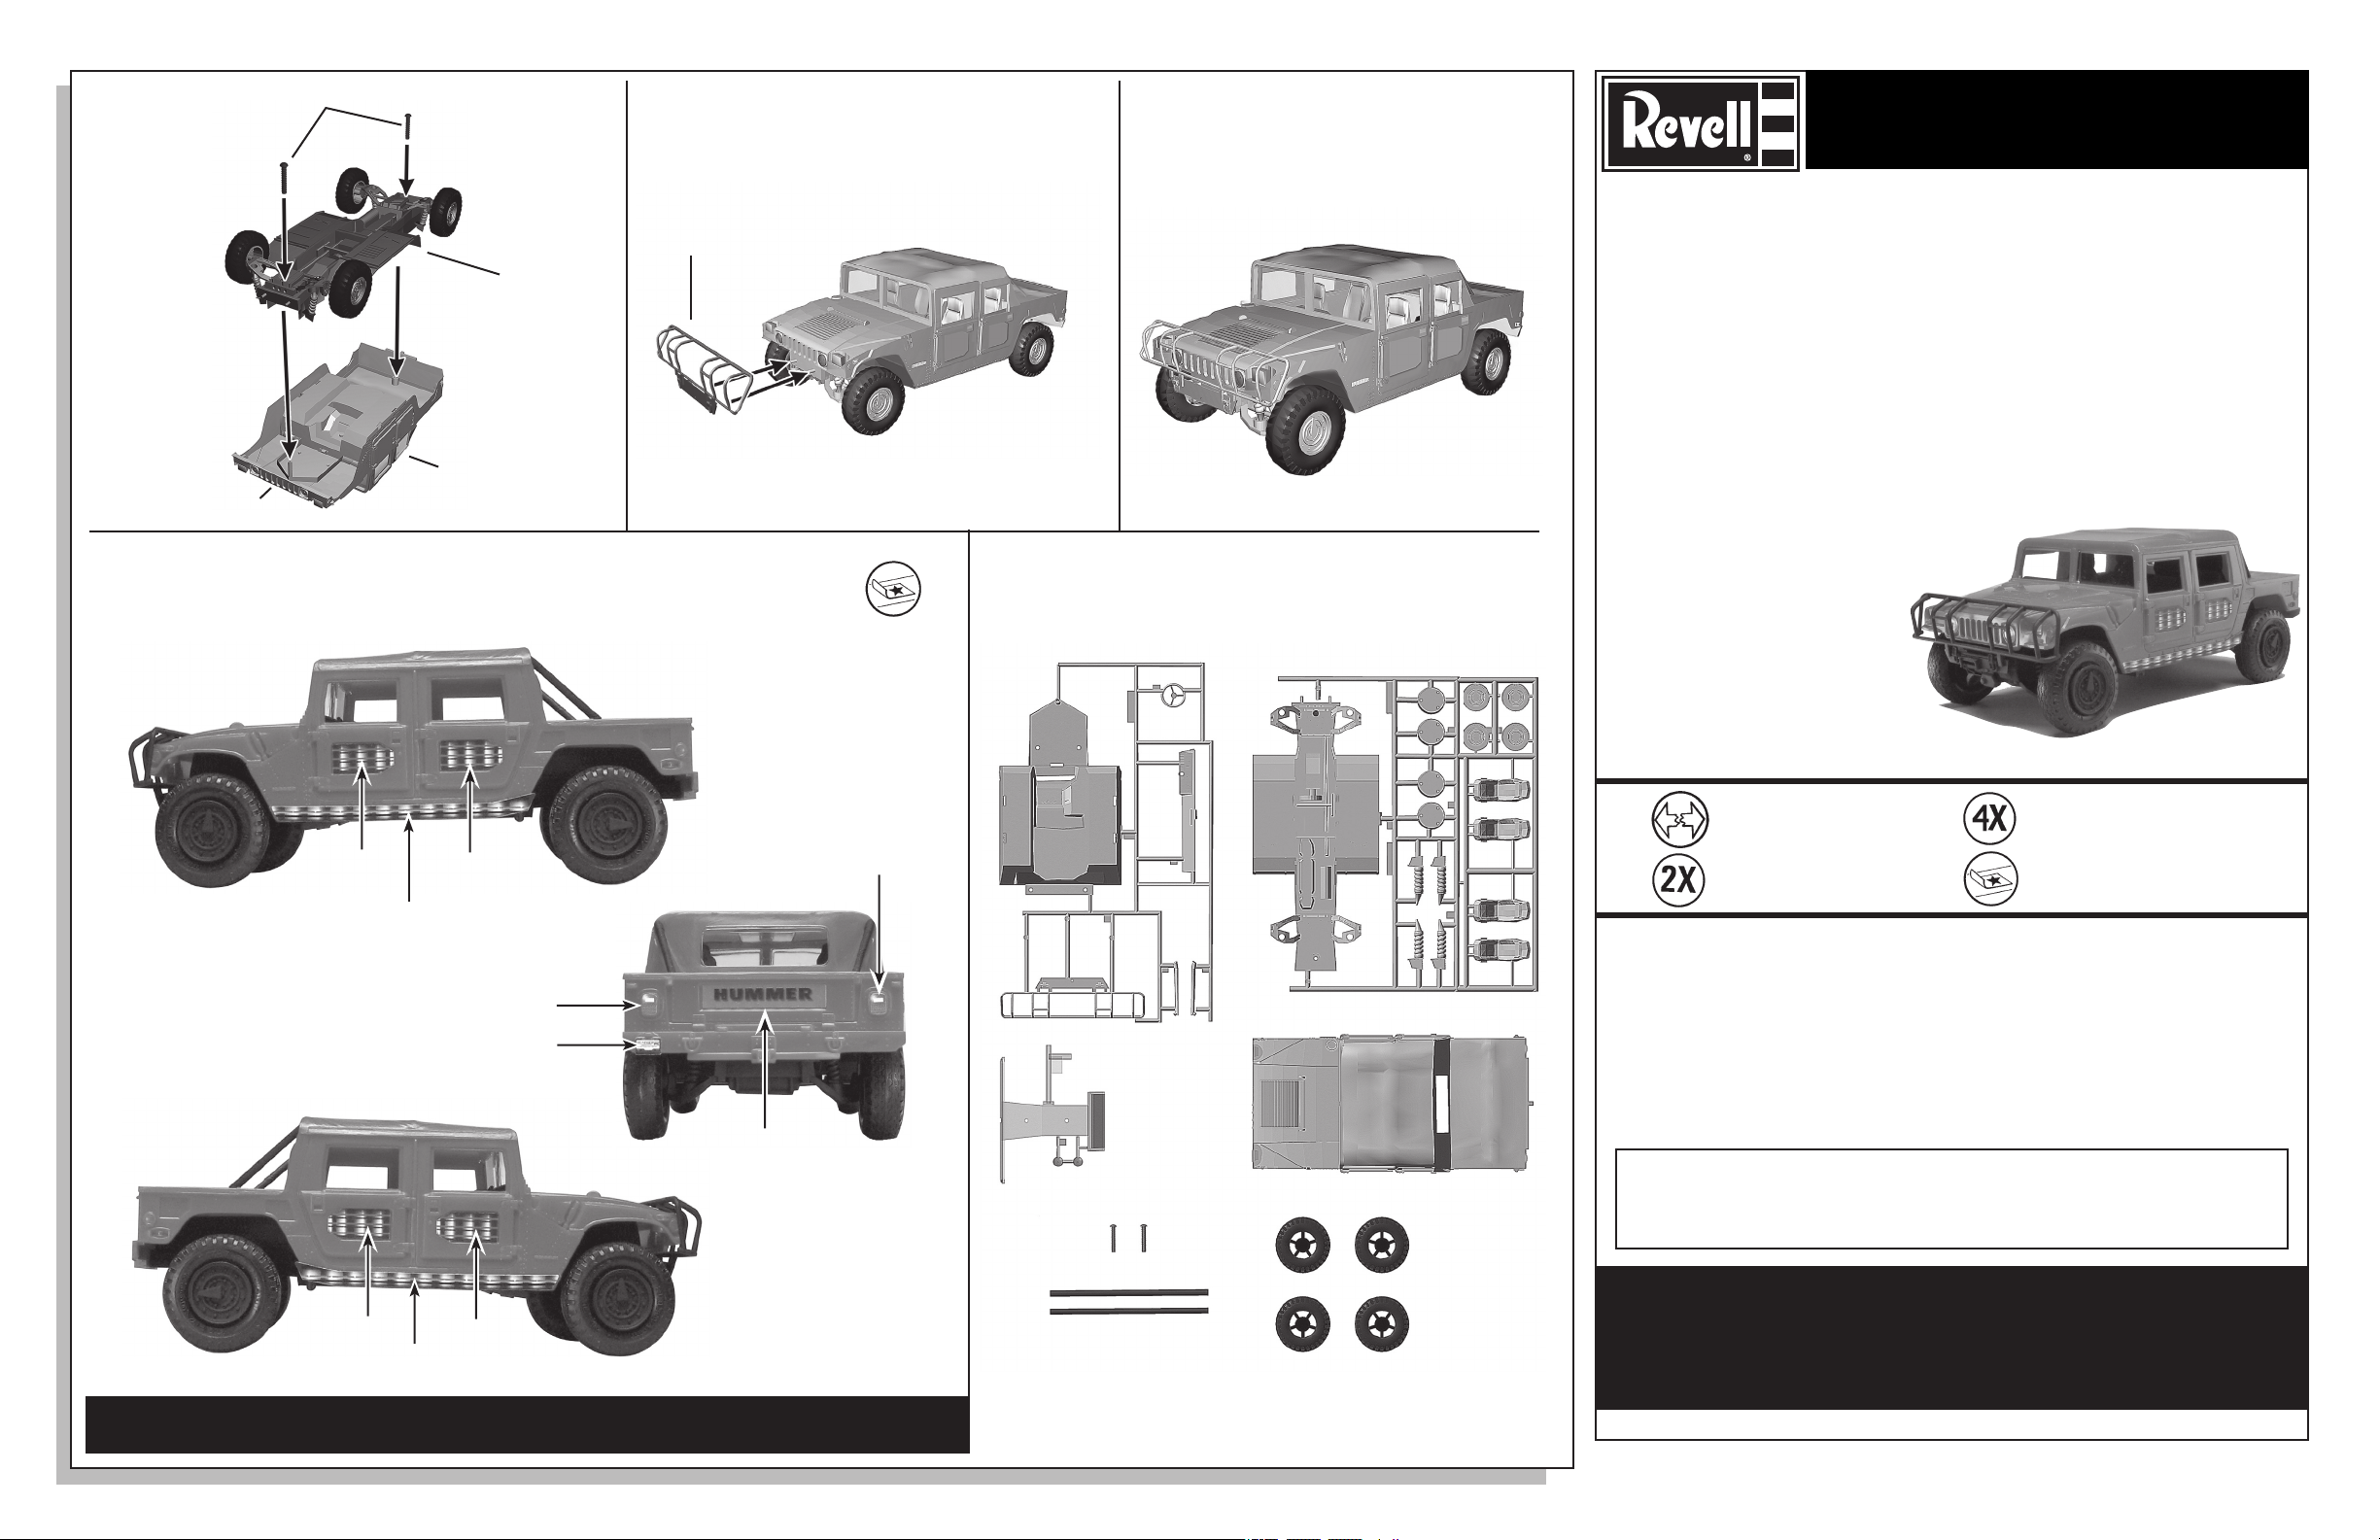
SCREWS
KIT 1907 85190710200
Step 14Step 13
Completed
HUMMER
7
BRUSH GUARD
COMPLETED
CHASSIS
ASSEMBLY
BODY ASSEMBLY
FRONT
Step 15 Sticker Placement Guide
Assembly
AM General’s Hummer is one of most rugged and capable 4X4’s ever
built. Development of the Hummer originally began in 1979, when the U.S.
Army needed a High Mobility Multi-Purpose Wheeled Vehicle (HMMWV, or
“Humvee” for short). The Hummer quickly proved itself as a highly versatile,
effective military vehicle, and became so popular that AM General introduced
a civilian version of the Hummer in 1992. The Hummer remains in widespread
use in the U.S. Army and commercial industries, and is a very popular “status”
vehicle among the general public.
The Hummer’s main body is made of a strong, heat-treated aluminum alloy,
held together with more than 2,800 rivets for unmatched durability. It features
a 4-wheel, fully independent suspension system with heavy-duty springs
and hydraulic shock absorbers, plus a Central Tire Inflation System (CTIS)
that enables the driver to inflate or deflate the Hummer’s tires right from the
ANY UNUSED PARTS MAY BE DISCARDED
Parts Included
10
13
18
19
19
driver’s seat for better traction. With its low center of gravity, 72 inch track
width, and a full 16 inches of ground clearance, the Hummer can tackle almost any o f f
road terrain, and with a snorkel kit,
it is capable of fording 60 inches
of water.
Your Revell Snaptite model
kit features easy snap and
screw together assembly, accurate body with separate brush
guard, free rolling wheels on metal a x l e s ,
and colorful customizing stickers. Enjoy building your kit of
6
5
7
When applying stickers, avoid touching the “sticky” side to prevent finger prints on stickers. Bend sticker sheet slightly to lift edge of sticker & use a finger-
nail to lift sticker from sheet. Line up sticker on body and press an edge into place, slowly working sticker with a finger nail until sticker is fully on model.
7
2
1
3
6
4
NOTE:
2
18
12
17
7
9
6
11
11
* REMOVE AND THROW AWAY
* A RETIRER ET JETER
* REPEAT SEVERAL TIMES
* A REPETER PLUSIEURS FOIS
READ BEFORE YOU BEGIN
* REPEAT SEVERAL TIMES
* A REPETER PLUSIEURS FOIS
* APPLY STICKERS
*APPLIQUEZ LES AUTO-COLLANTS
• CLEAR A SPACE TO WORK ON
• STUDY THE ASSEMBLY DRAWINGS BEFORE YOU BEGIN
8
20
• EACH PLASTIC PART IS IDENTIFIED BY A PART NUMBER
• DO NOT OVER TIGHTEN SCREWS
• SEE NOTE ABOUT APPLYING STICKERS IN STEP #15
21
BODY
POSITION ALL PARTS IN THIS KIT CAREFULLY. PARTS
CAUTION:
WILL ONLY SNAP TOGETHER ONCE.
METAL AXLES
& SCREWS
TIRES
If you h ave any q uesti ons or co mment s, call o ur hot line at: (800) 833-3570
or, please write to:
Revell-Monogram Consumer Service Department, 725 Landwehr Road,
Northbrook, Illinois 60062
Be sure to include the plan number (85190710200), part number, description,
your return address and phone number.
Visit our website: www.revell-monogram.com
REVELL-MONOGRAM LLC Northbrook, IL. Copyright © 2003. All rights reserved.
Page 2

Step 1
Step 2
Step 3
Step 4
WINDSHIELD &
REAR WINDOW
(CLEAR)
REAR
Step 5
20
INTERIOR TUB
ASSEMBLY
1
BODY
COMPLETED
DASHBOARD
ASSEMBLY
Step 6
8
STICKER
9
STICKER
PUSH
DOWN
11
SEAT
SEATS
10
INTERIOR TUB
Step 7
11
COMPLETED
INTERIOR
ASSEMBLY
11
SEATS
DASHBOARD
Step 8
12
ROLL BAR
BRACE
13
STEERING WHEEL
9
8
ROLL BAR
BRACE
Step 9
21
HEADLIGHTS
(CLEAR)
17
COIL
SPRING
*
*
*
SPRINGS SHOULD ANGLE
*
TOWARD CENTER OF CHASSIS
*
Step 10
18
WHEEL BACK
19
WHEEL FRONT
TIRE
Step 11
METAL AXLE
Step 12
FRONT
UNDERSIDE
SHOWN
851907100200
 Loading...