

Page 1
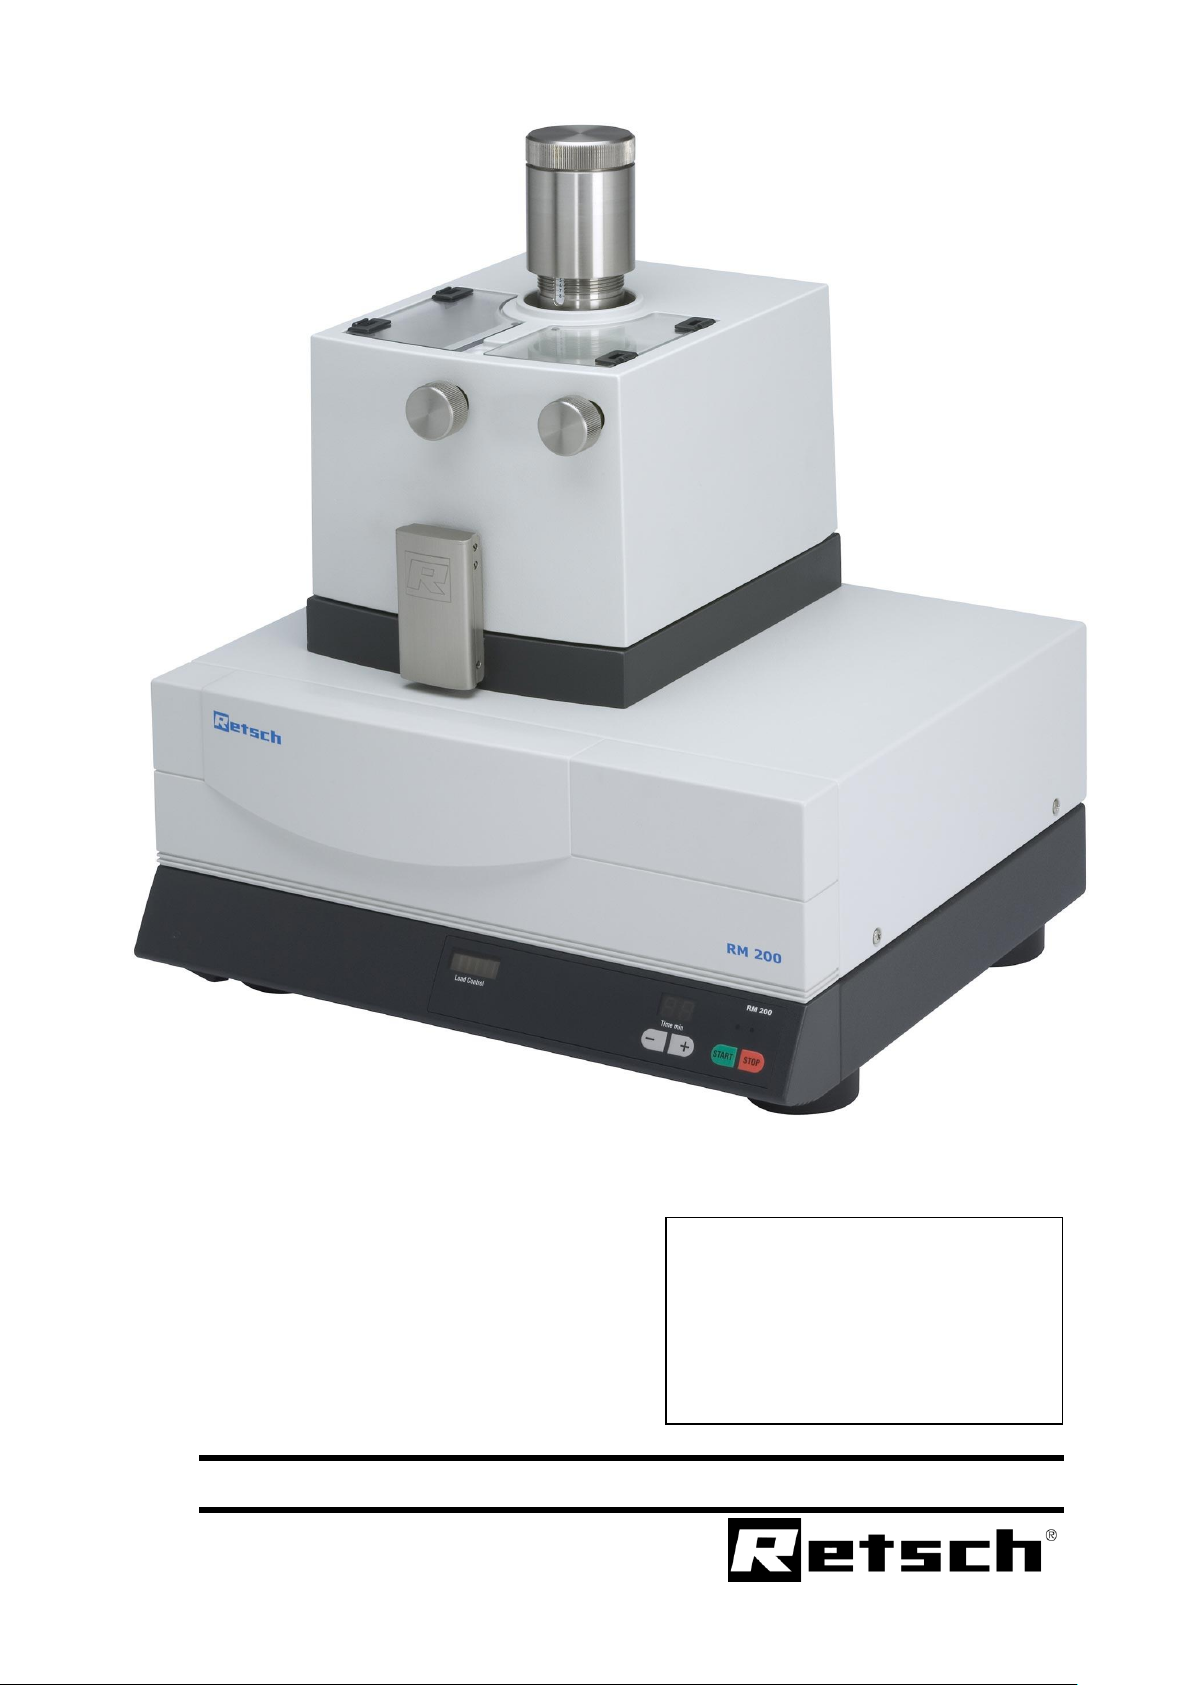
Operating Instructions for Mortar Mill RM200
Retsch GmbH, 42781 Haan, Retsch-Allee 1-5, Germany 11/6/2012 00023
Page 2

Notes on these operating
instructions
These operating instructions for the mortar mill, type RM200,
give all the necessary information on the areas mentioned in the
contents.
They instruct the target group(s) for each of the defined areas, in
order to ensure safe handling of the RM200 when used for the
intended purpose. Knowledge of the relevant section is an
essential precondition for safe, proper use of the machine.
This technical documentation is a reference work and also a set of
teaching instructions. The individual sections are complete in
themselves.
These operating instructions do not include instructions for
repairs. In case of possible defects or necessary repairs please
contact your suppliers or Retsch GmbH direct:
Retsch GmbH www.retsch.com
11/6/2012 2 Retsch GmbH 0002
Page 3

Notes on these operating instructions ..................................... 2
Safety ...................................................................................... 4
Safety instructions ............................................................................ 4
Warning signs ................................................................................... 5
Repairs ............................................................................................ 5
Confirmation .................................................................................... 8
Technical data ......................................................................... 9
Use according to the intended purpose ................................................ 9
Emissions ......................................................................................... 9
Protective system: IP53 .................................................................... 9
Rated power: 230 Watt ..................................................................... 9
Machine dimensions .......................................................................... 9
Required floor space .......................................................................... 9
Transport and installation ..................................................... 10
Packing .......................................................................................... 10
Transport ....................................................................................... 10
Intermediate storage ....................................................................... 10
Conditions for the place of installation ............................................... 11
Installation ..................................................................................... 11
Electrical connection ........................................................................ 11
Operation .............................................................................. 12
Operating elements and operation ..................................................... 12
Operating elements and their function ............................................... 13
View of milling chamber ................................................................... 15
Installing / changing the milling fittings ............................................. 16
Installing or changing the mortar ...................................................... 16
Installing or changing the pestle ....................................................... 17
Adjusting the pestle ........................................................................ 18
Adjusting the pestle pressure ........................................................... 18
Adjusting the Scraper to the Mortar ................................................... 19
Adjusting the contact pressure .......................................................... 20
Checking the scraper setting ............................................................ 21
Control milling operation .................................................................. 21
Adjusting the milling time ................................................................ 21
Stopping the milling process ............................................................. 23
Replacing the machine fuses ............................................................. 23
Working instructions ............................................................. 24
General .......................................................................................... 24
Materials ........................................................................................ 24
Crushing, mixing and milling of samples with grain size < 3mm ............ 25
Crushing, mixing and milling materials of grain size > 3 mm ................ 26
Security advice for handling liquid nitrogen ........................................ 27
Safety functions and fault displays ........................................ 28
Safety functions .............................................................................. 28
General ................................................................................. 29
Cleaning ........................................................................................ 30
Maintenance ................................................................................... 30
Accessories RM200 .......................................................................... 30
Wear ............................................................................................. 31
Readjusting the lock pre-tensioning ................................................... 31
Wearing parts ................................................................................. 31
Checks ........................................................................................... 31
Copyright ....................................................................................... 31
Alterations ..................................................................................... 31
Summary of safety regulations for the RM200..................................... 32
11/6/2012 3 Retsch GmbH 0002
Page 4

Safety
We exclude any claims for damages of any kind for
injury to persons and damage to equipment arising
from non-observance of the following safety
instructions.
Target group: All persons concerned with the
machine in any way.
The RM200 is a modern, highly efficient product of Retsch
GmbH, corresponding to state of the art. If the machine is
used according to the intended purpose with a knowledge of
this technical documentation it is completely safe and reliable
to operate.
Safety instructions
As the operating authority it is your duty to ensure that all
persons charged with working on the RM200:
have read and understood all the instructions on
safety,
before beginning work know all the instructions
and regulations for the target group relevant to
their work,
have access to the technical documentation for
this machine at all times, without problems.
New personnel should be familiarized with safe,
proper handling of the machine before beginning
work on the RM200, either by verbal instruction
from a competent person or through this
technical documentation.
Improper operation can cause injury to persons
or damage to the equipment. You are responsible
for your own safety and that of your employees.
Ensure that no unauthorised persons have access
to the RM200.
For your own protection have your employees confirm that
they have been instructed in operation of the RM200. The draft
of a suitable form is given at the end of the section on safety.
11/6/2012 4 Retsch GmbH 0002
Page 5
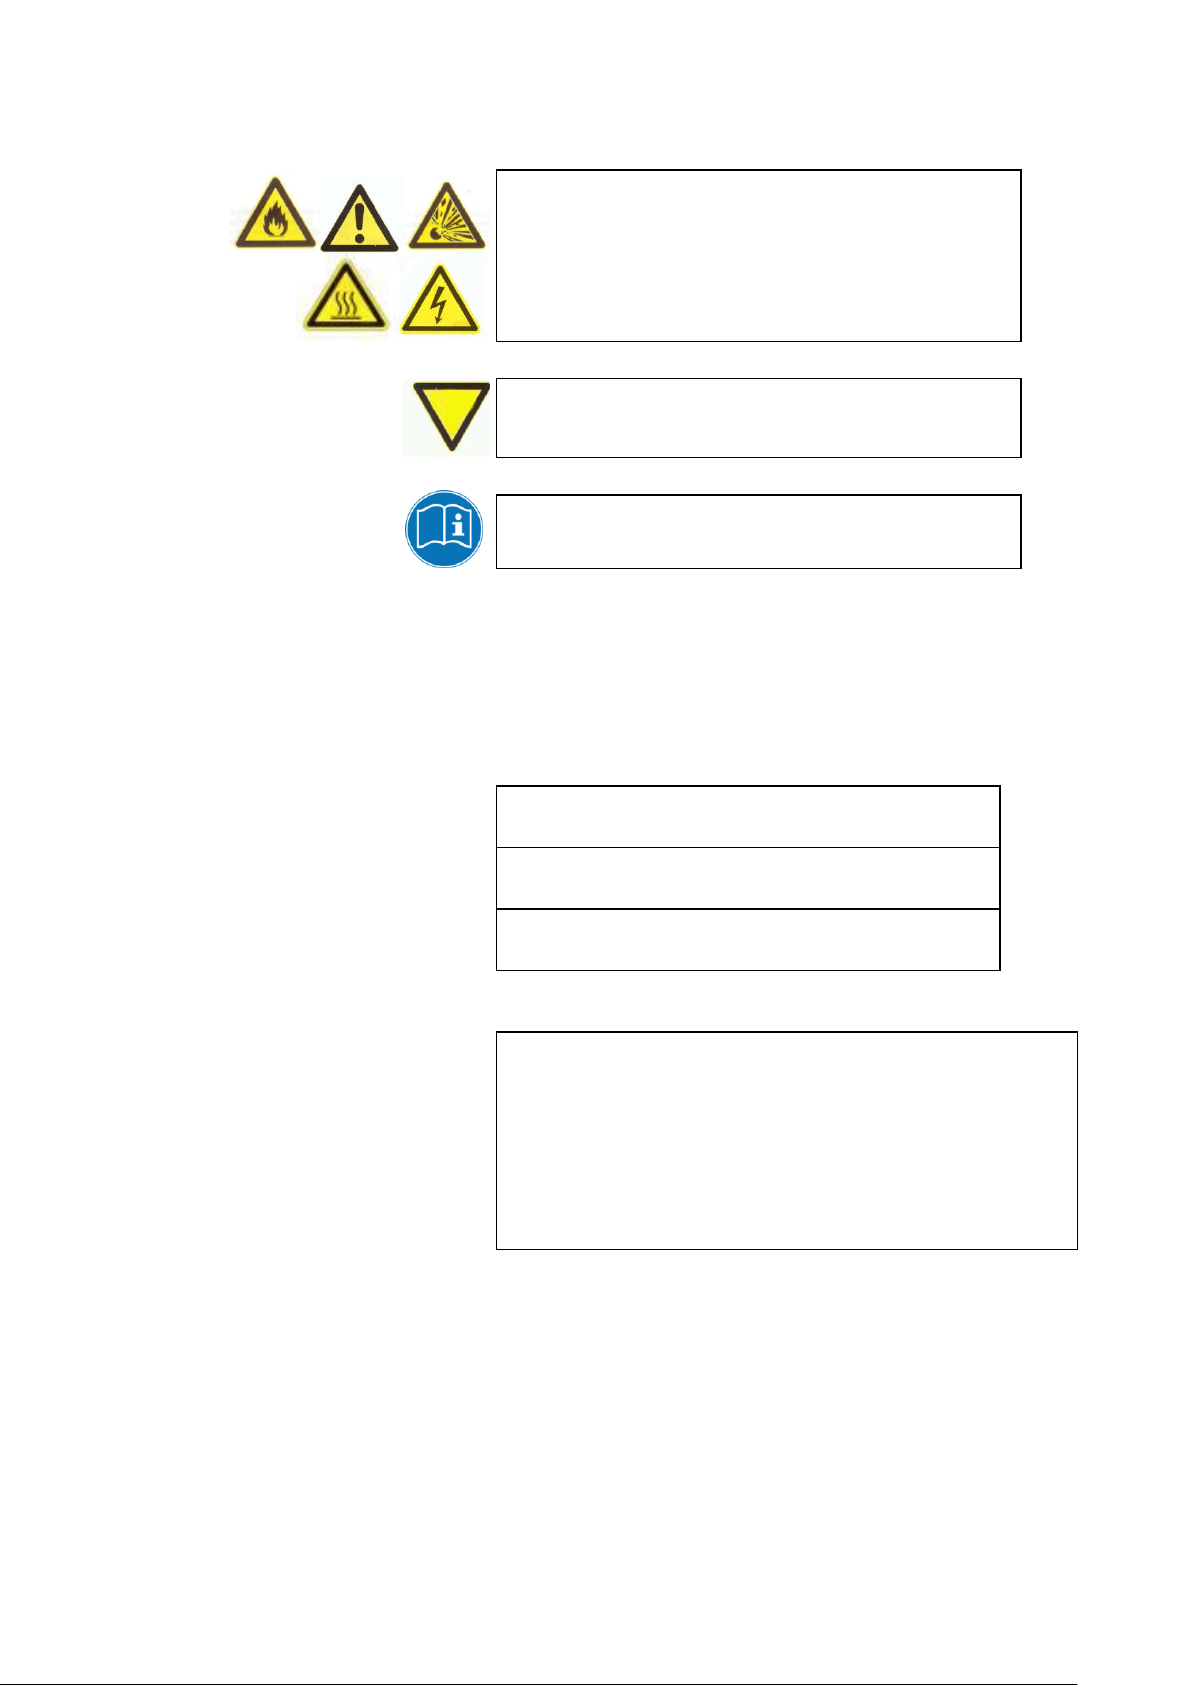
Warning signs
Injury to persons
Damage to equipment
Observe instructions for use
The Retsch agency in your country
Your supplier
Retsch GmbH directly
______________________________________
______________________________________
______________________________________
______________________________________
Warnings are given by the following signs:
Repairs
These operating instructions do not include repair instructions.
For your own safety repairs must be carried out only by Retsch
GmbH or an authorised agent (service technicians).
In this case please contact:
Your service address:
11/6/2012 5 Retsch GmbH 0002
Page 6
Safety instructions
We exclude any claims for damages of any kind for injury to persons and damage to equipment arising
from non-observance of the following safety instructions.
Do not make any alterations to the machine and use only spare parts and accessories approved by
Retsch.Otherwise the Declaration of Conformity with the European Directives by Retsch loses its
validity.Furthermore this will result in the loss of any kind of guarantee claim.
Please keep the packing material for the duration of the guarantee period since if there is a complaint and
the machine is returned with inadequate packing your guarantee claim will be at risk.
The RM200 must not be knocked, shaken or thrown during transport. Otherwise the electronic and
mechanical components can become damaged.
If temperature variations are high (e.g. during air transport) the RM200 must be protected against
condensed water. Otherwise the electronic components can become damaged.
If the delivery is incomplete and / or there is transport damage you must inform the transporter and
Retsch GmbH immediately (within 24 hrs). Later complaints may possibly be no longer considered.
If the ambient temperature drops below or exceeds these values the electronic and mechanical
components can become damaged and performance data are changed to an unknown extent.
At higher atmospheric humidity the electronic and mechanical components can become damaged and
performance data are changed to an unknown extent.
If the values on the type plate are not observed this can result in damage to the electrical and mechanical
components.
Ensure that the mortar has engaged properly in the groove of the plate.Otherwise the mortar will be
damaged when starting the machine.
When removing and opening heated milling cups protective gloves must be worn.Danger of burning the
hands.
Make sure that the pestle is locked in position. Otherwise it may fall out when the lid is closed and
damage the mortar.
The scraper can become sharp-edged as a result of sanding and wear during grinding operations. During
cleaning in particular there is a risk of injury.
If the scraper pressure is set too high this causes rapid wear of the scraper and contamination of the
material to be milled through the scraper material.
If the scraper pressure is set too high this increases the motor load and can cause triggering of the
overload protection switch on the rear side of the machine.
The milling operation can be started only if the lid is closed.
Use according to the intended purpose
Packing
Transport
Temperature variations
Supplied items
Conditions for the place of installation
Electrical connection
Installing or changing the mortar
Installing or changing the pestle
Adjusting the Scraper to the Mortar
Adjusting the scraper contact pressure
Adjusting the milling time
11/6/2012 6 Retsch GmbH 0002
Page 7
Please take all necessary measures, depending on the dangerousness of your sample, to prevent danger
to persons.
Please note that the properties, and therefore the dangerousness of your sample, can change during the
milling process.
General
Observe the relevant regulations and guidelines of your country for handling chemicals and hazardous
materials. These should be applied when working with the RM200.
Milling of materials with a risk of fire or explosion in the RM200 is prohibited.
Please take the necessary measures, depending on the dangerousness of your sample, to avoid danger to
persons.
Please not that the properties, and therefore the dangerousness of your sample, can change during the
milling operation.
Do not charge the materials in batches. The mortar and pestle can become blocked, so that the motor is
switched off by the controller to protect it from burning out.
Do not push material through the opening under the cover I with your fingers. Fingers can be squeezed.
Do not introduce any objects through the openings I + J. The mortar, pestle and scraper can become
damaged and there is a possible danger of injury.
Do not add the material in batches. The mortar and pestle can become blocked, which leads to switching
off of the machine.
Do not push material through the opening under the cover I with your fingers. Fingers can be squeezed.
Safety goggles and protective gloves should always be worn when handling liquid nitrogen. Liquid
nitrogen has a temperature of –196 °C and, if it comes into contact with the skin or eyes, may cause
injuries similar to burns or frostbite.
A funnel must be used to fill cooling liquid into the RM 200. Otherwise the cover might be damaged.
Please observe the security advice of the liquid nitrogen supplier. Retsch excludes any liability claims
which may result from the use of liquid nitrogen or similar substances.
Do not clean the RM200 with running water. Danger to life through current surgeUse only a cloth
moistened with water. Cleaning agents and solvents must not be used – not for cleaning the milling tools
either.
Do not carry out any modification of the machine and use only spare parts and accessories approved by
Retsch. Otherwise the declared Conformity with the European Directives by Retsch will lose its validity.
Furthermore this will lead to loss of any kind of guarantee claims.
These operating instructions do not include repair instructions. For your own safety repairs should be
carried out only by Retsch GmbH or an authorised agency and service technicians.
Materials
Crushing, mixing and milling of samples with grain size < 3mm
Crushing, mixing and milling materials of grain size > 3 mm
Security advice for handling liquid nitrogen
Cleaning
Accessories RM200
Wearing parts
11/6/2012 7 Retsch GmbH 0002
Page 8

Confirmation
I have taken note of the section „Notes on these
operating instructions” and the section on “Safety”.
_______________________________________
Signature of operating authority
_______________________________________
Signature of service technician
11/6/2012 8 Retsch GmbH 0002
Page 9

Technical data
Do not make any alterations to the machine and use only
spare parts and accessories approved by Retsch.
Otherwise the Declaration of Conformity with the
European Directives by Retsch loses its validity.
Furthermore this will result in the loss of any kind
of guarantee claim.
Target group: Operating authority, operators
Machine type designation: RM200
Use according to the intended purpose
This machine is not designed as a production machine but as
laboratory equipment, intended for an 8 hours single shift
operation with 30% operating time.
The RM200 is suitable for dry and wet milling of soft, medium
hard, hard, pasty and brittle materials, up to a hardness of 9
on the Mohs’ scale.
Furthermore quantities of approx. 10 to 190 ml and a max.
charging grain size of 8 mm can be ground and homogenised
with the RM200, without manual use of force.
A final fineness of down to 0.01 mm (10 µm), and in individual
cases even below this value, can be achieved with the RM200.
Emissions
Noise characteristic values :
Noise measurement according to DIN 45635-031-01-KL3
Intensity of sound LWA = 85 dB(A)
Emission value related to workplace L
Operating conditions:
Material to be milled = quartz sand, grain size < 1 mm
Protective system: IP53
Rated power: 230 Watt
Machine dimensions
Height: 480 mm up to approx. 550 mm with lid opened
Width: 400 mm
Depth : 370 mm up to approx. 510 mm with lid opened
= 72 dB(A)
pAeq
Weight: approx. 24 kg without mortar and pestle
Required floor space
11/6/2012 9 Retsch GmbH 0002
400 mm x 400 mm plus space at the rear for the opened
lid. No safety distance required.
Page 10
Transport and installation
Please keep the packing material for the duration
of the guarantee period since if there is a
complaint and the machine is returned with
inadequate packing your guarantee claim will be
at risk.
The RM200 must not be knocked, shaken or
thrown during transport. Otherwise the electronic
and mechanical components can become
damaged.
If temperature variations are high (e.g. during air
transport) the RM200 must be protected against
condensed water. Otherwise the electronic
components can become damaged.
Target group: Operating authority, transporter,
operators
Packing
Packing is adapted to the transport route and
conforms to generally applicable packaging guidelines.
Transport
Temperature variations
Intermediate storage
Ensure that the RM200 is also stored dry during
intermediate storage.
11/6/2012 10 Retsch GmbH 0002
Page 11
Conditions for the place of installation
If the ambient temperature drops below or
exceeds these values the electronic and
mechanical components can become damaged
and performance data are changed to an
unknown extent.
At higher atmospheric humidity the electronic
and mechanical components can become
damaged and performance data are changed
to an unknown extent.
If the values on the type plate are not observed this
can result in damage to the electrical and mechanical
components.
Ambient temperature:
5°C to 40°C
Atmospheric humidity:
Maximmum relative humidity 80% at temperatures up
to 31°C,
decreasing linearly down to 50% relative humidity at
40°C.
Installation height:
max. 2000 m above sea level
Installation
Mount the RM200 only on a firm, stable laboratory
bench since otherwise vibrations can be transmitted.
Electrical connection
Voltage and frequency for the RM200 are given
on the type plate.
Ensure that these values correspond to the
available power supply system.
Connect the RM200 to the power supply system
using the supplied connection cable.
Protection by external fusing is to be used when
connecting the mains cable to the power supply,
according to the regulations at the place of
installation.
The voltage supply to the RM200 must be
provided with a fault-current circuit breaker (FI
switch).
11/6/2012 11 Retsch GmbH 0002
Page 12

Operation
D G K L M F I J E H B A C
Target group: Operators
Operating elements and operation
Diagram of operating elements:
Front view
Rear view
11/6/2012 12 Retsch GmbH 0002
Page 13

Operating elements and their function
Element
Description
Function
A
Machine socket
Connection for power cable of machine
B
Fuse compartment
Takes two visible type fuses
C
Type plate
Information on the machine and connected
loads
D
ON/OFF switch
For switching the RM200 on and off
E
Display and operating unit: For
explanations see below
Time preselection and starting / stopping the
machine
F
Closing grip
For opening and locking the millling chamber
G
Turning handle – pestle pressure
adjustment
Turning alters the pestle contact pressure
H
Scale
Setting guide for pestle pressure
I
Filling opening
Sample material is filled here
J
Viewing window
Viewing possibility during the milling
process, particularly for adjusting the
scraper
K
Setting knob for scraper
Sets the contact pressure or gap of scraper
L
Pestle setting knob
For adjusting the pestle on the mortar wall
M
Hood
Closes the milling chamber
General plan
11/6/2012 13 Retsch GmbH 0002
Page 14

Display and operating unit E
Element
Description
Function
N
Load Control – load indicator
Shows the actual load of the drive motor. Helps
the user to avoid overloading and overload
circuit breaking.
Display = 1 to 4 green LEDs
Loading is OK
Display = 4 green + 1 yellow
LED
Slight overloading. Increasing the load can cause
circuit breaking.
Display =
4 green + 1 yellow + 1 red
LED
Overloading! Continuous overloading with the
red display switches off the control of the drive.
O
Time – minus button
In the adjusting mode and operating mode:
decrease in the adjusted milling time by one
minute. Continuous pressing switches off fast
running.
P
Time – plus button
In the adjusting mode and operating mode:
increase in the adjusted milling time by one
minute. Continuous pressing causes fast
running.
Q
Start button
Starts the milling operation
R
Stop button
Interrupts or ends the milling operation
S
Red LED
Indicates stand-by mode
T
Green LED
Indicates milling operation
U
Two digit display
Indicates the set milling time or, during
operation, the milling time still remaining.
Setting range: 1 to 99 minutes plus “- -“ for
continuous operation.
R Q S T P O N
U
11/6/2012 14 Retsch GmbH 0002
Page 15

View of milling chamber
Element
Description
Function
V
Pestle
Crushes and mills the material
W
Mortar
Contains the material to be milled
X
Scraper
Mixes the milled material and scrapes off
material adhering to the mortar
Y
Fixing screw for scraper
Holds the scraper with the screwed-on fixing
clamp
Z
Fixing clamp for scraper
Clamps the scraper
V
W Y X
Z
11/6/2012 15 Retsch GmbH 0002
Page 16

Installing / changing the milling fittings
If the RM200 has been ordered or supplied with
milling fittings the mortar, pestle and scraper will
have already been adjusted at the works.
If a new set of milling fittings is installed the pestle
and scraper must be readjusted or positioned.
The mortar and pestle should always be made of the
same material.
Fig. 1
Installing or changing the mortar
• Hold the closing grip F at the bottom and pull.
Fig.1
• Pull the hood upwards with the grip to open. Fig.1
• Remove mortar W Fig.2
• Place a new mortar in position and lock this in the
groove of the plate Tn Fig.3
Fig. 2
Fig. 3
Ensure that the mortar has engaged properly in the
groove of the plate.
Otherwise the mortar will be damaged when starting
the machine.
When removing and opening heated milling cups
protective gloves must be worn.
Danger of burning the hands.
F
W
Tn
W
11/6/2012 16 Retsch GmbH 0002
Page 17

Installing or changing the pestle
• Remove the pestle V horizontally from its holder
while holding the hood firmly Fig.4
• Insert a new pestle into the holder until it
noticeably engages.
• If the pestle does not engage turn this slightly
and, if necessary, hold the holder firmly with the
other hand so that the locking pins can engage at
this position. Fig.5
To prevent contact corrosion, take the pestle out of
the machine if the machine is idle for a long time.
Fig. 4
Ensure that the pestle bolt Pb is not contaminated.
No dirt should get into the pestle holder Pa Fig.4.1
Fig. 4.1
Make sure that the pestle is locked in position.
Otherwise it may fall out when the lid is closed and
damage the mortar.
Pa V Pb
11/6/2012 17 Retsch GmbH 0002
Page 18

Adjusting the pestle
Fig.5
Fig.6
Fig.7
Fig.5
• The mortar V is installed
• The pestle W is installed and locked in position
• Close the lid M and press the closing grip F shut.
• Turn the rotary grip G anticlockwise and remove.
• Start the machine by switching on with the on/off
switch D and pressing the start button Q
• Move the pestle forwards. To do this turn the pestle
knob L to the left until this reaches the stop. The
setting range is only a few millimeters for several
rotations of the setting knob.
• Then move the pestle backwards again until
resistance is felt. To do this turn the pestle knob L
to the right. Fig.6
• In Fig.6 the optimum setting has been reached
since the lower rounded surface of the pestle is
now running in the lower rounding of the mortar.
• As soon as the pestle shaft is pressed upwards
during the setting process the pestle moves
upwards on the mortar wall and setting is no
longer optimum. In this case turn the pestle knob
back slightly.
Adjusting the pestle pressure
The correct pestle pressure should be determined by
carrying out tests and depends on the material to be
milled and the required degree of fineness.
Increasing the pressure: Fig.5
• Turn the sleeve G clockwise
• This increases the pressing force downwards Fig.7
• The value can be read off on scale H
Reducing the pressure: Fig.5
• Turn the sleeve G anticlockwise
• The values on scale H are reduced
The values indicated on scale H are only for use as
a guide during setting. They can be used as an aid
in reproducing the conditions. However, no
mathematical conclusion regarding the contact
pressure is possible since this depends on the
material to be milled.
G L H
W
11/6/2012 18 Retsch GmbH 0002
Page 19

Adjusting the Scraper to the Mortar
When the machine is delivered or when a scraper is
re-ordered, it may be necessary to regrind scraper A.
This depends on the shape of the mortar M or the
wear on it.
Fig.7.1
Regrinding is necessary in the following cases:
• when the machine is supplied without a mortar or
grinding set
• when a scraper or mortar is reordered
The scraper was chamfered slightly in the factory in
order to make regrinding easier. The grinding angle
should be 45° and depend on the shape of the
mortar.
Fig.7.1 und Fig.7.2
You can use a belt sander, a grindstone or sandpaper
to do the grinding.
The scraper can become sharp-edged as a result of
sanding and wear during grinding operations. During
cleaning in particular there is a risk of injury.
Installing / replacing the scraper
Fig.8
• Open the cover M.
• Flip the cover to the back.
• Loosen the screw Y with the supplied screwdriver.
• Remove the retaining screw Y.
• Swing out the mounting bracket.
• Remove the scraper.
• Insert the new scraper.
• Hook the mounting bracket Z again.
• Turn the screw Y loose.
• The scraper can be adjusted by its slot slightly
forward or backward.
• Slide the scraper backwards.
• Tighten the screw. Fig.9
• Close the cover.
• Check visually or by sample material if the scraper
is applied accurate on the mortar.
M
A
delivery condition
ground
A
Fig.7.1
Fig.7.2
Y Z X
11/6/2012 19 Retsch GmbH 0002
Page 20

Fig.9
• See also below: "control the scraper adjustment"
If the scraper is not completely touching the bottom
of the mortar and the mortar inner wall (dotted line
in Fig.8), it must be adjusted again:
• Loosen the screw Y again.
• Move the scraper.
• Tighten the screw.
• Check again, visually or with sample material if the
scraper is applied accurate on the mortar.
Adjusting the contact pressure
Fig.10
The required contact pressure of the scraper X must
be determined empirically, depending on the
material to be milled and the required degree of
fineness.
Increasing the contact pressure: Fig.10
• Turn the scraper adjusting knob K anticlockwise
Reducing the contact pressure:
• Turn the scraper adjusting knob K clockwise
If the scraper pressure is set too high this causes
rapid wear of the scraper and contamination of the
material to be milled through the scraper material.
If the scraper pressure is set too high this increases
the motor load and can cause triggering of the
overload protection switch on the rear side of the
machine.
11/6/2012 20 Retsch GmbH 0002
Page 21

Checking the scraper setting
Fig.11
The scraper fulfils its function only if adjustment of
the contact pressure and contact with the bottom of
the mortar is optimum.
This can best be assessed by carrying out a neutral
milling operation.
Control milling operation
We recommend the following mixture as neutral
milling material:
e.g. 4 – 5 teaspoons of powder sugar
5 – 10 ml water
Fig.12
• Close the lid with the mortar empty and press the
closing grip shut.
• Turn the rotary grip G to setting „0“ of scale H
• Switch on the machine, start the operation by
pressing the start button Q.
• Add the powder sugar through the right-hand
window opening I of the lid, then pour in the
water.
A pasty mixture is formed which does not adhere to
the inside wall or to the bottom of the mortar if the
scraper has been adjusted correctly.
See Fig.11 and 12
For visually checking look through the left-hand
window J
Adjusting the milling time
The milling time can be adjusted with the display
and operating unit E
• Switch on the RM200 with switch D. Fig.13
Preselecting the time
• Set the required milling time with the + / - buttons
O and P Fig.14
• Short pressing of the + or – button changes the
milling time by one minute in each case. With
longer pressing the display runs through
continuously.
Fig.13
If 99 is exceeded the display U shows two minus
signs: -- This setting means continuous operation
D
Incorrect
Correct
11/6/2012 21 Retsch GmbH 0002
Page 22

without automatic switching off.
Fig.14
Starting the milling operation
• When the lid is closed:
• The milling operation is started with the start
button Q. Fig.13
The milling time is recorded and the
remaining milling time is indicated in display
U.
The milling operation can be started only if the lid is
closed.
Please take all necessary measures, depending on
the dangerousness of your sample, to prevent
danger to persons.
Please note that the properties, and therefore the
dangerousness of your sample, can change during
the milling process.
Q P O
R
U
11/6/2012 22 Retsch GmbH 0002
Page 23

Stopping the milling process
• Press the stop button R . Fig.14
Pressing the button once interrupts the milling
operation in order that, for example, the material to
be milled can be assessed. The remaining milling
time is still visible in the display U . By repressing
the start button the mill continues to run until the
milling time has completely elapsed.
• Pressing the stop button twice stops the milling
operation and the machine is then in the stand-by
mode.
• By pressing the start button the display is
reactivated and the milling time is reset to the last
start value.
During the milling operation the time can be
adjusted by pressing the + or – button.
The milling operation is automatically ended after
the milling time has elapsed. The display is reset to
the last started value.
Replacing the machine fuses
Fig.15
The following visible type fuses are required for the
RM200:
2 MT 3.15 A for 230V machine
2 MT 6.30 A for 100V to 120V machine
Replacing the fuses Fig.15
• Unplug mains plug from the machine socket A
• Unlock and remove the fuse compartment B by
pressing the locking device upwards.
• Replace the fuses
• Insert fuse holder B
B
A
11/6/2012 23 Retsch GmbH 0002
Page 24

Working instructions
Observe the relevant regulations and guidelines of
your country for handling chemicals and hazardous
materials.
These should be applied when working with the
RM200.
Milling of materials with a risk of fire or explosion in
the RM200 is prohibited.
Please take the necessary measures, depending on
the dangerousness of your sample, to avoid danger
to persons.
Target group: Laboratory assistant
General
The RM200 mills through pressure and friction. This
combination of two loading mechanisms enables both soft and
hard, brittle material to be crushed, milled and mixed in this
machine. Both dry and wet milling operations can be carried
out in the RM200.
Materials which are difficult to mill can be made brittle by
cooling, or can be prepared by mixing with milling auxiliary
agents. Please ask your Retsch contact for advice on this.
You should also take into consideration the health protection
regulations concerned with the function of health-hazardous
dusts, e.g.
BGR 217* „Handling mineral dust“
BGI 504-1-1* and BGI 504-1-4* „Dust exposure
– industrial preventive medicine“
BGR 120* „Directives for laboratories“
(* German federal laws)
Materials
The RM200 is suitable for dry and wet milling of materials of
all kinds, with the following possible properties:
soft
medium hard
hard
pasty or
brittle.
The maximum hardness of the materials can be up to 9 on the
Mohs’ scale.
11/6/2012 24 Retsch GmbH 0002
Page 25

Please not that the properties, and therefore the
dangerousness of your sample, can change during
the milling operation.
Fig.16
Fig.17
Connect the RM200 to the power supply, switch on
and start.
The sample is slowly added to the rotating mortar
through the filling opening I . For this purpose the
right-hand Plexiglass cover I is opened. Fig.16
The pestle, which is offset in relation to the centre of
the mortar, presses on the bottom of the mortar and
the material to be milled through spring tension and
its own weight.
Through the resulting friction the pestle is also
rotated with the mortar and this crushes the material
to be milled through pressure and friction. The
pressure can be varied by means of the rotary grip G
Fig.16
The scraper ensures that the sample material is
scraped off the inside wall of the mortar, recirculated
and refed to the milling gap between the pestle and
mortar.
This forced feeding of the material ensures that the
complete sample quantity is well mixed and that
every particle is continuously fed to the milling and
pulverizing process.
Load Control and safety switch off
The load indicator “Load Control” N Fig.17 and 18
serves as a guide for the user. It indicates loading of
the drive motor in 6 stages. At low to full load 1 to 4
green LEDs light up. At slight overloading a yellow
LED lights up in addition.
G
N
I
Quantities from approx. 10 to 190 ml and a max. charging
grain size of 8 mm can be milled and homogenised with the
RM200, without any manual use of force.
The ideal filling quantity depends on the sample quantity and
the properties of the materials to be milled.
Selection of the milling tools depends on the sample material
and the subsequent analysis.
Different milling tools have different characteristics, e.g. the
materials contained in them, hardness or abrasion resistance.
For reliable analytical results you should select the milling
tools in such a way that the milling process is neutral with
regard to contamination.
Please ask for advice in case of doubt.
Crushing, mixing and milling of samples with grain
size < 3mm
11/6/2012 25 Retsch GmbH 0002
Page 26

Fig.18
In the case of definite overloading the red LED lights
up additionally and thus signals that the machine will
soon be switched off. This switch-off takes place
when overloading for 90 secs is measured within a
short period.
The machine is also switched off if it comes to a
standstill for 10 seconds through blockage.
Do not charge the materials in batches.
The mortar and pestle can become blocked, so that
the motor is switched off by the controller to protect
it from burning out.
Do not push material through the opening under the
cover I with your fingers.
Fingers can be squeezed.
Do not introduce any objects through the openings I
+ J. The mortar, pestle and scraper can become
damaged and there is a possible danger of injury.
Fig. 19
Close the RM200 and switch on.
Precrushing: Fig.14
• Loosen the rotary grip for adjusting the pestle G
down to scale setting “0”
The pressure of the pestle on the mortar is now
minimum.
• Start the milling operation.
• Add the material to be milled slowly through the
charging opening I
Fine milling: Fig.14
• Increase the pestle pretension again by turning the
rotary grip G clockwise.
N
I
Crushing, mixing and milling materials of grain size
> 3 mm
11/6/2012 26 Retsch GmbH 0002
Page 27

Do not add the material in batches.
The mortar and pestle can become blocked, which
leads to switching off of the machine.
Do not push material through the opening under the
cover I with your fingers.
Fingers can be squeezed.
Security advice for handling liquid
nitrogen
Safety goggles and protective gloves should
always be worn when handling liquid nitrogen.
Liquid nitrogen has a temperature of –196 °C and, if
it comes into contact with the skin or eyes, may
cause injuries similar to burns or frostbite.
Safety goggles also give protection against eye
injuries cause by flying fragments of glass from glass
containers, which may burst owing to cold tensions.
The RM 200 can also be used for cryogenic grinding.
Please note that the cooling liquid must be filled in
via a funnel to avoid damages of the cover of the RM
200.
Place a standard funnel Tr into the feed opening I.
Pour liquid nitrogen into the funnel and take care
that the liquid does not get in contact with the cover.
Fig. 19.1
A funnel must be used to fill cooling liquid into the
RM 200. Otherwise the cover might be damaged.
Please observe the security advice of the liquid
nitrogen supplier.
Retsch excludes any liability claims which may result
from the use of liquid nitrogen or similar substances.
Tr
I
Fig.19.1
11/6/2012 27 Retsch GmbH 0002
Page 28

Safety functions and fault displays
F1
03
F4
F5
F6
Safety functions
F1 - Overloading
In order to prevent overloading of the drive motor and
resulting danger to the operator the RM200 is provided with a
load control.
This continuously measures the actual motor load and
indicates this in the load control display. In case of overloading
the load control switches off the machine in good time and
guarantees a cooling time. This is indicated to the operator by
the alternately flashing display F1 and the remaining cooling
time, e.g. 03 = 3 minutes.
After the cooling time has elapsed it is only necessary to
switch the machine off and on again to operate it normally
again.
F4 – Hood open
If the hood is open the drive should not run. This serves to
protect the operator from injury. If the hood is opened while
the machine is running the drive is immediately switched off
by the controller and “F4” appears in the display. If the start
button is pressed with the hood open in order to start the
milling operation F4 is also displayed and the drive is not
started.
This signal can be deleted by pressing the stop button.
F5 –Keyboard control
If one or more buttons are accidentally pressed for longer than
15 seconds the drive is switched off by the controller and F5 is
displayed.
This function is intended to prevent unintentional faulty
operation if an object accidentally presses on the keyboard.
In order to delete this fault signal switch the machine off and
on again once.
F6 – Switch control for hood switch
If the switch which controls hood opening has a lead defect
this is recognised by the controller and causes the machine to
be switched off. “F6” appears in the display. To remedy this
fault repairs by an authorised Retsch service technician are
required.
11/6/2012 28 Retsch GmbH 0002
Page 29

Accessories / milling tools
Mortar Fig.20
• Mortar of special steel
• Mortar of stainless steel
• Mortar of agate
• Mortar of sintered corundum
• Mortar of zirconium oxide
• Mortar of hard porcelain
• Mortar of tungsten carbide
Fig.20
Pestle Fig.21
• Pestle of tungsten carbide
• Pestle of special steel
• Pestle of stainless steel
• Pestle of agate
• Pestle of sintered corundum
• Pestle of zirconium oxide
• Pestle of hard porcelain
Fig.21
Scraper Fig.22
• Scraper of PUR (abrasion resistant, rubber type
material)
• Scraper of beech wood
• Scraper of PTFE (Teflon)
Fig.22
General
11/6/2012 29 Retsch GmbH 0002
Page 30

Cleaning
Do not clean the RM200 with running water.
Danger to life through current surge
Use only a cloth moistened with water. Cleaning
agents and solvents must not be used – not for
cleaning the milling tools either.
Designation
Material
Article No.
Mortar RM200/100
Special steel
02.460.0018
Mortar RM200/100
Stainless steel
02.460.0057
Mortar RM200/100
Tungsten carbide
02.460.0021
Mortar RM200/100
Agate
02.460.0098
Mortar RM200/100
Sintered corundum
02.460.0017
Mortar RM200/100
Zirconium oxide
02.460.0086
Mortar RM200/100
Hard porcelain
02.460.0016
Pestle RM200
Special steel
02.461.0112
Pestle RM200
Stainless steel
02.461.0113
Pestle RM200
Tungsten carbide
02.461.0114
Pestle RM200
Agate
02.461.0115
Pestle RM200
Sintered corundum
02.461.0116
Pestle RM200
Zircondium oxide
02.461.0117
Pestle RM200
Hard porcelain
02.461.0118
Scraper
PTFE
03.008.0022
Scraper
Beech wood
03.008.0023
Scraper
PU
03.862.0011
Do not carry out any modification of the machine and use only
spare parts and accessories approved by Retsch.
Otherwise the declared Conformity with the European
Directives by Retsch will lose its validity. Furthermore this
will lead to loss of any kind of guarantee claims.
Maintenance
The RM200 is maintenance free. When used properly
no maintenance and adjusting work need be carried
out.
Accessories RM200
11/6/2012 30 Retsch GmbH 0002
Page 31

Wear
Readjusting the lock pre-tensioning
The lock tension in the lock handle Vg can be
influenced by adjusting the rubber buffer GP.
Open the hood H and loosen the setscrew Gs.
Increasing the lock tension:
Turn the rubber buffer GP in an anti-clockwise
direction
Reducing the lock tension:
Turn the rubber buffer GP in a clockwise direction
These operating instructions do not include repair instructions.
For your own safety repairs should be carried out only by
Retsch GmbH or an authorised agency and service technicians.
Vg
Gs
H
GP
The scraper and milling tools can wear, depending on
the frequency of milling operations and the material to
be milled. The scraper should be regularly checked for
wear and replaced if necessary. The scraper must be
reset before the metal components come into contact
with the mortar.
Wearing parts
Checks
The function of the hood switch must be checked regularly:
• Switch on the machine with switch D
• Start the milling operation with start button Q
• Open the closing grip F and lift up the hood
• If there is an opening gap of only a few cm the machine is
• Delete F4 with stop button R
If switching off does not take place the RM200 must be
checked immediately by Retsch service.
Copyright
Distribution or duplication of this documentation, using
and passing on the contents is allowed only with the
express permission of Retsch GmbH.
Anyone violating is liable to pay damages.
switched off and F4 appears in the display.
Alterations
11/6/2012 31 Retsch GmbH 0002
Subject to technical alterations without notice.
Page 32

Summary of safety regulations for the RM200
Process
Action
Danger
Safety
Injury to persons and damage to the
machine caused through non-observance of
the safety instructions
Claims for damages in any form are
excluded
Transport
Do not knock, vibrate or throw the RM200
during transport
Electronic and mechanical components
can be damaged
Keep the packing material for the duration of
the guarantee
Complaint and return of the
equipment in inadequate packing
material puts your guarantee claim at
risk
Temperature
variations
If there are temperature variations protect
the RM200 from condensed water
Electronic components can be
damaged
Supplied items
If the delivery is incomplete and/or there is
transport damage you must inform the
transporter and Retsch GmbH immediately
(within 24 hrs).
Later complaints may possibly not be
considered.
Ambient
temperature
Drops below 5°C
Exceeds 40°C
Electronic and mechanical components
may be damaged.
Performance data are changed to an
unknown extent.
Atmospheric
humidity
Exceeds 80% at
temperatures up to 31°C
Electronic and mechanical components
can be damaged.
Performance data are changed to an
unknown extent.
Electrical
connection
Power supply does not agree with the values
on the type plate
Fault current protective switch must be
provided in the power supply
Mechanical and electronic components
can be damaged.
Prevents current surge if there is an
electrical defect in the machine.
Installing the
mortar
Ensure that the mortar is properly engaged
in the plate slot.
Mortar and pestle can be damaged.
Installing the
pestle
Ensure that the pestle engages properly.
The pestle can fall out when closing
the hood and damage the mortar.
Scraper pressure
Set too high
Rapid wear to be expected.
Contaminates the sample to a greater
extent than expected.
Increases the motor load and can
cause switching off through
overloading.
Crushing
Mixing
Milling
Do not push sample material into the
opening with your fingers.
Do not push sample material in using
objects.
Do not add sample material in batches.
Fingers can be squeezed.
Mortar, pestle and scraper can be
damaged, danger of injury.
Mortar and pestle can become
blocked.
Checks
Check hood switch regularly
Danger of injury if there is a defect
and the machine is open in operation.
Cleaning
Do not clean with running water.
Danger to life through current
surge
11/6/2012 32 Retsch GmbH 0002
Page 33

Authorized person for the compilation of technical documents:
J. Bunke (technical documentation)
The following records are held by Retsch GmbH in the form of Technical Documentation:
Detailed records of engineering development, construction plans, study (analysis) of the measures required for
conformity assurance, analysis of the residual risks involved and operating instructions in due form according to
the approved regulations for preparation of user information data.
The CE-conformity of the Retsch Mortar Grinder Type RM 200 is assured herewith.
In case of a modification to the machine not previously agreed with us as well as the use of not
licensed spare parts and accessories this certificate will lose its validity.
Retsch GmbH Haan, January 2010
Dr. Stefan Mähler
Manager technical services
Ret sch G mbH Ret s ch-Alle e 1-5 42781 Ha an Germ a ny www.r etsch .com
MORTAR GRINDER
RM 200
FB-EW-805-055 (E) Änderungsstand D 01.2012
CERTIFICATE OF CE-CONFORMITY
Translation
Certificate of CE-Conformity according to:
EC Mechanical Engineering Directive 2006/42/EC
Applied harmonized standards, in particular:
DIN EN ISO 12100 Security of machines
EC Directive Electromagnetic Compatibility 2004/108/EC
Applied standards, in particular:
EN 61000-3-2/-3 Electromagnetic compatibility (EMC)
EN 61236 Electrical measuring, operating, controlling and laboratory equipment – EMC-
requirements in conjunction with EN 61000
EN 55011 Limit values and measuring procedures for noise suppression of industrial,
scientific and medical high frequency devices
Additional applied standards, in particular
DIN EN 61010 Safety prescriptions concerning measuring-, operating-, controlling- and
laboratory equipment
Page 34

Page 35

Page 36

Copyright
® Copyright by
Retsch GmbH
Haan, Retsch-Allee 1-5
D-42781 Haan
Federal Republic of Germany
 Loading...