

Page 1
The engine exhaust from this product
contains chemicals known to the State
of California to cause cancer, birth
defects or other reproductive harm.
WARNING
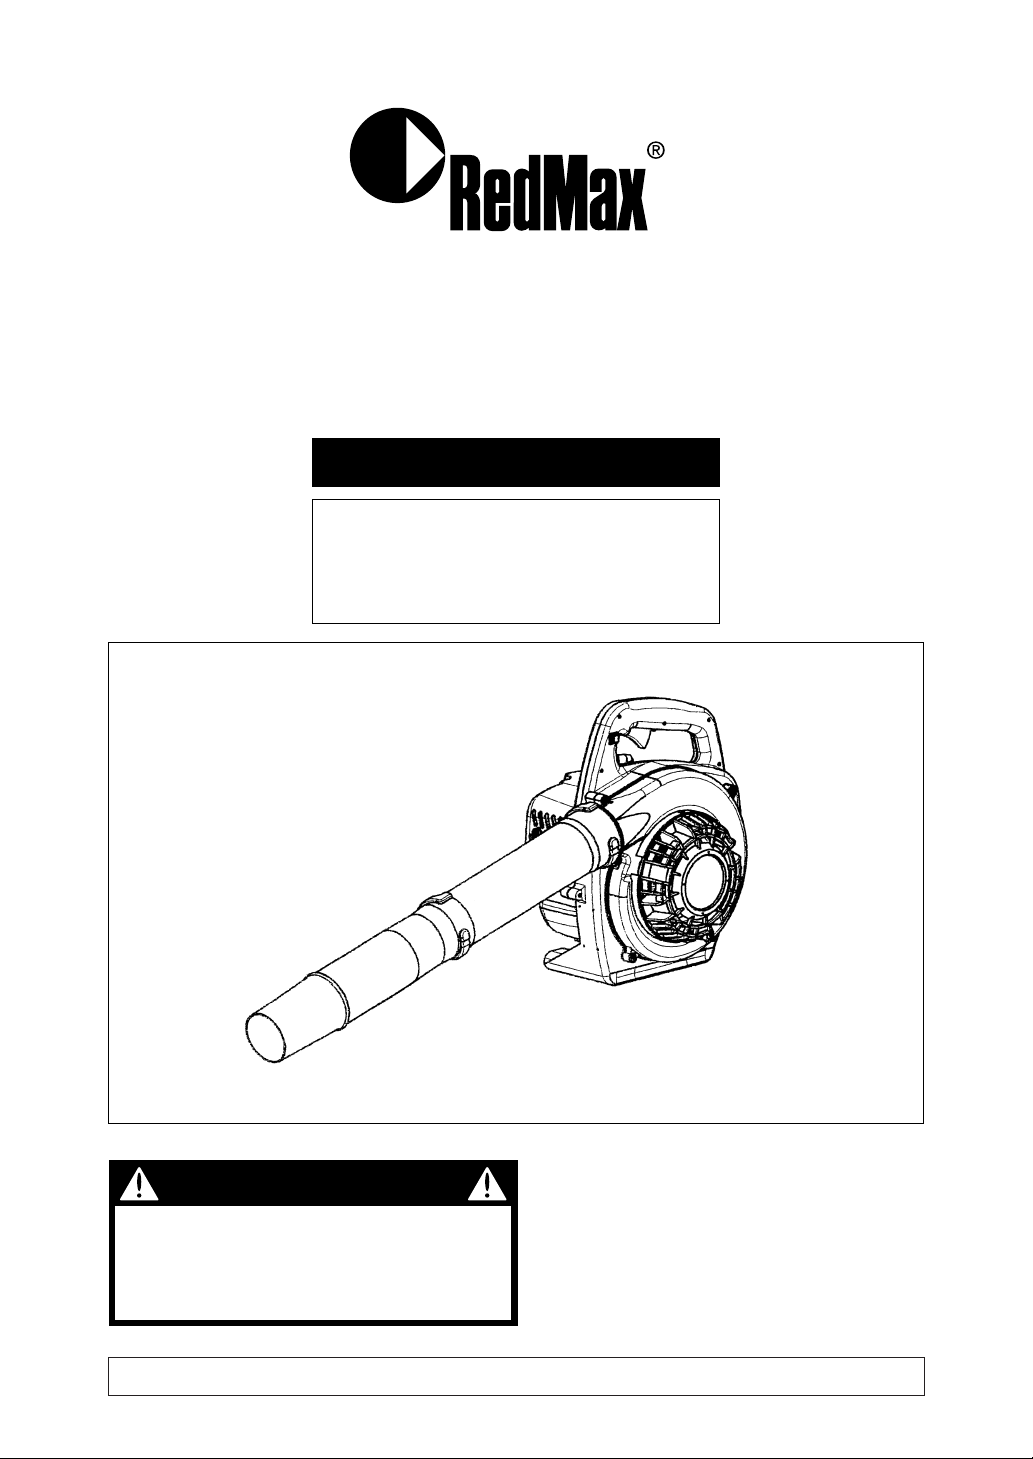
OWNER/OPERATOR MANUAL
HANDHELD BLOWER
848-L0F-93A0 (503)
HB250
Thank you for purchasing a RedMax
product.
Before using our blower, please read
this manual carefully to understand the
proper use of your unit.
DRIVE UNIT 40900101 and up ENGINE UNIT KU413473 and up
APPLICABLE SERIAL NUMBERS :
Page 2
Read this manual carefully to understand all
safety precautions, controls, proper operation
and maintenance of your RedMax blower.
Failure to do so could result in serious injury.
Instructions labeled as shown at left concern critical steps or
procedures which must be followed in order to prevent accidents
which could lead to serious bodily injury or death. This mark is
used to indicate instructions which must be followed without
exception.
Instructions labeled as shown at left concern steps or procedures
which, if not followed correctly, could lead to mechanical failure,
breakdown, or damage.
Used to label supplementary instructions designed to provide
hints or directions useful in the use of the product.
WARNING
IMPORTANT
NOTE
SAFETY FIRST
Instructions contained in warnings within this manual and warning seals marked
with a symbol on the blower concern critical points which must be taken into
consideration to prevent possible serious bodily injury, and for this reason you
are requested to read all such instructions carefully and follow them without fail.
Note that there may be times when warning seals peel off or become soiled and
impossible to read. If this happens, you should contact the dealer from which
you purchased the product to order new seals and affix the new seal(s) in the
required location(s).
■ Notes on types of warnings
Page 3

CONTENTS
SAFETY PRECAUTIONS················································································ 4
OPERATOR
USE OF BLOWER
WORKING CONDITION
AVOID NOISE PROBLEM
AVOID CHANCES OF DAMAGE
SYMBOLS ON THE MACHINE ······································································· 7
PARTS LOCATION & SPECIFICATIONS ······················································· 8
ASSEMBLY······································································································ 8
BLOWER PIPE
FUEL················································································································ 9
RECOMMENDED MIXING RATIO
HOW TO MIX FUEL
FUELING THE UNIT
OPERATION ·································································································· 11
STARTING ENGINE
RESTARTING ENGINE WHILE ENGINE HOT
STOPPING ENGINE
ADJUSTING IDLE SPEED
MAINTENANCE····························································································· 12
MAINTENANCE CHART
AIR CLEANER
FUEL FILTER
SPARK PLUG
MUFFLER
SPARK ARRESTER
AIR INLET SCREEN
PROCEDURES TO BE PERFORMED AFTER EVERY 100 HOURS OF USE
STORAGE ····································································································· 14
TROUBLESHOOTING GUIDE ······································································ 14
PARTS LIST ·································································································· 15
Page 4

• Read this Blower Owner/Operator
Manual carefully. Be sure you
understand how to operate this unit
properly before you use it. Failure to do
so could result in serious injury.
• Be sure to keep this manual handy so
that you may refer to it later whenever
any questions arise. Also note that you
are requested to contact the dealer from
whom you purchased the product for
assistance the event that you have any
questions which cannot be answered
herein.
• Always be sure to include this manual
when selling, lending, or otherwise
transferring the ownership of this
product.
■ OPERATOR
• Refrain from operating the blower if you
are tired, ill, or upset, or if you are under
the influence of alcohol, drugs or
medication.
• Always wear eye protection goggles.
• Always wear ear protectors to protect your
ears from engine noise. If this guideline is
not followed, hearing loss can occur.
Safety Precautions
• Wear a face mask to guard against the
inhalation of dust.
• Wear rubber-soled shoes or shoes with
some other form of anti-slip protection to
help protect you against falling.
• Be sure to wear proper work clothing.
■ USE OF BLOWER
• Each time before starting the engine,
inspect the entire unit to see if every part
is in good order and is securely tightened
in place. If any damage is found in the fuel
line, the exhaust line, or the ignition
wiring, do not use the blower until it has
been repaired.
4
Page 5
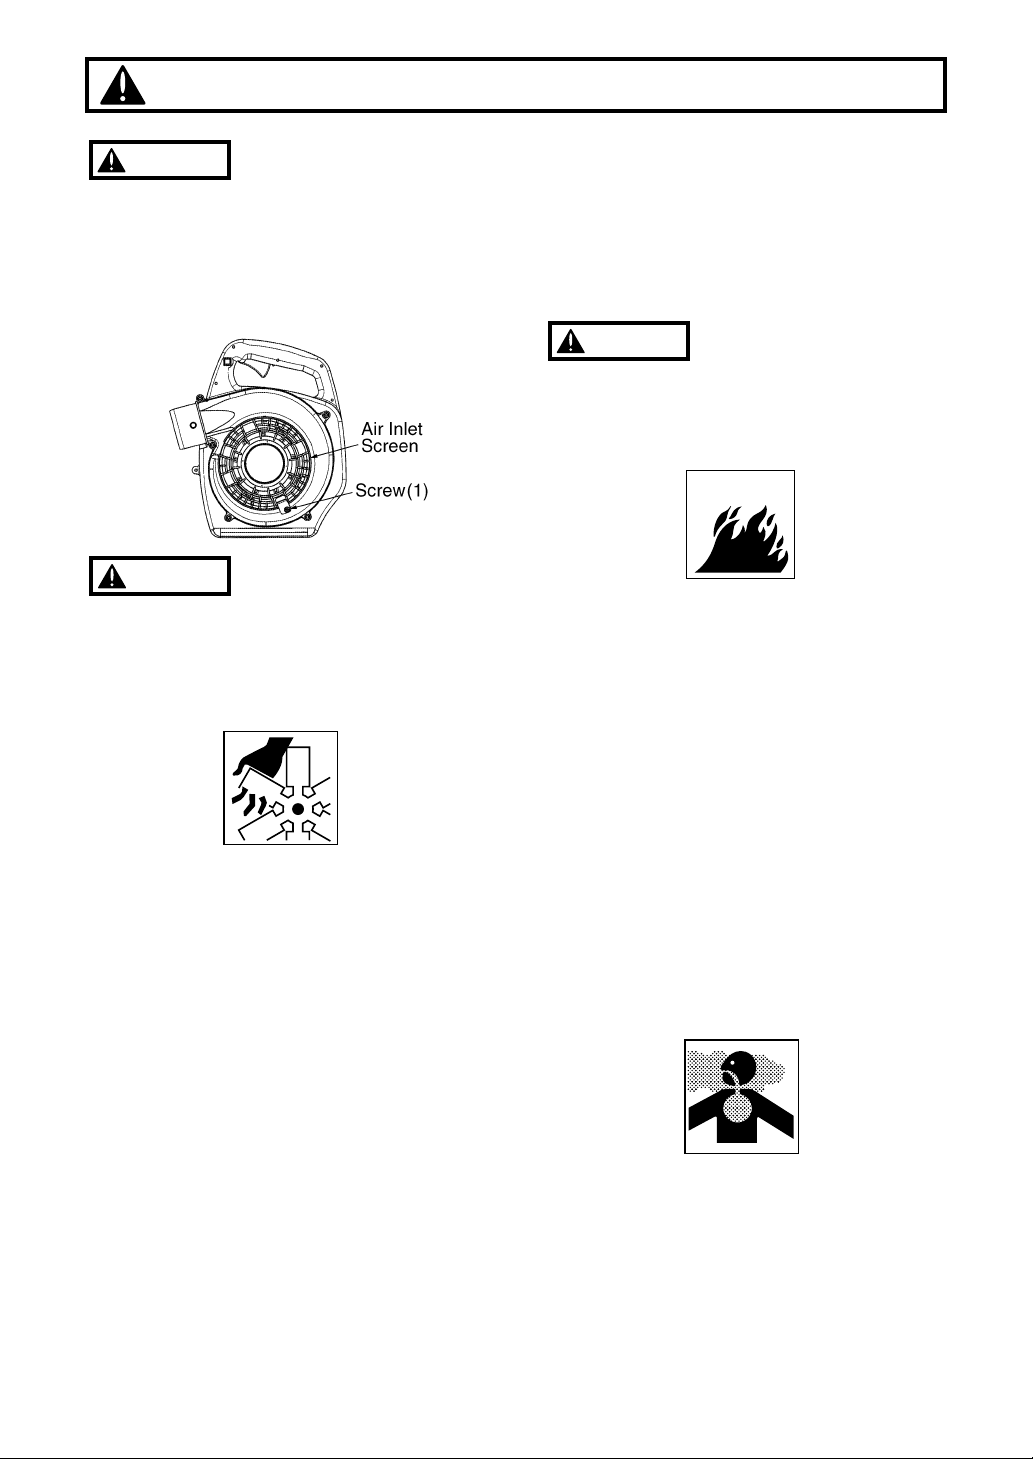
• Never use the blower without the
screen at the air intake of the blower.
Before each use, check that, the
screw(1) is securely tightened and is
free from any damage.
•Never remove debris from the intake
screen while the engine is running.
Contact with rotating blower fan may
result in a serious personal injury.
• Do not allow children to use blower. Make
sure that each person you authorize to
operate the blower understands all of the
safety rules in this manual.
• Avoid using any accessory or attachment
other than those bearing the RedMax
mark for use with the blower.
• When suspending a job or inspecting the
blower, be sure to stop engine.
• Drain the fuel from the fuel tank before
transporting or storing the blower.
• When storing the blower, choose a space
indoors free from moisture and out of the
reach of children.
• Examine the blower at intervals for loose
fasteners and rusted or damaged parts.
Use special care around the fuel line,
the muffler, and the ignition wiring.
• All engine service except for those
WARNING
Safety Precautions
described in this manual should be
performed by competent service
personnel. Improper service to the blower
fan and muffler could cause a hazardous
failure.
■ WORKING CONDITION
• Keep open flames and sparks away from
the area where fuel is handled or stored,
as the fuel is highly flammable.
• Make sure that the engine has cooled
down before refueling.
• Mix and store fuel only in a approved
container.
• Never smoke while refueling the blower.
•Wipe off any spilled fuel and tighten the
fuel cap securely.
•Move at least 3m(10ft) away from the
fueling spot before starting the engine.
• Check the work area that the blower will
be used in and remove or cover all
valuables that may be damaged by the air
blast or thrown debris.
• Avoid running the engine indoors. The
exhaust gases contain harmful carbon
monoxide.
WARNING
5
WARNING
Page 6

6
• Keep operation area clear of all persons,
particularly small children and pets. Injury
may result from flying debris.
• Avoid using the blower where stable
footing and balance are not assured.
• Never touch the spark plug or plug cord
while the engine is in operation. Doing so
may result in being subjected to an
electrical shock.
• Never touch the muffler, spark plug, or
other metallic parts of the engine while the
engine is in operation or immediately after
shutting down the engine. These metallic
parts reach high temperatures during
operation and doing so could result in
serious burns.
■ AVOID NOISE PROBLEM
Check and follow the local regulations
as to sound level and hours of
operations for blower.
• In general, operate blowers between
8a.m.and 5p.m.on week day and 9a.m.to
5p.m.weekends. Avoid using blower late
at night and/or early in the morning.
• Loosen compacted leaves, grass or debris
with a rake or broom beforehand, so that
the lowest possible throttle setting would
get the job done.
• In dusty conditions, slightly dampen
surfaces.
• Check if the air filter, air intakes and
muffler are working in properly.
• Never use more than one unit of the
blower at one time.
■ AVOID CHANCES OF DAMAGE
• Avoid directing the blower nozzle toward
persons, pets, cars, windows or anything
that could be harmed by blowing debris or
dust.
• Keep the nozzle at full extension when
operating so as to make the air stream
close to the ground.
• Collect any trash and leaves and put them
into a proper container after the job is
done.
• Always check to be sure that no debris
has been blown onto someone else’s
property.
NOTE
Safety Precautions
Page 7

7
Symbols on the machine
CE MOTEUR EST CONFORME A LA REGLEMENTATION U.S. EPA 2005 POUR LES PETITS
MOTEURS HORS-ROUTE. DUREE DE CONFORMITE DES EMISSIONS : CATEGORIE C.
SE REFERER AU MODE D’EMPLOI POUR DE PLUS AMPLES INFORMATIONS.
FAMMILLE DE MOAMMILLE DE MOTEUR :TEUR : 5KZXS.0254VW 5KZXS.0254VW;EM;EM
CYLINDREE : 25cm3 DATE DE FABRICAABRICATION :TION :
INFORMAINFORMATION IMPORTION IMPORTANTE CONCERNANT LE MOANTE CONCERNANT LE MOTEURTEUR
For safe operation and maintenance,
symbols are carved in relief on the machine.
According to these indications, please be
careful not to make a mistake.
(a) The port to refuel the "MIX GASOLINE"
Position: FUEL TANK CAP
(b) The direction A to close the choke
The direction B to open the choke
Position: AIR CLEANER COVER
Page 8

Parts Location & Specifications
Assembly
■ BLOWER PIPE
• Align groove in blower pipe with projection
on blower housing (or another blower pipe)
and slide the pipe onto the blower housing
(or another blower pipe).
Rotate the pipe clockwise to lock it into
place.
MODEL HB250
Dimensions ( L x W x H ) mm ( in ) 327 x 273 x 360 (12.9 x 10.7 x 14.2)
Dry Weight
(without tube and nozzle)
kg ( lbs ) 3.8 (8.3)
Fuel Tank Capacity liter ( fl. oz ) 0.65 (22.0)
Engine Type Air cooled 2-cycle gasoline engine
Piston Displacement cm3( cu. in ) 25.4 (1.60)
Durability Period 50h
Carburetor Walbro Diaphragm type
Ignition System CDI
Spark Plug NGK BPMR7A
Muffler Spark arrester equipped
Operating Engine Speed rpm 2.800 ~ 7.800
Idle Speed rpm 2.800
Max. Air Volume (with std. pipe) cu. m/min ( cfm ) 10.3 (364)
Max. Air Volume (w/o pipe) cu. m/min ( cfm ) 11.1 (392)
Max. Air Velocity m/sec ( mph ) 57 (127)
Noise Level
(50 Feet ANSI B175-2) dB (A) 73
8
Page 9

9
Fuel
■ RECOMMENDED MIXING RATIO
GASOLINE 50:OIL 1
• Exhaust emission are controlled by the
fundamental engine parameters and
components(eq., carburation, ignition
timing and port timing) without
addition of any major hardware or the
introduction of an inert material during
combustion.
• These engines are certified to operate on
unleaded gasoline.
• Make sure to use gasoline with a
minimum octane number of 89 RON
(USA/Canada: 87AL)
• If you use a gasoline of a lower octane
value than prescribed, there is a danger
that the engine temperature may rise and
an engine problem such as piston seizing
may consequently occur.
• Unleaded gasoline is recommended to
reduce the contamination of the air for the
sake of your health and the environment.
• Poor quality gasolines or oils may damage
sealing rings, fuel lines or fuel tank of the
engine.
■ HOW TO MIX FUEL
Pay attention to agitation.
1. Measure out the quantities of gasoline
and oil to be mixed.
2. Put some of the gasoline into a clean,
approved fuel container.
3. Pour in all of the oil and agitate well.
4. Pour In the rest of gasoline and agitate
IMPORTANT
• Gasoline is very flammable. Avoid
smoking or bringing any flame or
sparks near fuel. Make sure to stop the
engine and allow it cool before
refueling the unit. Select outdoor bare
ground for fueling and move at least
3m (10ft) away from the fueling point
before starting the engine.
• The RedMax engines are lubricated by oil
specially formulated for air-cooled 2-cycle
gasoline engine use. If RedMax oil is not
available, use an anti-oxidant added
quality oil expressly labeled for air-cooled
2-cycle engine use. (JASO FC GRADE
OIL or ISO EGC GRADE)
• Do not use BIA or TCW (2-stroke watercooling type) mixed oil.
WARNING
50:1 MIXING CHART
GASOLINE gal. 1 2 3 4 5
2-CYCLE OIL fl.oz 2.6 5.2 7.8 10.4 13
GASOLINE liter 1 2 3 4 5
2-CYCLE OIL ml 20 40 60 80 100
Page 10

10
Fuel
again for at least one minute. As some
oils may be difficult to agitate depending
on oil ingredients, sufficient agitation is
necessary for the engine to last long. Be
careful that, if the agitation is insufficient,
there is an increased danger of early
piston seizing due to abnormally lean
mixture.
5. Put a clear indication on the outside of the
container to avoid mixing up with gasoline
or other containers.
6. Indicate the contents on outside of
container for easy identification.
■ FUELING THE UNIT
1. Untwist and remove the fuel cap. Rest the
cap on a dustless place.
2. Put fuel into the fuel tank to 80% of the full
capacity.
3. Fasten the fuel cap securely and wipe up
any fuel spillage around the unit.
1. Select bare ground for fueling.
2. Move at least 10feet (3meters) away from
the fueling point before starting the
engine.
3. Stop the engine before refueling the unit.
At that time, be sure to sufficiently agitate
the mixed gasoline in the container.
FOR YOUR ENGINE LIFE, AVOID;
1. FUEL WITH NO OIL(RAW GASOLINE) –
It will cause severe damage to the internal
engine parts very quickly.
2. GASOHOL – It can cause deterioration of
rubber and/or plastic parts and disruption
of engine lubrication.
3. OIL FOR 4-CYCLE ENGINE USE – It can
cause spark plug fouling, exhaust port
blocking, or piston ring sticking.
4. Mixed fuels which have been left
unused for a period of one month or
more may clog the carburetor and result
in the engine failing to operate properly.
5. In the case of storing the product for a
WARNING
long period of time, clean the fuel tank
after rendering it empty. Next, activate the
engine and empty the carburetor of the
composite fuel.
6. In the case of scrapping the used mixed
oil container, scrap it only at an authorized
repository site.
As lot details of quality assurance, read the
description in the section Limited Warranty
carefully. Moreover, normal wear and
change in product with no functional
influence are not covered by the warranty.
Also, be careful that, if the usage in the
instruction manual is not observed as to the
mixed gasoline, etc. described therein, it
may not be covered by the warranty.
NOTE
Page 11

11
■
RESTARTING ENGINE WHILE ENGINE IS HOT
1. When restarting the engine immediately
after stopping it, leave the choke open.
2. If the engine won't start after several
attempts, close the choke and repeat
pulling the rope or remove the spark plug
and dry it.
■ STOPPING ENGINE
Release the throttle lever to the idling
position and press the stop switch (red
button) until the engine comes to a complete
stop.
Except for an emergency, avoid stopping the
engine while pulling the throttle lever.
■ ADJUSTING IDLE SPEED
1. When the engine tends to stop frequently
at an idle mode, turn the adjusting screw
clockwise.
Warm up the engine before adjusting the idle
speed.
NOTE
NOTE
■ STARTING ENGINE
1. Rest the unit on a flat, firm place.
2. Pump the primer until fuel flows out in the
clear tube.
3. Move the choke lever upward to close the
choke.
4. Holding the blower handle, pull the starter
rope with your right hand. (Throttle lever in
idling position.)
Avoid pulling the rope to its dead end or
returning it by releasing the knob. Such
actions can cause starter failures.
5. When the engine has started, move the
choke lever gradually downward to open
the choke.
6. Allow the engine to warm up for a half
minute before starting operation.
NOTE
Operation
Choke Lever
OPEN
CLOSE
A
B
Idle
Adjustment
Screw
Page 12

12
■ FUEL FILTER
•A clogged fuel filter may cause poor
acceleration of the engine. Check
periodically to see if the filter is clogged
with dirt. The filter can be taken out of the
fueling port using a small wire hook.
Disconnect the filter assembly from the
fuel pipe and unhook the retainer to
disassemble it. Clean the components
with gasoline.
Maintenance
■ MAINTENANCE CHART
every every every
25 50 100
system/compornent procedure before hours hours hours note
use after after after
fuel leaks, fuel spillage wipe out ✔
fuel tank, air filter, fuel filter inspect/clean ✔✔ replace, if necessary
see
■ADJUSTING
replace carburetor
idle adjusting screw ✔
IDLING SPEED (p.11)
if necessary
clean and readjust
GAP: .025in(0.6~0.7mm)
spark plug ✔
plug gap replace, if necessary
cylinder fins, intake air cooling vent clean ✔
muffler, spark arrester, cylinder exhaust port
clean ✔
throttle lever, ignition switch check operation ✔
screws/nuts/bolts tighten/replace ✔✔not adjusting screws
Maintenance, replacement, or repair of the emission control device and systems may be
performed by any non-road engine repair establishment or individual.
•Make sure that the engine has stopped
and is cool before performing any
service to the blower. Contact with
rotating blower fan or hot muffler may
result in a personal injury.
■ AIR CLEANER
• Check the air cleaner every 25 hours of
use or more frequently if used under dusty
conditions. A clogged air filter may
increase fuel consumption while cutting
down the engine power. Never operate
the blower without the air filter or with a
deformed filter element because unfiltered
dusty air will quickly ruin the engine.
CLEANING AIR FILTER:
Clean the filter element in warm, soapy
water as required. Dry completely before
installing. If the element is broken or shrunk,
replace with a new one.
WARNING
Air Filter
Page 13

the muffler may get loose during operation
which may result in engine catching on
fire.
■ SPARK ARRESTER
• The muffler is equipped with a spark
arrester to prevent red hot carbon from
flying out of the exhaust outlet.
Periodically inspect and clean as
necessary with a wire brush. In the State
of California it is required by law (Section
4442 of the California Public Resources
Code) to equip a spark arrester when a
gas powered tool is used in any forest
covered, brush covered, or grass covered
unimproved land.
■ AIR INLET SCREEN
• Blowing air is taken in from the air inlet
screen. When air flow has dropped down
during operation, stop the engine and
inspect the air inlet screen for blocking by
obstacles.
• Note that failure to remove any such
obstacles may result in the engine
becoming overheated and damaged.
• Never use the blower without the
screen at the air intake of the blower.
WARNING
IMPORTANT
■ SPARK PLUG
• The spark plug may gather carbon
deposits on its firing end with reasonable
use. Remove and inspect the spark plug
every 25 hours and clean the electrodes
as necessary with a wire brush. The spark
gap should be adjusted to .024~.028 in.
(0.6~0.7mm).
• Plug manufacturers recommend replacing
the plug twice a year to avoid unexpected
plug failure in a job.
REPLACEMENT PLUG IS A NGK BPMR7A.
• Note that using any spark plugs other than
those designated may result in the engine
failing to operate properly or in the engine
becoming overheated and damaged.
• To install the spark plug, first turn the plug
until it is finger tight, then tighten it a
quarter turn more with a socket wrench.
■ MUFFLER
•Inspect periodically the muffler for
loose fasteners, any damage or
corrosion. If any sign of exhaust
leakage is found, do not use the blower
and have it repaired immediately.
• Note that failing to do so may result in
the engine catching on fire.
• Before starting operation, always make
sure to check if the muffler is properly held
by two bolts to the cylinder. (Fastening
Torque : 70~110kg·cm)
• Even if one bolt out of two bolts is loose,
IMPORTANT
IMPORTANT
Maintenance
13
WARNING
Page 14

14
Storage
BEFORE STORING THE BLOWER:
1. Drain a fuel tank and push the primer bulb until it
becomes empty of fuel.
2. Remove the spark plug and drop a spoonful of
2-cycle oil into the cylider. Crank the engine
several time and install the spark plug.
Troubleshooting guide
Case 1. Starting failure
CHECK PROBABLE CAUSES ACTION
fuel tank ➞ incorrect fuel ➞ drain it and with correct fuel
fuel filter ➞ fuel filter is clogged ➞ clean
carburetor adjustment screw ➞ out of normal range ➞ adjust to normal range
sparking (no spark) ➞ spark plug is fouled/wet ➞ clean/dry
➞ plug gap is incorrect ➞ correct (GAP: 0.6~0.7mm)
spark plug ➞ disconnected ➞ retighten
Case 2. Engine starts but does not keep running/Hard re-starting.
CHECK PROBABLE CAUSES ACTION
fuel tank ➞ incorrect fuel or staled fuel ➞ drain it and with correct fuel
carburetor adjustment screw
➞ out of normal range ➞ adjust to normal range
muffler,cylinder (exhaust port)
➞ carbon is built-up ➞ wipe away
air cleaner ➞ clogged with dust ➞ wash
When your unit seems to need further service, please consult with our RedMax service shop in your area.
Maintenance
■ PROCEDURES TO BE PERFORMED AFTER
EVERY 50 HOURS OF USE
• Remove the muffler, insert a screwdriver into the
vent, and wipe away any carbon buildup. Wipe
away any carbon buildup on the muffler exhaust
vent and cylinder exhaust port at the same time.
• Tighten all screws, bolts, and fittings.
Page 15

Parts List
NOTE :
1. Use KOMATSU ZENOAH genuine parts as specified in the parts list for repair and/or
replacement.
2. KOMATSU ZENOAH does not warrant the machines, which have been damaged by the
use of any parts other than those specified by the company.
3. When placing parts orders for repair and/or replacement, check if the model name and the
serial number are applicable to those specified in the parts list, then use parts number
described in the parts list.
4. The contents described in the parts list may change due to improvement.
5. The parts for the machine shall be supplied seven (7) years after the machine is
discontinued. [It is possible that some specific parts may be subject to change of their
delivery term and list price within the limit of seven (7) years after the machine is
discontinued. It is also possible that some parts may be available even after the limit of
seven (7) years.]
15
HANDHELD BLOWER
HB250
July 2004
DRIVE UNIT 40900101 and up ENGINE UNIT KU413473 and up
APPLICABLE SERIAL NUMBERS :
Page 16

Fig.1 ENGINE GROUP HB250
16
Parts List
Page 17

17
Fig.1 ENGINE GROUP HB250
Key# Part Number Description Q'ty
1 6457402 ROTOR 1
2 4309501 CRANKCASE&SHAFT ASSY 1
3 6968501 • BEARING 2
4 5687501 • SEAL 1
5 9071301 GASKET CASE 1
6 6968401 • RING 1
7 5687401 • SEAL 1
8 6634801 • SCREW 3
9 3075003 • CRANKCASE ASSY 1
10 3090101 CRANKSHAFT ASSY 1
11 6457303 PISTON 1
12 6969001 RING 2
13 6969101 CLIP RING 2
14 6968701 WASHER 2
15 6997001 NEEDLE BEARING 1
16 6230101 WRIST PIN 1
17 6968801 KEY 1
18 4300401 PULLEY ASSY 1
19 5516-43230 EXTENTION 1
20 T1513-15100 MUFFLER ASSY 1
21 4810-15140 • ARRESTER 1
22 T4950-57030 BOLT TORX, M5x70 2
23 T1513-15210 GASKET, MUFF 1
30 6457003 CYLINDER 1
31 848-EU2-14B0 GASKET INSULATOR 1
32 5994702 INSULATOR 1
33 9071103 GASKET CABURETOR 1
34 6634402 SCREW TORX 2
35 3074518 CARBURETOR 1
36 6970001 CLIP HOSE 1
37 6969901 CLIP HOSE 1
38 5688002 PLASTIC RUBBER TUBING 1
39 3078001 PRIMER ASSY 1
40 3097402 CHOKE LEVER&PLATE ASSY 1
41 6634501 • SCREW TORX 1
42 5994601 • CHOKE PLATE 1
43 4315001 • CARBURETOR PLATE 1
44 5945801 • CHOKE LEVER 1
45 6634601 BOLT CARBURETOR 2
46 5687301 ELEMENT 1
48 3099904 COVER ASSY 1
49 5946101 KNOB 1
50 9506501 DECAL 1
51 9506009 DECAL(To Start) 1
Key# Part Number Description Q'ty
52 8714402 SPARK PLUG NGK BPMR7A 1
53 6634201 CAP SCREW 2
54 9070901 GASKET CYLINDER 2
55 3075304 RECOIL ASSY 1
56 6635101 SCREW TORX 4
57 9506010 DECAL(E Start) 1
58 848-L0F-90D0 DECAL(EMISSION) 1
61 848-EU2-8500 TANK ASSY 1
62 T1015-85202 • CAP ASSY 1
63 4500-85300 • • HOLDER ASSY 1
64 4500-85220 • • PACKING 1
65 5601-85260 • • FILTER 1
66 4820-85260 • • STOPPER 1
67 848-EU2-8530 • PIPE COMP. 1
68 3302-85400 • FILTER ASSY 1
69 2841-31280 • COLLER 1
70 4820-85510 BOLT TORX, M5x16 3
71 6634901 BOLT TORX 2
72 3075204 COIL&BOOT ASSY 1
73 T1513-71240 CORD 1
74 1900-72112 CAP 1
75 1900-72120 SPRING 1
76 T1513-71320 TUBE 1
77 5500-72130 GROMMET 1
78 5946201 SPACER 2
79 6996901 WASHER 2
80 2630-31950 SCREW 1
81 1484-86280 WASHER 1
82 5516-83101 CABLE 1
Page 18

Key# Part Number Description Q'ty
1 848-L0F-55A1 VOLUTE CASE 1
2 848-L0F-55B0 VOLUTE COVER 1
3 T4970-52000 SCREW TORX 12
4 6811-11130 GURD NET 1
5 6811-11170 SCREW 1
6 6811-11160 STOPPER 1
7 6811-11150 LEVER 1
8 6811-72200 SWITCH 1
9 848-L0F-31A0 ENGINE COVER 1
10 T4960-53510 SCREW TORX 4
11 6811-12110 FAN 1
12 1650-43230 182301 NUT 1
13 6811-12220 WASHER 2
14 848-L0F-90S0 LABEL, CAUTION 1
15 848-L0F-90C0 LABEL, RECOIL 1
Key# Part Number Description Q'ty
16 6811-51211 PIPE CT2-18 1
17 6811-51220 PIPE, END CT2-19 1
Fig.2 BLOWER GROUP HB250
18
Parts List
Page 19

EMISSION-RELATED PARTS, FOR TWO (2) YEARS FROM THE DATE OF ORIGINAL DELIVERY OF THE UNIT,
KOMATSU ZENOAH AMERICA INC. (THE COMPANY),
THROUGH ANY RedMax DEALER, WILL REPAIR OR REPLACE, FREE OF CHARGE, FOR THE ORIGINAL AND EACH
SUBSEQUENT PURCHASER, ANY PART OR PARTS FOUND TO BE DEFECTIVE IN MATERIAL AND/OR
WORKMANSHIP. EMISSION-RELATED PARTS ARE:
THE CARBURETOR ASSY, COIL ASSY, ROTOR, SPARKPLUG,
AIR FILTER, FUEL FILTER, INTAKE MANIFOLD, AND THE GASKETS
ALL OTHER PARTS EXCEPT ABOVE PARTS, FOR TWO (2) YEARS OF HOME USE, NINETY (90) DAYS FOR COMMERCIAL
USE FROM THE DATE OF ORIGINAL PURCHASE, THE COMPANY, THROUGH RedMax DEALER, WILL REPAIR OR
REPLACE, FREE OF CHARGE, FOR THE ORIGINAL PURCHASER, ANY PART OF PARTS FOUND TO BE DEFECTIVE IN
MATERIAL AND/OR WORKMANSHIP. THIS IS THE EXCLUSIVE REMEDY.
THE PURCHASER SHALL BEAR COSTS OF TRANSPORTING THE UNIT TO AND FROM THE RedMax DEALER.
THE PURCHASER SHALL NOT BE CHARGED FOR DIAGNOSTIC LABOR WHICH LEADS TO THE DETERMINATION
THAT A WARRANTED PART IS DEFECTIVE, IF THE DIAGNOSTIC WORK IS PERFORMED AT THE RedMax DEALER.
THE PURCHASER OR OWNER IS RESPONSIBLE FOR THE PERFORMANCE OF THE REQUIRED MAINTENANCE AS
DEFINED BY THE MANUFACTURER IN THE OWNER/OPERATOR MANUAL.
ANY WARRANTED PART WHICH IS NOT SCHEDULED FOR REPLACEMENT AS REQUIRED MAINTENANCE, OR
WHICH IS SCHEDULED ONLY FOR REGULAR INSPECTION TO THE EFFECT OF "REPAIR OR REPLACE AS
NECESSARY" SHALL BE WARRANTED FOR THE WARRANTY PERIOD.ANY WARRANTED PART WHICH IS
SCHEDULED FOR REPLACEMENT AS REQUIRED MAINTENANCE SHALL BE WARRANTED FOR THE PERIOD OF
TIME UP TO THE FIRST SCHEDULED REPLACEMNET POINT FOR THE PART.
ANY REPLACEMENT PART THAT IS EQUIVALENT IN PERFORMANCE AND DULABILITY MAY BE USED IN NONWARRANTY MAINTENANCE OR REPAIRS, AND SHALL NOT REDUCE THE WARRANTY OBLIGATION OF THE
COMPANY.
THE COMPANY IS LIABLE FOR DAMAGES TO OTHER ENGINE COMPONENTS CAUSED BY THE FAILURE OF A
WARRANTED PARTS STILL UNDER WARRANTY.
THE WARRANTY DOES NOT APPLY TO THOSE UNITS WHICH HAVE BEEN DAMAGED BY NEGLIGENCE OF
INSTRUCTION LISTED IN THE OWNER/OPERATOR MANUAL FOR PROPER USE AND MAINTENANCE OF THE UNITS,
ACCIDENTAL MISHANDLING, ALTERATION, ABUSE, IMPROPER LUBULICATION, USE OF ANY PARTS OR ACCESSARIES
OTHER THAN THOSE SPECIFIED BY THE COMPANY, OR OTHER CAUSES BEYOND THE CONPANY'S CONTROL.
THIS WARRANTY DOES NOT COVER THOSE PARTS REPLACED BY NORMAL WEAR OR HARMLESS CHANGES IN
THEIR APPEARANCE.
THERE ARE NO OTHER EXPRESS WARRANTIES.
IMPLIED WARRANTIES INCLUDING THOSE OF MERCHANTABILITY AND FITNESS FOR A PARTICULAR PURPOSE
ARE LIMITED TO TWO (2) YEARS HOME OF USE, NINETY (90) DAYS FOR COMMERCIAL USE FROM THE ORIGINAL
DELIVERY DATE.
LIABILITIES FOR INCIDENTAL OR CONSEQUENTIAL DAMAGE UNDER ANY AND ALL WARRANTIES
ARE EXCLUDED.
SOME STATES DO NOT ALLOW LIMITATION ON HOW LONG AN IMPLIED WARRANTY LASTS OR EXCLUSION OR
LIMITATION OF INCIDENTAL OR CONSEQUENTIAL DAMAGES, SO THE ABOVE LIMINATION OR EXCLUSION MAY
NOT APPLY TO YOU.
THIS WARRANTY GIVES YOU SPECIFIC LEGAL RIGHTS, AND YOU MAY ALSO HAVE OTHER RIGHTS WHICH VARY
FROM STATE TO STATE.
IF YOU NEED TO OBTAIN INFORMATION ABOUT THE NEAREST SERVICE CENTER, PLEASE CALL KOMATSU
ZENOAH AMERICA INC. AT (770)-381-5147.
IMPORTANT: YOU WILL RECEIVE A WARRANTY REGISTRATION CARD AT TIME OF PURCHASE.PLEASE FILL
OUT THE CARD AND SEND IT TO RedMax / KOMATSU ZENOA AMERICA WITHIN SEVEN (7) DAYS.BE SURE TO KEEP
A COPY FOR YOUR RECORDS.
RedMax
LIMITED WARRANTY
KOMATSU ZENOAH AMERICA INC.
4344 Shackleford Road Suite 500
Norcross, Georgia 30093
Page 20

Pièces en rapport avec les émissions de gaz d'échappement : KOMATSU ZENOAH AMERICA INC., par
l'intermédiaire de n'importe quel revendeur RedMax, réparera gratuitement ou remplacera gratuitement pour
l'acheteur initial et chaque acheteur successif toute(s) pièce(s) se révélant de constitution et/ou de montage
défectueux pendant deux (2) ans à compter de la date initiale de livraison d’une unité. Les pièces en rapport avec les
émissions de gaz d'échappement sont:
l'assemblage carburateur, l'assemblage bobine, le rotor, la bougie,
le filtre à air, le filtre à carburant, la tubulure d'admission et les joints
Toutes les pièces autres que celles mentionnées ci-dessus, deux (2) ans d'utilisation domestique, quatre-vingt-
dix (90) jours d'utilisation commerciale, à compter de la date d'achat initial. La société, par l'intermédiaire d'un
distributeur RedMax, réparera ou remplacera toute(s) pièce(s), sans frais et au bénéfice de l'acheteur original, en
prenant en charge les frais de pièces et/ou de main d'œuvre. Telles sont les limites de la garantie.
Le coût du transport de l'unité jusqu'au revendeur RedMax et depuis celui-ci sera à la charge de l'acheteur.
L'acheteur ne supportera pas le coût de main d'oeuvre du diagnostic qui amène à la conclusion qu'une pièce
garantie est défectueuse, si ce diagnostic est effectué chez le revendeur RedMax.
L’acheteur ou propriétaire a pour responsabilité d’effectuer l’entretien obligatoire tel que défini par le fabricant dans le
manuel du propriétaire/de l'utilisateur.
Toute pièce garantie dont le remplacement n'est pas prévu dans le cadre de l’entretien obligatoire, ou pour laquelle
est seulement prévue une inspection périodique pour "remplacement ou réparation si nécessaire" sera garantie pour
la période de garantie. Toute pièce garantie arrivée à l’échéance de son premier remplacement prévu sera garantie
jusqu’à celui-ci.
Toute pièce de rechange équivalente en performance ou en durabilité peut être utilisée pour l’entretien hors-garantie
ou les réparations hors-garantie, et ce sans réduire l’obligation de garantie incombant à la société.
La société sera tenue responsable des dommages aux autres composants du moteur causés par la défaillance de
pièce(s) garantie(s) en période de garantie.
La garantie ne s'applique pas aux unités endommagées par suite de: négligence dans la mise en oeuvre des
instructions spécifiées dans le manuel du propriétaire/de l'utilisateur en vue d’une utilisation et d’un entretien correct,
fausse manœuvre accidentelle, modification, utilisation abusive, lubrification incorrecte, utilisation de pièces ou
d’accessoires autres que ceux spécifiés par la société, ou autres causes hors du contrôle de la société.
Cette garantie ne couvre pas les pièces remplacées en raison de leur usure normale ou de changements
d’apparence sans effets.
Il n'existe aucune autre garantie explicite.
Les garanties implicites, y compris la valeur marchande et la valeur d'usage pour une utilisation particulière, sont
limitées deux (2) ans d'utilisation domestique, quatre-vingt-dix (90) jours d'utilisation commerciale, à compter de la
date originale de livraison.
Les responsabilités pour les dommage conséquents ou incidents sont exclues de toutes les garanties.
Certaines provinces n'autorisant pas les limitations à la durée des garanties implicites, ou les exclusions ou
limitations relatives aux dommages incidents ou conséquents, la limitation indiquée ci-dessus peut ne pas vous être
applicable.
Cette garantie vous donne des droits juridiques spécifiques, et vous pouvez également jouir d’autres droits variant
d'une province à l'autre.
Si vous désirez obtenir des informations sur le centre de service le plus proche, veuillez appeler KOMATSU
ZENOAH AMERICA INC. au (770)-381-5147
Note importante: vous recevrez une carte d'enregistrement de garantie au moment de l'achat. Veuillez la remplir et
l'adresser à RedMax / KOMATSU ZENOAH AMERICA sous sept (7) jours en prenant soin de conserver une copie
pour vous.
RedMax
Garantie limitée
KOMATSU ZENOAH AMERICA INC.
4344 Shackleford Road Suite 500
Norcross, Georgia 30093
 Loading...