

Page 1
télécommande
RCU1010RF
Limited 90-Day Warranty
Garantie limitée de 90 jours
Universal Learning
Remote with
TOUCHSCREEN
and Built-In RF Transmitter
Remote Sender Cone included
User’s Guide
Télécommande
Intelligente Universelle à
ÉCRAN TACTILE
Émetteur RF et Récepteur
Intégrés inclus
Guide de l’utilisateur
RCU_1010_RF_IB_RevA.qxd 9/24/03 10:30 AM Page 1
Page 2
Operating Precautions
To reduce the risk of fire, electric shock and injury to persons, you should follow basic safety
precautions when using your remote control signal sender, including:
1. Read and understand all instructions.
2. Follow all warnings and instructions marked on the product.
3. Unplug product from the wall outlet before cleaning. Use a damp cloth for cleaning. Do not use
liquid cleaners or aerosol cleaners.
4. Do not use product near a bathtub, washbowl, sink, laundry tub, in a wet basement, in or near
a swimming pool, or near any other water source.
5. Do not place product on an unstable cart, stand or table. It may fall, causing serious damage
to the product.
6. The product should be operated only from the type of power source indicated on the marking
label. If you are not sure of the type of power supply to your home or building, consult your
dealer or local power company.
7. To reduce the risk of electric shock, do not disassemble the product. Take it to a qualified
serviceperson when service or repair work is required. Opening and removing covers may expose
you to dangerous voltages or other risks and also voids the warranty. Incorrect reassembly can
cause electric shock when the product is subsequently used.
8. Unplug product from the wall outlet and refer servicing to qualified service personnel under the
following conditions:
a. The plug is damaged.
b. Liquid has been spilled into the product.
c. The product has been exposed to rain or water.
d. The product does not operate normally when you are following the operating instructions.
e. The product has been dropped or the cabinet has been damaged.
f. The product exhibits a distinct change in performance.
9. No repairs to the unit should be attempted by the customer.
THIS DEVICE COMPLIES WITH PART 15 OF THE FCC RULES. OPERATION IS SUBJECT TO THE
FOLLOWING TWO CONDITIONS:
1. THIS DEVICE MAY NOT CAUSE HARMFUL INTERFERENCE, AND
2. THIS DEVICE MUST ACCEPT ANY INTERFERENCE RECEIVED, INCLUDING INTERFERENCE THAT MAY
CAUSE UNDESIRED OPERATION.
This equipment generates and uses radio frequency energy, and, if not installed and used properly—that is, in strict
accordance with the manufacturer’s instructions—it may cause interference to radio and television reception. It has
been type tested and found to comply with the limits for remote control devices in accordance with the specifications
in Sub-Parts B and C of Part 15 of FCC Rules, which are designed to provide reasonable protection against such
interference in a residential installation. However, there is no guarantee that interference will not occur in a particular
installation. If this equipment does cause interference to radio and television reception, which can be determined by
unplugging the equipment, try to correct the interference by one or more of the following measures:
• Reorient the antenna of the radio/TV experiencing the interference.
• Relocate the equipment with respect to the radio/TV.
• Move the equipment away from the radio/TV.
• Plug the equipment into an outlet on a different electrical circuit from the radio/TV experiencing the interference.
• If necessary, consult your local dealer for additional suggestions.
NOTE: MODIFICATIONS TO THIS PRODUCT WILL VOID THE USER’S AUTHORITY TO OPERATE THIS EQUIPMENT.
CAUTION: TO REDUCE THE RISK OF ELECTRIC SHOCK, DO NOT REMOVE COVER OR BACK. NO USER
SERVICEABLE PARTS INSIDE. REFER SERVICING TO QUALIFIED SERVICE PERSONNEL.
2
CAUTION
RISK OF ELECTRICAL SHOCK
DO NOT OPEN
RCU_1010_RF_IB_RevA.qxd 9/24/03 10:30 AM Page 2
Page 3

3
Operating Precautions . . . . . . . . . . . . . . . . . . . . . . . . . . . . . . . . . . . . . . . . . . . . . . . . . . . . . . . . . . . . . . . . . . .2
Introduction . . . . . . . . . . . . . . . . . . . . . . . . . . . . . . . . . . . . . . . . . . . . . . . . . . . . . . . . . . . . . . . . . . . . . . . . . . .4
What’s So Great About RF Technology? . . . . . . . . . . . . . . . . . . . . . . . . . . . . . . . . . . . . . . . . . . . . . . . . . . . .4
System Contents . . . . . . . . . . . . . . . . . . . . . . . . . . . . . . . . . . . . . . . . . . . . . . . . . . . . . . . . . . . . . . . . . . . . . . . .5
RCU1010RF . . . . . . . . . . . . . . . . . . . . . . . . . . . . . . . . . . . . . . . . . . . . . . . . . . . . . . . . . . . . . . . . . . . . . . . . .5
Remote Sender Cone . . . . . . . . . . . . . . . . . . . . . . . . . . . . . . . . . . . . . . . . . . . . . . . . . . . . . . . . . . . . . . . . .5
IR Extender . . . . . . . . . . . . . . . . . . . . . . . . . . . . . . . . . . . . . . . . . . . . . . . . . . . . . . . . . . . . . . . . . . . . . . . . .5
Remote Sender Cone Setup . . . . . . . . . . . . . . . . . . . . . . . . . . . . . . . . . . . . . . . . . . . . . . . . . . . . . . . . . . . . . . .5
IR Extender Setup . . . . . . . . . . . . . . . . . . . . . . . . . . . . . . . . . . . . . . . . . . . . . . . . . . . . . . . . . . . . . . . . . . . . . .5
Battery Information . . . . . . . . . . . . . . . . . . . . . . . . . . . . . . . . . . . . . . . . . . . . . . . . . . . . . . . . . . . . . . . . . . . . .6
Battery Installation . . . . . . . . . . . . . . . . . . . . . . . . . . . . . . . . . . . . . . . . . . . . . . . . . . . . . . . . . . . . . . . . . . .6
Battery Saver . . . . . . . . . . . . . . . . . . . . . . . . . . . . . . . . . . . . . . . . . . . . . . . . . . . . . . . . . . . . . . . . . . . . . . . .6
Code Saver . . . . . . . . . . . . . . . . . . . . . . . . . . . . . . . . . . . . . . . . . . . . . . . . . . . . . . . . . . . . . . . . . . . . . . . . . .6
Power-on Default . . . . . . . . . . . . . . . . . . . . . . . . . . . . . . . . . . . . . . . . . . . . . . . . . . . . . . . . . . . . . . . . . . . .6
Product Diagram . . . . . . . . . . . . . . . . . . . . . . . . . . . . . . . . . . . . . . . . . . . . . . . . . . . . . . . . . . . . . . . . . . . . . . .7
LCD Touchscreen . . . . . . . . . . . . . . . . . . . . . . . . . . . . . . . . . . . . . . . . . . . . . . . . . . . . . . . . . . . . . . . . . . . . . . .7
LED Indicator Light . . . . . . . . . . . . . . . . . . . . . . . . . . . . . . . . . . . . . . . . . . . . . . . . . . . . . . . . . . . . . . . . . . . . .7
Setup Routine and Procedures . . . . . . . . . . . . . . . . . . . . . . . . . . . . . . . . . . . . . . . . . . . . . . . . . . . . . . . . . .7-9
Enter Setup Mode . . . . . . . . . . . . . . . . . . . . . . . . . . . . . . . . . . . . . . . . . . . . . . . . . . . . . . . . . . . . . . . . . . . .8
Exit Setup Mode . . . . . . . . . . . . . . . . . . . . . . . . . . . . . . . . . . . . . . . . . . . . . . . . . . . . . . . . . . . . . . . . . . .8-9
General Setup Notes . . . . . . . . . . . . . . . . . . . . . . . . . . . . . . . . . . . . . . . . . . . . . . . . . . . . . . . . . . . . . . . . . .9
Component Control Screens . . . . . . . . . . . . . . . . . . . . . . . . . . . . . . . . . . . . . . . . . . . . . . . . . . . . . . . . . . .9-10
Code Entry . . . . . . . . . . . . . . . . . . . . . . . . . . . . . . . . . . . . . . . . . . . . . . . . . . . . . . . . . . . . . . . . . . . . . . . . .10-13
Code List Entry . . . . . . . . . . . . . . . . . . . . . . . . . . . . . . . . . . . . . . . . . . . . . . . . . . . . . . . . . . . . . . . . . .10-11
Code Search . . . . . . . . . . . . . . . . . . . . . . . . . . . . . . . . . . . . . . . . . . . . . . . . . . . . . . . . . . . . . . . . . . . . .11-12
Code Autosearch . . . . . . . . . . . . . . . . . . . . . . . . . . . . . . . . . . . . . . . . . . . . . . . . . . . . . . . . . . . . . . . . .12-13
Code Identification . . . . . . . . . . . . . . . . . . . . . . . . . . . . . . . . . . . . . . . . . . . . . . . . . . . . . . . . . . . . . . . . . .13
Code Identification Chart . . . . . . . . . . . . . . . . . . . . . . . . . . . . . . . . . . . . . . . . . . . . . . . . . . . . . . . . . . . . . . .13
Key Label Options . . . . . . . . . . . . . . . . . . . . . . . . . . . . . . . . . . . . . . . . . . . . . . . . . . . . . . . . . . . . . . . . . .14-15
Change LCD Component Key Labels . . . . . . . . . . . . . . . . . . . . . . . . . . . . . . . . . . . . . . . . . . . . . . . . . . .14
Change LCD Key Labels Within a Component . . . . . . . . . . . . . . . . . . . . . . . . . . . . . . . . . . . . . . . .14-15
Learned Key Reference Page . . . . . . . . . . . . . . . . . . . . . . . . . . . . . . . . . . . . . . . . . . . . . . . . . . . . . . . . . . . . .16
Learning . . . . . . . . . . . . . . . . . . . . . . . . . . . . . . . . . . . . . . . . . . . . . . . . . . . . . . . . . . . . . . . . . . . . . . . . . . .17-19
Learning Tips . . . . . . . . . . . . . . . . . . . . . . . . . . . . . . . . . . . . . . . . . . . . . . . . . . . . . . . . . . . . . . . . . . . . . . .17
Code Learning . . . . . . . . . . . . . . . . . . . . . . . . . . . . . . . . . . . . . . . . . . . . . . . . . . . . . . . . . . . . . . . . . . . . . .17
Learning Commands . . . . . . . . . . . . . . . . . . . . . . . . . . . . . . . . . . . . . . . . . . . . . . . . . . . . . . . . . . . . . .17-18
Clear All Stored Learned Commands Under a Mode . . . . . . . . . . . . . . . . . . . . . . . . . . . . . . . . . . . . . .19
Master Clear . . . . . . . . . . . . . . . . . . . . . . . . . . . . . . . . . . . . . . . . . . . . . . . . . . . . . . . . . . . . . . . . . . . . . . .19
SmartMacroSMKey Operations . . . . . . . . . . . . . . . . . . . . . . . . . . . . . . . . . . . . . . . . . . . . . . . . . . . . . . . . .20-23
Program a SmartMacro . . . . . . . . . . . . . . . . . . . . . . . . . . . . . . . . . . . . . . . . . . . . . . . . . . . . . . . . . . . .20-21
Execute a SmartMacro . . . . . . . . . . . . . . . . . . . . . . . . . . . . . . . . . . . . . . . . . . . . . . . . . . . . . . . . . . . . . . .21
Delete a SmartMacro . . . . . . . . . . . . . . . . . . . . . . . . . . . . . . . . . . . . . . . . . . . . . . . . . . . . . . . . . . . . . .21-22
Edit a SmartMacro Inter-key Delay . . . . . . . . . . . . . . . . . . . . . . . . . . . . . . . . . . . . . . . . . . . . . . . . . .22-23
Event Timer . . . . . . . . . . . . . . . . . . . . . . . . . . . . . . . . . . . . . . . . . . . . . . . . . . . . . . . . . . . . . . . . . . . . . . . .23-25
Set an Event Timer . . . . . . . . . . . . . . . . . . . . . . . . . . . . . . . . . . . . . . . . . . . . . . . . . . . . . . . . . . . . . . . .23-24
Delete an Event Timer . . . . . . . . . . . . . . . . . . . . . . . . . . . . . . . . . . . . . . . . . . . . . . . . . . . . . . . . . . . . .24-25
TV or CD/AUDIO Volume Punch-through . . . . . . . . . . . . . . . . . . . . . . . . . . . . . . . . . . . . . . . . . . . . . .25-26
VCR/DVD Punch-through . . . . . . . . . . . . . . . . . . . . . . . . . . . . . . . . . . . . . . . . . . . . . . . . . . . . . . . . . . . . . .26
Record Key . . . . . . . . . . . . . . . . . . . . . . . . . . . . . . . . . . . . . . . . . . . . . . . . . . . . . . . . . . . . . . . . . . . . . . . . . . .26
Additional Features . . . . . . . . . . . . . . . . . . . . . . . . . . . . . . . . . . . . . . . . . . . . . . . . . . . . . . . . . . . . . . . . .27-31
Keypress Beep Feature . . . . . . . . . . . . . . . . . . . . . . . . . . . . . . . . . . . . . . . . . . . . . . . . . . . . . . . . . . . . . . .27
LCD Touchscreen Display Time . . . . . . . . . . . . . . . . . . . . . . . . . . . . . . . . . . . . . . . . . . . . . . . . . . . .27, 28
Set Day and Time for LCD Display . . . . . . . . . . . . . . . . . . . . . . . . . . . . . . . . . . . . . . . . . . . . . . . . . .28-29
Backlighting . . . . . . . . . . . . . . . . . . . . . . . . . . . . . . . . . . . . . . . . . . . . . . . . . . . . . . . . . . . . . . . . . . . . .29-30
Master Reset . . . . . . . . . . . . . . . . . . . . . . . . . . . . . . . . . . . . . . . . . . . . . . . . . . . . . . . . . . . . . . . . . . . . . . .30
RCA All Power Off Feature . . . . . . . . . . . . . . . . . . . . . . . . . . . . . . . . . . . . . . . . . . . . . . . . . . . . . . . . . . .31
Glossary of Terms . . . . . . . . . . . . . . . . . . . . . . . . . . . . . . . . . . . . . . . . . . . . . . . . . . . . . . . . . . . . . . . . . . .31-32
Troubleshooting . . . . . . . . . . . . . . . . . . . . . . . . . . . . . . . . . . . . . . . . . . . . . . . . . . . . . . . . . . . . . . . . . . . .33-34
User’s Guide in French . . . . . . . . . . . . . . . . . . . . . . . . . . . . . . . . . . . . . . . . . . . . . . . . . . . . . . . . . . . . . . .35-68
Code List . . . . . . . . . . . . . . . . . . . . . . . . . . . . . . . . . . . . . . . . . . . . . . . . . . . . . . . . . . . . . . . . . . . . . . . . . .69-77
Helpline . . . . . . . . . . . . . . . . . . . . . . . . . . . . . . . . . . . . . . . . . . . . . . . . . . . . . . . . . . . . . . . . . . . . . . . . . . . . . .78
Limited 90-Day Warranty . . . . . . . . . . . . . . . . . . . . . . . . . . . . . . . . . . . . . . . . . . . . . . . . . . . . . . . . . . . . . . .78
Table of Contents
RCU_1010_RF_IB_RevA.qxd 9/24/03 10:30 AM Page 3
Page 4
4
Congratulations on your purchase of the RCU1010RF Universal Learning Remote with Touchscreen
and Built-in RF Transmitter with additional Remote Sender Cone. This remote is one of the most
sophisticated, yet easy to use, remote controls available today. With the RCU1010RF, juggling
multiple remote controls is a thing of the past! This one unit controls up to nine components,
including the most popular brands of TV, VCR, DVD, SAT, PVR/DVR, CBL/AUX, CD and AUDIO
equipment, even when the component’s IR sensor isn’t visible.
Universal Learning Remote
with TOUCHSCREEN and
Built-in RF Transmitter
Remote Sender Cone included
Your RCU1010RF has a built-in RF transmitter that allows your remote control unit to transmit
commands to your components using both Infrared (IR) and Radio Frequency (RF) signals. Since
the RCU1010RF works on radio frequency, the remote does not have to be pointed directly at
the component’s IR sensor, which adds great flexibility when setting up your home electronic
components. The addition of the included Remote Sender Cone and IR Extender means you
can control your components even when your remote can’t see them.
The RCU1010RF has the ability to learn commands from your existing remotes, and the SmartMacro
SM
feature allows multiple commands to be executed with a single keypress. The RCU1010RF is easy to
use, easy to program, and it gives you total control—at the touch of your fingertips!
Your RCU1010RF transmits signals in infrared (IR) and radio frequency (RF). Most remote controls
transmit only in IR and must be pointed in a direct line of sight with the IR sensor on your electronic
component in order to function properly. Because the RCU1010RF has radio frequency capabilities,
the remote control does not have to be pointed at the receiver; in fact, it doesn’t even have to be in
the same room! The RF signals go through your whole house and enable you to control all of your
components wherever you are!
What advantages does that bring to you and your home electronic equipment? Plenty!
First, you can place your component (such as a VCR, DVD, etc.) in a closed cabinet, and the
RCU1010RF will transmit the proper signals to it. That gives you great flexibility in setting up
your home entertainment system.
Secondly, if your satellite receiver is upstairs, the RCU1010RF allows you to change the channel
while downstairs. (Additional wiring needed).
Thirdly, the RCU1010RF transmits through walls, floors, ceilings—even to your deck outdoors so
you can control your component(s) wherever you are. For example, if you are outside on your deck
enjoying music on your wireless speakers, you can use the RCU1010RF to adjust the volume without
going back into the house!
The RCU1010RF is packed with features you want—and its RF capabilities make it the perfect remote
to give you added control and flexibility.
What’s So Great About RF Technology?
RCU_1010_RF_IB_RevA.qxd 9/24/03 10:30 AM Page 4
Page 5

5
System Contents
The RCU1010RF is comprised of three elements: the RCU1010RF remote control unit,
the Remote Sender Cone and the IR Extender.
RCU1010RF
The RCU1010RF is one of the most advanced remote controls in the market today. It
controls up to nine components, including the most popular brands of TV, VCR, DVD, SAT,
PVR/DVR, CBL/AUX, CD and AUDIO equipment. Transmitting both Infrared (IR) and
Radio Frequency (RF) signals, the RCU1010RF offers unsurpassed flexibility and control.
The touchscreen allows you to program and use your remote with many components.
The LCD touchscreen displays a different screen for each component mode (up to nine
components), and each screen has a maximum of 40 keys.
REMOTE SENDER CONE
The Remote Sender Cone includes an antenna, power cord and a jack for the IR
Extender. The Remote Sender Cone captures radio frequency transmissions from the
remote control unit. Alight indicates that a signal is being received. The Remote
Sender Cone then converts the RF transmissions into IR signals used to control your
components. The Remote Sender Cone operates up to 100* feet away from the remote
control unit.
IR EXTENDER
In most cases, you will not need to use the IR Extender at all. When you cannot place the Remote Sender
Cone in front of all of the component(s) to be controlled, the IR Extender can be utilized. This device
consists of an IR Diode connected to a four-foot extension wire and plug. The IR Extender is plugged into
the Remote Sender Cone and the diode is placed in front of the component(s).
Remote Sender Cone Setup
Follow these few simple steps to set up the Remote Sender Cone.
1. Place the Remote Sender Cone in the room where the components to be controlled are located.
2. Plug the Remote Sender Cone into a standard electrical outlet.
3. Point the front of the unit (logo side) facing the component(s) you wish to operate.
4. Extend the antenna for best performance.
5. Be sure that the Remote Sender Cone is positioned within 20 feet (6.096 meters) of the components
you wish to control. The remote control unit will operate within 100 feet (30.48 meters)* of the
Remote Sender Cone.
Note: The Remote Sender Cone must be placed within line of sight of components to be controlled.
IR Extender Setup
When trying to control multiple components behind a closed door (entertainment
center), experiment with the placement of the Remote Sender Cone. In most cases,
you will be able to find the correct position of the Remote Sender Cone so that
you will not need to use the IR Extender (see figure A). When the Remote Sender
Cone cannot be easily placed in front of all of the components to be controlled,
use the IR Extender to help clearly direct the path of the IR signal to your
components (see Figure B). The IR Extender is best used to direct the IR signal
to a single component. Follow these simple steps to set up the IR Extender.
1. Plug the IR Extender into the back of the Remote Sender Cone.
2. Place the IR Diode (located on the opposite end of the extension cord)
in clear view of your component’s IR sensor to enable signal transmission.
Now you can use your remote control as you normally would—only you don’t
have to worry about the components receiving the signal. Get the picture?
* Range may vary based on home construction.
A.
B.
RCU_1010_RF_IB_RevA.qxd 9/24/03 10:30 AM Page 5
Page 6
6
Battery Information
Your RCU1010RF Universal Learning Remote with Touchscreen and Built-in RF Transmitter requires
four AAA alkaline batteries (sold separately).
Battery Installation
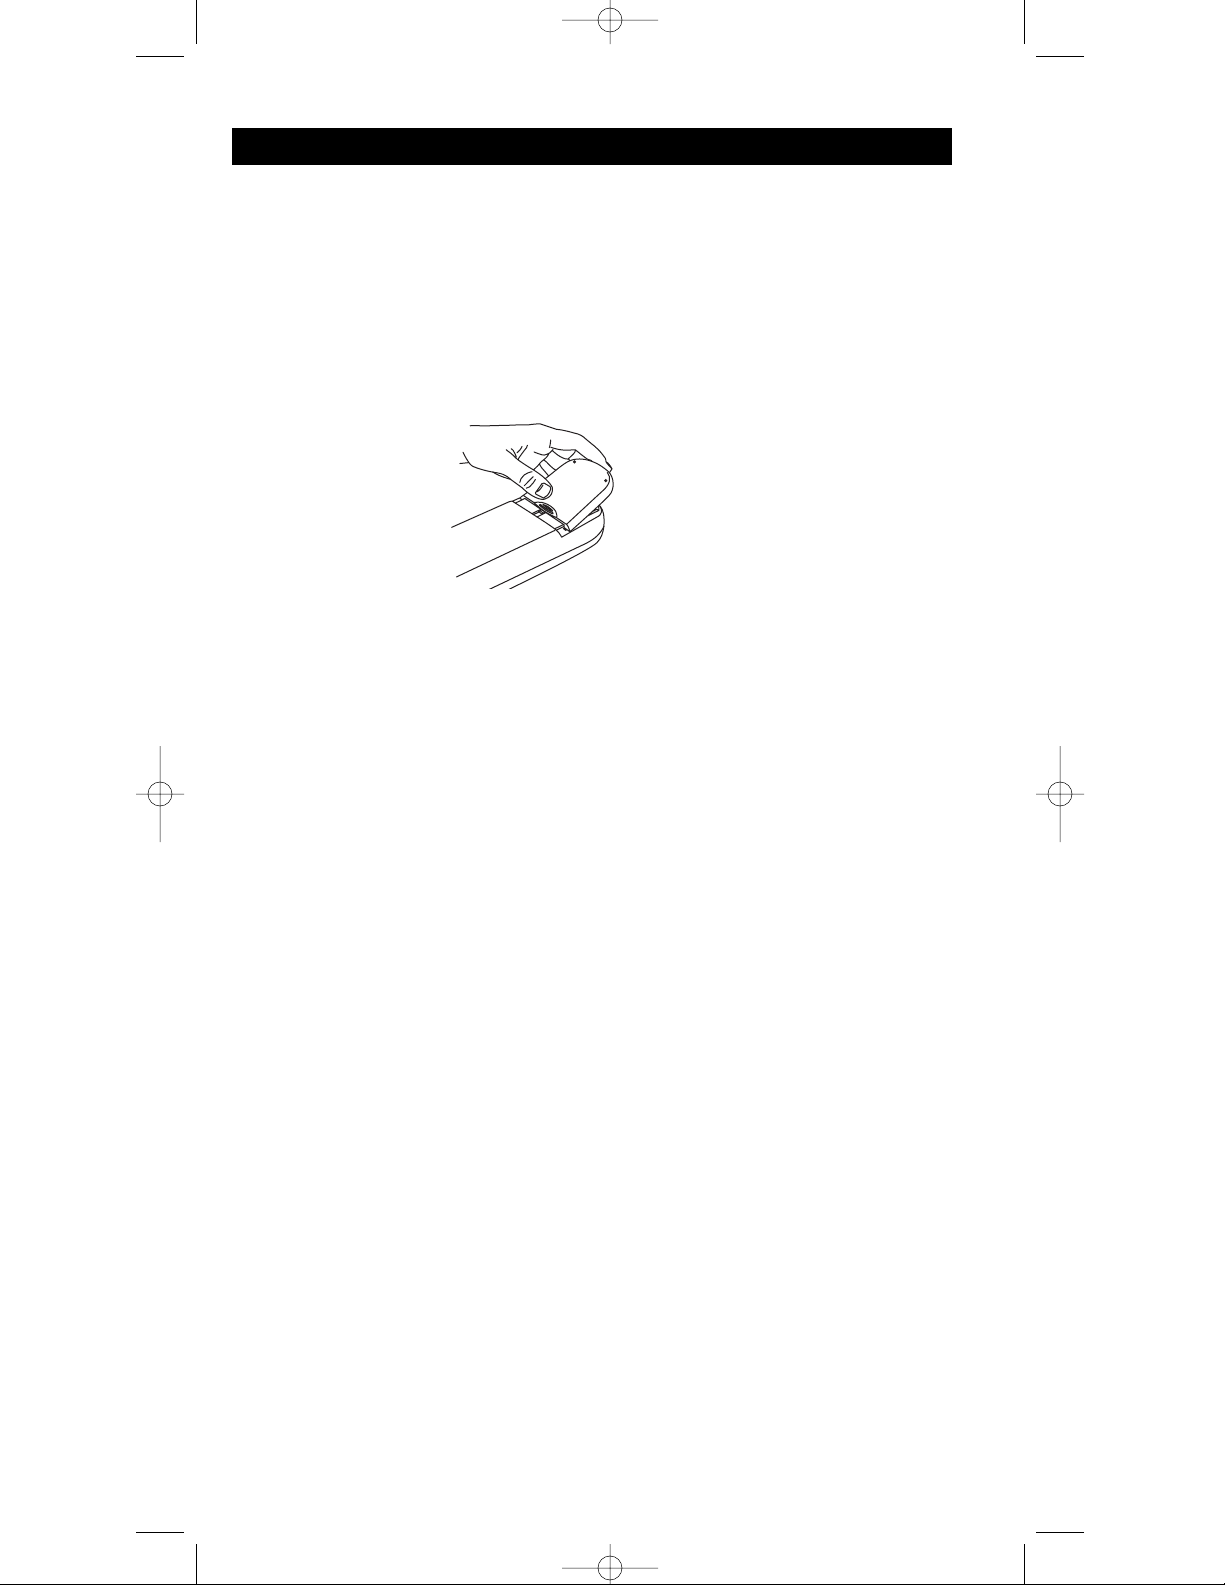
To install the batteries in the remote:
1. Turn the unit over, push on the tab and slide the cover down.
2. Insert the batteries, matching the batteries to the (+) and (-) marks inside the battery case.
3. Slide the battery cover back into place.
Battery Saver
Your RCU1010RF saves battery power by automatically turning off if any key is pressed for more
than 30 seconds. This saves your batteries should your remote get stuck in a place where the keys
remain depressed, such as under a book or between the sofa cushions.
Code Saver
With the RCU1010RF, you don’t have to worry about losing programmed information when
you change batteries. All programmed parameters are retained indefinitely in the event of
battery replacement.
Power-on Default
When you replace batteries, your RCU1010RF remote always powers on in the TV Mode. If your
TV, VCR or satellite receiver is an RCA, ProScan or GE brand, you may not even need to set
up the RCU1010RF to control it. In these instances, the remote should work as soon as the
batteries are installed.
RCU_1010_RF_IB_RevA.qxd 9/24/03 10:30 AM Page 6
Page 7
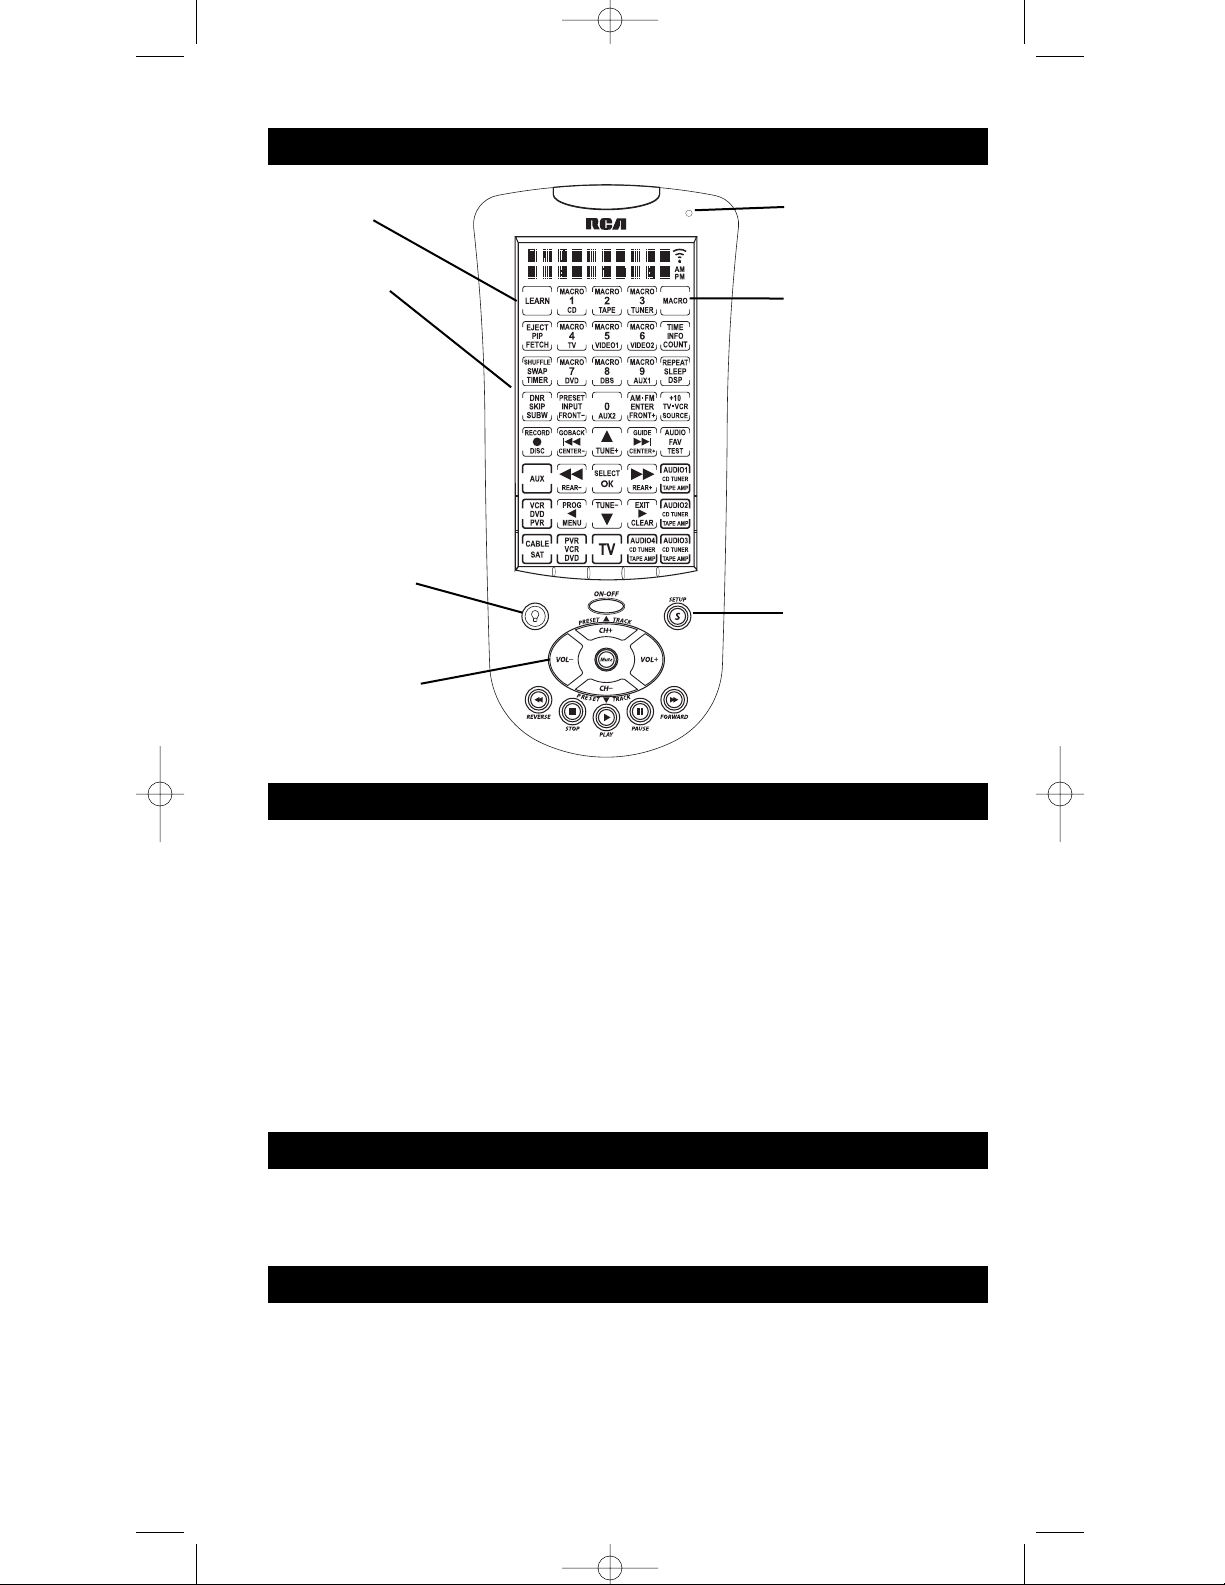
RCU1010RF
Liquid Crystal
Display (LCD)
SETUP key
Quick Access keys
LEARN key
LED indicator light
BACKLIGHT key
LCD Touchscreen
MACRO Key
The LCD (Liquid Crystal Display) touchscreen on your RCU1010RF acts as a “virtual keypad.”
This touchscreen makes it easy to program and use your remote with many components. For the
purposes of this guide, “component” refers to your electronic equipment—TV, VCR, DVD, SAT,
PVR/DVR, CBL/AUX, CD and AUDIO equipment—all of which can be operated using the
RCU1010RF remote control unit. When you press and release a component key on the LCD
touchscreen, you put the remote in that mode (e.g., pressing the TV key puts the remote in the TV
Mode), and it remains in that mode until you press and release another mode key. When you put the
remote in a specific component mode, the control screen for that mode is shown on the touchscreen.
For example, if you put the remote in TV Mode, the control screen you see on the touchscreen
is the TV Mode control screen. Each LCD touchscreen has a maximum of 40 keys.
The LCD touchscreen remains blank when the remote is not in use. The LCD touchscreen turns
on automatically when you press and release the SETUP key, the BACKLIGHT key, or any LCD
touchscreen key. The remaining rubber keys do not activate the LCD touchscreen
Setup Routine and Procedures
LED Indicator Light
The LED (Light Emitting Diode) indicator light, located at the upper right-hand side of the
RCU1010RF unit, lights up whenever a rubber key or any LCD touchscreen key is pressed. The LED
indicator flashes and beeps three times (approximately two seconds) to indicate any error condition.
The SETUP key is located towards the lower right-hand side of the remote. The SETUP key
is used to walk you through the steps in setting up the remote. To enter the Setup Mode, press and
hold the SETUP key on the rubber keypad for 2-3 seconds until the LED indicator light remains on.
Successive presses of the SETUP key walk you through all the available Setup routines.
7
RCU_1010_RF_IB_RevA.qxd 9/24/03 10:30 AM Page 7
Page 8
8
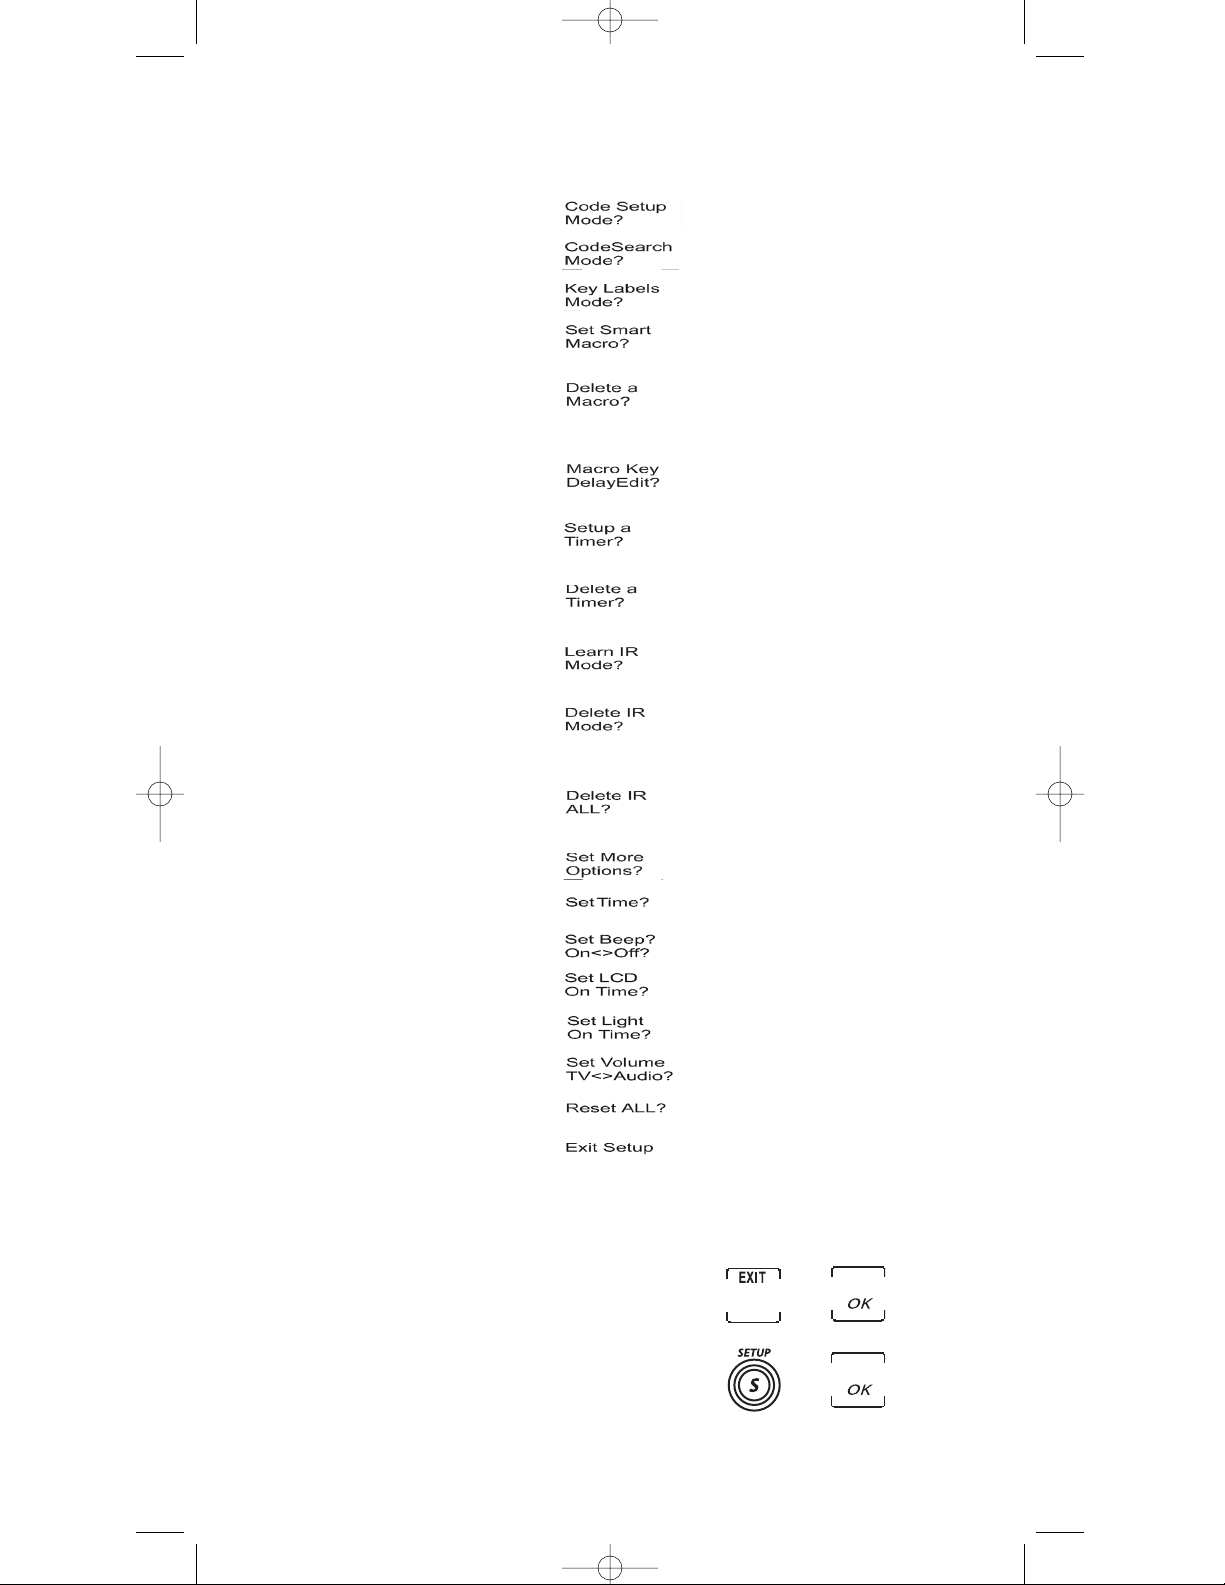
The following are the screen selections you will see in the Setup Mode.
1. Code Setup Mode?
2. Code Search Mode?
3. Key Labels Mode?
4. Set SmartMacro?
5. Delete a Macro?
(Only appears once a Macro
function has been programmed.)
6. Macro Key Delay Edit?
(Only appears once a Macro
function has been programmed.)
7. Setup a Timer?
8. Delete a Timer?
(Only appears once a Timer
function has been set.)
9. Learn IR Mode?
10. Delete IR Mode?
(Only appears once an
IR function has been learned.)
11. Delete IR ALL?
(Only appears once an
IR function has been learned.)
12. Set More Options?
a) Set Time?
b) Set Beep?
c) Set LCD On Time?
d) Set Light (Backlight) On Time?
e) Set Volume TV<>AUDIO?
13. Reset ALL?
14. Exit Setup
Enter Setup Mode
Exit Setup Mode
To exit the Setup Mode at any time and return to normal operation, follow these steps:
1. Press and release the LCD EXIT key on the touchscreen.
Then press and release the LCD OK key on the Exit Setup
Screen. The remote is now in normal operation mode.
OR
2. Press and release the SETUP key repeatedly until the LCD
displays the Exit Setup Screen. Press and release the LCD
OK key. The remote is now in normal operation mode.
+
+
RCU_1010_RF_IB_RevA.qxd 9/24/03 10:30 AM Page 8
Page 9
9
During a Setup function, if no key is pressed for 60 seconds, the unit automatically exits from the
Setup mode. The LED indicator light flashes an error in this instance, and the LCD displays the
TimeOut Screen for three seconds. Any operation that is not completed when the timeout occurs
is not saved.
General Setup Notes
1. When in Setup Mode, pressing the LCD LEARN key automatically forwards to the
Learn IR Mode? Screen.
2. When in Setup Mode, pressing the LCD MACRO key automatically forwards to the
Set SmartMacro? Screen.
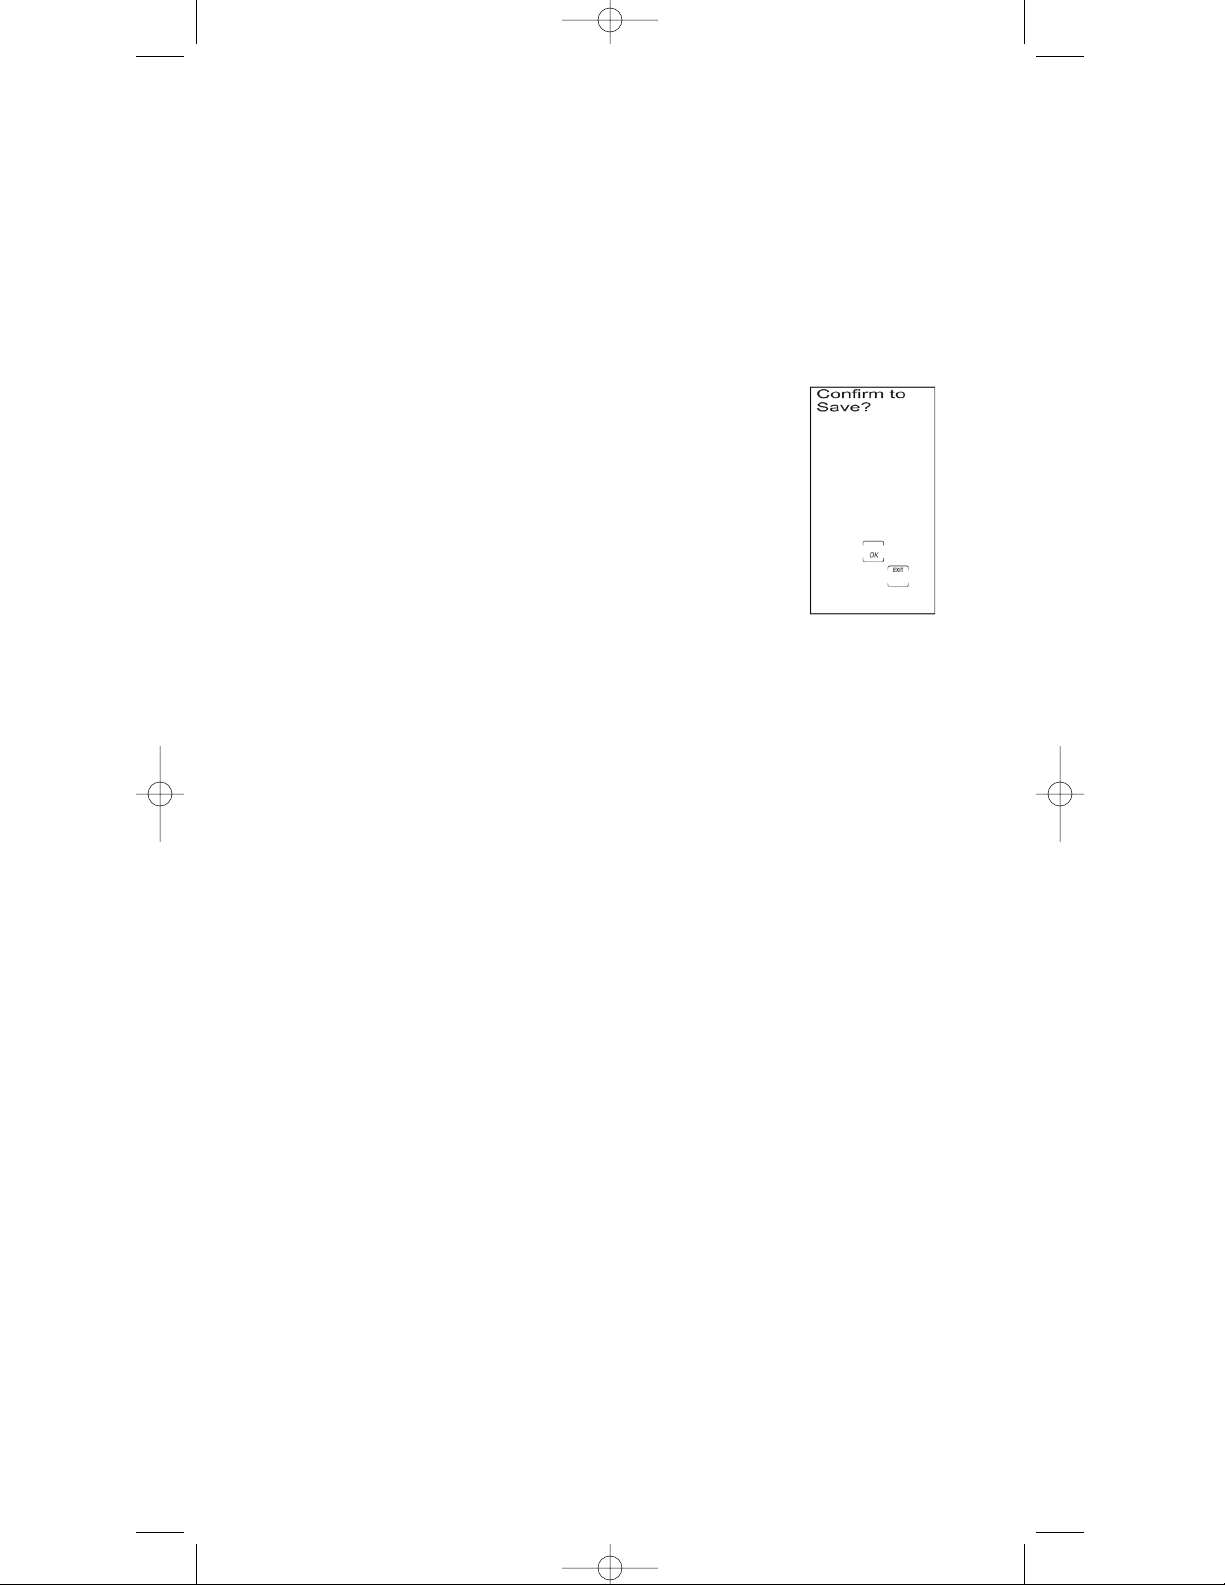
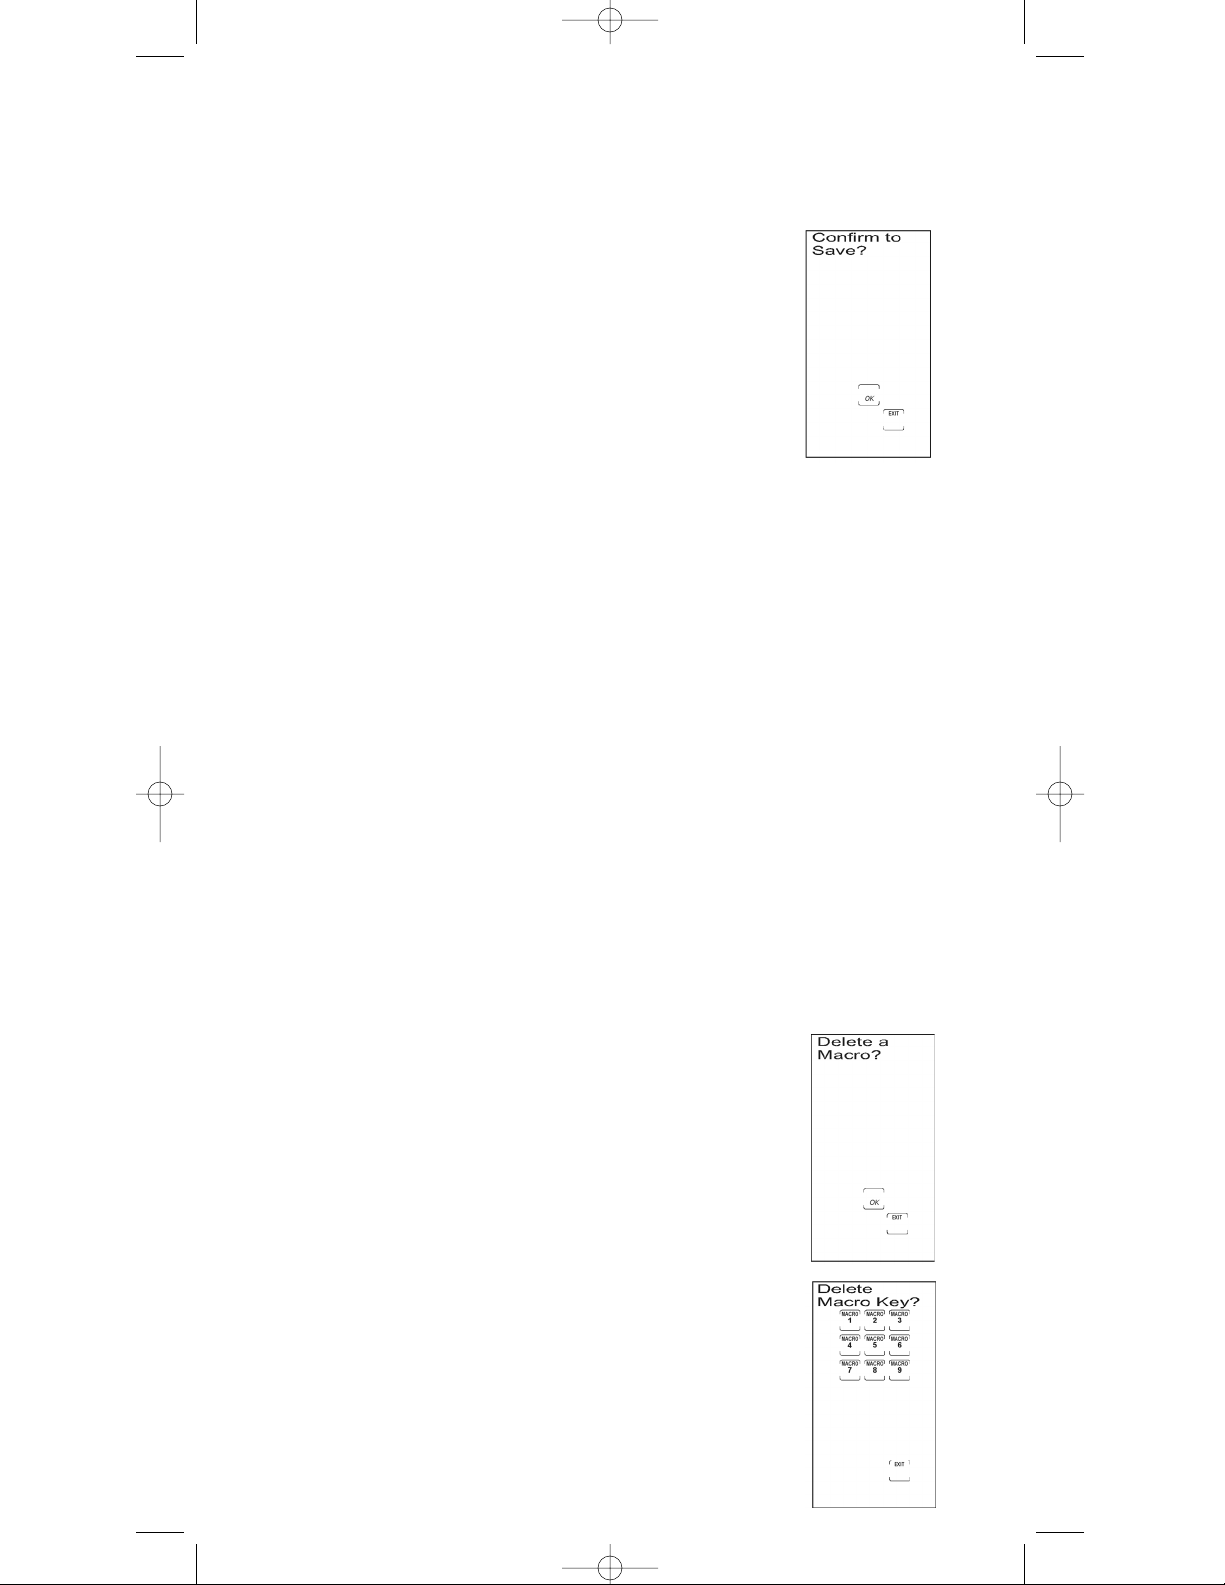
3. At any point in the Setup process, where a “save” is being made, the Confirm to Save? Screen
is displayed. Press and release the LCD OK key to save, or press and release the LCD EXIT key
to exit without saving any changes.
4. At any point in the Setup process, where an “overwrite” is being made (e.g., overwriting Macros,
Learned Modes, etc.), the Confirm to Overwrite? Screen is displayed. Press and release the
LCD OK key to confirm the change, or press and release the LCD EXIT key to exit without
overwriting any information.
5. At any point in the Setup process, where a “deletion” is being made (e.g., deleting Macros,
Timers, etc.), the Confirm to Delete? Screen is displayed. Press and release the LCD OK key
to confirm the deletion, or press and release the LCD EXIT key to exit without deleting
any information.
6. At any point in the Setup process, where a “change” is being made, the Success Screen displays
for one second to confirm the action.
7. Note: For all setup and operational functions, use the VCR key and VCR Mode to operate a PVR/DVR.
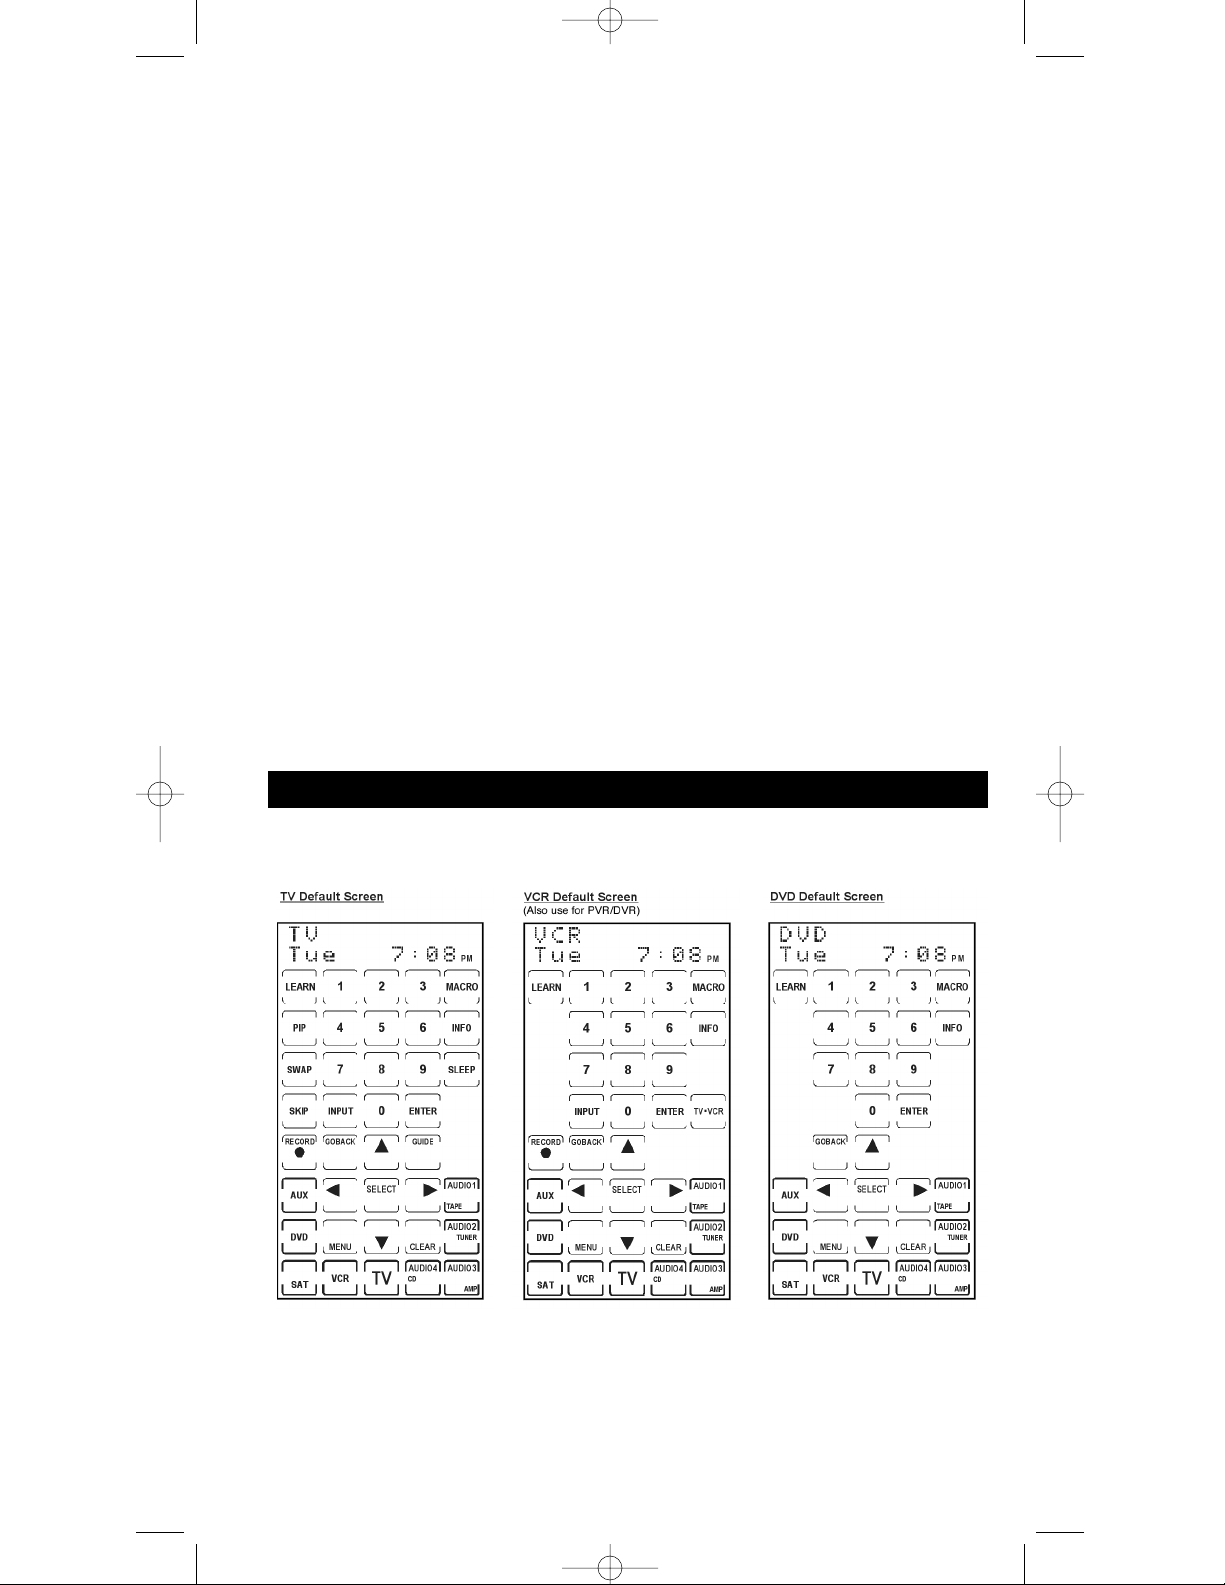
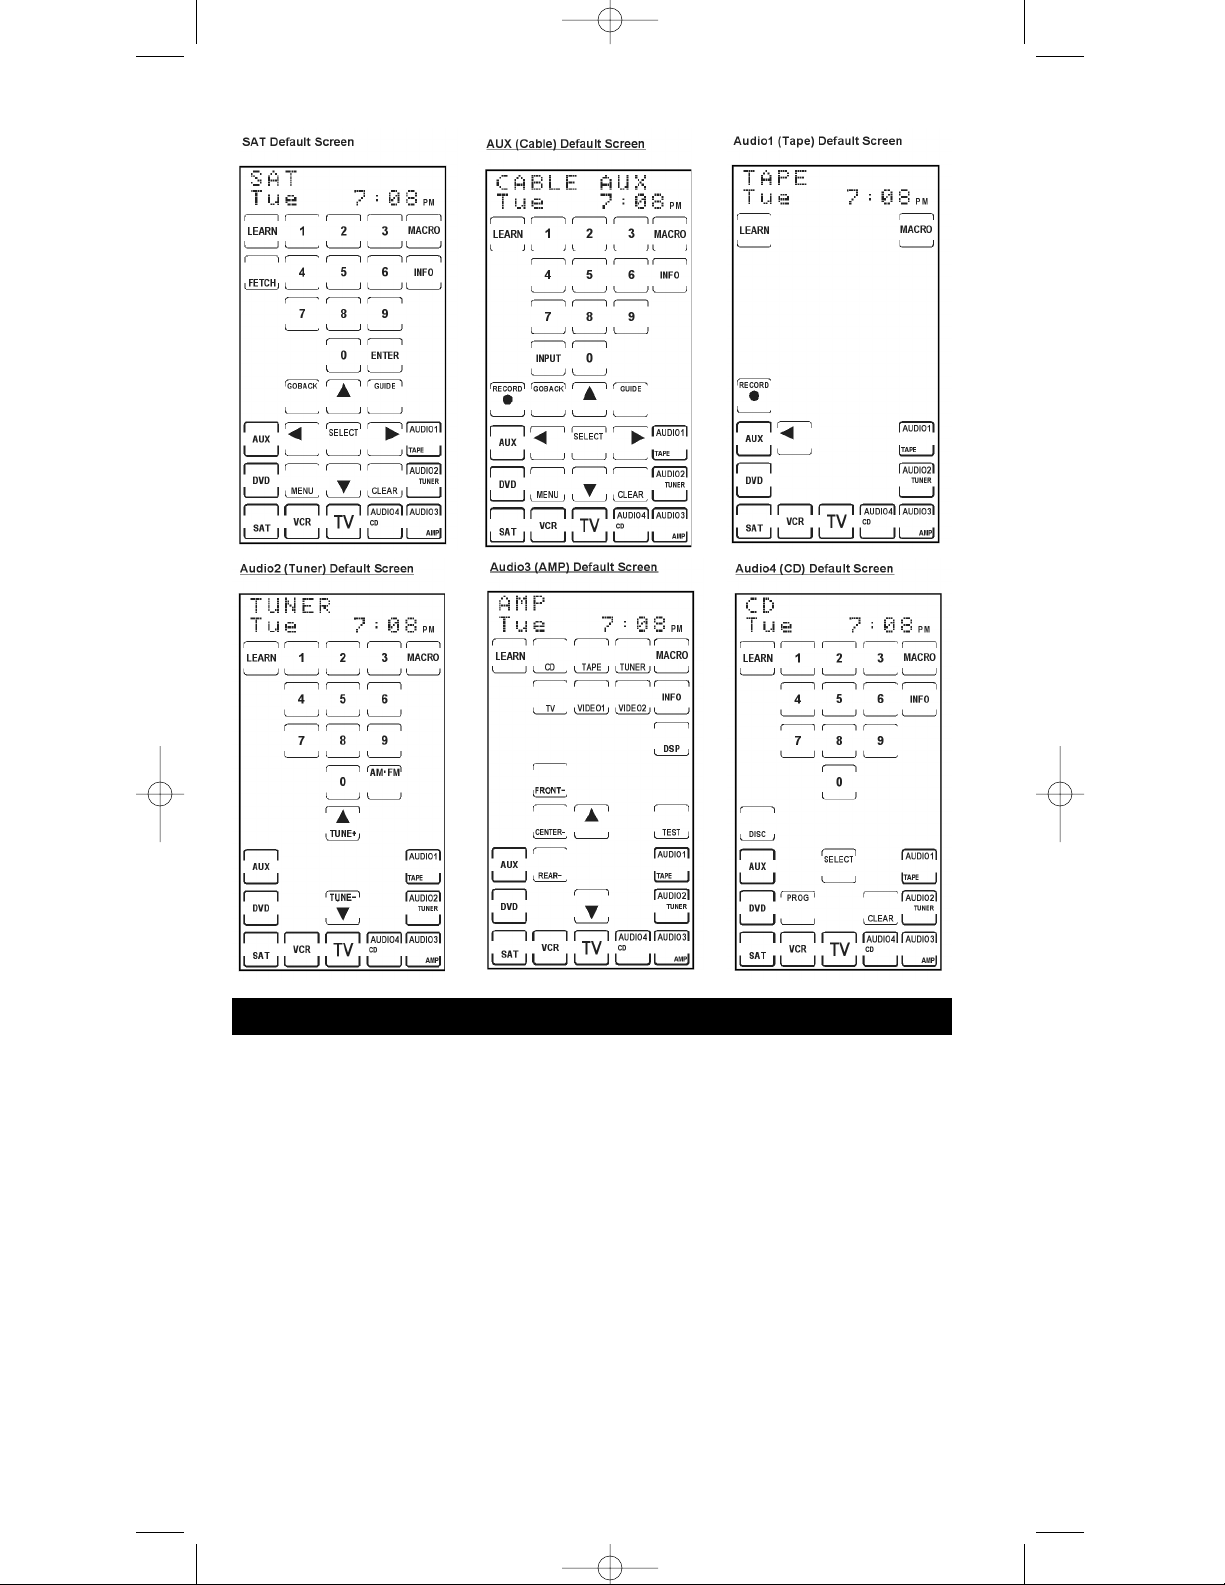
Component Control Screens
Component Control Screens
Your RCU1010RF displays a different control screen for each of the nine components. You can easily
switch between these components by simply pressing the desired LCD component key.Cod
RCU_1010_RF_IB_RevA.qxd 9/24/03 10:30 AM Page 9
Page 10
The RCU1010RF remote can control up to nine components. In order for the RCU1010RF to control your
components (TV, VCR, PVR/DVR, DVD, etc.), you must program it with the corresponding code entry
from the Code Lists. This enables the remote to control your component with the proper commands. If
your TV, VCR, DVD, or satellite receiver is an RCA, ProScan or GE brand, the RCU1010RF may not need
any programming to control it.
To program the remote with the codes for your components, you can use one of three methods: Code List
Entry, Code Search or Code Autosearch. Use the Code List Entry method first, as this is the quickest and
easiest method. The Code Search method may require up to 300 keypresses, and the Code Autosearch
may take some time to cycle through all available codes.
During all code entries, the remote control unit must be pointing at the component you are programming.
While programming your remote, you may wish to extend the LCD touchscreen display time (see LCD
Touchscreen Display Time section on pgs. 27-28).
Code Entry
You can enter codes in your RCU1010RF from the Code Lists using the SETUP key. (Refer to the Code Lists
of the most popular brands at the end of this User’s Guide.) When you enter a valid code for any given mode
(e.g., when you enter a valid code for a TV), the default key labels are displayed on the touchscreen, and any
Code List Entry
10
RCU_1010_RF_IB_RevA.qxd 9/24/03 10:30 AM Page 10
Page 11

If the component you wish to control does not respond to any of the codes
you have entered using the Code List Entry, you can search the entire Code
List for a code that will control your component. Aparticular component
might not be listed in the Code List or might be listed under a different brand.
Remember: The Code Search method may require up to 300 keypresses.
When you enter a valid code for any given mode (e.g., when you enter
a code for a TV), the default key labels are displayed on the touchscreen
and any previously Learned functions for that mode are deleted. The
mode is reset to its power-on default state.
previously Learned functions for that mode are deleted. The mode is
reset to its power-on default state.
The Code List Entry method is the quickest and easiest
programming method. Code Lists are specified on pages 69-77
of this User’s Guide. To enter a code directly from one of the
Code Lists, follow these steps:
1. Manually turn on the component to be controlled (TV, VCR,
DVD, PVR/DVR, etc.).
2. Press and hold the SETUP key on the rubber keypad for
2-3 seconds until the LED indicator light remains on and
the touchscreen shows the Code Setup Mode? Screen.
3. Release the SETUP key.
4. Press and release the desired component key (TV, VCR,
SAT, etc.) on the LCD touchscreen. For AUX, press and
release the LCD AUX key followed by the desired component
key to be programmed under that key.
Note: The AUX key automatically defaults to Cable Mode
unless another selection is made.
5. Enter the three-digit code for your component brand from
the corresponding Code Lists at the back of this User’s Guide.
If your brand has more than one code listed, begin with the
first code. When a valid code from the list is entered, the LCD
displays the Code Save Success Screen, followed by the Code
Setup Mode? Screen. For an invalid code entry, the LCD
displays the Invalid Entry Made Screen for two seconds
before displaying the Code Setup Mode? Screen. In this case,
no changes are made.
6. Before the code can be tested on the chosen component,
return to normal operation by pressing the LCD EXIT key
and then the LCD OK key on the Exit Setup Screen.
7. To test the code, turn the component on. Aim the RCU1010RF
at the component and press and release the ON•OFF key. If
you have entered the correct code number for your component,
it responds to the ON•OFF key. If the component responds,
no further programming is required.
8. If your component does not respond, try the next code in the
list for your brand by repeating the procedure starting at step
2. If no other codes exist for your brand, try the Code Search
or Code Autosearch methods.
Code Search
To search for a specific code in one of the Code Lists, follow
these steps:
1. Manually turn on the component to be controlled (TV, VCR,
DVD, PVR/DVR, etc.).
2. Press and hold the SETUP key on the rubber keypad for 2-3
seconds until the LED indicator light remains on and the
touchscreen shows the Code Setup Mode? Screen.
3. Release the SETUP key.
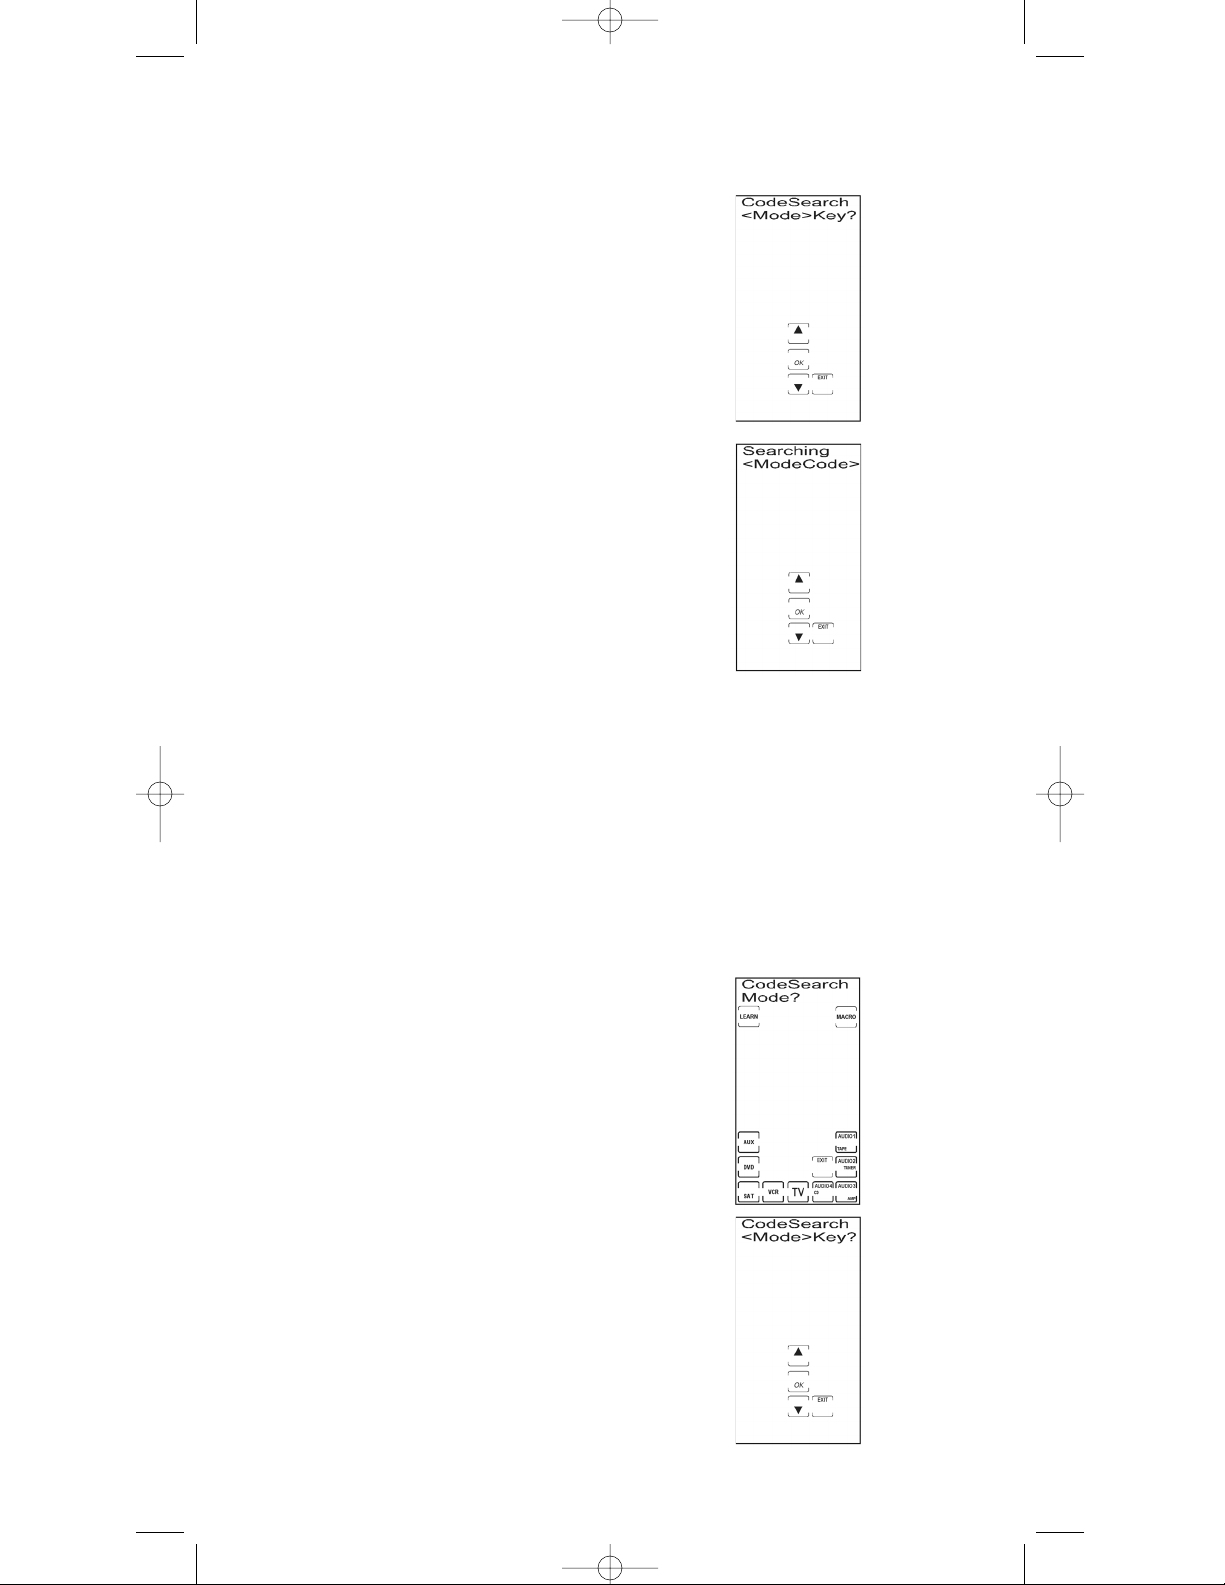
4. Press and release the SETUP key again. The LCD displays
the Code Search Mode? Screen.
11
RCU_1010_RF_IB_RevA.qxd 9/24/03 10:30 AM Page 11
Page 12
12
Code Search (continued)
Your RCU1010RF has the ability to automatically scroll through the entire Code Lists by using
the Autosearch feature. Remember: Code Autosearch may take some time to cycle through all
available codes. Be sure the remote control unit is pointed at the component you are programming.
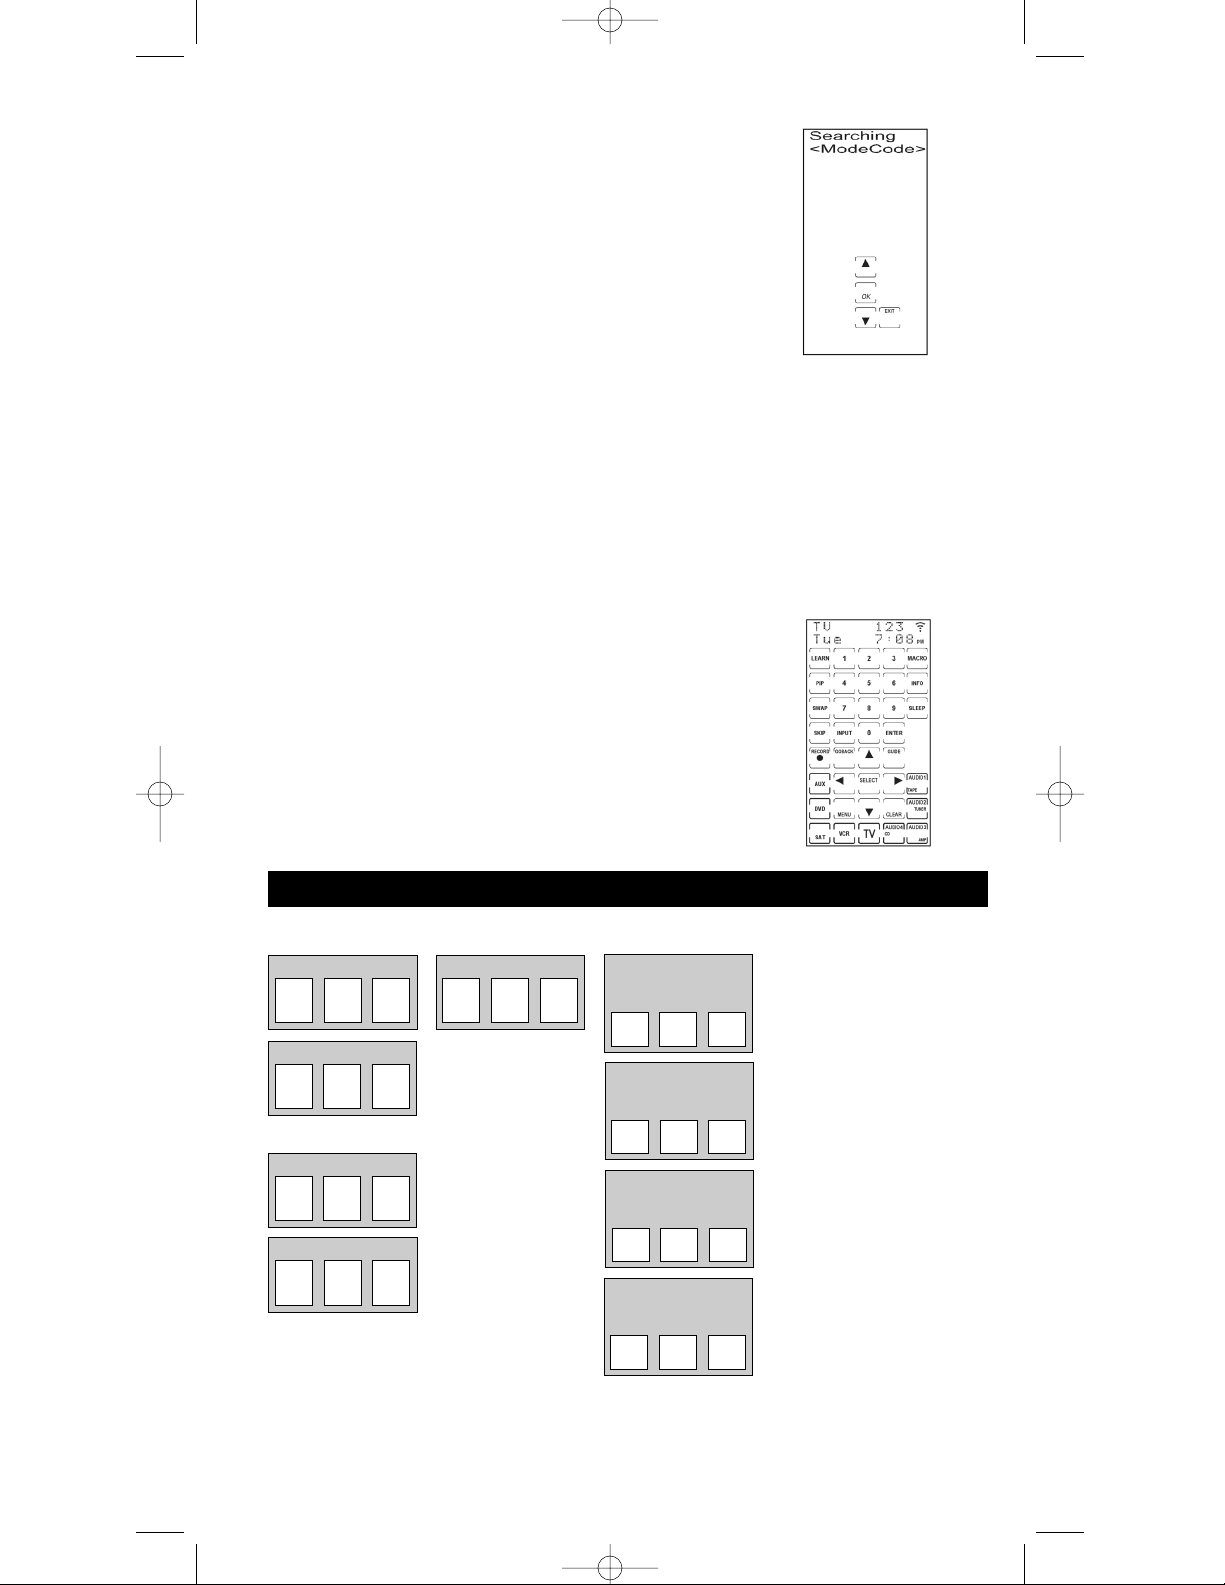
5. Press and release the desired component key (TV, VCR, SAT,
etc.). For AUX, press and release the LCD AUX key followed by
the desired component key to be programmed under that key.
Note: The AUX key automatically defaults to Cable Mode
unless another selection is made.
6. The LCD displays the Code Search Key? Screen. Press and
release the ON•OFF key repeatedly until the component to
be controlled responds to the command and turns off. The
current code being sent is displayed in the right-hand corner.
Note: The Code Search starts from the currently stored code
under that mode. For example, if the component Code List
contains 100 codes and the currently stored code is 050, the
Code Search starts from 051 and continues to 100 before
looping back to 000 and finishing at 050. This speeds up the
process of finding the correct code for your component, since
you may discover that some codes can turn your component
on and off but are not able to control its other functions. This
process allows you to bypass codes you’ve already tried.
7. Press and release the LCD OK key to save the code. After you
install this code, all key labels and any previously Learned
commands will be reset.
8. If your component responds and you accidentally overshoot
that code by pressing the ON•OFF key again, press and
release the CH- key or LCD DOWN ARROW key to backtrack
through the Code List. You can change the direction to
forward once again by pressing the ON•OFF, CH+, or LCD
UP ARROW keys.
9. After pressing the LCD OK key in step 7, the LCD displays
the Code Search Mode? Screen. The Code Search Method
entry is now complete. To exit the Setup Mode, press and
release the LCD EXIT key, followed by the LCD OK key on
the Exit Setup Screen.
Code Autosearch
To start a Code Autosearch, follow these steps:
1. Manually turn on the component to be controlled (TV, VCR,
DVD, PVR/DVR, etc.).
2. Press and hold the SETUP key on the rubber keypad for 2-3
seconds until the LED indicator light remains on and the
touchscreen shows the Code Setup Mode? Screen.
3. Release the SETUP key.
4. Press and release the SETUP key again. The LCD displays
the Code Search Mode? Screen.
5. Press and release the desired component key (TV, VCR, SAT,
etc.). For AUX, press and release the LCD AUX key followed by
the desired component key to be programmed under that key.
Note: The AUX key automatically defaults to Cable Mode
unless another selection is made.
6. The LCD displays the Code Search Key? Screen. Keep the
remote pointed at the component as you press and release the
ON•OFF key once. If you do not press any other keys, the
Autosearch feature automatically starts in six seconds.
RCU_1010_RF_IB_RevA.qxd 9/24/03 10:30 AM Page 12
Page 13
13
7. The Autosearch sends the next code in the list every three
seconds. The current code being sent is displayed in the upper
right-hand corner.
8. To speed up the Autosearch, you can manually override the
process and temporarily speed it up by pressing the normal
search keys (CH+, CH-, ON•OFF, LCD UP and DOWN
ARROW) in both forward and reverse directions.
9. Once the component to be controlled responds to the
commands, press and release the LCD OK key to save the
code. After you install its code, all key labels and any
previously Learned commands will be reset.
Note: If your component responds to the command, and the
RCU1010RF sends the next code before you have a chance to
press and release the LCD OK key, you can backtrack through
the Code List by pressing CH- or the LCD DOWN ARROW.
You can change the direction to forward once again by
pressing the ON•OFF, CH+, or LCD UP ARROW keys.
10. After pressing the LCD OK key in step 9, the LCD displays the
Code Search Mode? Screen. Code Autosearch is now complete.
To exit the Setup Mode, press and release the LCD EXIT key,
followed by the LCD OK key on the Exit Setup Screen.
Code Identification allows you to find out what code is currently
programmed in the remote under a given mode (TV, VCR, DVD, etc.).
To find the currently programmed code, follow these steps:
Code Identification
1. Press and release the SETUP key. The last active screen that
was displayed appears.
2. Press and hold any LCD component key. The top right corner
of the LCD touchscreen shows the current code programmed
for that component.
Code Identification Chart
TV CODE
Enter your codes here for easy reference:
VCR CODE
SAT CODE
DVD CODE
AUDIO 1
Tuner
❒
CD
❒
AMP
❒
Tape
❒
✓
AUDIO 2
Tuner
❒
CD
❒
AMP
❒
Tape
❒
✓
AUDIO 3
Tuner
❒
CD
❒
AMP
❒
Tape
❒
✓
AUDIO 4
Tuner
❒
CD
❒
AMP
❒
Tape
❒
✓
AUX component:______
NOTE: Cable Mode is the default for AUX.
(Also use for PVR/DVR)
RCU_1010_RF_IB_RevA.qxd 9/24/03 10:30 AM Page 13
Page 14
14
With the RCU1010RF, you have the ability to customize the LCD key labels to meet your needs.
Key Label Options allow you to change the LCD key labels to match the functions on your original
component remote controls. It is recommended that the Key Label Options feature be used only after
you have finished programming all your components. This feature allows you to select from multiple
preset key labels to be shown on the touchscreen. You can change any LCD panel key except the LCD
LEARN and MACRO keys. Any one of the available preset key label options can be chosen for each
key. You can also choose to show only the key frame or hide the key completely.
Change LCD Component Key Labels
You can change the name of your component keys, if desired (VCR, SAT, DVD, etc.).
The TV component key label cannot be changed.
To choose from the preset key label options for LCD component keys, follow these steps:
1. Press and hold the SETUP key on the rubber keypad for 2-3
seconds until the LED indicator light remains on and the
touchscreen shows the Code Setup Mode? Screen.
2. Release the SETUP key.
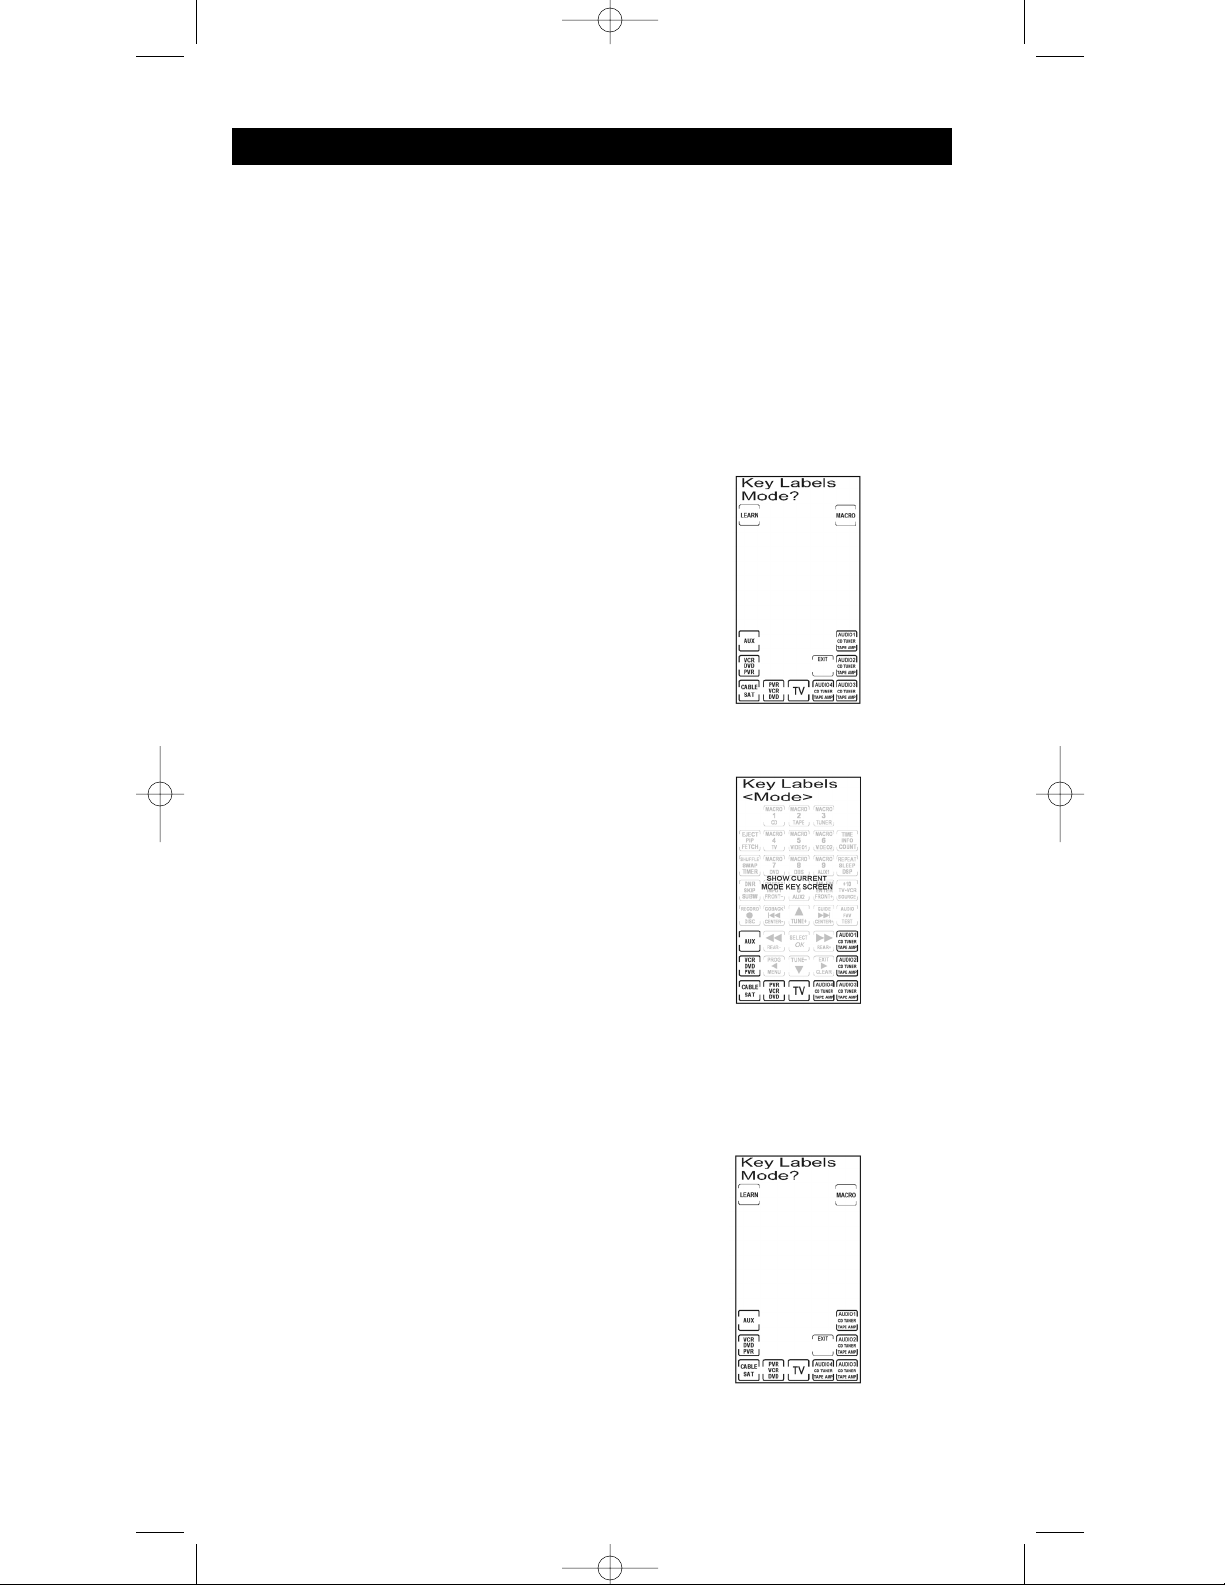
3. Press and release the SETUP key repeatedly until the LCD
touchscreen displays the Key Labels Mode? Screen.
4. If the current component key label is to be changed, make
this change prior to pressing any other LCD key.
5. To change a component key label, press and release the
component key repeatedly until the desired label appears.
If, at any point, you wish to change a component key back
to its original default setting, follow the steps above.
Note: At this point, if you do not wish to change any key
labels within this component, follow steps 6 and 7.
If you do wish to change key labels within this component,
skip directly to step 5 in the Change LCD Key Labels Within
a Component section below.
6. Press and release the SETUP key on the rubber keypad to
confirm your change.
7. Press and release the LCD OK key to save.
Note: The screen to the right shows ALL of the possible labels,
although only the options for the component you selected are
shown at any one time.
8. To exit the Setup Mode, press and release the LCD EXIT key,
followed by the LCD OK key on the Exit Setup Screen.
Change LCD Key Labels Within a Component
You can change the key labels within a component, if desired. To choose preset key label options
for keys within a component, follow these steps:
1. Press and hold the SETUP key on the rubber keypad for
2-3 seconds until the LED indicator light remains on and
the touchscreen shows the Code Setup Mode? Screen.
2. Release the SETUP key.
3. Press and release the SETUP key repeatedly until the
LCD touchscreen displays the Key Labels Mode? Screen.
4. From the Key Label Mode? Screen, press and release the
desired component key (TV, VCR, SAT, PVR/DVR, etc.)
to display the keys for that screen.
Key Label Options
RCU_1010_RF_IB_RevA.qxd 9/24/03 10:30 AM Page 14
Page 15
15
Note: To reset the current key labels within a component to
their default settings, press and hold the current component
key for three seconds. Resetting any key label within a
component to its power-on default setting results in an
automatic save for that mode. This will not affect your
program codes or any Learned commands. Performing this
reset will not reset the component key back to its default
setting. This must be done by following the steps in the
Change LCD Component Key Labels section above.
5. Press and release any of the LCD panel keys within the current
mode repeatedly to select the desired key label. Each time you
press a key, a different label for that key is displayed.
6. To save your new key label selections for the current mode,
press and release another component key or the SETUP key.
The display shows the Confirm to Save Screen. Press and
release the LCD OK key to save or the LCD EXIT key to
delete the changes you have made.
7. If you pressed another component key in step 6, those key
labels are now displayed and you can proceed to rename
them, if desired.
8. If the SETUP key was pressed in step 6, the screen returns
to the Key Label Options? Screen.
9. The relabeling of keys is complete. To exit the Setup Mode,
press and release the LCD EXIT key, followed by the LCD
OK key on the Exit Setup Screen.
RCU_1010_RF_IB_RevA.qxd 9/24/03 10:30 AM Page 15
Page 16

16
Component:________________
IMPORTANT NOTE: You cannot learn any commands under the LCD LEARN, LCD MACRO,
SETUP, BACKLIGHT or any LCD component keys. The following screens can be used to store learned
keys under a component mode. This page can be used to document the learned keys.
Learned Key Reference Page
Component:________________
Component:________________
Component:________________
RCU_1010_RF_IB_RevA.qxd 9/24/03 10:30 AM Page 16
Page 17
17
Learning Tips
Before transferring commands from your original remote to the RCU1010RF,
check out these useful tips on Learning.
1. Make sure you are using fresh batteries in both the RCU1010RF and your
original remote(s).
2. It is recommended that a Master Clear be done before attempting any Learning.
This clears all Learned commands for all component modes. (See section on
Master Clear.)
3. Point the top of the original remote at the base of the RCU1010RF so the
IR LED on the original remote is in line with the RCU1010RF Learn sensor,
located at the bottom of the remote.
4. The distance between the two remotes should be approximately 2-3
inches apart.
5. To ensure that your units are compatible and to increase your familiarity
with the Learning process, you may wish to experiment by learning two
or three keys initially. Then, carry out a Master Clear before learning all
the desired functions from your original remote.
6. Incandescent or low-energy light can cause interference with the
IR transmissions. When using the Learning function, keep the remotes
at least three feet away from such light sources.
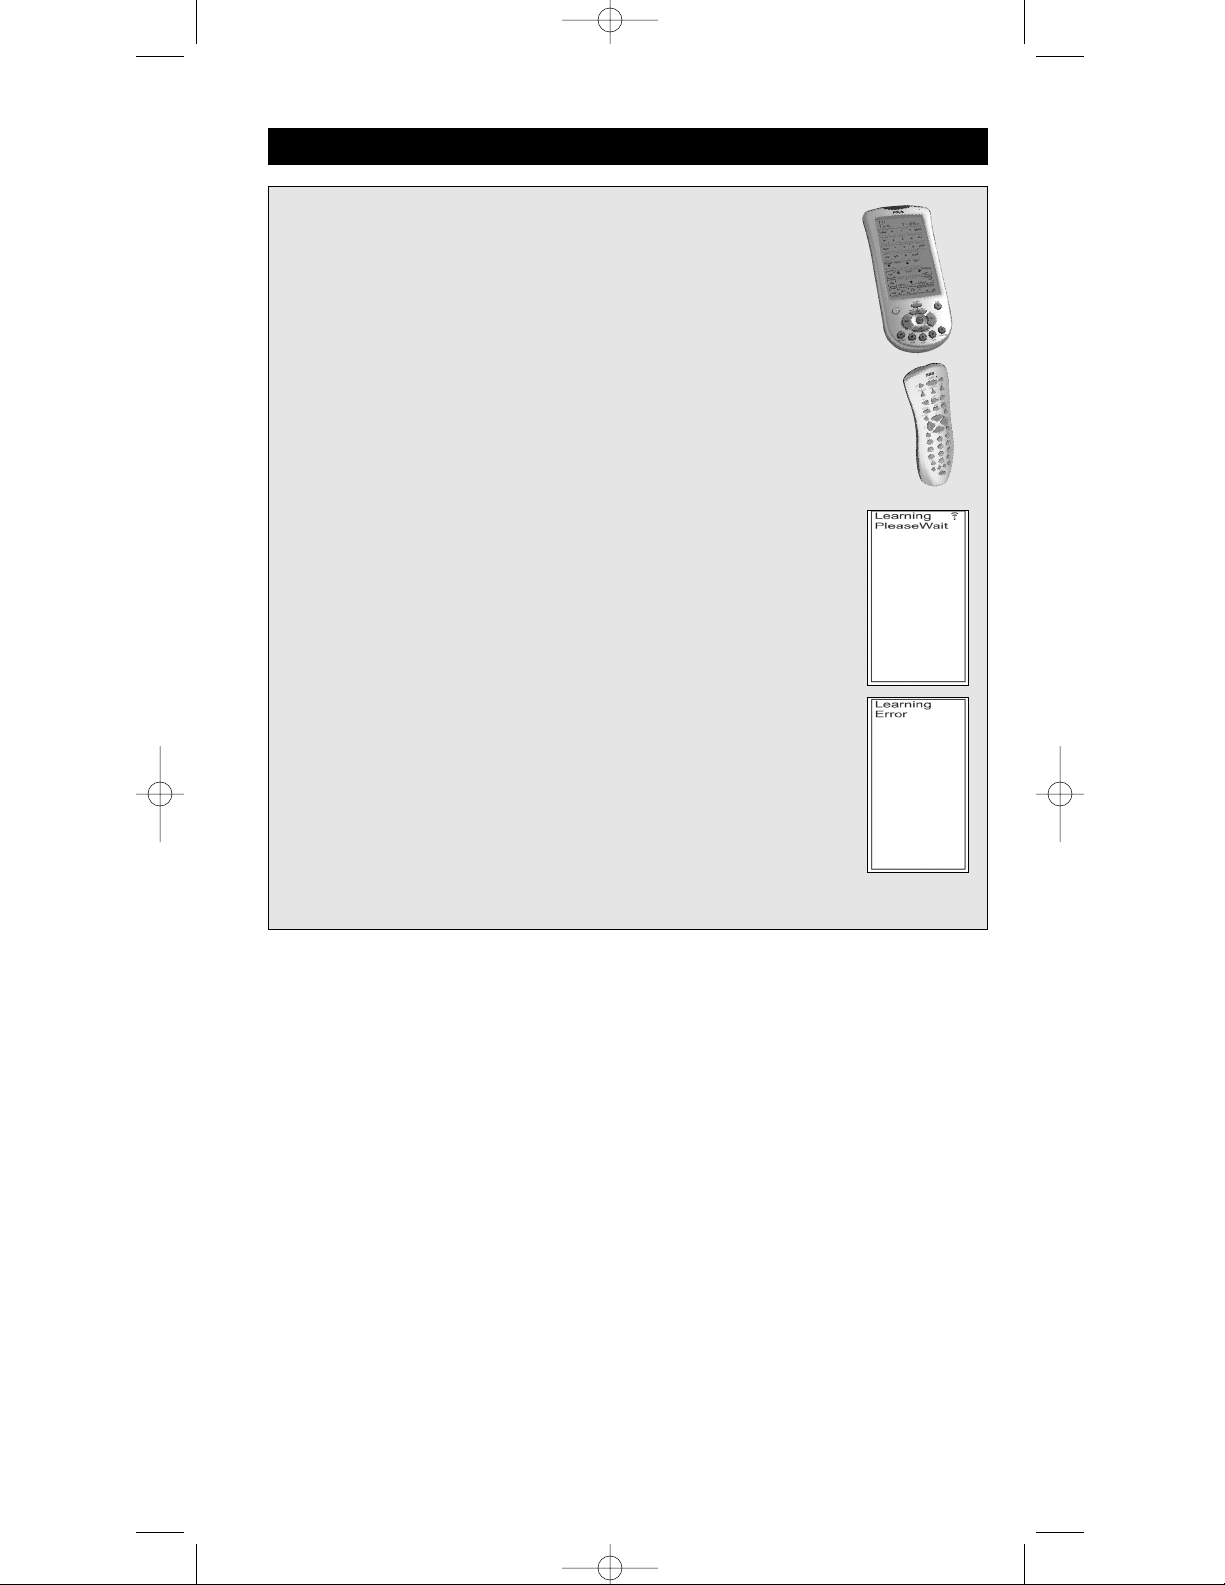
7. When learning a key, do not release the key on your original remote until
the Learning Success Screen is displayed on the RCU1010RF touchscreen,
which takes approximately 2-3 seconds. Until this occurs, the LCD
touchscreen will display the Learning Please Wait Screen.
8. You cannot learn any commands under the LCD
LEARN, LCD MACRO,
SETUP, BACKLIGHT or any LCD component keys.
9. If there is a problem during the Learning process, the LED indicator light
flashes for two seconds and the Learning Error Screen appears on the
touchscreen. The unit still remains in Learning Mode.
10. All Learned keys are saved automatically.
11. When the memory is full, the display shows the Memory Full Screen and
the LED indicator light flashes for two seconds. It is not possible to learn any
keys without first clearing Learned commands
under a component mode.
Code Learning
Codes from the Code Lists include basic functionality for each component they control. Once you
have programmed in the list code for your specific component, you can customize the RCU1010RF
touchscreen to include certain functions from your original remote(s) that were not embedded in the
preset code. This allows you to transfer the best features from existing remotes to the RCU1010RF remote.
Your RCU1010RF has the ability to learn and store commands from your original remote(s) under
the mode(s) of your choice. The RCU1010RF can store more than 30 key commands for each original
remote. Only one original remote can be learned under any one mode (i.e., the RCU1010RF can learn
the commands for one TV remote, one VCR remote, one DVD remote, etc.).
Once you have taught your RCU1010RF any additional commands from the original remotes and
set your Key Label Options, use the Learned Key Reference Pages in this manual to enter your
customized options for each mode.
Learning
Learning Commands
Now you’re ready to have your RCU1010RF learn the commands from your existing remote(s).
All Learned keys are saved automatically. Remember: only one original remote can be stored
under any one mode. The RCU1010RF can learn the commands for one TV remote, one VCR
remote, one DVD remote, etc.
RCU_1010_RF_IB_RevA.qxd 9/24/03 10:30 AM Page 17
Page 18
18
1. Gather all the remotes that you want to learn and have them all
lined up on a flat surface before going into the Learn IR Mode.
2. Place the first original remote in the Learning position (see
Learning Tips section on pg. 17). Point the top of the original
remote at the base of the RCU1010RF so the IR LED on the
original remote is in line with the RCU1010RF Learn sensor,
located at the bottom of the remote. The remotes should be
positioned 2-3 inches apart.
3. If the original remote is a universal remote, you must press
the component key on that remote to select the desired mode
before proceeding with Learning. For example, pressing the
VCR key on your original universal remote will allow your
RCU1010RF to learn from that component mode. If the
original remote is a dedicated remote, e.g., a DVD remote
only, this step is not needed.
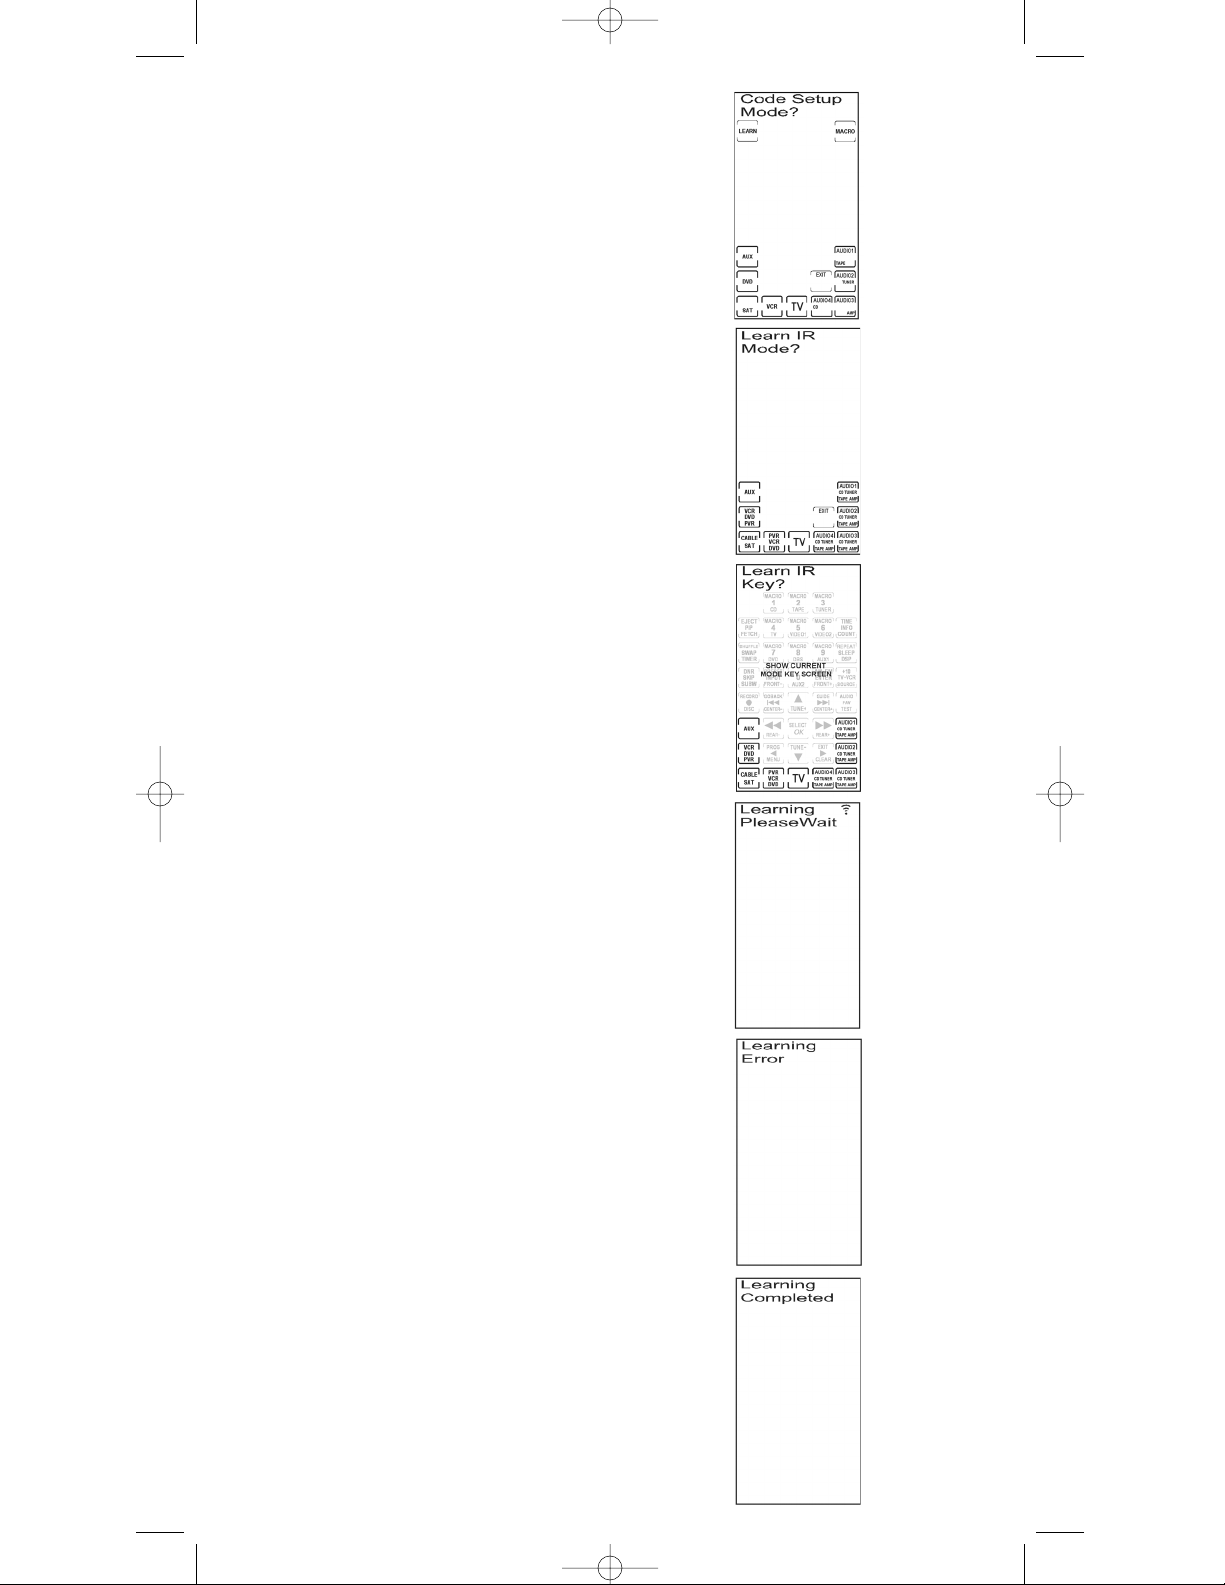
4. Press and hold the SETUP key on the RCU1010RF’s rubber
keypad for 2-3 seconds until the LED indicator light remains
on and the touchscreen shows the Code Setup Mode? Screen.
5. Release the SETUP key.
6. Press and release the LCD LEARN key. The Learn IR Mode?
Screen is displayed.
7. Press and release the desired component key (TV, VCR,
SAT, AUX, PVR/DVR, etc.). The Learn IR Key? Screen is
displayed.
8. Press and release the LCD key or the rubber key on the
RCU1010RF that you wish to use to store the Learned
commands. The Learning Please Wait Screen appears.
Note: You cannot learn any commands under the LCD
LEARN, LCD MACRO, SETUP, BACKLIGHT or any LCD
component keys.
9. Press and hold the original remote key you want to transfer to
the RCU1010RF until the Success Screen, followed by the
Learn IR Key? Screen, appears in the display. This process can
take 2-3 seconds to complete.
10. Release the original remote key. If there is a problem during
the Learning process, the LCD displays the Learning Error
Screen for three seconds but still remains in the Learning
Setup Mode. If this occurs, try adjusting the distance between
the remotes slightly and repeat from step 8.
11. Repeat steps 8-10 for other keys to be learned.
12. When all the original remote commands have been learned,
press and release the SETUP key. The display shows the
Learning Completed Screen, followed by the Learn IR Mode?
Screen. At this point, you can press and release the next
component key for additional remotes you want the
RCU1010RF to learn and repeat steps 7-10. Remember: Each
time you learn from a different component, you must put
your original remote in that component mode. If the original
remote is a dedicated remote, e.g., a DVD remote only, this
step is not needed.
13. The Learning process is now complete. To exit the Setup
Mode, press and release the LCD EXIT key, followed by the
LCD OK key on the Exit Setup Screen.
Note: If the LCD EXIT key does not respond, press and
release the SETUP key repeatedly until the Exit Setup
Screen appears.
Learning Commands (continued)
RCU_1010_RF_IB_RevA.qxd 9/24/03 10:30 AM Page 18
Page 19
This feature allows you to simultaneously delete all Learned commands.
Clearing all stored Learned commands is recommended before
first-time Learning.
Note: If no commands have been learned, this option is not shown
in the Setup Mode.
Clearing all stored Learned commands under a specific mode
allows you to continuously update your remote with the
latest commands.
Note: If no commands have been learned, this option is
not shown in the Setup Mode. Upon deletion of Learned
commands, all previously Learned keys under that
component mode return to their preset code functions.
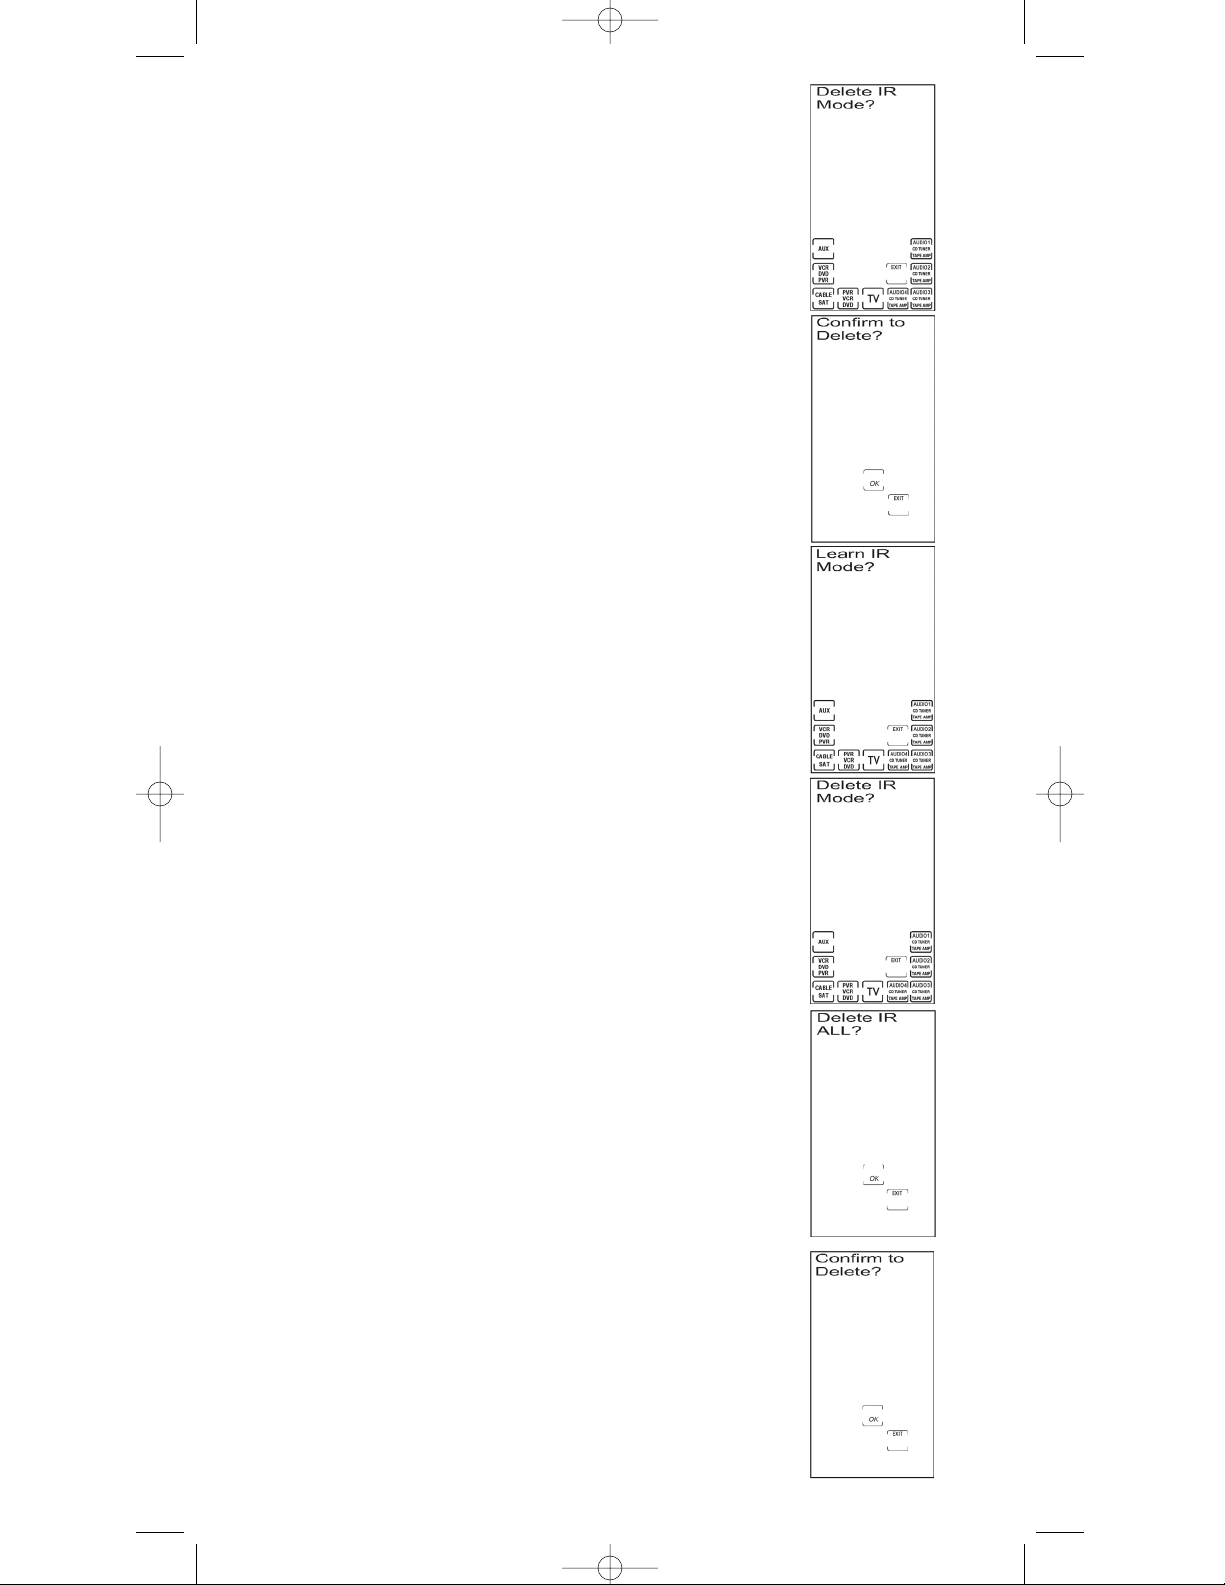
To clear all Learned commands under one mode (e.g., TV, VCR,
DVD, PVR/DVR, etc.), follow these steps:
1. Press and hold the SETUP key on the rubber keypad for
2-3 seconds until the LED indicator light remains on and
the touchscreen shows the Code Setup Mode? Screen.
2. Release the SETUP key.
3. Press and release the SETUP key repeatedly until the
Delete IR Mode? Screen appears.
4. Press and release the desired component key for the Learned
commands you want the RCU1010RF to clear (TV, VCR, SAT,
PVR/DVR, AUX, etc.).
Note: Only the components that have previously Learned
commands are shown on the LCD touchscreen.
5. The Confirm to Delete? Screen is displayed. Press and release
the OK key on the LCD touchscreen. The display shows the
Deleting Wait Screen. If there are no other component modes
with Learned commands, the Learn IR Mode? Screen appears.
If there are other component modes with Learned commands,
the Delete IR Mode? Screen is displayed.
6. All Learned commands that were previously stored under
that mode are now cleared. To exit the Setup Mode, press
and release the LCD EXIT key, followed by the LCD OK key
on the Exit Setup Screen.
Master Clear
To clear all Learned commands, follow these steps:
1. Press and hold the SETUP key on the rubber keypad for
2-3 seconds until the LED indicator light remains on and the
touchscreen shows the Code Setup Mode? Screen.
2. Release the SETUP key.
3. Press and release the SETUP key repeatedly until the Delete
IR All? Screen appears.
4. Press and release the LCD OK key.
Note: If, at this point, you wish to abort the Master Clear
operation, press and release the LCD EXIT key.
5. The Confirm to Delete? Screen is displayed. Press and release
the LCD OK key. The LCD touchscreen displays the Deleting
Wait Screen, followed by the Learn IR Mode? Screen.
6. All Learned commands are now cleared for all
component modes.
7. To exit the Setup Mode, press and release the LCD EXIT key,
followed by the LCD OK key on the Exit Setup Screen.
Clear All Stored Learned Commands Under a Mode
19
RCU_1010_RF_IB_RevA.qxd 9/24/03 10:30 AM Page 19
Page 20
20
Your RCU1010RF’s SmartMacroSMfeature allows you to perform a series of sequential commands with
one keypress. A SmartMacro
SM
learns any sequence of original remote commands. A total of 20 Learned
commands can be stored under each of the nine available LCD Macro keys. If you program all 20 keys
into a SmartMacro, the Macro is automatically stored after the twentieth Learned command is completed.
The sequence of commands you want a SmartMacro to execute must be programmed in correct
sequential order. Any sequence of commands that you regularly perform can be programmed as
a SmartMacro and reduced to a single keypress. You cannot program a Macro within a Macro.
Program a SmartMacro
Example of Programming a Macro
1. Turn on the TV and set it to channel 3.
2. Turn on the satellite receiver and set it to channel 57.
3. Turn on the VCR.
4. Now you’re ready to record your favorite satellite program with just a keypress.
SmartMacroSMKey Operations
To program a SmartMacro, follow these steps:
1. Gather all your original remotes that contain functions
you would like to add to a SmartMacro.
2. Place the first original remote in the Learning position (see
Learning Tips section on pg. 17). Point the top of the original
remote at the base of the RCU1010RF so the IR LED on the
original remote is in line with the RCU1010RF Learn sensor,
located at the bottom of the remote. The remotes should be
positioned 2-3 inches apart.
3. If the original remote is a universal remote, you must press
the component key on that remote to select the desired mode
before proceeding with programming a SmartMacro. For
example, pressing the VCR key on your original universal
remote will allow your RCU1010RF to program a SmartMacro
using that component mode. If the original remote is a dedicated
remote, e.g., a DVD remote only, this step is not needed.
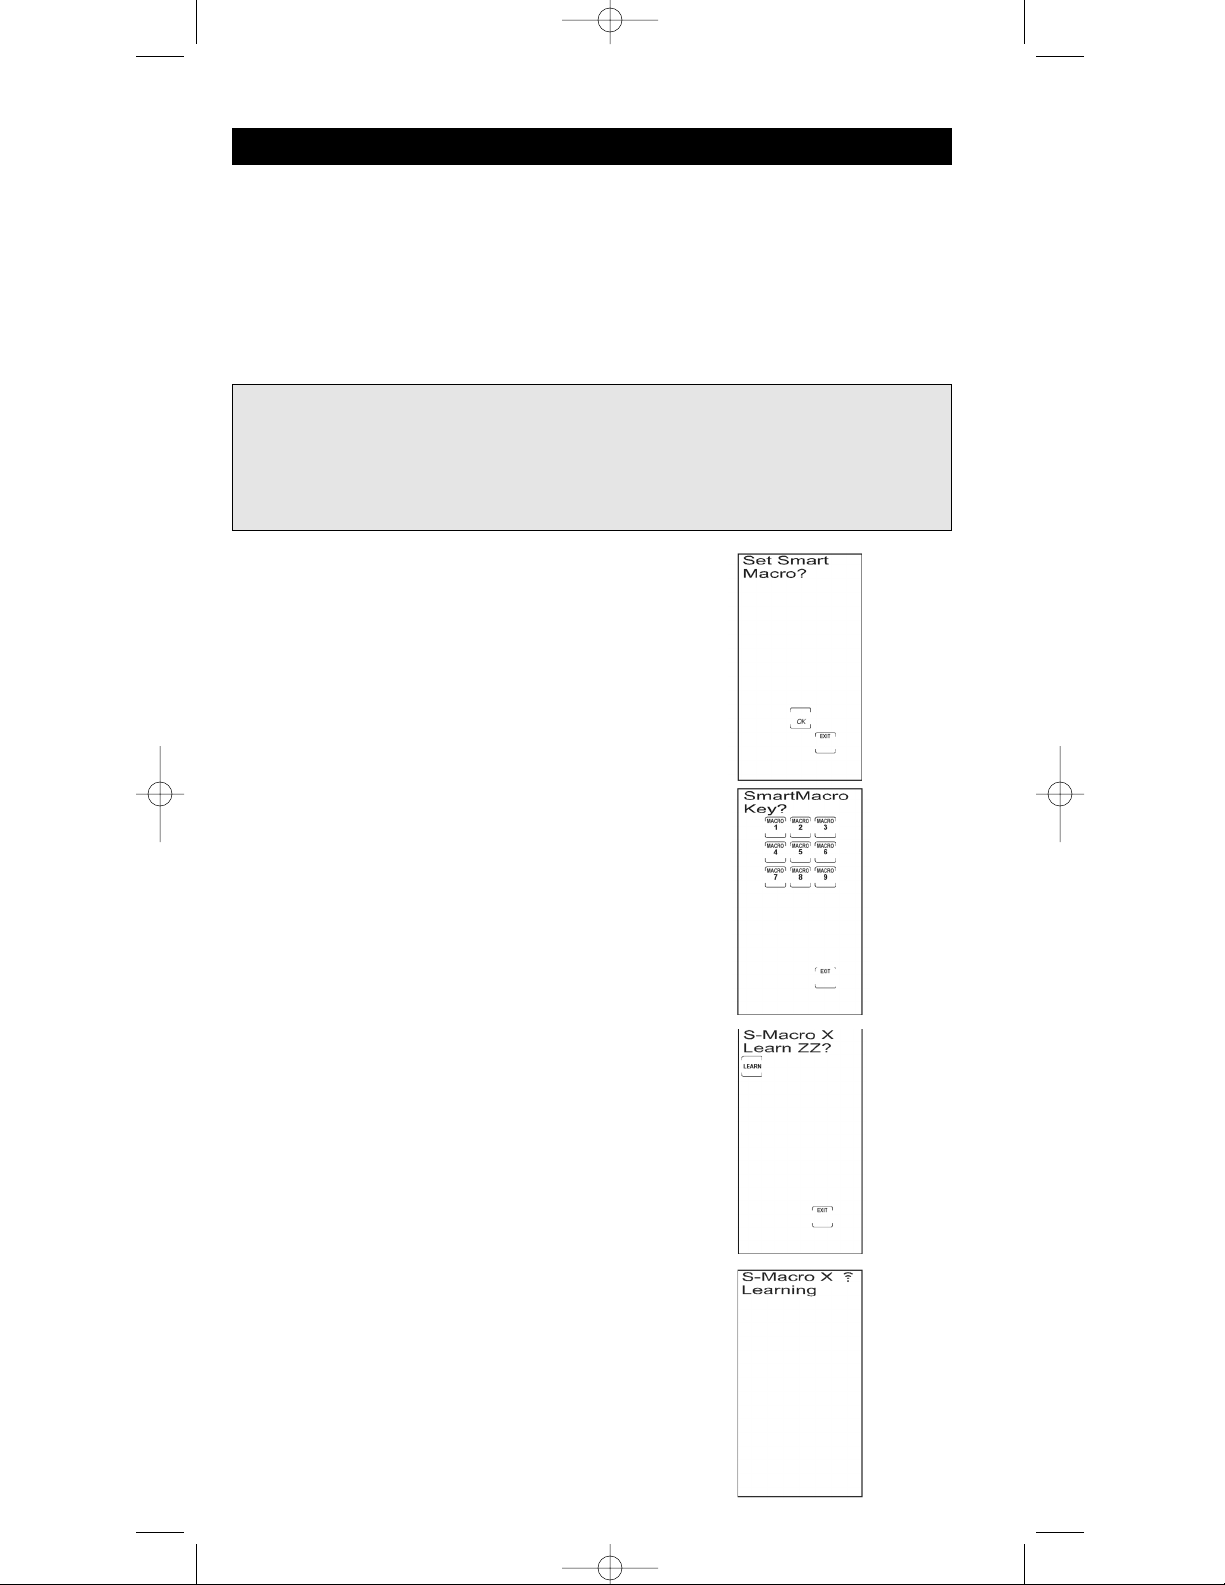
4. Press and hold the SETUP key on the rubber keypad for
2-3 seconds until the LED indicator light remains on and the
touchscreen shows the Code Setup Mode? Screen.
5. Release the SETUP key.
6. Press and release the LCD MACRO Key. The Set SmartMacro?
Screen is displayed.
7. Press and release the LCD OK key.
8. The touchscreen now displays the SmartMacro Key? Screen.
Press and release the digit key under which you want to store
the SmartMacro (from 1-9).
9. The touchscreen now shows the S-MacroX Learn? Screen.
Press and release the LCD LEARN key.
10. The S-Macro X Learning Screen now appears on the
touchscreen. Press and hold the key on the original remote
until the LED indicator light on the RCU1010RF blinks once.
This process takes 2-3 seconds to complete.
Note: If there is a problem during the Learning process,
the S-Macro X Error Screen is displayed for three seconds
but remains in the SmartMacro routine and returns to the
S-Macro X Learning Screen. If no Learned command is
detected, the RCU1010RF will timeout after 30 seconds.
11. Release the original remote key.
RCU_1010_RF_IB_RevA.qxd 9/24/03 10:30 AM Page 20
Page 21
Execute a SmartMacro
To execute a SmartMacro that has been previously programmed, follow these steps:
12. Program additional commands in the order you want them
to be stored in the SmartMacro. To add commands to the
SmartMacro, repeat steps 9-11 above, using the original
remotes to program. Remember: Each time you program a
SmartMacro from a different component, you must put your
original remote in that component mode. If the original
remote is a dedicated remote, e.g., a DVD remote only, this
step is not needed.
13. When finished, press and release the LCD OK key. You can store
up to 20 learned commands under one SmartMacro.
14. Once you are finished programming the Macro, press and
release the LCD OK key on the Confirm to Save? Screen to
confirm and save.
15. The touchscreen returns to the Set SmartMacro? Screen.
16. The SmartMacro programming is complete. To exit the Setup
Mode, press and release the LCD EXIT key, followed by the
LCD OK key on the Exit Setup Screen.
Note: If the LCD EXIT key does not respond, press and release
the SETUP key repeatedly until the Exit Setup Screen appears.
1. Press and release the SETUP key, the BACKLIGHT key, or
any LCD touchscreen key to activate the LCD touchscreen.
2. Press and release the LCD MACRO key.
Note: If no Macros are programmed, the No Macro Stored
Screen is displayed.
3. Press and release the programmed LCD MACRO key number
corresponding to the sequence you wish to activate.
4. If the keypress beep is enabled, you hear a series of beeps as
the Macro executes. The number of beeps you hear corresponds
to the number of Learned commands within the SmartMacro.
Delete a SmartMacro
To delete a SmartMacro that has previously been programmed, follow these steps:
Note: If no Macros have been previously programmed,
this option is not shown in Setup Mode.
1. Press and hold the SETUP key on the rubber keypad for
2-3 seconds until the LED indicator light remains on and the
touchscreen shows the Code Setup Mode? Screen.
2. Release the SETUP key.
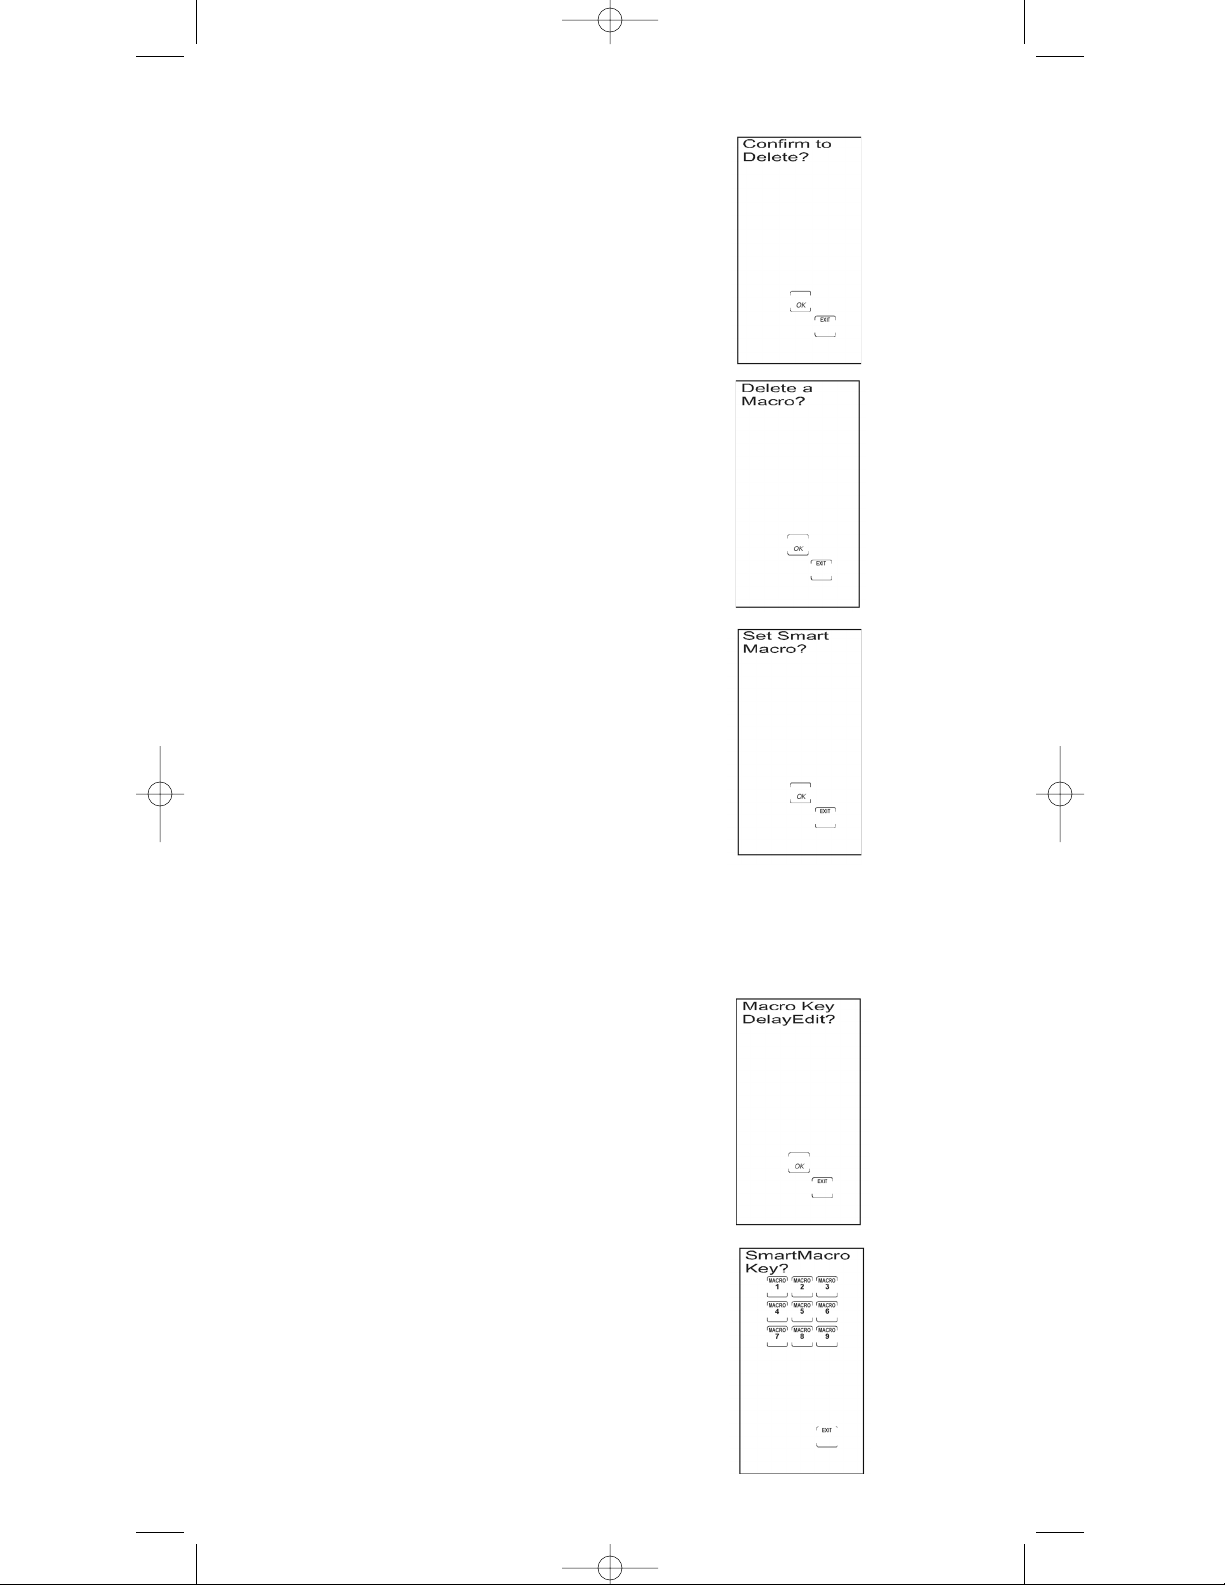
3. Press and release the SETUP key repeatedly until the Delete
a Macro? Screen appears. Press and release the LCD OK key.
4. The LCD displays the Delete Macro Key? Screen. Press and
release the LCD MACRO key (1-9) to select the previously
programmed Macro you wish to delete.
Note: When deleting a Macro, only the programmed Macro
key(s) are displayed on the LCD touchscreen.
21
Delete a SmartMacro (continued on next page)
RCU_1010_RF_IB_RevA.qxd 9/24/03 10:30 AM Page 21
Page 22
22
5. The LCD touchscreen displays the Confirm To Delete? Screen.
Press and release the OK key on the LCD.
Note: If you are in the process of deleting a SmartMacro and
you decide not to delete it, you can abort the deletion process
by pressing the LCD EXIT key.
6. If there are additional Macros already programmed, the
touchscreen displays the Delete a Macro? Screen again.
You may delete additional macros at this point, if you wish.
7. If there are no previously programmed Macros, the
touchscreen displays the Set SmartMacro? Screen.
8. The Macro deletion is now complete. To exit the Setup Mode,
press and release the LCD EXIT key, followed by the LCD OK
key on the Exit Setup Screen.
Edit a SmartMacro Inter-key Delay
It may be necessary to add a delay in between the Macro commands to allow your components
time to respond to all commands within the Macro. Once programmed, you can adjust the time
delays between each command in the Macro sequence. Any delay added to the Macro sequence is
counted as one keystroke of the possible 20 keystrokes for a SmartMacro. To add inter-key delays
to a SmartMacro, follow these steps:
Note: If no Macros have been previously programmed,
this option is not shown in Setup Mode.
1. Press and hold the SETUP key on the rubber keypad for
2-3 seconds until the LED indicator light remains on and
the touchscreen shows the Code Setup Mode? Screen.
2. Release the SETUP key.
3. Press and release the SETUP key repeatedly until the Macro
Key Delay Edit? Screen appears. Press and release the LCD
OK key.
4. The SmartMacro Key? Screen is shown. Press and release
a digit key (1-9) for the Macro you want to edit. Only
previously programmed Macros are displayed. The maximum
delay is 9.5 seconds.
Delete a SmartMacro (continued)
RCU_1010_RF_IB_RevA.qxd 9/24/03 10:30 AM Page 22
Page 23
23
Set an Event Timer
The Event Timer lets you program your RCU1010RF to turn a component (TV, VCR, AUDIO, etc.)
on or off at the preprogrammed time. For example, you can program your AUDIO equipment to
turn music on, program your TV as a Sleep Timer to turn off at a certain time, or program your VCR
to turn on and record. Up to four timer events can be set. However, events you program happen
only once, on the day you program them. You cannot program events for future days; they must
be on the current day. After setting up your Event Timer, be sure to leave the remote pointed at the
component(s) you have programmed it to control. To set an Event Timer, follow these steps:
5. To change the delay time between keys, press and release
the LCD UP or DOWN ARROW key to select the desired
delay time. You can increase the delay time in 0.5 second
increments. Pressing the LCD EXIT key programs the
default delay of 0.5 seconds.
6. After each inter-key delay you program, press and release
the LCD OK key on the Confirm to Overwrite? Screen to
advance to the next inter-key delay.
7. Repeat steps 5-6 for each inter-key delay in the stored
Macro sequence.
8. The SmartMacro Inter-key Delay process is now complete.
To exit the Setup Mode, press the LCD EXIT key, followed
by the LCD OK key on the Exit Setup Screen.
Event Timer
1. Press and hold the SETUP key on the rubber keypad for
2-3 seconds until the LED indicator light remains on and
the touchscreen shows the Code Setup Mode? Screen.
2. Release the SETUP key.
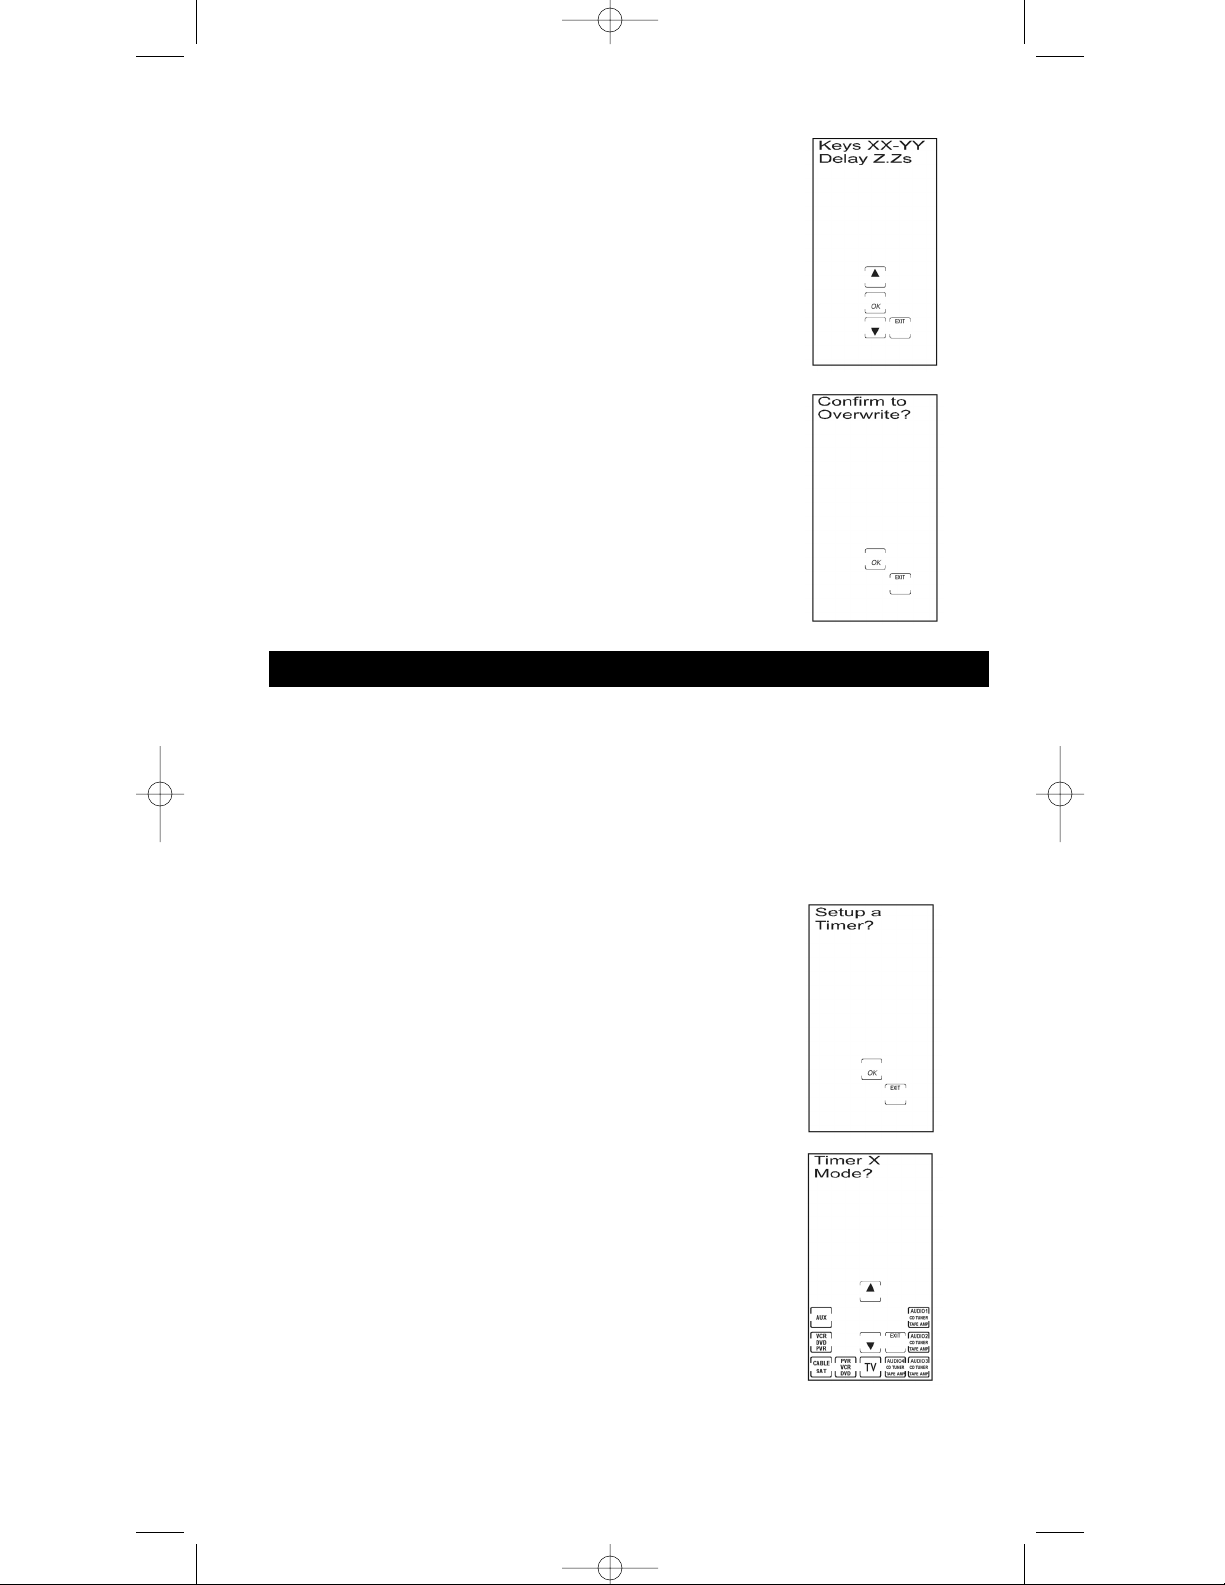
3. Press and release the SETUP key repeatedly until the Setup
a Timer? Screen appears. Press and release the LCD OK key.
4. The Timer 1 Mode? Screen appears. Press and release the
desired component key (TV, VCR, AUX, etc.).
Set an Event Timer (continued on next page)
RCU_1010_RF_IB_RevA.qxd 9/24/03 10:30 AM Page 23
Page 24
24
Delete an Event Timer
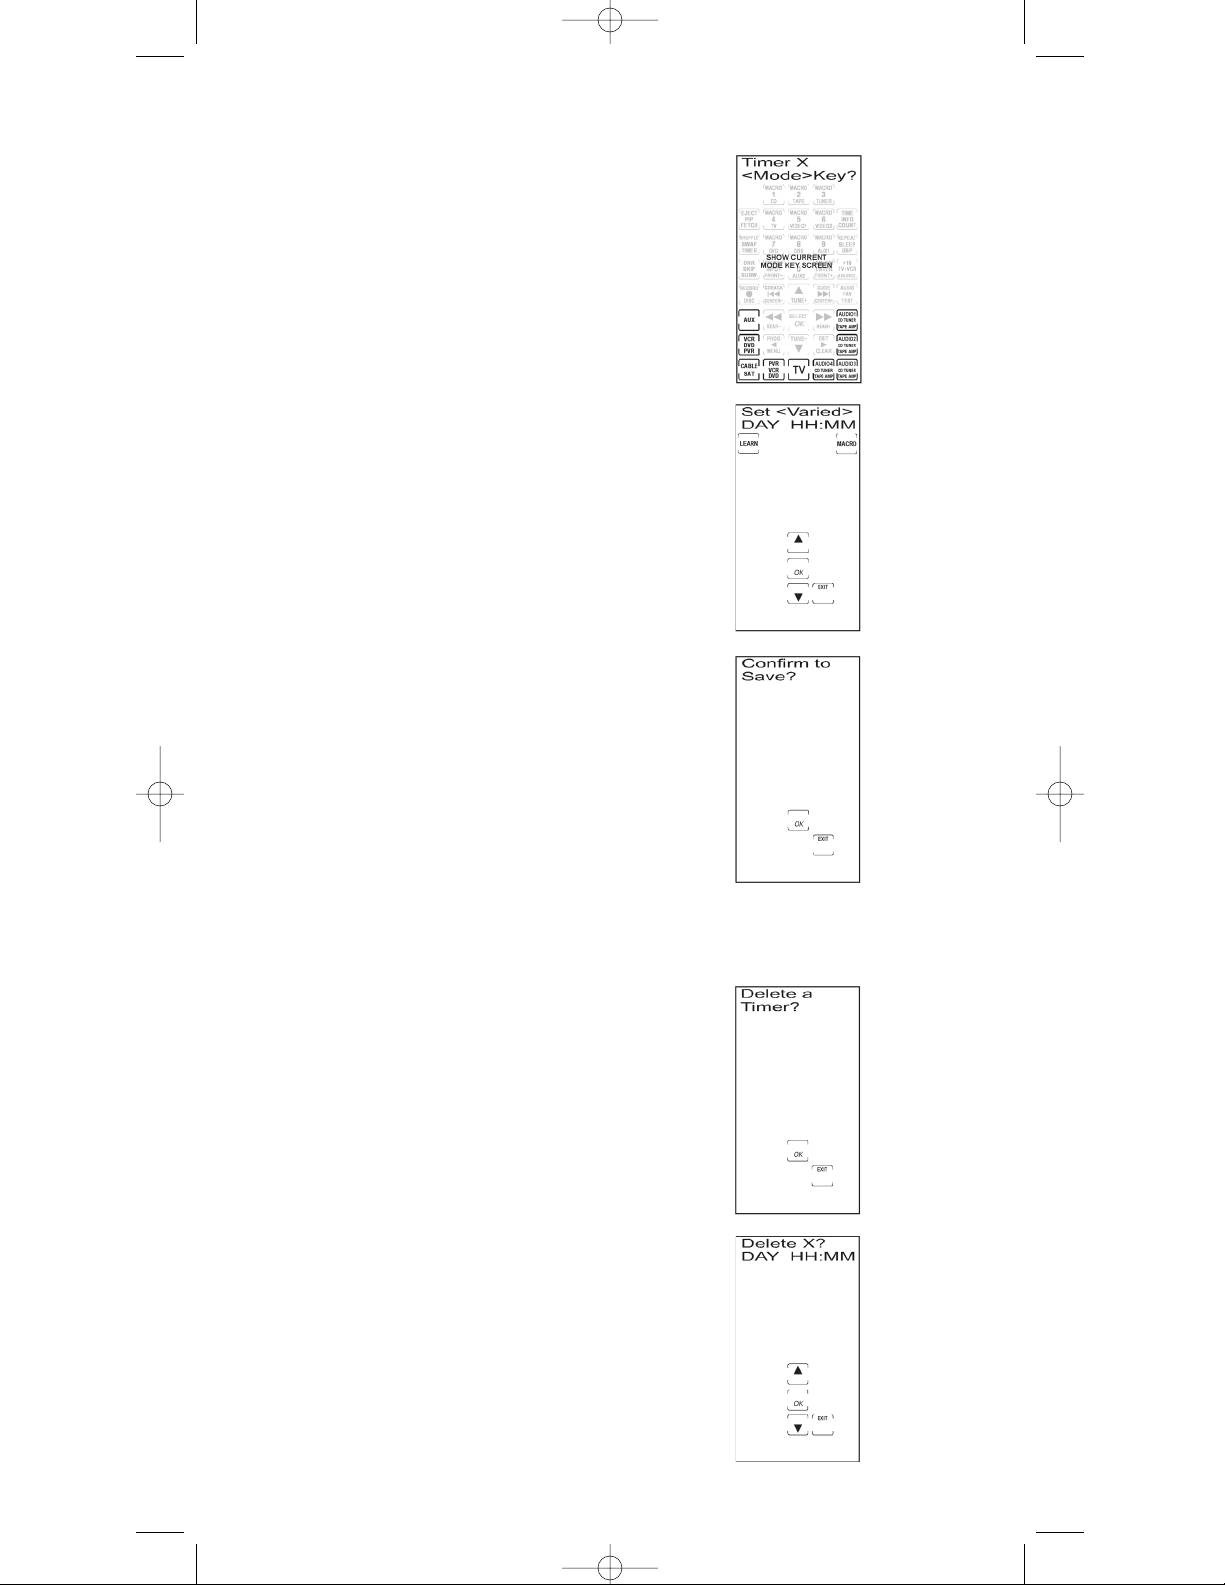
5. The Timer 1 Key? Screen appears. Press and release the key
you want to program to activate after a certain time delay.
For example, to set your VCR to record, press and release the
VCR component key in step 4, then the LCD RECORD key.
6. The Set Hours? Screen appears. The hour (HH) digits are
flashing. The day is not used for Event Timer settings. Press
and release the LCD UP or DOWN ARROW key to select the
desired hour. Press and release the LCD OK key.
7. The minutes (MM) digits are now flashing. Press and release
the LCD UP or DOWN ARROW key to select the minutes.
Press and release the LCD OK key.
8. Press and release the LCD OK key on the Confirm to Save?
Screen to confirm and save.
9. Once the first Event Timer is set, the LCD displays the Timer
2 Mode? Screen for setting the next Event Timer. If you want
to set another Event Timer, repeat steps 4-8. If you do not
want to set any more Event Timers, press and release the
LCD EXIT key.
Note: A symbol (T) will be displayed to signify a Timer is set.
The LCD touchscreen will remain on until the Timer expires.
10. The Set an Event process is now complete. To exit the Setup
Mode, press and release the LCD EXIT key, followed by the
LCD OK key on the Exit Setup Screen.
Any set Event Timer is indicated by the symbol (T) displayed above the clock on your
LCD touchscreen. To delete an Event Timer, follow these steps:
Note: If no Event Timer has been previously set, this option
is not shown in Setup Mode.
1. Press and hold the SETUP key on the rubber keypad for
2-3 seconds until the LED indicator light remains on and the
touchscreen shows the Delete a Timer? Screen.
2. Press and release the LCD OK key.
3. The Delete 1? Screen displays the current day and the
programmed HH:MM Event Timer.
4. The event number is displayed (1, 2, 3, or 4). Press and release
the SETUP key repeatedly until the Event Timer you wish to
delete is displayed.
5. To delete this event, press and release the LCD OK key.
To cancel this operation, press and release the SETUP key
repeatedly until the Exit Setup Screen is displayed. Press
and release the LCD OK key.
Set an Event Timer (continued)
RCU_1010_RF_IB_RevA.qxd 9/24/03 10:31 AM Page 24
Page 25

25
6. The Confirm to Delete? Screen is displayed. Press and release
the LCD OK key. This display returns to either the Delete a
Timer Screen or, if no more Event Timers have been
programmed, to the Exit Setup Screen.
7. Deleting an Event Timer is now complete. To exit
Setup Mode, press and release the LCD OK key at the
Exit Setup Screen.
TV or CD/AUDIO Volume Punch-through
Your RCU1010RF’s Volume Punch-through feature allows you to choose which component mode
(either TV or AUDIO 1, 2, 3 or 4) controls the VOL+, VOL- and MUTE keys on the rubber keypad.
With this feature, your TV volume can work even when you are in VCR Mode, because it “punches
through” from one component to another.
The component you select for Volume Punch-through control must be either the TV or the AUDIO
1, 2, 3 or 4 component programmed with a CD/AUDIO component. The power-on default for
volume control is TV Volume Punch-through.
Once the Volume Punch-through feature is programmed, your TV or AUDIO component VOL+,
VOL- and MUTE keys work even when you are in CABLE, DVD, SAT and VCR Modes.
(Note: Use VCR Mode for PVR/DVR.)
Note: All CD/AUDIO Modes take any Volume/Mute keypress commands from the CD/AUDIO code,
even when the TV is programmed as the Punch-through component. All other components punch
through to the TV Volume/Mute control. When the CD/AUDIO option is chosen as the Punch-through
component, all modes take any Volume/Mute keypress commands from the CD/AUDIO code.
To change the component that controls the VOL+, VOL- and
MUTE keys Punch-through, follow these steps:
1. Press and hold the SETUP key on the rubber keypad for
2-3 seconds until the LED indicator light remains on and the
touchscreen shows the Code Setup Mode? Screen.
2. Release the SETUP key.
3. Press and release the SETUP key repeatedly until the Set
More Options? Screen appears. Press and release the LCD
OK key. The Set Time? Screen appears.
TV or CD/AUDIO Volume Punch-through (continued on next page)
RCU_1010_RF_IB_RevA.qxd 9/24/03 10:31 AM Page 25
Page 26

26
4. Press and release the SETUP key or LCD UP ARROW key
repeatedly until the Set Volume TV<>Audio Screen appears.
Press and release the LCD OK key.
5. The Set Volume TV<>Audio Screen remains in the
display with a solid arrow indicating the current setting.
Press and release the LCD LEFT or RIGHT ARROW key
to select TV or AUDIO. Press and release the LCD OK key
to save the selection.
• If AUDIO is selected, the display shows the Set Volume
AudioMode? Screen for Audio Mode to be used for
VOLUME/MUTE control. Press and release the desired
Audio Mode and press and release the LCD OK key
on the Confirm to Save? Screen to confirm and save.
• If TV is selected, press and release the LCD OK key
on the Confirm to Save? Screen to confirm and save.
6. The LCD displays the Set More Options? Screen. To exit the
Setup Mode, press and release the LCD EXIT key, followed
by the LCD OK key on the Exit Setup Screen.
Your RCU1010RF punches through the five transport keys (REVERSE, PLAY, FORWARD, STOP and
PAUSE) to VCR or DVD Mode, whichever was used most recently. Punch-through to VCR or DVD
transport keys on the rubber keypad is only allowed for TV, VCR, DVD and Cable Modes. The AUX,
SAT and CD/AUDIO transport keys are dedicated to their programmed modes. (Note: Use VCR
Mode for PVR/DVR.)
Note: The LCD shows component changes for the VCR or DVD Punch-through keys if they are
pressed in other modes (e.g., if you are in Cable Mode and you press and release PLAY, either
VCR or DVD is displayed in the LCD).
VCR/DVD Punch-through
Record Key
In the VCR and AUDIO/CD Modes (including Punch-through), the LCD RECORD key must be
pressed twice before the command is sent. This is also true if a VCR component is programmed
under any other mode. The exceptions are for DVD and SAT codes, where the LCD RECORD
key transmits the command after only a single RECORD keypress. (Note: A PVR/DVR operates
under the VCR Mode.)
TV or CD/AUDIO Volume Punch-through (continued)
RCU_1010_RF_IB_RevA.qxd 9/24/03 10:31 AM Page 26
Page 27

27
LCD Touchscreen Display Time
You can choose the length of time (10, 20, 30 … 90 seconds) that the touchscreen remains on after
the last keypress. The power-on default is 10 seconds from the last keypress, after which the unit
automatically turns off. The LCD On Time cannot be set to a length less than the Backlight On Time.
To change the LCD Touchscreen Display Time, follow these steps:
Additional Features
Keypress Beep Feature
Your RCU1010RF beeps whenever a key is pressed to acknowledge the keypress.
You can turn this feature on or off. The default setting is On.
To turn the Keypress Beep on or off, follow these steps:
1. Press and hold the SETUP key on the rubber keypad for
2-3 seconds until the LED indicator light remains on and the
touchscreen shows the Code Setup Mode? Screen.
2. Release the SETUP key.
3. Press and release the SETUP key repeatedly until the Set
More Options? Screen appears. Press and release the LCD
OK key. The Set Time? Screen now appears in the LCD.
4. Press and release the SETUP key or the LCD UP ARROW key
repeatedly until the Set Beep? On<>Off Screen is displayed.
Press and release the LCD OK key.
5. The Set Beep? On<>Off Screen remains in the display with a
solid arrow indicating the current setting. Press and release
the LCD LEFT or RIGHT ARROW key to select On or Off.
Press and release the LCD OK twice to confirm and save the
beep state change on the Confirm to Save? Screen.
6. The LCD displays the Set More Options? Screen and the beep
change is now complete. To exit the Setup Mode, press and
release the LCD EXIT key, followed by the LCD OK key on
the Exit Setup Screen.
1. Press and hold the SETUP key on the rubber keypad for
2-3 seconds until the LED indicator light remains on and the
touchscreen shows the Code Setup Mode? Screen.
2. Release the SETUP key.
3. Press and release the SETUP key repeatedly until the Set
More Options? Screen appears.
LCD Touchscreen Display Time (continued on next page)
RCU_1010_RF_IB_RevA.qxd 9/24/03 10:31 AM Page 27
Page 28

28
LCD Touchscreen Display Time (continued)
4. Press and release the LCD OK key. The Set Time? Screen now
appears in the LCD.
5. Press and release the SETUP key or the LCD UP ARROW key
repeatedly until the Set LCD On Time? Screen is displayed.
Press and release the LCD OK key.
6. The LCD displays the LCD On for 10 Secs Screen (or the
length of time previously programmed). Press and release
the LCD UP or DOWN ARROW keys to select the desired On
Time. You can only change the time in 10-second increments
from 10 to 90 seconds. Press and release the LCD OK key
twice to confirm and save your settings on the Confirm to
Save? Screen.
7. The Set More Options? Screen is displayed. The LCD
Touchscreen Display Time setting is now complete. To exit the
Setup Mode, press and release the LCD EXIT key, followed by
the LCD OK key on the Exit Setup Screen.
Note: The 10-second display time will maximize battery life.
If you have changed the LCD Touchscreen Display Time to
assist in the Setup process, you may want to reset the display
time back to 10 seconds once the Setup process is complete.
Set Day and Time for LCD Display
You can set the day and time the LCD displays. To set the day and time for the LCD display,
follow these steps:
1. Press and hold the SETUP key on the rubber keypad for
2-3 seconds until the LED indicator light remains on and
the touchscreen shows the Code Setup Mode? Screen.
2. Release the SETUP key.
3. Press and release the SETUP key repeatedly until the
Set More Options? Screen appears. Press and release the
LCD OK key.
4. The Set Time? Screen now appears with the current day
(DAY) and time (HH:MM) in the LCD. Press and release
the LCD OK key.
RCU_1010_RF_IB_RevA.qxd 9/24/03 10:31 AM Page 28
Page 29

29
Backlighting
5. The Set Format 12 Hr<>24Hr Screen now appears in the LCD.
A solid arrow indicates the current setting. Press and release
the LCD LEFT or RIGHT ARROW keys to select 12Hr or 24Hr
time format. Press and release the LCD OK key.
6. The Set Day Screen now appears with DAY flashing.
7. Press and release or press and hold the LCD UP or DOWN
ARROW keys to select the DAY. Press and release the LCD
OK key once you have reached the correct day.
8. The HOURS (HH) digits will now be flashing. Press and
release or press and hold the LCD UP or DOWN ARROW
keys to select the hour. Press and release the LCD OK key
once you have reached the correct hour.
Note: To adjust the AM/PM designation, repeatedly scroll
through the hour settings.
9. The MINUTES (MM) digits now flash. Press and release or
press and hold the LCD UP or DOWN ARROW keys to select
the minutes. Press and release the LCD OK key once you
have reached the correct minute setting.
10. Press and release the LCD OK key on the Confirm to Save?
Screen to confirm and save.
11. Upon completion of setting the day, time and hour format,
the Set More Options? Screen appears. The Day and Time
setting is now complete. To exit the Setup Mode, press and
release the LCD EXIT key, followed by the LCD OK key on
the Exit Setup Screen.
Backlight illumination is generated by an Electroluminescent (EL) panel that gives a blue light,
which lets you see the touchscreen and the keys in the dark. Backlight illumination is only activated
when you press and release the BACKLIGHT key on the rubber keypad. Pressing the BACKLIGHT
key will also activate the LCD touchscreen display. After you press and release the BACKLIGHT key,
the light remains on for the power-on default of 10 seconds (or the length of time previously
programmed) if no keys are pressed.
If another key is pressed after the BACKLIGHT key, the illumination continues for another 10
seconds (or the length of time previously programmed) after the key is released. Once the Backlight
time has expired, the Backlight does not re-activate until the BACKLIGHT key is pressed again. If
the Backlight illumination is on, and the BACKLIGHT key is pressed again, the Backlight turns off.
To change the duration of the Backlight On Time, follow these steps:
1. Press and hold the SETUP key on the rubber keypad for
2-3 seconds until the LED indicator light remains on and the
touchscreen shows the Code Setup Mode? Screen.
2. Release the SETUP key.
3. Press and release the SETUP key repeatedly until the Set
More Options? Screen appears. Press and release the LCD
OK key.
Backlighting (continued on next page)
RCU_1010_RF_IB_RevA.qxd 9/24/03 10:31 AM Page 29
Page 30

30
Master Reset
4. The Set Time? Screen now appears in the LCD. Press and
release the SETUP key or the LCD UP ARROW key
repeatedly until the Set Light On Time? Screen is displayed.
Press and release the LCD OK key.
5. The LCD displays the Light On for 10 Secs Screen (or the
length of time previously programmed). Press and release the
LCD UP or DOWN ARROW keys to select the desired On
Time. You can only change the time in 10-second increments
from 10 to 90 seconds.
Note: The Backlight On Time cannot be set greater than
the LCD display time. Press and release the LCD OK key
twice on the Confirm to Save? Screen to confirm and save
your settings.
6. The Set More Options? Screen is displayed. The Backlight On
Time setting is now complete. To exit the Setup Mode, press
and release the LCD EXIT key, followed by the LCD OK key
on the Exit Setup Screen.
A Master Reset returns all the RCU1010RF defaults back to the original factory settings. The Master
Reset clears all customer-programmed codes, Learned commands and SmartMacros, and resets
all key labels.
To perform a Master Reset, follow these steps:
1. Press and hold the SETUP key on the rubber keypad for
2-3 seconds until the LED indicator light remains on and the
touchscreen shows the Code Setup Mode? Screen.
2. Release the SETUP key.
3. Press and release the SETUP key repeatedly until the Reset
ALL? Screen appears.
4. Press and release the LCD OK key.
5. The LCD displays the Confirm to Reset? Screen. Press and
release the LCD OK key. The Please Wait Screen appears and
the LCD touchscreen turns off.
6. All settings are now reset to the factory default.
Backlighting (continued)
RCU_1010_RF_IB_RevA.qxd 9/24/03 10:31 AM Page 30
Page 31

31
The RCA All Power Off feature is available in all normal operating modes. If the ON•OFF key on the
rubber keypad is pressed twice consecutively (within two seconds), all RCA equipment is turned off.
The touchscreen shows the Power Off Screen while this routine is active.
RCA All Power Off Feature
AUDIO FEATURES
AM•FM KEY
The AM•FM allows you to select the AM or FM band on your AUDIO system.
CENTER, FRONT, REAR & TEST KEYS
You can adjust the levels of the center, front and rear speakers by using the LCD UP
ARROW/DOWN ARROW keys. The TEST key is used when you make speaker balance
adjustments to maximize the performance of your AUDIO system.
CD, TAPE, TUNER, TV, VIDEO KEYS
Use the CD, TAPE, TUNER, TV and VIDEO keys to select the component you want to control.
DSP KEY
When the Digital Signal Processing (DSP) Mode is enabled, pressing this key allows you
to cycle through the various DSP Modes.
UP ARROW / DOWN ARROW KEYS
The UP and DOWN ARROW keys are used to make adjustments on delay time, center
speaker output level, rear speaker output level, front speaker level or subwoofer level.
PROG KEY
The PROGRAM key is used to program your AUDIO preset channels.
BACKLIGHT KEY
The BACKLIGHT key turns the LCD and key backlighting on or off.
COMPONENT KEYS
The component keys on the LCD change the component currently being controlled by the remote
(e.g., TV, VCR, CABLE, SAT, DVD, AUDIO 1, 2, 3, 4). The AUDIO 1-4 keys allow you to program
your CD, TUNER, TAPE and AMP player. (Note: The VCR key is used for PVR/DVR.)
ENTER KEY
The LCD ENTER key is used to complete channel selections for some brands of TV’s. It is also used
to complete the highlighted sections when navigating through new screens.
GO BACK KEY
The GO BACK key allows you to go to the previous channel you selected. It operates the same
as the Last Channel, Previous Channel or Recall keys on your existing remote.
GUIDE KEY
If your component is equipped with this feature, the LCD GUIDE key brings up the on-screen
program listing.
INPUT KEY
The LCD INPUT key selects the video inputs of your component, if the component is equipped
with this feature.
LEARN
The LEARN feature is used to supplement the preprogrammed Code Lists. The standard Code Lists
provide most of the functions needed, but you can add a small number of additional functions of
your choice.
LED INDICATOR LIGHT
The Light Emitting Diode (LED) indicator light, located at the upper right-hand side of the RCU1010RF
unit, lights up whenever a rubber key or any LCD touchscreen key is pressed. The LED indicator light
flashes and beeps three times (approximately two seconds) to indicate any error condition.
LIQUID CRYSTAL DISPLAY
The Liquid Crystal Display (LCD) acts as the “virtual keypad” on the remote. The touchscreen is
normally blank when the remote is not in use. Pressing the SETUP or BACKLIGHT key, or touching
anywhere on the LCD, turns the display on. The remaining rubber keys do not activate the display.
NOTE: Please use only your finger to touch the LCD screen. Sharp objects may cause scratches or cracks.
Glossary Of Terms
Glossary of Terms
RCU_1010_RF_IB_RevA.qxd 9/24/03 10:31 AM Page 31
Page 32

32
MENU KEY
The LCD MENU key brings up the Main Menu. If you are already in the menu system, press and
release the LCD OK or MENU keys to select a highlighted choice. Use the LCD NAVIGATION keys
(UP, DOWN, LEFT, and RIGHT ARROW keys) to move through the menu selections.
NOTE: With some brands, the CH+ and CH- and VOL+ and VOL- keys on the rubber keypad navigate
through the highlighted choices. Once you select a component key on the LCD touchscreen (TV, VCR,
DVD, etc.), you put the remote in that mode, and it remains in that mode until you press and release
another mode key. When you put the remote in a specific mode, the control screen for that mode is
shown on the touchscreen. For example, if you put the remote in TV Mode, the screen you see on the
touchscreen is the TV Mode control screen. (Note: The VCR key and the VCR Mode are used for
PVR/DVR operations.)
MUTE KEY
The MUTE key on the rubber keypad mutes the volume on your component with volume control.
NAVIGATION KEYS & SELECT KEY
Use the LCD NAVIGATION keys (UP, DOWN, LEFT and RIGHT ARROW keys) to move the through
on-screen menu and guides. The NAVIGATION keys may also be used to move through the
highlighted choices. The LCD SELECT key chooses the highlighted choice.
NOTE: With some manufactured models, the LCD MENU or ENTER key is used to select the
highlighted choices.
PIP & SWAP KEYS
The LCD Picture-in-Picture (PIP) and SWAP keys operate your TV’s Picture-in-Picture, if equipped
with this feature.
PUNCH-THROUGH
A Punch-through command has the ability to punch through from one component to another
(e.g., pressing the TV VOL+/VOL- keys can work while the remote is in the VCR Mode).
REVERSE, STOP, PLAY, PAUSE, FORWARD KEYS
These rubber keys operate the same as your existing remotes.
SETUP KEY
The SETUP key on the rubber keypad is used to walk you through the steps in setting up the remote.
Setup is used for Code List Entry, Code Search, Code Identification and other functions. During a Setup
function, if no button is pressed for 60 seconds, the remote automatically exits from the Setup routine.
SLEEP KEY
The LCD SLEEP key allows you to turn your TV off automatically, if your TV is equipped with
this feature.
SMARTMACRO
SM
When programmed, the SmartMacro function causes a series of events to occur in sequential order.
Once programmed, pressing the LCD MACRO key activates a screen that allows you to select any
of your programmed Macros. An example of a Macro sequence could be “Turn on the TV; then set
it to channel 3; then turn on the satellite receiver; then set it to channel 57.” You can program and
store nine SmartMacros, each consisting of up to 20 commands.
TIMER
This feature allows an event to happen at a later time on the current day, such as “Turn the TV
on at 7:00 PM.” The Timer Mode allows you to set up to four individual commands and must be
reprogrammed after each event occurs.
TV•VCR KEY
The LCD TV•VCR key operates the same as the TV/VCR or antenna keys on your original remotes.
VOLUME AND CHANNEL KEYS
The VOLUME and CHANNEL keys (VOL+/VOL-, CH+, and CH- keys) on the rubber keypad increase
and decrease the volume level and channel numbers.
NOTE: With some brands, these keys also navigate through the highlighted choices in the menu options.
Glossary of Terms (continued)
RCU_1010_RF_IB_RevA.qxd 9/24/03 10:31 AM Page 32
Page 33

33
PROBLEM
The touchscreen does not show anything when
you touch it or when you press the SETUP
or BACKLIGHT keys.
The remote does not operate your audio
or video components.
You have problems programming a TV/VCR
or TV/DVD combination unit.
Your VCR is not recording.
You have trouble changing the channels
on your TV.
The LCD SELECT key is not responding.
The LCD EXIT key does not respond during
the MACRO or LEARN process.
The IR Learning or SmartMacro processes
cannot be completed successfully.
SOLUTION
•
Replace the batteries with four new
AAA alkaline batteries.
• Check to make sure the batteries are
properly installed.
• Try all code programming procedures
with all the codes from the appropriate
part of the Code Lists.
• Make sure the remote is in the correct mode
for the component you are attempting to
control (TV, VCR, DVD, etc.). (Note: Use
the VCR Mode to operate a PVR/DVR.)
• Make sure the remote is pointed at the
component being operated.
•
Try the VCR or DVD code for your brand.
Some combination units, however, may
require both a TV and a VCR or DVD code
for full operation. To do this, program the TV
code under the TV key and the VCR or DVD
under the VCR or DVD key.
•
As a safety feature on your remote, you
must press the LCD RECORD key twice.
•
If your original remote requires the ENTER key
to be pressed after a channel is selected, press
the LCD ENTER key on the RCU1010RF
to select the channel.
•
Try using the LCD MENU, GUIDE, or
ENTER key to make the selection.
•
Press and release the SETUP key repeatedly
until the Exit Setup Screen appears. Press the
LCD OK key.
• Replace batteries in the RCU1010RF and the
remote from which you are trying to learn.
• The distance between the remotes should
be approximately 2-3 inches.
• Do not conduct the Learning process near
an incandescent lamp.
• The memory capacity is full (20 Learned
commands for each of the nine modes).
• The original remote may not be compatible
with the Learning procedure.
Troubleshooting
The LED indicator light on the RCU1010RF
remote illuminates when you press a key,
but the red light inside the transmitter
does not illuminate.
•
Make sure the Remote Sender Cone is plugged
into an electrical outlet.
•
Make sure you are operating the remote
control unit within 100 feet (30.48 meters)*
of the Remote Sender Cone.
• Extend the antenna all the way up on the
Remote Sender Cone or reposition the antenna
for better reception.
* Range may vary based on home construction
RCU_1010_RF_IB_RevA.qxd 9/24/03 10:31 AM Page 33
Page 34

34
Troubleshooting
PROBLEM
Your component does not respond but the red
light inside the Remote Sender Cone lights when
a key is pressed on the RCU1010RF remote
control unit.
SOLUTION
•
Make sure the Remote Sender Cone is within
20 feet (6.096 meters) of your component(s).
• Check to be sure the front (logo side) of the
Remote Sender Cone is pointing at the front
of your component(s).
• When trying to control multiple components
behind a closed door (entertainment center),
experiment with placement of the Remote
Sender Cone. In most cases, you will be able
to find correct position of the Remote Sender
Cone so that you will not need to use the
IR Extender.
• Make sure there is nothing blocking the
Remote Sender Cone and the component(s).
If something is blocking the signal, attach
the IR Extender (See page 5 for information
on setting up the IR Extender.)
RCU_1010_RF_IB_RevA.qxd 9/24/03 10:31 AM Page 34
Page 35

télécommande
RCU1010RFGarantie limitée de 90 jours
Télécommande
intelligente
universelle à
ÉCRAN TACTILE
et émetteur RF intégré
Cône émetteur
éloigné inclus
Guide de
l’utilisateur
RCU_1010_RF_IB_RevA.qxd 9/24/03 10:31 AM Page 35
Page 36

36
Précautions à prendre
MISE EN GARDE : AFIN DE RÉDUIRE LES RISQUES DE CHOC ÉLECTRIQUE, NE PAS RETIRER LE COUVERCLE
NI L’ARRIÈRE. NE CONTIENT AUCUNE PIÈCE POUVANT ÊTRE RÉPARÉE. CONFIER TOUTE RÉPARATION
À UN TECHNICIEN-RÉPARATEUR COMPÉTENT.
MISE EN GARDE
RISQUE DE CHOC ÉLECTRIQUE
NE PAS OUVRIR
Afin de réduire les risques d’incendie, de choc électrique et de blessures personnelles, prenez les
précautions de base suivantes lorsque vous utilisez votre émetteur de signal de télécommande :
1. Lisez et comprenez toutes les instructions.
2. Respectez toutes les mises en garde et instructions imprimées sur l’appareil.
3. Débranchez l’appareil de la prise de courant murale avant de le nettoyer. Utilisez un chiffon
humide pour le nettoyage. N’utilisez pas de nettoyeurs liquides ou en aérosol.
4. N’utilisez pas l’appareil près d’une baignoire, d’un lavabo, d’un évier, d’une cuve de lavage, dans
un sous-sol humide, dans une piscine ou près de celle-ci ni près d’une autre source d’eau.
5. Ne placez pas l’appareil sur un chariot, un support ou une table instable. Ceux-ci peuvent tomber
et endommager considérablement l’appareil.
6. L’appareil ne doit être branché que dans le type de source de courant indiqué sur l’étiquette. Si
vous n’êtes pas certain du type d’alimentation de votre résidence ou immeuble, consultez le
concessionnaire ou la compagnie d’électricité.
7. Ne démontez pas l’appareil afin de réduire les risques de choc électrique. Apportez-le à un
réparateur compétent pour toute réparation ou tout entretien. Ouvrir et fermer les couvercles peut
vous exposer à des tensions dangereuses ou à d’autres risques et annuler la garantie. Le remontage
incorrect peut produire des chocs électriques à l’utilisation subséquente du système.
8. Débranchez l’appareil de la prise de courant murale et confiez les réparations à un réparateur
compétent dans les conditions suivantes :
a. La fiche est endommagée.
b. Un liquide a été renversé dans l’appareil.
c. L’appareil a été exposé à la pluie ou à l’eau.
d. L’appareil ne fonctionne pas normalement lorsque vous suivez les
instructions de fonctionnement suivantes.
e. Le système a été échappé ou le boîtier a été endommagé.
f. L’appareil présente un changement net de rendement.
9. Le client ne doit en aucun temps tenter de réparer l’appareil.
CET APPAREIL SATISFAIT AUX TERMES DE LA PARTIE 15 DES DIRECTIVES FCC. SON UTILISATION EST
SOUMISE AUX DEUX CONDITIONS SUIVANTES :
1. CET APPAREIL NE PEUT PROVOQUER D’INTERFÉRENCE DANGEREUSE, ET
2. CET APPAREIL DOIT ACCEPTER LA RÉCEPTION DE TOUTES LES INTERFÉRENCES, Y COMPRIS
CELLES QUI PEUVENT PROVOQUER UN FONCTIONNEMENT NON VOULU.
Cet équipement produit et utilise de l’énergie radiofréquence et, s’il n’est pas installé et utilisé correctement, c’est-à-dire
conformément aux instructions rigoureuses du fabricant, peut perturber la réception de radio et de télévision. Il a été testé et
jugé conforme aux limites des appareils de télécommande conformément aux spécifications énoncées dans les sous-alinéas
B et C de la partie 15 du Règlement de la FCC, visant à assurer une protection raisonnable contre une telle interférence dans
une installation résidentielle. Toutefois, il n’est aucunement garanti qu’aucune interférence ne sera produite dans une
installation particulière. Si cet équipement ne perturbe pas la réception de radio et de télévision, ce qui peut être déterminé
en débranchant l’équipement, tentez de corriger l’interférence d’une ou plusieurs des façons suivantes :
• Réorientez l’antenne de radiotélévision qui présente l’interférence.
• Déplacez l’équipement par rapport à la radio ou au téléviseur.
• Éloignez l’équipement de la radio ou du téléviseur.
• Branchez l’équipement dans une prise de courant sur un circuit électrique différent de la radio ou du téléviseur
présentant l’interférence.
• Au besoin, demandez d’autres suggestions à votre détaillant local.
REMARQUE : LES MODIFICATIONS APPORTÉES À CE PRODUIT ANNULERONT LE DROIT D’UTILISER CET ÉQUIPEMENT.
RCU_1010_RF_IB_RevA.qxd 9/24/03 10:31 AM Page 36
Page 37

37
Table des matières
Précautions à prendre . . . . . . . . . . . . . . . . . . . . . . . . . . . . . . . . . . . . . . . . . . . . . . . . . . . . . . . . . . . . . . . . . .36
Introduction . . . . . . . . . . . . . . . . . . . . . . . . . . . . . . . . . . . . . . . . . . . . . . . . . . . . . . . . . . . . . . . . . . . . . . . . . .38
Pourquoi la technologie RF est-elle si spéciale ? . . . . . . . . . . . . . . . . . . . . . . . . . . . . . . . . . . . . . . . . . . . . .38
Contenu du système . . . . . . . . . . . . . . . . . . . . . . . . . . . . . . . . . . . . . . . . . . . . . . . . . . . . . . . . . . . . . . . . . . .38
RCU1010RF . . . . . . . . . . . . . . . . . . . . . . . . . . . . . . . . . . . . . . . . . . . . . . . . . . . . . . . . . . . . . . . . . . . . . . . .39
Cône émetteur éloigné . . . . . . . . . . . . . . . . . . . . . . . . . . . . . . . . . . . . . . . . . . . . . . . . . . . . . . . . . . . . . . .39
Prolongateur IR . . . . . . . . . . . . . . . . . . . . . . . . . . . . . . . . . . . . . . . . . . . . . . . . . . . . . . . . . . . . . . . . . . . . .39
Installation du cône émetteur éloigné . . . . . . . . . . . . . . . . . . . . . . . . . . . . . . . . . . . . . . . . . . . . . . . . . . . . .39
Installation du prolongateur IR . . . . . . . . . . . . . . . . . . . . . . . . . . . . . . . . . . . . . . . . . . . . . . . . . . . . . . . . . .39
Information sur les piles . . . . . . . . . . . . . . . . . . . . . . . . . . . . . . . . . . . . . . . . . . . . . . . . . . . . . . . . . . . . . . . .40
Installation des piles . . . . . . . . . . . . . . . . . . . . . . . . . . . . . . . . . . . . . . . . . . . . . . . . . . . . . . . . . . . . . . . . .40
Économiseur de piles . . . . . . . . . . . . . . . . . . . . . . . . . . . . . . . . . . . . . . . . . . . . . . . . . . . . . . . . . . . . . . . .40
Sauvegardeur de code . . . . . . . . . . . . . . . . . . . . . . . . . . . . . . . . . . . . . . . . . . . . . . . . . . . . . . . . . . . . . . .40
Mise en marche par défaut . . . . . . . . . . . . . . . . . . . . . . . . . . . . . . . . . . . . . . . . . . . . . . . . . . . . . . . . . . .40
Schéma du produit . . . . . . . . . . . . . . . . . . . . . . . . . . . . . . . . . . . . . . . . . . . . . . . . . . . . . . . . . . . . . . . . . . . . .41
Écran tactile ACL . . . . . . . . . . . . . . . . . . . . . . . . . . . . . . . . . . . . . . . . . . . . . . . . . . . . . . . . . . . . . . . . . . . . . .41
Voyant DÉL . . . . . . . . . . . . . . . . . . . . . . . . . . . . . . . . . . . . . . . . . . . . . . . . . . . . . . . . . . . . . . . . . . . . . . . . . . .41
Opérations de programmation . . . . . . . . . . . . . . . . . . . . . . . . . . . . . . . . . . . . . . . . . . . . . . . . . . . . . . . .41-48
Accéder au mode programmation . . . . . . . . . . . . . . . . . . . . . . . . . . . . . . . . . . . . . . . . . . . . . . . . . . . . .42
Mode Quitter la programmation . . . . . . . . . . . . . . . . . . . . . . . . . . . . . . . . . . . . . . . . . . . . . . . . . . . .42-43
Notes générales sur la programmation . . . . . . . . . . . . . . . . . . . . . . . . . . . . . . . . . . . . . . . . . . . . . . . . .43
Écrans de commande d’appareils . . . . . . . . . . . . . . . . . . . . . . . . . . . . . . . . . . . . . . . . . . . . . . . . . . . . . . . . .43
Entrée de code . . . . . . . . . . . . . . . . . . . . . . . . . . . . . . . . . . . . . . . . . . . . . . . . . . . . . . . . . . . . . . . . . . . . . .44-45
Entrée de liste de codes . . . . . . . . . . . . . . . . . . . . . . . . . . . . . . . . . . . . . . . . . . . . . . . . . . . . . . . . . . . .44-45
Recherche de code . . . . . . . . . . . . . . . . . . . . . . . . . . . . . . . . . . . . . . . . . . . . . . . . . . . . . . . . . . . . . . . .45-46
Autorecherche de code . . . . . . . . . . . . . . . . . . . . . . . . . . . . . . . . . . . . . . . . . . . . . . . . . . . . . . . . . . . .46-47
Identification de code . . . . . . . . . . . . . . . . . . . . . . . . . . . . . . . . . . . . . . . . . . . . . . . . . . . . . . . . . . . . . . . .47
Tableau d’identification de code . . . . . . . . . . . . . . . . . . . . . . . . . . . . . . . . . . . . . . . . . . . . . . . . . . . . . . . . . .47
Options d’étiquettes de touches . . . . . . . . . . . . . . . . . . . . . . . . . . . . . . . . . . . . . . . . . . . . . . . . . . . . . . .48-49
Changer les étiquettes de touches d’appareils ACL . . . . . . . . . . . . . . . . . . . . . . . . . . . . . . . . . . . . . . .48
Changer les étiquettes de touches ACL dans un appareil . . . . . . . . . . . . . . . . . . . . . . . . . . . . . . . .48-49
Page de référence des touches apprises . . . . . . . . . . . . . . . . . . . . . . . . . . . . . . . . . . . . . . . . . . . . . . . . . . . .50
Apprentissage . . . . . . . . . . . . . . . . . . . . . . . . . . . . . . . . . . . . . . . . . . . . . . . . . . . . . . . . . . . . . . . . . . . . . .51-53
Conseils d’apprentissage . . . . . . . . . . . . . . . . . . . . . . . . . . . . . . . . . . . . . . . . . . . . . . . . . . . . . . . . . . . . .51
Apprentissage de codes . . . . . . . . . . . . . . . . . . . . . . . . . . . . . . . . . . . . . . . . . . . . . . . . . . . . . . . . . . . . . .51
Apprentissage de commandes . . . . . . . . . . . . . . . . . . . . . . . . . . . . . . . . . . . . . . . . . . . . . . . . . . . . . .51-52
Suppression de toutes les commandes apprises sauvegardées sous un mode . . . . . . . . . . . . . . . . . .53
Suppression complète . . . . . . . . . . . . . . . . . . . . . . . . . . . . . . . . . . . . . . . . . . . . . . . . . . . . . . . . . . . . . . . .53
Opérations de la touche SmartMacroMS . . . . . . . . . . . . . . . . . . . . . . . . . . . . . . . . . . . . . . . . . . . . . . . . . .54-57
Programmer une macro SmartMacro . . . . . . . . . . . . . . . . . . . . . . . . . . . . . . . . . . . . . . . . . . . . . . . .54-55
Exécuter une macro SmartMacro . . . . . . . . . . . . . . . . . . . . . . . . . . . . . . . . . . . . . . . . . . . . . . . . . . . . . .55
Supprimer une macro SmartMacro . . . . . . . . . . . . . . . . . . . . . . . . . . . . . . . . . . . . . . . . . . . . . . . . . .55-56
Modifier un délai intertouches SmartMacro . . . . . . . . . . . . . . . . . . . . . . . . . . . . . . . . . . . . . . . . . . .56-57
Minuterie d’événement . . . . . . . . . . . . . . . . . . . . . . . . . . . . . . . . . . . . . . . . . . . . . . . . . . . . . . . . . . . . . .57-59
Programmation d’une minuterie d’événement . . . . . . . . . . . . . . . . . . . . . . . . . . . . . . . . . . . . . . . .57-58
Suppression d’une minuterie d’événement . . . . . . . . . . . . . . . . . . . . . . . . . . . . . . . . . . . . . . . . . . .58-59
Transfert de volume de téléviseur ou lecteur CD/AUDIO . . . . . . . . . . . . . . . . . . . . . . . . . . . . . . . . .59-60
Transfert Magnétoscope/DVD . . . . . . . . . . . . . . . . . . . . . . . . . . . . . . . . . . . . . . . . . . . . . . . . . . . . . . . . . . .60
Touche Record . . . . . . . . . . . . . . . . . . . . . . . . . . . . . . . . . . . . . . . . . . . . . . . . . . . . . . . . . . . . . . . . . . . . . . . .60
Autres caractéristiques . . . . . . . . . . . . . . . . . . . . . . . . . . . . . . . . . . . . . . . . . . . . . . . . . . . . . . . . . . . . . . .61-65
Fonction de bip d’enfoncement de touche . . . . . . . . . . . . . . . . . . . . . . . . . . . . . . . . . . . . . . . . . . . . . . .61
Durée d’affichage de l’écran tactile ACL . . . . . . . . . . . . . . . . . . . . . . . . . . . . . . . . . . . . . . . . . . . . . .61-62
Régler le jour et l’heure de l’affichage ACL . . . . . . . . . . . . . . . . . . . . . . . . . . . . . . . . . . . . . . . . . . .62-63
Rétroéclairage . . . . . . . . . . . . . . . . . . . . . . . . . . . . . . . . . . . . . . . . . . . . . . . . . . . . . . . . . . . . . . . . . . . .63-64
Rétablissement général . . . . . . . . . . . . . . . . . . . . . . . . . . . . . . . . . . . . . . . . . . . . . . . . . . . . . . . . . . . . . . .64
Fonction Mise à l’arrêt général RCA . . . . . . . . . . . . . . . . . . . . . . . . . . . . . . . . . . . . . . . . . . . . . . . . . . .65
Glossaire . . . . . . . . . . . . . . . . . . . . . . . . . . . . . . . . . . . . . . . . . . . . . . . . . . . . . . . . . . . . . . . . . . . . . . . . . . .65-66
Dépannage . . . . . . . . . . . . . . . . . . . . . . . . . . . . . . . . . . . . . . . . . . . . . . . . . . . . . . . . . . . . . . . . . . . . . . . . .67-68
Guide de l’utilisateur en français . . . . . . . . . . . . . . . . . . . . . . . . . . . . . . . . . . . . . . . . . . . . . . . . . . . . . .36-68
Liste de codes . . . . . . . . . . . . . . . . . . . . . . . . . . . . . . . . . . . . . . . . . . . . . . . . . . . . . . . . . . . . . . . . . . . . . .69-77
Assistance téléphonique . . . . . . . . . . . . . . . . . . . . . . . . . . . . . . . . . . . . . . . . . . . . . . . . . . . . . . . . . . . . . . . .78
Garantie limitée de 90 jours . . . . . . . . . . . . . . . . . . . . . . . . . . . . . . . . . . . . . . . . . . . . . . . . . . . . . . . . . . . . .78
RCU_1010_RF_IB_RevA.qxd 9/24/03 10:31 AM Page 37
Page 38

38
Télécommande intelligente universelle
à ÉCRAN TACTILE et émetteur
RF intégré Cône émetteur
éloigné inclus
Nous vous félicitons d’avoir acheté la télécommande intelligente universelle RCU1010RF à écran tactile et
émetteur intégré à cône émetteur éloigné additionnel. Cet appareil est l’une des télécommandes les plus
complexes et les plus simples à utiliser sur le marché. Grâce à la RCU1010RF, fini les nombreuses télécommandes
encombrantes ! Cette télécommande permet de commander un maximum de neuf appareils, dont les marques
les plus populaires de téléviseurs, magnétoscopes, lecteurs DVD, récepteurs de satellite, PVR/DVR, systèmes
CBL/AUX, lecteurs·CD et appareils AUDIO, même lorsque le capteur IR de l’appareil n’est pas visible.
Télécommande intelligente universelle à ÉCRAN TACTILE et émetteur RF intégré à cône émetteur
éloigné Cette télécommande RCU1010RF dispose d’un émetteur RF qui permet de transmettre les
commandes aux appareils par signaux infrarouges (IR) et radiofréquences (RF). Puisque la RCU1010RF
fonctionne par radiofréquence, il n’est pas nécessaire de pointer la télécommande directement en direction
du capteur IR de l’appareil, ce qui facilite considérablement le placement des appareils électroniques.
L’ajout du cône émetteur éloigné inclus et du prolongateur IR signifie que vous pouvez commander vos
appareils même quand la télécommande ne peut les voir.
La RCU1010RF peut apprendre des commandes des télécommandes existantes, et la fonction SmartMacro
MS
permet d’exécuter plusieurs commandes par une seule pression de touche. La RCU1010RF est facile à
utiliser, facile à programmer et vous donne le plein contrôle — au bout des doigts !
Pourquoi la technologie RF est-elle si spéciale ?
Votre RCU1010RF transmet les signaux infrarouges (IR) et radiofréquence (RF). La plupart des
télécommandes émettent seulement des signaux IR et doivent être pointées directement en direction
du capteur IR de votre appareil électronique pour fonctionner correctement. Puisque la RCU1010RF
dispose de la fonction radiofréquence, il n’est pas nécessaire de pointer la télécommande en direction
du récepteur ; en fait, il n’est même pas nécessaire qu’elle se trouve dans la même pièce ! Les signaux
RF traversent toute la maison et permettent de commander tous vos appareils, où que vous soyez !
Quels sont les avantages pour vos appareils électroniques ? Ils sont nombreux !
D’abord, vous pouvez placer votre appareil (magnétoscope, lecteur DVD, etc.) dans un meuble fermé
; la RCU1010RF émettra les signaux appropriés. Vous pouvez ainsi configurer beaucoup plus
facilement votre centre de divertissement au foyer.
Ensuite, si votre récepteur de satellite est à l’étage, la RCU1010RF permet de changer le canal du rezde-chaussée. (Câblage additionnel requis.)
De plus, la RCU1010RF transmet les signaux à travers les murs, les planchers, les plafonds, voire
même vers la terrasse extérieure ; vous pouvez donc commander vos appareils où que vous soyez.
Par exemple, si vous écoutez de la musique par les enceintes acoustiques sans fil de la terrasse, vous
pouvez utiliser la RCU1010RF pour régler le volume sans rentrer dans la maison !
La RCU1010RF déborde de caractéristiques pratiques et ses fonctions RF en font la télécommande
idéale pour ajouter à la commodité et à la souplesse d’utilisation.
RCU_1010_RF_IB_RevA.qxd 9/24/03 10:31 AM Page 38
Page 39
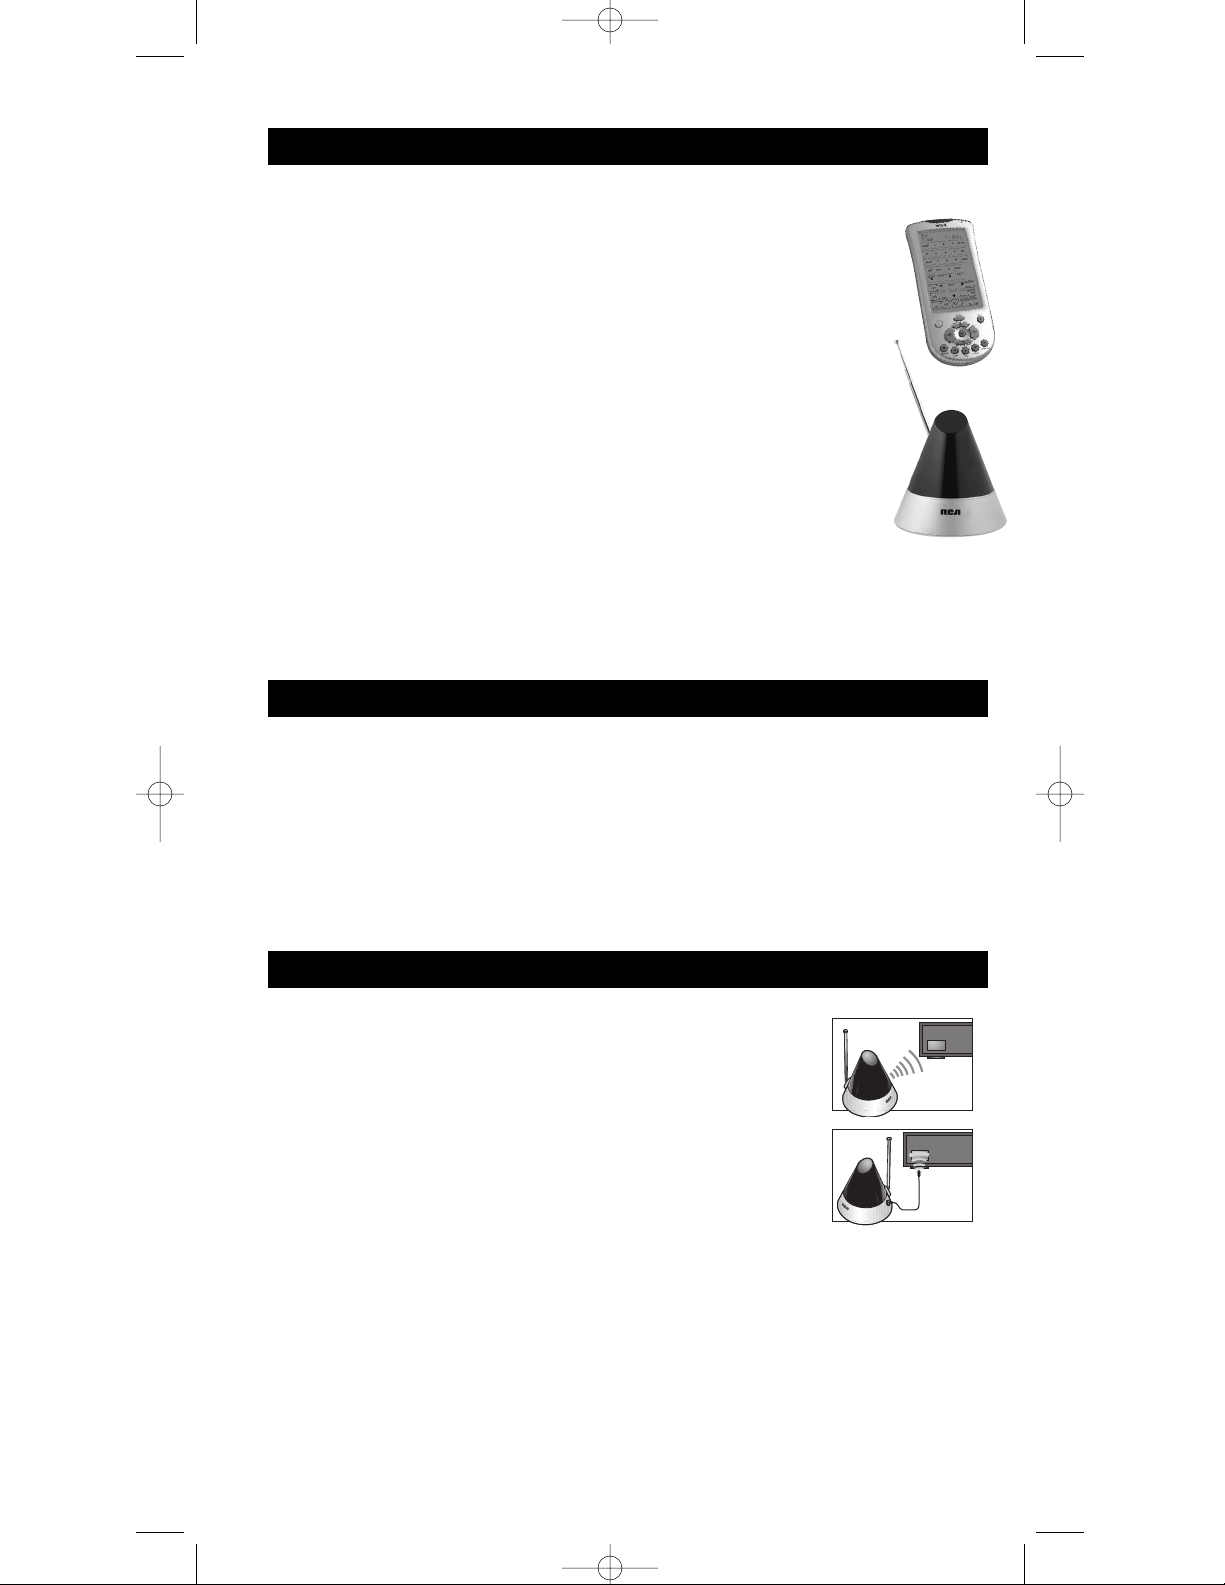
La RCU1010RF se compose de trois éléments : la télécommande RCU1010RF, le cône émetteur
éloigné et le prolongateur IR.
RCU1010RF
La RCU1010RF est l’une des plus télécommandes les plus avancées sur le marché. Elle
commande un maximum de neuf appareils, dont les marques les plus populaires de
téléviseurs, magnétoscopes, lecteurs DVD, récepteurs de satellite, PVR/DVR, CBL/AUX
et appareils CD. En transmettant les signaux infrarouges (IR) et radiofréquence (RF), la
RCU1010RF offre une souplesse et une commodité inégalées. L’écran tactile permet de
programmer et d’utiliser la télécommande avec de nombreux appareils. L’écran tactile
ACL affiche un écran différent pour chaque mode d’appareil (jusqu’à neuf appareils) et
chaque écran comporte un maximum de 40 touches.
CÔNE ÉMETTEUR ÉLOIGNÉ
Le cône émetteur éloigné comprend une antenne, un cordon d’alimentation et une prise
pour le prolongateur IR. Le cône émetteur éloigné saisit les transmissions radiofréquence
de la télécommande. Un voyant indique qu’un signal est reçu. Le cône émetteur éloigné
convertit alors les transmissions RF en signaux IR utilisés pour commander vos appareils.
Ce cône peut fonctionner à un maximum de 100* pieds de la télécommande.
PROLONGATEUR IR
Dans la plupart des cas, il n’est pas nécessaire d’utiliser du tout le prolongateur IR. Vous pouvez utiliser
le prolongateur IR lorsque vous ne pouvez placer le cône émetteur éloigné devant le ou les appareils à
commander. Ce dispositif se compose d’une diode IR raccordée à un fil de quatre pieds et à une fiche.
Le prolongateur IR est branché dans le récepteur RF et la diode est placée devant le ou les appareils.
Suivez ces quelques étapes simples pour installer le cône émetteur éloigné.
1. Placez le cône émetteur éloigné dans la pièce où les appareils à commander sont installés.
2. Branchez le cône émetteur éloigné dans une prise de courant standard.
3. Pointez le devant de la télécommande (côté logo) en direction des appareils à commander.
4. Étendez l’antenne pour obtenir un meilleur rendement.
5. Assurez-vous que le cône émetteur éloigné est placé à moins de 20 pieds (6,096 mètres) des
appareils à commander. La télécommande fonctionne à une distance maximale de 100 pieds
(30,48 mètres)* du cône émetteur éloigné.
Remarque : Le cône émetteur éloigné doit être placé dans la ligne de vue des appareils à commander.
Lorsque vous tentez de commander plusieurs appareils placés derrière une porte
fermée (centre de divertissement), essayez d’abord de placer le cône émetteur
éloigné à différents endroits. Dans la plupart des cas, vous pourrez placer le cône
émetteur éloigné dans un endroit permettant de ne pas utiliser le prolongateur IR
(voir Figure A). Si vous parvenez difficilement à placer le cône émetteur éloigné
devant tous les appareils à commander, utilisez l’extension IR pour aider à
diriger clairement le parcours du signal IR vers vos appareils (voir Figure B). Il
est préférable d’utiliser l’extension IR pour diriger le signal IR vers un seul
appareil. Suivez ces étapes simples pour installer le prolongateur IR.
1. Branchez l’extension IR à l’arrière du cône émetteur éloigné.
2. Placez la diode IR (située du côté opposé du cordon prolongateur) en ligne
directe avec le capteur IR de votre appareil pour permettre la transmission
des signaux.
Vous pouvez maintenant utiliser votre télécommande comme d’habitude —
vous n’avez pas à vous demander si les appareils reçoivent le signal.
Vous saisissez ?
39
Contenu du système
Installation du cône émetteur éloigné
Installation du prolongateur IR
*La portée peut varier selon la construction de la maison.
A.
B.
RCU_1010_RF_IB_RevA.qxd 9/24/03 10:31 AM Page 39
Page 40

40
Information sur les piles
La télécommande intelligente universelle RCU1010RF à écran tactile et émetteur RF intégré
fonctionne avec quatre piles alcalines AAA (vendues séparément).
Installation des piles
Pour installer les piles dans la télécommande :
1. Tournez la télécommande sens dessus dessous, appuyez sur la languette et faites glisser le
couvercle vers le bas.
2. Insérez les piles, en faisant correspondre les marques (+) et (-) à l’intérieur du logement à piles.
3. Glissez la porte du logement à piles en place.
Économiseur de piles
La RCU1010RF économise l’énergie des piles en s’éteignant automatiquement si aucune touche n’est
enfoncée pendant plus de 30 secondes. Ceci permet d’économiser les piles si la télécommande reste
coincée dans un endroit où les touches demeurent enfoncées, comme sous un livre ou entre les
coussins du sofa.
Sauvegardeur de code
Grâce à la RCU1010RF, vous ne vous souciez plus de perdre l’information programmée quand vous
remplacez les piles. Tous les paramètres programmés sont conservés indéfiniment en cas de
remplacement des piles.
Mise en marche par défaut
Lorsque vous remplacez les piles, la télécommande RCU1010RF se met toujours en marche en mode
TV. Si le téléviseur, le magnétoscope ou le récepteur de satellite sont de marque RCA, ProScan ou
GE, il se peut que vous n’ayez même pas à programmer la RCU1010RF pour les commander. Dans
ces cas, la télécommande devrait fonctionner dès que les piles sont installées.
RCU_1010_RF_IB_RevA.qxd 9/24/03 10:31 AM Page 40
Page 41
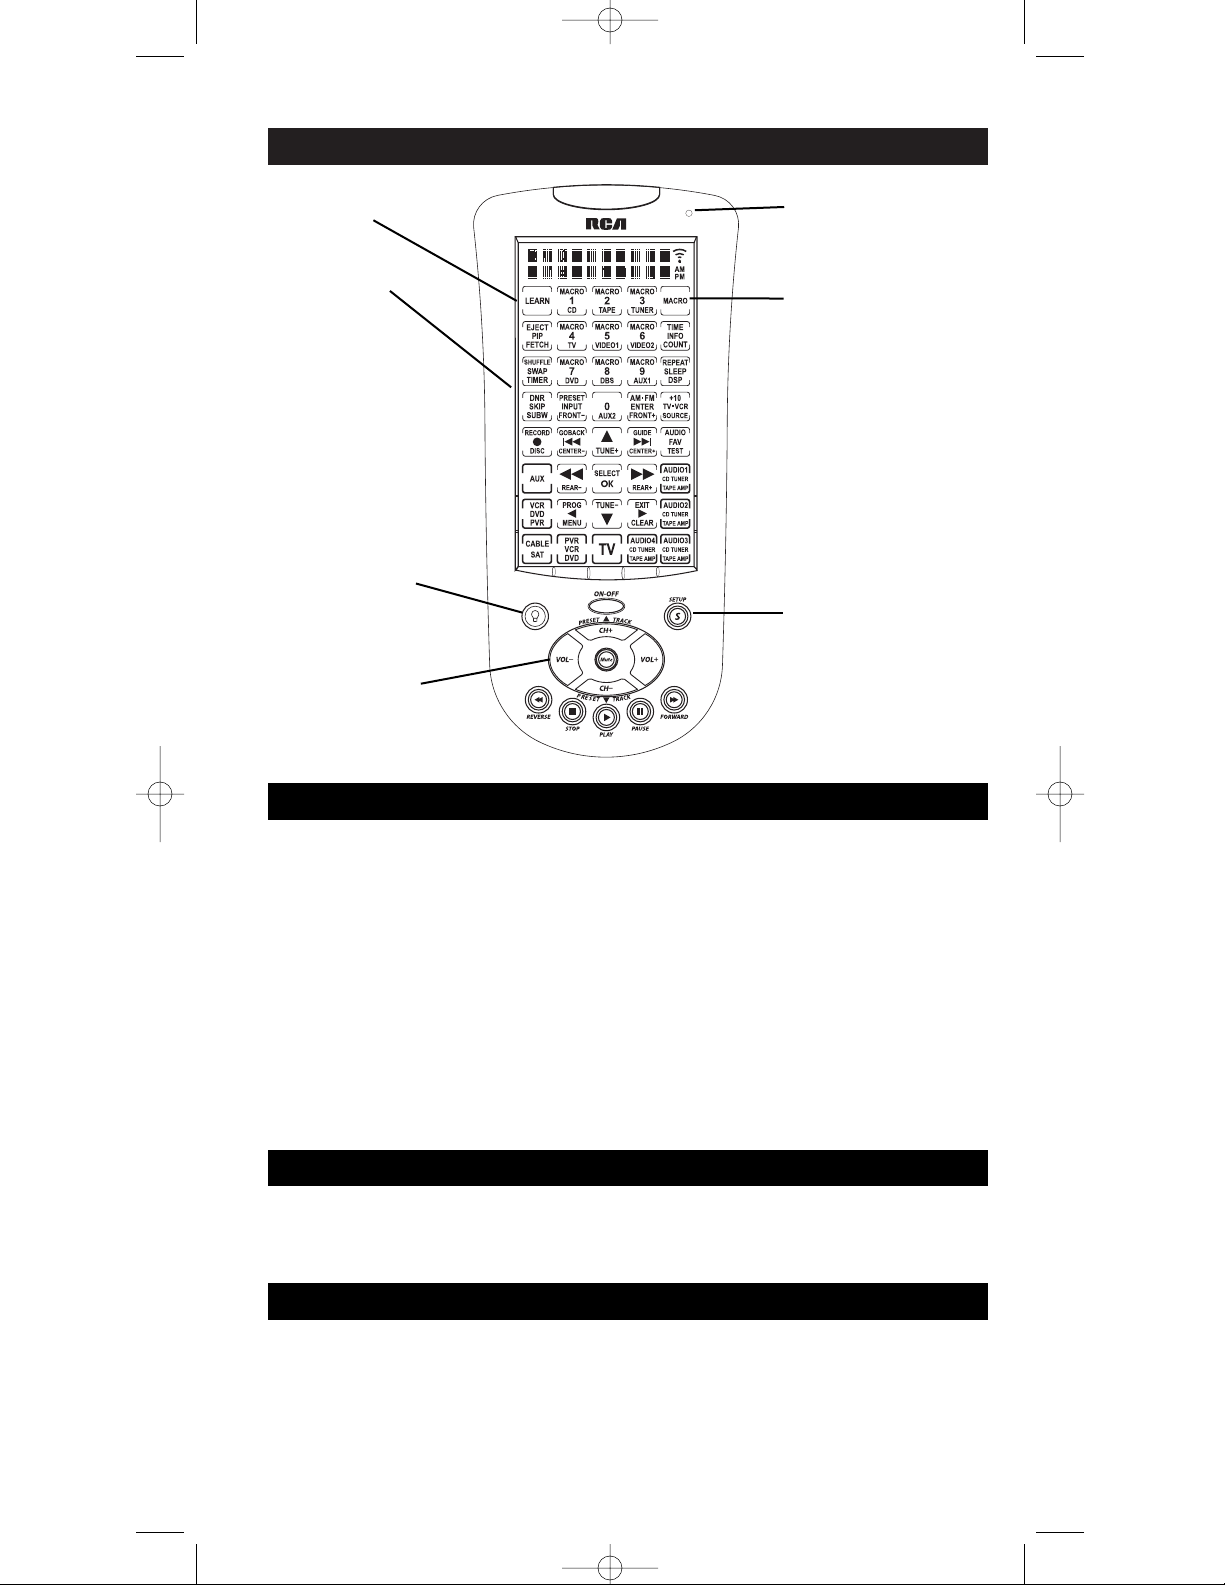
41
RCU1010RF
Afficheur à cristaux
liquides (ACL)
Touche SETUP
Touches d’accès rapide
Touche LEARN
Voyant DÉL
Touche BACKLIGHT
Touche MACRO
L’écran tactile ACL (affichage à cristaux liquides) de la RCU1010RF agit comme un “clavier virtuel”. Cet
écran tactile facilite la programmation et l’utilisation de la télécommande avec de nombreux appareils.
Dans ce guide, “appareil” signifie votre équipement électronique—téléviseur, magnétoscope, lecteur DVD,
récepteur de satellite, PVR/DVR, appareils CCBL/AUX, lecteur CD et appareils AUDIO—que vous
pouvez commander à l’aide de la télécommande RCU1010RF. Lorsque vous appuyez sur une touche
d’appareil à l’écran tactile ACL, vous placez la télécommande dans ce mode (ex. : le fait d’appuyer sur la
touche TV place la télécommande en mode téléviseur), et celle-ci reste dans ce mode jusqu’à ce que vous
appuyiez sur une autre touche de mode. Quand vous placez la télécommande dans un mode particulier,
l’écran de commande de ce mode apparaît à l’écran tactile. Par exemple, si vous placez la télécommande
en mode TV, l’écran de commande à l’écran tactile correspond au mode TV. Chaque écran tactile ACL
comprend un maximum de 40 touches.
L’afficheur tactile ACL demeure vide lorsque la télécommande n’est pas utilisée. L’écran tactile ACL
s’allume automatiquement quand vous appuyez sur la touche SETUP, la touche BACKLIGHT ou une
touche de l’écran tactile ACL. Les autres touches de caoutchouc n’activent pas l’écran tactile ACL.
Le voyant DÉL (diode électroluminescente), situé sur le côté supérieur droit de la télécommande
RCU1010RF, s’allume quand une touche de caoutchouc ou une touche d’écran tactile ACL est enfoncée.
Le voyant DÉL clignote et émet trois bips (environ deux secondes) pour indiquer un état d’erreur.
La touche SETUP se trouve du côté inférieur droit de la télécommande. La touche SETUP permet de
parcourir les étapes de programmation de la télécommande. Pour accéder au mode programmation,
maintenez la touche SETUP enfoncée sur le clavier de caoutchouc pendant 2 ou 3 secondes, jusqu’à
ce que le voyant DÉL reste allumé. Appuyez plusieurs fois sur la touche SETUP pour parcourir tous
les choix de programmation disponibles.
Écran tactile ACL
Opérations de programmation
Voyant DÉL
RCU_1010_RF_IB_RevA.qxd 9/24/03 10:31 AM Page 41
Page 42

1. Appuyez sur la touche LCD EXIT de l’écran tactile. Appuyez
ensuite sur la touche ACL OK à l’écran Exit Setup. La
télécommande est maintenant en mode de fonctionnement normal.
OU
2. Appuyez plusieurs fois sur la touche SETUP jusqu’à ce que l’écran
ACL montre l’écran Exit Setup. Appuyez sur la touche ACL OK.
La télécommande est maintenant en mode de fonctionnement normal.
Voici les éléments à l’écran disponibles en mode programmation.
1. Mode de programmation de code ?
2. Mode recherche de code ?
3. Mode étiquettes de touches ?
4. Programmer SmartMacro?
5. Supprimer une macro ?
(Apparaît seulement quand une
fonction macro a été programmée.)
6. Modifier le délai de touche macro?
(Apparaît seulement quand une
fonction macro a été programmée.)
7. Programmer une minuterie ?
8. Supprimer une minuterie ?
(Apparaît seulement quand une
fonction de minuterie a été programmée.)
9. Mode Apprentissage IR ?
10. Supprimer le mode IR ?
(Apparaît seulement quand une
fonction IR a été apprise.)
11. Supprimer TOUS IR?
(Apparaît seulement quand
une fonction IR a été apprise.)
12. Programmer d’autres options ?
a) Programmer l’heure?
b) Programmer le bip?
c)
Programmer la durée de marche ACL?
d) Programmer la durée de marche
de rétroéclairage?
e) Programmer le volume TV<>AUDIO?
13. Rétablir TOUT ?
14. Quitter la programmation
42
Accéder au mode programmation
Mode Quitter la programmation
+
+
Procédez comme suit pour quitter le mode programmation en tout temps et retourner au fonctionnement normal :
RCU_1010_RF_IB_RevA.qxd 9/24/03 10:31 AM Page 42
Page 43

La télécommande RCU1010RF affiche un écran de commande différent pour chacun des neuf
appareils. Vous pouvez facilement passer d’un appareil à l’autre en appuyant simplement sur la
touche d’appareil ACL désirée.
Durant une fonction de programmation, si aucune touche n’est enfoncée pendant 60 secondes, la
télécommande quitte automatiquement le mode de programmation. Le voyant DÉL clignote pour
indiquer une erreur dans ce cas et l’écran ACL montre l’écran TimeOut pendant trois secondes. Toute
opération qui n’est pas exécutée avant le délai prescrit n’est pas sauvegardée.
Notes générales sur la programmation
1. En mode programmation, appuyez sur la touche LCD LEARN pour passer automatiquement à
l’écran Learn IR Mode?.
2. En mode programmation, appuyez sur la touche LCD MACRO pour passer automatiquement à
l’écran Set SmartMacro?.
3. À tout moment durant la programmation, lorsqu’une “sauvegarde” est effectuée, l’écran Confirm
to Save? est affiché. Appuyez sur la touche LCD OK pour sauvegarder ou sur la touche LCD
EXIT pour quitter sans sauvegarder les changements.
4. À tout moment durant la programmation, lorsqu’un “remplacement” est effectué (ex. : remplacer
des macros, modes appris, etc.), l’écran Confirm to Overwrite? apparaît. Appuyez sur la touche
LCD OK pour confirmer le changement, ou sur la touche LCD EXIT pour quitter sans remplacer
d’information.
5. À tout moment durant la programmation, lorsqu’une “suppression” est effectuée (ex. :
suppression de macros, minuteries, etc.), l’écran Confirm to Delete? apparaît. Appuyez sur la
touche LCD OK pour confirmer la suppression, ou sur la touche LCD EXIT pour quitter sans
supprimer d’information.
6. À tout moment durant la programmation, lorsqu’un “changement” est effectué, l’écran Success
apparaît pendant une seconde pour confirmer l’action.
7. Remarque : Pour toutes les fonctions de programmation et d’utilisation, utilisez la touche VCR
et le mode VCR pour commander un PVR/DVR.
43
Écrans de commande d’appareils
Écran par défaut – télé
Écran par défaut – magnétoscope
(Utilisez aussi pour PVR/DVR)
Écran par défaut – DVD
RCU_1010_RF_IB_RevA.qxd 9/24/03 10:31 AM Page 43
Page 44
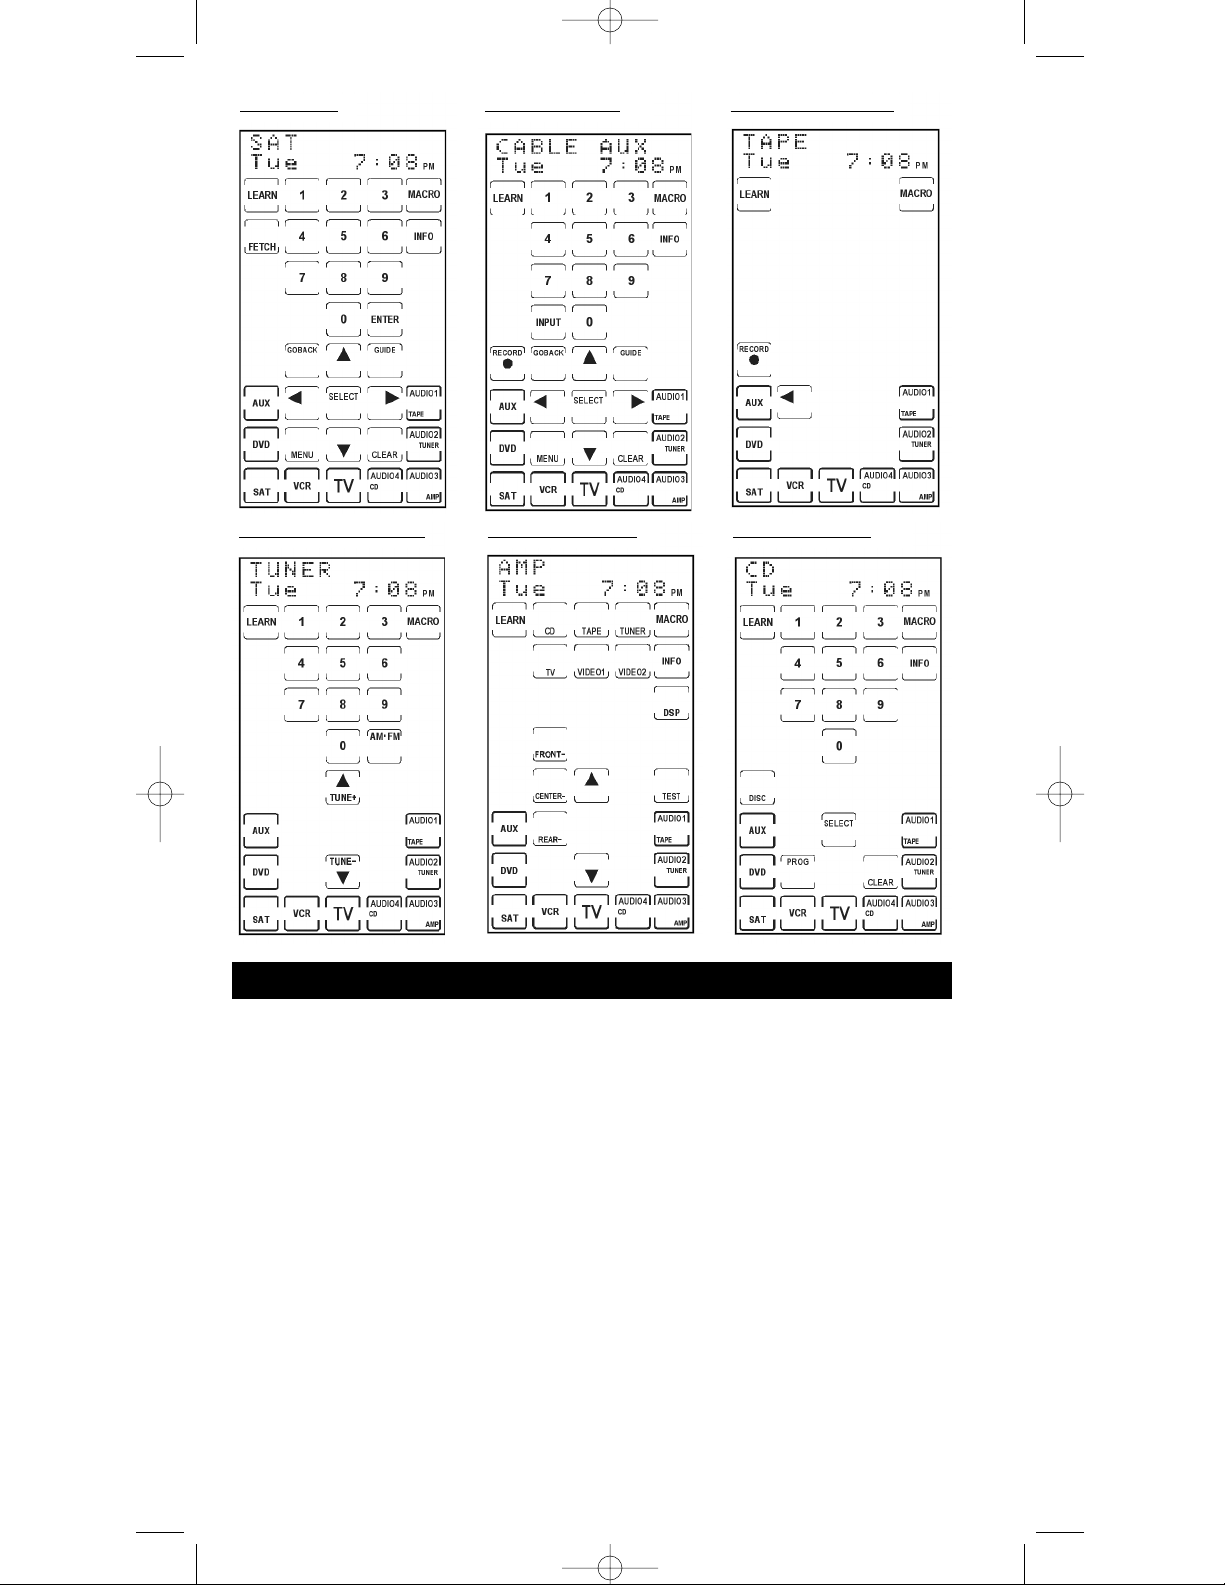
44
Entrée de code
La RCU1010RF peut commander un maximum de neuf appareils. Pour que la télécommande
RCU1010RF commande vos appareils (téléviseur, magnétoscope, PVR/DVR, lecteur DVD, etc.),
vous devez programmer le code correspondant à partir des Listes de codes. La télécommande
peut ainsi commander votre appareil en acheminant les commandes appropriées. Si le téléviseur,
magnétoscope, lecteur DVD ou récepteur de satellite est de marque RCA, ProScan ou GE, il se peut
que la RCU1010RF n’ait pas à être programmée pour les commander.
Pour programmer la télécommande avec les codes de vos appareils, vous pouvez utiliser une de trois
méthodes : Entrée de liste de codes, Recherche de code ou Autorecherche de code. Utilisez d’abord
l’entrée de liste de codes, car il s’agit de la méthode la plus rapide et la plus simple. La Recherche de
code peut exiger jusqu’à 300 enfoncements de touche, et l’Autorecherche de code peut demander du
temps pour parcourir tous les codes disponibles.
Il faut pointer la télécommande en direction de l’appareil à programmer pendant toutes les entrées de codes.
Pendant la programmation de la télécommande, vous pouvez prolonger la durée d’affichage de l’écran
tactile ACL (voir la section Durée d’affichage de l’écran tactile ACL à la pages 61-62).
Vous pouvez entrer les codes dans la RCU1010RF à partir des listes de codes à l’aide de la touche SETUP.
(Reportez-vous aux Listes de codes des marques les plus populaires à la fin de ce Guide de l’utilisateur.)
Quand vous entrez un code valide pour un mode donné (ex. : quand vous entrez un code valide pour un
téléviseur), les étiquettes de touches par défaut sont affichées à l’écran tactile, et les fonctions précédemment
apprises pour ce mode sont supprimées. Le mode est rétablit à son état par défaut à la mise en marche.
Écran par défaut SAT Écran par défaut AUX (Câble) Écran par défaut Audio 1 (Cassette)
Écran par défaut Audio 2 (Syntonisateur) Écran par défaut Audio 3 (Ampli) Écran par défaut Audio 4 (CD)
RCU_1010_RF_IB_RevA.qxd 9/24/03 10:31 AM Page 44
Page 45
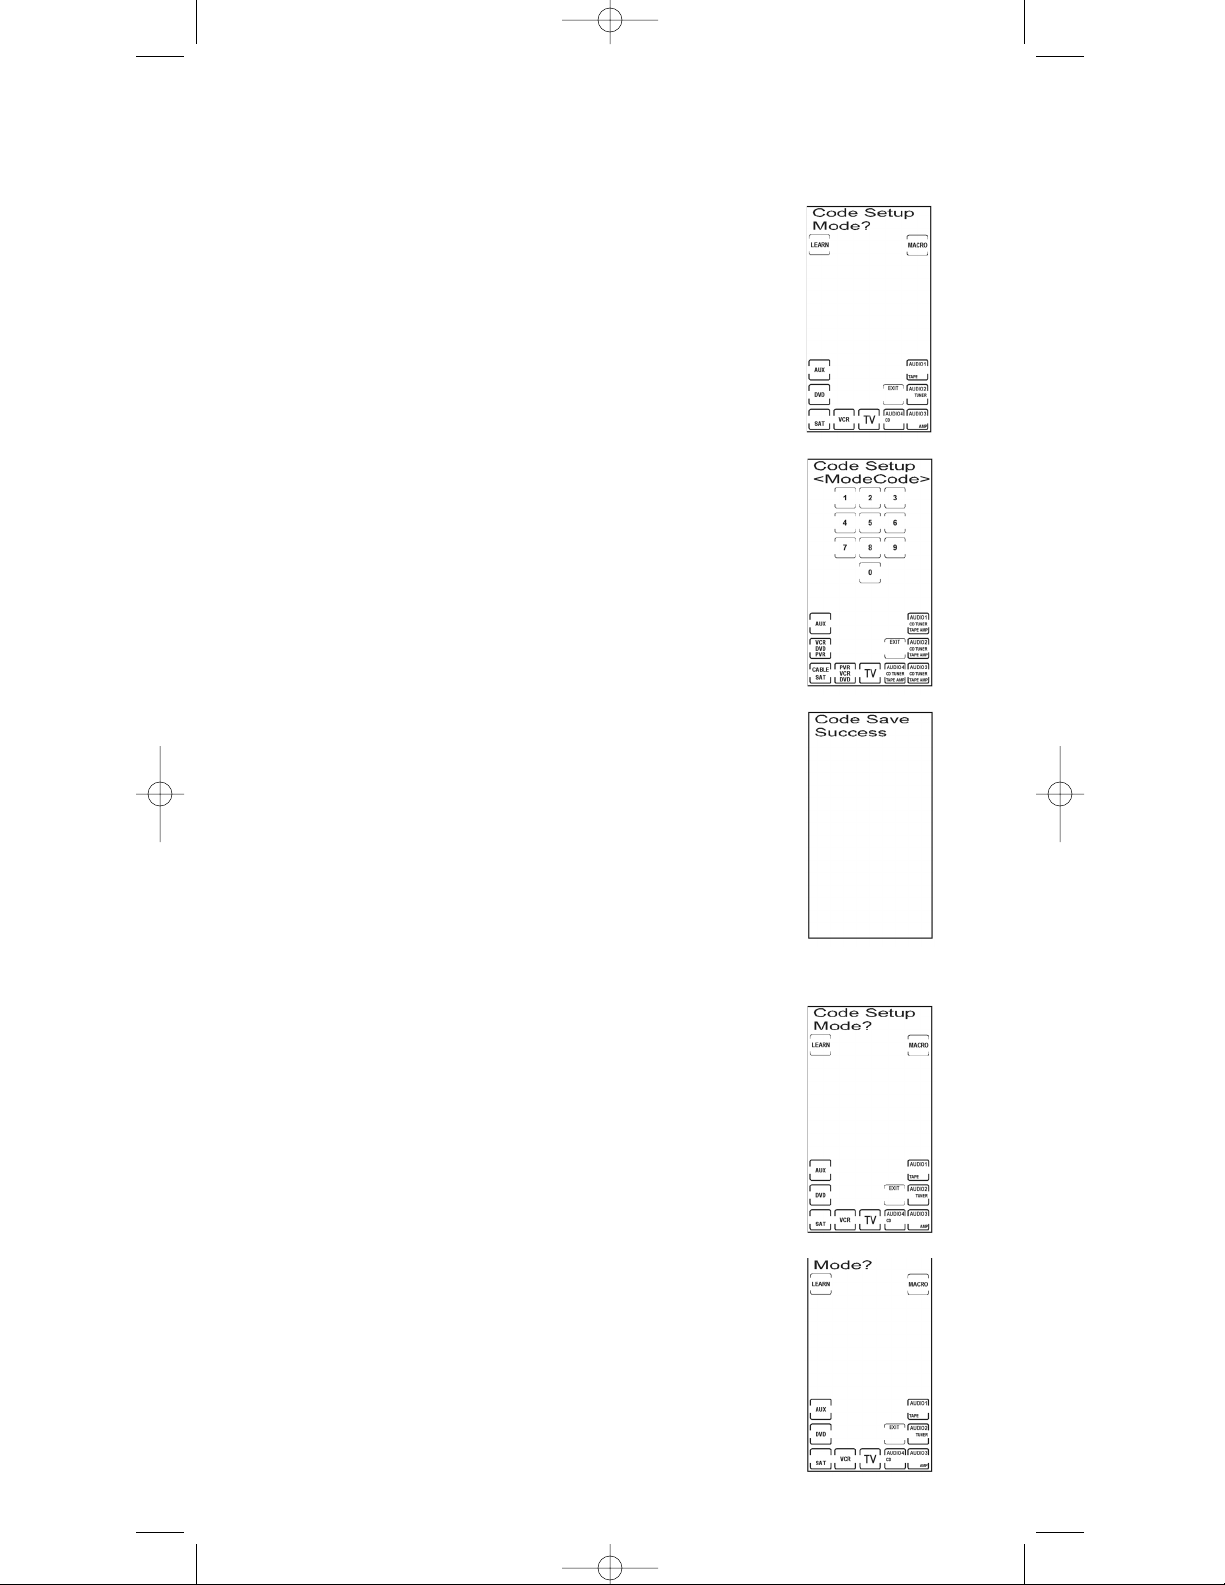
Si l’appareil que vous souhaitez commander ne répond pas aux codes
entrés par la méthode Entrée de liste de codes, vous pouvez explorer la liste
de codes au complet pour rechercher un code qui commande votre appareil.
Un appareil particulier peut ne pas figurer dans la liste de codes ou peut
apparaître sous une autre marque. Rappel : La Recherche de code peut
exiger jusqu’à 300 enfoncements de touche.
Quand vous entrez un code valide pour un mode donné (ex. : quand vous
entrez un code pour un téléviseur), les étiquettes de touches par défaut sont
affichées à l’écran tactile et les fonctions déjà apprises pour ce mode sont
supprimées. Le mode est rétablit à son état par défaut à la mise en marche.
45
L’Entrée de liste de codes est la méthode de programmation la
plus rapide et la plus simple. Les Listes de codes apparaissent
aux pages 69 à 77 du Guide de l’utilisateur. Pour entrer un code
directement de l’une des listes de codes, procédez comme suit :
1. Allumez manuellement l’appareil à commander (téléviseur,
magnétoscope, lecteur DVD, PVR/DVR, etc.).
2. Maintenez la touche SETUP du clavier de caoutchouc enfoncée
pendant 2 ou 3 secondes, jusqu’à ce que le voyant DÉL reste
allumé et que l’écran tactile montre l’écran Code Setup Mode?.
3. Relâchez la touche SETUP.
4. Appuyez sur la touche de l’appareil désiré (TV, VCR, SAT, etc.) à
l’écran tactile ACL. Pour AUX, appuyez sur la touche ACL AUX,
puis sur la touche d’appareil à programmer à cette touche.
Remarque : La touche AUX passe automatiquement par défaut
au mode Cable, à moins qu’un autre choix ait été fait.
5. Entrez le code à trois chiffres de la marque de votre appareil à
partir des Listes de codes correspondantes à la fin du guide
de l’utilisateur. Si votre marque compte plus d’un code,
commencez par le premier code. Lorsqu’un code valide de la
liste est entré, l’écran ACL montre l’écran Code Save Success,
suivi de l’écran Code Setup Mode?. Si l’entrée est invalide,
l’écran ACL montre l’écran Invalid Entry Made pendant deux
secondes avant d’afficher l’écran Code Setup Mode?. Dans ce
cas, aucun changement n’est apporté.
6. Avant de pouvoir tester le code avec l’appareil choisi, retournez
au fonctionnement normal en appuyant sur la touche LCD
EXIT, puis sur la touche LCD OK à l’écran Exit Setup.
7. Allumez l’appareil pour tester le code. Pointez la télécommande
RCU1010RF en direction de l’appareil et appuyez sur la touche
ON·OFF. Si vous avez entré le code correspondant à votre
appareil, celui-ci réagit à la touche ON•OFF. Si l’appareil
répond, aucune autre programmation n’est nécessaire.
8. Si l’appareil ne répond pas, essayez le code suivant dans la
liste pour votre marque en répétant le processus à partir de
l’étape 2. S’il n’existe aucun autre code pour votre marque,
essayez la Recherche de code ou l’Autorecherche de code.
Recherche de code
Pour rechercher un code particulier dans la Liste de codes,
procédez comme suit :
1. Allumez manuellement l’appareil à commander (téléviseur,
magnétoscope, lecteur DVD, PVR/DVR, etc.).
2. Maintenez la touche SETUP du clavier de caoutchouc enfoncée
pendant 2 ou 3 secondes, jusqu’à ce que le voyant DÉL reste
allumé et que l’écran tactile montre l’écran Code Setup Mode?.
3. Relâchez la touche SETUP.
4. Appuyez de nouveau sur la touche SETUP. L’écran ACL
montre l’écran Code Search Mode?.
RCU_1010_RF_IB_RevA.qxd 9/24/03 10:31 AM Page 45
Page 46

46
Recherche de code (suite)
5. Appuyez sur la touche de l’appareil désiré (TV, VCR, SAT, etc.).
Pour AUX, appuyez sur la touche ACL AUX, puis sur la touche
d’appareil à programmer à cette touche.
Remarque : La touche AUX passe automatiquement par défaut
au mode Cable, à moins qu’un autre choix ait été fait.
6. L’écran ACL montre l’écran Code Search Key?. Appuyez
plusieurs fois sur la touche ON•OFF jusqu’à ce que l’appareil
à commander réagisse à la commande et s’éteigne. Le code
actuel acheminé est affiché dans le coin droit.
Remarque : La Recherche de code commence à partir du code
actuellement sauvegardé pour ce mode. Par exemple, si la liste
de codes d’appareils renferme 100 codes et que le code
actuellement sauvegardé est 050, la Recherche de code débute à
051 et continue jusqu’à 100 avant de recommencer à 000 et de
terminer à 050. Ceci accélère le processus de recherche du code
approprié de votre appareil, puisqu’il se peut que vous
découvriez que certains codes peuvent allumer et éteindre votre
appareil, mais ne peuvent commander ses autres fonctions. Vous
pouvez ainsi éliminer les codes que vous avez déjà essayés.
7. Appuyez sur la touche ACL OK pour sauvegarder le code.
Après avoir installé ce code, toutes les étiquettes de touches
et les commandes déjà apprises sont rétablies.
8. Si votre appareil répond et que vous dépassez accidentellement
ce code en appuyant de nouveau sur la touche ON•OF , appuyez
sur la touche CH- ou sur la touche ACL à FLÈCHE VERS LE
BAS pour reculer dans la Liste de codes. Vous pouvez changer de
nouveau de sens en appuyant sur les touches ON•OFF, CH+ ou
ACL VERS LE HAUT.
9. Après avoir appuyé sur la touche ACL OK à l’étape 7,
l’écran ACL montre l’écran Code Search Mode?. La recherche
de code est maintenant terminée. Pour quitter le mode
programmation, appuyez sur la touche ACL EXIT, puis
sur la touche ACL OK à l’écran Exit Setup.
La RCU1010RF peut automatiquement parcourir toutes les listes de codes à l’aide de la fonction Autorecherche.
Rappelez-vous que l’Autorecherche de code peut demander un certain temps pour parcourir tous les codes
disponibles. Assurez-vous que la télécommande est pointée en direction de l’appareil que vous programmez.
Autorecherche de code
Pour entreprendre l’Autorecherche de code, procédez comme suit :
1. Allumez manuellement l’appareil à commander (téléviseur,
magnétoscope, lecteur DVD, PVR/DVR, etc.).
2. Maintenez la touche SETUP du clavier de caoutchouc enfoncée
pendant 2 ou 3 secondes, jusqu’à ce que le voyant DÉL reste
allumé et que l’écran tactile montre l’écran Code Setup Mode?.
3. Relâchez la touche SETUP.
4. Appuyez de nouveau sur la touche SETUP. L’écran ACL
montre l’écran Code Search Mode?.
5. Appuyez sur la touche de l’appareil désiré (TV, VCR, SAT, etc.).
Pour AUX, appuyez sur la touche ACL AUX, puis sur la touche
d’appareil à programmer à cette touche.
Remarque : La touche AUX passe automatiquement par défaut
au mode Cable, à moins qu’un autre choix ait été fait.
6. L’écran ACL montre l’écran Code Search Key?. Gardez la
télécommande pointée en direction de l’appareil pendant
que vous appuyez une fois sur la touche ON·OFF. Si vous
n’appuyez sur aucune autre touche, l’Autorecherche démarre
automatiquement dans les six secondes.
RCU_1010_RF_IB_RevA.qxd 9/24/03 10:31 AM Page 46
Page 47

L’identification de code permet de déterminer les codes qui sont programmés
dans la télécommande pour un mode donné (TV, VCR, DVD, etc.).
Pour trouver le code actuellement programmé, procédez comme suit :
47
Tableau d’identification de code
CODE DE TÉLÉVISEUR
Entrez vos codes ici pour référence ultérieure :
CODE DE MAGNÉTOSCOPE
CODE DE SATELLITE
CODE DVD
✓
AUDIO 2
Syntonisateur
❒
Lecteur CD
❒
Ampli
❒
Cassette
❒
✓
AUDIO 3
Syntonisateur
❒
Lecteur CD
❒
Ampli
❒
Cassette
❒
✓
AUDIO 4
Syntonisateur
❒
Lecteur CD
❒
Ampli
❒
Cassette
❒
✓
Appareil AUX :______
NOTE: Câble est le mode par défaut pour AUX.
(Utilisez aussi pour PVR/DVR)
7. L’Autorecherche envoie le code suivant dans la liste à toutes
les trois secondes. Le code actuel acheminé est affiché dans le
coin supérieur droit.
8. Pour accélérer l’Autorecherche, vous pouvez manuellement
contourner le processus et l’accélérer temporairement en
appuyant sur les touches de recherche normales (CH+, CH-,
ON•OFF, ACL à FLÈCHE VERS LE HAUT et VERS LE BAS)
dans les deux sens.
9. Quand l’appareil à commander répond aux commandes,
appuyez sur la touche ACL OK pour sauvegarder le code.
Après avoir installé ce code, toutes les étiquettes de touches
et les commandes déjà apprises sont rétablies.
Remarque : Si votre appareil répond à la commande, et que la
RCU1010RF envoie le code suivant avant que vous puissiez
appuyer sur la touche ACL OK, vous pouvez appuyer sur la touche
CH- ou la touche ACL à FLÈCHE VERS LE BAS pour reculer dans
la Liste de codes. Vous pouvez changer de nouveau de sens en
appuyant sur les touches ON•OFF, CH+ ou ACL VERS LE HAUT.
10. Après avoir appuyé sur la touche ACL OK à l’étape 9, l’écran ACL
montre l’écran Code Search Mode?. L’Autorecherche de code est
maintenant terminée. Pour quitter le mode programmation,
appuyez sur la touche ACL EXIT, puis sur la touche ACL OK
à l’écran Exit Setup.
1. Appuyez sur la touche SETUP. Le dernier écran actif
affiché apparaît.
2. Maintenez la touche d’appareil ACL enfoncée. Le code
actuellement programmé pour cet appareil apparaît dans le
coin supérieur droit de l’afficheur tactile ACL.
AUDIO 1
Syntonisateur
❒
Lecteur CD
❒
Ampli
❒
Cassette
❒
Identification de code
RCU_1010_RF_IB_RevA.qxd 9/24/03 10:31 AM Page 47
Page 48
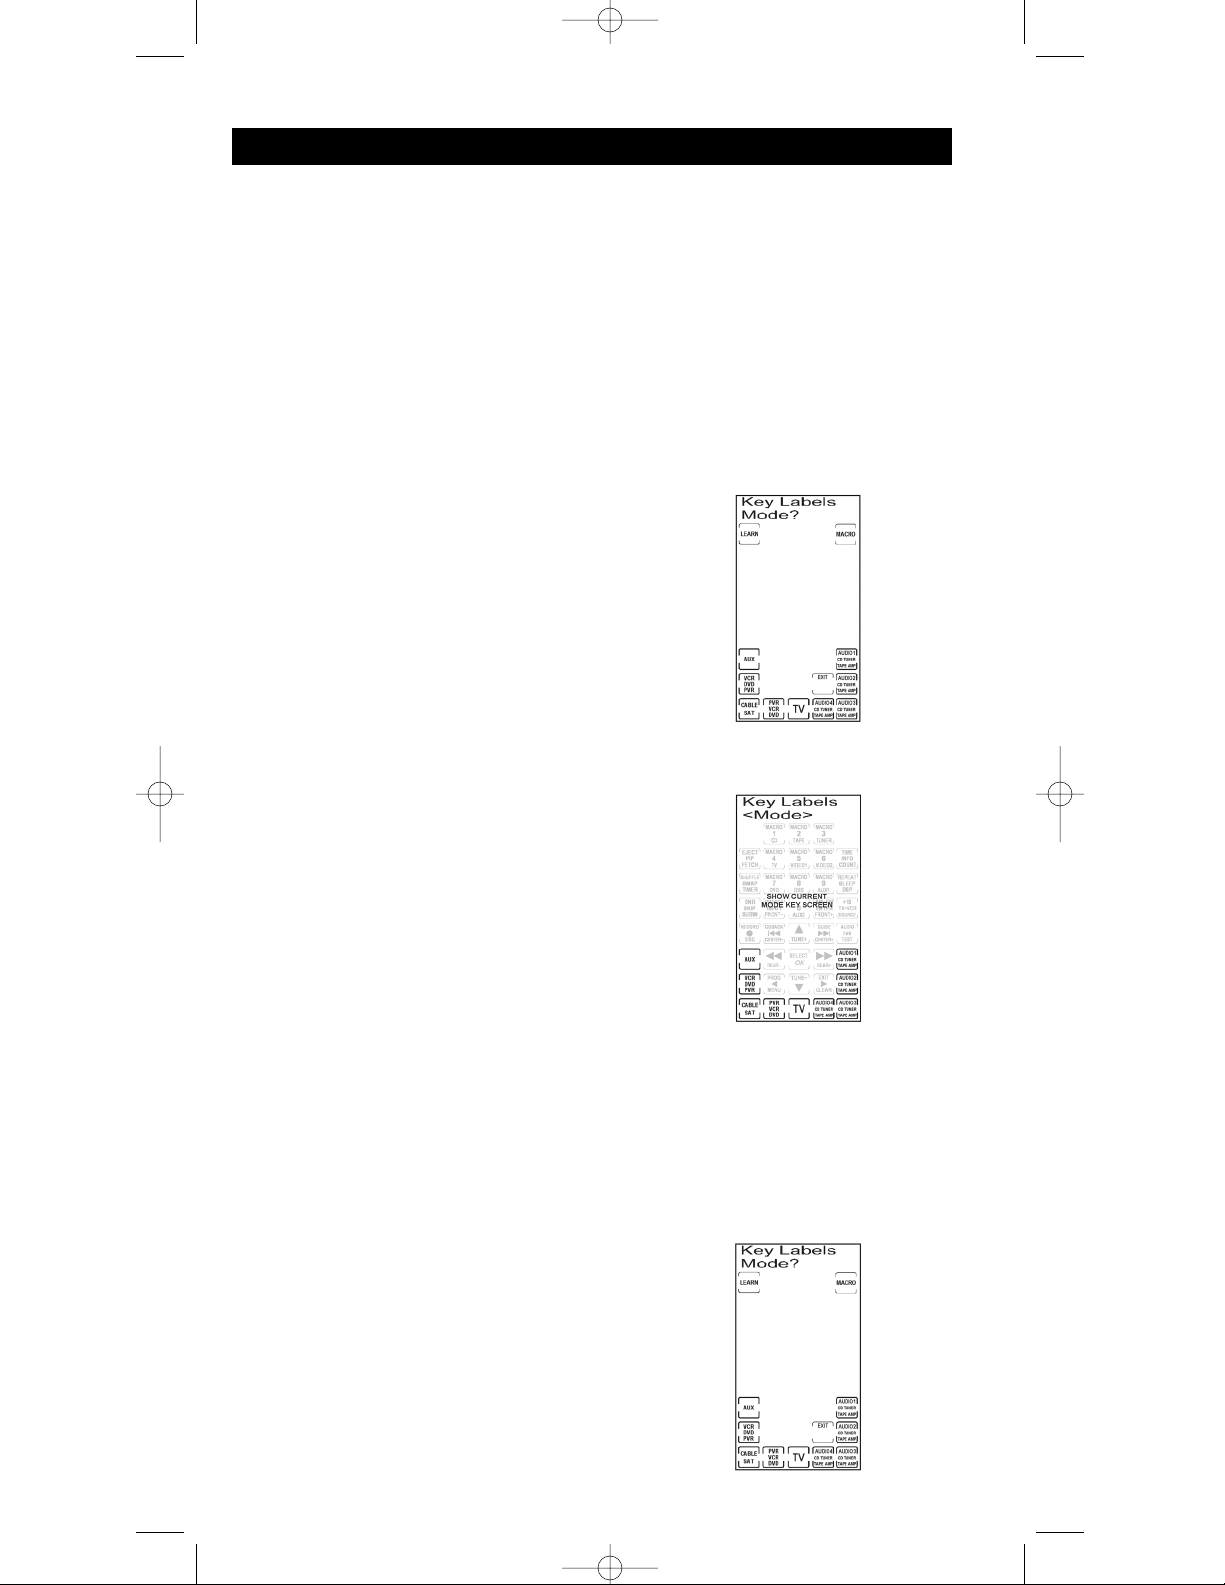
Options d’étiquettes de touches
La RCU1010RF permet de personnaliser les étiquettes de touches ACL selon vos besoins. La fonction
Options d’étiquettes de touches permettent de changer les étiquettes de touches ACL selon les
fonctions de vos télécommandes d’appareils originales. On recommande de n’utiliser la fonction
Options d’étiquettes de touches qu’après avoir programmé tous les appareils. Cette fonction permet
de choisir parmi plusieurs étiquettes de touches préréglées qui apparaîtront à l’écran tactile. Vous
pouvez changer toutes les touches de l’écran ACL, sauf les touches ACL LEARN et MACRO. Vous
pouvez choisir l’une ou l’autre des options d’étiquettes disponibles pour chaque touche. Vous pouvez
aussi choisir de ne montrer que le cadre de la touche ou de dissimuler complètement la touche.
Changer les étiquettes de touches d’appareils ACL
Vous pouvez changer le nom des touches de vos appareils, si nécessaire (VCR, SAT, DVD, etc.).
L’étiquette de touche TV ne peut être changée.
Pour choisir les options d’étiquettes de touches préréglées pour les touches d’appareil ACL,
procédez comme suit :
1. Maintenez la touche SETUP du clavier de caoutchouc
enfoncée pendant 2 ou 3 secondes, jusqu’à ce que le voyant
DÉL reste allumé et que l’écran tactile montre l’écran Code
Setup Mode?.
2. Relâchez la touche SETUP.
3. Appuyez plusieurs fois sur la touche SETUP jusqu’à ce que
l’écran tactile ACL affiche l’écran KEY LABELS MODE?.
4. Si l’étiquette de touche d’appareil actuelle doit être changée,
apportez ce changement avant d’appuyer sur une autre
touche LCD.
5. Pour changer une étiquette de touche d’appareil, appuyez
plusieurs fois sur la touche d’appareil jusqu’à ce que
l’étiquette désirée apparaisse. Si, à tout moment, vous
souhaitez rétablir une touche d’appareil à son réglage par
défaut d’origine, procédez comme ci-dessus.
Remarque : À ce point, si vous ne désirez pas changer les
étiquettes d’appareil pour cet appareil, suivez les étapes 6 et
7. Si vous souhaitez changer les étiquettes d’appareil pour cet
appareil, passez directement à l’étape 5 de la section
“Changer les étiquettes de touches ACL d’un appareil” cidessous.
6. Appuyez sur la touche SETUP du clavier de caoutchouc pour
confirmer votre changement.
7. Appuyez sur la touche ACL OK pour sauvegarder le code.
Remarque : L’écran à la droite montre TOUTES les étiquettes
possibles, mais seules les options pour l’appareil choisi
apparaissent à un moment donné.
8. Pour quitter le mode programmation, appuyez sur la touche
ACL EXIT, puis sur la touche ACL OK à l’écran Exit Setup.
Changer les étiquettes de touches ACL dans un appareil
Vous pouvez changer les étiquettes de touches d’un appareil, si désiré. Pour choisir les options
d’étiquettes de touches préréglées pour les touches d’un appareil, procédez comme suit :
1. Maintenez la touche SETUP du clavier de caoutchouc
enfoncée pendant 2 ou 3 secondes, jusqu’à ce que le
voyant DÉL reste allumé et que l’écran tactile montre
l’écran Code Setup Mode?.
2. Relâchez la touche SETUP.
3. Appuyez plusieurs fois sur la touche SETUP jusqu’à ce
que l’écran tactile ACL affiche l’écran Key Labels Mode?.
4. À l’écran Key Label Mode?, appuyez sur la touche
d’appareil désirée (TV, VCR, SAT, PVR/DVR, etc.) pour
afficher les touches de cet écran.
48
RCU_1010_RF_IB_RevA.qxd 9/24/03 10:31 AM Page 48
Page 49

49
Remarque : Pour rétablir les étiquettes de touches actuelles d’un
appareil au réglages par défaut, maintenez enfoncée la touche
d’appareil actuelle pendant trois secondes. Le rétablissement
d’une étiquette de touche d’un appareil à son réglage par
défaut à la mise en marche entraîne la sauvegarde automatique
pour ce mode. Cette sauvegarde n’influe pas sur vos codes
programmés ni sur les commandes apprises. Ce rétablissement
ne permet pas de rétablir la touche d’appareil à son réglage par
défaut. Pour ce, il faut suivre les étapes à la section Changer les
étiquettes de touches d’appareil ACL ci-dessus.
5. Appuyez plusieurs fois sur l’une des touches du panneau ACL
dans le mode actuel pour choisir l’étiquette d’appareil désirée.
À chaque pression d’une touche, une étiquette différente pour
cette touche est affichée.
6. Pour sauvegarder vos nouveaux choix d’étiquettes pour le mode
actuel, appuyez sur une autre touche d’appareil ou sur la touche
SETUP. L’écran Confirm to Save est affiché. Appuyez sur la
touche ACL OK pour sauvegarder ou sur la touche ACL EXIT
pour supprimer les changements apportés.
7. Si vous avez appuyé sur une autre touche d’appareil à l’étape
6, ces étiquettes d’appareil sont affichées et vous pouvez les
renommer, si désiré.
8. Si la touche SETUP a été enfoncée à l’étape 6, l’écran retourne
à l’écran Key Label Options?.
9. Le remplacement des étiquettes de touches est maintenant
terminé. Pour quitter le mode programmation, appuyez sur la
touche ACL EXIT, puis sur la touche ACL OK à l’écran Exit Setup.
RCU_1010_RF_IB_RevA.qxd 9/24/03 10:31 AM Page 49
Page 50
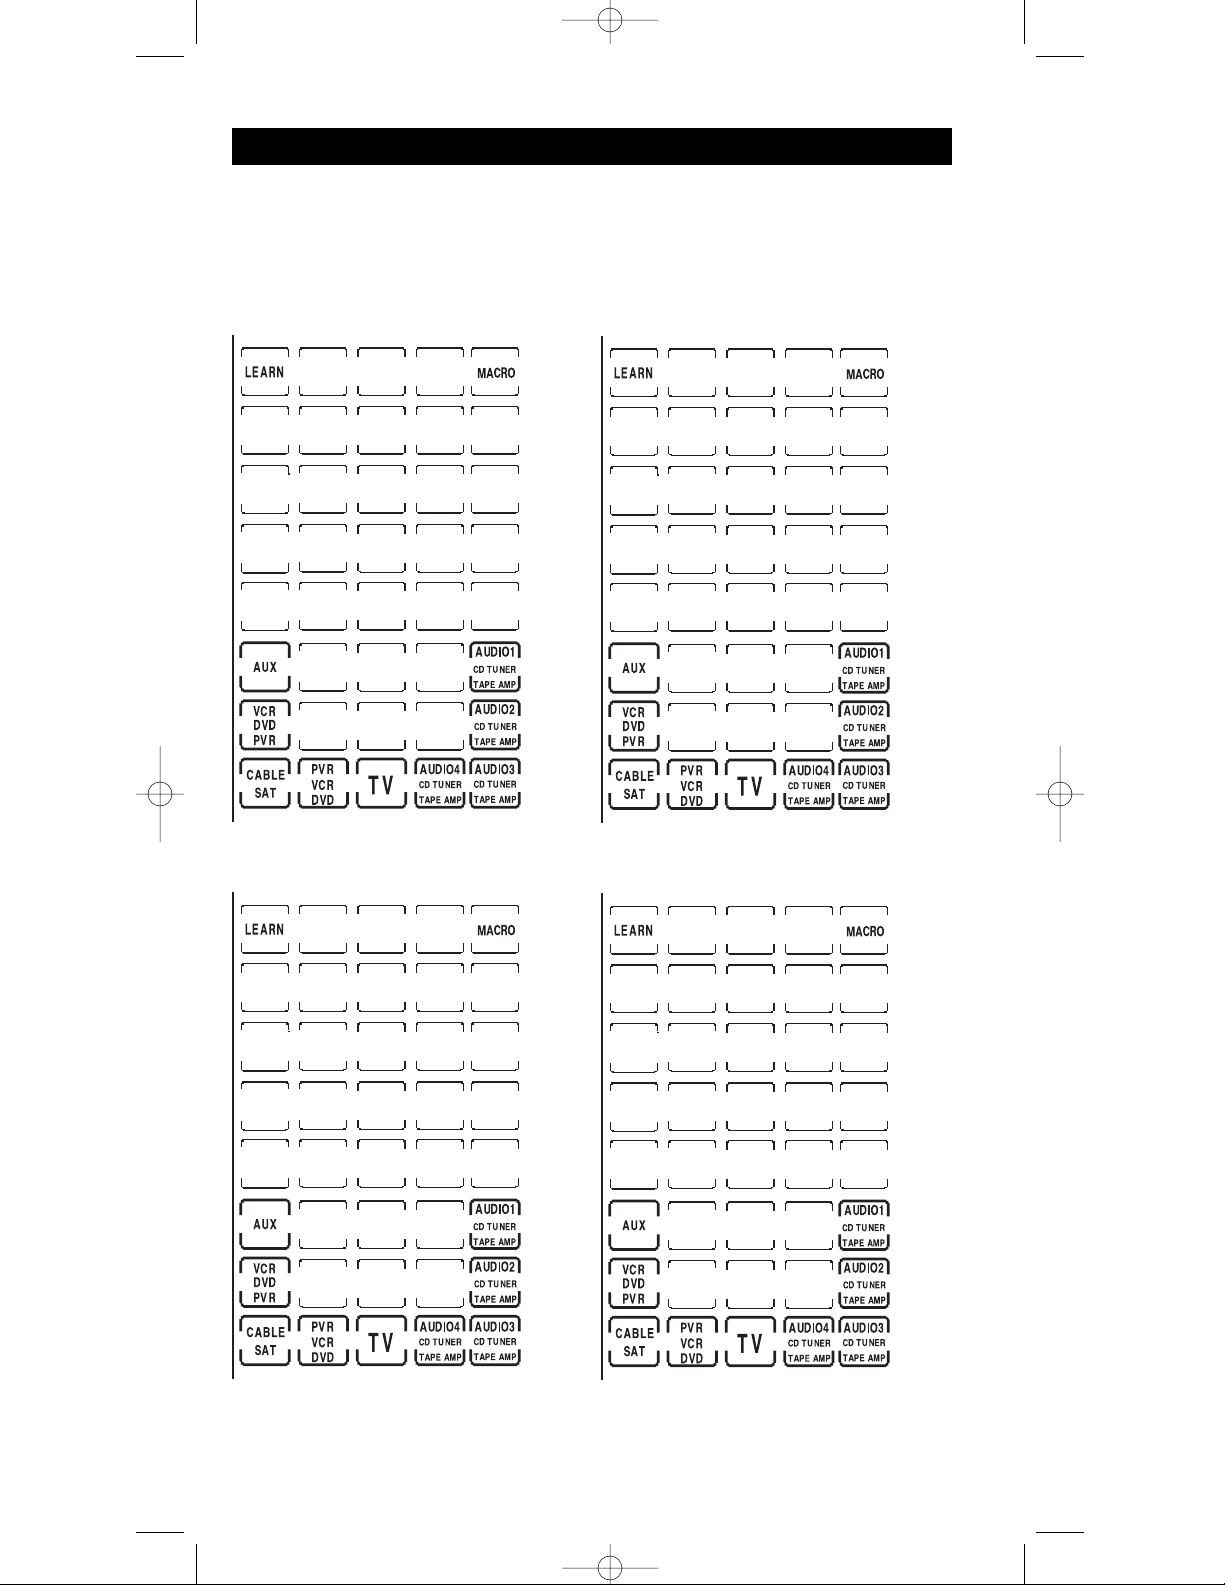
50
NOTE IMPORTANTE : Vous ne pouvez apprendre de commandes sous les touches de commande
ACL LEARN, ACL MACRO, SETUP, BACKLIGHT ou les touches ACL d’appareil. Les écrans suivants
peuvent être utilisés pour mémoriser les touches apprises dans un mode d’appareil. Cette page peut être
utilisée pour documenter les touches apprises.
Page de référence des touches apprises
Appareil :________________
Appareil :________________
Appareil :________________
Appareil :________________
RCU_1010_RF_IB_RevA.qxd 9/24/03 10:31 AM Page 50
Page 51

Apprentissage de commandes
La RCU1010RF est maintenant prête à apprendre les commandes de vos télécommandes existantes. Toutes
les touches apprises sont automatiquement sauvegardées. Rappel : seule la télécommande originale peut
être mémorisée dans tout mode. La RCU1010RF peut apprendre les commandes d’une télécommande de
téléviseur, d’une télécommande de magnétoscope, d’une télécommande de lecteur DVD, etc.
51
Conseils d’apprentissage
Avant de transférer les commandes de votre télécommande originale à la télécommande
RCU1010RF, consultez les conseils pratiques suivants sur l’apprentissage.
1. Assurez-vous que la RCU1010RF et la ou les télécommandes originales sont
alimentées par des piles correctement chargées.
2. On recommande d’effectuer une suppression complète avant de tenter
l’apprentissage. Vous supprimerez ainsi toutes les commandes apprises pour
tous les modes d’appareils. (Voir la section sur la Suppression complète).
3. Pointez la partie supérieure de la télécommande originale en direction de la base
de la RCU1010RF afin que le voyant DÉL IR de la télécommande originale soit
aligné avec le détecteur d’apprentissage de la RCU1010RF, situé à la partie
inférieure de la télécommande.
4. Les deux télécommandes doivent être à une distance d’environ deux à trois
pouces l’une de l’autre.
5. Pour vous assurer que les télécommandes sont compatibles et vous familiariser
davantage avec le processus d’apprentissage, on recommande de tenter des
expériences en apprenant d’abord deux ou trois touches. Effectuez ensuite
Suppression complète avant d’apprendre toutes les fonctions désirées de la
télécommande originale.
6. Une lampe à incandescence ou une lumière à faible énergie peut perturber les
transmissions IR. Lorsque vous utilisez la fonction d’apprentissage, éloignez les
deux télécommandes d’au moins trois pieds de telles sources de lumière.
7. Lorsque vous programmez une touche, ne relâchez pas la touche de la
télécommande originale avant que l’écran Learning Success ne soit affiché à
l’écran tactile de la RCU1010RF (environ 2 ou 3 secondes). L’écran tactile ACL
affiche jusqu’à alors l’écran Learning Please Wait.
8. NOTE IMPORTANTE : Vous ne pouvez apprendre de commandes sous les
touches ACL LEARN, ACL MACRO, SETUP, BACKLIGHT ou les touches
ACL d’appareil.
9. En cas de problème durant l’apprentissage, le voyant DÉL clignote pendant deux
secondes et l’écran Learning Error apparaît à l’écran tactile. La télécommande
reste en mode Apprentissage.
10. Toutes les touches apprises sont automatiquement sauvegardées.
11. Lorsque la mémoire est pleine, l’afficheur présente l’écran Memory Full et le voyant DÉL clignote
pendant deux secondes. Il est impossible d’apprendre d’autres touches sans d’abord supprimer les
commandes apprises dans un mode d’appareil.
Apprentissage
Apprentissage de codes
Les codes des listes de codes comprennent les fonctions de base de chaque appareil qu’ils commandent. Une
fois le code programmé pour l’appareil choisi, vous pouvez personnaliser l’écran tactile de la RCU1010RF de
manière à inclure certaines fonctions de la ou des télécommandes originales qui n’ont pas été intégrées dans
le code préréglé. Vous pouvez ainsi transférer les meilleures fonctions des télécommandes existantes à la
télécommande RCU1010RF.
La RCU1010RF peut apprendre et sauvegarder les commandes de la ou des télécommandes
originales dans le ou les modes de votre choix. La RCU1010RF peut mémoriser plus de 30
commandes de touches pour chaque télécommande originale. Une seule télécommande originale
peut être mémorisée dans chaque mode (c.-à-d. que la RCU1010RF peut apprendre les commandes
d’une télécommande de téléviseur, une télécommande de magnétoscope, une télécommande de
lecteur DVD, etc.).
Une fois que la RCU1010RF a appris des commandes supplémentaires des télécommandes originales
et que les options d’étiquettes de touche sont programmées, utilisez les pages de référence des
touches apprises de ce manuel pour entrer vos options personnalisées pour chaque mode.
RCU_1010_RF_IB_RevA.qxd 9/24/03 10:31 AM Page 51
Page 52

1. Rassemblez toutes les télécommandes que vous désirez
apprendre et alignez-les toutes sur une surface plate avant
de passer en mode IR d’apprentissage.
2. Placez la première télécommande originale à la position
d’apprentissage (voir la section Conseils d’apprentissage à la
page 17). Pointez la partie supérieure de la télécommande
originale en direction de la base de la RCU1010RF afin que le
voyant DÉL IR de la télécommande originale soit aligné avec
le détecteur d’apprentissage de la RCU1010RF, situé à la
partie inférieure de la télécommande. Les télécommandes
doivent être placées à 2 ou 3 pouces l’une de l’autre.
3. Si la télécommande originale est du type universel, vous
devez appuyer sur la touche d’appareil sur cette télécommande
pour choisir le mode désiré avant de passer à l’apprentissage.
Par exemple, si vous appuyez sur la touche VCR de la
télécommande universelle originale, la télécommande
RCU1010RF apprend de ce mode d’appareil. Si la télécommande
originale est de type dédié, c.-à-d. une télécommande de
lecteur DVD seulement, cette étape n’est pas nécessaire.
4. Maintenez enfoncée la touche SETUP du clavier de
caoutchouc de la télécommande RCU1010RF pendant 2 ou 3
secondes, jusqu’à ce que le voyant DÉL reste allumé et que
l’écran tactile montre l’écran Code Setup Mode?.
5. Relâchez la touche SETUP.
6. Appuyez sur la touche ACL LEARN. L’écran Learn IR Mode?
(Mode Apprentissage IR ?) est affiché.
7. Appuyez sur la touche de l’appareil désiré (TV, VCR, SAT,
AUX, PVR/DVR, etc.). L’écran Learn IR Key? (Apprendre la
touche IR ?) est affiché.
8. Appuyez sur la touche ACL ou la touche de caoutchouc de la
RCU1010RF que vous souhaitez utiliser pour mémoriser les
commandes apprises. L’écran Learning Please Wait apparaît.
Remarque : Vous ne pouvez apprendre de commandes sous les
touches de commande ACL d’appareil. LEARN, ACL MACRO,
SETUP, BACKLIGHT ou les touches ACL d’appareil.
9. Maintenez enfoncée la touche de la télécommande originale
que vous souhaitez transférer à la RCU1010RF jusqu’à ce que
l’écran Success, puis l’écran Learn IR Key? soient affichés.
Cette opération prend de 2 à 3 secondes.
10. Relâchez la touche de la télécommande originale. En cas de
problème durant le processus d’apprentissage, l’afficheur
ACL montre l’écran Learning Error pendant trois secondes,
mais reste en mode de programmation d’apprentissage.
Essayez alors d’ajuster légèrement la distance entre les
télécommandes et répétez à partir de l’étape 8.
11. Répétez les étapes 8 à 10 pour d’autres touches à apprendre.
12. Quand toutes les commandes de la télécommande originale
sont apprises, appuyez sur la touche SETUP. L’écran Learning
Completed est affiché, suivi de l’écran Learning IR Mode?. À
ce point, vous pouvez appuyer sur la touche d’appareil
suivante pour les autres télécommandes que la RCU1010RF doit
apprendre et répétez les étapes 7 à 10. Rappelez-vous que
chaque fois que vous apprenez d’un autre appareil, vous
devez mettre la télécommande universelle originale dans ce
mode d’appareil. Si la télécommande originale est de type
dédié, c.-à-d. une télécommande de lecteur DVD seulement,
cette étape n’est pas nécessaire.
13. L’apprentissage est maintenant terminé. Pour quitter le mode
programmation, appuyez sur la touche ACL EXIT, puis sur la
touche ACL OK à l’écran Exit Setup.
Remarque : Si la touche ACL EXIT ne réagit pas, appuyez
plusieurs fois sur la touche SETUP jusqu’à ce que l’écran Exit
Setup apparaisse
52
Commandes apprises (suite)
RCU_1010_RF_IB_RevA.qxd 9/24/03 10:31 AM Page 52
Page 53

Cette fonction permet d’effacer simultanément toutes les commandes
apprises. On recommande de supprimer toutes les commandes apprises
mémorisées avant l’apprentissage initial.
Remarque : Si aucune commande n’a été apprise, cette option
n’apparaît pas dans le mode programmation.
Suppression complète
Suppression de toutes les commandes apprises
sauvegardées sous un mode
Supprimez toutes les commandes apprises mémorisées sous un
mode particulier pour ajouter constamment les plus récentes
commandes à votre télécommande.
Remarque : Si aucune commande n’a été apprise, cette option
n’apparaît pas dans le mode programmation. Lors de la
suppression des commandes apprises, toutes les touches déjà
apprises dans ce mode d’appareil retournent à leurs fonctions
à code préréglé.
Pour supprimer toutes les commandes apprises dans un mode
(c.-à-d. TV, VCR, DVD, PVR/DVR, etc.), procédez comme suit :
1. Maintenez la touche SETUP du clavier de caoutchouc enfoncée
pendant 2 ou 3 secondes, jusqu’à ce que le voyant DÉL reste
allumé et que l’écran tactile montre l’écran Code Setup Mode?.
2. Relâchez la touche SETUP.
3. Appuyez plusieurs fois sur la touche SETUP jusqu’à ce que
l’écran Delete IR Mode? apparaisse.
4. Appuyez sur la touche d’appareil désirée pour les commandes
apprises que la RCU1010RF doit supprimer (TV, VCR, SAT,
PVR/DVR, AUX, etc.).
Remarque : Seuls les appareils ayant des commandes apprises
apparaissent à l’écran tactile ACL.
5. L’écran Confirm to Delete? (Confirmer pour supprimer ?) est
affiché. Appuyez sur la touche OK à l’écran tactile ACL. L’écran
Deleting Wait apparaît. L’écran Learn IR Mode? apparaît s’il
n’y a aucun autre mode d’appareil à commandes apprises.
L’écran Delete IR Mode? est affiché s’il y a d’autres modes
d’appareil à commandes apprises.
6. Toutes les commandes apprises déjà sauvegardées pour ce
mode sont désormais supprimées. Pour quitter le mode
programmation, appuyez sur la touche ACL EXIT, puis sur la
touche ACL OK à l’écran Exit Setup.
Pour supprimer toutes les commandes apprises, procédez comme suit :
1. Maintenez la touche SETUP du clavier de caoutchouc enfoncée
pendant 2 ou 3 secondes, jusqu’à ce que le voyant DÉL reste
allumé et que l’écran tactile montre l’écran Code Setup Mode?.
2. Relâchez la touche SETUP.
3. Appuyez plusieurs fois sur la touche SETUP jusqu’à ce que
l’écran Delete IR All? apparaisse.
4. Appuyez sur la touche ACL OK.
Remarque : Si, à ce point, vous désirez annuler la suppression
générale, appuyez sur la touche ACL EXIT.
5. L’écran Confirm to Delete? (Confirmer pour supprimer ?) est
affiché. Appuyez sur la touche ACL OK. L’écran tactile ACL
affiche l’écran Deleting Wait, suivi de l’écran Learn IR Mode?.
6. Toutes les commandes apprises sont désormais supprimées pour
tous les modes de l’appareil.
7. Pour quitter le mode programmation, appuyez sur la touche
ACL EXIT, puis sur la touche ACL OK à l’écran Exit Setup.
53
RCU_1010_RF_IB_RevA.qxd 9/24/03 10:31 AM Page 53
Page 54

1. Rassemblez toutes vos télécommandes originales qui renferment
les fonctions que vous aimeriez ajouter à une macro SmartMacro.
2. Placez la première télécommande originale à la position
d’apprentissage (voir la section Conseils d’apprentissage à la
page17). Pointez la partie supérieure de la télécommande
originale en direction de la base de la RCU1010RF afin que le
voyant DÉL IR de la télécommande originale soit aligné avec le
détecteur d’apprentissage de la RCU1010RF, situé à la partie
inférieure de la télécommande. Les télécommandes doivent
être placées à 2 ou 3 pouces l’une de l’autre.
3. Si la télécommande originale est du type universel, vous
devez appuyer sur la touche d’appareil sur cette télécommande
pour choisir le mode désiré avant de passer à la fonction
SmartMacro. Par exemple, si vous appuyez sur la touche VCR
de la télécommande universelle originale, la télécommande
RCU1010RF programme une macro SmartMacro par ce mode
d’appareil. Si la télécommande originale est de type dédié, c.-à-d.
une télécommande de lecteur DVD seulement, cette étape
n’est pas nécessaire.
4. Maintenez la touche SETUP du clavier de caoutchouc enfoncée
pendant 2 ou 3 secondes, jusqu’à ce que le voyant DÉL reste
allumé et que l’écran tactile montre l’écran Code Setup Mode?.
5. Relâchez la touche SETUP.
6. Appuyez sur la touche ACL MACRO. L’écran Set
SmartMacro? est affiché.
7. Appuyez sur la touche ACL OK.
8. L’écran tactile montre maintenant l’écran SmartMacro Key?.
Appuyez sur la touche numérique sous laquelle vous désirez
sauvegarder la macro SmartMacro (1 à 9).
9. L’écran tactile montre maintenant l’écran S-MacroX Learn?.
Appuyez sur la touche ACL LEARN.
10. L’écran S-Macro X Learning apparaît maintenant à l’écran
tactile. Maintenez la touche de la télécommande originale
enfoncée jusqu’à ce que le voyant DÉL de la RCU1010RF
clignote une fois. Cette opération prend de 2 à 3 secondes.
Remarque : En cas de problème durant l’apprentissage, l’écran
S-Macro X Error est affiché pendant trois secondes, mais reste
en mode SmartMacro et retourne à l’écran S-Macro X
Learning. Si aucune commande apprise n’est détectée, la
RCU1010RF se désactive après 30 secondes.
11. Relâchez la touche de la télécommande originale.
54
Opérations de la touche SmartMacro
MS
La fonction SmartMacro
MS
de la RCU1010RF permet d’exécuter une séquence de commandes par une seule
pression de touche. Une macro SmartMacro
MS
apprend toute séquence de commandes de la télécommande
originale Vous pouvez sauvegarder un maximum de 20 commandes apprises à chacune des neuf touches
LCD Macro disponibles. Si vous programmez les 20 touches dans une macro SmartMacro, la macro est
automatiquement mémorisée après la vingtième commande apprise. La séquence de commandes qu’une
macro SmartMacro doit exécuter doit être programmée dans l’ordre approprié. Toute séquence de commandes
que vous exécutez régulièrement peut être programmée sous forme de macro SmartMacro et réduite à une
simple pression de touche. Vous ne pouvez programmer une macro dans une macro.
Programmer une macro SmartMacro
Pour programmer une macro SmartMacro, procédez comme suit :
Exemple de programmation de macro
1. Allumez le téléviseur et syntonisez-le au canal 3.
2. Allumez le récepteur de satellite au canal 57.
3. Allumez le magnétoscope.
4. Vous pouvez maintenant enregistrer votre émission de satellite préférée par une simple
pression de touche.
RCU_1010_RF_IB_RevA.qxd 9/24/03 10:31 AM Page 54
Page 55
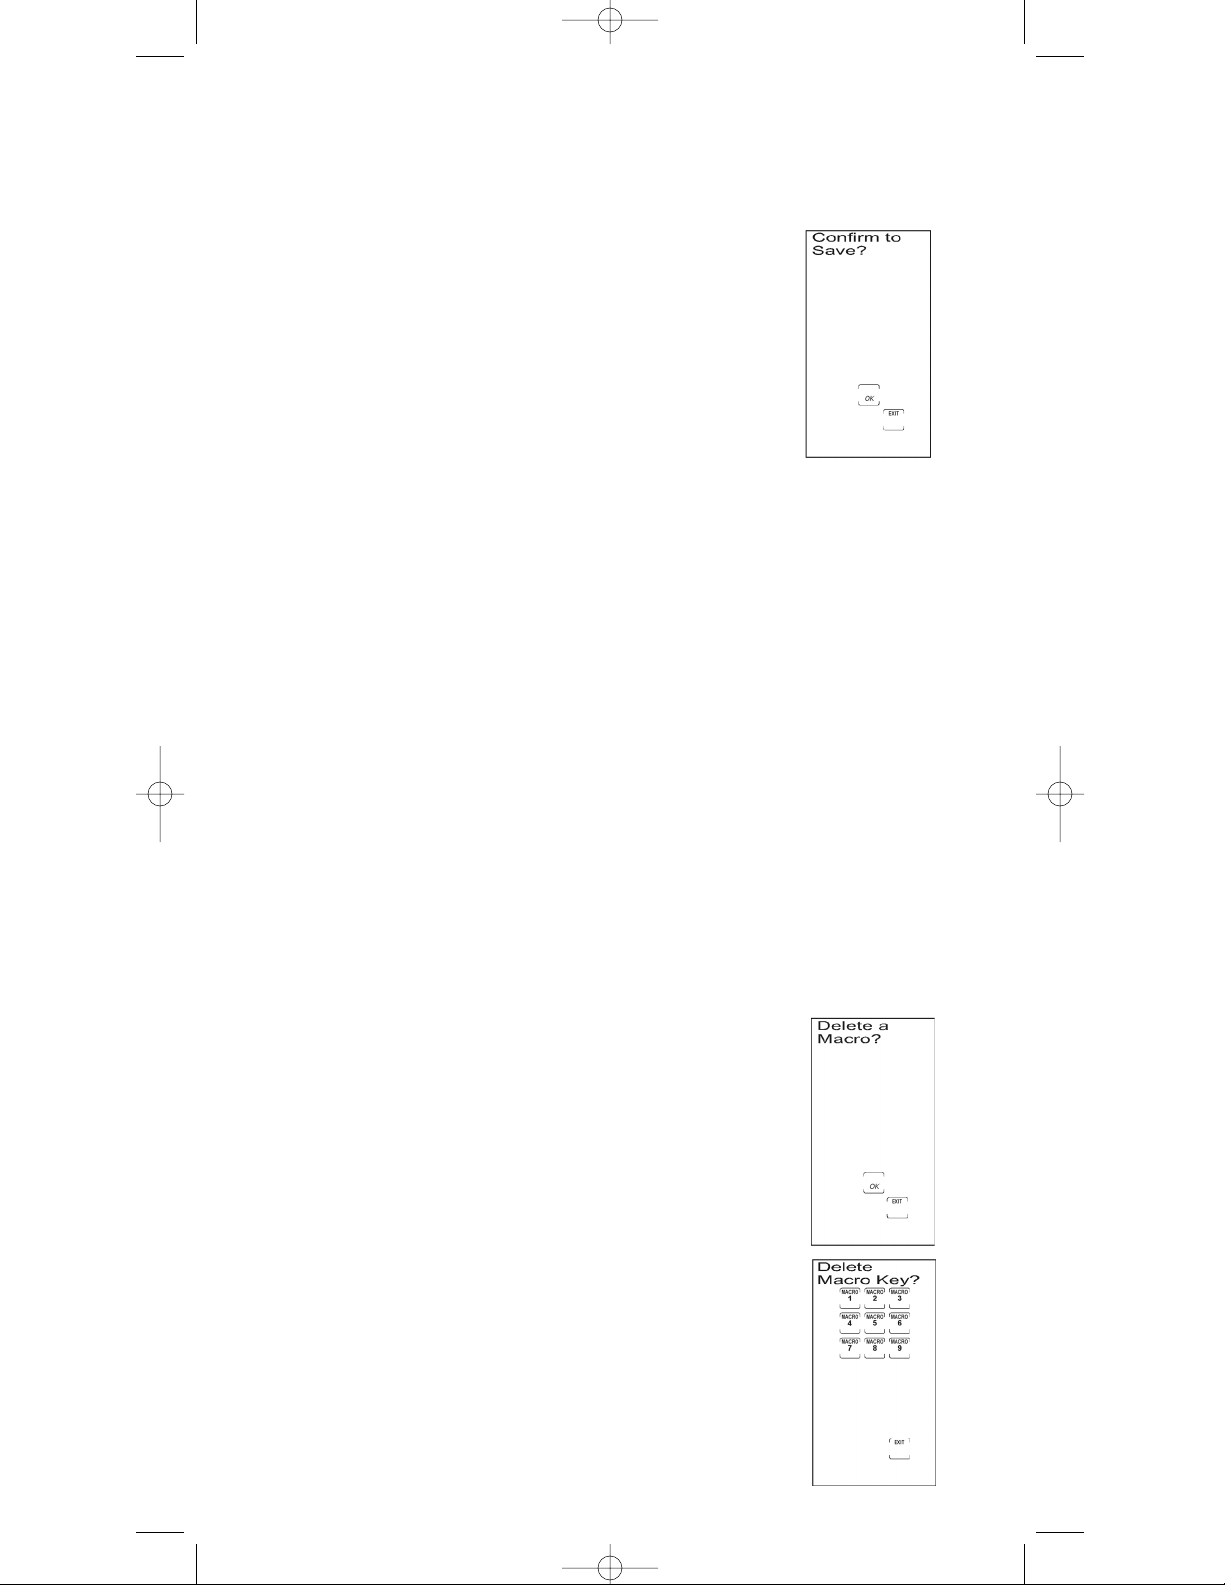
12. Programmez d’autres commandes dans l’ordre dans lequel
vous désirez les sauvegarder dans la macro SmartMacro.
Pour ajouter des commandes à la macro SmartMacro, répétez
les étapes 9 à 11 ci-dessus, en utilisant les télécommandes
originales pour programmer. Rappelez-vous que chaque fois
que vous programmez une macro SmartMacro d’un appareil
différent, vous devez mettre la télécommande universelle
originale dans le mode de ce composant. Si la télécommande
originale est de type dédié, c.-à-d. une télécommande de
lecteur DVD seulement, cette étape n’est pas nécessaire.
13. Appuyez sur la touche ACL OK quand vous avez terminé. Vous
pouvez mémoriser un maximum de 20 commandes apprises
dans une macro SmartMacro.
14. Quand vous avez terminé la programmation de la macro,
appuyez sur la touche ACL OK à l’écran Confirm to Save?
pour confirmer et sauvegarder.
15. L’écran tactile retourne à l’écran Set SmartMacro?.
16. La programmation de la macro SmartMacro est terminée.
Pour quitter le mode programmation, appuyez sur la touche
ACL EXIT, puis sur la touche ACL OK à l’écran Exit Setup.
Remarque : Si la touche ACL EXIT ne réagit pas, appuyez
plusieurs fois sur la touche SETUP jusqu’à ce que l’écran Exit
Setup apparaisse.
Exécuter une macro SmartMacro
Pour exécuter une macro SmartMacro déjà programmée, procédez comme suit :
1. Appuyez sur la touche SETUP, la touche BACKLIGHT ou une
touche d’écran tactile ACL pour activer l’écran tactile ACL.
2. Appuyez sur la touche ACL MACRO.
Remarque : Si aucune macro n’est programmée, l’écran No
Macro Stored est affiché.
3. Appuyez sur le numéro de touche ACL MACRO programmée
correspondant à la séquence que vous souhaitez activer.
4. ISi la signalisation d’enfoncement de touche est activé, vous
entendez une série de bips quand la macro est exécutée. Le
nombre de bips que vous entendez correspond au nombre de
commandes apprises dans la SmartMacro.
Supprimer une macro SmartMacro
Pour supprimer une seule SmartMacro déjà programmée, procédez
comme suit :
Remarque : Si aucune commande n’a été apprise, cette option
n’apparaît pas dans le mode programmation.
1. Maintenez la touche SETUP du clavier de caoutchouc enfoncée
pendant 2 ou 3 secondes, jusqu’à ce que le voyant DÉL reste
allumé et que l’écran tactile montre l’écran Code Setup Mode?.
2. Relâchez la touche SETUP.
3. Appuyez plusieurs fois sur la touche SETUP jusqu’à ce que
l’écran Delete a Macro? apparaisse. Appuyez sur la touche ACL
OK.
4. L’écran ACL affiche l’écran Delete Macro Key?. Appuyez sur
la touche ACL MACRO (1 à 9) pour choisir la macro déjà
programmée à supprimer.
Remarque : Quand vous supprimez une macro, seule la ou les
touches macro programmées sont affichées à l’écran tactile ACL.
Supprimer une macro SmartMacro (page suivante)
55
RCU_1010_RF_IB_RevA.qxd 9/24/03 10:31 AM Page 55
Page 56

Remarque : Si aucune commande n’a été apprise, cette option
n’apparaît pas dans le mode programmation.
1. Maintenez la touche SETUP du clavier de caoutchouc enfoncée
pendant 2 ou 3 secondes, jusqu’à ce que le voyant DÉL reste
allumé et que l’écran tactile montre l’écran Code Setup Mode?.
2. Relâchez la touche SETUP.
3. Appuyez plusieurs fois sur la touche SETUP jusqu’à ce que
l’écran Macro Key Delay Edit? apparaisse. Appuyez sur la
touche ACL OK.
4. L’écran SmartMacro Key? apparaît. Appuyez sur une touche
numérique (1 à 9) pour la macro que vous souhaitez modifier.
Seules les macros déjà programmées sont affichées. Le délai
maximal est 9,5 secondes.
Modifier un délai intertouches SmartMacro
Il peut être nécessaire d’accroître le délai entre les commandes macro pour permettre aux appareils
de répondre à toutes les commandes de la macro. Une fois la programmation terminée, vous pouvez
régler les délais entre chaque commande de la séquence macro. Tout délai ajouté à la séquence
macro est considéré comme une pression parmi les 20 pressions de touches possibles pour une
macro SmartMacro. Pour ajouter des délais entre les enfoncement de touches d’une macro
SmartMacro, procédez comme suit :
56
Supprimer une macro SmartMacro (suite)
5. L’écran tactile ACL affiche l’écran Confirm To Delete?.
Appuyez sur la touche OK à l’écran tactile ACL.
Remarque : Si vous avez entrepris de supprimer une macro
SmartMacro et que vous décidez de ne pas la supprimer, vous
pouvez annuler la suppression en appuyant sur la touche
ACL EXIT.
6. Si d’autres macros sont déjà programmées, l’écran tactile
affiche de nouveau Delete a Macro?. Vous pouvez supprimer
d’autres macros à ce point, si désiré.
7. Si aucune macro n’a déjà été programmée, l’écran tactile
montre l’écran Set a SmartMacro?.
8. La suppression de macro est maintenant terminée. Pour
quitter le mode programmation, appuyez sur la touche ACL
EXIT, puis sur la touche ACL OK à l’écran Exit Setup.
RCU_1010_RF_IB_RevA.qxd 9/24/03 10:31 AM Page 56
Page 57
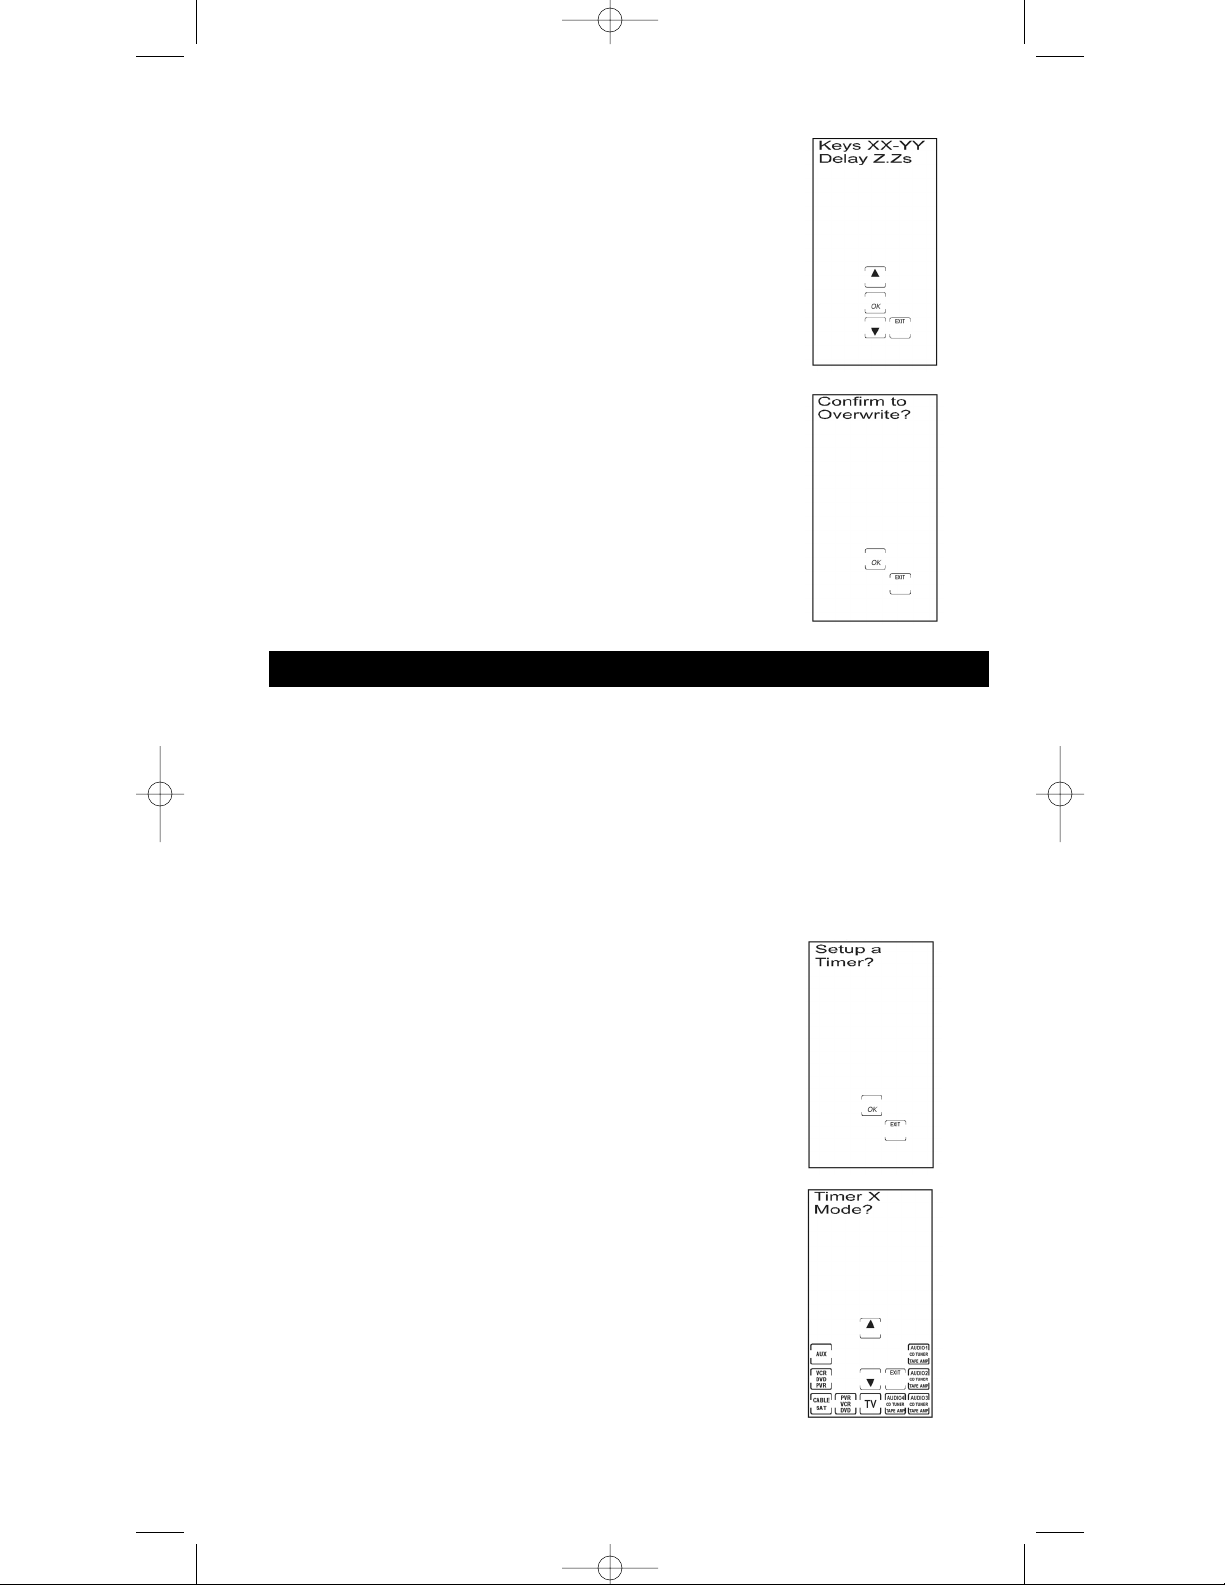
Programmation d’une minuterie d’événement
La minuterie d’événement permet de programmer la RCU1010RF pour allumer ou éteindre un
appareil (téléviseur, magnétoscope, chaîne stéréo, etc.) à l’heure préprogrammée. Par exemple, vous
pouvez programmer la chaîne stéréo pour qu’elle s’allume au son de la musique, le téléviseur pour
qu’il s’éteigne à une heure donnée ou le magnétoscope pour qu’il s’allume et enregistre. Vous pouvez
programmer un maximum de quatre événements-minuterie. Toutefois, les événements que vous
programmez ne surviennent qu’une seule fois, le jour de leur programmation. Vous ne pouvez
programmer d’événements pour des jours à venir ; ceux-ci doivent survenir le jour de leur programmation.
Après avoir programmé la minuterie d’événement, n’oubliez pas de laisser la télécommande pointée
en direction du ou des appareils pour lesquels vous l’avez programmée. Pour programmer une
minuterie d’événement, procédez comme suit :
57
Minuterie d’événement
5. Pour changer le délai entre l’enfoncement des touches,
appuyez sur la touche ACLà FLÈCHE VERS LE HAUT ou LE
BAS pour choisir le délai désiré. Vous pouvez augmenter les
délais par tranches de 0,5 seconde. Appuyez sur la touche
ACL EXIT pour obtenir le délai par défaut de 0,5 seconde.
6. Après chaque délai intertouches programmé, appuyez sur la
touche ACL OK à l’écran Confirm to Overwrite? pour passer
au délai intertouches suivant.
7. Répétez les étapes 5 et 6 pour chaque délai intertouches dans
le séquence macro mémorisée.
8. La programmation des délais intertouches SmartMacro est
maintenant terminée. Pour quitter le mode programmation,
appuyez sur la touche ACL EXIT, puis sur la touche ACL OK
à l’écran Exit Setup.
1. Maintenez la touche SETUP du clavier de caoutchouc enfoncée
pendant 2 ou 3 secondes, jusqu’à ce que le voyant DÉL reste
allumé et que l’écran tactile montre l’écran Code Setup Mode?.
2. Relâchez la touche SETUP.
3. Appuyez plusieurs fois sur la touche SETUP jusqu’à ce que
l’écran Delete a Timer? apparaisse. Appuyez sur la touche
ACL OK.
4. L’écran Timer 1 Mode? apparaît. Appuyez sur la touche de
l’appareil désiré (TV, VCR, AUX, etc.).
Programmer une minuterie d’événement (page suivante)
RCU_1010_RF_IB_RevA.qxd 9/24/03 10:31 AM Page 57
Page 58

Remarque : Si aucune minuterie d’événement n’a été
programmée, cette option n’apparaît pas en mode
programmation.
1. Maintenez la touche SETUP du clavier de caoutchouc enfoncée
pendant 2 ou 3 secondes, jusqu’à ce que le voyant DÉL reste
allumé et que l’écran tactile montre l’écran Delete a Timer?.
2. Appuyez sur la touche ACL OK.
3. L’écran Delete 1? montre le jour actuel et la minuterie
d’événement HH:MM programmée.
4. Le numéro de l’événement est affiché (1, 2, 3 ou 4). Appuyez
plusieurs fois sur la touche SETUP jusqu’à ce que la
minuterie d’événement à supprimer soit affichée.
5. Pour supprimer cet événement, appuyez sur la touche ACL
OK. Pour annuler cette opération, appuyez plusieurs fois sur
la touche SETUP jusqu’à ce que l’écran Exit Setup soit affiché.
Appuyez sur la touche ACL OK.
Les minuteries d’événement sont indiquées par le symbole (T) au-dessus de l’horloge de l’écran
tactile ACL. Pour supprimer une minuterie d’événement, procédez comme suit :
5. L’écran Timer 1 Key? apparaît. Appuyez sur la touche à
programmer pour qu’elle soit activée après un certain temps.
Par exemple, pour programmer le magnétoscope pour
enregistrer, appuyez sur la touche d’appareil VCR à la
quatrième étape, puis sur la touche ACL RECORD.
6. L’écran Set Hours? apparaît. Les chiffres de l’heure (HH)
clignotent. Le jour n’est pas utilisé pour les réglages de
minuterie. Appuyez sur la touche ACL à FLÈCHE VERS LE
HAUT ou LE BAS pour choisir l’heure désirée. Appuyez sur
la touche ACL OK.
7. Les chiffres des minutes (MM) clignotent. Appuyez sur la
touche ACL à FLÈCHE VERS LE HAUT ou LE BAS pour
choisir les minutes. Appuyez sur la touche ACL OK.
8. Appuyez sur la touche ACL OK de l’écran Confirm to Save?
pour confirmer et sauvegarder.
9. Une fois la première minuterie d’événement programmée,
l’écran ACL montre l’écran Timer 2 Mode? pour permettre
de programmer la prochaine minuterie d’événement. Pour
programmer une autre minuterie d’événement, répétez les
étapes 4 à 8. Si vous ne souhaitez pas programmer d’autres
minuteries d’événement, appuyez sur la touche ACL EXIT.
Remarque : Un symbole (T) est affiché pour indiquer qu’une
minuterie est programmée L’afficheur tactile ACL reste
allumé jusqu’à l’expiration de la minuterie.
10. La programmation d’un événement est maintenant terminée.
Pour quitter le mode programmation, appuyez sur la touche
ACL EXIT, puis sur la touche ACL OK à l’écran Exit Setup.
58
Programmer une minuterie d’événement (suite)
Suppression d’une minuterie d’événement
RCU_1010_RF_IB_RevA.qxd 9/24/03 10:32 AM Page 58
Page 59
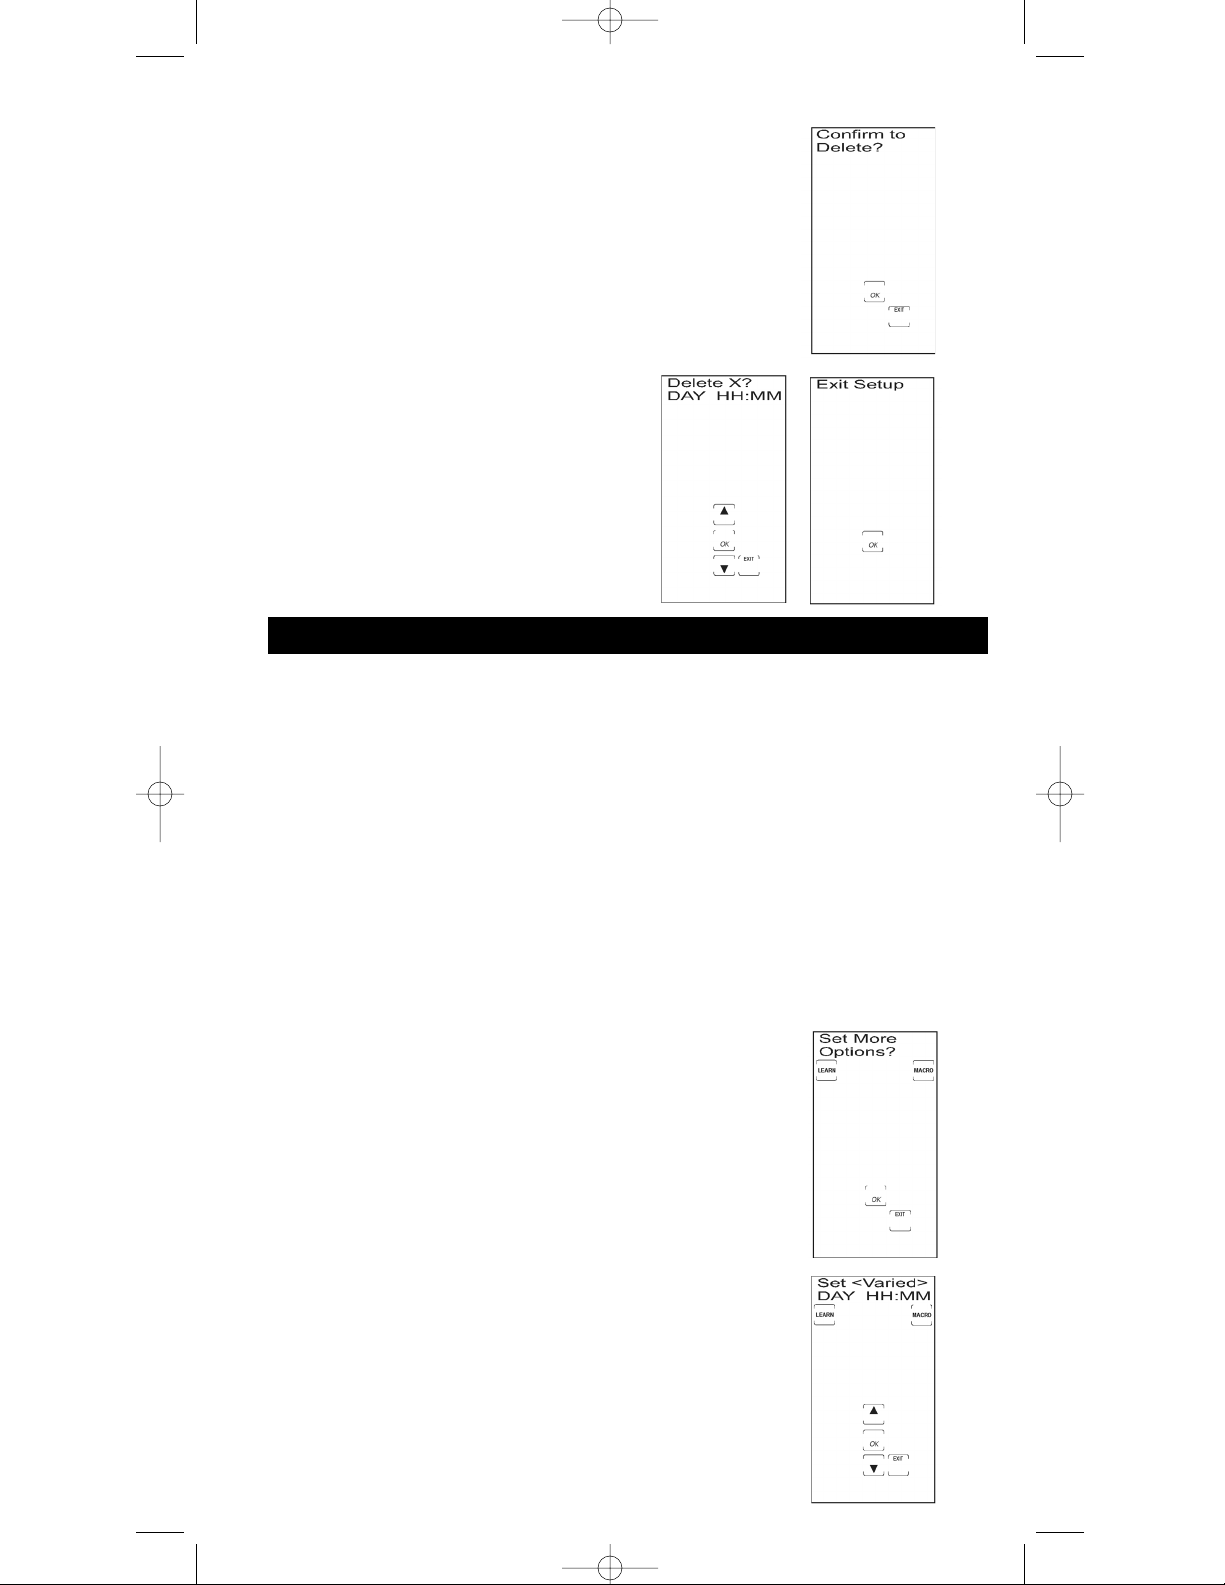
Transfert de volume de téléviseur ou lecteur CD/AUDIO (page suivante)
La fonction de transfert de volume de la RCU1010RF permet de choisir le mode d’appareil (TV ou
AUDIO 1, 2, 3 ou 4) commande les touches VOL+, VOL- et MUTE du clavier de caoutchouc. Grâce
à cette fonction, le volume du téléviseur peut fonctionner même quand vous êtres en mode VCR,
parce qu’il est “transféré” d’un appareil à l’autre.
L’appareil que vous choisissez pour commander le volume transféré doit être TV ou l’appareil
AUDIO 1, 2, 3 ou 4 programmé avec un appareil CD/AUDIO. La commande de volume par défaut
à la mise en marche est assurée par le mode TV.
Une fois la fonction de transfert de volume programmée, les touches VOL+, VOL- et MUTE du téléviseur
ou de l’appareil AUDIO fonctionnent même quand vous êtes en modes CABLE, DVD, SAT et VCR.
(Remarque : Utilisez le mode VCR pour PVR/DVR.)
Remarque : Tous les modes CD/AUDIO acceptent les commandes de volume/silencieux provenant du code
CD/AUDIO, même si le téléviseur est programmé comme appareil de transfert. Tous les autres appareils sont
reliés à la commande de volume/silencieux du téléviseur. Si vous choisissez l’option CD/AUDIO comme
appareil de transfert, tous les modes acceptent toutes les commandes de volume/silencieux provenant du
code CD/AUDIO.
Pour changer l’appareil qui commande le transfert des touches
VOL+, VOL- et MUTE, procédez comme suit :
1. Maintenez la touche SETUP du clavier de caoutchouc enfoncée
pendant 2 ou 3 secondes, jusqu’à ce que le voyant DÉL reste
allumé et que l’écran tactile montre l’écran Code Setup Mode?.
2. Relâchez la touche SETUP.
3. Appuyez plusieurs fois sur la touche SETUP jusqu’à ce que
l’écran Set More Options? apparaisse. Appuyez sur la touche
ACL OK. L’écran Set Time? apparaît.
59
Transfert de volume de téléviseur ou lecteur CD/AUDIO
6. L’écran Confirm to Delete? (Confirmer pour supprimer ?) est
affiché. Appuyez sur la touche ACL OK. Cet affichage retourne
à l’écran Delete a Timer ou, si aucune autre minuterie
d’événement a été programmée, à l’écran Exit Setup.
7. La suppression d’une minuterie d’événement est maintenant
terminée. Pour quitter le mode programmation, appuyez sur
la touche ACL OK à l’écran Exit Setup.
RCU_1010_RF_IB_RevA.qxd 9/24/03 10:32 AM Page 59
Page 60

60
Transfert Magnétoscope/DVD
Touche Record
Transfert de volume de téléviseur ou lecteur CD/AUDIO (suite)
4. Appuyez plusieurs fois sur la touche SETUP ou la touche ACL
à FLÈCHE VERS LE HAUT jusqu’à ce que l’écran Set Volume
TV<>Audio apparaisse. Appuyez sur la touche ACLOK.
5. L’écran Set Volume TV<>Audio reste affiché avec flèche
pleine pour indiquer le réglage actuel. Appuyez sur la touche
ACL à FLÈCHE VERS LA GAUCHE ou VERS LA DROITE
pour choisir TV ou AUDIO. Appuyez sur la touche ACL OK
pour sauvegarder le choix.
• Si AUDIO est choisi, l’écran Set Volume AudioMode?
apparaît pour le mode Audio à utiliser pour la commande
VOLUME/SILENCIEUX. Appuyez sur la touche de mode
Audio désiré, puis sur la touche ACL OK à l’écran Confirm
to Save? pour confirmer et sauvegarder.
• Si TV est choisi, appuyez sur la touche ACL OK à l’écran
Confirm to Save? pour confirmer et sauvegarder.
6. L’écran ACL Set More Options? est affiché. Pour quitter le
mode programmation, appuyez sur la touche ACL EXIT, puis
sur la touche ACL OK à l’écran Exit Setup.
La RCU1010RF transfère les cinq touches de transport (REVERSE, PLAY, FORWARD, STOP et
PAUSE) au mode VCR ou DVD, selon celui qui était utilisé le plus récemment. Le transfert aux
touches de transport VCR ou DVD du clavier en caoutchouc n’est permis qu’en modes TV, VCR,
DVD et Cable. Les touches de transport AUX, SAT et CD/AUDIO sont dédiées à leurs modes
programmés. (Remarque : Utilisez le mode VCR pour PVR/DVR.)
Remarque : L’écran ACL montre les changements d’appareil pour les touches de transfert VCR ou
DVD si elles sont enfoncées dans d’autres modes (c.-à-d. si vous êtes en mode CABLE et que vous
appuyez sur PLAY, VCR ou DVD apparaît à l’écran ACL).
En modes VCR et AUDIO/CD (incluant le transfert), il faut appuyer deux fois sur la touche ACL
RECORD avant que la commande soit acheminée. Cela est aussi vrai si un magnétoscope est
programmé dans tout autre mode. Les seules exceptions sont les codes DVD et SAT, dans lesquels
cas la touche ACL RECORD transmet la commande après seulement une pression de la touche
RECORD. (Remarque : Un PVR/DVR fonctionne dans le mode VCR.)
RCU_1010_RF_IB_RevA.qxd 9/24/03 10:32 AM Page 60
Page 61

Fonction de bip d’enfoncement de touche
La RCU1010RF émet un bip quand une touche est enfoncée pour confirmer l’enfoncement de la
touche. Vous pouvez activer ou désactiver cette fonction. Le réglage par défaut est Activé.
Pour activer et désactiver le bip de confirmation, procédez comme suit :
1. Maintenez la touche SETUP du clavier de caoutchouc enfoncée
pendant 2 ou 3 secondes, jusqu’à ce que le voyant DÉL reste
allumé et que l’écran tactile montre l’écran Code Setup Mode?.
2. Relâchez la touche SETUP.
3. Appuyez plusieurs fois sur la touche SETUP jusqu’à ce que
l’écran Set More Options? apparaisse. Appuyez sur la touche
ACL OK. L’écran Set Time? apparaît dans l’afficheur ACL.
4. Appuyez plusieurs fois sur la touche SETUP ou sur la touche
ACL à FLÈCHE VERS LE HAUT jusqu’à ce que l’écran Set
Beep? On<>Off soit affiché. Appuyez sur la touche ACL OK.
5. L’écran Set Beep? On<>Off reste affiché avec une flèche pleine
pour indiquer le réglage actuel. Appuyez sur la touche ACL
à FLÈCHE VERS LA GAUCHE ou VERS LA DROITE pour
choisir On ou Off. Appuyez deux fois sur la touche ACL OK
pour confirmer et sauvegarder le changement d’état de bip à
l’écran Confirm to Save?.
6. L’écran ACL montre l’écran Set More Options? et le
changement de bip est maintenant terminé. Pour quitter le
mode programmation, appuyez sur la touche ACL EXIT, puis
sur la touche ACL OK à l’écran Exit Setup.
Durée d’affichage de l’écran tactile ACL
Vous pouvez choisir la durée (10, 20, 30 … 90 secondes) d’affichage de l’écran tactile après
l’enfoncement de la dernière touche. Le réglage par défaut à la mise en marche est 10 secondes à
partir de l’enfoncement de la dernière touche, après lequel l’unité s’éteint automatiquement. La
durée d’affichage ACL ne peut être programmée à une durée inférieure à la durée du rétroéclairage.
Pour changer la durée d’affichage de l’écran tactile ACL, procédez comme suit :
1. Maintenez la touche SETUP du clavier de caoutchouc enfoncée
pendant 2 ou 3 secondes, jusqu’à ce que le voyant DÉL reste
allumé et que l’écran tactile montre l’écran Code Setup Mode?.
2. Relâchez la touche SETUP.
3. Appuyez plusieurs fois sur la touche SETUP jusqu’à ce que
l’écran Set More Options?
Durée d’affichage de l’écran tactile ACL (page suivante)
61
Autres caractéristiques
RCU_1010_RF_IB_RevA.qxd 9/24/03 10:32 AM Page 61
Page 62

62
Durée d’affichage de l’écran tactile ACL (suite)
4. Appuyez sur la touche ACL OK. L’écran Set Time? apparaît
dans l’afficheur ACL.
5. Appuyez plusieurs fois sur la touche SETUP ou sur la touche
ACL à FLÈCHE VERS LE HAUT jusqu’à ce que l’écran Set
LCD On Time? soit affiché. Appuyez sur la touche ACL OK.
6. L’écran ACL montre l’écran LCD On for 10 Secs (ou la durée
déjà programmée). Appuyez sur les touches LCD à flèche vers
le HAUT ou le BAS pour choisir la durée de marche désirée.
Vous pouvez changer la durée par tranches de 10 secondes
seulement, de 10 à 90 secondes. Appuyez deux fois sur la
touche ACL OK pour confirmer et sauvegarder vos réglages
à l’écran Confirm to Save?.
7. L’écran Set More Options? (Programmer d’autres options ?)
est affiché. Le réglage de durée d’affichage de l’écran tactile
ACL est maintenant terminé. Pour quitter le mode programmation,
appuyez sur la touche ACL EXIT, puis sur la touche ACL OK
à l’écran Exit Setup.
Remarque : Le temps d’affichage de 10 secondes maximise la
durée utile des piles. Si vous avez changé la durée d’affichage
de l’écran tactile ACL pour faciliter la programmation, on
recommande de rétablir la durée d’affichage à 10 secondes
quand vous avez terminé.
Régler le jour et l’heure pour l’affichage ACL
Vous pouvez programmer le jour et l’heure de l’écran ACL. Pour programmer le jour et l’heure de
l’écran ACL, procédez comme suit :
1. Maintenez la touche SETUP du clavier de caoutchouc enfoncée
pendant 2 ou 3 secondes, jusqu’à ce que le voyant DÉL reste
allumé et que l’écran tactile montre l’écran Code Setup Mode?.
2. Relâchez la touche SETUP.
3. Appuyez plusieurs fois sur la touche SETUP jusqu’à ce que
l’écran Set More Options? apparaisse. Appuyez sur la touche
ACL OK.
4. L’écran Set Time? apparaît maintenant avec le jour actuel
(DAY) et l’heure (HH:MM) à l’écran ACL. Appuyez sur la
touche ACL OK.
RCU_1010_RF_IB_RevA.qxd 9/24/03 10:32 AM Page 62
Page 63

1. Maintenez la touche SETUP du clavier de caoutchouc enfoncée
pendant 2 ou 3 secondes, jusqu’à ce que le voyant DÉL reste
allumé et que l’écran tactile montre l’écran Code Setup Mode?.
2. Relâchez la touche SETUP.
3. Appuyez plusieurs fois sur la touche SETUP jusqu’à ce que
l’écran Set More Options? apparaisse. Appuyez sur la touche
ACL OK.
Rétroéclairage (page suivante)
Le rétroéclairage est produit par un panneau électroluminescent (ÉL) qui donne une lumière bleue,
laquelle permet de voir l’écran tactile dans le noir. Le rétroéclairage n’est activé que lorsque vous
appuyez sur la touche BACKLIGHT du clavier de caoutchouc. Le fait d’appuyer sur la touche
BACKLIGHT active aussi l’écran tactile ACL. Après avoir appuyé sur la touche BACKLIGHT, la
lumière reste allumée pendant la durée par défaut de 10 secondes (ou la durée déjà programmée)
si aucune touche n’est enfoncée.
Si une autre touche est enfoncée après la touche BACKLIGHT, l’éclairage continue pendant 10 autres
secondes (ou la durée déjà programmée) après que la touche a été relâchée. Après la durée programmée
de rétroéclairage, cette fonction n’est réactivée que lorsque la touche BACKLIGHT est enfoncée de
nouveau. S’il est activé, et que la touche BACKLIGHT est enfoncée de nouveau, le rétroéclairage
est désactivé.
Pour changer la durée de rétroéclairage, procédez comme suit :
63
5. L’écran Set Format 12 Hr<>24Hr apparaît maintenant à
l’écran ACL. Une flèche pleine indique le réglage actuel.
Appuyez sur les touches LCD à flèche vers la GAUCHE ou
à la DROITE pour choisir le format d’heure 12Hr ou 24Hr.
Appuyez sur la touche ACL OK.
6. L’écran Set Day apparaît maintenant et le JOUR clignote.
7. Appuyez sur les touches ACL à FLÈCHE VERS LE HAUT ou
LE BAS, ou maintenez-les enfoncées, pour choisir le JOUR.
Appuyez sur la touche ACL OK quand vous avez atteint le
réglage du jour exact.
8. Les chiffres des HEURES (HH) clignotent. Appuyez sur les
touches ACL à FLÈCHE VERS LE HAUT ou LE BAS, ou
maintenez-les enfoncées, pour choisir l’heure. Appuyez sur
la touche ACL OK quand vous avez atteint le réglage de
l’heure exacte.
Remarque : Pour régler la désignation AM/PM, faites défiler
plusieurs fois les réglages de l’heure.
9. Les chiffres des MINUTES (MM) clignotent. Appuyez sur les
touches ACL à FLÈCHE VERS LE HAUT ou LE BAS, ou
maintenez-les enfoncées, pour choisir les minutes. Appuyez
sur la touche ACL OK quand vous avez atteint le réglage des
minutes exactes.
10. Appuyez sur la touche ACL OK à l’écran Confirm to Save?
pour confirmer et sauvegarder.
11. Après que vous avez réglé le jour et le format d’heure et de
minutes, l’écran Set More Options? apparaît. Le réglage du
jour et de l’heure est maintenant terminé. Pour quitter le
mode programmation, appuyez sur la touche ACL EXIT,
puis sur la touche ACL OK à l’écran Exit Setup.
Rétroéclairage
RCU_1010_RF_IB_RevA.qxd 9/24/03 10:32 AM Page 63
Page 64
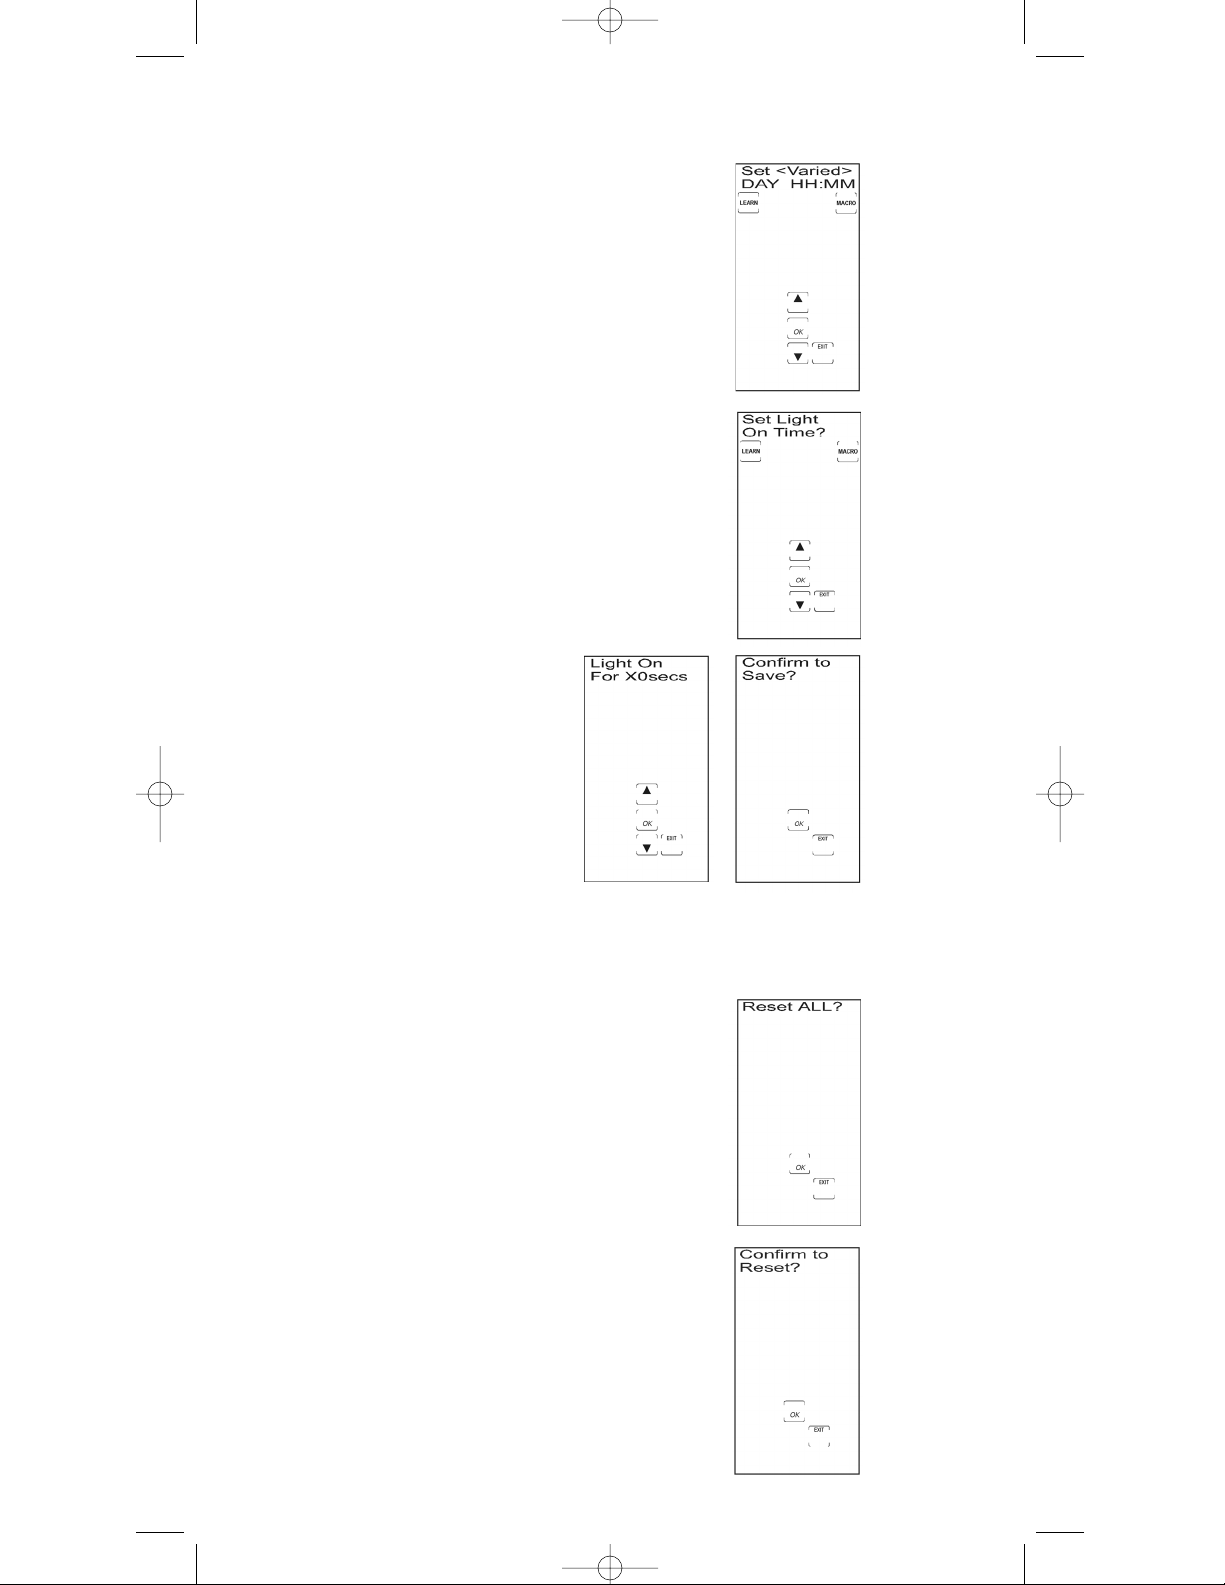
Un rétablissement général rétablit tous les réglages par défaut de la RCU1010RF aux réglages d’usine
originaux. Cette fonction supprime tous les codes programmés par l’utilisateur, les commandes
apprises et les macros intelligentes SmartMacro, et rétablit toutes les étiquettes de touches.
Pour exécuter un rétablissement général, procédez comme suit :
Rétablissement général
64
Rétroéclairage (suite)
4. L’écran Set Time? apparaît dans l’afficheur ACL. Appuyez
plusieurs fois sur la touche SETUP ou la touche ACL à
FLÈCHE VERS LE HAUT jusqu’à ce que l’écran Set Light
On Time? soit affiché. Appuyez sur la touche ACL OK.
5. L’écran ACL montre l’écran LCD On for 10 Secs (ou la durée
déjà programmée). Appuyez sur les touches LCD à flèche vers
le HAUT ou le BAS pour choisir la durée de marche désirée.
Vous pouvez changer la durée par tranches de 10 secondes
seulement, de 10 à 90 secondes.
Remarque : La durée de rétroéclairage ne peut être supérieure
à la durée d’affichage de l’écran ACL. Appuyez deux fois sur
la touche ACL OK de l’écran Confirm to Save? pour confirmer
et sauvegarder vos réglages.
6. L’écran Set More Options? (Programmer d’autres options ?)
est affiché. Le réglage de durée de rétroéclairage est
maintenant terminé. Pour quitter le mode programmation,
appuyez sur la touche ACL EXIT, puis sur la touche ACL
OK à l’écran Exit Setup.
1. Maintenez la touche SETUP du clavier de caoutchouc
enfoncée pendant 2 ou 3 secondes, jusqu’à ce que le voyant
DÉL reste allumé et que l’écran tactile montre l’écran Code
Setup Mode?.
2. Relâchez la touche SETUP.
3. Appuyez plusieurs fois sur la touche SETUP jusqu’à ce que
Reset ALL? apparaisse.
4. Appuyez sur la touche ACL OK.
5. L’écran Confirm to Reset? apparaît à l’écran ACL. Appuyez
sur la touche ACL OK. L’écran Please Wait apparaît et l’écran
tactile ACL s’éteint.
6. Tous les réglages sont alors rétablis aux réglages par défaut
de l’usine.
RCU_1010_RF_IB_RevA.qxd 9/24/03 10:32 AM Page 64
Page 65

65
Glossaire
Fonction Mise à l’arrêt général RCA
La fonction de mise à l’arrêt général RCA est offerte dans tous les modes de fonctionnement normaux.
Si la touche ON•OFF du clavier de caoutchouc est enfoncée deux fois de suite (dans les deux secondes),
tous les appareils RCA s’éteignent. L’écran tactile montre l’écran Power Off pendant cette opération.
CARACTÉRISTIQUES AUDIO
TOUCHE AM•FM
La touche AM•FM permet de choisir la bande AM ou FM du système sonore.
TOUCHES CENTER, FRONT, REAR ET TEST
Vous pouvez régler les niveaux des enceintes centrale, avant et arrière à l’aide des touches
ACL à FLÈCHE VERS LE HAUT/BAS. La touche TEST est utilisée quand vous réglez
l’équilibre des enceintes afin de maximiser le rendement du système sonore.
TOUCHES CD, TAPE, TUNER, TV, VIDEO
Utilisez les touches CD, TAPE, TUNER, TV et VIDEO pour choisir l’appareil à commander.
TOUCHE DSP
Lorsque le mode DSP (Traitement de signal numérique) est activé, l’enfoncement de cette
touche permet de parcourir les divers modes DSP.
TOUCHES À FLÈCHE VERS LE HAUT / BAS
Les touches à FLÈCHE VERS LE HAUT et LE BAS permettent de modifier le délai, le
niveau de sortie de l’enceinte centrale, le niveau de sortie des enceintes arrière, le niveau
des enceintes avant ou le niveau du sous-grave.
TOUCHE PROG
La touche PROGRAM permet de programmer les voies AUDIO préréglées.
TOUCHE BACKLIGHT
La touche BACKLIGHT active et désactive le rétroéclairage de l’afficheur ACL.
TOUCHES D’APPAREIL
Les touches d’appareil de l’écran ACL changent l’appareil actuellement commandé par la
télécommande (ex. TV, VCR, CABLE, SAT, DVD, AUDIO 1, 2, 3, 4). Les touches AUDIO 1-4
permettent de programmer le lecteur CD, le syntonisateur, le magnétocassette et l’amplificateur.
(Remarque : La touche VCR est utilisé pour PVR/DVR.)
TOUCHE ENTER
La touche ACL ENTER permet de sélectionner les canaux de certaines marques de téléviseurs. Elle
permet aussi d’exécuter les sections en surbrillance pendant la navigation dans les nouveaux écrans.
TOUCHE GO BACK
La touche GO BACK permet de passer au canal précédemment choisi. Il fonctionne comme la touche
Last Channel, Previous Channel ou Recall de la télécommande existante.
TOUCHE GUIDE
Si l’appareil dispose de cette fonction, la touche ACL GUIDE affiche l’horaire-télé à l’écran.
TOUCHE INPUT
La touche ACL INPUT permet de choisir les entrées vidéo d’un appareil doté de cette fonction.
APPRENTISSAGE (LEARN)
La fonction LEARN permet de compléter les listes de codes préprogrammés. Les listes de codes
standard contient la plupart des fonctions requises, mais vous pouvez ajouter un petit nombre
d’autres fonctions de votre choix.
VOYANT DÉL
Le voyant DÉL (diode électroluminescente), situé sur le côté supérieur droit de la télécommande
RCU1010RF, s’allume quand une touche de caoutchouc ou une touche de l’écran tactile ACL est enfoncée.
Le voyant DÉL clignote et émet trois bips (environ deux secondes) pour indiquer un état d’erreur.
AFFICHEUR À CRISTAUX LIQUIDES
L’écran à cristaux liquides (ACL) agit comme le “clavier virtuel” de la télécommande. L’écran tactile est
généralement vide lorsque la télécommande n’est pas utilisée. Le fait d’appuyer sur la touche SETUP
ou BACKLIGHT, ou de toucher l’afficheur ACL n’importe où, allume l’écran. Les autres touches de
caoutchouc n’activent pas l’écran.
REMARQUE : Toucher l’écran ACL seulement avec le doigt. Les objets pointus peuvent érafler ou
fendre l’écran.
RCU_1010_RF_IB_RevA.qxd 9/24/03 10:32 AM Page 65
Page 66

66
Glossaire (suite)
TOUCHE MENU
La touche ACL MENU affiche le menu principal. Si vous vous trouvez déjà dans le système de menus,
appuyez sur la touche ACL OK ou MENU pour choisir un élément en surbrillance. Utilisez les
touches NAVIGATION ACL (FLÈCHES HAUT, BAS, GAUCHE, et DROITE) pour parcourir les
éléments du menu.
REMARQUE : Avec certaines marques, les touches CH+ et CH- et VOL+ et VOL- du clavier de
caoutchouc permettent de naviguer parmi les choix en surbrillance. Quand vous avez choisi une
touche d’appareil à l’écran tactile ACL (TV, VCR, DVD, etc.), vous placez la télécommande dans ce
mode, et celle-ci reste dans ce mode jusqu’à ce que vous appuyiez sur une autre touche de mode.
Quand vous placez la télécommande dans un mode particulier, l’écran de commande de ce mode
apparaît à l’écran tactile. Par exemple, si vous placez la télécommande en mode TV, l’écran de
commande à l’écran tactile correspond au mode TV. (Remarque : La touche VCR et le mode VCR sont
utilisés pour les opérations de PVR/DVR.)
TOUCHE MUTE
La touche MUTE du clavier de caoutchouc supprime le son de l’appareil à commande de volume.
TOUCHE DE NAVIGATION ET TOUCHE SELECT
Utilisez les touches LCD NAVIGATION (touches à flèche vers le HAUT, le BAS, la GAUCHE et la
DROITE) pour parcourir le menu et les guides à l’écran. Les touches NAVIGATION permettent aussi de
parcourir les choix en surbrillance La touche ACL SELECT permet de choisir l’élément en surbrillance.
Remarque : Pour certains modèles, il faut utiliser la touche ACL MENU ou ENTER pour choisir les
éléments en surbrillance.
TOUCHES PIP ET SWAP
Les touches LCD d’image sur image (PIP) et de permutation SWAP commandent la fonction Image
sur image de votre téléviseur s’il en est équipé.
TRANSFERT
Une commande de transfert peut transférer d’un appareil à l’autre (c.-à-d. que les touches VOL+/VOL-
du téléviseur peuvent fonctionner pendant que la télécommande est en mode Magnétoscope).
TOUCHES REVERSE, STOP, PLAY, PAUSE, FORWARD
Ces touches en caoutchouc fonctionnent comme sur les télécommandes existantes.
TOUCHE SETUP
La touche SETUP du clavier de caoutchouc permet de parcourir les étapes de programmation de la
télécommande. Le mode de programmation est utilisé pour l’entrée de liste de codes, la recherche de code,
l’identification de code et autres fonctions. Durant une fonction de programmation, si aucune touche n’est
enfoncée pendant 60 secondes, la télécommande quitte automatiquement le mode de programmation.
TOUCHE SLEEP
La touche ACL SLEEP permet d’éteindre automatiquement le téléviseur s’il est doté de cette fonction.
MACRO INTELLIGENTE (SMARTMACRO
MS
)
La fonction Macro intelligente, lorsque programmée, permet d’exécuter une série d’événements en séquence.
Une fois programmée, la touche ACL MACRO fait apparaître un écran qui permet de choisir l’une ou l’autre
de vos macros programmées. Exemple de séquence macro : “Allumer le téléviseur ; le syntoniser au canal 3 ;
allumer le récepteur de satellite ; le syntoniser au canal 57.” Vous pouvez programmer et mémoriser neuf
macros intelligentes SmartMacro, chacune constituée d’un maximum de 20 commandes.
MINUTERIE
Cette fonction permet à un événement de survenir à une heure ultérieure du jour en cours, comme
“Allumer le téléviseur à 19 h.” Le mode Minuterie permet de programmer un maximum de quatre
commandes individuelles et doit être reprogrammé après chaque événement.
TOUCHE TV•VCR
La touche ACL TV•VCR fonctionne comme les touches TV/VCR ou d’antenne de vos
télécommandes originales.
TOUCHES VOLUME ET CHANNEL
Les touches VOLUME et CHANNEL (touches VOL+/VOL-, CH+ et CH-) du clavier de caoutchouc
permettent de monter et de baisser le volume et de changer les canaux.
Remarque : Avec certaines marques, ces touches permettent aussi de naviguer parmi les choix en
évidence du mode Menu.
RCU_1010_RF_IB_RevA.qxd 9/24/03 10:32 AM Page 66
Page 67

PROBLÈME
L’écran tactile n’affiche rien quand vous le
touchez ou quand vous appuyez sur les
touches SETUP ou BACKLIGHT.
La télécommande ne commande pas les
appareils audio ou vidéo.
Difficulté à programmer un téléviseur/
magnétoscope ou téléviseur/DVD combiné.
Le magnétoscope n’enregistre pas.
Difficulté à changer les canaux
au téléviseur.
La touche ACL SELECT ne répond pas.
La touche ACL EXIT ne répond pas pendant les
fonctions MACRO et LEARN.
Impossible d’exécuter les fonctions
d’apprentissage IR ou Macro intelligente.
SOLUTION
•
Remplacez les piles par quatre piles
alcalines AAA neuves.
• Vérifiez que les piles sont
correctement installées.
• Essayez toutes les procédures de programmation
de codes avec tous les codes de la section
appropriée de la liste de codes.
• Assurez-vous que la télécommande se trouve
dans le mode correspondant à l’appareil que vous
tentez de commander (TV, VCR, DVD, etc.). (Note:
Use the VCR Mode to operate a PVR/DVR.)
• Assurez-vous que la télécommande est pointée
en direction de l’appareil commandé.
• Essayez le code de magnétoscope ou de DVD
de la marque. Certains appareils combinés
peuvent toutefois exiger un code de téléviseur
et un code de magnétoscope ou de DVD pour
assurer un fonctionnement complet. Pour ce,
programmez le code de téléviseur à la touche
TV et le code de magnétoscope ou le lecteur
DVD à la touche VCR ou DVD.
• Par mesure de sécurité, vous devez appuyer
deux fois sur la touche ACL RECORD de
la télécommande.
• Si la télécommande originale exige l’enfoncement
de la touche ENTER après la sélection d’un
canal, appuyez sur la touche ACL ENTER de la
RCU1010RF pour choisir le canal.
• Essayez d’utiliser la touche ACL MENU,
GUIDE ou ENTER pour faire la sélection.
• Appuyez plusieurs fois sur la touche SETUP
jusqu’à ce que Exit Setup apparaisse. Appuyez
sur la touche ACL OK.
• Remplacez les piles de la RCU1010RF et
de la télécommande de laquelle vous
tentez d’apprendre.
• La distance entre les télécommandes doit être
d’environ deux à trois pouces.
• N’exécutez pas les opérations d’apprentissage
près d’une lampe à incandescence.
•
La mémoire est pleine (20 commandes apprises
pour chacun des neuf modes).
• La télécommande originale peut ne pas être
compatible avec la méthode d’apprentissage.
Dépannage
* La portée peut varier selon la construction de la maison
67
Le voyant DÉL de la télécommande RCU1010RF
s’allume quand vous appuyez sur une touche,
mais le voyant rouge à l’intérieur de l’émetteur
ne s’allume pas.
• Assurez-vous que le cône émetteur éloigné est
branché dans une prise de courant.
•
Assurez-vous que la télécommande se trouve à
un maximum de 100 pieds (30,48 mètres)* du
cône émetteur éloigné.
• Étendez complètement l’antenne du cône
émetteur éloigné ou repositionnez l’antenne
pour obtenir une meilleure réception.
RCU_1010_RF_IB_RevA.qxd 9/24/03 10:32 AM Page 67
Page 68

PROBLÈME
Votre appareil ne réagit pas, mais le voyant
rouge à l’intérieur du cône émetteur éloigné
s’allume quand une touche est enfoncée à la
télécommande RCU1010RF.
SOLUTION
•
Assurez-vous que le cône émetteur éloigné se
trouve à un maximum de 20 pieds (6,096
mètres) de vos appareils.
• Assurez-vous que l’avant (côté logo) du cône
émetteur éloigné est pointé en direction de
vos appareils.
• Lorsque vous tentez de commander plusieurs
appareils placés derrière une porte fermée
(centre de divertissement), essayez d’abord de
placer le cône émetteur éloigné à différents
endroits. Dans la plupart des cas, vous pourrez
placer le cône émetteur éloigné dans un
endroit permettant de ne pas utiliser le
prolongateur IR.
• Assurez-vous que rien n’obstrue la vue entre le
cône émetteur éloigné et les appareils. Si un
objet bloque le signal, fixez le prolongateur IR
(voir page 5 pour de l’information sur
l’installation de le prolongateur IR).
68
Dépannage
RCU_1010_RF_IB_RevA.qxd 9/24/03 10:32 AM Page 68
Page 69

69
Code List/Liste de codes
Televisions/Téléviseurs
Abex ...............................................................................................................................................................................................................185
Acme......................................................................................................................................................................................................039, 050
ADA.......................................................................................................................................................................................................007, 008
ADC ...............................................................................................................................................................................................................003
Admiral .................................................................................................................................................................................................001, 173
Adventura .....................................................................................................................................................................................................174
Aiko................................................................................................................................................................................................................058
Aiwa.......................................................................................................................................................................................................195, 196
Akai................................................................................................................................................................................................................002
Alleron...........................................................................................................................................................................................................051
Amark............................................................................................................................................................................................................020
Amtron...........................................................................................................................................................................................................053
Amstrad.........................................................................................................................................................................................................189
Anam National ............................................................................................................................................................003, 025, 042, 053, 193
AOC ......................................................................................................................................................004, 005, 007, 009, 014, 132, 156, 175
Apex...............................................................................................................................................................................................................214
Archer ............................................................................................................................................................................................................020
Audiovox.......................................................................................................................................................................................................053
Bang & Olufsen............................................................................................................................................................................................190
Belcor .............................................................................................................................................................................................................004
Bell & Howell...............................................................................................................................................................................000, 001, 049
Bradford.........................................................................................................................................................................................................053
Broksonic...............................................................................................................................................................................................136, 147
Brokwood......................................................................................................................................................................................................004
Candle ...................................................................................................................................................................................004, 008, 009, 174
Capehart ........................................................................................................................................................................................................175
Celebrity ........................................................................................................................................................................................................002
Centurion ......................................................................................................................................................................................................009
Cetronic .........................................................................................................................................................................................................042
Changhong....................................................................................................................................................................................................214
Citizen ..................................................................................................................................001, 004, 008, 009, 042, 053, 058, 105, 109, 177
Clairtone........................................................................................................................................................................................................014
Classic....................................................................................................................................................................................................042, 214
Colortyme .....................................................................................................................................................................................004, 009, 010
Concerto ................................................................................................................................................................................................004, 009
Concierge.......................................................................................................................................................................................................121
Contec/Cony ...............................................................................................................................................................012, 013, 014, 042, 053
Craig.......................................................................................................................................................................................................042, 053
Crown....................................................................................................................................................................................................042, 053
Curtis-Mathes .............................................................................................................000, 001, 004, 009, 015, 031, 049, 073, 105, 109, 130
CXC........................................................................................................................................................................................................042, 053
Daewoo ...............................................................................004, 005, 009, 017, 018, 019, 042, 058, 082, 085, 097, 100, 126, 127, 130, 138
Daytron..................................................................................................................................................................................................004, 009
Dimensia ...............................................................................................................................................................................................000, 031
Dumont .................................................................................................................................................................................................004, 121
Dynasty..........................................................................................................................................................................................................042
Elektra............................................................................................................................................................................................................001
Electroband...........................................................................................................................................................................................002, 014
Electrohome..........................................................................................................................................................................003, 004, 009, 022
Emerson..............................................................................................004, 009, 014, 023, 024, 025, 026, 027, 030, 032, 033, 034, 035, 036,
..............................................................................................................................................037, 038, 039, 040, 041, 042, 043, 045, 049, 051,
........................................................................................................................................................053, 116, 135, 147, 155, 177, 179, 189, 198
Envision.................................................................................................................................................................................................004, 009
Fisher .....................................................................................................................................................................................013, 049, 180, 209
Fujitsu ....................................................................................................................................................................................................051, 197
Funai......................................................................................................................................................................042, 051, 053, 155, 189, 198
Futuretec................................................................................................................................................................................................042, 053
GE ................................................................................000, 003, 004, 009, 015, 022, 031, 044, 052, 054, 055, 087, 092, 103, 107, 125, 164
Gibralter ................................................................................................................................................................................................004, 121
Goldstar................................................................................................................................................004, 005, 009, 056, 057, 155, 156, 172
Grundy ..................................................................................................................................................................................................051, 053
Haier ......................................................................................................................................................................................................216, 217
Hallmark ...............................................................................................................................................................................................004, 009
Harvard .........................................................................................................................................................................................................053
Hitachi.................................................................................................................................001, 004, 009, 013, 059, 060, 061, 088, 091, 137,
.......................................................................................................................................................139, 141, 142, 143, 144, 145, 146, 179, 210
IMA ................................................................................................................................................................................................................053
Infinity ...........................................................................................................................................................................................................062
Inteq ...............................................................................................................................................................................................................121
Janeil...............................................................................................................................................................................................................174
JBL ..................................................................................................................................................................................................................062
JCB..................................................................................................................................................................................................................002
JC Penney ...................................................................000, 004, 005, 008, 009, 015, 022, 030, 031, 052, 054, 055, 087, 105, 107, 109, 172
Jensen.....................................................................................................................................................................................................004, 009
JVC.................................................................................................................................................................013, 054, 055, 060, 065, 067, 089
Kawasho........................................................................................................................................................................................002, 004, 009
Kaypani .........................................................................................................................................................................................................175
KEC ................................................................................................................................................................................................................042
Kenwood...............................................................................................................................................................................................004, 009
Kloss Novabeam..........................................................................................................................................................................068, 069, 174
Konka....................................................................................................................................................................016, 047, 066, 157, 158, 176
KTV................................................................................................................................................................014, 021, 042, 053, 070, 116, 177
Lodgenet................................................................................................................................................................................................000, 001
Loewe.....................................................................................................................................................................................................062, 211
Logik ......................................................................................................................................................................................................000, 001
Luxman..................................................................................................................................................................................................004, 009
LXI.................................................................................................................................................000, 004, 009, 015, 031, 049, 062, 107, 109
Magnavox............................................................................................................004, 008, 009, 062, 068, 069, 074, 075, 077, 089, 163, 165
Majestic..................................................................................................................................................................................................000, 001
RCU_1010_RF_IB_RevA.qxd 9/24/03 10:32 AM Page 69
Page 70

70
Televisions (continued)/Téléviseurs (suite)
Marantz .........................................................................................................................................................................................004, 009, 062
Megatron.......................................................................................................................................................................................004, 009, 059
MEI.................................................................................................................................................................................................................014
Memorex.......................................................................................................................................................000, 001, 004, 009, 049, 051, 135
MGA......................................................................................................................................................................004, 005, 009, 022, 051, 180
Midland ................................................................................................................................................................015, 054, 055, 107, 121, 172
Minutz............................................................................................................................................................................................................052
Mitsubishi ....................................................................................................................................004, 005, 009, 022, 051, 081, 089, 132, 180
Montgomery Ward ..............................................................................................................................................................................000, 001
Motorola................................................................................................................................................................................................003, 173
MTC.......................................................................................................................................................................004, 005, 009, 014, 105, 109
Multitech .......................................................................................................................................................................................................053
Multivision....................................................................................................................................................................................................084
NAD ......................................................................................................................................................................................004, 009, 109, 185
NEC.......................................................................................................................................................003, 004, 005, 009, 010, 085, 089, 095
Nikei...............................................................................................................................................................................................................042
Nikko .............................................................................................................................................................................................004, 009, 058
NTC................................................................................................................................................................................................................058
Onking ...........................................................................................................................................................................................................042
Onwa......................................................................................................................................................................................................042, 053
Optimus.................................................................................................................................................................................................170, 185
Optonica................................................................................................................................................................................................095, 173
Orion..............................................................................................................................................................................................035, 121, 135
Panasonic .............................................................................................................................................003, 054, 055, 062, 070, 148, 170, 171
Philco............................................................................................................................003, 004, 005, 008, 009, 062, 068, 069, 074, 075, 077
Philips .................................................................................................................003, 004, 006, 008, 062, 068, 069, 074, 075, 086, 087, 089,
.......................................................................................................................................................163, 183, 184, 205, 206, 207, 208, 212, 213
Philips/Magnavox......................................................................................................................................................183, 184, 204, 208, 213
Pilot ................................................................................................................................................................................................................004
Pioneer ..........................................................................................................................................................................004, 009, 090, 179, 185
Portland.................................................................................................................................................................................004, 005, 009, 058
Precision ........................................................................................................................................................................................................166
Price Club......................................................................................................................................................................................................105
Prism ..............................................................................................................................................................................................................055
ProScan..................................................................................................................................................................................000, 015, 031, 107
Proton....................................................................................................................................................................004, 009, 093, 175, 186, 192
Pulsar .............................................................................................................................................................................................................121
Pulser .............................................................................................................................................................................................................004
Quasar...................................................................................................................................................003, 054, 055, 062, 070, 148, 170, 171
RadioShack .........................................................................................000, 004, 009, 031, 041, 042, 048, 049, 053, 095, 155, 170, 172, 194
RCA.....................................................................................000, 003, 004, 005, 007, 009, 011, 015, 048, 082, 092, 094, 096, 098, 101, 102,
.......................................................................................................................................103, 107, 113, 125, 129, 167, 179, 187, 188, 191, 194
Realistic........................................................................................................000, 004, 009, 031, 041, 042, 048, 049, 053, 095, 155, 170, 172
Rhapsody ......................................................................................................................................................................................................014
Runco .............................................................................................................................................................................................................121
Sampo............................................................................................................................................................................004, 009, 046, 172, 175
Samsung.......................................................................................................................................004, 005, 009, 015, 104, 105, 106, 109, 172
Samsux...........................................................................................................................................................................................................009
Sansui.....................................................................................................................................................................................................135, 136
Sanyo.............................................................................................................................................................004, 013, 049, 108, 110, 180, 209
Scotch.....................................................................................................................................................................................................004, 009
Scott...............................................................................................................................................................004, 009, 024, 035, 042, 051, 053
Sears .....................................................................................................000, 004, 009, 013, 015, 031, 049, 051, 105, 107, 109, 110, 180, 189
Sharp .............................................................................................................................004, 009, 079, 095, 111, 112, 114, 122, 123, 124, 173
Shogun...........................................................................................................................................................................................................004
Signature .......................................................................................................................................................................................000, 001, 023
Simpson.........................................................................................................................................................................................................008
Sonic...............................................................................................................................................................................................................014
Sony .......................................................................................................................................................................................002, 006, 071, 128
Soundesign...........................................................................................................................................................004, 008, 009, 042, 051, 053
Spectravision.................................................................................................................................................................................................203
Squareview....................................................................................................................................................................................................189
SSS..................................................................................................................................................................................................004, 042, 053
Starlite............................................................................................................................................................................................................053
Supre-Macy...................................................................................................................................................................................................174
Supreme.........................................................................................................................................................................................................002
Sylvania ...............................................................................................004, 008, 009, 062, 068, 069, 074, 075, 077, 155, 161, 163, 189, 198
Symphonic....................................................................................................................................................................033, 053, 155, 189, 198
Tandy.............................................................................................................................................................................................................173
Tatung............................................................................................................................................................................................................003
Technics.................................................................................................................................................................................................054, 055
Techwood..............................................................................................................................................................................004, 009, 054, 055
Teknika........................................................................................000, 001, 004, 005, 008, 009, 013, 042, 051, 053, 058, 105, 109, 170, 174
Telecaption....................................................................................................................................................................................................117
Telerent ..................................................................................................................................................................................................000, 001
Tera.........................................................................................................................................................................................................004, 186
TMK .......................................................................................................................................................................................................004, 009
Toshiba..................................................................................................................................013, 049, 089, 105, 109, 117, 118, 120, 159, 178
Universal ...............................................................................................................................................................................................052, 087
Victor..............................................................................................................................................................................................................060
Vidtech...........................................................................................................................................................................................004, 005, 009
Viking.............................................................................................................................................................................................................174
Wards ..................................................................................................................000, 001, 004, 005, 008, 009, 024, 031, 033, 051, 052, 062,
........................................................................................................................................................................068, 069, 074, 075, 087, 095, 119
White Westinghouse...........................................................................................................................................................097, 100, 130, 155
Yamaha..........................................................................................................................................................................................004, 005, 009
Zenith...........................................................................................................000, 001, 004, 023, 038, 058, 059, 064, 073, 121, 135, 136, 153
VCR/Magnétoscopes
Admiral .........................................................................................................................................................................................................001
Adventura .....................................................................................................................................................................................................026
Aiko................................................................................................................................................................................................................027
Aiwa ......................................................................................................................................................................................002, 020, 026, 044
RCU_1010_RF_IB_RevA.qxd 9/24/03 10:32 AM Page 70
Page 71

71
Akai........................................................................................................................................................003, 004, 005, 006, 008, 029, 111, 112
Allegro...........................................................................................................................................................................................018, 022, 104
American High.....................................................................................................................................................................................021, 060
Asha ...............................................................................................................................................................................................................134
Audio Dynamics..................................................................................................................................................................................009, 123
Audiovox.......................................................................................................................................................................................................014
Bell & Howell ...............................................................................................................................................................................................043
Beaumark ......................................................................................................................................................................................................134
Broksonic ......................................................................................................................................................................012, 025, 031, 064, 085
Calix ...............................................................................................................................................................................................................014
Candle...........................................................................................................................................................009, 014, 015, 016, 017, 019, 134
Canon.....................................................................................................................................................................................021, 060, 114, 115
Capehart ........................................................................................................................................................................................................104
Carver ............................................................................................................................................................................................................062
CCE ........................................................................................................................................................................................................027, 061
Citizen...................................................................................................................................................009, 014, 015, 016, 017, 019, 027, 134
Colortyme......................................................................................................................................................................................................009
Colt .................................................................................................................................................................................................................061
Craig ......................................................................................................................................................................................014, 023, 061, 134
Curtis-Mathes..............................................................................................................000, 002, 009, 016, 021, 024, 060, 109, 115, 133, 134
Cybernex .......................................................................................................................................................................................................134
Daewoo ........................................................................................................................................015, 017, 019, 025, 026, 027, 028, 054, 109
DBX ........................................................................................................................................................................................................009, 123
Dimensia........................................................................................................................................................................................................000
Dynatech ...............................................................................................................................................................................................002, 026
Electrohome..........................................................................................................................................................................................014, 029
Electrophonic................................................................................................................................................................................................014
Emerson..............................................................................................................002, 006, 008, 012, 014, 015, 021, 024, 025, 026, 029, 030,
......................................................................................................................................031, 032, 034, 036, 037, 038, 040, 041, 043, 044, 045,
................................................................................................................................................................................047, 060, 065, 105, 116, 134
Fisher ............................................................................................................................................009, 023, 042, 043, 048, 049, 050, 062, 079
Fuji..................................................................................................................................................................................................004, 021, 060
Funai ..............................................................................................................................................................................................002, 008, 026
Garrard ..........................................................................................................................................................................................................026
GE ..........................................................................................................................................................000, 021, 053, 060, 115, 117, 120, 134
Goldstar.........................................................................................................................................................................................009, 014, 121
Gradiente.......................................................................................................................................................................................................026
Go-Video ...............................................................................................................................................................................................134, 143
Harley Davidson..........................................................................................................................................................................................026
Harman Kardon...................................................................................................................................................................................009, 068
Harwood .......................................................................................................................................................................................................061
Headquarter..................................................................................................................................................................................................043
Hitachi...........................................................................................................................................002, 055, 057, 107, 111, 120, 122, 144, 145
Hi-Q................................................................................................................................................................................................................023
Instant Replay ..............................................................................................................................................................................008, 021, 060
Inteq ...............................................................................................................................................................................................................014
JCL..........................................................................................................................................................................................................021, 060
JC Penney .....................................................................................................................009, 014, 043, 055, 060, 107, 111, 115, 118, 123, 134
Jensen .....................................................................................................................................................................................................055, 111
JVC.................................................................................................................................................................009, 022, 043, 111, 123, 151, 152
Kenwood.......................................................................................................................................................................009, 016, 043, 111, 123
KLH........................................................................................................................................................................................................061, 131
Kodak ............................................................................................................................................................................................014, 021, 060
Lloyd......................................................................................................................................................................................................002, 026
Logik ..............................................................................................................................................................................................................061
LXI ..................................................................................................................................................................................................................014
Magnavox.....................................................................................................................................................021, 060, 062, 104, 106, 115, 124
Magnin...........................................................................................................................................................................................................134
Marantz ........................................................................................................................................009, 016, 021, 043, 060, 062, 064, 114, 123
Marta..............................................................................................................................................................................................................014
Matsushita.............................................................................................................................................................................................021, 060
MEI.........................................................................................................................................................................................................021, 060
Memorex......................................................................................................................001, 002, 014, 021, 023, 026, 043, 060, 104, 112, 134
MGA ......................................................................................................................................................................................................029, 065
MGN Technology.........................................................................................................................................................................................134
Midland .........................................................................................................................................................................................................053
Minolta ..................................................................................................................................................................................................055, 107
Mitsubishi....................................................................................................029, 051, 052, 055, 065, 066, 068, 069, 070, 071, 073, 074, 123
Montgomery Ward ..............................................................................................................................................................................001, 075
Motorola........................................................................................................................................................................................001, 021, 060
MTC ...............................................................................................................................................................................................002, 026, 134
Multitech.......................................................................................................................................................................002, 026, 053, 061, 134
NEC.......................................................................................................................................009, 016, 024, 043, 064, 076, 077, 078, 111, 123
Nikko .............................................................................................................................................................................................................014
Noblex............................................................................................................................................................................................................134
Olympus................................................................................................................................................................................................021, 060
Optimus........................................................................................................................................................001, 014, 134, 136, 137, 138, 149
Optonica................................................................................................................................................................................................075, 134
Orion ..............................................................................................................................................................................................................031
Panasonic......................................................................................................................................................021, 060, 115, 125, 138, 148, 149
Pentax....................................................................................................................................................................................016, 055, 107, 120
Pentex Research............................................................................................................................................................................................009
Philco .....................................................................................................................................................................................021, 060, 062, 115
Philips...........................................................................................................................021, 060, 062, 063, 075, 103, 106, 108, 124, 146, 153
Philips/Magnavox...............................................................................................................................................................................108, 103
Pilot ................................................................................................................................................................................................................014
Pioneer...................................................................................................................................................................................055, 080, 081, 123
Portland.........................................................................................................................................................................................016, 017, 019
ProScan ..........................................................................................................................................................................................................000
Protec .............................................................................................................................................................................................................061
Pulsar .............................................................................................................................................................................................................104
Quarter...........................................................................................................................................................................................................043
Quartz ............................................................................................................................................................................................................043
Quasar ...........................................................................................................................................................................021, 060, 115, 125, 149
RCU_1010_RF_IB_RevA.qxd 9/24/03 10:32 AM Page 71
Page 72

72
VCR (continued)/Magnétoscopes (suite)
RCA .............................................................................................................................000, 003, 021, 055, 060, 082, 083, 084, 086, 087, 088,
........................................................................................................................................089, 090, 091, 107, 110, 115, 117, 120, 125, 134, 137
RadioShack.........................................................................................................................000, 001, 002, 014, 021, 023, 026, 029, 043, 049,
................................................................................................................................................050, 060, 075, 112, 115, 117, 134, 136, 137, 138
Radix ..............................................................................................................................................................................................................014
Randex...........................................................................................................................................................................................................014
Realistic .......................................................000, 001, 002, 014, 021, 023, 026, 029, 043, 049, 050, 060, 075, 112, 115, 134, 136, 137, 138
Replay ............................................................................................................................................................................................................148
Ricoh ..............................................................................................................................................................................................................128
Runco .............................................................................................................................................................................................................104
Samsung .......................................................................................................................................................005, 015, 053, 055, 112, 129, 134
Sanky .....................................................................................................................................................................................................001, 104
Sansui .....................................................................................................................................................................................................111, 123
Sanyo.............................................................................................................................................................................023, 042, 043, 079, 134
Scott.......................................................................................................................................................012, 015, 025, 032, 038, 065, 093, 116
Sears......................................................................................................................014, 021, 023, 043, 048, 049, 050, 055, 060, 062, 107, 118
Sharp.....................................................................................................................................................001, 002, 017, 029, 075, 135, 136, 142
Shintom.........................................................................................................................................................................004, 055, 061, 128, 132
Shogun...........................................................................................................................................................................................................134
Signature........................................................................................................................................................................................................002
Singer.............................................................................................................................................................................................021, 060, 061
Sony ..............................................................................................................................................004, 099, 128, 139, 140, 141, 147, 154, 155
STS .........................................................................................................................................................................................021, 055, 060, 107
Sylvania ........................................................................................................................................002, 008, 026, 060, 062, 065, 115, 124, 231
Symphonic ............................................................................................................................................................................002, 008, 011, 026
Tandy.....................................................................................................................................................................................................002, 043
Tashiko...........................................................................................................................................................................................................014
Tatung.............................................................................................................................................................................................................111
Teac.................................................................................................................................................................................................002, 026, 111
Technics.................................................................................................................................................................................................021, 060
Teknika..................................................................................................................................................................002, 014, 021, 026, 060, 100
TiVo ........................................................................................................................................................................................................146, 147
Toshiba..........................................................................................................................................................015, 049, 055, 062, 065, 093, 116
Totevision..............................................................................................................................................................................................014, 134
TMK...............................................................................................................................................................................................024, 047, 134
Unitech...........................................................................................................................................................................................................134
Vector Research....................................................................................................................................................................009, 015, 016, 123
Victor..............................................................................................................................................................................................................123
Video Concepts............................................................................................................................................................009, 015, 016, 029, 123
Videosonic.....................................................................................................................................................................................................134
Wards...................................................................................001, 002, 014, 015, 021, 023, 026, 029, 055, 060, 061, 075, 101, 107, 116, 134
White Westinghouse............................................................................................................................................................................002, 008
XR-1000 .................................................................................................................................................................................021, 026, 060, 061
Yamaha..................................................................................................................................................................................009, 043, 111, 123
Zenith ..........................................................................001, 004, 007, 010, 014, 018, 022, 056, 058, 059, 085, 104, 119, 123, 128, 133, 145
DVD
Aiwa...............................................................................................................................................................................................................189
Akai................................................................................................................................................................................................................170
Ames ..............................................................................................................................................................................................................206
Apex......................................................................................................................................................165, 166, 167, 199, 205, 220, 232, 234
A-Trend..........................................................................................................................................................................................................168
Classic ............................................................................................................................................................................................................206
Cyberhome....................................................................................................................................................................................................168
Daewoo .........................................................................................................................................................................................215, 216, 219
Denon ....................................................................................................................................................................................................175, 196
Digitrex..........................................................................................................................................................................................................220
Elta..........................................................................................................................................................................................................209, 210
Emerson ........................................................................................................................................................................................171, 231, 233
Fisher..............................................................................................................................................................................................................191
Funai ......................................................................................................................................................................................................231, 233
GE...........................................................................................................................................................................................................184, 205
Goldstar.........................................................................................................................................................................................................171
Go-Video ...............................................................................................................................................................................................182, 201
Gradiente.......................................................................................................................................................................................................190
Harman Kardon...........................................................................................................................................................................................202
Hitachi ...................................................................................................................................................................................................179, 194
Hiteker ...........................................................................................................................................................................................................220
Integra............................................................................................................................................................................................................197
JVC .........................................................................................................................................................................................................181, 193
Kenwood...............................................................................................................................................................................................175, 204
KLH................................................................................................................................................................................................................205
Konka ....................................................................................................................................................................................185, 186, 187, 188
Koss ................................................................................................................................................................................................................190
Lasonic...........................................................................................................................................................................................................229
LG ...................................................................................................................................................................................................................171
Magnavox .............................................................................................................................................................................................173, 183
Marantz .........................................................................................................................................................................................171, 173, 183
Microsoft........................................................................................................................................................................................................178
Mintek............................................................................................................................................................................................................205
Mitsubishi......................................................................................................................................................................................................177
Mustek ...........................................................................................................................................................................................................206
NAD.......................................................................................................................................................................................................171, 208
Nakamichi.....................................................................................................................................................................................................207
Onkyo ............................................................................................................................................................................................................197
Optimus.........................................................................................................................................................................................................179
Oritron ...........................................................................................................................................................................................................190
Panasonic.......................................................................................................................................................................................................175
Philips............................................................................................................................................................................................173, 183, 198
Pioneer...........................................................................................................................................................................................................179
Proline............................................................................................................................................................................................................190
ProScan ..........................................................................................................................................................................................................184
RCU_1010_RF_IB_RevA.qxd 9/24/03 10:32 AM Page 72
Page 73

73
RadioShack ...................................................................................................................................................................................218, 224, 228
Reoc................................................................................................................................................................................................................226
RCA .......................................................................................................................................................................178, 184, 205, 218, 224, 228
Samsung................................................................................................................................................................................................182, 230
Sampo ............................................................................................................................................................................................................192
Sanyo..............................................................................................................................................................................................................191
SEG.................................................................................................................................................................................................................203
Sharp ..............................................................................................................................................................................................................172
Sherwood ......................................................................................................................................................................................................200
Shinco.............................................................................................................................................................................................................205
Sony................................................................................................................................................................................................................174
Sylvania .................................................................................................................................................................................................231, 233
Symphonic ............................................................................................................................................................................................231, 233
Teac.................................................................................................................................................................................................................179
Technics.........................................................................................................................................................................................................175
Tevion............................................................................................................................................................................221, 223, 225, 226, 227
Theta Digital .................................................................................................................................................................................................179
Toshiba...........................................................................................................................................................................................173, 211, 222
Wharfedale....................................................................................................................................................................................................217
Yamaha..................................................................................................................................................................................................175, 195
Yamakawa.....................................................................................................................................................................................................213
Zenith.............................................................................................................................................................................................171, 180, 212
PVR/DVR
Panasonic.......................................................................................................................................................................................................148
Philips ............................................................................................................................................................................................................146
RCA................................................................................................................................................................................................................184
Replay TV......................................................................................................................................................................................................148
Sonic Blue......................................................................................................................................................................................................148
Sony................................................................................................................................................................................................................147
TiVo ........................................................................................................................................................................................................146, 147
VCR/DVD Combos/Combinés Magnétoscope/DVD
VCR/DVD
Go-Video..................................................................................................................................................................................................230
JVC............................................................................................................................................................................................................151
Philips ......................................................................................................................................................................................................183
Samsung ..................................................................................................................................................................................................230
Sanyo........................................................................................................................................................................................................042
...................................................................................................................................................................................................................191
TV/VCR, TV/DVD Combos/Combinés Téléviseur/Magnétoscope,
Téléviseur/DVD
TV VCR/DVD
Admiral................................................................................................................................................................115 .............................001
...............................................................................................................................................................................124 .............................001
Aiwa .....................................................................................................................................................................155.............................002
...............................................................................................................................................................................155 .............................008
Broksonic .............................................................................................................................................................136.............................085
Candle ..................................................................................................................................................................153.............................014
Curtis-Mathes .....................................................................................................................................................073.............................133
Daewoo................................................................................................................................................................039 .............................027
...............................................................................................................................................................................097 .............................027
...............................................................................................................................................................................138 .............................054
Emerson ...............................................................................................................................................................036 .............................041
...............................................................................................................................................................................039 .............................027
...............................................................................................................................................................................155 .............................002
...............................................................................................................................................................................155 .............................008
...............................................................................................................................................................................198 .............................231
Fisher....................................................................................................................................................................209 .............................043
Funai.....................................................................................................................................................................155 .............................002
...............................................................................................................................................................................155 .............................008
...............................................................................................................................................................................198 .............................231
GE .........................................................................................................................................................................102 .............................117
...............................................................................................................................................................................194 .............................117
Goldstar ...............................................................................................................................................................121 .............................113
...............................................................................................................................................................................153 .............................014
...............................................................................................................................................................................155 .............................002
...............................................................................................................................................................................155 .............................008
Hitachi..................................................................................................................................................................155 .............................002
Infinity..................................................................................................................................................................062 .............................062
Konka ...................................................................................................................................................................157.............................187
...............................................................................................................................................................................158 .............................188
LG .........................................................................................................................................................................121 .............................113
...............................................................................................................................................................................153 .............................014
...............................................................................................................................................................................155 .............................002
LXI ........................................................................................................................................................................155.............................002
Magnavox............................................................................................................................................................062 .............................062
...............................................................................................................................................................................115.............................001
Memorex..............................................................................................................................................................209 .............................043
Panasonic.............................................................................................................................................................148 .............................138
Philips ..................................................................................................................................................................062 .............................062
...............................................................................................................................................................................212 .............................063
Philips/Magnavox.............................................................................................................................................213 .............................103
Quasar..................................................................................................................................................................148 .............................138
RCA ......................................................................................................................................................................102.............................117
...............................................................................................................................................................................194 .............................117
RadioShack..........................................................................................................................................................102 .............................117
...............................................................................................................................................................................194 .............................117
RCU_1010_RF_IB_RevA.qxd 9/24/03 10:32 AM Page 73
Page 74

74
TV/VCR, TV/DVD Combos (continued)/Combinés Téléviseur/Magnétoscope, Téléviseur/DVD (suite)
TV VCR/DVD
Samsung...............................................................................................................................................................073 .............................129
...............................................................................................................................................................................073 .............................133
Sansui ...................................................................................................................................................................136.............................085
Sanyo....................................................................................................................................................................209 .............................043
Sharp ....................................................................................................................................................................124.............................001
Sony......................................................................................................................................................................002 .............................155
...............................................................................................................................................................................128 .............................155
Sylvania................................................................................................................................................................155 .............................002
...............................................................................................................................................................................155 .............................008
...............................................................................................................................................................................198 .............................231
Symphonic...........................................................................................................................................................155 .............................002
...............................................................................................................................................................................155 .............................008
...............................................................................................................................................................................198 .............................231
White Westinghouse..........................................................................................................................................155 .............................002
...............................................................................................................................................................................155 .............................008
Zenith ...................................................................................................................................................................036.............................041
...............................................................................................................................................................................073 .............................133
...............................................................................................................................................................................097 .............................027
...............................................................................................................................................................................121 .............................104
...............................................................................................................................................................................121 .............................113
...............................................................................................................................................................................136 .............................085
...............................................................................................................................................................................153 .............................014
Satellite Receivers/Récepteurs De Satellite
Amplica..........................................................................................................................................................................................................115
Channel Master.............................................................................................................................................................................117, 118, 119
Chapparal..............................................................................................................................................................................................100, 101
Cheyenne.......................................................................................................................................................................................................101
Drake..............................................................................................................................................................................................102, 114, 127
Dish Network......................................................................................................................................128, 129, 130, 168, 187, 188, 194, 195
DX Antenna..........................................................................................................................................................................................108, 122
Echosphere....................................................................................................................................................................................................168
Echostar ................................................................................................................................................................128, 129, 130, 168, 187, 194
Expressvu......................................................................................................................................................................................168, 187, 194
Fujitsu ....................................................................................................................................................................................................131, 132
GE...........................................................................................................................................................................................................162, 176
Gemini ...........................................................................................................................................................................................................135
General Instruments...................................................................................................................104, 105, 106, 133, 180, 182, 183, 184, 185
DSS Hitachi...........................................................................................................................................................................................172, 181
DSS Hughes Satellite ..................................................................................................................................................169, 170, 172, 173, 178
Jerrold ............................................................................................................................................................................................................137
JVC .................................................................................................................................................................................................................188
Kenwood .......................................................................................................................................................................................................138
Luxor..............................................................................................................................................................................................................139
DSS Magnavox.............................................................................................................................................................................116, 152, 179
Macom State .................................................................................................................................................................................................140
Norstat ...........................................................................................................................................................................................................141
Pace ................................................................................................................................................................................................154, 155, 186
DSS Panasonic......................................................................................................................................................................................126, 166
Primestar ...............................................................................................................................................................................................167, 180
Philips ............................................................................................................................................................................................116, 152, 179
Philips/Magnavox.......................................................................................................................................................................116, 152, 179
Pioneer...........................................................................................................................................................................................................124
ProScan..................................................................................................................................................................................................162, 176
DSS RCA.......................................................................................................................................................................176, 189, 192, 193, 198
Realistic .................................................................................................................................................................................................107, 143
Samsung................................................................................................................................................................................................134, 153
Sharp ..............................................................................................................................................................................................................144
Sierra I, II, III.................................................................................................................................................................................................101
DSS Sony ...............................................................................................................................................................................................125, 163
Starchoice ..............................................................................................................................................................................................167, 180
Star Sight .......................................................................................................................................................................................................173
Star Trak.........................................................................................................................................................................................................148
STS ..................................................................................................................................................................................................108, 110, 111
Super Guide..................................................................................................................................................................................................149
Thomson........................................................................................................................................................................................................154
Toshiba...........................................................................................................................................................................................................112
Toshiba DSS..................................................................................................................................................................................164, 165, 171
Uniden ...................................................................................................................................................................................................113, 151
DSS Uniden...................................................................................................................................................................................................173
Video Cipher II.............................................................................................................................................................................................114
Zenith............................................................................................................................................102, 103, 114, 127, 135, 155, 174, 175, 186
HDTV/SAT
Hughes..................................................................................................................................................................................169, 170, 172, 178
Panasonic.......................................................................................................................................................................................................126
Philips ............................................................................................................................................................................................................156
RCA........................................................................................................................................................................................................190, 198
Samsung................................................................................................................................................................................................134, 153
Sharp ..............................................................................................................................................................................................................144
Sony................................................................................................................................................................................................................163
Zenith.....................................................................................................................................................................................................135, 174
DVR/PVR-SAT Combos/Combinés DVD/PVR-SAT
Dish Network ...............................................................................................................................................................................................195
Echostar .........................................................................................................................................................................................................195
Expressvu......................................................................................................................................................................................................195
RCA................................................................................................................................................................................................................176
RCU_1010_RF_IB_RevA.qxd 9/24/03 10:32 AM Page 74
Page 75

75
Cable Boxes/Câblosélecteurs
ABC .......................................................................................................................................................................001, 002, 003, 004, 005, 006
Adelphia........................................................................................................................................................................................................136
Allegro...................................................................................................................................................................................................064, 065
Americast ......................................................................................................................................................................................................067
Antronix ................................................................................................................................................................................................008, 009
Archer....................................................................................................................................................................................008, 009, 010, 011
AT&T..............................................................................................................................................................................................................051
Cabletenna ....................................................................................................................................................................................................008
Cableview......................................................................................................................................................................................................008
Century ..........................................................................................................................................................................................................011
Citizen............................................................................................................................................................................................................011
Colour Voice .........................................................................................................................................................................................012, 013
Comtronics............................................................................................................................................................................................014, 015
Contec/Cony................................................................................................................................................................................................016
Eastern ...........................................................................................................................................................................................................017
Garrard...........................................................................................................................................................................................................011
GC Electronics ..............................................................................................................................................................................................009
Gemini...........................................................................................................................................................................................018, 019, 076
GE...................................................................................................................................................................................................................089
General Instrument............................................................................................................003, 049, 051, 053, 054, 058, 068, 069, 070, 071
Hamlin...........................................................................................................................................................................................020, 021, 022
Hitachi ...........................................................................................................................................................................................................003
Hytek..............................................................................................................................................................................................................002
Jasco................................................................................................................................................................................................................011
Jerrold...................................................................................................................001, 003, 004, 005, 018, 024, 049, 050, 051, 066, 068, 069
Magnavox......................................................................................................................................................................................................025
Memorex........................................................................................................................................................................................................026
Motorola......................................................................001, 003, 004, 005, 018, 024, 049, 050, 051, 053, 054, 058, 066, 068, 069, 070, 071
Movie Time...........................................................................................................................................................................................002, 027
NSC ........................................................................................................................................................................................................002, 027
Oak.................................................................................................................................................................................................002, 016, 029
Pace ................................................................................................................................................................................................................072
Panasonic ..............................................................................................................................................................................................000, 048
Paragon..........................................................................................................................................................................................................026
Philips ...................................................................................................................................................011, 012, 013, 019, 025, 030, 031, 032
Philips/Magnavox...............................................................................................................................................................................045, 074
Pioneer...........................................................................................................................................................................................033, 034, 038
Pulsar .............................................................................................................................................................................................................026
RadioShack ...................................................................................................................................................................................045, 065, 074
RCA........................................................................................................................................................................................................000, 047
Realistic..........................................................................................................................................................................................................009
Regal...............................................................................................................................................................................................................022
Regency .........................................................................................................................................................................................................017
Rembrandt ....................................................................................................................................................................................................003
Runco .............................................................................................................................................................................................................026
Samsung................................................................................................................................................................................................014, 034
Scientific Atlanta .........................................................................................................................................006, 036, 037, 038, 075, 136, 147
Signal .....................................................................................................................................................................................................014, 018
Signature........................................................................................................................................................................................................003
SL Marx .........................................................................................................................................................................................................014
Sprucer...........................................................................................................................................................................................................000
Standard Components ................................................................................................................................................................................039
Starcom..................................................................................................................................................................................................001, 018
Stargate..................................................................................................................................................................................................014, 018
Star Sight .......................................................................................................................................................................................................060
Star Sight Cable Service..............................................................................................................................................................................047
Starquest........................................................................................................................................................................................................018
Star Trak.........................................................................................................................................................................................................056
Tandy.............................................................................................................................................................................................................040
Teleview.........................................................................................................................................................................................................014
Telewest.........................................................................................................................................................................................................072
Texscan...........................................................................................................................................................................................................039
Tocom............................................................................................................................................................................................004, 041, 053
Toshiba...........................................................................................................................................................................................................026
Tusa................................................................................................................................................................................................................018
TV86 ...............................................................................................................................................................................................................027
Unika..............................................................................................................................................................................................008, 009, 011
United Artists ...............................................................................................................................................................................................002
United Cable.................................................................................................................................................................................................001
Universal.......................................................................................................................................................................008, 009, 010, 011, 042
Videoway ......................................................................................................................................................................................................044
ViewStar................................................................................................................................................................................015, 025, 027, 040
Video Tech .....................................................................................................................................................................................................090
Zenith...........................................................................................................026, 028, 043, 057, 059, 060, 061, 062, 063, 064, 065, 067, 073
Audio Systems/Systèmes Sonores
Aiwa ......................................................................................................................................................................................179, 182, 191, 200
Carver ............................................................................................................................................................................................................165
Citizen............................................................................................................................................................................................................166
Denon ....................................................................................................................................................................................................143, 157
Fisher .....................................................................................................................................................................................................154, 161
Goldstar.........................................................................................................................................................................................................106
Harman Kardon...................................................................................................................................................................................144, 158
JVC .................................................................................................................................................................................................130, 153, 159
Kenwood ..............................................................................................................................................................023, 148, 156, 168, 172, 209
Magnavox .............................................................................................................................................................................................136, 154
Marantz .................................................................................................................................................................................................028, 164
Mitsubishi......................................................................................................................................................................................................217
NAD...............................................................................................................................................................................................061, 079, 083
Onkyo............................................................................................................................................................................................145, 151, 152
Optimus................................................................................................................................................007, 087, 088, 089, 091, 092, 094, 133
RCU_1010_RF_IB_RevA.qxd 9/24/03 10:32 AM Page 75
Page 76

76
Audio Systems (continued)/Systèmes Sonores (suite)
Panasonic .............................................................................................................................................056, 076, 131, 150, 155, 163, 203, 204
Philips............................................................................................................................................................................095, 154, 163, 164, 165
Pioneer...................................................................................................................................................................................177, 206, 207, 218
RadioShack..................................................................................................................046, 094, 133, 146, 205, 206, 207, 208, 215, 218, 219
RCA ......................................................................................................057, 112, 121, 135, 167, 185, 206, 207, 210, 211, 212, 215, 218, 219
Realistic..........................................................................................................................................................................................................162
Sanyo..............................................................................................................................................................................................................045
Scott................................................................................................................................................................................................................108
Sharp..............................................................................................................................................................................................011, 037, 149
Sherwood..............................................................................................................................................................................046, 159, 198, 199
Sony...............................................................................................................................................118, 137, 138, 139, 173, 174, 175, 176, 183
Teac................................................................................................................................................................................050, 147, 195, 196, 197
Technics................................................................................................................................................056, 076, 131, 150, 155, 163, 203, 204
Venturer.........................................................................................................................................................................................................085
Yamaha.........................................................................................................................................141, 142, 178, 180, 181, 186, 187, 188, 189
Zenith............................................................................................................................................016, 070, 089, 099, 105, 106, 124, 154, 190
CD Players/Lecteurs CD
ADC ...............................................................................................................................................................................................................000
Adcom ...................................................................................................................................................................................................001, 054
Aiwa ......................................................................................................................................................................................002, 003, 047, 182
Akai................................................................................................................................................................................................055, 077, 170
Audio Technica.............................................................................................................................................................................................005
California Audio Labs.................................................................................................................................................................................056
Capetronic.....................................................................................................................................................................................................009
Carver....................................................................................................................................................................................006, 007, 008, 165
Casio...............................................................................................................................................................................................................117
Citizen............................................................................................................................................................................................................166
Curtis-Mathes ...............................................................................................................................................................................................117
Denon.............................................................................................................................................................................................................010
Emerson.................................................................................................................................................................................................001, 013
Fisher.............................................................................................................................................................................007, 015, 016, 017, 058
GE...................................................................................................................................................................................................................065
Genexxa.........................................................................................................................................................................................013, 018, 059
Goldstar.........................................................................................................................................................................................................060
Harman Kardon...................................................................................................................................................................................020, 031
Hitachi ...........................................................................................................................................................................................................018
Inkel................................................................................................................................................................................................................021
JC Penney..............................................................................................................................................................................................030, 117
JVC .........................................................................................................................................................................................................022, 153
Kenwood ..............................................................................................................................................................019, 023, 025, 067, 068, 168
Krell................................................................................................................................................................................................................006
Kyocera..........................................................................................................................................................................................................000
Luxman .................................................................................................................................................................................026, 027, 069, 078
LXI ..................................................................................................................................................................................................................117
Magnavox .....................................................................................................................................................................................006, 071, 140
Marantz.................................................................................................................................................................................006, 028, 029, 072
MCS........................................................................................................................................................................................................030, 117
MGA...............................................................................................................................................................................................................031
Mission ..........................................................................................................................................................................................................006
Mitsubishi .............................................................................................................................................................................................031, 032
NAD.......................................................................................................................................................................................................061, 083
Nakamichi.....................................................................................................................................................................................033, 034, 171
NEC................................................................................................................................................................................................................030
Nikko.............................................................................................................................................................................................005, 013, 016
NSM ...............................................................................................................................................................................................................006
Onkyo....................................................................................................................................................................................035, 036, 062, 151
Optimus .......................................................................................................................007, 008, 018, 024, 037, 038, 039, 040, 084, 087, 091
Panasonic......................................................................................................................................................................056, 073, 080, 160, 202
Philips............................................................................................................................................................................................006, 071, 165
Pioneer..........................................................................................................................................................018, 041, 042, 059, 090, 177, 216
Proton.............................................................................................................................................................................................................006
Quasar............................................................................................................................................................................................................056
RadioShack...................................................................................................................................................008, 046, 090, 126, 208, 214, 216
RCA.......................................................................................................................................................043, 063, 090, 135, 184, 185, 214, 216
Realistic.................................................................................................................................................001, 007, 009, 013, 018, 029, 037, 039
Rotel ...............................................................................................................................................................................................................006
Sae...................................................................................................................................................................................................................006
Samsung ........................................................................................................................................................................................................081
Sansui ....................................................................................................................................................................................006, 044, 063, 074
Sanyo.............................................................................................................................................................................007, 045, 058, 075, 082
Scott........................................................................................................................................................................................................001, 013
Sears ...............................................................................................................................................................................................024, 029, 117
Sharp..............................................................................................................................................................................................024, 019, 029
Sherwood......................................................................................................................................................................021, 029, 038, 046, 199
Shure ..............................................................................................................................................................................................................030
Sony...............................................................................................................................................................................047, 048, 132, 134, 140
STS..................................................................................................................................................................................................................000
Sylvania .........................................................................................................................................................................................................006
Symphonic ....................................................................................................................................................................................................049
Teac................................................................................................................................................................016, 029, 039, 049, 050, 051, 196
Technics.................................................................................................................................................................................056, 073, 160, 202
Theta Digital .................................................................................................................................................................................................071
Toshiba...........................................................................................................................................................................................................061
Victor..............................................................................................................................................................................................................022
Yamaha..........................................................................................................................................................................005, 052, 053, 064, 186
Zenith ............................................................................................................................................................................016, 070, 099, 124, 190
RCU_1010_RF_IB_RevA.qxd 9/24/03 10:32 AM Page 76
Page 77

77
Laser Disc Players/Lecteurs De Disque Laser
Denon.............................................................................................................................................................................................................080
Pioneer...........................................................................................................................................................................................................080
ProScan ..........................................................................................................................................................................................................083
RCA................................................................................................................................................................................................................083
Sanyo..............................................................................................................................................................................................................007
Sony................................................................................................................................................................................................................098
Zenith.............................................................................................................................................................................................................007
RCU_1010_RF_IB_RevA.qxd 9/24/03 10:32 AM Page 77
Page 78

RCU1010RF NA REVA
Helpline
If you need additional setup assistance, please call the Helpline at 1-800-420-7968.
Limited 90-Day Warranty
Limited 90-Day Warranty
Our company (in the U.S.,THOMSON INC. / In Canada, Thomson multimedia Ltd.) will replace
this product, for 90 days from the date of purchase, it if found to be defective in materials or
workmanship. For a prompt, no-charge replacement of equivalent product, return the defective
product postage prepaid to the appropriate address.
In the U.S.:
Product Exchange Center
11721 Alameda Avenue
Socorro TX 79927
In Canada:
Thomson multimedia Ltd.
6200 Edwards Boulevard
Mississauga, Ontario Canada L5T 2V7
This replacement is the company’s sole obligation under this warranty. THOMSON INC. / Thomson
multimedia Ltd. will not be responsible for any incidental or consequential damages or for any loss
arising in connection with the use or inability to use this product. Some states/provinces do not
allow the exclusion or limitation of incidental or consequential damages, so the above limitation
or exclusion may not apply to you. This warranty excludes defects or damage due to misuse, abuse,
or neglect. This warranty gives you specific legal rights, and you may also have other rights, which
vary from state to state/province to province.
Assistance téléphonique
Pour obtenir de l’aide additionnelle sur la programmation, veuillez appeler notre service d’assistance
téléphonique au 1-800-420-7968.
Garantie limitée de 90 jours
Notre compagnie (aux États-Unis,THOMSON INC./au Canada, Thomson multimédia Ltée)
remplacera ce produit, pendant 90 jours à compter de la date d’achat, s’il est jugé défectueux en
termes de matériaux ou de main-d’œuvre. Pour obtenir rapidement un produit de remplacement
équivalent, sans frais, retourner le produit défectueux port payé à l’adresse appropriée.
Aux États-Unis:
Centre d’échange de produits
11721 Alameda Avenue
Socorro TX 79927
Au Canada:
Thomson multimédia Ltée
6200, boulevard Edwards
Mississauga, Ontario _Canada L5T 2V7
Ce remplacement constitue la seule obligation de la compagnie en vertu de cette garantie.
THOMSON INC. / Thomson multimédia Ltée ne sera pas tenue responsable des dommages
accidentels ou accessoires ni des pertes attribuables à l’utilisation ou à l’incapacité d’utiliser ce
produit. Certaines provinces ne permettent pas d’exclure ou de restreindre les dommages accidentels
ou accessoires, par conséquent, les restrictions ou exclusions ci-dessus peuvent ne pas s’appliquer à
vous. Cette garantie exclut les défauts ou dommages attribuables à la mauvaise utilisation, à l’abus
ou à la négligence. Cette garantie vous confère des droits légaux spécifiques et vous pouvez avoir
d’autres droits qui peuvent varier d’une province à l’autre.
Specifications and features are subject to change without notice. Product may vary from that shown.
Logos are registered trademarks of their respective companies.
Les spécifications peuvent être modifiées sans avis. Le produit peut varier par rapport à l’illustration.
Les logos sont des marques déposées de leurs compagnies respectives.
Trademark(s) ® Registered
Marque(s) ® déposées
Marca(s) Registrada(s)
www.rca.com
RCU_1010_RF_IB_RevA.qxd 9/24/03 10:32 AM Page 78
 Loading...