

Page 1
MD-981 MIDI Keyboard
42-4042.fm Page 1 Friday, April 28, 2000 11:18 AM
Owner’s Manual
Please read before using this equipment.
Page 2
42-4042.fm Page 2 Friday, April 28, 2000 11:18 AM
ˆ
Contents
Features .................................................................. ................................................. 4
The FCC Wants You to Know ............................................................................. 5
Preparation .............................................................................................................. 5
Connecting Power .............................................................................................. 5
Using Batteries ............................................................................................. 6
Using AC Power ........................................................................................... 6
Using Vehicle Battery Power ........................................................................ 7
Connecting Headphones .................................................................................... 7
Listening Safely ............................................................................................ 7
Connecting an External Amplifier ....................................................................... 7
Using the Sheet Music Stand ............................................................................. 8
A Quick Look at Your Keyboard ............................................................................ 8
Operation ................................................................................................................. 9
Basic Operation .................................... ....... ....................................... ...... ...... .... 9
Cancelling Auto Power Off ........................................................................... 9
Playing the Prerecorded Tunes .......................................................................... 9
Playing Back a Prerecorded Tune ............................................................. 10
Playing Along with a Prerecorded Tune ..................................................... 11
Turning Applause Off/On ........................................................................... 12
Consecutively Playing Back the Tunes ...................................................... 12
Using the Preset Tones .................................................................................... 12
Selecting/Playing a Preset Tone ................................................................ 12
Keyboard Split Tones ................................................................................. 13
Layered Tones ........................................................................................... 13
Percussion Sounds .................................................................................... 13
Using the Preset Auto-Rhythms ....................................................................... 14
Selecting/Playing an Auto-Rhythm ............................................................ 14
Using SYNCHRO ....................................................................................... 15
Using FILL-IN ............................................................................................. 15
Using Auto Accompaniment ............................................................................. 15
Adjusting the Accompaniment Volume ...................................................... 15
Concert Chord ....... ...... ....................................... ...... ....... ...... ....... ...... ...... .. 16
Standard Fingering .................................................................................... 17
Using the Chord Book ...................................................................................... 18
©
2000 Tandy Corporation.
RadioShack and RadioShack.com are trademarks used by Tandy Corporation.
2
All Rights Reserved.
Contents
Page 3
42-4042.fm Page 3 Friday, April 28, 2000 11:18 AM
Special Features .................................... ....... ...... ....... ...... ....... ...... ....... ...... ...... ..... 19
Changing Keys ................................................................................................. 19
Tuning the Keyboard ........................................................................................ 20
Using a Sustain Pedal ...................................................................................... 20
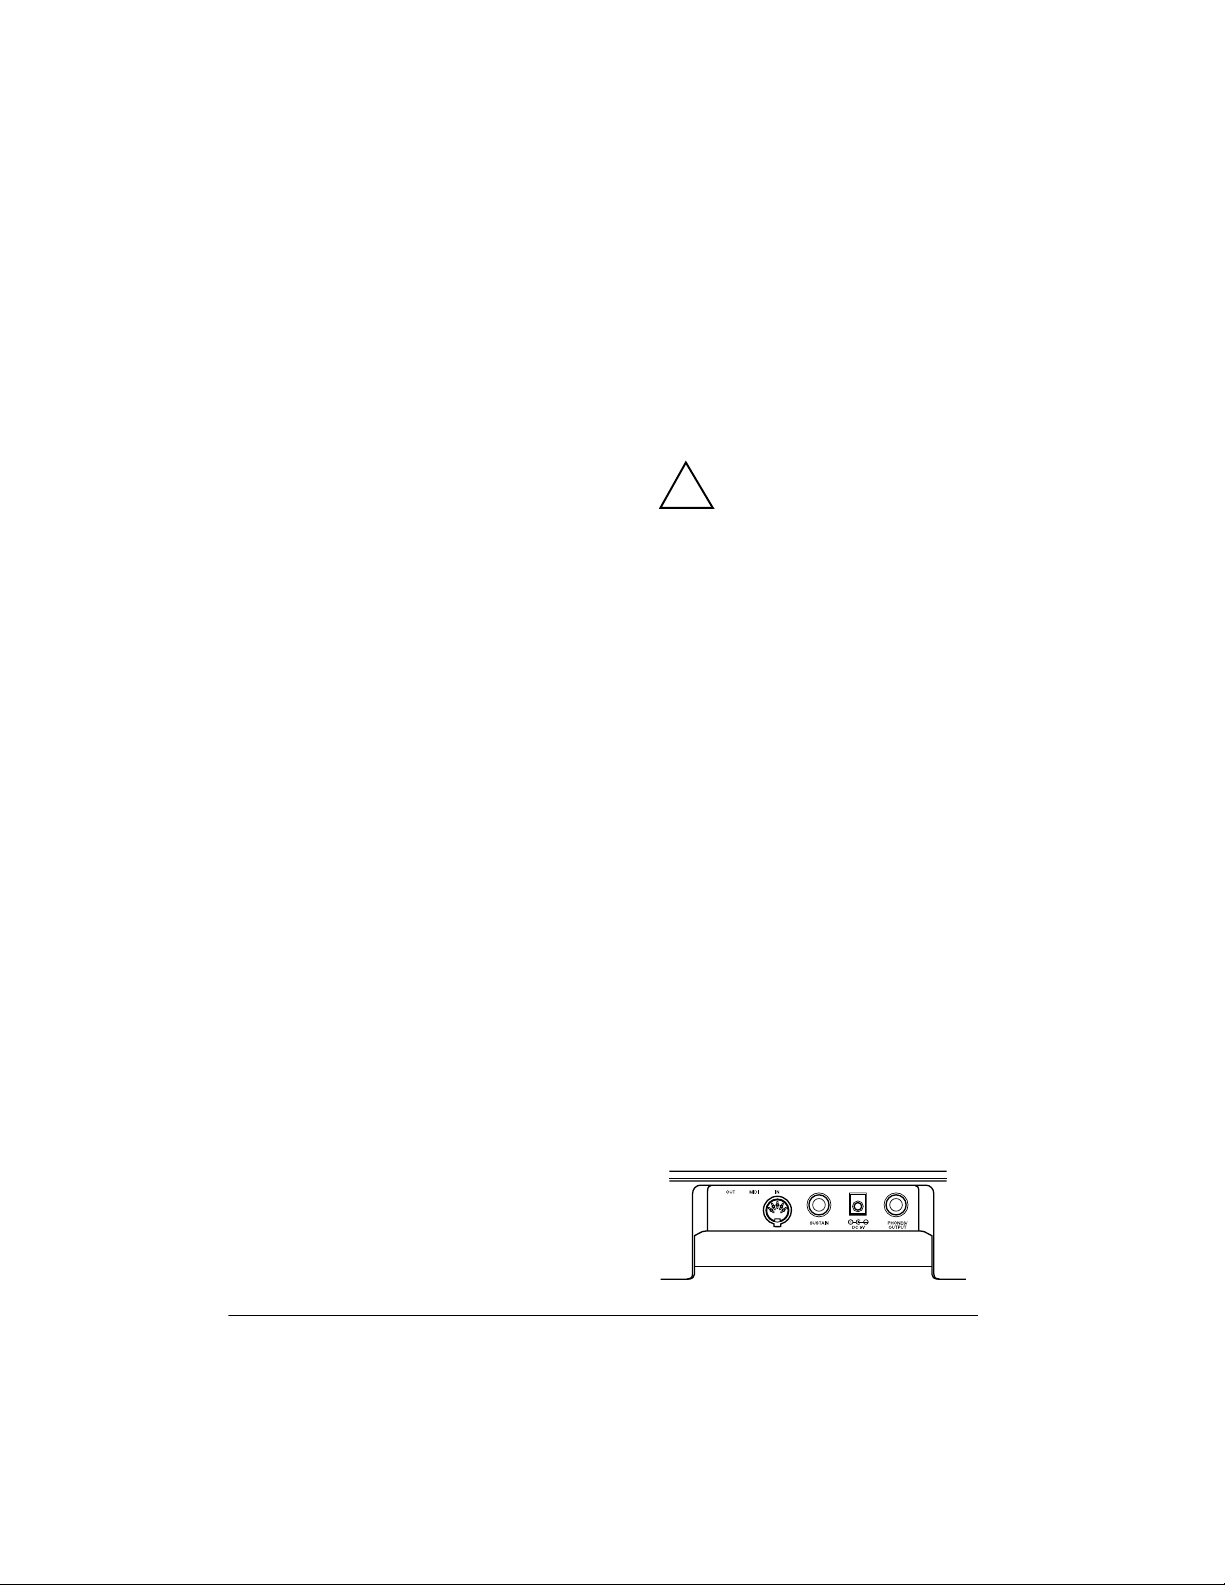
Using MIDI ............................................................................................................. 21
About MIDI ........................... ....... ...... ....... ...... ....... ...... ....... ...... ....... ...... ........... 21
Making the MIDI Connections .......................................................................... 21
MIDI Data ......................................................................................................... 22
Changing MIDI Settings ................................................................................... 22
Notes About the MIDI Implementation Chart .................................................... 23
Troubleshooting ...................................................................... ................... ........... 24
Standard Fingering Chord Charts ....................................................................... 26
Note Table .............................................................................................................. 29
MIDI Implementation Chart .................................................................................. 31
Care and Maintenance .......................................................................................... 32
Specifications ....................................................................................................... 33
3Contents
Page 4

42-4042.fm Page 4 Friday, April 28, 2000 11:18 AM
ˆ
Features
Your RadioShack MIDI Keyboard is a
state-of-the-art ke yboard with many exciting features. You can set the keyboard to sound like 100 different musical
instruments or sound effects. To accompany your music, the keyboa rd has 100
rhythms, as well as auto accompaniments and percussion sounds.
Your keyboard also includes a MIDI
(Musical Instrument Digital Interface)
feature, which lets you connect it to other MIDI-equipped musical instruments
or devices — eve n your personal computer.
This versatile keyboard can provide
hours of fun and is i dea l for anyone who
wants to make music, from the begi nner
to the experienced musician.
Note:
The keyboard conforms to most,
but not all, General MIDI spe cifications.
Because of this, you might experience
some incompatibility when using the
keyboard with ano the r Ge ner al MID I de vice. For more information, see “Using
MIDI” on Page 21.
Your keyboard’s features include:
61 Full-Sized Keys
of a fine musical instrument.
LCD Music Information Display
shows you a ‘staff’ with the notes and
chords as you play them, alo ng with the
fingering, current tone , rhythm, volume,
melody, and tempo. The display also
shows a metronom e icon to i ndicate the
beat.
— provide the feel
—
100 Tones
board to sound like anything from a
harpsichord to a honky-tonk piano.
100 Auto-Rhythms
steady beat for many styles of music,
from rhumba to slow rock.
100 Prerecorded Tunes
a sample of what you and the k eyboard
can do. You can play the tunes either
one at a time or c onsecutively, and you
can turn off the melody or accompaniment portion so you can play along with
the tunes.
12-Note Polyphonic Sound
play and hear up to 12 notes at the
same time so you can play o r create almost any type of music.
MIDI In/Out Jacks
the keyboard to another MIDI- equipped
device.
Sustain Jack
sustain pedal (not suppl ied) to the keyboard so you can sustain your keyboard’s sound.
Headphones/Output Jack
connect headphones so you can play
without disturbing oth ers, or an external
amplifier so you can play for a crowd.
Tune Control
pitch of your keyboard so yo u can play
in tune with other instruments.
Transpose Function
stantly change the key of the music,
even while you are playing.
— you can set your key-
— give you a
— let you h ear
— lets you
— let you connect
— lets you connect a
— lets you
— lets you adjust the
— lets you in-
4
Features
Page 5
42-4042.fm Page 5 Friday, April 28, 2000 11:18 AM
Tempo Control
slow down the tempo of any selected
music pattern.
Chord Book
which keys to press and which fingers to
use to form a chord, as well as a chord’s
name.
Three Power Options
the keyboard fro m inter nal b atteries (not
supplied), standard AC power (with an
optional adapter), or your v ehic le’s ci garette-lighter socket (with an optional
adapter) so you can make mu sic almost
anywhere.
Notes:
• You can use an optional keyboard
stand (available at your local
RadioShack store) to mount the
keyboard.
• This Owner ’s Manual explains how
to use this electronic keyboard. It
does not teach music.
— lets you speed up or
— lets you easily see
— let you power
THE FCC WANTS YOU TO
KNOW
This equipment compl ies with the limits
for a Class B dig ital device as speci fied
in Part 15 of
provide reasonable protection against
radio and TV interference in a residential
area. However, your equipment might
cause TV or radio interference even
when it is operating properly. To eliminate interference, you can try one or
more of the following corrective measures:
• reorient or relocate the receiving
antenna
• increase the distance between the
equipment and the radio or TV
• use outlets on di fferent electrical circuits for the keyboar d and the radio
or TV.
Consult your local RadioShack store if
the problem still exists.
FCC Rules
. These limits
ˆ
Preparation
Note:
To connect a MIDI device to your
keyboard, see “Making the MIDI Connections” on Page21.
CONNECTING POWER
You can power your keyboard in any of
these ways:
• internal batteries
• standard AC power using an
optional AC adapter
You must use shielded interface cables
with this equipment.
• a vehicle’s cigarette-lighter socket
using an optional DC adapter
Notes
:
• Connecting an AC or DC adapter
automatica lly disconnects any internal batteries.
• Always disconnect the AC or DC
adapter when you finish using the
keyboard.
5Preparation
Page 6
Using Batteries
Using AC Power
Your keyboard can use s ix AA batteries
(not supplied) for power. For the best
performance and longest life, we rec om mend RadioShack alkaline batteries.
Cautions:
• Use only fresh batteries of the
required size and recommended
type.
• Do not mix old and new batteries,
different types of batteries (standard, alkaline, or rechargeable), or
rechargeable batteries of different
capacities.
Follow these steps to install batteries.
1. Slide
2. While pressing the tab on the bat-
3. Place the batteries in the compart-
4. Replace the cover.
POWER/MODE
tery compartment cov er on the bottom of the keyboard, pull up the
cover to remove it.
ment as indicated by the polarity
symbols (+ and –) marked below the
compartment.
to
OFF
.
You can power the keyboard using a 9V,
800-mA AC adapter and a size M
Adaptaplug™ adapter (neither supplied). Both are available at your local
RadioShack store.
Cautions:
You must use a Class 2
power source that s upplies
!
9V DC and delivers at least
800 mA. Its center tip must be se t to
negative and its plug must fit the
keyboard's
adapter that does not meet these
specifications could damage the
keyboard or the adapter.
• Always connect the AC adapter to
the keyboard befo re you connect it
to AC power. When you finish, disconnect the adapter from AC power
before you disconnect it from the
keyboard.
Follow these steps to connect an AC
adapter to the keyboard.
1. Slide
2. Set the DC adapter ’s voltage swi tch
to 9V .
DC 9V
POWER/MODE
jack. Using an
OFF
to
.
When the keyboard stops operating
properly, replace the batteries.
Warning:
promptly and properly. Do not burn or
bury them.
Caution:
keyboard with batteries for a week or
more, remove the batteries. Batteries
can leak chemicals that can destroy
electronic parts.
6
Dispose of old batteries
If you do not plan to use the
Preparation
3. Insert the Adaptaplug adapter into
the adapter’s cord so it reads – TIP.
4. Connect the AC adapter’s barrel
plug to the
the keyboard.
DC 9V
jack on the b ack of
Page 7
42-4042.fm Page 7 Friday, April 28, 2000 11:18 AM
5. Plug the AC adapter’s other end into
a standard AC outlet.
Using Vehicle Battery Power
You can power the keyboard f rom a ve hicle’s 12V power source (such as a cigarette-lighter socket) using a 9V, 800mA AC adapter and a size M Adaptaplug adapter (neither supplied). Both are
available at your local RadioShack
store.
Cautions:
You must use a power
source that supplies 9V DC
!
and delivers at least 800
mA. Its center tip must be set to
negative and its plug must fit the
keyboard's
adapter that does not meet these
specifications could damage the
keyboard or the adapter.
• Always connect the DC adapter to
the keyboard before you connect it
to the power source. When you fin ish, disconnect the adapt er from the
power source before you disconnect
it from the keyboard.
Follow these steps to connect a DC
adapter to the keyboard.
1. Slide
2. Plug the DC adapter’s barrel plug
into the cable so it reads – TIP.
3. Set the DC ada pter ’s voltage s witch
to 9 volts.
4. Connect the DC adapter’s barrel
plug to the
the keyboard.
DC 9V
POWER/MODE
DC 9V
jack on the back of
jack. Using an
OFF
to
.
5. Plug the DC adapter’s other end into
your vehicle’s cigarette-lighter
socket.
CONNECTING
HEADPHONES
To listen to your keyboard without disturbing others, yo u can connect an optional pair of st ereo headphones with a
1
/4-inch (6.4-mm) plug. Your local RadioShack store sells a wide s election of
headphones.
Insert the headphones’ plug into the
PHONES/OUTPUT
the keyboard.
Note
: Connecting headphones discon-
nects the keyboard’s built-in speakers.
Listening Safely
To protect your hearing, follow these
guidelines when you use headphones.
• Set the volume to the low est setting
before you begin liste ning. A fter you
begin listening, adjus t the volume to
a comfortable level.
• Do not listen at extr emely high volume levels. Extended high-volume
listening can lead to permanent
hearing loss.
• Once you set the volume, do not
increase it. Over time, your ears
adapt to the volum e level, so a volume level that does not cause discomfort might still damage your
hearing.
jack on the back of
7Preparation
Page 8

CONNECTING AN
EXTERNAL AMPLIFIER
To amplify your keyboard’s so und, you
can connect it to an optional external
amplifier using an audio ca ble wi th a
inch (6.4-mm) plug (not supplied).
To connect an external amplifier to you r
keyboard, insert the cable’s plug into the
PHONES/OUTPUT
the keyboard, and connect the cable’s
other end to the amplifier ’s input jack(s)
(such as AUX IN or TAPE IN).
jack on the back of
1
/4-
Your local Radi oShack store sells a f ull
line of amplifiers, speakers, and connection cables.
USING THE SHEET MUSICl
STA12(as)NIER
8
A Quick Look at Your Keyboard
Page 9
42-4042.fm Page 9 Friday, April 28, 2000 11:18 AM
ˆ
Operation
BASIC OPERATION
1. To turn on the keyboard, set
POWER/MODE
POWER/MODE indicator li ghts.
Note:
To save power when operating on batteries, th e keyboard auto matically turns off after about 6
minutes if you do not press a key. To
turn on the keyboard again, set
POWER/MODE
NORMAL
2. To hear a sample of the keyboa rd’s
many sounds, play a prerecorded
tune (see “Playing the Prerecorded
Tunes”). To make your own music,
simply begin playing the keyboard.
Notes:
• The keyboard automatically
• To select an auto-rhythm, see
• To play auto accom pan iment, see
.
selects th e to ne PIA NO 1 ( No. 00)
when you turn the power on. To
select a different tone, see
“Selecting/Playi ng a Preset Tone”
on Page 12 .
“Using the Preset Auto-Rhythms”
on Page 14 .
“Using Auto Accompaniment” on
Page 15.
to
OFF
to
NORMAL.
then back to
The
Notes:
• The keyboard’s volume ranges
from 0 (no sound) to 9 (maximum). Each time you turn on th e
keyboard, the volume is set to 7.
• To quickly change the volume setting, hold down
or ▼.
• To quickly return to the default
volume setting of 7, press both
MAIN VOLUME
same time.
• The volume leve l differs depending on the tone, accompa niment,
or song you s elected.
4. To turn off the keyboard, set
POWER/MODE
MODE indicator turns off.
MAIN VOLUME
buttons at the
OFF
to
. The POWER/
▲
Cancelling Auto Power Off
The keyboard automatically turns itself
off when you use batteries to power it.
To have the keyboa rd not automatical ly
turn off during a session, turn on the
keyboard while holding down
The next time you turn the keyboard off
then back on again, it wi ll automatically
turn off after about 6 minutes.
TONE
.
3. Repeatedly press
or ▼ to increase or decrease the
volume. The current setting appears.
MAIN VOLUME
▲
PLAYING THE
PRERECORDED TUNES
You can sit back and listen to the 100
tunes that come prere cord ed in the ke y-
9Operation
Page 10
42-4042.fm Page 10 Friday, April 28, 2000 11:18 AM
board, or you can tur n off a t une ’s me lo dy or accompaniment an d play alon g on
the keyboard.
Playing Back a Prerecorded
Tune
1. Press
next to
the current tune appears.
Note:
the tune “A Whole New World” (No.
00) the first time you press
after turning the power on.
SONG
. An indicator appears
SONG
and the number of
The keyboard always selects
SONG
• a “score” to show you the notes
that are playing (right side of th e
display)
• a “keyboard” to show yo u the fingering and which keys are
pressed (bottom of the display)
2. Choose a tune from the 100
SONGS list and enter its two-digit
number on the keypad.
Or, you can press
– or +
to move to
the next higher or lower numbered
tune.
Notes:
• Precede a single-digit number
with a 0. For example, to select
07 (“O Christmas Tree”), press
7
.
• If you enter an incorrect first dig it,
SONG
press
to clear your entry,
then enter the correct digit.
3. Press
PLAY/PAUSE
START/STOP
or
to start playing the tune.
You can cha nge the t une by r epeat-
ing Step 2 even while a tune is playing. The new tune immediately
begins to play.
• a “metronome” to show you the
selected tempo — the metronome’s bar swings alo ng with the
tempo you selected, and the
black dots above the met ronome
show the beat co unt in the measure
• the chord name (excep t for tunes
80 to 99, center right of the display)
0
• “hands” that show the fin geri ng to
play the tune and chords
Note:
Each tune plays a different
preset tone for t he melody, but you
can change to another tone even
while the tune is playing. Fol low the
steps under “Selecting/Playing a
Preset Tone” on Page 12 to select a
different tone.
4. Use
MAIN VOLUME
to adjust the
overall volume as desired.
As a tune plays, the display shows:
10
Operation
To adjust only the accompaniment
volume (except tunes 80 to 99),
ACCOMP VOLUME
press
then enter
Page 11
42-4042.fm Page 11 Friday, April 28, 2000 11:18 AM
the desired volume level using the
0
number keys (between
+
press
or – within 5 seconds.
and 9) or
5. To move to a particular section of a
REW
tune, hold down
or FF during
play. When you think you have
reached the section you want,
release
REW
or FF to resume nor-
mal play.
6. To change the tem po, press
▼
or ▲. The current tempo setting
TEMPO
appears.
Notes
:
• To quickl y sl ow d own o r sp eed up
the tempo, hold down
TEMPO
▼
or ▲.
• To reset the tempo to its default
(original) speed, pr ess
TEMPO
▲
and ▼ at the same time.
• Tunes 80 to 99 are arranged so
the tempo changes during play.
However, if you select a tempo
other than the default tempo,
those tunes play in the newest
tempo.
7. To temporarily stop playing the tune,
press
the tune completely, press
PLAY/PAUSE
again. To stop
STOP
.
Playing Along with a
Prerecorded Tune
Follow these steps to have the keyboard
not play the melody of a prerecorded
tune, so you can!
Note:
You can find the scores for most
of the prerecorded tunes in the
Play
Guide for the Prerecorded Tunes
, sup-
plied with your keyboard.
1. Select an d enter the tune you want
to play.
2. Press
melody.
ON/OFF RIGHT
R
disappears from the
to turn off the
“hands,” indicating that the keyboard is not playing the right-hand
portion of the music.
Press
accompaniment.
ON/OFF LEFT
L
disappears from
to turn off the
the “hands.”
Notes:
• Tunes 80 to 99 are solo tunes.
You can turn off either the righthand or left-hand portion , but not
both.
• If you select tunes 00 through 79
and turn off both the melo dy and
accompaniment, the keyboard
plays an obligato accompaniment (a simple background
accompaniment).
3. Press
PLAY/PAUSE
to start play.
4. Adjust the tempo and volume as
desired.
5. Play along with the tune on the keyboard.
Note:
You can turn the melody on or
off by repeating Step 2 even while
the current tune is playing.
6. To temporarily stop playing the tune,
press
the tune completely, press
PLAY/PAUSE
again. To stop
STOP
.
11Operation
Page 12

42-4042.fm Page 12 Friday, April 28, 2000 11:18 AM
Turning Applause Off/On
When you turn off eith er the melody or
accompaniment and then play a tune,
applause automatically sounds at the
end of the tune. To turn off the applause,
hold down
OFF LEF T
appears. To turn the applause on again,
press the same bu ttons.
pears.
STOP
and press either
ON/OFF RIGHT
or
Apls=Off
.
Apls=On
ON/
ap-
Consecutively Playing Back
the Tunes
Normally, the tune you selected plays
continuously until you press
play all 100 prere cord ed t une s c on se cu tively, press either
then press
plays the tunes in sequence starting with
Tune 00.
To stop consecutive playback, press
STOP
PLAY/PAUSE
START/STOP
or
TONE
.
STOP
. To
RHYTHM
or
. The keyboard
USING THE PRESET
TONES
Your keyboard can sound like 100 different musical instruments or sound effects. The name and two-digit number
for each preset tone is liste d on the 100
TONES list on the keyboard’s top panel.
Notes:
• The keyboard has 12-note (maximum) polyphonic sound. This
means that you can play up to 12
different notes at the same time with
most of the keyboard’s preset tones.
Some of the keyboard’s preset
tones, however, are capable of only
6-note polyphony.
• Most tones on this keyboard have
been recorded a nd pr ocessed usin g
a technique called digital sampling.
To ens ure a high level of tonal qua lity, samples are taken in the low,
mid, and high ranges and are then
combined to sound amaz ingly close
to the originals. You might notice
very slight differences in volume or
sound quality for some tones when
you play them at d ifferent positions
on the keyboard. This is an unavoidable result of multiple sampli ng and
is not a malfunction.
• Some sound effect tones, such as
PERCUSSION (No. 99) , do not follow the musical scale when played,
,
but change effect as you play the m
in different octaves on the keyboard.
Selecting/Playi ng a Preset
Tone
1. Press
next to TONE and the current to ne’s
number appears.
Note:
board on, it automatically selects the
tone PIANO 1 (No. 00).
2. To play a different tone, choose a
preset tone from the 100 TONES list
and enter its two-digit number on
the keypad. As you pres s the keys,
the selected digits appear.
Or, you can use
the next higher or lower numbered
tone.
TONE
. An indicator appears
Each time you turn the key-
+
or – to move to
12
Operation
Page 13

42-4042.fm Page 13 Friday, April 28, 2000 11:18 AM
Notes:
• Precede a single-digit number
with a 0. For example, to select
ELEC PIANO 1 (No . 04), press
4
.
• If you enter an incorrect first dig it,
TONE
press
to clear your entry,
then enter the correct digit.
3. Play the keyboard to hear the
selected tone a nd adjust
UME
to the desired level.
MAIN VOL-
4. To select a different tone, repeat
Steps 1 and 2.
Keyboard Split Tones
The preset tones numbered 90 throu gh
96 on your keyboard let you automatically play two different musical instruments or sound effects independently
on opposite sides of the keyboard.
The instrument listed first in the tone’s
name plays on the left half of the keyboard (below middle C). T he instrument
listed next plays on the right half of the
keyboard (above middle C). For example, BS/PNO (No. 90) play s a bass tone
on the left half of th e keyboa rd a nd a piano tone on the right.
Percussion Sounds
PERCUSSION (No . 99) le ts yo u pl ay t he
35 different percussion sounds shown
0
here. The symbol for each sound appears above the corresponding key on
the keyboard.
Bass Drum Cowbell
Side Stick Crash Cymbal 2
Acoustic Snare Claves
Hand Clap Ride Cymbal 2
Electric Snare High Bongo
Low Floor Tom Low Bongo
Closed Hi-Hat Mute High Conga
High Floor T om Open High Conga
Pedal Hi-Hat Low Conga
Low Tom High Timbale
Open Hi-Hat Low T i mba le
Low-Mid Tom High Agogo
High-Mid Tom Low Agogo
Crash Cymbal 1 Cabasa
High Tom Maracas
Ride Cymbal 1 Voice Bass
Chinese Cymbal Voice Snare
Drum
Layered Tones
The preset tones numbered 80 throu gh
89 on your keyboard let you automatically play two differen t layered tones at
the same time when you pre ss one key.
For example, STR PNO (No. 80) plays
string and piano tones when you press a
key.
Ride Bell Voice Closed
Hi-Hat
Tambourine Voice Open
Hi-Hat
Splash Cymbal
Note:
When you select t he Fingered or
Concert Chord mode, the keys in the
lower 1
1
/2 octaves become the accom-
13Operation
Page 14

42-4042.fm Page 14 Friday, April 28, 2000 11:18 AM
paniment keys and do not prod uce percussion sounds. See “Using Auto
Accompaniment” on Page 15.
USING THE PRESET
AUTO-RHYTHMS
Your keyboard has 100 preset autorhythms that provide a steady beat for
your music. The name and two-digit
number of each preset auto-rhythm is
listed on the keyboard’s top panel.
You can play a preset auto-rhythm on
the keyboard in any of the following
ways:
• select and play a rhythm (see
“Selecting/Playing an AutoRhythm”)
• synchronize the start of a rhythm
with your music (see “Using SYNCHRO” on Page 15)
• briefly vary the pattern of a rhythm
(see “Using FILL-IN” on Page 15)
Selecting/Playing
an Auto-Rhythm
1. Press
appears to the righ t of
the number of the current autorhythm appears.
Note:
keyboard, it automatically selects
the rhythm Club Pop (No. 00).
RHYTHM
. An indicator
RHYTHM
and
Each time you turn on the
the next higher or lower numbered
rhythm.
Notes
:
• Precede a single-digit number
with a 0. For exampl e, press
0 5
to select POP BALLAD (No. 05).
• If you incorrectly enter the first
digit of the rhythm, press
RHYTHM
to clear the entry and return to the
last selected auto-rhythm.
3. Press
START/STOP
to start the
selected auto-rhythm.
4. Adjust
VOLUME
MAIN VOLUME
to the desired level (see
and
ACCOMP
“Adjusting the Accompaniment Volume” on Page 15).
5. To change the auto-rhythm speed,
TEMPO
press
▼ or ▲. The current
tempo setting appears.
Notes
:
• You can adjust the tempo
to play
an auto-rhythm from 20 to 255
beats per minute.
• To quick ly s lo w dow n or spee d up
the tempo, hold down
TEMPO
▼
or ▲.
• To reset the tempo to its default
(original) speed, press
TEMPO
▲
and ▼ at the same time.
6. Play the keyboard along with the
auto-rhythm.
2. To select a different rhythm , choose
an auto-rhythm from the 100
RHYTHMS list and enter its twodigit number on the keypad. Or,
repeatedly press
14
+
or – to move to
Operation
7. To select a different rhythm, repeat
Steps 1 and 2.
8. To stop the auto-rhythm, press
START/STOP
again.
Page 15

42-4042.fm Page 15 Friday, April 28, 2000 11:18 AM
Using SYNCHRO
This feature lets you synchronize the
start of an auto-rhythm with the beginning of your music.
After you select and enter an autorhythm, press
SYNCHRO/FILL-IN
. The
bars of the metronome flash to show the
keyboard is in a standby mode.
Begin playing the keyboard. The keyboard automatically begins to play the
rhythm when you press any key within
the first 1
1
/2 octaves of the lower end of
the keyboard (the fi rst 18 keys from the
left side of the keyboard).
Using FILL-IN
This feature lets you ins ert a shor t (1- to
2-measure) variation in the beat pattern
of a selected auto-rhythm.
Simply press and release
FILL-IN
while the auto-rhythm is playi ng.
SYNCHRO/
The keyboard inserts a 1- to 2-measure
variation, then the original rhythm automatically resumes at the end of the current measure.
USING AUTO
ACCOMPANIMENT
The 18 keys on th e left side of the keyboard with note labels above them are
accompaniment keys
called
Accompaniment
Keyboard
.
Melody
Keyboard
You can set the keyboard to play two different types of auto acc ompaniment using the accompaniment keys .
Concert Chord
•
— lets you play
chords on the accomp animent keys
using chord formatio ns of from one
to four notes. The number of keys
you press determines the type of
chord that plays (see “Concert
Chord” on Page 16).
Standard Fingering
•
— lets you play
chords on the accompaniment keys
using standard chord formations of
three or four notes (see “Standard
Fingering” on Page 17).
Notes
:
• Yo u can use the keyboard’s rhyth m
controls (
FILL-IN
and
SYNCHRO
with both types of auto a ccompaniment.
• After you press the auto accompaniment keys, the keyboard plays the
same chord until you press other
keys to play a different chord or
START/STOP
press
.
Adjusting the Accompaniment
Volume
The keyboard lets you adjust the volume
of your accompanimen t separately from
the overall volume of the keyboard.
1. Press
rent accompaniment volume setting
appears next to
ACCOMP VOLUME
Acomp Vol
. The cur-
.
)
2. Within 5 seconds, enter a number
from 0 (no sound) to 9 (loudest) on
the keypad. The number appears as
you press the key.
15Operation
Page 16

42-4042.fm Page 16 Friday, April 28, 2000 11:18 AM
Or, press – or + to select the next
lowest or highest accompaniment
volume setting.
To reset the acc ompaniment volume to
its default value of 7, press
–
and + at
the same time.
Note:
You can adjust the accompaniment volume separately for your keyboard play and prerecorded tune
playback.
Concert Chord
The concert chord method lets beginning keyboard players ea sily select and
play a chord.
The number of accompaniment keys
you press determines the type of chord
that plays. This chart shows the chord
type that plays when you press one,
two, three, or four accompan iment keys
at the same time.
The lowest note you play determines the
key of the chord. For example, if the lowest note is C, the keyboard plays a C
chord.
Note:
You can press
any
labeled note(s)
to the right of the lowest note in the
chord to produce a minor, a dominant
seventh, or minor seventh chord.
Follow these steps to start concert chord
auto accompaniment.
1. Set
CHORD
POWER/MODE
.
to
CONCERT
2. Enter a two-digit auto-rhythm number.
3. To start the auto-rhythm be fore the
auto accompaniment, pr ess
STOP
.
START/
Or, to synchronize the start of the
selected auto-rhythm with your
accompaniment, press
FILL-IN
.
SYNCHRO/
Number of Keys
Pressed
C DE FGAB C DE F
C DE FGAB C DE F
C D E F G A B C D E F
C DE FGAB C DE F
16
Chord Type
Major
Minor (m)
Dominant
Seventh (7)
Minor
Seventh
(m7)
Operation
4. Begin the accompaniment at the
desired interval by pressing the
desired accompa nim ent ke y( s ).
To play a melody along with the
accompaniment, press any key(s) to
the right of the accompaniment
keys.
5. Adjust the tempo,
ACCOMP VOLUME
and
MAIN VOLUME
to the de-
sired levels.
6. To change chords without interrupting the rhythm, simply press the
auto accompaniment key(s) required to form the new chord.
7. To stop auto accompaniment and
the auto-rhythm, press
START/STOP
,
.
Page 17

Standard Fingering
The standard fingeri ng method use s standard formations of thr ee or four not es, and
lets the experienced musician play a wider variety of accompaniment chords.
This chart shows the 15 chord types you can play on your keyboard by using standard fingering.
()
Notes:
• You do not hav e to press the key marked with parentheses on the keyboard in
the preceding chart to produce a 7, m7, M7, mM7, 9, or m9 chord.
• This chart shows onl y one possib le fingering po sition for each chord. It i s possible to play a chor d using several differen t positions. For examp le, the following
three fingering positions produce the same C chord.
17Operation
Page 18

42-4042.fm Page 18 Friday, April 28, 2000 11:18 AM
–
• When you play an aug, 7
5
, or dim7
chord, the lowest note you play
determines th e root of the chord. Be
sure that your fingering correctly
defines the root you want.
Note
: See “Standard Fingering Chord
Charts” on Page 26 for a list of all the
chords you can play on your keyboard
using standard fingering accompaniment.
Follow these steps to start s tandard fingering auto accompaniment.
1. Set
POWER/MODE
FINGERED
to
.
2. Select and enter an auto-rhythm.
3. To start the auto-rhythm before your
auto accompaniment, press
STOP
.
START/
Or, to synchronize the start of the
selected auto-rhythm with your
accompaniment, press
FILL-IN
.
SYNCHRO/
7. To stop auto accompaniment and
the auto-rhythm, press
START/STOP
USING THE CHORD BOOK
You can use your keyboard’s chord
book display feature to see which keys
to press and which fingers to use to form
a chord. You ca n also dis play the nam e
of a chord you play.
Follow these steps to use the chord
book feature.
1. Set
2. Press
POWER/MODE
CONCERT CHORD
CHORD BOOK
CLEAR (0
.
) to clear any previ-
ous chord entry.
3. If you wan t to see info rmation abou t
a major chord while you play it, skip
to Step 4. Otherwis e (if the desired
chord name is a min or chord) , enter
the chord’s name using that chord’s
keys on the numeric keypad.
NORMAL
to
, then press
or
.
4. Begin the accompaniment at the
desired interval by p ressing at least
three accompaniment keys to play
the desired chord.
To play a melody along with the
accompaniment, press any key(s) to
the right of the accompaniment
keys.
5. Adjust the tempo,
ACCOMP VOLUME
and
MAIN VOLUME
to the de-
sired levels.
6. To change chords without interrupting the rhythm, simply press the
auto accompaniment keys required
to form the new chord.
18
,
Operation
For example, to enter a mino r 7
7 (9
–5 (2
) and
chord, pre s s m (8) 7 (9)
to enter 7sus4, press
–
). Or,
sus4
(1).
4. Press the root key on the a ccompaniment keyboard to play the chord.
As the chord plays, the display
shows the chord you entered, the
keys to press to fo rm the chord (on
the bottom “keyboard”), the fingers
you need to use to play the chord
(on the center “hands”), and the
notes that make up the chord (on
the staff display).
5
Page 19

42-4042.fm Page 19 Friday, April 28, 2000 11:18 AM
5. Use – or + to scroll through the
chords associated with the root
chord you entered in Step 3. Or,
press a different root key to see the
chords based on that key.
Notes:
• If the chord is not rec ognized by
the keyboard, only a dash appears.
• Since the keyboard automatically
changes some chor ds so y ou c an
play them on the accom paniment
keyboard, the keyboard might display some chords in inverted
form.
• The keyboard does not display
some chords because the chord s
cannot be played within the
ˆ
Special Features
accompaniment keyboard’s
range. See “Standard Fingering
Chord Charts” on Page 26 for
more information.
6. Using the center “hands” as a guide,
play the displaye d ch or d on th e ke yboard.
7. You can also display the name of
the chord you play o n the a ccompaniment keyboard. Press
BOOK
, press
previous entry, then play the chord
on the accompaniment keyboard.
The name of the chord appears.
8. When you have finished, press
CHORD BOOK
book.
CLEAR
to erase any
to turn off chord
CHORD
CHANGING KEYS
The keyboard automatically selects the
key of middle C each time you turn it on.
For added flexibility as you play, the
keyboard lets you change (transpose)
the musical key in which it plays.
Note:
You cannot cha nge the k ey while
a prerecorded tune is selected or playing.
1. Repeatedly press
TUNE/MIDI
rent key setting appear
Note:
The number on the display is
the number of “semiton es” to which
the keyboard is set, compared to its
until
Trans
TRANSPOSE/
and the cur-
.
default key. A semitone is a measurement that represents the acoustical interval between the tones of
any two keys on the keyboard. For
example, the difference between C
and C or B and B is one semitone. You can transpose the key
down 6 semitones (to an F ) and up
5 semitones (to an F) — a full
octave.
2. Within 5 seconds, press
lower or raise the key. Each time
you press
decreases or increases by 1 (semitone).
As you raise the key,
and so on. As you lower th e key, –
is B, –2 is B , –3 is A, and so on.
–
or +, the number
–
or + to
1
is C , 2 is D,
1
19Special Features
Page 20

42-4042.fm Page 20 Friday, April 28, 2000 11:18 AM
Notes
:
• You can also use the number keypad to quickly raise the key. Simply
press the semitone chang e value (1
to 5).
• The keyboard automatically resets
the key to the default value of 0
(middle C) ea ch t im e yo u pl ay a pr erecorded tune.
• Each preset tone plays within a
specified range. If a key change
causes a note t o exceed its range,
the same note sounds in the nearest
octave.
• When you select preset tones 90
through 96 after changing the key,
the keyboard split point changes
accordingly (see “Keyboard Split
Tones” on Page 13).
• Changing the key does not affect
the PERCUSSION (No. 99) preset
tone.
TUNING THE KEYBOARD
Although your k eyboard never g oes out
of tune, it does le t you adjus t its pit ch to
match other instruments or musical recordings.
keyboard is currently tuned, compared to its default pitch. A cent is
the measurement that represents
the acoustical inter val between two
tones. 1200 cents equal 1 octave.
Yo u can tu ne the keyboard to withi n
50 cents (101 levels) of its default
pitch.
2. Within 5 seconds, repeatedly press
–
or + to lower or raise the keyboard’s pitch. Each time you press
the key, the number decreases or
increases by 1 (cent).
Notes:
• Yo u can use the number keypad to
raise the pitch by entering the cent
change value.
• The keyboard automatically resets
the tuning pitch to the default valu e
of 00 (cents) eac h time you turn off
the keyboard or play the prerecorded tunes.
USING A SUSTAIN PEDAL
For added flexibili ty and control as you
make music, you can connect an optional sustain peda l (available through your
local RadioSh ack st ore) . A sus tai n peda l
lets you sustain the keyboard’s sound.
Note:
You cannot tune the keyboard
while a prerecorded tune is disp layed or
playing.
Follow these steps to tune the keyboard.
1. Repeatedly press
TUNE/MIDI
Tune
Note:
the number of “cents” to which the
20
until the display shows
and the current pitch setting.
The number on the display is
TRANSPOSE/
Special Features
To connect a sustain ped al to your keyboard, insert the plug on the pedal’s
cord into
keyboard.
SUSTAIN
on the back of the
Page 21

42-4042.fm Page 21 Friday, April 28, 2000 11:18 AM
ˆ
Using MIDI
Your keyboard i ncludes a featur e called
MIDI (Musical Instrument Digital Interface). MIDI is the universal standard fo r
sending and receiving performance data
between all types of electronic musical
instruments, reg ardless of the m anufacturer.
Using MIDI, you can play music on you r
keyboard and ano ther instrument at the
same time while pressing the keys on
only one, record your music to a sequencer, acquire a wider selection of
preset tones from a sound module, and
much more.
ABOUT MIDI
Every MIDI-equipped instrument has
MIDI OUT and IN terminals, and some
also have a MIDI THRU terminal. Each
of these terminals serves a different purpose.
MIDI OUT sends MIDI data to (“talks
to”) the other MIDI instrument(s).
MIDI IN receives (“listens to”) MIDI data
sent by the other MIDI instrument(s).
MIDI-equipped devices communicate
with each other using digital codes (instructions). O ne MIDI d evice sends dig ital instructions representing exactly
what is being played on it. The other
MIDI device receives and translates
those instructions, then produces (or
records) the sound exactly as it was
played on the first device.
Note:
Connecting your keyboa rd to another MIDI device requires a MIDI cable
(not supplied). See “Making the MIDI
Connections.”
MAKING THE MIDI
CONNECTIONS
To connect your keyboard to another
MIDI-equipped device, you must use a
MIDI cable (available at your local RadioShack store).
Cautions:
• Always turn off power to your keyboard and the other MIDI device
before you connect or disconnect
MIDI cables.
MIDI THRU lets you connect (“network”)
additional MIDI instruments, and sends
along to other MIDI devices a copy of al l
data it receives through its MIDI IN terminal.
Your keyboard has
terminals.
The cable that connects MIDI devices
does not actually carry sound between
them, like a speaker wire carries sound
from a receiver to a speaker. Instead,
MIDI OUT
and
MIDI IN
• As you make the cable connection s,
be sure to align the M IDI cable pins
with the matching holes on your keyboard’s
nals. If you have trouble plugging in
the cable, do not force it! You m ight
damage the plug or the instrument.
To send MIDI da ta from your keyboard ,
use a MIDI cable to connect the keyboard’s
device’s MIDI IN terminal.
MIDI OUT
MIDI OUT
terminal to the other
and
MIDI IN
termi-
21Using MIDI
Page 22

42-4042.fm Page 22 Friday, April 28, 2000 11:18 AM
To receive MIDI data on y our keybo ard,
use a MIDI cable to connect the keyboard’s
MIDI IN
terminal to the other de-
vice’s MIDI OUT terminal.
Note:
You do not need to make both
connections if you are only e ither sending or receiving.
MIDI DATA
Your keyboard can send and receive
several different ty pe s o f MIDI data. The
keyboard’s tones, rhythms, and other
types of MIDI data are sent auto matic ally as you play.
Notes:
• The keyboard’s prerecorded tunes
cannot be sent as MIDI data.
• For detailed specifications of the
MIDI function, see the “MID I Implementation Chart” on Page 31.
within the same range if GM tone mapping is set to N, or in the range of 0 to
127 if GM tone mapping is set to G. In
the latter case, tones in the range of 100
to 127 are translated to the closest ton e
that the keyboard has.
Pitch Bend —
supplies pitch bend information. The keyboard’s pitch changes
as it receives a Pitch Bend message
through the
Control Change —
MIDI IN
terminal.
adds effects such
as vibrato and volume chan ges applied
during keyboard p lay. The message includes a control number (the effect type)
and a control value (the on/off and depth
of the effect).
Here is the data that can be received
with this keyboard and the correspo nding control number.
Effect
Control
Number
Note On/Off
—
specifies which keys are
pressed (Note On) or released (Note
Off). Also includes how loud a note is
played as a value from 0 to 127.
Notes:
• The pitch of a note de pends on the
tone that is being used, as shown in
the “Note Table” on Page 29.
• If the keyboard receives a “request”
to play notes outside of its range
(higher or lower), it automatically
selects the same note in the nearest
octave.
Program Ch ange —
specifies the tone.
The keyboard sends program change
data in the range of 0 to 99, corresponding to tone numbers. It receives data
22
Using MIDI
Modulation 1
Volume 7
Pan 10
Hold1 (Sustain) 64
The keyboard can send Hold1 Control
Change data only when you connect a
sustain pedal and press it.
CHANGING MIDI
SETTINGS
The keyboard lets y ou change two MIDI
parameters, Tone Map and Keyboard
Channel.
Keyboard Channel
for sending MIDI data to an external device (Default: 01). The keyboard receives
— sets the channel
Page 23

42-4042.fm Page 23 Friday, April 28, 2000 11:18 AM
MIDI data on channels 1 th roug h 4 and 10
only. The data received on other channels
are ignored. For transmission of MIDI data, you can use any of 16 channels.
1. Repeatedly press
TUNE/MIDI
2. Within 5 seconds, press
select the channel you want.
Tone Map
change values received/recognized by
this keyboard.
1. Repeatedly press
2. Within 5 seconds, press
—sets the range o f program
TUNE/MIDI
appears.
select the setting you want.
N
: Normal Tone Map. This setting
allows receipt of 0 to 99 program
changes. Each program change
corresponds to one of the keyboard’s prerecorded tones.
G
: General MIDI Tone Map. This
setting allows recei pt of all 0 to 127
program changes. Any data over
100 are translated to the closest
tone the keyboard has. See “Note
Table” on Page 29 for details.
Select
MIDI data from an external device.
G
when you listen t o Gener al
Keybd Ch
until
until
TRANSPOSE/
appears.
–
or + to
TRANSPOSE/
TonMap=N
–
or + to
NOTES ABOUT THE MIDI
IMPLEMENTATION
CHART
The “MIDI Implementation Chart” on
Page 31 illustrates the details of the keyboard’s MIDI function . An O in the chart
means that the keyboard has this feature; X means it does not have thi s feature. The following notes explain what
the keyboard can do.
Basic Channel
channels to exch ange data. As in a TV
broadcast, different channels send different data. The keyboard can send data
in any of 16 channel s, but receiv es data
only on channels 1 through 4 or 10.
Mode
— The chart shows that Mode 3
is OMNI OFF, POLY. This means the
keyboard sends and recei ves polyphonic data on only one channel at a time.
Note Number
sents each key of the keyboard. The
lowest number (0) is fiv e octaves below
middle C. Since the keyboard’s lowest
note is two octaves below middle C and
the highest is thr ee octaves abo ve middle C, your keyboard can send note
numbers between 36 and 96 and receive note numbers from 0 throug h 127.
The keyboard a utom ati cally assigns any
key outside its range to a key within its
key range.
Velocity
fast the key was pressed, or how loud
the note should soun d. Pianis simo (1) is
the lowest velocity, Fortissimo (127) is
the loudest. A zero (0) mea ns the key is
released. Your keyboard can send volume level 75 or 100, an d rece ive all volume levels from 0 through 127.
9n
message is 9 hexadec imal, and n is the
channel number.
Pitch Bender
(but cannot send) pitch bending signals.
— This number shows how
— This means that the Note On
— MIDI uses up to 16
— This number repre-
— The keyboard receives
23Using MIDI
Page 24

42-4042.fm Page 24 Friday, April 28, 2000 11:18 AM
Control Change
— This feature sends
data on various control lers, eac h having
its own number. For the details of each
parameter, see “MIDI Data” on Page 22.
Program Change
— This feature
changes the preset sounds. Each sound
number corresponds to a prog ram number between 0 and 127. For more information, see “MIDI Data” on Page 22.
ˆ
Troubleshooting
If your keyboard is not perfo rming as it should, thes e suggestions migh t help. If you
still cannot so lve the problem , take the key board to your l ocal RadioShack store for
assistance.
Trouble Possible Cause Remedy
No sound, even if keys
are pressed.
The keyboard has turned
off automatically.
Volume is turned down. Repeatedly press
Headphones are connected.
Power supply problem. Check the power supply.
POWER/MODE
Set
then ON again.
UME
▲ to increase the volume.
Disconnect headphone s.
Are battery symbols
(+/–) facing correctly?
Are the batteries fresh?
Is the AC or DC adapter connected properly?
OFF
to
MAIN VOL-
No sound when connected to an external
amplifier.
The key or tuning does
not match when playing
along with another MIDI
instrument.
24
You are pressing too few
accompaniment keys
POWER/MODE
while
FINGERED
set to
Volume is turned down. Repeatedly press
Defective connection cord. Replace the connection cord.
The tuning or transpose
parameter is set to a value
0
other than
or 00.
Troubleshooting
is
.
POWER/MODE
Set
MAL or CONCERT CHORD
Press 3 or 4 keys to form a
chord while
set to
UME
Set the tuning or transpose to
00
or
POWER/MODE
FINGERED
▲ to increase the volume.
.
NOR-
to
.
MAIN VOL-
.
is
0
Page 25

42-4042.fm Page 25 Friday, April 28, 2000 11:18 AM
Trouble Possible Cause Remedy
No sound when receivin g
and playing MIDI data.
Bass notes in General
MIDI data are sent out
one octave lower.
Sounds sent to another
MIDI device by the keyboard do not sound correct.
MIDI cables are not connected properly.
T one map para meter is set
N
to
.
The other device’s MIDI
THRU function is turned
on.
Check the connection.
Set the tone map parameter to
G
(see “Changing MIDI Set-
tings” on Page 22).
Turn off the MIDI THRU func-
tion on the other device.
25Troubleshooting
Page 26

ˆ
Standard Fingering Chord Charts
These tables show the left-hand fingering for the chords you play most often.
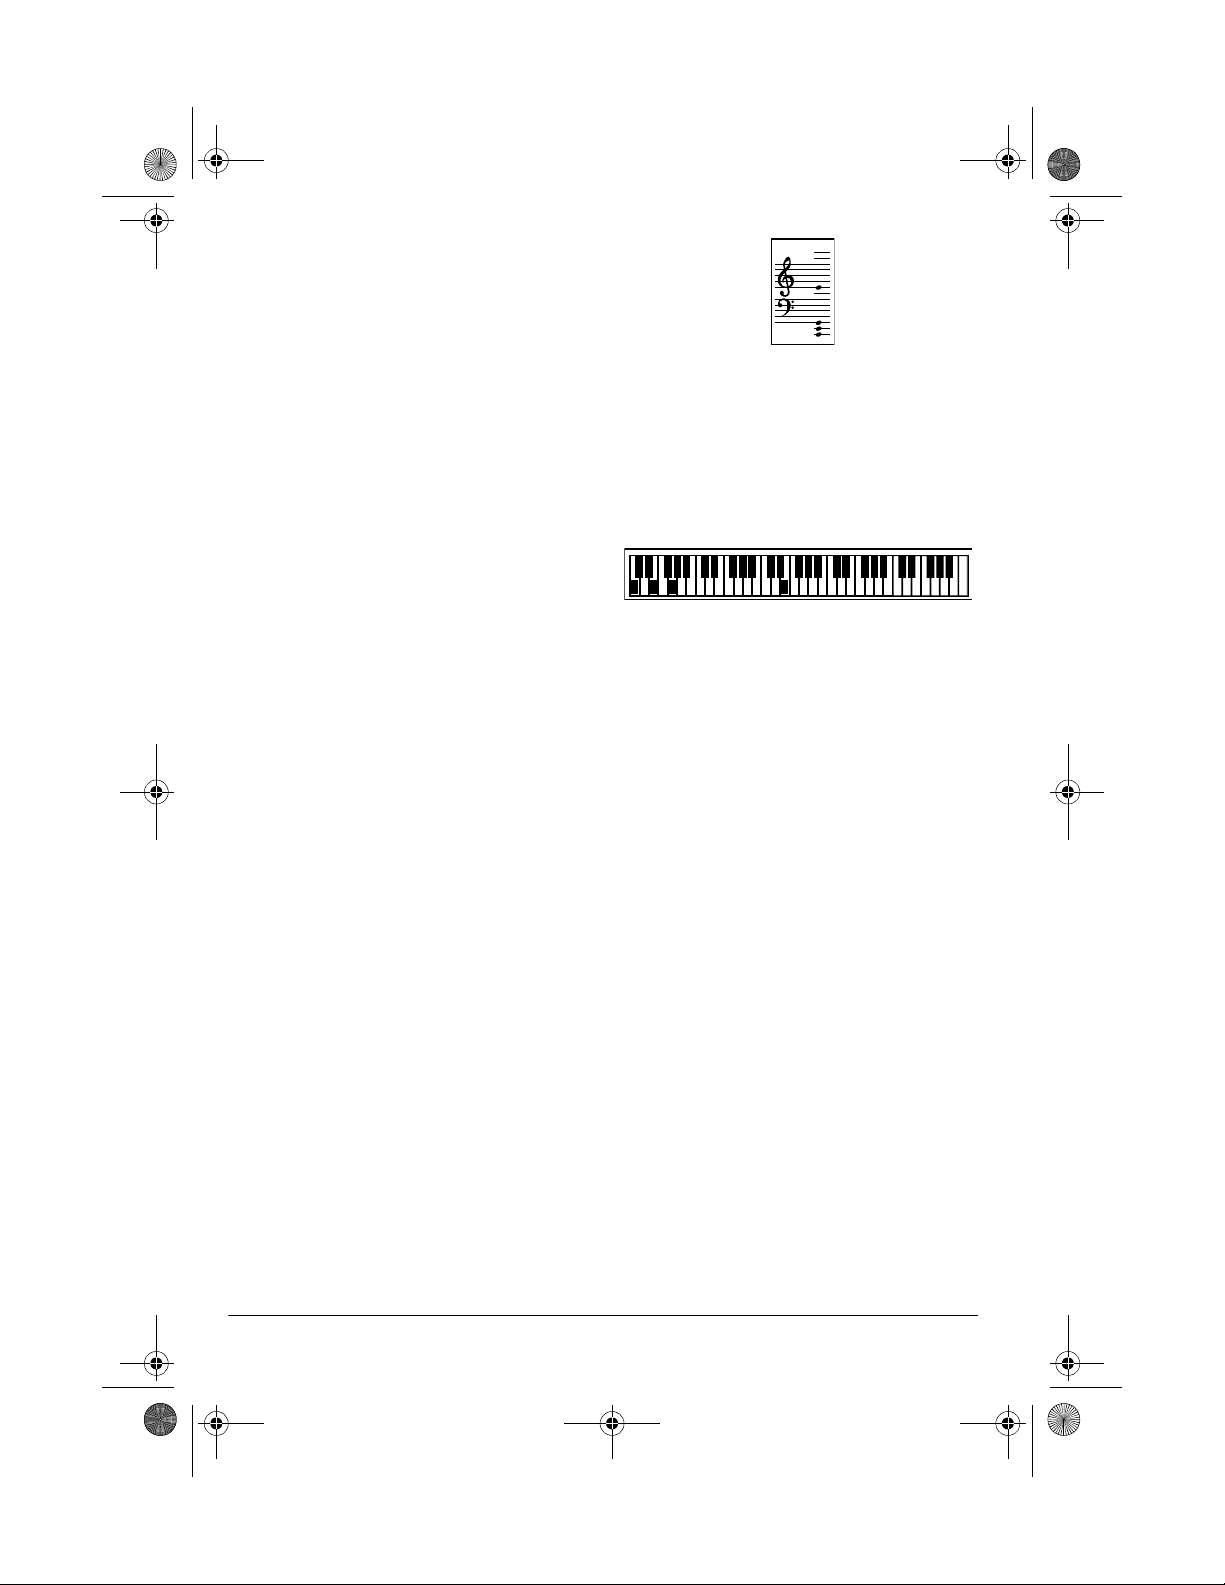
This illustratio n shows which fingers on your left hand match th e numbers on the charts . The ill ustratio n also appear s on y our keyboa rd’s di splay.
Note:
You cannot play chord s marked with an asterisk (*) in th e fingered mode on
this keyboard.
26
Standard Fingering Chord Charts
Page 27

42-4042.fm Page 27 Friday, April 28, 2000 11:18 AM
27Standard Fingering Chord Charts
Page 28

28
Standard Fingering Chord Charts
Page 29

ˆ
Note Table
Legend:
(1) Tone number
(2) Maximum polyphony
(3) Range type (see Page 30)
(4) Corresponding general MIDI number (see “MIDI Data” on Page 22)
29Note Table
Page 30

Legend:
Range of keyboard play
Playable range (when receiving MIDI data)
Range transposed to nearest octave (when receiving MIDI data or using the
keyboard’s transpose function)
(1) The received MIDI data is played one octave lower
(2) The received MIDI data is played one octave higher
30
Note Table
Page 31

42-4042.fm Page 31 Friday, April 28, 2000 11:18 AM
ˆ
MIDI Implementation Chart
FUNCTION TRANSMITTED RECOGNIZED REMARKS
Basic
Channel
Mode Default
Note
Number: True voice
Velocity Note ON
After
Touch
Default
Changed
Messages
Altered
Note OFF
Keys
Channels
1
1–16
Mode 3
X
❊❊❊❊❊❊❊❊❊❊❊❊❊❊❊❊
36–96
❊❊❊❊❊❊❊❊❊❊❊❊❊❊❊❊
O 9nH v=75,100
*2
X 9nH v=0
X
X
Pitch Bender X O
Control
Change16, 38
7
10
11
64
100, 101
120
121
Program
Change: True #
X
X
X
X
X
O
X
X
X
O 0–99
❊❊❊❊❊❊❊❊❊❊❊❊❊❊❊❊
1–4, 10
1–4, 10
Mode 3
X
❊❊❊❊❊❊❊❊❊❊❊❊❊❊❊
0–127
36–96
1
*
O 9nH v=1–127
X 9nH v=0, 8nH
*3
v=
X
X
O
X
O
O
X
O
X
X
X
O 0–127
❊❊❊❊❊❊❊❊❊❊❊❊❊❊❊
*4
1
*
Depends on tone
*2
: V(Veloci ty)=10 0 when note
on date when the main volume value of this unit is 9 to 2,
and V=75 when the main volume value is 1 or 0.
*3
no relation
Modulation
Data entry
Volume
Pan
Expression
Hold1
RPN LSB, MSB
All sound off
Reset all controller
*4
: Depends on GM Tone
Map setting
When set to N, only the
100 normal list tones
from 0 to 99 are
received.
When set to G, tone
numbers 0 to 127 are
received. Those that
most closely match the
100 prerecorded t ones of
this keyboa rd are
mapped to the applicab le
tone numbers (0 to 99)
31MIDI Implementation Chart
Page 32

42-4042.fm Page 32 Friday, April 28, 2000 11:18 AM
FUNCTION TRANSMITTED RECOGNIZED REMARKS
System Exclusive X X
System
Common
System
Real
Time
Aux
Mes-
sages
: Song Pos
: Song Sel
: Tune
: Clock
: CommandsXX
: Local ON/
OFF
: All notes
OFF
: Active
Sense
: Reset
X
X
X
X
X
X
X
X
X
X
X
X
X
X
X
X
Mode 1: OMNI ON, POLYMode 3: OMNI OFF, POLYO: Yes
Mode 2: OMNI ON, MONOMode 4: OMNI OFF, MONOX: No
ˆ
Care and Maintenance
Your RadioShack MID I Keyboard is an examp le of superior de sign and craftsm anship. The follow ing s ugg es tio ns will he lp y ou ca re for yo ur keyboa rd s o y ou c an enjoy it for years.
Keep the keyboard dry. If it gets wet, wipe it dry immediately. Liquids
might contain minerals that can corrode the electronic circuits.
Use and stor e the keyboard only in normal t emperature environm ents.
Temperature extreme s can shorten the life of electronic dev ices, damage batteries, and distort or melt plastic parts.
Keep the keyboard away from dust and dirt, which can cause premature
wear of parts.
Handle the keyboa rd gently and c arefully. Droppin g it can damage circuit boards and cases and can cause the keyboard to work improperly.
32
Care and Maintenance
Page 33

42-4042.fm Page 33 Friday, April 28, 2000 11:18 AM
Use only fresh b atteries of the required size and recommended type.
Batteries can leak chemicals that damage your keyboard’s electronic
parts.
Wipe the keyboard with a damp cloth occasionally to keep it looking
new. Do not use h arsh chemicals, cleaning solven ts, or strong detergents to clean the keyboard.
Modifying or tampering wi th the keyboard’s in ternal components ca n cause a malfunction and might inval idate its warranty and void yo ur FCC authorizati on to operate it. If your keyboard is not performing as it should, take it to your local
RadioShack store for assistance.
ˆ
Specifications
Number of Keys ..................................................................................................................... 61
Polyphonic Sound .............................................................................................. 12-note (Max.)
Preset Tones ....................................................................................................................... 100
Auto-Rhythms ...................................................................................................................... 100
Tempo ...................................................................... Adjustable (20–255 Beats Per Minute)
Other ..............................................................................................Fill-in and Synchro Start
Accompaniments ................................................................................ Concert Chord, Fingered
Prerecorded Tunes .................................................................................................... 100 Tunes
Transpose ................................................................................................ (F ~C~F: half-notes)
Tuning ................................................................................. Adjustable A4 = 440 Hz ±50 cents
Built-In Speakers ......................................................... 4
Terminals:
Power Supply ....................................................................................................
PHONES/OUTPUT
Power Sources ............................................................................................. DC: 6 AA batteries
Power Consumption ......................................................................................................... 7.7 W
Jack ........................................................ Output Impedance: 78 Ohms
3
/4 Inch (12 cm) × 2 (Output 2W + 2W)
DC 9V
Jack
Output Voltage: 4V (RMS) MAX
MIDI IN, OUT
SUSTAIN 1/4-Inch Standard Jack
AC: 120V, 60Hz, with AC adapter
Vehicle Battery: 9V with DC adapter
33Specifications
Page 34

42-4042.fm Page 34 Friday, April 28, 2000 11:18 AM
Dimensions (HWD) ...................................................................... 41/4 × 3617/32 × 1215/16 Inches
(108 × 929 × 329 mm)
Weight (Without Batteries) .......................................................................................... 8 lb 14 oz
(4 kg)
Included Accessories ................................................................................... Sheet Music Stand
Play Guide for the Prerecorded Tunes
Specifications are typical; individual units might vary. Specifications are subject to change and
improvement without notice.
34
Specifications
Page 35

42-4042.fm Page 35 Friday, April 28, 2000 11:18 AM
ˆ
Notes
35Notes
Page 36

42-4042.fm Page 36 Friday, April 28, 2000 11:18 AM
Limited One-Year Warranty
This product is warrante d by RadioSha ck against manufac turing defect s in material and wor kmanship under normal use for one (1) year from the date of purchase from RadioShack company-owned
stores and authorized RadioShack franchisees and dealers. EXCEPT AS PROVIDED HEREIN, RadioShack MAKES NO EXPRESS WARRANTIES AND ANY IMPLIED WARRANTIES, INCLUDING
THOSE OF MERCHANTABILITY AND FITNESS FOR A PARTICULAR PURPOSE, ARE LIMITED
IN DURATION TO THE DURATION OF THE WRITTEN LIMITED WARRANTIES CONTAINED
HEREIN. EXCEPT AS PROVIDED HEREIN, RadioShack SHALL HAVE NO LIABILITY OR RESPONSIBILITY TO CUSTOMER OR ANY OTHER PERSON OR ENTITY WI TH RESPECT TO ANY
LIABILITY, LOSS OR DAMAGE CAUSED DIRECTLY OR INDIRECTLY BY USE OR PERFORMANCE OF THE PRODUCT OR ARISING OUT OF ANY BREACH OF THIS WARRANTY, INCLUDING, BUT NOT LIMITED TO, ANY DAMAGES RESULTING FROM INCONVENIENCE, LOSS
OF TIME, DATA, PROPERTY, REVENUE, OR PROFIT OR ANY INDIRECT, SPECIAL, INCIDENTAL, OR CONSEQUENTIAL DAMAGES, EVEN IF RadioShack HAS BEEN ADVISED OF THE
POSSIBILITY OF SUCH DAMAGES.
Some states do not allow limitations on how long an implied warranty lasts or the exclusion or limitation of incidental or consequential damages, so the above limitations or exclusions may not apply to
you.
In the event of a pr oduct defect durin g the warranty pe riod, take the pro duct and the RadioShack
sales receipt as proof of purchase date to any RadioShack store. RadioShack will, at its option, unless otherwise provid ed by law: (a) correct the def ect by p rod uct rep ai r witho ut charge for parts and
labor; (b) replace the product wi th one of the same or similar design; or (c) refund the purch ase
price. All replace d parts a nd prod ucts, and p roducts o n which a refund is made, become th e property of RadioShack. New or recond itioned parts a nd products may be used in the performance of
warranty service. Re paired or replace d parts and pro ducts are warran ted for the rem ainder of the
original warranty period. You will be charged for repair or replacement of the product made after the
expiration of the warranty period.
This warranty does not cover: (a) damage or failure caused by or attributable to acts of God, abuse,
accident, misuse, i mproper or abnormal usage, failure to fo ll ow instr ucti o ns, imp rop er ins t allat i on or
maintenance, altera tion, lightning or othe r incidence of excess voltage or current; (b ) any repairs
other than those provided by a RadioShack Authorized Service Facility; ( c) consumables such as
fuses or batteries; (d) cosmetic dam age; (e) tra nsportation , shipping or insurance costs; or (f) costs
of product removal, installation, set-up service adjustment or reinstallation.
This warranty give s you specific l egal rights, an d you may al so have other r ights which var y from
state to state.
RadioShack Customer Relations, 200 Taylor Street, 6th Floor, Fort Worth, TX 76102
We Service Wh at We Sell
12/99
MD981E-1
RadioShack
A Division of Tandy Corporation
Fort Worth, Texas 76102
42-4042
MA0005-A
04A00
Printed in Malaysia
 Loading...