

Page 1
talking blood pressure monitor
63-1537
In response to the increasing desire for improved health, personal balance and overall well-being, we developed the LifeWise brand of personal and home
health products. This comprehensive suite of technologically advanced and easy-to-use products offers a variety of smart ideas designed to help keep you,
your family and your home happier, healthier and more at ease.
Smart Choices for Your Health, Comfort, and Peace of Mind
Take the LifeWise Heart Truth Pledge and begin
making one change a month to improve the
health of you and your family.
www.hearttruthpledge.com
Thank you for purchasing your Talking Blood Pressure
Monitor from RadioShack. It features voice playback
during and after blood pressure measurement results,
as well as general instructions to help you prepare
for taking measurements. When your blood pressure
monitor has finished reading your measurement, it
will announce your blood pressure readings, pulse and
blood pressure classification.
Talking Blood Pressure Monitor Plastic Case
User’s Guide
what’s included
NOTE: Actual product may vary from images found in
this document.
Set the clock before using your blood pressure monitor, so that a time
stamp can be assigned to each record that is stored in the memory.
1. When the unit is off, press and hold SET for two
seconds to enter the setting mode.
2. Repeatedly press SET to enter the modes.
• 12/24-hour format
• hour, minute, and year format
• month/day or day/month
format
• month, date, and
measurement unit (kPa or mmHg)
3. In each mode, press user1/ or user2/
to change value setting.
4. Press
SET to confirm the change and
switch to the next setting.
5. When you are finished, press
º to exit the setup menu.
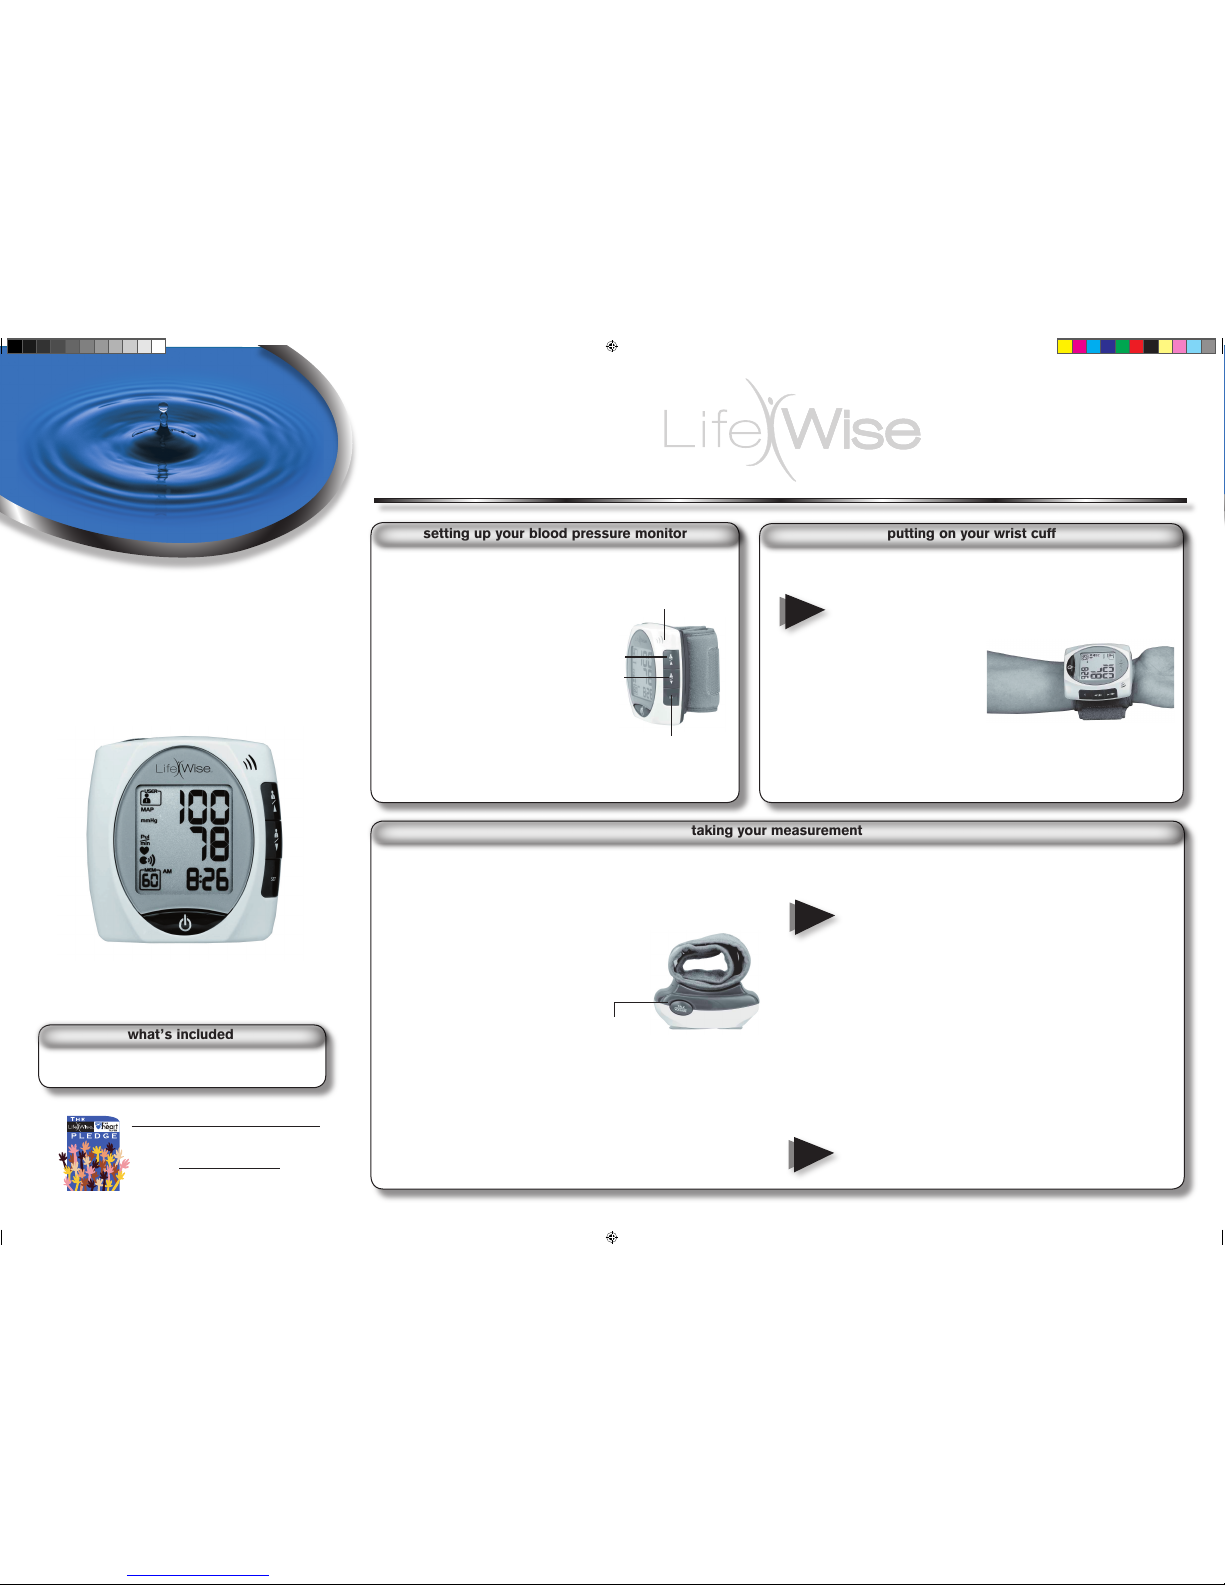
Position the wrist cuff to ensure that you receive an accurate reading.
1. Remove all accessories (i.e. watch, bracelet, etc.) from your left wrist.
If your physician has diagnosed you with poor circulation in your left
arm, use your right wrist.
2. Roll or push up your sleeve to expose
your skin.
3. Attach the cuff to your left wrist with
your palm facing up.
4. Position the edge of the cuff about 0.4
inches (1 cm) from the bottom of your
palm.
5. Fasten the wrist cuff around your wrist, leaving no extra room between the cuff
and your skin. If the cuff is too loose, the measurement will not be accurate.
putting on your wrist cuff
Note
1. Choose the position from which you wish to measure sitting or
lying down.
2. Position your body so your wrist is parallel with your heart.
sitting with an armrest
• Place your elbow on a table, using an object as a
support under your forearm.
• Your wrist should be parallel with your heart,
palm facing up.
sitting without an armrest
• Place your arm across your chest with your
wrist parallel to your heart. Hold your elbow
with the other hand.
lying down
• Position your wrist on a support, a
cushion, or your thigh so it is parallel
with your heart,
and with your palm facing up.
3. Relax your hand and press º to turn on your monitor. Press º again and
the wrist cuff begins inflating.
• Once the pressure reaches 180 mmHg, your monitor will slowly
deflate until the measurement results show on the LCD.
4. To repeat the announcement, simply press TALK/VOLUME.
5. If you want to save the record to memory, press user1 or user2 and the
results are saved to User 1 or User 2’s memory accordingly.
The measurement is stored as the first (MEM 1) entry in the user record you
selected. The last entry (MEM 60) is dropped, and all the entries in between
move up 1 digit.
This unit can intelligently adjust the cuff pressure and inflate to a
higher-pressure level (>180 mmHg and up to 280mmHg) when needed.
Your systolic and diastolic pressure readings flash on the LCD, followed
by MAP and pulse readings every 2 seconds. At the same time, your
measurement results and blood pressure classification are announced.
voice playback of blood pressure measurements
When your monitor has finished taking your measurement, your blood
pressure readings, pulse, and blood pressure classification are announced.
To repeat the announcement, press TALK/VOLUME. Press TALK/VOLUME
if you need to repeat the playback of any record saved previously.
volume control
You can adjust the volume level, when you are not in measure mode:
1. Press and hold TALK/VOLUME until volume level flashes on the
LCD.
2. Press TALK / VOLUME
to adjust volume level to 0, 1, or 2.
3. Press
º when you have finished adjusting the volume.
When volume level 0 is selected, the unit is on mute and you will
not hear any voice messages announced.
taking your measurement
setting up your blood pressure monitor
SET
USER 1/
USER 2/
Notes
TALK/
VOLUME
Speaker
Note
63-1537.indd 1 07/12/2005 11:33:15
Page 2
This product is warranted by Innovation One against manufacturing defects in material and workmanship under normal use for one (1) year from the date of purchase from
Innovation One company-owned stores and authorizedInnovation One franchisees and dealers. For complete warranty details and exclusions, check with your local Innovation
One store.
Innovation One Customer Relations
350 N. Henderson St., Ft. Worth, TX 76102 04/04
limited one-year warranty
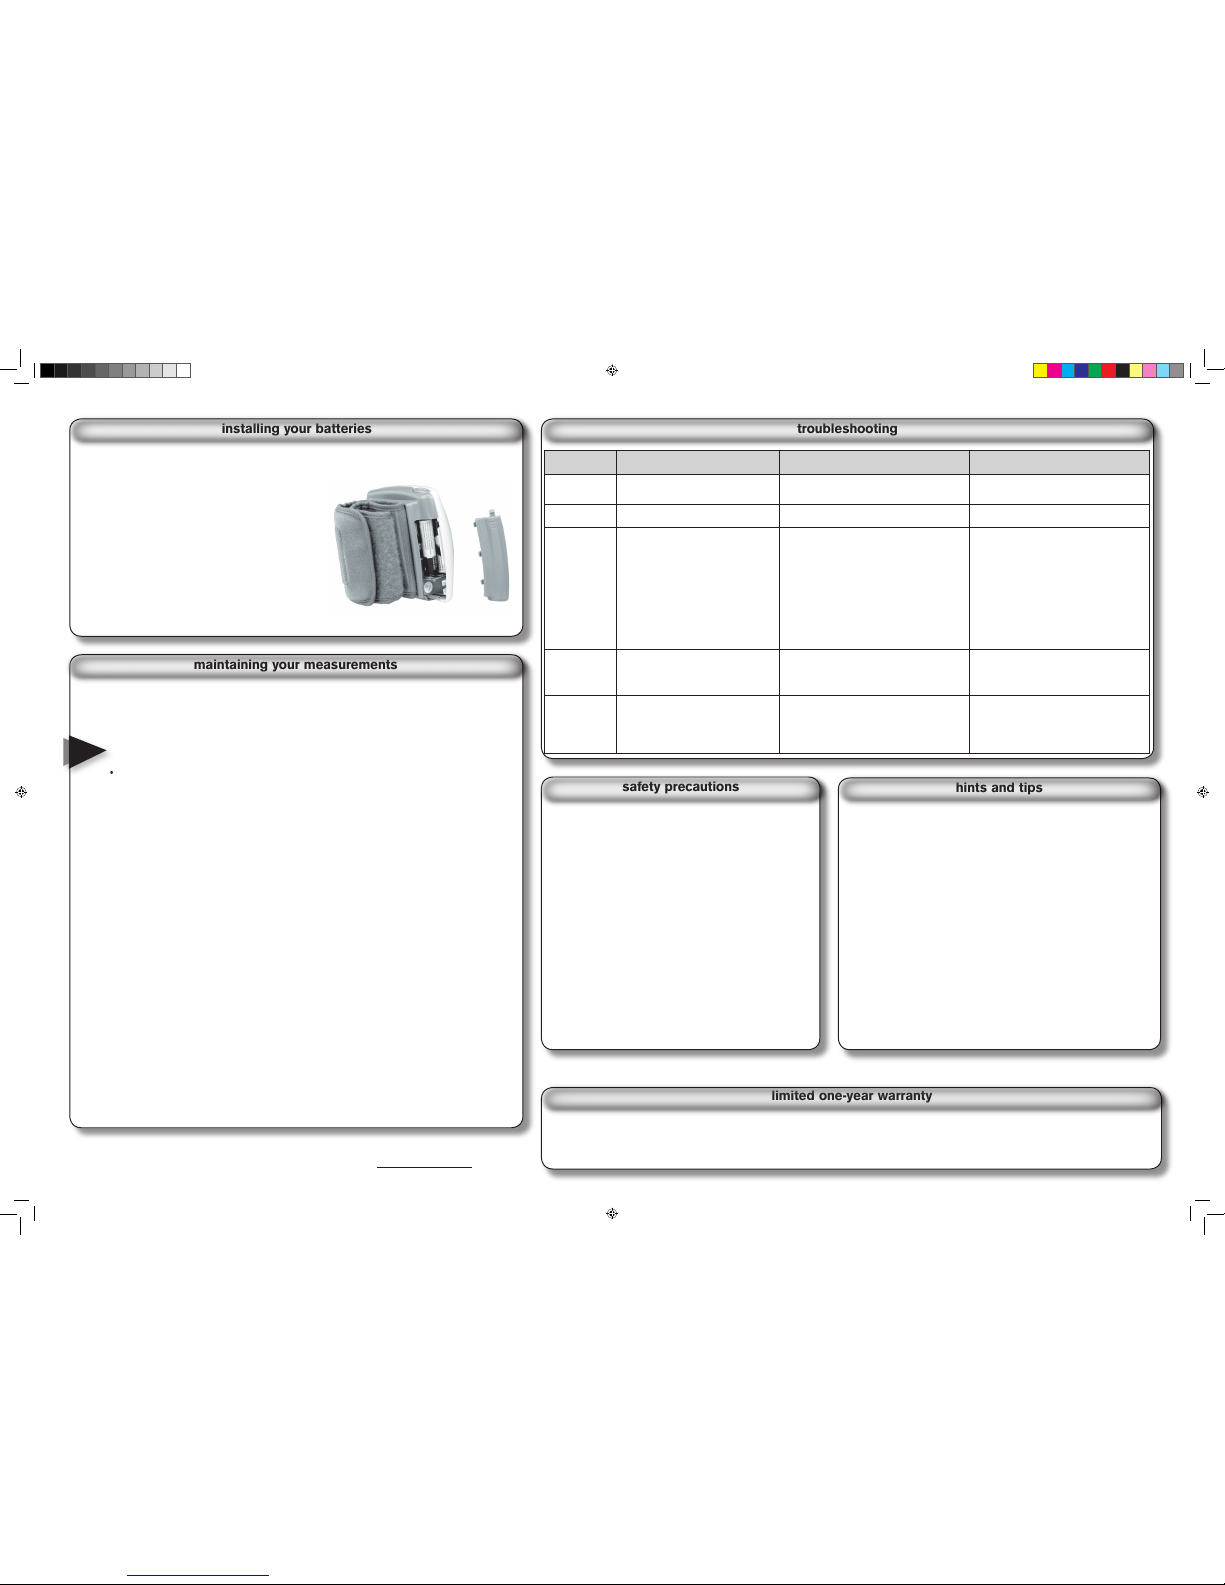
Insert two AAA batteries, matching the polarity symbols (+ or -) marked inside.
Battery notes:
• Place the tab under batteries to assist with r emoving
batteries.
• Dispose of old batteries pr omptly and properly. Do
not burn or bury them.
• Use only fr esh batteries of the required size and
recommended type.
• Do not use batteries of differ ent capacities or
chemistries.
• If you do not plan to use your blood pr essure monitor
for several weeks, remove the batteries. Batteries can
leak chemicals that may damage electronic parts.
installing your batteries
For additional information:
www.lifewiseonline.com
63-1537
06A05
Printed in China
recalling measurements stored in memory
To view a history of User 1’s records, press (user1).
To view a history of User 2’s records, press
(user2).
• The most recent record (1) is shown first. Each new measurement is assigned to the first (1)
record. All other records are pushed back one digit (e.g., 2 becomes 3, and so on), and the last
record (60) is dropped from the list.
• Press the corresponding button again (user1 or user2 ) to see additional records.
• Press and hold the corresponding button to auto-advance to each subsequent record.
• The date and time of the measurement are shown with each record.
• Memory records are saved when battery power is depleted or when you replace batteries.
deleting measurement records from memory
You have the option of deleting your latest measurement record or your entire measurement
history. This is useful if measurements have not been accurately recorded and need to be
recorded again.
to delete the latest record:
1. Press user1 or user2 to recall the latest measurement record for User 1 or User 2.
2. Press and hold SET until the LCD shows “DEL ONE”.
3. Press and hold
SET to delete the latest recorded measurement for User 1 or User 2. After
you have confirmed deleting the latest record, the screen shows “DEL DONE.”
4. If you decide to abort the delete action instead, press
user1 twice, º or press user2 once
to go back to the main screen.
to delete all records
1. Press user1 or user 2 to recall the latest measurement record for User 1 or User 2.
2. Press and hold SET until the LCD shows “DEL ONE”.
3. Press
user 1 to show the option of deleting your entire measurement history; the LCD
displays “DEL ALL”.
4. Press and hold SET to delete all measurement records. After you have confirmed
deleting all records, the screen shows “DEL DONE.”
If you decide to abort the delete action instead, press user 2 once, º or press user 1 twice
to go back to the main screen.
maintaining your measurements
• It is important to relax when taking your blood pressure. Rest for at
least 15 minutes before you begin.
• Do not lean backward or bend your wrist inward while taking a
measurement.
• Avoid talking or moving your fingers and hand. Rapid movements or
other activities may alter your reading.
• If you have just eaten a large meal, wait at least an hour before
taking your blood pressure.
• Do not smoke or drink alcohol before taking your blood pressure.
• Do not measure your blood pressure if you are under stress.
• Wait at least 3 minutes between measurements.
• For a meaningful comparison, try to measure under similar
conditions. For example, take daily measurements at approximately
the same time, on the same wrist, or as directed by a physician.
• To stop the measurement process at any time, press º.
• The unit automatically switches off one minute after taking a
measurement. To save the battery life, press º as soon as you are
finished to turn off the unit.
• Diastolic blood (80-85mmHg) and Systolic blood (120-130mmHg)
is normal blood pressure. If your measurements falls outside the
range, consult your physician.
hints and tips
• This device is intended for adult use only and for noninvasive measuring and monitoring of arterial blood
pressure. It is not intended for use on extremities other
than the wrist or for functions other than obtaining a
blood pressure measurement.
• Do not confuse self-monitoring with self-diagnosis. This
unit allows you to monitor your blood pressure. Do not
begin or end medical treatment based solely on the
measurements of this device. Consult a physician for
treatment advice.
• If you are taking medication, consult your physician to
determine the most appropriate time to measure your
blood pressure. Never change a prescribed medication
without consulting your physician.
• This unit is not suitable for continuous monitoring during
medical emergencies or operations.
• If the cuff pressure exceeds 40 kPa (300 mmHg), the unit
will automatically deflate. If it does not deflate when
pressure exceeds 40 kPa (300mmHg), detach the cuff from
the wrist and press the power button to stop inflation.
safety precautions
troubleshooting
Problem Symptom Check this Remedy
No power
Display is dim or will not light up. Batteries are exhausted.
Batteries are inserted incorrectly.
Replace with new batteries.
Insert batteries correctly.
Low Batteries
Low Battery Icon appears on the display.
Replace the batteries.
Error Message
1. Err appears on the display.
2. Err1, 2 or 3 appears on the display.
3. Err4 appears on the display.
4. Err5 appears on the display.
5. EEx or EExx appers on the display.
1. A measurement error occurred.
2. The wrist cuff is not secure.
3. The monitor detected motion while measuring.
4. Pressure is over 300mmHg.
5. A calibration error occurred.
1. Relax for a moment and then measure again.
2. Refasten the cuff and measure again.
3. Movement may affect the measurement. Relax
for a moment and then measure again.
4. Same as 3.
5. Retake the measurement. If the problem
persists, contact the retailer or our customer
service department for further assistance. Refer
to the warranty for contact information and
return instructions.
Wrong
Settings
Date and time are incorrect.
Measurement unit (kPa or mmHg) are
incorrect.
The clock was not set or reset after installing new
batteries.
The measurement unit was not set or reset after
installing new batteries.
Reset the clock.
Reset the measurement unit.
No User
Memory
Cannot find a record.
The memory was not saved after taking a
measurement.
The record was stored to the wrong user memory.
Retake the measurement, Press user 1 or user 2
to save the corresponding user’s memory.
Press user 1 to view User 1’s record or press
user 2 to view User 2’s record.
Notes
63-1537.indd 2 07/12/2005 11:33:17
 Loading...