

Page 1
©
1999 Tandy Corporation.
All Rights Reserved.
RadioShack and Plug ’n Power are registered trademarks used by Tandy Corporation.
Keychain-Remote Control System
Your RadioShack Keychain-Remote
Control System is a valuable accessory for your Wireless Remote Control
System. With this switch and transceiver you can indi vidually turn on or
off lights or appliances fr om any location in your home. Using the remote,
you can turn on and off a lam p or appliance, connected to the transceiver.
You can also turn on and off other
lamps or applianc es attached to your
optional Plug 'n Power
®
receivers.
This remote cont rol sy st em is co mpa tible with other Plug 'n Po wer systems
and controllers, all o f which are available from your local RadioShack
store.
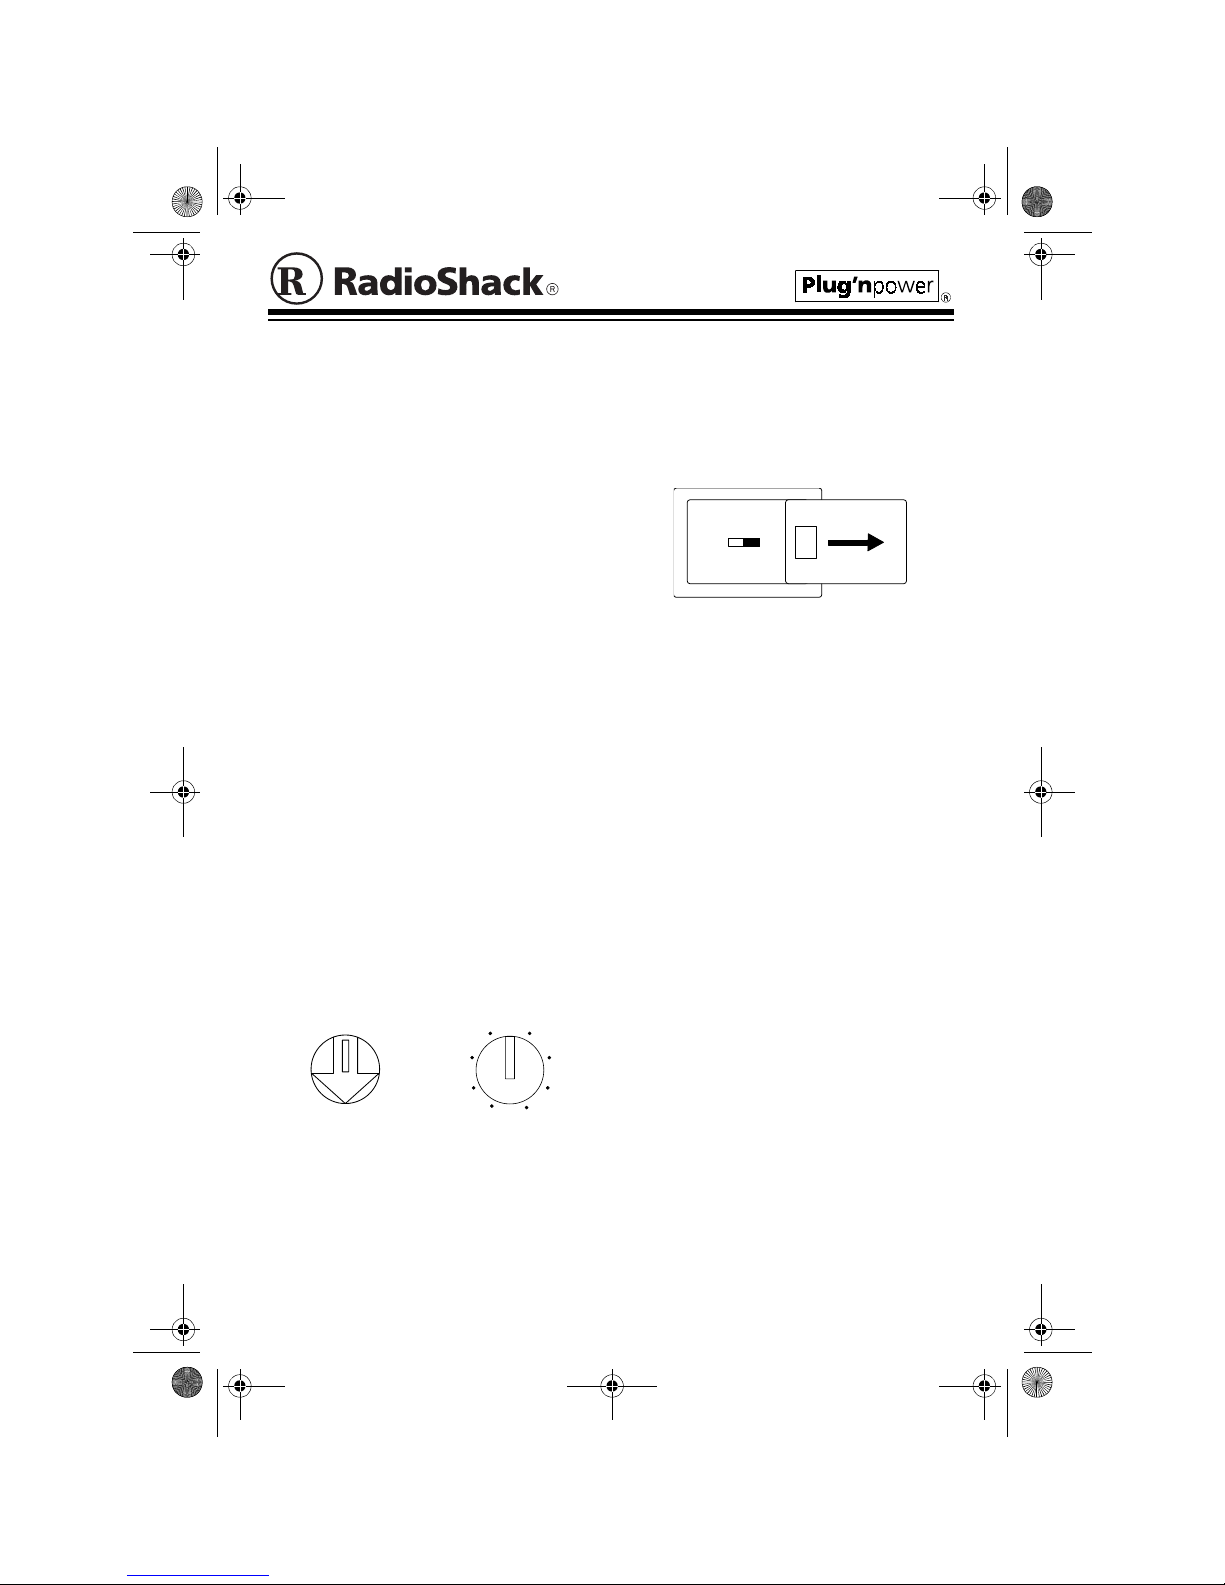
PREPARATION
1. Using a small screwdriver, set the
house code dial of the transc eiver
and the dial of the remote (located
inside the remote’s battery compartment) to the same letter.
2. Set the slide switch inside the remote's battery compartm ent to t he
unit code of the lamps or appliances you want to control ( 1 a nd 2, o r
A
E
I
M
E
A
C
I
O
M
K
G
Remote Transceiver
5 and 6). Set the u nit code on e ach
optional lamp/appliance module to
correspond to the same number setting on the slide switch.
Note:
Regardless of the slide switch
setting, the transceive r always turns
on a connected lamp or appliance
using Button 1.
Your appliance switc h requires two AAA
batteries (not supplied) for power. For
the best performance and longest life,
we recommend RadioShack alkaline
batteries.
Cautions:
• Use only fresh batteries of the required size and recommended type.
• Do not mix old an d new batteries or
different types of batteries.
Follow these steps to install batteries.
1. Slide the battery co mpa rt men t cover
in the direction of the arrow to remove it.
2. Place the batteries in the compartment as indicated by the polarity
symbols (+ and –) marked inside.
5, 61, 2
61-2663.fm Page 1 Wednesday, August 11, 1999 5:05 PM
Page 2
2
3. Replace the cover.
4. Plug the tran sceiver in to a standard
AC outlet, then fully extend the
transceiver's antenna. Plug the lamp
or appliance into the transceiver. If
you plug the transceiver into a
switched outlet, turn the switch on.
When a lamp or appli ance does not re liably respond to the remote’s command, replace the batteries.
Warning:
Dispose of old batteries
promptly and properly. Do not burn or
bury them.
Caution:
If you do not plan to use the
remote switch for several weeks, remove the batteries. Batteries can leak
chemicals that can destroy electronic
parts.
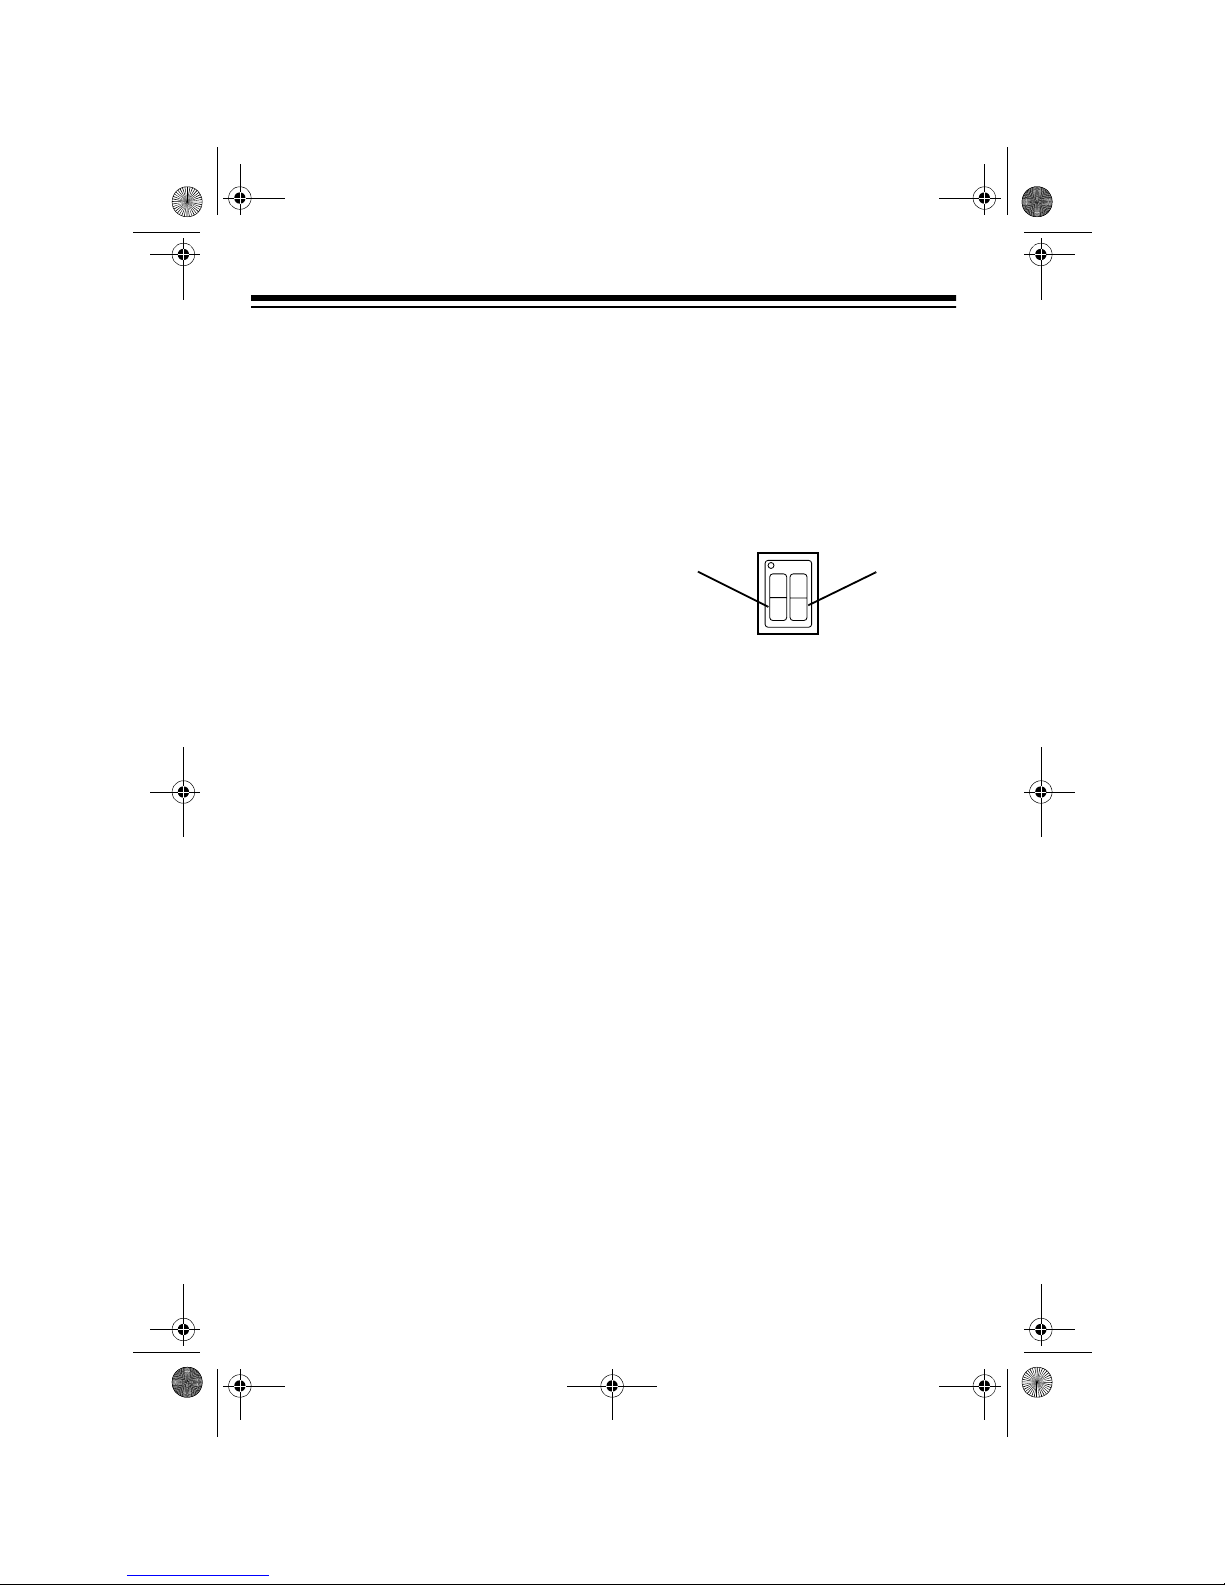
OPERATION
Button 1 on the remote al ways controls
the lamp/appliance connected to the
transceiver. Button 1 or 2 controls ot her
optional modules in addition to this
transceiver if you set the unit code for
those modules to either 1, 2, 5, or 6.
For other modu les with unit codes set to
1 or 2, press Button 1. F or modules set
to unit codes 5 or 6, press Button 2.
Button 1 Button 2
61-2663.fm Page 2 Wednesday, August 11, 1999 5:05 PM
Page 3

3
CARE
To enjoy your Keychain-Remote Control
System for a long time:
•Keep the remote and transceiver
dry. If they get wet, wipe them dry
immediately.
•Use and store the remote and transceiver only in normal temperature
environments.
•Handle the remote and transceiver
gently and carefully. Don’t drop
them.
•Keep the remote and transceiver
away from dust and dirt.
•Wipe the remote and transceiver
with a damp cloth occasionally to
keep them looking new.
Modifying or tampering with the r emote
and transceiver’s internal components
can cause a malfunction and invalidate
their warranty. If your remote and transceiver are not performing as they
should, take them to your local RadioShack store for assistance.
THE FCC WANTS YOU TO
KNOW
Modifying or tampering with your Keychain-Remote Control System's internal
components can cause a malfunction
and might invalidate your system's warranty and void your FCC license to use
it. If your system is not performing as i t
should, take it to your local RadioShack
store.
Your Keychain-Remote Control System
might cause TV or radio interference
even when operating properly. To determine whether your system is causing
the interference, unplug the transceiver.
If the interference goes away, your system is causing the problem. Try to eliminate the interference by:
•moving your transceiver to a location away from the radio or TV
•connecting the transceiver to an outlet that is on a different electrical circuit from the radio or TV
•contacting your local RadioShack
store for assistance
If you cannot eliminate the interference,
the FCC requires that you stop using
your keychain remot e.
61-2663.fm Page 3 Wednesday, August 11, 1999 5:05 PM
Page 4

RadioShack
A Division of Tandy Corporation
Fort Worth, Texas 76102
08A99 Printed in C hina
Cat. No. 61-2663
A
Limited Ninety-Day Warranty
This product is warranted by RadioShack against manufactu ring defects in ma terial and workman ship under norma l use for ninet y (90) days fr om the date of purchase f rom RadioSh ack companyowned stores and authorized RadioShack franchisees and dealers. EXCEPT AS PROVIDED
HEREIN, RadioShack MAKES NO EXPRESS WARRANTIES AND ANY IMPLIED WARRANTIES,
INCLUDING THOSE OF MERCHANTABILITY AND FITNESS FOR A PARTICULAR PURPOSE,
ARE LIMITED IN DURATION TO THE DURATION OF THE WRITTEN LIMITED WARRANTIES
CONTAINED HEREIN. EXCEPT AS PROVIDED HEREIN, RadioShack SHALL HAVE NO LIABILITY OR RESPONSIBILITY TO CUSTOMER OR ANY OTHER PERSON OR ENTITY WITH RESPECT TO ANY LIABILITY, LOSS OR DAMAGE CAUSED DIRECTLY OR INDIRECTLY BY USE
OR PERFORMANCE OF THE PRODUCT OR ARISING OUT OF ANY BREACH OF THIS WARRANTY, INCLUDING, BUT NOT LIMITED TO, ANY DAMAGES RESULTING FROM INCONVENIENCE, LOSS OF TIME, DATA, PROPERTY, REVENUE, OR PROFIT OR ANY INDIRECT,
SPECIAL, INCIDENTAL, OR CONS EQUENTIAL DAMAGES, EVEN IF RadioS hack HAS BEEN ADVISED OF THE POSSIBILITY OF SUCH DAMAGES.
Some states do not allow the limitations on how long an implied warranty lasts or the exclusion of incidental or consequential damages, so the above limitations or exclusions may not apply to you.
In the event of a p roduct defect duri ng the warranty per iod, take the prod uct and the Radi oShack
sales receipt as proof of purchase date to any RadioShack store. RadioShack will, at its option, unless otherwise pro vide d b y law: (a ) correct the defect by p ro duct re pair w ith out cha rge fo r parts and
labor; (b) repla ce the product with o ne of the same or s imilar design; or (c) refund the purchase
price. All replac ed parts and pro ducts, and products on which a refun d is m ade, become the p roperty of RadioShac k. New or reconditi oned parts an d products may be used in the p erformance of
warranty service. Repaired or rep laced parts an d products are wa rranted for the remainder o f the
original warranty peri od . You will be charged for repai r or rep lacem en t of th e pro du c t mad e af ter th e
expiration of the warranty period.
This warranty does not cover: (a) damage or failure caused by or attributable to acts of God, abuse,
accident, misuse, i m pro pe r or ab nor ma l usage, failure to foll o w i ns tru ctions, improper insta ll ation o r
maintenance, alter ation, lightning or ot her incidence of excess vo ltage or current; (b) any repairs
other than those provided by a RadioShack Authorized Service Facility; (c) consumables such as
fuses or batteries; (d) cosmetic da mage; ( e) transpo rtation, shippin g or insuran ce costs; or (f) costs
of product removal, installation, set-up service adjustment or reinstallation.
This warranty gives you specific legal r ights, and you m ay also have oth er rights which va ry from
state to state.
RadioShack Customer Relations, 200 Taylor Street, 6th Floor, Fort Worth, TX 76102
We Service What We Sell
04/99
61-2663.fm Page 4 Wednesday, August 11, 1999 5:05 PM
 Loading...