

Page 1

42-507 1.fm Page 1 Th ursday, Au gust 12, 1999 10:45 AM
5-Disc Compact Disc Changer
Cat. No. 42-5071
OWNER’S MANUAL
Please read before using this equipment.
CD-8150
Page 2

g
g
g
y
y
y
y
42-507 1.fm Page 2 Th ursday, Au gust 12, 1999 10:45 AM
FEATURES
Your Optimus CD-8150 5-Disc Compact Disc Changer holds up to five
CDs. Its automatic disc loading system lets you select more music for
continuous play and gives you musical
variety without having to continually
remove and load discs.
The CD-8150’s advanced design
makes this CD changer simpl e to operate. It has these great features:
Four-Times Oversamplin
ital Filterin
— improves the sound of
with Dig-
CDs by multiplying the standard 44.1
kHz sampling rate by four and using a
digital filter to reduce or eliminate
high-frequency distortion.
1-Bit DAC
— uses the latest in digitalto-analog conversion circuitry to accurately reproduce all sound levels w ith
virtually no distortion.
Sequence Pro
ramming
— lets you
program up to 3 2 selection s to play in
any order you choose.
Intro Scan
— helps you locate a desired track by playing the f irst 10 seconds of each track on the current CD.
You can also change the length of the
intro play time.
Remote Control
— lets you control
the CD changer from a distance.
Repeat Pla
— lets you automatica lly
repeat a single track, multiple CDs, or
a series of programmed tracks.
Shuffle Pla
— randomly selects
tracks on loaded CDs and plays them.
Tri-Spot Pickup Servo S
stem
—
helps ensure perfect tracking of your
CDs.
5- or 3-Inch CD Compatible
æ lets
you play 5- or 3-inch CDs.
The remote control requires two
Note:
AA batteries.
Audible Search
— helps you locate a
section of music by playing the CD
rapidly in either direction.
Automatic Search Music S
(ASMS)
— lets you quickly move to
stem
any track on a CD.
© 1997 Tandy Corporation.
RadioShack and Optimus are registered trademarks used by Tandy Corporation.
All Rights Reserv ed .
2
We recommend you record the CD
changer’s serial number here. The
number is on the back panel.
Serial Number: __________________
Page 3
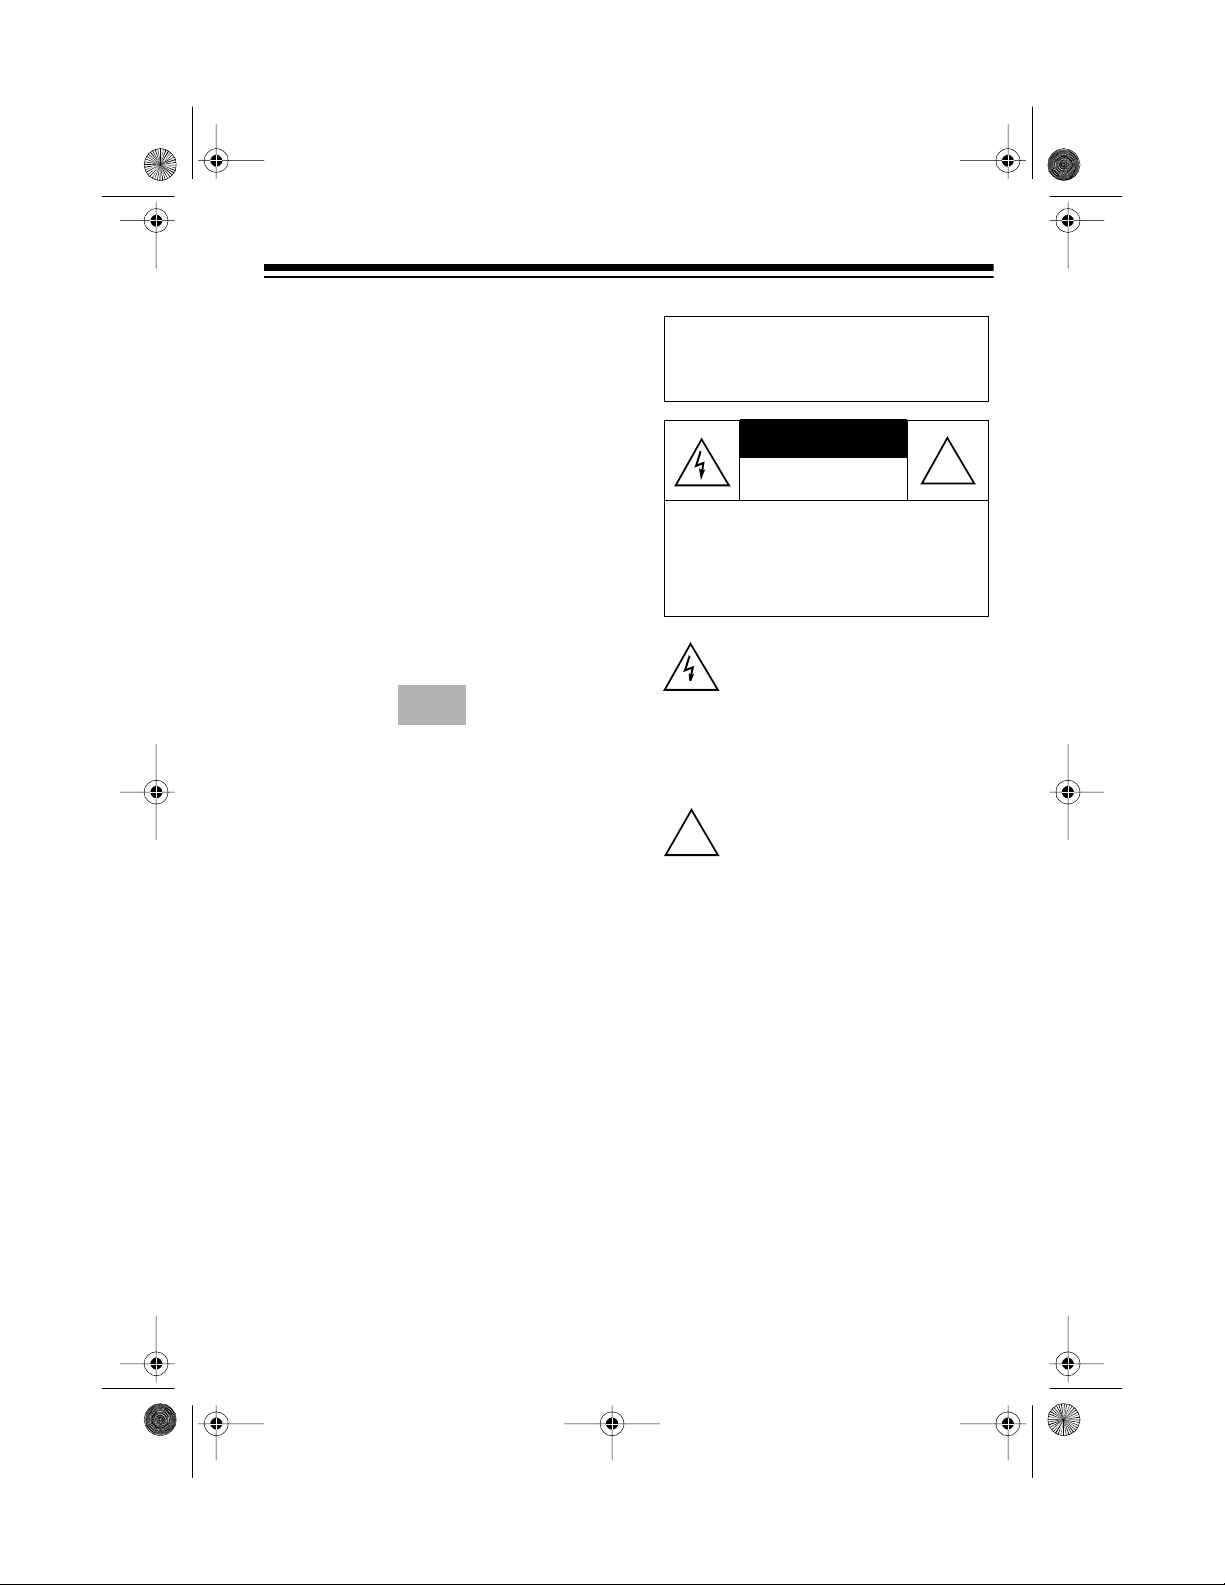
CAUTION
42-507 1.fm Page 3 Th ursday, Au gust 12, 1999 10:45 AM
Important: Most material on compact
discs is copyrighted. Unauthor ized duplication of copyrighted material is a
violation of the copyright laws of most
countries and such duplication may
result in fines and/or imprisonment.
Note, however, that in the United
States, it is not a violation of U.S.
copyright laws for a consumer to use
an audio recording device to duplicate
musical recordings for noncommercial (personal) use.
CDs that you can play on this changer
have this mark on them:
Warnings:
• This unit employs a laser. Because of possible eye injury, only
a qualified service person should
remove the cover or attempt to
service this device.
Warning: To prevent f ire or shoc k
hazard, do not expose this product
to rain or moisture.
RISK OF ELECTRIC SHOCK.
DO NOT OPEN.
CAUTION: TO REDUCE THE RISK OF
ELECTRIC SHOCK, DO NOT REMOVE
COVER OR BACK. NO USER-SERVICEABLE PARTS INSIDE. REFER SERVICING TO QUALIFIED PERSONNEL.
This symbol is intended to alert you
to the p r es en c e o f un in su lated dan gerous voltage within the product’s
enclosure that might be of sufficient
magnitude to constitute a risk of
electric shock. Do not open the
product’s case.
This symbol is intended to inform
you that important operating and
!
maintenance instructions are included in the literature accompanying this product.
!
• Use of controls or adjustments or
performance of procedures other
than those specified herein may
result in hazardous radiation exposure.
3
Page 4
42-507 1.fm Page 4 Th ursday, Au gust 12, 1999 10:45 AM
IMPORTANT SAFETY INSTRUCTIONS
Careful attention is devoted to quality
standards in the manufacture of your
CD changer, and safety is a major factor in its design. However, safety is
also your responsibility.
This section lists important information
that will help you properly use and enjoy your CD changer and accessories.
Read all the included safety and operating instructions before using your
CD changer. Follow them closely, and
retain them for future reference.
Heed Warnings
ings on the product and i n the operating instru c tio n s.
Cleaning
the wall outlet before cleaning. Use
only a damp cloth for cleaning. Do not
use liquid or aerosol cleaners.
Attachments
ments/accessories not recommended
by the product manufacturer, as they
might create a hazard.
Water and Moisture
this product near water (for example,
near a bathtub, washbowl, kitchen
sink, or laundry tub; in a wet basement; or near a swimming pool).
— Unplug this product from
— Follow all warn-
— Do not use attach-
— Do not use
mended by the manufacturer or sold
with the product. Follow the m anufacturer's instructions for mounting, and
use a recommended mount ing accessory.
Carts
— Move the product on a cart carefully.
Quick stops, excessive
force, and uneven surfaces may cause the
product/cart to overturn.
Ventilation
the cabinet provide ventilation, ensure
reliable operation, and protect from
overheating. Do not block or cover
these openings, an d do not place the
product on a bed, sofa, rug, or other
similar surface. Do not place the product in a built-in bookcase or rack unless it provides proper ventilation as
specified by the manufacturer.
Power Sources
uct using only the power source indicated on its marking label. If you are
not sure of your home's power type,
consult your product dealer or local
power company.
— Slots and openings in
— Operate this prod-
Accessories
product on an unstable cart, s tand, tripod, bracket, or table. The product
may fall, causing serious injury to a
child or adult, and serious damage to
the product. Use only with a cart,
stand, tripod, bracket, or table recom -
4
— Do not place this
Page 5

42-507 1.fm Page 5 Th ursday, Au gust 12, 1999 10:45 AM
Polarization — This product is
equipped with a polarized AC line plug
(a plug having one blade wider than
the other). This plug will fit in the power outlet only one way. This is a safety
feature. If you cannot insert the plug
fully into the outlet, try reversing the
plug. If the plug still doesn't fit, contact
your electrician to replace your o bsolete outlet. Do not defeat the safety
purpose of the polarized plug. If you
need an extension, use a polarized
cord.
Power-Cord Protection — Route
power-supply cords so they are not
likely to be walked on or pinched by
items placed on or against them, paying particular attention to cords at
plugs, convenience receptacles, and
the point where they exit from the
product.
Nonuse Periods — Unplug the CD
changer’s power cord when you will
not use it for extended periods.
Lightning — For added protection f or
this product during a lightning storm,
or when it is left unattended and unused for long periods of time, unplug it
from the wall outlet and disconnect the
antenna or cable system. This will prevent damage to the product due to
lightning and power-line surges.
Overloading — Do not overload wall
outlets, extension cords, or integral
convenience receptacles, as this can
result in a risk of fire or electric shock.
Objects a nd Liquids — Never push
objects of any kind into this product
through openings, as they may touch
dangerous voltage point s or short out
parts that could res ult i n a f ire or electric shock. Never spill liquid of any
kind on the product.
Servicing — Do not attempt to service this product yourself, as opening
or removing covers may expose you
to dangerous voltage or other hazards. Refer all servicing to qualified
service personnel.
Damage Requiring Service — Unplug this product from the wall outlet
and refer servicing to qualified service
personnel under the following conditions:
• When the power-supply cord or
plug is damaged.
• If liquid has been spilled or objects
have fallen into the product.
• If the product has been exposed
to rain or water.
• If the product does not operate
normally by following the operating instructions. Adjust only those
controls that are covered by the
operating instructions, as an improper adjustment of other controls may result in damage and
will often require extensive work
by a qualified technician to restore
the product to normal operation.
• If the product has been dropped
or damaged in any way.
5
Page 6

42-507 1.fm Page 6 Th ursday, Au gust 12, 1999 10:45 AM
• When the product exhibits a distinct change in performance.
Replacement Parts — When replacement parts are required, be sure
the service technician uses replacement parts specified by the m anufacturer or having the same characteristics as the original part. Unauthorized
substitutions may result in fire, electric
shock, or other hazards.
Safety Check — Upon completion of
service or repairs to this product, ask
the service technician to perform safety checks to determine that the product is in proper operating condition.
Wall or Ceiling Mount — The product should be mounted to a wall or
ceiling only as recommended by the
manufacturer.
Heat — The product s hould b e situated away from heat sources such as
radiators, heat registers, stoves, or
other products (including amplifiers)
that produce heat.
6
Page 7

g
42-507 1.fm Page 7 Th ursday, Au gust 12, 1999 10:45 AM
CONTENTS
Preparation ........................................................................................................... 8
Connecting the CD Changer ......................... .. ....... .......... ....... .. .......... ....... .. ... 8
Using the Remote Control ............................................................................... 8
Installing Batteries .................................................................................... 8
Using the Remote ..................................................................................... 9
Operation ............................................................................................................ 10
Loading CDs ................................................................................................. 10
Playing CDs .................................................................................................. 10
Selecting a CD .............................................................................................. 12
Selecting a Track .......................................................................................... 12
Changing CDs During Playback ............................................... ..... ..... .. ..... .. . 13
Special Features ................................................................................................ 14
Audible Search .............................................................................................. 14
Repeat Play .................................................................................................. 14
Shuffle Play ................................................................................................... 15
Intro Scan ...................................................................................................... 15
Playing a Sequence of Tracks ...................................................................... 16
Checking/Changing the Programmed Sequence ................................... 17
Adding to the Programmed Sequence ................................................... 17
Erasing a Programmed Sequence ......................................................... 17
Troubleshootin
Care and Maintenance ...................................................................................... 19
CD Care Tips ................................................................................................ 20
The FCC Wants You to Know ....................................................................... 20
Specifications .................................................................................................... 21
................................................................................................ 18
7
Page 8
42-507 1.fm Page 8 Th ursday, Au gust 12, 1999 10:45 AM
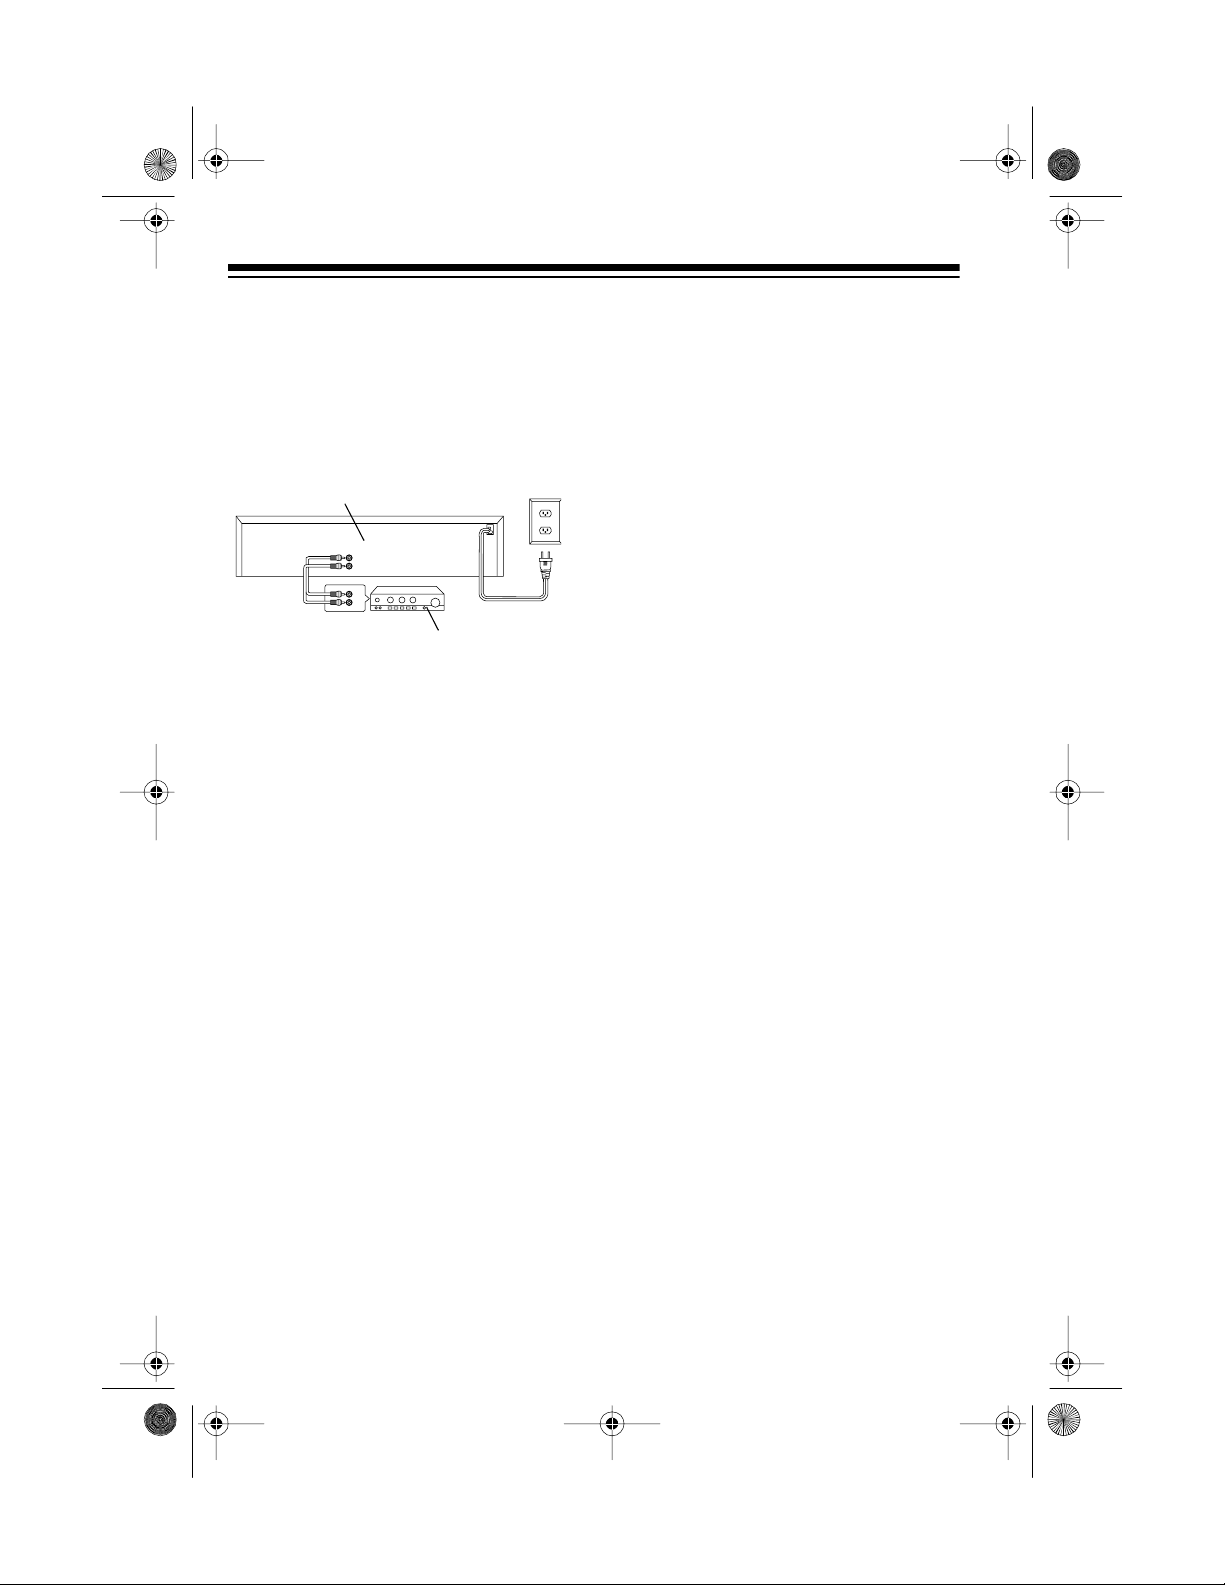
PREPARATION
CONNECTING THE CD
CHANGER
Follow these steps to conne ct the CD
changer to your audio system and to
power.
CD Changer
Receiver/Amplifier
1. Select a location for your CD
changer that is near your receiver/
amplifier and a standard AC outlet.
Caution:
changer on top of the receiver/amplifier or any other component that
gets hot.
Note:
near other audio components or
their wires, you might hear a hum
when you play a CD. To eliminate
the hum, move the components or
their wires.
2. Plug one end of the supplied audio cable into the CD changer’s
LINE OUT L
put jacks, matching the red p l ug to
the red
to the white
3. Plug the other end of the cable
into the receiver/amplifier’s left
and right CD, AUX, or TAPE input
jacks.
Do not place the CD
If you place the CD changer
(left) and R (right) out-
R
jack and the white plug
L
jack.
Caution:
amplifier’s PHONO inputs. Doing
so could damage the receiver/amplifier.
4. Plug the CD changer’s power cord
into a standard AC outlet.
Do not use the receiver/
USING THE REMOTE
CONTROL
Installing Batteries
Your CD changer’s remote control requires two AA batteries (not supplied)
for power. We recommend alkaline
batteries, such as RadioShack Cat.
No. 23-552, for the best perform ance
and longest life.
Cautions:
• Always use fresh batteries of the
required size and recommended
type.
• Do not mix old and new batteries,
different types of batteries (standard, alkaline, or rechargeable),
or rechargeable batteries of different capacities.
1. Press down on the battery compartment cover and slide it off.
illustration
8
Page 9

42-507 1.fm Page 9 Th ursday, Au gust 12, 1999 10:45 AM
2. Install the batteries in the compartment as indicated by the polarity symbols (+ and –) marked
inside.
illustration
3. Replace the cover.
You can use the remote control up to
a distance of about 20 feet. If the remote control operates erratically or
does not work, replace both batteries.
Cautions:
• Never leave dead or weak batteries in the remote control. Batteries
can leak chemicals that can corrode the control.
Using the Remote
You can use the remote control for
any of the CD changer’s functions except turning power on/off and opening/
closing the CD compartment.
For the best res ults, point the remot e
control toward REMOTE SENSOR on
the front of the CD changer.
×
×
30
30
30
30
20 feet
20 Feet
• If you will not be using the remote
control for a month or more, remove the batteries.
9
Page 10

g
42-507 1.fm Page 10 T hursday, August 12, 1999 10:45 AM
OPERATION
LOADING CDS
Your CD changer can play 5-inch or 3inch CDs. Follow these steps to load
CDs.
1. Press
2. Press
POWER
The display lights.
OPEN/CLOSE
disc tray.
on the CD changer.
illustration
to open the
illustration
4. Carefully place the CD, label side
up, into the recessed holder with
the label side up.
illustration
Notes:
• If you use a 3-inch CD, pl ace it
in the middle of a recessed
holder.
• Do not load more than one CD
into each recessed disc holder.
• Each disc holder is marked with
a tray number (1–5).
5. Repeat Steps 3 and 4 to load
more CDs .
Caution:
partment open or closed. You
might damage its loading me chanism.
3. Press
disc tray moves to the front. (Do
not touch the disc tray while it rotates .)
Do not force the com-
DISC SKIP
until the desired
illustration
10
6. Press
OPEN/CLOSE
disc tray. The CD changer displays the number of the CD in the
play position.
to close the
PLAYING CDS
After you load CDs, follow these steps
to play them.
The CD-8150 has a wide
Warnin
dynamic range. If you set your amp lifier’s volume too high during soft (low
volume) parts of the music, you might
damage your headphones, speakers,
or hearing when a sudden loud passage occurs.
:
Page 11

42-507 1.fm Page 11 T hursday, August 12, 1999 10:45 AM
1. Turn on your receiver/amplifier
and select the audio input to
which you connected your CD
changer (for example, CD, AUX,
or TAPE).
2. Press
PLAY
to play the CD in
the play position from Track 1.
PLAY
appears.
To sel ect a different CD, see “S electing a CD” on Page 12.
To select a different track see “Selecting a Track” on Page 12.
3. While a CD plays, the CD changer
displays the current disc and track
number, the elapsed time of the
current track, and a music calendar that shows the total number of
tracks on the CD (up to 20) with
the current track number flashing.
illustration
When the CD changer finishes
playing a track, that track’s number disappears from the music
calendar.
TIME
Repeatedly press
on the re-
mote control to display in order:
• The current track’s remaining
time
• The total number of tracks on
the CD and total playing time
Note:
During playback, if the
changer is subject ed to a sudden
shock or jolt, the rotation speed
might change, or some noise
might be produced. This is not a
malfunction.
4. To tem porarily stop playing, press
PAUSE
PAUSE
Press
y y
.
PAUSE
y
again or
appears.
PLAY
to resume play.
illustration
Or, press
STOP
to stop play be-
fore the last CD ends.
illustration
5. After the CD changer plays all
tracks on the current CD, it automatically loads the next highernumbered CD and p lays all of its
tracks. After it plays all tracks on
the highest-numbered CD, the CD
changer stops.
• The remaining number of tracks
and total time remaining on the
CD
• To return to the original display
11
Page 12

42-507 1.fm Page 12 T hursday, August 12, 1999 10:45 AM
SELECTING A CD
To select a CD, press that
(1–5) button on the remote control,
then press
PLAY
. The selected CD
plays from Track 1.
illustration
To select the CD in the next highernumbered disc holder, press
SKIP
. The CD changer moves to the
next higher-numbered disc holder and
begins to play that CD.
DISC NO.
DISC
SELECTING A TRACK
illustration
You can select a track in two ways.
You can enter the track number using
the remote control’s
tons. Then press
Notes:
• If you e nter a track number higher
than the highest track numb er on
a CD, the CD changer starts to
play the last track on that CD.
TRACK NO.
PLAY
but-
.
Note:
DISC NO.
You cannot use
during programmed play
DISC SKIP
or
(see “Playing a Sequence of Tracks”
on Page 16).
12
• You cannot use
TRACK NO.
during
programmed play (see “Playing a
Sequence of Tracks” on Page 16).
You can also select a particular track
with the and buttons.
While a CD is playing, press once
to return to the beginning of the current track. Press to skip other
tracks on the same CD.
Page 13

42-507 1.fm Page 13 T hursday, August 12, 1999 10:45 AM
Or, while the CD is stopped or
paused, press or
desired track number appears.
To quickly locate a track during programmed play, hold down or
until you reach the desired track.
If you try to advance past the
Note:
CD’s last track, the changer starts
counting again from Track 1. If you try
to move to before Track 1, the chan ger starts counting back from the last
track.
until the
CHANGING CDS DURING
PLAYBACK
To open the disc t ray without stopping
playback, press
the CD changer. The tray opens and
the current CD continues to play. You
can then change the CDs in the two
front holders.
If you press
Note:
the tray while the disc tray is open, the
CD changer stops playing t he current
CD and starts playing the next loaded
CD.
OPEN/CLOSE
DISC SKIP
to rotate
on
13
Page 14

42-507 1.fm Page 14 T hursday, August 12, 1999 10:45 AM
SPECIAL FEATURES
AUDIBLE SEARCH
Use this feature during play to rapidly
search forward or backward f or a specific section of a track on a CD. During
audible search, the CD plays at a lo wer volume and a higher speed.
To search forward or b ackward, hold
SEARCH
down
mote control. Release the button to resume normal play.
or on the re-
illustration
REPEAT PLAY
Using the remote control, your CD
changer can repeat a single track, all
loaded CDs, or a programmed sequence.
illustration
Repeatedly press
mote control. The changer cycles
through these options:
REPEAT
on the re-
You cannot search bey ond the
Note:
beginning or end of a CD.
14
REPEAT ONE
plays the track
REPEAT ALL
all loaded CDs or the current programmed sequence
REPEAT
peat play
To end repeat play, press
REPEAT
til
.
— continuously re-
— replays all tracks on
disappears — cancels re-
REPEAT
disappears, or press
un-
STOP
Page 15

42-507 1.fm Page 15 T hursday, August 12, 1999 10:45 AM
SHUFFLE PLAY
To set the CD changer to sele ct and
play all tracks in random order from
the loaded CDs or from a programmed sequence, before or during
play, press
pears.
SHUFFLE
illustration
To cancel shuffle play at any time,
SHUFFLE
press
pears, or press
until
STOP
SHUFFLE
.
SHUFFLE
.
ap-
disap-
INTRO SCAN
Intro scan automatically plays the first
10 seconds of each t rack on the current CD through the CD loaded in disc
holder 5 or the programmed sequence. Press
PLAY
pear.
To cancel intro sca n and resume normal play, press
INTRO
.
INTRO SCAN
and
illustration
INTRO SCAN
PLAY
.
then
ap-
To temporarily change t he duration of
intro scan, when pl ay is stopped, use
TRACK NO.
the
control to enter the desired play time
in seconds (1 to 99). Then press
INTRO SCAN
start intro scan with the new duration.
Note:
The intro scan duration returns
to 10 seconds all tracks have played.
buttons on the remote
followed by
PLAY
to
15
Page 16

42-507 1.fm Page 16 T hursday, August 12, 1999 10:45 AM
PLAYING A SEQUENCE
OF T RACKS
You can program up t o 32 selections
to play in any order you choose. A “selection” can be an individual track or
an entire CD.
Follow these steps to program and
play a sequence of tracks.
Hint:
You can open the disc tray com partment while you program the sequence, so you can check the loaded
CDs’ tracks.
1. Press
rent function.
2. Press
select a CD.
To enter all the tracks on a CD as
one selection, skip to Step 4.
3. Press
to select a track.
4. Press
tion into memory. The MEMORY
indicator appears and the time
display shows
grammed selection 1).
STOP
to cancel the cur-
DISC NO.
TRACK NO.
MEMORY
DISC SKIP
(or
(or or )
to store the selec-
P-01
) to
(pro-
32 selections. The programmed
selection number on the display
increases with each added selec-
P-02
tion (
Note:
If you try to store more than
to
P-32
).
32 selections, the CD changer
FULL
briefly displays
6. Press
PLAY
.
to play the sequence. If you programmed individual tracks, the music calendar
displays the number of programmed tracks, with the current
track number flashing. If you programmed an entire CD, t he music
calendar displays only the current
track playing.
After the CD changer plays all
programmed tracks, it stops and
P-01
reappears on the time display. The sequence is still in memory, so you can press
PLAY
replay the sequence.
Notes:
• You can use or ,
or ,
SHUFFLE
INTRO SCAN
during programmed
play.
to
SEARCH
, and
illustration
Note:
If you enter a track numb er
higher than the h ighest t rack o n a
CD, this entry is ignored during
programmed play.
5. Repeat Steps 2–4 for each track
or CD you want to program, up to
16
• You cannot use the
DISC NO.
TRACK NO.
, or
during programmed play.
DISC SKIP
buttons
,
Page 17

42-507 1.fm Page 17 T hursday, August 12, 1999 10:45 AM
Checking/Changing the
Programmed Sequence
Press
funct ion. Pr ess
CD changer displays the programmed
sequence’s first selection. Each time
you press
changer displays the next programmed selection.
To change a selection, repeatedly
press
changer displays the disc number and
track number you want to change. E nter the desired disc number and/or
track number, then press
STOP
to cancel the current
MEMORY CHECK
MEMORY CHECK
illustration
MEMORY CHECK
until the CD
, the CD
MEMORY
. The
.
Adding to the Programmed
Sequence
You can add individual tra cks or entir e
CDs to the end of a programmed sequence up to a total of 32 tracks.
1. Repeatedly press
0:00
appears. This cancels the
current function.
2. Enter the desired disc number
and/or track number, then press
MEMORY
the selection to the end of the programmed sequence.
. The CD changer adds
STOP
until
Erasing a Programmed
Sequence
To erase the programmed sequence
from memory, press
CLEAR
off. The sequence is also erased
when you turn off the CD changer.
. The MEMORY indicator turns
STOP
then
illustration
17
Page 18

gg
42-507 1.fm Page 18 T hursday, August 12, 1999 10:45 AM
TROUBLESHOOTING
With proper care and handling, your CD changer should give you years of troublefree service. However, if your CD-8150 is n ot working properly, follow these suggestions to see if you can eliminate the problem. If you still have a problem, take
the CD changer to your local RadioShack store for assistance.
Problem Su
Power is on but no indicators
light.
CD is loaded but play does not
start.
No sound. The audio cable is not connected or is defec-
The sound is interrupted or the
same part repeats.
Sound is distorted. Moisture might be present on the pickup lens.
Make sure the power cord is plugged into an
AC outlet.
The CD is loaded upside-down. Load the CD
with the label side up.
The CD is dirty or scratched. To clean the CD
surface, use a CD cleaner kit (such as Cat. No.
42-225). If the CD gets scratched, use Scratch
’n Fix (RadioShack Cat. No. 42-127).
The CD is not a standard (3- or 5-inch) compact disc. Load a standard size CD.
tive. Check all connections and replace defective cables, if necessary.
The CD is scratched or dirty. If the CD gets
scratched, use Scratch ’n Fix (RadioShack
Cat. No. 42-127). T o clean the CD surface, use
a CD cleaner kit (such as Cat. No. 42-225).
Unplug the CD changer from power and wait 2
hours for condensation to evaporate before
resuming play.
estion
18
Page 19

42-507 1.fm Page 19 T hursday, August 12, 1999 10:45 AM
CARE AND MAINTENANCE
Your Optimus CD-8150 5-Disc Compact Disc Change r is an example of sup erior
design and craftsmanshi p. The following su ggestions will he lp you car e for the CD
changer so you can enjoy it for years.
Keep the CD changer dry. If it gets wet, wipe it dry immediately. Liquids might contain minerals that can corrode the electronic circuits.
Use and store the CD changer only in normal temperature environments. Temperature extrem es can shorten t he life of electronic devices, damage batteries, and distort or melt plastic parts.
Handle the CD changer gently and carefully. Dropping it can damage
circuit boards and cases and can cause the CD chang er to work improperly.
Keep the CD changer away from dust and dirt, which can cause premature wear of parts.
Wipe the CD changer with a damp cloth occasionally to keep it looking new. Do not use harsh chemicals, cleaning solvents, or strong detergents to clean the CD changer.
Modifying or tampering with the your CD changer’s internal components can cause
a malfunction and might invalidate its warranty and void your FCC authorization to
operate it. If your CD changer is not performing as it should, take it to your local RadioShack store for assistance.
19
Page 20

42-507 1.fm Page 20 T hursday, August 12, 1999 10:45 AM
CD CARE TIPS
Even though a compact disc is very
durable, treat the CD surface with
care. Here are some tips:
• Do not place anything but a CD in
the disc tray. This can damage the
drive mechanism.
• Do not write on either side of the
CD, particularly the non-label side
(signals are read from the non-label side).
• Do not store CDs in hightemperature, high-humidity locations. The CDs might warp.
• Keep CDs dry. A water drop can
act as a lens and affect the las er
beam’s focus.
• Always handle a CD by the edg es
to avoid fingerprints and always
keep it in its protective case or
sleeve when not in use. Fingerprints and scratches on the CD’s
surface can prevent the laser
beam from correctly reading the
digital information. To clean the
CD surface, use a CD cleaner kit
(such as Cat. No. 42-225). If the
CD gets scratched, use Scratch ’n
Fix (RadioShack Cat. No. 42-
127).
THE FCC WANTS YOU
TO KNOW
This system complies with the limits
for a Class B digital device as specified in Part 15 of
limits provide reasonable protection
against TV or radio interference in a
residential area. However, your system might cause TV or radio interference even when it is operating
properly.
To eliminate interference, you can try
one or more of the following corrective
measures.
• Reorient or relocate the TV or radio’s receiving antenna.
• Increase the distance between the
system and the TV or radio.
• Use outlets on different electrical
circuits for the system and the TV
or radio.
Consult your local RadioShack store if
the problem still exists.
FCC Rules
. These
20
Page 21

42-507 1.fm Page 21 T hursday, August 12, 1999 10:45 AM
SPECIFICATIONS
AUDIO
Frequency Response ................................................ 20 Hz–18 KHz, (1 kHz, 0 dB)
Channel Separation ................................................. More than 85 dB (1 kHz, 0 dB)
Harmonic Distortion ................................................ Less than 0.02% (1 kHz, 0 dB)
Dynamic Range .................................................................... 84 dB (1 kHz, –60 dB)
S/N Ratio ................................................................. More than 96 dB (1 kHz, 0 dB)
Wow and Flutter ............................................................................ Quartz Precision
SIGNAL FORMAT
Pickup ............................................................ Three-Beam Tracking Servo System
Object Lens Drive System ..................................... Two-Dimensional Parallel Drive
Sampling Frequency .................................................................................. 44.1 kHz
D/A Conversion ............................................................................. Dual 1-bit Linear
Filter ..................................................................................... 4 Times Oversampling
GENERAL
Power Supply ....................................................................................... 120V, 60 Hz
Power Consumption .................................................................................. 12 Watts
Dimensions (HWD) .......................................................... 4
1
/2 × 171/8 × 143/4 Inches
(1 15 × 435 × 375 mm)
Weight .................................................................................................. 11 lbs 14 oz
(5.4 kg)
Specifications are typical; individual units m ight vary. Specifications are subj ect to
change and improvement without notice.
21
Page 22

42-507 1.fm Page 22 T hursday, August 12, 1999 10:45 AM
NOTES
22
Page 23

42-507 1.fm Page 23 T hursday, August 12, 1999 10:45 AM
23
Page 24

42-507 1.fm Page 24 T hursday, August 12, 1999 10:45 AM
Limited One-Year Warranty
This product is warrant ed by RadioShac k against man ufacturing d efects in materia l and workmanship under normal use for one (1) year from the date of purchase from RadioShack company-owned
stores and authorized RadioShack franchisees and dealers. EXCEPT AS PROVIDED HEREIN, RadioShack MAKES NO EXPRESS WARRANTIES AND ANY IMPLIED WARRANTIES, INCLUDING
THOSE OF MERCHANTABILITY AND FITNESS FOR A PARTICULAR PURPOSE, ARE LIMITED
IN DURATION TO THE DURATION OF THE WRITTEN LIMITED WARRANTIES CONTAINED
HEREIN. EXCEPT AS PROVI DED HEREIN, Rad ioShack SH ALL HAVE NO LIABILIT Y OR RESPONSIBILITY TO CUSTOMER OR ANY OTHER PERSON OR ENTITY WITH RESPECT TO ANY
LIABILITY, LOSS OR DAMAGE CAUSED DIRECTLY OR INDIRECTLY BY USE OR PERFORMANCE OF THE PRODUCT OR ARI SING OUT OF ANY BREACH OF THIS WARRANTY, INCLUDING, BUT NOT LIMITED TO, ANY DAMAGES RESULTING FROM INCONVENIENCE, LOSS
OF TIME, DATA, PROPERTY, REVENUE, OR PROFIT OR A NY INDIRECT, SPECIAL, INCIDENTAL, OR CONSEQUENTIAL DAMAGES, EVEN IF RadioShack HAS BEEN ADVISED OF THE
POSSIBILITY OF SUCH DAMAGES.
Some states do not allow the limitations on how long an implied warranty lasts or the exclusion of incidental or consequential damages, so the above limitations or exclusions may not apply to you.
In the event of a product defect during the warran ty period, take the product and the RadioShack
sales receipt as proof of pur cha se date to any RadioS hack s tore. Radi oSha ck wil l, at its option, unless otherwise provided by law: (a) correct the defect by product repair without charge for parts and
labor; (b) replace the produc t with one of the same or similar design; or (c) refund the purchase
price. All replaced parts and pr oducts, and pro ducts on which a refund is made, become the property of RadioShack. New or rec onditioned parts and products may be used in the performance of
warranty service. Repa ired or replaced parts and produ cts are warranted for the remainder of the
original warranty period. You will be charged for repair or replacement of the product made after the
expiration of the warranty period.
This warranty does not cover: (a) damage or failure caused by or attributable to acts of God, abuse,
accident, misuse, impr oper or abnormal usa ge, failure to fol low i nstruct ions, improper instal lation or
maintenance, alterati on, lightning or other incidence of exc ess voltage or current; (b) any repairs
other than those provi ded by a RadioShack Autho rized Service Facility; ( c) consumables such as
fuses or batteries; (d ) cosmeti c dam age; (e) transp ortatio n, sh ipping or insuranc e c osts; or (f) cos ts
of product removal, installation, set-up service adjustment or reinstallation.
This warranty gives you specifi c legal rights, and you may also have oth er rights which vary from
state to state.
RadioShack Customer Relations, Dept. W, 100 Throckmorton St., Suite 600, Fort Worth, TX 76102
We Service What We Sell
3/97
RadioShack
A Division of Tan dy Corporation
Fort Worth, Texas 76102
CEC6P10001920
8A7 Printed in China
 Loading...