

Page 1
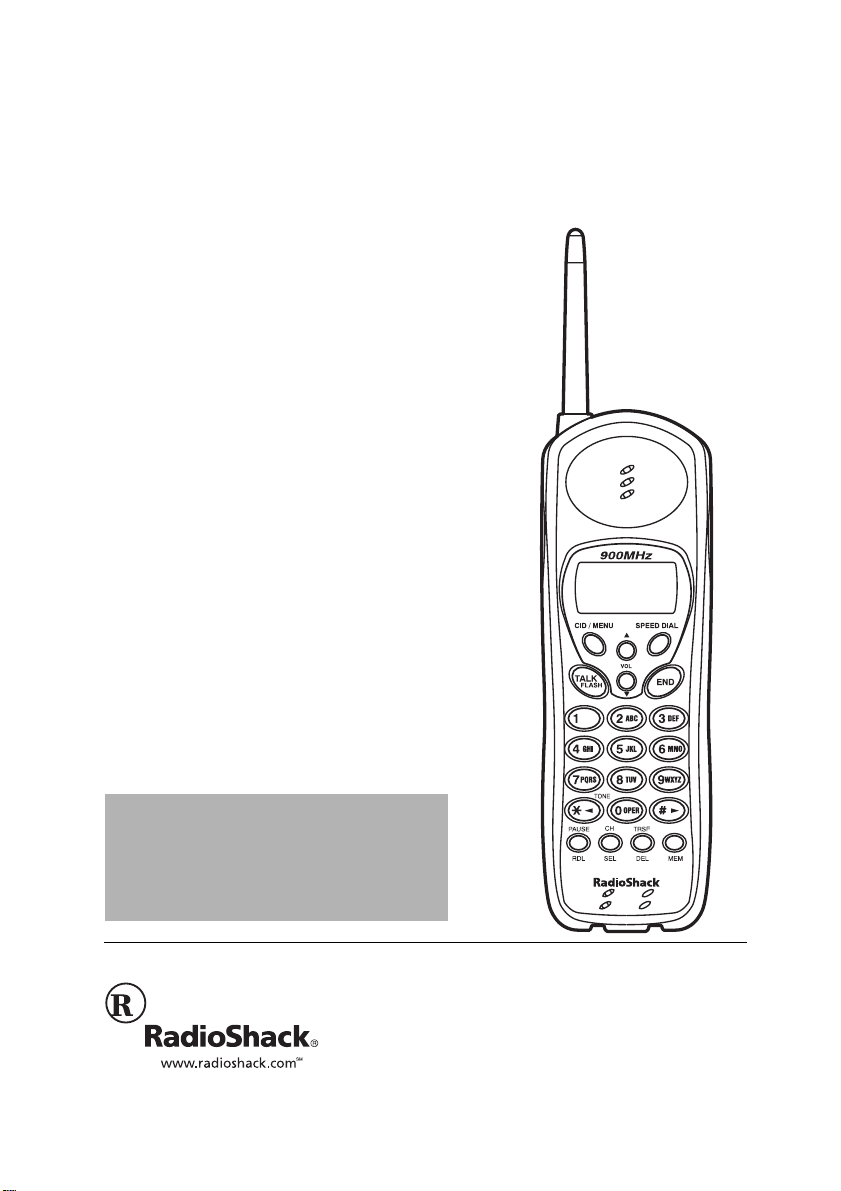
;22/*\"&WCN"*CPFUGV"%QTFNGUU"2JQPG
YKVJ"%CNNGT"+&"CPF"&KIKVCN"#PUYGTKPI"5[UVGO
43-3820
Two Cordless Handsets — allow greater
convenience in placement of handsets.
10 Number Memory Dialing — stores 10
numbers in memory on each handset for easy
dialing. See “Memory Dialing” on Page 17.
Long Battery Life — the supplied battery pack
(when fully charged) provides about seven
hours of talk time or seven days of standby time.
20 Channels — automatically selects a clear
channel when you make or answer a call. You can
also manually change channels during a call. See
“Selecting the Channel” on Page 15.
Headset Jack — connects an optional
headset (available at your local RadioShack
store) for hands-free convenience. See
“Using a Headset” on Page 17.
Toll-Saver — lets you avoid unnecessary
charges when you call by long distance to
check your messages. See “Using the TollSaver” on Page 34.
"+/2146#06"
If an icon appears at the end of a paragraph, go to the
#
box on that page with the correspon ding icon for
pertinent information.
— Warning# — Important
Rý
°°°°
— Hint
#
±
....
— Caution
— Note
RadioShack and RadioShack.com are trademarks used by
E
NERGYSTAR
OWNER’S MANUAL
Please read before using this equipment.
2002 RadioShack Corporation.
©
All Rights Reserved.
RadioShack Corporation.
and the E
NERGYSTAR
are registered US marks.
certification mark
Page 2
Important Safety Instructions
%106'065
Battery Safety Instructions ........ 4
Introduction ............................... 5
Important Caller ID
Information ................................ 5
Read This Before
Installation ............................. 6
Installation ................................. 7
Mounting the Phone .............. 7
On a Desk Top.....................7
On a Wall Plate or Wall........8
Installing the Charging
Cradle .................................... 8
Connecting, Charging and
Replacing
the Battery Pack .................... 9
Recycling
Ni-Cd Batteries...................10
Registering the Second
Handset ............................... 10
Setting the Dialing Mode ..... 11
Setting the Handset’s Ringer
Tone/Volume ....................... 12
Turning the Base’s Ringer
On/Off .................................. 12
Setting Auto Talk ................. 13
Turning Caller ID/Call Waiting
On/Off .................................. 13
Storing Your Area Code ...... 13
Telephone Operation ............... 14
Making and Receiving
Calls .................................... 14
Selecting the Channel ......... 15
Setting the Handset
Volume ................................ 15
Using Flash ......................... 15
Using Redial ........................ 16
Muting the Ringer ................ 16
Using Tone Services on a
Pulse Line ........................... 16
Paging ................................. 16
Transferring a Call ............... 17
Using a Headset .................. 17
Memory Dialing ................... 17
Storing a Name and Number
in Memory...........................17
Editing or Deleting a Number
in Memory...........................19
Entering a Pause................20
Reviewing Memory
Numbers.............................20
Dialing a Memory
Number...............................20
Chain-Dialing Service
Numbers ............................21
Testing Stored Emergency
Numbers ............................21
One-Touch Speed Dial ........ 21
Storing/Editing Numbers ....21
(Continued)
To reduce the risk of fire or shock hazard, do not expose this product to rain or moisture.
WARNING:
.
CAUTION
RISK OF ELECTRIC SHOCK
DO NOT OPEN
The exclamation symbol is intended t o
inform you that important operating and
maintenance instructions are included in
!
the literature accompany ing this product.
.
!
TO REDUCE THE RISK OF ELECTRIC
CAUTION:
SHOCK, DO NOT REMOVE COVER OR BACK. NO
USER-SERVICEABLE PARTS INSIDE. REFER
SERVICING TO QUALIFIED PERSONNEL.
The lightning symbol is intended to alert you to
the presence of uninsulated dangerous voltage
within this product’ s enclosure that mi ght be of
sufficient magnitude to constitute a risk of
electric shock. Do not open the product’s case.
+/2146#06"5#('6;"
+05647%6+105
When using your telephone e quipment, ba sic safety
precautions should always be followed to reduce
the risk of fire, electric shock and injury to persons,
including the following:
1. Read and understand all instructions.
2. Follow all warnings an d instru ct ions mark ed on
the product.
3. Never install telephone wiring during a lightning
storm.
4. Never install telephone jac ks in wet locat ion s
unless the jack is specifically designed for wet
locations.
5. Never touch uninsulated telephone wires or
terminals unless the telephone line has been
disconnected at the network interface.
6. Use caution when installing or modifying
telephone lines.
7. Do not affix the AC power supply cord to
building surfaces with metal fittings (if the
product has an AC power cord).
8. Unplug this product from the wall outlet before
cleaning. Do not use liquid cleaners or aerosol
cleaners. Use a damp cloth for cleaning.
9. Do not use this product near water, for
example, near a bathtub, wash bowl, kitchen
sink, or laundry tub , in a wet b asement, or nea r
a swimming p ool.
10. Do not place this product on an unstable cart,
stand, or table. The product may fall , causing
serious damage to the product.
2
Page 3

11. Slots and openings in the telephone’s cabinet
%106'065
(continued)
Using Speed Dial................22
Deleting a Number in
Memory .............................22
Caller ID Operation ................. 22
Reviewing Caller ID
Records ............................... 23
Caller ID Messages............24
Adding/Deleting the
Area Code ........................... 24
Dialing Numbers from a Caller
ID Record ............................ 24
Storing a Caller ID Record in
Memory ............................... 25
Deleting Caller ID
Records ............................... 25
Answering System
Operation ................................ 26
Using the Menu Button ........ 26
Setting the Day/Time ........... 26
Setting the Number
of Rings ............................... 27
Setting the Record Time ...... 28
Setting the Message
Alert Tone ............................ 28
Turning the Message Alert
Tone Off .............................29
Selecting the Outgoing
Message .............................. 29
Recording/Deleting an
Outgoing Message .............. 29
Setting the System to Answer
Calls .................................... 30
Screening Calls ................... 30
Recording Incoming
Messages ............................ 30
Recording a Memo .............. 31
Recording a
Conversation ....................... 31
Playing Messages ............... 32
Adjusting the Volume .......... 32
Deleting Messages .............. 33
Remote Operation ............... 33
Setting the Security
Code...................................33
Using the Toll-Saver...........34
Using Remote
Commands............................34
Remote Commands ...........36
Troubleshooting ...................... 36
Care ........................................ 38
FCC Statement ....................... 38
The FCC Wants You
to Know ............................... 38
Lightning .............................. 39
and the back or bottom are provided for
ventilation. To protect the telephone from
overheating, these openings must not be
blocked or covered. The openings should
never be blocked by placing the product on a
bed, sofa, rug, or other similar surface. This
product should never be placed near or over a
radiator or heat register. This product should
not be placed in a built-in installation unless
proper ventilation is provided.
12. This product should be operated only from the
type of power source indicated on the marking
label. If you are not sure of the type of power
supply to your home, consult your local power
company.
13. Do not allow anything to rest on the power
cord. Do not locate th is p rodu ct whe r e the c ord
will be stepped on.
14. Do not overload wall outlets and extension
cords as this can result in a risk o f fire or
electric shock.
15. Never push objec ts of any kind into this produc t
through cabinet slots as they may touch
dangerous voltage points or short ou t parts that
could result in a risk of fire or electric shock.
Never spill liquid of any kind on the product.
16. To reduce the risk of electric shock, do not
disassemble this product. Take it to a qualified
serviceman when service or repair work is
required. Opening or removing covers may
expose you to dangerous voltages or other
risks. Incorrect reassembly can cause electric
shock when the product is subsequently used.
17. Unplug this product from the wall outlet and
refer servicing to qualified services personnel
under the following conditions:
• When the power cord plug is damaged or
frayed.
• If liquid has been spilled into the product.
Important Safety Instructions
3
Page 4

• If the product has been exposed to rain or
water.
• If the product does not operate normally by
following the operating instructions.
18. Adjust only those controls that are covered by
the operating instructions because improper
adjustments of other controls may result in
damage and will often require extensive work
by a qualified technician to restore the product
to normal operation.
Battery Safety Instructions
19. If the product has been dropped or the cabinet
has been damaged.
20. If the product exhibits a distinct change in
performance.
21. Avoid using a telephone (other than a cordless
type) during an electrical storm. There may be
a remote risk of electric shock from lightning.
22. Do not use the telephone to report a gas leak
while in the vicinity of the leak.
.
"%#76+10"
TO REDUCE THE RISK OF
FIRE OR INJURY, READ
AND FOLLOW THESE
INSTRUCTIONS.
NERGYSTAR
As an E
RadioShack Co rporation has
determined that this product
meets the E
guidelines for energy
efficiency.
NERGYSTAR
.
Partner,
4
$#66'4;"5#('6;"
+05647%6+105
• Use only the appropriate type and size battery
pack specified in the instruction manual
.#
provided for this product.
• Do not dispose of the battery pack in a fire. The
cell may explode. Check with local codes for
possible special disposal instructions.
• Do not open or mutilate the battery pack.
Released electrolyte is corrosive and may
cause damage to the eyes or skin. It may be
toxic if swallowed.
• Exercise care in handing the battery pack in
order not to short it with conducting materials
such as rings, bracelets and keys. The battery
or conductor may overheat and cause burns.
.#
.#.#
Page 5

• Charge the battery pack provided with or
#
"+/2146#06"
#
Cordless phones such as
this one require AC power
to operate. When the AC
power is off, you cannot dial
out or receive incoming
calls using your phone. To
be safe, you should also
have a phone that does not
need AC power to operate
(not a cordless phone) so
you can still make and
receive calls if there is an
AC power failure.
When AC power is lost, the
phone loses the security
access-protection code
connection between the
base and the handset.
When power is restored, put
the both handsets on the
base briefly to restore this
connection.
identified for use with this product only in
accordance with the instructions and limit ations
specified in the instruc tion manual provided for
this product.
• Observe proper polarity orientation between
the battery pack and battery charger.
+05647%6+105
+0641&7%6+10
Thank you for purchasing a RadioShack 900 MHz
Cordless Telephone. Your telephone provides
excellent clarity a nd range and integra tes Cal ler ID ,
Call Waiting ID, and a digita l answeri ng sys tem into
one space-saving device. The 900 MHz band
provides less interference, clearer sound, and
greater range than 46/49 MHz cordless telephones.
The digital answering system provides clear reliable
messaging with call screening, day/time stamp, call
counter, remote access and instant skip or replay
messaging.
The Caller ID records each caller’s name (if
available in your area), telephone number, and the
date and time of the call, as provided by your local
phone company to Caller ID service subscribers.
+/2146#06"%#..'4"+&"
+0(14/#6+10
To use Caller ID and Call Waiting, you must be in
an area where those servi ces are availab le and you
must subscribe to th ose serv ices thro ugh you r local
phone company. Where Caller ID is offered, one or
more options are generally available:
5#8'"6*'5'"
Introduction
#"
5
Page 6

Important Caller ID Information
• caller’s number only
• caller’s name only
• caller’s name and number
If you subscribe to Call Wai ting ID and Caller ID, the
system can show you the incoming caller
information, even when you are already talking on
the phone.
4'#&"6*+5"$'(14'"+056#..#6+10
We have designed your p hone to conform to federal
regulations and you can connect it to most phone
lines. However, each devi ce th at yo u con nect to the
telephone line draws power from the line. We refer
to this power draw as the phone’s ringer
equivalence number, or REN. The REN is on the
bottom of your phone.
If you use more than one phone or other device on
the line, add up all the RENs. If the total is more
than five (three in rural areas), your phones might
not ring. If ringer ope rati on i s i mp air ed, remove one
of the devices from the line.
The digital answering system stores up to 16
minutes of messages on a computer chip and
records each message’s day and time. This gives
you advanced capabilities over tape-based
answering machines:
• You can delete individual messages and save
the rest.
• There are no tapes to bother with and no tape
mechanisms to wear out.
The remote operation feature lets you operate your
answering system fro m a touch-tone phon e (or from
a rotary phone with a pocket tone dialer).
6
Page 7
+056#..#6+10
.
"%#76+10"
.
You must use a
Class 2 power
source that
supplies 9V DC and
delivers at least 350 mA.
Its center tip must be set
to positive and its plug
must fit the phone's DC
IN 9V jack. The supplied
adapter meets these
specifications. Using an
adapter that does not
meet these
specifications could
damage the phone or
the adapter.
• Always connect the AC
adapter to the phone
before you connect it to
AC power. When you
finish, disconnect the
adapter from AC power
before you disconnect it
from the phone.
TEL LINE
DC IN 9V
/1706+0)"6*'"2*10'
You can place the phone on a desk or table, mount
it on a standard wall plate, or directly on a wall.
Choose a location that is:
• near an AC outlet
• near a modular telephone line jack
• out of the way of normal activities
• away from electrical machinery, electrical
appliances, metal walls or filing cabinets,
wireless intercoms, alarms, and room monitors
• away from other cordless phones
You can try different locations t o see which provides
the best performance.
Your telephone connects directly to a modular
telephone line jack. If your telephone wiring does
not have a modular ja ck, you can update the wiring
yourself using jacks and adap ters (ava ilabl e at your
local RadioShack store or online at
RadioShack.com), or have the telephone company
update the wiring for you. You must use compatible
modular jacks that are compliant with Part 68 of
FCC Rules
installed is RJ11C (RJ11W for a wall plate).
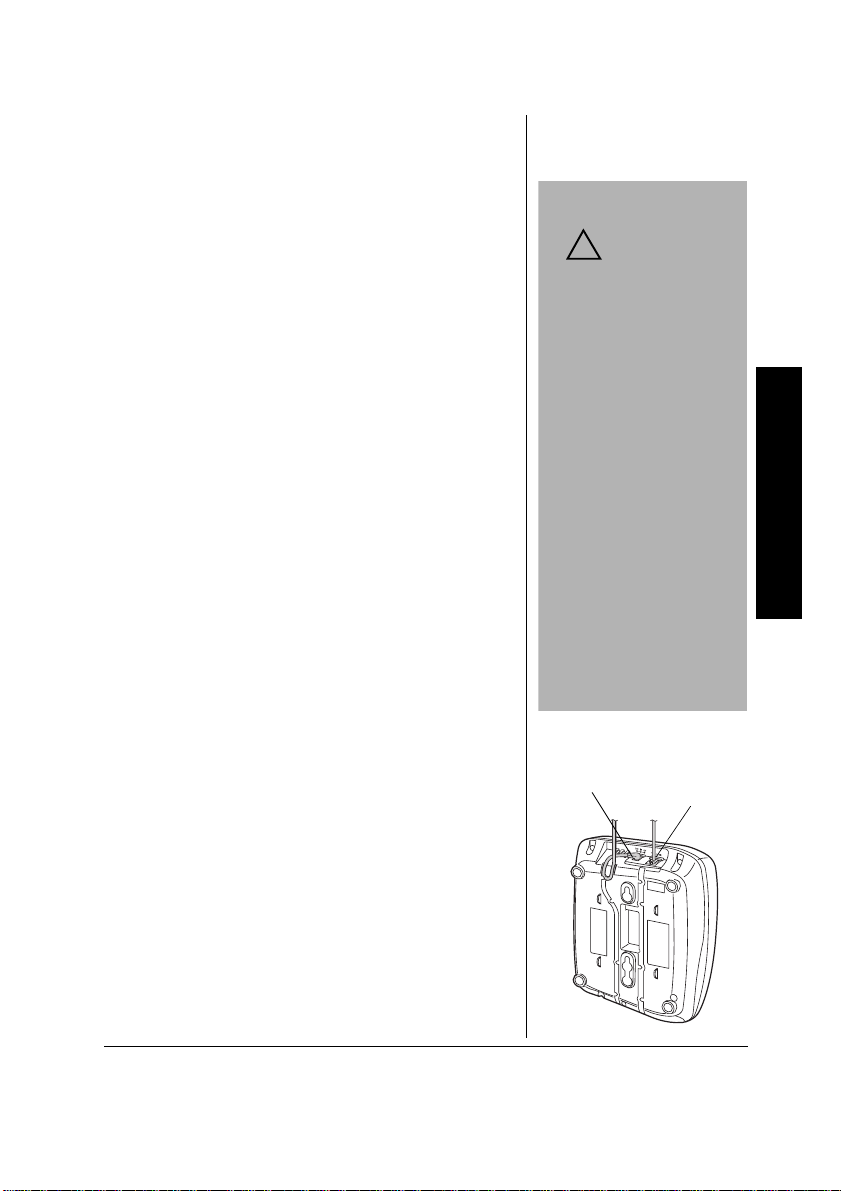
1P"C"&GUM"6QR
1. Plug one end of the supplie d long m odular c ord
into the
2. Plug the modular cord’s other end into a
modular telephone line jack.
3. Insert the supplied AC adapter’s barrel plug
into the
4. Route the adapter’s cord through the strain
relief slot on the base’s bottom.
.#
.#
.#.#
. The USOC number of the jack to be
TEL LINE
DC IN 9V
jack on the base’s back.
jack on the back.
!
Installation
7
Page 8
Installation
DC IN 9V
TEL LINE
5. Plug the adapter into a standard AC outlet.
6. Lift the base’s antenna to a vertical position.
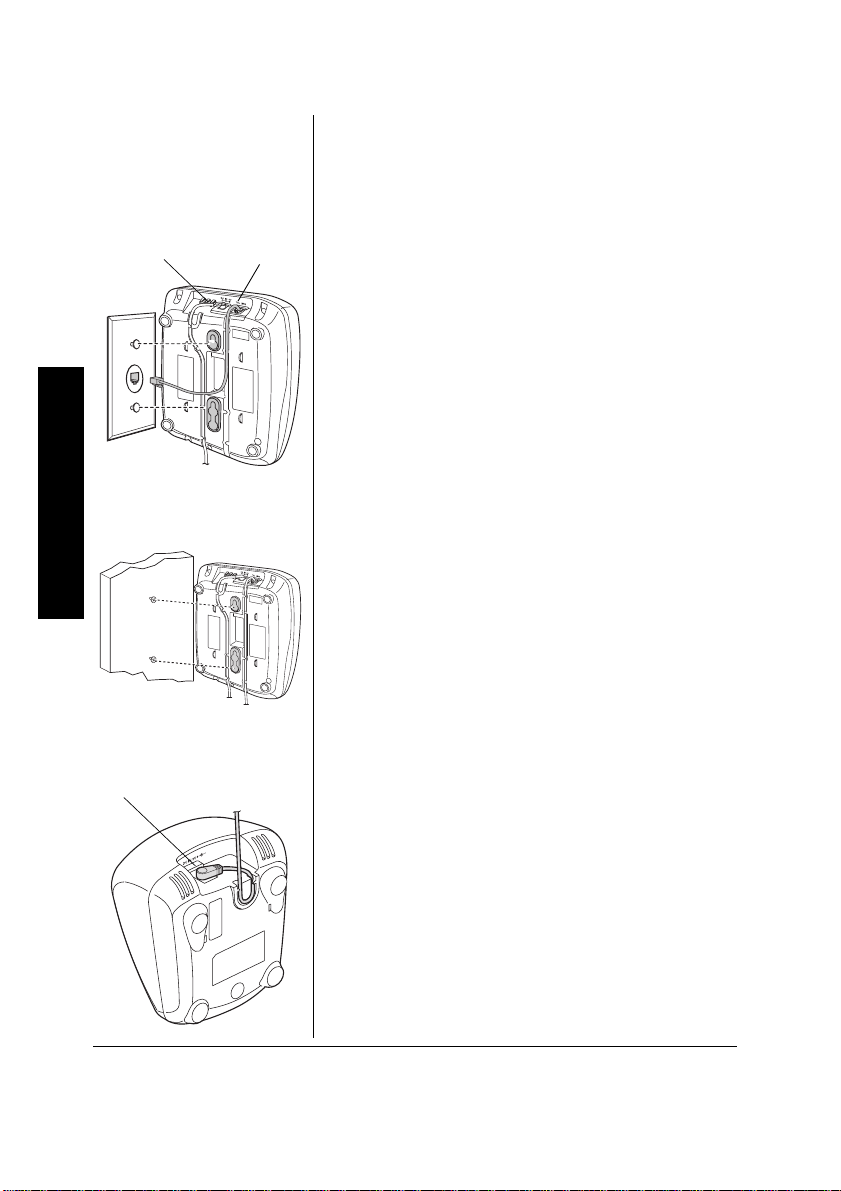
1P"C"9CNN"2NCVG"QT"9CNN
To mount the phone di rectly on a wall , you need tw o
screws (not supplied) with heads that fit into the
keyhole slots on the base. Drill two holes 315/16
inches apart. Thread a screw into each hole,
leaving the heads extended about
1. Plug one end of the supplied modular cord
(short for a wall plate, long for direct wall
mounting) into the
back.
2. Insert the supplied AC adapter’s barrel plug
into the
3. Route the adapter and modular cords through
the base’s grooves.
4.
For a wall plate
end into the wall plate jack, then align the
base’s keyhole slots with the wall plate studs
and slide the base downward to secure it.
DC IN 9V
TEL LINE
jack.
, plug the modular cord’s other
1
/8 inch.
jack on the base’s
DC IN 9V
8
For direct wall mounting
keyhole slots with the mounting screws and
slide the base downward to secure it.
5. Plug the adapter into a standard AC outlet.
6. Lift the base’s antenna to a vertical position.
, align the base’s
+056#..+0)"6*'"%*#4 )+0) "
%4#&.'
1. Insert the supplied AC adapter’s barrel plug
into the DC IN 9V jack on the back of the
charger.
2. Route the cord th rough the st rain re lief s lot a nd
plug the adapter into a standard AC outlet.
Page 9
%100'%6+0)."%*#4)+0)"#0&"
#
"+/2146#06"
#
Be sure the battery pack is
properly connected before
you try to charge it. The
CHARGE LED lights when
the handset is on the base
or cradle even if the battery
pack is not connected
properly.
±
"016'"±"
• If the phone does not
work, recharge the
battery pack. (The
battery power might be
too low for the display to
operate.)
• If the battery pack
becomes weak during a
call, the handset beeps
and
ýBemý8Wjj[ho
ýBemý8Wjj[hoýBemý8Wjj[ho
ýBemý8Wjj[ho
flashes. When this
happens, you cannot
make a call on the
phone until you recharge
the battery pack.
• If the battery pack is
completely discharged
or the base loses power
while the handset is
away from it, place the
handset on the base to
reset the security
access-protection code.
If it was the handset that
lost power, recharge the
battery pack.
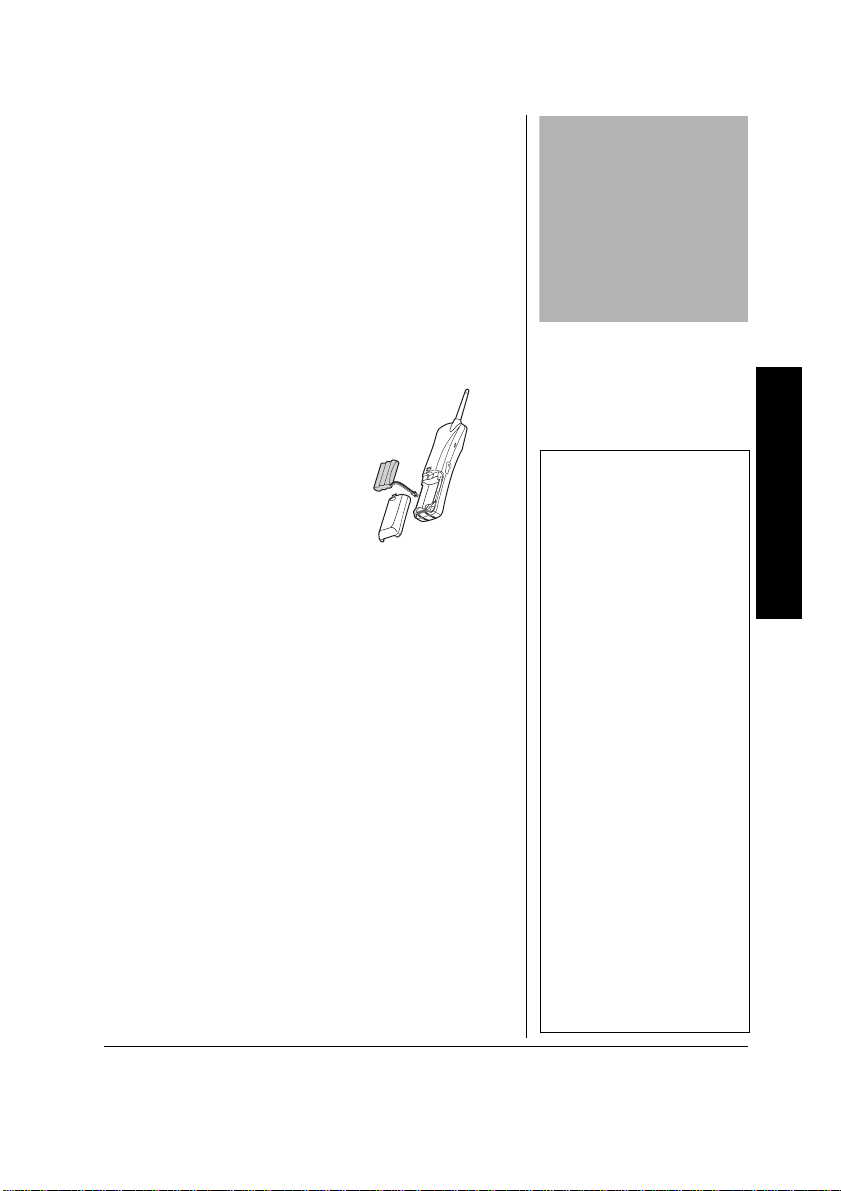
'2.#%+0)"6*'"$#66 '4;"2#%-
4
The phone comes with a rechargeable Ni-Cd
(nickel-cadmium) battery pack installed in each
handset, but not connected. Before using your
phone, you must connect the battery packs, then
charge them for about 24 hours.
1. Press down and slide off the battery pack
compartment cover.
2. Lift the battery pack out of the compartment.
3. Plug the battery pack’s
connector into the
socket in the
compartment. The
connector fits only one
way.
4. Put the battery pack in
the compartment.
5. Replace the cover.
To charge the battery packs, place one handset on
the base, face up or down. The base’s CHARGE
LED lights. Pla ce th e othe r hand set o n the chargi ng
cradle. The cradle’s CHARGE LED lights
Recharge the battery pack when
flashes.
±ý
When you first use the phone after charging or
recharging the battery packs, the phone might not
work and you might hear error beeps. If this
happens, return the hands et to the base for a bout 5
seconds to reset the security access-protection
code.
Using a pencil eraser, clean the charging contacts
on the handset, the base, and the charger about
once a month.
#"
Bemý8Wjj[hoý
Bemý8Wjj[hoý
Bemý8Wjj[hoýBemý8Wjj[hoý
Installation
9
Page 10

"9#40+0)
ý
R
Dispose of the old battery
pack promptly and properly.
Do not burn or bury it (see
Installation
“Battery Safety Instructions”
on Page 4 for additional
information on proper
battery handling).
ý
R
About once a month, fully discharge the battery
pack by keeping the handset off the base or cradle
Bemý8Wjj[ho
Bemý8Wjj[ho
until
Bemý8Wjj[hoBemý8Wjj[ho
pack loses its ability to fully recharge.
The supplied battery pack sho ul d las t about a year.
If the battery pack does not hold a charge for more
than 2 hours after an overnight charge, repl ace it
with a new 3.6V, 600 mAh battery pack with a
connector that fits the socket in the battery
compartment. You can orde r a repl acem ent b atte ry
pack through your loc al RadioSha ck store (or onlin e
"
at RadioShack.com). Install the new battery pack
and charge it for about 24 hours.
If you have trouble replacing the battery pack, take
the phone to your local RadioShack for assistance.
flashes. Otherwise, the battery
Rý
4GE[ENKPI"0K/%F"$CVVGTKGU0
The EPA certified RBRC® Battery
Recycling Seal on the nickel-cadmium
(Ni-Cd) battery indicates RadioShack
is voluntarily pa rticipating in an i ndustry
program to collect and recycle these
batteries at the end of their useful life, when taken
out of service in the United States or Canada. The
RBRC program prov ides a co nvenient alternativ e to
placing used Ni-Cd batteries into the trash or the
municipal waste stream, which may be illegal in
your area. Please call 1-800-THE-SHACK (1-800843-7422) for information on Ni-Cd battery recyc ling
and disposal bans/restrictions in your area.
RadioShack’s in volvem ent in this program is part of
the company’s commitment to preserving our
environment and conserving our natural resources.
10
4')+56'4+0)"6*'"5'%10&"
#0&5'6
*
The handset placed on the base during the
charging process automatically registered with the
>I'
base, and
>I'
appears on the upper right of the
>I'>I'
Page 11

display. The handset charged in the cradle must
±
"016'"±"
Registering the Second
Handset
• Once registered, you
may charge HS1 and
HS2 on either the base
or the charging cradle.
• When a power failure
occurs, or the base
unit’s power is
disconnected for longer
than one hour, both
handsets will need to be
re-registered.
Setting the Dialing Mode
• You cannot use HS2 to
set the dialing mode.
Check the handsets’
displays to distinguish
between HS1 and HS2.
• The phone exits setting
mode if a call or page is
received, or if you press
END.
also be registered with the base prior to use.
Place the second handset on the base. The base’s
CHARGE LED flashes. When the registration is
>I(
>I(
complete
display.
appears in the second handset’s
>I(>I(
±
5'66+0)"6*'"&+#.+0)"/1&'
Your phone comes set for tone dialing. If you have
pulse service, you need to change the dialing mo de.
If you are not sure which type of service you have,
do this test:
1. Lift the handset, press
for a dial tone.
2. Press any number other than
an outside line access code (9, for example).
If the dial tone stops,
service.
If the dial tone continues
service.
Once you have determined which type of service
you have, set the diali ng mode. Use hands et HS1 to
set the dialing mode.
1. Press
then hold down
screen appears.
2. Press 4 or
3. Press
±ý
4. To store the new setting, press
the handset to the base.
TALK/FLASH
0
or, if required,
you have touch-tone
, you have pulse
±
END
to hang up the phone if necessary,
9
three times to select
CH/SEL
to toggle between
CID/MENU
until the selection
:_Wb
:_Wb
:_Wb:_Wb
Jed[ý
Jed[ý
Jed[ýJed[ý
END
, and return
, and listen
.
Fkbi[
Fkbi[
and
Fkbi[Fkbi[
Installation
.
11
Page 12

If the battery power is too low, the dial mode might
reset to tone. If you are on a pulse line and cannot
make a call, try re-setting the dialing mode to pulse.
5'66+0)"6*'"*#0&5'6N5"4+0)'4"
10'181.7/'
6
You can select one of the handsets’ four different
ringer tone/volume settings or turn the ringers off.
You can also select a di fferent tone/vol ume for each
handset.
At any time, except during a call, repeatedly press
8888
9
or
to select the desired ringer setting. Each
time you press a button, the phone rings at the
H_d]ýJof[ý7
Installation
selected setting and
H_d]ýJof[ý8ý>_]^
H_d]ýJof[ý8ý>_]^, H_d]ýJof[ý8ýBem
Bem
Bem
,
H_d]ýJof[ý8ý>_]^H_d]ýJof[ý8ý>_]^
BemBem
appears.
H_d]ýJof[ý7 >_]^
H_d]ýJof[ý7H_d]ýJof[ý7
H_d]ýJof[ý8ýBem,ýýýý
H_d]ýJof[ý8ýBemH_d]ýJof[ý8ýBem
>_]^, H_d]ýJof[ý7ý
H_d]ýJof[ý7ý
>_]^>_]^
H_d]ýJof[ý7ýH_d]ýJof[ý7ý
H_d][hýE\\ý
H_d][hýE\\ý
or
H_d][hýE\\ýH_d][hýE\\ý
6740+0)"6*'"$#5'N5"4+0)'4"
1011(("
You can set the base’s ringer to high or low, or turn
it off.
"016'"±"
±
The phone exits the setting
mode if you:
• wait more than 2
seconds between key
presses
• receive an incoming call
•press PLAY/STOP
•press TALK/FLASH on
the handset
Start again at Step 1.
12
1. Press
2. Repeatedly press
3. Press
Even when you turn off the base’s ringer, you can
still make or receive calls using this phone.
Telephones on the sam e l ine and the handset (if its
ringer is not turned off) still ring when there is an
incoming call.
SET/RING
sounds, and the current setti ng appears. Wh en
the ringer is set to
±
“Off.”
current setting. The system rings at each
setting change and
PLAY/STOP
mode.
. The phone’s current ly set ring
E<
E<
, the phone announces
E<E<
SET/RING
>_
>_, Be
>_>_
to store and exit the setting
to change the
Be
E\
E\
, or
BeBe
E\E\
appears.
Page 13

5'66+0)"#761"6#.-
±
"016'"±"
Turning Caller ID/Call
Waiting On/Off
This setting must be made
from HS1. The CIDCW
menu does not appear on
HS2.
Storing Your Area Code
• If your calling area
requires 10-digit dialing
(including area code), do
not enter the area code.
• The area code setting is
independent in each
handset. You can set
either handset to a
different area code.
Your phone is preset so you must press
FLASH
to answer a call. With Auto Talk turned on,
you can answer a call by just lifting the handset
from the baseor cradle. Auto Tal k is inde pen den t in
each handset. You can s et eac h hands et diff erently .
TALK/
1. Lift the handset and hold down
the setup menu appears.
2. Press
Ed
Ed
E\\
E\\
or
EdEd
E\\E\\
3. To clear the screen when you finish, press
or return the handset to the base or cradle.
6740+0)"%#..'4"+&1%#.."
9#+6+0)"1011((
If you have Call Waiting and Caller ID service, you
can set the system to show Caller ID inform ation for
an incoming call even while you are on the phone.
1. Lift the handset and hold down
the menu appears.
2. Press
Waiting).
3. Press
Waiting setting.
4. Press
to store the new setting.
5614+0)";174"#4'#"%1&'
You can store your local area code in the phone’s
Caller ID record so th e area code does n ot appear i f
the received call is from your local area. If for some
reason you need to dial the are a cod e (or sto re it in
memory), you can add it afterwards. See “Adding/
Deleting the Area Code” on Page 24.
CID/MENU
CH/SEL
to change the Auto Talk setting.
appears.
CID/MENU
±
9999
2
or
to select
CH/SEL
to change the Caller ID/Call
END
and return the handset to the base
Ed
Ed
EdEd
or
9?:9Mý
9?:9Mý
9?:9Mý9?:9Mý
E\\
E\\
appears.
E\\E\\
(Caller ID/Call
±ý
until
END
until
Installation
13
Page 14

"016'"±"
±
If an area code is already
stored, it appears on the
display. To delete the area
code, press TRSF/DEL
three times, then enter your
Telephone Operation
area code. Or you can use
6666
∗∗∗∗
/TONE or
the cursor and edit the area
code
7
####
to move
1. Lift the handset and hold down
the menu appears.
9999
3
or
2. Press
3. Press
code. If you make a mistake, repeatedly press
6666
∗∗∗∗
/TONE or
incorrect digit, then enter the correct number.
±ý
4. Press
press
cradle to clear the display.
twice to select
CH/SEL
, then enter your three-digit area
7
####
to move the cursor over the
CH/SEL
to store the area code, then
END
or return the handset to the base or
CID/MENU
ý7h[Wý9eZ[
ý7h[Wý9eZ[
ý7h[Wý9eZ[ý7h[Wý9eZ[
until
.
6'.'2*10'"12'4#6+10
/#-+0)"#0&"4'%'+8+0)"%#..5
1. To make a call, lift the handset an d press
FLASH
volume setting (see “Setting the Handset
Volume” on Page 15) appear on the handset.
If you set the ringer to of f,
under the volume setting. The b ase’s CH ARGE
LED lights.
9edd[Yj_d]
9edd[Yj_d]
.
9edd[Yj_d]9edd[Yj_d]
, then
JWba
JWba
and the current
JWbaJWba
2H_d][hýE<<4
2H_d][hýE<<4
2H_d][hýE<<42H_d][hýE<<4
TALK/
appears
14
2. Dial the number. The number appears on the
handset as you dial, then the call’s elapsed
time appears.
You can also dial the number before you press
TALK/FLASH
press
enter the correct number. Hold down
delete the entire number.
When you receive a call,
the handset from the base or cradle and press
TALK/FLASH
from the base or cradle. If the han dset is away from
the base or cradle, press
. If you make a mistake, repeatedly
TRSF/DEL
to erase the wrong entry, then
?dYec_d]ý9Wbbý
?dYec_d]ý9Wbbý
?dYec_d]ý9Wbbý?dYec_d]ý9Wbbý
. If auto talk is on, just lift the handset
TALK/FLASH
TRSF/DEL
appears. Lift
or any
to
Page 15

####
∗∗∗∗
9edd[Yj_d]
number including
the current volume setting appears.
To end a call, place the handset on the base or
cradle, or press
END
or
.
9edd[Yj_d]
.
9edd[Yj_d]9edd[Yj_d]
, then
JWba
JWba
JWbaJWba
and
5'.'%6+0)"6*'"%*#00' .
The phone scans 20 channels (frequency pairs
used between the base and the handset) and
automatically selects a clear channel when you
make or receiv e a call.
If you hear other conversations or excessive noise
CH/SEL
during a call, press
IYWdd_d]
channel.
for a clear channel.
If the handset is too far from the base, the channel
might not change. Move closer to the base and try
again.
IYWdd_d]
IYWdd_d]IYWdd_d]
appears as your phone searches
to select a different
5'66+0)"6*'"*#0&5'6"81.7/'
To adjust the handset’s volume during a call, press
8888
9
or
on the handset until you reach the desired
Lebkc[ýCWn_ckc
volume level.
C[Z_kc
C[Z_kc
C[Z_kcC[Z_kc
Lebkc[ýBem
Lebkc[ýBem
, or
Lebkc[ýBemLebkc[ýBem
Lebkc[ýCWn_ckc, Lebkc[ý>_]^
Lebkc[ýCWn_ckcLebkc[ýCWn_ckc
appears.
Lebkc[ý>_]^, Lebkc[ý
Lebkc[ý>_]^Lebkc[ý>_]^
Lebkc[ý
Lebkc[ýLebkc[ý
8888
When you press
CWn_ckc
CWn_ckc
CWn_ckcCWn_ckc
handset beeps and the setting does not change.
The volume setting is maintained even after you
hang up the phone.
(or
while the setting is
9999
while the setting is
Lebkc[ý
Lebkc[ý
Lebkc[ýLebkc[ý
Lebkc[ýBem
Lebkc[ýBem
Lebkc[ýBemLebkc[ýBem
) the
75+0)"(.#5*
Flash performs the electronic equivalent of a
switchhook operation for special services, such as
Call Waiting.
For example, if you have Call Waiting, press
FLASH
to answer an incoming call without
TALK/
Telephone Operation
15
Page 16

"016'"±"
±
• The redial memory holds
up to 32 digits, so you
can redial long-distance,
as well as local
numbers.
• The redial memory also
holds pause entries (see
“Entering a Pause” on
Page 20).
Telephone Operation
disconnecting the curr ent ca ll. Pres s
again to return to the first call.
If you do not have any special phone services,
pressing
call.
TALK/FLASH
might disconnect the current
TALK/FLASH
75+0)"4'&+#.
To quickly dial the last number dialed, lift the
handset and press
FLASH
. You can also press
pressing
TALK/FLASH
RDL/PAUSE
RDL/PAUSE
±ý
.
, then press
TALK/
after
/76+0)"6*'"4+0)'4
To temporarily mute the ringer’s tone when you
receive a call with the handset off the base, press
END
. The ringer automatically turns back on when
you receive another call.
75+0)"610'"5'48+%'5"10"#"27.5'"
+0'
.
Some special services, such as bank-by-phone,
require tone signals. If you have pulse service, you
can still use these special tone services. Dial the
service’s main number. When the service answers,
6666
∗∗∗∗
/TONE
press
are sent as tone signals.
. Any additional numbers you dial
16
When you hang up, the phone automatically resets
to pulse dialing.
2#)+0)
To page the person who has a handset or to locate
the handsets when the phone is not in use, press
PAGE
on the base. Both handsets beep for about
one minute. To stop it from beeping sooner, press
PAGE
any key on the handset. Press
the paging at the base.
again to stop
Page 17

64#05('44+0)"#"%#..
±
"016'"±"
Transferring a Call
• You cannot transfer a call
to the base’s answering
machine.
• Only one handset can talk
at one time. You cannot
accomplish a 3-way
conference call, or make a
call while the other
handset is in use.
• To cancel the transfer,
press
TRSF/DEL
or
TALK/FLASH
.
• If a transferred call is not
answered within five
minutes, the call is
disconnected.
Using a Headset
• Connecting a headset
disconnects the handset ’s
earpiece and microphone.
•8 or 9 on the handset
also controls the
connected headset’s
volume.
• If you place the handset
on the base to recharge it
while the headset is
connected, be sure the
handset seats properly.
• With a headset
connected, you make or
answer calls as usual
using the key s on t h e
handset.
• You can use an op t i o n al
handset holder (available
from RadioShack) t o hang
the handset on your belt
for greater convenience.
You can transfer an outside call from one handset
to the other.
±
TRSF/DEL
Press
automatically put on hold, and the transfer tone
sounds.
Pick up the other handset from the base or cradle
and press
up the handset. If the handset is away from the
base or cradle, press
key including
75+0)"#"*'#&5'6
You can connect an optional headset with a 3/32inch (2.5-mm) plug. Contact RadioShack for a
suitable headset.
To connect the headset, open the rubber cover on
the side of the handset, then insert the headset’s
plug into the jack.
When you finish using the headset, disconnect it
from the handset and close the rubber cover to
protect the jack.
/'/14;"&+#.+0)
You can store up to 10 phone numbers and names
in each handset’s memory (10 in one handset and
an additional 10 in the other), then dial a stored
number by entering its memory location number.
Each number can be up to 20 digits, and each
name can be up to 14 characters.
5VQTKPI"C"0COG"CPF"0WODGT"KP"
/GOQT[
When you are stori ng a num ber in m emory, an error
tone sounds and the phone exits the storing
process if you wait more than 30 seconds between
each keypress. If you receive a call duri ng memory
entry, the phone exits the storing process.
TALK/FLASH
during a call. The call is
. If auto talk is on, just pick
TALK/FLASH
or #. The transfer tone stops.
*
or any number
±ý
Telephone Operation
17
Page 18

1. Lift the handset.
"*+06"
°°°°
To select the desired letter,
refer to the letters on the
number keys. Press once
for the first uppercase
letter, twice for the second
letter, and so on. To enter a
lowercase letter, press four
or five times for the first
lowercase letter, five or six
times for the second letter,
and so on.
Telephone Operation
For example, to enter
press 5 once; upper case
appears. Then press 6 six
times; lower case
appears. Press 4 five times;
lower case
Finally, press 6 five times;
lower case
^^^^ appears.
dddd appears.
°°°°
eeee
"
John
2. Hold down
memory location numbers appear.
3. Select a memory location (1–0) by pressing a
number or repeatedly pressing
4. Press
not want to enter a name, skip to Step 6.
5. To enter a name, use the number keys.
MEM
CH/SEL
.
C[cehoýIjeh[
C[cehoýIjeh[
until
C[cehoýIjeh[C[cehoýIjeh[
Ijeh[ýDWc[
Ijeh[ýDWc[
Ijeh[ýDWc[Ijeh[ýDWc[
appears. If you do
T o ent er two lette rs from the sam e key in a row,
7777
press #/
position. For example to enter
appears. Then press #/
the next position. Press
°°°°
To enter a space,
entering any character.
To enter a number,
corresponding number key until the number
appears.
:
@@@@
To enter a special character,
you press
this order:
If you make a m istake,
move the cursor over the error, then enter the
correct character, or press
a character. Hold down
characters.
to move the cursor to the next
7777
. The cursor moves to
2
twice so
7777
press #/
repeatedly press the
0
, the following characters ap pe ar in
∗∗∗∗
çý#ý
çý#ý&ýâýá
çý#ýçý#ý
twice without
use 0. Each time
ýâýá
(space)
эвэбэвэб
∗∗∗∗
use
TRSF/DEL
TRSF/DEL
and a list of
9
or 8.
AB
, press 2 so
8888
&&&&
6666
/TONE or
to delete all
appears.
7
####
to
to delete
7
7
77
18
6. Press
7. Enter the phone number and any tone or pause
CH/SEL
entries (see “Using Tone Services on a Pulse
Ijeh[ýDkcX[hý
Ijeh[ýDkcX[hý
.
Ijeh[ýDkcX[hýIjeh[ýDkcX[hý
appears.
Page 19

Line” on Page 16 and “Entering a Pause” on
±
"016'"±"
Each tone or pause entry
uses one digit of memory.
Page 20).
±ý
CH/SEL
8. Press
Ijeh[Z
Ijeh[Z
(
Ijeh[ZIjeh[Z
appears.
C[cehoýIjeh[
C[cehoýIjeh[
C[cehoýIjeh[C[cehoýIjeh[
store more nu mbers.
9. When you finish, press
To replace a stored number, store a new one in its
place.
. The phone beep s an d
dddd
is the memory location number)
reappears. Repeat Steps 3–8 to
END
.
C[cehoýdý
C[cehoýdý
C[cehoýdýC[cehoýdý
'FKVKPI"QT"&GNGVKPI"C"0WODGT"KP"
/GOQT[
1. Lift the handset.
2. Hold down
memory location numbers appear.
3. Choose a memory location (1–0) by pressing a
number or by repeatedly pressing
4. Press
three options, then press
your selection.
;Z_jýC[cehoýd
;Z_jýC[cehoýd
;Z_jýC[cehoýd;Z_jýC[cehoýd
Steps 5 through 8 of “Storing a Name and
Number in Memory” on Page 17.
MEM
CH/SEL
. Press
— Edit the record as described in
C[cehoýIjeh[
C[cehoýIjeh[
until
C[cehoýIjeh[C[cehoýIjeh[
8
9
or
to select one of
CH/SEL
and a list of
8
or 9.
to confirm
:[b[j[ýC[cehoýd
:[b[j[ýC[cehoýd
:[b[j[ýC[cehoýd:[b[j[ýC[cehoýd
confirm the deletion. Press
cursor to
The phone beeps, and
appears.
=eý8WYa
=eý8WYa
=eý8WYa=eý8WYa
numbers.
— The display prompts you to
8
to move the
O[i
O[i
, then press
O[iO[i
— Returns you to the list of memory
CH/SEL
C[cehoýdý:[b[j[Z
C[cehoýdý:[b[j[Z
C[cehoýdý:[b[j[ZC[cehoýdý:[b[j[Z
TRSF/DEL
or
Telephone Operation
.
19
Page 20

'PVGTKPI"C"2CWUG
Some telephone systems require you to dial an
access code (9, for example) and wa it for a se co nd
dial tone before you can dial an outside number.
You can store the access code with the phone
number. However, you should also store a pause
after the access code to allow the outside line time
to connect.
Telephone Operation
To enter a 2-second pause, press
appears. You can add more pause entries for a
longer pause.
RDL/PAUSE
FFFF
.
4GXKGYKPI"/GOQT["0WODGTU
To review your memory numbers,
list of memory location numbers (
the name stored with each number (or
if you did not store a name).
To see the stored phone numbers,
arrow to the right of the number means it is longer
7
than 14 digits. Press
number. Repeatedly press
the name display.
To exit the memory number list,
####
again to see the rest of the
6666
∗∗∗∗
/TONE
press
To see a stored name and phone number at the
CH/SEL
TRSF/DEL
.
press
until the screen clears, or press
same time,
memory location number. To exit this display, hold
down
END
when the cursor is by a
MEM
press
''''–&&&&
) appears with
2C[cehoýd4
2C[cehoýd4
2C[cehoýd42C[cehoýd4
press #/
to return to
END
.
7777
. The
. An
&KCNKPI"C"/GOQT["0WODGT
1. Lift the handset and press
memory number. The list of memory location
numbers appears.
MEM
to dial a stored
20
2. Choose a memory locati on (0–9) by pressing a
8888
number or by repeatedly pressing
then press
TALK/FLASH
.
or 9,
Page 21

You can also dial a memory number after pressing
±
"016'"±"
The speed dial memory
location is independent
from the standard memory
locations.
TALK/FLASH
change), then enter a memory location number.
. Press
MEM
(the display does not
%JCKP/&KCNKPI"5GTXKEG"0WODGTU
To quickly reca ll numb ers f or sp ecial servic es (s uch
as bank-by-phone), store eac h group of n umbers in
its own memory location.
1. Dial the service’s main num be r.
2. When the next number is requested, press
MEM
and enter the number for the location
where the additional information is stored.
6GUVKPI"5VQTGF"'OGTIGPE["0WODGTU
If you store an emergency service’s number (police
department, fire departm ent, ambulance) and you
choose to test the stored number, make the test call
during the late evening or early morning hours to
avoid peak demand periods. Also, remain on the
line to explain the reason for your call.
10'/617%*"52''&"&+#.
You can store one frequently-used number in the
one-touch speed dial. (You do not need to press
TALK/FLASH
number.)
; the phone automatically dials the
±ý
5VQTKPI1'FKVKPI"0WODGTU
1. Lift the handset.
2. Hold down
appears.
If the menu screen ap pears, move the cu rsor to
;Z_jýDkcX[h
;Z_jýDkcX[h
;Z_jýDkcX[h;Z_jýDkcX[h
3. Enter the phone number and any tone or paus e
entries (see “Storing a Name and Number in
Memory” on Page 17.)
SPEED DIAL
, then press
until
CH/SEL
Ijeh[ýDkcX[h
Ijeh[ýDkcX[h
Ijeh[ýDkcX[hIjeh[ýDkcX[h
.
Telephone Operation
21
Page 22

4. Press
Ijeh[Z
Ijeh[Z
Ijeh[ZIjeh[Z
CH/SEL
appears.
.The phone beeps and
DkcX[hý
DkcX[hý
DkcX[hýDkcX[hý
7UKPI"5RGGF"&KCN
To dial the number stored in speed dial, lift the
handset and press
instantly dialed .
SPEED DIAL
. The number is
&GNGVKPI"C"0WODGT"KP"/GOQT["
1. Lift the handset.
Caller ID Operation
"016'"±"
±
Normally, the record
contents are the same in
both handsets, but can
differ if either handset was
out of range or its battery
pack was discharged when
Caller ID data was
received.
2. Hold down
appears.
3. Press
press
4. Press
CH/SEL
DkcX[hý:[b[j[Z
DkcX[hý:[b[j[Z
DkcX[hý:[b[j[ZDkcX[hý:[b[j[Z
SPEED DIAL
9
or 8 to select
CH/SEL
.
8
to move the cursor to
TRSF/DEL
or
. The phone beeps, and
appears.
until the menu screen
:[b[j[ýDkcX[h
:[b[j[ýDkcX[h
:[b[j[ýDkcX[h:[b[j[ýDkcX[h
, then
O[i
O[i
, then press
O[iO[i
%#..'4"+&"12'4#6+10
If you subscribe to Caller ID service from your
phone company, the phone company sends
information about the call, as well as the time and
date, between the firs t and second rings of every
call you receive.
The phone displays this information after the
second ring, and stores up to 30 Call er ID records in
each handset for later review. It also shows if caller
information is unavailable or if the name and
number were blocked by the caller (s ee “Caller ID
Messages” on Page 24).
If the phone’s Caller ID memory becomes full, any
new call replaces the oldest call record.
If you subscribe to Call Waiting and Caller ID, you
will hear a tone through the handset when a call
comes in, then the Caller ID record appears. If you
±
22
Page 23

want to answer the incoming call, press
±
"016'"±"
If the handset is face-up on
the base, it shows the
number of Caller ID
records, so you can see if
you have new records to
review.
FLASH
. To resume the previous phone
conversation, press
TALK/FLASH
again.
TALK/
4'8+'9+0)"%#..'4"+&"4'%14&5
To review the Caller ID record s, lift th e hands et and
CID/MENU
press
records, if any, and the total number of records
appear.
±ý
Repeatedly press 9 to scroll through the Caller ID
records from the most recent to the oldest, or 8 to
scroll back through the records. To scroll quickly
through the records, hold down 8 or 9.
When you scroll do wn pa st t he l as t rec ord , the total
number of records appears, then the first record.
When you scroll up past the first record, the total
appears, then the last record.
The top line of each record shows the date, time
and the number of calls from that number (the first
time you review the re cord). T he sec ond li ne sho ws
the caller’s name, and the third line shows the
caller’s phone number.
To exit the Caller ID record display, press
. The number of new Caller ID
END
.
Caller ID Operation
23
Page 24

%CNNGT"+&"/GUUCIGU
Caller ID Operation
&KURNC[ &GUETKRVKQP
D[m0ýNN
D[m0ýNN
D[m0ýNND[m0ýNN
JejWb0ýNN
JejWb0ýNN
JejWb0ýNNJejWb0ýNN
Fh_lWj[ýDWc[ý
Fh_lWj[ýDWc[ýor
Fh_lWj[ýDWc[ýFh_lWj[ýDWc[ý
Fh_lWj[ýDkcX[h
Fh_lWj[ýDkcX[h
Fh_lWj[ýDkcX[hFh_lWj[ýDkcX[h
KdademdýDWc[
KdademdýDWc[ or
KdademdýDWc[KdademdýDWc[
KdademdýDkcX[h
KdademdýDkcX[h
KdademdýDkcX[hKdademdýDkcX[h
?dYecfb[j[ý:WjW
?dYecfb[j[ý:WjW
?dYecfb[j[ý:WjW?dYecfb[j[ý:WjW
Shows the number of new Caller ID
records (records you have not
reviewed) and the total number of
records.
The caller has blocked the Caller ID
information.
The caller is not within a Caller ID
service area.
Appears if there was an error during
the transmission of Caller ID
information. Occasional errors are
normal. If the phone frequently
displays
ý?dYecfb[j[ý:WjW
ý?dYecfb[j[ý:WjW, contact
ý?dYecfb[j[ý:WjWý?dYecfb[j[ý:WjW
your local telephone company or
RadioShack store.
#&&+0)1&'.'6+0)"6*'"#4'#"
%1&'
When the area code of the rec eived ca ll is the same
as the one you stored (see “Storing Your Area
Code” on Page 13), the Caller ID record does not
show the area code. If it is different, the record
shows the area code.
However, you can add or delete the area code on
the display. When the record is on the display,
3
to add or delete the area code. Pressing 3
press
again deletes or adds the area code.
24
When you dial the number or store it into memory,
the phone dials or stores the number as it appears
on the screen.
&+#.+0)"07/$'45"(41/"#"
%#..'4"+&"4'%14&"
To dial a local number stored in a Caller ID record,
recall the record, then press
TALK/FLASH
.
Page 25

If it is a long distance call, press 1 (
±
"016'"±"
If a Caller ID record does
not contain a phone
number (if it was blocked by
the caller, for example), you
cannot dial from that record.
the displayed number) before you press
FLASH
.
If you want to add or delete the area code, press 3
before you press
TALK/FLASH
''''
appears before
±ý
.
TALK/
5614+0)"#"%#..'4"+&"4'%14&"+0"
'/14;"
/
1. Press
CID/MENU
record you want to store.
, then 8 or 9 to recall the
Caller ID Operation
If it is a long distance number,
press 1.
If you want to add or delete the area code,
3
.
press
MEM
I[b[YjýBeYWj_ed
2. Press
3. Choose a memory location (
number or by repeatedly pressing 8 or 9,
then press
If the selected location is empty,
beeps to confirm that it stored the num ber , th en
the Caller ID record appears.
I[b[YjýBeYWj_ed
.
I[b[YjýBeYWj_edI[b[YjýBeYWj_ed
CH/SEL
.
appears.
0–9
) by pressing a
the phone
If a record exists in the selected location,
H[fbWY[ýC[ceho5
H[fbWY[ýC[ceho5
H[fbWY[ýC[ceho5H[fbWY[ýC[ceho5
confirm the replacement. Move the cursor to
O[i
O[i
De
De
or
O[iO[i
DeDe
appears, prompting you to
, then press
CH/SEL
.
&'.'6+0)"%#..'4"+&"4'%14&5
To delete a single Caller ID record:
1. Press
2. Press
CID/MENU
record you want to delete.
TRSF/DEL
then 8 or 9 to recall the
:[b[j[ýC[iiW][5ý
:[b[j[ýC[iiW][5ý
.
:[b[j[ýC[iiW][5ý:[b[j[ýC[iiW][5ý
appears.
3. Press 8 or 9 to move the cursor to
CH/SEL
press
to indicate the record was deleted.
TRSF/DEL
or
O[i
O[i
, then
O[iO[i
. The phone beeps
25
Page 26

To delete all Caller ID records:
Answering System Operation
"016'"±"
±
Using the Menu Button
The system exits menu
setting when you:
• wait more than 30
seconds between key
presses (except when
you set the clock, for
which time-out is about 2
minutes )
• receive an incoming call
•press PLAY/STOP
•press TALK/FLASH on
the handset
Start again at Step 1 of the
setting operation.
Setting the Day/Time
Enter each key press within
about 2 minutes.
Otherwise, the system exits
the time setting process
and you must begin again
with Step 1.
1. Press
2. Press
CID/MENU
TRSF/DEL
3. Press 8 or 9 to move the cursor to
CH/SEL
press
JejWb0ý&&
JejWb0ý&&
and
JejWb0ý&&JejWb0ý&&
to display the record totals.
:[b[j[ý7bb5
:[b[j[ý7bb5
.
:[b[j[ý7bb5:[b[j[ý7bb5
TRSF/DEL
or
appears.
O[i
O[i
, then
O[iO[i
. The phone beeps
appears, indicating all Caller ID
records were deleted.
#059'4+0)"5;56'/"
12'4#6+10
75+0)"6*'"/'07"$76610
MENU
Use
function settings. Each time you press
system announces the function and its current
setting.
2TGUUGU
5'66+0)"6*'"&#;16+/'
You must set the day and time so the system can
record the correct day and time of each message.
±ý
1. Press
on the base to select the various
MENU
, the
±ý
%"QH"
1 Clock set
2 Remote operation Security Code
3 Number of rings before the system answers
4 Recording time for incoming messages
5 Message Alert
6 Exit the menu setting mode.
MENU
once. The system announce s
(WPEVKQP
“Time,” then the currently set time, day, and the
day’s number (
''''
for Sunday,
((((
for Monday, and
so on) appear.
26
Page 27

|
±
"016'"±"
If power fails, the clock
retains the current time.
When the power is
restored, it starts counting
again from the time the
power failed.
2. Repeatedly press
forward or
correct day appears, then pre ss
system announces and displays the hour.
3. Repeatedly press
hour appears, then press
system announces and displays the minutes.
4. Repeatedly press
minutes appear, then press
system announces “AM” or “PM,” and
appears.
|
5. Press
To check the day and time, press
system announces the currently set day and time.
±ý
6or7
SET/RING
press
announces “Time,” then announces the
currently set day and time.
7
|
6
|
on the base to move
to move backward until the
SET/RING
|
|
6or7
|
6or7
to choose AM or PM, then
. The system beeps and
until the correct
SET/RING
|
until the correct
SET/RING
MENU
. The
. The
. The
7777
FFFF
or
once. The
5'66+0)"6*'"07/$'4"1("4+0)5
You can select how long the system waits to
answer a call — 2, 4, or 6 rings, or toll-saver. If you
plan to check messages by long distan ce, set the
ring time to toll-saver (see “Usin g the Toll-Saver” o n
Page 34).
Answering System Operation
1. Press
announces “Ring time” followed by the current
setting. The current setting —
saver) — displa ys.
2. Repeatedly press
number appears.
3. Press
The system beeps and an nou nces “Rin g Time” and
the currently set ring time.
MENU
three times. The system
|
6or7
SET/RING
to store the setting.
((((, ****, ,,,,
|
until the desired
, or
jI
jIjI
jI
(toll
27
Page 28

5'66+0)"6*'"4'%14&"6+/'
'''', ****
You can set the recording time to
ýýýý
(Announce Only)
records incoming messages.
When set to
message and lets callers leave a message up to 1
minute (for
7777
, the system pl ay s the outgoing mes s age but does
not let callers leave a message.
1. Press
Answering System Operation
“Record time” followed by the current setting.
The current setting —
2. Repeatedly press
number appears.
to determine how the system
''''
****
or
, the system plays the outgoing
''''
) or 4 minutes (for
MENU
four times. T he system announces
'''', ****
|
6or7
****
) long. When set to
ý7
ý7
, or
ý7ý7
|
until the desired
7777
, or
— appears.
28
3. Press
The system beeps and announces “Record Time”
followed by the currently set record time.
SET/RING
to store the setting.
5'66+0)"6*'"/'55#)'"#.'46"
610'
The Message Alert feature lets you know you have
new messages by sounding a short beeping tone.
When a new message is received with th e message
alert on, the alert tone sounds every 15 seconds.
MENU
1. Press
“Message Alert” followed by the current settin g.
The current setting —
2. Press
3. Press
sounds, then th e sy st em announces “Message
Alert” followed by the new setting.
When the first new message is received, a beep
sounds.
five times. The sys tem anno unces
E<
|
6or7
SET/RING
E<
(Off) or
E<E<
|
to select
to store the setting. A beep
Ed
Ed
EdEd
or
E<
E<
E<E<
Ed
Ed
EdEd
.
— appears.
Page 29

6WTPKPI"VJG"/GUUCIG"#NGTV"6QPG"1HH"
±
"016'"±"
Recording/Deleting an
Outgoing Message
Outgoing messages must
be between 2 and 30
seconds long.
The Message Alert tone automatically stops when
you have listened to all the new messages.
To turn off the Message Alert tone sooner, press
any key on the base. The Message Alert to ne
automatically sounds when the next message is
received.
5'.'%6+0)"6*'"176)1 +0 )"
/'55#)'
The system has two prerecorded outgoing
messages. One asks th e caller to leave a me ssage:
“Hello, no one is available to take your call. Please
leave a message after the tone.” The system uses
''''
this message whe n the recording t ime i s set to
(see “Setting the Record Time” on Page 28).
The other announcement does not allow the caller
to leave a message: “Hello, no one is available to
take your call. Please call again.” The system uses
this message when the recording time is set to
Announce Only.
You can also record your own message (see
“Recording/Deleting an Outgoing Message” on
Page 29). When you record your own outgoing
message and select it, the system uses it for all
recording time settings (
'''', ****
, and
7777
).
or
****
Answering System Operation
To switch between your outgoing message and the
system’s prerecorded message, press
current message plays. While the message is
playing, press
4'%14&+0)1&'.'6+0)"#0"
176)1+0)"/'55#)'
1. Hold down
“Record greeting,” followed by a beep.
flashes.
2. Speak your message.
±ý
OGM
again.
OGM
. The system announces
OGM
. The
#ý#
#ý#
#ý##ý#
29
Page 30

Answering System Operation
"016'"±"
±
Setting the System to
Answer Calls
When the system’s
message memory is full,
appears and the system
announces “No remaining
time” when you try to
operate it
Screening Calls
Even if you turn the volume
to
can still hear incoming
message playback and
announcements.
Recording Incoming
Messages
When the message
memory is full, the caller
hears “Hello, no one is
available to take your call.
Please call again.” The
system cannot record
additional messages until
you delete some of the old
messages (see “Deleting
Messages” on Page 33).
.
&&&& for call screening, you
3. When you finish your message, press
PLAY/STOP
. The system beeps and plays back
your message.
To delete your outgoing message and use the
system’s prerecorded mes s age s, pres s
DELETE
press
when your message plays. The
system announces “Greeting has been deleted.”
5'66+0)"6*'"5;56'/"61"#059'4"
%#..5
ANSWER
Press
.
If the system is set to record a caller’s message
(see “Setting the Record Time” on Pag e 28), it plays
the outgoing message and the number of recorded
messages appears.
If the system is set to
outgoing message, and
<B
<B
<B<B
announce only, it plays the
7777
appears.
To set the system to not answer calls, press
ANSWER
again. The system announces “Answer
off” and the message counter turns off.
5%4''0+0)"%#..5
You can let the system answer calls whi le you lis ten
to the caller’s message through the speaker.
TALK/FLASH
Press
to answer the call i f th e handset
is off the base, or lift the handset if it is on the base
and autotalk is on. You can also pick up any phone
on the same line. The system stops recording and
resets to answer the next call.
Press
or 9 to adjust the call screening
8
VOL
volume level. If you do not want to listen to calls,
9
repeatedly press
VOL
until
&&&&
appears.
4'%14&+0)"+0%1/+0)"/'55#)'5
After the system answers a call, it plays the
outgoing message, beeps, then records the caller’s
OGM
±ý
±ý
OGM
, then
or
30
Page 31

message. Each incoming message can be up to
±
"016'"±"
• The maximum length for
recording a memo is ten
minutes.
• The system cannot
record a memo less than
two seconds long.
• When you try to record a
memo and the TAD’s
message me mor y is fu ll,
<Bý
<Bý<Bý
<Býappears and the
system announces “No
remaining time”.
#
"+/2146#06"
#
Every state has different
regulations governing the
recording of conversations
over the telephone. Be sure
to check your local, state
and federal laws before
using this product to record
any telephone conversation
in order to determine that
your use is in compliance
with such laws or
guidelines.
one or four minutes long, depending on how you set
the recording time (see “Setting the Record Time”
on Page 28). The maximum recording capacity is
about 16 minutes (or 59 messages).
The system stops recording and resets to answer
the next call when:
• The caller hangs up.
• The maximum message length is reached.
• The system de tec ts a busy signal or more than
seven seconds of silence.
• You pick up the handset or any phone on the
same phone line.
±ý
4'%14&+0)"#"/'/1
A memo is a message you can record for yourself
or others. The system stores memos as incoming
messages (see “Playing Messages”).
MEMO
Hold down
“Record memo message” and beeps. Speak your
#ý#
message.
#ý#
#ý##ý#
until the system announce s
flashes.
Answering System Operation
When you finish the memo, press
±ý
STOP
.
4'%14&+0)"#"%108'45#6+10
The system lets you record both sides of a
telephone conversation when you are talking with
the handset.
To start recording a phone conversation, press
MEMO
on the base until the answering system
beeps and
conversation, the system beeps to indicate the
conversation is being recorded. To stop recording,
press
PLAY/STOP
recorded conversation as a message (see “Playing
Messages”).
#
##
##
appears. As it records the
####
MEMO
or
. The system stores a
MEMO
or
PLAY/
31
Page 32

2.#;+0)"/'55#)'5
After the answering system has recorded a
message, its message counter shows the total
number of messages stored. If you have new
messages, the number of new messages flash. To
play your messages , press
announces the number of new and old messages,
then plays the new messages. The message
number appears as each message plays, and the
system announces the day and time of the call at
the end of each message.
PLAY/STOP
. The system
Answering System Operation
To play all messages after playing the new
PLAY/STOP
messages,
To skip to the next message,
message is playing. Hold down
advance through a me ssage. The system advances
through the message at double speed until the end
of the last message. Release
playback.
To replay the current message from the beginning
press
message. The system skips back every other
second of playback and pla ys t he pre vi ous sec ond,
until the beginning of the message. Release
resume normal playback.
To replay the previous message
about 2 seconds (4 seconds during remote
operation) after a message begins playing. If the
current message is the first new message, the
system plays back from the beg inning of th e current
message (it does not go back into the old message
group).
press
|
6
. Hold down
again.
|
7
press
7
|
6
to review the current
while the
|
7
to quickly
|
to resume normal
, press
|
6
|
6
within
to
,
#&,756+0)"6*'"81.7/'
To adjust the speaker’s volume, repeatedly press
8
VOL
or 9 on the base. The volume setting fro m
////
(lowest) to
(highest) appears.
&&&&
32
Page 33

&'.'6+0)"/'55#)'5
±
"016'"±"
Deleting Messages
You cannot delete new
(unplayed) messages. If
you attempt the procedure
to delete all messages
while you still have new
messages, the system
beeps and announces
“Please play back all
messages.”
Remote Operation
You cannot remotely
operate the system using its
handset or another
telephone on the same line.
To delete the current message while it is playing,
press
DELETE
. The system beeps.
To delete all messages, while messages are not
playing, press
DELETE
announces, “To de lete all message s, press
again.” Within 30 seconds, press
. The system beeps and
DELETE
DELETE
. The
system beeps, the display clears momentarily, t hen
&&&&
appears.
±ý
4'/16'"12'4#6+10
While you are away from your home or office, you
can use a touch-tone phone, or a pulse (rotary)
phone with a pocket tone dialer (available through
RadioShack), to enter your security code and do
any of the following:
• Set the system to answer or not answer calls.
• Listen to your messages.
• Record a new outgoing message.
• Record a m emo.
• Erase messages.
5GVVKPI"VJG"5GEWTKV["%QFG
The two-digit remote operation security code
prevents unauthorized remote access to your
messages. The code i s preset to 80 . To chan ge the
code to any number from 00 to 99:
±ý
Answering System Operation
1. Press
“Security code,” followed by the currently set
code. The code appears.
2. Repeatedly press or hold down
change the number.
3. Press
system announces “Se curity code ,” followed by
the newly set code.
MENU
twice. The system announces
SET/RING
to store the setting. The
|
6or7
|
to
33
Page 34

To check your code at any time, press
The code appears, and the system announces it.
MENU
twice.
7UKPI"VJG"6QNN/5CXGT
jI
If the ring time is set to
the Number of Rings” on Page 27), the system
answers after two rings if you have new messages
(ones you have not listened to).
If there are no new messages, the system answers
after four rings, so you can hang up before the
system answers and avoid unnecessary long-
Answering System Operation
distance charges.
If the message memory is full, the system answers
after about ten rings, regardless of the ring time
setting.
jI
(toll-saver) (see “Setting
jIjI
75+0)"4'/16'"%1//#0&5
While in remote operation, the system stops all
Bh
Bh
answering functions and displays
functions resume when it is no longer being
operated remotely, if you have not turned the
system off.
Remote operation stops when someone picks up
the handset or any phone on the same phone line.
1. Dial your phone number and wait for the
system to answer. If the system is not set to
answer calls, it wi ll answer aft er about ten ri ngs
and sound a series of beeps.
. Answering
BhBh
34
2. When the outgoing message begins (or the
system sounds a series of beeps), press
then enter your security code within 2 seconds.
3.
If the code is correct
the number of n ew and old m essage s, the n “To
play incoming message, press
####
0.”
press
, the system announces
####
2. For help,
####
,
Page 35

If the system does not respond
±
"016'"±"
If you wait more than 15
seconds between
keypresses, the system
sounds a long beep and
hangs up.
, try entering
your code again. If you enter an incorrect code
three times, the system beeps and
disconnects.
4. While the system is beeping, press # and
(within 2 seconds) the number for the desired
command. (See “Remote Commands” on
Page 36.)
±ý
Answering System Operation
35
Page 36

4GOQVG"%QOOCPFU
2TGUU"%"VJGP 6Q
Repeat current message during playback. If you press
1
2
3
4
5
6
7
8
9
0
seconds after a message begins (unless it is the first new message), the
previous message replays.
Play messages. The remote playback of incoming messages is limited to 4
minutes. If you have more messages after 4 minutes have passed, you must
####
press
2 again to listen to the rest of the messages.
Skip current message during playback.
Deletes current me ss age du rin g play b ack. Dur ing play bac k, you ca n on ly de lete
the current message. You cannot delete all messages.
Stop playback or recording.
Set the system to answer calls. Announces the current outgoing message.
Record a memo. Anno unces “Record memo message.” The length of a memo
must be between 2 seconds and 4 mi nutes. Press
recording.
Record a new outgoin g message. Announc es “Reco rd greeti ng.” Pres s
####
or
5 to stop recording.
Set the system to not answer calls.
Announces the help guidance.
6417$.'5*116+0)
2TQDNGO 5WIIGUVKQP
Troubleshooting
Low volume or unusual
sounds.
Severe noise interference.
The phone does not work
or works poorly.
Low Battery flashes every
few seconds
The phone cannot be
operated at a useful
distance from the base
because the signal
becomes weak or noi s y.
Someone has picked up another phone on the same line. Hang up
the other phone.
Press
Keep the handset away from computers, remote control toys,
wireless microphones, alarm systems, intercoms, room monitors,
fluorescent lights, and electrical appliances.
Move the handset to another location or turn off the source of
interference.
Be sure the base’s phone line cord and AC adapter are correctly
and securely connected, and the battery pack is charged.
Be sure the battery pack is correctly connected.
Return the handset to the base or cradle to recharge battery pack.
Lift the base’s antenna to a vertical position.
The handset’s range has decreased. Return the handset to the
base or cradle and recharge the battery pack. Replace the battery
pack if necessary.
to change the channel.
DELETE
####
1 within about 4
####
again or
7
####
5 to stop
####
8 again
36
Page 37

2TQDNGO 5WIIGUVKQP
If the charging contacts on the handset, cradle, or base are dirty,
The handset battery pack
does not charge.
The handset does not ring
or receive a page.
Y ou have an incoming call,
but do not receive any
Caller ID information.
The handset s tops working
or works poorly during a
call.
Either handset will not
work
KdWlW_bWXb[
KdWlW_bWXb[
KdWlW_bWXb[KdWlW_bWXb[
H[]_ij[hý>WdZi[jýXoýfbWY_d]ýedý
H[]_ij[hý>WdZi[jýXoýfbWY_d]ýedý
H[]_ij[hý>WdZi[jýXoýfbWY_d]ýedýH[]_ij[hý>WdZi[jýXoýfbWY_d]ýedý
BWh][ý8Wi[
BWh][ý8Wi[
BWh][ý8Wi[BWh][ý8Wi[
The system does not
answer calls.
The system does not
record the caller’s
messages
appears
appears.
clean them w ith a pencil er aser.
Be sure the battery pack is connected correctly.
Replace the battery pack.
Move the base away from other electrical devices a nd sources of
noise.
Move the handset closer to the base.
Lift the base’s antenna to a vertical position.
Be sure the battery pack is charged. (If the battery power is too low,
it does not have enough power to light the display.)
Let the phone ring twice before you answer, so the system has time
to record the Caller ID information.
Check that the system is correctly and securely connected.
Verify with the phone compa ny that your CID service is active.
Move the handset closer to the base.
Lift the base’s antenna to a vertical position.
Be sure the battery pack is charged. (If the battery power is too low,
it does not have enough power to light the display.)
If the base loses power while the handset is away, the security
access-protection code might change. Restore power to the base,
then place the handset back on the base. The CHARGE LED
lights, indicating that the code is set again.
If the charging contacts on the handset, cradle, or base are dirty,
clean them w ith a pencil er aser.
Be sure the battery pack is connected properly and fully charged.
Registration might have failed. Re-register BOTH handsets.
Be sure that t he othe r h an dse t i s no t a lre ad y in use . B oth ha nd set s
cannot be in talk mode at the same t i me.
Move the handset closer to the base.
Re-register the handset
Register the handset by placing it on the base.
Make sure the system is turned on and the AC adapter is properly
connected.
Check all phone line c onnections.
Recording time is set to announce only. Set it to
Delete messages if the memory is fu ll.
''''
or
Troubleshooting
****
.
37
Page 38

Care
If you still have problems, disconnect the phone. If
other phones on the same line work properly, the
fault is in this phone or its installation. If you cannot
find the problem, take your phone to your local
RadioShack store for assistance.
%#4'
Keep the phone dry; if it gets wet, wipe it dry
immediately. Use and store the phone only in
normal temperature environments. Handle the
phone carefully; do not drop it. Keep the phone
away from dust and dirt, and wipe it with a damp
cloth occasionally to keep it looking new.
Modifying or tampering with the phone’s internal
components can cause a malfunction and might
invalidate its warranty and void your FCC
authorization to operate it. If your phone is not
performing as it should, take it to your local
RadioShack store for assistance.
If the trouble is affecting the telephone lines, the
phone company can ask you to disconnect your
phone until you have resolved the problem.
"016'"±"
±
You must not connect your
telephone to:
• coin-operated systems
• party-line systems
• most electronic key
phone systems
38
(%%"56#6'/'06
Your telephone complies with Part 68 of the
Rules
. Upon request, you must pro vide the phone’ s
FCC registration number and REN to your
telephone company. These numbers are on the
bottom of the base.
±ý
6*'"(%%"9#065";17"61"-019
In the unlikely event that your phone causes
problems on the phone line, the phone company
can temporarily discontinue your service. If this
happens, the phone com pany attempts to notify you
in advance. If advance notice is not practical, the
phone company notifies you as soon as possible
FCC
Page 39

and advises you of yo ur righ t t o file a co mplai nt w ith
±
"016'"±"
Some cordless telephones
operate on frequencies that
might cause interference to
nearby TVs and VCRs. To
minimize or prevent such
interference, the base of
the cordless telephone
should not be placed near
or on top of a TV or VCR.
the FCC.
Also, the phone company can make changes to its
lines, equipment, operations, or procedures that
could affect the operation of this telephone. The
telephone company notifies you of these chang es in
advance, so you can take the necessary Steps to
prevent interruption of your t ele pho ne se rvi ce.
Your phone might cause TV or radio interference
even when it is operating properly. To determine
whether your phone is causing the interfe r enc e,
turn off your phone. If the interference goes away,
your phone is causing it. Try to eliminate the
interference by:
• moving your phone away from the receiver
• connecting your phone to an AC outlet that is
on a different electrical circuit from the receiver
• contacting your lo cal Radi oShack store for help
If you cannot eliminate the interference, the FCC
requires that you stop using your phone.
±ý
.+)*60+0)
Your telephone has built-in protection circuits to
reduce the risk of da mage from surges in t elepho ne
line and power line current. These protection
circuits meet or exceed the FCC requirements.
However, lightning striking the telephone or power
lines can damage your telephone.
FCC Statement
Lightning damage is not common. Nevertheless, if
you live in an a rea th at has sev ere elec trical st orms,
we suggest that you unplug your phone when
storms approach to reduce the possibility of
damage.
39
Page 40

Limited One-Yea r Warranty
This product is warran ted by R adioSh ack agai nst m anufact urin g defec ts in mate rial a nd workm anship under normal use for one (1 ) year from the date of purchase from RadioSha ck companyowned stores and authorized RadioShack franchisees and dealers. EXCEPT AS PROVIDED
HEREIN, RadioShack MAKES NO EXPRESS WARRANTIES AND ANY IMPLIED WARRANTIES,
INCLUDING THOSE OF MERCHANTABILITY AND FITNESS FOR A PARTICULAR PURPOSE,
ARE LIMITED IN DURATION TO THE DURATION OF THE WRITTEN LIMITED WARRANTIES
CONTAINED HEREIN. EXCEPT AS PROVIDED HEREIN, RadioShack SHALL HAVE NO LIABILITY OR RESPONSIBILITY TO CUSTOMER OR ANY OTHER PERSON OR ENTITY WITH RESPECT TO ANY LIABILITY, LOSS OR DAMAGE CAUSED DIRECTLY OR INDIRECTLY BY USE
OR PERFORMANCE OF THE PRODUCT OR ARISING OUT OF ANY BREACH OF THIS WARRANTY, INCLUDING, BUT NOT LIMITED TO, ANY DAMAGES RESULTING FROM INCONVENIENCE, LOSS OF TIME, DATA, PROPERTY, REVENUE, OR PROFIT OR ANY INDIRECT,
SPECIAL, INCIDENTAL, OR CONSEQUENTIAL DAMAGES, EVEN IF RadioShack HAS BEEN
ADVISED OF THE POSSIBILITY OF SUCH DAMAGES.
Some states do not al lo w l imitations on how long an implied warr ant y last s or th e e xcl usio n o r li m itation of incidental or consequential damages, so the above limitations or exclusions may not apply
to you.
In the event of a product defe ct during the warranty period , take the produ ct and the RadioS hack
sales receipt as proof of purchase date to any RadioShack store. RadioShack will, at its option, unless otherwise provided by law: (a) correct the defect by product repair without charge for parts and
labor; (b) replace th e product with one of the same or simil ar design; or (c) re fund the purchase
price. All replaced p arts an d pro duct s, and p roduct s on w hich a r efund is ma de, be come th e prop erty of RadioShack. New or reconditi oned parts and pr oducts may be us ed in the per formance of
warranty service. Repair ed or replace d parts and prod ucts are warrant ed for the remai nder of the
original warranty period. You will be charged for repair or replacement of the product made after the
expiration of the warranty period.
This warranty does not cover: (a) damage or failure caused by or attributable to acts of God, abuse,
accident, misuse, improper or abnormal usage, failure to follow instructions, improper installation or
maintenance, alterati on, lightning or other inci dence of excess voltage or curre nt; (b) any repairs
other than those provided by a RadioShack Authorized Service Facility; ( c) consumables such as
fuses or batteries; (d) cosmetic damage; (e) transportation, shipping or insurance costs; or (f) costs
of product removal, installation, set-up service adjustment or reinstallation.
This warranty gives you s pecific lega l rights, and yo u may also have other rights wh ich vary fro m
state to state.
RadioShack Customer Relations, 200 Taylor Street, 6th Floor, Fort Worth, TX 76102
12/99
RadioShack Corporation
Fort Worth, Texas 76102
43-3820
UCZZ01376BZ
09A02
Printed in China
 Loading...