

Page 1

Paint Mask
4/9C["+P/9CNN"5RGCMGT
40-4093
"+/2146#06"
#
If an icon appears at the end of a paragraph, go
to the box on that page with the corresponding
icon for pertinent information.
— Warning
Rý
. — Caution
± — Note
#
— Important
#
— Hint
°°°°
OWNER’S MANUAL — Please read before using this equipment.
Your RadioShack 2-Way In-Wall Spea ke r
1
features a crossover, a 5
/4-inch woofer for
rich lows, and a 1-inch tweeter for crisp
highs. The speake r can handle up to 80 watts
of music power. The wing-type mounting
+056#..#6+10
24'2#4+0)"6*'".1%#6+10
To mount your speaker, you need the
following items (not supplied, available at
your local RadioShack or online at
RadioShack.com).
• drywall or keyhole saw
• wire stripper
• Phillips scr ewdriver
• pencil or marker
• 18–20 gauge speaker wire
1. Be sure the mount ing surface is between
3
/8
inch and 1
3
/4
-inch clearance behin d the m ountin g
2
surface and no wall studs or other
objects to block the back of the speaker.
1
/4-
inch thick, with at least a
system makes it easy to mount your speaker
flush with the ceiling or wall, making it ideal
for unobtrusive use in a surround-sound
system. The frame and grille can also be
painted to match the room’s decor.
24'2#4+0)"6*'"52'#-'4
If you choose to paint the frame and grille,
paint them and let them dry before you
connect the speaker wire or mount the
speaker.
To remove the grille for painting, insert a
paper clip into one of the gri lle openings , then
pull up. Or, you can carefully twist the plastic
frame back and forth until the grille edge
becomes exposed, then lift the grille to
remove it.
"016'"±"
±
Do not paint the speaker element. We
recommend you spray-paint
does not block the holes.
.
"%#76+10"
Be sure not to cut into any existing wiring or
plumbing
• Avoid routing the speaker wire near electrical
• Do not nail or staple the speaker wire.
hidden behind the wall.
±
wires.
"016'5"±"
the grille so paint
.
2. Remove the inner cardboard disc from
the supplied template/paint mask and
keep it for later. Use the outer portion as
a template to mark the cutout hole size
and location for mounting the speaker.
Carefully remove the dust cloth from behind
the grill and replace it after you are finished
painting.
±
You can also paint the f rame to match your
wall or ceiling. To preven t pain t from e ntering
the speaker, remove the grille and insert the
supplied cardboard paint mask. After the
paint is dry, remove the paint mask and
replace the grille.
3. Use a drywall or keyhole saw to cut the
.
hole.
%100'%6+0)"6*'"52'#-'4"9+4'5
Your local RadioShack store sells a wide
selection of speaker wire. We recommend
you use wire that is color-cod ed or marked on
one side to help you connect the wire
correctly.
1. Route the speaker wire to the speaker
from the receiver .
±
2. Separate about 4 inche s of sp eaker wi re
at each end.
4 inches
1
/4 inch
2002 RadioShack Corporation.
©
RadioShack and RadioShack.com are trademarks
All Rights Reserved.
used by RadioShack Corporation.
Page 2
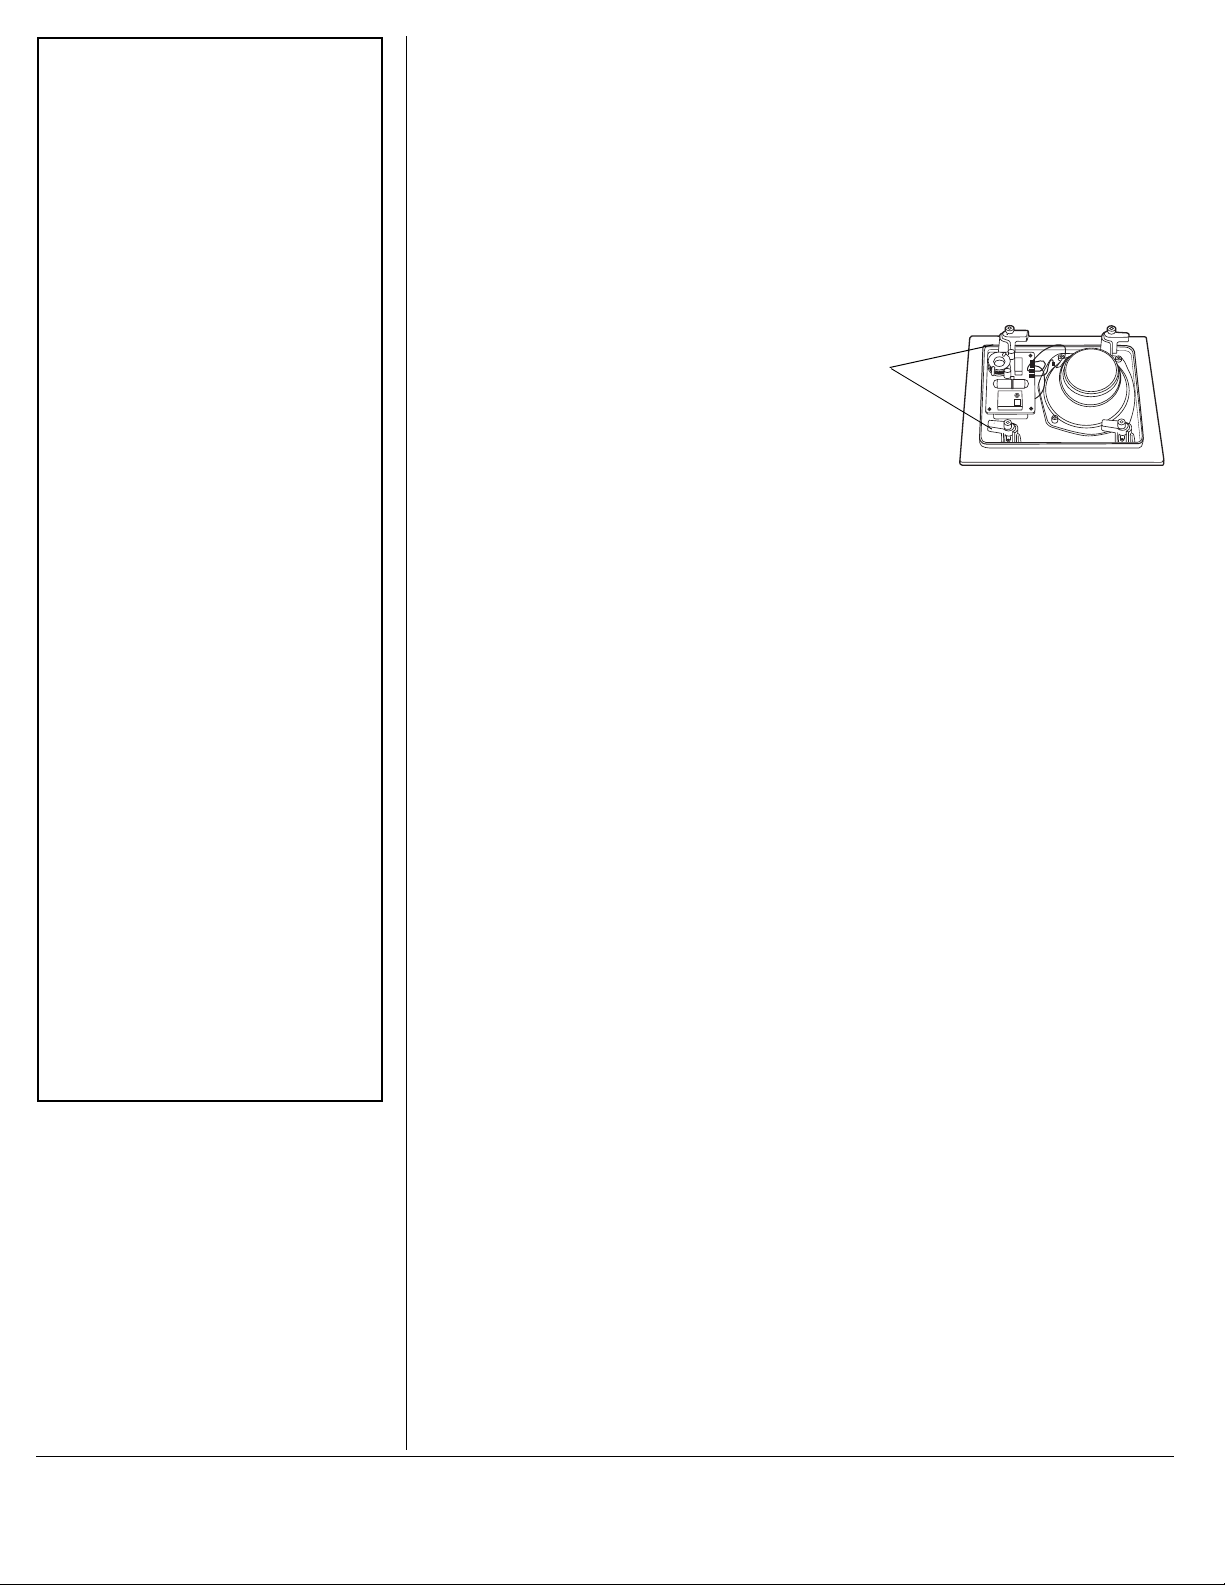
Mounting
Tabs
Limited Two-Year Warranty
This product is warranted by RadioShack against
manufacturing defects i n material and workmanship
under normal use for two (2) years f rom the date of
purchase from Radio Shack company- owned stores
and authorized RadioShack franchisees and dealers.
EXCEPT AS PROVIDED HEREIN, RadioShack
MAKES NO EXPRESS WARRANTIES AND ANY
IMPLIED WARRANTIES, INCLUDING THOSE OF
MERCHANTABILITY AND FITNESS FOR A PARTICULAR PURPOSE, ARE LIMITED IN DURATION
TO THE DURATION OF THE WRITTEN LIMITED
WARRANTIES CONTAINED HEREIN. EXCEPT AS
PROVIDED HEREIN, RadioShack SHALL HAVE NO
LIABILITY OR RESPONSIBILITY TO CUSTOMER
OR ANY OTHER PERSON OR ENTITY WITH RESPECT TO ANY LIABILITY, LOSS OR DAMAGE
CAUSED DIRECTLY OR INDIRECTLY BY USE OR
PERFORMANCE OF THE PRODUCT OR ARISING
OUT OF ANY BREACH OF THIS WARRANTY, INCLUDING, BUT NOT LIMITED TO, ANY DAMAGES
RESULTING FROM INCONVENIENCE, LOSS OF
TIME, DATA, PROPERTY, REVENUE, OR PROFIT
OR ANY INDIRECT, SPECIAL, INCIDENTAL, OR
CONSEQUENTIAL DAMAGES, EVEN IF RadioShack HAS BEEN ADVISED OF THE POSSIBILITY OF SUCH DAMAGES.
Some states do not allow limitations on how long an
implied warranty lasts or the exclusion or limitation of
incidental or conseque ntial damages, so the above
limitations or exclusions may not apply to you.
In the event of a product defect d uring the warran ty
period, take the product and the RadioShack sales
receipt as proof of p ur chas e da te to any RadioShack
store. RadioShack will, at its option, unless otherwise
provided by law: (a) correct th e defect b y produ ct repair without char ge for parts and labor; (b ) replace
the product with one of the same or similar design; or
(c) refund the pu rchase price . All re placed par ts and
products, and product s on which a refund is made,
become the property of RadioShack. New or reconditioned parts and pr odu cts may be used in t he performance of warranty service. Repaired or replaced
parts and products ar e warranted for the remainde r
of the original warranty period. You will be charged
for repair or replaceme nt of the product made after
the expiration of the warranty period.
This warranty does not cover: (a) damage or failure
caused by or attributable to acts of God, abuse, accident, misuse, impro per or abnor mal usa ge, fai lure to
follow instructions, improper installation or maintenance, alteration, lightning or other incidence of excess voltage or curr ent; (b) any repairs other than
those provided by a R adioShack Authori zed Serv ice
Facility; (c) consumabl es such as fuse s or batteries;
(d) cosmetic damage; (e ) transportation, ship ping or
insurance costs; or (f) costs of product removal, installation, set-up service adjustment or reinstallation.
This warranty gives you specific legal rights, and you
may also have other rights w hich vary from state to
state.
RadioShack Customer Relations, 200 Taylor Street,
6th Floor, Fort Worth, TX 76102
12/99
1
3. Using a wire stripper, remove about
inch of insulation from each wire. Then
twist the ends of each wire.
4. Connect the marked wire to a red
speaker terminal by press ing the release
tab, inserting the wire into the hole, and
then releasing the tab. Repeat this
/4
procedure to connect the unm arked wire
to the black terminal.
5. Connect the marked wire coming from
the speaker to the left channel of the
receiver's positive (+) terminal. Then
connect the unmarked wire to the left
channel of the amplifier's negative (–)
terminal.
/1706+0)"6*'"52'#-'4
1. Remove the grille to expose the
mounting screws.
2. Be sure the mounting t abs are turned in,
allowing the speaker to fit into the hole.
Then insert the speaker into the
mounting ho le.
3. Use the four screws to tighten the
mounting tabs to the wall or ceiling. Be
careful not to overtighten the screws.
4. Replace the grille.
To remove the speaker from the wall or
ceiling, loosen the screws only far enough to
remove the speaker. This will prevent loss of
the mounting tabs.
52'%+(+%#6+105
Resonance Frequency ................................................................................... .... ......... .... .... .... ....60 Hz ±20%
Frequency Response .......................................... .. .... ..... .... .. .... .. .. ....... .... .. .. .... .. ....... .... 35 Hz through 22 kHz
Power Rating ................................................................................................... 40 Watts RMS, 80 Watts Max.
Impedance (nominal) ...........................................................................................................................8 Ohms
Sensitivity.....................................................................................................................................85 dB ±3 dB
Voice Co il ................ ............. ............ ............. ............ ............. ............. ............ ........................... 1 in. (25 mm)
Voice Coil (Tweeter) ................................................................................................................. 1 in. (25 mm)
Magnet Size (Woofer)..................................................................................................................... .. .......11 oz
The plastic enclosure for this speaker meets UL 94 requirements for flammability.
Specifications are typical; individual units may vary. Specifications are subject to change or improvement
without notice.
RadioShack Corporation
Fort Worth, Texas 76102
40-4093
03A02
Printed in China
 Loading...