

Page 1
21-533.fm Page 1 Thursday, August 5, 1999 3:47 PM
Please read before using this equipment.
CB/Ham Field-Strength
Cat. No. 21-533
OWNER’S MANUAL
SWR Meter
Page 2
21-533.fm Page 2 Thursday, August 5, 1999 3:47 PM
INTRODUCTION
Your RadioShack CB/Ha m Field- Strengt h SWR Meter hel ps
you tune your CB or amateur radio system for the best performance.
CB and amateur radio syste ms work best when the antenna
system’s impedance matches the transmitter’s output impedance as closely as possible. The meter’s st anding wave
ratio (SWR) f unction helps you trim your antenna to the precise length you need for t he ma ximum transmitted power.
The meter’s field strength function helps you position your
antenna for the best coverage and determine the effectiveness of changes you make to your antenna, antenna cable,
and transmitter.
Carefully read all of these instructions to get the best use
from this meter.
Warning:
You can use this meter to make measurements
on equipment that uses high voltages. Carefully observe all
safety precaut ions provided wi th the equipment you are testing.
You need a separate 50-ohm coaxial cable (such as
Note:
RG-58U) with a PL-259 connector connected to both ends
(such as Cat. No. 278-968, not supplied), long enough to
reach from your radio’s antenna jack to the back of the
meter.
© 1998 Tandy Corporation.
RadioShack is a registered trademark used by Tandy Corporation.
All Rights Reserved.
2
Page 3
21-533.fm Page 3 Thursday, August 5, 1999 3:47 PM
CONTENTS
Measuring SWR . . . . . . . . . . . . . . . . . . . . . . . . . . . . . . . . . 4
Connecting the Meter . . . . . . . . . . . . . . . . . . . . . . . . . . 4
Calibrating the Meter/Measuring SWR . . . . . . . . . . . . . 5
Interpreting SWR Readings . . . . . . . . . . . . . . . . . . . 8
Improving SWR . . . . . . . . . . . . . . . . . . . . . . . . . . . . . . 9
Measuring Field Strength . . . . . . . . . . . . . . . . . . . . . . . . 10
Preparing the Antenna Site . . . . . . . . . . . . . . . . . . . . 11
Calibrating the Meter/Measuring Field Strength . . . . . 13
Using Field Strength Readings to Tune Your Radio
and Antenna . . . . . . . . . . . . . . . . . . . . . . . . . . . . . . . . 17
Care and Maintenance . . . . . . . . . . . . . . . . . . . . . . . . . . 19
Schematic Diagram . . . . . . . . . . . . . . . . . . . . . . . . . . . . . 21
Specifications . . . . . . . . . . . . . . . . . . . . . . . . . . . . . . . . . 22
3
Page 4
21-533.fm Page 4 Thursday, August 5, 1999 3:47 PM
MEASURING SWR
Measuring SWR s hows you h ow much of your r adio’ s transmi t
power is reflected from the antenna back into the antenna c able, generating heat and wasting power. With t his informat ion,
you can adjust the le ngth of your ant enna or antenna cabl e so
your antenna and radio combination can produce the maximum power they are capable of producing.
For more information about measuring SWR, see the
Handbook
, available at your local library.
ARRL
CONNECTING THE METER
To connect this meter to your CB or amateur radio and your
antenna, you need RG-58U coaxial cable (not supplied) with
a PL-259 connector on both ends (such as RadioShack Cat.
No. 278-968). The cable must reach from the back of the
meter to your radio’ s antenna jack.
Follow these st eps to connect the meter to your radio and antenna.
4
Page 5
21-533.fm Page 5 Thursday, August 5, 1999 3:47 PM
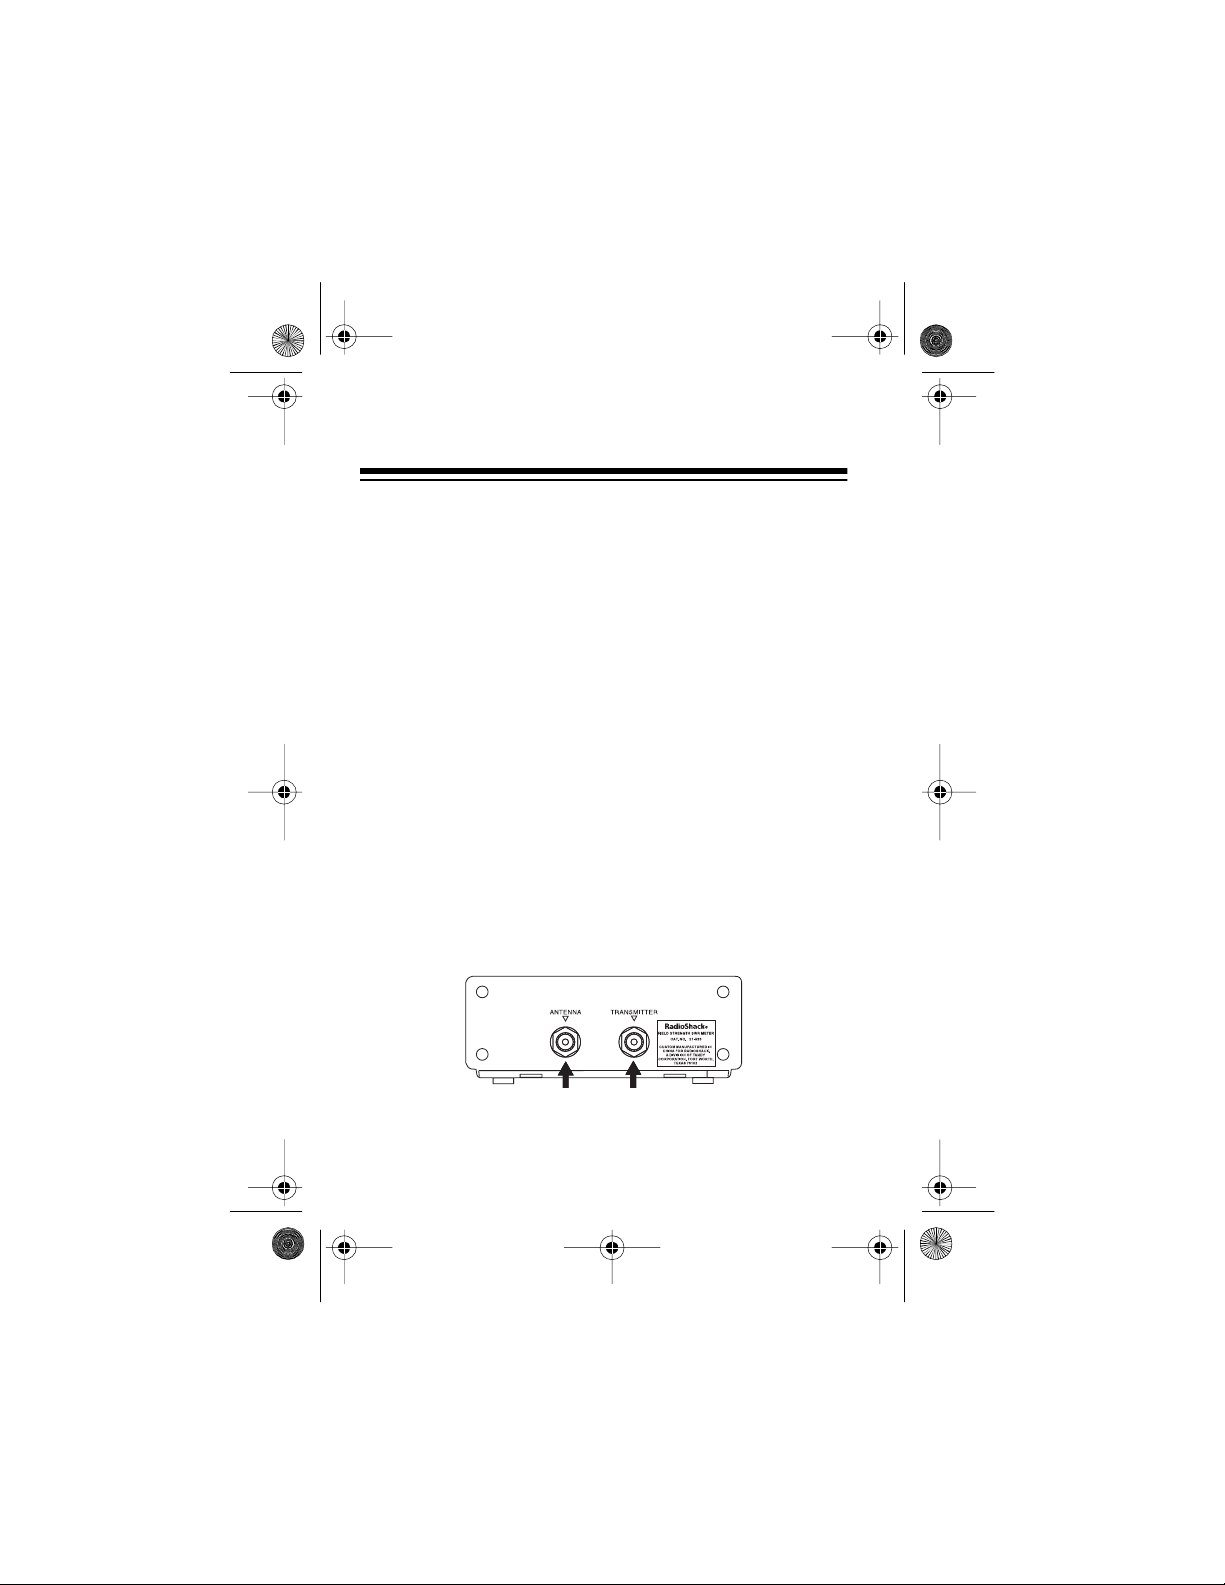
1. Turn off your radio. Then disconnect the antenna from
the radio and plug it into
meter.
2. Plug the coaxial cable into the radio’s antenna jack and
TRANSMITTER
into
on the back of the meter.
ANTENNA
on the back of the
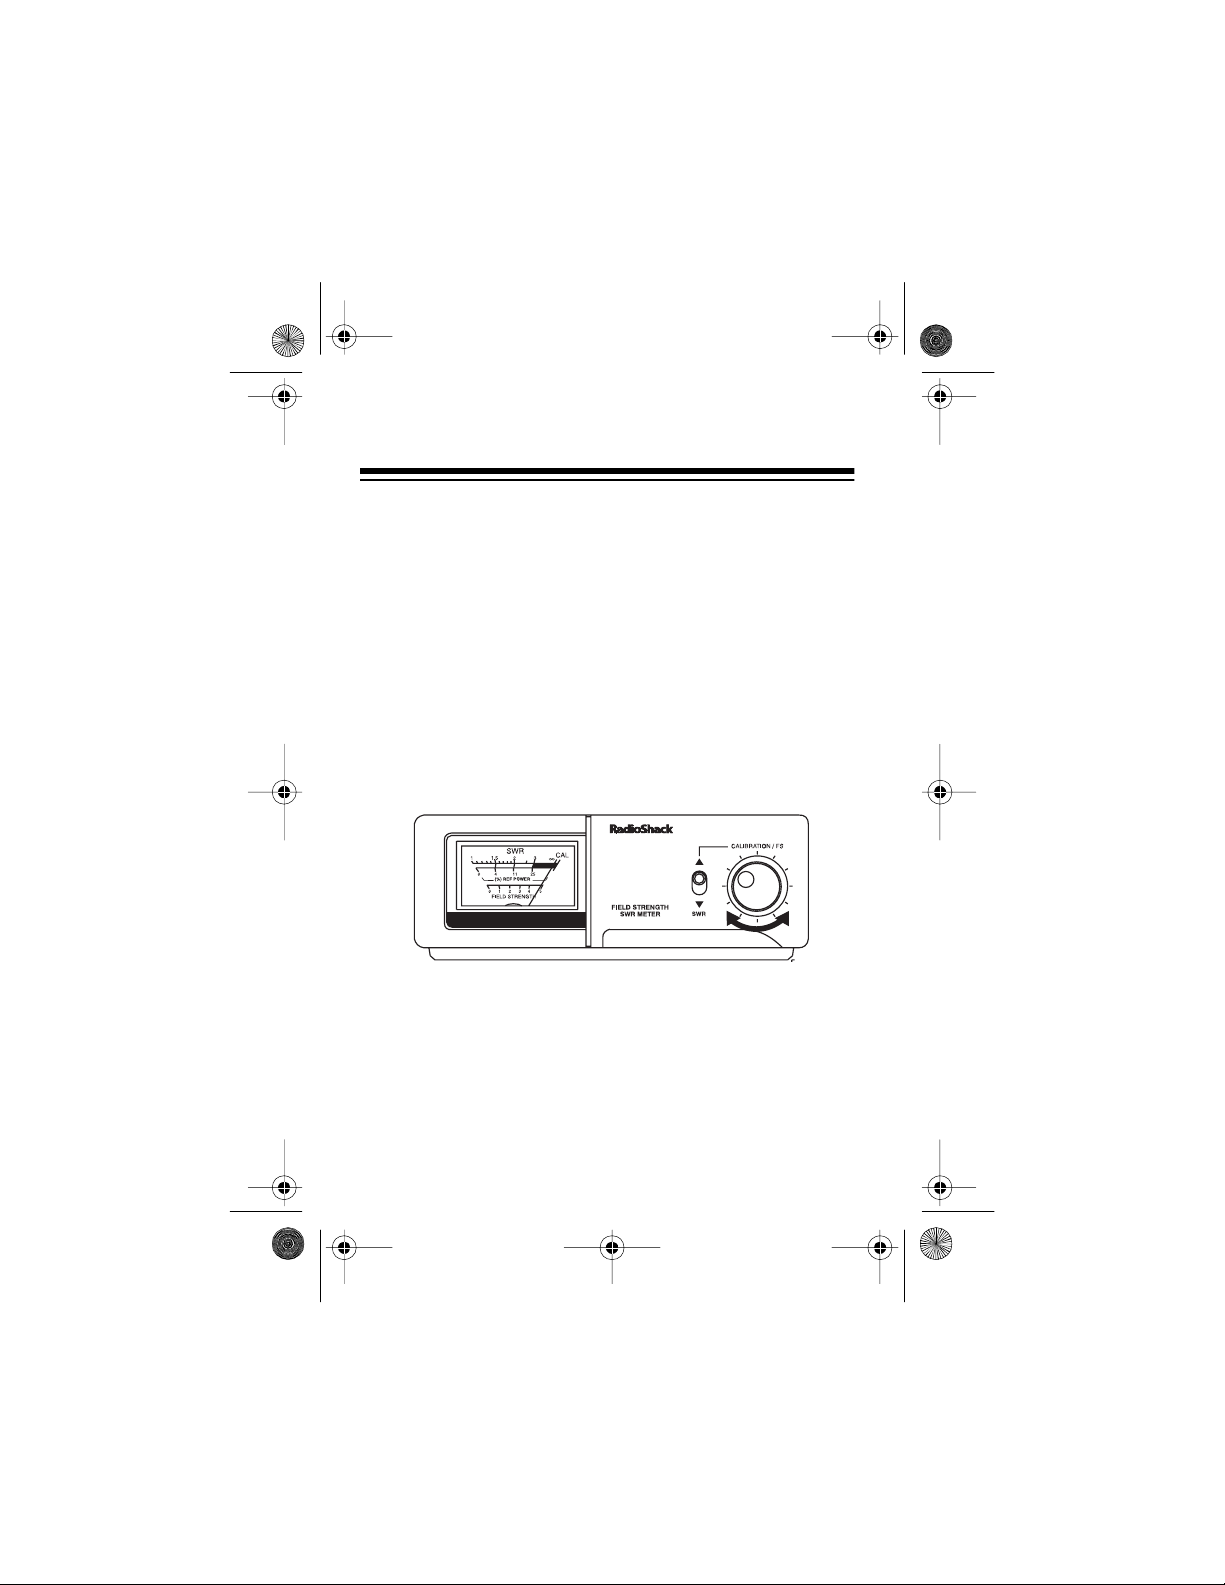
CALIBRATING THE METER/
MEASURING SWR
CALIBRATION/FS/SWR
1. Set
CALIBRATION/FS
.
on the front of the meter to
2. Turn on your radio. Then select a channel or frequency
on your transmit ter and hold down it s transmi t key. Do
speak into the microphone.
Notes:
• An SWR reading will be different for different frequen-
cies (channels). If you transmit on one channel more
often than any other, select that channel. If you trans-
not
5
Page 6
21-533.fm Page 6 Thursday, August 5, 1999 3:47 PM
mit on several channels, choose a frequency in the
middle of the range of channels you use. (For exampl e,
if you transmit on all 40 CB channels, choose Channel
20, because it is midway between Channel 1 and
Channel 40.)
• If you use a CB that has sideband modes (SSB), do not
select any of these modes. (Use only AM for SWR
measurements).
• If you have an amateur radio, select the continuous
wave (CW) or tuning mode to check the SWR.
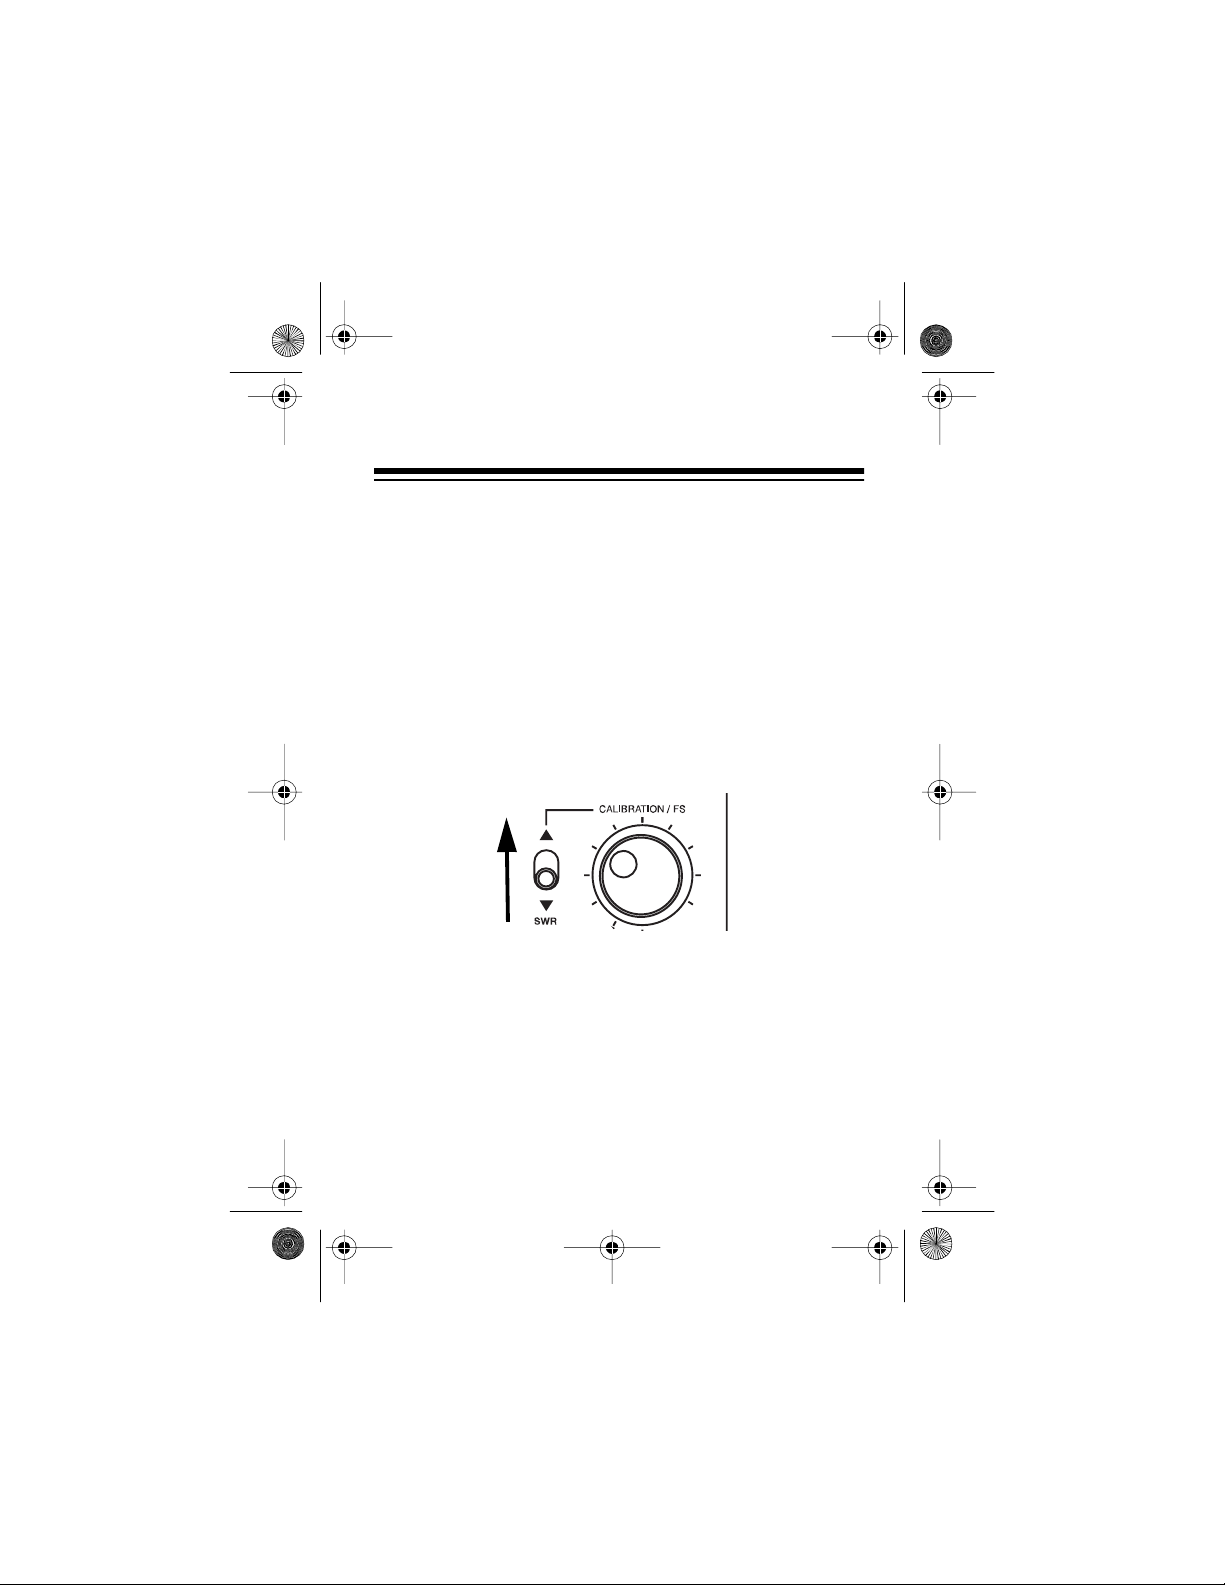
3. While you hold down the transmit key, rotate the meter’s
knob until the needle points to CAL.
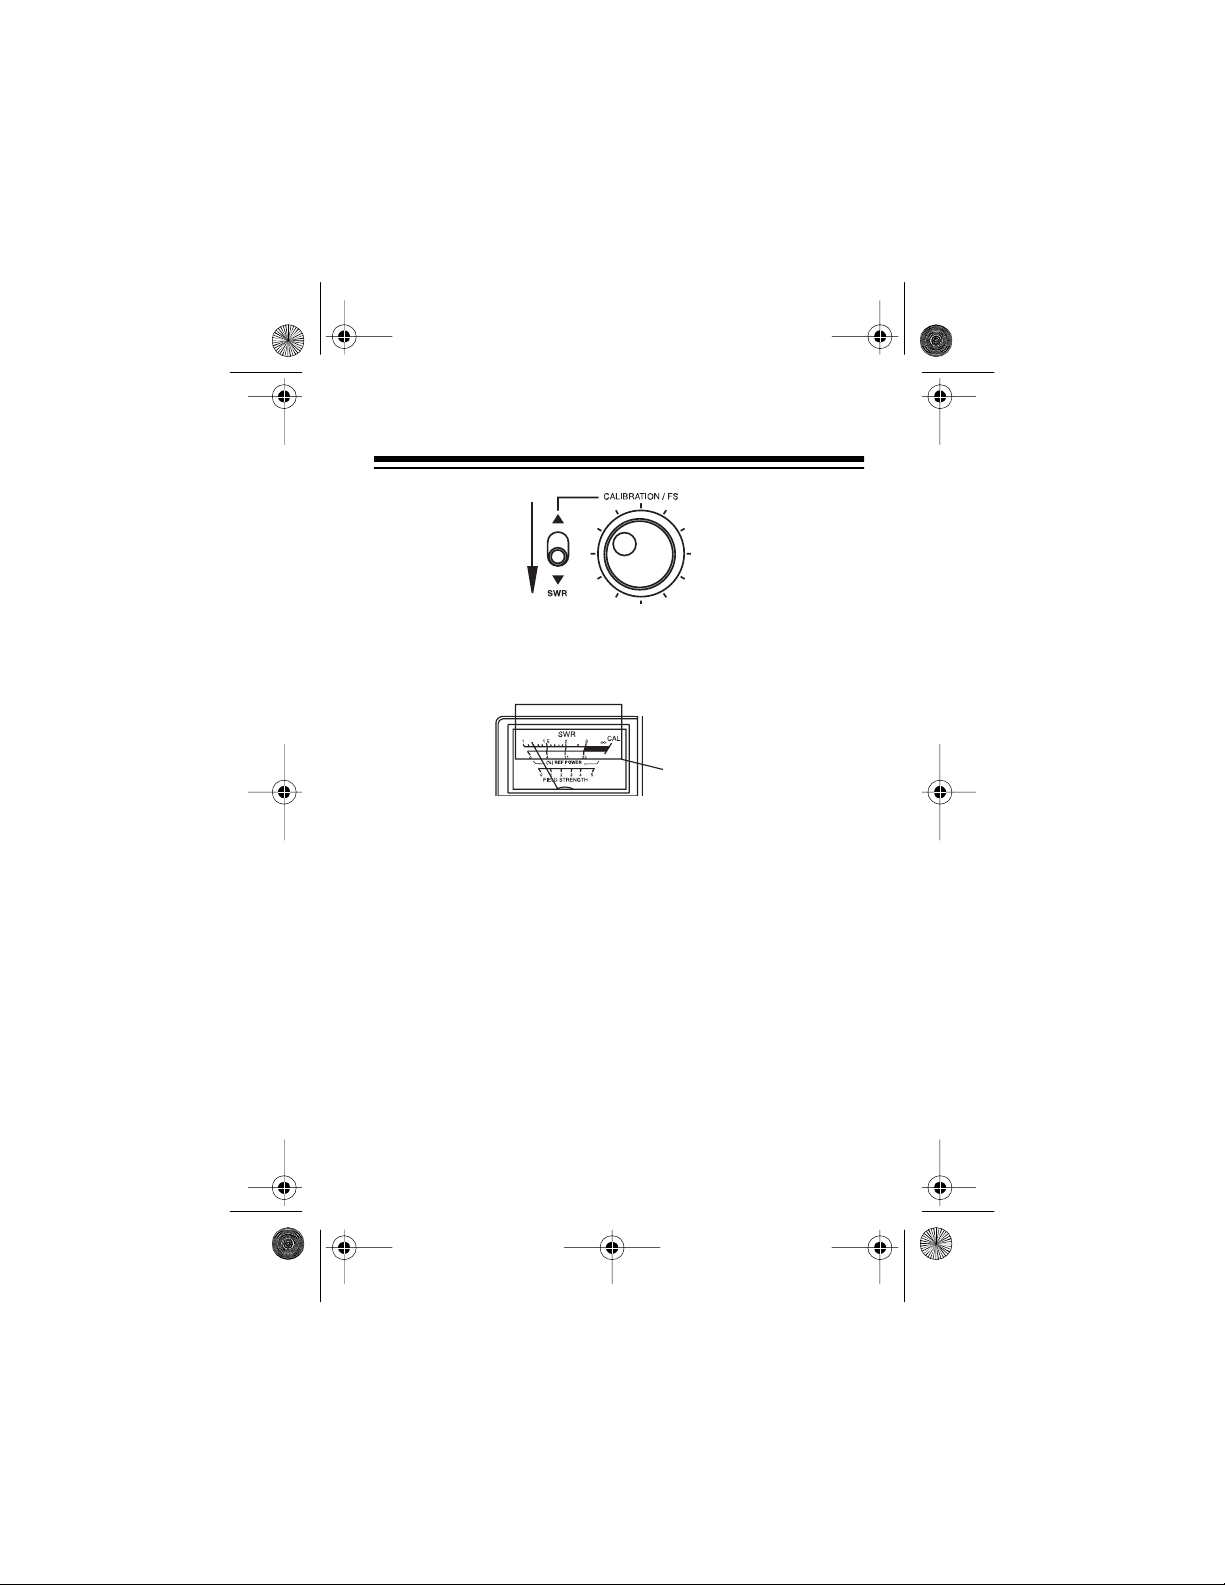
4. Release the transmit key, then set
SWR
to
.
6
CALIBRATION/FS/SWR
Page 7
21-533.fm Page 7 Thursday, August 5, 1999 3:47 PM
5. Press the transmit key again, then read the SWR by noting the needle’s position on the upper SWR scale. A
meter reading of 1 on the upper scale is ideal.
SWR Scales
The figure shown between the upper and lower scales on
the meter (% REF POWER) indicates the percentage of
power that is wasted through reflection of the signal from
the antenna back into the antenna cable. For example,
an SWR readin g of 1.5 also means that 4% of your si gnal
power is lost. However, 96% of the radio power is more
than enough for al mo st al l applications.
6. Repeat Steps 1–5 for each channel or frequency you
want to get an SWR reading for.
7
Page 8

21-533.fm Page 8 Thursday, August 5, 1999 3:47 PM
Interpreting SWR Readings
An ideal SWR reading is 1.0, but thi s reading is usually possible only un der l abor atory condi tions or wit h a du mmy l oad. Actual antenna installations have higher readings. The information below will help you interpret the readings you get.
SWR Efficiency Interpretation
1.0 to 1.5 Excellent The antenna cable and the
antenna length match the
transmitt er’s out put requirements almost perfectly.
1.5 to 2.0 Very good The antenna, the cable, and
the transmitter operate very
efficiently.
2.0 to 3.0 Acceptable The antenna, the cabl e, and
the transmitter operate with
some loss. If possible, adjust
your antenna or antenna
mounting system to i m prove.
Above 3.0 Inefficient Adjust your antenna or
antenna mounting system to
improve efficiency.
8
Page 9

21-533.fm Page 9 Thursday, August 5, 1999 3:47 PM
IMPROVING SWR
There are several ways to improve the SWR of your radio/antenna combinati on. Try these first.
• Be sure you are using the type of cable re commended fo r
your equipment. If the manufacturer recommends a 50ohm cable, do not substitute another type that has a different impedance.
• Confirm that you mounted your antenna according to the
manufacturer’s instructions. The angle and the base
arrangemen t can af fect the SWR reading.
• Adjust the length of your antenna according to the
instructions provided by the manufacturer. A change of
as little as
• See your radio’s and antenna’s owner’s manuals.
1
/8 inch can make a measurabl e difference.
9
Page 10

21-533 .fm Page 10 Thurs day, August 5, 1999 3:47 PM
MEASURING FIELD STRENGTH
Your meter can measure t he low le vels of radio f requency (RF)
generated by a radio transmitter. You can use these measurements to map the transmitting direction and coverage pattern
of your antenna, or to compare your radio and antenna’s efficiency before and a fter an adj us tment. You do not need to connect the meter to the antenna or the radio to measure field
strength.
It takes two people to measure field strength. For an accurate
measurement, you will need to map the site around your ant enna. Then, whil e someone presses the radio’s transmit key, you
will need to walk around the site around your antenna with the
meter, marking the readings you see.
Hints:
• In addition to the meter, we recommend you use the following items to help you measure field strength:
— Several photocopies of the template on Page 11
— 36 objects such as rocks or weighted pieces of paper
— 25 feet of rope or strong cord
— Calculator
— Pencil
— Compass
• Make sure there is at least 25 feet of open space in all
directions around your antenna.
10
Page 11

21-533 .fm Page 11 Thurs day, August 5, 1999 3:47 PM
PREPARING THE ANTENNA SITE
Before you use the meter to measure f ield strengt h, you shoul d
mark the site around the an tenna in a pa ttern that wil l hel p you
make the measurement.
An easy way to do t his i s to m ap the a rea arou nd yo ur ante nna
using a templat e li ke thi s one.
Antenna Location
11
Page 12

21-533 .fm Page 12 Thurs day, August 5, 1999 3:47 PM
The template shows an imaginary circle around an antenna.
The spokes on the template represent imaginary straight lines
measured from the center of the circle to 36 points spaced
equally arou nd the circle. Each straight li ne is 25 feet in length.
The numbers on the template (1–5) are a guide to show you
where to mark the fiel d str ength l evel t he met er dis plays a s you
measure.
Hint: To help measure a circular path around the antenna, tie
a slip knot in a 25-foot piece of rope or strong cord, slide the
knot loosely around your anten na, th en us e the rope as a gu ide
as you walk around the anten na.
Follow these steps to prepare the antenna site.
1. Starting at the antenna, use a compass to find due north.
Then walk due north and stop about 15 to 25 feet away
from the antenna.
2. Use an object such as a rock or a weighted pie ce of paper
to mark where you are standing.
3. Walk around the antenna in a circle, using more objects to
mark 35 more evenly spaced marks on the path.
Hint: You can quickly find the space to leave between each
mark by using a calculator. Measure the diameter of the
marked circle (from one side of the circle to the other). Then,
divide the diameter by 11.46.
12
Page 13

21-533 .fm Page 13 Thurs day, August 5, 1999 3:47 PM
For example, for a 50-foot diameter circle :
50 feet
11.46
So, you would place a mark every 4.363 feet (4 feet, 3 inches).
= 4.363 Feet
CALIBRATING THE METER/
MEASURING FIELD STRENGTH
Important:
limit the amount of ti me you can transmit witho ut a break or station identification.
1. Remove the supplied short wire antenna attached to the
Be sure to follow any radio service regulations that
bottom of the meter, then insert it into
meter.
FS ANT
on top of the
13
Page 14

21-533 .fm Page 14 Thurs day, August 5, 1999 3:47 PM
CALIBRATION/FS/SWR
2. Set
CALIBRATION/FS
to
.
3. To calibrate the meter, have your helper select a channel
or frequency on your transmitter and hold down its transmit key. Tell the helper
not
to speak into the microphone.
Then, while the helper holds down the transmit key, walk
around inside the marks you made using the steps in
“Preparing the Antenna Site” on Page 11, covering as
much area inside the circle as you can. As you walk,
watch the meter’s needle. If it moves to the right of 5 on
the FIELD STRENGTH scale, rotate the knob on the front
of the meter until the nee dle lines up with 5 on the scale.
Notes:
• If you use a CB that has sideband modes (SSB), do not
select any of these modes. (Use only AM for field
strength measu rements).
14
Page 15

21-533 .fm Page 15 Thurs day, August 5, 1999 3:47 PM
• If you have an amateur radio, select the continuous
wave (CW) or tuning mode to check the field strength.
4. To measure field strength, as the helper continues to hold
down the transmit key, move to the marked spot on the
circle due north of the antenna, then watch the meter’s
needle.
Note the reading on the FIELD STRENGTH scale and
place a dot on the template on Page 11 corresponding to
the reading at that poi nt.
In this example, the needle shows a 4 on the FIELD
STRENGTH scale. Place a dot where the spoke representating t he path you walked fr om the center of the circle
intersects the circle marked with a 4 on the template.
Direction of Travel
You are Here
Dot
15
Page 16

21-533 .fm Page 16 Thurs day, August 5, 1999 3:47 PM
5. Move to each marked spot along the circular path then
repeat Step 4 for each one, taking another reading and
recording that readi ng on the template.
Here is an example of a completed template. It shows an antenna mounted on the rear bumper of an automobile that is
parked facing north. The field strength readings form a twolobed pattern when plotted, meaning the antenna’s power is
greatest at the fr ont, weake r at the ba ck, and almost nonexist ent at the sides.
16
Page 17

21-533 .fm Page 17 Thurs day, August 5, 1999 3:47 PM
USING FIELD STRENGTH READINGS
TO TUNE YOUR RADIO AND ANTENNA
You can use field strength meas urements to monitor the effectiveness of changes you make to your radio and antenna
you make them. Changes you might make include:
• Installing a new antenna or antenna cable
• Adjusting the length of an antenna
• Changing the antenna mount on your vehicle
• Adjusting your radio’s transmitter
You do not need to connect the meter to the antenna or the radio to measure field strength, but you will need two people.
While someone presses the radio’s transmit key, you will need
to note the readings you see on the meter.
while
Important:
limit the amount of ti me you can transmit witho ut a break or station identification.
1. Remove the supplied short wire antenna attached to the
2. Set
3. To calibrate the meter, have your helper select a channel
Be sure to follow any radio service regulations that
bottom of the meter, then insert it into
meter.
CALIBRATION/FS/SWR
or frequency on your transmitter and hold down its transmit key. Tell the hel per
CALIBRATION/FS
to
not
to speak into the micr ophone.
FS ANT
on top of the
.
17
Page 18

21-533 .fm Page 18 Thurs day, August 5, 1999 3:47 PM
Then, while the helper holds down the transmit key, walk
around and adjust the meter’s knob until the meter’s needle moves to 3 on the FIELD STRENGTH scale.
Notes:
• If you use a CB that has sideband modes (SSB), do not
select any of these modes. (Use only AM for field
strength measu rements).
• If you have an amateur radio, select the continuous
wave (CW) or tuning mode to check the field strength.
4. Have the helper release the transmit key, then make a
change to your radio or antenna (such as adjusting the
antenna or transmitter or adding a new antenna).
5. When the change is completed, have the helper hold
down the transmit key again while you watch the meter’s
needle.
If the field strength reading is higher
, you have probably
improved the power output and efficiency of your radio
and antenna.
If the field strength reading is lower
, repeat
Steps 4 and 5.
Note: If you move the physical location, or change the
transmission direction, of your antenna, you mi ght have to
recalibrate the meter and measure the field strength
again. See “Calibrating the Meter/Measuring Field
Strength” on Page 13.
18
Page 19

21-533 .fm Page 19 Thurs day, August 5, 1999 3:47 PM
CARE AND MAINTENANCE
Your RadioShack CB/Ham Field-Strength SWR Meter is an
example of superior design and craftsmanship. The following
suggestions will help you care for your meter so you can enjoy it for years.
Keep the meter dry. If it gets wet, wipe it dry immediately. Liquids can con tain minerals t hat can
corrode the elec tr onic circuits.
Handle the meter gen tly an d caref ully. Droppi ng
it can damage circ uit boar ds and cases and can
cause the meter to work improperly.
Use and store the meter only in normal temperature envi ronmen ts. Te mperatur e ex tremes can
shorten the life of electronic devices and distort
or melt plastic parts.
Keep the meter away from dust and dirt, which
can cause premature wear of parts.
Wipe the meter with a damp cloth occasionally
to keep it looking new. Do not use harsh chemicals, cleaning solvents, or strong detergents to
clean the meter.
19
Page 20

21-533 .fm Page 20 Thurs day, August 5, 1999 3:47 PM
Modifying or tampering with your meter’s internal components can cause a malfunction and might invalidate the
meter’s warranty and void your FCC authorization to operate
it. If your meter is not operating as it should, take it t o your l ocal RadioShack store for assistance.
20
Page 21

21-533 .fm Page 21 Thurs day, August 5, 1999 3:47 PM
SCHEMATIC DIAGRAM
(illus - show schematic diagram
of meter)
21
Page 22

21-533 .fm Page 22 Thurs day, August 5, 1999 3:47 PM
SPECIFICATIONS
Measurable RF Power ..................................... 1–1000 Watts
SWR ................................................................................ 1–3
Impedance ..................... ............ ............ ............ ..... 50 Ohms
Frequency Range ................................................. 3–30 MHz
Dimensions (HWD) ...................... 2
Weight ............................................................................ 8 oz
Specifications are typical; individual units might vary. Specifications are subject to change and improvement without notice.
9
/16 ¥ 65/16 × 315/16 Inches
(65 ¥ 160 ¥ 100 mm)
(226 g)
22
Page 23

21-533 .fm Page 23 Thurs day, August 5, 1999 3:47 PM
Limited Ninety-Day W arranty
This product is warranted by RadioShack against manufacturing defects in material and workm anship unde r normal us e f or nin ety (90) days from the date of
purchase from RadioShack company-owned stores and authorized RadioShack franchisees and dealers. EXCEPT AS PROVIDED HEREIN, RadioShack MAKES NO EXPRESS WARRANTIES AND ANY IMPLIED
WARRANTIES, INCLUDING THOSE OF MERCHANTABILITY AND FITNESS
FOR A PARTICULAR PURPOSE, ARE LIMITED IN DURATION TO THE DURATION OF THE WRITTEN LIMITED WARRANTIES CONTAINED HEREIN.
EXCEPT AS PROVIDED HEREIN, RadioShack SHALL HAVE NO LIABILITY
OR RESPONSIBILITY TO CUSTOMER OR ANY OTHER PERSON OR ENTITY WITH RESPECT TO ANY LIABILITY, LOSS OR DAMAGE CAUSED DIRECTLY OR INDIRECTLY BY USE OR PERFORMANCE OF THE PRODUCT
OR ARISING OUT OF ANY BREACH OF THIS WARRANTY, INCLUDING,
BUT NOT LIMITED TO, ANY DAMAGES RESULTING FROM INCONVENIENCE, LOSS OF TIME, DATA, PROPERTY, REVENUE, OR PROFIT OR
ANY INDIRECT, SPECIAL, INCIDENTAL, OR CONSEQUENTIAL DAMAGES,
EVEN IF Ra di oShack HA S B EEN AD VI SED OF T HE PO SSIBILITY OF SUCH
DAMAGES.
Some states do n ot allo w the lim ita tions on how long an implie d war ranty la sts
or the exclusion of incidental or consequential dama ges, so the abov e limitations or exclusions may not apply to you.
In the event of a product defect during the warranty period, take the product and
the RadioShack sales rec eipt as proof of purchase date to any RadioSh ack
store. RadioShack will, at its option, unless otherwise provided by law:
(a) correct the defect by product repair without charge for parts and labor; (b) replace the product wi th o ne of the s ame or si milar de sign; o r (c ) ref und th e purchase price. All replaced parts and products, and products on which a refund is
made, become the property of Radi oShack. New or reconditioned parts and
products may be used in the performanc e of warranty service. R epaired or replaced parts and products are warranted for th e remainder of the or iginal warranty period. You will be charged for repair or replacement of the product made
after the expiration of the warranty period.
(continued)
23
Page 24

g
g
y
g
g
j
y g
y
21-533 .fm Page 24 Thurs day, August 5, 1999 3:47 PM
(continued)
tributable to acts of God, abuse, accident, misuse, improper or abnormal usa
failure to follow instructions, improper installation or maintenance, alteration,
li
than those provided b
ables such a s fuse s or bat teries ; (d) cos meti c dama
pin
service ad
This warrant
which var
This warranty does not cover: (a) damage or failure caused by or at-
htning or other incid ence of excess vol tage or current; (b) any repairs other
or insurance costs; or (f) costs of product removal, installation, set-up
ustment or reinstallation.
from state to state.
RadioShack Customer Relations, Dept. W, 100 Throckmorton St., Suite 600,
a Radi oShack Author ized S ervice F acility; (c) consum-
ives you specific legal rights, and you may also have other rights
Fort Worth, TX 76102
We Se rvi ce Wh at We Sell
e; (e) transportation, ship-
3/97
e,
RadioShack
A Division of Tandy Corporation
Fort Worth, Texas 76102
3A8 Printed in China
811081260A
 Loading...