

Page 1
A GUIDE TO QUARKXPRESS
p
The choice for publishing software worldwide.
FOR MAC OS
For internal use by licensee only. The information in this electronic file may not be disseminated in any form to any unlicensed person
or entity without prior written consent of Quark Technology Partnership or its licensee, Quark, Inc.
Page 2

A GUIDE TO QUARKXPRESS
The choice for publishing software worldwide.
p
Page 3

A Guide to QuarkXPress
Acknowledgments
Quark, Inc., acknowledges with gratitude the contribution of its Research
and Development Team, who developed QuarkXPress
™
and QuarkXPress
Passport
™
Edition. Quark also thanks its alpha and beta testing sites for their
help in testing QuarkXPress and QuarkXPress Passport Edition. Quark recognizes the contribution of all the team members and departments involved
in producing QuarkXPress and QuarkXPress Passport Edition worldwide
including: Product Management, Editorial, Art, Document Production,
Quality Assurance, Technical Support, and Localization.
This manual was produced entirely with QuarkXPress and Quark
Publishing System
™
(QPS™). It was output using a high-resolution
imagesetter. Copies were printed via offset lithography.
This manual may not, in whole or in part, be copied, photocopied,
reproduced, translated, or converted to any electronic or machinereadable form without prior written consent of Quark, Inc.
ii
Page 4

A GUIDE TO QUARKXPRESS
The choice for publishing software worldwide.
p
Page 5

iv
A Guide to QuarkXPress
©1999 Quark Technology Partnership as to the content and arrangement of this material.
All rights reserved.
©1986–1999 Quark Technology Partnership as to the technology. All rights reserved.
Quark, QuarkCopyDesk, QuarkDispatch, QuarkXPress, QuarkXTensions, Quark Publishing
System, QPS, and XTensions are trademarks of Quark, Inc., Reg. U.S. Pat. & Tm. Off. Cool
Blends, QuarkConnect, QuarkImmedia, QuarkLibraries, QuarkXPress Passport, and the
Quark logo are trademarks of the Quark companies.
AppleTalk, ImageWriter, LaserWriter, and Macintosh are registered trademarks of Apple
Computer, Inc. ImageWriter II, Macintosh Plus, Macintosh SE, Macintosh II, and Mac OS
are trademarks of Apple Computer, Inc.
PANTONE® Computer Video simulations displayed may not match PANTONE-identified
solid color standards. Use current PANTONE Color Reference Manuals for accurate color.
All trademarks noted herein are either the property of Quark, Inc., Pantone, Inc., or their
respective companies. “PANTONE Open Color Environment™(POCE™)” © Pantone, Inc.
1994. Pantone, Inc. is the copyright owner of “PANTONE Open Color Environment
™
(POCE™)” and Software which are licensed to Quark, Inc. to distribute for use only in combination with QuarkXPress and QuarkXPress Passport. “PANTONE Open Color Environment
™
(POCE™)” and Software shall not be copied onto another diskette or into memory unless as
part of the execution of QuarkXPress or QuarkXPress Passport.
FOCOLTONE and FOCOLTONE Colour System are registered trademarks of FOCOLTONE.
The concept, structure, and form of FOCOLTONE material and intellectual property are
protected by patent and copyright law. Any reproduction in any form, in whole or in part,
for private use or for sale, is strictly forbidden. Contact FOCOLTONE, Ltd. for specific
patent information.
TRUMATCH, TRUMATCH Swatching System, and TRUMATCH System are trademarks of
TRUMATCH, Inc.
Color Data is produced under license from Dainippon Ink and Chemicals, Inc.
Toyo Ink Mfg. Co., Ltd. is the copyright owner of TOYO INK COLOR FINDER™SYSTEM
AND SOFTWARE which is licensed to Quark, Inc. to distribute for use only in connection
with QuarkXPress. TOYO INK COLOR FINDER™SYSTEM AND SOFTWARE shall not be
copied onto another diskette or into memory unless as part of the execution of QuarkXPress.
TOYO INK COLOR FINDER™SYSTEM AND SOFTWARE © TOYO INK MFG. CO., LTD.,
1991. COLOR FINDER is in the process of registration as the registered trademark of Toyo
Ink Mfg. Co., Ltd. COLOR FINDER™computer video simulation used in the product may
not match the COLOR FINDER™book, and additionally some printer color used in the product may also not match. Please use the COLOR FINDER™book to obtain the accurate color.
Quark, Inc. does not warrant, guarantee, or make any representations regarding the use or the
results of the use of any color system included in Quark products. Video simulations may not
match published color standards. Refer to current materials of the specific color company
(i.e., PANTONE, Inc.; FOCOLTONE, Ltd.; TRUMATCH, Inc.; TOYO INK, Mfg. Co., Ltd.; or
other companies involved in the process of color reproduction) for accurate color samples.
All other trademarks are the properties of their respective owners.
Page 6

v
A Guide to QuarkXPress
Apple Disclaimer
The following disclaimer is required by Apple Computer, Inc. It applies only to Apple software.
All other software is covered by Quark’s limited warranty.
APPLE COMPUTER, INC. (“APPLE”) MAKES NO WARRANTIES, EXPRESS OR
IMPLIED, INCLUDING WITHOUT LIMITATION THE IMPLIED WARRANTIES OF
MERCHANTABILITY AND FITNESS FOR A PARTICULAR PURPOSE, REGARDING
THE APPLE SOFTWARE. APPLE DOES NOT WARRANT, GUARANTEE OR MAKE ANY
REPRESENTATIONS REGARDING THE USE OR THE RESULTS OF THE USE OF THE
APPLE SOFTWARE IN TERMS OF ITS CORRECTNESS, ACCURACY, RELIABILITY,
CURRENTNESS OR OTHERWISE. THE ENTIRE RISK AS TO THE RESULTS AND PERFORMANCE OF THE APPLE SOFTWARE IS ASSUMED BY YOU. THE EXCLUSION
OF IMPLIED WARRANTIES IS NOT PERMITTED BY SOME STATES. THE ABOVE
EXCLUSION MAY NOT APPLY TO YOU.
IN NO EVENT WILL APPLE, ITS DIRECTORS, OFFICERS, EMPLOYEES OR AGENTS
BE LIABLE TO YOU FOR ANY CONSEQUENTIAL, INCIDENTAL OR INDIRECT
DAMAGES (INCLUDING DAMAGES FOR LOSS OF BUSINESS PROFITS, BUSINESS
INTERRUPTION, LOSS OF BUSINESS INFORMATION, AND THE LIKE) ARISING
OUT OF THE USE OR INABILITY TO USE THE APPLE SOFTWARE EVEN IF APPLE
HAS BEEN ADVISED OF THE POSSIBILITY OF SUCH DAMAGES. BECAUSE SOME
STATES DO NOT ALLOW THE EXCLUSION OR LIMITATION OF LIABILITY FOR
CONSEQUENTIAL OR INCIDENTAL DAMAGES, THE ABOVE MAY NOT APPLY TO
YOU. Apple’s liability to you for actual damages from any cause whatsoever, and regardless
of the form of the action (whether in contract, tort (including negligence), product liability
or otherwise), will be limited to $50.
Page 7

Page 8

vii
A Guide to QuarkXPress
Introduction
Publishing with QuarkXPress
xvii
About this Book
xxi
About the Other Books
xxiv
QuarkXPress Basics
xxv
The Interface
xxx
1
Tools
The Tool Palette
1.3
Tool Overview
1.5
Item Tool and Content Tool
1.7
Rotation Tool
1.12
Zoom Tool
1.14
Standard-Shape Text Box Tools
1.16
Standard-Shape Picture Box Tools
1.18
Straight Line Tools
1.20
Straight Text-Path Tools
1.22
Bézier Tools
1.24
Freehand Tools
1.26
Linking/Unlinking Tools
1.28
Page Grabber Hand Tool
1.30
2
Palettes
Displaying and Arranging Palettes
2.3
Measurements Palette
2.4
Document Layout Palette
2.14
Style Sheets Palette
2.17
Colors Palette
2.19
Trap Information Palette
2.21
Lists Palette
2.26
Table of Contents
Page 9

viii
A Guide to QuarkXPress
3
Menus and Dialog Boxes
File Menu
3.3
Edit Menu
3.33
Style Menu for Text
3.115
Style Menu for Pictures
3.137
Style Menu for Lines
3.146
Item Menu
3.149
Page Menu
3.201
View Menu
3.213
Utilities Menu
3.221
4
Customizing QuarkXPress
Setting Defaults
4.3
Setting Preferences
4.5
Kerning and Tracking Tables,
Hyphenation Exceptions, and Bitmap Frames
4.8
Saving XPress Preferences
4.10
Using XTensions
4.13
Managing Print Styles and PPDs
4.16
Using Apple Events Scripts
4.18
Understanding Nonmatching Preferences
4.19
5
Layout Tools
Arranging Documents
5.3
Navigating Documents
5.4
Changing Document Views
5.7
Using the Pasteboard
5.8
Using Rulers and Guides
5.10
Specifying Greeking
5.14
Page 10

ix
A Guide to QuarkXPress
6
Document Basics
Creating New Documents
6.3
Opening Documents
6.5
Saving Documents
6.6
Saving Documents Automatically
6.8
Saving Revisions of Documents
6.10
Saving Documents as Templates
6.12
7
Box Basics
Creating Boxes
7.3
Resizing Boxes
7.8
Reshaping Boxes
7.10
Moving Boxes
7.18
Framing Boxes
7.20
Coloring Boxes
7.29
Merging and Splitting Boxes
7.32
Filling and Converting Boxes
7.38
Understanding Symmetry and Smoothness
7.40
8
Line Basics
Creating Lines
8.3
Resizing Lines
8.7
Reshaping Lines
8.10
Moving Lines
8.16
Applying Line Styles
8.21
9
Manipulating Items
Selecting Items
9.3
Moving, Reshaping, and Resizing Items
9.4
Cutting, Copying, and Pasting Items
9.5
Clearing and Deleting Items
9.7
Table of Contents
Page 11

x
A Guide to QuarkXPress
Undoing and Redoing
9.8
Locking and Unlocking Items
9.9
Controlling the Stacking Order of Items
9.10
Grouping Items
9.12
Duplicating and Repeating Items
9.14
Spacing and Aligning Items
9.17
Rotating and Skewing Items
9.20
10
Document Layout
Creating Master Pages
10.3
Formatting and Applying Master Pages
10.9
Creating Multipage Spreads
10.12
Numbering Pages and Sectioning Documents
10.15
Inserting, Deleting, and Moving Pages
10.17
Working with Text Chains
10.21
Creating “Continued” References
10.26
Working with Columns
10.28
Changing Page Size and Facing-Pages Status
10.30
Copying Items and Pages Between Documents
10.32
11
Text Basics
Editing Text
11.3
Importing and Exporting Text
11.6
Finding and Changing Text
11.9
Finding and Changing Attributes
11.12
Changing Fonts in a Document
11.16
Checking Spelling
11.19
Using Auxiliary Dictionaries
11.22
Page 12

xi
A Guide to QuarkXPress
12
Typography
Confirming Typographic Preferences
12.3
Applying Character Attributes
12.5
Specifying Kerning and Tracking
12.13
Applying Paragraph Attributes
12.18
Specifying Alignment and Indents
12.19
Specifying Leading and Paragraph Spacing
12.22
Setting Tabs
12.25
Controlling Widow and Orphan Lines
12.28
Controlling Hyphenation and Justification
12.30
Working with Style Sheets
12.39
Positioning Text in Text Boxes
12.48
13
Graphics in Typography
Converting Text to Boxes
13.3
Running Text Around Items
13.5
Creating Text Paths
13.16
Creating Initial Caps
13.21
Specifying Anchored Rules
13.24
Anchoring Boxes and Lines in Text
13.27
14
Pictures
Understanding Picture File Formats
14.3
Importing Pictures
14.9
Exporting Pictures
14.13
Manipulating Pictures
14.16
Applying Contrast to Pictures
14.23
Applying Custom Halftone Screens to Pictures
14.27
Creating and Editing Clipping Paths
14.29
Listing and Updating Pictures
14.38
Table of Contents
Page 13

xii
A Guide to QuarkXPress
15
Color
Specifying Spot Versus Process Colors
15.3
Specifying Matching System Colors
15.4
Creating and Editing Colors
15.6
Applying Color, Shade, and Blends
15.19
16
Trapping
Understanding Trapping
16.3
Trapping Guidelines
16.5
Specifying Default Trapping
16.6
Specifying Color-Specific Trapping
16.12
Specifying Item-Specific Trapping
16.16
Trapping EPS Pictures to Background Colors
16.21
Creating and Using a Rich Black
16.23
17
Libraries
Creating New Libraries
17.3
Opening Libraries
17.4
Working with Libraries
17.5
Working with Labels
17.8
Saving Libraries
17.10
18
Books
Creating New Books
18.3
Opening and Saving Books
18.4
Working with Chapters
18.6
Controlling Page Numbers
18.11
Synchronizing Chapters
18.13
Printing Chapters
18.16
Creating Tables of Contents and Indexes
18.18
Page 14

xiii
A Guide to QuarkXPress
19
Lists
Preparing Style Sheets for Lists
19.3
Specifying Lists
19.4
Displaying Lists
19.7
Updating Lists
19.9
Working with Lists in Books
19.11
20
Indexes
Installing the Index XTensions Software
20.3
Using the Index Palette
20.4
Specifying the Index Marker Color
20.9
Creating Index Entries
20.10
Creating Cross-References
20.14
Editing and Deleting Index Entries
20.17
Building Indexes
20.19
Editing Final Indexes
20.22
Nested Index Quick Reference
20.24
Run-in Index Quick Reference
20.25
21
Output
New Printing Features in QuarkXPress
21.3
Specifying Printing: The Print Dialog Box Tabs
21.4
Specifying Print Dialog Box Settings
21.17
Creating and Using Print Styles
21.19
Printing Color Separations
21.21
Specifying Setup for Imagesetters
21.22
Updating Picture Paths
21.24
Printing Odd-Sized Documents
21.25
Preparing Documents for Service Bureaus
21.29
Understanding DPI vs. LPI
21.30
Table of Contents
Page 15

xiv
A Guide to QuarkXPress
22
Technical Notes
An Introduction to Troubleshooting
22.3
The Document Environment
22.4
The Application Environment
22.6
The Operating System Environment
22.8
The PostScript Environment
22.10
23
QuarkXPress Passport Edition
QuarkXPress Passport Terms
23.3
Managing Language Files
23.4
Specifying the Program Language
23.5
Assigning Languages to Paragraphs
23.6
Checking Spelling
23.7
Hyphenation Methods
23.9
Saving Documents with Multiple Languages
23.11
24
Appendices
Error Messages
24.3
XPress Tags
24.29
Crossplatform Issues
24.42
25
Glossary
26
Index
Page 16

Introduction
Publishing with QuarkXPress
xvii
About this Book
xxi
About the Other Books
xxiv
QuarkXPress Basics
xxv
The Interface
xxx
For internal use by licensee only. The information in this electronic file may not be disseminated in any form to any unlicensed person or entity
without prior written consent of Quark Technology Partnership or its licensee, Quark, Inc.
Page 17

Introduction
From the simplest brochure to highly complex
corporate communications, QuarkXPress encourages
you to push the boundaries of professional publishing.
With superior color capabilities, exceptional picture
handling, and precise typographic controls,
QuarkXPress increases your publishing power.
Create exciting and effective pieces that deliver your
message with impact. It’s no wonder QuarkXPress is
the leading choice among professional designers and
corporate publishers worldwide.
Page 18

xvii
A Guide to QuarkXPress
Publishing with QuarkXPress
Publishing with QuarkXPress
QuarkXPress is electronic publishing software. You can use it to create any
kind of publication, from a black-and-white business card to a multicolor
magazine. The best way to integrate QuarkXPress into your production
process depends on many factors, including the kind of publications you
create, how they are printed, the other hardware and software you use for
publishing, and the size and needs of your production staff. You will find
that, no matter how you use QuarkXPress, the program’s ability to perform
virtually all layout and production tasks will make the publishing process
easier and will let those who use it do their jobs faster and more creatively.
Planning the project
Before you can begin creating a publication, you should answer a number
of basic questions. First, what kind of publication will you create? In the
case of a magazine or newspaper publishing organization, that decision
has already been made. An advertising agency working with a corporate
client, however, may have to do some information gathering before
deciding what kind of publication will best meet a client’s needs.
Once you know what you’ll be publishing, you can address other
important issues. What size will your publication be, and what colors
will be used to create it? How will your publication be produced,
printed, and distributed? And, what effect do budget considerations
have on the publication planning process? Production can begin only
after these issues have been addressed.
Page 19

xviii
A Guide to QuarkXPress
Designing the layout
A designer must make dozens of decisions when planning and designing
a publication. Page size, margin widths, number of columns, the use of
typefaces and type styles, and the use of color are just a few of the design
issues that must be considered. QuarkXPress can help designers work
through the planning process and develop a preliminary design. During
production, the flexible layout environment of QuarkXPress lets designers
rework and refine the preliminary design until they are satisfied.
Editing text
Because QuarkXPress includes powerful word processing capabilities, you
can write directly in QuarkXPress. Basic editing features like cut, copy,
paste, and delete, plus more sophisticated features such as drag-and-drop
text, find/change, and spell checking let writers enter and edit text without
having to purchase and learn a separate word processing program. For
long publications, QuarkXPress provides features for tracking multiple
documents, generating a table of contents, and creating an index. It is
also possible to generate text using a word processing program, and then
import the text directly into a QuarkXPress layout.
Creating and importing graphics
While writers and editors work on text, graphic artists create the illustrations, photographs, and other graphic elements that will accompany
text and enhance the layout.
Using the drawing tools in QuarkXPress, designers can create boxes and
lines with straight edges and Bézier curves. The flexible drawing tools let
designers create charts, line drawings, and other design elements directly
in QuarkXPress. You can also flow text along any shaped path, and even
convert characters to boxes.
Introduction
Page 20

xix
A Guide to QuarkXPress
Publishing with QuarkXPress
With QuarkXPress, you can import many types of pictures, including
line art, and grayscale or color digital images in various file formats (TIFF,
EPS, etc.). QuarkXPress has the ability to read or create a custom clipping
path for an image. This lets you precisely control how much of an
imported picture appears on the page. Once imported, you can use
QuarkXPress to separate color layouts into color separation plates.
Fine-tuning the layout
The final stage of production begins when all the editorial and design
elements are ready to be combined and laid out on the page. No matter
how you generate your text and graphics, the page layout features in
QuarkXPress let you build documents quickly.
You can create templates for often-used document layouts so that you can
quickly place text and pictures onto formatted pages. Using paragraph
style sheets, you can style text into headlines, subheads, body copy, and
captions, making even complicated text formatting a simple, one-step
process. With character style sheets, you can apply multiple formats to
individual words in one step.
Typographic polishing can include everything from precise adjustments, to
leading, kerning, line spacing, word spacing, and character spacing to finetuning hyphenation and line breaks. Text adjustments can be made locally
or implemented on a global scale by editing kerning and tracking tables
and using an increasingly sophisticated group of typographic preferences.
Imported pictures can be framed, rotated, skewed, sized, and cropped.
You can also add background color and shade to some imported picture
formats. Sophisticated text runaround controls let you create elegant
text wraps around pictures and items.
Page 21

xx
A Guide to QuarkXPress
The electronic publishing advantage
By taking advantage of the speed and precision offered by computer
technology, you can use QuarkXPress to produce top-quality publications
in less time and for less money than those who still use traditional
manual techniques. The program’s ability to handle all facets of document
production — from preliminary design through prepress production —
makes it the ideal tool for any publishing situation. But QuarkXPress is
more than a tool. It provides a work environment that gives you the
freedom to be more creative and more productive.
Printing
The printing process actually begins with preliminary, rough copies in the
early stages of production. You can print roughs with an inkjet or laser
printer; you can use a color printer to proof copies of color publications.
Because text and pictures are easily edited, you can make changes at any
time during the production process.
When it is time to print the final version, a laser printer may be adequate for your needs. But, if you are working on a sophisticated publication, you may be working with a service bureau or in-house production
department to produce imagesetter output — including separation plates
for color printing. Although QuarkXPress lets you control many prepress
factors such as trapping, color separation, and screening, many users
have their output provider set these specifications to ensure their job
looks great when it comes off the press.
XTensions
If QuarkXPress does not already meet all your publishing needs, you
can add custom features with XTensions. Many XTensions exist to fulfill
specific functions that were not built into the application itself.
Introduction
Page 22

xxi
A Guide to QuarkXPress
About this Book
A Guide to QuarkXPress is not meant to be read cover to cover. The book is
designed so that you can look things up quickly, find out what you need to
know, and get on with your work. However, if you need more comprehensive
information about electronic publishing, that is also provided.
Where we’re coming from
This book assumes you are familiar with your computer and know how to:
• Launch an application
• Open, save, and close files
• Use menus, dialog boxes, and palettes
• Use the mouse, keyboard commands, and modifier keys
If you need help performing any of these tasks, consult the documentation
resources (user/reference guides) provided with your computer.
Where to look
This book is split into two distinct sections: Introducing QuarkXPress, which
describes the interface, and
Using QuarkXPress, which offers steps for
specific tasks. Both sections include concept blocks, which provide helpful
background information about various features without interrupting tasks.
Introducing QuarkXPress
If you stumble on an unfamiliar command, or want more information
about how to use a tool, check the first section of this book:
Introducing
QuarkXPress.
A black bar on the upper right corner of each two-page
spread makes the section easy to find.
About this Book
Page 23

xxii
A Guide to QuarkXPress
The Introducing section explains the QuarkXPress interface, including
menus and dialog boxes, tools, palettes, and preferences. Commands are
documented in menu order, starting with the first command in the
File
menu and ending with the last command in the Utilities menu.
Using QuarkXPress
Whenever you think to yourself, “I wonder how to do this …,” check the
second section of this book,
Using QuarkXPress. The detailed Table of
Contents at the beginning of this book, the condensed Table of Contents
at the beginning of each chapter, and the Index should help you quickly
find the information you need.
Each chapter in the
Using section includes a series of specific tasks such
as “Creating New Documents” or “Importing Pictures.” Instructions for
accomplishing tasks are presented in steps or bullets. Tips from expert
QuarkXPress users are frequently included in the sidebars of these pages.
Concept blocks
If you need background information about publishing tasks or issues,
look at the concept blocks throughout this book. Concept blocks, on
shaded pages, are placed at the beginning or end of chapters. The first
word in the title of a concept block is usually “Understanding,” for
example: “Understanding Picture File Formats.” You can read concept
blocks any time — they’re designed to round out your knowledge of
electronic publishing without relating to a specific task.
What you’re looking at
This book uses various conventions (styles) to help you find information quickly:
Bold type style
The names of QuarkXPress menu commands, dialog boxes, and other
controls are set in bold type. For example: “The
Colors palette lets you
apply colors to text, pictures, lines, and box backgrounds.”
Introduction
Page 24

xxiii
A Guide to QuarkXPress
References and arrows
Whenever a feature is mentioned, a reference shows how to access that feature. For example: “The
Save as dialog box (File menu) lets you save a copy
of a document.” Arrows are used to represent the menu path to a feature.
For example: “Choose
File & Print to display the Print dialog box.”
Icons
The names of tools and graphic buttons are followed by the appropriate icons. For example: “Select the Item tool
e in the Tool palette” or
“Click the centered button
} in the Measurements palette.”
Charts
The Introducing QuarkXPress section charts the range of values that any
control can accept. Charts follow this format:
Range Measurement system Smallest increment
2 to 720 pt various (", pt, cm, etc.) .001
The “Range” is expressed in the default measurement system. You can
enter values in fields according to the “Measurement system” column. For
example, measurements may be expressed in pixels, points, or any measurement system supported by QuarkXPress. (The example above shows a
feature that accepts any supported measurement system.) The “Smallest
increment” is often the smallest unit of measurement you can enter.
Notes and tips
R
Notes provide helpful information about particular features.
S
Tips provide extra information about particular features and general techniques for electronic publishing.
About this Book
Page 25
xxiv
A Guide to QuarkXPress
About the Other Books
The QuarkXPress box also contains a tutorial, A Preview to QuarkXPress,
and various other cards and booklets.
A Preview to QuarkXPress
If you are new to electronic publishing applications, this tutorial is for
you. The introduction familiarizes you with the QuarkXPress interface,
and the exercises highlight the primary features of this version.
What’s New in QuarkXPress 4.0
If you are a proficient QuarkXPress user, start with this booklet. It provides
a brief overview of all the new features in this version of QuarkXPress to
get you started with your new software as quickly as possible.
Other pieces in the box
Your QuarkXPress box also includes installation and user registration
instructions, service plan information, a book about QuarkXPress color
features, a list of keyboard commands, and documentation for any latebreaking features.
Choosing File &Print.
Introduction
Page 26
QuarkXPress Basics
To use QuarkXPress effectively, you need to understand the basic concepts.
Read this section if you are new to QuarkXPress or if you need a quick
refresher. QuarkXPress uses concepts from traditional publishing to make
its tools and layout environment more familiar.
Document environment
A work area called the pasteboard surrounds each page or spread. You
use the pasteboard to store items temporarily or to experiment with
something before you put it on a page. You can have individual pages or
multipage spreads, and you can add, move, and delete pages as you
work. Pages can be manipulated using the
Document Layout palette,
the
Page menu, and in Thumbnails view.
Basic tools
QuarkXPress pages contain items. Items are text boxes, text paths, picture boxes, and lines; they are created in QuarkXPress and manipulated
primarily with the Item tool
e. Contents are text and pictures; they are
manipulated primarily with the Content tool
E.
In general, you will use
Item menu commands and the left half of the
Measurements palette when working with items. Likewise, you will use
the
Style menu and the right half of the Measurements palette when
working with contents.
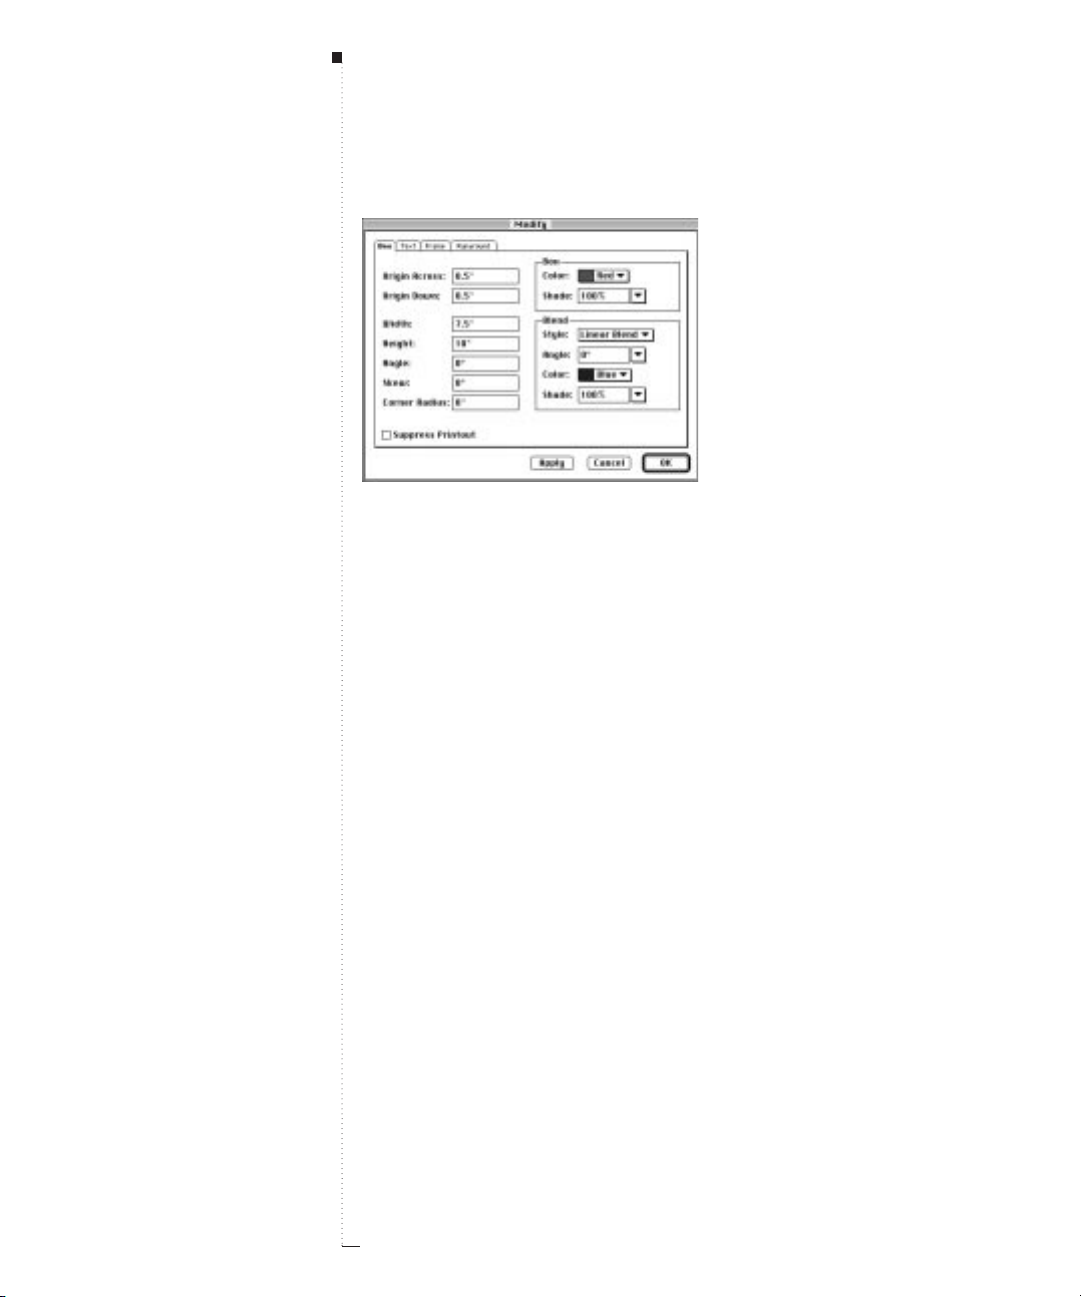
The controls in the Measurements palette change according to the current selection — whether
it is a text box, picture box, line, text, or picture.
xxv
A Guide to QuarkXPress
QuarkXPress Basics
Page 27

xxvi
A Guide to QuarkXPress
The box concept
In QuarkXPress, most things go into a box. Text is contained in text
boxes and pictures are contained in picture boxes. Text can also be
placed on a path. You have control over the size, shape, layering, color,
and other properties of each box or path — and you have similar control
over the text or pictures contained in them.
Working with text
A text box or a text path contains text. To create a text box or path, use a
Text Box tool
T or a Text Path tool ˜. Then use the Get Text command
(
File menu) to import text files from other sources, including many popular word processors, databases, and spreadsheets. Or, create or select a
text box with the Content tool
E and begin typing.
The
Style menu provides formatting options such as fonts, type styles, and
colors when you are working with text. High-end typographic controls are
provided through a combination of menu items, keyboard commands,
and preferences. To simplify text formatting, you can create paragraph and
character style sheets (
Edit & Style Sheets) and apply them using a menu
command, the
Style Sheets palette, or keyboard commands.
To flow text from one text box to the next (or from one text path to the
next), you can create an automatic chain of text. You can also use the
Linking
u and Unlinking U tools to manually create custom text
chains. To create an automatic text chain, check
Automatic Text Box
in the New Document dialog box (File & New & Document).
Placing pictures
Picture is a general term for any type of graphic file in a QuarkXPress document. Just as text boxes contain text, picture boxes contain pictures. To
create a picture box, use any of the picture box creation tools
p, x, O,
Introduction
Page 28

xxvii
A Guide to QuarkXPress
å, 7, ƒ, or ∂. Then, use the Get Picture command (File menu) to
import a copy of a picture file. You can also paste a picture that has been
copied to the
Clipboard into your document.
When you are working with pictures, the
Style menu provides formatting choices like contrast, line screen, and colors. Picture formatting
options are selectively available depending on the imported picture’s
graphic file format.
Shapes and lines
To create a colored shape, create any shape picture box and apply a color
to the background of the box. Background colors are applied to boxes
using the
Colors palette (View menu) or the Box tab of the Modify dia-
log box (
Item menu). The Merge controls (Item menu) let you create
boxes with multiple contours and combine different boxes.
Create custom line styles using the
Dashes & Stripes dialog box (Edit
menu); then use line creation tools to draw any shape lines. When a line
is selected, the
Modify dialog box and the Style menu provide options
for formatting lines such as style, width, and arrowheads.
Electronic paste-up
Items can be moved, resized, reshaped, and layered with other items. You
can drag items into place by aligning them with rulers and guides, or you
can enter precise
X and Y coordinates in the Measurements palette.
Each type of item has its own
Modify dialog box (Item menu) that controls the size, position, background color, position of the contents, and
more. To flow text around pictures, lines, and other items, use the
Runaround tab in the Modify dialog box. Other Item menu commands
let you group items so they can be moved together, change the stacking
order (layering) of items, duplicate items, and space selected items evenly.
QuarkXPress Basics
Page 29
xxviii
A Guide to QuarkXPress
When you choose Item & Modify, a dialog box specific to the selected item is displayed. The
various tabs in the
Modify dialog box provide access to different sets of controls.
Master pages and templates
Items (pictures and text) that need to go on many pages in your document can be placed on master pages. Applying a master page to a document page places the recurring items automatically. For example, if you
are working on a newsletter, you might want a master page for the cover
and nameplate, one for the inside spreads, and one with mailing information for the back page. Master pages can be created, edited, and applied
using the
Document Layout palette. Once you’ve established the format-
ting of a publication, you can save a document as a reusable template.
Customizing QuarkXPress
QuarkXPress has many options for customizing how you work, how
your text flows, how your tools work, and more. These are called
Prefer-
ences
(Edit menu), and you can control preferences for your copy of
QuarkXPress (
Application Preferences) or for individual documents
(
Document Preferences).
Introduction
Page 30

xxix
A Guide to QuarkXPress
In addition to preferences, you can create custom style sheets, colors,
dashes and stripes, frames, lists (style-sheet generated lists), and H&Js
(hyphenation and justification specifications) for use in a document
or template. All these specifications are created through commands in
the
Edit menu.
On to output
The Print dialog box (File menu) offers plenty of output options. For
convenience, you can combine all these settings and save them as
Print
Styles
(Edit menu). When you print, QuarkXPress requires all the font
and picture files used in the document. The
Collect for Output (File
menu) feature automatically gathers the document and pictures into one
folder, and it produces a report of the document’s fonts, colors, trapping,
and other settings — ready for output.
Power through palettes and keyboard commands
As you use QuarkXPress, you will develop your own working style.
Maybe you will prefer to use the mouse and menu commands for everything. Or, you may find that you prefer the quick access to features provided by palettes and extensive keyboard commands. In many cases,
QuarkXPress offers multiple ways to perform a given task.
QuarkXPress Basics
Page 31

xxx
A Guide to QuarkXPress
The Interface
QuarkXPress menus and dialog boxes adhere to Mac OS conventions —
with a few enhancements. This section provides a quick look at standard
interface controls, and highlights features unique to QuarkXPress. If you
are new to the Mac OS, we recommend that you consult the documenta-
tion resources provided with your computer for complete information
about using the Mac OS. If you are new to QuarkXPress, we recommend
that you perform the tutorial contained in
A Preview to QuarkXPress.
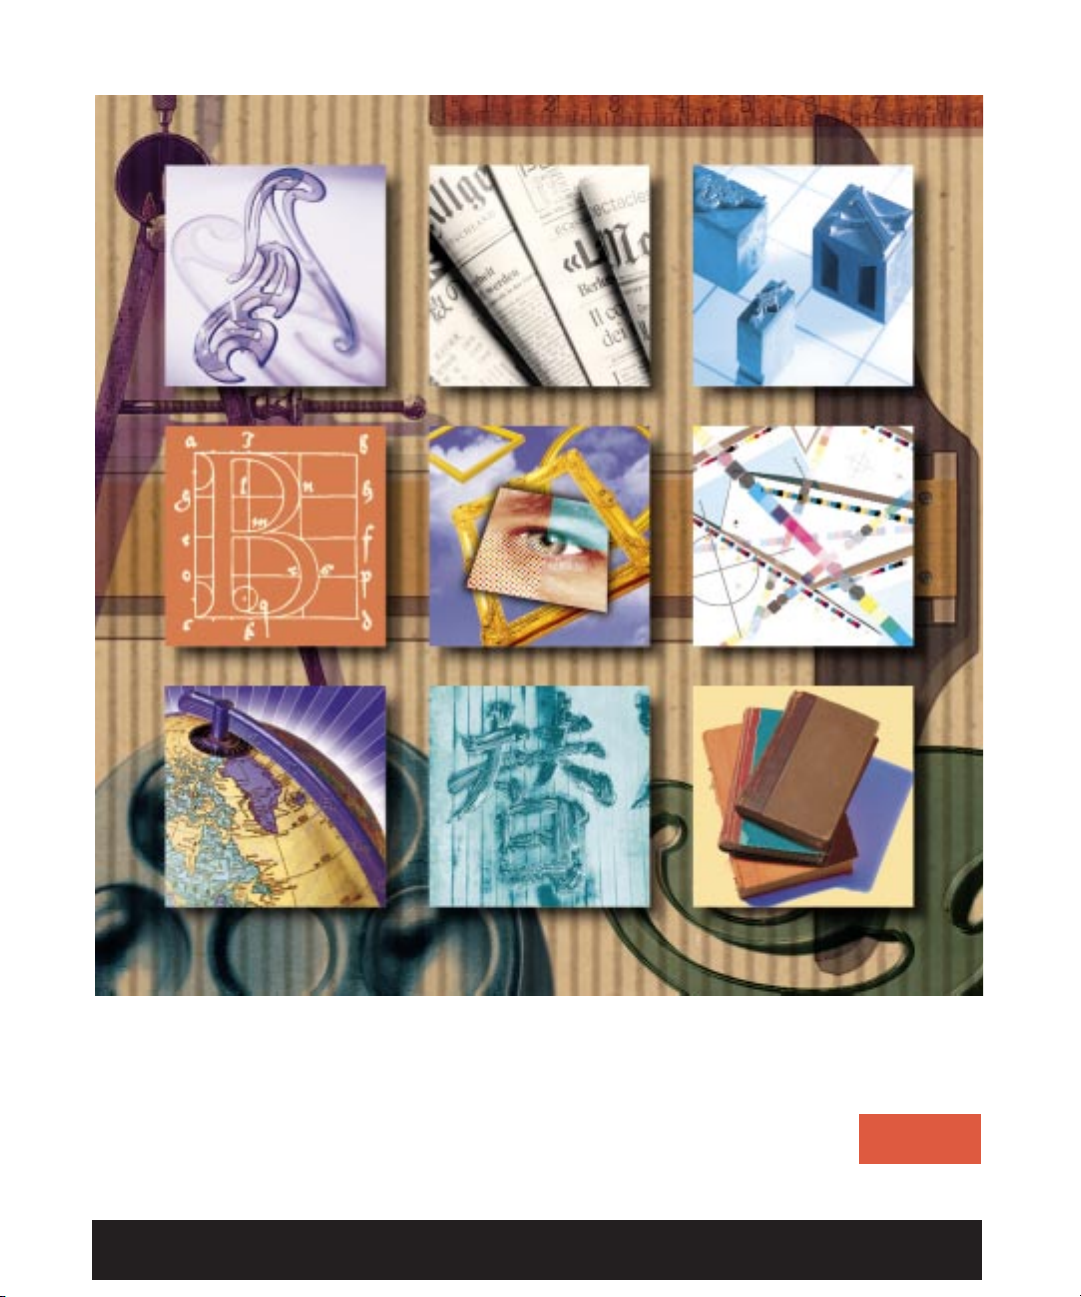
QuarkXPress menus
The menu bar displays the seven menus available in QuarkXPress: File,
Edit, Style, Item, Page, View,
and Utilities. The menu bar can also display QuarkXTensions such as QuarkImmedia and QuarkDispatch. Each
menu contains groups of related commands separated by lines. Many
menu entries are followed by keyboard shortcuts, displayed with the following modifier keys: Command (
C), Option (`), Control (^), and
Shift (
w). See Figure 1.
Context-sensitive menus
QuarkXPress menus are context-sensitive (menu items change according
to the active item, the current situation, or the tool selected).
• The commands listed under a menu may change. For example, the
Style menu commands change depending on whether text, a picture,
or a line is active.
• An individual menu command may change. For example, the
Undo
command (Edit menu) changes to reflect your last action (such as
Undo Typing or Undo Item Deletion).
Introduction
Page 32

xxxi
A Guide to QuarkXPress
• The availability of menu entries may change. For example, when a picture is selected,
Save Text (File menu) is dimmed and not available.
• The availability of entire menus may change. For example, the
Style
menu entries for text are available only when a text box is active and
the Content tool
E is selected.
• The function of a menu command may change slightly when you press
a modifier key while selecting the menu. For example, if you press the
Option key while you choose the
Item menu, the Send to Back com-
mand changes to
Send Backward.
Check mark
A check mark j in a menu indicates one of the following:
• A function has been performed. For example, a check mark is displayed
next to
Flip Vertical (Style menu) when the contents of a box are
flipped vertically.
See Figure 2.
• A feature is turned on. For example, a check mark next to Snap to
Guides
(View menu) means that items in your document will snap to
the guides you’ve created.
• A format from a list has been applied. For example, a check mark is displayed in the
Font submenu next to the font applied to selected text.
When multiple formats have been applied to a selection, check marks
are displayed next to formats common to the entire selection only.
QuarkXPress dialog boxes
Choosing a menu entry followed by an ellipsis (…) displays a dialog box.
Dialog boxes contain related commands that allow you to specify exactly
what you want to happen. The context-sensitive controls in QuarkXPress
dialog boxes consist primarily of tabs, areas, fields, pop-up menus, radio
buttons, check boxes, and buttons.
See Figure 3.
Figure 1: Like other QuarkXPress menus,
the
File menu contains groups of related
commands separated by lines.
The Interface
Page 33

xxxii
A Guide to QuarkXPress
Tabs
Many dialog boxes provide multiple functions through tabs. By clicking
a tab icon, you can display different sets of controls. Pressing ControlTab takes you to the next tab in a dialog box.
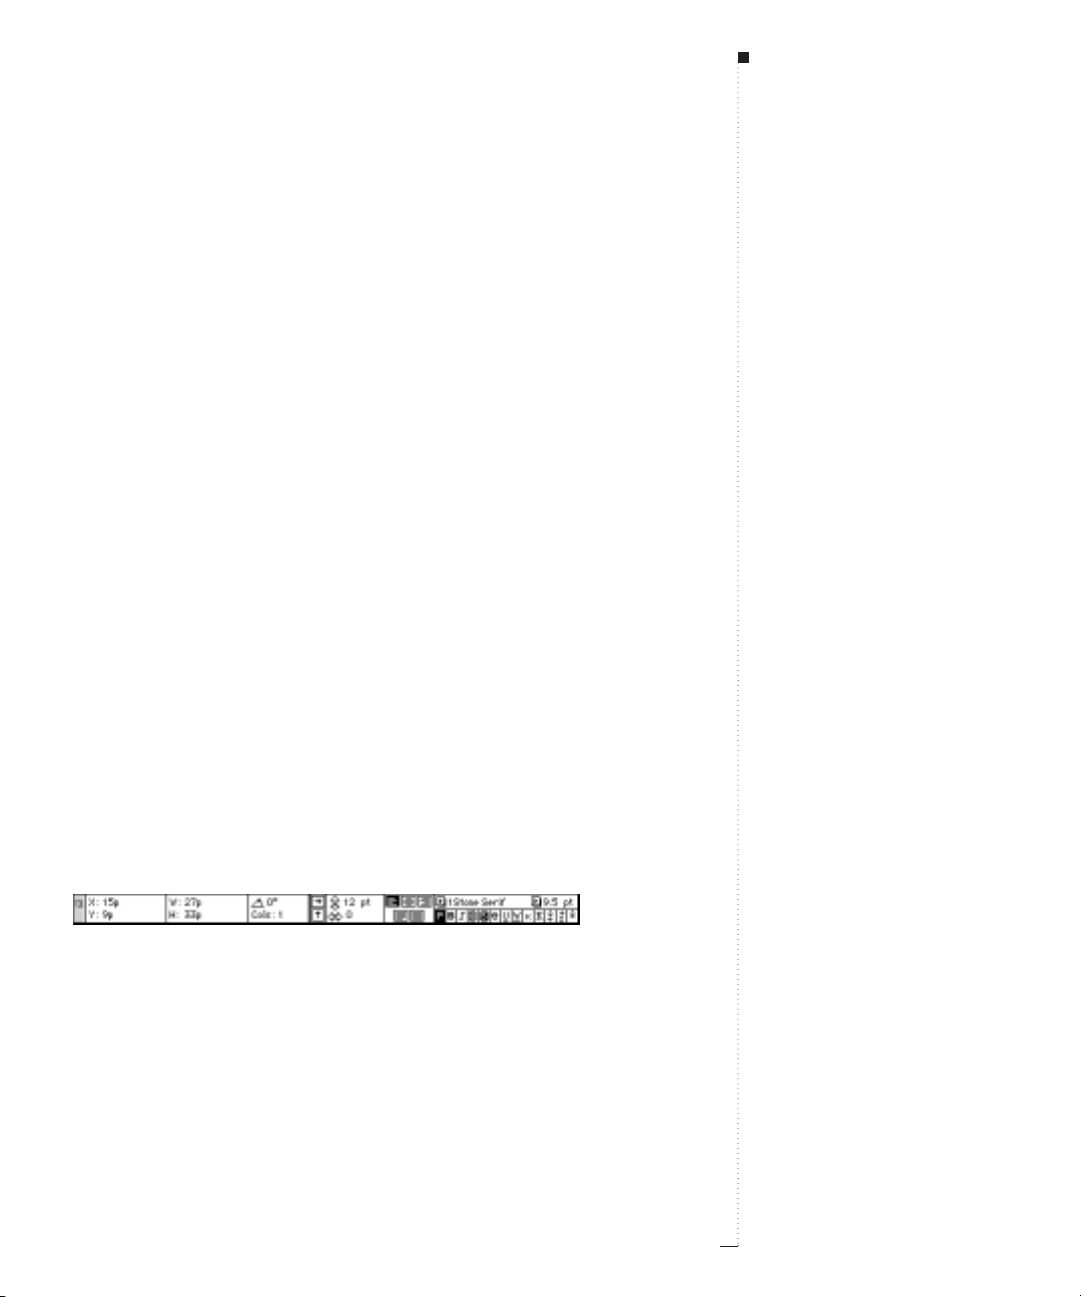
Area
Related commands within a dialog box or tab are grouped into an
“area,” which is named and surrounded by a border. For example, the
Box tab in the Modify dialog box (Item menu) has a Blend area, which
lets you specify a custom blend for a box.
See Figure 4.
List
Some dialog boxes include lists of elements for you to select or edit. For
example, the
Colors dialog box (Edit menu) displays a list of colors. You
can navigate through lists using the up and down arrow keys. Depending on the type of list, you may be able to multiple-select items to edit.
For example, in the
Tool tab of the Document Preferences dialog box
(
Edit & Preferences & Document), you can select multiple tools and
edit common attributes. To select a group of continuous elements, click
the first element then press the Shift key while clicking the last element
in the range. To select a group of noncontinuous elements, press the
C
key while clicking them.
Field
A field is a rectangular box for entering a specific value. For example, in
the
Text tab of the Modify dialog box (Item menu), you can enter the
number of columns for an active text box in the
Columns field. Fields
have the following characteristics:
• You can enter measurements in any of the supported measurement sys-
tems, using the following abbreviations: inches or inches decimal ("),
picas (p), points (pt), millimeters (mm), centimeters (cm), ciceros (c),
and agates (ag).
Figure 2: The check mark next to Flip
Vertical
in the Style menu for text indi-
cates that the contents of the active text
box are flipped vertically.
Figure 3: The
Modify dialog box (Item
menu) includes tabs, areas, fields, pop-up
menus, check boxes, and buttons.
Introduction
Page 34

xxxiii
A Guide to QuarkXPress
• You only need to specify units of measure with an abbreviation
when you are not using the default measurement system. For example, if your measurement preferences are set to inches, and you
want to specify an indent in points, you can enter “6 pt” in the
field. The measurement will be converted to inches the next time
you open the dialog box.
•The default measurement system is specified in the
Horizontal Mea-
sure
and Vertical Measure pop-up menus in the General tab of the
Document Preferences dialog box (Edit & Preferences & Document).
• You can tab to highlight the next field in a dialog box and Shift-Tab to
highlight the previous field.
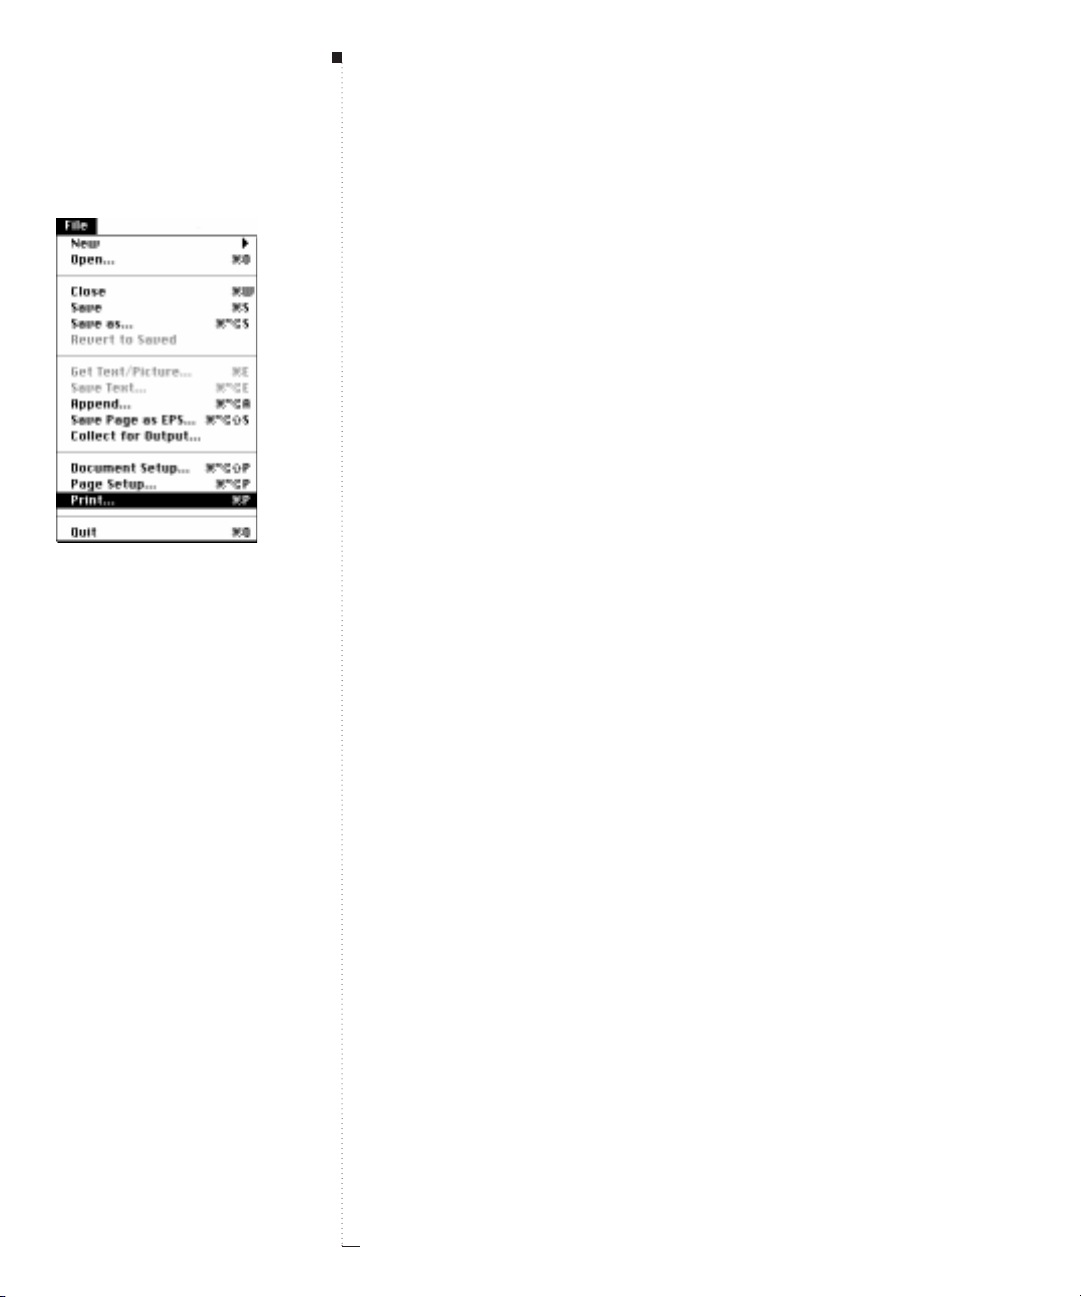
• You can perform math in fields using these operators: + (addition),
– (subtraction), * (multiplication), or, / (division). For example, to double the width of a box, you can multiply the width by 2 by entering *2
to the right of the current value. You can even perform multiple operations — such as dividing a value by 4, then adding 2.
See Figure 5.
R
QuarkXPress performs multiplication and division first, followed by
subtraction and addition, from left to right; you cannot use parentheses when performing math in fields. You can add and subtract
specific measurements, such as 2".
Pop-up menu
A pop-up menu is a small menu within a dialog box or palette. A pop-up
menu like this contains a list of options. A pop-up menu like
this contains an editable field in addition to a list of options.
You can enter a value (such as a percentage) or a word (like a font name)
in the field, rather than choosing an option from the list.
See Figure 6.
Check box
A check box lets you turn options on and off . Checking a box may
activate other controls; checking or unchecking a box may expand a dialog box to display more controls.
Figure 4: The Box tab of the Modify dialog box (
Item menu) includes a bordered
Blend area.
The Interface
Page 35

xxxiv
A Guide to QuarkXPress
Radio button
A radio button lets you select from mutually exclusive options. For
example, in the
XTensions tab (Edit & Preferences & Application),
you can choose when to display the
XTensions Manager dialog box by
clicking a radio button.
Button
A button, shaped like this , performs an action. If a button has a
border around it , you can also press Return or Enter on the keyboard rather than clicking the button with the mouse. A button may also
include a pop-up menu that lets you choose a type of action. For
example, the
New button in the Style Sheets dialog box (Edit menu) lets
you create either a character style sheet or a paragraph style sheet.
Many dialog boxes in QuarkXPress include an
Apply button so you can
preview your changes before closing the dialog box. For example, the
Apply button in the Paragraph Attributes dialog box (Style & Formats)
lets you see how your changes affect selected paragraphs. If you press the
Option key the first time you click
Apply, you can view all your changes
as you make them without clicking the
Apply button again.
Figure 5: You can perform math in
QuarkXPress fields. The formula in the
Width field multiplies the width of the
box by 2, then adds 1 point. The formula
in the
Height field divides the height of
the box by 2, then subtracts .25 inch.
Figure 6: A pop-up menu offers a list of
options, and often includes a field that
accepts custom values. For example, the
Width pop-up menu in the Frame tab of
the
Modify dialog box (Item menu)
includes a list of frame widths and a field.
Introduction
Page 36

Figure 7: The Save as dialog box (File
menu) is an example of a directory dialog
box. It includes the current disk name,
the
Eject, Desktop, New Folder, Can-
cel
, and Save buttons, pop-up menus for
file type and version, a scroll list for navigating through folders, and a check box.
xxxv
A Guide to QuarkXPress
Directory dialog boxes
Directory dialog boxes are used to open, import, export, or save files;
they include standard Mac OS controls for navigating through disks
and folders so you can locate files, or choose where you want to save
files.
See Figure 7. Dialog boxes in QuarkXPress with directory dialog
box elements include:
New Library, New Book, Open, Save as, Get
Text, Save Text, Append, Save Page as EPS, Collect for Output,
and
Auxiliary Dictionary.
Alert dialog boxes
An alert is a dialog box that warns you when there is a problem and
often suggests a solution. For example, if you enter an invalid value in a
field, an alert notifies you and often provides an acceptable range of values for the field. The “Error Messages” section of Chapter 24, “Appendices” lists and explains the alerts you may encounter in QuarkXPress.
The Interface
Page 37

A GUIDE TO QUARKXPRESS
Introducing QuarkXPress
Page 38

1
Tools
The Tool Palette
1.3
Tool Overview
1.5
Item Tool and Content Tool
1.7
Rotation Tool
1.12
Zoom Tool
1.14
Standard-Shape Text Box Tools
1.16
Standard-Shape Picture Box Tools
1.18
Straight Line Tools
1.20
Straight Text-Path Tools
1.22
Bézier Tools
1.24
Freehand Tools
1.26
Linking/Unlinking Tools
1.28
Page Grabber Hand Tool
1.30
For internal use by licensee only. The information in this electronic file may not be disseminated in any form to any unlicensed person or entity
without prior written consent of Quark Technology Partnership or its licensee, Quark, Inc.
Page 39

1
Tools
QuarkXPress preserves the cliché “you need the
right tools to get the job done.” The
Tool palette
provides easy access to powerful tools that allow
you to accomplish the most basic — and the most
sophisticated — publishing tasks.
Tools let you create and place boxes, lines, pictures,
and text; rotate items; link text boxes so text flows
from page to page; and enlarge and reduce the
document view. You can customize the
Tool palette
by rearranging and hiding tools, and you can cus-
tomize many individual tools using preferences.
Page 40

1.3
A Guide to QuarkXPress
The Tool Palette
Use the tools in the Tool palette to create and edit many elements in
QuarkXPress, including text boxes, picture boxes, lines, text paths, text,
and pictures. The selected tool determines which commands in
QuarkXPress are available.
Displaying the Tool palette
To display the Tool palette, choose View & Show Tools. The Tool
palette remains open until you close it. To close the Tool palette, choose
View & Hide Tools or click the close box.
Selecting a tool
To select a tool, click it. Press C-Tab to select the tool below the current
tool; press
C-Shift-Tab to select the tool above the current tool.
Tool preferences
You can specify default settings for magnification and item creation
through the
Tools tab of the Document Preferences dialog box (Edit &
Preferences & Document). You can also access the Tools tab by double-
clicking an item creation tool or the Zoom tool
Z. Tool preferences
apply to the active document; if no documents are open, tool preferences become application defaults.
Introducing QuarkXPress
The Tool Palette
S
Tips
Using the Tool palette
• Click a tool to select it.
• The selected tool determines
which QuarkXPress commands
are available.
• Press the Control key while selecting a pop-out tool to add the tool
to the Tool palette. Press the
Control key while clicking an
unnecessary tool to remove it
from the Tool palette.
• Double-click an item creation
tool or the Zoom tool Z to set
its preferences.
Page 41

1.4
A Guide to QuarkXPress
Customizing the Tool palette
QuarkXPress lets you customize the Tool palette by rearranging, hiding,
and adding tools. Many tools are condensed under “pop-outs” indicated
by an arrow next to the tool.
• To display the pop-out tools, click and hold a tool that displays an
arrow next to it.
• To use a pop-out tool, click and drag to select the tool. This replaces the
tool in the main
Tool palette.
• To add a tool to the main
Tool palette, press the Control key while you
click and drag to select a new tool from a pop-out.
• To hide a tool, press the Control key while you click that tool. At least
one tool from each pop-out must remain on the palette.
R
When you quit QuarkXPress, your current tool arrangement is
saved in the
XPress Preferences file. The next time you launch
QuarkXPress, your
Tool palette will be just as you left it.
Keyboard commands
Use the following keyboard commands with the Tool palette and tools:
Tool choice Command
Show Tools F8
Hide Tools F8
Show/Hide individual tool Control-click
Select tool below current tool C-Tab
Select tool above current tool C-Shift-Tab
Show Tool tab (Document Preferences) Double-click any creation tool
Use Page Grabber Hand H Option*
Use Zoom In pointer M Control
Use Zoom Out pointer
m Option-Control
*The Page Grabber Hand H is not accessible when the Zoom tool Z is
selected or when the Caps Lock key is down.
Tools
Tool palette and text box pop-out tools
Page 42

Default Tool palette
1.5
A Guide to QuarkXPress
Tool Overview
The basic function of each tool in the Tool palette is described below.
Complete information about how each tool works is covered in the
remainder of this chapter.
Default Tool palette
e
Item tool
Selects, moves, resizes, and reshapes items (boxes, lines, text paths, and
groups), and reshapes clipping and runaround paths.
E
Content tool
Imports and edits text and pictures, and imitates most Item tool
functionality.
R
Rotation tool
Rotates items visually rather than numerically.
Z
Zoom tool
Enlarges or reduces the document view.
T
Text Box tool
Creates a rectangular text box; provides access to other text box tools.
p, x, ç, ∂
Picture Box tools
Create a rectangle, rounded-corner, oval, or Bézier picture box; the Rectangle Picture Box tool
p provides access to other picture box tools.
L
Line tool
Creates straight lines of any angle; provides access to other line tools.
Introducing QuarkXPress
Tool Overview
Page 43

1.6
A Guide to QuarkXPress
o
Orthogonal Line tool
Creates straight lines that are perfectly horizontal or vertical.
Ò
Line Text-Path tool
Creates a straight line, of any angle, that contains text; provides access
to other text-path tools.
u
Linking tool
Establishes text chains to flow text among text boxes.
U
Unlinking tool
Breaks links among text boxes.
H
Page Grabber Hand (not displayed in the palette; press Option key to use)
Scrolls a page in any direction.
Pop-out tools
Å, ı, Ç, Î, ´, Ô
Text Box tools
Create a rounded-corner, concave-corner, beveled-corner, oval, Bézier, or
freehand Bézier text box.
å, ∫, ƒ
Picture Box tools
Create a concave-corner, beveled-corner, or freehand Bézier picture box.
∞, §
Line tools
Create a Bézier line or freehand Bézier line.
, Â, ˜
Text-Path tools
Create an orthogonal, Bézier, or freehand Bézier text path.
Tools
Tool palette with all the tools showing.
(Control-drag while selecting a pop-out
tool to add it to the palette.)
Page 44

1.7
A Guide to QuarkXPress
Item Tool e and Content Tool
E
When the Item tool e is selected, you can cut, copy, and paste picture
boxes, lines, text paths, and groups. When the Content tool
E is selected,
you can cut, copy, paste, clear, and edit text or pictures. The Item tool and
the Content tool also have several characteristics common to both tools.
Use the Item and Content tools interchangeably to select and manipulate
boxes, lines, and text paths — or to import and apply styles to pictures.
Arrow pointer a
When you select the Item or Content tool, the Arrow pointer a displays.
To select an item, click it with the Arrow pointer; to select multiple
items, press the Shift key while you click them.
Mover pointer e
When the Item tool is over the interior of a box, a straight line, or a Bézier
line whose bounding box is displayed, the Mover pointer
e displays. You
can access the Mover pointer
e when the Content tool is selected by
pressing the
C key. To move active items, click and drag with the Mover
pointer
e. If no items are selected, you can press the Shift key while select-
ing and dragging to move an item horizontally or vertically only.
When you drag, an outline of the item is displayed. To see the item and
its contents when you drag, press the mouse button until the item
flashes, and then start dragging.
Introducing QuarkXPress
Item Tool and Content Tool
S
Tips
“Items” in QuarkXPress are
• Picture boxes
• Text boxes
• Lines
• Text paths
• Groups
• Multiple-selected items
Using the Item and Content tools
• Click items to select them for
modification.
• Click and drag to move items.
• Drag bounding box handles to
resize items. (Not available if
Item & Edit & Shape is
checked.)
• Drag points, curve handles, or segments to reshape a Bézier shape.
(An option must be checked in the
Item & Edit submenu.)
Page 45

1.8
A Guide to QuarkXPress
Resizing pointer #
When the Item or Content tool is over a bounding box handle on an
active item, the Resizing pointer
# displays. To enlarge or reduce an
item, click and drag the Resizing pointer.
You can scale the contents of a box or text path, while you resize the
item itself, by pressing modifier keys as you drag a handle:
Resize item and scale contents Command
Scale C-Drag
Scale and constrain to square bounding box C-Shift-Drag
Scale and maintain proportions
C-Option-Shift-Drag
Point pointer ˝
When the Item or Content tool is over a point on a selected Bézier
shape, the Point pointer
˝ displays. To select a point, click with the
Point pointer displayed.
• Press the Shift key while clicking to select multiple points.
• Double-click a point to select all the points in the shape. Triple-click to
select all the points in a multiple-path item.
• To reshape, click and drag the Point pointer. If the point is deselected,
you can press the Shift key while selecting and dragging to move the
point in 45° increments only.
• Press the Option key to change the Point pointer into a Point Deletion
pointer
v, and click to delete the point.
Curve Handle pointers Ï, Ó
When the Item or Content tool is over a curve handle on a selected
Bézier shape, one of the two Curve Handle pointers
Ï, Ó displays.
Tools
Resizing handles
Delayed item dragging in action
Page 46

Reshaping a Bézier item
1.9
A Guide to QuarkXPress
To reshape a curve, click and drag with the Curve Handle pointer displayed. Curve handle angles determine the starting angles for curves.
The distance of the curve handles from the point determines the
extremity of the curve.
•Press the Shift key while dragging a curve handle to move it in 45°
increments from the point.
• Press the Control key while dragging a curve handle to change a
smooth point to a corner point or vice versa.
• Press the Option key to change the Curve Handle pointer into the
Retract Curve Handle pointer
v, and click to retract the curve handle.
Line Segment pointer ˆ
When the Item or Content tool is over a line segment on a selected
Bézier shape, the Line Segment pointer
ˆ displays. To select a line seg-
ment (and the two points attached to it), click with the Line Segment
pointer displayed.
• To reshape a Bézier item, click and drag the Line Segment pointer.
• Press the Shift key while dragging a line segment to constrain both its
curve handles to 45° increments.
• Press the Option key to change the Line Segment pointer into an Add
Point pointer
V, and click to add a point.
Marquee o
When the Item or Content tool is selected, you can access a standard
Marquee pointer
o for selecting multiple items. Click the mouse button
outside the boundaries of any items, then drag the Marquee over items
to select them. To add or remove an item from a Marquee selection,
press the Shift key while you click it.
Introducing QuarkXPress
Item Tool and Content Tool
Page 47

1.10
A Guide to QuarkXPress
Features specific to the Item tool e
When the Item tool is selected, this additional functionality is available:
• Cut, copy, or paste active items entirely. (This is also possible when any
other tool is selected except the Content tool
E.)
• Delete active Bézier points using the Delete key.
• Move active items using arrow keys.
• Activate a group by selecting only one of its items.
• Change the line attributes of an active text path. (This is also possible
when any other tool is selected except the Content tool
E.)
Features specific to the Content tool E
When the Content tool is selected, this additional functionality is available:
Cut, copy, paste, or clear contents
When the Content tool is selected, you can cut, copy, paste, or clear
highlighted text or a picture in an active picture box. The box itself is
unaffected.
Import and edit text
Use the Content tool to edit and apply attributes to existing text or
import new text into an active text box or text path.
I-beam pointer
I
When the Content tool is over a selected text box or text path, the Ibeam pointer
I displays. Click the I-beam pointer to place the Text Inser-
tion bar
i where you want to begin importing or editing text. You cannot
place the Text Insertion bar
i below existing paragraphs within a text
box. To highlight text, click and drag the I-beam pointer
I. You can cut,
copy, clear, drag-and-drop, or apply
Style menu attributes to highlighted
text.
Tools
S
Tips
“Contents” in QuarkXPress are
• Pictures
• Text
Using the Content tool E
• Click a text box or text path to
import or edit text.
• Click a picture box to import or edit
a picture.
• Choose File & Get Picture or
File & Get Text to import a picture file or text file.
• Highlight text to edit it.
Page 48

1.11
A Guide to QuarkXPress
Text Insertion bar
i
When you click the I-beam pointer I in text, a blinking Text Insertion
bar
i displays. This is the text insertion point. When you create a new
text box, the Text Insertion bar
i displays automatically at the top of the
box.
You can enter text at this point by typing or choosing
File & Get Text.
You can delete text preceding this point by pressing the Delete key. To
reposition the Text Insertion bar
i, use the arrow keys on the keyboard
or click with the I-beam pointer
I.
Picture Mover pointer
H
When the Content tool is over an active picture box containing a picture,
the Picture Mover pointer
H displays. To move the picture, click and drag
the Picture Mover pointer in any direction, or use the arrow keys.
You can edit the picture using the
Style menu, the Measurements
palette, keyboard commands, or the Picture tab of the Modify dialog
box (
Item & Modify).
Introducing QuarkXPress
Item Tool and Content Tool
Page 49

1.12
A Guide to QuarkXPress
Rotation Tool
R
Use the Rotation tool to rotate items visually around a point you establish.
Arrow pointer a
If no items are selected when you select the Rotation tool, the Arrow
pointer
a displays. To select an item to rotate, click it with the Arrow
pointer.
Rotation pointer :
When the Rotation tool is over an active item, the Rotation pointer :
displays. To establish a point for an item to rotate around, click and hold
the Rotation pointer. The rotation point can be within or outside the
active item.
Arrowhead pointer ;
After you establish the Rotation point, the Arrowhead pointer ; displays.
To rotate the item, drag the Arrowhead pointer in a circular motion. A
line extends from the center of the rotation point to the Arrowhead
pointer indicating the item’s angle of rotation.
You can rotate an item from –360° to +360°. As you drag the Arrowhead
pointer
;, the r field in the Measurements palette displays the angle
change. Press the Shift key to constrain rotation to 45° increments.
Rotating boxes
When you rotate an item, an outline of the item is displayed. To see the
item and its contents when you rotate, press the mouse button until the
item flashes before you begin rotating.
Tools
S
Tips
You can rotate items visually or
numerically
• Use the Rotation tool to establish
a point to rotate an item around,
then rotate the item visually.
• Use the rotation field r in the
Measurements palette to rotate a
box around its center numerically.
Using the Rotation tool R
• Select an item to rotate it.
• Click the Rotation pointer : to
establish a rotation point, then
drag the Arrowhead pointer ; to
rotate the item.
• The Rotation tool reverts to the
Item tool e or the Content
tool E automatically.
Page 50

The rotation point
:
1.13
A Guide to QuarkXPress
Rotating straight lines
Straight lines defined in Endpoints Mode (Item & Modify & Line tab)
can only be rotated with the Rotation tool.
Reverting to the previous tool
After you rotate an item, the Rotation tool automatically reverts to the
last tool selected (the Item tool
e or Content tool E). To prevent this,
press the Option key while selecting the Rotation tool. This allows you
to experiment with the rotation of one item without having to reselect
the tool each time you rotate.
Introducing QuarkXPress
Rotation Tool
Page 51

1.14
A Guide to QuarkXPress
Zoom Tool
Z
Use the Zoom tool to change the view percent of a document or to view a
specific area.
Zoom In pointer M
When you select the Zoom tool, the Zoom In pointer M displays. To
enlarge the document view according to a specified interval, click the
Zoom In pointer. To enlarge a specific area of a document to fit in the
document window, marquee the area.
Zoom Out pointer m
When the Zoom In pointer is displayed, press the Option key to access
the Zoom Out pointer
m. To reduce the document view, click the Zoom
Out pointer. To view a specific area of a document, marquee an area
larger than the existing view area by clicking and dragging. The area is
reduced as necessary to fit the document window.
Zoom tool preferences
The Zoom tool enlarges or reduces the document view according to the
Minimum, Maximum, and Increment settings in the Tool tab of the
Document Preferences dialog box (Edit & Preferences & Document).
To quickly access the
Tool tab of the Document Preferences dialog box,
double-click the Zoom tool.
Tools
S
Tips
Using the Zoom tool Z
• Click the Zoom In pointer M to
enlarge the document view.
• Click and drag the Zoom In M or
Zoom Out m pointer to select an
area to view.
• Press the Option key to access the
Zoom Out pointer m; click to
reduce the document view.
• Each time you click the Zoom tool,
the view is enlarged or reduced
according to the Increment specified in the Tool tab of the
Document Preferences dialog
box (Edit & Preferences &
Document).
Page 52

1.15
A Guide to QuarkXPress
Click and drag the mouse with the Zoom
tool selected to zoom in on the area of
the marquee.
The values in the Minimum and Maximum fields indicate the smallest
and largest document views you can obtain by clicking the Zoom tool
(within the 10% to 800% range). The value in the
Increment field indicates the percent change in view for each mouse click of the Zoom In
pointer
M or Zoom Out pointer m. The default value is 25%.
Accessing the Zoom tool
When any other tool is selected, you can access the Zoom In pointer M
by pressing the Control key. You can access the Zoom Out pointer m
while any tool is selected by pressing the Option and Control keys. (If
the pointer is over a Bézier point when you press the Control key, the
Zoom tool will not display.)
Introducing QuarkXPress
Zoom Tool
Page 53

1.16
A Guide to QuarkXPress
Standard-Shape Text Box Tools T, Å, ı, Ç,
Î
Use the standard-shape text box tools to create text boxes (containers for
text) in the following predefined shapes:
• Rectangle Text Box tool T for rectangular or square text boxes.
• Rounded-corner Text Box tool
Å for rectangular text boxes with
curved corners.
•Concave-corner Text Box tool
ı for rectangular text boxes with cor-
ners rounded inward.
• Beveled-corner Text Box tool
Ç for rectangular text boxes with
beveled corners.
•Oval Text Box tool
Î for oval or circular text boxes.
Crosshair pointer c
When a standard-shape text box tool is selected, the Crosshair pointer c
displays. To create a standard-shape text box, click and drag the Crosshair
pointer diagonally. To create a square or circular text box, press the Shift
key while you click and drag. (You can change the shape of a selected text
box using the
Shape submenu of the Item menu.)
Size and placement
As you click and drag the Crosshair pointer c, the X, Y, W, and H fields
in the
Measurements palette display the coordinates, width, and height
of the text box. If the Rulers are showing in the document window
(
View & Show Rulers), small lines on the ruler indicate the starting posi-
tion of the Crosshair pointer and the width and height of the text box.
Tools
S
Tips
Key concepts
• Text is imported or entered into
text boxes.
• New text boxes have the attributes specified in the Tool tab of
the Document Preferences dialog box (Edit & Preferences &
Document) for the selected text
box tool.
Using the standard-shape text box tools
• Click and drag diagonally to create
a new text box.
• Press the Shift key while creating a text box to make it square
or circular.
• The text box tools revert to the
Item tool e or the Content
tool E automatically.
Page 54

1.17
A Guide to QuarkXPress
Click and drag the mouse in any direction
to create a text box using a standardshape text box tool.
Text box tool preferences
New text boxes have the attributes specified in the Tool tab of the
Document Preferences dialog box (Edit & Preferences & Document
). To quickly access the Tool tab of the Document Preferences
dialog box, double-click a text box tool.
Use the
Modify button in the Tool tab to access a dialog box that allows
you to specify attributes for new text boxes such as the background
color, number of columns, frame, and runaround. You can also specify
Corner Radius (the amount of space taken up by the corners) for
rounded-corner, concave-corner, and beveled-corner text boxes.
Reverting to the previous tool
After you create a text box, the text box tools automatically revert to the
last tool selected (the Item tool
e or Content tool E). To prevent this,
press the Option key while selecting a text box tool. This allows you to
draw several text boxes without selecting the tool again.
Introducing QuarkXPress
Standard-Shape Text Box Tools
Page 55

1.18
A Guide to QuarkXPress
Standard-Shape Picture Box Tools p, x,
ç, å, ∫
Use the standard-shape picture box tools to create picture boxes (containers
for pictures) in the following predefined shapes:
• Rectangle Picture Box tool p for rectangular or square picture boxes.
• Rounded-corner Picture Box tool
x for rectangular picture boxes with
curved corners.
• Concave-corner Picture Box tool
å for rectangular picture boxes with
corners rounded inward.
• Beveled-corner Picture Box tool
∫ for rectangular picture boxes with
beveled corners.
• Oval Picture Box tool
ç for oval or circular picture boxes.
Crosshair pointer c
When a standard-shape picture box tool is selected, the Crosshair
pointer
c displays. To create a standard-shape picture box, click and drag
the Crosshair pointer diagonally. To create a square or circular picture box,
press the Shift key while you click and drag. (You can change the shape of
a selected picture box using the
Shape submenu of the Item menu.)
Size and placement
As you click and drag the Crosshair pointer c, the X, Y, W, and H
fields in the Measurements palette display the coordinates, width,
and height of the picture box. If the Rulers are showing in the document window (
View & Show Rulers), small lines on the ruler indi-
cate the starting position of the Crosshair pointer and the width and
height of the picture box.
Tools
S
Tips
Key concepts
• Pictures are imported into picture
boxes; you cannot have a picture
in a document without a box.
• New picture boxes have the attributes specified in the Tool tab of
the Document Preferences dialog box (Edit & Preferences &
Document) for the selected picture box tool.
Using the standard-shape picture box
tools
• Click and drag diagonally to create
a new picture box.
• Press the Shift key while creating
a picture box to make it square or
circular.
• The picture box tools revert to the
Item tool e or the Content
tool E automatically.
Page 56

1.19
A Guide to QuarkXPress
Click and drag the mouse in any direction
to create a picture box using a standardshape picture box tool.
Picture box tool preferences
New picture boxes have the attributes specified in the Tool tab of the
Document Preferences dialog box (Edit & Preferences & Document
). To quickly access the Tool tab of the Document Preferences
dialog box, double-click any picture box tool.
Use the
Modify button in the Tool tab to access a dialog box that allows
you to specify attributes for new picture boxes such as the background
color, picture angle, frame, and runaround. You can also specify
Corner
Radius
(the amount of space taken up by the corners) for rounded-cor-
ner, concave-corner, and beveled-corner picture boxes.
Reverting to the previous tool
After you create a picture box, the picture box tools automatically revert
to the last tool selected (the Item tool
e or Content tool E ). To pre-
vent this, press the Option key while selecting a picture box tool. This
allows you to draw several picture boxes without selecting the tool
again.
Introducing QuarkXPress
Standard-Shape Picture Box Tools
Page 57

1.20
A Guide to QuarkXPress
Straight Line Tools
o, L
Use the straight line tools to create horizontal, vertical, and diagonal lines:
• Orthogonal Line tool o for horizontal and vertical lines.
• Line tool
L for diagonal lines.
Crosshair pointer c
When either straight line tool is selected, the Crosshair pointer c displays. To create a straight line, click and drag the Crosshair pointer. To
constrain lines created with the Line tool
L to any 45˚ increment (0˚,
45˚, 90˚, etc.), press the Shift key while you click and drag.
Size and position
As you click and drag the Crosshair pointer c, the fields in the Measurements
palette change to reflect the position, length, and/or angle of the
line. If the
Rulers are showing in the document window (View & Show
Rulers
), small lines on the ruler indicate the starting and ending position
of the Crosshair pointer.
QuarkXPress reports the position of straight lines according to their
End-
points, First Point, Midpoint,
or Last Point. Fields in the Measurements
palette change to report the appropriate values for the selected line mode.
The
first point is the endpoint you draw from; the last point is the endpoint
created when you release the mouse button.
Line tool preferences
New lines have the attributes specified in the Tool tab of the Document
Preferences
dialog box (Edit & Preferences & Document). To
quickly access the
Tool tab of the Document Preferences dialog box,
double-click one of the line tools.
Tools
S
Tips
Key concepts
• Lines can be positioned, sized, and
rotated in several modes: Endpoints, First Point, Midpoint, and
Last Point.
• New lines have the attributes
specified in the Tool tab of the
Document Preferences dialog
box (Edit & Preferences &
Document) for the selected
line tool.
Using the straight line tools
• Click and drag to create a line with
either of the straight line tools.
• Use the Orthogonal Line tool o to
create horizontal and vertical lines.
• Use the Line tool L to create diagonal lines.
Page 58

1.21
A Guide to QuarkXPress
Click and drag the mouse to create a
straight line using the Line tool or the
Orthogonal Line tool.
Use the Modify button in the Tool tab to access a dialog box that allows
you to specify attributes for new lines such as the style, width, color,
shade, and runaround.
Reverting to the previous tool
After you create a line, the line tools automatically revert to the last tool
selected (the Item tool
e or Content tool E ). To prevent this, press the
Option key while selecting a line tool. This allows you to draw several
lines without selecting the tool again.
Introducing QuarkXPress
Straight Line Tools
Page 59

1.22
A Guide to QuarkXPress
Straight Text-Path Tools
, Ò
Use the straight text-path tools to create horizontal, vertical, and diagonal
text paths (lines that support text):
• Orthogonal Text-Path tool for horizontal and vertical text paths.
• Line Text-Path tool
Ò for diagonal text paths.
Crosshair pointer c
When either straight text-path tool is selected, the Crosshair pointer c
displays. To create a straight text path, click and drag the Crosshair
pointer. To constrain text paths created with the Line Text-Path tool to
any 45˚ increment (0˚, 45˚, 90˚, etc.), press the Shift key while you click
and drag.
Size and position
As you click and drag the Crosshair pointer c, the fields in the Measurements
palette change to reflect the position, length, and/or angle of the
text path. If the
Rulers are showing in the document window (View &
Show Rulers), small lines on the ruler indicate the starting and ending
position of the Crosshair pointer.
QuarkXPress reports the position of straight text paths according to their
Endpoints, First Point, Midpoint, or Last Point. Fields in the Measurements
palette change to report the appropriate values for the selected
line mode. The
first point is the endpoint you draw from; the last point is
the endpoint created when you release the mouse button.
Tools
S
Tips
Key concepts
• Text is imported or entered onto
text paths.
• Text paths can be positioned,
sized, and rotated in several
modes: Endpoints, First Point,
Midpoint, and Last Point.
• New text paths have the attributes specified in the Tool tab of
the Document Preferences dialog box (Edit & Preferences &
Document) for the selected textpath tool.
Using the straight text-path tools
• Click and drag to create a text
path with either of the straight
text-path tools.
• Use the Orthogonal Text-Path
tool to create horizontal and
vertical text paths.
• Use the Line Text-Path tool Ò to
create diagonal text paths.
Page 60

1.23
A Guide to QuarkXPress
Click and drag the mouse to create a
straight text path using the Line TextPath tool or the Orthogonal Text-Path
tool.
Text-path tool preferences
New text paths have the attributes specified in the Tool tab of the
Document Preferences dialog box (Edit & Preferences & Document
). To quickly access the Tool tab of the Document Preferences
dialog box, double-click one of the text-path tools.
Use the
Modify button in the Tool tab to access a dialog box that allows
you to specify attributes for new text paths such as the style, width,
color, shade, and runaround for the line, or the alignment and orientation of text in relation to the line.
Reverting to the previous tool
After you create a text path, the text-path tools automatically revert to
the last tool selected (the Item tool
e or Content tool E ). To prevent
this, press the Option key while selecting a text-path tool. This allows
you to draw several text paths without selecting the tool again.
Introducing QuarkXPress
Straight Text-Path Tools
Page 61

1.24
A Guide to QuarkXPress
Bézier Tools
´, ∂, ∞, Â
Use the Bézier tools to create text boxes, picture boxes, lines, and text
paths of any desired shape, with point-by-point control.
Crosshair pointer c
When a Bézier tool is selected, the Crosshair pointer c displays. To create a Bézier item:
• Click to establish the first corner point in the shape, or click and drag
to establish the first smooth point in the shape. If you click and drag,
the curve handles of the smooth point are exposed.
• Release the mouse button and repeat the above step to establish a second point, a third point, and so on. Segments display between each
two points. Click when you want a corner point; click and drag when
you want a smooth point.
• When curve handles display, their angles determine the starting angles
for curves. The distance of the curve handles from the point determines
the extremity of a curve.
• To access the Item tool
e to reshape the item before it is completed,
press the
C key. While the C key is pressed, the Crosshair pointer
changes to the Arrow pointer
a, or to one of the Bézier reshaping
pointers (
˝, Ï, Ó, ˆ) when placed over a point, segment, or curve
handle. Press the
C and Control keys while dragging a curve handle to
change a smooth point to a corner point with curve handles. See “Item
Tool
e and Content Tool E” earlier in this section for descriptions of
the Bézier reshaping pointers.
• Complete the new shape by double-clicking to create the last point or
by selecting a new tool in the
Tool palette. If you have one of the
Bézier box tools selected (
´, ∂), you can also complete the shape by
Tools
S
Tips
Key concepts
• Bézier items can be text boxes,
picture boxes, lines, or text paths
depending on which Bézier tool
you select.
• Bézier tools create shapes point by
point. To create a Bézier item by
simply dragging the mouse, you
can use a freehand tool.
• New Bézier items have the attributes specified in the Tool tab of
the Document Preferences dialog box (Edit & Preferences &
Document) for the selected tool.
Using the Bézier tools
• Click to create corner points; click
and drag to create smooth points.
Successive clicking produces
straight segments only.
• To reshape a Bézier item before it
is completed, press the C key. To
reshape a Bézier item after it is
completed, use the Item or Content tool and make sure Item &
Edit & Shape is checked.
Page 62

1.25
A Guide to QuarkXPress
Using a Bézier tool, click to create each
corner point; click and drag to create
smooth points that form seamless transitions between two curved segments.
clicking the first point in the box. The Crosshair pointer changes to the
Close Box pointer
V when the pointer is positioned over the first point
in a box.
Placement
As you click and drag using any of the Bézier pointers, the X and Y fields
in the
Measurements palette display the pointer’s coordinates. If the
Rulers are showing in the document window (View & Show Rulers),
small lines on the ruler indicate the position of the pointer.
Bézier tool preferences
New Bézier items have the attributes specified in the Tool tab of the
Document Preferences dialog box (Edit & Preferences & Document).
To quickly access the
Tool tab of the Document Preferences dialog box,
double-click a Bézier tool.
Use the
Modify button in the Tool tab to access a dialog box that allows
you to specify attributes for the new Bézier item.
Reverting to the previous tool
After you create a Bézier item, the Bézier tools automatically revert to the
last tool selected (the Item tool
e or Content tool E ). To prevent this,
press the Option key while selecting a Bézier tool. This allows you to
draw several Bézier items without selecting the tool again.
Introducing QuarkXPress
Bézier Tools
Page 63

1.26
A Guide to QuarkXPress
Freehand Tools
Ô, ƒ, §, ˜
Use the freehand tools to quickly create Bézier text boxes, picture boxes,
lines, and text paths of any shape you draw.
Crosshair pointer c
When a freehand tool is selected, the Crosshair pointer c displays. Click
and drag the mouse to draw the shape you want to create.
Release the mouse button to complete the shape. If you are using one of
the freehand box tools (
Ô, ƒ), the Close Box pointer V is displayed
when you drag the Crosshair pointer over the starting point.
To edit the Bézier curves of a completed freehand shape, use the Item tool
e or Content tool E, and make sure Item & Edit & Shape is checked.
Placement
As you click and drag the Crosshair pointer c, the X and Y fields in the
Measurements palette display the pointer’s coordinates. If the Rulers are
showing in the document window (
View & Show Rulers), small lines
on the ruler indicate the position of the Crosshair pointer.
Freehand tool preferences
New freehand Bézier items have the attributes specified in the Tool tab
of the
Document Preferences dialog box (Edit & Preferences &
Document). To quickly access the Tool tab of the Document Prefer-
ences
dialog box, double-click a freehand tool.
Tools
S
Tips
Key concepts
• Freehand items can be text boxes,
picture boxes, lines, or text paths
depending on which freehand tool
you select.
• Freehand tools create Bézier items
automatically according to how
you drag the mouse.
• New Bézier items have the attributes specified in the Tool tab of
the Document Preferences dialog box (Edit & Preferences &
Document) for the selected tool.
Using the freehand tools
• Drag the mouse to describe the
Bézier shape you want
QuarkXPress to create.
• To reshape a Bézier item after it is
completed, use the Item or Content tool and make sure Item &
Edit & Shape is checked.
Page 64

1.27
A Guide to QuarkXPress
Use the Modify button in the Tool tab to access a dialog box that allows
you to specify attributes for new freehand items such as the background
color, picture angle, frame, and runaround.
Reverting to the previous tool
After you create a freehand Bézier item, the freehand tools automatically
revert to the last tool selected (the Item tool
e or Content tool E ). To
prevent this, press the Option key while selecting a freehand tool. This
allows you to draw several freehand Bézier items without selecting the
tool again.
Introducing QuarkXPress
Freehand Tools
Using a freehand tool, drag the mouse to
describe the Bézier shape you want
QuarkXPress to create.
Page 65

1.28
A Guide to QuarkXPress
Linking/Unlinking Tools u,
U
Use the Linking tool to link text boxes so that text flows from box to box.
This text is referred to as a “chain” or “story.” Use the Unlinking tool to
break the links between text boxes.
Arrow pointer a
When you first select the Linking tool, the Arrow pointer a displays. To
select the first text box in a chain, click it with the Arrow pointer. The
text box displays a marquee .
Linking pointer /
When the first text box in the chain is selected and displays a marquee,
the Linking pointer
/ displays. To link the box to another box, click on
a second box. Text flows through the boxes in the order in which you
link them. When the Linking tool is selected, links for the selected text
boxes are shown with arrows.
Reverting to the previous tool
After you link two boxes, the Linking tool automatically reverts to the
last tool selected (the Item tool
e or Content tool E ). To prevent this,
press the Option key while selecting the Linking tool. This allows you to
link multiple boxes without selecting the tool again.
Arrow pointer a
When you first select the Unlinking tool, the Arrow pointer a displays.
Click any text box within a text chain; the text box links are shown
with arrows.
Tools
S
Tips
Key concepts
• A text chain, or “story,” is created
when you manually link several
text boxes.
• The Automatic Text Box feature
and master pages can be used to
create an automatic text chain,
without manually linking boxes.
Using the Linking tool u
• Click the first text box in a chain to
display a marquee around it.
• Click on the second text box in a
chain to establish a link.
Page 66

1.29
A Guide to QuarkXPress
Unlinking pointer ?
When a text box within a text chain is selected, the Unlinking
pointer
? displays. To break links between boxes, click the arrowhead
(next box) or the tailfeathers (previous box) on the linking arrows.
To remove a text box from a text chain, and reroute the links around it,
press the Shift key while you click the box with the Unlinking tool.
Reverting to the previous tool
After you break the link between two boxes, the Unlinking tool automatically reverts to the last tool selected (the Item tool
e or Content
tool
E). To prevent this, press the Option key while selecting the
Unlinking tool. This allows you to break the link between several boxes
without selecting the tool again.
Introducing QuarkXPress
Linking/Unlinking Tools
S
Tips
Using the Unlinking tool U
• Click the arrowhead (next box) or
the tailfeathers (previous box) on
the linking arrows, to break links
between boxes.
• To remove a text box from a text
chain and reroute the links around
it, press the Shift key while you
click a box with the Unlinking tool.
Page 67

1.30
A Guide to QuarkXPress
Page Grabber Hand Tool
H
Use the Page Grabber Hand to scroll a page in any direction. The Page
Grabber Hand allows you to scroll with more precision than the scroll
bars, and to scroll horizontally and vertically at the same time.
Access from any tool
You can access the Page Grabber Hand by pressing the Option key while
any tool except the Zoom tool
Z is selected. The Caps Lock key cannot
be pressed. Click and drag the mouse in any direction to move around
within a page, spread, or document. When you release the Option key,
the previous tool is selected again.
Live Scroll
The Page Grabber Hand is always in Live Scroll mode, regardless of the
Live Scroll setting in the Interactive tab of the Application Preferences
dialog box (Edit & Preferences & Application). This means the document view is updated as you scroll, rather than redrawing after you stop.
Speed Scroll
Scrolling with the Page Grabber Hand is affected by the Speed Scroll setting in the
Interactive tab of the Application Preferences dialog box
(
Edit & Preferences & Application). Speed Scroll accelerates scrolling
by temporarily greeking pictures and blends; when you stop scrolling,
the page elements redraw completely.
Tools
S
Tips
Using the Page Grabber Hand tool H
• Press the Option key with any tool
selected except the Zoom tool Z
for temporary access to the Page
Grabber Hand.
• Live Scroll is always active when
you use the Page Grabber Hand.
Page 68

2
Palettes
Displaying and Arranging Palettes
2.3
Measurements Palette
2.4
Document Layout Palette
2.14
Style Sheets Palette
2.17
Colors Palette
2.19
Trap Information Palette
2.21
Lists Palette
2.26
For internal use by licensee only. The information in this electronic file may not be disseminated in any form to any unlicensed person or entity
without prior written consent of Quark Technology Partnership or its licensee, Quark, Inc.
Page 69

2
Palettes
In addition to the Tool palette described in
Chapter 1, “Tools,” several other palettes give you
complete control over page design, character for-
matting, color, trapping, and long-document pub-
lishing features.
Options on some palettes change depending on the
particular tool selected in the
Tool palette. Each
palette may be hidden or displayed, and placed
anywhere on your monitor, allowing you to fully
customize your workspace.
Page 70

2.3
A Guide to QuarkXPress
Displaying and Arranging Palettes
The primary palettes in QuarkXPress include the Tool palette, the
Measurements palette, the Document Layout palette, the Style Sheets
palette, the Colors palette, the Trap Information palette, and the Lists
palette. Each of these palettes may be displayed using the View menu. For
more information about the
Books, Libraries, and Index palettes, see
their respective chapters.
Opening palettes
To open or display a palette, choose View & Show [name of palette].
Palettes always display in front of other windows, and remain open until
you close them.
Closing palettes
You can hide palettes when you do not need them. To close an open
palette, click the close box in the upper left corner of the palette, or
choose
View & Hide [name of palette].
Moving palettes
Palettes are especially convenient because they can be placed anywhere
on your screen, allowing you to customize your workspace. Click and
drag the bar at the top of a palette to reposition it.
Resizing palettes
You can resize the Document Layout, Style Sheets, Colors, and Lists
palettes by dragging the resize box in the lower right corner of the palettes.
Introducing QuarkXPress
Displaying and Arranging Palettes
Show and hide palettes using the
commands in the
View menu.
Clicking the close box to close a palette.
Resizing the
Colors palette by drag-
ging the
Size box.
Page 71

2.4
A Guide to QuarkXPress
Measurements Palette
The Measurements palette (View & Show Measurements) lets you quickly
edit several commonly used item specifications without choosing
Item &
Modify or using the Style menu. Options on the Measurements palette
change to reflect the currently selected tool or item. The left side of the
palette indicates an item’s position; the right side indicates an item’s content.
Overview
You can edit any of the values in the Measurements palette (F9).
Changes made to values on the left side of the palette are applied
when you exit the palette; changes made to numerical values on the
right side of the palette are applied when you move to a different field
or exit the palette. Clicking a button or choosing an item from a popup menu on the right side of the
Measurements palette applies the
change immediately.
Measurements displayed in the
Measurements palette are updated
when you create, move, resize, or modify items, create or move guides,
or reposition the ruler origin.
Click on the
Measurements palette to enter it, or press C-Option-M to
access the first field in the palette. Press the Tab key to highlight the
next field, or press Shift-Tab to highlight the previous field. Click on the
document, or press the Return or Enter key to apply changes made in
the
Measurements palette. Press C-period (.) to exit the Measurements
palette without applying changes.
The fields displayed in the measurements palette correspond to fields
that can be accessed by choosing
Item & Modify. Character attributes
and paragraph formats are described in “Style Menu for Text” in
Chapter 3, “Menus and Dialog Boxes.”
Palettes
Page 72

Measurements palette for text boxes
Item information
When a text box is selected in the document window, the left side of the
Measurements palette lets you view and edit the text box item information. See Chapter 10, “Document Layout” and Chapter 12, “Typography.”
• The
X and Y fields indicate the horizontal and vertical locations of the
origin (upper left corner) of the text box.
• The
W and H fields indicate the width and height of the text box.
• The
r field indicates the text box’s angle of rotation.
• The
Cols field indicates the number of columns in the text box.
Content information
When the Content tool E is selected, the right side of the
Measurements palette lets you edit the contents of the text box.
• The
( button lets you flip the contents of the text box along a
horizontal axis.
•The
) button lets you flip the contents of the text box along a
vertical axis.
•The
n field indicates paragraph leading. Enter a value in the field or click
the arrows to adjust leading. See “Specifying Leading and Paragraph
Spacing” in Chapter 12, “Typography.”
• The
N field indicates kerning when the Text Insertion bar i is
between two characters and indicates tracking when a block of text
is highlighted. Enter a value in the field or click the arrows to adjust
kerning and tracking. See “Specifying Kerning and Tracking” in
Chapter 12, “Typography.”
The X and Y fields indicate the location
of the origin of the text box in relation to
the upper left corner of the page.
The
W and H fields indicate the width
and height of the text box.
The
Cols field indicates the number of
columns contained in the text box.
2.5
A Guide to QuarkXPress
Introducing QuarkXPress
Measurements Palette
Page 73

• The {, }, [, $, ] buttons indicate left, centered, right, justified, and
forced justified alignment of selected paragraphs.
• The
Font pop-up menu < indicates the selected font. To change the
font, choose a font from the pop-up menu or enter the name of the
font in the field.
• The
Size pop-up menu < indicates the size of the selected font. To
change the font size, choose a size from the pop-up menu or enter a
value in the field.
• The
P, B, I, U, W, ?, O, S, K, H, +, _, and M buttons indicate
plain, bold, italics, underline, word underline, strike thru, outline,
shadow, all caps, small caps, superscript, subscript, and superior type
styles, respectively. Multiple type styles may be applied to a single
character or group of characters.
R
The Measurements palette looks slightly different for anchored
text boxes. When an anchored text box is active, the
Measurements
palette indicates whether the text box aligns with the ascent 6 or
baseline
5 of the associated line of text. Click the ascent 6 or
baseline
5 buttons to change the alignment of an anchored text
box. The
X, Y, and r fields are not available for anchored text
boxes. When the Content tool
E is selected, the Measurements
palette displays the same content controls for anchored text boxes
as those for nonanchored text boxes.
Measurements palette for picture boxes
Item information
When a picture box is selected in the document window, the left side of
the
Measurements palette lets you edit the picture box item information.
See Chapter 14, “Pictures.”
2.6
A Guide to QuarkXPress
Palettes
The nandNfields indicate leading and
tracking/kerning respectively.
The
{, }, [, $
, and]buttons
indicate the alignment applied to
selected paragraphs.
The
6
and 5buttons indicate whether
the anchored text box aligns with the
ascent or baseline of the text.
The
X and Y fields indicate the location
of the origin of the picture box in relation
to the upper left corner of the page.
Page 74

The W and H fields indicate the width
and height of the picture box.
The
r
and =fields indicate the picture
box’s angle of rotation and the radii of its
corners, respectively.
The
(
and )buttons let you flip the
contents of the picture box horizontally
or vertically.
The
X% and Y% fields indicate the
scaling of the picture box’s contents.
The
N
and nfields indicate horizontal
and vertical offsets of the picture box’s
contents from the upper left corner of
the picture box.
The
6
and 5buttons indicate whether
the anchored picture box aligns with the
ascent or baseline of the text.
2.7
A Guide to QuarkXPress
• The X and Y fields indicate the location of the origin (upper left corner)
of the picture box.
• The
W and H fields indicate the width and height of the picture box.
• The
r field indicates the picture box’s angle of rotation.
• The
= field indicates the radii of the corners of the picture box.
Content information
When the Content tool E is selected, the right side of the
Measurements palette lets you edit the contents of the picture box.
• The
( button lets you flip the contents of the picture box along a
horizontal axis.
• The
) button lets you flip the contents of the picture box along a
vertical axis.
• The
X% and Y% fields indicate the horizontal and vertical scaling of
the contents of the picture box.
• The
N and n fields indicate the horizontal and vertical offsets of the con-
tents of the picture box from the picture box’s origin (upper left corner).
• The
r field indicates the angle of rotation of the contents of the
picture box.
• The
S field indicates the skew (slant) of the contents of the picture box.
R
The Measurements palette looks slightly different for anchored
picture boxes. When an anchored picture box is active, the
Mea-
surements
palette indicates whether the picture box aligns with
the ascent
6 or the baseline 5 of the associated line of text. Click
the ascent
6 or baseline 5 buttons to change the alignment of the
anchored picture box. The
X, Y, r, and = fields are not available
for anchored picture boxes. When the Content tool
E is selected,
the
Measurements palette displays the same content controls for
anchored picture boxes as those for nonanchored text boxes.
Introducing QuarkXPress
Measurements Palette
Page 75

2.8
A Guide to QuarkXPress
Measurements palette for lines
Fields displayed in the Measurements palette for lines vary according
to the line description method selected in the
Mode pop-up menu.
Line description methods available in the
Mode pop-up menu include
Endpoints, First Point, Midpoint, and Last Point. See Chapter 8,
“Line Basics.”
Endpoints
• The X1 and Y1 fields indicate the horizontal and vertical coordinates of
the first endpoint of the line.
• The
X2 and Y2 fields indicate the horizontal and vertical coordinates of
the last endpoint of the line.
• The
Mode pop-up menu lets you choose whether to describe the
selected line by
Endpoints; by a First Point, length, and angle; by a
Last Point, length, and angle; or by a Midpoint, length, and angle.
• The
W field indicates the width of the line.
• The left pop-up menu indicates the line’s style.
• The right pop-up menu indicates the line’s arrowheads.
First Point
• The X1 and Y1 fields indicate the horizontal and vertical coordinates of
the left endpoint of the line.
• The
r field indicates the line’s angle of rotation.
• The
L field indicates the line’s length.
Palettes
The X1, Y1 and X2, Y2 fields indicate the
horizontal and vertical coordinates of the
left and right endpoints of the line.
The
Mode pop-up menu indicates the
method used to describe the line.
The
r
and L fields indicate the angle
and length of the line, respectively.
The
W field indicates the width of the line.
The two pop-up menus on the right side
of the palette indicate the style of the
line and its arrowheads.
Page 76

• The Mode pop-up menu lets you choose whether to describe the
selected line by
Endpoints; by the First Point, length, and angle; by
the
Last Point, length, and angle; or by a Midpoint, length, and angle.
• The
W field indicates the width of the line.
• The left pop-up menu indicates the line’s style.
• The right pop-up menu indicates the line’s arrowheads.
Midpoint
• The XC and YC fields indicate the horizontal and vertical coordinates
of the midpoint of the line.
• The
r field indicates the line’s angle of rotation.
• The
L field indicates the line’s length.
• The
Mode pop-up menu lets you choose whether to describe the
selected line by
Endpoints; by the First Point, length, and angle; by a
Last Point, length, and angle; or by a Midpoint, length, and angle.
• The
W field indicates the width of the line.
• The left pop-up menu indicates the line’s style.
• The right pop-up menu indicates the line’s arrowheads.
Last Point
• The X2 and Y2 fields indicate the horizontal and vertical coordinates of
the right endpoint of the line.
• The
r field indicates the line’s angle of rotation.
• The
L field indicates the line’s length.
The XC and YC fields indicate the
horizontal and vertical coordinates of
the center point of the line.
The flip text button √ places text on the
opposite side of the line, starting from
the opposite endpoint. For example, if
you create a circular text path with text
flowing on the outside of the circle, Flip
Text positions text on the inside of the
circle. Text alignment is not affected.
2.9
A Guide to QuarkXPress
Introducing QuarkXPress
Measurements Palette
Page 77

2.10
A Guide to QuarkXPress
• The Mode pop-up menu lets you choose whether to describe the
selected line by
Endpoints; by the First Point, length, and angle; by
the
Last Point, length, and angle; or by a Midpoint, length, and angle.
• The
W field indicates the width of the line.
• The left pop-up menu indicates the line’s style.
• The right pop-up menu indicates the line’s arrowheads.
Measurements palette for groups and multiple-selected items
When groups of items or multiple items are selected, the Measurements
palette lets you edit the origin and angle of the group of items.
• The
X and Y fields indicate the location of the origin (upper left corner)
of the bounding box containing the group of items.
• The
r field indicates the angle of rotation of the group of items. When
an item is rotated with a group of items, it is rotated relative to the center
of the bounding box enclosing the group, not to its own origin (upper
left corner).
Measurements palette for editing Bézier items
When a point, line segment, or curve handle on a Bézier shape is selected,
the
Measurements palette lets you edit the origin, dimension, and angle
of the item, as well as the type of point or line segment in the shape. You
can also enter values to manipulate point position and curve handle
angle and length. See “Reshaping Boxes” in Chapter 7, “Box Basics.”
• The
X and Y fields indicate the horizontal and vertical locations of the
origin (upper left corner) of the Bézier item’s bounding box.
Palettes
The X and Y fields indicate the horizontal and vertical coordinates of the upper
left corner of the bounding box containing the group of items.
The
r
field indicates the angle of the
group of items.
The point and line segment buttons for
Bézier items let you manipulate active
points and line segments.
The
XP and YP fields indicate the horizon-
tal and vertical location of the active point.
The
r
field and the length field for the
„ curve handle indicates the angle and
length of the curve handle in relation to
the active point.
Page 78

The rfield and length field for the Œ
curve indicates the angle and length of
the curve handle in relation to the
active point.
2.11
A Guide to QuarkXPress
• The W and H fields indicate the width and height of the Bézier item.
• The
r field indicates the angle of rotation of the Bézier item.
• The Symmetrical Point button
† lets you convert a point into a
symmetrical point for a Bézier item.
• The Smooth Point button
¥ lets you convert a point into a smooth
point for a Bézier item.
• The Corner Point button
® lets you convert a point into a corner
point for a Bézier item.
• The Straight Segment button
œ lets you convert a curved line segment
to a straight line segment for a Bézier item.
• The Curved Segment button
∑ lets you convert a straight line segment
to a curved line segment for a Bézier item.
• The
XP and YP fields indicate the horizontal and vertical location of
the active point.
• The Diamond Curve Handle Angle field
r indicates the angle of the
diamond-shaped curve handle in relation to the active point.
• The Diamond Curve Handle Distance field
„ indicates the distance of
the diamond-shaped curve handle from the active point.
• The Square Curve Handle Angle field
r indicates the angle of the
square-shaped curve handle in relation to the active point.
• The Square Curve Handle Distance field
Πindicates the distance of the
square-shaped curve handle from the active point.
Introducing QuarkXPress
Measurements Palette
Page 79

2.12
A Guide to QuarkXPress
Measurements palette for item creation
When a text box, picture box, or line is being created, the Measurements
palette displays item information.
Text box creation
• The X and Y fields indicate the horizontal and vertical locations of
the origin (upper left corner) of the text box. These also display the
coordinates of the pointer after selecting one of the text box creation
tools in the
Tool palette but before clicking the mouse button.
•The
W and H fields indicate the changing width and height of the
text box.
Picture box creation
• The X and Y fields indicate the horizontal and vertical locations of the
origin (upper left corner) of the picture box. These also display the
coordinates of the pointer after selecting one of the picture box creation tools in the
Tool palette but before clicking the mouse button.
•The
W and H fields indicate the changing width and height of the
picture box.
Palettes
Page 80

Line creation
• Depending on the line description method selected in the Mode
pop-up menu, the X1, Y1, X2, Y2, and XC, YC fields indicate the
horizontal and vertical coordinates of the left endpoint, right endpoint, or midpoint of the line.
Measurements palette for Ruler Origin relocation
The X and Y fields indicate the changing origin of the ruler when
dragging the 0,0 origin crosshair out of the ruler origin box.
Measurements palette for Ruler Guide placement
The X and Y fields indicate the horizontal locations of vertical guides
and the vertical positions of horizontal guides as they are dragged
from the ruler.
The X and Y fields indicate the horizontal and vertical locations of the active
ruler guide.
2.13
A Guide to QuarkXPress
Introducing QuarkXPress
Measurements Palette
Page 81

2.14
A Guide to QuarkXPress
Document Layout Palette
The Document Layout (View & Show Document Layout) palette lets
you add, delete, move, and access document pages and master pages using
page icons.
Page insert, duplicate, and delete area
The four icons at the top of the Document Layout palette (F10) let
you insert single-sided and facing pages, and duplicate and delete
selected pages.
•The
0 icon lets you insert blank single-sided document pages into a
layout. To insert a single-sided page, drag the
0 icon into the docu-
ment page area of the
Document Layout palette, move the pointer
over the document page icons to preview the placement of the page,
and release the mouse button to place the page in the layout.
• The
3 icon lets you insert blank facing-page document pages into a
layout. The
3 icon is available only if you have checked Facing Pages
either in the New dialog box (File & New) or in the Document Setup
dialog box (File & Document Setup). To insert a blank facing-page
document page, drag the
3 icon into the document page area of the
Document Layout palette, move the pointer over the document page
icons to preview the placement of the page, and release the mouse
button to place the page in the layout.
•The
0 and 3 icon also lets you create new master pages. To create a
new master page, drag the
0 or 3 icon into the master page area of the
Document Layout palette and release the mouse button. Releasing the
mouse button when an existing master page is highlighted replaces the
master page with a blank page.
Palettes
The 0, 3,
2
2
, and Lbuttons let you
add single-sided and facing pages and
duplicate and delete selected pages.
Page 82

The master pages area of the Document
Layout
palette lets you insert, apply,
and rename master pages.
2.15
A Guide to QuarkXPress
• The 22icon lets you create new master pages based on existing master
pages. To duplicate a master page, click the master page in the master
page area to select it, then click the
22icon. The new master page is
placed in the master page area immediately after the master page from
which it is duplicated.
• The
L icon lets you delete selected master pages and document
pages.To delete a master page, highlight it in the master page area of
the
Document Layout palette, then click the L icon. To delete a docu-
ment page, highlight it in the document page area of the
Document
Layout
palette, then click the L icon. An alert asks you to confirm or
abort the deletion. You can also press the Option key while clicking the
delete icon to bypass the confirmation alert.
Master pages area
The master pages area of the Document Layout palette lets you insert,
apply, and rename user-defined master pages.
• Master page icons
0 or ! let you insert master pages in a document.
To insert a master page, drag the master page’s icon
0 or ! into the
document page area of the
Document Layout palette, move the
pointer over the document page icons to preview the placement of the
page, and release the mouse button to place the page in the layout.
• Master page icons
0 or ! also let you apply master page elements to
blank pages. To apply a master page to a blank page, drag the master
page’s icon on top of the blank page and release the mouse button.
• The name fields next to the master page icons
0 or ! let you rename
the master pages. Click the name field to highlight it, then enter a
name of up to 64 characters for the master page. Each master page may
have a prefix of up to three characters. When created, new master pages
are automatically assigned prefixes of “A,” “B,” “C,” and so on. To
change the prefix of a master page, highlight the name field next to the
Introducing QuarkXPress
Document Layout Palette
Page 83

2.16
A Guide to QuarkXPress
master page icon 0 or !, enter the prefix, followed immediately by a
hyphen, followed by the remainder of the name.
R
You can expand the master page area with the split bar between the
master page and document page areas. This lets you display an
entire list of master pages. To expand the master page area, click
the split bar and drag it down.
Document page area
The document page area of the Document Layout palette displays page
layout, absolute page numbers, and the master pages on which individual
pages are based.
• Document page icons
0, 1, 2 can be repositioned in the layout. To
reposition a page, drag the page to a new position in the layout.
• Single-page document page icons
0 indicate single pages not based on
master pages.
• Facing-page document page icons
1 indicate facing pages not based on
master pages.
• Facing-page document page icons
1 containing master page prefixes
indicate document pages based on master pages.
• Single-side page icons
0 that are based on a single-sided master page
will also have a letter on them.
• The number beneath a page indicates the page’s actual page number,
including prefixes, section starts, etc.
• The bar at the bottom of the
Document Layout palette indicates the
page number of a selected page. Clicking this bar displays the
Section
dialog box (Page & Section).
• Double-clicking a document page icon displays the associated page in
the document window.
Palettes
The document page area lets you position and access pages in your layout.
Page 84

Style Sheets Palette
The Style Sheets palette (View & Show Style Sheets) lets you create,
apply, edit, duplicate, and delete character and paragraph style sheets.
Style Sheets pop-out menu
Four options display to the right of the style sheets when you press
the
C key and click a style sheet name in the Style Sheets palette
(F11). This lets you edit, duplicate, delete, and create new paragraph
and character style sheets. See “Working with Style Sheets” in
Chapter 12, “Typography.” To display the
Edit Style Sheets dialog box
(
Edit & Style Sheets) from the Style Sheets palette, press C-Option
while clicking a style sheet name.
Pressing Cwhile clicking a style sheet name in the Style Sheets palette lets you edit, duplicate,
delete, or create character and paragraph style sheets.
Paragraph style sheet area
The paragraph style sheet area lets you select paragraph style sheets and
apply them to text. Style sheets
π in the paragraph style sheet area are
available when both the Content tool
E and a text box are selected.
Clicking the paragraph style sheet name
or the
π
icon lets you apply paragraph
style sheets.
2.17
A Guide to QuarkXPress
Introducing QuarkXPress
Style Sheets Palette
Page 85

2.18
A Guide to QuarkXPress
• Clicking the π icon next to paragraph style sheet, or clicking the
paragraph style sheet name, let you apply the style sheet to selected
paragraphs or at the text insertion point
i.
• A highlighted paragraph style sheet name indicates that the style sheet
is chosen. Click a paragraph style sheet’s name to choose it. Only one
paragraph style sheet and it’s associated character style sheet may be
chosen at a time.
• The keyboard equivalent (if any) specified for a paragraph style sheet is
displayed to the right of the style sheet name.
Character style sheet area
The character style sheet area lets you select character style sheets and
apply them to text. Style sheets in the character style sheet area are
available when both the Content tool
E and a text box are selected.
•Clicking the
Ø icon next to a character style sheet, or clicking the style
sheet name, lets you apply the style sheet to selected characters or at
the text insertion bar
i.
• A highlighted character style sheet name indicates that the style sheet
is chosen. Click a character style sheet’s name to choose it. Only one
character style sheet may be chosen at a time.
• The keyboard equivalent (if any) specified for a character style sheet is
displayed to the right of the style sheet name.
R
The split bar between the paragraph style sheet and character style
sheet areas lets you expand the paragraph style sheet area so you
can display your entire list of paragraph style sheets. To expand the
character style sheet area, click the split bar and drag it up.
Palettes
Clicking the character style sheet name
or the
Ø
icon in the character style
sheet area lets you apply character style
sheets to selected text.
Page 86

Buttons at the top of the Colors palette
let you apply colors to frames, text, lines,
and backgrounds.
Buttons displayed when a line is
selected let you apply color to a line.
2.19
A Guide to QuarkXPress
Colors Palette
The Colors palette (View & Show Colors) lets you add color to selected
text, pictures, box backgrounds, lines, and frames.
Colors palette buttons
The buttons located at the top of the Colors palette (F12) let you choose
whether to apply the color to frames, text, lines, or the background of
picture boxes and text boxes.
• The
J button lets you view and apply the colors to the frame for the
selected text boxes or picture boxes.
• The
T button lets you view and apply the color to selected text or the
text insertion bar
i.
• The
L button lets you view and apply the color to a selected line.
• The
Y button lets you view and apply the colors to the background for
the selected text boxes, picture boxes, and groups.
• The
p icon lets you apply color to certain picture formats.
• The
Shade pop-up menu indicates the saturation of a selected color. To
change the saturation of a selected color, choose a value from the popup menu, or enter a value directly in the field. You can enter values
from 0 to 100% in increments as fine as 0.1%.
Blends area
The blends area of the Colors palette lets you apply color blends to
the backgrounds of text boxes and picture boxes. The Cool Blends
XTensions software must be running to see anything except solid and
linear blend patterns.
Introducing QuarkXPress
Colors Palette
Page 87

2.20
A Guide to QuarkXPress
• The Type pop-up menu indicates the type of blend applied to the back-
grounds of selected text boxes or picture boxes. Options in the
Type pop-
up menu include
Solid, Linear Blend, Mid-Linear Blend, Rectangular
Blend
, Diamond Blend, Circular Blend, and Full Circular Blend.
• The #1 and #2 buttons let you choose the beginning and ending
colors of a blend when an option other than
Solid is chosen from
the
Type pop-up menu. Clicking the #1 button lets you specify the
first color in the blend; clicking the
#2 button lets you specify the
second color. Blends are displayed in active text boxes only when the
Item tool
e is selected.
•The
Angle field indicates the angle at which a blend fills a box. You can
enter a value from –360˚ to 360˚ in increments as fine as 0.001˚.
R
To display the Colors dialog box (Edit & Colors) from the Colors
palette, press C while clicking a color name.
Color selection area
The color selection area of the Colors palette lets you apply colors to
frames, text, pictures, lines, and backgrounds of text boxes and
picture boxes.
•Swatches display colors next to their names in a list.
• Swatches also let you apply colors to selected lines, frames, and the
backgrounds of text boxes and picture boxes. To apply a color to a line,
frame, or background, drag and drop the associated swatch over the
item in the document page.
• A highlighted color name indicates the chosen color. If various colors
are applied to multiple selected items, no color name is highlighted.
Palettes
The Type pop-up menu, #1 and #2 but-
tons, and the
Angle field let you apply
blends to the backgrounds of text boxes
and picture boxes.
Clicking the name of a color in the color
list area applies the color to selected
frames, text, lines, backgrounds, and certain picture formats based on the button
selection at the top of the palette.
Page 88

These values in the Trap Information
palette (View&Show Trap Informa-
tion
) control how QuarkXPress traps the
Background for an active item.
These values control how QuarkXPress
traps the
Text for an active item.
2.21
A Guide to QuarkXPress
Trap Information Palette
The Trap Information palette (View & Show Trap Information) lets you
specify trapping information for adjacent colors on an object-by-object
basis. See “Specifying Item-Specific Trapping” in Chapter 16, “Trapping.”
Background and Text fields for trapping boxes and text
The Background and Text fields of the Trap Information palette
(Option-F12) display the element of a selected box. You can specify
trapping for any QuarkXPress box, its contents (except for imported pictures), its frames, and its background. The following information features a text box containing text and a background color with no frame.
Background and Text pop-up menu
The Background and Text pop-up menus indicate the elements of the
selected item. Options vary depending on the type of item selected.
•
Default indicates the default for the Background and Text fields using
the trapping values specified in the
Trap Specifications dialog box
(
Edit & Colors & Edit Trap) for the item’s current object color against
the item’s current background color.
•
Overprint indicates that QuarkXPress will overprint an active item.
Overprint overrides the Overprint Limit value entered in the Trapping
tab and overprints regardless of the shade of the object and back-
ground colors involved.
•
Knockout indicates that an active item will knockout its background.
•
Auto Amount (+) will apply the positive value entered in the Auto
Amount
field of the Trapping tab. This value is displayed to the right
of the pop-up menu as a positive number (a spread).
Introducing QuarkXPress
Trap Information Palette
Page 89

2.22
A Guide to QuarkXPress
• Auto Amount (–) will apply the negative value entered in the Auto
Amount
field of the Trapping tab. This value is displayed to the right
of the pop-up menu as a negative number (a choke).
•
Custom will specify a custom choke or spread value for the active item,
entered in the field to the right of the pop-up menu.
Trapping for frames
A frame for a box always traps to the background color(s) specified for
the box, to the color(s) used to color the frame, and to any background
color(s) underneath the box. The trapping type from the pop-up menus
specify trapping values for the
Frame Inside, Frame Middle and Frame
Outside
fields.
•
Frame Inside indicates trapping applied between the innermost color
of a frame and the box contents (background color or picture).
•
Frame Middle indicates trapping applied to colors within a frame.
•
Frame Outside indicates trapping applied between the outermost color
of a frame and colors underneath it.
The trapping types contained in the pop-up menus are the same as those
described in “Background and Text fields for trapping boxes and text”
earlier in this section.
Palettes
These values control how QuarkXPress
traps the
Picture for an active item.
The
Trap Information palette indicates
trapping for the
Inside, Middle, and
Outside of a frame created with a multi-
line style.
Page 90

The Trap Information palette indicates
trapping for the
Line, Line Middle, and
Gap of a line created with a multiline
style
The
Default Trap information window
displays information about active items
with
Default selected.
2.23
A Guide to QuarkXPress
Trapping for lines
A line always traps to the color(s) used to color it, and to any background colors underneath the line. Choose a trapping type from the
pop-up menu to specify trapping values for the
Line, Line Middle,
and
Gap fields.
•The
Line field indicates trapping applied to the Line color specified for
a line in relation to an adjacent background color.
•
Line Middle indicates trapping applied to colors within a line.
• The
Gap field indicates trapping applied to the Gap color specified for
a line in relation to an adjacent background color. The
Gap field is only
available with dashed lines or multi-lines with only one arrowhead.
The trapping types contained in the pop-up menus are the same as those
described in “Background and Text fields for trapping boxes and text”
earlier in this section.
Default Trap information window
Information about a Default trap value can be viewed by clicking the
question mark to the right of the value. The
Default Trap information
window is displayed, and fields will be highlighted or dimmed. See
“Specifying Default Trapping” in Chapter 16, “Trapping.”
•
Object Color indicates the color applied to the element of the active box.
•
Underneath Color indicates the color and color type of the object(s)
underneath the selected item.
Multiple will display if there are multiple
background colors, and there is not a conflict between the choke and
spread amount in the
Trap Specifications dialog box. Indeterminate will
display if there is a conflict between the choke amount and the spread
amount. Otherwise, the name of the color covering the entire background of the object is displayed.
Introducing QuarkXPress
Trap Information Palette
Page 91

2.24
A Guide to QuarkXPress
Source of Trap Values area
Text displayed in this area is dimmed if that trap source is not being used.
•
Edit Trap indicates the source of trap value is from settings in the Trap
Specifications
dialog box (Edit & Colors & Edit Trap). See “Specifying
Color-Specific Trapping” in Chapter 16, “Trapping.”
•
Trap Preferences indicates the source of the trap value is from settings
in the
Trapping Preferences dialog box (Edit & Preferences &
Document & Trapping tab). See “Specifying Default Trapping” in
Chapter 16, “Trapping.”
Properties area
Text displayed in this area is dimmed if that trap property is not being used.
•
Proportional indicates that proportional trapping is applied. Proportional
trapping uses the calculated trap value multiplied by the difference between the luminance of the object color and background color
to calculate the trapping value.
•
Process Trapping indicates the object color and background color have
process trapping applied. Process trapping is not applied if the background underneath the object has more than one color.
•
Rich Black indicates Rich Black is applied to the object color or background, and that
Rich Black trapping will be used. See “Creating and
Using a Rich Black” in Chapter 16, “Trapping.”
•
Small Object indicates that trapping for text less than 24 points, or for
an object width (such as a stripe, a line, etc.) less than 10 points will
require special trapping if process trapping is on.
•
Overprint Limit indicates that the object color was set to overprint the
background, but the shade of the object was less than the overprint
limit in the
Overprint Limit field of the Trapping tab (Edit & Prefer-
ences
& Document & Trapping tab).
Palettes
The Source of Trap Values area has
one selection highlighted, which shows
the location where the trap information
is taken from. Text displayed in this area
is dimmed if that trap source is not
being used.
The
Properties area displays high-
lighted text when that trap property is
being used. Text displayed in this area
is dimmed if that trap source is not
being used.
Page 92

2.25
A Guide to QuarkXPress
• Knockout Limit indicates that the color’s luminance is less than or
equal to the knockout limits specified in the
Trapping Preferences
dialog box (Edit & Preferences & Document & Trapping tab).
•
Smallest Trap Value indicates that multiple underneath colors have
traps in the same direction (all chokes or all spreads). The smallest trap
value of the underneath colors is used.
Introducing QuarkXPress
Trap Information Palette
Page 93

2.26
A Guide to QuarkXPress
Lists Palette
The Lists palette helps you create lists, such as table of content lists, for
any number of documents. The
Lists palette displays text with style sheets
applied, as defined in the
Lists dialog box (Edit & Lists).
Viewing and updating lists
The Lists palette (Option-F11) helps you work with lists. You can view and
update lists for a single document, a chapter of a book, or an entire book.
Viewing lists
Documents, chapters, or books must be open to view lists.
• The
Show List For pop-up menu lets you choose to display lists for a
book or current document. Choosing
Current Document lets you view
the list for the open document; choosing an entry below the gray line
lets you view lists for any open book.
• The
List Name pop-up menu displays the name of all lists for the
current document or book.
•
Find lets you locate items in the Lists palette. Enter the first few letters
of a list entry and it finds the closest entry in the
Lists palette. Double-
click the entry to locate the item in the document.
•
Build lets you copy the current list to an active text box. The Format
As
style sheets for the list are applied automatically. The Build button
is not available unless a text box is active.
Palettes
Blank Lists palette
Use the options in the
Lists palette to
create lists for your documentation.
Page 94

2.27
A Guide to QuarkXPress
Updating lists for chapters and documents
The Lists palette is not automatically updated as you work. If you
have made changes to the text, you will need to update the list to be
sure it is current.
Update lets you scan the document for list items in the current document, build a list, and save it with the document. When the process is
complete, the list is displayed in the
Lists palette.
Updating lists for books
Update lets you update lists for the open book. QuarkXPress reads the
saved list information from the publication file and displays it in the
Lists palette. However, you may not have the most recent versions of
the lists for each chapter. Click
Update to force QuarkXPress to rescan
all chapters in a book and build a new list. Building an accurate list for
the book is very important if you are working on a shared book. See
“Creating Tables of Contents and Indexes” in Chapter 18, “Books.”
R
To display the most accurate list for a book, all chapters must be
“Available” in the
Books palette before you Update. If QuarkXPress
encounters a chapter that is unavailable, you will be alerted that
chapters are missing. Clicking
OK continues the list-building
process, but the unavailable chapter is skipped. The result is a list
that does not include list items from the missing chapter.
Introducing QuarkXPress
Lists Palette
Page 95

3
Menus and Dialog Boxes
File Menu
3.3
Edit Menu
3.33
Style Menu for Text
3.115
Style Menu for Pictures
3.137
Style Menu for Lines
3.146
Item Menu
3.149
Page Menu
3.201
View Menu
3.213
Utilities Menu
3.221
For internal use by licensee only. The information in this electronic file may not be disseminated in any form to any unlicensed person or entity
without prior written consent of Quark Technology Partnership or its licensee, Quark, Inc.
Page 96

3
Menus and Dialog
Boxes
Menus group an application’s primary functions
and make them readily available, while dialog
boxes offer easy access to a variety of controls.
Menus and dialog boxes let you “feel” your way
through an application and learn it by intuition.
The QuarkXPress interface is structured so you can
learn it quickly. By skimming through the menus,
you will find that many commands are familiar or
self-explanatory. And, with a little experimentation,
you will see that menu and dialog box controls act
the way you expect them to. Once you become famil-
iar with QuarkXPress, you will discover that keyboard
commands and palettes offer convenient access to
features you first learn to access through menus.
Page 97

File menu
3.3
A Guide to QuarkXPress
File Menu
The QuarkXPress File menu lets you manipulate electronic files in a number
of ways, from creating, opening, and saving files, to setting up a document
for printing.
Sections
The File menu is divided into five sections:
• The first section lets you create and open documents, libraries, and
books. The
New and Open commands are available unless too many
files are open (25 documents and libraries combined, plus an additional 25 books).
•The second section lets you close and save document files and work
with revisions of files. The
Close and Save as commands are available
when a file is open. The
Save and Revert to Saved commands are
available any time unsaved changes were made to a file.
•The third section lets you import text and pictures into documents,
save text in a variety of formats, append sets of document attributes,
save document pages as EPS files, and collect the picture files required
for output into a folder with the document. The
Append, Save Page as
EPS
, and Collect for Output commands are available when a docu-
ment is open.
Get Text is available when a text box is active; Get Pic-
ture
is available when a picture box is active.
• The fourth section lets you change a document’s size and control the
way it prints. The
Document Setup, Page Setup, and Print commands
are available when a document is active.
• The fifth section lets you close the application. The
Quit command is
always available.
Introducing QuarkXPress
File Menu
Page 98

3.4
A Guide to QuarkXPress
New (submenu)
File menu
The New command displays a submenu that lets you create new documents, libraries, and books.
Document (command)
File &New
The Document command (C-N) displays the New Document dialog
box, which lets you specify the setup of a new document.
New Document (dialog box)
File &New &Document
The New Document dialog box lets you define a document’s first page
and original master page. (All new documents contain a master page by
default.) These specifications become program defaults and are displayed
the next time you open the
New Document dialog box.
Page (area)
File &New &Document
The Page area lets you specify a standard or custom page size, and lets
you specify an orientation for the document.
• To specify a standard page size, choose an option from the
Size pop-up
menu. The appropriate dimensions are automatically displayed in the
Width and Height fields.
• To specify a custom page size, enter values in the
Width and Height
fields. The minimum page size is 1" ´ 1"; the maximum is 48" ´ 48".
When you enter values in the fields, the option in the
Size pop-up
menu changes to
Custom.
• To change the Orientation of the document, click the portrait ™
(vertical) or landscape £ (horizontal) icon. The values in the Width
and Height fields change to reflect the new orientation.
Menus and Dialog Boxes
New submenu
Document command
New Document dialog box and
Page area
Page 99

Margin Guides area
Column Guides area
3.5
A Guide to QuarkXPress
Margin Guides (area)
File &New &Document
The Margin Guides area lets you specify the position of margin guides
on the default master page and its document pages. You can also specify
whether a document contains facing pages or nonfacing pages.
• Enter values in the
Top, Bottom, Left, and Right fields to specify the
margins for the default master page. When
Facing Pages is checked,
the
Left and Right margin fields change to Inside and Outside (the
Inside margin is nearest the binding; the Outside margin is on the
opposite edge).
• Check
Facing Pages to create a document with different left and right
page formats (like this manual). If you check
Facing Pages, the new
document’s original master page, and any additional master pages you
create, will be divided into left and right components to represent the
facing-page spread.
R
If you check Automatic Text Box, the values you enter in the
Margin Guides fields determine the size and location of the
automatic text box.
Column Guides (area)
File &New &Document
The Column Guides area lets you specify the position of column guides
on the default master page.
• Enter a value between 1 and 30 in the
Columns field to specify the
number of columns.
• Enter a value from 3 to 288 points (4") in the
Gutter Width field to
specify the amount of white space between columns.
R
If you check Automatic Text Box, the values you enter in the
Column Guides fields are used to divide the automatic text box.
Introducing QuarkXPress
File Menu
Page 100

3.6
A Guide to QuarkXPress
Automatic Text Box (check box)
File &New &Document
Check Automatic Text Box to place an initial automatic text box on the
first page of a new document. The values in the
Margin Guides and Col-
umn Guides
fields determine the size, placement, and columns in the
automatic text box.
R
An automatic text box is a text box defined on a master page
through which text flows automatically to other pages when pages
are inserted into a document. When you check
Automatic Text
Box
, this text box is automatically placed on the master page. The
first page of the document, because it is based on the original master page, also includes the automatic text box.
Library (command)
File &New
A library is a file that displays as a palette and lets you store and retrieve
QuarkXPress items. The
Library command (C-Option-N) displays the
New Library directory dialog box, which lets you create a new library.
New Library (dialog box)
File &New &Library
The New Library directory dialog box lets you specify a location for the
library file and name the library. Enter a name in the
Library Name field
and click
Create to display the new library. See Chapter 17, “Libraries,”
for information about using libraries.
Menus and Dialog Boxes
Automatic Text Box check box
Library command
New Library dialog box
 Loading...