

Page 1

A Guide to QuarkCopyDesk
8.1
Page 2

CONTENTS
Contents
Legal notices.....................................................................................9
About this guide.............................................................................15
What we're assuming about you..........................................................................15
Where to go for help............................................................................................15
Conventions..........................................................................................................16
Technology note...................................................................................................16
The user interface...........................................................................17
Menus...................................................................................................................17
QuarkCopyDesk menu (Mac OS only)...........................................................................17
File menu.......................................................................................................................18
Edit menu......................................................................................................................18
Style menu.....................................................................................................................19
Component menu.........................................................................................................21
View menu.....................................................................................................................21
Utilities menu.................................................................................................................22
Window menu...............................................................................................................23
Context menus......................................................................................................24
Palettes.................................................................................................................24
Measurements palette...................................................................................................24
Style Sheets palette.......................................................................................................24
Colors palette................................................................................................................25
Lists palette...................................................................................................................25
Glyphs palette...............................................................................................................26
Picture Effects palette...................................................................................................27
Palette groups and palette sets............................................................................28
Splitting a window................................................................................................29
Articles and components.................................................................30
Understanding articles and components..............................................................30
Reading order...............................................................................................................30
Text components and pages.........................................................................................31
Editing picture components..........................................................................................31
Master components......................................................................................................31
ii | A GUIDE TO QUARKCOPYDESK 8.1
Page 3

CONTENTS
Templates......................................................................................................................32
QuarkCopyDesk lightweight file format........................................................................32
Articles and QuarkXPress..............................................................................................32
Working with articles............................................................................................34
Creating articles............................................................................................................34
Saving articles automatically.........................................................................................35
Saving articles as templates..........................................................................................36
Changing article setup..................................................................................................36
Working with components....................................................................................37
Creating components....................................................................................................37
Controlling component properties................................................................................37
Deleting components....................................................................................................37
Navigating among components....................................................................................38
Text and typography.......................................................................39
Editing text...........................................................................................................39
Importing and exporting text...............................................................................39
Import/export filters......................................................................................................40
Importing and exporting text with Unicode options.....................................................40
Finding and changing text....................................................................................41
Checking spelling..................................................................................................42
Auxiliary dictionaries.....................................................................................................44
Counting words and characters............................................................................44
Applying character attributes...............................................................................45
Applying a font..............................................................................................................45
Choosing a font size......................................................................................................45
Applying type styles......................................................................................................46
Applying color, shade, and opacity...............................................................................46
Applying horizontal or vertical scale.............................................................................47
Applying baseline shift..................................................................................................47
Applying multiple character attributes..........................................................................48
Applying paragraph attributes.............................................................................48
Controlling alignment...................................................................................................49
Controlling indentation.................................................................................................49
Controlling leading........................................................................................................50
Controlling space before and after paragraphs............................................................51
Setting tabs...................................................................................................................51
Controlling widow and orphan lines.............................................................................51
Controlling hyphenation and justification.............................................................52
Specifying hyphenation exceptions..............................................................................53
Using discretionary hyphens.........................................................................................53
Controlling kerning...............................................................................................53
A GUIDE TO QUARKCOPYDESK 8.1 | iii
Page 4

CONTENTS
Kerning manually...........................................................................................................54
Kerning automatically....................................................................................................54
Controlling tracking..............................................................................................54
Tracking manually..........................................................................................................55
Working with style sheets....................................................................................55
Creating and editing paragraph style sheets................................................................55
Creating and editing character style sheets..................................................................58
Applying style sheets....................................................................................................59
Appending style sheets.................................................................................................59
Controlling font usage..........................................................................................60
Using text runaround............................................................................................60
Running text around pictures........................................................................................60
Fine-tuning a runaround path.......................................................................................62
Editing a runaround path..............................................................................................62
Working with text paths.......................................................................................63
Creating drop caps...............................................................................................63
Using anchored boxes...........................................................................................64
Working with OpenType fonts.............................................................................64
Applying OpenType styles............................................................................................65
Using ligatures...............................................................................................................67
Working with the Glyphs palette..........................................................................67
Displaying invisible characters..............................................................................69
Inserting special characters...................................................................................69
Inserting spaces.............................................................................................................69
Inserting other special characters..................................................................................69
Specifying character language..............................................................................69
Using font fallback................................................................................................69
Working with font mapping rules.........................................................................70
Working with hanging characters.........................................................................70
Creating hanging character classes...............................................................................72
Creating hanging character sets ..................................................................................73
Applying hanging character sets...................................................................................74
Color, opacity, and drop shadows..................................................75
Working with colors..............................................................................................75
The Colors palette.........................................................................................................75
The Colors dialog box...................................................................................................75
Creating a color.............................................................................................................76
Editing a color...............................................................................................................77
Duplicating a color........................................................................................................77
Deleting a color.............................................................................................................77
Importing colors from another article or project...........................................................77
iv | A GUIDE TO QUARKCOPYDESK 8.1
Page 5

CONTENTS
Changing all instances of one color to another color...................................................77
Applying color and shade to text..................................................................................78
Working with opacity............................................................................................78
Pictures...........................................................................................79
Understanding pictures.........................................................................................79
Supported picture file types.................................................................................80
Working with pictures...........................................................................................81
Importing a picture........................................................................................................81
Moving pictures.............................................................................................................81
Resizing pictures............................................................................................................81
Cropping pictures.........................................................................................................81
Rotating and skewing pictures......................................................................................82
Coloring and shading pictures......................................................................................82
Flipping pictures............................................................................................................82
Listing, verifying status of, and updating pictures.........................................................82
Specifying background colors for pictures....................................................................82
Maintaining picture attributes.......................................................................................83
Working with clipping paths.................................................................................83
Clipping path basics......................................................................................................83
Creating clipping paths.................................................................................................84
Using embedded clipping paths...................................................................................84
Working with alpha masks....................................................................................84
Working with PSD pictures...................................................................................85
Preparing PSD files........................................................................................................86
Working with PSD layers...............................................................................................86
Working with PSD channels...........................................................................................87
Working with PSD paths................................................................................................88
Printing with PSD Import...............................................................................................88
Using picture effects.............................................................................................89
Working with picture effects..........................................................................................89
Document construction...................................................................92
Working with lists.................................................................................................92
Preparing for lists...........................................................................................................92
Creating a list................................................................................................................93
Importing lists from another document.........................................................................93
Navigating with lists......................................................................................................93
Building lists..................................................................................................................94
Updating lists................................................................................................................94
Output.............................................................................................96
A GUIDE TO QUARKCOPYDESK 8.1 | v
Page 6

CONTENTS
Printing an article..................................................................................................96
Updating picture paths..................................................................................................96
Setting Print dialog box controls...................................................................................96
Print dialog box.............................................................................................................98
Exporting an article in PDF format.....................................................................100
Working with output styles................................................................................101
Views.............................................................................................103
Switching between views...................................................................................103
Working in WYSIWYG view................................................................................103
Working in Galley view.......................................................................................104
Working in Full Screen view................................................................................105
Redline..........................................................................................107
Tracking changes................................................................................................107
Viewing tracked changes....................................................................................108
Accepting and rejecting changes........................................................................109
Notes.............................................................................................110
Creating notes....................................................................................................110
Working with notes............................................................................................111
Opening and closing notes.........................................................................................111
Showing and hiding notes...........................................................................................111
Deleting notes.............................................................................................................111
Converting between notes and text............................................................................112
Viewing notes by author, date, name, or color...........................................................112
Moving and resizing notes..........................................................................................112
Printing notes..............................................................................................................112
Notes in PDFs..............................................................................................................112
Working with multiple languages..................................................113
Applying a character language...........................................................................113
Changing the program language........................................................................114
XTensions software.......................................................................115
Working with XTensions modules.......................................................................115
Installing XTensions modules......................................................................................115
Enabling and disabling XTensions modules................................................................115
Working with XTensions sets.......................................................................................116
XTensions module overview...............................................................................116
Type Tricks..........................................................................................................117
vi | A GUIDE TO QUARKCOPYDESK 8.1
Page 7

CONTENTS
Make Fraction..............................................................................................................117
Make Price...................................................................................................................117
Word Space Tracking..................................................................................................118
Line Check...................................................................................................................118
Custom Underline.......................................................................................................119
DejaVu XTensions software................................................................................119
Multiple Article XTensions software...................................................................119
Installing Multiple Article XTensions software.............................................................120
Using Multiple Article XTensions software..................................................................120
Exporting articles.........................................................................................................122
QCDImportFilter XTensions software................................................................123
Word 6-2000 Filter..............................................................................................123
WordPerfect Filter .............................................................................................123
Output Enhancements...................................................................124
Output Profiles...................................................................................................124
Creating an Output Profile for a printer......................................................................124
Creating an Output Profile for PDF output.................................................................133
Creating an Output Profile for an article XML file.......................................................141
Executing an Output Profile........................................................................................146
Output Profile Groups........................................................................................146
Creating an Output Profile Group...............................................................................147
Executing an Output Profile Group.............................................................................148
Placeholders........................................................................................................149
Placeholder syntax......................................................................................................149
Getting a substring of a placeholder value.................................................................150
Formatting placeholder output...................................................................................151
Placeholder reference.................................................................................................152
Preferences...................................................................................155
Understanding preferences................................................................................155
What's in the QuarkCopyDesk preferences files.........................................................155
Changes to QuarkCopyDesk preferences...................................................................156
Application preferences......................................................................................157
Preferences — Application — General.......................................................................157
Preferences — Application — WYSIWYG View...........................................................157
Preferences — Application — Galley/FullScreen View...............................................157
Preferences — Application — Characteristics.............................................................158
Preferences — Application — Input Settings..............................................................159
Preferences — Application — Font Fallback...............................................................159
Preferences — Application — Undo...........................................................................160
Preferences — Application — Open and Save...........................................................160
A GUIDE TO QUARKCOPYDESK 8.1 | vii
Page 8

CONTENTS
Preferences — Application — XTensions Manager....................................................161
Preferences — Application — Fonts...........................................................................161
Preferences — Application — File List........................................................................161
Preferences — Application — Default Path................................................................162
Preferences — Application — EPS..............................................................................162
Preferences — Application — Full Res Preview..........................................................162
Preferences — Application — Notes..........................................................................162
Preferences — Application — PSD Import..................................................................163
Preferences — Application — PDF.............................................................................163
Preferences — Application — Redline........................................................................163
Preferences — Application — SpellCheck..................................................................163
Preferences — Application — Fraction/Price..............................................................164
Article preferences.............................................................................................164
Preferences — Article — General...............................................................................164
Preferences — Print Layout/Default Article — General..............................................165
Preferences — Print Layout/Default Article — Measurements....................................165
Preferences — Print Layout/Default Article — Paragraph...........................................166
Preferences — Print Layout/Default Article — Character............................................167
Preferences — Print Layout/Default Article — Guides and Grid.................................168
viii | A GUIDE TO QUARKCOPYDESK 8.1
Page 9

Legal notices
©2008 Quark, Inc. as to the content and arrangement of this material. All rights reserved.
©1986–2008 Quark, Inc. and its licensors as to the technology. All rights reserved.
Protected by one or more of U.S. Patent Nos. 5,541,991, 5,907,704, 6,005,560, 6,052,514,
6,081,262, 6,633,666 B2, 6,947,959 B1, 6,940,518 B2, 7,116,843 and other patents pending.
Quark Products and materials are subject to the copyright and other intellectual property
protection of the United States and foreign countries. Unauthorized use or reproduction
without Quark’s written consent is prohibited.
LEGAL NOTICES
QUARK IS NOT THE MANUFACTURER OF THIRD PARTY SOFTWARE OR OTHER THIRD
PARTY HARDWARE (HEREINAFTER “THIRD PARTY PRODUCTS”) AND SUCH THIRD
PARTY PRODUCTS HAVE NOT BEEN CREATED, REVIEWED, OR TESTED BY QUARK, THE
QUARK AFFILIATED COMPANIES OR THEIR LICENSORS. (QUARK AFFILIATED COMPANIES
SHALL MEAN ANY PERSON, BRANCH, OR ENTITY CONTROLLING, CONTROLLED BY
OR UNDER COMMON CONTROL WITH QUARK OR ITS PARENT OR A MAJORITY OF
THE QUARK SHAREHOLDERS, WHETHER NOW EXISTING OR FORMED IN THE FUTURE,
TOGETHER WITH ANY PERSON, BRANCH, OR ENTITY WHICH MAY ACQUIRE SUCH
STATUS IN THE FUTURE.)QUARK, THE QUARK AFFILIATED COMPANIES AND/OR THEIR
LICENSORS MAKE NO WARRANTIES, EITHER EXPRESS OR IMPLIED, REGARDING THE
QUARK PRODUCTS/SERVICES AND/OR THIRD PARTY PRODUCTS/SERVICES, THEIR
MERCHANTABILITY, OR THEIR FITNESS FOR A PARTICULAR PURPOSE. QUARK, THE
QUARK AFFILIATED COMPANIES AND THEIR LICENSORS DISCLAIM ALL WARRANTIES
RELATING TO THE QUARK PRODUCTS/SERVICES AND ANY THIRD PARTY
PRODUCTS/SERVICES. ALL OTHER WARRANTIES AND CONDITIONS, WHETHER EXPRESS,
IMPLIED OR COLLATERAL, AND WHETHER OR NOT, MADE BY DISTRIBUTORS,
RETAILERS, XTENSIONS DEVELOPERS OR OTHER THIRD PARTIES ARE DISCLAIMED BY
QUARK, THE QUARK AFFILIATED COMPANIES AND THEIR LICENSORS, INCLUDING
WITHOUT LIMITATION, ANY WARRANTY OF NON-INFRINGEMENT, COMPATIBILITY,
OR THAT THE SOFTWARE IS ERROR-FREE OR THAT ERRORS CAN OR WILL BE
CORRECTED. THIRD PARTIES MAY PROVIDE LIMITED WARRANTIES AS TO THEIR OWN
PRODUCTS AND/OR SERVICES, AND USERS MUST LOOK TO SAID THIRD PARTIES FOR
SUCH WARRANTIES, IF ANY. SOME JURISDICTIONS, STATES OR PROVINCES DO NOT
ALLOW LIMITATIONS ON IMPLIED WARRANTIES, SO THE ABOVE LIMITATION MAY
NOT APPLY TO PARTICULAR USERS.IN NO EVENT SHALL QUARK, THE QUARK
AFFILIATED COMPANIES, AND/OR THEIR LICENSORS BE LIABLE FOR ANY SPECIAL,
A GUIDE TO QUARKCOPYDESK 8.1 | 9
Page 10

LEGAL NOTICES
INDIRECT, INCIDENTAL, CONSEQUENTIAL OR PUNITIVE DAMAGES, INCLUDING, BUT
NOT LIMITED TO, ANY LOST PROFITS, LOST TIME, LOST SAVINGS, LOST DATA, LOST
FEES, OR EXPENSES OF ANY KIND ARISING FROM INSTALLATION OR USE OF THE
QUARK PRODUCTS/SERVICES, IN ANY MANNER, HOWEVER CAUSED AND ON ANY
THEORY OF LIABILITY. IF, NOTWITHSTANDING THE FOREGOING, QUARK, THE QUARK
AFFILIATED COMPANIES AND/OR THEIR LICENSORS ARE FOUND TO HAVE LIABILITY
RELATING TO THE QUARK PRODUCTS/SERVICES OR THIRD PARTY PRODUCTS/SERVICES,
SUCH LIABILITY SHALL BE LIMITED TO THE AMOUNT PAID BY THE USER TO QUARK
FOR THE SOFTWARE/SERVICES AT ISSUE (EXCLUDING THIRD PARTY
PRODUCTS/SERVICES), IF ANY, OR THE LOWEST AMOUNT UNDER APPLICABLE LAW,
WHICHEVER IS LESS. THESE LIMITATIONS WILL APPLY EVEN IF QUARK, THE QUARK
AFFILIATED COMPANIES, THEIR LICENSORS AND/OR THEIR AGENTS HAVE BEEN
ADVISED OF SUCH POSSIBLE DAMAGES. SOME JURISDICTIONS, STATES OR PROVINCES
DO NOT ALLOW THE EXCLUSION OR LIMITATION OF INCIDENTAL OR
CONSEQUENTIAL DAMAGES, SO THIS LIMITATION OR EXCLUSION MAY NOT APPLY.
ALL OTHER LIMITATIONS PROVIDED UNDER APPLICABLE LAW, INCLUDING STATUTES
OF LIMITATION, SHALL CONTINUE TO APPLY.IN THE EVENT ANY OF THESE PROVISIONS
ARE OR BECOME UNENFORCEABLE UNDER APPLICABLE LAW, SUCH PROVISION SHALL
BE MODIFIED OR LIMITED IN ITS EFFECT TO THE EXTENT NECESSARY TO CAUSE IT
TO BE ENFORCEABLE.USE OF THE QUARK PRODUCTS IS SUBJECT TO THE TERMS OF
THE END USER LICENSE AGREEMENT OR OTHER APPLICABLE AGREEMENTS FOR SUCH
PRODUCT/SERVICE. IN THE EVENT OF A CONFLICT BETWEEN SUCH AGREEMENTS
AND THESE PROVISIONS THE RELEVANT AGREEMENTS SHALL CONTROL.
Quark, the Quark logo, QuarkXPress, XTensions, QPS, QuarkCopyDesk and
Composition Zones are trademarks or registered trademarks of Quark, Inc. and its affiliates
in the U.S. and/or other countries.
Microsoft, OpenType, Excel, and Windows are registered trademarks of Microsoft
Corporation in the United States and/or other countries.
Mac OS, AppleScript and QuickDraw are trademarks or registered trademarks of Apple,
Inc. in the U.S.A. and other countries. QuickTime is a trademark used under license.
QuickTime is registered in the U.S. and other countries.
Adobe, PostScript, Photoshop, Acrobat, Reader and Illustrator are either registered
trademarks or trademarks of Adobe Systems Incorporated in the United States and/or other
countries.
PANTONE ® Colors displayed in the software application or in the user documentation
may not match PANTONE-identified standards. Consult current PANTONE Color
Publications for accurate color. PANTONE ® and other Pantone, Inc. trademarks are the
property of Pantone, Inc. © Pantone, Inc., 2007.
Color Data is produced under license from Dainippon Ink and Chemicals, Inc.
FOCOLTONE and FOCOLTONE Colour System are registered trademarks of FOCOLTONE.
The concept, structure, and form of FOCOLTONE material and intellectual property are
protected by patent and copyright law. Any reproduction in any form, in whole or in part,
10 | A GUIDE TO QUARKCOPYDESK 8.1
Page 11

LEGAL NOTICES
for private use or for sale, is strictly forbidden. Contact FOCOLTONE, Ltd. for specific
patent information.
Toyo Ink Mfg. Co., Ltd. is the copyright owner of TOYO INK COLOR FINDER™ SYSTEM
AND SOFTWARE which is licensed to Quark, Inc. to distribute for use only in connection
with QuarkXPress. TOYO INK COLOR FINDER™ SYSTEM AND SOFTWARE shall not be
copied onto another diskette or into memory unless as part of the execution of QuarkXPress.
TOYO INK COLOR FINDER™ SYSTEM AND SOFTWARE © TOYO INK MFG. CO., LTD.,
1991. COLOR FINDER is in the process of registration as the registered trademark of Toyo
Ink Mfg. Co., Ltd. COLOR FINDER™ computer video simulation used in the product may
not match the COLOR FINDER™ book, and additionally some printer color used in the
product may also not match. Please use the COLOR FINDER™ book to obtain the accurate
color."
TRUMATCH, TRUMATCH Swatching System, and TRUMATCH System are trademarks of
TRUMATCH, Inc.
WordPerfect is a registered trademark of Corel Corporation.
Unicode is a trademark of Unicode, Inc.
This product includes software developed by the TTF2PT1 Project and its contributors.
Copyright ©1997–2001 by the AUTHORS: Andrew Weeks <ccsaw@bath.ac.uk>; Frank M.
Siegert <fms@this.net>; Mark Heath <mheath@netspace.net.au>; Thomas Henlich
<thenlich@rcs.urz.tu-dresden.de>; Sergey Babkin <babkin@bellatlantic.net>,
<sab123@hotmail.com>; Turgut Uyar <uyar@cs.itu.edu.tr>; Rihardas Hepas
<rch@WriteMe.com>; Szalay Tamas <tomek@elender.hu>; Johan Vromans
<jvromans@wqujirrel.nl>; Petr Titera <P.Titera@sh.cvut.cz>; Lei Wang
<lwang@amath8.amt.ac.cn>; Chen Xiangyang <chenxy@sun.ihep.ac.cn>; Zvezdan Petkovic
<z.petkovic@computer.org>. All rights reserved.
THE TTF2PT1 SOFTWARE IS PROVIDED BY THE AUTHORS AND CONTRIBUTORS “AS IS”
AND ANY EXPRESS OR IMPLIED WARRANTIES, INCLUDING, BUT NOT LIMITED TO,
THE IMPLIED WARRANTIES OF MERCHANTABILITY AND FITNESS FOR A PRATICULAR
PURPOSE ARE DISCLAIMED. IN NO EVENT SHALL THE AUTHORS OR CONTRIBUTORS
BE LIABLE FOR ANY DIRECT, INDIRECT, INCIDENTAL, SPECIAL, EXEMPLARY, OR
CONSEQUENTIAL DAMAGES (INCLUDING, BUT NOT LIMITED TO, PROCUREMENT OF
SUBSTITUTE GOODS OR SERVICES; LOSSOF USE, DATA, OR PROFITS; OR BUSINESS
INTERRUPTION) HOWEVER CAUSED AND ON ANY THEORY OF LIABILITY, WHETHER
IN CONTRACT, STRICT LIABILITY, OR TORT (INCLUDING NEGLIGENCE OR OTHERWISE)
ARISING IN ANY WAY OUT OF THE USE OF THIS SOFTWARE, EVEN IF ADVISED OF THE
POSSIBILITY OF SUCH DAMAGE.
As to Apache technology, copyright ©1999–2006 The Apache Software Foundation. All
rights reserved. Any Apache software which is distributed with this software is developed
by the Apache Software Foundation (http://www.apache.org/). Licensed under the Apache
License, Version 2.0 (the “License”); you may not use these files except in compliance with
the License. You may obtain a copy of the License at
http://www.apache.org/licenses/LICENSE–2.0. Unless required by applicable law or agreed
to in writing, software distributed under the License is distributed on an “AS IS” BASIS,
A GUIDE TO QUARKCOPYDESK 8.1 | 11
Page 12

LEGAL NOTICES
WITHOUT WARRANTIES OR CONDITIONS OF ANY KIND, either express or implied. See
the License for the specific language governing permissions and limitations under the
License.
As to MoreFiles software, ©1992–2002 by Apple, Inc., all rights reserved.
Portions of this product include technology used under license from Global Graphics.
As to ICU technology, copyright ©1995–2001 International Business Machines Corporation
and others. All rights reserved.Permission is hereby granted, free of charge, to any person
obtaining a copy of this software and associated documentation files (the “Software”), to
deal in the Software without restriction, including without limitation the rights to use,
copy, modify,merge, publish, distribute, and/or sell copies of the Software,and to permit
persons to whom the Software is furnished to do so, provided that the above copyright
notice(s) and this permission notice appear in supporting documentation.THIS SOFTWARE
IS PROVIDED “AS IS” WITHOUT WARRANTY OF ANY KIND, EXPRESS OR IMPLIED,
INCLUDING BUT NOT LIMITED TO THE WARRANTIES OF MERCHANTABILITY,FITNESS
FOR A PARTICULAR PURPOSE AND NONINFRINGEMENT OF THIRD PARTY RIGHTS. IN
NO EVENT SHALL THE COPYRIGHT HOLDER OR HOLDERS INCLUDED IN THIS NOTICE
BE LIABLE FOR ANY CLAIM, OR ANY SPECIAL INDIRECT OR CONSEQUENTIAL DAMAGES,
OR ANY DAMAGES WHATSOEVER RESULTING FROM LOSS OF USE, DATA OR PROFITS,
WHETHER IN AN ACTION OF CONTRACT, NEGLIGENCE OR OTHER TORTIOUS ACTION,
ARISING OUT OF OR IN CONNECTION WITH THE USE OR PERFORMANCE OF THIS
SOFTWARE. Except as contained in this notice, the name of a copyright holder shall not
be used in advertising or otherwise to promote the sale, use or other dealings in this
Software without prior written authorization of the copyright holder.
This software is based in part on the work of the Independent JPEG Group.
As to Microsoft technology, ©1988–2007 Microsoft Corporation. All rights reserved.
As to Nodeka software, ©1999–2002 Justin Gottschlich. All rights reserved.
As to STLport technology, Copyright 1999,2000 Boris Fomitchev. This material is provided
“as is”, with absolutely no warranty expressed or implied. Any use is at your own risk.
Permission to use or copy this sofware for any purpose is hereby granted without fee,
provided the above notices are retained on all cpies. Permission to modify the code and
to distribute modified code is granted, provided the above notices are retained, and a
notice that the code was modified is included with the above copyright notice. The Licensee
may distribute binaries compiled with STLport (whether original or modified) without any
royalties or restrictions. The Licensee may distribute original or modified STLport sources,
provided that: The conditions indicated in the above permission notice are met; The
following copyright notices are retained when present, and conditions provided in
accompanying permission notices are met: Copyright 1994 Hewlett-Packard Company.
Copyright 1996,97 Silicon Graphics Computer Systems, Inc. Copyright 1997 Moscow
Center for SPARC Technology.
Permission to use, copy, modify, distribute and sell this software and its documentation
for any purpose is hereby granted without fee, provided that the above copyright notice
appear in all copies and that both that copyright notice and this permission notice appear
12 | A GUIDE TO QUARKCOPYDESK 8.1
Page 13

LEGAL NOTICES
in supporting documentation. Hewlett-Packard Company makes no representations about
the suitability of this software for any purpose. It is provided “as is” without express or
implied warranty.Permission to use, copy, modify, distribute and sell this software and its
documentation for any purpose is hereby granted without fee, provided that the above
copyright notice appear in all copies and that both that copyright notice and this permission
notice appear in supporting documentation. Silicon Graphics makes no representations
about the suitability of this software for any purpose. It is provided “as is” without express
or implied warranty.Permission to use, copy, modify, distribute and sell this software and
its documentation for any purpose is hereby granted without fee, provided that the above
copyright notice appear in all copies and that both that copyright notice and this permission
notice appear in supporting documentation. Moscow Center for SPARC Technology makes
no representations about the suitability of this software for any purpose. It is provided “as
is” without express or implied warranty.
As to Dr. Brian Gladman software, Copyright ©2001, Dr. Brian Gladman
<brg@gladman.uk.net>, Worcester, UK. All rights reserved. LICENSE TERMS The free
distribution and use of this software in both source and binary form is allowed (with or
without changes) provided that: 1. distributions of this source code include the above
copyright notice, this list of conditions and the following disclaimer; 2. distributions in
binary form include the above copyright notice, this list of conditions and the following
disclaimer in the documentation and/or other associated materials; 3. the copyright holder’s
name is not used to endorse products built using this software without specific written
permission. DISCLAIMER This software is provided ‘as is’ with no explicit or implied
warranties in respect of any properties, including, but not limited to, correctness and
fitness for purpose.
As to cascading menus based on menu.js. by Gary Smith, July 1997, Copyright ©1997–1999
Netscape Communication Corp. Netscape grants you a royalty free license to use or modify
the cascading menus software provided that this copyright notice appears on all copies.
This software is provided “AS IS,” without a warranty of any kind.
As to W3C software, Copyright ©2001 World Wide Web Consortium, (Massachusetts
Institute of Technology, European Research Consortium for Informatics and Mathematics,
Keio University). All rights reserved. This work is distributed under the W3C® Software
License (1) in the hope that it will be useful, but WITHOUT ANY WARRANTY; without
even the implied warranty of MECHANTABILITY or FITNESS FOR A PARTICULAR PURPOSE.
(1)http://www.w3.org/Consortium/Legal/2002/copyright-software–20021231.
Portions of this software is based on the work of Jean-loup Gailly and Mark Adler and is
©1995–1998 Jean-loup Gailly and Mark Adler [ZIPlibrary]
As to Sun technology, Copyright 2003–2006, Sun Microsystems, Inc. All rights reserved.
Use is subject to license terms.
As to SunSoft technology, Copyright ©1994–1996 SunSoft, Inc. Rights Reserved
Permission is hereby granted, free of charge, to any person obtaining a copy of this software
and associated documentation files (the "Software"), to deal in the Software without
restriction, including without limitation the rights to use, copy, modify, merge, publish
distribute, sublicense, and/or sell copies of the Software, and to permit persons to whom
A GUIDE TO QUARKCOPYDESK 8.1 | 13
Page 14

LEGAL NOTICES
the Software is furnished to do so, subject to the following conditions: The above copyright
notice and this permission notice shall be included in all copies or substantial portions of
the Software. THE SOFTWARE IS PROVIDED "AS IS", WITHOUT WARRANTY OF ANY
KIND, EXPRESS OR IMPLIED, INCLUDING BUT NOT LIMITED TO THE WARRANTIES OF
MERCHANTABILITY, FITNESS FOR A PARTICULAR PURPOSE AND NON-INFRINGEMENT.
IN NO EVENT SHALL SUNSOFT, INC. OR ITS PARENT COMPANY BE LIABLE FOR ANY
CLAIM, DAMAGES OR OTHER LIABILITY, WHETHER IN AN ACTION OF CONTRACT,
TORT OR OTHERWISE, ARISING FROM, OUT OF OR IN CONNECTION WITH THE
SOFTWARE OR THE USE OR OTHER DEALINGS IN THE SOFTWARE. Except as contained
in this notice, the name of SunSoft, Inc. shall not be used in advertising or otherwise to
promote the sale, use or other dealings in this Software without written authorization
from SunSoft Inc.
All other marks are the property of their respective owners.
14 | A GUIDE TO QUARKCOPYDESK 8.1
Page 15

About this guide
You do not need to read the QuarkCopyDesk® documentation from beginning to end.
Instead, use this guide to quickly look up information, find out what you need to know,
and get on with your work.
What we're assuming about you
In writing this guide, we assume that you are familiar with your computer and know how
to:
ABOUT THIS GUIDE
• Launch an application
• Open, save, and close files
• Use menus, dialog boxes, and palettes
• Work within a networked computing environment
• Use the mouse, keyboard commands, and modifier keys
Consult the documentation provided with your computer or other resources if you need
more information in any of these areas.
Where to go for help
If you're new to QuarkCopyDesk, or if you want to explore one of its other longstanding
features, consult the following resources:
• A Guide to QuarkCopyDesk
• QuarkCopyDesk Help
• Third-party books
• General books about desktop publishing
If your issues are at the system level — saving files, moving files, activating fonts, for
example — consult the documentation resources provided with your computer.
A GUIDE TO QUARKCOPYDESK 8.1 | 15
Page 16

ABOUT THIS GUIDE
Conventions
Formatting conventions highlight information to help you quickly find what you need.
• Bold type style: The names of all dialog boxes, fields, and other controls are set in bold
type. For example: "Click OK."
• References: In descriptions of features, parenthetical references guide you in accessing
those features. For example: "The Find/Change dialog box (Edit menu) lets you find and
replace text."
• Arrows: You will often see arrows (>), which map out the menu path to a feature. For
example: "Choose Edit > Style Sheets to display the Style Sheets dialog box."
• Icons: Although many tools and buttons are referenced by name, which you can see by
displaying ToolTips, in some cases icons are shown for easy identification. For example,
"Click the button on the Measurements palette to center text."
• Cross-platform issues: This application is quite consistent across operating systems. However,
some labels, buttons, key combinations, and other aspects of the application must differ
between Mac OS® and Windows® because of user interface conventions or other factors.
In such cases, both the Mac OS and Windows versions are presented, separated by a slash,
with the Mac OS version presented first. For example, if the Mac OS version of a button
is labeled Select, and the Windows version is labeled Browse, you are directed to "Click
Select/Browse." More complex cross-platform differences are mentioned in notes or
parenthetical statements.
Technology note
Quark developed QuarkCopyDesk for Mac OS and Windows to give publishers control
over typography, color, and collaboration, particularly with content in QuarkXPress®
projects. In addition to unique typographic controls, QuarkCopyDesk offers comprehensive
font management with TrueType®, OpenType®, and Unicode® support. Designers can
use PANTONE® (the PANTONE MATCHING SYSTEM®), Trumatch®, Focoltone®, DIC®,
and Toyo to add color to articles.
You can import files from applications such as Microsoft® Word, WordPerfect®, Adobe®
Illustrator®, and Adobe Photoshop®. You can output content as PostScript® or in PDF
format for Adobe Acrobat® Reader®. Using features such as Composition Zones®, you can
be sure that multiple people share specifications to produce consistent publications, even
while working on a single publication simultaneously.
The QuarkCopyDesk software architecture lets you and software developers expand
publishing capability. Through XTensions® software technology, third-party developers
can create custom modules for QuarkCopyDesk. QuarkXTensions® (Quark® XTensions
software) also provide a modular approach for meeting your particular publishing needs.
And if you can write AppleScript® scripts, you can use this scripting language from Apple®
to automate many QuarkCopyDesk activities.
16 | A GUIDE TO QUARKCOPYDESK 8.1
Page 17

The user interface
Skimming through the QuarkCopyDesk user interface, you will find that many commands
are familiar or self-explanatory. Once you become familiar with QuarkCopyDesk menus
and dialog boxes, you will discover that keyboard commands and palettes offer convenient
access to features that you can also access through menus.
THE USER INTERFACE
Menus
The topics below describe the menus and menu items available in QuarkCopyDesk.
QuarkCopyDesk menu (Mac OS only)
The QuarkCopyDesk menu is a part of QuarkCopyDesk for Mac OS X. This menu contains
the same commands as in the application menu for other Mac OS X applications — to
hide or show QuarkCopyDesk and other applications, to access preferences, and to quit
QuarkCopyDesk. This menu includes the following commands:
• About QuarkCopyDesk: Use this command to display information about QuarkCopyDesk
such as the version number.
• Edit License Code: Use this command to change the validation code of an installed copy
of QuarkCopyDesk. By changing this code, you can change a Test Drive version (formerly
called "evaluation copy") of QuarkCopyDesk into a fully functional version, change the
languages supported by the user interface, or change QuarkCopyDesk into a Plus edition.
• Transfer QuarkCopyDesk License: Use this command to deactivate QuarkCopyDesk on
one computer so that you can activate it on a different computer. Available only when
QuarkCopyDesk has been activated.
• Activate QuarkCopyDesk: Use this command to activate QuarkCopyDesk on your
computer. Available only when QuarkCopyDesk is running in demo mode.
• Preferences: Lets you modify default values and settings. For more information, see
"Preferences."
• Quit QuarkCopyDesk: Exits the application.
A GUIDE TO QUARKCOPYDESK 8.1 | 17
Page 18

THE USER INTERFACE
File menu
The File menu enables you to manipulate electronic files in many ways, including the
ability to create, open, print, and save. This menu includes the following commands:
• New: Use the submenu to create an article.
• Open: Use this option to open article files.
• Close: Closes the active article.
• Save: Use this option to save the active article.
• Save As: Use this option to save a copy of the active article.
• Revert to Saved: Returns the active article to the state it was in when it was last saved.
• Import: Use this option to import text or a picture into a component. If you import text
into a picture component, the picture component changes to a text component. If you
import a picture into a text component, the component changes into a picture component.
• Save Text: Use this option to save the text of a text component in a text-based format
(such as Microsoft Word).
• Append: Use this option to append style sheets, colors, and a variety of other types of
resources from another file.
• PDF: Use this option to create a PDF from the active article (see "Exporting an article in PDF
format").
• Print: Use this option to print the active file (see "Printing an article").
• Output Profile Jobs: Use the options on this submenu to execute Output Profiles and
Output Profile Groups. For more information, see "Output Enhancements."
• Article Setup: Displays the Article Setup dialog box, which lets you set the page size and
orientation, control whether the article uses facing pages, and create and configure the
article's master components.
• Exit (Windows only) : Use this option to exit the application.
Edit menu
The Edit menu includes the following commands:
• Undo: Undoes the last action.
• Redo: Redoes an undone action.
• Cut: Cuts the selected content.
• Copy: Copies the selected content to the clipboard.
• Paste: Pastes the clipboard contents on the active page.
• Paste Without Formatting: Pastes the clipboard contents as plain text.
• Clear/Delete: Deletes the active content.
• Select All: Selects all content in the active box or text path.
18 | A GUIDE TO QUARKCOPYDESK 8.1
Page 19

THE USER INTERFACE
• Show Clipboard: Displays the contents of the clipboard.
• Find/Change: Displays the Find/Change palette, which you can use to find and change
text based on content, formatting, or both.
• Preferences (Windows only): Lets you modify default values and settings. For more
information, see "Preferences."
• Style Sheets: Lets you add, edit, and delete style sheet definitions. For more information,
see "Working with style sheets."
• Colors: Lets you add, edit, and delete color definitions. For more information, see "Working
with colors."
• H&Js: Lets you add, edit, and delete H&J (hyphenation and justification) definitions. H&Js
let you control how text breaks. For more information, see "Controlling hyphenation and
justification."
• Lists: Lets you add, edit, and delete list definitions. The Lists feature is a tool for
automatically generating tables of contents and other types of listed content. For more
information, see "Working with lists."
• Dashes and Stripes: Lets you add, edit, and delete custom line patterns.
• Hanging Characters: Lets you add, edit, and delete custom hanging character definitions.
For more information, see "Working with hanging characters."
• Output Styles: Lets you add, edit, and delete output style definitions. Output styles let
you easily switch between different sets of output options. For more information, see "
Working with output styles."
• Program Language (multi-language editions only): Lets you change the language of the user
interface.
• Note: Lets you insert, delete, and navigate between notes. For more information, see
"Notes."
• Output Profiles: Lets you add, edit, and delete Output Profiles. For more information, see
"Output Enhancements."
• Output Profile Groups: Lets you add, edit, and delete Output Profile Groups. For more
information, see "Output Enhancements."
• Underline Styles: Lets you access and modify underline styles.
Style menu
The Style menu changes depending on whether a text component or a picture component
is active.
Style menu for text
The Style menu for text includes commands for specifying character attributes and
paragraph formats. This menu includes the following commands:
• Font: Lets you change the font of selected text.
A GUIDE TO QUARKCOPYDESK 8.1 | 19
Page 20

THE USER INTERFACE
• Size: Lets you change the size of selected text.
• Type Style: Lets you apply type styles such as bold, italic, and underline to selected text.
• Change Case: Lets you change case of selected text to uppercase, lower case, or title case.
• Color: Lets you change the color of selected text.
• Shade: Lets you set the tint of an applied color.
• Opacity: Lets you control the transparency of selected text.
• Horizontal/Vertical Scale: Lets you stretch selected text horizontally or vertically.
• Kern/Track: When the text insertion point is between two characters, Kern lets you control
the spacing between those characters. When text is selected, Track lets you control the
spacing between all selected characters.
• Baseline Shift: Lets you move selected text up or down in relation to the baseline without
changing line spacing.
• Character: Displays the Character Attributes dialog box, which lets you control every
aspect of character formatting for selected text.
• Character Style Sheets: Lets you apply character style sheets to selected text.
• Alignment: Lets you align active paragraphs to the left, right, or center. Also lets you
justify or force-justify selected paragraphs.
• Leading: Lets you change the line spacing of selected paragraphs.
• Formats: Displays the Paragraph Attributes dialog box, which lets you control every
aspect of paragraph formatting for selected text.
• Tabs: Lets you set tab stops for selected paragraphs.
• Rules: Lets you create automatic lines above and below selected paragraphs.
• Paragraph Style Sheets: Lets you apply paragraph style sheets to selected text.
• Update Style Sheet: Lets you update a character or paragraph style sheet definition based
on local changes to the applied style sheet.
• Flip Horizontal: Lets you flip selected text horizontally.
• Flip Vertical: Lets you flip selected text vertically.
• Underline Styles: Lets you modify and apply an underline style to selected text.
Style menu for pictures
The Style menu for pictures includes commands for formatting and editing pictures. This
menu includes the following commands:
• Picture: Displays the Modify dialog box, which lets you control a variety of picture
attributes. For more information, see "Working with pictures."
• Invert/Negative: Applies a negative or inverse effect to a selected picture. The command
name is Negative when you select a CMYK picture.
20 | A GUIDE TO QUARKCOPYDESK 8.1
Page 21

THE USER INTERFACE
• Scale Picture: Lets you change the scale of a picture within a picture component.
• Rotate Picture: Lets you rotate a picture within a picture component.
• Flip Horizontal: Flips the selected picture horizontally.
• Flip Vertical: Flips the selected picture vertically.
• Center Picture: Centers the selected picture in its picture box.
• Stretch Picture To Fill Box: Reduces or enlarges the selected picture horizontally and
vertically to fill its picture box.
• Scale Picture To Box: Reduces or enlarges the selected picture proportionately to fill its
picture box.
• Reset Picture: Resets the picture in the active picture component to its default scale, skew,
and rotation.
• Picture Effects: Displays a submenu that lets you apply picture adjustments and filters to
the selected picture.
• Halftone: Lets you apply a halftone screen pattern to a selected grayscale picture.
Component menu
The Component menu includes commands for adding, deleting, and modifying article
components. This menu includes the following commands:
• New: Lets you add a component to the active article.
• Properties: Lets you control the properties of the active component, including the
component's name.
• Delete: Lets you delete the active component from the active article.
• Expand All: In Galley view and Full Screen view, expands all components in the active
article.
• Collapse All: In Galley view and Full Screen view, collapses all components in the active
article.
In addition, this menu includes an item for every component in the active article. You
can use these menu items to easily switch between components when in WYSIWYG view.
View menu
The View menu gives you options for viewing articles. This menu includes the following
commands:
• WYSIWYG: Lets you switch to the WYSIWYG view mode. This view mode is useful for
viewing the page as it will appear at output. Options on this submenu let you choose a
magnification at which to view the article.
• Galley View: Lets you switch to the Galley view mode. This view mode is useful for editing
text and checking line breaks.
A GUIDE TO QUARKCOPYDESK 8.1 | 21
Page 22

THE USER INTERFACE
• Full Screen View: Lets you switch to the Full Screen view mode. This view mode is
optimized for editing text.
• Page: The options on this submenu let you navigate between pages in the active article.
• Guides: Displays or hides page guides.
• Page Grids: Displays nonprinting gridlines applied to pages.
• Text Box Grids: Displays nonprinting gridlines applied to text boxes.
• Invisibles: Displays or hides invisible characters.
• Show Notes/Hide Notes: Displays and hides notes.
• Spread Picture: Displays or hides page elements (such as pictures or lines) for an active
article in WYSIWYG view when the article includes page pictures.
• Full Res Previews: Displays full-resolution pictures on screen using the picture files' full
resolution. You can scale or magnify image without pixilation.
Utilities menu
The Utilities menu includes the following commands:
• Check Spelling: Use the submenu to display the Check Spelling palette to check the
spelling of a word, a selection of text, a component, or an article.
• Auxiliary Dictionary: Lets you specify an auxiliary dictionary for use in spell checking.
• Edit Auxiliary: Lets you edit the auxiliary dictionary associated with the active layout.
• Word And Character Count: Displays the Word and Character Count dialog box.
• Insert Character: Lets you easily insert special characters, including special breaking and
nonbreaking spaces.
• Suggested Hyphenation: Displays the suggested hyphenation for the word containing
the text insertion point.
• Hyphenation Exceptions: Lets you specify whether and how particular words should be
hyphenated in the active article.
• Usage: Lets you view and update the usage of fonts, pictures, QuarkVista effects, and
Composition Zones that are linked to external data sources.
• XTensions Manager: Lets you control which XTensions modules are loaded when the
application is launched.
• Font Mapping: Lets you create and edit rules for substituting a new font for a font that is
requested by a project but which is not installed on your computer.
• Component Status: Lets you view the status of required software components.
• PPD Manager: Lets you control which PostScript Printer Description files (PPDs) are loaded
in the Print dialog box.
• Convert Project Language: Lets you convert all of the characters in the active article that
use a particular character language to a different character language.
22 | A GUIDE TO QUARKCOPYDESK 8.1
Page 23

THE USER INTERFACE
• Redline: Use the submenu to turn automatic tracking and highlighting on and off. You
can also use this submenu to display the Redline palette.
• Remove Manual Kerning: Lets you remove all manual kerning applied between characters,
or remove kerning from a kerning pair.
• Line Check: Displays a submenu that lets you find widows, orphans, loosely justified
lines, lines that end with a hyphen, and overflow situations.
• Convert Old Underlines: Converts all underlines in the active text chain from
QuarkXPress 3.x (Stars & Stripes) format to Type Tricks format.
Window menu
The Window menu enables you to control the on-screen display of open windows and
palettes. This menu includes the following commands:
• New Window: Displays the active project in a new window. You can then view different
parts of the project in each window.
• Split Window: Splits the project window into two parts. You can then view different parts
of the project in each part of the window.
• Bring All to Front (Mac OS only): Positions and displays all open windows.
• Tile (Mac OS only): Tiles all open windows horizontally to fit on the screen.
• Tile Horizontally (Windows only): Tiles all open windows horizontally to fit on the screen.
• Stack (Mac OS only): Layers multiple open projects so just a portion of each project's menu
bar displays.
• Tile Vertically (Windows only): Tiles all open windows vertically to fit on the screen.
• Measurements: Displays and hides the Measurements palette.
• Style Sheets: Displays and hides the Style Sheets palette.
• Colors: Displays and hides the Colors palette.
• Lists: Displays and hides the Lists palette.
• Redline: Displays and hides the Redline palette.
• Glyphs: Displays and hides the Glyphs palette.
• Picture Effects: Displays and hides the Picture Effects palette.
• PSD Import: Displays and hides the PSD Import palette.
• Palette Sets: Use the submenu to store and recall arrangements of palettes.
In addition, this menu includes an item for every open window. You can use these menu
items to easily switch between windows.
A GUIDE TO QUARKCOPYDESK 8.1 | 23
Page 24
THE USER INTERFACE
Context menus
Palettes
QuarkCopyDesk offers a wide variety of functionality through context menus. To display
a context menu, Control+click (Mac OS) or right-click in text, on a picture, or on a palette.
To open or display a palette, check the palette name in the Window menu.
To close an open palette, click the close box in the upper-left corner of the palette, uncheck
the palette name in the Window menu, or use the appropriate keyboard equivalent.
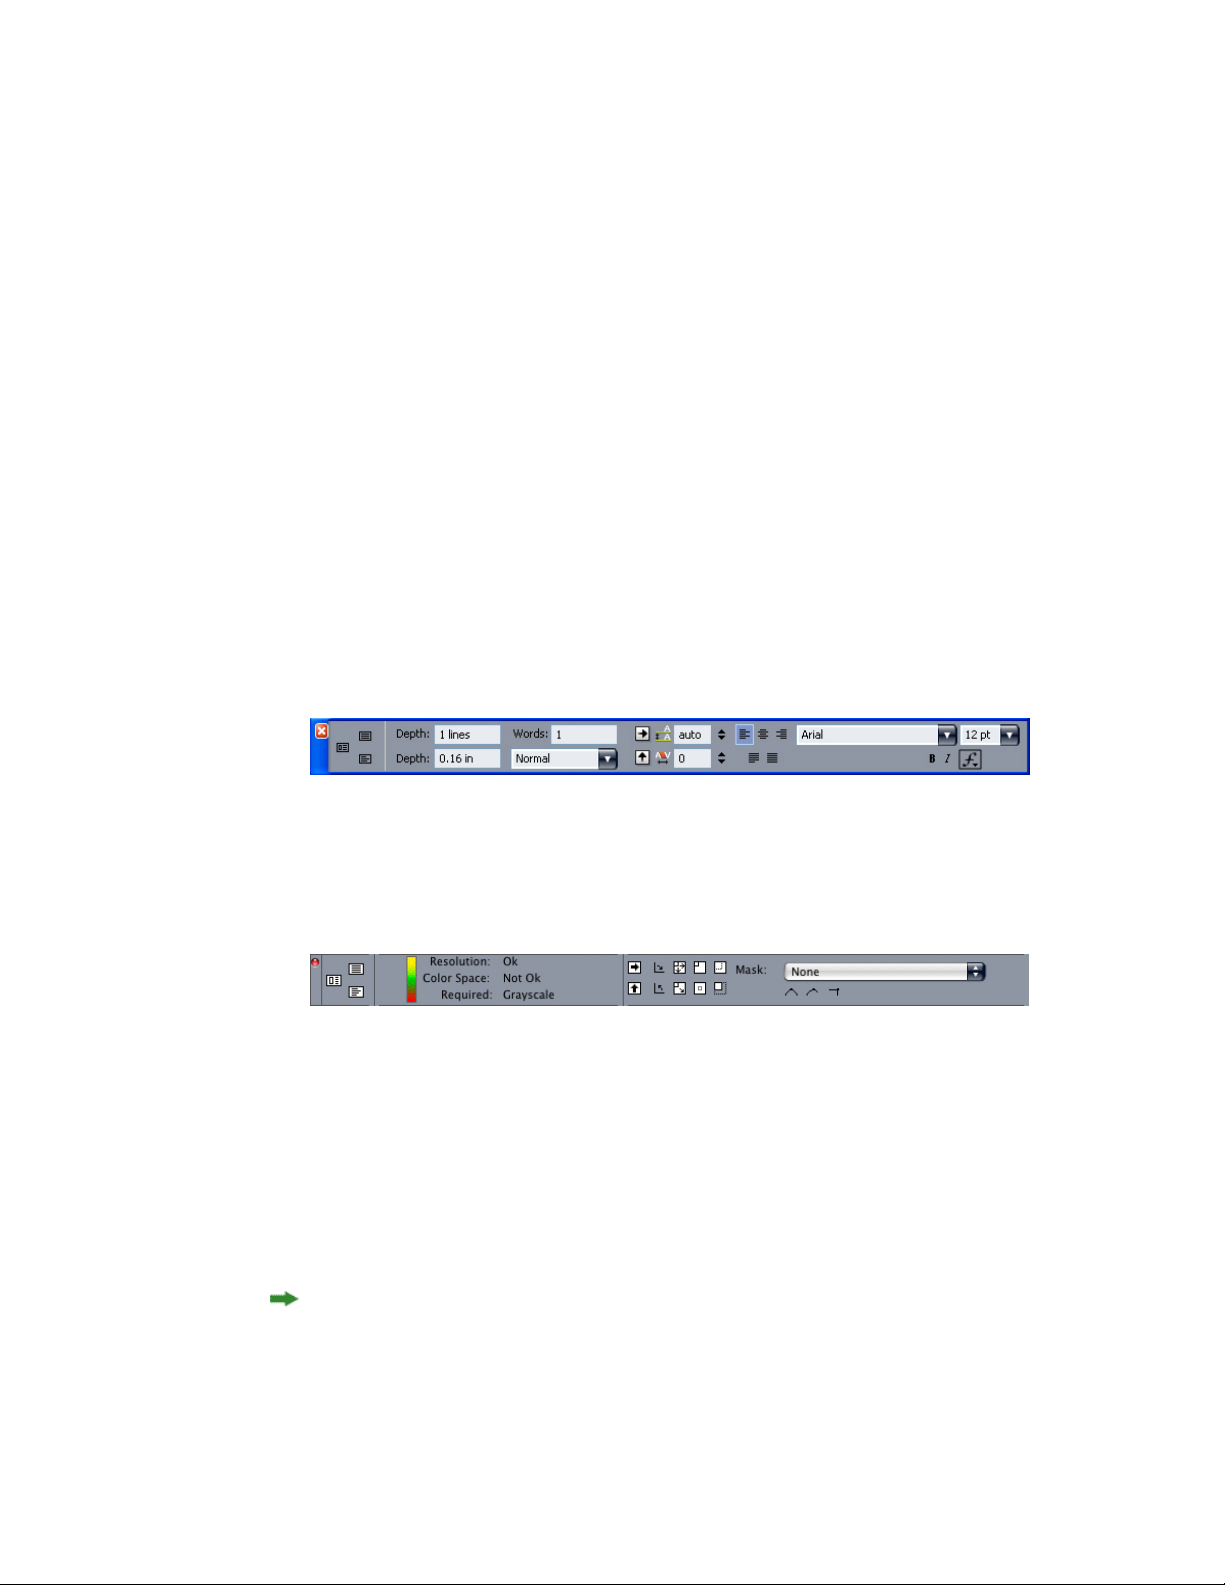
Measurements palette
You can use the Measurements palette to access many of the commands available through
dialog boxes.
The controls available on this palette change depending on what kind of item is selected
in the layout. When a text component with corresponding geometry is selected, the
Measurements palette lets you format text and see whether the text in the component is
overset, is underset, or fits.
This version of the Measurements palette displays when a text component is active.
When a picture component is selected, the Measurements palette lets you view and control
the quality of the picture; flip, rotate, and scale the picture; show or hide an alpha mask
stored in the picture file; and tweak the picture's clipping path.
This version of the Measurements palette displays when a picture component is active.
Both versions of the palette let you switch among Full Screen, Galley, and WYSIWYG view
using the buttons on the left end.
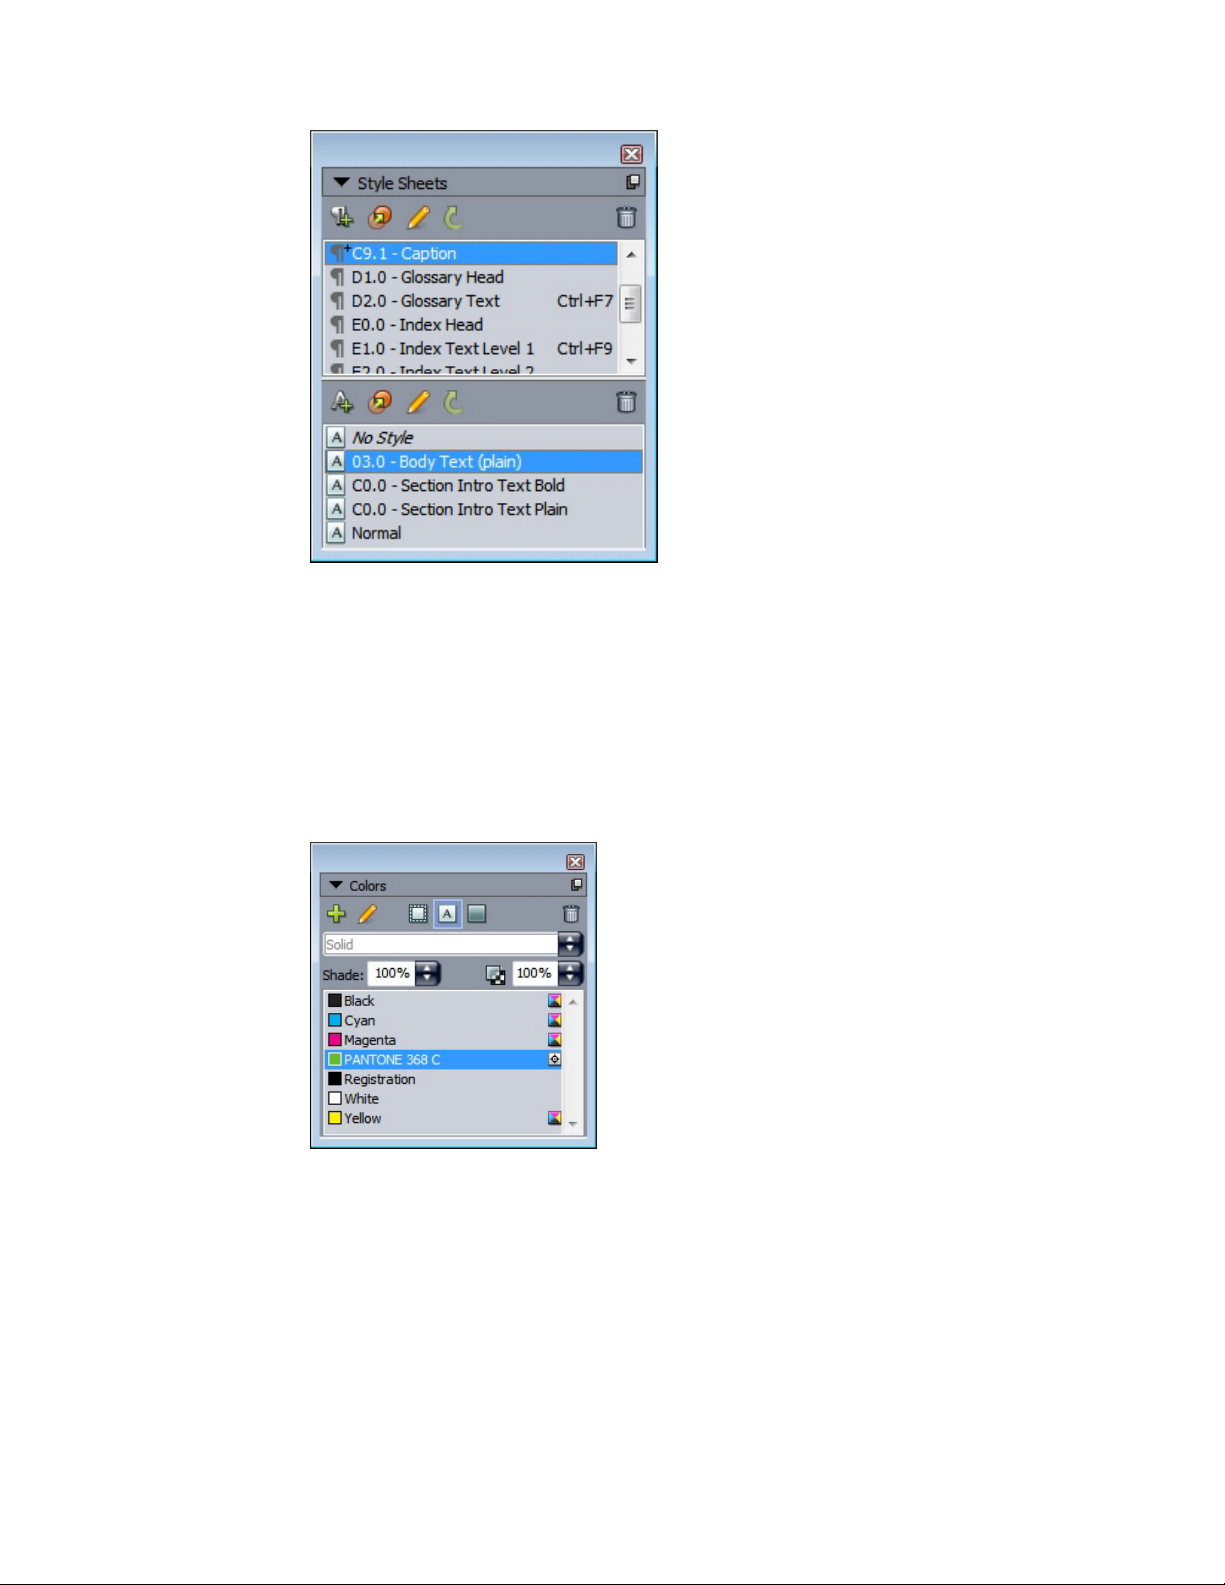
Style Sheets palette
The Style Sheets palette (Window > Show Style Sheets) enables you to apply character
and paragraph style sheets by clicking style sheet names. The buttons at the top of each
section of this palette let you create, edit, duplicate, update, and delete style sheets.
A plus sign next to a style sheet indicates that local formatting has been applied.
24 | A GUIDE TO QUARKCOPYDESK 8.1
Page 25
THE USER INTERFACE
The Style Sheets palette lets you view and apply paragraph and character style sheets.
Colors palette
The Colors palette lets you view and apply colors defined in the active article. The buttons
at the top of this palette let you create, edit, and delete colors.
Users create colors through the Colors dialog box (Edit > Colors). For more information,
see "Working with colors."
The Colors palette lets you view and apply colors.
Lists palette
The Lists palette helps you view and generate lists. This feature is useful for creating things
like tables of contents. You can create lists in the Lists dialog box (Edit > Lists).
The List Name drop-down menu lets you choose from among the lists defined in the
active project and the Update button lets you refresh the list currently displayed in the
palette.
A GUIDE TO QUARKCOPYDESK 8.1 | 25
Page 26

THE USER INTERFACE
The Find button enables you to locate items in the Lists palette. You can also navigate to
a word or heading by simply double-clicking it in the palette.
The Build button lets you insert the active list into the active text chain. If the list already
exists in the story, you can update it rather than inserting another copy. The Format As
style sheets for the list are applied automatically.
The Lists palette lets you create things like tables of contents
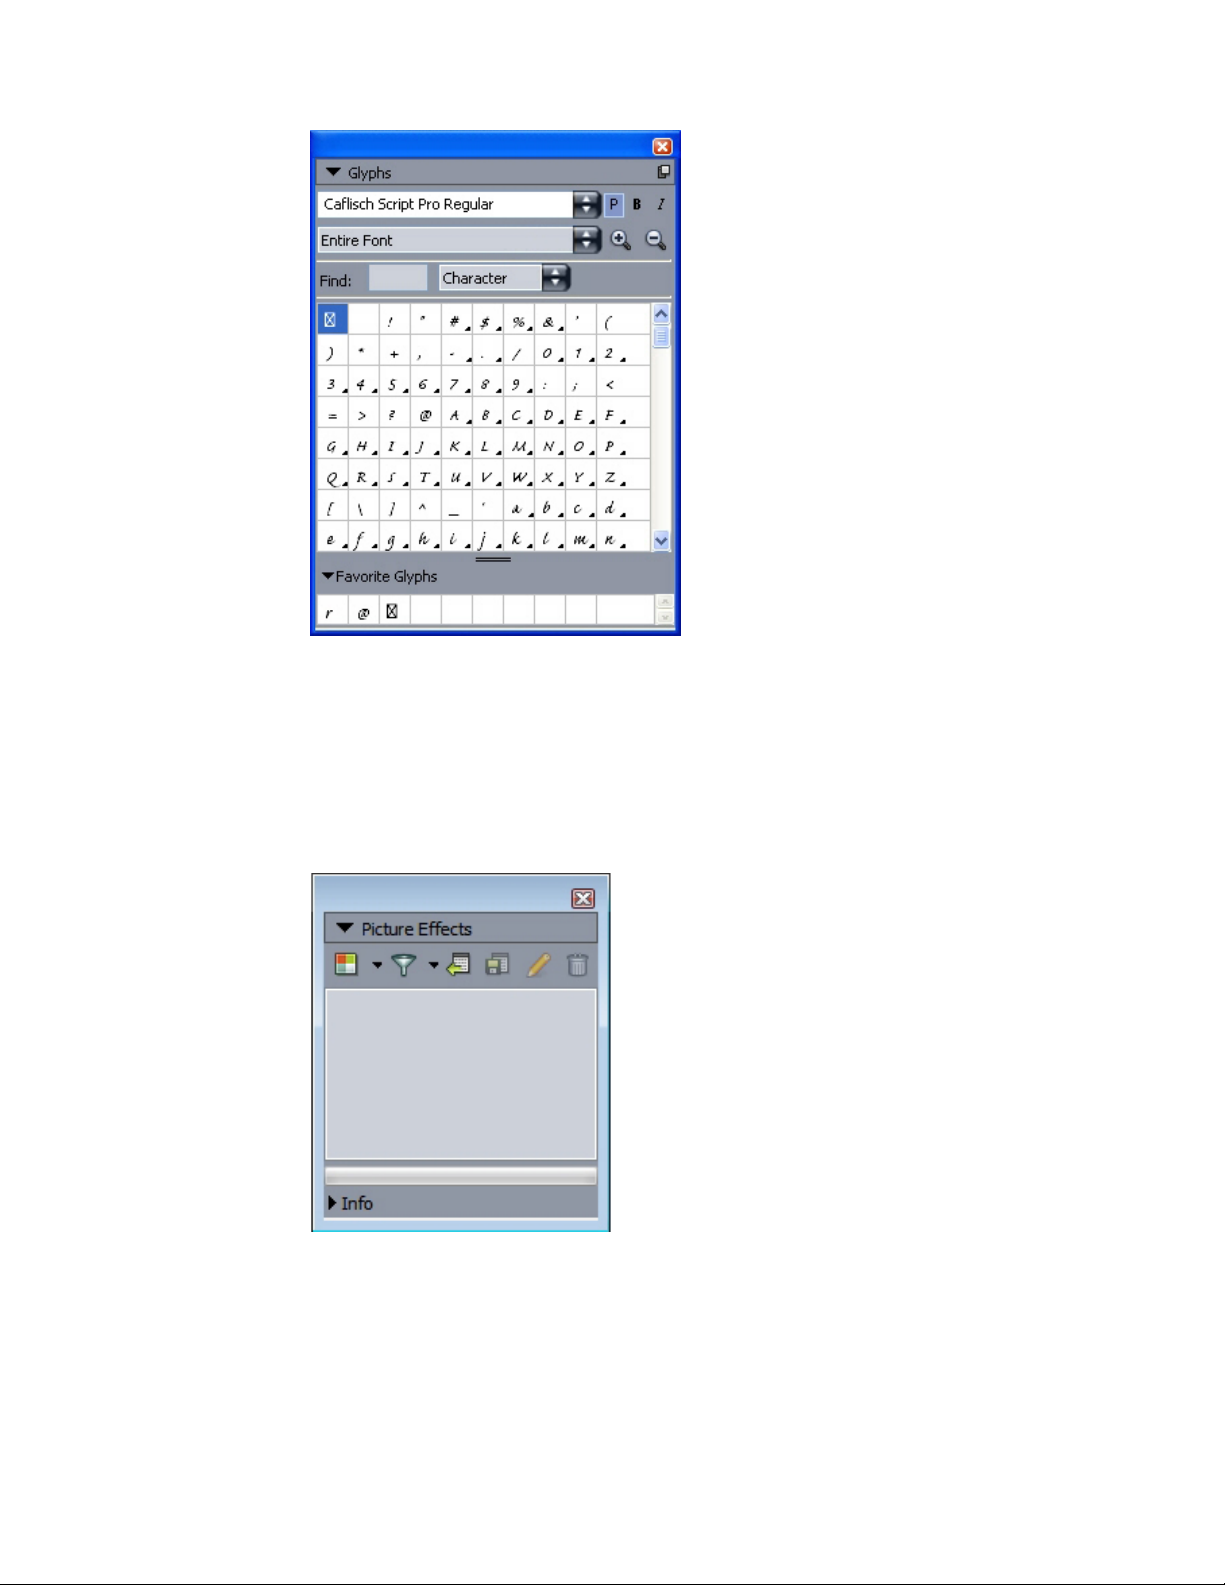
Glyphs palette
The Glyphs palette gives you easy access to every character in each font on your computer.
You can display all characters in the selected font or narrow down the selection by choosing
an option from the second drop-down menu. You can add characters to a story by
double-clicking them. Using the Favorite Glyphs area at the bottom of the palette, you
can store often-used characters for easy access.
26 | A GUIDE TO QUARKCOPYDESK 8.1
Page 27
THE USER INTERFACE
The Glyphs palette gives you easy access to every character in every font.
Picture Effects palette
The Picture Effects palette lets you apply effects such as sharpening and contrast
adjustment to pictures. This palette displays only when QuarkVista XTensions software is
installed. For more information, see "Using picture effects."
The Picture Effects palette lets you apply various visual effects to pictures in the layout.
A GUIDE TO QUARKCOPYDESK 8.1 | 27
Page 28
THE USER INTERFACE
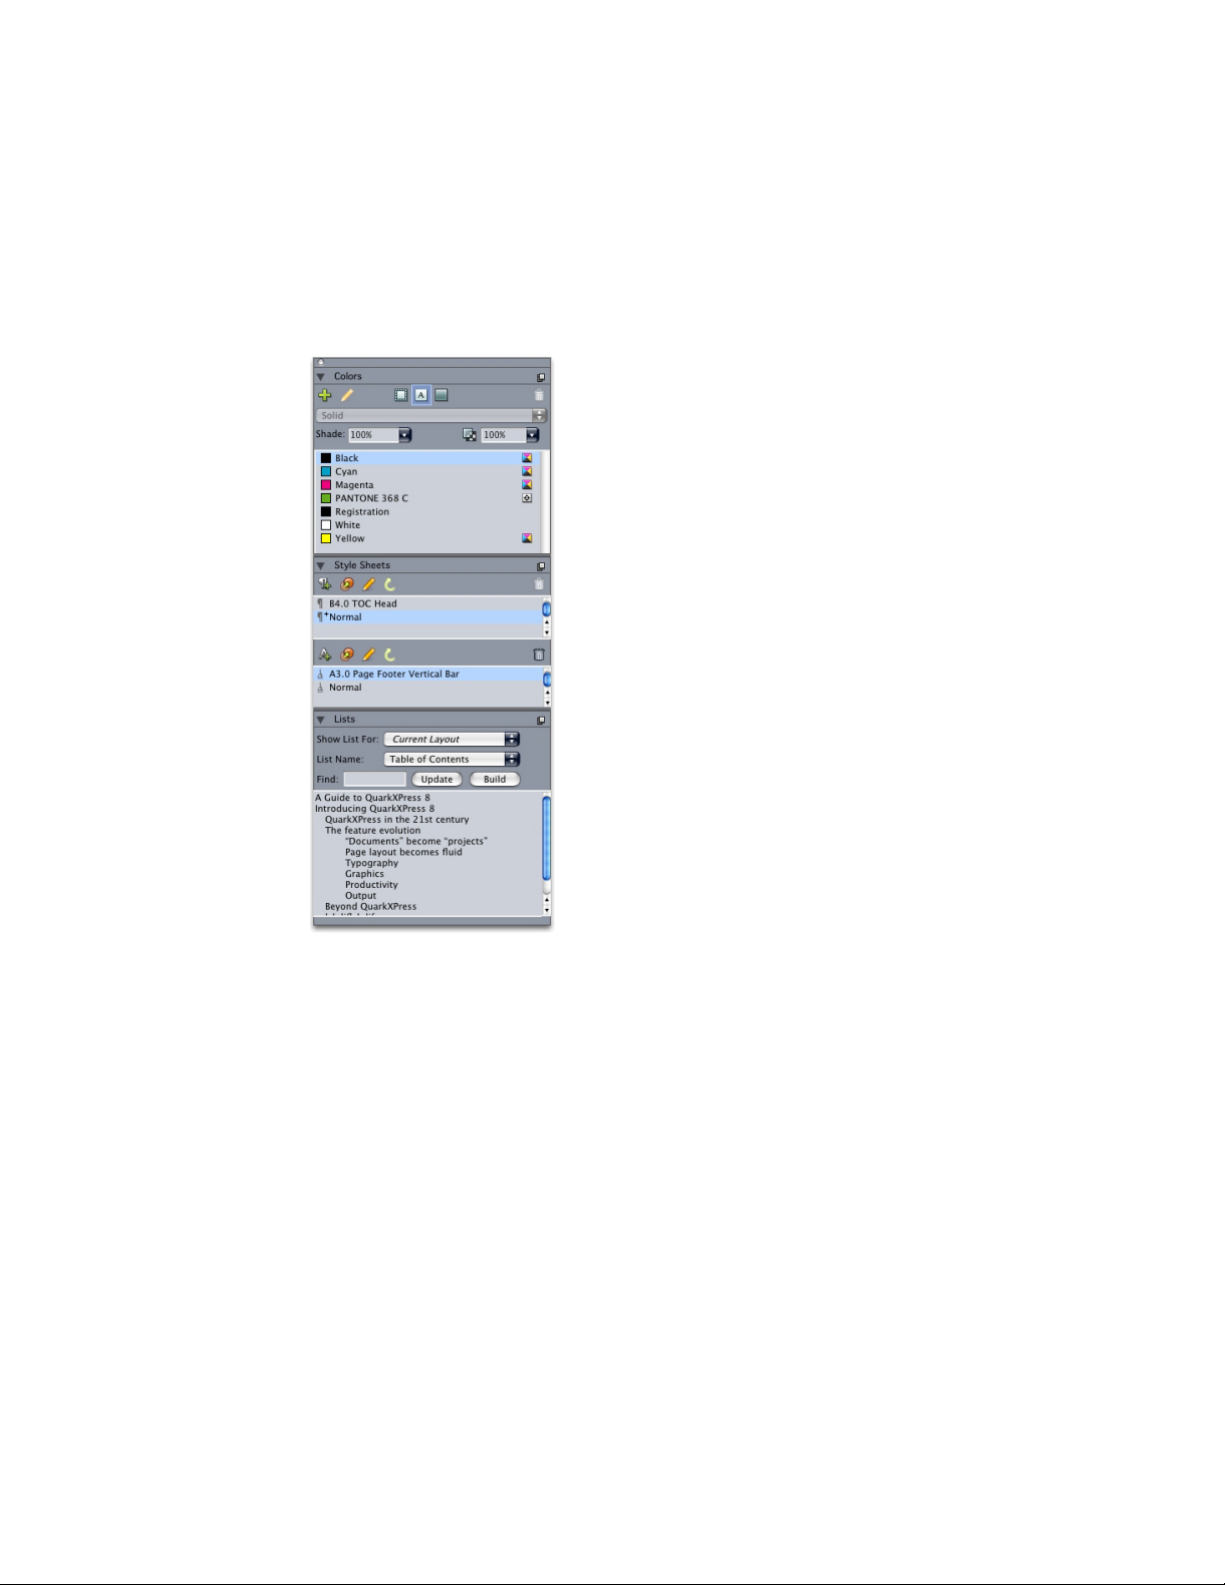
Palette groups and palette sets
QuarkCopyDesk offers two features that help you to manage palettes: palette groups and
palette sets.
Using palette groups
The Palette Groups feature lets you combine several palettes into one.
This palette group shows the Style Sheets, Colors, and Lists palettes attached as one, which
economizes space while providing easy access to functions.
To attach a palette to a palette group, Control+click/right-click the title bar of a palette
group and choose an unchecked palette name. When you attach a palette that is already
displayed, the palette moves to become part of the palette group. To detach a palette from
a palette group, Control+click/right-click the palette name and choose Detach [palette
name].
Using palette sets
The Palette Sets feature lets you store and recall the position and status of all open palettes
and libraries, so that you can easily switch between different palette configurations.
To create a palette set, first display all of the palettes you will need for a particular task
and hide all other palettes. Then choose Window > Palette Sets > Save Palette Set As to
display the Save Palette Set As dialog box, enter a name, and optionally assign a key
command.
28 | A GUIDE TO QUARKCOPYDESK 8.1
Page 29
THE USER INTERFACE
To retrieve a palette set, choose Window > Palette Sets > [name of palette set] or press
the keyboard combination for that palette set.
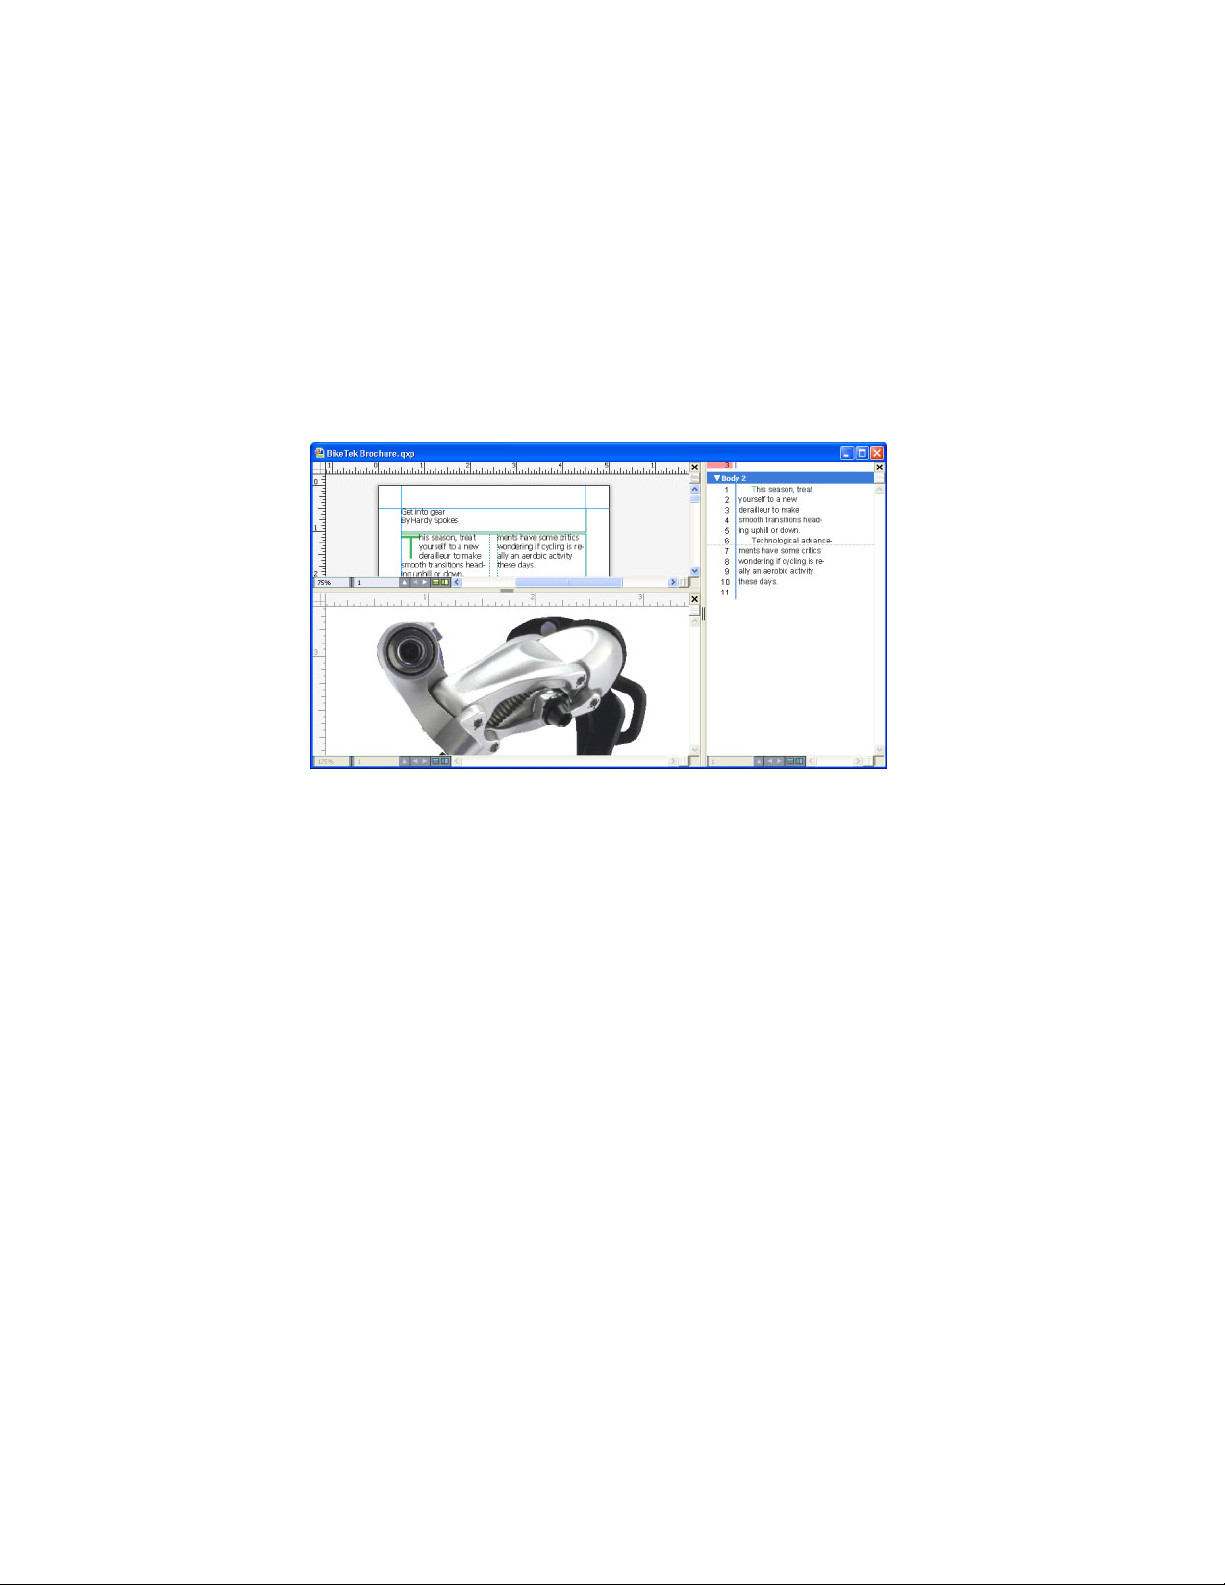
Splitting a window
By splitting a window into two or more panes, you can display multiple views of one article
at the same time, and you can see changes in all panes simultaneously. You can even use
different view modes in each pane, and see your edits in one pane and update in the other
pane in real time. You can split multiple views horizontally or vertically within a window.
By splitting a window, you can view your work at different magnifications at the same time.
There are three ways to split a window:
• Choose Window > Split Window > Horizontal or Window > Split Window > Vertical.
• Click the split bar to the right of the scroll bar (for a vertical split) or at the top of the scroll
bar (for a horizontal split).
• Click the split-screen icons in the layout controls bar at the bottom of the project window.
Once a window has been split, you can change the width and height of the split by dragging
the bars between the splits.
To remove splits from a window, use one of the following techniques:
• Choose Window > Split Window > Remove All.
• Drag a split bar to the side of the window.
A GUIDE TO QUARKCOPYDESK 8.1 | 29
Page 30
ARTICLES AND COMPONENTS
Articles and components
Articles and components are the basic building blocks that you work with in
QuarkCopyDesk. This topic describes both in detail.
Understanding articles and components
An article is the main format used by QuarkCopyDesk. Each article consists of one or more
components, and each component is an independent text flow or picture. When you select
a text component in QuarkCopyDesk, you can edit and apply formatting to the text in
that component. When you select a picture component in QuarkCopyDesk, you can crop,
scale, rotate, and even perform image-editing operations on the picture in that component.
One way to create an article is to simply choose File > New > Article in QuarkCopyDesk,
and then add the components you need. (You can create a component by choosing
Component > New.) You can also create an article in a QuarkXPress project by adding
text and picture boxes to an article icon in an Article palette in QuarkXPress.
There are two ways to open an article that was created in QuarkXPress. One way is to
export the article from QuarkXPress as an article file and then open the article file in
QuarkCopyDesk (for more information, see "Multiple Article XTensions software"). The other
way is to simply open the QuarkXPress project file in QuarkCopyDesk. Whichever method
you use, the stories in the QuarkXPress article's text boxes become text components and
the picture boxes in the article become picture components.
You can also import content from an article's components in QuarkXPress. You can import
the contents of a text component into a text box, and you can import the contents of a
picture component into a picture box.
Reading order
Components in an article occur in a particular reading order — the order in which the
components should be viewed, regardless of how they're physically arranged — which you
can change if you need to. Every component also has a name, so you can descriptively
label your components. For example, you might name the first component in a story
"Headline," the second text component "Story," the following picture component "Photo,"
and the last text component "Caption."
30 | A GUIDE TO QUARKCOPYDESK 8.1
Page 31

ARTICLES AND COMPONENTS
Text components and pages
Each text component can be viewed and edited as a series of one or more pages. If you
add content until a page overflows, QuarkCopyDesk creates another page. If you delete a
page of content, QuarkCopyDesk automatically deletes the empty page from the
component.
You can import a variety of types of documents into a text component, including Microsoft
Word files and articles saved by versions 7.x and later of QuarkCopyDesk. You can also
export text from an article in most of these formats.
Editing picture components
Among the ways QuarkCopyDesk lets you edit pictures are the following:
• Rotating
• Scaling
• Cropping
• Applying picture effects (including Brightness/Contrast, Blur, Despeckle, and others)
Picture editing must be done in WYSIWYG view. Pictures can only be viewed in Full Screen
and Galley views.
Master components
Each component is based on a master component. A master component is the equivalent
of a master page in QuarkXPress; it dictates the properties of components you create from
it. For example, if you create a text component from a master text component that has
particular margin, column, and gutter values, then the text component inherits those
margin, column, and gutter values.
When you create a QuarkCopyDesk article from scratch, QuarkCopyDesk uses the first
master text component to create a single text component. If you create a component, and
multiple master components of that type are available, you must choose which master
component you want to use.
If you change a master component (File > Article Setup), the change affects all components
that are based on that master component. This includes changes to the margin guides,
number of columns, and column guides.
A GUIDE TO QUARKCOPYDESK 8.1 | 31
Page 32

ARTICLES AND COMPONENTS
The Article Setup dialog box lets you work with master components.
Master components and QuarkXPress
When you open a QuarkXPress project in QuarkCopyDesk, that project's master pages
become master components. Any items on such master pages are ignored; only the
text-related specifications of the page (such as margin, column, and gutter values) are used.
Templates
A template is a locked article that you can use to create articles that have pre-existing
components or content. You can save any article as a template. To create an article from
a template file, double-click the file's icon or choose File > New from Template in
QuarkCopyDesk and then select the template file.
QuarkCopyDesk lightweight file format
In addition to its native file format, QuarkCopyDesk lets you open and save files in a
lightweight file format. This format can be useful in situations where file size is an issue.
Where the QuarkCopyDesk format includes all content in a project, the lightweight file
format includes only those items that a QuarkCopyDesk user is supposed to work on. The
lightweight file format can also contain a page picture to show what the layout looks like,
either within the article file or as a separate file.
Articles and QuarkXPress
The QuarkCopyDesk file format is based on the QuarkXPress file format. Consequently,
you can open a QuarkXPress project in QuarkCopyDesk. You cannot open a QuarkCopyDesk
article in QuarkXPress, but you can import the contents of an article's components into
text boxes and picture boxes.
A QuarkXPress project can contain items that have been marked as articles. To create
articles in QuarkXPress, you must have the Multiple Articles XTensions module loaded.
After you have created articles in QuarkXPress, you can either open the project file in
32 | A GUIDE TO QUARKCOPYDESK 8.1
Page 33

ARTICLES AND COMPONENTS
QuarkCopyDesk or export the articles as article files (in either the QuarkCopyDesk file
format or the QuarkCopyDesk lightweight file format).
When you open a QuarkXPress project in QuarkCopyDesk:
• If the project contains an article, QuarkCopyDesk lets you edit the contents of the
components in that article. Non-article content is displayed if you are in WYSIWYG view,
but it cannot be edited.
• If the project contains more than one article, QuarkCopyDesk displays a dialog box and
asks you to choose one of the articles.
• If the project does not contain articles, and all of its layouts are Print layouts, you can view
the contents of the project's layouts but you cannot edit them. (Use the tabs at the bottom
of the article window to navigate between layouts.)
• If the layout contains more than one layer, all items on all visible layers are available in
QuarkCopyDesk. There is no such thing as switching between layers in QuarkCopyDesk;
all components from every visible layer are available at all times. QuarkCopyDesk keeps
track of which items are on which layers internally, though, so if you edit such an article
in QuarkCopyDesk and then open the project in QuarkXPress, all items remain on the
layers where they were.
Components on layers that are suppressed cannot be printed from QuarkCopyDesk.
WYSIWYG view
QuarkCopyDesk gives you three ways to look at the components in an article: Full Screen
view, Galley view, and WYSIWYG view. Full Screen view and Galley view are designed to
let you concentrate on the text, and WYSIWYG view is designed to show you what the
text looks like in the context of the layout.
When you use WYSIWYG view, you see a visual representation of the actual layout. You
can identify the components that are included in an article by their colored outline. Items
from the layout that are not included in the article are neither selectable nor editable.
WYSIWYG view is relevant only to QuarkXPress projects that contain articles and articles
that were exported from QuarkXPress layouts.
Overset and underset
If a text story in a QuarkXPress text box is too long, the box overflows and the last part
of the text does not display. (There are exceptions to this rule, but this is a common
scenario.) The portion of text that does not display in this scenario is called overset. If there
is not enough text to fill the space available, this is called underset. Copyfitting is the process
of working with text until it fits the available space.
If you are working in WYSIWYG mode, an overset occurs when the last text box in a chain
overflows and new pages are created at the end of the article. In Galley view and Full Screen
view, the Measurements palette includes a Depth field that indicates when text is underset,
fit, and overset. Galley view and Full Screen view also include special characters that
A GUIDE TO QUARKCOPYDESK 8.1 | 33
Page 34

ARTICLES AND COMPONENTS
indicate column breaks, page breaks, and overset. (Keep in mind: Overset can only occur
in an article that was created in QuarkXPress.)
Picture components
In WYSIWYG mode, pictures display as they display in the source layout. In Full Screen
view and Galley view, QuarkCopyDesk displays cropped views of pictures.
Technically there is no such thing as overset and underset for pictures. However, in
QuarkXPress you can specify effective resolution requirements for various types of pictures,
and QuarkCopyDesk will alert you if the picture in a picture component does not adhere
to those requirements. (Effective resolution is the resolution at which a picture will be
imaged; it is equal to resolution divided by scaling.)
Geometry
The shapes and positions of items in a QuarkXPress layout are collectively referred to as
geometry. A layout's geometry is, essentially, the collection of boxes and lines in that layout.
When you open an article exported from QuarkXPress in QuarkCopyDesk, QuarkCopyDesk
displays the layout's geometry in WYSIWYG view. Text boxes that are designated as part
of the article display as text components, and picture boxes that are part of the article
display as picture components. You can edit the contents of components that are part of
the article in QuarkCopyDesk, but you cannot edit the geometry of the layout.
Anchored boxes
In QuarkXPress, you can paste a box into a text story so that it flows along with the text
like a character. Such a box is called an anchored box. You can work with the contents of
an anchored box in QuarkCopyDesk, but you cannot create an anchored box in
QuarkCopyDesk.
If you open a QuarkXPress project with an article that contains an anchored box,
QuarkCopyDesk displays the anchored box inline. You can edit the contents of such a
box in all three view modes.
If an article contains an anchored table, you can edit the contents of the table only in
WYSIWYG view. An anchored table displays as an icon in Full Screen and Galley views.
Working with articles
An article is basically a container for components. You can open article files that were
exported from QuarkXPress or create articles from scratch in QuarkCopyDesk.
Creating articles
When you create an article, you can choose whether the article will consist of single pages
or of spreads with left- and right-facing pages. You also have the option to create up to 30
columns and specify the width between the columns.
34 | A GUIDE TO QUARKCOPYDESK 8.1
Page 35

ARTICLES AND COMPONENTS
To create an article, choose File > New > Article (Command+/Ctrl+N). Use the controls
in the New Article dialog box to configure your article.
• To specify page size, choose an option from the Size drop-down menu. To create a
custom-sized page, enter dimensions in the Width and Height fields.
• To specify page orientation, click Portrait or Landscape.
• Check Facing Pages to specify that the article contains both left-facing and right-facing
pages. When you check Facing Pages the Left and Right fields in the Margin Guides area
change to Inside and Outside.
• To specify the position of the margin guides, enter values in the fields in the Margin
Guides area.
• To specify the number of columns on article pages and the spacing between them, enter
values in the Columns and Gutter Width fields.
Use the New Article dialog box to set up an article.
Saving articles automatically
The Auto Save feature protects your work from power and system failures. When Auto
Save is on, QuarkCopyDesk automatically records changes made to all articles and saves
them to your article folder. Auto saves are performed at user-defined intervals (during idle
time, if possible).
To turn on the Auto Save feature, display the Open and Save pane of the Preferences
dialog box (Edit/QuarkCopyDesk menu), check Auto Save, and enter an interval in the
minutes field
QuarkCopyDesk does not overwrite the original files until you choose File > Save. When
you choose File > Save, the auto-saved version is deleted, and the interval starts again.
A GUIDE TO QUARKCOPYDESK 8.1 | 35
Page 36

ARTICLES AND COMPONENTS
Auto Save only works with saved articles. If you have an unnamed article that was never
saved, it is not protected by Auto Save.
Recovering an Auto Saved article
To recover an auto-saved article after a system or power failure, choose File > Open and
locate the article. Two files will be displayed in the dialog box: the original article and the
auto-saved version. Open the original article; it will be combined with the auto-saved
version as it is opened. When you open the article, an alert will display. Click OK to
continue.
The auto-saved article retains changes made until the last auto save occurred. Depending
on your auto save interval, you may have lost a few minutes of work. At this point, you
can save the article with its auto-saved changes (File > Save), or you can reject the
auto-saved changes and return to the last manually saved version of the article (File >
Revert to Saved).
Saving articles as templates
A template is a preformatted article that is protected from overwriting. You should create
templates for any articles that will use the same format and specifications. Templates
should include all essential style sheets, colors, H&Js, and lists that will be used in articles
based on the template.
To save an article as a template, choose File > Save As and choose Template from the
Type drop-down menu. You can modify a template by saving it again with the Save as
command (File menu).
Changing article setup
To change an article's size or orientation, control whether an article uses facing pages, or
add or remove master components, choose File > Article Setup. The Article Setup dialog
box displays.
You can use the Article Setup dialog box to control an article's attributes.
36 | A GUIDE TO QUARKCOPYDESK 8.1
Page 37

ARTICLES AND COMPONENTS
Use the controls in the Page area to configure the article's size and orientation and indicate
whether you want to use facing pages.
The controls in the Master Components area let you add, remove, and configure master
components. To add a master component, click Add Single Master (for a single-sided
master component) or Add Facing Master (for a facing-pages master component). To
duplicate the selected master component, click Duplicate . To remove the selected master
component, click Delete . To configure a master component, select it and click Edit ;
the Edit Master Component dialog box displays. You can use this dialog box to specify
the name, number of columns, and margin and gutter sizes for the master component.
The Edit Master Component dialog box lets you configure a master component.
Working with components
A component is an independent text flow or picture. A component in QuarkCopyDesk
corresponds to a text chain or picture in QuarkXPress.
Creating components
When you create a component, you must create it from a master component.
To create a component, choose Component > New (Command+Option+C/Ctrl+Alt+C).
The New Component dialog box is displayed. Enter up to 31 characters in the Name field
and then click OK. The new component is immediately active. The components in the
active article are listed at the bottom of the Component menu.
Controlling component properties
To rename the active component, change its type (Text or Picture), or change the master
component on which it is based, choose Component > Properties.
Deleting components
To delete the active component in an active article, choose Component > Delete. Note
that if an article contains only one component, you cannot delete that component.
A GUIDE TO QUARKCOPYDESK 8.1 | 37
Page 38

ARTICLES AND COMPONENTS
Navigating among components
The following shortcuts make it easy to navigate within an article.
• To cycle to the previous page (in WSYIWYG view mode) or component (in Galley and Full
Screen view modes), press Option+up arrow/Alt+up arrow.
• To open a selected component in Galley and Full Screen view modes, press Option+right
arrow/Alt+up right arrow.
• To close an active component in Galley and Full Screen view modes, press Option+left
arrow/Alt+up right arrow.
• To change component order in Galley and Full Screen view modes, click on a component
title bar and drag it to a new location.
38 | A GUIDE TO QUARKCOPYDESK 8.1
Page 39

Text and typography
Text is an integral part of nearly every publication. QuarkCopyDesk lets you create and
edit text directly in your publications or import text from most popular word processing
applications. In addition to the standard text formatting and editing features,
QuarkCopyDesk includes such features as finding and changing text and its attributes,
spell checking, custom spelling dictionaries, and a font usage utility for making article-wide
TEXT AND TYPOGRAPHY
changes to text formatting.
Typography is the art of making the appearance of your text convey the tone or meaning
of the content. QuarkCopyDesk lets you control the tone of your text by letting you adjust
every facet of typography, including typefaces, type styles, leading, and spacing.
Editing text
When you type in a text component, the text is entered at the text insertion point, which
is indicated by the blinking line. A story is all of the text in a text box. If a series of boxes
is linked, all of the text in all of the boxes is a single story.
You can select text using multiple mouse clicks. A double-click selects the word containing
the text insertion point; a triple-click selects the line containing the text insertion point;
four clicks selects the entire paragraph containing the text insertion point; five clicks selects
the entire story.
When you double-click to select a word and cut or copy it, the application looks at the
context of the word and adds or deletes a space automatically as needed when you paste
the word in its new location. This feature is referred to as Smart Space. If you want an
accompanying punctuation mark included with the word you're selecting, double-click
between the word and its adjacent punctuation.
Importing and exporting text
To import text, do one of the following:
A GUIDE TO QUARKCOPYDESK 8.1 | 39
Page 40

TEXT AND TYPOGRAPHY
• Place the text insertion point where you want text to be inserted, and then choose File >
• Drag a text file from the file system onto a text component.
• Drag text from another application onto a text component.
• Drag a text file from the file system onto a picture component and press Command/Ctrl
• Drag text from another application onto a picture component and press Command/Ctrl
Import. Check Convert Quotes option to convert double hyphens to em dashes and
convert foot or inch marks to typesetter's apostrophes and quotation marks. Check Include
Style Sheets to import style sheets from a Microsoft Word or WordPerfect file or convert
"XPress Tags" to formatted text.
to make the component accept the text.
to make the component accept the text.
To export text, first either place the text insertion point in a text component (if you want
to save all of the text in that component) or select the text you want to export. Then
choose File > Save Text, choose an option from the Format pop-up menu, enter a name,
choose a location, and then click Save.
Import/export filters
XTensions software lets you import and export text in a variety of formats, including those
described in this section.
Word 6-2000 filter
The Word 6-2000 Filter allows documents to be imported from, or exported to, the Microsoft
Word 97/98/2000 (Word 8) formats.
To avoid import problems, uncheck Allow fast saves (in the Save tab of the Options dialog
box) in Microsoft Word or use the Save As command to create a copy of the Word file to
be imported.
WordPerfect filter
The WordPerfect Filter allows documents to be imported from WordPerfect 3.0 and 3.1
(Mac OS) and WordPerfect 5.x and 6.x (Windows). The WordPerfect Filter also lets you
save text in WordPerfect 6.0 format.
WordPerfect 3.1 for Mac OS can read WordPerfect 6.0 for Windows documents, so there
is no WordPerfect 3.1 for Mac OS export option.
QCDImportFilter XTensions software
For more information, see "QCDImportFilter XTensions software."
Importing and exporting text with Unicode options
You can specify an encoding type when importing text and exporting text. The encoding
type specifies the byte sequence used to represent each glyph in text. When working with
40 | A GUIDE TO QUARKCOPYDESK 8.1
Page 41

TEXT AND TYPOGRAPHY
international text or HTML text, you can choose the appropriate encoding to convert all
the characters in the file to Unicode. The options work as follows:
• The Import dialog box includes an Encoding drop-down menu when a plain text or
"XPress Tags" text file is selected. The software attempts to determine the encoding of
selected text files and apply an appropriate encoding type. You can, however, choose a
different option for text.
• The Save Text dialog box provides an Encoding drop-down menu when you're exporting
text in plain text or "XPress Tags" format.
• The Convert Quotes option continues to convert straight quotes to typesetter's quotation
marks and double hyphens to em dashes.
Finding and changing text
The Find/Change palette (Edit menu) lets you perform standard search-and-replace
operations. In addition, you can use this palette to:
• Find and change using wild card characters: Command+Shift+?/Ctrl+Shift+?
• Find and change text formatting, including style sheet, font, size, color, and type style
(including OpenType styles)
• Constrain find/change operations to a single component, or to an entire article
• Find and change based on character language (see "Applying a character language")
• Find and change ligatures
• Find and change invisible characters (see the Keyboard Command Guide)
Press Option/Alt to change the Find Next button to Find First. To search and replace
based on formatting attributes, uncheck Ignore Attributes.
A GUIDE TO QUARKCOPYDESK 8.1 | 41
Page 42

TEXT AND TYPOGRAPHY
Use the Find/Change dialog box to search for and replace text. To search and replace based
on formatting attributes, uncheck Ignore Attributes.
The Find/Change feature works only with text components that have not been locked in
QuarkXPress.
Checking spelling
To check spelling, choose an option from the Utilities > Check Spelling submenu. The
Check Spelling palette displays.
42 | A GUIDE TO QUARKCOPYDESK 8.1
Page 43

TEXT AND TYPOGRAPHY
Check Spelling palette
To change the scope of the spell check, choose an option from the Check drop-down
menu. The options are Word, Selection, End Of Component, Component, or Article.
To check spelling in locked text boxes, cells, and paths, check Search Locked Content.
Spell checking always starts from the text insertion point.
To start a spell check, click Start. To start the spell check from the beginning of the active
component, Shift+click Start.
To replace a misspelled word, type the correct spelling in the Replace With field or choose
the correct word from the list, then click Replace. To replace all occurrences of the
misspelled word, click Replace All.
To look up suggestions for the word in the Replace With field, click Look up.
To skip the selected word, click Skip.
To add the word in the Replace With field to an auxiliary dictionary, click Add. If no
auxiliary dictionary is open, you can select or create one after you click Add. To add all
suspect words to an open auxiliary dictionary, press Option+Shift/Alt+Shift and click Add
All.
To close the Check Spelling palette, click Done.
You can click outside the Check Spelling palette and return to the palette to restart a spell
check.
To reverse changes from the Check Spelling palette, choose Edit > Undo Text Change.
To display spell checking preferences, click Preferences. For more information, see
"Preferences — Application — SpellCheck."
A GUIDE TO QUARKCOPYDESK 8.1 | 43
Page 44

TEXT AND TYPOGRAPHY
Auxiliary dictionaries
To prevent a word from being flagged by the spell checker, create an auxiliary dictionary
and add the word to that auxiliary dictionary. To create an auxiliary dictionary, choose
Utilities > Auxiliary Dictionary, enter a name, and then click New. To add words to an
auxiliary dictionary, choose Utilities > Edit Auxiliary.
Only one auxiliary dictionary at a time can be open for use with an article. An auxiliary
dictionary remains associated with an article until you click Close in the Auxiliary
Dictionary dialog box or until you open a different auxiliary dictionary.
Auxiliary dictionaries are saved as separate files on your hard drive. The path to an article's
auxiliary dictionary is saved with the article, so if you move an open auxiliary dictionary
to another folder or volume, the application will be unable to find it.
To create or open an auxiliary dictionary without closing the Check Spelling palette, click
Add while a word you want to keep is highlighted.
To add all suspect words to an open auxiliary dictionary, press Option+Shift/Alt+Shift and
click Add All.
Counting words and characters
To display a count of the words and characters in a component, choose Utilities > Word
and Character Count.
Word and Character Count dialog box
The Word Count area displays the number of total and unique words in the story.
The Character Count area displays the total number of characters and specific language
characters.
44 | A GUIDE TO QUARKCOPYDESK 8.1
Page 45

TEXT AND TYPOGRAPHY
Private Use Characters are unique characters specified within a range of the Unicode
character set by individuals, organizations, and software vendors outside the ISO and
Unicode Consortium.
Applying character attributes
QuarkCopyDesk lets you maintain precise, character-by-character control over text
formatting.
Applying a font
To apply a font to selected text, do one of the following things:
• Choose Style > Font and choose a font from the submenu.
• Display the Character Attributes dialog box (Style > Character) and choose a font from
the Font menu.
• Choose a font from the Font drop-down menu in the Measurements palette.
• Press Command+Option+Shift+M/Ctrl+Alt+Shift+M to jump directly to the font field in
the Measurements palette, enter the first few characters of the font name until it is
recognized, then press Return/Enter.
Your most recently used fonts display at the top of the font list.
To display font previews in font menus, check the Show in Font Menu box in the Fonts
pane of the Preferences dialog box (QuarkCopyDesk/Edit menu). Press Shift to temporarily
override this preference.
Choosing a font size
You can apply font sizes from 2 to 3456 points. To apply a size to selected text, do one of
the following things:
• Choose Style > Size and choose a point size from the submenu.
• Click the arrow next to the current font size to display a list of point sizes, then either
choose a size from the list or enter a new point size.
• Use one of the keyboard commands below.
Mac OS
• Increase 1 pt: Command+Option+Shift+>
• Decrease 1 pt: Command+Option+Shift+<
• Increase in preset range: Command+Shift+>
• Decrease in preset range: Command+Shift+<
A GUIDE TO QUARKCOPYDESK 8.1 | 45
Page 46

TEXT AND TYPOGRAPHY
• Increase 1 pt: Ctrl+Alt+Shift+>
• Decrease 1 pt: Ctrl+Alt+Shift+<
• Increase in preset range: Ctrl+Shift+>
• Decrease in preset range: Ctrl+Shift+<
• Choose Style > Type Style and choose a type style from the submenu.
• Choose Style > Character and click check boxes in the Type Style area.
• Choose a type style from the Text Styles drop-down menu in the Measurements palette.
Windows
Applying type styles
To apply a type style to selected text, do one of the following things:
Apply bold and italic type styles using the icons to the left of the Text Styles drop-down
menu. To remove all styles from selected text, choose Remove All Styles from the Text
Styles drop-down menu.
Intrinsic fonts are distinct font styles built into font families, such as “Times New Roman
MT Std Bd” in the “Times New Roman MT Std” font family.
Simulated fonts are plain intrinsic fonts that have been modified to simulate bold, italic,
or bold italic. When a font family does not include a bold or italic variation as a separate
intrinsic font, you can apply the bold and italic type styles to allow your operating system
to perform a transform to create a bold or italic rendition of the font. The result is a
simulated font.
When you apply bold to a plain font, the application first tries to find an intrinsic bold
version of the font, and then if it can't find such a font, it creates a simulated bold version of
the font.
Warning icons identify simulated fonts in a layout because simulated fonts can cause
output problems. Simulated fonts display with a warning icon in the Measurements
palette, the Glyphs palette, the Character Attributes dialog box, the Style > Type Style
submenu, the Edit Character Style Sheet dialog box, the Change To area of the
Find/Change palette, the Fonts pane of the Usage dialog box (Utilities menu), the Replace
Font dialog box accessible from the Usage dialog box, and the Character Attributes tab
of the Rubi dialog box.
Applying color, shade, and opacity
To apply color, shade, and opacity to selected text, do one of the following things:
• Choose options from the Style > Color, Style > Shade, and Style > Opacity submenus.
• Display the Colors palette (Window > Show Colors), click a color, and then choose or
enter Shade and Opacity values.
• Use the color, shade, and opacity controls in the Measurements palette.
46 | A GUIDE TO QUARKCOPYDESK 8.1
Page 47

TEXT AND TYPOGRAPHY
Applying horizontal or vertical scale
To apply horizontal or vertical scaling to selected text, do one of the following things:
• Choose Style > Horizontal/Vertical Scale, choose Horizontal or Vertical from the Scale
drop-down menu, enter a value in the field, and then click OK.
• Use one of the keyboard commands below. If a range of text is selected that has both
horizontal and vertical scaling applied, the keyboard commands will increase or decrease
the text accordingly.
You cannot apply horizontal and vertical scaling values simultaneously.
Mac OS
• Condense 5%: Command+[
• Expand 5%: Command+]
• Condense 1%: Command+Option+[
• Expand 1%: Command+Option+]
Windows
• Condense 5%: Ctrl+[
• Expand 5%: Ctrl+]
• Condense 1%: Ctrl+Alt+[
• Expand 1%: Ctrl+Alt+]
Applying baseline shift
You can place characters above or below their baseline without affecting paragraph spacing.
A positive value raises the text; a negative value lowers the text. To apply baseline shift to
selected text, do one of the following things:
• Choose Style > Baseline Shift, enter a value in the Baseline Shift field, and then click
OK.
• Use one of the keyboard commands below.
Mac OS
• Down 1 pt: Command+Option+Shift+-
• Up 1 pt: Command+Option++
Windows
• Down 1 pt: Ctrl+Alt+Shift+9
• Up 1 pt: Ctrl+Alt+Shift+0
A GUIDE TO QUARKCOPYDESK 8.1 | 47
Page 48

TEXT AND TYPOGRAPHY
Applying multiple character attributes
You can view and edit all character attributes at one time using the Character Attributes
dialog box (Style > Character).
Blank fields and gray check boxes in the Character Attributes dialog box indicate that
multiple styles are applied to selected text. For example, if the Font field is blank, then
more than one font is applied to the selected text.
If you enter a value in a blank field in the Character Attributes dialog box, that value will
be applied to all the selected text. If you check or uncheck a gray check box, that style
setting will be applied to or removed from all selected text.
Use the Character Attributes dialog box to format text.
Applying paragraph attributes
Paragraph attributes are formatting options that apply to a paragraph as a whole. They
include alignment, indents, leading, and tab settings. To apply attributes to selected
paragraphs, use the Paragraph Attributes dialog box (Style > Formats) or the
Measurements palette.
You can copy any applied paragraph formats from one paragraph to other paragraphs in
the same box or text chain. To copy applied paragraph formats, select the paragraph or
range of paragraphs that you want to change, then press Option+/Alt+Shift while clicking
48 | A GUIDE TO QUARKCOPYDESK 8.1
Page 49

TEXT AND TYPOGRAPHY
anywhere in the paragraph with the formats you want to copy. Copying paragraph formats
in this way will not change any character attributes.
Controlling alignment
You can choose from five paragraph alignments: Left, Centered, Right, Justified, and Forced.
The Forced option aligns all lines between the left and right indentations, like the Justified
option, but also justifies the last line (if there is a return at the end of the paragraph).
To set the alignment of selected text, do one of the following things:
• Choose an alignment from the Style > Alignment submenu.
• Click an alignment icon in the Measurements palette.
• Use one of the keyboard commands below.
Mac OS
•
Left : Command+Shift+L
•
Centered : Command+Shift+C
•
Right : Command+Shift+R
•
Justified :Command+Shift+J
•
Forced : Command+Option+J
Windows
•
Left : Ctrl+Shift+L
•
Centered : Ctrl+Shift+C
•
Right : Ctrl+Shift+R
•
Justified : Ctrl+Shift+J
•
Forced : Ctrl+Alt+Shift+J
Controlling indentation
To specify indents for selected paragraphs, use the Style > Alignment submenu or the
Paragraph Attributes dialog box (Style > Formats).
• To specify how far a paragraph is indented from the left edge of a box or column, enter a
value in the Left Indent field.
• To specify how far the first line of a paragraph is indented from the Left Indent value,
enter a value in the First Line field. Note that First Line indentation is relative to the Left
Indent applied to a paragraph. For example, if you specify a Left Indent of .5", and a First
Line indentation of .5", the first line will begin 1" from the left edge of the text box.
A GUIDE TO QUARKCOPYDESK 8.1 | 49
Page 50

TEXT AND TYPOGRAPHY
• To specify how far a paragraph is indented from the right edge of a box or column, enter
• To create a hanging indentation, specify a positive Left Indent and a negative First Line
a value in the Right Indent field. Click OK.
indentation or drag the indentation icons on the column ruler. Use the Apply button in
the Formats tab of the Paragraph Attributes dialog box (Style > Formats) to experiment
with the hanging indentation.
In addition to setting hanging indents as a paragraph attribute, you can enter a special
character that forces the indenting of all lines of text from that point to the next paragraph
return. Press Command+\ (Mac OS) or Ctrl+\ (Windows) to enter a special Indent Here
character. (The Indent Here character is an invisible character; to view invisible characters,
choose View > Show Invisibles (Command+I/Ctrl+I.)
Controlling leading
Leading is a measure of line spacing — the distance between text baselines in paragraphs.
When you specify a leading value, it is applied to all lines in selected paragraphs. You can
specify leading by three methods:
• Absolute leading sets the distance between baselines of text to a specific value, regardless
of the size of characters on the lines. For example, if you specify an absolute leading value
of 16 points for a paragraph, all baselines will be spaced 16 points apart. When specifying
absolute leading, use a value that is the total vertical distance you want between text
baselines.
• Incremental auto leading combines a base amount of auto leading with an absolute value
specified in the Leading field (Style menu). Incremental leading values must be preceded
by a plus (+) or minus (–) sign.
• Auto leading means the application uses the value in the Auto Leading field
(QuarkCopyDesk /Edit > Preferences > Paragraph pane) to decide whether
percentage-based or incremental auto leading occurs. The default — percentage-based —
takes the base amount of auto leading and adds to it a fixed percentage of the largest font
size on the upper line to determine the total amount of leading between an auto-leaded
line and the line above it. The default value for percentage-based auto leading is 20%. To
specify auto leading, enter auto in the Leading field.
To set the alignment of selected paragraphs, do one of the following things:
• Choose Style > Leading, then enter an absolute leading value, an incremental leading
value (preceded by a plus or minus sign), or auto in the Leading field.
• Use the Leading controls in the Measurements palette.
• Use one of the keyboard commands below.
Mac OS
• Decrease 1 pt: Command+Shift+:
50 | A GUIDE TO QUARKCOPYDESK 8.1
Page 51

TEXT AND TYPOGRAPHY
• Decrease .1 pt: Command+Option+Shift+:
• Increase 1 pt: Command+Shift+"
• Increase .1 pt: Command+Option+Shift+"
Windows
• Decrease 1 pt: Ctrl+Shift+:
• Decrease .1 pt: Ctrl+Alt+Shift+:
• Increase 1 pt: Ctrl+Shift+"
• Increase .1 pt: Ctrl+Alt+Shift+"
Controlling space before and after paragraphs
Space Before and Space After controls let you specify the amount of space before and
after selected paragraphs.
To set the space before and after selected paragraphs, choose Style > Formats, then enter
values in the Space Before or Space After fields.
Setting tabs
You can choose from six kinds of tab stops:
• Left aligns text flush left on the tab stop.
• Center aligns text centrally on that tab stop.
• Right aligns text flush right on the tab stop.
• Decimal aligns text on a decimal point (period).
• Comma aligns text on a first comma.
• Align On aligns text on any character you specify. When you select this tab, the Align
On field displays. Select the existing entry, and enter the character to align on.
If you do not set custom tabs, the application sets default left-aligned tabs every half-inch.
To apply tabs to selected paragraphs, use the controls in the Tabs tab of the Paragraph
Attributes dialog box (Style > Tabs).
Controlling widow and orphan lines
Widows and orphans are two kinds of typographically undesirable lines. Traditionally, a
widow is defined as the last line of a paragraph that falls at the top of a column. An orphan
is the first line of a paragraph that falls at the bottom of a column.
Using the Keep Lines Together feature, you can choose not to break paragraphs, so that
if all the lines in a paragraph do not fit in a column or on a page, the whole paragraph
will flow to the top of the next column or page. Alternatively, you can specify the number
of lines that must be left at the bottom of a column or box, and at the top of the following
A GUIDE TO QUARKCOPYDESK 8.1 | 51
Page 52

TEXT AND TYPOGRAPHY
Controlling hyphenation and justification
column or box, when a paragraph is broken. Using the Keep with Next ¶ feature, you can
keep a paragraph together with the paragraph that follows it. This lets you keep a subhead
together with the paragraph that follows it, or keep other lines of text that logically go
together from being separated.
It is common to specify Keep with Next ¶ for headline and subhead style sheets and
specify Keep Lines Together (usually with Start and End parameters) for body text style
sheets.
To turn the Keep Lines Together and Keep with Next ¶ features on or off for selected
paragraphs, choose Style > Formats to display the Formats tab of the Paragraph Attributes
dialog box, then check or uncheck Keep Lines Together and Keep with Next ¶.
A hyphenation and justification (H&J) specification is a named package of settings for
hyphenating words that go over the margin of a line of text and for justifying spaces
between words and characters. You can apply H&Js to individual paragraphs, or you can
associate an H&J with a paragraph style sheet. Use the Edit Hyphenation & Justification
dialog box (Edit > H&Js > New) to control these settings.
The Edit Hyphenation & Justification dialog box
• Auto Hyphenation: Specify whether automatic hyphenation is allowed.
• Smallest Word: Specify the minimum number of characters a word must contain to allow
hyphenation.
• Minimum Before: Specify the minimum number of characters before a hyphen.
• Minimum After: Specify the minimum number of characters after a hyphen.
• Break Capitalized Words: Specify whether hyphenation of capitalized words is allowed.
• Hyphens in a Row: Specify how many words can be hyphenated in consecutive line ends.
52 | A GUIDE TO QUARKCOPYDESK 8.1
Page 53

TEXT AND TYPOGRAPHY
• Hyphenation Zone: Specify the area before the right indentation in which hyphenation
can occur. For example, if you set the hyphenation zone to .05", the word is hyphenated
when an acceptable hyphenation point falls within .05" of the right indentation. The word
preceding the hyphenated word must not fall within the hyphenation zone.
• Justification Method: Specify how words and characters are spaced.
• Space: Specify the minimum and maximum amount of space between words in paragraphs
that have justified or forced alignment. Specify the optimum amount of space between
words in all paragraphs, regardless of their alignment.
• Char: Specify the minimum and maximum amount of space between characters in
paragraphs that have justified or forced alignment. Specify the optimum amount of space
between characters in all paragraphs, regardless of their alignment.
• Flush Zone: Specify the area before the right indentation within which the last word in
the last line of a justified paragraph must fall in order to justify that line. For example, if
you enter 1", the last line of a paragraph to which the hyphenation and justification
specification is applied will not be justified until the last word in the line falls within 1"
of the right indentation.
• Single Word Justify: Specify whether a single word on a line in a justified paragraph
extends from the left indentation to the right indentation. When the box is unchecked,
a single word on a line is left-aligned.
Specifying hyphenation exceptions
In most language editions of QuarkCopyDesk, you can create language-specific lists of
hyphenation exceptions. The Hyphenation Exceptions dialog box (Utilities menu) has a
Language drop-down menu that lets you specify which language a hyphenation exception
applies to. When a paragraph is automatically hyphenated, the application checks the list
of hyphenation exceptions for the appropriate paragraph language.
The Suggested Hyphenation dialog box (Utilities menu) displays the recommended
hyphenation of a word that is based on the hyphenation method specified for the paragraph
and the hyphenation exceptions for the paragraph's language.
Using discretionary hyphens
In addition to hyphenating text automatically, you can control line breaks and text flow
by inserting manual, or discretionary, hyphens (Command+- [hyphen]/Ctrl+- [hyphen]).
A discretionary hyphen is inserted only when a word is broken at the end of a line.
Controlling kerning
Kerning is the adjustment of space between character pairs. Because of their shapes, certain
character pairs look better when kerned. You can use automatic kerning, and you can also
use manual kerning controls to specify additional kerning between characters.
A GUIDE TO QUARKCOPYDESK 8.1 | 53
Page 54

TEXT AND TYPOGRAPHY
• Choose Style > Kern and enter a value in the Kern Amount field. Click OK.
• Use the Kern Amount controls in the Measurements palette.
• Use one of the keyboard commands below.
• Decrease 1/20-em: Command+Shift+{
• Increase 1/20-em: Command+Shift+}
• Decrease 1/200-em: Command+Option+Shift+{
• Increase 1/200-em: Command+Option+Shift+}
Kerning values are expressed as 1/200 of an em space. A positive kerning value increases
the amount of space between characters; a negative value decreases it.
Kerning manually
To apply kerning between two characters, do one of the following things:
Mac OS
Windows
• Decrease 1/20-em: Ctrl+Shift+{
• Increase 1/20-em: Ctrl+Shift+}
• Decrease 1/200-em: Ctrl+Alt+Shift+{
• Increase 1/200-em: Ctrl+Alt+Shift+}
Kerning automatically
To automatically kern text above a specific point size, display the Character pane of the
Preferences dialog box (QuarkCopyDesk/Edit menu), check Auto Kern Above, and enter
a value in the field.
Controlling tracking
Tracking lets you adjust the space between selected characters and words for copyfitting
and typographic effects. Tracking values are expressed as 1/200 of an em space. A positive
tracking value increases the space to the right of each character; a negative value decreases
it.
Tracking is commonly used for copyfitting. However, too much tracking can interfere with
design and readability. When you are using tracking for copyfitting, consider these
guidelines:
• Track whole paragraphs rather than one line or one word.
• Establish guidelines for tracking (for example from +3 to –3).
54 | A GUIDE TO QUARKCOPYDESK 8.1
Page 55

TEXT AND TYPOGRAPHY
• Make sure vertically adjacent paragraphs have similar tracking applied.
These are general rules; appropriate tracking values depend on the design, font, column
width, and other factors.
Tracking manually
To apply tracking to selected text, do one of the following things:
• Choose Style > Track, enter a value in the Track Amount field, and then click OK.
• Use the Track Amount controls in the Measurements palette.
• Use one of the keyboard commands below.
Mac OS
• Decrease 1/20-em: Command+Shift+{
• Increase 1/20-em: Command+Shift+}
• Decrease 1/200-em: Command+Option+Shift+{
• Increase 1/200-em: Command+Option+Shift+}
Windows
• Decrease 1/20-em: Ctrl+Shift+{
• Increase 1/20-em: Ctrl+Shift+}
• Decrease 1/200-em: Ctrl+Alt+Shift+{
• Increase 1/200-em: Ctrl+Alt+Shift+}
Working with style sheets
A style sheet is a group of paragraph attributes, character attributes, or both that can be
applied to selected paragraphs and characters in one step. Use style sheets to change
unformatted text into styles such as headlines, subheadings, captions, or body copy. Using
style sheets to apply a number of character and paragraph attributes at one time reduces
layout time and helps maintain typographic consistency.
Creating and editing paragraph style sheets
A paragraph style sheet is a named package of paragraph and character attributes. You can
apply all of a paragraph style sheet's formatting attributes to text by simply applying the
style sheet to the text. To create, edit, duplicate, or delete paragraph style sheets, use the
Style Sheets dialog box (Edit > Style Sheets).
A GUIDE TO QUARKCOPYDESK 8.1 | 55
Page 56

TEXT AND TYPOGRAPHY
Use the Style Sheets dialog box to create, edit, and delete style sheets.
To create a paragraph style sheet, choose Paragraph from the New drop-down button.
The Edit Paragraph Style Sheet dialog box displays. Use the controls in this dialog box
to configure the attributes of the style sheet.
Use the Edit Paragraph Style Sheet dialog box to configure a paragraph style sheet.
56 | A GUIDE TO QUARKCOPYDESK 8.1
Page 57

TEXT AND TYPOGRAPHY
First, configure the controls in the General tab:
• Name: Enter a name in this field, or the application will use a default "New Style Sheet"
name.
• Keyboard Equivalent: To define a keyboard command for the style sheet, enter one in
the Keyboard Equivalent field. You can enter any combination of Command, Option,
Shift, or Control/Ctrl or Ctrl+Alt, along with a function or keypad key.
• If you define a keyboard equivalent for a style sheet with a key sequence that also defines
an existing command, the style sheet command will override the existing command when
a text component is active.
• Based on: To base the attributes of a new style sheet on an existing one, click the Based
on drop-down menu and choose a style sheet from the list. Note that if you use the Based
on drop-down menu in the Edit Paragraph Style Sheet dialog box to base a style sheet
on an existing one, changes you make to the original style sheet are automatically applied
to those based on it.
• Next Style: To select a transition from one paragraph style sheet to another after entering
a carriage return, choose a paragraph style sheet from the Next Style drop-down menu.
• Style: To associate a character style sheet with the paragraph style sheet, choose an option
from the Style drop-down menu in the Character Attributes area. To create a character
style sheet, see "Creating and editing character style sheets."
Next, use the Formats, Tabs, and Rules tabs to specify additional attributes for your
paragraph style sheet. When you're done, click OK to return to the Style Sheets dialog
box, then click Save to save the style sheet. After you save a paragraph style sheet, it is
listed in the Paragraph Style Sheet submenu (Style menu) and also in the Style Sheets
palette.
When you create a style sheet with no articles open, that style sheet becomes part of the
default style sheet list and is included in all subsequently created articles. When you create
a style sheet with an article open, that style sheet is included only in the active article's
style sheet list.
To create a paragraph style sheet based on formatted text, first place the text insertion
point within a paragraph that uses the format attributes that you want in your paragraph
style sheet. Choose Edit > Style Sheets to display the Style Sheets dialog box. Choose
New > Paragraph and enter a name in the Name field. Click Save. Then apply the new
style sheet to the paragraph.
Updating paragraph style sheets
When you place the cursor in a paragraph that has uniform local formatting applied, you
can update the style sheet applied to that text to include the local formatting by clicking
the Update button . Alternatively, you can choose Style > Update Style Sheet >
Paragraph.
A GUIDE TO QUARKCOPYDESK 8.1 | 57
Page 58

TEXT AND TYPOGRAPHY
To update both the paragraph style sheet and the character style sheet applied to text so
that they reflect local formatting, choose Style > Update Style Sheet > Both.
Creating and editing character style sheets
A character style sheet is a named package of character attributes. You can apply all of a
character style sheet's formatting attributes to text by simply applying the style sheet to
the text. To create, edit, or delete character style sheets, use the Style Sheets dialog box
(Edit > Style Sheets).
To create a character style sheet, choose Character from the New drop-down button. The
Edit Character Style Sheet dialog box displays. Use the controls in this dialog box to
configure the attributes of the style sheet.
Use the Edit Character Style Sheet dialog box to configure a character style sheet.
First, configure the controls in the General tab:
• Name: Enter a name in this field, or the application will use the default "New Style Sheet"
name.
58 | A GUIDE TO QUARKCOPYDESK 8.1
Page 59

TEXT AND TYPOGRAPHY
• Keyboard Equivalent: To define a keyboard command for the style sheet, enter one in
the Keyboard Equivalent field. You can enter any combination of Command, Option,
Shift, or Control/Ctrl or Ctrl+Alt, along with a function or keypad key.
• Based On: To base the attributes of a new style sheet on an existing one, choose a style
sheet from the Based On drop-down menu.
Next, choose character attributes from the lower section of the Edit Character Style Sheet
dialog box. When you're done, click OK to return to the Style Sheets dialog box, then
click Save to save the style sheet. After you save a character style sheet, it is listed in the
Character Style Sheet submenu (Style menu) and also in the Style Sheets palette.
Updating character style sheets
When you select text that has uniform local formatting applied, you can update the style
sheet applied to that text to include the local formatting by clicking the Update button
. Alternatively, you can choose Style > Update Style Sheet > Character.
To update both the paragraph style sheet and the character style sheet applied to text so
that they reflect local formatting, choose Style > Update Style Sheet > Both.
Applying style sheets
To apply a style sheet to selected text, do one of the following things:
• Choose the style sheet name from the Style > Paragraph Style Sheet submenu or the
Style > Character Style Sheet submenu.
• Display the Style Sheets palette (Window menu) and then click the style sheet name in
the palette.
• Use the keyboard command (if any) displayed next to the style sheet name in the Style
Sheets palette.
When local paragraph or character attributes exist in selected text, a plus sign displays
next to the style sheet name in the Style Sheets palette. To remove local attributes, click
No Style and then reselect the style sheet, or Option+click/Alt+click the style sheet name.
Appending style sheets
To import paragraph and character style sheets from a different article or project, choose
File > Append, navigate to the target article or project file, then display the Style Sheets
pane and import the style sheets you want.
If a style sheet from the source file has the same name as a style sheet in the target project,
but is defined differently, the Append Conflict dialog box displays. You can use this dialog
box to determine how such conflicts are handled.
A GUIDE TO QUARKCOPYDESK 8.1 | 59
Page 60

TEXT AND TYPOGRAPHY
Controlling font usage
Using text runaround
To view and replace fonts, display the Fonts pane of the Usage dialog box (Utilities menu).
This pane lists all fonts used in the active article. To replace every occurrence of a font,
select the font name, click Replace, and choose a replacement font.
If a font is listed in the Fonts tab (Utilities > Usage) as [Name of Font] preceded by a
negative number, the system you are using does not have that font installed. When this
occurs, you can install the necessary font and reopen the document, or you can use the
Usage command to locate occurrences of the font and apply a different font.
The text runaround feature lets you control the way text runs behind, around, or within
pictures. You can specify text to run around the actual picture, or you can create custom
runaround paths and then manually modify them.
Runaround is a great way to make a page visually distinctive.
Running text around pictures
Image editing applications can embed paths and alpha channels in an image. A path is a
smooth Bézier shape, whereas an alpha channel is usually a grayscale image. Both paths
and alpha channels are typically used to determine which parts of an image should be
shown and which parts should be hidden or transparent.
If you import a picture that has an embedded path or alpha channel, you can use that
path or alpha channel to control the way text runs around that picture. More specifically:
The application can scan a path or channels and create a text runaround path based on
the information.
To apply text runaround to a picture component in front of a text box, select the picture
component, choose Style > Picture, click the Runaround tab, and then choose an option
from the Type drop-down menu:
60 | A GUIDE TO QUARKCOPYDESK 8.1
Page 61

TEXT AND TYPOGRAPHY
• Choose None to run text behind the active picture component.
• Choose Item to run text around the picture component's boundaries. If the picture
component is rectangular, enter values in the Top, Left, Bottom, and Right fields to outset
or inset the runaround area. If the picture component is not rectangular, a single Outset
field is provided.
• Choose Auto Image to create a Bézier clipping and runaround path based on the picture's
non-white areas.
• Choose Embedded Path to run text around a path embedded in an image by an
image-editing application.
• Choose Alpha Channel to run text around an alpha channel embedded in an image by
an image-editing application.
• Choose Non-White Areas to create a runaround path based on the picture's subject.
Depending on the value in the Threshold field, the runaround path will outline a dark
figure within a larger white or near-white background (or vice versa).
• Choose Same As Clipping to set the text runaround path to the clipping path selected in
the Clipping tab.
• Choose Picture Bounds to run text around the rectangular "canvas area" of the imported
picture file. This includes any white background areas saved with your original picture
file. Enter values in the Top, Left, Bottom, and Right fields to determine the outset or
inset of the text from the picture's boundaries.
The inner path in the Preview area represents the runaround path, and the outer outline
represents the picture box.
A GUIDE TO QUARKCOPYDESK 8.1 | 61
Page 62

TEXT AND TYPOGRAPHY
Runaround tab of Picture dialog box, showing runaround preview
Fine-tuning a runaround path
When you choose Auto Image, Embedded Path, Alpha Channel, Non-White Areas, or
Same As Clipping from the Type drop-down menu (Style > Picture > Runaround), the
following fields let you manipulate the runaround path:
Outset changes the size of the runaround path. Positive values result in a runaround path
1
that is further from the original setting, negative values decrease the amount of image
included in the runaround path.
Noise lets you specify the smallest allowable closed path. Any closed path smaller than
2
the noise value is ignored. Noise values are useful for cleaning up runaround paths and
making them easier to output.
Smoothness lets you control path accuracy. A lower value creates a more complex path
3
with a greater number of points. A higher value creates a less accurate path.
Threshold determines how "white" is defined. All pixels defined as "white" are excluded.
4
For example, if the Threshold value is 20%, and a pixel's gray value is below or at 20%,
the pixel will be considered "white" and excluded from the runaround path.
Editing a runaround path
To adjust a runaround path, check Runaround (Style > Edit). The runaround path displays
as a magenta outline. You can then edit the path as you would any Bézier object.
62 | A GUIDE TO QUARKCOPYDESK 8.1
Page 63

TEXT AND TYPOGRAPHY
You can also change the types of the runaround path's points and segments with the
controls in the Measurements palette. To change a point from one type to another, use
one of the following three buttons:
•
Symmetrical Point : A symmetrical point connects two curved lines to form a
continuous curve. The result is similar to a smooth point, but the curve handles always
rest on a straight line through the point and are always equidistant from the point.
•
Smooth Point : A smooth point connects two curved lines to form a continuous curve.
The curve handles always rest on a straight line through the point, but they can be distanced
independently.
•
Corner Point : A corner point connects two straight lines, a straight line and a curved
line, or two noncontinuous curved lines. With curved lines, the corner point's curve
handles can be manipulated independently, usually to form a sharp transition between
the two segments.
To change the character of a line segment, use one of the following buttons:
•
Straight Segment : Makes the active segment straight.
•
Curved Segment : Makes the active segment curved.
You can also change point and segment types with the Style > Point/Segment Type
submenu.
Working with text paths
In QuarkXPress, a text path is a line to which you can add text. The text follows the path
of the line. In QuarkCopyDesk, you can edit the text on an existing text path, but you
cannot draw or edit the path itself.
Creating drop caps
Drop caps are initial caps that hang two or more lines below the first line of a paragraph.
The automatic Drop Caps feature enlarges the drop cap characters and runs the paragraph
around the drop caps automatically. The typeface and styles match the rest of the paragraph.
To apply drop caps to a selected paragraph, display the Formats tab of the Paragraph
Attributes dialog box and check Drop Caps. To specify how many characters to use as
drop caps, enter a value from 1 to 127 in the Character Count field. To specify the number
of lines the characters are dropped, enter a value from 2 to 16 in the Line Count field.
A GUIDE TO QUARKCOPYDESK 8.1 | 63
Page 64

TEXT AND TYPOGRAPHY
Using anchored boxes
Drop caps are a great way to make text visually distinctive.
Drop caps are measured by percentage rather than by points. When you select a drop cap,
the default size is 100%.
You can also create drop caps from the Paragraph Attributes tab of the Measurements
palette.
In QuarkXPress, you can paste boxes and lines of any shape in text, which makes them
act like characters and flow with text. This is especially helpful when text reflows, because
anchored items reflow like other characters in the text. If items are not anchored and text
reflows, they become displaced, and can end up overlapping text.
Working with OpenType fonts
OpenType is a cross-platform font format developed by Adobe and Microsoft that
accommodates large character sets and glyphs, often including fractions, discretionary
ligatures, old-style numerals, and more. When text has an OpenType font applied, you
can access any style options built into that font through the Character Attributes dialog
box (Style > Character).
Learning about the distinction between characters and glyphs can help you understand
how OpenType styles work. A character is an element of a written language — uppercase
letters, lowercase letters, numerals, and punctuation are all characters. A glyph is actually
an image that represents a character, possibly in different forms. For example, a standard
numeral 1 is a character, whereas an old-style numeral 1 is a glyph. As another example,
an "f" and an "i" next to each other are characters, whereas an "fi" ligature is a glyph.
A one-to-one relationship does not always exist between characters and glyphs. In some
cases, three characters (such as a 1, a virgule, and a 4) make up a single fraction glyph. Or,
one character may be represented by three possible glyphs (three different ampersand
symbols, for example). You can select individual characters for formatting and editing,
regardless of the glyphs used.
64 | A GUIDE TO QUARKCOPYDESK 8.1
Page 65

TEXT AND TYPOGRAPHY
The fonts selected for Galley view and Full Screen view may not include an OpenType
glyph that is visible in WYSIWYG view. In such cases, a box is shown instead of the
OpenType glyph.
Some OpenType styles replace a series of characters (such as the three characters, "1/4")
with a single glyph. Such replacements are visible only in WYSIWYG view. In Galley view
and Full Screen view, each character is displayed separately, so that you can edit it if
necessary. Word and character counts are the same for every view, even when you use
composite glyphs.
Applying OpenType styles
You can apply an OpenType "style" to characters to display different, specially designed,
or repositioned glyphs within the current font. For example, you can apply Fractions to
access specific fraction glyphs instead of manually formatting fractions by resizing and
repositioning existing characters. Likewise, applying Standard Ligatures represents
characters according to ligatures available in the font. (See "Using ligatures" for more
information.) You can apply many styles in combination, although some, such as
Superscript and Subscript, are mutually exclusive.
To apply OpenType styles in the Character Attributes dialog box (Style > Character) and
the Edit Character Attributes panes (Edit > Style Sheets) for setting up character and
paragraph style sheets, click the arrow next to OpenType to display the styles, and then
use the check boxes to apply styles. A check box that is unavailable or a drop-down menu
option in brackets indicates an OpenType style that the current font does not support.
A GUIDE TO QUARKCOPYDESK 8.1 | 65
Page 66

TEXT AND TYPOGRAPHY
OpenType styles available in the Character Attributes dialog box
OpenType styles include the following:
• Standard Ligatures: Apply ligatures that are designed to enhance readability and are in
standard use.
• Discretionary Ligatures: Apply ligatures that are not in standard use. This feature covers
the ligatures that may be used for special effect at the user's preference.
• Tabular Figures: Apply equal widths to numbers.
• Proportional Figures: Apply unequal widths to numbers.
• Small Caps: Apply small capital letters to lowercase non-CJK (Chinese, Japanese, and
Korean) characters.
• All Small Caps: Apply small capital letters to all non-CJK (Chinese, Japanese, and Korean)
characters.
• Lining Figures: Apply modern numeric styles that align better with text that is in all
capital letters.
• Oldstyle Figures: Apply numeric styles that are best suited for numbers that are integrated
into text.
• Italics: Apply italic glyphs.
• Fractions: Apply slashed fraction glyphs.
• Swashes: Apply calligraphic glyphs.
66 | A GUIDE TO QUARKCOPYDESK 8.1
Page 67

TEXT AND TYPOGRAPHY
• Ordinals: Apply ordinal number glyphs.
• Titling Alternates: Apply capital letter glyphs designed for titles at larger point sizes.
• Contextual Alternates: Apply alternate glyph variations based on contextual juxtapositions
of text.
• Localized Forms: Replace default forms of glyphs with localized forms.
• Position: Apply superscript, subscript, scientific inferior, numerator, and denominator
glyphs to selected text.
Using ligatures
There are two methods for using ligatures: The legacy method or the OpenType method.
The legacy method supports standard ligatures such as fi and fl in PostScript fonts. The
OpenType method allows access to both standard ligatures and discretionary ligatures in
OpenType fonts. Both methods are applied as character attributes, meaning that you can
apply them to any selected text.
To apply ligatures to selected text, check Ligatures in the Character Attributes dialog box
(Style > Character).
Ligature preferences
You can set preferences for ligatures in the Character pane of the Preferences dialog box
(QuarkCopyDesk/Edit > Preferences > Print Layout > Character):
• Break Above: The value in the field specifies a tracking or kerning value above which
ligatures will break apart. At the default value of 1, if you track text +1 (1/200th of an em
space), the ligatures revert to standard letters.
• Not "ffi" or "ffl": Check this box to prevent fi and fl ligatures in words such as "office" or
"waffle" when ffi and ffl ligatures do not exist in the current font.
Working with the Glyphs palette
A glyph is the smallest unit of a font — each uppercase letter, for example, consists of its
own glyph. To access all the glyphs in a font — especially an OpenType font that may
include approximately 65,000 glyphs — you need to view a complete character map. You
can access such a character map in the Glyphs palette (Window menu), which enables
you to view all the glyphs in the selected font, view bold or italic glyphs, double-click a
glyph to insert that glyph in text, and save favorite glyphs for easy access.
A GUIDE TO QUARKCOPYDESK 8.1 | 67
Page 68

TEXT AND TYPOGRAPHY
The Glyphs palette makes it easy to work with large character sets and professional-quality
fonts.
To view the glyphs in a font, display the Glyphs palette (Window menu) and choose a
font from the Font menu in the upper-left corner. Options available in the Glyphs palette
include the following:
• You can use the Bold and Italic buttons to display the bold and italic versions of glyphs;
if the bold, italic, or bold italic instance of the font is not active on your system, the
application will simulate bold, italic, or bold italic on the glyphs as it does when you apply
the Bold and Italic type styles using the Measurements palette.
• To view a subset of the glyphs in the font, choose an option from the Show drop-down
menu.
• To see any alternates available for a glyph, click the box in the lower-right corner of an
individual glyph's cell.
• If necessary, click the Zoom tool on the palette to increase the size of the glyphs.
• If you need a glyph's Unicode code point — for HTML authoring, for example — you can
point at the glyph to display the Unicode code point (represented as a hexadecimal).
• To insert a glyph at the text insertion point, double-click the glyph in the Glyphs palette.
• If you frequently use specific glyphs from a font, you can save those glyphs as favorites
for quick access. To create a favorites list, first click the expander next to Favorite Glyphs
in the Glyphs palette (Window menu). Then, simply drag a glyph to an empty cell in the
Favorite Glyphs area. To delete a favorite, Control+click/right+click the glyph and use
the context menu.
68 | A GUIDE TO QUARKCOPYDESK 8.1
Page 69

TEXT AND TYPOGRAPHY
Displaying invisible characters
The Invisibles option (View menu) is always helpful when editing text or fine-tuning
typography because it allows you to see common "invisible characters" such as spaces,
tabs, and paragraph returns.
Inserting special characters
There are all kinds of special characters for typographic and formatting purposes. You can
enter such special characters using keyboard commands or choose them from the Utilities >
Insert Character submenu. Each character displays differently when invisibles are showing
(View > Invisibles).
Inserting spaces
To insert a specific type of space — such as an em space — at the text insertion point,
choose Utilities > Insert Character > Special > Em Space or Utilities > Insert Character >
Special (nonbreaking) > Em Space. The options in the Nonbreaking Space submenu
act as "glue" between two words or numbers, for example, preventing breaks from occurring
between the two "glued" elements at the end of a line.
Inserting other special characters
To insert a special character other than a space — such as an em dash or a current page
number placeholder character — at the text insertion point, choose Utilities > Insert
Character > Special or Utilities > Insert Character > Nonbreaking Special.
Specifying character language
You can specify the language to be used for hyphenation and spell checking by applying
a character language to text. This lets you mix words from different languages in the same
paragraph without triggering poor hyphenation or more Suspect Words in Spell Check
(Utilities menu). In addition to applying a specific language to characters, you can apply
None so that a word is not considered for hyphenation or spell checking.
To apply a language to selected characters, use the Language drop-down menu in the
Character Attributes dialog box (Style > Character).
Using font fallback
When Font Fallback is on, if the application encounters a character that is not available
in the current font, it searches through the active fonts on your system to find a font that
does include that character. For example, if Helvetica is applied at the text insertion point
and you import or paste text containing a Kanji character, the application might apply
the Hiragino font to that character. If the application cannot find an active font that
contains the character, the character still displays as a box or symbol.
A GUIDE TO QUARKCOPYDESK 8.1 | 69
Page 70

TEXT AND TYPOGRAPHY
Working with font mapping rules
Font Fallback is implemented as an application preference, meaning that the feature is
either on or off for your copy of the program. The feature is on by default, but if you need
to turn it off, uncheck Font Fallback in the Font Fallback pane of the Preferences dialog
box (QuarkCopyDesk/Edit > Preferences).
For more information about the Font Fallback feature, see "Preferences — Application —
Font Fallback."
The Font Fallback feature works only in WYSIWYG view.
When you open an article, the application checks to make sure all the fonts applied to
text are active on your system. If not, the Missing Fonts alert displays, which gives you
the opportunity to replace missing fonts with active fonts. You can save those replacements
as global "font mapping rules," which can be applied automatically each time you open a
project.
To create a font mapping rule, first open a project that uses a missing (inactive) font. Click
List Fonts to display the Missing Fonts alert. Use the Replace button to choose replacement
fonts for any missing fonts, then click Save As Rule. All the replacements listed in the
Missing Fonts alert are saved as rules, even if only some replacements are selected. If you
change your mind about a replacement, select its line and click Reset. You can also choose
File > Revert to Saved after you open the article. This will display the Missing Fonts alert
again and allow you to make changes. (Note that the changes apply only to that article
— not to any rules you just saved.)
Once you create a font mapping rule by clicking Save As Rule in the Missing Fonts alert,
the rule is saved in preferences for your copy of the application and applied to all articles.
If you need to change, delete, or share font mapping rules, choose Utilities > Font
Mapping.
You can use the Fonts pane (QuarkCopyDesk/Edit > Preferences) to specify a default
replacement font and to control whether the Missing Fonts alert displays when you open
a project with missing fonts. For more information, see "Preferences — Application — Fonts."
Working with hanging characters
Hanging character sets handle both hanging punctuation and margin alignment. Margin
alignment lets you hang characters partially outside the margin to create visually uniform
text alignment along the margin. Hanging punctuation lets you hang punctuation
characters fully outside the margin so that the text is flush against either a uniform margin
at the beginning of a line of text (leading) or against a uniform margin at the end of a line
of text (trailing). For example, the quotation mark in the first sample text below is hanging
outside the leading margin, which allows the first character in the first line of text to align
70 | A GUIDE TO QUARKCOPYDESK 8.1
Page 71

TEXT AND TYPOGRAPHY
evenly with the rows of text below it. The quotation mark in the second sample text below
is hanging outside the trailing margin.
The opening quotation mark in this sample text is a leading hanging character
The closing quotation mark in this sample text is a trailing hanging character
You can create custom hanging character classes and hanging character sets, or you can use
the default classes and sets that come with the software. A hanging character class is a
group of characters that should always hang outside the margin or indent inside the margin
by the same percentage. A hanging character set is a group of hanging character classes.
You can use a hanging character set to apply one or several hanging character classes to
paragraphs.
To view, create, edit, duplicate, and delete hanging character sets and classes, use the
Hanging Characters dialog box (Edit > Hanging Characters).
A GUIDE TO QUARKCOPYDESK 8.1 | 71
Page 72

TEXT AND TYPOGRAPHY
The Hanging Characters dialog box
Hanging character sets are preceded by a icon. Hanging character classes are preceded
by a icon.
If you select a hanging character set in the center pane of the dialog box, the lower pane
displays the hanging character classes that belong to that set. If you select a class in the
center pane of the dialog box, the lower pane displays the sets to which the selected class
belongs and the attributes of the selected class.
To compare hanging character sets or classes, select two classes or sets in the Hanging
Characters dialog box and press Option/Alt. The Append button changes to Compare.
Creating hanging character classes
Use the Edit Hanging Character Class dialog box (Edit > Hanging Characters > New >
Class) to specify the characters to be included in a hanging character class, the hang
percentage of the class, and whether the class is leading or trailing.
72 | A GUIDE TO QUARKCOPYDESK 8.1
Page 73

TEXT AND TYPOGRAPHY
The Edit Hanging Character Class dialog box
Enter characters in the Characters pane. Then choose a percentage from the Hang
drop-down menu. The hang percentage specifies what percentage of the glyph width should
always hang over the margin or what percentage of the glyph width should always indent.
For example, if you choose –50%, the characters in the character class indent inside of the
margin by half of their glyph width. If you choose 100%, the characters in the character
class hang outside of the margin by their full glyph width.
Next, choose whether the character class is Leading or Trailing. Characters in a Leading
class hang over the beginning margin. Characters in a Trailing class hang over the end
margin.
After you have saved a hanging character class in a hanging character set, you can check
Preview to view changes to the hanging character class as you edit.
Creating hanging character sets
Use the Edit Hanging Character Set dialog box (Edit > Hanging Characters > New >
Set) to specify the hanging character classes to be included in a hanging character set.
A GUIDE TO QUARKCOPYDESK 8.1 | 73
Page 74

TEXT AND TYPOGRAPHY
The Edit Hanging Character Set dialog box
The center pane of the dialog box displays all of the available hanging character classes
that can be added to a hanging character set. Check the boxes next to the classes you want
to add, give the hanging character set a name, and then click OK.
To edit a hanging character class before saving the new hanging character set, select the
class and click Edit Class.
You cannot specify different leading or trailing values for a single character within a
hanging character set.
Applying hanging character sets
To apply a hanging character set to text, choose an option from the Hanging Character
Set drop-down menu in the Paragraph Attributes dialog box (Edit > Formats).
To apply a hanging character set to a paragraph style sheet, choose an option from the
Hanging Character Sets drop-down menu in the Formats tab of the Edit Paragraph Style
Sheet dialog box (Edit > Style Sheets > New > Paragraph or Edit > Style Sheets > Edit).
74 | A GUIDE TO QUARKCOPYDESK 8.1
Page 75

COLOR, OPACITY, AND DROP SHADOWS
Color, opacity, and drop shadows
QuarkCopyDesk lets you create custom colors, choose colors from several standardized
color matching systems, and edit colors. You can apply both color and shade to text and
pictures. You can also control the opacity of text in the same way you control its color.
You can apply drop shadows to both items and text.
Working with colors
Some colors are automatically included in the Colors palette. To use other colors, you'll
need to create colors or edit existing colors using the Colors dialog box, which allows you
to create colors using color wheels, numeric fields, or color matching systems.
The Colors palette
When you create an article, its Colors palette (View > Show Colors) contains all the colors
in the application's Colors dialog box (Edit > Colors).
The Colors palette lets you create, edit, and delete colors.
The Colors dialog box
You can use the Colors dialog box (Edit > Colors) to create, edit, duplicate, delete, and
append colors. You can also use the Colors dialog box to edit trapping rules for colors.
A GUIDE TO QUARKCOPYDESK 8.1 | 75
Page 76

COLOR, OPACITY, AND DROP SHADOWS
The Colors dialog box lets you create, edit, and delete color definitions.
Creating a color
You can choose from several color models and from a number of color matching systems
when you create colors. If you have colors you use frequently, you can create colors for
the default color list in the application when no files are open. You can create up to 1,000
default or article-specific colors. To create a color, choose Edit > Colors to display the
Colors dialog box, and click New to display the Edit Color dialog box. Then, enter a name
in the Name field and specify the color model for your new color.
• RGB: This additive color system is most often used with slide recorders or color video
monitors, and also works well for Web pages. Red, green, and blue light is mixed to
represent colors on a video screen.
• HSB: This color model is often used by artists because it resembles the manner in which
they mix colors. Hue describes color pigment; saturation measures the amount of color
pigment; and brightness measures the amount of black in a color.
• LAB: This color space is designed to be independent of differing interpretations imposed
by monitor or printer manufacturers. The LAB color model, also referred to as LAB color
space, is a standard three-dimensional model for representing colors. Colors are specified
by a luminance coordinate (L) and two chrominance coordinates (A for green-red), and
(B for blue-yellow).
• Multi-Ink: This color model is color based on tint percentages of existing process or spot
inks.
• CMYK: CMYK is a subtractive color model used by professional printers to reproduce colors
by combining cyan, magenta, yellow, and black inks on a press.
• Web Safe or Web Named Colors: Web-safe colors are used for color consistency in Web
layouts.
76 | A GUIDE TO QUARKCOPYDESK 8.1
Page 77

COLOR, OPACITY, AND DROP SHADOWS
• To select a color from a color matching system and add it to your color list, choose one
of the standardized color matching systems from the Model drop-down menu.
Editing a color
To edit an existing color, choose Edit > Colors, select the color you want to edit in the
Colors list, then click Edit to display the Edit Color dialog box. You can also double-click
the color you want to edit in the Colors list to display the Edit Color dialog box.
Edit Color dialog box
Duplicating a color
To duplicate an existing color, choose Edit > Colors, select the color you want to duplicate
from the Colors list, then click Duplicate to display the Edit Color dialog box for the
duplicate color.
Deleting a color
While you cannot delete some of the default colors, you can delete any new or duplicate
colors you have created. To remove a color from the color list, choose Edit > Colors, select
the color you want to remove from the Colors list, and then click Delete.
Importing colors from another article or project
You can append colors from another article or project using the Colors dialog box (Edit >
Colors) or the Append command (File > Append).
Changing all instances of one color to another color
To globally change all items of one color to another color, either edit the color you want
to change to the desired color or choose Edit > Colors to display the Colors dialog box,
and select the name of a color to delete; then click Delete.
A GUIDE TO QUARKCOPYDESK 8.1 | 77
Page 78

COLOR, OPACITY, AND DROP SHADOWS
When you are globally changing all items and text from one color to another, remember
to save your work before you do so. That way, if you accidentally change everything to
the wrong color, you can simply choose File > Revert to Saved to undo the error without
losing any of your other work.
Applying color and shade to text
You can apply color and shade to text in four ways:
• You can apply color and shade using the Style > Color and Style > Shade commands.
• You can use the Colors palette (View > Show Colors).
• You can use the Character Style Sheet command (Style > Character Style Sheet) to apply
color and shade to selected text using character style sheets you have created.
• You can use the Character Attributes dialog box (Style > Character).
Working with opacity
Specifying opacity is as easy as specifying the shade of a color. In fact, wherever you can
pick a color — in the Colors palette, the Style menu, the Character Attributes dialog
box (Style > Character), and more — you can enter an opacity value from 0% (transparent)
to 100% (opaque) in 0.1% increments.
78 | A GUIDE TO QUARKCOPYDESK 8.1
Page 79

Pictures
You can import and paste pictures from image-editing or other graphic applications into
QuarkCopyDesk. Once a picture is in a picture component, you can perform a number of
operations on it, such as altering its position, changing its size, or skewing or flipping it.
Understanding pictures
Picture files come in two fundamental varieties: Raster and object-oriented.
PICTURES
Bitmap pictures
Bitmap pictures (sometimes called raster pictures) are made up of individual pixels (tiny
dots). The pixels align on a grid, which your eye blends into a single image.
Color mode describes the way colors are represented in a file; bit depth is the number of bits
used to represent each pixel. The simplest color mode is 1-bit (also known as "line art" or
"black-and-white"). More complex images, such as photographs, have depth because they
contain multiple-bit pixels that can describe many levels of gray or color.
Dimensions describe the physical size of a picture (for example, 3" x 5"). The dimensions
of a picture file are determined by the application that creates it, and dimensions are stored
in the picture file.
Resolution is the number of pixels (dots) per inch in a picture. Resolution is dependent on
dimension. In other words, if you change a picture's dimensions, you change its resolution
too. For example, consider a 72 dpi picture that's 1" x 1". If you scale that picture to 200%
after importing it, its effective resolution drops to 36 dpi, because the pixels are enlarged.
Object-oriented pictures
Object-oriented pictures contain information that describes how to draw the position and
attributes of geometric objects. You can then reduce, enlarge, stretch, and rotate these
pictures without worrying about how they will look — object-oriented pictures look
smooth, no matter what their scaled size may be, because the are not made up of pixels.
Object-oriented pictures are sometimes referred to as vector file format because they use
vector (distance and direction) information to describe a shape.
A GUIDE TO QUARKCOPYDESK 8.1 | 79
Page 80

PICTURES
Supported picture file types
File type refers to how picture information is formatted. Is it formatted as an EPS
(Encapsulated PostScript) file? A TIFF (Tagged Image File Format) file? Dozens of graphic
file formats exist, and each offers variations on how bitmap or object-oriented images are
saved and can be manipulated. The following is a list of common file formats, including
their main features:
DCS 2.0 (Desktop Color Separations): An EPS saved as a single file that can include process
1
plates (cyan, magenta, yellow, black) as well as spot plates and a master image. A DCS 2.0
file is preseparated, so it prints faster than a standard EPS. The master image is used for
composite printing. A DCS 2.0 file can contain bitmap and object-oriented information.
The DCS 2.0 format supports bitmap, spot, and CMYK color models. DCS 1.0 — also known
as "five-file format" — contains five separate files: cyan, magenta, yellow, and black plate
files, as well as a master file.
Some EPS files don't have a preview. After you import an EPS file that does not have a
preview, "PostScript Picture" and the file's name display in the picture box. However, if
you send the picture to a PostScript output device, the image outputs. To make the preview
visible, edit the EPS file in the original application and save it with a preview.
Lossy compression is a method that can introduce data loss and possibly quality
degradation. Lossy compression often produces smaller file sizes and faster rendering than
lossless compression.
PhotoCD:Proprietary Kodak format, designed for storage on CD-ROMs. This format contains
2
only bitmap information and supports grayscale, RGB, and LAB color models.
PICT: A Mac OS format based on the original QuickDraw® drawing routines. PICTs contain
3
bitmap and object-oriented information. Their bit depth is limited to one bit per pixel,
but each pixel can be one of eight colors (using QuickDraw commands).
PNG (Portable Network Graphics): A bitmap file format that supports both indexed color
4
and continuous tone color, with lossless or lossy compression.
TIFF (Tagged Image File Format): Allows lossless compression if the source application
5
supports it. TIFFs can also allow JPEG compression. TIFFs can contain bitmap and
object-oriented information and support bitmap, grayscale, RGB, CMYK, and indexed
color models. This format allows inclusion of embedded paths and alpha channels, as well
as inclusion of OPI comments.
WMF (Windows Metafile): A Windows file format that can contain both bitmap and
6
object-oriented information. When a Windows Metafile picture is imported into
QuarkXPress or QuarkCopyDesk on Mac OS, it is converted to a PICT.
PDF (Portable Document Format): A proprietary format developed by Adobe Systems, Inc.,
7
to facilitate file transfer. You can import PDF file versions 1.6 and 1.7.
Adobe Illustrator 9: A file format for Adobe Illustrator files that conforms to PDF standards.
8
When you import Adobe Illustrator files in native format (version 9 and later), the imported
picture is subject to the same restrictions that apply to imported PDF files. When you
80 | A GUIDE TO QUARKCOPYDESK 8.1
Page 81

import Adobe Illustrator files in native format (version 8), the EPS data in the file is
included. You cannot import Adobe Illustrator files saved in version 7 or earlier.
Working with pictures
If an article contains pictures, you can view and manipulate pictures in QuarkCopyDesk.
You can also create picture components.
Importing a picture
To import a picture, do one of the following:
• Choose File > Import.
• Drag a picture file from the file system onto a picture component. If the component
contains a picture, press Command/Ctrl to replace it.
• Drag a picture from another application onto a picture component. If the component
contains a picture, press Command/Ctrl to replace it.
• Drag a picture file from the file system onto a text component and press Command/Ctrl
to make the component accept the picture.
PICTURES
• Drag a picture from another application onto a text component and press Command/Ctrl
to make the component accept the picture.
Moving pictures
You can move pictures inside their picture components by clicking and dragging or by
pressing the arrow keys.
Resizing pictures
You can scale pictures to make them larger or smaller by clicking and dragging the round
picture handles on the corners and sides of the picture. Press the Shift key while resizing
a picture to resize the picture proportionately. Press Shift+Option/Shift+Alt while dragging
a corner handle to resize the picture proportionately from the center. You can also scale
pictures using the Item menu (Item > Modify), the Style menu, the Measurements palette,
or the context menu.
To scale a picture proportionally so that its largest dimension fits inside the picture
component, choose Scale Picture to Box from the context menu or Style menu. To scale
a picture proportionally so that it completely fills the picture component, choose Scale
Picture to Fill Box from the context menu or Style menu.
Cropping pictures
If you only want a portion of your image to display, you can manually crop it by adjusting
the size of the picture with the picture handles.
A GUIDE TO QUARKCOPYDESK 8.1 | 81
Page 82

PICTURES
Rotating and skewing pictures
Rotating a picture sets it at a different angle within the box, while skewing a picture applies
a slanted look to it.
To rotate a picture, move the mouse over one of the picture's corner handles. A Rotation
pointer displays according to the selected corner. Drag the pointer to rotate the picture.
You can also enter rotate values for a picture in the Picture Angle field of the Modify
dialog box (Style > Picture).
To skew a picture, enter a value in the Picture Skew field of the Modify dialog box (Style >
Picture).
Coloring and shading pictures
You can apply color and shade values to the shadows and middle tones of black-and-white
and grayscale pictures using the Colors palette (Window > Colors), the Modify dialog
box , or the Style menu. You can also apply color to the picture background and the box
background.
•
To apply color to a black-and-white or grayscale picture, select the Picture Color icon
in the Colors palette and click a color name.
• To apply color to the background of a black-and-white or grayscale picture, select the
Picture Background Color icon in the Colors palette and click a color name.
Flipping pictures
You can flip the contents of a picture component from left to right and from top to bottom
using the Style menu (Style > Flip Horizontal or Style > Flip Vertical) or the
Measurements palette (click the flip horizontal icon or the flip vertical icon ).
Listing, verifying status of, and updating pictures
QuarkCopyDesk automatically displays a low-resolution 72 dpi preview of each imported
picture file while maintaining a path to picture files and retrieving the high-resolution
information required for output.
The Usage feature (Utilities menu) lets you keep track of all your imported pictures. To
use this feature, choose Utilities > Usage, then click Pictures to display the Pictures pane.
The Show button displays the selected picture in the layout.
The Update button lets you update missing and modified pictures. To update modified
pictures without a confirmation alert, Option+click/Alt+click the Update button.
To suppress the output of a picture, uncheck the Print column for that picture.
Specifying background colors for pictures
To increase your design options with pictures, you can modify box color, picture color,
and picture background color. See "Coloring and shading pictures" for more information.
82 | A GUIDE TO QUARKCOPYDESK 8.1
Page 83

• For gray pixels, the picture color and picture background color are mixed.
• If you specify different opacities for the picture color or picture background color, the
colors will interact with each other and the box color.
Maintaining picture attributes
When you import a picture into a picture component — whether or not the picture
component already contains a picture — you can retain all picture attributes. For example,
if an empty picture compopnent specifies that the picture should be scaled 50% and rotated
90 degrees, you can import a new picture and those attributes are automatically applied.
To import a picture and retain the attributes specified for the component and/or the
existing picture, check Maintain Picture Attributes in the Import dialog box (File menu).
Working with clipping paths
A clipping path is a closed Bézier shape that indicates which parts of a picture should be
displayed and which parts should be treated as transparent. Clipping paths are especially
useful when you are attempting to isolate the picture's subject from its surrounding
background in the original picture file.
PICTURES
You can create clipping paths from scratch in QuarkXPress or QuarkCopyDesk, or you can
use embedded path or alpha channel information to create clipping paths. Clipping paths
created by QuarkXPress or QuarkCopyDesk are based on the high-resolution picture file,
and are stored with the layout.
A clipping path lets you control which parts of a picture show and which parts are hidden.
Clipping path basics
A clipping path is any closed Bézier shape that defines a region (or regions) that should
be treated as visible, and a region (or regions) that should be treated as invisible.
Clipping paths tell QuarkXPress and QuarkCopyDesk which parts of a picture should be
considered visible, and runaround paths tell QuarkXPress and QuarkCopyDesk where to
wrap text. You are not limited to using the same settings for your runaround and clipping
A GUIDE TO QUARKCOPYDESK 8.1 | 83
Page 84

PICTURES
paths. You can even use different clipping paths or alpha channels for your clipping and
runaround settings.
Clipping paths created by QuarkCopyDesk are based on the high-resolution picture file,
and are stored with the article.
Creating clipping paths
To create or assign a clipping path for the active picture component, choose Style > Picture,
click the Clipping tab, and then choose an option from the Type drop-down menu:
• Choose Item to crop an image to the picture component boundaries. Choosing Item does
not create a clipping path; it simply crops the picture to its picture component.
• Choose Embedded Path to clip a picture around a path already embedded in the picture
file. Choose a path from the Path drop-down menu if the picture file contains more than
one embedded path.
• Choose Alpha Channel to clip a picture around an alpha channel already embedded in
a picture file. Choose an alpha channel from the Alpha drop-down menu if the picture
file contains more than one embedded alpha channel. Note that using a clipping path
around an alpha channel will create a hard edge rather than a blended effect. If you want
a semi-opaque blend, use an alpha mask. (See "Working with alpha masks.")
• Choose Non-White Areas to create a clipping path based on the picture's subject.
Depending on the image and the value in the Threshold field, the clipping path will
outline a non-white figure within a larger white or near-white image (or vice versa). The
Non-White Areas option works best when the unwanted parts of the image are much
lighter than the subject itself (or vice versa).
• Choose Picture Bounds to clip a picture around the rectangular "canvas area" of the
imported picture file. This includes any white background areas saved with the original
picture file. Enter values in the Top, Left, Bottom, and Right fields to determine the outset
of the clipping path from the picture's boundaries. Positive values increase the outset, and
negative values decrease the outset.
Using embedded clipping paths
You can use image-editing applications to embed paths and alpha channels in an image.
If a picture storing this information is imported into QuarkCopyDesk, you can access the
path and channel information using the Clipping tab in the Modify dialog box or the
Measurements palette.
TIFFs and PSDs can have embedded paths and alpha channels. EPS, BMP, JPEG, PCX, and
PICT files can only have embedded paths.
Working with alpha masks
Unlike clipping paths, which produce a hard edge primarily used for separating a foreground
image from a background image, alpha masks can include transparency information to
84 | A GUIDE TO QUARKCOPYDESK 8.1
Page 85

subtly blend a foreground image into a new background. To work with alpha masks in
QuarkCopyDesk, you must first create an alpha mask in an image-editing application such
as Adobe Photoshop. You can then use the alpha mask in QuarkCopyDesk.
PICTURES
The alpha mask on the flames allows the text in the background to show through.
To work with alpha masks in QuarkCopyDesk, you'll need to save them with the picture
in a format that supports alpha channels.
To apply an alpha mask to the selected picture, choose an alpha channel from the
Measurements palette's Mask drop-down menu.
Working with PSD pictures
You can import native, unflattened picture files from Adobe Photoshop directly into
QuarkCopyDesk with PSD Import XTensions software. Once files are imported, you can
manipulate any layers, channels, and paths saved with the Photoshop (PSD) files. This
integration between Photoshop and QuarkCopyDesk streamlines your workflow by allowing
you to skip flattening; saves hard disk space by enabling you to work with native files; and
enhances your creative possibilities by providing access to layers, channels, and paths.
When the PSD Import XTensions software is running, you can use File > Import to import
a PSD file into a selected QuarkCopyDesk picture box.
To work with layers, channels, and paths in the image, choose Window > PSD Import.
You can use the PSD Import palette to blend layers, work with color channels, and select
paths.
A GUIDE TO QUARKCOPYDESK 8.1 | 85
Page 86

PICTURES
To work with PSD files in QuarkCopyDesk, you must have PSD Import XTensions software
loaded.
Preparing PSD files
When you're preparing pictures in Photoshop for use with PSD Import, you need to keep
a few things in mind:
• You do not need to save the image in another file format, which means that you don't
have to flatten the layers.
• Create alpha channels or clipping paths for any contours that you might want to wrap
text around.
• Create channels for areas where you might want to apply a different spot color or varnish.
• PSD Import cannot read layer information for certain images — including those that use
layer effects. The composite image is used instead.
Picture effects are not available for Photoshop pictures.
PSD Import supports PSD files in grayscale, RGB, CMYK, index, and multichannel modes.
Working with PSD layers
Experimenting with layers allows you to see different images within the context of the
entire layout. In addition, you can modify the opacity of a layer and try different blend
modes — such as dissolve, lighten, and difference — to see how these effects work with
the rest of a design.
You can use the Layers pane of the PSD Import palette to show, hide, blend, and change
the opacity of layers within PSD pictures. The PSD Import palette displays information
about how the picture file was created, but does not allow you to make fundamental
changes to the picture file:
• You cannot create, name, copy, duplicate, align, reposition, delete, or merge layers using
the Layers pane.
• If there are no layers in the PSD file, the PSD Import palette shows only the background
layer.
Blending PSD layers
The Blend Mode drop-down menu in the Layers pane lets you control how pixels in a
selected layer interact with pixels in all the layers below the selected layer. The blend
modes are similar to those in image-editing applications: They include Multiply, Color
Dodge, Exclusion, and Saturation.
86 | A GUIDE TO QUARKCOPYDESK 8.1
Page 87

Showing and hiding Photoshop layers
You can view and print layers that are showing; hidden layers do not display on-screen
or in print. PSD Import allows you to hide any layer, including the background layer.
• To show a layer, click the empty box icon to the left of the layer.
• To show all layers, Option+Shift+click/Alt+Shift+click the empty box icon.
•
To hide a layer, click the eye icon .
•
To hide all but one layer, Option+click/Alt+click the eye icon .
If changing the blending and opacity of layers produces undesirable results, you can revert
the layers to their original state in the imported PSD file with the Revert Layer or Revert
All Layers options in the PSD Import palette menu.
Modifying PSD layer opacity
A menu and a field on the Layers pane let you control the transparency of pixels on a
selected layer. You can specify a transparency from 0% (transparent) to 100% (opaque) in
increments of 1%.
PICTURES
Working with layer masks
If layer masks are saved with PSD files, you can enable and disable the masks in the Layers
pane of the PSD Import palette by Shift-clicking the thumbnail preview of the layer mask.
Working with PSD channels
Photoshop channels store color information about images. By default, grayscale and
indexed color images have one channel, RGB images have three channels, and CMYK
images have four channels. These are referred to collectively as the default channels. You
can use the Channels pane of the PSD Import palette to show and hide all channels, to
change the color and ink solidity of a selected spot-color channel or alpha channel, and
to assign spot colors to selected indexed colors. For example, you might assign special
effects such as varnishes, embossing, and die cuts to channels.
Showing and hiding channels
Visible channels in imported PSD files display on screen and can be printed; channels that
are hidden do not display on screen and cannot be printed. The process to show and hide
channels is the same as for layers.
Clicking the composite channel displays all the default channels, such as CMYK or RGB.
Modifying channel color and solidity
You can use PSD Import to change the color, shade, and ink solidity of any spot color,
mask, or alpha channel you created in Photoshop. You can assign spot colors to channels
that overprint composite images, and you can specify solidity for displaying channels
on-screen and printing color composites. (The solidity value is not relevant when you are
printing color separations.)
A GUIDE TO QUARKCOPYDESK 8.1 | 87
Page 88

PICTURES
Channels specified as mask channels in Photoshop are imported differently than channels
specified as spot colors. In Photoshop, mask channels are assigned an opacity setting, while
spot channels are assigned a solidity setting. Since PSD Import supports ink solidity, mask
channels are imported with a 0% ink solidity. To see mask channels in imported PSDs,
you need to manually turn on the mask channels in the Channels tab of the PSD Import
palette. Spot-color channels, on the other hand, retain the solidity setting saved in the
PSD file and are mapped to QuarkCopyDesk colors by default.
Use the Channel Options dialog box to modify the color, shade, or ink solidity of pixels
in a spot-color or alpha channel. To display the Channel Options dialog box, simply
double-click a channel in the Channels pane of the PSD Import palette (Window menu).
Working with indexed color channels
By default, when you print color separations from QuarkXPress using PSD Import, the
colors in indexed color images separate to CMYK. You can override this by creating a spot
color or multi-ink color (Edit > Colors) and assigning that color to the selected indexed
colors in the image. PSD Import also allows you to create spot colors from colors in the
indexed color image. Indexed colors that you do not modify will still separate to CMYK.
Working with PSD paths
You can also use PSD Import to choose among embedded paths for specifying clipping
and runaround. The Paths pane in the PSD Import palette provides convenient access to
the clipping-path and text-runaround functions in QuarkCopyDesk
Using the Paths pane, you can select different clipping paths to use for text runaround
contours. To select a text runaround contour, click the empty box in the first column. The
Text Runaround icon displays and the text wraps around the contours of the clipping
path.
You also can use the Paths pane to control the display of an image by selecting a clipping
path you created in Photoshop. To select a clipping path, click in the empty box in the
second column. The Clipping Path icon displays and the area of the picture within the
selected clipping path displays.
You can reverse any changes you make to paths in PSD Import. The paths will revert to
their original state as they were created in the imported PSD file. To do this, choose Revert
Path or Revert All Paths from the PSD Import palette or context menu.
Printing with PSD Import
When you print an article using PSD Import, you can specify the layers, channels, and
paths within each PSD picture to print. Since the eye icon in the PSD Import palette
controls both display and printing, pictures print as they display.
If you print an article without PSD Import XTensions software running, the PSD files print
as low-resolution composite previews. The layers, channels, and path information are not
available, and the pictures will not separate.
88 | A GUIDE TO QUARKCOPYDESK 8.1
Page 89

Using picture effects
The Picture Effects feature adds several commonly used image-editing features to
QuarkCopyDesk. This allows you to apply sophisticated image manipulations within the
context of the surrounding layout rather than having to work in another application and
switch back and forth. Picture effects are described in detail in "Picture Effects: Adjustments"
and "Picture Effects: Filters."
Changes made with the Picture Effects feature are nondestructive, meaning that they do
not affect the source image file. Rather, adjustments and filters are saved with layouts, can
display on screen in full resolution, and are applied at output.
You can apply multiple effects and multiple instances of the same effect but with different
parameters.
To work with picture effects, you must have Vista XTensions software loaded.
When you synchronize a picture, you can include picture effects so that if you add, delete,
or change an effect, that change is made to all instances of the synchronized picture. When
you add a picture box to the Shared Content palette (Window menu), check Synchronize
Content in the Shared Item Properties dialog box. Then, be sure to click Content and
Attributes. This applies the same effects to the same picture file throughout the layout.
PICTURES
Working with picture effects
You can use the Picture Effects palette (Window menu) to experiment with different
effects. Simply select an imported picture in any supported file format: TIFF (.tif), PNG
(.png), JPEG (.jpg), Scitex CT (.sct), GIF (.gif), PICT (.pct or .pict), BMP (.bmp), or
raster/Photoshop EPS (.eps).
You can use the Picture Effects palette to apply effects to the selected picture. You can
also use the Style > Picture Effects > Adjustments submenu and the Style > Picture
Effects > Filters submenu to apply effects.
Effects are applied to pictures as listed in the Picture Effects palette from top to bottom.
To reorder effects, simply drag them up and down in the list.
Applying and editing effects
An effect is an adjustment or filter applied through QuarkVista; the effects are described
in detail in "Picture Effects: Adjustments" and "Picture Effects: Filters." You can use the Picture
Effects palette to apply effects to the selected picture. You can also use the Style > Picture
Effects > Adjustments submenu and the Style > Picture Effects > Filters submenu to
apply effects.
You can apply multiple effects and multiple instances of the same effect but with different
parameters.
A GUIDE TO QUARKCOPYDESK 8.1 | 89
Page 90

PICTURES
When judging colors on screen — even in a calibrated and color-managed environment
— be sure to consider all the variables involved. To display actual color values for pixels,
use the Info area of the Picture Effects palette.
Removing and deleting picture effects
The Picture Effects palette lets you temporarily remove an effect for experimentation
purposes, or delete effects from the list entirely.
• To remove an effect (without deleting it), uncheck it. You can check and uncheck effects
to experiment with different combinations.
•
To delete an effect, select it and click Delete Effect or press Backspace/Delete.
Displaying effects at full resolution
The Picture Effects feature displays pictures according to the current preview resolution.
You can change the resolution for a selected picture by choosing an option from the
Preview Resolution submenu (Item menu).
Picture Effects: Adjustments
Adjustments analyze pixels throughout a picture and map them to different values. If
you're familiar with an adjustment or effect from another application, you'll be comfortable
with adjustment controls in QuarkCopyDesk as well.
• To make simple changes to the tonal range of a picture, you can use the
Brightness/Contrast effect to adjust the tonality of every pixel instead of individual
channels.
• The Invert effect inverts the gray values of each channel in a picture. This effect is
recommended for 1-bit, grayscale, and RGB pictures. Because CMYK pictures contain a
black channel, this effect is not recommended for CMYK pictures. The inversion of the
black channel usually results in images that are mostly black or mostly white.
Picture Effects: Filters
Filters provide options that evaluate an entire picture or clusters of pixels and then modify
pixels based on context. If you're familiar with a filter or effect from another application,
you'll be comfortable with filter controls in QuarkCopyDesk as well.
• The Despeckle filter detects the edges in a picture and blurs all of the picture except those
edges. It removes noise while preserving detail, and can be useful for removing dust from
a scanned image.
• The Gaussian Blur filter smoothes transitions by averaging pixels next to hard edges of
defined lines and shaded areas in a picture. By checking Blur Picture and/or Blur Mask,
you can apply this filter separately to pictures and their alpha masks.
• The Unsharp Mask filter compares pixel values in a defined area to the specified threshold
value. If a pixel has a lower contrast value than the threshold value, its contrast is increased.
90 | A GUIDE TO QUARKCOPYDESK 8.1
Page 91

Saving and loading Picture Effects presets
To quickly and consistently apply the same adjustments and filters to multiple pictures,
you can export settings as presets. Presets are saved as separate files with a .vpf extension.
To save a preset, apply effects to a picture, verify all the settings and with the picture
selected, click Save Preset on the Picture Effects palette.
To apply a preset, select a picture and then click Load Preset on the Picture Effects palette.
You cannot edit presets. If you need to make changes to settings in a preset file, delete the
existing preset file and create a new one.
By default, when you save presets, they are saved in the "Picture Effects Presets" folder in
the application folder. While you're working on pictures with the Picture Effects palette,
image data is saved in the cache. To customize the locations for saving presets, use the
Picture Effects pane of the Preferences dialog box (QuarkCopyDesk/Edit > Preferences).
Reviewing Picture Effects usage
To make it easy to see where the Picture Effects features are used, display the Vista pane
of the Usage dialog box (Utilities menu). Similar to the Pictures pane, the Vista pane lists
the file name, location, page number (a dagger symbol or PB indicates pasteboard), file
type, and number of effects for each picture in the layout.
PICTURES
A GUIDE TO QUARKCOPYDESK 8.1 | 91
Page 92

DOCUMENT CONSTRUCTION
Document construction
The Lists feature lets you create tables of contents and other lists.
Working with lists
The Lists feature lets you collect the text of paragraphs that have specific character or
paragraph style sheets applied to them. Although the Lists feature is most often used for
creating a table of contents, you can also use it to create a list of figures or pictures used
in a publication.
Preparing for lists
Before you create a list, you must create and apply style sheets in your document. Begin
by creating style sheets to be used in a table of contents, such as "Chapter Name," "Section
Name," and "Body Text." Then create another paragraph style sheet for the formatted table
of contents.
Including style sheets in a list
The first step in creating a list is to decide what style sheets you want to include in the
list. To create a table of contents, you might include chapter and section style sheets in
your list, since a table of contents generally lists chapter titles and their respective page
numbers. You can include paragraph and character style sheets in lists.
Specifying levels in a list
You will also need to decide how the different levels in the paragraph style sheets will be
defined before generating a list. You might want chapter headings to be at the first level
and subjects within a chapter to be at the second level. For example, if you are writing a
manual about an application, and a chapter in the manual is titled "File Menu," you might
want the chapter heading "File Menu" to be the first level on your list. The "New," "Open,"
"Close," and "Save" items (subheadings in the "File Menu" chapter) could be at the second
level. Making decisions such as these beforehand will simplify the process of generating
a list.
92 | A GUIDE TO QUARKCOPYDESK 8.1
Page 93

DOCUMENT CONSTRUCTION
Creating a list
Once you have created and applied the style sheets in your document and have decided
which ones will be included in your list, you are ready to start creating your list. Choose
Edit > Lists and click New to display the Edit List dialog box and enter a name in the
Name field.
The Available Styles list displays all of the style sheets in the active article. Select each
style sheet you want to use in the list and click Add to add it to the Styles in List list. For
example, if you want to include all headings that use the "Heading 1" and "Heading 2"
style sheets in a TOC, add these two style sheets to the Styles in List list.
Once you've indicated which style sheets should determine what goes into the TOC, you
can specify how the TOC should be formatted. For each style in the Styles in List list,
choose a Level, a Numbering option, and a Format As style sheet:
• Level determines how the contents of the list are indented on the Lists palette (higher
levels are indented further).
• Numbering lets you control if and where the list includes the page number for each
occurrence of a style sheet.
• Format As lets you specify the style sheet to be applied to each level of the automatically
generated TOC.
You can use the Edit List dialog box to create lists for things like automatic tables of contents.
Importing lists from another document
QuarkCopyDesk lets you append lists from another document or from the Lists dialog
box (Edit > Lists), or by using the Append command (File > Append).
Navigating with lists
To view a list, display the Lists palette (Window menu), select the list in the List Name
drop-down menu, and then click Update. The selected list displays in the Lists palette.
A GUIDE TO QUARKCOPYDESK 8.1 | 93
Page 94

DOCUMENT CONSTRUCTION
You can use the Lists palette to navigate in a layout.
If your article contains multiple layouts, you can choose a different layout from the Show
List For drop-down list.
To locate a particular line in the active list, enter a word from that line in the palette's
Find field. The list in the palette scrolls to the first appearance of that word in the list.
To jump to a particular paragraph, double-click it in the Lists palette. The window scrolls
to that paragraph's location in the layout.
Building lists
To create a TOC (or other type of list) in the layout, place the text insertion point where
you want the list to go, then click Build in the Lists palette. The list is built automatically.
The style sheets you selected for the list in the Format As drop-down menu (New List
dialog box) are applied automatically.
If the text in the document is on the pasteboard, then a dagger character (Mac OS) or the
characters "PB " (Windows) displays next to the text in the built list instead of a page
number.
Updating lists
The Lists palette is not automatically updated as you work. When you make changes to
text, you must update the list to be sure it is current. Clicking the Update button in the
Lists palette scans the document for list items, and rebuilds a list in the Lists palette.
To update a list that you have already flowed into the active text component, click Update
to make sure the list is up-to-date, and then click Build. The application detects that there
is already a copy of the list in the text component and displays an alert asking if you want
94 | A GUIDE TO QUARKCOPYDESK 8.1
Page 95

DOCUMENT CONSTRUCTION
to Insert a new copy of the list or Replace the existing version. To update the existing list,
click Replace.
A GUIDE TO QUARKCOPYDESK 8.1 | 95
Page 96

OUTPUT
Output
Whether you want to print proof copies for review on a laser printer, or you need final
film or plate output on a high-resolution imagesetter, QuarkCopyDesk will help you get
satisfying results every time.
Printing an article
To print the active article, first choose File > Print (Command+P/Ctrl+P). The Print dialog
box displays. Use the controls in this dialog box to specify the way you want your output
to look, and then click Print.
Updating picture paths
QuarkCopyDesk uses two types of information for imported pictures: low-resolution and
high-resolution. Low-resolution information is used to display picture previews. When
you print, high-resolution information contained in the original picture files is accessed
using paths to the pictures.
A path to a picture is established when you import a picture. The application keeps
information about each picture's path as well as when the picture was last modified.
If a picture is moved or changed after it is imported, the application warns you when you
execute the Print command or the Collect for Output command (File menu).
The application can always "find" pictures that are in the same folder as the document,
whether or not the picture was in that folder at the time it was imported.
Setting Print dialog box controls
To print an article:
Choose File > Print (Command+P/Ctrl+P). The Print dialog box displays.
1
To select a printer driver, choose an option from the Printer drop-down menu.
2
• Windows only: Clicking the Properties button opens a dialog box with controls specific to
the selected printer driver. For more information about the options in this dialog box or
96 | A GUIDE TO QUARKCOPYDESK 8.1
Page 97

how to install printers, consult the documentation provided with Microsoft Windows
software.
Specify output options in one of the following ways:
3
• To use an existing print output style, choose an option from the Print Style drop-down
menu.
• To manually configure print options, use the controls in the bottom half of the dialog
box. This part of the Print dialog box is divided into panes. To display a pane, click its
name in the list on the bottom left. For information, see "Print dialog box."
• To capture the selected print options as a new output style, choose New Print Output
Style from the Print Style drop-down menu.
To specify the number of copies you want to print, enter a value in the Copies field.
4
To specify which pages you want to print, enter a value in the Pages field. You can enter
5
ranges of pages, nonsequential pages, or a combination of ranges and nonsequential pages
for printing. Use commas and hyphens to define a sequential or nonsequential range of
pages. For example, if you have a 20-page layout and you want to print pages 3 through
9, pages 12 through 15, and page 19, then enter 3–9, 12–15, 19 in the Pages field.
OUTPUT
To specify whether only odd, only even, or all pages should be printed, choose an option
6
from the Page Sequence drop-down menu. All (the default setting) prints all of the related
pages. When you choose Odd, only odd-numbered pages print. When you choose Even,
only even-numbered pages print.
To make your document print smaller or larger, enter a percentage in the Scale field. The
7
default is 100%.
If you are printing two or more copies of the layout, and you want each copy to emerge
8
from the printer in sequential order, check Collate. If Collate is unchecked, the application
prints multiple copies of each page at a time.
To print spreads (horizontally adjoining pages) side by side on the film or paper, check
9
Spreads.
To print a multipage layout in reverse order, check Back to Front. The last page in the
10
layout will print first.
Check Fit in Print Area to reduce or enlarge the size of a page in your document to fit the
11
imageable area of the selected media.
Mac OS only: Click the Printer button to open the Printer Driver dialog box. Consult the
12
documentation supplied with your computer for more information.
Click Print to print the layout.
13
Click Cancel to close the Print dialog box without saving settings or printing the layout.
14
The area at the upper right of the Print dialog box is the page preview area. You can use
this image to preview how the pages will appear on the output device.
A GUIDE TO QUARKCOPYDESK 8.1 | 97
Page 98

OUTPUT
Print dialog box
The panes in the Print dialog box are described in the topics below.
Device pane
Use the Device pane to control device-specific settings, including PPD selection and page
positioning:
• When you specify a PPD, the Paper Size, Width, and Height fields are automatically filled
with default information supplied by the PPD. If you choose a PPD for an imagesetter, the
Page Gap and Paper Offset fields also will be available. You can customize the list of PPDs
available in the PPD drop-down menu using the PPD Manager dialog box (Utilities menu).
If you do not have the right PPD, choose a similar built-in, generic PPD.
• To specify the media size used by your printer, choose a size from the Paper Size drop-down
menu.
• To specify the width and height of custom media supported by your printer, choose Custom
from the Paper Size drop-down menu and enter values in the Width and Height fields.
When sending output to a continuous-feed or nondrum imagesetter, use the Automatic
setting in the Height field.
• To position your document on the selected output media, choose an option from the
Position drop-down menu.
• For imagesetters only: Enter a value in the Paper Offset field to specify the distance that
the left edge of the page will be offset (or inset) from the left edge of the roll media.
• For imagesetters only: Enter a value in the Page Gap field to specify the amount of space
between pages of the layout as the pages print on the roll.
• To print negative page images, check Negative Print.
• To receive printed PostScript error reporting during output, check PostScript Error Handler.
Pages pane
Use the Pages pane to specify page orientation, tiling, page flipping, and related options:
• To specify whether to print in portrait or landscape mode, click an Orientation radio
button (Portrait or Landscape).
• To include blank pages in the output, check Include Blank Pages.
• To flip the output vertically or horizontally, choose an option from the Page Flip
drop-down menu.
To print a large layout in sections (tiles), choose an option from the Page Tiling drop-down
menu. The application prints tickmarks and location information on each tile to aid you
in reassembling them.
• To control the way in which a page is tiled by positioning the ruler origin, choose Manual.
98 | A GUIDE TO QUARKCOPYDESK 8.1
Page 99

• To have the application determine the number of tiles needed to print each document
page based on the layout size, the media size, whether or not Absolute Overlap is checked,
and the value in the Overlap field, choose Automatic. The value entered in the Overlap
field is the amount the application will use to extend the page as needed to create the tile.
When Absolute Overlap is checked, the application will use only the value in the Overlap
field when extending the page to create the tile. If Absolute Overlap is unchecked, the
application will use at least the amount in the Overlap field when creating the tile, but
may use a larger amount if necessary. Do not check Absolute Overlap if you want your
layout centered on the final assembled tiles.
Color pane
The Color pane lets you choose whether to create a color PDF or a grayscale PDF.
Pictures pane
Use the Pictures pane to control the way pictures are printed:
• To specify how pictures are printed, choose an option from the Output drop-down menu.
Normal provides high-resolution output of pictures using the data from the pictures'
source files. Low Resolution prints pictures at screen preview resolution. Rough suppresses
printout of pictures and blends and prints a box with the frame and an "x" in it, much
like an empty picture box on screen.
OUTPUT
• To select a format for print data, choose an option from the Data drop-down menu.
Although documents print more quickly in Binary format, the ASCII option is more
portable because it is a standard format readable by a wider range of printers and print
spoolers. The Clean 8-bit option combines ASCII and binary in a versatile and portable
file format.
Marks pane
Use the Marks pane to include crop marks, registration marks, and bleed marks in the
output. Crop marks are short vertical and horizontal lines printed outside the page's final
trim size, indicating where to cut the page. Registration marks are symbols that are used to
align overlaying plates. Bleed marks indicate where page bleeds end.
• To include crop marks and registration marks on every page, choose Centered or Off
Center from the Marks drop-down menu.
Article pane
The Article pane lets you choose whether to output an article in WYSIWYG mode, Galley
mode, or Full Screen mode. You can choose to output all components, only the active
components, or only those components that are expanded in the article window. You can
also choose whether or not to include pictures and page pictures (if you are using WYSIWYG
view).
A GUIDE TO QUARKCOPYDESK 8.1 | 99
Page 100

OUTPUT
Notes pane
Use the Notes pane to output notes along with an article. You can output all notes or only
open notes. You can also output footnotes, either inline or on a separate page.
Summary pane
The Summary pane displays a summary of the settings in the other panes.
Exporting an article in PDF format
To export the active article in PDF format:
Choose File > PDF. The Export as PDF dialog box displays.
1
Enter a page range in the Pages field.
2
To use an existing output style, choose an option from the PDF Style drop-down menu.
3
To modify output settings, click Options. Use the panes in the resulting dialog box to
4
control the format of the exported file.
• To use a PDF output style, choose an option from the PDF Style drop-down menu. To
create a PDF output style using the current settings, choose New PDF Output Style.
• Use the Pages pane to specify whether to export spreads, whether to export each page as
a separate PDF file, whether to include blank pages, and whether to embed a thumbnail
of the PDF file.
• Use the Meta Data pane to provide the details that display in the Description tab of the
Document Properties dialog box in Adobe Acrobat Reader.
• Use the Hyperlink pane to specify how links and lists from the layout export and how
hyperlinks should appear in the PDF. You can also use this pane to specify the default
zoom of the PDF file.
• Use the Compression pane to choose from three compression options. Optimum creates
a PDF file that is suitable for printing to a personal printer. Files created with this setting
may be relatively large, and may take a while to generate.High creates a PDF file that is
reasonably small in size and reasonably high in quality. Images are compressed, but should
be suitable for on-screen viewing. Files created with this setting should be small enough
to send by e-mail.Low creates a PDF file that is quite small in size. Images in PDFs created
with this setting should have acceptable quality, but text in raster images may not be
readable. This setting lets you generate PDFs more quickly than the other settings.
• Use the Color pane to specify whether to create composite output or separations, to choose
an output setup for the PDF file, and to select which plates should be included in the
output.
• Use the Marks pane to specify the positioning, width, and length of registration marks in
the PDF file.
100 | A GUIDE TO QUARKCOPYDESK 8.1
 Loading...