

Page 1

NETQ-6000
Quick Installation Manual
BRIDGE - REPEATER
Enterprise High Power Outdoor Wireless Access Point
NETQ-6000
PC Laptop IPAD
Page 2
NETQ-6000
1
quick installation manual bridge-repeater
Thank you for purchasing Enterprise High Gain wireless Router. This manual
will instruct you how to configure router, and enable you to use it in a perfect
status. After you have installed the router, you will be able to enjoy the surfing
feely.
1.1. Wireless Router Connection
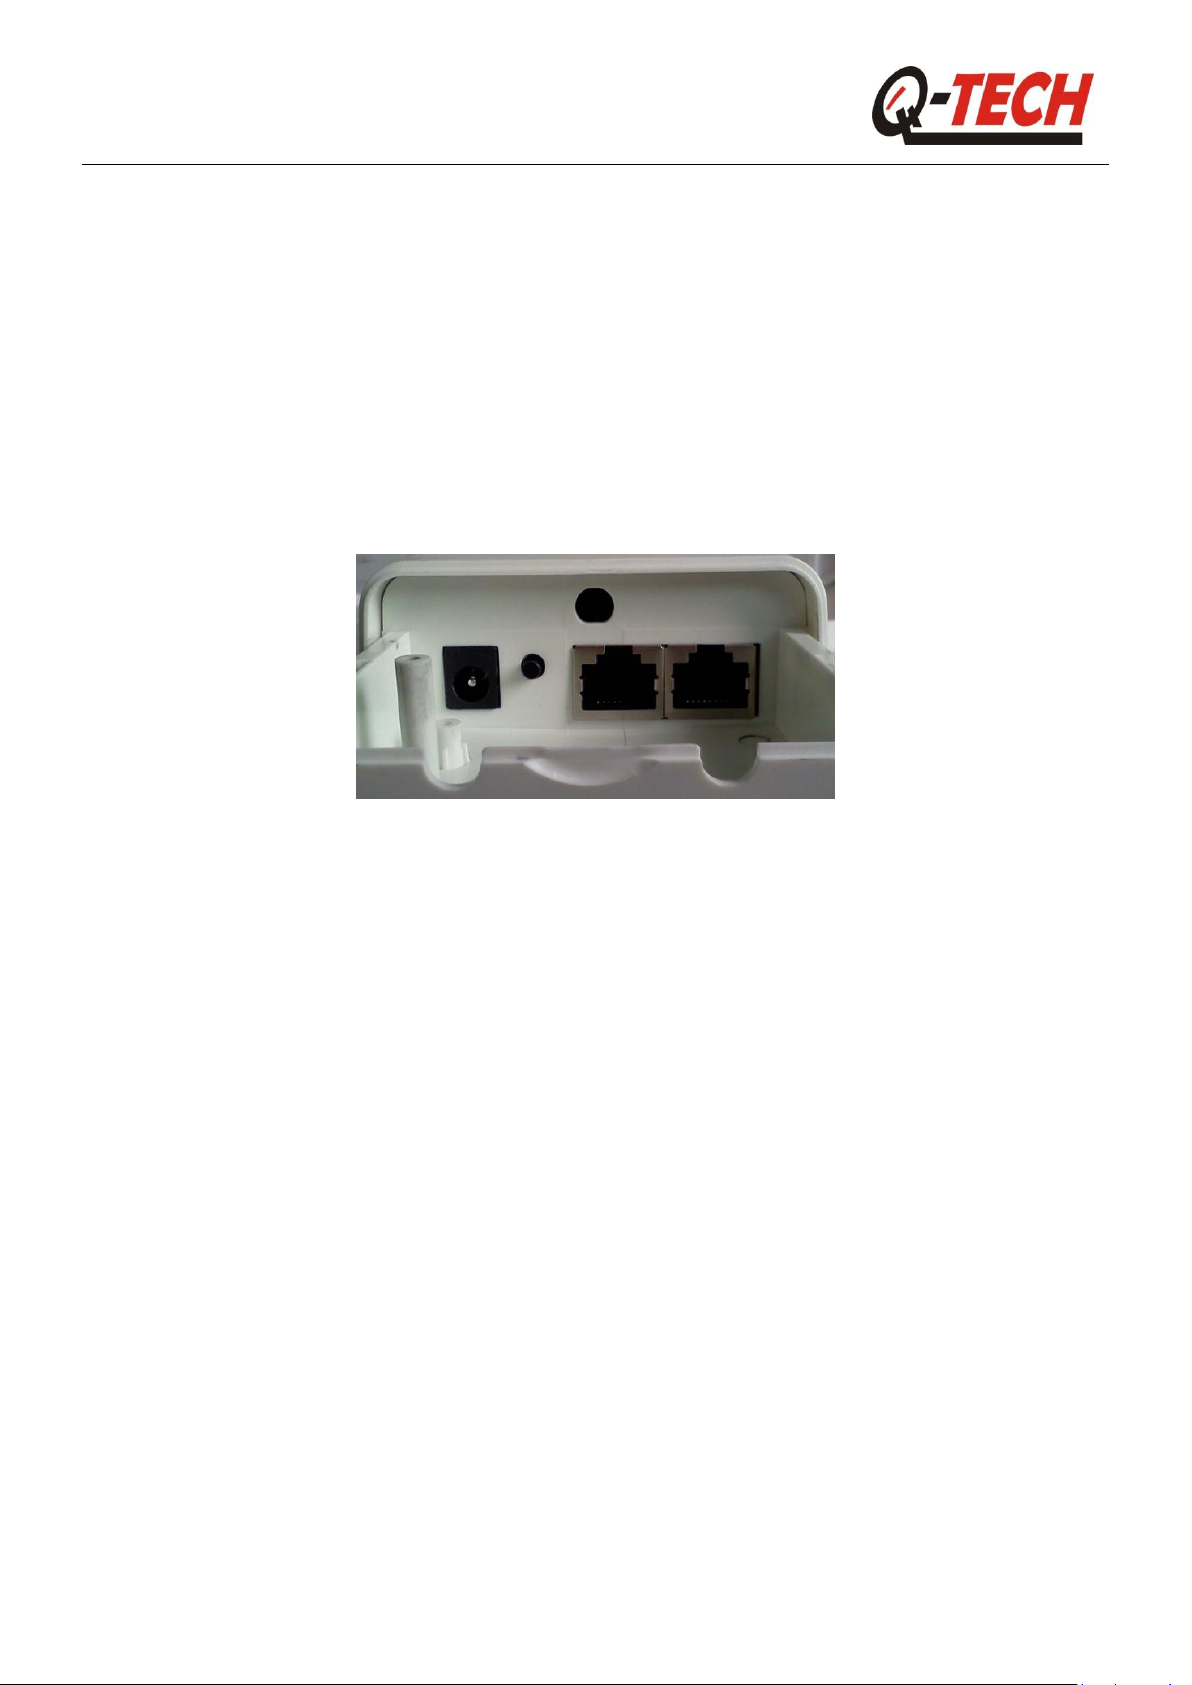
Below diagram is the connection instruction
Reset: Press it for 5-10 seconds, then, the router return to its default
configuration.
Wan: Wan connectin
LAN1-LAN4: LAN Connection to connect PC by cable.
Power: for Power supply
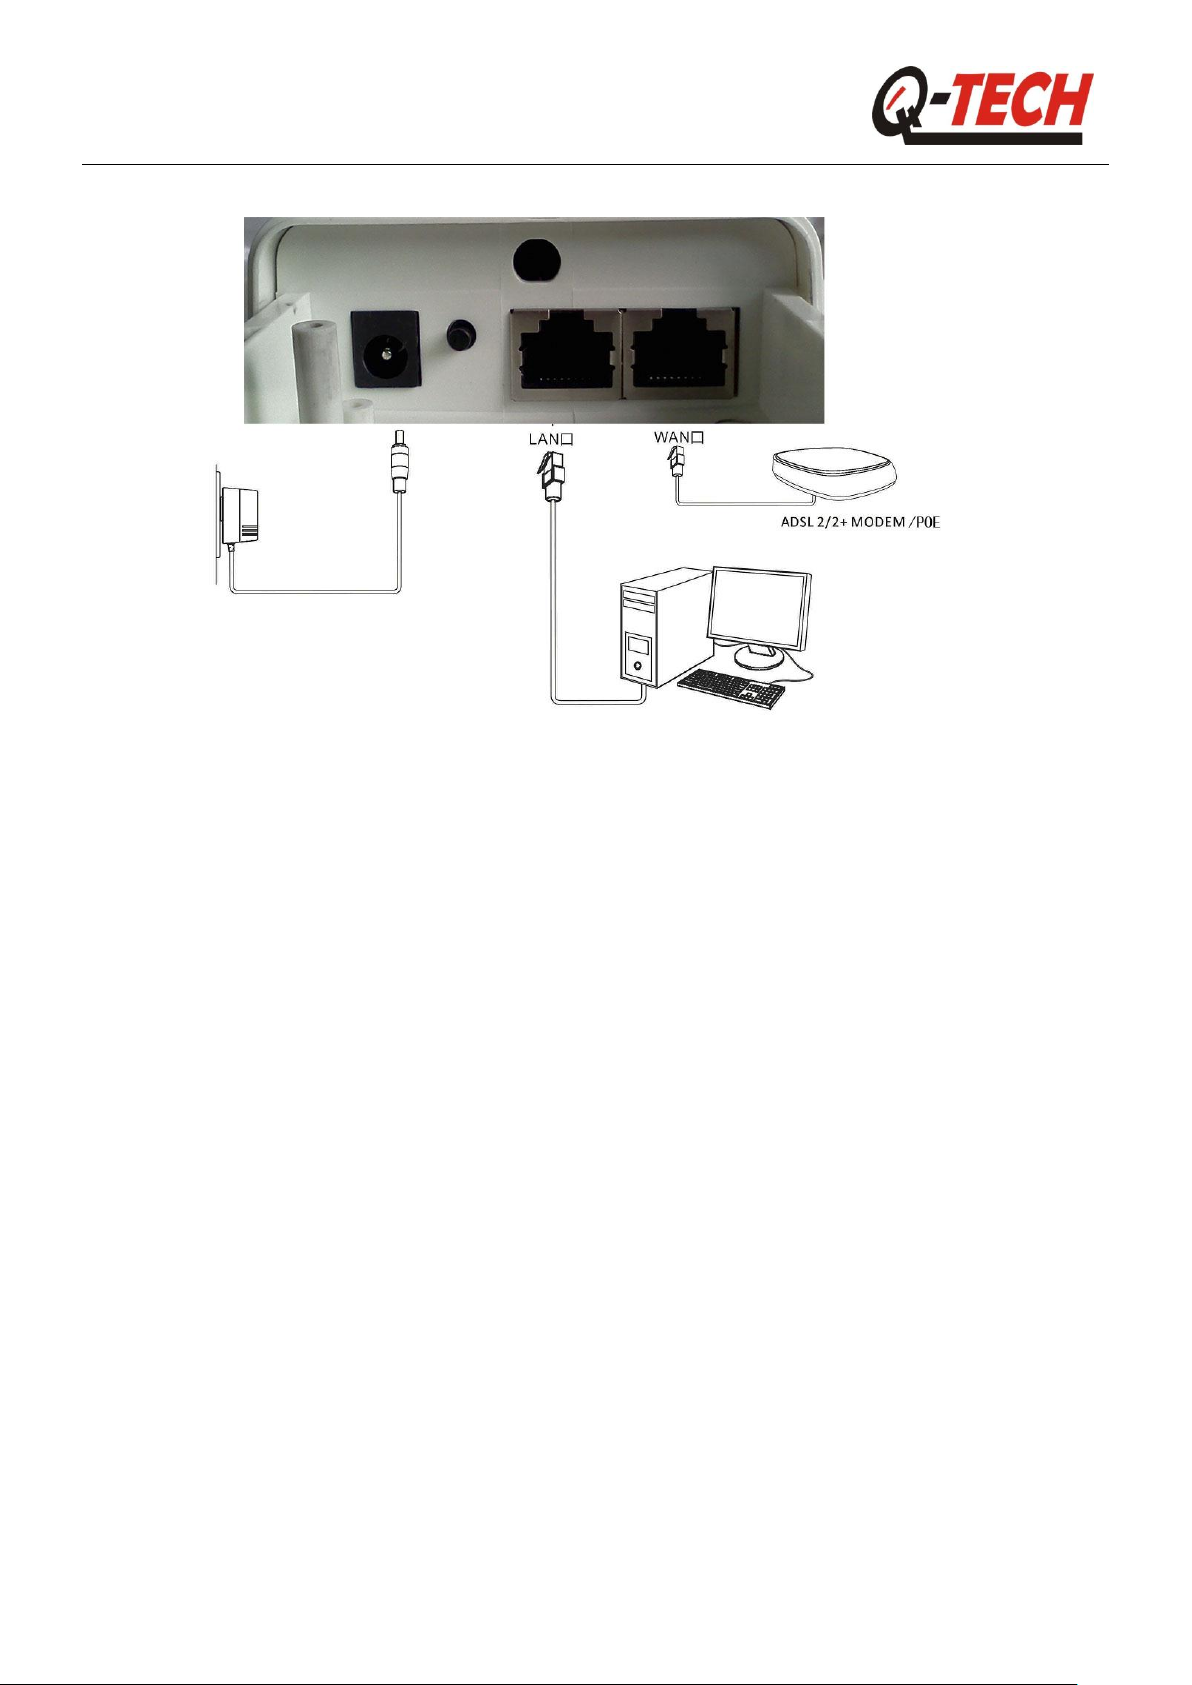
If use router by cable, the correct connecting way is as below:
Page 3
NETQ-6000
2
quick installation manual bridge-repeater
1. Connect PC to one of the lan ports
2. Connect router’s Wan Port to ADSL Modem. Please do this only after you
have finished the router configuration, to avoid any installation issues. This is
very important. Please do it accordingly
3. If you already connect router to ADSL Modem, then, please firstly
disconnected it, then, reset wireless router.
1.2. configuration on PC end
Before configuring wireless router, firstly, do some configuration on the PC
who manages the router.
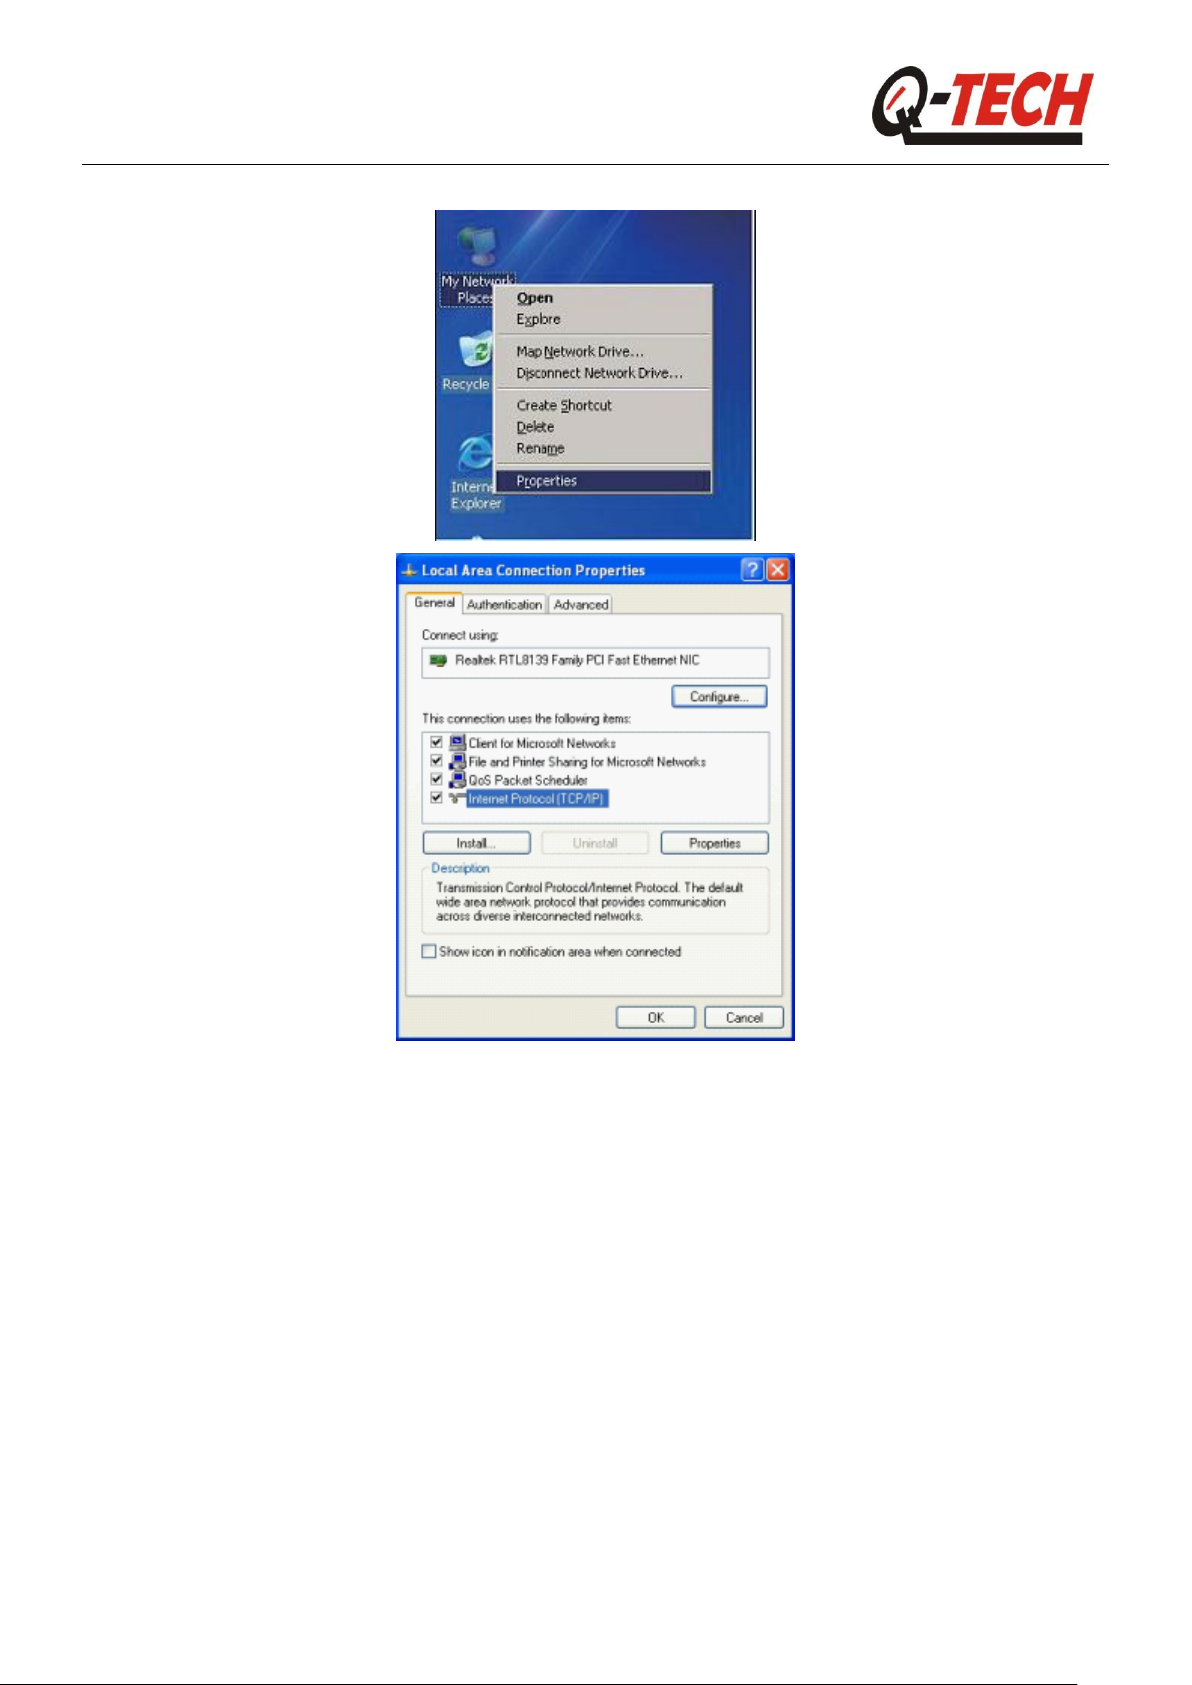
A. Switch on PC, click on right ‘My Network Place’, then click on right the
“local area connection”->“properties”-> “Internet protocol(TCP/IP)” and
“Properties”.
Page 4
NETQ-6000
3
quick installation manual bridge-repeater
B, Click “General ” ,Select “Obtain an IP address automatically” and “Obtain
DNS server address automatically”, then click OK.
Page 5

NETQ-6000
4
quick installation manual bridge-repeater
1.3. log in wireless router
A. Connect the configured PC to one of the four lan ports of router. Do not
connect router to any other devices. (this is to avoid any IP address chaos),
and switch on the router
B. Start PC’s Internet Explorer, and enter http://192.168.1.1, press enter.
C. Users will see the following login page, Enter admin for the User Name
and Password, both in lower case letters. Then click the OK button or press
the Enter key.
D. Then, enter the configuration page of the AP, and select the operation
Page 6

NETQ-6000
5
quick installation manual bridge-repeater
mode as Bridge, then, click the Apply as below:
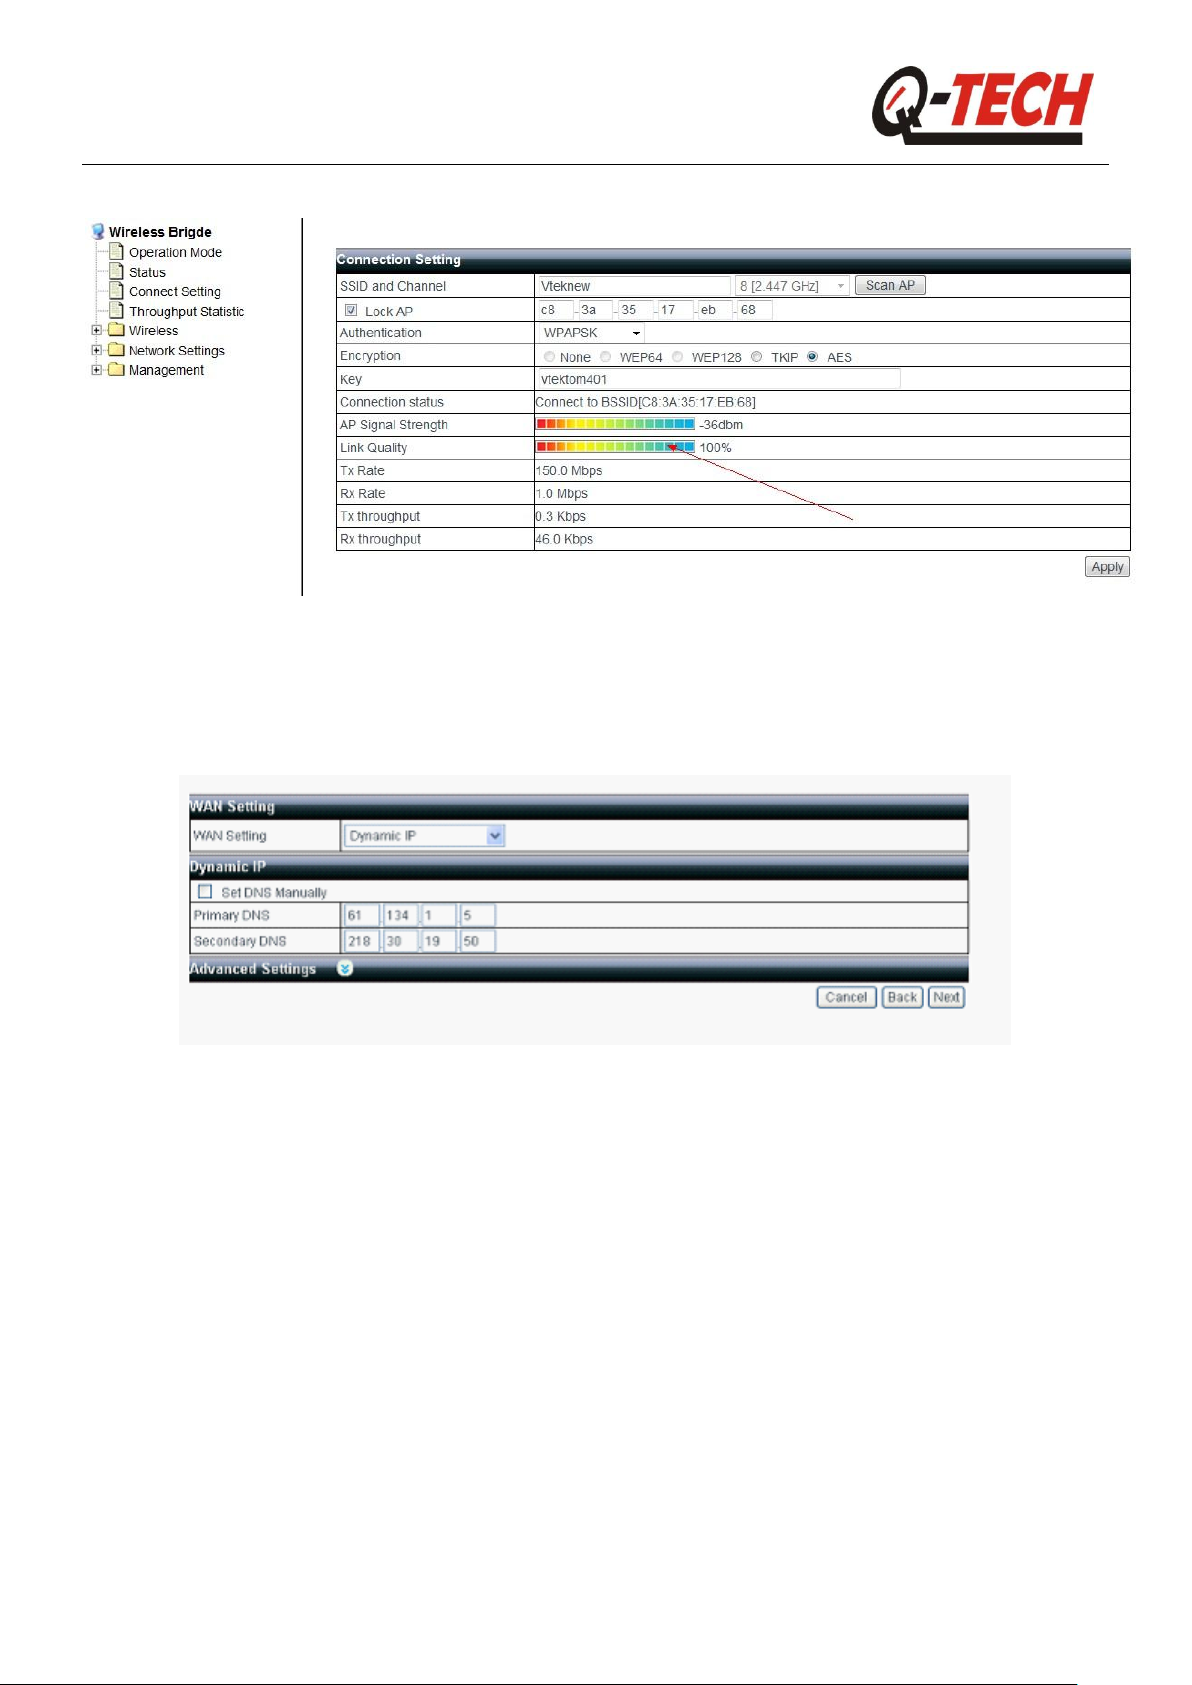
1.4. Connect Setting
At new page select the Router you want to bridge:
Page 7

NETQ-6000
6
quick installation manual bridge-repeater
Put the password, and lock the AP, then, click the apply
Page 8
NETQ-6000
7
quick installation manual bridge-repeater
2.1. Wlan Settings
Please choose any one broadband setting method of below 3
2.1.1. ADSL(PPPOE)dial-up settings
As example of China Telecom ADSL with below related details provided by
telecom operator.
User Name:gzDSL38912111@163.gd
PasswordЧЧЧЧЧЧЧЧ
Please fill in user name and password provided by telecom operator as
picture.
Page 9

NETQ-6000
8
quick installation manual bridge-repeater
3.1. Wireless Settings
Here you can amend router SSID and make encryption
Pls write down the right SSID and security method in above picture( It is
better to choose WPAPSK with secutiry), click finish to share the network.
A. If you want to share the network by wifi after the basic setting, pls click
wireless network connection in My Network Places, right click Wireless
Network Connection and choose View Availale Wireless Networks
Page 10

NETQ-6000
9
quick installation manual bridge-repeater
Remarks: if you computer with build in 802.11b/g/n wireless USB adapter,
and can’t search the available network, pls contact with after-sale department
of your computer seller.
With Wireless network connection: Right-click Network Neiborhood and
choose Nature,only local connections or other connections, but no wireless
network connection in the network connection type
Without Wireless network connection: right-click "Wireless Network
Connection" select "Properties" tab, only "normal" and "Advanced", no
"Wireless Network Configuration", even if you normally connect the wireless
in other places.
B. Click "Refresh network list" on the top left, the computer will search some
wireless networks and listed on the right, select the right SSID you want to
connect, then Double-click to connect, if the router with passwords, input the
passwords, Click Connect tab too access the Internet through wireless.
Page 11

NETQ-6000
10
quick installation manual bridge-repeater
List of Accessory:
1, Wireless broadband router;
2, power adapter;
3, quick installation guide;
4, 1Meter LAN Cable;
5, warranty card.
FAQ:
1、It can not enter router setting interface after typing router IP in browser..
Please check if the router is working normally. The SYS will flashing after few
seconds while energized. Otherwise it has internal fault, please send us to handle.
Please check whether the networking cable connects router well,also its
Page 12

NETQ-6000
11
quick installation manual bridge-repeater
corresponding cable interface light is light? If only sometimes lighting doesn’t mean
the networking cable is connected..
Please run the ping in the command prompt to verify the network connection
between your PC(s) and the router. LAN Interface with IP address 192.168.2.1
If yes, then check your browser, whether it sets up surfing via a proxy server, if
without, please don't do that.
If no, you can hold “RESET” with 7 seconds to restore factory settings and try to
ping 192.168.2.1 to see if it can be verified
If failed again, please call our technical support hot line.
2、If forget the enter password of the router setting page and can not access it, how
to solve it??
Please restore factory settings. The way is to hold” RESET” button with 15
seconds.
3、 How to deal with the problem of IP address confliction when computer
connected with router?
Pls check is there any other DHCP server in LAN, if yes, pls close it.
The router’s original IP address is 192.168.1.1, pls make sure this IP address is
different from other local networking. If same, pls change one. If the IP address is
same in two different computers , pls change one to make them different.
How to access the internet for the dynamic IP users?
Enter into the router’s management interface, and set it as Dynamic IP in internet
settings, then save.
Some ISPs binding the MAC address to computer’s LAN Card, you should copy
the router’s MAC address on this condition.
The way of copy MAC address is as below:
Pls click “Advanced Settings” and choose “ MAC Clong”, input the MAC Address
which is Limit to computer’s Lan Card, click “save” after that.
 Loading...