


QCS 65
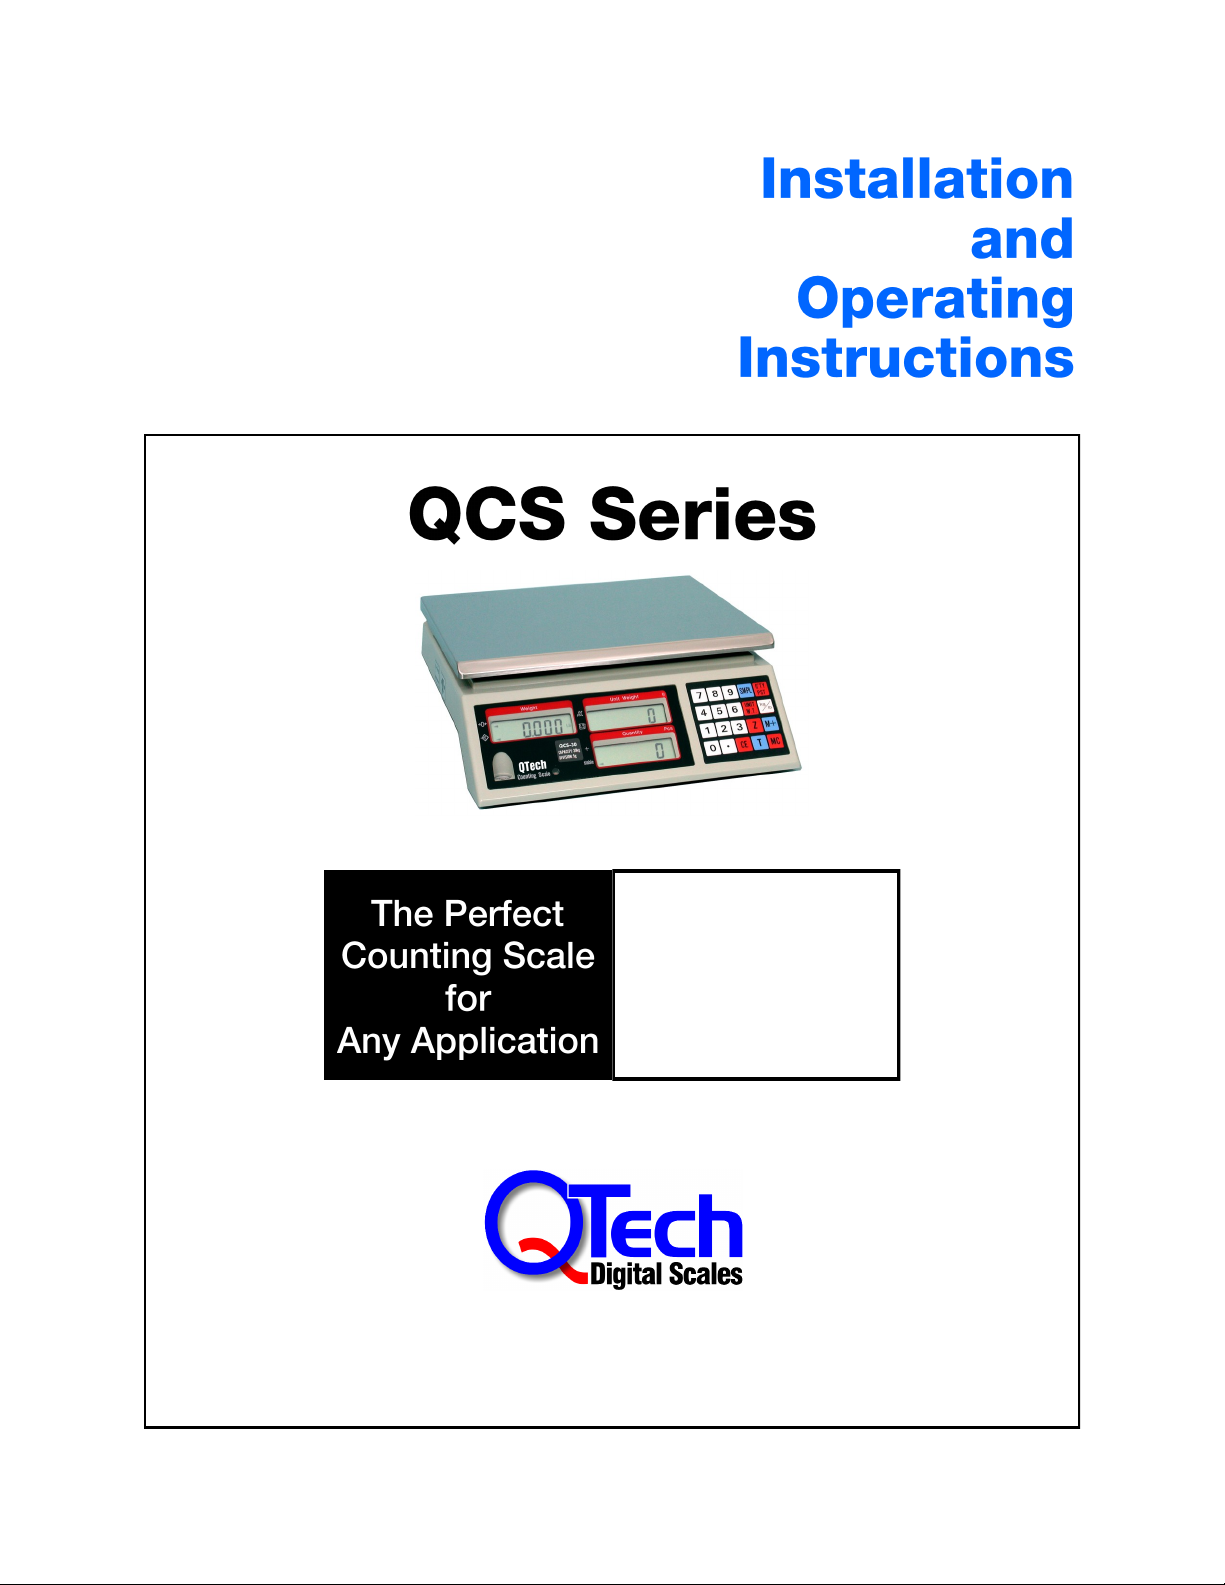
3, 6,15, 30, or 65 lb. Capacity
• Counting
• Weighing
• Shipping
• Inventory Control
• Batching
129 Cramer Road, Jewett, New York 12444 USA
800-831-4175 • 518-734-6514 • Fax: 518-734-6497
Email: info@QTechScales.com • Web Site: www.QTechScales.com
Remove the contents from the carton which includes the scale, platter, and the AC adaptor. The
QCS-3, 6, 15 and 30 models have a locking post on the underside of the console which must be
removed before operation. It is located in a round opening next to the red “” label. Using a
slotted screwdriver remove the post by turning counter clockwise. (Note: The QCS-65 model
does not have a locking post.) Should you ever need to ship the scale, the locking post should
be reinserted and just tightened by hand.
Install the platter by inserting the pins on the underside into the holes on the top of the scale
console. The beveled edge of the platter should face forward. If any of the pins are bent, contact
QTech; inaccurate counts may result.
The scale is battery powered with the AC adapter functioning as the charger. Since the battery
ships with only a partial charge, allow the unit to charge for at least 10 minutes before initial use.
(A full charge takes about 8 to 12 hours.) When charging first insert the plug into the jack on the
left side of the unit and then plug the transformer into a standard 110/120 volt AC outlet. The
power indicator light on the scale will glow red when recharging. As the charge approaches
completion the light will change to yellow and finally green, indicating a full charge. The scale
power switch need not be in the “on” position during charging.
A full battery will hold a charge for about two months providing approximately 200 hours of
continuous use. The scale will require recharging when the battery symbol appears in
the lower right corner of the WEIGHT window. Since the battery can be damaged if it is
discharged too much, the scale will automatically power off if the battery is not recharged within
20 hours of the first appearance of the warning symbol.
Locate your scale on a solid, level work surface free from air drafts and vibrations. Tighten the
two black disks of the leveling feet together, and then hand tighten them as a unit into the base.
If the scale is not steady, loosen and extend only one of the feet to eliminate any imbalance.
While precise leveling of the scale is not required, you may get inaccurate results if all four
adjustable feet are not in contact with the work surface, or are extended too far.
CAUTION: The AC adaptor supplied with the scale is a proprietary design. If it should
ever fail, replace only with a QTech unit. The use of any other adaptor may result in
scale and/or battery damage as well as voiding your warranty.
For Consistent and Accurate Results:
Avoid scale placement near windows, fans, or air conditioning and heating vents. Do
not leave anything on the scale platter when not in use.
Use a surge protector with the AC adaptor to minimize the effects of voltage spikes.
Do not jog paper/parts or drop cartons on the scale platter.
To avoid electronic interference do not operate cell phones within 6 feet of the scale.
Important: Save the shipping carton, locking post and all packing materials should it be necessary to
return the unit to the factory for service. (Tip: tape the locking post to the underside of the scale.)
2
Sampling is the process of “teaching” your scale to calculate a unit weight or “weight per 1000”
pieces. Once the scale knows the unit weight, it can quickly provide a count by dividing the
weight on the scale by the unit weight.
This is the most critical step in the entire counting process. The golden rule of sampling is this:
the larger the initial sample size, the more accurate your counts will be. There is a point,
however, at which an increased sample size will provide little or no additional accuracy. We
suggest you use the sampling sizes listed in the table below as a starting point. You may then
experiment with these values to find a reasonable tradeoff between the time spent sampling and
the resulting accuracy.
Turn the scale on by pressing the ON/OFF rocker switch on the left side of the scale. All the
display windows will temporarily show a series of alphanumeric digits. After about five seconds
the WEIGHT, UNIT WEIGHT, and QUANTITY windows will each display “0”. The scale is now
ready for use.
Select from the following sampling procedures depending on the item you wish to count and the
QCS model/weight capacity:
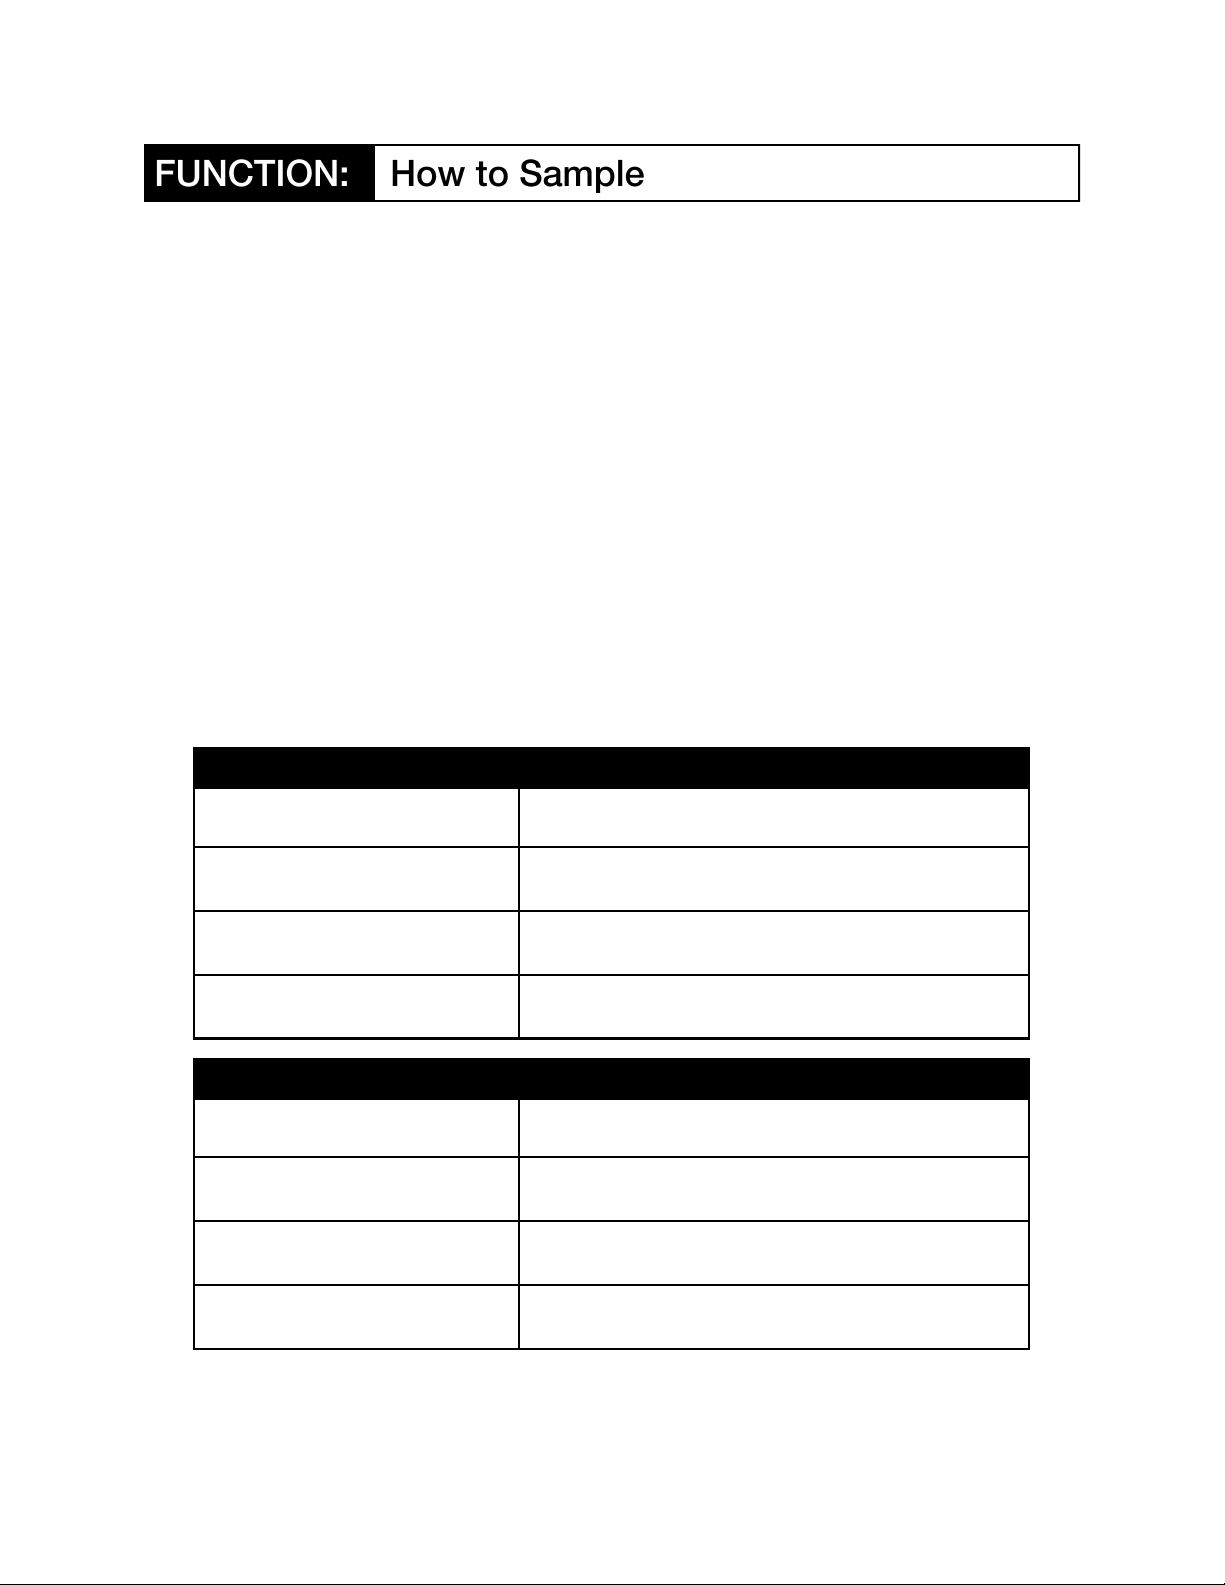
PAPER SAMPLING: Select Appropriate Table Based on QCS Model
Sheet Size QCS-6 and QCS-15 Sampling Procedure
11 x 17”
8-1/2 x 11”
5-1/2 x 8-1/2”
2 x 3-1/2” or Smaller Sheets
Sheet Size QCS-30 and QCS-65 Sampling Procedure
11 x 17”
8-1/2 x 11”
5-1/2 x 8-1/2”
2 x 3-1/2” or Smaller Sheets
NOTE: If you will be counting fewer than 1000 sheets you may halve these sampling
quantities. Never use fewer than 10 sheets, however, as a sample size.
Put 10 sheets on the scale, key in "10" and then
press the SMPL key within 5 seconds.
Put 20 sheets on the scale, key in "20" and then
press the SMPL key within 5 seconds.
Put 30 sheets on the scale, key in "30" and then
press the SMPL key within 5 seconds.
Put 40 sheets on the scale, key in "40" and then
press the SMPL key within 5 seconds.
Put 10 sheets on the scale, key in "10" and then
press the SMPL key within 5 seconds.
Put 40 sheets on the scale, key in "40" and then
press the SMPL key within 5 seconds.
Put 50 sheets on the scale, key in "50" and then
press the SMPL key within 5 seconds.
Put 60 sheets on the scale, key in "60" and then
press the SMPL key within 5 seconds.
3
 Loading...