

Page 1

QS Series Products
Software User Guide
WWW.Q-SEE.COM
Company Toll Free: 877-998-3440 OR
714-998-3440
Technical Support: 877.998.3440
1
Page 2

Contents
1、Necessary to know.............................................................................1
COMMUNICATION CONNECTION ILLUSTRATION .............................1
1.1
1.1.1 RS232 Communication.............................................................1
1.1.2 RS485 Communication.............................................................1
2. Install and uninstall program.............................................................3
3. Attendance administration program.................................................7
AINTENANCE/SETUP......................................................................7
3.1.M
3.1.1 Maintenance/setup....................................................................7
3.1.2 Department list..........................................................................7
3.1.3 Staff maintenance.....................................................................9
3.1.4 Administrator setting ..............................................................20
3.1.5 period time maintenance.........................................................25
3.1.6 Shift management...................................................................30
3.1.7 Arrange staff’s shift ................................................................31
3.1.8 Holiday list .............................................................................36
3.1.9 Leave style setting ..................................................................37
3.1.10 Attendance rule .....................................................................37
3.1.11 Database setup......................................................................42
HANDLE ATTENDANCE..................................................................46
3.2.
3.2.1 Handle attendance...................................................................47
3.2.2 Employee leaving on business / asking for leave...................47
3.2.3 handle staff forgetting to check-in..........................................53
3.2.4 Handle staff forgetting to check-out .......................................54
3.2.5 handle coming late collectively..............................................54
3.2.6 handle leaving early collectively............................................55
EARCH/PRINT ...............................................................................56
3.3.S
3.3.1 search/print ............................................................................. 56
3.3.2 Attendance record ...................................................................56
3.3.3 Current staff’s at-post Status...................................................58
3.3.4 Attendance abnormal search and record .................................59
DATA..............................................................................................71
3.4
3.4.1 Data menu...............................................................................71
3.4.2 Initial system...........................................................................72
3.4.3 Clear obsolete data..................................................................72
3.4.4 Back up database ....................................................................74
3.4.5 Import attendance data............................................................74
3.4.6 Export attendance data............................................................76
2
Page 3

3.4.7 Log on system again...............................................................78
3.4.8 Exit..........................................................................................78
4 operating help.....................................................................................79
CONFIRM BEGINNING DATE EXPORT DATA....................................79
4.1
SELECT DEPARTMENT AND EMPLOYEE..........................................81
4.2
CONFIRM BEGINNING/ENDING DATE.............................................82
4.3
CONFIRM DATE..............................................................................82
4.4
SELECT EMPLOYEE ........................................................................82
4.5
DATASHEET PROCESS TOOL BAR...................................................83
4.6
SELECT DEPARTMENT.................................................................... 84
4.7
TIME PERIOD MANAGEMENT .........................................................85
4.8
5 Common Question and Answer........................................................87
6.Contact information............................................................................90
3
Page 4

1. Necessary to know
1.1 Communication connection
illustration
1.1.1 RS232 Communication
RS232 communication connect with on more than 50 metre length
shielding twisted-pair.
This RS232 communication only use three signal line, the both
ending use a BD 9-pin port connector, make sure the connector pin -1
connect another connector pin -1,the connection wire and defi nition
signal illustration with following:
Attendance device terminal
Pin-number signal definition Pin-number signaldefinition
2 TXD---------------------------------2 RXD
3 RXD-------------------------------- 3 TXD
5 GND---------------------------------5 GND
1.1.2 RS485 Communication
Use shielding twisted-pair, RS485 communication standrad
connection length are no more than1.2Km.
RS485 connection illustrate with following picture,
1 5
6 9
1 5
6 9
1
Page 5

RS 232/485
transducer
RS485+
RS485-
PC
RS485+ RS485-
RS485+ RS485-
Number 1
Number N
The RS458 communication use half-duplexes communication, there
are no more than 32 QS series fingerprint attendance devices in an
attendance network.
The device RS485 connector is a RJ11 plug port; RJ11 plug port
front illustration and signal definition are following:
1 2 3 4
RS485-
RS485+
Some RS232/485 transducer have four label TX+, TX-, RX+, RXconnector terminal, there are only two connector terminals in .the
equipment, because we join the TX+ and TX-signal, RX+ and TX-signal,
while we connect with this transducer, it is necessary to join TX+ and
RX+ terminal which connect RS485+, and to join TX- and RX- terminal
which connnect RS485-, so that communication is successful.
2
Page 6

2. Install and uninstall program
Suggest turn off other application program before installing, in order
to avoid conflict in installing process.
Attention: some software edition number maybe doesn’t tally
with CD real contents, please allow CD installing program for
standard
Insert the CD into your CD-ROM, the CD a utomatically display the
installing menu:
Click on the next, the window appear:
3
Page 7

This page is an agreement of using program, please read carefully. if
you agree with this agreement contents, click on the‘yes’. Enter the next
installing process;if you don’t agree with the agreement , please click on
the ‘ON’Exit the installing process;if you need come back the last
operating, please click‘back’. The next installing windows is following:
4
Page 8

The install interface use in installing catalog of definition attendance
menagement, you can choice default catalog, can also choice or create
another catalog. Confirrm, the next display interface appear following:
After selected, click on the “next”, the following interface appear:
5
Page 9

In the page, local form“start/program “to create the program name.
Click next, the display is following:
Enter the window, it is show that you already finish all setup of
installing program, if you want modify the setup, click back; otherwise
click on the ‘install’ button, the installing program will copy file to hard
disks and write relate information, after finish installing process, click
finish, the installing process is over.
It is necessary that to register software in the first time beginning
running, the specification process to see 1. neceassary to kown.
6
Page 10

3. Attendance administration
program
3.1. Maintenance/setup
3.1.1 Maintenance/setup
Click on the ‘handling attendance’ on main menu, it will appear:
First set up database, then set up holiday scheduler、set up leave
style and attendance rule, department、staff maintenance and
administrator setting, at the finals, period time maintenance, unit shift
managing, arrang staff shift.
3.1.2 Department list
Click on the “department list” sub-item on the menu “maintenance
/setup”, the windows appear:
7
Page 11

If you want to modify a department name, double left-click on the
department name or press F2, and type new name in the box of
Department.
If you want to change a company name, it is need to modify the
attendance rule setup.
In adding department, you first left-click the superior department of
the new department, click on the “adding department” button, input the
name of new department in the dialog box, click “confirm” to save.
In deleting department, you only first left-click the department
selected, click on the “cancel department” button, select “confirm” in the
display caution box, OK.
If you want to modify a department’s subordination relationship, first
selected the department to modify, left-click, hold, and drag the name
within the new superior department. Then operate according to
instruction.
Click on the “enroll staff’ button. The following appear:
8
Page 12

Staffs in the Employees box are those who don’t belong to any
department, that is, who have left their posts. This is the same on leave
no salary
In the box of staffs select those employees that your department
want to employ, and click Add button, and then those selected employees
will be added into your department.
In the box of Our Department’s Employees select those employees
that will leave your department, and click Remove button, and the select
employees will leave your department (leave their posts).
After operations, click Close button or
to return to Windows..
3.1.3 Staff maintenance
Select the ‘maintenance/setup’, click staff maintenance item, open
“staff list”, within this window, maintenance staff’s various information
and attendance setting.
9
Page 13

The upper half of the window of Staff List is a list of employees, and
the lower half is designed to select and set staff’s varied information. The
lower half is paginated to two pages, click the pagination label on the
bottom, enter different pages. Operations can be conducted on different
pages.
Among staff’s varied information items, the two, Name and
Attendance No. must be filled in, and the others are. optional
Add New Staff
Press
button to add a new Staff. Select the department this
employee belongs to, enter his/her name and attendance No., make this
mark, and then press Save button.
1) Add batch staffs: when some departments enroll a lot of staff,
you can use this function to add staffs, cut down operator work.
10
Page 14

E.g., the bill department adds a lot of staffs, first select
department, click on the “add batch staffs” buttons, the adding
batch staffs window appears.
If there are not staffs in this department, the following appear.
If there are staffs in the department, the following appear:
11
Page 15

the backup data of staffs witch select from bill department display on
the left-up corner, if the shift and attendance setup of adding staffs are
the same of selected staffs, left-click “copy current staff” shift and
attendance setting, select the item, if there are other same words, select
relating to words from the selected words box.
Attendance NO increase accord to add batch staffs, with the “(*)”
symbol, it is easy that to add staff NO.
The number style: that is attendance serial number, E.g. the staff NO
of this department is the figure 1 on the first, so its serial number is 1???,
input 1 (*) to the serial box, the window display following:
12
Page 16

The symbol wide: That is, how many figures the symbol indicate?
E.g. before the serial number is 1? Its symbol range is 3, if the serial
number is 1??, so its symbol wide is 2. After the symbol wide have been
definite; by use the ‘from ‘box to ‘box ‘to create serial number range. E.g.
create the serial number range from 106 to118; input 6 to “from” box,
import 18 “to” box, the symbol wide is 2, but from 6to9 wide is one
figure. At this, the system will add zero automatically.
Click on the “confirm” button, add staffs, and click on the
“abandon” button, return the staff interface.
3) Modify staff
Employees’ attendance NO. or name modified. Press
button, enter
new data in the corresponding input box, and then press Save button.
4)Transfer Employee
Click Transfer Employee button to transfer employees from one
department to another department, and this dialog box will come forth
13
Page 17

In the box of Fold Department select the department to add new
employees in, and press OK to transfer the employee, or Cancel to
cancel this action.
Staff Leaving Posts
Some employees may remain in the company, but don’t belong to
any department, which is similar to the currently quite popularized
lay-off phenomenon. Leaving-post employees can be re-employed
through Employ Staff in Department Management. Click Staff Leaving
Posts button to present this dialog box:
14
Page 18

Press Yes (Y) button to transfer the employee to a new department,
or press No (N) to abandon this action.
Staff resign
If a current employee leaves the company, all of his/her records will
be cleleted completely. Be careful to use this function before an
employee really leaves the company. Click Staff resignbutton to present
this dialog box:
About the staff important information is input in relating page,
select department, select staff, press
button, add an item record, type
15
Page 19

information style in words row, input relating material to contents, then
save it.
4、click attendance setup on the pagination label. The windows will
appear:
Attendance valid: if this item is definition , the staff will be
accounted and statistic attendance in accord with the attendance rule and
other select item, otherwise, this staff doesn’t attend the attendance
record, and record as normal on-duty ,E.g. A leader of unit doesn’t go
to attendance, but account on normal duty.
Over time: this item by sign, account the staff over time.
Holiday valid: this item by sign, the staff will have a rest on holiday,
if the staff is on duty, be signed to over time, otherwise, the staff has to
be on duty if the staff is off duty, account to neglect work.
On duty check-in/off duty check-out:
The setup can control if the staff have to check-in or check-out, the
setup authorize in the item is super than it in the shift.
16
Page 20

The method of attendance account and statistics is similar to the
method of attendance setup, it is only that there increase optional which
the over-time has to be registered and examined, in the option, all
over-time must be registered and examined, otherwise, the over-time will
be free.
A current shift list indicate the staff on duty scheduler, the box show
that the staff shift include beginning, stopping date and shift name, if
need to modify the staff shift, first select the shift item in the current shift
list, it will turn blue, then click on ‘-’ button, cancel the current shift,
after this, click on “+” button, add a new shift, the window is following:
17
Page 21

Select a new shift from shift that has setup, definition starting and
stopping date, click on “confirm” button to confirm action, click on
“cancel” button to cancel operation, return attendance setup window.
While staffs shift in normal work hours, you can add a lot of item of
schedule, E.g.:
Starting date stopping date shift
03-3-1 03-5-30 spring
03-6-1 03-9-1 summer
18
Page 22

The intellects arrange staff’s shift be selected, the window will
appear:
The intellects arrange staff’s shift function is that, while staff who
does not arrange shift for period time, but he/she has attendance record,
the system will can define automatically the period time. This function
main use in more change shifts.
Min intellect arrange shift time: when you setup a period time,
example one day, at this time the system will accord with setup period
time to determine after it expire more one day, otherwise not to
determine.
Can use period time: that is, this staff is able to on-duty period time,
click on
button, the selecting period time appear, this shift period time
is shift name list which has been set up in shift management。The
windows following:
Left-click shift names that select from display shift name list add
selected shift. If want to cancel shift where there are used period time,
first define period time, click on
button, it will be canceled.
19
Page 23

After set up, click on “OK“ to save setup, click on “Cancel“ to
give up action, return attendance setting label page.
Input the staff name or attendance NO. in the input box of staff
search bar (you may input one or two character of name or attendance
NO..), click on
one, click on
button to locate the employee as the first qualified
to continue search for.
3.1.4 Administrator setting
Click the ‘maintenance/setting’ sub-item on the menu of
administrator setting, this window will pop up:
20
Page 24

Click on the “administrator” button, the display is following:
Here you should choose to add a department administrator or a
super administrator, the department administrator can not only manage
his/he own staff’s information, but also watch his/he own staff’s
attendance information, thus, if several attendance system are linked
together, each department is allow to manage its own attendance
information, so as to decrease the super administrator work volume, as
well as guaranteeing the punctuality and accuracy of attendance data.
Click on ‘deleted administrator’ button, to cancel an administrator .
But an administrator can not cancel himself, e.g. you enter management
21
Page 25

program as a super administrator, at this time, you can not cancel
yourself, you can cancel other administrator
Click on department administrator or super administrator the
following windows will pop up:
Select the department where an administrator is add, and this staff
name, click on OK button to add this selected staff as one administrator,
click on cancel button to cancel this action, the default code of the fresh
added administrator is his/her won attendance NO..
Click OK button to pop up the window of purview setup as the
following:
22
Page 26

Put a tick beside each selected authorized item; put a Cross to
remove all the authorized item, click OK button to complete
administrator setting.
Click’ modify password’ to modify administrator password, and
administrator is only capable of modifying he/his own password, the
window of modify password is like this:
Type the original password in the input box of old password, type a
23
Page 27
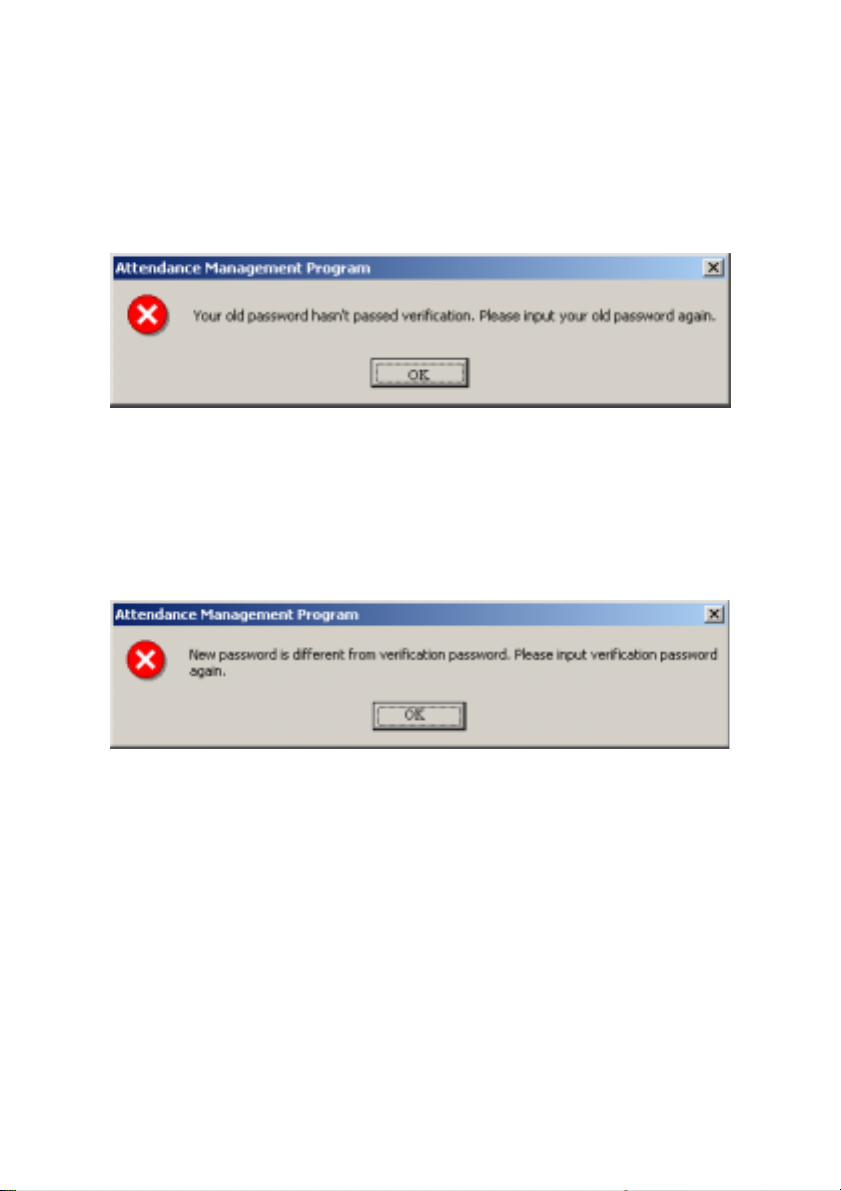
new in the input box of new password, and type the new password again
in the input box of verify new password, press OK button to complete
modify password, or click cancel button to give up this action.
If the original password isn’t input correctly this prompt message
will be shown:
Please type the original password again; if it is not to type correctly
for three times in succession, the system will automatically return back
modify password box.
If the new password is different from the verification password, the
prompt massage will come forth, press OK to modify the verification
password until it is the same with the new password.
Click on ‘operating authorize’ to set administrator authorize. As this
condition, the system demands you set up administrator. While you
cancel the starting prompt information, as well as the staff has been
enrolled
In the system, an administrator has not been registered, the starting
management program will appear prompt following:
24
Page 28

Click ‘cancel’ button, return to main menu, click on ‘OK’ button,
enter administrator operation interface, the operation method is the same
as the forward.
3.1.5 Period time maintenance
Before staffs are arranged schedule, the period time must be set up
to complete, select ‘maintenance/ setting’ menu, click on the ‘period time
maintenance’, can set period time which use to arrange staffs shift, the
interface is following:
25
Page 29

Click button, add new a period time, type name of period time
on-duty time and off-duty time, check-in time range, check-out time
range, record coming late time, record leaving early time and record
work date, only the check-time and check-out time is in the definition
range, there records are valid, as that , attendance account and statistics
depend on there record, as well as selected period time whether is in
check-in and check-out range, input time style; hh:mm:ss.
Record coming lately time
(minute): up illustration is for 5 minute,
it is to show that after 5 minute on-duty will be record coming late, E.g.
illustration, on-duty time7: 50, A 7: 53 check-in time, B 8: 00check in
time, so the A is not coming late, because he check-in time is not over
5minute, the B is coming late for 10 minutes, because he check-in time is
over for 5 minute.
Record leaving early (minute): it is the same as record coming lately,
it is depend on the difference check-out time between off-duty time.
How many work date to record: if set up the value, account and
statistics according to this value amount work date, otherwise, it depend
on attendance rule setup to amount.
Selected a period time, click on
time
。
button to cancel selected period
After the prompt appear, there is any setup period time in system,
can also .according to prompt, set up period time, the window is
following:
26
Page 30

Click “cancel” button, return main menu windows, click on “OK”
button, start to set period time, the window is following:
According to the company real condition, the method of on-duty and
off-duty is selected, is twice attendance (morning and evening), or is four
times (morning, noon, noon, evening), input correspond to on- duty an d
off-duty time, click “next” button to continue setting, the window is
following:
27
Page 31

Definite the time range of check-in and check-out, and whether this
time must be check-in and check-out, click “next” the window is
following:
28
Page 32

On the window, set record coming lately time and record leaving
early time, click on “next” button to enter next window :
29
Page 33

On the window, the system prompt that it will add named ‘day’ a
period time and named ‘normal shift’ a shift, because, before we selected
method that is twice attendance in a day, system will increase two new
period time, each is ‘A.M’ and ‘P.M’. There are three option on the
window, according to need to select, and then click on ‘finish’ button,
complete setup. If selected ‘open period time maintenance window to
detail setting’, click on ‘finish’, enter period time maintenance window.
3.1.6 Shift management
Select maintenance/ setting menu, click shift management sub-item,
and then you can enter shift menu with the following window:
Management Utilize Shift Management Tool Bar to add , cancel,
modify shift. Under the status of adding or modifying shifts (when {
√}
button is valid), you may Add/Modify/Delete Shift Time Periods.
The shift name can’t be repeated, and all the fields in the form can’t be
empty. Application Beginning Date is in the form of yyyy-mm-dd, for
example, NO.vember the 15
March the 6
th
, 2003 is recorded as 2003-03-06.
th
, 2003 is recorded as 2003-10-15, and
30
Page 34

Shift cycling periodicity = periodicity count * periodicity unit
Periodicity unit consist of day, week, months
Can set empty shift that is no no-duty
Click ‘add period time’ button, window will pop up:
Select a period time that is setup in down -drag menu, add shift
period time directly, then selected date of this period time, as well as
selected period time whether is over time, click “OK” button to save
setup, click on “cancel” button to give up the action.
Click on “cancel period time” button, selected period time will be
cancel, if select “cancel all period time” button, display all period time
will be cancel.
3.1.7 Arrange staff’s shift
Select Maintenance/Setup menu, click arrange staff’s shift option,
open the window of arrange staff’s shift Setup. Here, you can maintain
data related to staff’s shifts:
31
Page 35

Select departments and the staffs whose shifts are to be arranged. If
only one employee is selected, in Staff’s Normal Work Hours should be
shown this employee’s normal work hours, which is in the range of shift
arrangement time period.
Arrange depart ment staff’s schedule
Click Arrange department staff’s schedule button to present this
dialog box
32
Page 36

Default shift: select a shift from down-drag menu, make it to default
use for enrolling new staff, after enroll new staff it will give new staff a
shift.
Can schedule shift: able to schedule shift list display name of current
setup shift, when arrange department shift, the shift will display list until
selected shift
Staff schedule
Click on staff schedule button, the dialog box is following:
33
Page 37

On the window the operation is the same with attendance time
setting operation, which sub-item is staff maintenance attendance setup.
Staff shift
Click shift management button to manage shift
Staff temporary shifts arrangement
If one (or several) staff needs to change his/her work hours
temporarily, his/her shift can be arranged temporarily, click staff
temporary arrangement button, pop up dialog box, window is following:
Click “OK” button, enter temporarily schedule, click “Cancel”
button, return staff’s schedule window. First definite schedule time range,
select staff, if you want to select a lot of staffs, can press Ctrl key,
34
Page 38

simultaneously click staff or use all selected button, then click on ‘add
period time’ button, select to add period time on the window of adding
period time, and what day or how many is to add. The operation method
is the same in shift management to add period time, click ‘save
temporarily schedule’ button, to save temporarily schedule or click
cancel to cancel the action.
Temporarily schedule is superior to shift schedule.
Print staff ought on-duty time
Click ‘print staff ought on duty time’ button. It can print all selected
staffs work hours, which is in definition period time.
Cancel temporarily shift
Click ‘cancel temporarily’ button, cancel data of selected staffs in
definition period time back to normal work hours.
Alter shift
To handel verious regular change shift is a software‘s strong
function.
Here, illustrate change shift method with four shifts three times
change a week, example ,there are A, B, C, D four shifts, work hours
schedule is divided into, morning shift, day shift, night shift, three period
time, the application beginning date is 1.
As before instruction finish the operation, the following window
appears:
35
Page 39

Staff work hours schedule list:
date shift Morning shift Day shift Night shift Have rest
1 A B C D
2 D A B C
3 C D A B
4 B C D A
5 A B C D
6 D A B C
7 C D A B
From schedule list, the regular are fund, cycle of all staff work hour
is four day. So, A, B, C, D four shifts’ s four day work hours is divided
into four shifts.
Other shift follow the instruction.
3.1.8 Holiday list
On the statutory holidays, staff will take a rest or vacation with
related rules of law. Then it is required to adjust some setting of the
attendance system. Select holiday list sub-item under of
maintenance/setup, to open the window of holid ay m aint ena nce:
36
Page 40

Utilize holiday list maintenance tool bar to construction holiday
It is need to set holiday’s name, holiday dates and holiday lengths.
3.1.9 Leave style setting
Click ‘leaving setting’ in down-drag menu, the following window
pop up.
Utilize the tool bar to add, delete, and modify leave style as well as
utilize account rule to set leave record rule, not only set to control leave
give up or count, but also set the symbol in record list.
3.1.10 Attendance rule
Select maintenance /setup menu, click ‘attendance rules,’ option, and
this window will pop up
37
Page 41

A setup interface consists of three label pages, first see the base
content of label page.
It is required to set the beginning day for each week or the
beginning date for each month. Some companies calculate their
attendance record from Sunday, and other from the 26th, after these setup,
it is convenience for calculation to select time.
If a shift expires 0:00, it should be defined which workday this shift
belong to.
How many minutes are the max shift period time not more than?
How many minutes is the min shift period time not fewer than.
In order to determine attendance status, verify record correctly, suit
intellect schedule to demand, so that the valid attendance time is not litter
a few minute. Otherwise the system will determine record as invalid
E.g. an interval of five minute, there is valid record at8: 10, so,
among 8: 10 between 8: 15 record is invalid, it is only valid record after 8:
15.
38
Page 42

Leaving status:
there are four methods be select to handle leaving
status
Neglect attendance status: this status is neglected while attendance
statistic handle.
Normal leaving status: this out status is sided normal out.
On Business leaving status: this status is sided on business out.
To examine: make verify for record by hand, examine staff whether
go out.
Over time status: the over time consist of, counting over time, not
counting over time, leader allowing and count over time, three status
Neglect attendance status: attendance statistic does not count over
time
;
Count over time directly: over time does not need to examine, count
it directly:
Examine: make to verify for record by hand, in order to examine
whether staffs have over time
Examine operation is sub-item which attendance abnormal require
and record list other abnormal require.
2
、click attendance count patinas label, attendance account window
appear, it is following:
39
Page 43

You need to set that one work hours account by minute, this value
should be the same with on-duty hour, because statistics result correct
depend on the value.
In the setup, how many minute will be record coming late after
expire on-duty time, how many minute will be record leaving early
before near off-duty, the definition period time must be the same with
period time maintenance setup, otherwise the statistics result is not
correct.
For the clock-in record, how many minute means coming late of
neglect work, for the clock-off record, how many minute means leaving
early or neglect work.
If you’re coming late or leaving early exceed set minutes, there will
be record neglect work
Can setup overtime how many minutes it exceeds clock-off time, so
this will be record overtime.
、Click calculate item on the patinas label, and following window
3
40
Page 44

will pop up:
You can set statistical rules and symbols for staff leave on business,
coming late and leaving early, etc, on the pagination label.
Free over time: over time work not registered in schedule staff
attendance is record as free overtime.
Notice: the system default setup only suit attendance situation
which one day is divided into two period time, if one day is divided into
more than three parts for attendance, please select all item and total them
to ensure the accuracy of the calculation.
Group according to shift period time: this item will define whether
attendance record will be grouped into their corresponding shift period
time. For instance, select all items without clock-in item and group them,
then you will get the total of time without clock-in and clock-out item.
Accord to holiday to organize:
Groups according to times: only count times, how many times are
41
Page 45

display on the record list, no time.
After cumulate to round: select this item’s all time to amount, which
become into corresponding statistic unit, then according to min unit
setting rule to round.
Upward carry: when the statistic data have point, the system will
make after point figure to carry upward as 1. For stance, the min unit is
1-work hours, so that the calculation result of 1.1and 1.9 work hour will
be record 2-work hour.
Round: if the left value which after point figure excess 5, the value
add 1 otherwise the left value is abandon
Downward round: abandon the value no matter how many it is. E.g.
min unit is I work hour, so that the calculation result’s 1.1and 1.9 count 1
work hours
3.1.11 Database setup
The system adopt Microsoft ADO database connect port, default
single Access2000 database, filename is att2000.mdb, you can set up
database connection according with real situation.
When system appear error prompt, you need modify you database
connection setup.
1, How to connect Microsoft Access data method setting:
(1)Provider selects Microsoft Jet 4.0 OLE dB Provider;
42
Page 46

(2)Click next or connect, enter following window:
43
Page 47

Click
button, select database filename
A: For a single computer
On the window of File Manager, select the database file. The default
file path is C:\Program Files\Att\att2000.mdb
B: For a network
For instance, three attendance checking systems are linked together,
with their computers labeled with Computer1,Computer2, Computer3
44
Page 48

respectively and Computer1 is the mainframe. First, set the installation
directory of the attendance checking system on Computer1 as pool, and
grant Computer2 and Computer3 read-write access to Computer1.
Database connection on Computer1 is pointed to the local attendance
checking database, and database connection on Computer2 and
Computer is pointed to the database on Computer1. Thus the three
machines are able to share data.
2. How to connect to SQL Server:
If you want to use a network database, first you should establish the
Fingerprint Attendance Checking System database on the database server.
In the installation directory of this attendance checking system, you can
find a file with the name of sqlserver.sql, which is the SQL script for
establishing the Fingerprint Attendance Checking System database on
MicroSoft SQL Server 7.0 . If you are using database servers other than
MicroSoft SQL Server 7.0, please refer to this document to establish the
Fingerprint Attendance Checking System database.
Provider Select Microsoft OLE DB Provider for SQL Server, click
next or connrctor to enter this following window:
45
Page 49

Confirm the server name for storing this database, information, and
the database name for logging on this server. Click OK button to
complete settings.
3.2. Handle attendance
46
Page 50

3.2.1 Handle attendance
Click ‘handle attendance’ on main menu, pop up following menu:
3.2.2 Employee leaving on business / asking for
leave
When staff leaving on business or ask for leave are unable to attend
normal attendance, in order to ensure end statistic result is correct, it is
required that utilize the function to set. Click ‘staff leaving on business/
ask leave’ command on menu, the window is following:
For stance, illustrate with general company for staff Mr. Wang set
47
Page 51

asking leave operation, the process is like this:
First select departments and Employees, Confirm Beginning/Ending
Date. There are tow methods to add leaving on business or asking leave:
One method:
After selecting departments, staff and date/time, lift-click on the box
of Select Set Asking-for-leave Time, and hold, drag to draw a time
period bar, then loosen the left button of the mouse, and the following
dialog box of Select Leave Types will pop up
Choose asking leave s from the selected style box, type reason in the
cause box, click ‘OK’ button to save adding leave, click ‘cancel’ button
to cancel all action , after, the window is following.
48
Page 52

You can modify one asking –for leave time period on the window
You may move the cursor of the mouse to one end of the
asking-for-leave time bar, and when the cursor changes to
,
right-clickand hold, drag the mouse to modify asking-for-leave time.
You may also move the cursor to the asking-for-leave bar, and when
the cursor changes to
, right-click, hold and drag to move the
asking-for-leave time as a whole.
If you want to modify accurate time ,and when the cursor changes to
, duble-left-click or click ‘modify’ button on the setup window. The
following dialog box wil appear.
49
Page 53

Type correct time into time box, click ‘OK’ button to save modify
two methods:
Click create button on the operation window, the pop-up window is
following:
50
Page 54

Choose the date, time、leave style, then type into asking leave reason,
click ‘OK’ button to save setup , click ‘cancel’ button to cancel the action
After saving, the window as before.
If you want to cancel one item setup, E.g. just set asking-for-leave
will be canceled, you can left-click on the asking-for-leave bar which
want cancel, then press
cursor to end of asking-for-leave time, when cursor become
“DEL”key to cancel. Or you can drag mouse
, left-click,
hold and drag mouse till all asking-for-leave time bar disappear, by the
time the caution box will appear.
Press ‘yes’ key to cancel the setup, press ‘no’ key to abandon the
action.
51
Page 55

You may utilize cancel setup to left-click cancel ‘button’ on the
setup window, after click, the following prompt box appear;
Real to cancel the item, click ‘yes (Y)’ button, abandon operation to
click ‘no (N)’ button
When you add leaving on business time period, and if this time
period overlap exited time period, the following caution box will appear:
Click ‘yes’ key, the operation is invalid.
The system provide some only sample leave style, if you want add
leave style, can enter leave in maintenance /setup to add.
Click ‘establish list’ button on the setup window, the following
window will appear:
52
Page 56

May utilize ‘zoo’ button to alter display area, click ‘save’ button,
will save the report file to the disk.
3.2.3 Handle staff forgetting to check-in
If one staff forgets to check in due to some special reasons, this
function of Handle Staff’s Forgetting to Check In can be used to add a
clock-in record. Click Handle Staff’s Forgetting To Check In under the
menu of Handle Attendance Checking, and the following dialog box will
pop up:
53
Page 57

You first select department and staff, and choose adding record style,
Set record the date and time, click ‘add’ to add anew clock-in record
When a new record has been added, the add button becomes gray and
invalid. But it will become bright and valid again after the employee has
been changed to another one, or the clock-out time has been changed.
Click the close button to close this dialog box and return to the main
menu.
There are many select status of not only clock-in and clo ck-o ut, bu t
also other option in select box, the window is following.
3.2.4 Handle staff forgetting to check-out
If one staff forgets to check out due to some special reasons, this
function of hand staff forgeetting to check-out can be used to add a
clock-out record.,the operation process is the same with operation of to
handle staff forgetting to check-out.see up part.
3.2.5 Handle coming late collectively
If part or all of the staff of one department come late with reason,
54
Page 58

this function can be used to modify staff clock-in time, click “handle
coming late collectively” on the down drag menu, and the following
dialog box will pop up:
In the department option, select the department to which the staff
who come late collectively belong and then click the staff that you want
to select in the staff option box, if you want choose staff more than one,
you can click the mouse while press Ctrl key. Click selected all buttons
to select all staff, click cancel all buttons to call off all selected staff.
Selected style consist of ‘coming late collectively’ and ‘leaving
early collectively’, when you select, only lift-click on item you are select.
Neglect clock-in record means to neglect selected staff all clock-in
record during the time period defined by the form time box and the to
time box, clock-in time after modification means the time of the clock-in
records to be adds in.
Click ‘OK’ button to delete all neglect clock-in records or add
clock-in record after modification, and to return the main menu.
Click ‘cancel’ to abandon this action and return main menu.
3.2.6 Handle leaving early collectively
If part or all of the staff of one department leaving early with reason ,
this function can be used to modify staff clock-out time, the operation
process is the same with to handle coming late collectively , it is only to
select leaving early collectively.
55
Page 59

3.3. Search/print
3.3.1 search/print
Click ‘handle attendance’ on the main menu, pop up menu is
following,
3.3.2 Attendance record
Click attendance record sub-item on the main window of
require/print, and the following window will pop up:
Select staff define Beginning Date/Time, and Ending Date/time, and
click search button, selected employees’ attendance records during the
defined time period will be shown in the display box of Search Result in
the lower part of the window.
56
Page 60

If you want modify the color which clock-in and clock-out record
display, double-left click color signature, pop up color option; select
color for need to save. Click ‘preview’ button, appear following window
Click ‘export’ button, you can export searching result, the operation
method is the same as the operation which attendance record export.
Some times, it, because mistake operates and real situation change,
need to cancel modification of attendance record, as this time, you may
utilize restore function to make it real.
57
Page 61

3.3.3 Current staff’s at-post Status
To check employees who are currently at post or not at post
(including leaving work normally), you can click Current Staff’s At-post
Status sub-item under Search/print, and the window is like this:
Select Departments and date t, click All or At Post or Not At Post,
select query type, click Search button, and you can find out current
staff’s at-post status. One query result likes this
58
Page 62

Click ‘preview’ button to preview record list of searching result, the
window is following,
After searching, click ‘EXIT’ button to exit or
menu
return to main
3.3.4 Attendance abnormal search and record
In attendance management, we usually need to search abnormal
situation and to print various attendance record, this function can be used
to meet need, this attendance is able to establish attendance statistic
record per day, attendance statistic total list
staff on-off-duty time list, can also create itself attendance list.
As well as, attendance abnormal searching and record list are able to
modify attendance abnormal and record list, there are attendance record
abnormal situation
attendance statistic four operation windows .Attendance record abnormal
situation is to search for origin record whether abnormal and to modify
attendance record situation. Shift abnormal situation main check coming
late, leaving early, neglect work situation, and set asking leave, leaving
on business, forget clock-in or clock –out to handle. Other abnormal
situation main handle overtime and leaving; attendance statistic establish
all account and statistic record list.
、shift abnormal situation、other abnormal situation and
、department statistic list and
59
Page 63

Click abnormal search on the main window, or abnormality search
sub-item under search/print and the following window will appear.
Click display/hide button, it will show the function of display or hide
on right tool column.
Abnormal divide into three kinds: attendance record abnormal
situation, shift abnormal situation, other normal situation. Click
attendance abnormal situation page label, to select department, staff and
to define start date/time, ending date/time, click “search count” button,
the window is following.
60
Page 64

The system depend on the setup rule, sift, method of count to
determine the situation whether correct .the system determine these
records which locate without clock-in, clock-out period time setup scope
are invalid. E.g. Mrs. on the 4.march. His attendance record was
determined invalid, and that day, it is only one record, so when the
system statistic, it will be think neglect work, this may be not true at this
situation. the administrator need to know what happen the staff is
forgetting clock-out or leaving on business to unable clock -out, if
forgetting need to patch a clock-out record, if leaving on business, to
patch record on business leave.
The system are able to modify record, which can be determined, and
to correct, the correction situation column is already corrected situation,
while statistic, utilize the situation to count.
Tool column
Change indication color:
able to change various statue appear color
click the window will appear;
61
Page 65

Click color piece on every status, choose color you need on the
window, confirm to click ‘OK’ button, and save.
Change: definite that status record in display, click the following
window will appear:
Put check it shows selected status, appear on the display box, utilize
to click status to switch between selected and unselected.
Modify new status: able to make present select status become select
status, selected a record, click the window is following:
Because there is all clock-in record on the picture, so that the
62
Page 66

clock-in status is unable to use, can click to select on other status.
Cancel attendance record able to sign select attendance to cancel
status, after use the function, the tool column will add two item, the
window is following:
Utilize all setting operation: after selected this item, all setting
operation which display in operation column is valid before this,
Cancel all setup operation: after select this item, all setting
operation is invalid before this, all operation will disappear in operation
column.
Cancel current record operation: only cancel current record
operation.
Make all intellect schedule record to become over time:
make
system intellect schedule record to overtime.
Handle forgetting clock-in or clock-out: the same as attendance
handling operation.
63
Page 67

Search modification record log: the same as sub-item of
search/print attendance record operation.
In the search record display window, right –click. The menu will
appear as follow:
Export data:
the same as ‘export data’ button function on the
window.
Other operation is the same as to export data before.
64
Page 68

Establish current data record list: the same as ‘preview record
list’ to establish current data record list function, make searched
attendance record as record list to export.
Able to list prints to export, save, search for in list, etc. operation
Restore data (from beginning to current position): searched
record result copy directly, form duplicating to current position) and can
patch in Excel list directly
Restore data (from beginning to ending): searched record result
copy from current copying position to ending, and can patch to Excel list
directly.
Data row:
select item name on the searching window appearing,
click pop up menu is following,
Check show appearing words, able to click correspond word name to
change selected status
Display all row: all item name of data row display on search
window
Hide all rows: all item name of data row except surname and name
hide on the search window, only show surname and name
Save data row setting: item name on which the search window
appears can be saved, load data row setting to use.
65
Page 69

Load data row setting: According to store data row to show item
Record list preview: click ‘record list preview’ button, pop up
following menu:
Select you need statistic record list, and establish record list you
need, after it has counted, to establish other record list not need count
again.
Everyday attendance statistic record list style is following.
Click ‘watch scale’ button to watch record list at a ratio,
click
button to open saved record list file, click floppy disk button to
save record list as file, click “print” button to directly print search result
on the printer
Click
。
button to recall search menu, window is following:
66
Page 70

Able to type text to search on the window, the system will
automatically find result and display it on top-left corner of appear
column
Attendance statistic total list style, following:
Department attendance statistic total list style, following
67
Page 71

Staff’s on-off-duty time list style, following:
You are able to establish current data record list, pop up window is
following.
68
Page 72

Click shift abnormal situation page label, pop up window is
following:
Sift abnormal status: Click it, the selected menu appear, able to
select these abnormal statue display, put check to indicate the display be
selected, it show abnormal situation.
Sift period time: click it, the selected menu appear, able to select
these period time abnormal situation, put check on ahead of period time’s
name to indicate selected, it show this period time abnormal situation.
69
Page 73

Setting asking for leave/leaving on business: This accord with
asking for leave/leaving on business of attendance handling setup
Click abnormal situation page label, appear following
If attendance rule want examine leaving on business and overtim e
setting situation, so that examine situation column is empty, if definite
status, the examine status will appear correspond situation
Restore origin status before examine: it is only valid to examine
record, restore record status to origin status before examining
All overtime invalid:
the record which indicate overtime in
abnormal situation is invalid to handle
All free overtime valid: the system determines all staff without
arranging attendance record is free overtime, if this item is selected,
the system determine free overtime is overtime.
The status display overtime in examined column, and display two
new item.
Save examine record: confirm examined, make examined status to
become has examined status.
Cancel this examine: don’t save examined which have done, make
70
Page 74

examined record save as origin status.
All leaving be record on business leaving: make all leave to record
leaving on business
Cancel all leaving on business: will cancel all leaving on business,
。
all leaving is common leaving or handle it as real situation.
Setting this attendance invalid: make option record status to
become invalid
Click attendance statistics page label, appear window is following:
The display is statistic result list, right-click on display box, appear
menu:
The operation method is the same as before
。
3.4 Data
3.4.1 Data menu
Click data item on main interface, the pop-up menu is following,
71
Page 75

3.4.2 Initial system
Click initial system menu, this pop-up window is following:
Caution: if confirm you’re selected, the system will clear all staff’s
data and all attendance data. Before this operation you must be carefully.
Click ‘yes(Y)’ button, the system will clear all data, and return
initial status just system install.
Click
data.
‘no(N)’button, the system return main menu without clear
3.4.3 Clear obsolete data
Click this item on the menu, this pop-up menu will appear:
72
Page 76

r:
After your system has been used for a period of time, a big amount
of obsolete data are saved in the database, which not only occupy hard
disk space but also affect operation speed. Then you can clear these
useless data by using this function.
When clearing attendance clock-in and attendance exception records,
you are required to back up clock-in data to files. You can click
corresponding txt input box to type file name,or click
button to
confirm your data file’s saving path and file name, notice that you should
choose a new filename, if the name has existed the system will suggest
you to define a new filename
Input the close date of the data that you want to clear in close date
box, and the close date should be ten days before the current day you will
73
Page 77

clear the corresponding data after clicking OK, and prompt messages will
display’
Attendance time setup data means to clear obsolete staff’s shift
schedule data, select close data for clearing record, click OK and you will
clear obsolete staff’s shift schedule data
In the terms of Microsoft Access database, can click “compress
attendance database file” button to compact the database.
After clearing data, click
3.4.4 Back up database
In order to ensure data security and to restore, we suggest you back up
database in regular, click command on the men, select position to save
file, input filename (may be defined filename), click “save” button.
When origin database was damage, it need to restore, you should change
back up filename asATT2000.mdb, copy the file under attendance install
dir to cover same name file, but the action only restore these data to
before back up. E.g. you back up data in 31.3, so that these data be
restored is only one before 31.3.
to return the main menu
3.4.5 Import attendance data
To import attendance record in another machine or old record to the
current attendance software click this command on the menu and this
operation window will pop up:
74
Page 78

1. import from files
To import from files can import following some kinds of data:
secret attendance clock-in data (*.abt), attendance clock-in data (*.txt),
back up attendance database files (*.attbackup.mdb), 1.1 version
fingerprint attendance system database file (att.mdb) and attendance
system database file (*.mdb). Usual attendance and attendance clock-in
are used, to import attendance system database file can import all
information of original database, to import attendance clock-in data only
import staff attendance data.
Click
button, and you will open a file manger, select to import
file style, select the path and filename of the data file to import, and then
click “OK”, return the window illustrate with up picture, click “import”
can import data’
2. import from database
Import from database means to import attendance data from
attendance database backups, and the data include staff information, shift
information, clock-in records, etc. You can import the data from
databases of previous version, or databases of the same version. For the
data format of database files of versions previous to 1.2 differs from that
of Version 1.2X, if the version of the database file that you want to
75
Page 79

import is below 1.2(not including 1.2), please select versions before1.2
option; Otherwise please select 2.2x option.
Before importing data, if it is unnecessary to remain the data in your
system, please first select initialize the system. This is because if some
data remaining in the current system overlap with the data that will
import, errors will appear when importing data, and data’s importing
speed will slow down.
Click versions1.2 or version 1.2xbutton, and a file manager will pop up.
Enter the path and file name of the database to import, and click Open,
the system will import data automatically.
If your database is SQL Server database, you can click button to begin
settings. For detailed information please refer to Database Setup.
After importing data, click
to go back to the main menu.
3.4.6 Export attendance data
This function is mainly used to back up all attendance data in the
current attendance system or clock-in data, click this command on the
menu and the following operation window will pop up
76
Page 80

1. Export to files
it can export four file style: secret attendance data (*.abt),
attendance check-in data (*.txt), back up attendance data
(*.attbackup.mdb) and attendance system database file (*.mdb)
click
button, a file manger menu will pop up confirm the path and file
name for the back file and click open.
2. Export to databases
This option means to back up all data, such as staff information shift
information and clock-in record to a database file. Click quickly selects
database file button and you will open a file manger menu. Confirm the
path and file name for the back up and click open.
If your database is SQL Server database, click
button to begin
setting, for detailed please see Database setup
Notice you must choose a new filename if the file has existed the
system will suggest you to define new file name.
Exporting record will not lead to clean data in database.
After finish to export data, click ‘X’ up-right concern, return main
menu.
77
Page 81

3.4.7 Log on system again
While a system run, it is require to change administrator, utilize this
function, make another administrator to log on system again as he/her ID.
The operation interface and operation method is the same with to log on
administrator as system starting
3.4.8 Exit
Click exit order on menu, or click on the ‘exit system’ in the tools
bar, end system run, return Windows.
78
Page 82

4 operating help
4.1 Confirm beginning date Export Data
Next let’s take searching staff’s attendance records as an example to
illustrate concrete operations for exporting data:
As shown in the above picture, click Export button to pop up the
following window:
79
Page 83

Tick checks before the fields to export. If next time you want to
select the same fields to export data, you can enter a item name in the
box of Predefined Items, and click OK to save the selected fields in this
item. Next time, if you want to call your previous choices, select a name
saved in the box of Predefined Items, and click OK to enter the following
window:
80
Page 84

Enter a filename for this file to save in the column of Filename,
select the type to save this file, and then you will export the selected data
to this file. You can save a file in five formats: Excel files {Microsoft
Excel File (*.xls)}, DBF formed database files, right justified text files,
text files separated by TAB, and text files separated by semicolons.
4.2 Select Department and Employee
Click the box of Department to expand its tree-formed dropdown
box and select the department in which the employee on official business
is. Click the box of Employee to stretch its dropdown box, and select the
employee who will leave on official business.
81
Page 85

4.3 Confirm Beginning/Ending Date
In the box of Beginning/Ending Date click the box of “From”, and
click
“To”, and click
box for dates, click
or downward, and click
downward. Click on the date you want to select it.
button to select the beginning date. Then click the box of
button to select the ending date. In the dropdown
or button to move the date one month upward
or to move the date one year upward or
4.4 Confirm Date
In the box of Date/Time click
the box of Time click
the time. In the dropdown box of Date, click
the date one month upward or downward. Click the year number to
change the year directly, or click
upward or downward. Click on the date you want to select the it.
button to select the time or directly change
button to select the date, and in
or button to move
button to move the date one year
4.5 Select Employee
The option box of Employee is like this:
82
Page 86

Move the mouse to the row the employee to select is in, click the
left button of the mouse, and this row will turn blue.
To select more than one employee, press Ctrl.
4.6 Datasheet Process Tool Bar
The Datasheet Process Tool Bar contains the following operation
buttons:
83
Page 87

In the datasheet, the row marked with symbol is the current row,
and all operations for he sheet is conducted in the current row.
Click buttons to carry out corresponding operations for the datasheet.
First: To move the current row to the first row.
Previous: To move the current row one row upward.
Next: To move the current row one row downward.
Last: To move the current row to the last row.
Add: To add a new row in which new data can be entered in, and
the current row is the new row.
Delete: To delete the current row.
Edit: To modify the data in the current row.
Save: To save the data after edition or in the newly added row.
Cancel: To cancel the result of adding a new row or editing the data.
Under the status of adding or editing, the result of moving data will
be automatically saved.
In the datasheet, click on the row to select it, and select multiple
rows by pressing Ctrl and clicking at the same time when possible. The
selected rows will change to blue.
4.7 Select Department
The option box of Department is like this:
84
Page 88

Click the left button of the mouse on the department name, and you
will select this department when the name turns blue.
4.8 Time Period Management
The display box for Time Period is like this:
85
Page 89

Generate New Time Period: Move the mouse to the time you want,
pull the mouse while pressing its left button, and loosen the mouse to
generate a new time period.
Edit Time Period: Move the mouse to one end of the time period to
edit. When the cursor changes to
, move the mouse while pressing its
right button, and loosen the mouse to get the time period you want. In
addiction, you may double-click on the time period to modify to enter a
dialog box shown as the right picture on the right. Here, you can adjust
the beginning/ending time for this time period.
Move Time Period: Move the cursor of the mouse to the time period
to modify. When the cursor changes to
, move the mouse while
pressing its right button, and you may move the time period as a whole.
Delete Time Period: Move the mouse to the time period to modify.
When the cursor changes to
, move the time period to make it
disappear. Besides, you may click the time period, and press Del to
delete this time period.
86
Page 90

5 Common Question and Answer
1. As the administrator changed or forget password reason, can not
enter the program, what will I to do?
Answer: the computer has to have been installed Office2000 at first, then
enter the attendance program installing catalog, find the att2000.mdb file,
double-click, and find the ‘userinfo’ list in the appear interface,
double-click, to find ‘securityflags’ word, cancel all figure of list in the
sentence (15 indicate administrator).
2.
How does to clean the register of attendance administrator?
Answer: can use communication of attendance device between
computers, after it’s successful, enter attendance device management
interface, click on the ‘cancel administrator’ button, able to clean
attendance device administrator, after to break out connection, then can
enter attendance device menu style.
3.
I forget the password of database, how to do?
Answer: enter ‘maintenance and setting’ of management program, click
on the ‘setting password of database’, then have no need to verify old
password, so can set up new password of database.
4.
Some time it is difficult to register or contrast in the independently
attendance device, how I to solve?
Answer: in the condition, there are two ways to solve, one way is that put
finger on front head or nose to rub some times, enhance finger wet for
register and contrasting; two way is that put finger on fingerscan for
more 1 to 2 second time when attendance device appear’ please take
away finger, the method can enhance success.
The both ways have nothing to do, can use ID code plus password to
register.
5.
The liquid screen is too dim, If it can be modifying, or not?
Answer: the liquid screen is not adjusted by user, it is need that returns
our company to adjust by engineer.
6.
How to use the business check-in and business check-out?
Answer: when the staff need to go out, the staff should check -out on
attendance device. When the staffs come back, select business check-in.
87
Page 91

7.
While inquire attendance record, selected the highest department,
selected all staff, why cannot see record, but it’s true display that
saved downloading data?
Answer: (1) it is maybe the data record time expire inquire range, want to
watch the origin record time, must open attendance database
(att2000.mdb), enter check-in-out list, can see all origin record, prove
that origin attendance record is in the range which you inquire, specific
attention year;
(2) it is maybe that add a highest department after the general
company name was canceled, finish installing the default highest
department general company can not be cancel, but it is able to be
modify in attendance.
8.
I have done shift, why no the result of account and statistics indicate
leave, come late, gone early?
Answer: first enter management to check the setup shift, in normal
condition the name of shift corresponding right time box appear in blue
color, if there isn’t any problem, enter staff shift list, watch the starting
date of staff shift, the starting date is before the account and statistics
time range, isn’t it? If it isn’t, arrange shift again, fix new starting date.
9.
How to cancel the schedule which has been set up?
Answer: you can ahead add a empty schedule, then use the empty
schedule change the schedule wich will be cancel in arranging staff, enter
schedule management to cancel corresponding schedule, OK.
10.
Why the data which has been loaded down and stored record is litter
than loaded down data?
Answer: while loaded down and record, the attendance program can
determine loaded down record, the repeat record will be cancel
automatically, the stor ed record will not be store again.
11.
Why the loaded record appear, but cannot find it while inquire?
Answer: confirm time range you inquire is accord with attendance time
of loaded record, or it’s not. can watch attendance record day, month,
year, after loaded down record, or open database (att2000.mdb), enter
check-in-out scheduler, can see all origin record, confirm time of
attendance origin record is among the range of inquire, pay attention
88
Page 92

years record specifically, some independence equipment set time is not
real, result in attendance record time isn’t correct.
12.
Why I attendance normally, but it is show I stay away from work
without leave or good reason?
Answer: examine your period time setting first, confirm your attendance
record is among the range of check-out time, example, you setup the
check-out time is from 17: 00 to 18: 00, you check-out time record is16:
30, so that the record is invalid, system will indicate neglect afternoon (in
attendance rule, no check-out is neglect) next, examine you attendance
time is correct, or it’s not.
13.
Why there are come late and gone early in the attendance account
and statistics shift, but there aren’t its record in inquiring record?
Answer: please examine the setting of attendance account in attendance
rule, see if ‘on duty check-in record: come late/gone early’ have been
sign or have not, if it has been labeled so that the neglect system will
indicate come late/gone early.
14.
Leaders of company don’t require check-in-out, but their attendance
demand account, how do it to set?
Answer: (1)enter attendance setting under staff maintenance, cancel valid
attendance;
(2)set up a period time of unnecessary to check-in-out, produce a
schedule, the schedule is used to account with staff. OK
15.
Why cannot I add new schedule in shift management?
Answer: the program has to set up time period of shift, and then can set
up schedule, please see the time period of shift is set, or it’s not.
89
Page 93

6.Contact Information
Digital Peripheral Solutions, Inc.
Mailing Address:
Digital Peripheral Solutions, Inc.
8015 E. Crystal Dr. Anaheim, CA 92807
Phone:
Company Toll Free: 877-998-3440 OR 714-998-3440 Technical
Support: 877.998.3440.
Fax: 714.998.3509
Email:
Sales Department: sales@dpsi-usa.com
Technical Support: ts@dpsi-usa.com
Customer Service : cs@dpsi-usa.com
90
 Loading...