

Page 1
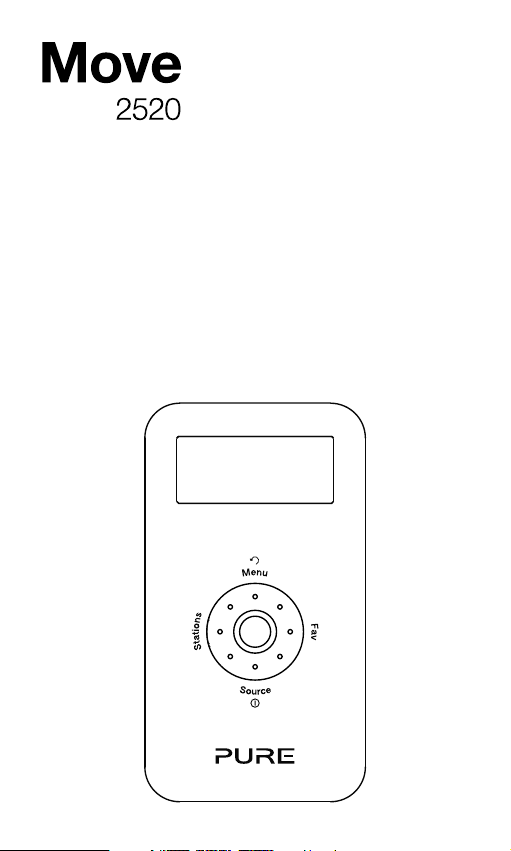
Page 2

Page 3
Thank you for choosing Move 2520. This manual
will get you up and running in no time and
explains how to make the most of Move 2520’s
great features. If you need additional help with
topics not covered in this manual, please visit the
Pure support pages at www.pure.com.
1
Page 4
Move 2520 Safety Instructions
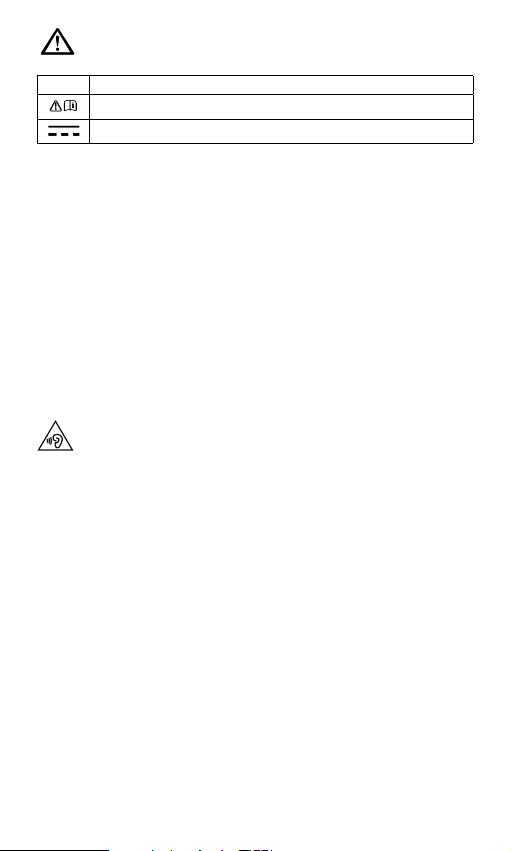
Symbols used on this product
Symbol Description
This symbol is used on the product to indicate a caution and that instructions
should be read before use.
This symbol indicates DC voltage.
1. Read these instructions – All the safety and operating instructions should be read before
this product is operated.
2. Keep these instructions – The safety and operating instructions should be
retained for future reference.
3. Heed all warnings – All warnings on the appliance and in the operating instructions
should be adhered to.
4. Follow all instructions – All operating and use instructions should be followed.
5. Clean only with dry cloth.
6. Do not install near any heat sources such as radiators, heat registers, stoves, or other
apparatus (including amplifiers) that produce heat.
7. Only use attachments/accessories specified by the manufacturer.
8. Unplug the apparatus during lightning storms or when unused for long periods of time.
9. Refer all servicing to qualified personnel. Servicing is required when the apparatus has
been damaged in any way, does not operate normally, or has been dropped.
10. To reduce the risk of electric shock, do not remove plastic cover or screws as there are
no user-serviceable parts inside. Refer servicing to qualified personnel.
11. Avoid liquids getting into Move. Should not be immersed in water, or used where this
may happen, such as a bathroom.
12. The power adaptor is used as the disconnect device & must remain readily accessible
and operable.
13. Use only the power supply provided. (Model: KSLFB0500080W1UV-1 or
SW0500800-AM) with Micro USB DC connection.
14. Do not use the power adaptor for any other purpose other than to power the supplied
product.
Damage to hearing can occur with consistent exposure to high volume when using
headphones. Always check the volume level before inserting headphones into
your ears.
Use of headphones while operating a vehicle is not recommended and is illegal in some
areas. Stop listening to your Move if you find it distracting while operating any type of vehicle
or performing any other activity that requires your full attention.
ChargePAK M1 Safety Instructions
1. Read the instructions for ChargePAK use in this document.
2. Only use your ChargePAK with original Pure products. Use only the original Pure
ChargePAK M1.
3. Store ChargePAK in a cool, dry place at normal room temperature. Remove from
devices that will be stored unused for extended periods.
4. Do not puncture, modify, drop, throw, or cause other unnecessary shocks to your
ChargePAK. May present a risk of fire, explosion, or chemical burn if mistreated.
5. Do not dispose of ChargePAK in a fire or incinerator, or leave in hot places such as a
motor car under direct sunlight. Do not store near oven, stove, or other heat source.
6. Do not connect ChargePAK directly to an electrical source, such as a building outlet
or automobile power-point. Do not place into a microwave oven, or any other highpressure container.
7. Danger of explosion if the battery is incorrectly replaced (ensure correct polarity).
Replace only with the same type. The battery shall not be exposed to excessive heat
such as sunshine, fire or similar. Attention is drawn to the environmental aspects of
battery disposal.
8. Do not immerse ChargePAK in water or otherwise expose it to liquids.
9. Do not short circuit ChargePAK.
10. Do not use or charge a ChargePAK that appears to be leaking, discoloured, rusty,
deformed; emitting an odour; or is otherwise abnormal.
11. Do not touch a leaking ChargePAK directly; wear protective material to remove and
dispose of it properly immediately.
12. Do not store where children may have access.
13. Dispose of ChargePAK as per normal rechargeable batteries according to the local laws
and regulations of your region. Some batteries may be recycled, and may be accepted
for disposal at your local recycling centre.
2
Page 5

Contents
4 What’s in the box?
5 Quick guide to Move 2520
6 Getting started
6 Insert the ChargePAK
7 Connect headphones
7 Switch on
7 Select language
7 Autotune
8 Reading the display
9 Using the navigation dial
10 Listening to digital radio
10 Listening to FM radio
11 Favourites
12 Settings
12 Time (12/24h)
12 Language
12 Factory reset
12 Version
12 Update
13 FM stereo
13 Autotune
13 Sleep timer
14 Audio settings
14 Display settings
15 Help and specifications
15 Hints and tips
15 Technical specifications
17 Pure Warranty Statement for Australia
3
Page 6
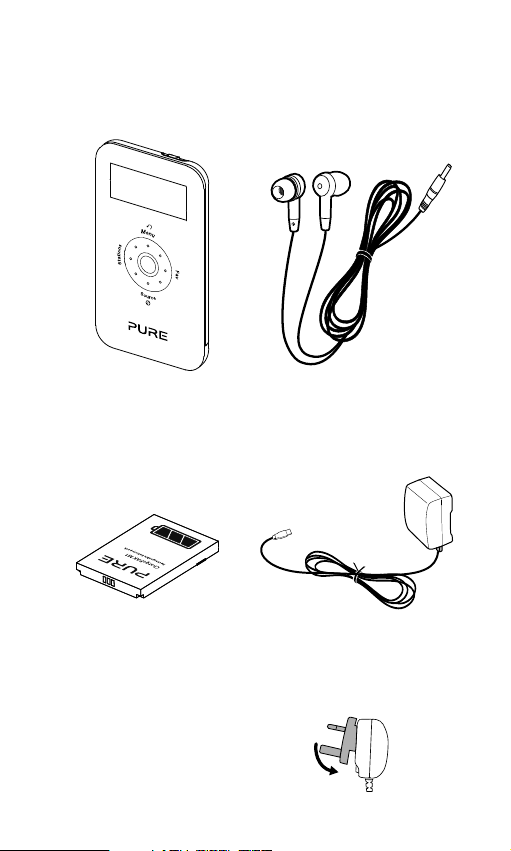
What’s in the box?
Move 2520 Noise-isolating headphones
ChargePAK M1
(Plus a choice of small,
medium or large earbuds)
Power adapter
(Attach the appropriate pins for
your region)
4
Page 7

Quick guide to Move 2520
Display
Navigation dial
See page 9 for information.
Select button
Top
Bottom
Lock switch
Slide to lock the navigation dial
and the Select button to prevent
accidental use.
Micro USB socket
For connecting the mains
adapter or a USB cable (for
software updates).
3.5mm socket
For headphones.
5
Page 8

Getting started
Insert the ChargePAK
1. Press plastic catch on rear and slide the rear cover and lift off as
shown.
2. Insert ChargePAK M1. It can only be inserted one way, with the
ChargePAK logo facing up.
3. Once ChargePAK M1 is securely inserted, place the rear cover
back on. Press down slightly near the catch while sliding the cover
back on.
Note: Before using Move for the first time, we recommend that you
charge it for at least 3 hours.
Remove ChargePAK M1 if you are storing Move unused for a long
period.
Under normal circumstances your ChargePAK M1 will give you
years of trouble-free use, but as with all rechargeable batteries its
performance will gradually reduce with age. To replace it, visit your
local Pure dealer or buy direct from www.pure.com.
6
Page 9

Connect headphones
For optimum sound quality and noise
isolation, attach the size of earbuds that best
fit your ears.
Unravel the earphone cable and plug the
headphones into the socket on the bottom
of Move.
Warning: Damage to hearing can occur with
consistent exposure to high volume when
using headphones. Always check the volume
level before using Move.
Note: Because the headphone cable doubles
as an aerial, using headphones with shorter
or asymmetrical cables or using headphones
with volume controls may affect reception.
Move 2520
Language *
English
Scanning... 32
BBC Radio 2
Now playing: P
Switch on
Press Source to switch Move on.
Select language
Turn the navigation dial and press Select to
choose from English, French, German or
Italian.
ST
DR
Autotune
Move will perform an autotune for digital
stations and tune to a station when complete.
The number of stations found is displayed
during an autotune.
ST
DR
Note: An autotune can take up to two
minutes.
7
Page 10

Reading the display
Battery charge level
Animated when charging.
Removed when fully
charged.
Current time
AM/PM
indicator
AM
PM
1Xtra - BBC
Bringing you hot
ST
Stereo signal
DR
Digital radio
FM
FM radio
ST
DR
FM
8
Volume/mute
Text area
Displays menus,
settings and station
information
Sleep timer
Displayed when the sleep
timer is set
Signal strength
Page 11

Using the navigation dial
Turn
ST
During normal listening
25
DR
Turn the dial to adjust the volume level.
ST
When in a menu
DR
Turn the dial to scroll through options.
Select (centre button)
Confirm selections.
Menu
Access options and settings. Press again to
go back one step.
Fav
Press to display the favourites list. Hold to
save a favourite. You can save up to 10 digital
and 10 FM stations as favourites.
Source (also On/Off)
Switch between digital and FM radio. Press to
switch on and hold to switch off.
Stations
Displays the station list in digital radio or
tuning screen in FM.
Volume
Digital radio
Settings
Press
9
Page 12

Listening to digital radio
ST
DR
Station list
Absolute
Tuning
Press Stations to show the station list. Turn
the navigation dial to scroll through stations
and press Select to tune. Press Menu or
Stations to exit.
Listening to FM radio
ST
Tuning
FM tuning
87.50MHz
Scanning
88.30MHz
FM
Press Stations to show the FM tuning screen
then use one of the following methods to find
the station you want:
Seek tune
FM
Press left (Stations) or right (Fav) on the
navigation dial to seek to the previous or next
station with a strong signal. Press Select to
exit.
Manual tune
Turn the navigation dial to manually tune to a
frequency. Press Select to exit.
10
Page 13

Favourites
ST
Favourites
3: Empty
Favourite 3
Stored
Favourites
3: Absolute
DR
ST
DR
ST
DR
Saving a favourite
You can save up to 10 digital and 10 FM
stations as favourites for easy access.
1. Press Fav to show the favourites list.
2. Turn the navigation dial to scroll through
favourites.
3. Press and hold Fav or Select to save the
current station as a favourite. You can
save over existing favourites.
Selecting a favourite
1. Press Fav to show the favourites list.
2. Turn the navigation dial to scroll through
favourites.
3. Press Select to tune.
11
Page 14

Settings
Press Menu, select Settings and choose a setting to adjust:
ST
DR
Time (12h/24h)
24 hour
Language *
English
Factory reset?
<No> Yes
Version
V1.0_M_dab-mmi
Update?
<No> Yes
Time (12h/24h)
Switch between 12 or 24 hour clock.
ST
DR
Language
Select a menu language from English,
French, German or Italian.
ST
DR
Factory reset
Select Yes to delete all personal settings and
favourites. Restarts with default settings.
ST
DR
Version
Displays the current software version.
ST
DR
Update
Contact Pure technical support
(http://support.pure.com) for more
information on how to update Move 2520 to
the latest software version.
12
Page 15

FM stereo
ST
(FM radio only)
FM stereo *
Stereo
FM
Press Menu, then select FM stereo and
choose between Stereo or Mono FM
reception. Mono may improve weaker
reception.
Autotune
(Digital radio only)
ST
Scanning... 32
DR
Press Menu, then select Autotune to search
for new stations and remove those no longer
broadcasting.
Sleep timer
The sleep timer can be set to switch Move off after a period of time.
ST
1. Press Menu, then select Sleep timer.
Set sleep time
30 minutes
1Xtra - BBC
Bringing you
DR
2. Turn the navigation dial and press Select
to set the timer for up to 90 minutes or
choose Sleep off to cancel.
ST
The sleep timer icon will appear when a sleep
DR
timer is set.
13
Page 16

Audio settings
To adjust the bass and treble settings:
1. Press Menu, then select Audio.
ST
Treble
3
DR
2. Select Bass or Treble.
3. Turn the navigation dial and press Select
to set the level from -6 (low) to 6 (high).
Display settings
Press Menu, select Display and select one of the following options:
ST
DR
Backlight
Always on
Information
Sig. quality
Backlight
Adjust how long the display backlight stays
on. Choose from Always on, Timed off (after
7 seconds) or Off.
ST
DR
Information
(Digital radio only)
Choose the information shown on the display.
Scrolling text
Provided by the broadcaster.
Signal strength
The clear block indicates reliable reception
level.
Signal quality
From 0 (low) to 100 (high).
14
Page 17

Help and specifications
*
Hints and tips
The current value for most settings is indicated on the display by an
asterisk (
Technical specifications
Radio DAB/DAB+/DMB-R (Band III and L-Band) and
FM (RDS).
Headphones Noise-isolating, 16 Ohm, 10 mm drivers.
Input Micro USB for power supply and software
Output 3.5mm stereo output for headphones.
Mains power 100-240V, 50/60Hz 5V DC 800mA external
Battery ChargePAK M1 1000mAh.
Dimensions 102 mm x 56 mm x 15 mm
Approvals CE marked. Compliant with the EMC and Low
(2014/30/EU, 2014/35/EU and 2011/65/EU)
Note: Will be compliant with RED(2014/53/EU)
Occasionally, under certain environmental
).
upgrade.
power adapter.
Voltage Directives and RoHS
ETSI EN 300 401 compliant.
after 12th June 2017
conditions where electrostatic discharge is
present, this product may malfunction and
need the user to reset it to achieve recovery of
normal operation.
15
Page 18

Warranty information
Pure Inte rnatio nal Ltd. war rants to the end use r that this p roduct w ill be
free from defec ts in mater ials an d workmanship i n the course of nor mal use
for a period of two ye ars fro m the date of purchas e. This gu arante e covers
breakd owns due to m anufac turin g or desi gn fault s; it doe s not apply in case s
such as accidental dam age, howev er caus ed, wear a nd tear, negligence,
adjust ment, mod ification or re pair not a uthorised by us. S hould yo u have a
problem with your unit please contact your supplier or contact Pure Support at
http://support.pure.com.
Disclaimer
Pure International Limited makes no representation or warranties with respect to
the content of this document and specifically disclaims any implied warranties of
merchantability or fitness for any particular purpose. Further, Pure International
Limited reserves the right to revise this publication and to make changes in it from
time to time without obligation of Pure International Limited to notify any person or
organization of such revisions or changes.
Trademarks
Move 2520, ChargePAK, Pure and the Pure logo are trademarks or registered
trademarks of Pure International Limited.
Copyright
Copyright © 2016 Pure International Limited. All rights reserved. No part of this
publication may be copied or distributed, transmitted, transcribed, stored in
a retrieval system, or translated into any human or computer language, in any
form or by any means, electronic, mechanical, magnetic, manual or otherwise,
or disclosed to third parties without the express written permission of Pure
International Limited.
Disposal of Waste Electrical & Electronic Equipment
This symbol on the product or on its packaging indicates that this
product should not be treated as household waste. Instead it should
be handed over to a suitable collection point for the recycling of electrical and electronic equipment. By ensuring this product is disposed
of correctly, you will help prevent potential negative consequences
for the environment and human health, which could otherwise be
caused by inappropriate waste handling of this product. The recycling of materials will help to conserve natural resources. For more
detailed information about recycling of this product, please contact
your local council office, your household waste disposal service or
the shop where you purchased the product.
16
Page 19

17
Page 20

www.pure.com
connect.pure.com
www.facebook.com/pure
Pure International Limited
Concept House
Home Park Estate
Kings Langley
Herts, WD4 8LZ
United Kingdom
http://support.pure.com
104FO_06 ( V9)
 Loading...