

Page 1
aerocom® III
Portable Stereo Intercom
with
P
ILOTS
P
ILOTS
IntelliVox®
G
G
UIDE
UIDE
Flying Never Sounded So Good®
aerocom® III Operation Manual Page 1
200-003-0002 Rev 5 September 2013
Page 2

Congratulations on your purchase
of the PS Engineering Inc® aerocom III®, the intelligent choice in
portable intercoms. Please read this
manual fully to take advantage of
the aerocom III features.
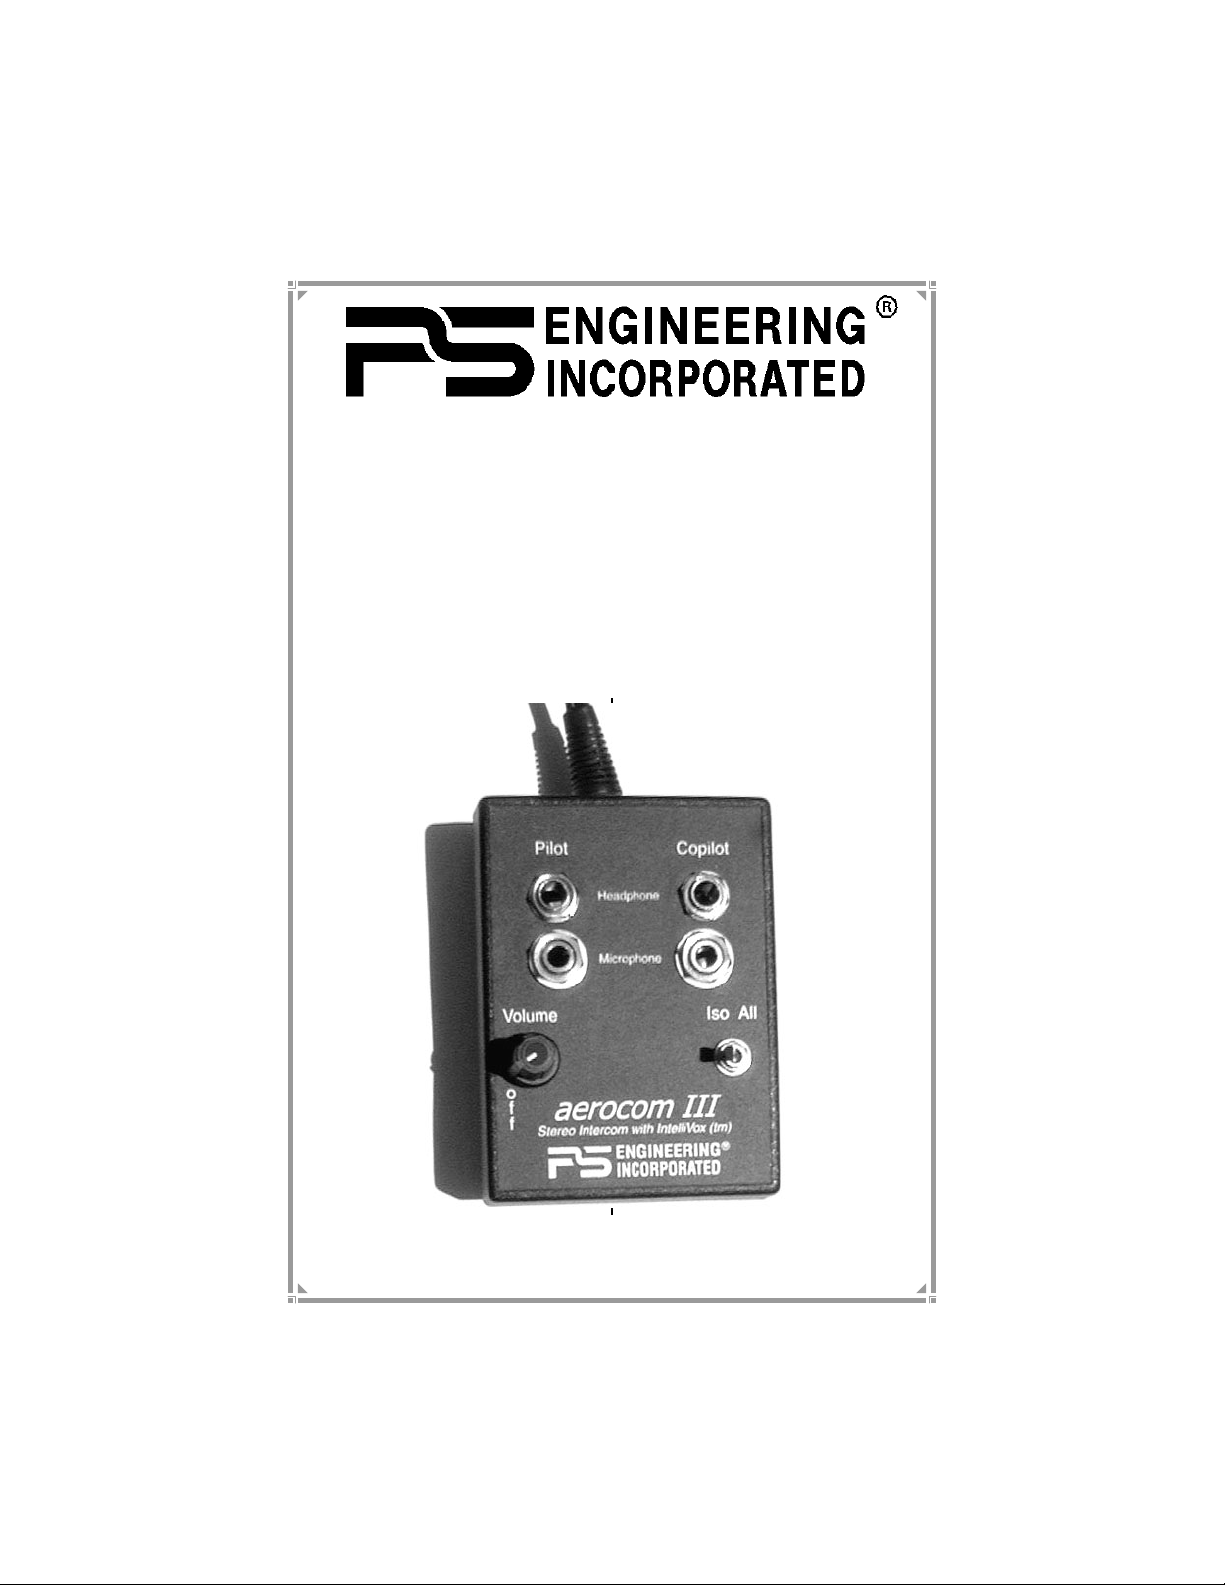
Description
The aerocom III is a 2-place portable
intercom with individual IntelliVo®
circuits for the pilot and copilot. The
IntelliVox® (Voice Activated Squelch
or VOX) prevents mic audio from
getting through the intercom until
someone speaks and automatically
opens the circuit. The volume control
adjusts the intercom level for both
headsets and functions as the power
switch.
The aerocom III has an automatic,
fail-safe connection to the aircraft
radio. In the event that power to the
intercom is lost, or it is turned off, an
internal relay will immediately connect
the pilot's headset directly to the aircraft radio connection.
An entertainment input allows the
pilot and copilot to listen to stereo
music during flight. During radio or
intercom activity, this music automatically mutes to allow communications
without distraction. A SoftMute™
circuit gradually returns the music to
full volume after the radio or intercom
activity ceases.
The 2-position switch acts as a mode
selector. In the ALL position, each
position will hear the aircraft radio,
music, and each other. In the ISO position, (isolation mode) only the pilot is
connected to the aircraft radio for undisturbed radio communications. In
ISO, the pilot is no longer on the inter-
com
. The copilot will continue to hear
the music input.
With the aerocom III, both the pilot
and copilot have radio transmit capabilities. Only the person who presses
their Push To Talk (PTT) will be heard
over the aircraft radio. If both pilot and
copilot press the PTT, the copilot will
override.
Specifications
Internal Power: 9 VDC battery
(Duracell MN1604, or equiv)
External Input power: 12-28 Volts DC
Headphone Impedance: 150-1000 ΩTypical
Total audio power available: 80 mW
Audio Distortion:
<10% @ 75 mW into 150 Ω load
Aircraft Radio Impedance: 1000 Ω Typical
±3 dB Mic Frequency Response:
600 Hz-2800 Hz
±3 dB Music Frequency Response:
200 Hz - 15 kHz
Net weight: 10.5 Ounces
Dimensions: 4.375” L x 3.250” W x 1.500” h
The aerocom III is designed to work
with either 12 or 28 volt DC negative
ground systems. The aerocom III
power cable is internally protected
with a 3-amp fuse.
Entertainment Input
A low-cost entertainment device
(CD player, cassette player, etc.) can
be connected to the aerocom III. An
interface cable with a ⅛" stereo connector (not provided) can be used to
provide a input. Use a NON ATTENUATING type interface cable.
The entertainment will be automatically muted when the ICS becomes
active.
When the intercom or radio traffic
ceases, PS Engineering's SoftMute
circuit will allow the music to return
slowly to the previous level
Page 2 Operation Manual aerocom® III
200-003-0001 Rev 5 September 2013
Page 3

Push to Talk
Part of the aerocom III operation
includes the use of PTT (Push-ToTalk) switches (not included) that allow the use of your aircraft communications radio for transmissions.
There are several possible configurations. Only the person pressing their
PTT will be heard over the radio.
If the aircraft has a control wheel
mounted PTT for the pilot, and only
pilot transmission is desired, no action
is required (See Fig. 1).
A/C Panel,
Mic and Headphone jacks
If there is no PTT installed, and only
the pilot position desires to transmit,
connect a remote PTT between the
aerocom III and aircraft mic jack, as
shown in Fig 3.
If both pilot and copilot positions are
A/C Panel,
Mic and Headphone jacks
Re mote
PTT
Pil ot Hea dset
switch
aerocom III
Fig. 3– Pilot ONLY PTT with portable switch
Copilot Headset
Pil ot Hea dset
aerocom III
Copilot Headset
Fig. 1– Pilot PTT built-in control wheel
For copilot transmit capability, a
modified (See Appendix A) external
PTT switch must be connected to the
copilot’s microphone jack.
You must connect the push to talk
switches into the aerocom III microphone inputs, and then insert your
headset into the PTT cable (Fig. 2).
A/C Panel,
Mic and Headphone jacks
Pil ot Hea dset
aerocom III
Fig 2– Pilot built-in, copilot PTT with external switch
Copilot Headset
Copilot
Re mote
PTT
switch
to talk on the radio, two modified (see
Appendix A) external PTT switches
are required, as shown in Fig 4.
Most after-market Push to Talk
A/C Panel,
Mic and Headphone jacks
Pilot Headset
Pilot
Remote
PTT
switch
Fig. 4– Pilot and copilot PTT using MODIFIED portable switches
aerocom III
Copilot Headset
Copilot
Remote
PTT
switch
switches must be modified before use
with the aerocom III. This is because
the microphone audio circuit is opened
by the switch, and no signal can reach
the intercom when not transmitting.
See Appendix A. PS Engineering can
provide a modified PTT for $24.95.
Call 1-800-ICS-AERO to order.
Input Power
The aerocom III is powered by a
aerocom® III Operation Manual Page 3
200-003-0002 Rev 5 September 2013
Page 4

9V battery (Duracell MN1604, or
equiv.). After about 12 hours of use,
the battery will be exhausted. At this
point the copilot position can no longer
transmit, extending the remaining battery life, although the intercom is still
active. At this time the battery should
be replaced, or the aerocom III disconnected from the aircraft. The aerocom
III does have a fail safe system, so the
pilot can continue to use the aircraft
radio when the battery is depleted.
To replace the battery, open the
battery compartment located on the
bottom of the unit (see Fig. 6).
Carefully remove the battery and
disconnect the clip. Connect a
fresh 9V battery, and reinstall into
the unit.
Aircraft power (12 or 28 VDC)
can be connected using the power
cable (provided). When using external power, be sure that the plug
is fully engaged with the jack, with
the plug body against the unit case.
It is not necessary to remove the
battery when using aircraft power.
OPERATING INSTRUCTIONS
Switch on the aerocom III by turning
the volume control knob clockwise.
This also engages the automatic failsafe system.
Adjusting the Volume
The volume control knob adjusts the
loudness of the intercom for both
headsets. Turning the control clockwise increases the audio. Many headsets have volume controls on them. If
it becomes necessary to reduce the
volume for an individual headset, the
other should be set at maximum, and
the unit volume set for a comfortable
level. That individual can then reduce
their volume accordingly.
The volume control on the aerocom
III does not affect
the aircraft radio or music.
VOX Squelch Control
No adjustment of the IntelliVox®
squelch control is necessary. Through
micro-controller processors, the ambient noise in both microphones is constantly being sampled. Non-voice signals are blocked. When someone
speaks, only their microphone circuit
opens, allowing their voice on the
intercom.
For best performance, the microphone must be placed within ¼ inch of
your lips, preferably against them. It is
also a good idea to keep the microphone out of a direct wind path. Moving your head through a vent air stream
may cause the IntelliVox® to open
momentarily. This is normal.
For optimum microphone performance, we recommend installing a leatherette microphone muff. This will not
only optimize VOX performance, but
will improve the overall clarity of all
your communications.
The mode selector is a 2-position
switch. Regardless of configuration,
the pilot will always hear the radio.
ISO: The pilot is isolated from the
intercom and connected to the aircraft
radios. He will hear only the aircraft
radio reception and sidetone (during
radio transmissions). The copilot will
hear the intercom and music but not
the aircraft radio.
All: Both positions will hear the
aircraft radio reception and transmissions, intercom, and music. However,
during any radio or intercom activity,
the music volume automatically de-
creases
.
the volume level of
Mode Select
Page 4 Operation Manual aerocom® III
200-003-0001 Rev 5 September 2013
Page 5

Interconnect
Refer to Fig. 5 for jack locations.
The aerocom III has a ⅛” jack for
Stereo Music, a power jack for
aircraft power, which disconnects
the battery.
The aerocom III is expandable to
4-place intercom using the 2717A
expansion unit and the expansion
jack.
Appendix A,
PTT Modifications
When received from the manufacturer, an after-market PTT switch
opens the mic audio path to the "ring"
connection of the PTT mic plug. When
the PTT is between the intercom and
the headset, the intercom audio path
will not work until the PTT switch is
depressed. A simple modification can
be performed to allow proper intercom
operation.
NOTE: This modification does not
alter normal radio operation.
Due to the variety of different PTT
manufacturers, we can’t provide all of
the specific instructions. Contact the
PTT manufacturer if you require more
information, or purchase a modified
PTT from PS Engineering for $24.95.
Portable PTT
MIC
+
P-T-T
SWITCH
GND
Warranty
PS Engineering, Inc. warrants this
product to be free from defect in material and workmanship for a period of
one year from the date of purchase.
During the warranty period, the unit
must be returned to PS Engineering,
Inc. and, at its option, we will send a
replacement at no charge. The customer is responsible for shipping
charges returning the unit to PS Engineering.
This warranty is not transferable.
Any implied warranties expire at the
expiration date of this warranty.
WE SHALL NOT BE LIABLE FOR
INCIDENTAL OR CONSEQUENTIAL DAMAGES. This warranty
does not cover a defect that has resulted from improper or unreasonable
use or maintenance as determined by
us. This warranty is void if there is
any attempt to dissemble this product
without factory authorization.
This warranty gives you specific legal
rights, and you may also have other rights,
which vary, from state to state. Some states
do not allow the exclusion of limitation of
incidental or consequential damages, so the
above limitation or exclusions may not
apply to your state.
Added By-Pass
MIC PLUG
MIC AUDIO
PTT LINE
Modified P-T-T Schematic
Modified P-T-T Schematic
aerocom® III Operation Manual Page 5
200-003-0002 Rev 5 September 2013
Page 6

Service
Call PS Engineering, Inc. at (865) 988-9800 before you return any unit.
This will allow the service technician to provide any other suggestions for
identifying the problem and recommend possible solutions.
After discussing the problem with the technician and you obtain a Return
Authorization Number, ship product to:
PS Engineering, Inc.
Attn: Service Department
9800 Martel Rd.
Lenoir City, TN 37772
(865) 988-9800 FAX (865) 988-6619
Email: contact@ps-engineering.com
Units that arrive without an RMA number, or telephone number for a
responsible contact, will be returned un-repaired. PS Engineering is not
responsible for items sent via US Mail.
Looking from aircraft cable end
Power Jack
Expansion Jack
Fig. 5, Jack Connections
Aircraft Radio Cables
Music Jack
PWR A/C
EXP
aerocom III
2-Place Stereo Portable Intercom
with IntelliVox
Product No. 2716A
Serial No.
Radio
TM
Music
TM
NOTES:
Battery Cover
Fig. 6, Battery Compartment
Page 6 Operation Manual aerocom® III
200-003-0001 Rev 5 September 2013
Page 7

Note: For optimum microphone performance, we recommend use
of a Microphone Muff Kit from Oregon Aero (1-800-888-6910). This
will not only optimize VOX performance, but will improve the overall
clarity of all your communications.
Headset
Model Part Number
Manufacturer
Bose Dynamic
Electret
M87
David Clark H10-30
H10-20, H10-40
H10-13.4, 13X
H20-10X
90010
90015
90020
90010
90015
90015
90015
Lightspeed All 90015
Peltor 7003
ANR Pro, 7000
90010
90015
Pilot 11-20, 11-90, 1776, DXL 90015
Sennheiser All 90015
Telex Airman 750, AIR4000
AIR3000, Echelon 100
90010
90015
aerocom® III Operation Manual Page 7
200-003-0002 Rev 5 September 2013
Page 8

aerocom III Serial Number:_______________
Purchased from: _______________________
Purchase date: ________________________
Page 8 Operation Manual aerocom® III
200-003-0001 Rev 5 September 2013
 Loading...