


|
|
|
> |
Primare P30 Processor User Guide |
|
|
|
|
|
|
|
|
|
|
i

> Preface
C O P Y R I G H T A N D A C K N O W L E D G M E N T S
Copyright © 2000 Primare Systems AB. All rights reserved.
Primare Systems AB
Idavägen 5
SE-352 46 Växjö
Sweden
The information in this guide is believed to be correct as of the date of publication. However, our policy is one of continuous development and so the information is subject to change without notice, and does not represent a commitment on the part of Primare Systems AB.
Primare is a trademark of Primare Systems AB. Manufactured under license from Dolby Laboratories Dolby, Pro Logic, and the double-D symbol are trademarks of Dolby Laboratories. Confidential Unpublished Works. Copyright 1992-1997 Dolby Laboratories, Inc. All rights reserved. LaserDisc is a trademark of Pioneer Electric Corp. All other product names are trademarks or registered trademarks of their respective owners.
FCC Warning: This equipment generates and can radiate radio frequency energy and if not installed and used correctly in accordance with our instructions may cause interference to radio communications or radio and television reception. It has been type-tested and complies with the limits set out in Subpart J, Part 15 of FCC rules for a Class B computing device. These limits are intended to provide reasonable protection against such interference in home installations.
EEC: This product has been designed and type-tested to comply with the limits set out in EN55013 and EN55020.
This guide was produced by Human-Computer Interface Ltd, http://www.interface.co.uk
ii

> Contents
Introduction
W E L C O M E T O T H E P 3 0 P R O C E S S O R ............ |
(1 |
U S I N G T H E P 3 0 W I T H O T H E R P R I M A R E |
|
P R O D U C T S ................................................................ |
(2 |
T E C H N I C A L S P E C I F I C A T I O N ............................. |
(2 |
Using the P30 Processor
F R O N T P A N E L C O N T R O L S .................................. |
(3 |
F R O N T P A N E L D I S P L A Y ......................................... |
(4 |
S W I T C H I N G O N A N D O F F ................................ |
(4 |
S E L E C T I N G A S O U R C E ........................................ |
(5 |
C H A N G I N G T H E V O L U M E .................................. |
(6 |
C H A N G I N G T H E B A L A N C E , C E N T E R , |
|
R E A R , A N D S U B W O O F E R L E V E L S .................... |
(6 |
L A T E N I G H T M O D E ................................................ |
(7 |
Advanced use
U S I N G T H E M A I N M E N U .................................... |
(9 |
C H O O S I N G T H E S U R R O U N D M O D E .............. |
{10 |
M A K I N G R E C O R D I N G S ........................................ |
{11 |
L A T E N I G H T M O D E ................................................ |
{12 |
L O C K I N G T H E F R O N T P A N E L ............................ |
{12 |
Connecting the P30 Processor
B A C K P A N E L C O N N E C T I O N S ........................... |
{13 |
M A I N O U T P U T S ...................................................... |
{14 |
A U D I O I N P U T S ........................................................ |
{14 |
V I D E O C O N N E C T I O N S ....................................... |
{14 |
R E C O R D O U T P U T S ................................................. |
{15 |
M I C R O P H O N E , D A T A A N D R S 2 3 2 .................. |
{15 |
C O N N E C T I N G T O T H E P R I M A R E A 3 0 . 5 |
|
M U L T I - C H A N N E L A M P L I F I E R ............................... |
{15 |
C O N N E C T I N G T O T H E P R I M A R E V 2 0 D V D |
|
P L AY E R ........................................................................ |
{15} |
iii

> Preface
Setting up the speakers
C O N F I G U R I N G T H E S P E A K E R S ........................ |
{17 |
|||
S E T T I N G |
T H E |
S P E A K E R |
D E L A Y S ........................ |
{19 |
S E T T I N G |
T H E |
S P E A K E R |
L E V E L S ......................... |
{20 |
S E T T I N G |
T H E |
S P E A K E R |
P H A S E S ....................... |
{22 |
Setting up the sources
S T A N D A R D |
S O U R C E S ........................................... |
{23 |
R E M O V I N G |
A S O U R C E ........................................ |
{24 |
E D I T I N G A |
S O U R C E .............................................. |
{25 |
E X A M P L E S O F S O U R C E S ..................................... |
{26 |
|
Configuring the display
C O N F I G U R I N G T H E O N - S C R E E N |
|
D I S P L AY ...................................................................... |
{27 |
C O N F I G U R I N G T H E F R O N T P A N E L |
|
D I S P L AY ...................................................................... |
{28 |
Saving the configuration
I N T R O D U C T I O N ...................................................... |
{29 |
Index
iv

> Introduction
Welcome to the Primare P30 Processor! This chapter introduces you to its key features, and explains how you can take advantage of its configurability to create a system perfectly suited to your requirements.
W E L C O M E T O T H E P 3 0 P R O C E S S O R
The P30 provides a comprehensive range of features to make it ideal as the heart of a superb music or home entertainment system:
Flexible range of inputs
The P30 provides a range of inputs flexible enough to cater for virtually any combination of sources including: seven analog phono inputs, one analog balanced input, five coaxial digital inputs, two TOSlink optical digital inputs, and one AES/EBU balanced digital input.
Video switching
The P30 provides four composite video inputs and three S-Video inputs to allow you to switch up to seven audio-visual sources.
Digital Surround Processing
The P30 can decode multi-channel sources encoded in either Dolby Pro Logic, or Dolby Digital (AC-3), to provide six discrete output channels for up to six loudspeakers in a surround system.
Bypass mode
The P30 provides a Bypass mode, which bypasses the digital processing stages for the purest possible reproduction of conventional two-channel music sources.
Full configurability
The P30 is fully configurable, using a simple set of on-screen menus, to allow you to set it up with the exact combination of sources and outputs that you want to use for your own system. The P30 is supplied already set up with a standard set of sources, designed to cater for the most usual combination of inputs and outputs in a typical system, but you can modify these or define your own sources with total flexibility.
Intuitive user interface
In keeping with the philosophy of the Primare range of systems, the P30’s powerful range of features can be controlled through a very simple and intuitive interface, designed so that it will not distract you from the pleasure of listening to music or watching movies on your system.
In fact almost all the features of the P30 can be accessed through just two front panel controls and four push buttons; alternatively the same degree of control is provided through the remote control supplied with the P30.
1

> Introduction
Easy to set up
The P30 is also exceptionally easy to set up for a perfectly balanced surround sound. Simply plug a microphone into the appropriate P30 input, and position it at the listening position. The built-in calibration test will then balance the level of each output to give a correct sound image for your system and the room you are listening in.
U S I N G T H E P 3 0 W I T H O T H E R P R I M A R E P R O D U C T S
Although the P30 is flexible enough to work with virtually any other equipment you have in your system, it is ideal for use with the other products in the Primare range, including the Primare A30.5 Multi-Channel Amplifier and the Primare V20 DVD Player. A particular benefit of using the P30 with the Primare DVD Player is that you can control both units with the single remote control, to give you a fully integrated system with the simplest possible user interface.
T E C H N I C A L S P E C I F I C A T I O N
Analogue inputs |
1 balanced, 7 RCA. |
Digital inputs |
1 balanced, 5 coax, 1 TOSlink. |
Video inputs |
2 composite, 3 S-Video. |
Balanced analogue outputs |
Front left and right |
Analogue outputs |
Rear left and right, center and sub. |
Record |
Analogue, 1 coax. 1 TOSlink |
|
2 composite, 2 S-Video |
Modes |
Dolby Digital, Dolby Pro Logic, Music surround, DTS. |
Calibration |
Automatic or manual with calibration microphone. |
Video |
NTSC/PAL, S-Video and composite. |
Analogue data |
|
Bandwith |
1Hz – 100kHz, -1dB |
THD |
<0.005%, 20Hz-20kHz |
Signal-to-noise |
-110dB |
Frequency response |
<10Hz – 100kHz, -1dB |
Input impedance |
15kΩ, unbalanced |
|
10kΩ, balanced |
Output impedance |
50Ω |
Digital data |
|
Frequency response |
20Hz – 20kHz, ±0.2dB |
THD+noise |
0.005% @1kHz |
Dimensions (WxDxH) |
430 x 385 x 100mm |
Weight |
10kg |
|
|
2

> Using the P30 Processor
This chapter explains how to operate the P30 Processor, using either the front panel controls or the direct remote control commands.
F R O N T P A N E L C O N T R O L S
Almost all the functions of the P30 Processor can be accessed using the two front panel controls and four push buttons, and information about its operation is displayed on the front panel display:
]A The INPUT SELECTOR control selects which input you want to listen to or watch.
]B The DIM button dims the front panel display.
]C The NIGHT button selects late night listening mode.
]D The LEVEL button selects which setting you change with the VOLUME control.
]E The STANDBY button mutes the sound. Holding it down switches the P30 to standby.
]F The VOLUME control changes the volume, or a setting selected with the
LEVEL button.
INPUT SELECTOR |
|
|
VOLUME |
57 |
AC-3 |
|
P.L |
VOLUME |
DVD |
|
|
DIM |
NIGHT |
LEVEL |
STANDBY |
P30 PROCESSOR
]A |
]B ]C ]D ]E |
]F |
3

> Using the P30 Processor
F R O N T P A N E L D I S P L AY
The following illustration shows the information on the front panel display:
]A |
]B |
]C |
]D |
]E |
|||||
|
|
|
|
|
|
|
|
|
|
|
|
|
|
|
|
|
|
|
|
57 |
AC-3 |
DTS |
MPEG |
P.L |
|||||
VOLUME |
DVD |
|
|
|
|
|
|
||
|
|
|
|
|
|
|
|
|
|
|
|
|
|
|
|
|
|
|
|
|
|
|
|
|
|
|
|
|
|
]F
]A Volume setting.
]B AC-3 or Dolby D indicates that a Dolby Digital input is present.
]C DTS indicates that a DTS input is present.
]D MPEG indicates that an MPEG input is present.
]E P.L indicates that the digital input is 2-channel Pro Logic.
]F Currently selected input, Mute, or level setting.
To dim the front panel display
• Press the DIM button on the front panel or remote control.
The display will dim to a single bar. The normal display will reappear while you adjust any settings.
S W I T C H I N G O N A N D O F F
To switch on
• Use the switch under the left-hand edge of the front panel.
During normal operation you can leave the P30 switched on and in standby.
To switch to standby
•Hold down the STANDBY button on the front panel or the STBY button on the remote control.
4

Using the P30 Processor <
S E L E C T I N G A S O U R C E |
To select a source |
The P30 Processor allows you to define up to 16 sources, eight digital and eight analog, and any source can be combined with one of the video inputs.
When the P30 Processor is first supplied the standard sources shown below are already set up for you.
You can simply disable any of these sources that you do not need; see
Removing a source, page 24. You can also change any source to use different inputs, or configure your own sources with any name you choose and using any particular inputs as appropriate for the source.
•Turn the INPUT SELECTOR control on the front panel until the name of the source is shown on the front panel display.
For example: |
46 |
P.L |
|
||
|
VOLUME Tuner |
|
•Alternatively, press the SEL A or SEL V buttons on the remote control to step between sources.
The current source is also shown on the on-screen display.
Source |
Audio |
Video |
Surround mode |
Description |
CD |
Analog |
None |
Bypass |
High quality CD player |
DVD |
Digital |
S-Video |
PCM 2-CH |
DVD player |
TapeD |
Digital |
None |
Pro Logic |
Digital tape recorder or minidisc player |
Laser |
Digital |
S-Video |
PCM 2-CH |
LaserDisc player |
Tuner |
Analog |
None |
Stereo |
FM radio tuner |
TV |
Analog |
Video |
Pro Logic |
Television or monitor |
TapeA |
Analog |
None |
Stereo |
Analog tape output |
Sat |
Analog |
Video |
Pro Logic |
Satellite receiver |
|
|
|
|
|
5
> Using the P30 Processor
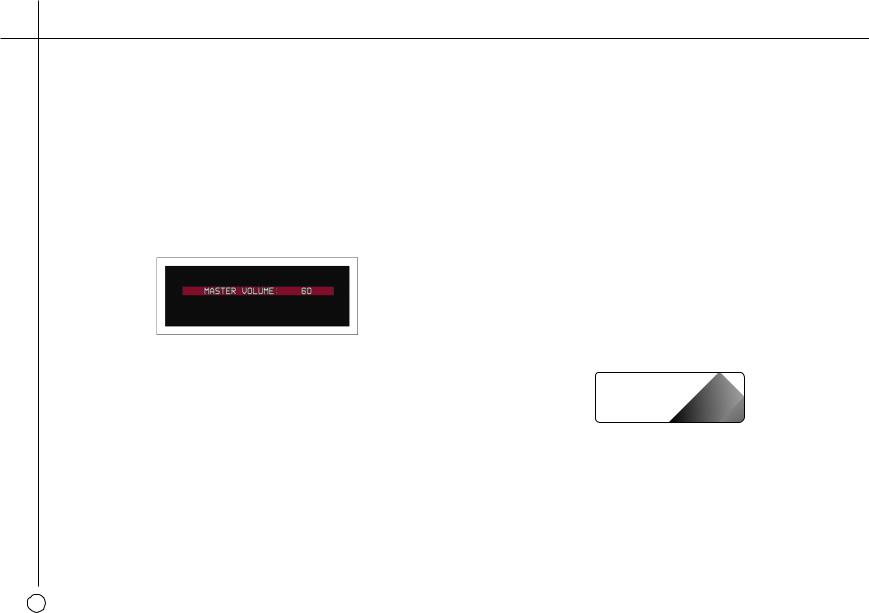
C H A N G I N G T H E V O L U M E
The P30 allows you to vary the volume from 0 (silence) to 99 (maximum volume), where each step is equivalent to 0.5dB.
To change the volume
•Rotate the VOLUME control on the front panel, or press the VOL A or
VOL V buttons on the remote control.
The current volume setting is shown on the front panel and on-screen displays:
To mute the sound
•Press the STANDBY button on the front panel or the STBY button on the remote control.
To restore the sound to its original volume
• Press the STANDBY (or STBY) button again.
The sound is also restored to its original volume if you change the volume, or select a different source.
To switch on from standby
• Operate any of the controls or buttons on the front panel or remote.
C H A N G I N G T H E B A L A N C E , C E N T E R , R E A R , A N D S U B W O O F E R L E V E L S
You can independently change the balance, center level, rear levels, and subwoofer level to alter the balance of sound in your surround system.
Changing the balance alters the level of both the left and right main loudspeakers to shift the position of the stereo image, keeping the overall level of the sound the same. The other adjustments change the level of the corresponding speaker(s) without affecting the remaining speakers in the surround system.
To change a level
•Press the LEVEL button on the front panel, or the _ (or MENU) button on the remote control, until the display shows the current value of the level you want to change.
5 |
P.L |
|
|
For example: |
|
VOLUME C +2.0 |
|
•Use the VOLUME control on the front panel, or the VOL A or VOL V buttons on the remote control, to adjust the value of the level.
After a short delay the display will revert to volume.
6
Using the P30 Processor <
The levels are selected in the sequence shown in the following table:
Display |
Level |
Range |
L, Balanced, R |
Balance |
Balanced to -19.5dB to OFF |
C |
Center |
-20.0dB to +20.0dB |
SR |
Rear |
-20.0dB to +20.0dB |
S |
Sub |
-20.0dB to +20.0dB |
|
|
|
L A T E N I G H T M O D E
Late night mode takes advantage of information provided with Dolby Digital sources to reduce the variation in loudness of the soundtrack, without any distortion of the original content. It does this by increasing the volume of quiet passages and reducing the volume of loud passages.
Select late night mode when you want to minimise disturbance, such as when watching movies.
To select late night mode
• Press the NIGHT button on the front panel.
The NIGHT indicator lights up.
To return to normal mode
• Press the NIGHT button again.
7
 Loading...