

Presonus HP4 Owner’s Manual
HP4
Owner’s Manual
EnglishDeutsch EspañolFrançais
®
www.presonus.com

SPL Warning:
Exposure to extremely high noise levels may
cause permanent hearing loss. Individuals vary
considerably in susceptibility to noise-induced
hearing loss but nearly everyone will lose some
hearing if exposed to sufficiently intense noise
for a period of time. The U.S. Government’s
Occupational Safety and Health Administration
(OSHA) has specified the permissible noise level
exposures shown in the following chart. According
to OSHA, any exposure in excess of these permissible
Duration per Day
in Hours
8 90 Duo in small club
6 92
4 95 Subway train
3 97
2 100 Very loud classical music
1.5 102
1 105
0.5 110
0.25 or less 115 Loudest parts of a rock concert
Sound Level, dBA, Slow
limits could result in some hearing loss. To ensure
against potentially dangerous exposure to high
sound-pressure levels, it is recommended that all
persons exposed to equipment capable of producing
high sound-pressure levels use hearing protectors
while the equipment is in operation. Earplugs or
protectors in the ear canals or over the ears must
be worn when operating the equipment in order
to prevent permanent hearing loss if exposure is in
excess of the limits set forth here:
Typical Example
Response

Owner’s Manual
Overview 1
Summary of Features 1.1
1.0 Overview
Thank you for purchasing this PreSonus product.
PreSonus Audio Electronics, Inc., has manufactured
it using high-grade components to ensure
optimum performance that will last a lifetime.
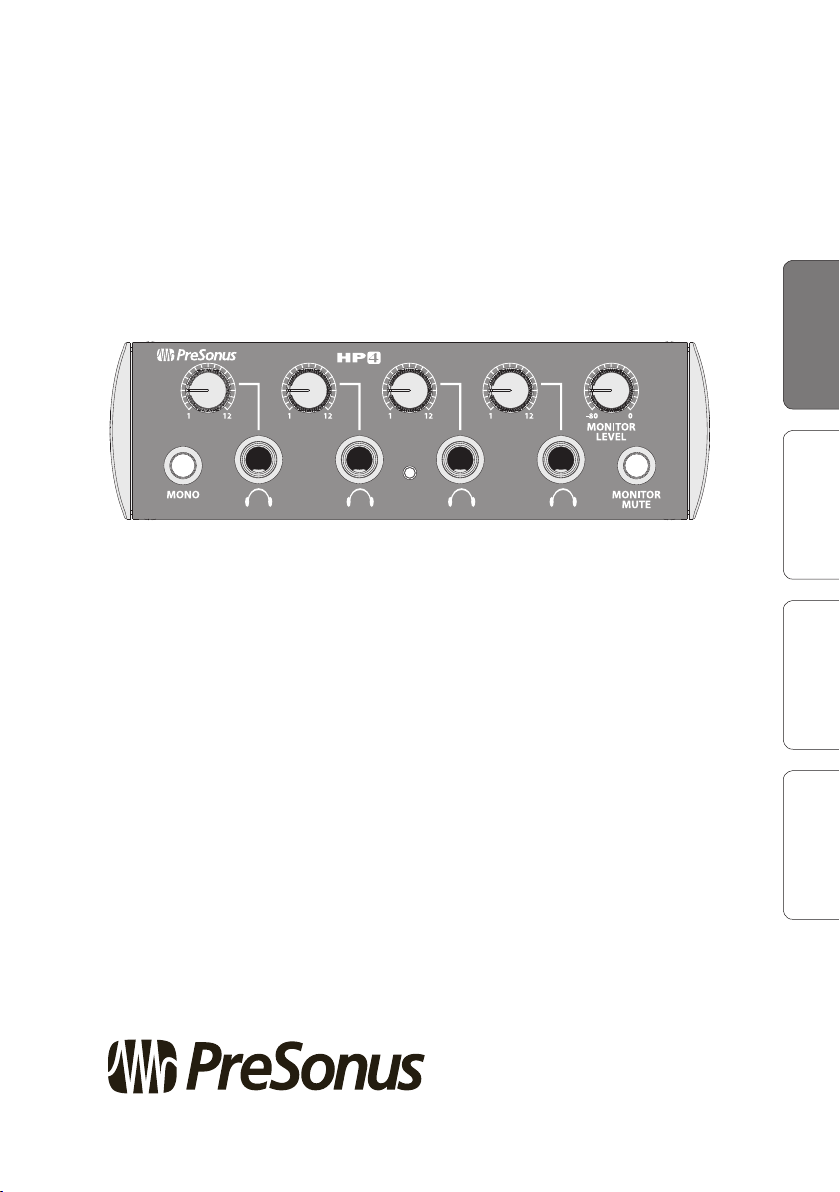
The 150 mW headphone amps in the HP4 are
loud enough to explode the oysters in a Po-Boy
sandwich, yet the sound is clear and clean, with
a wide dynamic range. The HP4 is loaded with
professional features, such as a monitor output
with level control and mute and a Mono summing
switch for the headphone and monitor outputs.
1.1 Summary of Features
• 4 discrete headphone-level controls
• Mono summing switch
• Monitor level control
EnglishDeutsch EspañolFrançais
• Monitor mute switch
• 2 balanced ¼” line inputs
• Daisy-chain multiple units or pass signal to
studio monitors via monitor outputs
• 4 stereo, ¼” headphone outputs
• 2 impedance-balanced, ¼” line outputs
We encourage you to contact us with questions or
comments regarding this product. You can reach us
by email at techsupport@presonus.com or call us at
1-225-216-7887 between 9 a.m. and 5 p.m. Central
Time (GMT 05:00). PreSonus Audio Electronics is
committed to constant product improvement, and
we value your suggestions highly. We believe the
best way to achieve our goal of constant product
1
English DeutschEspañol Français
1 Overview
1.1 Summary of Features
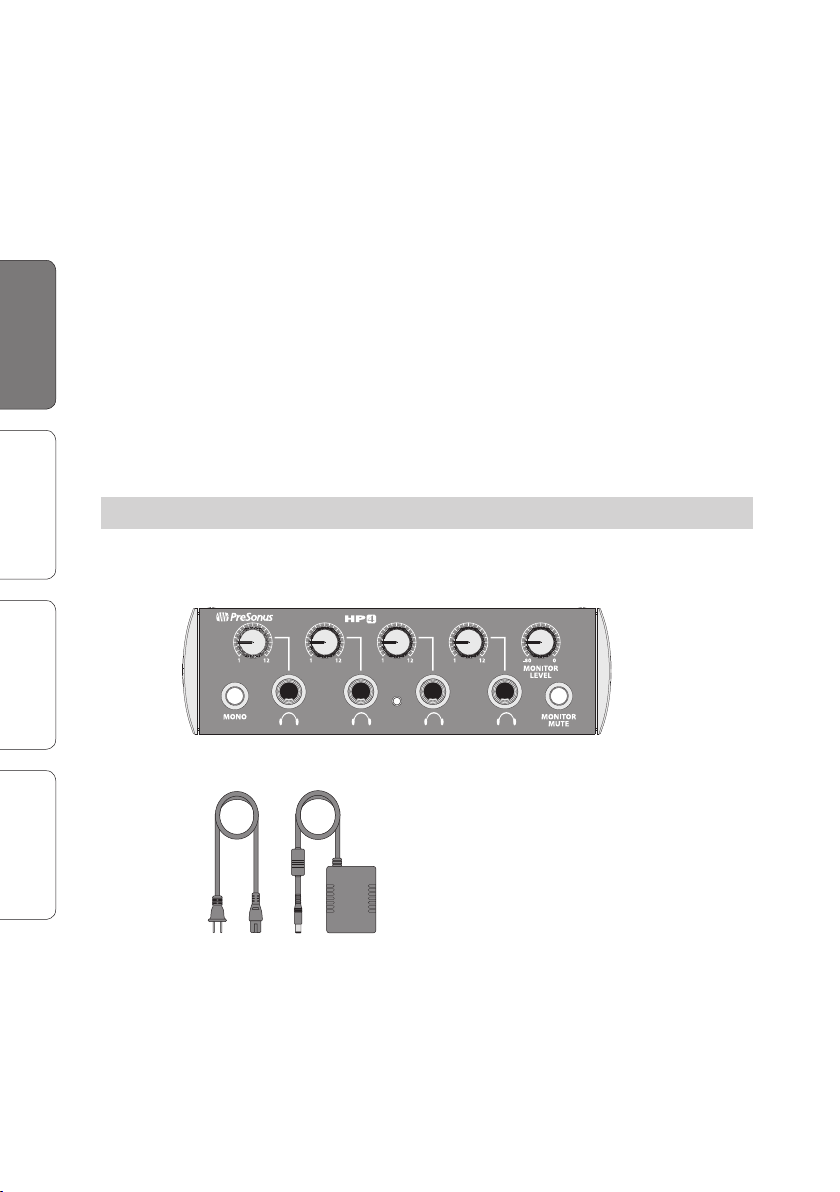
1.2 What Is In The Box
In addition to this manual, your PreSonus
package contains the following:
PreSonus HP4
improvement is by listening to the real experts: our
valued customers. We appreciate the support you
have shown us through the purchase of this product.
Please use this manual to familiarize yourself with
the features, applications, and correct connection
procedure for the HP4 before trying to connect it
to your recording system. Pay close attention when
connecting the HP4 to your system, as bad cables
and improper grounding are the most common
causes of problems encountered in recording and live
P. A. environments. We recommend checking your
cables, connections, and grounding if you experience
any noise or other sonic performance problems.
• PreSonus HP4
• 16 VAC, 1,000 mA Power Supply
2

Owner’s Manual
Overview 1
What’s in the Box 1.1
2.0 Quick Start Guide
This Quick Start guide is designed to help get your
HP4 connected to your system as quickly as possible.
The following step-by-step instructions are based
on a common studio environment. Your actual setup
may change based on your needs and applications.
2.1 Getting Started
Connect the Power
1. Turn every knob on the front panel of the
2. Connect the included power supply to
Connect Your Input Sources
1. Turn down the main output volume on your
2. Connect the main outputs of your audio
3. Connect the Left and Right Monitor/Thru outputs
EnglishDeutsch EspañolFrançais
HP4 completely counterclockwise (left).
the HP4 and plug it in to a wall socket,
power strip, or surge protector.
audio interface or mixer to its lowest position.
interface or mixer to the Left and Right TRS
inputs on the back of your HP4. For the best
sound quality, PreSonus recommends us-
ing balanced cables whenever possible.
on the back of your HP4 to the inputs of your pow-
ered studio monitors or power amp (if your studio
monitors are passive). This will allow you to use a
single output pair from your audio interface or mix-
er to feed both your HP4 and your studio monitors.
3
 Loading...