

Presonus CDL12P Owner’s Manual
CDL12P
Constant Directivity Loudspeaker
Owner’s Manual
®
www.presonus.com
English

Table of Contents
4 Technical Information — 12
1 Overview — 1
1.1 Introduction — 1
1.2 What is in the Box — 2
1.3 Rigging Accessories (Sold Separately) — 2
2 Application and Deployment — 3
2.1 Getting Started — 3
2.2 Cooling — 3
2.3 Important Safety Instructions — 4
2.4 Rigging Instructions — 5
2.5 CDL Rigging Extension Bar Installation
Instructions — 6
2.6 Suspending the CDL Array — 7
2.7 Supported Configurations — 7
2.7.1 Rigging a CDL12P to Another
CDL12P — 7
4.1 Specifications — 12
4.2 Mechanical Drawings — 12
2.7.2 Rigging a CDL12P to a CDL12P Rigging
Grid — 7
2.7.3 Using the CDL Rigging Sling with the CDL
Rigging Grid — 8
2.8 Pole Mounting Options — 8
2.8.1 Important Pole Mounting Safety
Instructions — 8
2.8.2 Pole Mounting Instructions — 9
3 Hookup — 10
3.1 Rear-Panel Connections and Controls — 10
3.2 Onboard Performance Monitoring — 10
3.3 Onboard Tuning Features — 10
3.4 Power — 11
3.4.1 Connecting Loop-Thru Power — 11

1 Overview
1.1 Introduction
1 Overview
1.1 Introduction
CDL12P
Owner’s Manual
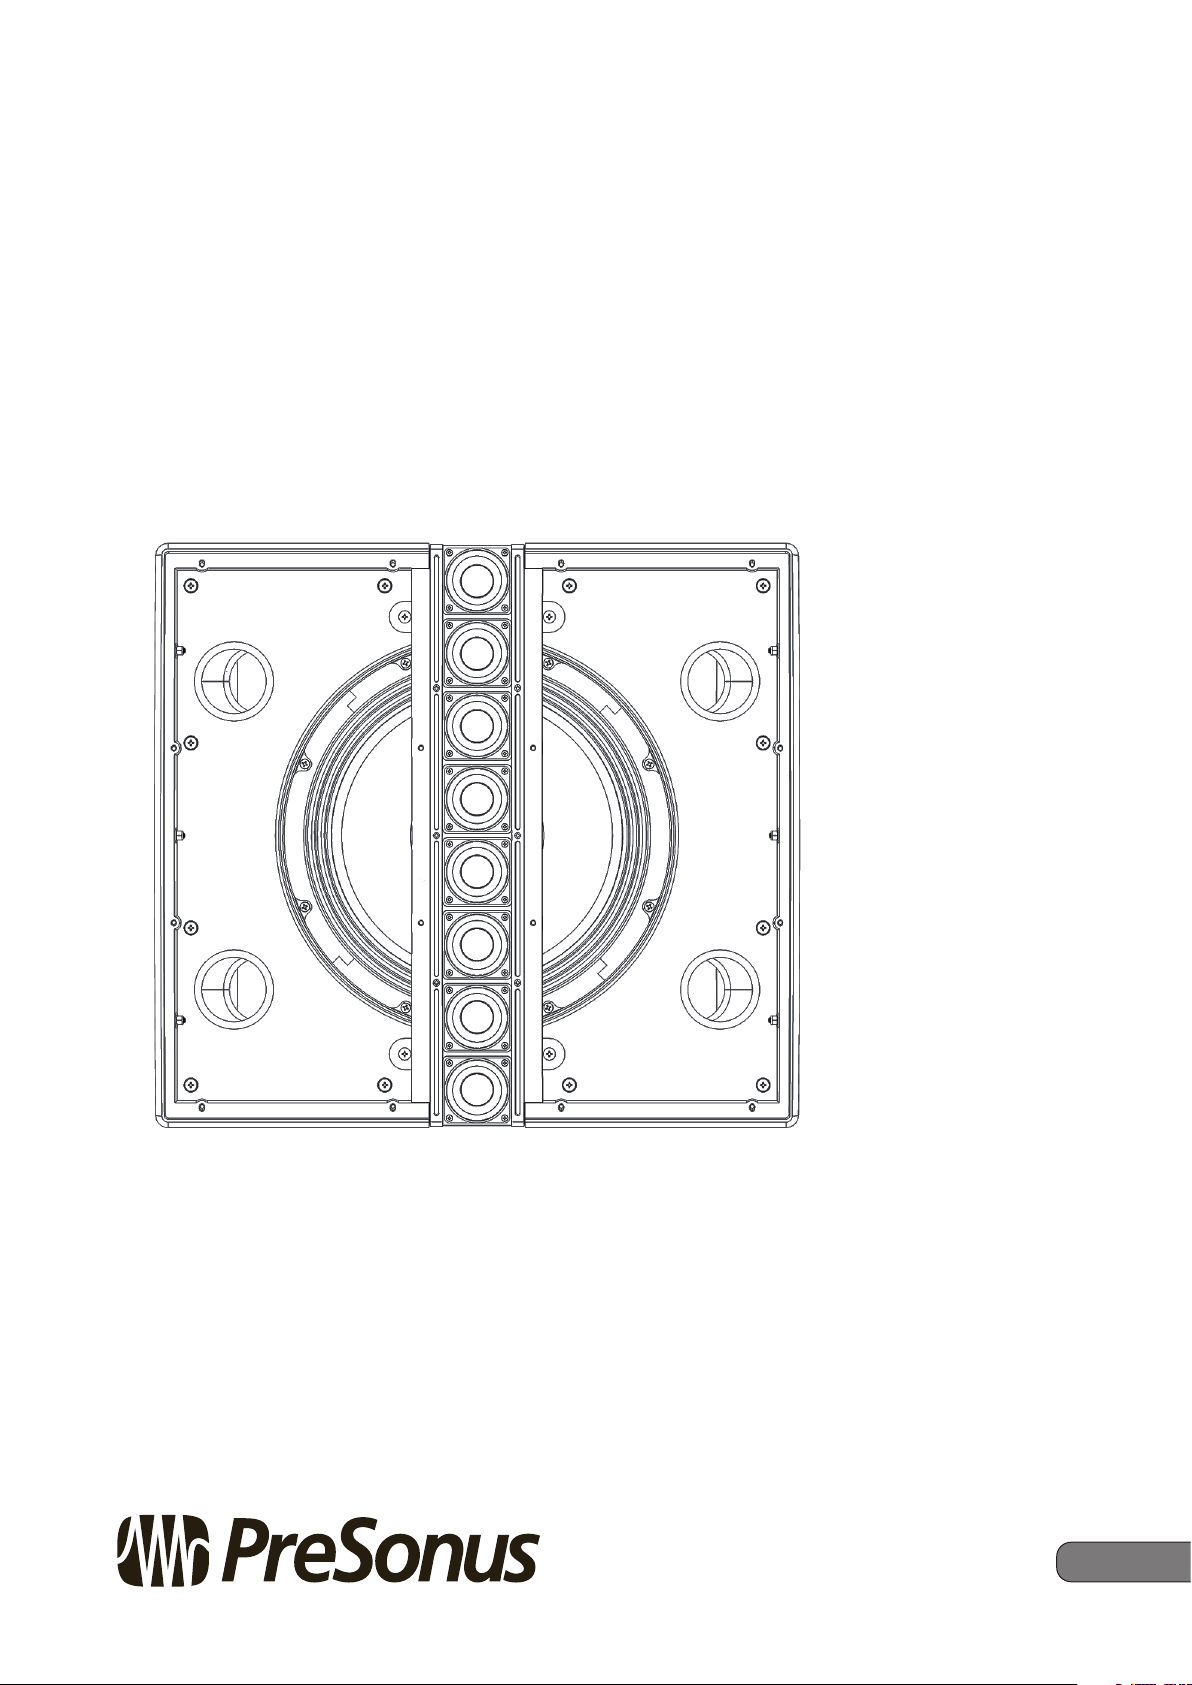
Thank you for purchasing a PreSonus® CDL12P loudspeaker. The CDL12P
utilizes a unique design that takes advantage of Constant Directivity
Loudspeaker (CDL) technology by placing eight 2-inch high-frequency drivers
in a 15˚ constant curvature vertical array, centered in front of a 12-inch woofer.
This allows the CDL12P to radiate sound in a focused directional pattern
with up to 90˚ of vertical coverage when using six boxes rigged together.
The CDL12P is a true hybrid of both point-source and line-array speaker
designs that combine the benecial elements of both technologies.
We encourage you to contact us with questions or comments regarding
this product. PreSonus Audio Electronics is committed to constant
product improvement, and we value your suggestions highly. We believe
the best way to achieve our goal of constant product improvement is by
listening to the real experts: our valued customers. We appreciate the
support you have shown us through the purchase of this product.
1
1 Overview
1.2 What is in the Box
1.2 What is in the Box
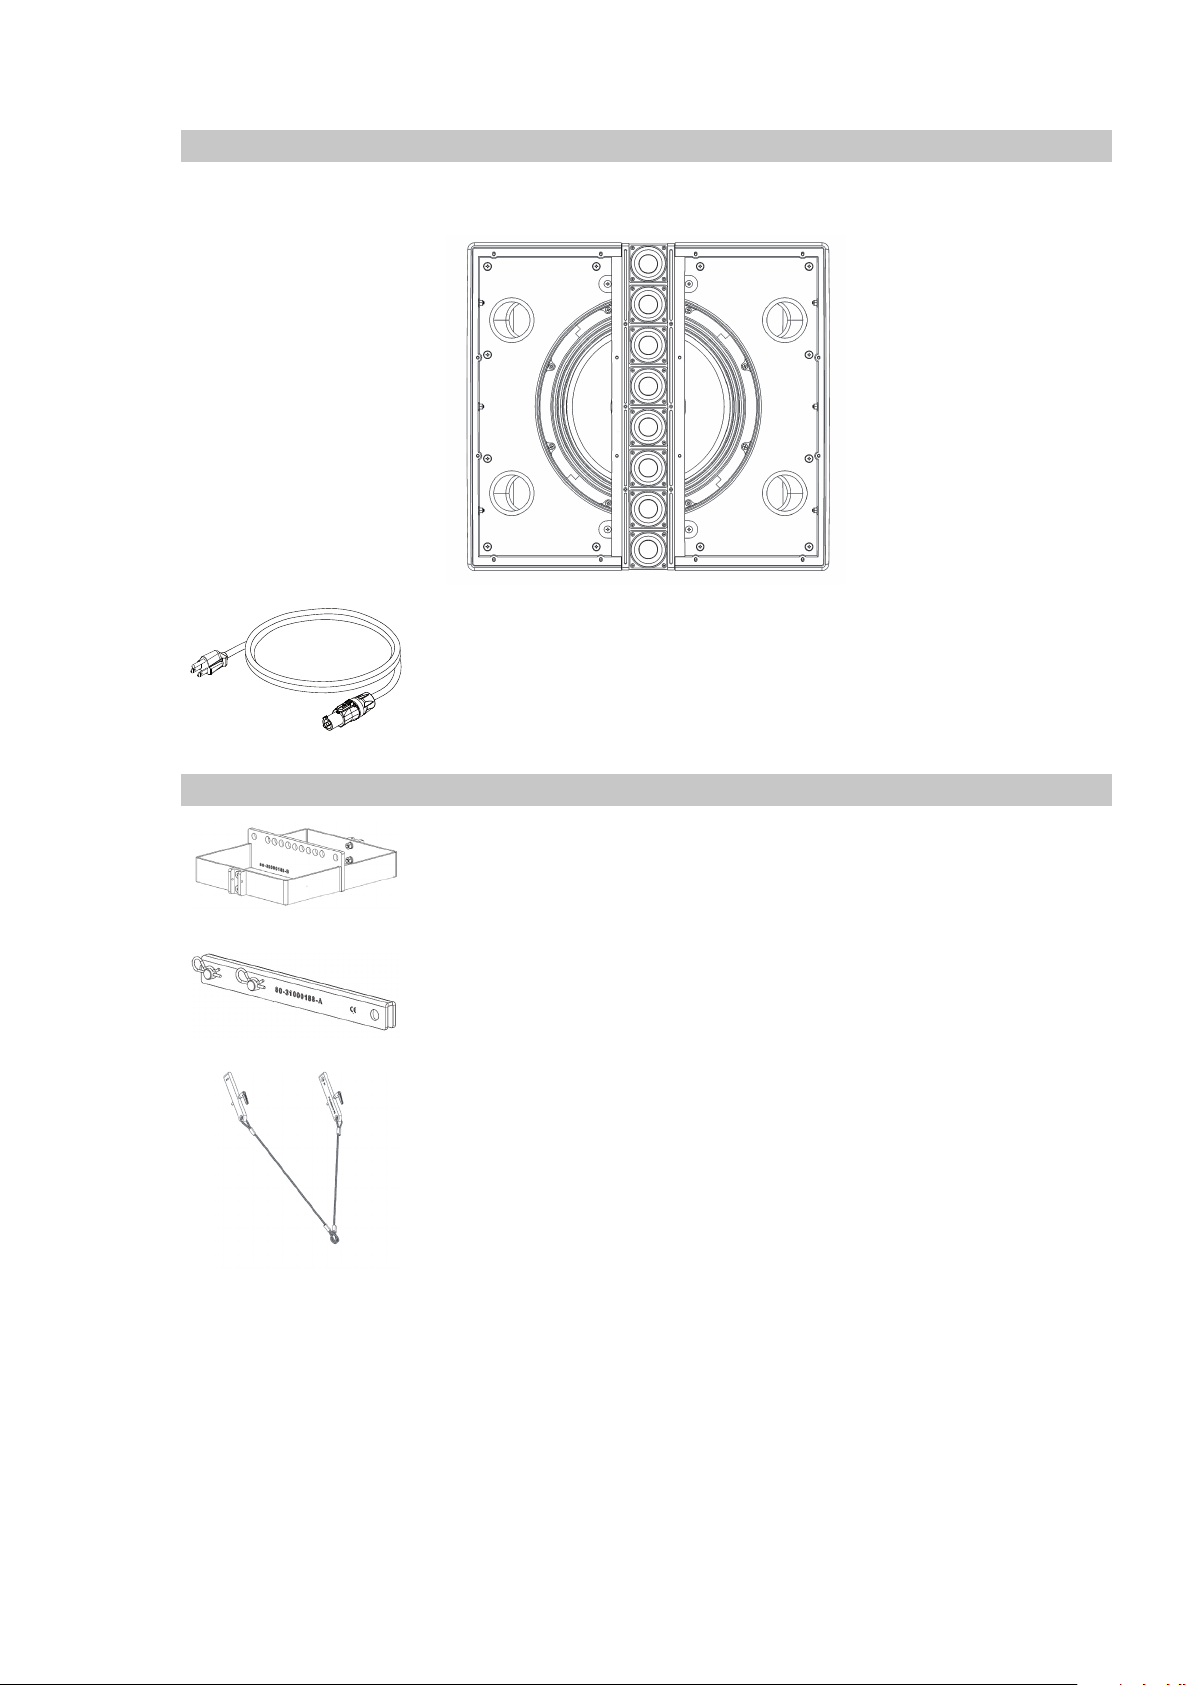
In addition to this manual, your CDL12P package contains the following:
• (1) CDL12P Loudspeaker
• (1) AC locking 3 conductor14AWG cord
CDL12P
Owner’s Manual
1.3 Rigging Accessories (Sold Separately)
• CDL12P Rigging Grid
• CDL Rigging Extension Bar
• CDL12P Rigging Sling
2
2 Application and Deployment
2.1 Getting Started
2 Application and Deployment
The CDL12P can be congured as an individual point-source loudspeaker
or in a vertical array with other CDL12P loudspeakers. Integrated rigging
makes easy and secure box-to-box deployment. When suspending two or
more arrayed CDL12P loudspeakers, PreSonus requires the CDL12P Rigging
Grid. This separately sold rigging grid allows the suspension up to (6) CDL12P
loudspeakers. For all supported congurations, see the chart in Section 2.6.
Up to two CDL12P loudspeakers maybe be used on a tripod or on a sub
pole over the CDL18s. A single CDL12P may be mounted atop a ULT18,
or AIR18 subwoofer (See Section 2.7 for restrictions and guidelines). The
CDL12P is equipped with a two-position pole-mount to provide more
exible coverage when pole-mounted (0˚ or 7.5˚ downward).
IMPORTANT: In all cases, when rigging loudspeakers together, attach
the bottommost unit to the loudspeaker directly above it, moving up the
grid to the topmost unit, ending with the CDL12P Rigging Grid.
WARNING: The CDL12P weighs 63 lbs. (28.6 kg). Use proper lifting techniques
to avoid serious injury. Please see Section 2.4 for Maximum Suspended Load.
WARNING: When assembling or disassembling arrayed
loudspeakers, make sure that all components are properly
supported throughout the entire process to avoid damage or injury.
WARNING: To ensure secure latching, verify that the loudspeakers are
properly aligned for box-to-box vertical arraying. If loudspeakers are not
properly aligned, physical damage, and personal injury may occur. The top of each
loudspeaker should be parallel to the bottom of the unit above it. For suspension,
the topmost unit must be securely attached to the CDL12P Rigging Grid.
CDL12P
Owner’s Manual
2.1 Getting Started
2.2 Cooling
Before you begin, here are a few general rules of thumb:
• Always make sure your loudspeakers are powered o when making connections.
• Do not allow your inputs to clip. Watch the Clip LED on the back of your
loudspeaker. When this LED illuminates, it indicates that the analogto-digital converters are in danger of being overdriven. Overdriving
the converters causes digital distortion, which sounds terrible.
Your PA and attached equipment should be powered on in the following order:
1. Sound sources (keyboards, D.I. boxes, etc.) connected to your mixer
2. Mixer
3. CDL12P Loudspeakers
When it’s time to power down, your system should be turned o in the reverse order.
CDL12P loudspeakers are internally-powered. As such, they utilize a power amplifier
that produces heat. Allow a minimum of 6” (152.4 mm) clearance at the rear of the
enclosure for cooling. Do not restrict airflow to the rear of the speaker enclosure.
CAUTION: To avoid overheating, do not install enclosures with the amplier
panels exposed to direct sunlight. This can heat the amplier module and
reduce performance. Install sunshades to avoid direct exposure. The maximum
ambient temperature for full performance should not exceed 104˚ F (40˚ C).
CAUTION: Do not install enclosures where they will be exposed to rain
or other moisture. CDL12P loudspeakers are not weatherproof. Protection
from the elements must be provided in outdoor installations.
3
 Loading...