

PreSonus AudioBox Stereo User Manual

AudioBox™ Stereo
Quick Start Guide
®
www.presonus.com
English

Table of Contents
1 Overview — 1
1.1 Introduction — 1
1.2 About This Guide — 2
1.3 Technical Support — 2
1.4 Summary AudioBox Stereo
Features — 3
1.4.1 AudioBox USB — 3
1.4.2 Studio One Artist — 3
1.5 What is in the Box — 4
2 Hookup — 5
2.1 Front-Panel Connections — 5
2.2 Rear-Panel Connections — 6
3 Connecting to
a Computer — 7
3.1 AudioBox USB Driver
Installation — 7
3.1.1 Installation
for Mac OS X — 7
3.1.2 Installation for
Windows — 7
3.2 Studio One: Installation and
Authorization — 7
3.2.1 Running the Studio One
Installer — 8
3.2.2 Creating a User
Account — 8
3.2.3 Activating Studio One Artist
Online — 9
3.2.4 Activating Studio One Artist
Offline — 10
3.2.5 Installing Bundled Content for
Studio One Artist — 13
3.2.6 Installing Third-Party
Content — 14
4 Setting up
and Recording — 15
4.1 Microphone Placement — 15
4.1.1 Mounting Your
Microphones — 16
4.1.2 Positioning Your
Microphones — 17
4.2 Connect Your AudioBox Stereo
Bundle — 19
4.3 Configure Studio One Artist — 20
4.4 Create a New Song
in Studio One — 21
4.5 Record in Studio One Artist — 23
4.6 Play Your Audio — 25
5 Using Your
Recordings — 26
5.1 Level and Balance — 26
5.2 Adding Plug-in Effects — 27
5.3 Exporting Audio — 28
1 Overview
1.1 Introduction
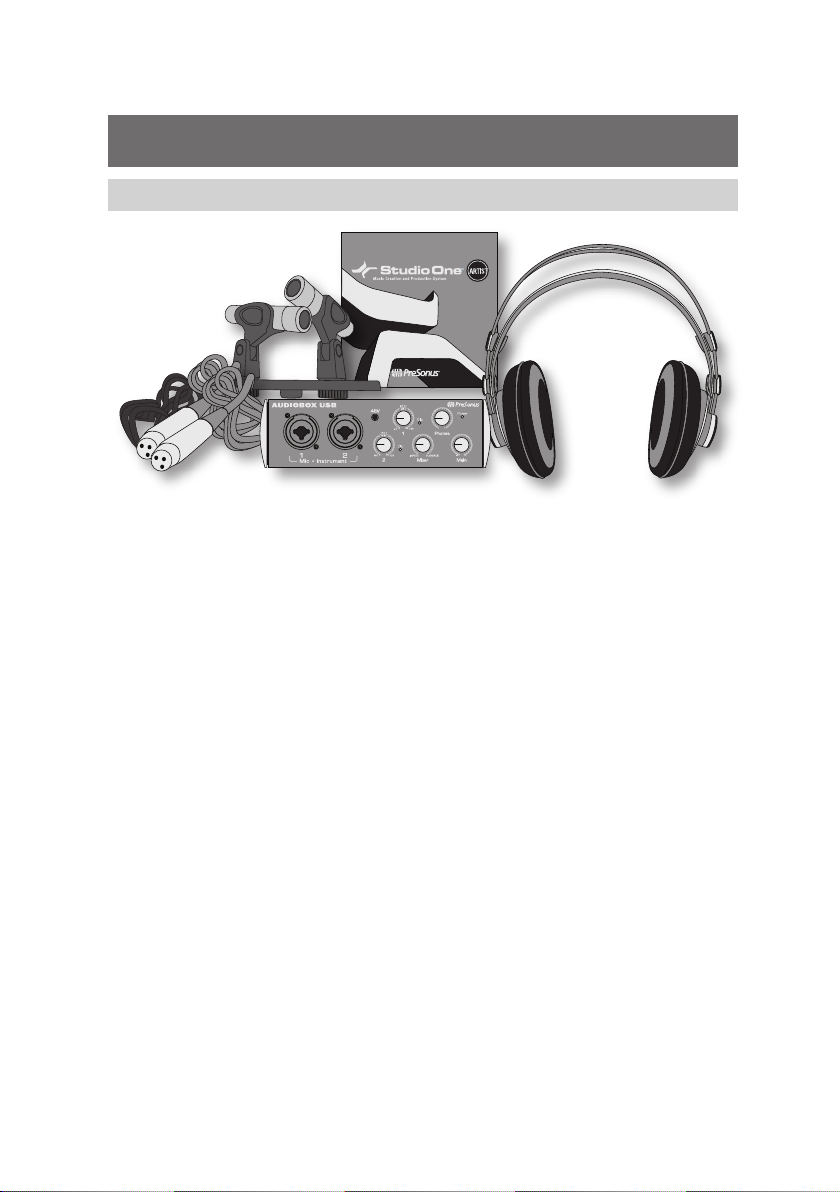
Thank you for purchasing the PreSonus AudioBox™
Stereo bundle. You now own all the tools you need
to create professional-quality stereo recordings.
All you need is a computer with a USB connection,
an artist to record, and a little inspiration.
Your AudioBox Stereo bundle includes:
• AudioBox USB. A 2x2 USB recording interface
• PS626 Stereo Microphone Kit. Two small
• HD7 Professional Headphones. Lightweight, ergonomic
• Studio One Artist. Complete recording and
We encourage you to contact us with questions or
comments regarding this product. PreSonus Audio
Electronics is committed to constant product improvement,
and we value your suggestions highly. We believe
the best way to achieve our goal of constant product
improvement is by listening to the real experts: our
valued customers. We appreciate the support you have
shown us through the purchase of this product.
AudioBox™ Stereo User Guide
with 2 Class A microphone preamplifiers, zerolatency analog monitoring, and MIDI I/O.
diaphragm condenser microphones with
XLR cables and XY microphone mount.
design with a patented, semi-open sound chamber.
production software for Windows® and Mac OS X®.
1

1.2 About This Guide
1.2 About This Guide
This guide is written to help you get acquainted with
your AudioBox Stereo bundle. Complete information
about the AudioBox USB interface can be found in the
user manual located on the AudioBox driver disc. We
suggest that you use this manual to familiarize yourself
with the features, applications, and correct connection
procedures for the AudioBox Stereo bundle before trying
to connect your AudioBox to a computer. This will help
you avoid problems during installation and setup.
Throughout this guide and the user manual, you will
find Power User Tips. These tips provide useful hints on
how to best use the AudioBox Stereo bundle and take
advantage of unique workflow functions and features.
1.3 Technical Support
Many technical issues can arise when using a standard
computer as a digital audio workstation (DAW) and when
networking wireless devices. PreSonus can only provide
support for issues that directly relate to the AudioBox
Stereo bundle. PreSonus does not provide support
for computer hardware and non-PreSonus hardware
and software, and it may be necessary to contact the
manufacturer of these products for technical support.
Please check our Web site (www.presonus.com) regularly for
software information and updates, firmware updates, and
support documentation for frequently asked questions.
Online technical support is available at www.presonus.com/
support/Contact-Technical-Support. PreSonus telephone
technical support is available to customers in the USA on
Monday through Friday from 9 a.m. to 5 p.m. Central Time by
calling 1-225-216-7887. Customers outside of the USA should
contact their national or regional distributor for telephone
technical support. A list of international distributors is provided
at www.presonus.com/buy/international_distributors.
Advanced troubleshooting guides can be found
at http://support.presonus.com/forums.
Please note: you must register your product at My.PreSonus.
com to validate your warranty and receive technical support.
2

AudioBox™ Stereo User Guide
1.4 Summary AudioBox Stereo Features
1.4.1 AudioBox USB
• 24-bit/48 kHz sampling rate
• 2 Class A microphone preamplifiers
• 2 Instrument inputs
• MIDI I/O
• 2x2 USB 1.1 audio interface
• Headphone outputs
• Analog monitor mixing with playback/input mix control
• Rugged steel chassis
• Mac OS X® and Windows® compatible
1.4.2 Studio One Artist
All PreSonus audio interfaces include PreSonus Studio
One Artist recording software, which comes with over 6
GB of plug-ins, loops, and samples, giving you everything
you need for music recording and production. This
manual will take you through the basics of recording
and exporting audio, however you will find a complete
user manual on the Studio One Artist installation DVD.
• Unlimited track count, inserts, sends,
and plug-in instantiations
• 21 high-quality PreSonus Native Effects™ plug-ins, in
eight categories: amp modeling (Ampire XT), delay
(Analog Delay, Beat Delay), distortion (RedLight Dist™),
dynamics processing (Channel Strip, Fat Channel,
Compressor, Gate, Expander, Limiter, Tricomp™),
equalizer (Channel Strip, Fat Channel, Pro EQ),
modulation (Autofilter, Chorus, Flange, Phaser, X-Trem),
reverb (Mixverb™, Room Reverb), and utility (Binaural
Pan, Mixtool, Phase Meter, Spectrum Meter, Tuner)
• Four high-quality PreSonus virtual instruments,
including: Presence™ sample player, Impact™
drum machine, SampleOne™ sampler, and Mojito
analog-modeled subtractive synthesizer
• Over 6 GB of loops, samples, and instruments
• Innovative and intuitive MIDI mapping
• Powerful drag-and-drop functionality for faster workflow
• Mac OS X® and Windows® compatible
3
1.5 What is in the Box
ARTIST
Music Creation and Production System
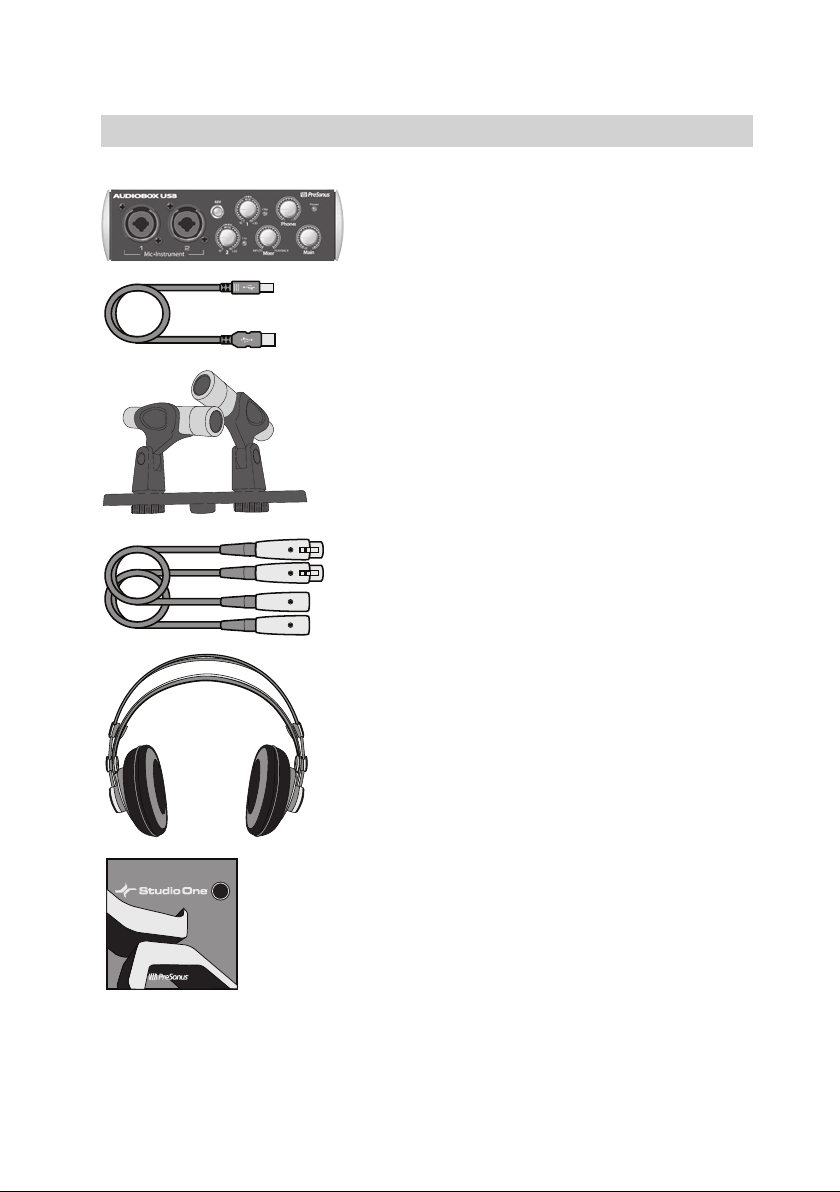
1.5 What is in the Box
Your AudioBox Stereo bundle contains the following:
PreSonus AudioBox USB recording interface
6’ (1.8m) USB cable
2 PS626 microphones with XY stereo bar
2 15’ XLR cables
HD7 headphones with storage bag
Software Library containing
• PreSonus Studio One Artist installation DVD
• AudioBox driver and manual CD
4
2 Hookup
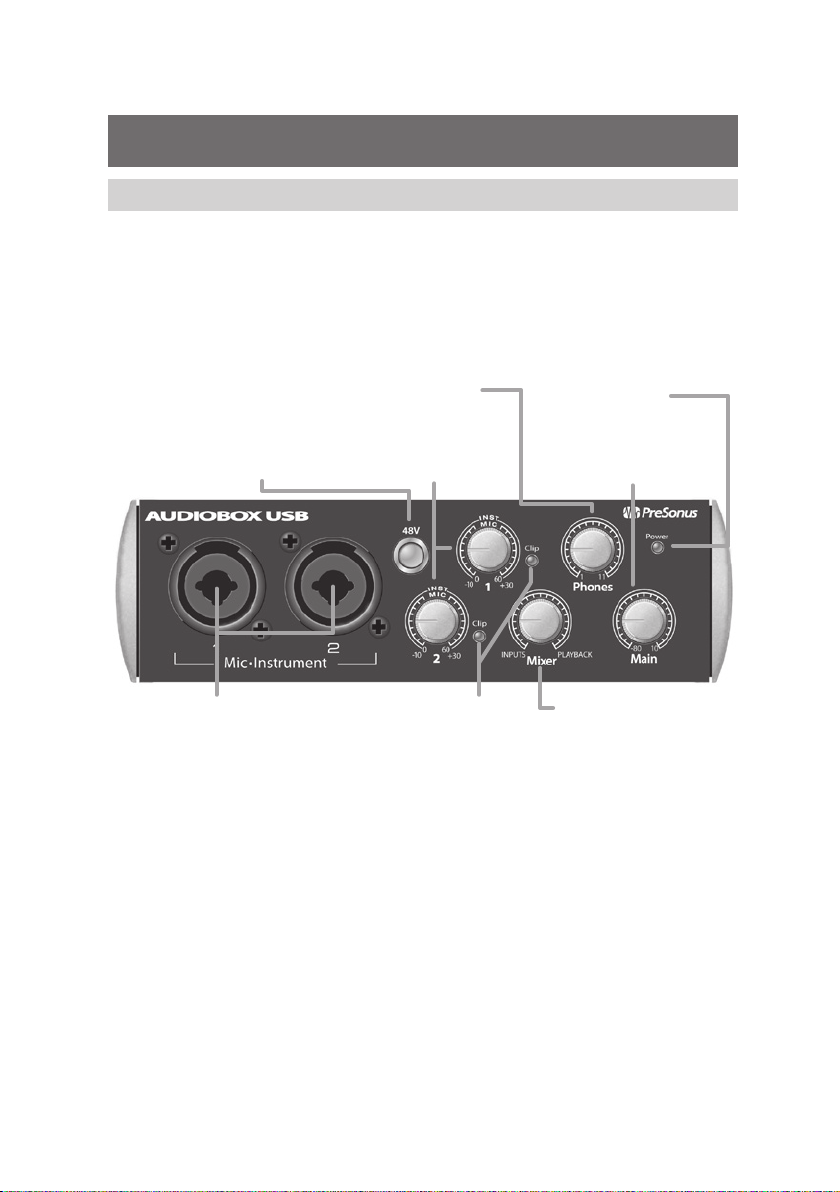
2.1 Front-Panel Connections
48V Phantom Power. This
button activates phantom power
for both microphone preamps.
Power User Tip: Condenser
microphones, like the PS626
microphones included in your
AudioBox Stereo bundle require
+48V phantom power to o perate.
When using microphones other
than those included in this
bundle, review the manufacturer’s
documentation to verify that
phantom power is required and
will not damage the microphone.
Phones Level. This knob
controls the output level for
the headphone connection
on the back of the unit.
Input Gain/Trim Control.
These knobs adjust the
input gain level for their
respective inputs.
AudioBox™ Stereo User Guide
Power LED. This LED indicates
bus power. It will illuminate
red when the AudioBox USB
is being properly powered
by the USB connection
on your computer.
Main Level. This knob
controls the output level
for the Main Outs on
the back of the unit.
Microphone / Instrument
Inputs. Each input channel
has both a microphone and
an instrument preamplifier.
The combo connectors allow
you to use either a ¼” TS
or the included XLR cables.
Use the ¼” connection for
guitars and other unamplified
instruments. Use the XLR
connections to connec t
your PS626 microphones.
Clip Indicator. Both channels
feature a clip LED next to each
trim control. This light will
illuminate red when the channel’s
input signal reaches 0 dBFS.
Power User Tip: Never run your
input levels higher than the channel
inputs can handle. If you overdrive
the analog-to-digital converters, it
will cause digital distortion, which
sounds terrible and will ruin an
otherwise wonderful recording.
Always set your input levels so that
the clip light rarely, if ever, comes
on. It’s important to remember
that you can usually increase
the level of a recording that is
too quiet, but once a recording is
clipped, there is no way to undo it.
Mixer. The knob blends the
analog input signals with
the playback signal from
your computer. This allows
you to monitor your input
signal with zero latency. If
the knob is positioned at 12
o’clock, the input signal and
the playback stream will be
equally balanced. Turning the
knob to the lef t will increase
the level of the input signal
relative to the playback stream;
turning it right will increase the
level of the playback stream
relative to the input signal.
Power User Tip: In most instances
you will set the Mixer knob to
Input while you are recording and
Playback when you are listening
to your recordings in Studio One.
5
2.2 Rear-Panel Connections
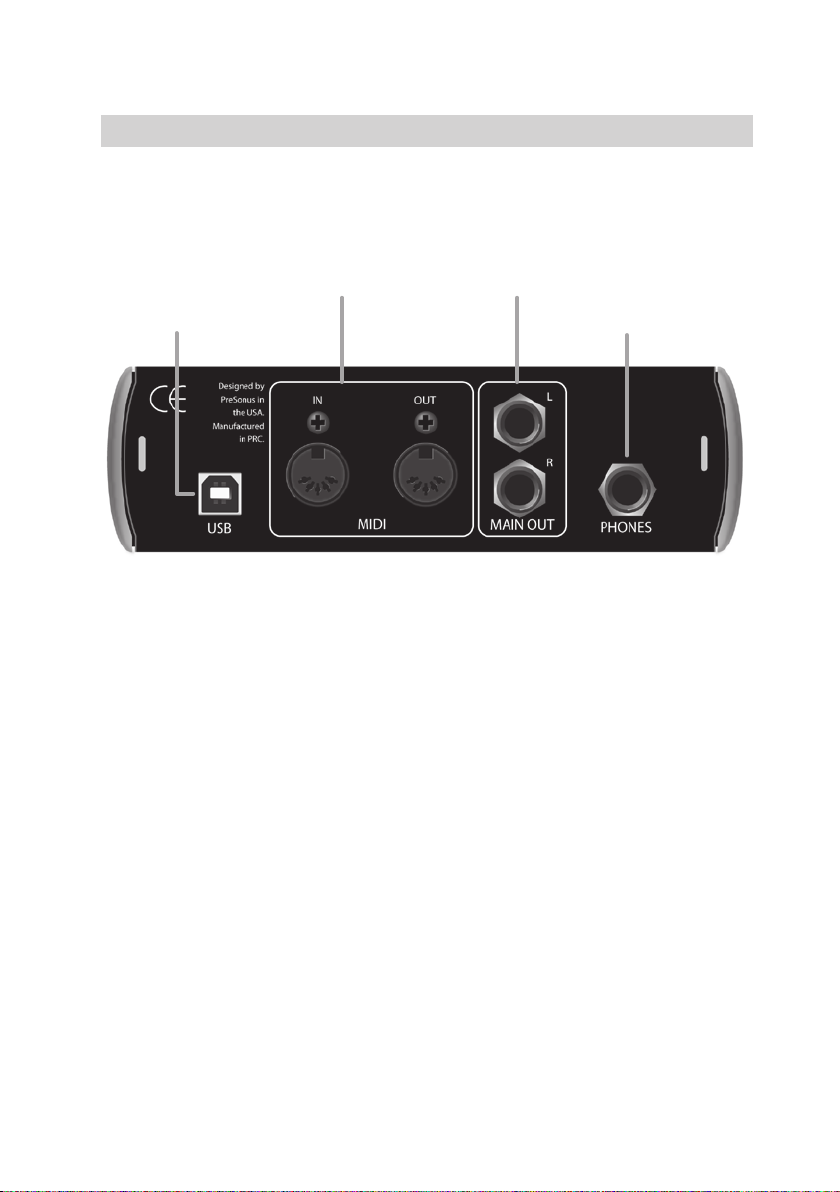
2.2 Rear-Panel Connections
USB Connection. This
is where you connect
the USB cable from
your AudioBox USB to
your computer. The
AudioBox is completely
bus-powered from
this connection.
MIDI In and Out. The
MIDI connections are
for use with external
MIDI equipment for
sequencing and other
MIDI functions.
Main Outputs. This
is where you connect
your studio monitors.
The Main knob on the
front of the unit controls
the output level.
Headphone Output.
This is where you
connect your HD7
headphones. The
Phones volume
knob on the front
of the unit controls
the output level.
6

3 Connecting to a Computer
3.1 AudioBox USB Driver Installation
3.1.1 Installation for Mac OS X
The AudioBox USB is a class-compliant Core
Audio device. No driver installation is necessary
in OS X. Simply connect the USB cable from your
AudioBox USB to your Mac to begin using it.
3.1.2 Installation for Windows
The AudioBox installer requires that your AudioBox
USB be connected to your computer. Connect your
AudioBox USB to an available USB port and insert
the Installation CD into your disc drive. The installer
will auto-launch and guide you through each step of
the process. Please read each message carefully.
We recommend that your quit all applications
before you start the installation.
After you have followed the onscreen instructions,
you will be alerted that the installation was successful
and asked to reboot your computer. Clicking “Finish”
will automatically restart your computer.
AudioBox™ Stereo User Guide
3.2 Studio One: Installation and Authorization
Once you have installed the AudioBox drivers and
connected the AudioBox USB to your computer, you can use
the included PreSonus Studio One Artist music-production
software to begin recording, mixing, and producing music.
7
3.2 Studio One: Installation and Authorization
n
u
s
A
u
d
i
o
E
l
e
c
t
-
A
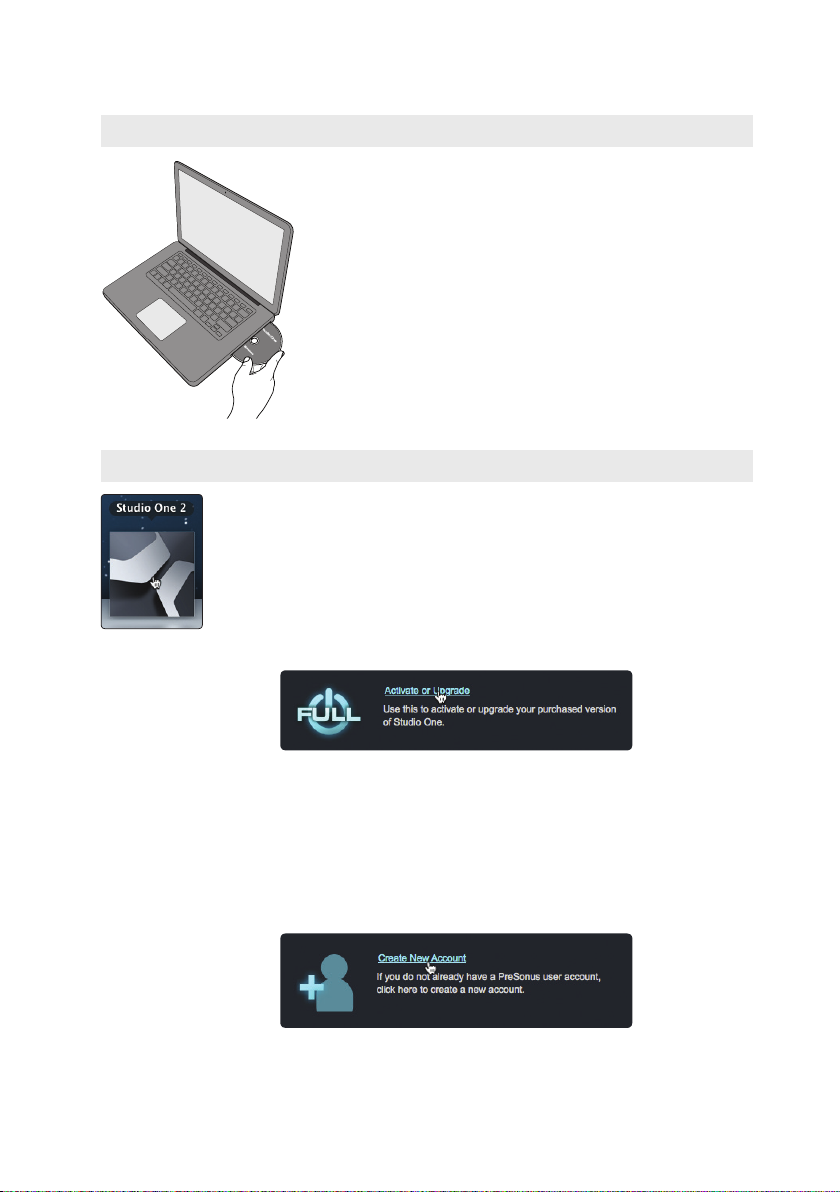
3.2.1 Running the Studio One Installer
To Install Studio One Artist, insert your Studio One
Artist installation DVD into your computer’s DVD
drive.
Windows Users: Launch the Studio One Artist
installer and follow the onscreen instructions.
Mac Users: Drag the Studio One Artist application
into the Applications folder on your hard drive.
3.2.2 Creating a User Account
1. After installing Studio One Artist, launch the program, and the
Activate Studio One menu will appear.
2. Click on the Activate or Upgrade link to begin.
3. If you are a new Studio One user, you will need to create
a user account. Click on the “Create New Account” link
if your computer is connected to the Internet.
If you already have a PreSonus user account, you can skip
to Section 3.2.3 “Activating Studio One Artist Online.”
If your computer is not connected to the Internet, skip
to Section 3.2.4 “Activating Studio One Artist Offline.”
8

AudioBox™ Stereo User Guide
4. Fill out the user registration form. You will be asked to create
a username and password. This information will be used to
access your PreSonus user account on the PreSonus Web
site. With this account, you can manage the registrations
for all of your PreSonus hardware and software products.
You will be notified of, and will have access to, important
information and updates related to your PreSonus products,
ensuring you get the best performance possible from them.
Your username and password will also provide you
with access to the PreSonus user forums to chat with
other PreSonus users as well as PreSonus employees.
Power User Tip: Once your user account has been
successfully created, you will be alerted that the
activation email has been sent to the email address that
you provided. Don’t forget to activate your PreSonus
user account the next time you check your email!
3.2.3 Activating Studio One Artist Online
Now that you have created a user account, you
can activate your copy of Studio One Artist.
1. Click on the Activate Online link.
9
 Loading...