

S3.15 Shroud Assembly and Maintenance Guide
6 - 1³⁄₄" buttonhead screws
6 - tapered spacers
A
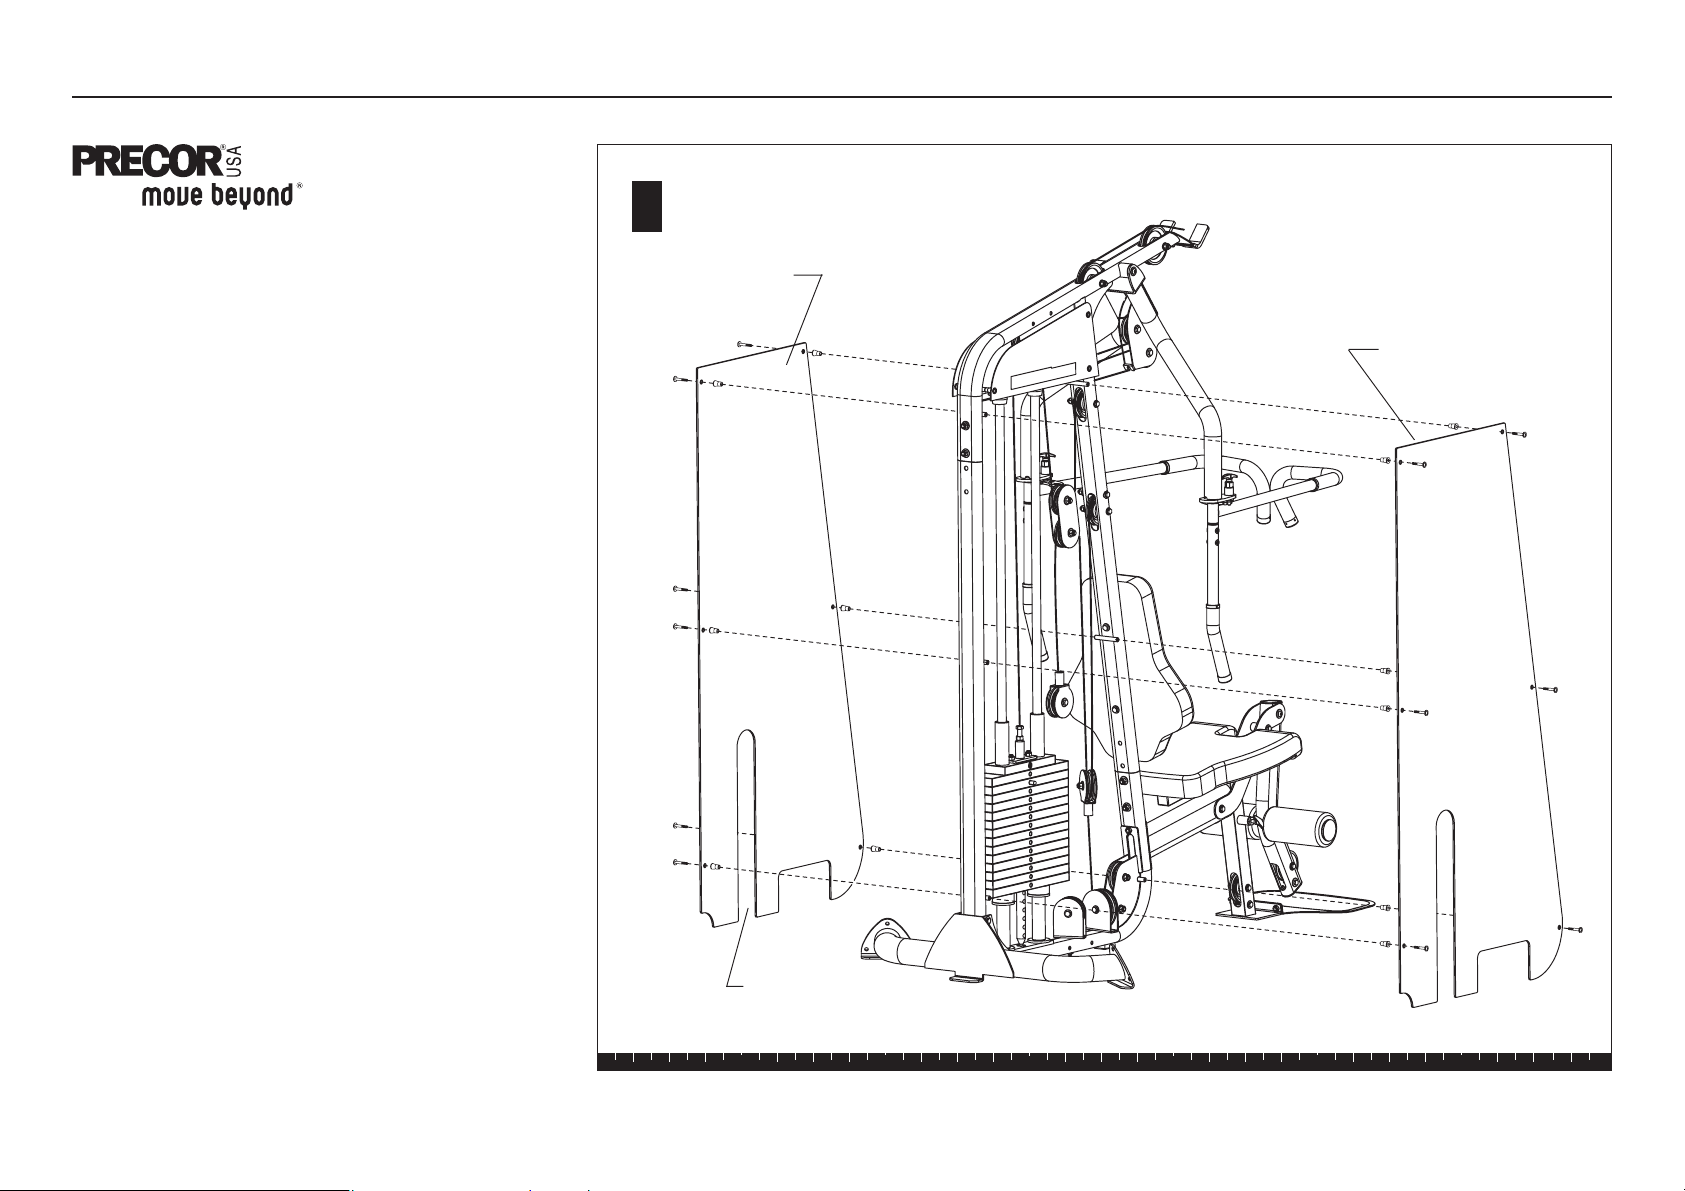
S3.15 Shroud Assembly
Two acrylic Shrouds attach to the Main Frame.
Complete the assembly steps for one side of the unit
before moving to the other.
Note: If you have purchasesd the S3.19, follow the
Shroud installation instructions found in the
Assembly and Maintenance Guide
.
The frosted side of the Shroud faces the Weight Stack.
Install the Shrouds so the cutouts allow access to the
Weight Stack Pin.
Important: Handle each Shroud with care. The acrylic
shrouds require special handling as they are easily
scratched.
A. Attach a Shroud to each side of the Main Frame
using
6 - 1¾-inch buttonhead screws
6 - tapered spacers
Start with top fasteners and work toward the base.
Ask your assistant to hold the Shroud in place
while you insert the top spacers and fasteners.
Alternately finger tighten all six fasteners while
adjusting the alignment.
B. If necessary, loosen the fasteners on the Upper
Shroud and adjust it so its bottom edge is parallel
to the top edge of the acrylic shroud. Wrench
tighten all fasteners using a 5mm hex key.
CAUTION: Do not over tighten. You can crack or
warp the Shroud if too much pressure is applied to
the fasteners.
S3.19
Shroud (frosted side
faces weight stack)
Cutout in
Shroud
1 2 3 4 5 6
S3.15
Shroud (frosted side
faces weight stack)
S3.15 Shroud Assembly
P/N 49502-102
06 November 2006

S3.15 Shroud Assembly and Maintenance Guide
Shroud Maintenance
CAUTION: Clean the Shrouds with product
specifically labeled as safe for acrylic. Use a clean,
nonabrasive cloth and light pressure to avoid
scratching the acrylic surface.
The acrylic Shrouds are easily scratched or damaged
through improper cleaning techniques. To avoid
problems, dust the shrouds often with a clean, lint-free
cloth and light pressure. Avoid rubbing dirt or grit into
the surface. If you use glass cleaner or a similar
product, make sure the label states that it is safe to
use on Plexiglas® or acrylic products.
Important: DO NOT use ketones, aromatics, esters,
halogens, window cleaning sprays, alcohol, kitchen
scouring compounds, or solvents (such as acetone,
benzene, gasoline, carbon tetrachloride, or thinners).
Do not use ammonia-based cleaning solutions
because the ammonia destroys the plastic coating.
To remove light scratches on the smooth side only, use
a buffing compound such as, car wax. Lightly buff the
acrylic sheet using a clean buffer until the scratches
disappear.
Shroud Maintenance
page 2
 Loading...