

Page 1
Page 2

Table of contents
Quick Scanning Guide iii
1 Installation
System requirements 1-2
Installing the software 1-3
Technical Support 1-4
Registration card 1-4
2 Scanning
Starting up the software 2-1
Inserting originals for scanning 2-2
Choosing initial settings 2-3
Making a preview scan 2-5
Adjusting settings based on the preview 2-7
Making a final scan 2-11
The Scan to Disk option 2-11
i
Page 3

3 Advanced scanning settings
When to use advanced features 3-2
Image adjustment: the basics 3-2
Automated features 3-6
Exposure adjustment 3-8
Setting a white, black and gray point 3-9
Adjusting brightness, contrast, and midtone (gamma) 3 - 1 1
Adjusting the tonescale curve 3-13
Adjusting color saturation 3-14
Adjusting sharpness 3-15
Saving and reusing your settings 3-17
Plug-in preferences 3-18
4 Troubleshooting
Tips on correcting images 4-3
Hardware and software problems 4-7
Polaroid Offices and Service Centers 4-9
Appendix A: Glossary A-1
License Agreements L-1
Index I-1
ii
Page 4
Quick Scanning Guide
See page Use this guide as a quick reference for scanning.
– – 1 Connect your scanner to your computer (see your scanner
hardware manual). Turn on the scanner, then your computer.
1-3 2 Install the SprintScan software, then restart your computer as
instructed.
2-1 3 Open your Adobe Photoshop or compatible application.
2-1 4 Open the SprintScan plug-in by choosing File, Acquire.
2-2 5 Insert your original. Place a mounted slide in the top access
slot, or place an unmounted slide or filmstrip negative into the
filmstrip carrier and insert the carrier into the side access slot
from the right.
2-3 6 Choose a film type from the Film pop-up menu.
2-3 7 Choose Color or Grayscale from the Type pop-up menu.
2-4 8 If necessary, change orientation to match your original by
choosing Portrait, Landscape or SuperSlide from the View
pop-up menu.
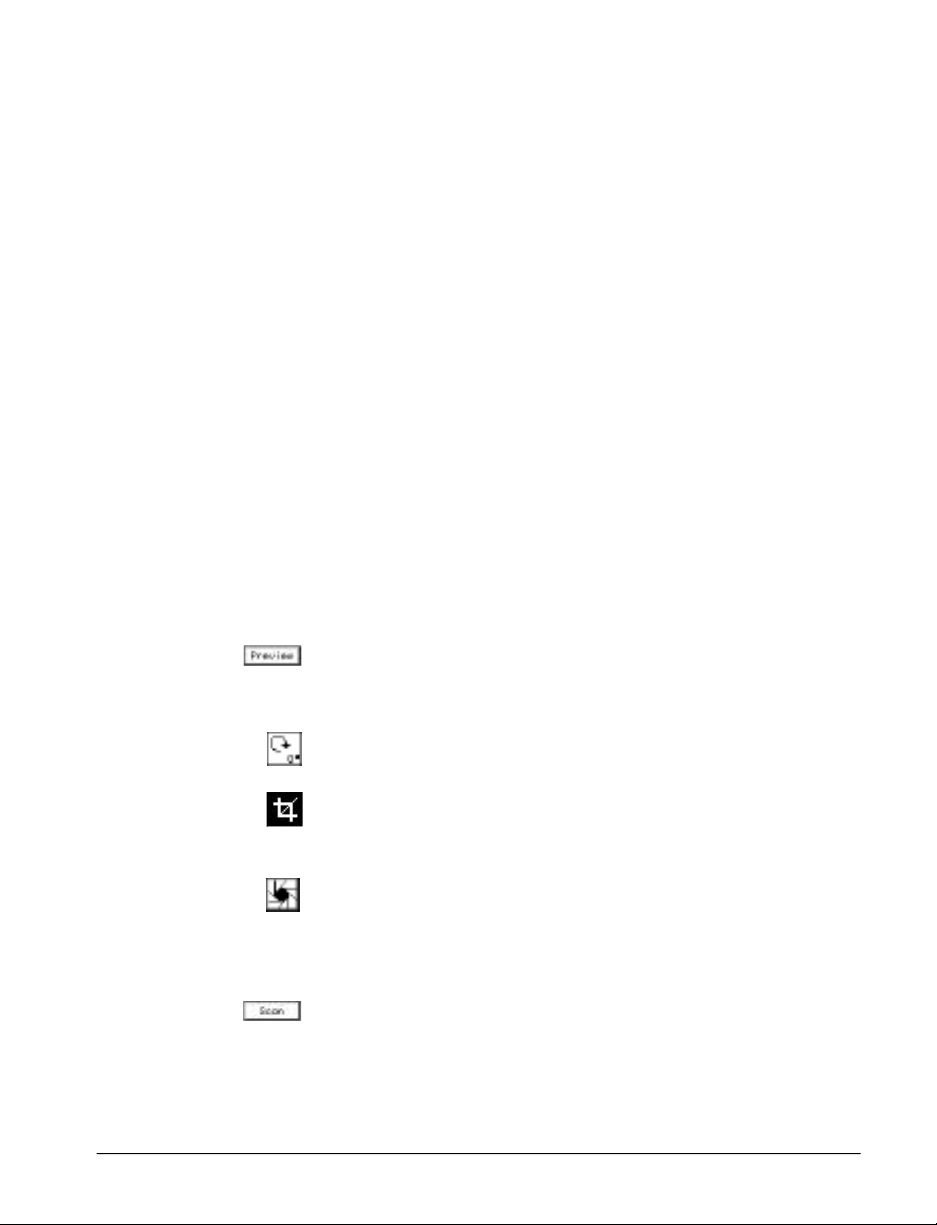
2-5 9 Click the Preview button. Your original will be moved down
in front of the lens, then raised again after preview. A preview
image will appear in the image area of the plug-in.
2-7 10 Click the rotation icon to rotate the preview image in 90º
increments, if necessary.
2-7 11 Change the area of interest, if desired, with the cropping tool
on the Preview window. (Click the Cropping button if it is not
already selected.)
2-9 12 Click the Auto Exposure button if you want the plug-in to
make automatic adjustments to the image.
2-4 13 Choose the output resolution you want from the Resolution
pop-up menu.
2-11 14 Click the Scan button. The original is lowered into the scan-
ner again. All the settings you have specified apply to the final
scan. The scanned image then appears in your imaging
application.
Quick Scanning Guide iii
Page 5

1 I n s t a l l a t i o n
The SprintScan 35 software for Macintosh is an Adobe
Photoshop plug-in module that automatically transfers final
scans into Adobe Photoshop or other compatible software, or
saves final scans directly to disk.
First, connect your scanner to your computer as described in
your scanner hardware manual. Then, install the SprintScan
35 software as described in this chapter.
The software features real-time sharpening options, and tone
and color correction. Recent improvements to the software
include:
•Automatic maximum sizing of the preview window
•Simplified, efficient scanning features
•Adjustable tone curve control
•Auto highlight, shadow and contrast
•Gray balance correction
•Enhanced user interface controls, such as one-click controls
•Support for the SprintScan 35 Plus scanner
1-1
Page 6

System re q u i re m e n t s
M i n i m u m •A Macintosh II family, Quadra family, PowerPC or
Powerbook computer (use appropriate Powerbook SCSI
cable as required)
•System 7.01 or later
•12 MB of RAM
•A 256 (8-bit) color monitor
•Adobe Photoshop v3.0.4 or later, or Adobe Photoshop plugin-compliant software
R e c o m m e n d e d •A PowerPC computer
•System 7.53 or later
•32 MB of RAM
•A 24-bit color monitor
•Adobe Photoshop v3.0.4 or later
SprintScan plug-in The SprintScan plug-in requires:
•Free disk space: Three times the image size
•4 MB of RAM in addition to the requirements of the
application
Note: Application memory is the amount of memory avail-
able for the application after the system has started. The
imaging application should have enough memory (combined
RAM and hard disk memory) to allow for about three times
the maximum image size you plan on scanning. This means
you should have the minimum memory plus enough memory
for the maximum scan size. Note that the maximum scan size
depends on the images and resolutions you want to scan. For
example, scanning a 35mm slide at 500 dpi resolution
requires about 1.2 MB of memory. Scanning the same slide at
1950 dpi requires 18 MB of memory, and at 2700 dpi, about
32 MB of memory, which means utilizing the hard disk.
1-2
If you do not have the minimum required configuration for
using the SprintScan 35, contact the dealer from whom you
purchased your computer system.
Page 7

Installing the software
Before you install A folder for Plug-ins must be on your system for the installa-
tion of the plug-in module. This folder should have been
included when you installed the Adobe Photoshop or compatible application. If you do not have a Plug-ins folder on your
system, see the user guide to your application. Note: The
SprintScan Plug-in requires 4MB of RAM beyond the normal
application requirements. To accommodate the plug-in, you
may need to increase the amount of RAM allocated to your
application.
Upgrade customers If you are upgrading from a previous version of SprintScan
35, do a full install as described below, not a Custom install.
As part of the installation, the new install program will move
your old SprintScan 35 Preferences Folder to the trash.
Installation 1 Insert the SprintScan installation disk into a floppy drive.
2 Open the disk, if its contents are not already visible.
3 Be sure to read any Read Me First file included on the disk. The
Read Me First file contains important late-breaking product
information that may affect installation and use.
4 Double-click the Installer icon to open the Installer program.
Note: If you are using a PowerBook 5300 computer, click the
Installer icon “for PowerBook 5300 owners” to install a version of SprintScan 35 that is designed to avoid problems with
older versions of that computer.
5 Click Continue on the Polaroid screen.
6 Click the Install button to install the full program, even if you
are upgrading from a previous version. To reinstall selected
parts of the software, click Custom and make your selection.
7 The system will prompt you to select your Plug-ins folder.
Double-click to open folders until the folder containing Plugins is selected. For example, in Adobe Photoshop, open the
Plug-ins folder and highlight the Acquire/Export folder.
8 When installation is complete, click Restart. If you have
upgraded from a previous version, empty the trash. To startup
the SprintScan 35 software, see page 2-1.
Installation 1-3
Page 8

Technical Support
Before you call, have ready the following information:
•The model of your computer, including the kind of processor,
and the amount of RAM you have
•The model and serial number of your SprintScan 35 (located
on the bottom or rear panel of the scanner)
•A list of other devices attached to your system, such as CDROM drives, printers, external hard disks, and other SCSI
devices
•A list of any special cards and drivers that you are using,
along with any system extensions (see the Extensions folder in
the System folder)
•Other applications you are using
•A description of the problem and the wording of any error
messages on your screen when the problem occurs
Run a system diagnostic We recommend you run a system diagnostic utility to provide
detailed information about your system before you call.
Call us You may call Polaroid toll-free from within the U.S.A. at
1-800-432-5355, or fax the information about your problem
to 1-617-386-9688, Monday through Friday, 8 A.M. to
8 P.M. Eastern Time. We offer a variety of Customer Support
Services; call us for details and applicable fees. You may also
write to Electronic Imaging Technical Support, Polaroid
Corporation, 565 Technology Square 3B, Cambridge, MA
02139. In Canada, call toll-free at 1-800-268-6970. Outside
North America, contact the Polaroid office nearest you (see
pages 4-9–4-10).
Internet support Technical Support is also available over the Internet. Connect
to our web site at: http://www.polaroid.com
Registration card
Be sure to fill out and mail your registration card. As a registered owner, you’ll receive information about software
updates and about the availability of new scanning products
from Polaroid.
1-4
Page 9

2 S c a n n i n g
S t a rting up the software
The SprintScan 35 system uses a Photoshop-type plug-in
module, which you installed in Chapter 1, to capture image
data. You must open your application to access the plug-in.
1 Turn on your scanner, then your computer.
2 Open Adobe Photoshop (or a compatible application).
3 Choose Acquire from the File menu.
4 Choose SprintScan 35.
The SprintScan 35 windows will appear.
2-1
Page 10
I n s e rting originals for scanning
The scanner can accept 35mm slide transparencies without
removal from the mounts. You can also scan unmounted
slides and 35mm filmstrips using the filmstrip carrier included
in the accessory kit. See the instructions provided with your
scanner for inserting a slide or filmstrip. Remember that the
filmstrip carrier moves in one direction, from right to left. If
you go past the image you want, remove the carrier all the
way from the left side and then insert it again from the right.
When you choose either the Preview or Scan commands, the
SprintScan scanner automatically moves the slide down for
scanning and then returns it to the start position when scanning has been completed.
With your original in the scanner and the SprintScan 35 window
visible on your screen, choose some basic settings (see the next
section). Then preview the image and make adjustments if necessary before your final scan.
2-2
Page 11

Choosing initial settings
The SprintScan plug-in provides you with files containing predetermined settings for popular film types, both negatives and
positives, to produce an accurate and satisfactory scan. You
also choose whether you want your image scanned in color or
grayscale, and the resolution for the final scan.
Film The film type files provide basic settings that should give satis-
factory results for most popular slide transparencies and film
negatives. The generic default files can be used if your film
doesn’t appear in the list.
Note: If you do not see film types other than the defaults—
Color Slide, Color Negative, and Black & White Slide—then
the film type files have not been installed correctly in the
Preferences folder. Reinstall the Preferences folder using the
Custom install option (see page 1-3).
To choose a film type:
•Open the Film pop-up menu and choose the name of the film
you are using. The name of the current film type appears as
the selected pop-up menu item.
Type Your choice of image type depends on what sort of reproduc-
tion you want to make from an original: color or grayscale.
To choose an image type:
•Open the Type pop-up menu and choose color or grayscale.
Scanning 2-3
Page 12

View You may choose portrait or landscape orientation, or the
SuperSlide format (36x36mm). In portrait orientation, height
is greater than width; in landscape orientation, width is
greater. The default is landscape orientation.
•To change orientation, open the View pop-up menu and
choose Portrait or Landscape. The image area in the plug-in
dialog box will change accordingly.
Note: If you want to change the film type, image type, or ori-
entation after making a preview scan, you’ll need to make a
new preview scan.
Note about the SuperSlide format: Be sure you do not use
the SuperSlide format with traditional slides. If you do,
SprintScan 35 scans the area equivalent to the SuperSlide format. This results in part of the slide mount appearing in the
Preview window. This affects any corrections you make to the
slide.
Output resolution You can scan an original at a number of output resolutions,
ranging from 144 to 2700 dpi. The pop-up Resolution menu
lists the native resolutions, those that give you the best results.
Non-native resolutions may be selected by choosing Other
and typing the resolution you want.
The resolution you choose applies only to the final scan.
Preview scans do not reflect output resolution, but instead use
the resolution appropriate for the screen. To choose an output
resolution:
2-4
•Open the Resolution pop-up menu in the Output box and
choose the resolution value you want, or choose Other to type
a value.
The final scan size takes into account the output resolution,
the scale factor, and whether only native resolutions can be
used, as set in the Preferences dialog box. (See Chapter 3 for
information on preferences).
Page 13

Making a preview scan
A preview, sometimes called a prescan, is an image scanned at
low resolution and stored in the scanner’s internal memory
buffer, which has a 1 MB capacity. The preview image also
appears in the image area of the SprintScan 35 window.
Working with the preview image, you can select an area of
interest using the cropping controls, and you can also change
the resolution of the image for the final scan.
The plug-in controls also allow adjustments to the preview
image’s tone, color, and sharpness without requiring you to
re-scan the original (these advanced settings are discussed in
Chapter 3). When everything is the way you want it, you then
choose Scan to capture the data and transfer it to your application.
To make a preview image:
1 Position the original in the scanner and choose initial settings.
Insert the film upside down with the emulsion side facing the
back of the scanner. (See the hardware manual for more information.)
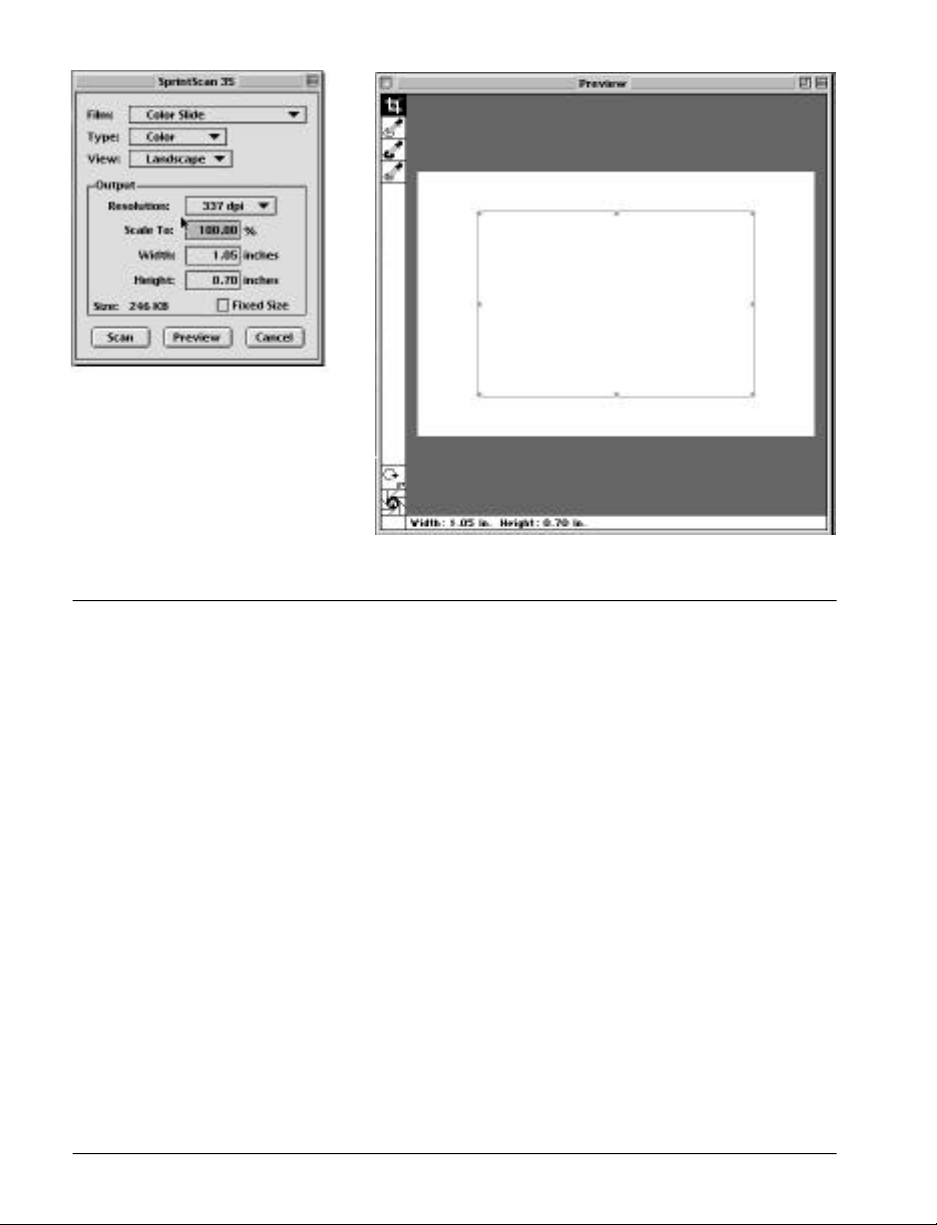
2 Click the Preview button in the SprintScan 35 window.
The original is drawn into the scanner and the image is
scanned for the preview. While the scanner is working, the
ready light will be off.
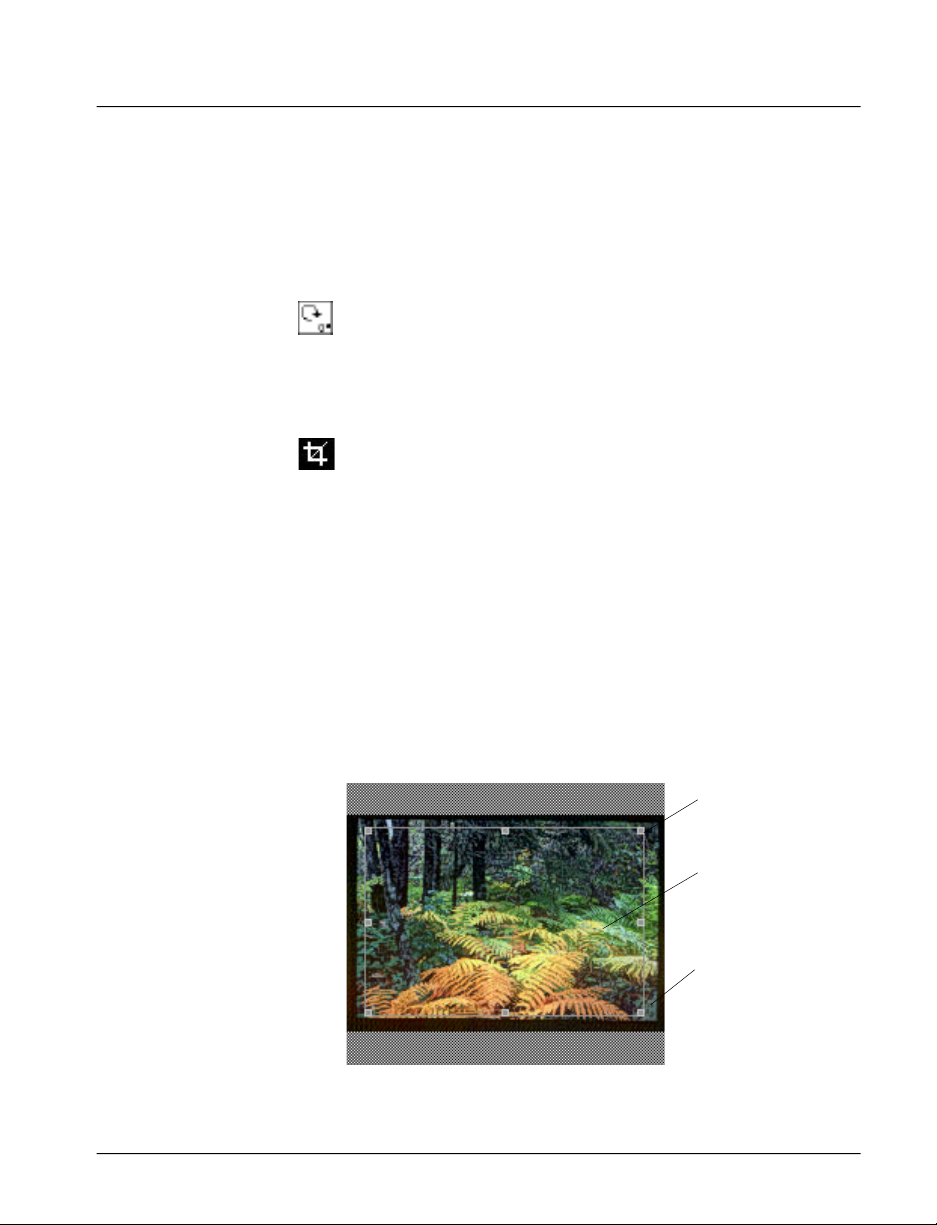
Scanning takes only a short time. After the preview scan is
completed, the original returns to the start position, the ready
light glows steadily, and the preview image appears in the preview window, as shown in the following figure.
Scanning 2-5
Page 14
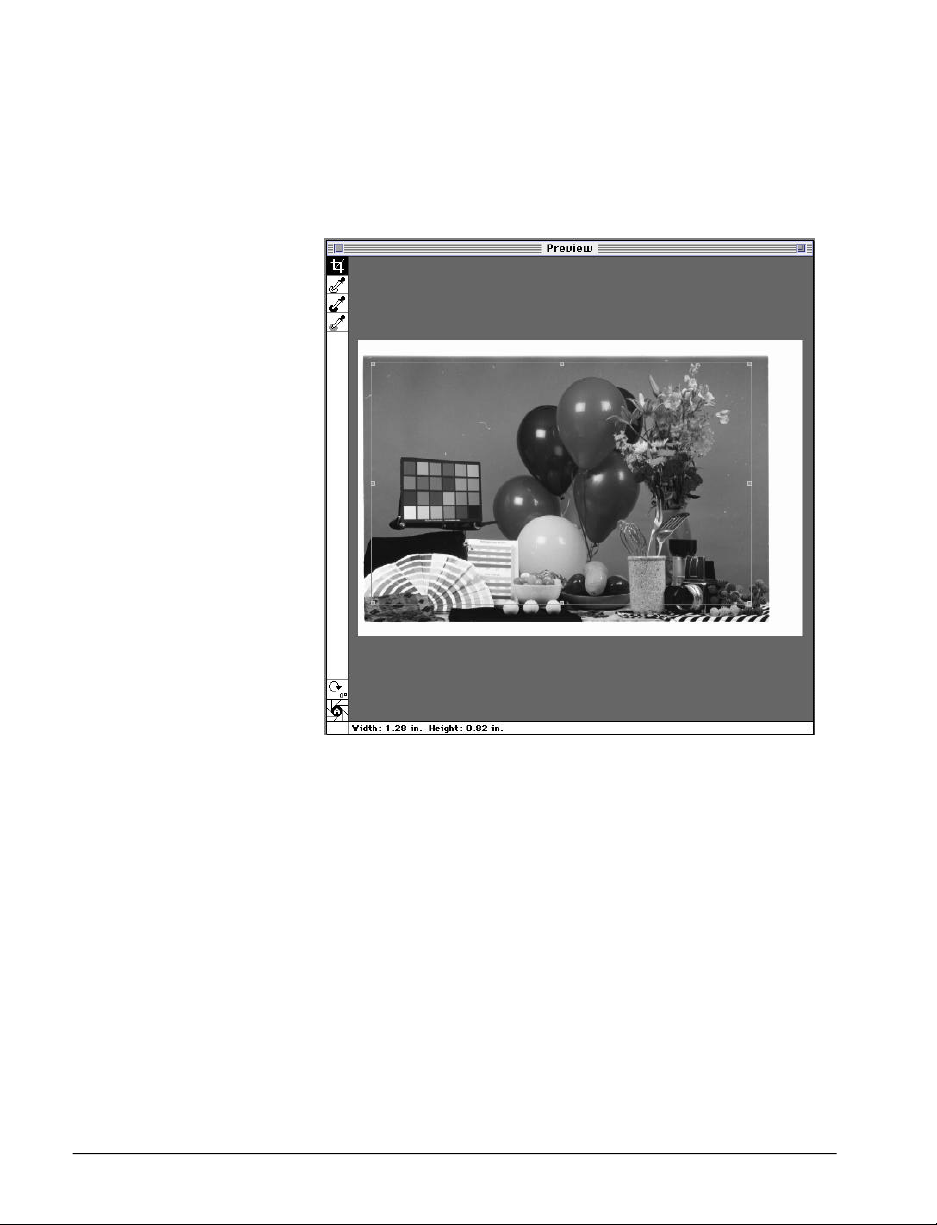
Maximized Preview The SprintScan 35 software lets you get the most of your
computer’s display by making its preview window as large as
possible. It detects the size of your display and automatically
scales the preview window to the largest display possible. If
you normally use two monitors, you can use your second
monitor as your preview window.
2-6
Page 15
Adjusting settings based on the pre v i e w
Working with the preview image, you can adjust the image’s
exposure, area of interest, designate the size of output and
scaling, if desired, and change the resolution for your output
scan. (You can change other image characteristics as well,
such as the tone, color, and sharpening, and see the result
almost instantly—see Chapter 3 for details.)
Preview rotation The SprintScan 35 software has a rotation icon that lets you
rotate the preview image in increments of 90º clockwise. The
rotation is retained by the software when you perform the final
scan. This saves you time because you don’t have to rotate
the image in your image processing application.
Cropping the area The part of an image that you want to capture is termed the
of interest area of interest. Use the selection rectangle in the image area
to center on the area of interest and to omit the unwanted
parts of the image from the final scan. (If you are not sure
how you will want the final image cropped, scan the entire
image area and crop it later using the tools in your application.) To adjust the area of interest:
1 Click the cropping tool, if it is not already selected.
2 Move the pointer into the image area. The pointer changes
shape depending on its placement.
3 Change the rectangle’s shape, drag it around, or create a new
rectangle.
Drag the handles
with the arrow to
change the shape and
size of the rectangle.
Drag inside the rectangle with the grabber hand to move the
rectangle.
Drag from outside the
rectangle with the
crosshair to make a
new rectangle, replacing the current one.
Scanning 2-7
Page 16

When you change the area of interest, the width and height
values in the status bar below the image area and in the boxes
inside the Output box change accordingly. These two sets of
values are the same if the percent shown in the Scale To box is
100%. The values in the status bar below the image always
indicate the size of the rectangle in the image area.
Constraining the aspect ratio
You can constrain the cropping tool to the width and height
ratio of your choosing. When constrained, the selection rectangle is kept to the proportions between width and height
that you have set. To constrain the tool:
1 Double-click the Cropping tool. The Crop Setup dialog box
appears.
2-8
2 Click the Constrained Aspect Ratio button to select it.
3 Enter the ratio you want between width and height. Note that
the numbers you enter are not units of measure, but an
expression of the width versus the height. For example, the
value 3 for width and 2 for height means that regardless of
the actual size of the area of interest, the width-to-height ratio
is 3:2.
4 Click OK. Now when you drag the selection rectangle, the
aspect ratio will be maintained. The actual values in units of
measure at a particular resolution value can be viewed in the
Output box.
Opening the dialog box again and selecting Normal returns
the controls to their unconstrained state.
Page 17

Auto Exposure If the button has no A in the middle of the shutter graphic,
click the button to readjust the brightness and contrast of the
image. The software estimates the best contrast and brightness
values for your original. This feature can often give you excellent output results without your having to manipulate settings
yourself.
Note: If the button has an A in the middle, the option has
been turned on for every scan as a default in the Preferences
dialog box; see pages 3-18–3-19. Auto Exposure has already
been applied to your image.
Setting output size The Width and Height values in the Output box reflect the
and scaling output size of the area of interest at a particular scale value.
To change the Width and Height values manually:
•Select the value in the Width (or Height) box and type a new
value.
The scaling value in the Scale To box changes accordingly.
Notice also that the value in the Height (or Width) box is also
adjusted. The adjustment of the scaling and the other dimensional parameter is necessary to maintain the proportions of
the area of interest within the selection rectangle.
You can change the units of measurement by choosing
Preferences from the Edit menu. Your choice of units may
depend on your final output. Pixels is the unit most often used
for screen display, and inches for printed output.
Scanning 2-9
Page 18

Fixed size If Constrained Aspect Ratio is selected in the Crop Setup dia-
log box, the Fixed Size checkbox is available for selection.
When Fixed Size is selected, the output width and height measurements, as you have entered them, are kept constant, as
well as the aspect ratio between them being constrained. The
Scale To value changes to reflect the scaling required to give
the fixed width and height values. This feature can be useful if
you want to fit an image into an existing space.
You can also change the scaling value manually. For instance,
you might want an enlargement of your area of interest. To
change scaling:
•Select the value in the Scale To box and type a new value. The
values in the Width and Height output boxes change accordingly. The proportions of your designated area of interest are
retained.
Changing Resolution You can change the resolution for a final scan before or after
making a preview scan.
•To change the output resolution, select a new value from the
Resolution pop-up menu.
Changing the resolution will not cause any visible change on
the screen. The change is reflected in the final scan output.
Size The SprintScan 35 software can display the file size of the final
image in megabytes, MB, or kilobytes, KB. Click on the file
size in the main window to toggle between MB and KB. If the
file is less than 1 MB, SprintScan 35 displays it in KB.
2-10
Page 19

Making a final scan
When you have completed the adjustments, make the final
scan. The scanner will again scan the original, and this time
the image will be transferred into your application.
To make a final scan:
1 Make your final changes to settings, as described in the previ-
ous section.
2 Click the Scan button.
The original will again be drawn into the scanner. Even at
highest resolution, scanning takes a relatively short time.
After scanning has been completed, the image is transferred to
your application. To work with your image further, see the
user’s guide for your application.
To learn about advanced image modification using the plugin, go on to Chapter 3.
The Scan to Disk option
Scan to Disk When you use Scan to Disk, you do not have to use your
image processing application to name and store the image file
you are scanning. Scan to Disk stores the file on the hard
drive while it is performing the scan.
1 Select Scan to Disk from the Image menu.
2 Enter a name for the image in the dialog box.
3 Click Save. The SprintScan 35 software scans and stores the
image all in one step, saving you time.
Scanning 2-11
Page 20

3 Advanced scanning settings
This chapter describes how to fine-tune the SprintScan 35
Plug-in module settings for a particular purpose or for unusual input or output. Although the standard settings and film
type files described in Chapter 2 produce satisfactory results
for most images, you can go much further with image alteration and enhancement. Feel free to experiment.
The advanced settings involve manipulating the tonescale for
input vs. output variations, changing the exposure and color
saturation of an image, setting white point, black point, and
gray point, and adjusting the sharpness of an image. You can
also save your customized settings and use them with other
images.
See chapter 4, Troubleshooting, for tips on fixing common
problems.
3-1
Page 21

When to use advanced feature s
Here are some situations in which you might use the advanced
features of the SprintScan 35 software:
•To compensate for an original that is poorly exposed, or that
has unacceptable color balance or focus
•To design customized settings and save them as a settings file
for a specific type of original or output device
•To optimize an image, that is, to alter image values for the
best visual results.
Using advanced settings controls requires some understanding
of the terminology and of how the settings interrelate. Because
you can see the results of a change immediately, you’ll learn
best how these settings work by trying them yourself. The
next section summarizes the relationships between the controls. The sections that follow describe use of each control.
Image adjustment: the basics
When you preview an original, the system inputs the original
data values obtained by the scanner during prescan. To make
corrections, you use the advanced controls to change the output values for the final scan, relative to what the scanner
“sees” initially as input values. You can compensate for exposure, saturation, and sharpening faults so that the output is
better than the original from which you take the image.
Exposure The concept of exposure as used in the scanner is similar to
photographic exposure. The exposure control allows you to
increase or decrease the total amount of light available to the
image. Increasing the light can increase detail in an underexposed image, and decreasing the light can increase detail in an
overexposed image.
By changing the exposure of an image one channel at a time,
it is possible to shift the color balance of an image. For example, an image with an overall pinkish cast can be adjusted so
the whites in the image look white and the mid-tone channels
look neutral (not dominated by any one color).
3-2
Page 22

Contrast, brightness, Contrast, as the term implies, refers to differences between the
and other tone-related lightest and darkest areas of an image. Low contrast is char-
features acterized by a grayed-out appearance, where the difference
between lightest areas and darkest areas is not great. High
contrast gives a stark appearance—light areas are very white
and dark areas very black. In the SprintScan 35 system, the
red, green, and blue (RGB) channels of the image data are
evaluated in terms of a scale where 0 is the darkest end of the
range and 255 is the lightest.
White point and black point settings are another way to alter
the range. By setting a white point, you define a light area of
an image as having the value of pure white. By setting a black
point, you define a dark area as having the value of pure
black.
Brightness, highlights, shadows, and midtone (gamma) corrections all affect the tone of an image. Increasing brightness
increases the amount of light in the image as a whole.
Increasing the value of highlights (setting a white point)
makes values at the light end of the scale lighter, and decreasing the value of shadows (setting a black point) makes dark
values darker. Increasing midtones lightens values in the
midrange of the scale.
Advanced scanning settings 3-3
Page 23

The figure that follows shows a graphical representation of
variations on the dark-to-light scale of values.
When working with color, the same idea applies; however,
when you are working with only one color at a time, the
changes result in differences in color casts in portions of the
image. Brightening a color makes it more apparent, and darkening it makes its complement more apparent.
Color saturation Color saturation is the degree of intensity, brilliance, or
purity of a color. Saturated colors are eye-catching, even loud.
Unsaturated colors are more gray or washed-out looking.
Increasing the saturation of a color makes it, and its complement, more intense, even if there is not much of that color in
the image, relative to the others.
Here’s an illustration of how saturation is different from tone:
Increasing the value of blue in the color saturation settings
causes blue and its complement, yellow, to be intensified.
Decreasing the value of blue would cause both blue and its
complement to become less intense, or grayer. By comparison,
increasing blue in the tonescale settings makes all colors
become more blue; decreasing blue would make all colors
become more yellow.
3-4
Page 24

Sharpening In images with light and dark areas, edges exist where
adjacent areas change suddenly in tone or color. These may be
edges of actual objects or color transitions on a single object,
such as in a checkered tablecloth. The SprintScan system
increases sharpening by enhancing the difference in values
between the adjacent areas, even improving the sharpness
over that of the original. Blurring decreases the difference.
Even in relatively smooth areas in an image, small differences
may exist, such as those between individual white threads in a
white square on a checkered tablecloth. These “flat” areas can
become grainy looking if sharpening is done on the image
overall. To avoid this effect when it’s not desired, options are
included for sharpening only edges, leaving “flat” areas
unenhanced.
Correcting an image A good strategy is to start with the Exposure dialog box to
correct the overall luminance and color, then use the
Contrast/Brightness or the Tonescale dialog box to adjust
contrast and midtone values. Finally, use the Saturation dialog
box to adjust the color intensity. Sharpening is fairly independent of the others and depends more on the final scan resolution and output device (printer or monitor) than on a particular image.
Advanced scanning settings 3-5
Page 25

Automated features
Auto-Highlight The Auto-Highlight feature makes it easier to find an image’s
fullest tonal range by finding its lightest point. After finding
the lightest point, the SprintScan 35 software adjusts the
image accordingly.
Before using Auto-Highlight, preview an image and choose an
area of interest that contains the value that you would like to
be the lightest point in your image. Frame this area of the
image with the marquee.
•Choose Auto-Highlight from the Image menu.
Auto-Highlight finds the lightest point inside the marquee.
The SprintScan software makes it the brightest point in your
image, and adjusts the entire image based on the new highlight. Now you can move the marquee to the section of the
image you want to scan and then scan the image.
Auto-Shadow Similar to the Auto-Highlight feature, Auto-Shadow finds an
image’s fullest tonal range by finding its darkest point. After
finding the darkest point, the SprintScan 35 software adjusts
the image accordingly.
Before using Auto-Shadow, preview an image and choose an
area of interest that contains the value that you would like to
be the darkest point in your image. Frame this area of the
image with the marquee.
•Choose Auto-Shadow from the Image menu.
Auto-Shadow finds the darkest point inside the marquee. The
SprintScan software makes it the darkest point in your image,
and adjusts the entire image based on the new shadow. Now
you can move the marquee to the section of the image you
want to scan and then scan the image.
Auto-Contrast Auto-Contrast combines the effects of the Auto-Highlight and
Auto-Shadow features. Auto-Contrast finds an image’s fullest
tonal range by finding the image’s lightest and darkest points
and adjusts the image accordingly.
3-6
Page 26

Before using Auto-Contrast, preview an image and choose an
area that has a tonal quality that you like. Frame this area of
the image with the marquee.
•Choose Auto-Contrast from the Image menu.
The SprintScan software adjusts the entire image based on the
area in the marquee. Once you have adjusted the image, you
can move the marquee to the section of the image you want to
scan and then scan the image.
Auto-Expose The Auto-Expose option on the Image menu is identical to the
icon in the Preview window (see page 2-9). When selected, the
plug-in estimates the best contrast and brightness values for
an image, based on the area of interest.
For example, if an area of the image has the levels of brightness and contrast that you want, select the area with the crop
box and select Auto-Expose (or click the button with the shutter icon). The software will then readjust the rest of the image
based on the selected area. In many cases Auto-Expose will
give you acceptable results, without having to make corrections to individual brightness, tone and contrast controls.
• Choose Auto-Expose from the Image menu.
To turn Auto-Expose on for every preview scan, see
page 3-19.
Advanced scanning settings 3-7
Page 27

E x p o s u re adjustment
•From the Image menu, choose Exposure to display the
Exposure dialog box. It offers features that simplify exposure
control for all film types and that automate color cast removal
for negatives.
The Exposure dialog box contains several options for correcting under or overexposed originals. There are Color Balance
controls for red, green, and blue. The top slider adjusts all
three at once, which shifts the overall darkness and lightness of
the original.
3-8
You can use the Automatic Cast Removal buttons to fix an
objectionable color cast in negatives. There are three methods for
removing a color cast in negatives. The best method depends on
the image you are scanning and the image content enclosed by
the cropping frame. If you do not like any of the methods, you
can click the None button and no automatic color cast removal is
a p p l i e d .
The image is updated automatically when you change exposure
s e t t i n g s .
Page 28

Tip: Increase or decrease the exposure until the brightest parts of
the image are correct. If darker areas of the image still need to be
lightened, use the Gamma control in the Contrast/Brightness dialog box. Increasing the exposure too much results in a loss of
detail in the whites.
You can reset the exposure values to their defaults at any time by
clicking the Reset button.
Setting a white, black and gray point
White point When you set a white point, you pick a light area of the image
that you want to have the lightest value; that is, that point is
made white.
To set a white point:
1 Click the white point eyedropper button, with the icon of an
eyedropper with white ink. The cursor changes to an eyedrop-
per tool.
2 Move the eyedropper tool over a light area that you want to
designate as the white point of the image. The RGB values of
the pixel under the tip of the eyedropper are displayed in the
status bar.
3 When the eyedropper is over the pixel you want as the white
point, click. All color component values are changed to the
value 255 (pure white). Values in the rest of the image are
adjusted accordingly.
Retain cast: Hold down the Option key when you click with
the eyedropper to lighten the values while retaining the color
cast. The values of the color components are increased proportionately.
Advanced scanning settings 3-9
Page 29

Black point The Black Point tool has a similar effect, but at the other end
of the scale. When you set a black point, you assign a dark
area of the image the darkest value—that point is made black.
To set a black point:
1 Click the black point eyedropper button, with the icon of an
eyedropper with black ink. The cursor changes to an eyedrop-
per tool.
2 Move the eyedropper tool over a dark area that you want to
designate as the black point of the image. The RGB values of
the pixel under the tip of the eyedropper are displayed in the
status bar.
3 When the eyedropper is over the pixel you want as the black
point, click. All color component values are changed to the
value 0 (pure black). Values in the rest of the image are
adjusted accordingly.
Retain cast: Hold down the Option key when you click with
the eyedropper to darken the values while retaining the color
cast. The values of the color components are decreased
proportionately.
Gray point The gray point tool lets you choose a neutral point in the
image by which the rest of the image can be adjusted.
3-10
To set the gray point:
1 Click the gray point eyedropper button, with the icon of an
eyedropper with gray ink. The cursor changes to an eyedrop-
per tool.
2 Move the eyedropper tool over an area of the image that you
want to make neutral. The RGB values of the pixel under the
tip of the eyedropper are displayed in the status bar.
3 Click to designate the gray point. The SprintScan software
neutralizes the point by adjusting the brightness levels, then
adjusts the values in the rest of the image accordingly.
Page 30

Adjusting brightness, contrast, and midtone (gamma)
As you use the controls to vary different components of an
image, you’ll see the results almost instantly in the preview
window. To make changes to brightness, contrast, and midtone (gamma) values:
•Choose Contrast/Brightness on the Image menu.
The use of each of the controls in the Contrast/Brightness dia-
log box is described in the sections that follow. The Reset button undoes any changes you make and resets the sliders to
their values as stored in the settings file.
Brightness control Moving the Brightness slider increases or decreases the overall
amount of light in the image. Output values increase as the
slider moves toward the right. Use the Channel pop-up menu
to alter values for all colors (RGB) or for individual color
channels (Red, Green, Blue). (If you are scanning in grayscale,
the only active choice in the menu is Black.) Brightening a
color makes it more apparent. Brightening green, for example,
will make the entire image appear green, while dimming green
will make the image appear more magenta (magenta is the
complement of green).
Advanced scanning settings 3-11
Page 31

Contrast control Moving the Contrast slider alters the contrast between dark
and light areas. High contrast, at the right end of the slider,
makes everything look starkly black and white; low contrast
makes everything look gray. As with the Brightness control,
you can vary all color channels or individual channels using
the Channel pop-up menu, if you are scanning in color.
Gamma control The tonescale curve is a graph of input values against output
values. The gamma (γ) value is an exponential value controlling the shape of the curve. When the curve has an upward
bow in it, the midtones (middle range) of the output have
been brightened compared with the input. This effect of
brightening midtones is an approximation of how human eyes
see images.
A gamma value of 1 results in a straight line. As you move the
Gamma slider to the right, the tonescale curve bows increasingly upward, indicating brightening of the the midtones. Use
the Channel pop-up menu to choose all color channels or
individual channels. With an individual color selected, moving
the slider to the left has the effect of removing that color compared to the other two and heightening its complement. For
example, if you choose the blue channel and move the gamma
slider to the left, the image will appear more yellow.
3-12
Page 32

Adjusting the tonescale curv e
The Tonescale dialog box lets you change the highlights, midtones, and shadows of an image separately by adjusting the
tonescale curve. To display the Tonescale dialog box:
•Choose Tonescale from the Image menu.
The lower left corner of the scale represents the darkest values, and the upper right corner is the lightest values. The horizontal axis represents input from the original, and the vertical
axis the output. At the top is a pop-up menu from which you
choose which channel components to modify: RGB reflects all
color components taken together. Red, Green, or Blue shows
only the curve for that particular component. If you are scanning in grayscale, the only active choice in the menu is Black.
Note: When you adjust a curve for a single color, you are
effectively changing the color balance.
The Reset button sets the curve to its initial value.
•To adjust the curve, click a point on the curve to create a con-
trol point, then move the point to reshape the curve. The
Preview window immediately reflects the adjustments you
make to the curve. There is no limit to the number of points
you can create. To delete a point, move it on top of an existing point; they become one.
Advanced scanning settings 3-13
Page 33

Adjusting color saturation
Saturation refers to the intensity or brilliance of a color. You
can change the saturation using the controls in the Saturation
dialog box. The Reset button sets all sliders to their initial values or the values stored in the settings file.
1 Choose Saturation from the Image menu.
2 Drag the sliders to change the values; the individual sliders
control the red, green, and blue values respectively.
The saturation settings can give you brash or subtle color
effects, as you choose. Note that the saturation settings have
no effect if you are scanning in grayscale.
3-14
Link Colors: The Link Colors checkbox allows you to
increase or decrease saturation of all colors when it’s selected.
Moving any one control moves the others as well, keeping the
relative settings the same. In this way you can change saturation without changing color balance from that of the original.
Page 34

Adjusting sharpness
1 Choose Sharpen from the Image menu.
2 Select the effect you want from the buttons in the Effect box.
You can increase the sharpness of an image beyond the focus
of the original, or you can reduce the sharpness for a softer
effect. You can also choose to smooth “noise,” or the detail of
background areas, for a smoother overall appearance.
To adjust sharpness:
The choices are described in the table that follows. The drawings on the next page show schematically what changes take
place at the edges of different areas.
Advanced scanning settings 3-15
Page 35

Sharpening Effect
options
Unaltered image Edges and flat areas
as input
Sharpen Sharpens the entire
image; heightens all
differences
Sharpen Detail Sharpens edges; does
not change differences
in flat areas
Sharpen Detail Sharpens edges and
& Smooth Noise smooths flat areas
Blurring Effect
options
Smooth Noise Smooths (lessens
differences in) flat
areas, leaves edges
unchanged
3-16
Blur Softens the entire
image; both edges
and flat areas
smoothed
Sharpen Detail and Sharpen Detail & Smooth Noise are the
options likely to produce satisfactory results in most cases.
3 Use the sliding control on the left side to increase or decrease
the amount of change of the effect you have chosen. The high-
er the number, the greater the effect. The slider range is from
0 to 10.
Page 36

Saving and reusing your settings
You may want to save the settings you have created for a particular image so that you can use them again with the same
original or others like it. Parameters that are saved in a settings file include tonescale, saturation, sharpening, area of
interest, and resolution.
To save settings:
1 Choose Save As from the File menu.
2 In the dialog box, give your settings file a name.
3 Click OK.
To open an existing settings file:
1 Choose Open from the File menu.
2 Locate the file using the directory dialog box.
3 Click Open.
Advanced scanning settings 3-17
Page 37

Plug-in pre f e re n c e s
The SprintScan 35 Plug-in Preferences dialog box allows you
to set certain preferences that will be in effect until you
change them.
•Choose Preferences from the Edit menu.
Units (default: Inches)
You have a choice of inches, millimeters, pixels, points and
picas as your units of measure in the dimensions areas of the
main screen. When Use Native Resolutions is checked, Pixels
is dimmed and cannot be selected.
3-18
1 Open the Units pop-up menu and choose the units you want.
2 Click OK.
Use Native Resolutions (default: selected)
Native resolutions are those resolutions that give the best output results. When the Use Native Resolutions checkbox is
unselected, you get the exact resolution that is needed, taking
into account the output sizing values (see Setting output size
and scaling in Chapter 2). When Use Native Resolutions is
selected, you get the nearest native resolution greater than
what is needed.
1 Click the checkbox to select or deselect native resolutions only.
2 Click OK.
Page 38

Startup with Last Settings File (default: unselected)
When this option is selected, the plug-in remembers the last
settings file used and loads the file the next time the plug-in
starts up. When deselected, the default settings are used at
start-up.
Scan Again (default: unselected)
When you turn on the Scan Again preference, the SprintScan
35 plug-in re-opens after you complete each scan. This allows
you to scan a number of images without having to open the
SprintScan 35 plug-in each time.
Exposure Options Perform automatic exposure on preview (default: selected)
Check this option to turn on Auto Expose as a default setting.
The software will automatically correct exposure during the
preview scan for every scan, until you turn this option off.
When you check this option, the letter A appears in the Auto
Expose shutter icon in the Preview window to indicate it has
been turned on in the Preferences dialog box.
When this option is turned off, you can turn on Auto Expose
for individual images by using the icon or the menu item; see
pages 2-7 and 3-7.
Warn if color cast is detected (default: selected)
If the software detects a color cast when setting a white point
or black point, it displays a dialog box asking if you want to
remove or retain the color cast.
Advanced scanning settings 3-19
Page 39

4 Tro u b l e s h o o t i n g
If you cannot resolve a problem using this chapter and the
hardware manual, contact Polaroid Technical Support. Before
you call, have ready the following information:
•The model of your computer, including the kind of processor
and the amount of RAM you have
•The model and serial number of your SprintScan 35 scanner
(located on the bottom or rear panel of the scanner)
•A list of other devices attached to your system, such as CDROM drives, printers, external hard disks, and other SCSI
devices
•A list of any other cards and drivers that you are using, along
with any system extensions (see the Extensions folder inside
the System Folder)
•Other applications you are using
•A description of the problem and the wording of any error
messages that you see on your screen when the problem
occurs
4-1
Page 40

Call us You may call Polaroid toll-free from within the U.S.A. at
1-800-432-5355, or fax the information about your problem
to 1-617-386-9688, Monday through Friday, 8 A.M. to
8 P.M. Eastern Time. We offer a variety of Customer Support
Services; call us for details and applicable fees. You may also
write to Electronic Imaging Technical Support, Polaroid
Corporation, 565 Technology Square 3B, Cambridge, MA
02139. In Canada, call toll-free at 1-800-268-6970. Outside
North America, contact the Polaroid office nearest you (see
pages 4-9–4-10).
Internet support Technical Support is also available over the Internet. Connect
to our web site at: http://www.polaroid.com
4-2
Page 41

Tips on correcting images
This section describes how to make corrections to originals
having common photographic faults. Note that many situations can be improved simply by clicking the Auto Exposure
button. Understanding the various controls, however, can give
you finer control over the results.
The original is underexposed (too dark) or overexposed
(too light).
A well exposed image has good detail in the highlights (the
lightest areas of the image) and in the shadow areas (the darkest parts of the image). An underexposed image is dark overall; it lacks detail in the shadow areas, the midtones are too
dark, and the highlights are not light enough. An overexposed
image is too light overall; it lacks detail in the highlight areas,
the midtones are too light, and the shadow areas are not dark
enough. To correct for exposure:
1 Choose Reset All on the Edit menu.
2 Choose Exposure on the Image menu to display the Exposure
dialog box.
3 If the image is underexposed, increase exposure by moving the
master slider to the right. If overexposed, decrease exposure
by moving the master slider to the left. Adjust the image so
that the highlights are bright, but still show detail.
4 If the shadow regions are now too light, use the Auto-
Contrast feature from the Image menu. If they are still too
light, use the black point eyedropper.
5 Choose Contrast/Brightness on the Image menu to display the
Contrast/Brightness dialog box.
6 Using the Gamma (midtone) button for the RGB channel,
increase or decrease the gamma control to correct the midtones and shadows.
Troubleshooting 4-3
Page 42

The original has too much contrast.
An image that has too much contrast has highlights that are
too light and lack detail, and shadow areas that are too dark
and lack detail. To correct for this:
1 Begin with the image controls (Contrast/Brightness,
Tonescale, Saturation and Exposure) set to the default settings. Click the Reset button on the individual dialog boxes if
necessary.
2 Choose Exposure on the Image menu to display the Exposure
dialog box.
3 Increase or decrease the master exposure slider until the image
highlights are bright, but still show detail.
4 Choose Contrast/Brightness on the Image menu to display the
Contrast/Brightness dialog box.
5 Using the Gamma (midtone) button for the RGB channel,
increase or decrease the gamma control until the dark areas
are dark, but still show detail.
Tip: The usual procedure for reducing contrast is to lower the
exposure to correct the highlights, and then increase the midtone/gamma to correct the shadows.
The original lacks contrast.
An image that lacks contrast has a flat or overall gray appearance; there are no true blacks or whites. To correct an image
that lacks contrast:
4-4
1 Choose Auto-Contrast on the Image menu. The area of inter-
est is analyzed, and the contrast is automatically adjusted. The
Auto-Contrast feature is somewhat conservative, so you may
need more correction.
2 To further brighten the highlights, use the white point eye-
dropper.
3 To further darken the shadows, use the black point
eyedropper.
Page 43

The original is correctly exposed, but has a color cast.
As an example, a scene photographed in the shade will often
have a blue cast. To correct a color cast:
1 Choose Exposure on the Image menu to display the Exposure
dialog box.
2 If the image is a negative, try each of the three Automatic Cast
Removal buttons. Each uses a different method for automatically correcting a cast. One of them will likely correct the
problem.
3 If the image is a positive image, try Auto Exposure first.
Then, try the gray eyedropper on a part of the image that
should be neutral. Lastly, try adjusting the red, green, and
blue sliders manually to fix the color cast.
Note: You may have trouble determining which color is off.
Common mistakes are confusing blue with cyan and magenta
with red. Try moving the different color sliders and watch the
preview. For example, if you think the image is too blue,
adjust the blue slider. As you move toward blue, the cast
should get worse, and moving toward yellow should remove
it. If this doesn't seem to be working, try moving the red slider
and you may find you've mistaken a cyan cast for blue.
4 Neutralize minor color casts in the shadows, highlights or
midtones with the gray point eyedropper.
Common color casts:
•Pictures taken outdoors in the shade are blue. To correct,
move the slider toward yellow.
•Pictures taken with outdoor film under tungsten lights are
red-yellow. To correct, move the sliders toward cyan and
blue.
•Pictures taken with outdoor film under fluorescent lights are
green or yellow-green. To correct, move the sliders toward
magenta and blue.
Troubleshooting 4-5
Page 44

Tip: Some experience in judging color will go a long way in
helping you to fix a problem. If you are having difficulty, try
starting with an image that looks correct. Experiment with
this image by moving the color sliders to create color casts
and observe the effect on the image.
Equal values of R, G, and B in a neutral part of the image
indicate successful color cast correction. These values can also
help determine which way to adjust an image.
The colors of the image are too intense or are washedout.
Color saturation is the intensity, or purity of a color.
Saturated colors are bright and eye-catching. Unsaturated colors are gray, muted, or washed-out looking. Adjust your
image as follows:
1 Choose Saturation on the Image menu to display the
Saturation dialog box.
2 If the image is undersaturated, increase the color by moving
the master slider to the right. If oversaturated, decrease the
color intensity by moving the master slider to the left.
Tip: Usually, you'll find values between 1.0 and 1.4 to be
pleasing. Although many people prefer colors that are slightly
more intense than reality, increasing the saturation too much
will produce colors that look unnatural.
4-6
Page 45

H a rd w a re and software pro b l e m s
Note: For connection and scanner operation problems, see
also the scanner hardware manual.
The power indicator light comes on, but the ready light
does not.
The scanner’s self-test may have detected a problem. Try issuing a scan command with the SprintScan 35 Plug-In Module;
the software may report more about the problem.
There is a communication problem between the computer and
the scanner. Attempt to access the scanner with the plug-in to
check whether the software can “see” the scanner.
The light itself may be faulty. Contact your dealer or Polaroid
Technical Assistance.
The SprintScan 35 plug-in can’t “see” the scanner.
Check that the scanner is plugged in and turned on. If it is
not, shut down the computer, turn on the scanner, and then
start up the computer.
Check the SCSI connections. Are both ends of the cable
securely fastened, including the diamond-shaped clips?
Shut down your computer and turn off the scanner. Wait a
few minutes, then turn on the scanner. Next, turn on the computer. Open your application and the SprintScan 35 plug-in
and try again to make a preview scan.
On startup, the scanner driver displays an icon when system
extensions are loaded. The number in the icon is the SCSI ID
number assigned to the scanner. If the icon is not shown or if
the icon has a bar through it, it means that the system was
unable to see the scanner in the SCSI chain. (1) Go over the
installation instructions again. (2) If you have more than one
SCSI device in the chain, try disconnecting the other devices
and connecting only the scanner. If the scanner then works,
the problem may be one of your other devices or an ID
number conflict.
Troubleshooting 4-7
Page 46

Does any other SCSI device in the chain, if you have any, use
the same SCSI ID number? Each device must have a unique
number.
Nothing happens when you click Preview.
It’s normal for the scanner to pause before scanning for
calibration. The mechanism may move up and down slightly.
After the calibration cycle, the mechanism should begin to
lower for the preview scan. The initial preview may take
several seconds.
An “insufficient memory” message appears when you
try to make a final scan.
Your application takes care of memory allocation when you
make a final scan. An insufficient memory message may indicate that you do not have enough RAM, or storage on your
hard disk, or both, to continue. See your application’s user
manual. Strategies include closing other applications and windows, freeing storage on your hard disk, and scanning an
image at a smaller scale or lower resolution.
4-8
Page 47

P o l a roid Offices and Service Centers
Australia
Polaroid Australia Pty Ltd
13–15 Lyonpark Road
PO Box 163
North Ryde, NSW 2113
Tel.: (02) 950 7000
Fax: (02) 887 2209
Belgique/België
Polaroid (Belgium) S.A.-N.V.
rue Colonel Bourg 111
Kolonel Bourgstraat 111
1140 Bruxelles-1140 Brussel
Tel.: 32 2 702 86 20
Fax: 32 2 726 92 99
Toll free: 32 2 78 155 905
Brasil
Polaroid do Brasil Ltda.
Av. Paulista, 1776/11º andar
Cerqueira Cesar
São Paulo - Capital
01310-921
Tel.: 55.11.285.6411
Fax: 55.11.287.5393
Canada
Polaroid Canada Inc.
350 Carlingview Drive
Etobicoke, ON M9W 5G6
Tel.: 1 416 675 3680
Fax: 1 416 675 4245
Toll free: 1-800-268-6970
Danmark
Polaroid a.s.
Blokken 75, 3460 Birkerød
Tel.: 45 42 81 75 00
Fax: 45 42 81 70 26
España
Polaroid (España), S.A.
Calle Orense 16, 2ª planta.
28020-Madrid, Spain
Tel.: 34-1-597 02 52
Fax: 34-1-597 27 82
France
Polaroid (France) S.A.
12 Bis Ave. Gay Lussac 78391
La Clef de Saint-Pierre, B.P. 7
78996-Elancourt Cédex
Tel.: 33 1 30 68 38 38
Fax: 33 1 30 68 38 39
Great Britain
Polaroid (U.K.) Ltd. &
Polaroid Export Operations
Wheathampstead House
Codicote Rd.
Wheathampstead
Hertfordshire AL4 8SF
Tel.: 44 1582 632000
Fax: 44-1582 632001
Hong Kong
Polaroid (Far East) Ltd.
32/F Windsor House
311 Gloucester Road
Causeway Bay
Tel.: (852) 2894 0333
Fax: (852) 2895 1382
Italia
Polaroid (Italia) S.p.A.
Via Piave 11
21051 Arcisate (Varese)
Tel.: 39 332-470031
Fax: 39 332-478249
Deutschland
Polaroid GmbH
Sprendlinger Landstrasse 109
63069 Offenbach
Tel.: 49 69 840 4100
Fax: 49 69 840 4204
Japan
Nippon Polaroid Kabushiki
Kaisha
Mori Building, No. 30
2-2 Toranomon 3-chome
Minato-ku, Tokyo (105)
Tel.: 81-3-3438-8811
Fax: 81-3-3433-3537
Troubleshooting 4-9
Page 48

México
Polaroid de México S.A. de C.V.
Paseo de la Reforma 195-Piso 17
C.P. 06500 México, D.F.
Tel.: 52 5 703-1111
Fax: 52 5 566-0505
Del interior al 91 (800) 70-727
Ventas 91 (800) 70-747
Portugal
Polaroid (España) S.A.
Sucursal em Portugal
Edificio Monumental
Avenue Praia da Vitória 71-A, 4ºB
1050 Lisboa
Tel.: (35 1) 316.10.49
Fax: (35 1) 316.10.56
Nederland
Polaroid Nederland B.V.
Zonnebaan 45
3606 CH Maarssen
Tel.: 31-30-2410-420
Fax: 31-30-2411-969
Reparaties:
Polaroid (Europa) B.V.
Hoge Bothofstraat 45
7511 ZA Enschede
Tel.: 31 53 4865 400
New Zealand
Polaroid New Zealand Ltd.
Camera Services
24-26 Anzac Avenue
Auckland
Tel.: (64 9) 377 3773
Norge
Polaroid (Norge) A/S
Industriveien 8B
1471 Skårer
Tlf.: 47 67 90 47 10
Fax: 47 67 90 51 73
Österreich
Polaroid Ges.m.b.H.
Eitnergasse 5A
1231 Wien
Tel.: 43 1 869 86 27
Fax: 43 1 869 81 00
Puerto Rico
Polaroid Caribbean Corporation
Centro de Seguros
Ave. Ponce de León 701,
Miramar, Santurce 00907
Tel.: (1 809) 725-6240
Fax: (1 809) 725-5462
Schweiz/Suisse/Svizzera
Polaroid AG
Hardturmstrasse 133
8037 Zürich
Tel.: (41 1) 277.72.72
Fax: (41 1) 271.38.84
Suomi
Polaroid Oy
Sinikalliontie 10
02630 Espoo, Finland
Tel.: 358 0 502 35 33
Fax: 358 0 502 35 50
Sverige
Polaroid AB
Ekholmsvägen 36, Box 204
127 24 Skärholmen, Sweden
Tel.: 46 8-710 08 50
Fax: 46 8-740 73 68
U.S.A.
Polaroid Corporation
Technical Support
Toll free: 1-800-432-5355
4-10
Page 49

Appendix A: Glossary
black point A point in an image that you select to be set to pure black
(value 0 or the lowest value in the range). Any areas that had
been darker than the selected point are clipped to the same
value. Compare white point.
CCD Abbreviation for charge-coupled device; a light-sensitive elec-
tronic device that converts light into an electrical charge. The
SprintScan 35 scanner uses a CCD to read an original image
and transmit its data to the computer.
contrast The relative difference between light and dark areas of an
image. High contrast gives a stark appearance; low contrast
gives a gray or flat appearance.
crop To select a rectangular area of interest in an image using the
framing bars (or gray border). You can change the size of the
rectangle and can move it around the image area to center the
part of the image you want as your final scan. Changing the
framed area can affect settings in the Output box.
dot The smallest unit in a bitmapped image. The abbreviation dpi
stands for dots per inch, a measure of image resolution.
A-1
Page 50

emulsion The light-sensitive coating on photographic film or paper.
The emulsion side should face the read of the scanner for
scanning (emulsion side toward the lens).
gamma An exponential factor in the tonescale equation that is a
means of easily adjusting midtone brightness of an image. The
purpose of this factor is to replicate the eye’s natural tone discrimination.
halftone A type of image that uses a pattern of dots of varying size to
represent shades of gray or color. The tighter the dot packing,
i.e., the greater the dots per inch (dpi), the less perceptible are
the individual dots and the higher the apparent resolution.
h i g h l i g h t s The lightest parts of an image. Setting a white point designates
the most extreme highlight value.
hue A more technical term for what we speak of as colors. Hues
are different points along the continuous color spectrum.
midtones The parts of an image between the lighter and darker areas;
the middle portion of an image’s tonescale curve. See also
gamma.
negative An image in which color values have been reversed, e.g.,
white is shown as black, and so on. The film type files included
with the SprintScan 35 system allow conversion of 35mm
negative images to positive images upon scanning.
pixel Short for picture element; the smallest discrete element in a
picture. Pixel is interchangeable with dot, although pixel most
often refers to dots on the monitor screen rather than image
dots.
positive An image in which color values are roughly the same as in the
subject itself. Slides are positive images; 35mm film negatives
produce positives upon printing or computer manipulation.
resolution The measure of detail in an image, usually given in dots per
inch (dpi) or pixels per inch.
A-2
Page 51

RGB Abbreviation for red, green, blue; one of the standard color
models. Computerized color images using this model are composed of combinations of red, green, and blue color values.
sampling A process that converts an analog signal into digital values for
computer use. Images can be saved by measuring the red,
green, and blue (RGB) components of the image and assigning
a range of values to each component. The higher the sampling
rate, the better the reproduction of the image.
saturation The degree of intensity of a color. Low saturation results in a
gray or washed-out appearance, and high saturation in a
bright, attention-getting appearance.
SCSI Acronym for Small Computer System Interface; pronounced
“scuzzy.” An industry standard for connections and communication between the computer and peripheral devices.
shadows The darkest parts of an image. The black point designates the
most extreme shadow value.
sharpen To improve or enhance the level of detail in an image. It is
possible to create effects that exceed “perfect” focus.
smooth To lessen the level of detail in an image by reducing the differ-
ence between edges of areas.
TIFF Acronym for Tagged Image Format File; a file format used to
store black-and-white, grayscale, and color images.
tone The brightness, range, and balance of reds, greens, and blues
in an image. Tone varies depending on color balance, contrast
between highlights and shadows, and dimness or brightness of
midtones (gamma variations).
tonescale A graph showing input values versus output values for a
scanned image. As you vary brightness, contrast, and gamma
values, the changes are reflected in the tonescale graph.
white point A point in an image that you select to be set to pure white
(value 255 or the highest value in the range). Any areas that
had been lighter than the selected point are clipped to the
same value. Compare black point.
Appendix A: Glossary A-3
Page 52

License Agre e m e n t s
P o l a roid SprintScan License Agre e m e n t
U.S.A. and Canada IMPORTANT: By opening the sealed disk package accompa-
nying this manual, you indicated your acceptance of the following Polaroid License Agreement.
Polaroid License Agreement
(SINGLE-USER PRODUCTS)
This is a legal agreement between you, the end user, and
Polaroid Corporation. By opening the sealed disk package,
you are agreeing to be bound by the terms of this agreement.
If you do not agree to the terms of this agreement, promptly
return the unopened disk package and the accompanying
items (including written materials and binders or other containers) to the place you obtained them for a full refund.
POLAROID SOFTWARE LICENSE
1 GRANT OF LICENSE. Polaroid grants to you the right to use
one copy of the enclosed Polaroid software program (the
"SOFTWARE") on a single terminal connected to a single
computer (i.e., with a single CPU). You may not network the
SOFTWARE or otherwise use it on more than one computer
or computer terminal at the same time.
2 COPYRIGHT. The SOFTWARE is owned by Polaroid or its
suppliers and is protected by United States copyright laws and
international treaty provisions. Therefore you must treat the
SOFTWARE like any other copyrighted material (e.g., a book
or musical recording) except that you may either (a) make one
copy of the SOFTWARE solely for backup or archival purposes, or (b) transfer the SOFTWARE to a single hard disk
provided you keep the original solely for backup or archival
purposes. You may not copy the written materials accompanying the software.
3 OTHER RESTRICTIONS. You may not rent or lease the
SOFTWARE, but you may transfer the SOFTWARE and
accompanying written materials on a permanent basis provided you retain no copies and the recipient agrees to the terms
L-1
Page 53

of this AGREEMENT. You may not reverse engineer, decompile, or disassemble the SOFTWARE. If SOFTWARE is an
update, any transfer must include the update and all prior
versions.
4 DUAL MEDIA SOFTWARE. If the SOFTWARE package
contains both 3 1/2 inch and 5 1/4-inch disks, then you may
use only the disks appropriate for your single-user computer.
You may not use the other disks on another computer or
loan, rent, lease, or transfer them to another user except as
part of the permanent transfer (as provided above) of all
SOFTWARE and written materials.
90-DAY SOFTWARE WARRANTY
Polaroid warrants that the SOFTWARE media will be free of
defects in materials and workmanship for a period of 90 days
from the date of purchase.
CUSTOMER REMEDIES. Polaroid's entire liability and your
exclusive remedy shall be, at Polaroid's option either (a)
return of the price paid or (b) repair or replacement of the
SOFTWARE that does not meet Polaroid's Limited Warranty
and which is returned to Polaroid with a copy of your receipt.
This limited Warranty is void if failure of the SOFTWARE
has resulted from accident, abuse, or misapplication. Any
replacement SOFTWARE will be warranted for the remainder
of the original warranty period or 30 days, whichever is
longer.
L-2
NO OTHER WARRANTIES. Polaroid disclaims all
other warranties, either express or implied,
including but not limited to implied warranties of
merchantability and fitness for a particular purpose, with respect to the SOFTWARE, and the
accompanying written materials.
NO LIABILITY FOR CONSEQUENTIAL DAMAGES.
In no event shall Polaroid or its suppliers be liable
for any consequential or incidental damages
(including, without limitation, damages for loss of
business profits, business interruption, loss of
business information, or other pecuniary loss)‚
arising out of the use or inability to use this
Page 54

Polaroid product, even if Polaroid has been
advised of the possibility of such damages.
Because some states do not allow the exclusion
or limitation of liability for consequential or incidental damages, the above limitation may not
apply to you.
U.S. GOVERNMENT RESTRICTED RIGHTS
The SOFTWARE and documentation are provided with
RESTRICTED RIGHTS. Use, duplication, or disclosure by
the Government is subject to restrictions as set forth in subparagraph (c)(1)(ii) of the rights in Technical Data and
Computer Software clause at 52.227-7013.
Contractor/Manufacturer is Polaroid Corporation, 549
Technology Square, Cambridge, Massachusetts 02139.
This Agreement is governed by the laws of the
Commonwealth of Massachusetts, U.S.A.
Should you have any questions concerning this Agreement, or
if you wish to contact Polaroid for any reason, please write:
Electronic Imaging Technical Support, Polaroid Corporation,
565 Technology Square, Cambridge, Massachusetts 02139.
License Agreements L-3
Page 55

P o l a roid SprintScan License Agre e m e n t
Outside U.S.A. and IMPORTANT: By opening the sealed disk package accompa-
Canada nying this manual, you indicated your acceptance of the fol-
lowing Polaroid License Agreement.
Polaroid License Agreement
(SINGLE-USER PRODUCTS)
This is a legal agreement between you, the end user, and
Polaroid Corporation. By opening the sealed disk package,
you are agreeing to be bound by the terms of this agreement.
If you do not agree to the terms of this agreement, promptly
return the unopened disk package and the accompanying
items (including written materials and binders or other containers) to the place you obtained them for a full refund.
POLAROID SOFTWARE LICENSE
1 GRANT OF LICENSE. Polaroid grants to you the right to use
one copy of the enclosed Polaroid software program (the
"SOFTWARE") on a single terminal connected to a single
computer (i.e., with a single CPU). You may not network the
SOFTWARE or otherwise use it on more than one computer
or computer terminal at the same time.
L-4
2 COPYRIGHT. The SOFTWARE is owned by Polaroid or its
suppliers and is protected by United States copyright laws and
international treaty provisions. Therefore you must treat the
SOFTWARE like any other copyrighted material (e.g., a book
or musical recording) except that you may either (a) make one
copy of the SOFTWARE solely for backup or archival purposes, or (b) transfer the SOFTWARE to a single hard disk
provided you keep the original solely for backup or archival
purposes. You may not copy the written materials accompanying the software.
3 OTHER RESTRICTIONS. You may not rent or lease the
SOFTWARE, but you may transfer the SOFTWARE and
accompanying written materials on a permanent basis provided you retain no copies and the recipient agrees to the terms
Page 56

of this AGREEMENT. You may not reverse engineer, decompile, or disassemble the SOFTWARE. If SOFTWARE is an
update, any transfer must include the update and all prior
versions.
4 DUAL MEDIA SOFTWARE. If the SOFTWARE package
contains both 3 1/2 inch and 5 1/4-inch disks, then you may
use only the disks appropriate for your single-user computer.
You may not use the other disks on another computer or
loan, rent, lease, or transfer them to another user except as
part of the permanent transfer (as provided above) of all
SOFTWARE and written materials.
90-DAY SOFTWARE WARRANTY
Polaroid warrants that the SOFTWARE media will be free of
defects in materials and workmanship for a period of 90 days
from the date of purchase.
CUSTOMER REMEDIES. Polaroid's entire liability and your
exclusive remedy shall be, at Polaroid's option either (a)
return of the price paid or (b) repair or replacement of the
SOFTWARE that does not meet Polaroid's Limited Warranty
and which is returned to Polaroid with a copy of your receipt.
This limited Warranty is void if failure of the SOFTWARE
has resulted from accident, abuse, or misapplication. Any
replacement SOFTWARE will be warranted for the remainder
of the original warranty period or 30 days, whichever is
longer.
THIS WARRANTY EXCLUDES ALL INCIDENTAL AND
CONSEQUENTIAL DAMAGES AND DOES NOT AFFECT
YOUR STATUTORY RIGHTS.
This Agreement is governed by the laws of the
Commonwealth of Massachusetts, U.S.A.
Should you have any questions concerning this Agreement, or
if you wish to contact Polaroid for any reason, please write:
Electronic Imaging Technical Support, Polaroid Corporation,
565 Technology Square, Cambridge, Massachusetts 02139.
License Agreements L-5
Page 57

I n d e x
A
adjusting
brightness, contrast and
gamma, 3-11–3-12
color saturation, 3-14
exposure, 3-8–3-9
sharpness, 3-15–3-16
tonescale, 3-13
Adobe Photoshop
installing, 1-3
starting, 2-1
advanced features, using, 3-2
area of interest, 2-7
aspect ratio, constraining, 2-8
Auto-Contrast, 3-6
Auto-Expose
button, 2-9
on Image menu
setting in Preferences, 3-19
Auto-Highlight, 3-6
Auto-Shadow, 3-6
Automatic Cast Removal, 3-8
automatic exposure (default), 3-19
B
black point
defined, A-1
setting, 3-3, 3-10
blurring options, 3-16
Brightness
control, 3-11
defined, 3-3
I-1
Page 58

C
color cast correction, 3-8, 4-5
color cast warning, 3-19
Color (Type list), 2-3
color saturation. See Saturation
connecting the scanner, 1-1
Constrained Aspect Ratio button, 2-8
contrast. See also Auto-Contrast
defined, 3-3, A-1
control, 3-11
correction, 4-4
correcting images, 3-5, 4-3
crop, defined, A-1
Setup dialog box, 2-8
tool, 2-7
help, 1-4
highlights, 3-3–3-4, 4-3, A-2. See
also Auto-Highlight
hue, A-2
I
initial scan settings, 2-3–2-4
inserting originals, 2-2
installing SprintScan 35, 1-3
insufficient memory message, 4-8
Internet support, 1-4
L
landscape orientation, 2-4
License Agreements, L-1–L-5
Link Colors, 3-14
E
emulsion, A-1
Exposure
brightness control, 3-11
defined, 3-2
dialog box, 3-8
F
Film list, 2-3
fixed size checkbox, 2-10
final scan, 2-11
G
gamma, 3-3, 3-12, A-1
Glossary, Appendix A
gray point, 3-10
Grayscale (Type list), 2-3
H
halftone, A-1
height values, 2-9
M
Macintosh computers,
compatible, 1-2
maximized preview, 2-6
memory requirements, 1-2
memory, insufficient, 4-8
midtone (gamma)
defined, A-2, 3-3–3-4
control, 3-11–3-12
N
native resolution, 2-4, 3-18
negative, A-2
O
orientation (view), 2-4
orientation, changing, 2-7
output resolution, 2-4
overexposed imaged, correcting, 4-3
I-2
Page 59

P
pixel, A-2
plug-in preferences, 3-18–3-19
Polaroid Offices and Service
Centers, 4-9–4-10
Polaroid Technical Support, 1-4, 4-1
portrait orientation, 2-4
positive, A-2
PowerBook 5300 computers, 1-3
Preferences dialog box, 3-18
prescan, 2-5
preview
button, 2-5
rotation, 2-7
scan, 2-5
window, 2-6
problems, correcting, 4-7
Q
Quick Scanning Guide, iii
R
RAM required, 1-2, 1-3
Read Me First, 1-3
registration card, 1-4
resolution
changing, 2-10
defined, A-2
output, 2-4
pop-up menu, 2-4
retain cast, 3-9, 3-10
reusing your settings, 3-17
RGB, defined, A-3
S
sampling, A-3
saturation
correcting, 4-6
definition, 3-4, A-3
dialog box, 3-14
saving your settings, 3-17
scaling, 2-9, 2-10
Scan Again (Preferences), 3-19
Scan button, 2-11
scan size, 1-2
Scan to Disk, 2-11
scanning
final, 2-11
preview, 2-5
SCSI, 4-7, A-3
settings, saving and reusing, 3-17
shadows, 3-2–3-3, A-3. See also
Auto-Shadow
sharpening
defined, 3-5, A-3
dialog box, 3-15–3-16
Size display, 2-10
size of scanned images, 1-2
slides, inserting, 2-2
smooth, A-3
SprintScan 35 software
features, 1-1
installation, 1-3
main window, 2-2
Preferences, 3-18–3-19
Preview window, 2-2
starting up the software, 2-1
Startup with Last Settings File, 3-19
SuperSlide format, 2-4
system requirements, 1-2
Index I-3
Page 60

T
Technical Support, 1-4, 4-1
TIFF, A-3
tone, A-3
Tonescale, 3-13, A-3
Type list, 2-3
U
underexposed images,
correcting, 4-3
Units (of measurement), 2-9, 3-18
Use Native Resolutions, 3-18
V
View, 2-4
W
warranties, L-2, L-5
white point
defined, A-3
setting, 3-3, 3-9
width values, 2-9
“Polaroid” and “SprintScan” are trademarks of Polaroid Corporation, Cambridge, MA U.S.A.
Other product names may be trademarks of their respective owners.
PXW8529 8/96 QX/ZBR Printed in U.S.A.
 Loading...