

Page 1

Blackwire® C435-M
Headset
User guide
TM
Page 2

ContentsContentsContents
Welcome 3
System requirements 3
Registering your product online 3
Technical assistance 3
What’s in the box 4
Headset features 5
Accessories 6
Using your headset 7
Connecting the headset 7
Wearing the headset 7
Checking audio settings 9
In-line controls 10
Useful tips 11
Clothing clip 11
Stereo cable tidy 11
Hook and eye cable tidy 12
Troubleshooting 13
2
Page 3

Welcome
Congratulations on purchasing your new Plantronics product. This guide contains instructions
for using your Blackwire C435-M headset.
Please refer to the safety instructions found in the Quick Start Guide for important product
safety information prior to installation or use of the product.
System requirements
Computer
• Supported operating systems: Windows XP®, Windows Vista®, Windows® 7
• Processor: 400 MHz Pentium® processor or equivalent (Minimum); 1 GHz Pentium processor or
equivalent (Recommended)
• RAM: 96 MB (Minimum); 256 MB (Recommended)
• Hard disk: 280 MB (Minimum); 500 MB (Recommended)
• Microsoft Windows XP - Service Pack 3 (SP3) or later (Recommended)
Microsoft Windows Vista - Service Pack 1 (SP1) or later (Recommended)
Display
• At least 800 x 600, 256 colours
• We recommend: 1024 x 768 high colour, 32-bit (Recommended)
Browser
• Internet Explorer® V6 or better must be on the user’s system (Required)
Registering your product online
Visit plantronics.com/productregistration to register your product online
so we can provide you with the best possible service and technical support.
Technical assistance
Visit our web site at plantronics.com/support for technical support including frequently asked
questions, compatibility and accessibility information.
3
Page 4
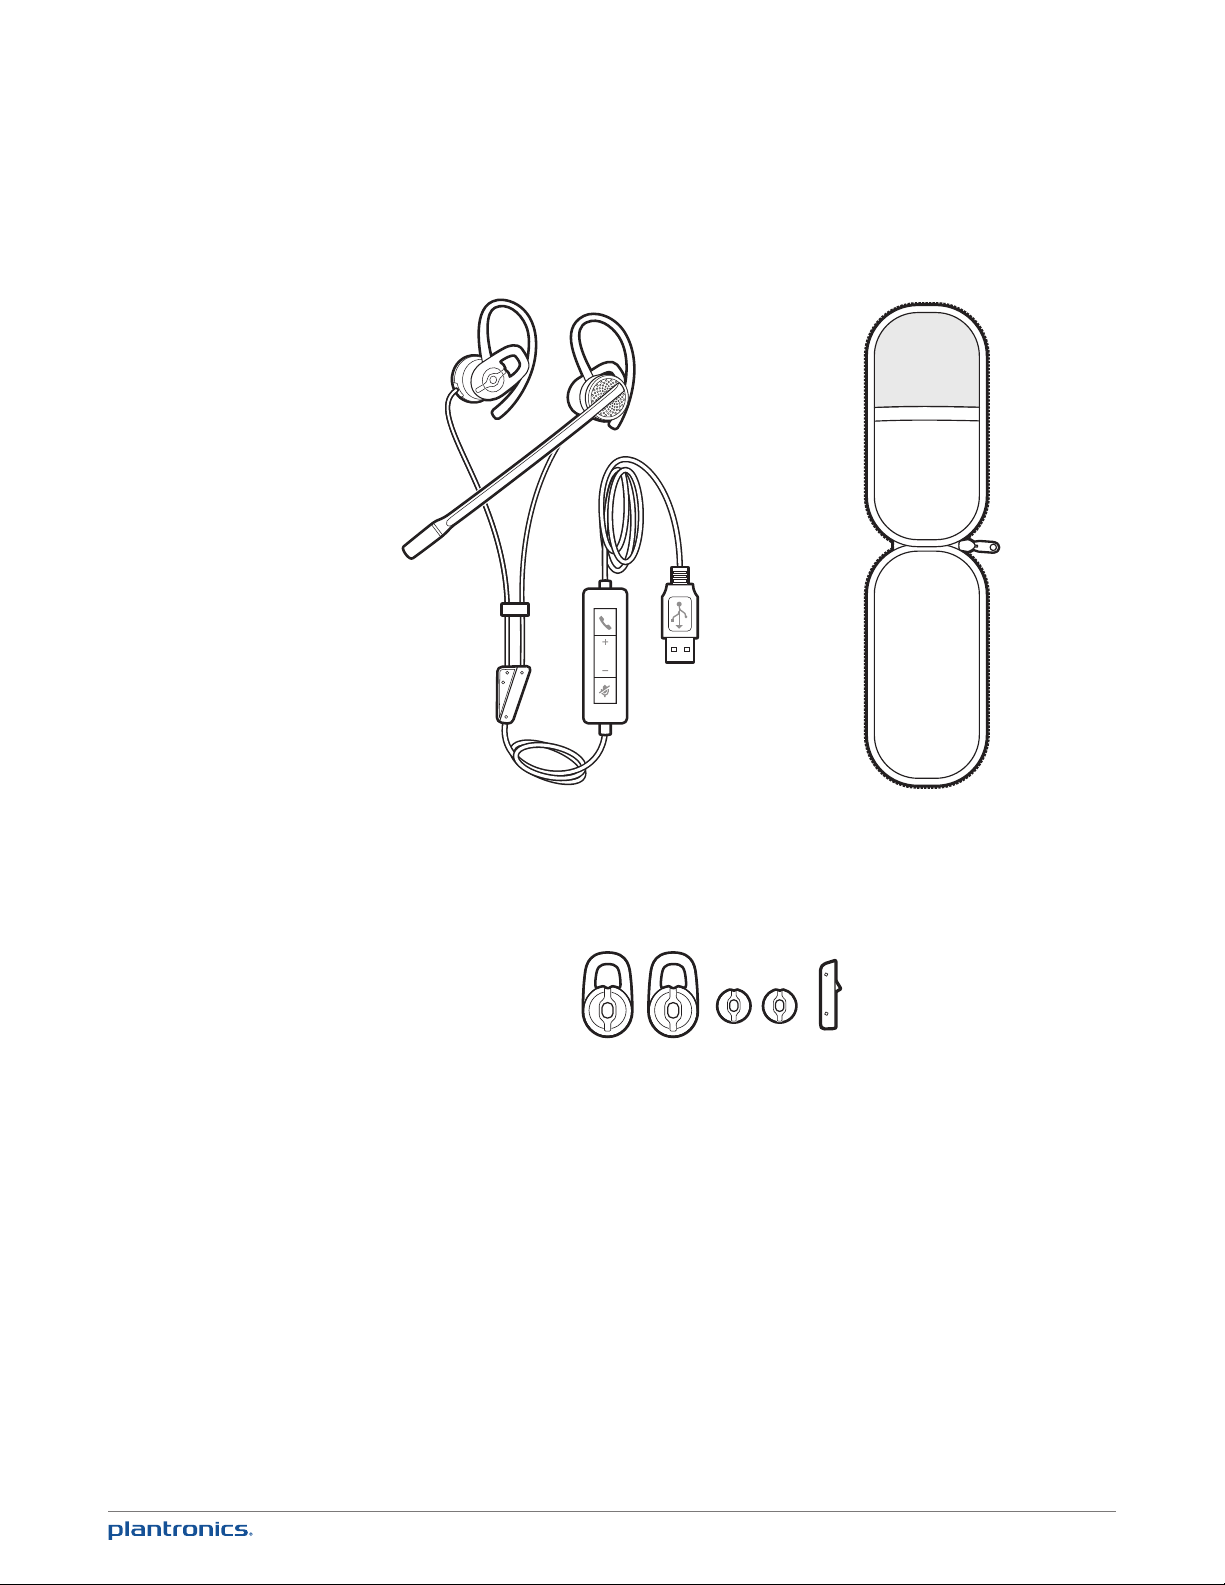
What’s in the box
Carrying caseBlackwire C435-M headset
Large and small ear gels and mono connector cover
4
Page 5

Headset features
1
2 3 4 5 6 7
14
131198 1210
1 Noise-cancelling microphone
2 Right speaker
3 Right ear loop
4 Ear gel (fitted)
5 Left ear loop
6 Ear gel (fitted)
7 Left speaker
5
8 Stereo cable tidy
9 Mono/stereo connection
10 In-line control
11 Mute/unmute
12 Volume up/volume down
13 Call answer/end
14 USB connector
Page 6

Accessories
(Sold separately)
Headband and case For those who would prefer a neckband wearing style. An accessory (with
its own larger case) is available as an option.
6
Page 7

Using your headset
Connecting the headset
Simply plug the headset into the USB port on your PC.
Wearing the headset
The headset comes fitted with the ear loop and medium ear gel.
1 To wear the headset, simply place the ear gel in your ear with the loop at the top of your ear
and rotate the microphone boom forwards. The microphone should be pointed to the corner of
your mouth. If it cannot be comfortably positioned there, you can rotate the ear loop and gel to
fit your ear.
7
Page 8

2 The headset comes configured with the microphone on the left but it’s very simple to switch
the microphone to your right ear if you prefer that configuration. Simply pull the ear loops off
the speaker, rotate them and replace.
3 The headset comes with medium ear gels already fitted. If you find that the headset is
uncomfortable or unstable, you can easily change the gel to suit. Simply unpeel the gel that is
on the speaker and replace with a different one.
Large
Small
4 Once the headset is positioned on your head, adjust the flexible boom to place the tip closer to
the corner of your mouth. The boom can be shaped to follow the curvature of your face.
2"
50.8
mm
8
Page 9

5 For those users who do not want speakers in both ears (all the time or just occasionally),
you can disconnect the second speaker at the connection point shown below. This will
automatically change the headset from stereo to mono (and vice versa when reconnecting)
*
*The headset is supplied with a cover for the connector when configured as a mono headset.
Checking audio settings
1 Ensure Microsoft
Check that the C435-M is set as the audio device in audio device settings under tools.
2 Place a call using Microsoft Lync/Office Communicator.
3 For non-Lync/Communicator applications, confirm the speaker and microphone settings for the
PC softphone are set to Plantronics C435-M.
• To check in Windows 7:
Go to Control Panel -> Sound -> Playback tab, and set the Plantronics C435-M device as both
the Default Communications Device and the Default Audio Device. In the Playback tab, this is
indicated by the green tick mark.
• To check in Windows XP:
Go to Control Panel -> Sounds and Audio Devices, and in the Audio tab set the Plantronics C435-M
for both the Sound playback and Sound recording sections. In the Voice tab, select the
Plantronics C435-M item for both the Voice playback and Voice recording sections.
IMPORTANT For your safety, do not use headset at high volumes for extended periods
of time. Doing so can cause hearing loss. Always listen at moderate levels. For more
information on headsets and hearing visit: plantronics.com/healthandsafety.
9
Lync™/Microsoft® Office Communicator is running on PC.
®
Page 10

In-line controls
Call answer/end
Volume
Mute
Can be used to answer or end a call directly from the headset with a single press.
LED will flash green when a call is coming in and be solid green when on a call.
Volume up and down are available.
A single press of the mute button will mute the microphone. A red LED will be
on when you are muted. Pressing this button again will take the microphone off
mute.
1010
Page 11

Useful tips
Clothing clip
This will reduce the weight of the cable on the capsule for greater comfort. It will also reduce
the tug on the capsule from the USB cable if you move away from the PC whilst wearing the
headset.
Stereo cable tidy
This can help reduce cable tangle. When you remove the headset, zip up the cable and you
reduce the risk of the headset cable becoming tangled. This is also advised when wrapping the
cable to stow in the case.
1111
Page 12

Hook and eye cable tidy
If you want to reduce the cable on your desk, simply wrap the excess in the hook and eye cable
tidy.
1212
Page 13

Troubleshooting
Problem Solution
I cannot hear. Ensure that the C435-M is set as the audio device in Microsoft Lync/
I cannot be heard. Ensure that the C435-M is set as the audio device in Microsoft Lync/
Communicator (refer to Microsoft for instructions on changing the audio
output).
Ensure that the C435-M is set as the default listening device in Windows.
Make sure that the volume settings on the headset, Windows and
Lync/Communicator are not turned down.
Communicator (refer to Microsoft for instructions on changing the audio
output).
Ensure that the C435-M is set as the default microphone device in
Windows.
Make sure that the softphone and headset are not muted.
I cannot answer a call with
the headset.
The volume control on the
headset does not adjust
Windows volume.
Ensure that the C435-M is set as the audio device in Microsoft Lync/
Communicator (refer to Microsoft for instructions on changing the audio
output).
The headset volume is local unless you have installed Plantronics
software. With the software, the headset volume is synchronised to
Windows.
http://www.plantronics.com/businesssoftware
1313
Page 14

Congratulations!
The product you have just purchased carries the TCO Certified Headsets 2 label. This means that your headset is designed and
manufactured according to some of the strictest performance and environmental criteria in the world. The manufacturer of this
headset has selected it to be certified to TCO Certified Headsets 2 as a sign of usability, high performance and reduced impact on
Products certified to TCO Certified Headsets 2 are specifically designed for limiting the risk for hearing impairment. The headsets have acoustic limit
protection to protect the user from sudden “sound-spikes” caused by interference on the telephone lines.
Other features of TCO Certified Headsets 2:
Ergonomics
•Volumecontrol,individualadjustmentandadaptation,replaceablepartsandqualitydurability.
Energy
•Lowenergyconsumptiononthechargingstation.
Emissions
•LowSARvalue.Lowelectromagneticeldssurroundingthecharger.
Ecology
•Productisdesignedforrecycling.ManufacturermusthaveacertiedenvironmentalmanagementsystemsuchasEMASorISO14001
•Restrictionson
o Chlorinated and brominated flame retardants and polymers
o Hazardous heavy metals such as cadmium, mercury, hexavalent chromium and lead.
All TCO labelled products are verified and certified by TCO Development, an independent third party labelling organization. For over 20 years,
TCO Development has been at the forefront of moving the design of IT equipment in a more user-friendly direction. Our criteria are developed in
collaboration with an international group of researchers, experts, users and manufacturers. Since the program’s inception, TCO labelled products have
grown in popularity and are now requested by users and IT-manufacturers all over the world.
Full specifications and lists of certified products can be found on our homepage – www.tcodevelopment.com
the natural environment.
NEED MORE HELP?
plantronics.com/support
Plantronics, Inc.
345 Encinal
Santa Cruz, CA 95060
United States
©2011 Plantronics, Inc. All rights reserved. Plantronics, Blackwire and C435-M are trademarks or registered trademarks of Plantronics, Inc. Pentium is a
trademark of Intel Corporation in the US and/or other countries. Windows, Windows 7, Windows Vista, Windows XP and Internet Explorer are registered
trademarks of Microsoft Corporation in the US and other countries. All other trademarks are the property of their respective owners.
Patents US 5,712,453; Patents Pending
86498-07 (08.11)
Plantronics BV
South Point Building C
Scorpius 140
2132 LR Hoofddorp
Netherlands
EEE Yönetmeliğine Uygundur
 Loading...