

Pitney Bowes Datamax w1110 Installation Instruction
Right, let’s get your Network
Printer up and running quickly…
Let’s rst get together the things you will need:
• The box containing your Network Printer.
• A PC on which you have full admin rights to allow downloading
and installing software.
• 1 available USB port on your PC.
Continue reading below
Stand-Alone Network Printer
Read Now BEFORE you unpack your equipment
Microsoft Windows Installation Instruction
USB Printer Connection
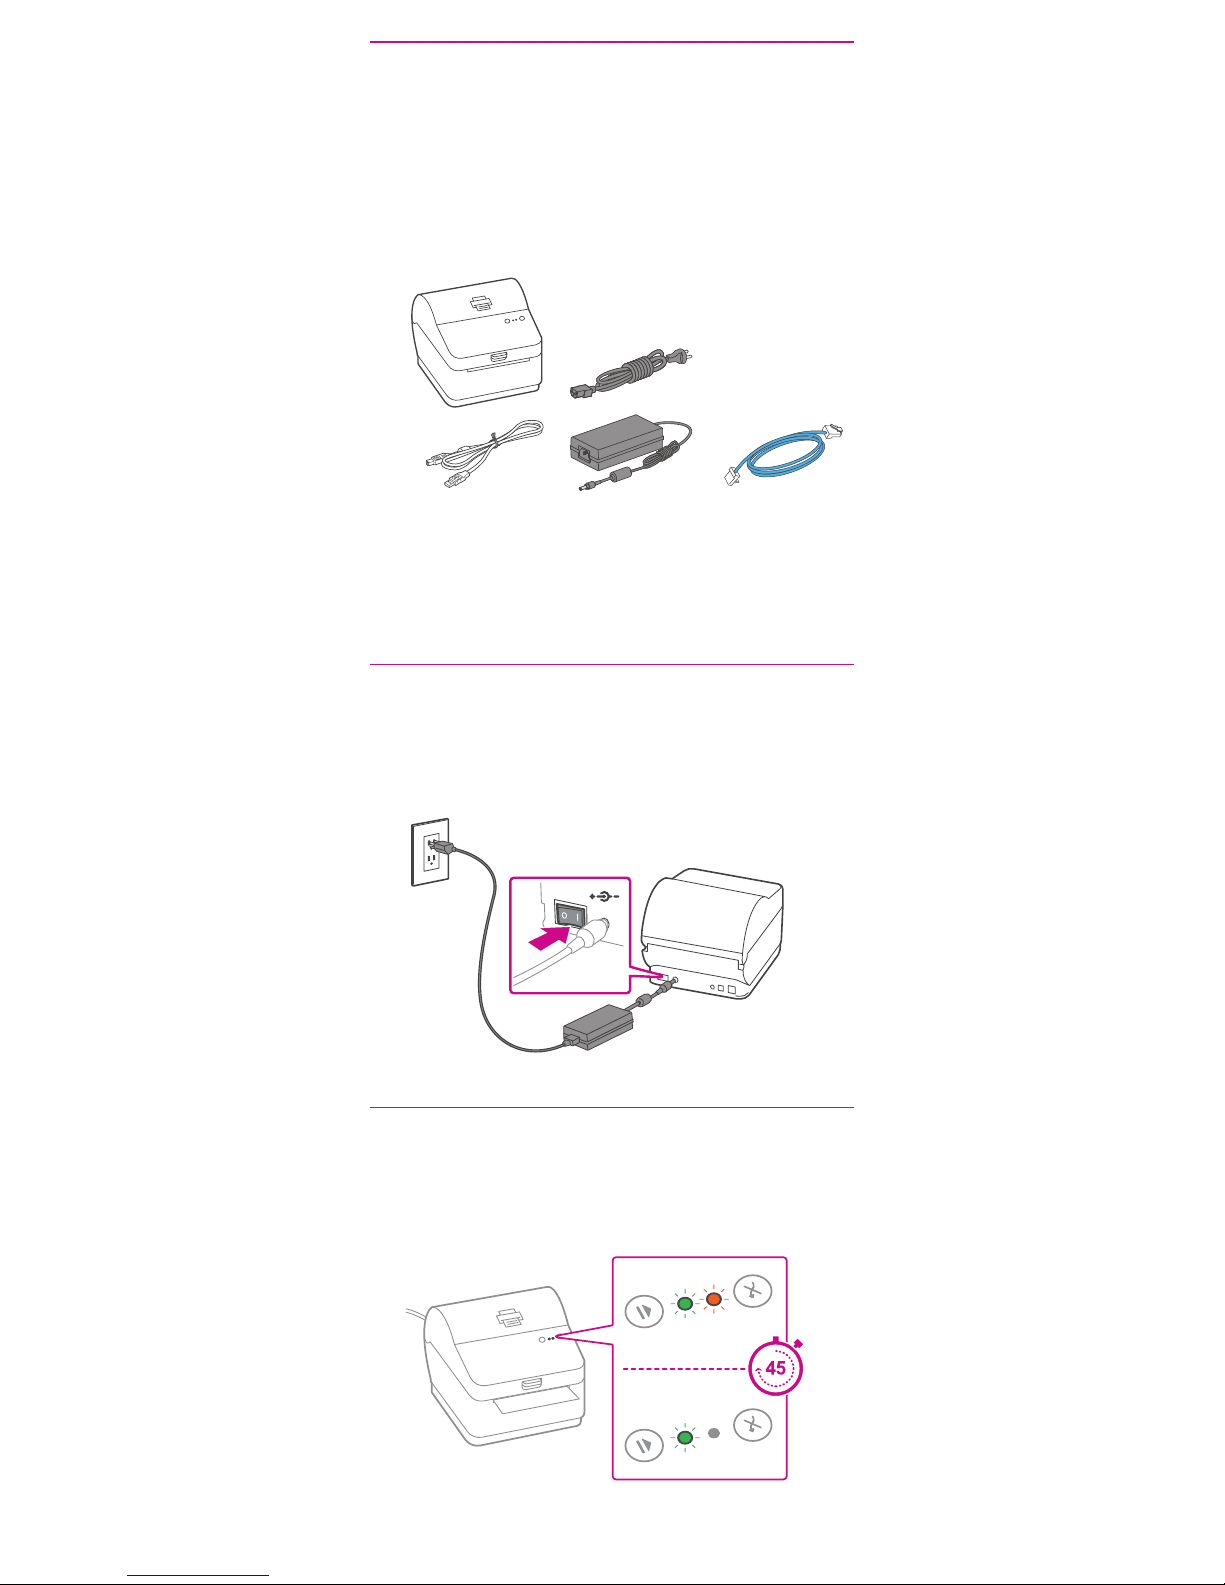
1. Opening the box and unpacking.
Printer
USB Power Cord Network Cable
(not used for
USB installation)
Here’s a diagram and explanation of the items you should
nd in your box.
If you have any problems during this installation, refer to
‘Troubleshooting’.
2. Connecting the printer.
Connect the power cord and adapter to your printer
(as shown) and switch on.
3. Printer ready.
Wait for approximately 45 seconds until the green
light remains constant and the printer is ready.
 Loading...