

PIONEER XW-NAV1K-K User Manual [fr]

XW-NAV1
-K
XW-NAV1K
-K
DVD Speaker system for iPod
Station d’accueil DVD pour iPod
Sistema de DVD con parlante para iPod
Operating Instructions
Mode d’emploi
Manual de instrucciones
Discover the benefits of registering your product online at
http://www.pioneer.co.uk
(or http://www.pioneer.eu).
Découvrez les nombreux avantages offerts en enregistrant
votre produit en ligne maintenant sur
http://www.pioneer.fr
(ou http://www.pioneer.eu).
Registre su producto en
http://www.pioneer.es
(o en
http://www.pioneer.eu) Descubra los beneficios de
registrarse on-line:
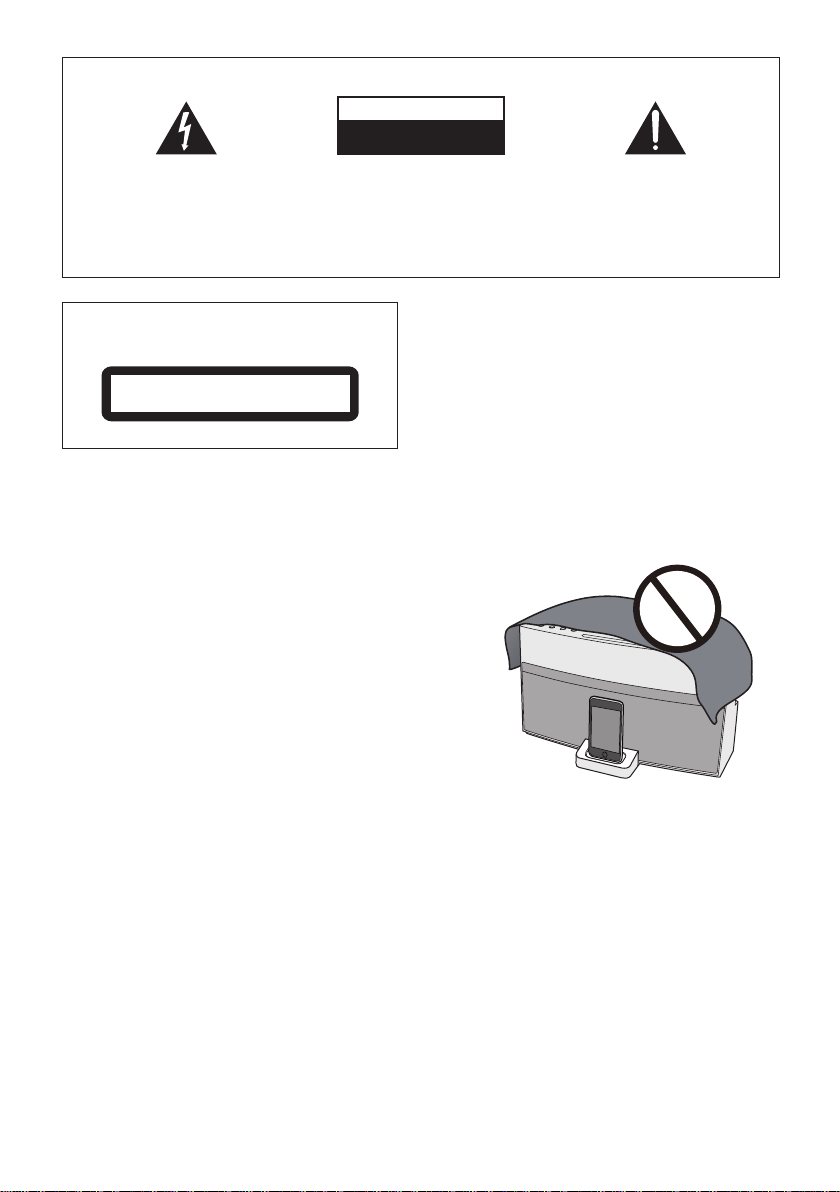
WARNING
Store small parts out of the reach of children and
infants. If accidentally swallowed, contact a doctor
immediately.
The exclamation point within an equilateral
triangle is intended to alert the user to the
presence of important operating and
maintenance (servicing) instructions in the
literature accompanying the appliance.
The lightning flash with arrowhead symbol,
within an equilateral triangle, is intended to
alert the user to the presence of uninsulated
“dangerous voltage” within the product’s
enclosure that may be of sufficient
magnitude to constitute a risk of electric
shock to persons.
CAUTION:
TO PREVENT THE RISK OF ELECTRIC
SHOCK, DO NOT REMOVE COVER (OR
BACK). NO USER-SERVICEABLE PARTS
INSIDE. REFER SERVICING TO QUALIFIED
SERVICE PERSONNEL.
CAUTION
RISK OF ELECTRIC SHOCK
DO NOT OPEN
IMPORTANT
D3-4-2-1-1_A1_En
CAUTION
This product is a class 1 laser product classified
under the Safety of laser products, IEC 60825-1:2007.
CLASS 1 LASER PRODUCT
D58-5-2-2a_A1_En
WARNING
This equipment is not waterproof. To prevent a fire or
shock hazard, do not place any container filled with
liquid near this equipment (such as a vase or flower
pot) or expose it to dripping, splashing, rain or
moisture.
D3-4-2-1-3_A1_En
WARNING
Before plugging in for the first time, read the following
section carefully.
The voltage of the available power supply differs
according to country or region. Be sure that the
power supply voltage of the area where this unit
will be used meets the required voltage (e.g., 230 V
or 120 V) written on the bottom panel.
D3-4-2-1-4*_A1_En
WARNING
To prevent a fire hazard, do not place any naked flame
sources (such as a lighted candle) on the equipment.
D3-4-2-1-7a_A1_En
Operating Environment
Operating environment temperature and humidity:
+5 °C to +35 °C (+41 °F to +95 °F); less than 85 %RH
(cooling vents not blocked)
Do not install this unit in a poorly ventilated area, or in
locations exposed to high humidity or direct sunlight (or
strong artificial light)
D3-4-2-1-7c*_A1_En
VENTILATION CAUTION
When installing this unit, make sure to leave space
around the unit for ventilation to improve heat radiation
(at least 10 cm at top, 10 cm at rear, and 10 cm at each
side).
WARNING
Slots and openings in the cabinet are provided for
ventilation to ensure reliable operation of the product,
and to protect it from overheating. To prevent fire
hazard, the openings should never be blocked or
covered with items (such as newspapers, table-cloths,
curtains) or by operating the equipment on thick carpet
or a bed.
D3-4-2-1-7b*_A1_En
CAUTION
The
STANDBY/ON switch on this unit will not
completely shut off all power from the AC outlet.
Since the power cord serves as the main
disconnect device for the unit, you will need to
unplug it from the AC outlet to shut down all
power. Therefore, make sure the unit has been
installed so that the power cord can be easily
unplugged from the AC outlet in case of an
accident. To avoid fire hazard, the power cord
should also be unplugged from the AC outlet
when left unused for a long period of time (for
example, when on vacation).
D3-4-2-2-2a*_A1_En
Information for users on collection and disposal of old equipment and used batteries
These symbols on the products, packaging, and/or accompanying documents mean
that used electrical and electronic products and batteries should not be mixed with
general household waste.
For proper treatment, recovery and recycling of old products and used batteries,
please take them to applicable collection points in accordance with your national
legislation.
By disposing of these products and batteries correctly, you will help to save valuable
resources and prevent any potential negative effects on human health and the
environment which could otherwise arise from inappropriate waste handling.
For more information about collection and recycling of old products and batteries,
please contact your local municipality, your waste disposal service or the point of sale
where you purchased the items.
These symbols are only valid in the European Union.
For countries outside the European Union:
If you wish to discard these items, please contact your local authorities or dealer and
ask for the correct method of disposal.
K058a_A1_En
Symbol examples
for batteries
Symbol for
equipment
Pb
If the AC plug of this unit does not match the AC
outlet you want to use, the plug must be removed
and appropriate one fitted. Replacement and
mounting of an AC plug on the power supply cord of
this unit should be performed only by qualified
service personnel. If connected to an AC outlet, the
cut-off plug can cause severe electrical shock. Make
sure it is properly disposed of after removal.
The equipment should be disconnected by removing
the mains plug from the wall socket when left unused
for a long period of time (for example, when on
vacation).
D3-4-2-2-1a_A1_En
POWER-CORD CAUTION
Handle the power cord by the plug. Do not pull out the
plug by tugging the cord and never touch the power
cord when your hands are wet as this could cause a
short circuit or electric shock. Do not place the unit, a
piece of furniture, etc., on the power cord, or pinch the
cord. Never make a knot in the cord or tie it with other
cords. The power cords should be routed such that they
are not likely to be stepped on. A damaged power cord
can cause a fire or give you an electrical shock. Check
the power cord once in a while. When you find it
damaged, ask your nearest PIONEER authorized
service center or your dealer for a replacement.
S002*_A1_En
This product is for general household purposes.
Any failure due to use for other than household
purposes (such as long-term use for business
purposes in a restaurant or use in a car or ship)
and which requires repair will be charged for
even during the warranty period.
K041_A1_En
When using this product, confirm the safety
information shown on the bottom of the unit.
D3-4-2-2-4_B1_En

[For UK model]
Replacement and mounting of an AC plug on the power supply cord of this unit should be performed only by qualified
service personnel.
D3-4-2-1-2-2*_A2_En
IMPORTANT: THE MOULDED PLUG
This appliance is supplied with a moulded three pin mains plug for your safety and convenience. A 5 amp fuse is fitted in this plug.
Should the fuse need to be replaced, please ensure that the replacement fuse has a rating of 5 amps and that it is approved by ASTA or BSI to
BS1362.
Check for the ASTA mark or the BSI mark on the body of the fuse.
If the plug contains a removable fuse cover, you must ensure that it is refitted when the fuse is replaced. If you lose the fuse cover the plug
must not be used until a replacement cover is obtained. A replacement fuse cover can be obtained from your local dealer.
If the fitted moulded plug is unsuitable for your socket outlet, then the fuse shall be removed and the plug cut off and disposed of
safely. There is a danger of severe electrical shock if the cut off plug is inserted into any 13 amp socket.
If a new plug is to be fitted, please observe the wiring code as shown below. If in any doubt, please consult a qualified electrician.
IMPORTANT: The wires in this mains lead are coloured in accordance with the following code:
Blue : Neutral Brown : Live
As the colours of the wires in the mains lead of this appliance may not correspond with the coloured markings identifying the terminals in
your plug, proceed as follows;
The wire which is coloured BLUE must be connected to the terminal which is marked with the
letter N or coloured BLACK.
The wire which is coloured BROWN must be connected to the terminal which is marked with the
letter L or coloured RED.
How to replace the fuse: Open the fuse compartment with a screwdriver and replace the fuse.

Thank you for buying this Pioneer product.
Please read through these operating instructions so that you will know how to operate your model
properly. After you have finished reading the instructions, put them in a safe place for future
reference.
Contents
English
01 Before you start
What’s in the box . . . . . . . . . . . . . . . . . . . . . . . . 6
Loading the batteries in the remote control. . .6
Using the remote control . . . . . . . . . . . . . . . .7
02 Connections
Connecting using an audio/video cable . . . . . .8
Connecting using an HDMI cable . . . . . . . . . . 8
Connecting to a TV . . . . . . . . . . . . . . . . . . . . . . .9
Connecting to an AV receiver or amplifier . . . .9
Audio signals that can be output from this
unit’s HDMI OUT terminal . . . . . . . . . . . . . . .10
Plugging in . . . . . . . . . . . . . . . . . . . . . . . . . . . .10
03 Controls and displays
Remote control . . . . . . . . . . . . . . . . . . . . . . . .11
Front/top panel . . . . . . . . . . . . . . . . . . . . . . . . . 14
04 iPod/iPhone playback
Confirm what iPod/iPhone models are
supported . . . . . . . . . . . . . . . . . . . . . . . . . . . . .15
Connecting your iPod/iPhone . . . . . . . . . . . . . 16
Connecting your TV . . . . . . . . . . . . . . . . . . . . 16
Playing your iPod/iPhone. . . . . . . . . . . . . . . . .17
05 Disc playback
Playing discs or files . . . . . . . . . . . . . . . . . . . . 18
Eject a disc from this unit . . . . . . . . . . . . . .18
Example of display on the front panel display
. . . . . . . . . . . . . . . . . . . . . . . . . . . . . . . . . . . . . .18
Playing in the desired order (Programmed Play)
. . . . . . . . . . . . . . . . . . . . . . . . . . . . . . . . . . . . . .19
06 USB playback
Playing files stored on USB devices . . . . . . . .20
Recording audio CD tracks on USB devices
. . . . . . . . . . . . . . . . . . . . . . . . . . . . . . . . . . . . . .20
Recording all the tracks . . . . . . . . . . . . . . . .21
Selecting the track(s) to be recorded . . . . . 21
Playing in the desired order
(Programmed Play) . . . . . . . . . . . . . . . . . . . . .21
07 Using the tuner
Connect the FM antenna . . . . . . . . . . . . . . . . .22
Listening to the FM radio . . . . . . . . . . . . . . . . .22
Memorizing stations . . . . . . . . . . . . . . . . . . . 22
Listening to station presets. . . . . . . . . . . . . . . 22
08 Other connections
Connecting auxiliary components . . . . . . . . . 23
09 Changing the settings
Audio Settings parameters . . . . . . . . . . . . . . . 24
About Sound Retriever function . . . . . . . . . 24
Video Adjust parameters. . . . . . . . . . . . . . . . . 25
Initial Settings parameters . . . . . . . . . . . . . . . 26
Digital Audio Out settings . . . . . . . . . . . . . . 26
Video Output settings . . . . . . . . . . . . . . . . . . 26
Language settings . . . . . . . . . . . . . . . . . . . . 26
Display settings. . . . . . . . . . . . . . . . . . . . . . . 27
Options settings . . . . . . . . . . . . . . . . . . . . . . 27
Setting the HDMI Resolution settings back
to their defaults . . . . . . . . . . . . . . . . . . . . . . . . 27
Restoring all the settings to the defaults. . . . 27
10 Sound settings
Using the Virtual Surround . . . . . . . . . . . . . . 28
Adjusting the bass and treble. . . . . . . . . . . . . 28
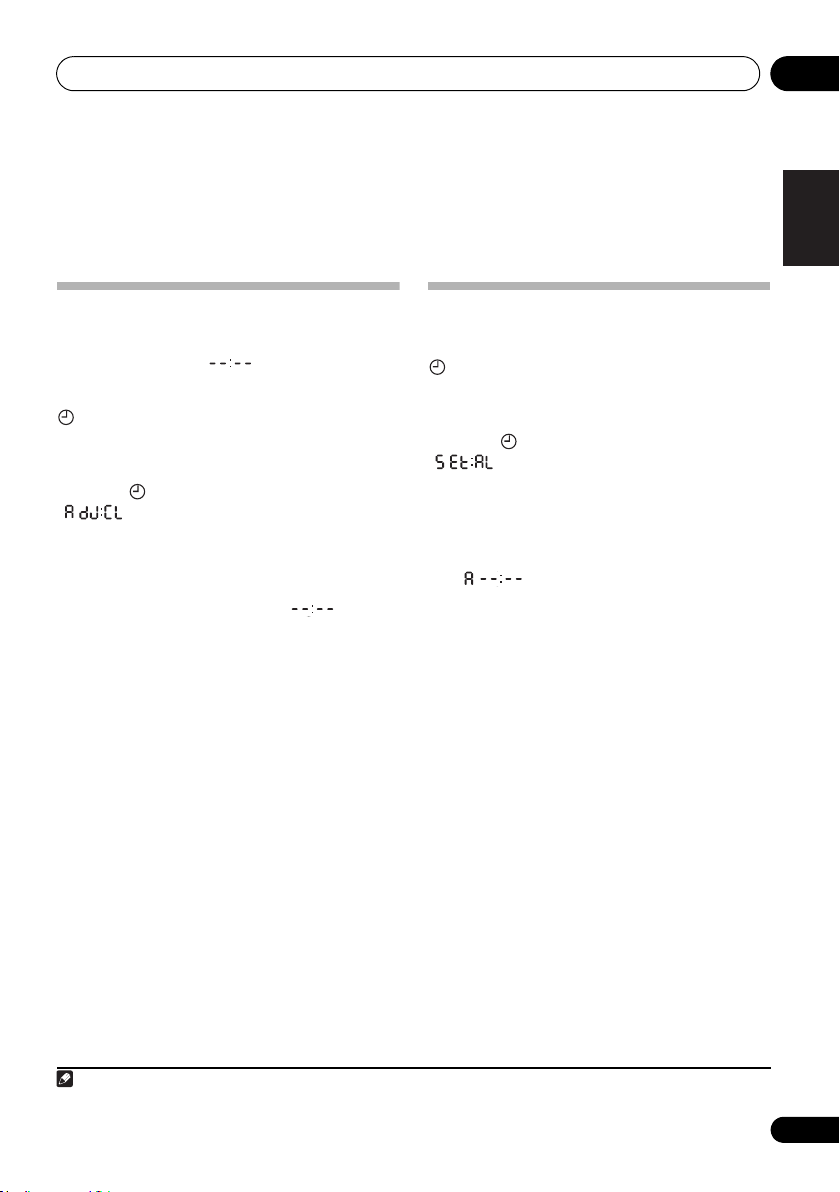
11 Using the timer
Setting the clock . . . . . . . . . . . . . . . . . . . . . . . 29
Setting the wake-up timer. . . . . . . . . . . . . . . . 29
Turning the wake-up timer on/off . . . . . . . . 30
Using the wake-up timer . . . . . . . . . . . . . . . 30
Using the sleep timer . . . . . . . . . . . . . . . . . . . 30
12 Playable discs and files on discs or
USB storage devices
Playable discs . . . . . . . . . . . . . . . . . . . . . . . . . 31
Playable files . . . . . . . . . . . . . . . . . . . . . . . . . . 32
13 Additional information
Troubleshooting . . . . . . . . . . . . . . . . . . . . . . . . 35
Language Code Table and Country/Area
Code Table . . . . . . . . . . . . . . . . . . . . . . . . . . . . 39
Language Code Table . . . . . . . . . . . . . . . . . . 39
Country/Area Code Table . . . . . . . . . . . . . . . 39
Setting the TV system . . . . . . . . . . . . . . . . . . . 40
Cautions on use . . . . . . . . . . . . . . . . . . . . . . . . 40
Handling discs . . . . . . . . . . . . . . . . . . . . . . . . . 42
About iPod/iPhone . . . . . . . . . . . . . . . . . . . . . 43
Specifications. . . . . . . . . . . . . . . . . . . . . . . . . . 43
Français Español
En
5
Before you start01
1
2
Chapter 1:
Before you start
3 Insert the batteries as shown on the
What’s in the box
Please confirm that the following accessories
are in the box when you open it.
•Remote Control
•Audio/Video cable
•Power cord
•FM wire antenna
• AA batteries (R6) x 2
• Warranty card
• Operating instructions (this document)
diagram below.
Loading the batteries in the
remote control
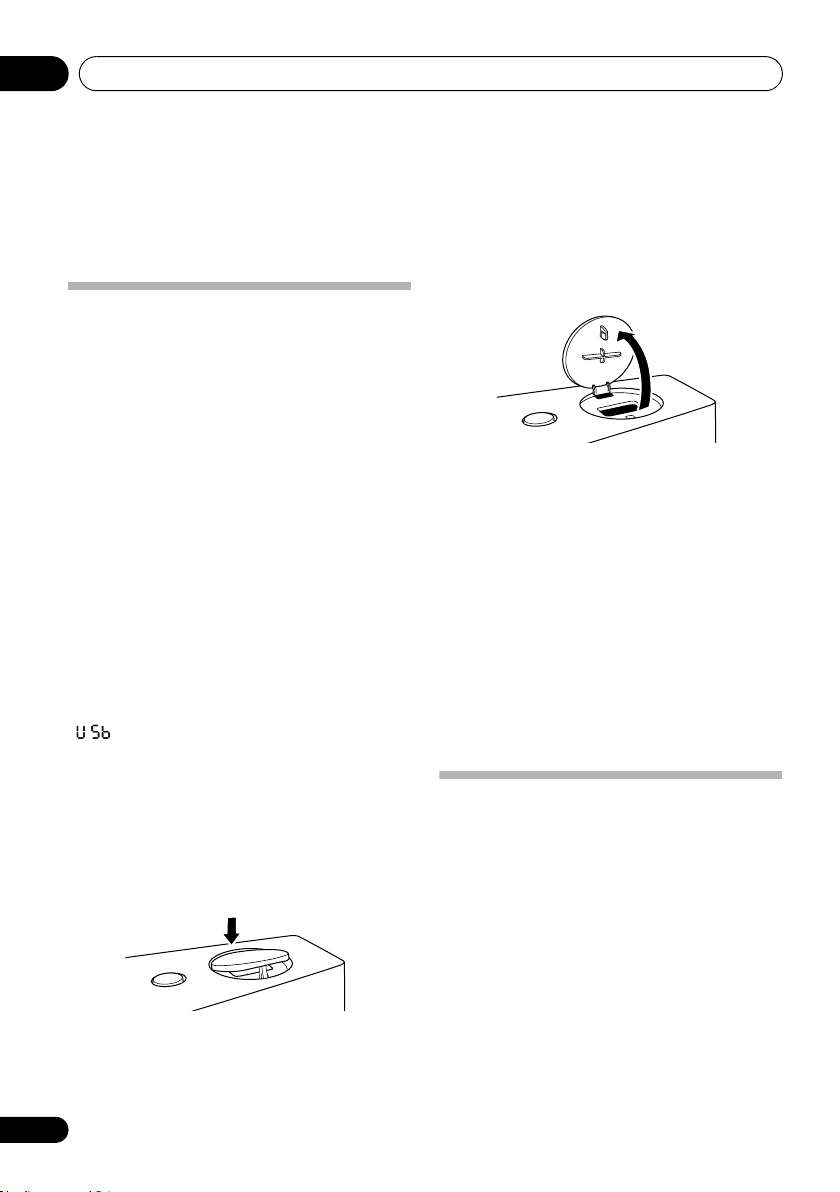
1 Slide the rear lid in the direction.
Slide in the direction of the arrow ().
2 Open the rear lid.
6
En
4
Close
the rear lid.
Caution
• Do not use any batteries other than the
ones specified. Also, do not use a new
battery together with an old one.
• When loading the batteries into the remote
control, set them in the proper direction, as
indicated by the polarity marks ( and ).
• Do not heat batteries, disassemble them,
or throw them into flames or water.
• Batteries may have different voltages, even
if they are the same size and shape. Do not
use different types of batteries together.
• To prevent leakage of battery fluid, remove
the batteries if you do not plan to use the
remote control for a long period of time (1
month or more). If the fluid should leak,
wipe it carefully off the inside of the case,
Before you start 01
30°
30°
7 m
then insert new batteries. If a battery
should leak and the fluid should get on
your skin, flush it off with large quantities of
water.
• When disposing of used batteries, please
comply with governmental regulations or
environmental public institution’s rules
that apply in your country/area.
• WARNING
Do not use or store batteries in direct
sunlight or other excessively hot place,
such as inside a car or near a heater. This
can cause batteries to leak, overheat,
explode or catch fire. It can also reduce the
life or performance of batteries.
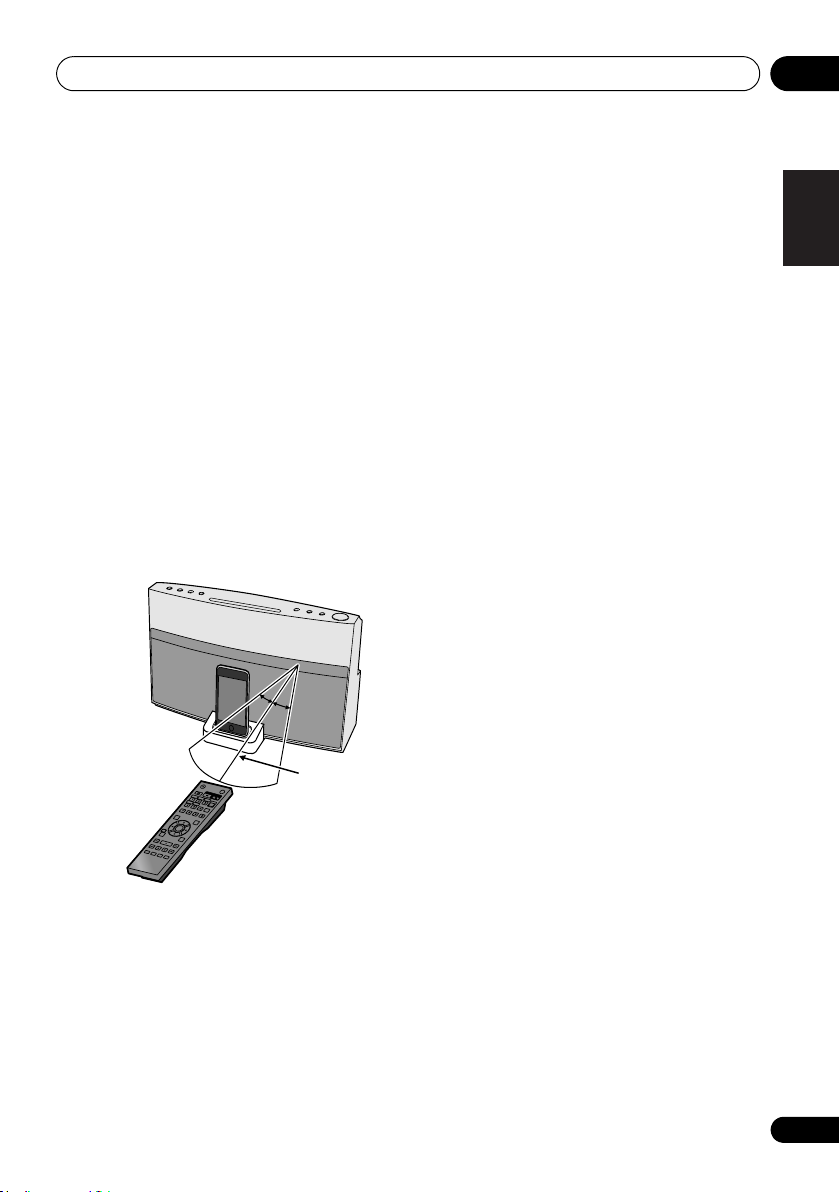
Using the remote control
The remote has a range of about 7 m at an
angle of about 30º from the remote sensor.
• Remote controllers for different devices
can interfere with each other. Avoid using
remotes for other equipment located close
to this unit.
• Replace the batteries when you notice a
fall off in the operating range of the remote.
English
Français Español
Keep in mind the following when using the
remote control:
• Make sure that there are no obstacles
between the remote and the remote sensor
on the unit.
• Remote operation may become unreliable
if strong sunlight or fluorescent light is
shining on the unit’s remote sensor.
7
En
Connections02
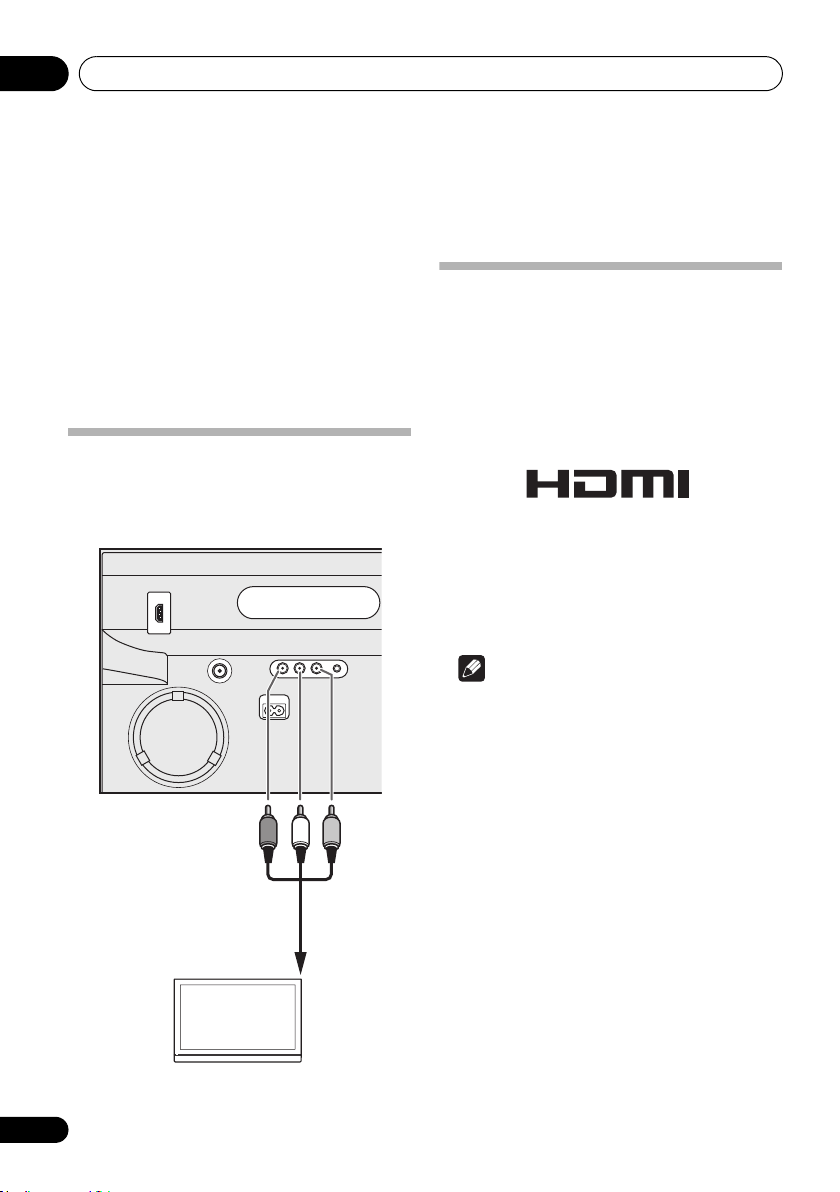
To audio/video
input terminals
Audio/Video cable
(include)
TV
R
W
Y
Chapter 2:
Connections
• Be sure to turn off the power and unplug
the power cord from the power outlet
whenever making or changing
connections.
• Connect the power cord after all the
connections between devices have been
completed.
Connecting using an audio/video
cable
This unit’s rear panel
Connecting using an HDMI cable
By using an HDMI cable, digital signals can be
transferred to an HDMI-compatible TV on a
single cable with no loss of picture or sound
quality. After connecting, make this unit’s
resolution and HDMI color settings according
to the HDMI-compatible TV. Also refer to the
HDMI-compatible TV’s operating instructions.
• HDMI, the HDMI Logo and High-Definition
Multimedia Interface are trademarks or
registered trademarks of HDMI Licensing
LLC in the United States and other
countries.
8
En
Note
• When playing a disc or USB storage device
content, this unit can transfer digital
signals by the HDMI OUT terminal. When
playing the other contents, use the audio/
video cable.
• This unit’s interface is designed based on
the High-Definition Multimedia Interface
specification.
• When an HDMI-compatible device is
connected, the resolution is displayed on
the front panel display.
• The resolution of the video signals output
from this unit’s HDMI OUT terminal is
changed manually. Change the HDMI
Resolution setting (page 26). Settings for
two units can be stored in the memory.
Connections 02
Match the direction
of the plug to the
terminal and insert
straight.
To HDMI input terminal
HDMI cable
(commercially
available)
TV
Match the direction
of the plug to the
terminal and insert
straight.
To HDMI input
terminal
HDMI cable
(commercially
available)
TV
From HDMI output terminalAV receiver
or amplifier
HDMI cable
(commercially available)
• This unit is designed for connection to
HDMI-compatible devices. It may not
operate properly if connected to DVI
devices.
Connecting to a TV
This unit’s rear panel
English
Connecting to an AV receiver or
amplifier
This unit’s rear panel
Français Español
• If you connect this unit to your television
with the HDMI cable, sound can not be
transferred from your television to this unit.
To listen to sound, connect the rear panel
AUX IN mini-plug jack to your television.
9
En
Connections02
Audio signals that can be output
from this unit’s HDMI OUT
terminal
• 44.1 kHz to 96 kHz, 16-bit/ 20-bit/ 24-bit 2channel linear PCM audio (including 2channel downmixing)
• Dolby Digital 5.1-channel audio
• DTS 5.1-channel audio
•MPEG audio
• Manufactured under license from Dolby
Laboratories. Dolby and the double-D
symbol are trademarks of Dolby
Laboratories.
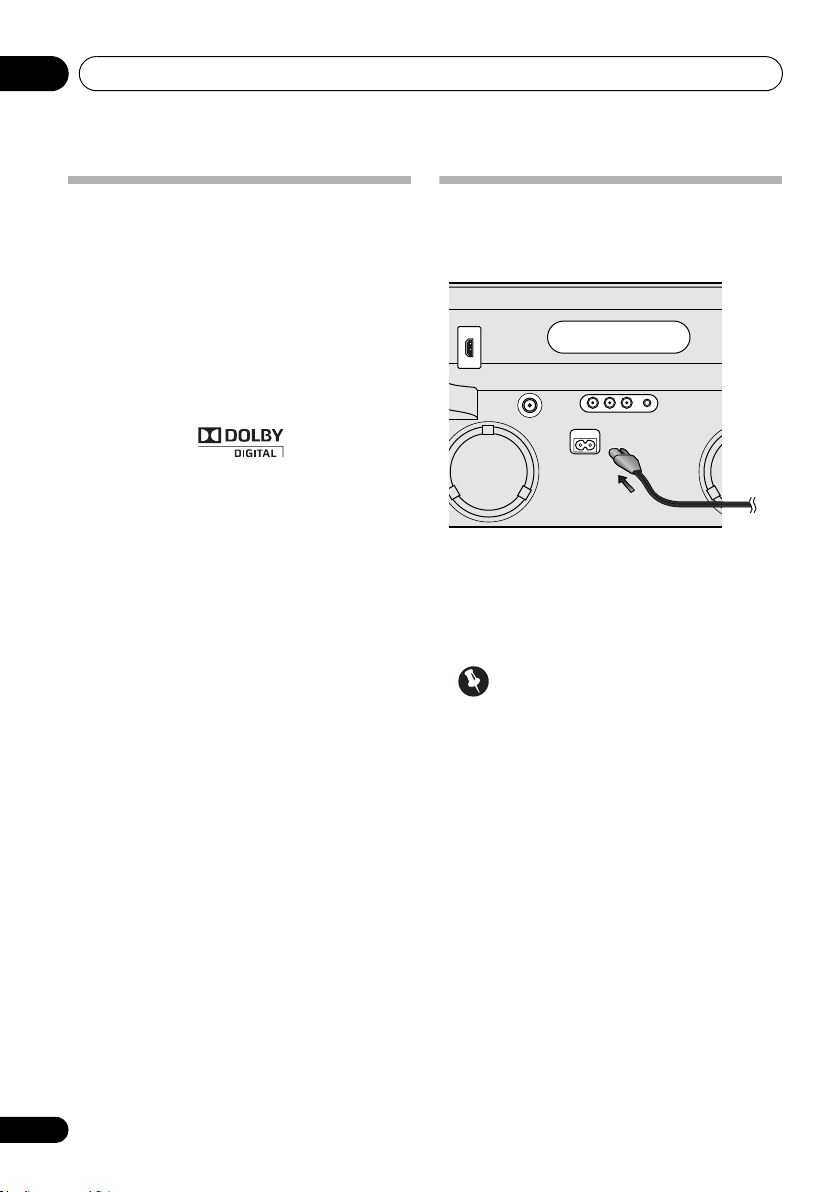
Plugging in
After you’ve finished making all connections,
plug the unit into an AC outlet.
1 Plug the supplied power cord into the
IN
socket on the back of the unit.
2 Plug the other end into a power outlet.
Important
• Before making or changing any
connections, switch off the power and
disconnect the power cord from the AC
outlet.
AC
10
En
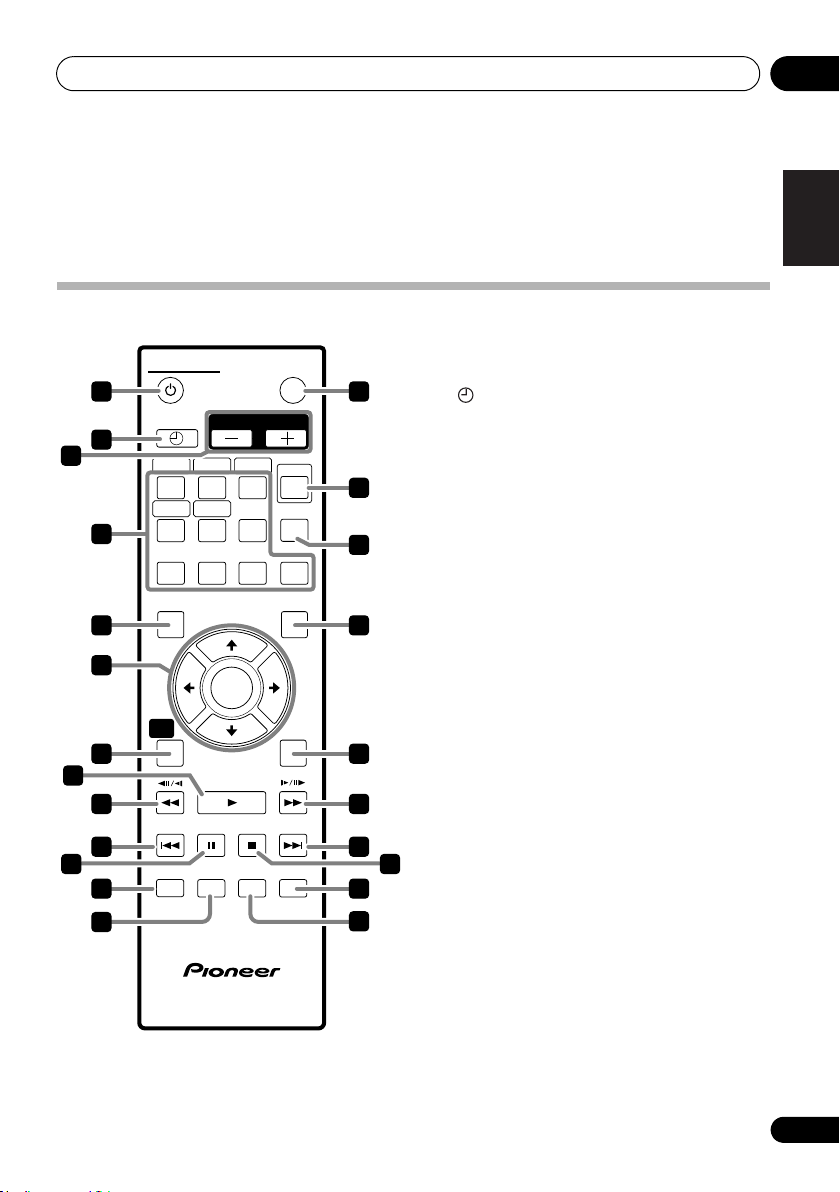
Controls and displays 03
STANDBY/ON
FUNCTION
AUDIO
SUBTITLE
SOUND ZOOM
ANGLE
TIMER/CLOCK
1 23
CLEAR
SHIFT
456
789
0
TOP MENU
MENU
TUNE+
TUNE-
ST- ST+
ENTER
RETURN
REPEATSLEEP USB REC DISPLAY
PLAY
PREV PAUSE STOP NEXT
HOME
MENU
VOLUME
5
6
10
11
4
8
12
13
1
2
3
7
9
21
14
15
18
19
20
22
23
17
16
Chapter 3:
Controls and displays
Remote control
1 STANDBY/ON
Press to turn the power on and off.
2
Use to set the clock (page 29).
3
VOLUME –/+
Use to set the listening volume. (Default
setting: 10)
4 Number buttons (0 to 9)
Use these to specify and play the title,
chapter, track or file you want to view/
listen to. Also use them to select the
station preset when using the tuner, etc.
AUDIO*
For discs or files including multiple audio
streams/ channels, the audio stream/
channel can be switched during playback.
For files stored in iPod/iPhone, this button
is not available.
SUBTITLE
On DVD-Video or DivX discs containing
subtitles in multiple languages, the
subtitle can be switched during playback.
SOUND
Turns the Virtual Surround on and off
(page 28). Also use to adjust the bass and
treble.
ANGLE
On DVD-Video discs containing multiple
angles, the angle can be switched during
playback.
ZOOM
Zooming on the image. For images stored
in iPod/iPhone, this button is not available.
English
Français Español
TIMER/CLOCK
*
*
*
*
11
En
Controls and displays03
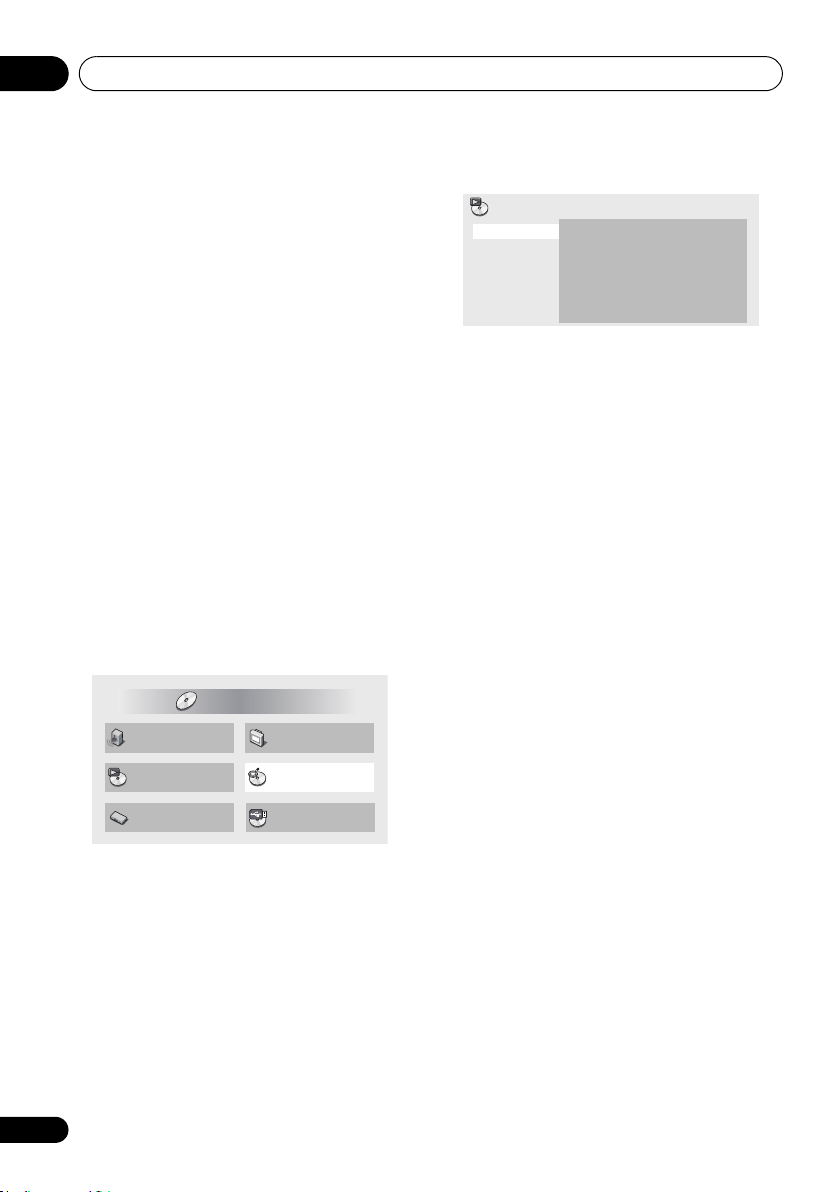
Audio Settings
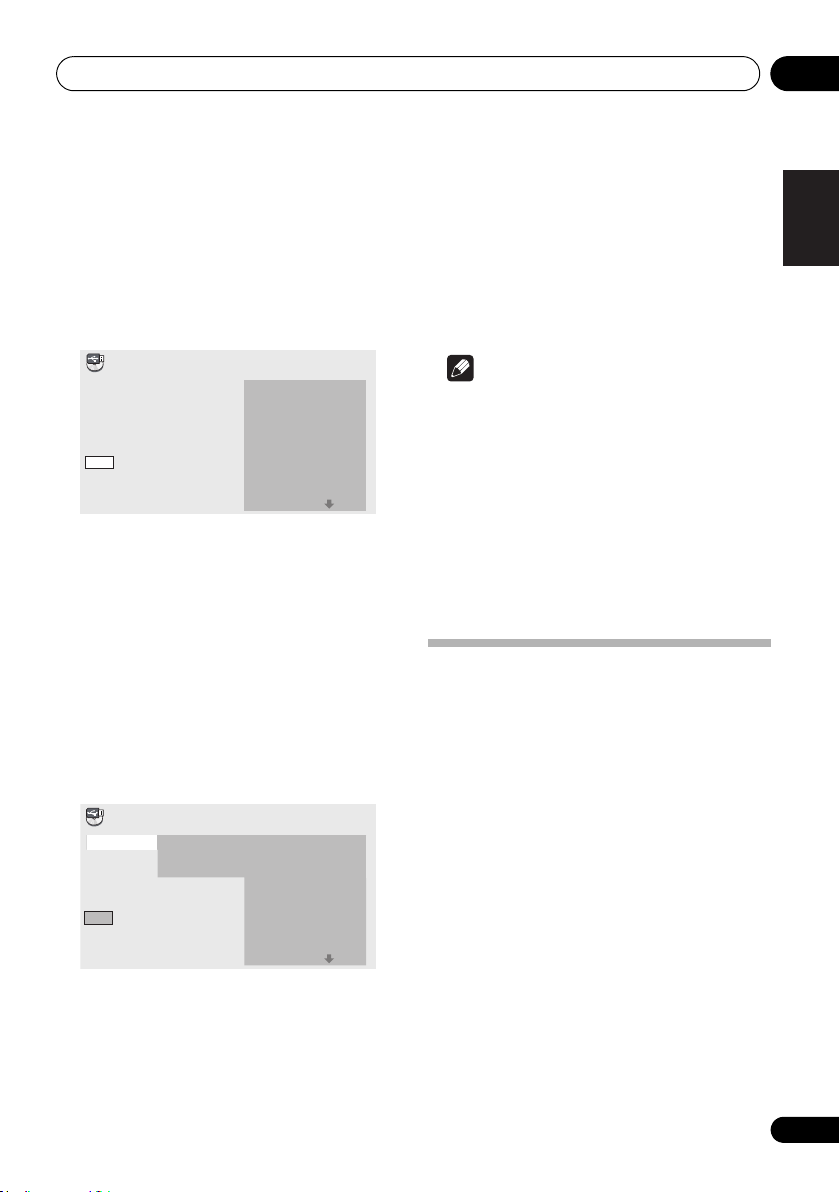
Play Mode Disc Navigator
Initial Settings
Video Adjust
HOME MENU
DVD
CD –> USB Rec
5
TOP MENU
Press to display the top menu of the DVDVideo.
6
///
Use these to select items, change settings
and move the cursor. For iPod/iPhone’s
menu screen, this button is not available.
ENTER
Use this to implement the selected item or
enter a setting that you have changed. For
iPod/iPhone’s menu screen, this button is
not available.
ST +/–
Use these to select station presets.
TUNE +/–
Change the frequency one step at a time.
To search for stations automatically, press
and hold for about a few second.
7
HOME MENU
When selecting a DVD or USB storage device
input, press to display/ hide the HOME MENU.
When selecting the other input, this button is
not available.
• Audio Settings (page 24)
• Video Adjust (page 25)
• Play Mode (this page)
• Disc Navigator (MENU on page 13)
• Initial Settings (page 26)
• CD -> USB Rec (page 20)
Play Mode
Play Mode
A-B Repeat
Repeat
Random
Program
Search Mode
A(Start Point)
B(End Point)
Off
•A-B Repeat
The specified section within a single title or
track is played repeatedly.
• Repeat
Plays titles, chapters, tracks or files
repeatedly.
• Random
Plays titles, chapters or tracks in random
order.
• Program (page 19)
Plays titles, chapters, tracks or files in the
order in which you program them.
• Search Mode
Plays the specified number or time within
the title, chapter, track or file.
The Play Mode function may not work for some
discs or files. For files stored in iPod/iPhone,
this function is not available.
8
PLAY
Press to start playback.
9 //
• Press during playback to fast-reverse.
• Press in the pause mode to move
backward frame-by-frame. (DVD-Video or
DVD VR discs only)
• Press and hold in while in the pause mode
for slow play in the reverse direction. (DVDVideo or DVD VR discs only)
10
PREV
Press to return to the beginning of the
currently playing title, chapter, track or file.
Press twice to move back to the beginning of
the previous title, chapter, track or file.
12
En
Controls and displays 03
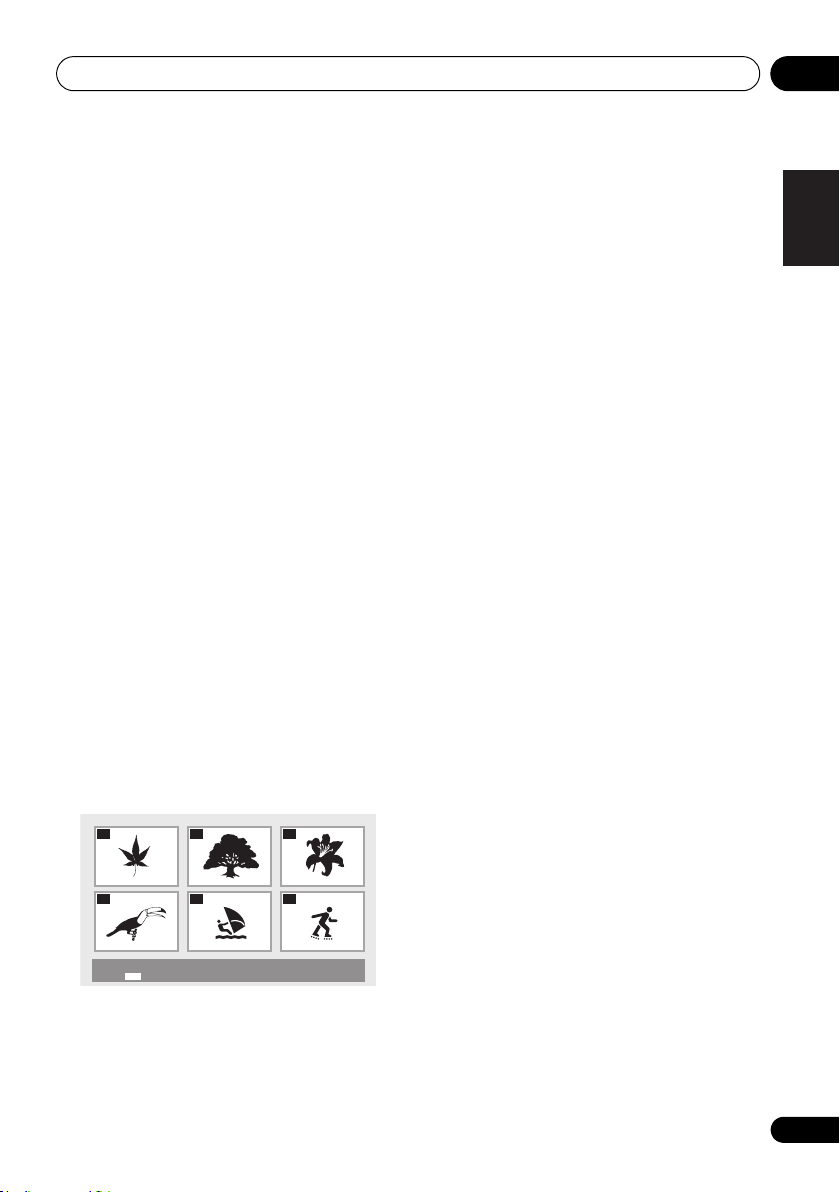
01
04
02
05
03
06
Disc Navigator: Title
01- 49: – –
11
PAUSE
Press to stop playback temporarily. Press
again to resume.
12
SLEEP
Use to put the unit in sleep mode and select
the amount of time before sleep (page 30).
13
REPEAT
Plays titles, chapters, tracks or files repeatedly.
(For iPod/iPhone, this button is not available.)
14
FUNCTION
Use to select an input source. Press repeatedly
to switch between iPod/iPhone, DVD/CD, USB,
TUNER and external input (AUX).
15
SHIFT
Press to access the ‘boxed’ commands (above
the buttons) on the remote. These buttons are
marked with an asterisk (*) in this section.
16
CLEAR
Press to clear the selected item. Use this for
example if you input the wrong number.
17
MENU
• Press to display the menu screen or Disc
Navigator.
• Select and play the title, chapter, track or
file from the Disc Navigator.
• For iPod/iPhone, this button is not
available.
Ex.: DVD-Video Disc Navigator
19 //
• Press during playback to fast-forward.
• Press in the pause mode to move forward
frame-by-frame. (DVD-Video, DVD VR,
Video CD or DivX discs only)
• Press and hold in while in the pause mode
for slow play in the forward direction. (DVDVideo, DVD VR, Video CD or DivX discs
only)
20
NEXT
Press during playback to skips ahead to the
beginning of the next title, chapter, track or file.
21
STOP
When STOP is pressed during playing a disc
or USB storage device, the point at which
playback was stopped is stored in the memory.
When PLAY is pressed, playback resumes
from the point at which it was stopped (except
MP3 and WMA files).
22
DISPLAY
The elapsed time, amount remaining, etc., is
displayed. (When playing files stored in iPod/
iPhone or playing in TUNER or AUX mode, they
are not displayed.)
23
USB REC
Press to display the CD ->USB Rec and
recoding starts. This unit records all tracks
with the bitrate that is set at previous
recording. Only when a CD is in the stop mode,
this button is available. If you want to record
the specified tracks or change the bitrate,
press HOME MENU and select the CD ->USB
Rec.
English
Français Español
RETURN
18
Press to return to the previous screen. Also,
use to cancel the clock setting or the sound
setting.
13
En
Controls and displays03
TIMER HDMI TUNE
1 2 3 4 6
119 12
8
5
1413 13
10
7
Front/top panel
1 STANDBY/ON
Switches the unit between standby and on.
2
FUNCTION
Use to select an input source. Press repeatedly
to switch between iPod/iPhone, DVD/CD, USB,
TUNER and external input (AUX).
3 PLAY/PAUSE
Press to start playback. During playback,
pause/ unpause playback.
4
STOP
When STOP is pressed during playing a disc
or USB storage device, the point at which
playback was stopped is stored in the memory.
When PLAY is pressed, playback resumes
from the point at which it was stopped. When
playing MP3 or WMA file, playback can not
resume.
5
Disc slot
6
EJECT
Eject the disc.
7
VOLUME –/+
Use to set the listening volume. (Default
setting: 10)
8 USB terminal
When no USB storage device is connected,
install the USB terminal cover.
WARNING
Store the USB terminal cover out of the
reach of children and infants. If
accidentally swallowed, contact a doctor
immediately.
9Display
10
TIMER
indicator
When the wake-up timer is set to ON, this
indicator lights.
11 HDMI indicator
When this unit is recognized by another HDMI
compatible component, this indicator lights.
12
TUNE
indicator
When the tuner receives FM broadcasts while
the TUNER input is selected, this indicator
lights.
13 Speaker units
14 iPod/iPhone connector ports
14
En
iPod/iPhone playback 04
Note
Chapter 4:
iPod/iPhone playback
Merely by connecting your iPod/iPhone to this
speaker system, you can enjoy high-quality
sound from your iPod/iPhone. This unit can
also be connected to a television set, letting
you view movies and images from your iPod/
iPhone. When connecting to a television set,
use the included audio/video cable. This unit
can not transfer iPod/iPhone’s musics, movies
and images from the HDMI OUT terminal.
Playback setting for iPod/iPhone music and
images can be performed from this unit or the
iPod/iPhone itself. This unit can not record
sound of CD and tuner, etc. to iPod/iPhone.
Confirm what iPod/iPhone
models are supported
The iPod/iPhone playable on this unit are
shown below.
iPod/iPhone Audio Video
iPod nano 1/2G
iPod nano 3/4/5G
iPod classic 2007
iPod classic 2008
iPod classic 2009
iPod touch 1G
iPod touch 2G
iPod touch 2G 2009
iPhone
iPhone 3G/3GS
1
Always use the most recent version of iPod/
iPhone software available. Operation
compatibility may vary depending on the
version of the software used. You can confirm
your software version by operating your iPod/
iPhone as follows:
1 Select ‘Settings’ from the top menu.
When using iPod touch or iPhone, select
‘General’ after selecting ‘Settings’.
2 Select ‘About’.
The software version will be displayed.
• Consult the Apple website regarding the
newest software versions and instructions
on how to update your version.
Tip
• When using an iPod/iPhone not supported
by this unit, use a commercially available
cable to connect the iPod/iPhone to the
AUX IN connector of this unit.
English
Français Español
1 • Pioneer does not guarantee that this unit plays iPod/iPhone other than the ones specified.
• Some functions may be restricted depending on the model or software version.
• iPod/iPhone is licensed for reproduction of non-copyrighted materials or materials the user is legally permitted to reproduce.
• Features such as the equalizer cannot be controlled using this system, and we recommend switching the equalizer off before
connecting.
• Pioneer cannot under any circumstances accept responsibility for any direct or indirect loss arising from any inconvenience
or loss of recorded material resulting from the iPod/iPhone failure.
• For detailed instructions on using the iPod/iPhone, please refer to the manual supplied with the iPod/iPhone.
15
En
iPod/iPhone playback04
MENU
iPod nano/
iPod classic/
iPod touch/
iPhone
Universal dock
adapter
Note
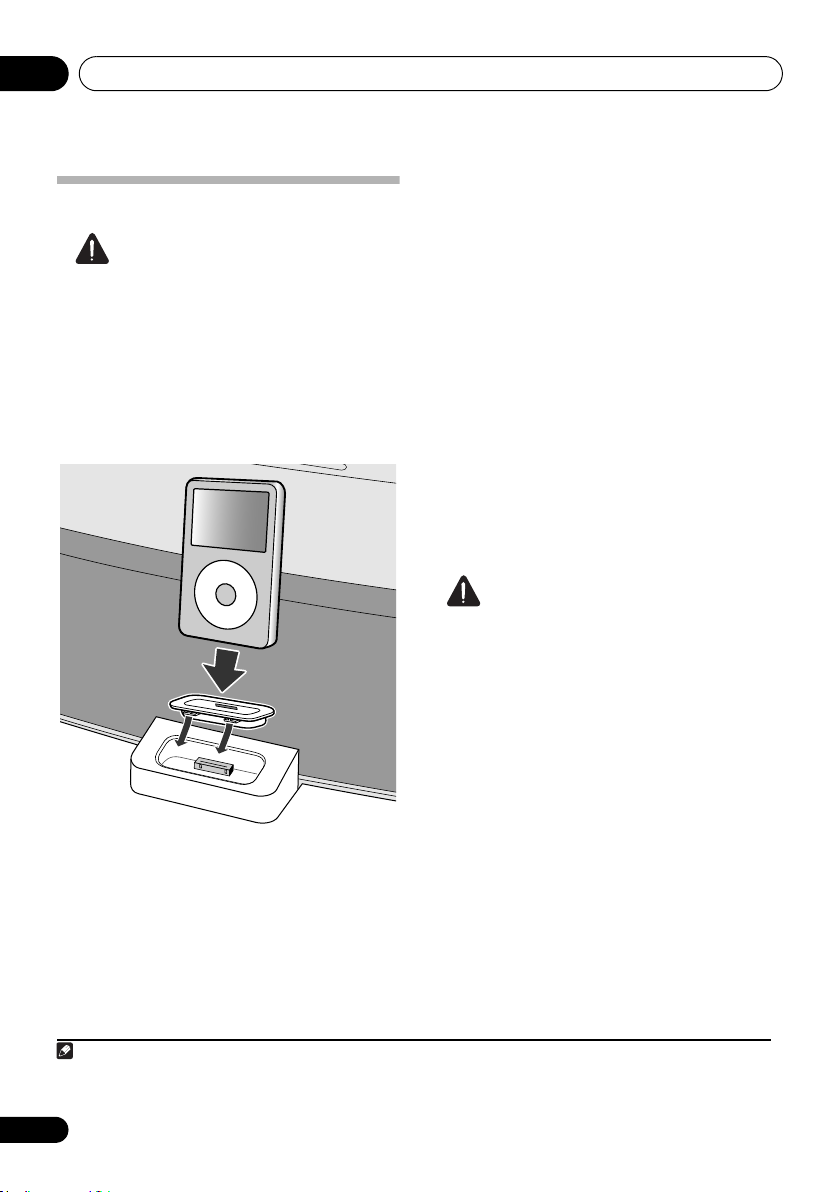
Connecting your iPod/iPhone
Caution
• When connecting an iPod/iPhone units,
always use the universal dock adapter
provided with your iPod/iPhone, or a
commercially adapter designed to support
iPod/iPhone. The iPod/iPhone cannot be
connected without a universal dock
adapter; attempting to connect an iPod/
iPhone without a universal dock adapter
will cause damage or malfunction.
of the adapter into the depressions on the
iPod/iPhone connector port and press into
position. When attaching the adapter, be
careful not to strike the connectors.
2 Connect your iPod/iPhone.
• If an iPod/iPhone is connected when this
unit is in standby mode, the power will turn
on and playback of the iPod/iPhone will
begin.
Connecting your TV
1
To watch iPod/iPhone images on a television,
perform connections using the included audio/
video cable. For details, see Connecting using
an audio/video cable on page 8.
• When an iPod/iPhone is connected to this
unit, the iPod/iPhone’s TV output setting is
automatically set to ON.
2
Caution
• Before making or changing the
connections, switch off the power and
disconnect the power cord from the power
outlet. Plugging in should be the final step.
1 Attach the Universal dock adapter to
iPod/iPhone connector port on the front
panel of this unit.
• An iPod/iPhone universal dock adapter is
not supplied with this unit.
When attaching the Universal dock adapter, be
sure to orient the front-back directions of the
Universal dock adapter correctly. To attach,
first place the protruding tabs on the front side
1 For detailed instructions on using the iPod/iPhone, please refer to the manual supplied with the iPod/iPhone.
2
• Some iPods allow the TV output setting to be changed while connected.
• When the iPod/iPhone is disconnected from this unit, the iPod/iPhone’s TV output setting returns to its original state.
16
En
iPod/iPhone playback 04
Note
Playing your iPod/iPhone
Caution
• When your iPod/iPhone is connected to
this unit and you wish to operate the iPod/
iPhone by touching it directly, be sure to
hold the iPod/iPhone steady with the other
hand to prevent malfunctions due to faulty
contacts.
1 Connect your iPod/iPhone.
• If an iPod/iPhone is connected when this
unit is on, playback of the iPod/iPhone will
not begin.
2 Press
‘ ’ is displayed on the front panel display.
3 Press
FUNCTION
PLAY
• The available iPod/iPhone’s playback
control by touching this unit directly is ,
, , , , , .
• In the following case, operate your iPod/
iPhone directly
- You want to search a file by artist name
or genre.
- You want to play in the repeat or shuffle
mode.
- You want to watch images stored in
iPod/iPhone on your television.
to select the iPod input.
.
1
:
• Reconnect the iPod/iPhone to the unit. If
this doesn’t seem to work, try resetting
your iPod/iPhone.
• Update the iPod/iPhone software to the
latest version.
If the iPod/iPhone cannot be operated, check
the following items:
• Is the iPod/iPhone connected correctly?
Reconnect the iPod/iPhone to the unit.
• Is the iPod/iPhone experiencing a hangup?
Try resetting the iPod/iPhone, and
reconnect it to the unit.
Tip
• iPod/iPhone recharging occurs whenever
an iPod/iPhone is connected to this unit.
(This function is supported in standby
mode as well.)
• When this unit’s power is turned ON with
another function is selected, even if an
iPod/iPhone is connected, playback will
not automatically begin.
• If the unit is set to standby when an iPod/
iPhone is connected, the iPod/iPhone’s
power will be turned OFF automatically.
English
Français Español
Important
If this unit can not play the iPod/iPhone or ‘Err’
is displayed, perform the following
troubleshooting checks:
• Check whether the iPod/iPhone was
supported by this unit.
1 For detailed instructions on using the iPod/iPhone, please refer to the manual supplied with the iPod/iPhone.
17
En
Disc playback05
Slot a disc with
the label side
facing front.
Chapter 5:
Disc playback
Playing discs or files
Note
• By using the number buttons (0 to 9), you
can specify and play the title, chapter, track
or file you want to view/ listen to.
• When playing a DVD-Video or DivX discs,
turn the TV’s power on and switch the TV’s
input before starting.
• This unit’s screen display language can be
changed (OSD Language on page 27).
1Press
on.
The selected input is displayed on the front
panel display.
2Press
input.
Please wait until the indicator changes from
flashing ‘ ’ to ‘ ’.
When a disc has already been slotted in the
disc slot, press EJECT to eject the disc.
3Slot a disc.
Playback will begin automatically.
STANDBY/ON
FUNCTION
to select the DVD/CD
to turn the power
• Hold the disc as shown in the illustration,
insert it in the center of the disc slot, and
press in gently from above.
• The disc will then be automatically drawn
into the slot.
Note
• If the disc does not load smoothly, do not
attempt to force it. Remove it from the slot
and try inserting it again. Attempting to
force a disc causes damage or
malfunction.
• Do not touch the recording surface of the
disc, since the disc may not play properly if
it has fingerprints or other soiling.
• Adapters for 8 cm CDs cannot be used
when you play a 8 cm CD/DVD.
Eject a disc from this unit
• Press
EJECT
.
Example of display on the front
panel display
When the power is turned on (ON)
18
En
When the power is turned off (OFF)
When the disc is being loaded (LOAD)
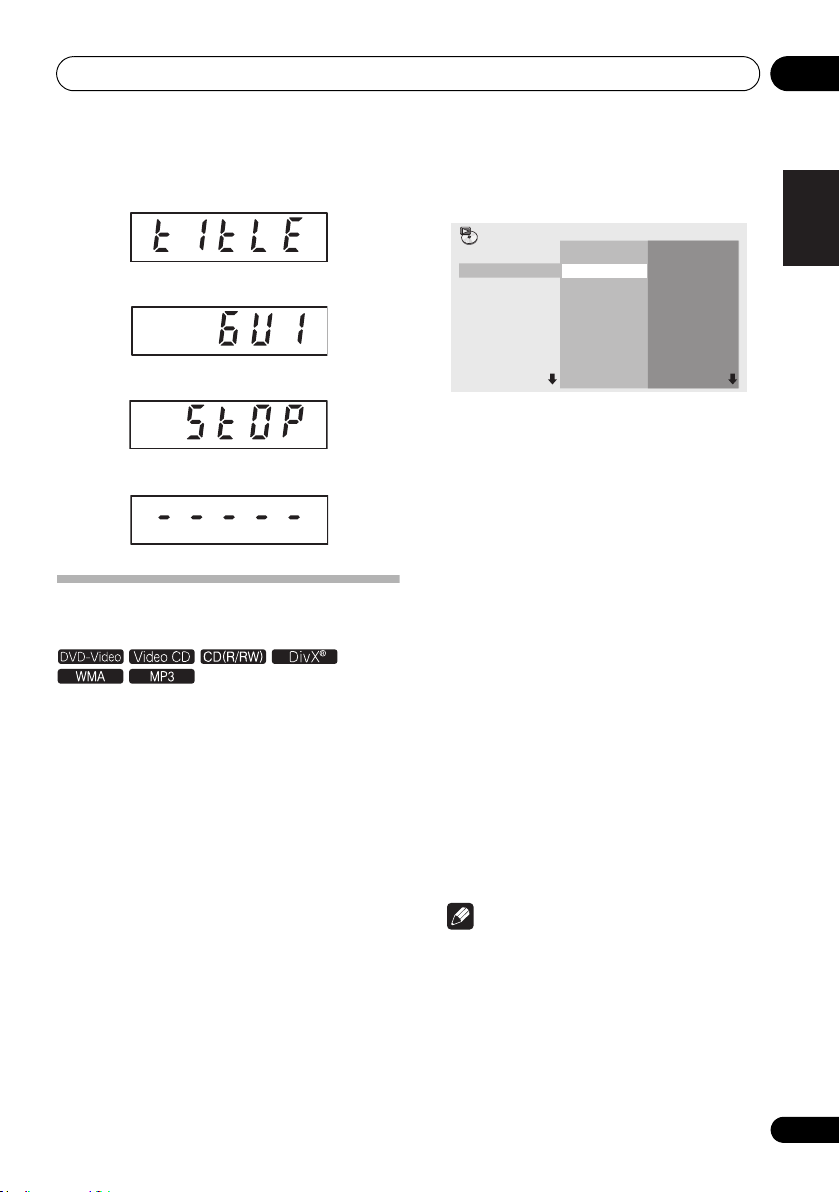
Disc playback 05
When the title menu or menu is displayed
(TITLE)
When the GUI is displayed or operated (GUI)
When the disc is stopped (STOP)
When no disc is loaded
Playing in the desired order
(Programmed Play)
1 Press
The HOME MENU is displayed.
2Use / to select ‘
press ENTER.
The Play Mode screen is displayed.
3Use / to select ‘
ENTER or
4Use
press
The Create/ Edit screen differs according to the
disc or file.
HOME MENU
.
/
to select ‘
ENTER
.
.
Play Mode
Program
’, then press
Create/Edit
’, then
’, then
5Use /
chapter, track or file, then press
Program
Program Step
01.
02.
03.
04.
05.
06.
07.
08.
//
to select the title,
ENTER
Title 1-01
Title 01
Chapter 1-015
Chapter 001
Chapter 002
Chapter 003
Chapter 004
Chapter 005
Chapter 006
Chapter 007
Chapter 008
.
• To add to a program, first select the place
in the program (the program step), next
select the title, chapter or track, then press
ENTER (files are added at the end of
program).
•Press RETURN to return to the previous
screen. If you return to the previous screen
when inputting it, the settings you have
programmed are cleared.
• To delete a step, highlight it and press
CLEAR.
6Press to start playback.
• To play a program that has already been
set, select ‘Playback Start’ from the
program screen, then press ENTER.
• To resume normal playback, select
‘Playback Stop’ from the program screen,
then press ENTER. The program remains in
the memory.
• To cancel the entire program, select
‘Program Delete’ from the program
screen, then press ENTER.
Note
• Programs can be played repeatedly. Select
‘Program Repeat’ from ‘Repeat’ on the
play mode screen during programmed
playback.
• Programs cannot be played in random
order (random play is not possible during
programmed play).
English
Français Español
19
En
USB playback06
Chapter 6:
USB playback
Playing files stored on USB
devices
• This unit may not recognize the USB
device, may not play files or may not supply
power to the USB device. For details, see
When a USB device is connected on
page 36.
• Pioneer does not support that all files
recorded on all USB devices will play or
that power will be supplied to the USB
device. Also note that Pioneer will accept
no responsibility whatsoever for loss of files
on USB devices caused by connection to
this unit.
1Press
on.
The selected input is displayed on the front
panel display.
2Press
‘ ’ is displayed on the front panel display.
3 Connecting USB devices.
The Disc Navigator appears automatically.
When a USB storage device is connected to
the USB terminal, remove the USB terminal
cover.
STANDBY/ON
FUNCTION
1.
Push the USB terminal cover as shown
on the diagram below.
to turn the power
to select the USB input.
2.
Pull the USB terminal cover.
WARNING
Store the USB terminal cover out of the
reach of children and infants. If
accidentally swallowed, contact a doctor
immediately.
4Use /
press
Playback starts.
•If you press PLAY, this unit will play
• Turn the power off before removing the
//
ENTER
automatically files stored in a USB storage
device.
USB storage device.
to select the file, then
.
Recording audio CD tracks on
USB devices
• The tracks of audio CDs loaded in this unit
can be recorded on a USB device
connected to the USB terminal. This unit
can not record the other input’s sound.
• It may not be possible to record tracks of
audio CDs on a USB device. For details, see
When a USB device is connected on
page 36.
20
En
USB playback 06
Start
Selected Track
Total Time
00
000:00
Select Track
Bitrate
Individual
Select All
All Clear
01:43
03:17
04:18
04:59
04:20
04:38
04:40
04:11
Track 1–13
Track01
Track02
Track03
Track04
Track05
Track06
Track07
Track08
CD –> USB Rec
Recording all the tracks
1 Load the audio CD.
• If playback starts automatically, press
STOP to stop playback. Only when a CD
is in the stop mode, recording can start.
2 Press
USB REC
.
The CD -> USB Rec screen is displayed.
CD –> USB Rec
Select Track
Bitrate
Start
Selected Track
Total Time
128kbps
055:07
13
Track 1–13
Track01
Track02
Track03
Track04
Track05
Track06
Track07
Track08
01:43
03:17
04:18
04:59
04:20
04:38
04:40
04:11
Selecting the track(s) to be recorded
1 Load the audio CD.
• If playback starts automatically, press
STOP to stop playback. Only when a CD
is in the stop mode, recording can start.
2 Press
The HOME MENU is displayed.
3Use /
then press
HOME MENU
//
ENTER
to select ‘CD -> USB Rec’,
.
.
• All Clear: Deselect all the tracks.
5Use /
(transfer rate), then press
//
to select ‘Bitrate’
ENTER
.
Select ‘128kbps’, ‘192kbps’ or ‘320kbps’.
6Use /
press
ENTER
//
.
to select ‘
Start
’, then
Recording starts.
Note
• If recording does not start, confirm this
unit's settings on the TV screen.
• The audio signals are converted into MP3
format for output.
•‘CD -> USB Rec’ can only be selected when
the audio CD is stopped.
• When recording is completed, a folder
named “PIONEER” is automatically
created on the USB device. The recorded
tracks are stored in this folder.
Playing in the desired order
(Programmed Play)
This unit can play repeatedly files stored in the
storage device. For details, see Playing in
USB
the desired order (Programmed Play)
on page 19.
English
Français Español
///
4Use
‘
Individual’
record.
• Individual: Select 1 track at a time.
• Select All: Select all the tracks.
to select ‘
the track(s) you want to
Select Track’
21
En
Using the tuner07
Note
Chapter 7:
Using the tuner
• This unit can not transfer FM radio from the
HDMI OUT terminal.
Connect the FM antenna
Connect the FM antenna plug onto the center
pin of the FM antenna socket.
not transfer FM radio from the HDMI OUT
terminal.
1
This unit can
Listening to the FM radio
The tuner can receive FM broadcasts, and lets
you memorize your favorite stations so you
don’t have to manually tune in every time you
want to listen.
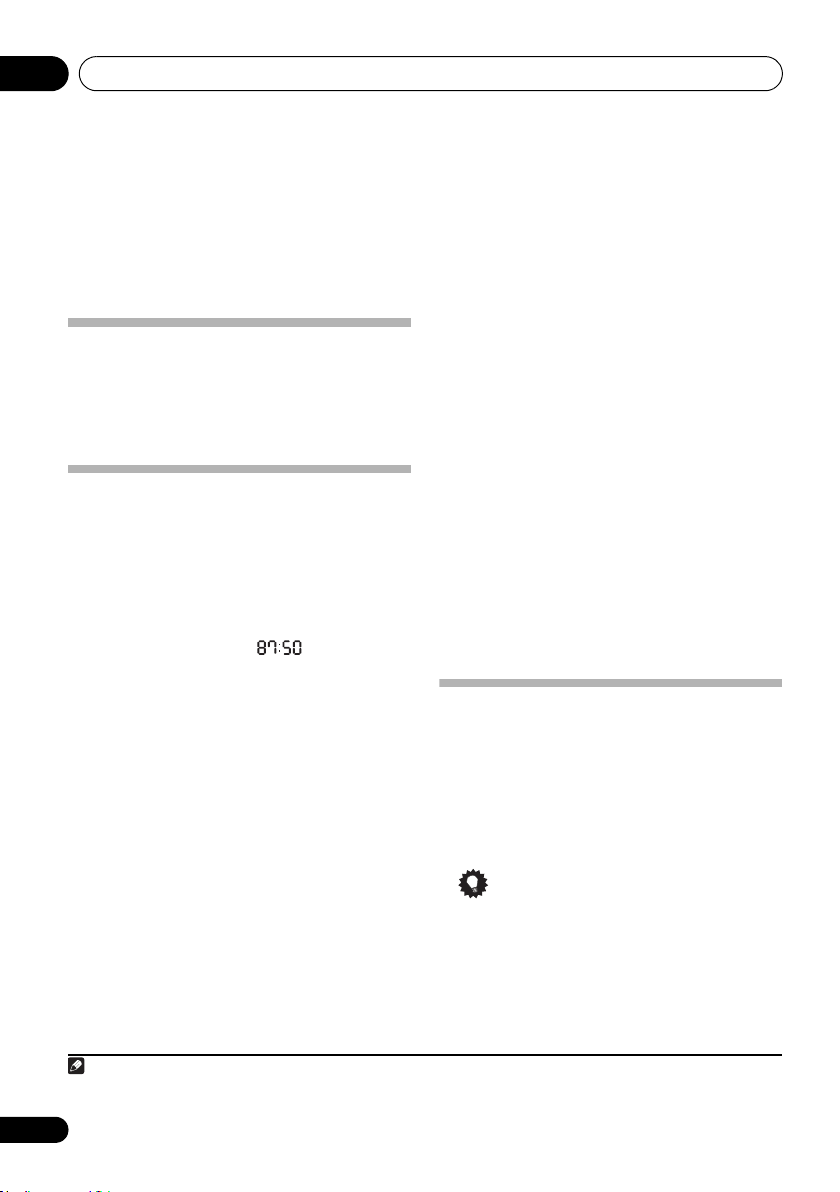
1Press
The tuned frequency will be displayed on the
front panel display (e.g., ‘ ’).
2 Tune to a station.
When the tuner receives FM broadcasts, the
TUNE indicator lights.
There are two ways to do this:
Memorizing stations
You can save up to 9 station presets so that you
always have easy access to your favorite
stations without having to tune in manually
each time.
FUNCTION
Automatic tuning - To search for stations,
press and hold TUNE +/– for about a few
second. This unit will start searching for
the next station, stopping when it has
found one. Repeat to search for other
stations.
Manual tuning - To change the frequency
one step at a time, press TUNE +/–.
2
to switch to the tuner.
• Manually saving station presets
1 Press
The tuned frequency will be displayed on the
front panel display.
2 Tune to an FM radio station.
3 Press number button (1 to 9) for three
seconds.
The tuned frequency is preset to the selected
number button. The previous station preset is
overwritten.
• Automatically saving station presets
1 Press
The tuned frequencies will be preset to the
buttons in numerical order.
Auto tuning stops automatically after the FM
band is finished, or after the limit of 9 presets
has been reached.
FUNCTION
ST +
to switch to the tuner.
for three seconds.
Listening to station presets
1 Press
The tuned frequency will be displayed on the
front panel display.
2 Press number button (1 to 9) that is
memorized the FM radio station.
• Press ST + repeatedly to selected the
FUNCTION
Tip
station preset in numerical order.
to switch to the tuner.
1 To ensure optimum reception, make sure the FM antenna is fully extended and not coiled or hanging at the rear of the unit.
2 When a new broadcast frequency is stored in a station containing a previously stored frequency, the previous frequency will
be overwritten with the new one.
22
En
Other connections 08
Digital audio
player, etc.
Stereo mini-plug cable
(commercially available)
Chapter 8:
Other connections
• Before making or changing the
connections, switch off the power and
disconnect the power cord from the AC
outlet.
• If the AUX IN mini-plug jack is connected to
auxiliary phones jack, this unit’s volume
will be changed by the playback
component’s volume. If the sound is
distorted after you lower this unit’s volume,
try lowering the auxiliary playback
component’s volume.
• This unit can not transfer the external
input’s sound from the HDMI OUT
terminal.
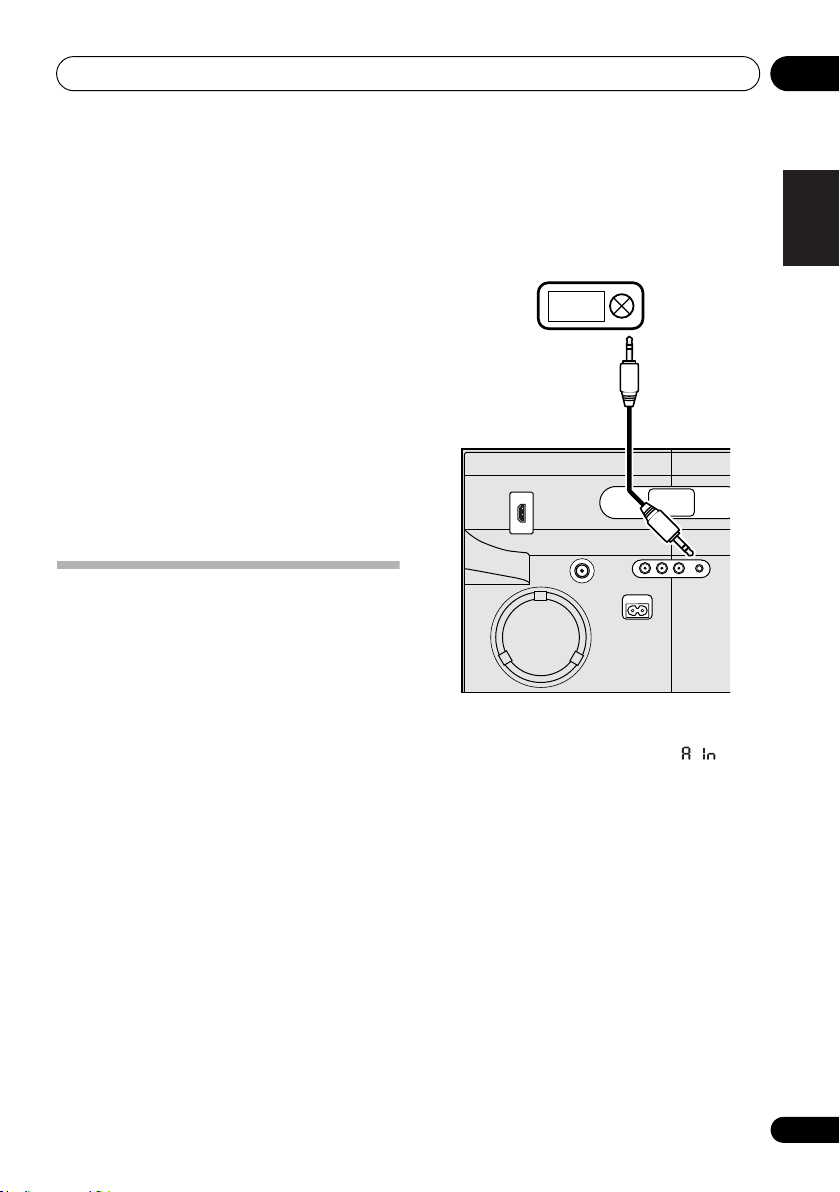
Connecting auxiliary
components
Connect the rear panel AUX IN mini-plug jack
to your auxiliary playback component.
• This method can be used to play music on
this unit from iPod/iPhones that do not
support use of an iPod Dock.
•Press
mode.
When the AUX input is selected, ‘ ’ is
displayed on the front panel display.
FUNCTION
English
Français Español
to switch to AUX input
23
En

Changing the settings09
Chapter 9:
Changing the settings
The factory default settings are indicated in
Note
• The following settings is available for a disc or USB storage device content. These are not
available for iPod/iPhone, tuner, external input (AUX).
• In the USB mode, you can only change the Play Mode and Audio Settings on the HOME MENU
screen.
italic
.
Audio Settings parameters
Settings What it does
Sound Retriever
(High/Low/
Equalizer
Off
(
Dance/ Techno/
Classic/Soft)
Audio DRC
(High/Medium/Low/
Off
Dialog
(High/Medium/Low/
Off
Off
)
/Rock/Pop/Live/
)
)
• The sound of a WMA or MP3 file is played with high sound quality. This is
only valid for files with the extension “.wma” or “.mp3”.
• The effect depends on the file. Try different settings, and choose the one
providing the good effect.
Select according to the genre of music to be listened to.
• This makes loud sounds weaker and weak sounds louder. Change the
setting for example when watching movies late at night.
• This setting only affects Dolby Digital sound.
• The effect depends on the volume of the connected TV, AV receiver or
amplifier, speakers, etc. Try different settings, and choose the one
providing the strongest effect.
Change this setting if the sound of dialogs is low and the dialogs are hard to
hear. This setting only affects multichannel sound.
About Sound Retriever function
When audio data is removed during the compression process, sound quality often degrades. The
Sound Retriever function automatically enhances compressed audio and restores CD quality
sound.
24
En
Changing the settings 09
Note
• The following settings is available for a disc or USB storage device content. These are not
available for iPod/iPhone, tuner, external input (AUX).
• In the USB mode, you can only change the Play Mode and Audio Settings on the HOME MENU
screen.
Video Adjust parameters
Settings What it does
Sharpness
(Fine/
Standard
Brightness
(-20 to +20)
Contrast
(-16 to +16)
Gamma
(-3 to +3)
Hue
(green 9 to red 9)
Chroma Level
(-9 to +9)
Brightness, Contrast, Gamma, Hue and Chroma Level are set to 0 upon purchase.
/Soft)
Adjusts the picture’s sharpness.
Adjusts the picture’s brightness.
Adjusts the ratio of the brightness of the brightest and darkest portions of the
picture.
Adjusts the look of the dark portions of the picture.
Adjusts the balance between green and red.
Adjusts the density of the colors. This setting is effective for sources with
many colors, such as cartoons.
English
Français Español
25
En
Changing the settings09
Note
• The following settings is available for a disc or USB storage device content. These are not
available for iPod/iPhone, tuner, external input (AUX).
• In the USB mode, you can only change the Play Mode and Audio Settings on the HOME MENU
screen.
Initial Settings parameters
• This unit’s detailed settings can be changed here.
• Initial Settings cannot be selected during playback. Stop the disc first.
Digital Audio Out settings
Settings What it does
HDMI Out
Select the audio signals to be output from the
(2CH)/
Auto
Video Output settings
Settings What it does
TV Screen
HDMI Resolution
HDMI Color
Change the picture’s display format (
(Wide)/16:9 (Compressed)
Change the resolution of the video signals output from the HDMI OUT
terminals (
1920x1080i/1920x1080p
changing the setting, return the setting to “
Setting the HDMI Resolution settings back to their defaults
Change the video signals output from the HDMI OUT terminal (
RGB/RGB/
/Off
) according to the connected HDMI-compatible device.
4:3 (Letter Box)
), according to the connected TV.
720x480i/720x576i/
Component
720x480p/720x576p
). If the image does not appear correctly after
).
HDMI OUT
terminal (
/4:3 (Pan & Scan)/16:9
/1280x720p/
720x480p/720x576p
on page 27.
Full range
LPCM
.” Refer to
Language settings
Settings What it does
Audio Language
Subtitle Language
DVD Menu Lang.
Subtitle Display
• If the above setting is used to select
26
En
Language Code Table on page 39.
Change the language when listening to the sound of DVD-Video discs
(
Change the language of the subtitles displayed for DVD-Video discs (
available languages/
Change the language used for the menu displays of DVD-Video discs
(
Select whether to display subtitles (
English
/
available languages
w/ Subtitle Lang.
/Other Language
Other Language
/
available languages
“
Other Language
).
English
).
/Other Language
On
) or not (
Off
).
).
,” perform operations while referring to
/
Changing the settings 09
Note
• The following settings is available for a disc or USB storage device content. These are not
available for iPod/iPhone, tuner, external input (AUX).
• In the USB mode, you can only change the Play Mode and Audio Settings on the HOME MENU
screen.
Display settings
Settings What it does
OSD Language
Angle Indicator
On Screen Display
Change the language of the operation messages (
English
on the TV screen (
Select whether to display the angle mark on the TV screen (
Select whether to display operation messages (
screen (
On
) or not (
/available languages).
Off
).
Play, Stop
Play, Stop
, etc.) displayed
On
) or not (
Off
, etc.) on the TV
Options settings
Settings What it does
Parental Lock
DivX VOD
Restrict DVD-Video viewing (
Country/Area Code Table
Display the registration code required for playing DivX VOD files (
Deactivate
).
Password/Level Change/Country Code
on page 39 in order to set the “Country Code.”
Activate/
). See
Setting the HDMI Resolution settings back to their defaults
English
Français Español
).
1 Press
2 Press
Use the buttons on this unit’s top panel. The power turns on.
STANDBY/ON
STANDBY/ON
to turn this unit’s power off.
while pressing
VOLUME –
.
Restoring all the settings to the defaults
Note
• The preceding settings is restore to the default.
1 Press
2 Press
‘ ’ is displayed during restoring all the settings.
STANDBY/ON
STANDBY/ON
to turn this unit’s power off.
while pressing
STOP.
27
En
Sound settings10
Chapter 10:
Sound settings
Using the Virtual Surround
You can add exciting effects to audio sources.
• Default setting: ON
1Press
‘
SURROUND
2Use
The newly set value displays for 5 seconds, and
then the setting is completed.
on.
off.
SHIFT
and
SOUND
’.
/
to select ‘ ’ or ‘ ’.
– The Virtual Surround is set to
– The Virtual Surround is set to
to select
Adjusting the bass and treble
Use the bass and treble controls to adjust the
overall tone.
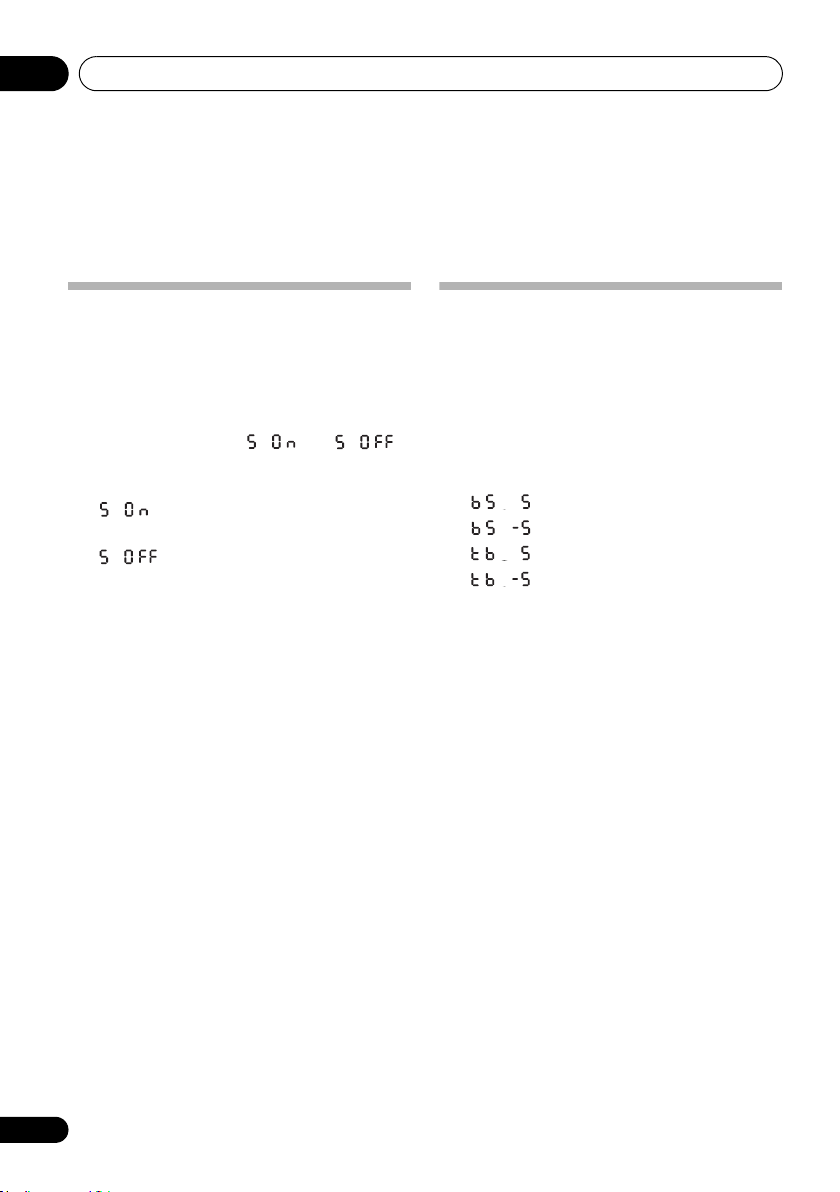
1 Press
or ‘
2Use
You can adjust low and high sounds on a scale
of –5 to +5 (eleven steps).
The newly set value displays for 5 seconds, and
then the setting is completed.
TREBLE
/
SHIFT
and
SOUND
’.
to adjust the bass or treble.
– Bass +5
– Bass -5
– Treble +5
– Treble -5
to select ‘
BASS
’
28
En
Using the timer 11
Note
Chapter 11:
Using the timer
Setting the clock
Setting the clock allows you to use the timer.
•Default setting:
1 With the power turned ON, press
TIMER/CLOCK
The current time is displayed on the front panel
display.
2 Press
‘ ’ is displayed on the front panel
display.
3 Press
The hour blinks on the front panel display.
• When the clock is not set, ‘ ’ is
displayed on the front panel display.
4Use
ENTER
The minute blinks on the front panel display.
5Use
ENTER
The newly set value displays for 5 seconds, and
then the setting is completed.
/
.
/
.
.
TIMER/CLOCK again
ENTER
.
to set the hour, then press
to set the minute, then press
.
1
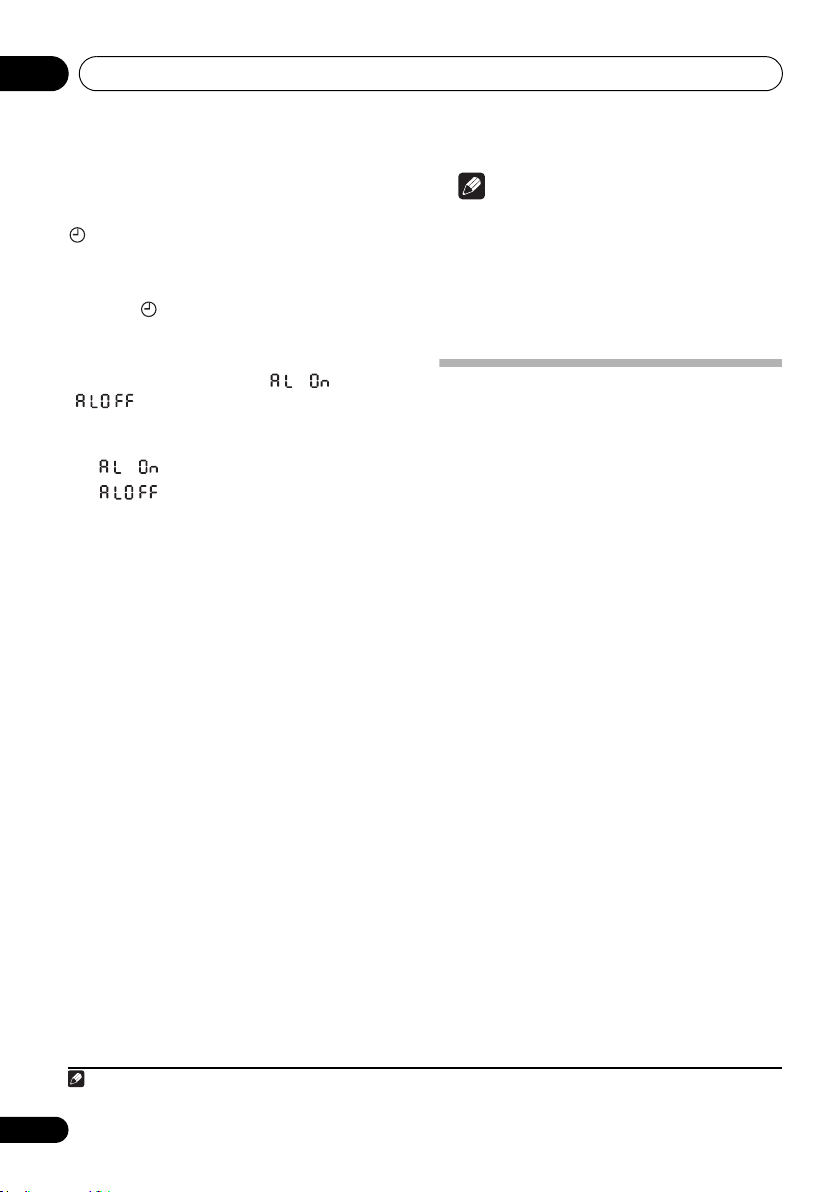
Setting the wake-up timer
1 With the power turned ON, press
TIMER/CLOCK
The current time is displayed on the front panel
display.
2Press
‘ ’ is displayed on the front panel
display.
3Press
The hour blinks on the front panel display.
• When the wake-up timer is not set,
‘ ’ is displayed on the front panel
display.
4Use
ENTER
The minute blinks on the front panel display.
5Use
ENTER
/
.
/
.
.
TIMER/CLOCK twice
ENTER
.
to set the hour, then press
to set the minute, then press
.
English
Français Español
1 You’ll need to set the clock again if you unplug the unit (or in case of a power failure).
29
En
Using the timer11
Note
Turning the wake-up timer on/off
1 With the power turned ON, press
TIMER/CLOCK
The current time is displayed on the front panel
display.
2Press
The newly set value displays for 5 seconds on
the front panel.
3Press
‘’.
The newly set value displays for 5 seconds, and
then the setting is completed.
.
TIMER/CLOCK
ENTER
to select ‘ ’ or
– The wake-up timer is set to on.
– The wake-up timer is set to off.
three times.
Using the wake-up timer
1 Set the wake-up timer to on, and connect
iPod/iPhone or USB storage device or slot a
disc.
2Press
function that this unit plays when the wakeup timer works.
3Press
off.
4 At the wake-up time, this unit will be
turned on automatically, and this unit will
play on the selected input function.
If this unit is not operated for 60 minutes or
more after playback is started by the wake-up
timer, power will automatically turn OFF
(standby mode).
FUNCTION
STANDBY/ON
to select the input
to turn the power
Note
• If at the wake-up time iPod/iPhone or USB
storage device is not connected to this unit
or a disc is not slotted, this unit will be
turned to on and not play back the track.
• Some discs may not be played
automatically at the wake-up time.
Using the sleep timer
The sleep timer switches off the unit after a
specified time so you can fall asleep without
worrying about it.
• Press
off time.
Choose between 5 min, 15 min, 30 min, 60 min,
90 min or Off.
The newly set value displays for 3 seconds, and
then the setting is completed.
• If you press SLEEP while the sleep timer is
SLEEP
repeatedly to select a switch
set, the remaining time will be displayed.
1
1 The sleep timer can be set by pressing SLEEP while the remaining time is displayed.
30
En
 Loading...