

Page 1

XW-NAS5
Digital Speaker System for iPod
Station d’accueil audio numérique pour iPod
Sistema digital de parlantes para iPod
Discover the benefits of registering your product online at
http://www.pioneer.co.uk
Découvrez les nombreux avantages offerts en enregistrant
votre produit en ligne maintenant sur
http://www.pioneer.fr
(or http://www.pioneer.eu).
(ou http://www.pioneer.eu).
Registre su producto en
http://www.pioneer.eu) Descubra los beneficios de
registrarse on-line:
Operating Instructions
Mode d’emploi
Manual de instrucciones
http://www.pioneer.es
(o en
Page 2
The exclamation point within an equilateral
triangle is intended to alert the user to the
presence of important operating and
maintenance (servicing) instructions in the
literature accompanying the appliance.
The lightning flash with arrowhead symbol,
within an equilateral triangle, is intended to
alert the user to the presence of uninsulated
“dangerous voltage” within the product’s
enclosure that may be of sufficient
magnitude to constitute a risk of electric
shock to persons.
CAUTION:
TO PREVENT THE RISK OF ELECTRIC
SHOCK, DO NOT REMOVE COVER (OR
BACK). NO USER-SERVICEABLE PARTS
INSIDE. REFER SERVICING TO QUALIFIED
SERVICE PERSONNEL.
CAUTION
RISK OF ELECTRIC SHOCK
DO NOT OPEN
IMPORTANT
D3-4-2-1-1_A1_En
WARNING
This equipment is not waterproof. To prevent a fire or
shock hazard, do not place any container filled with
liquid near this equipment (such as a vase or flower
pot) or expose it to dripping, splashing, rain or
moisture.
D3-4-2-1-3_A1_En
WARNING
Before plugging in for the first time, read the following
section carefully.
The voltage of the available power supply differs
according to country or region. Be sure that the
power supply voltage of the area where this unit
will be used meets the required voltage (e.g., 230 V
or 120 V) written on the bottom panel.
D3-4-2-1-4*_A1_En
WARNING
To prevent a fire hazard, do not place any naked flame
sources (such as a lighted candle) on the equipment.
D3-4-2-1-7a_A1_En
Operating Environment
Operating environment temperature and humidity:
+5 °C to +35 °C (+41 °F to +95 °F); less than 85 %RH
(cooling vents not blocked)
Do not install this unit in a poorly ventilated area, or in
locations exposed to high humidity or direct sunlight (or
strong artificial light)
D3-4-2-1-7c*_A1_En
VENTILATION CAUTION
When installing this unit, make sure to leave space
around the unit for ventilation to improve heat radiation
(at least 20 cm at top, 10 cm at rear, and 10 cm at each
side).
WARNING
Slots and openings in the cabinet are provided for
ventilation to ensure reliable operation of the product,
and to protect it from overheating. To prevent fire
hazard, the openings should never be blocked or
covered with items (such as newspapers, table-cloths,
curtains) or by operating the equipment on thick carpet
or a bed.
D3-4-2-1-7b*_A1_En
This product is for general household purposes. Any
failure due to use for other than household purposes
(such as long-term use for business purposes in a
restaurant or use in a car or ship) and which requires
repair will be charged for even during the warranty
period.
K041_A1_En
When using this product, confirm the safety
information shown on the bottom of the unit.
D3-4-2-2-4_B1_En
Page 3
Information for users on collection and disposal of old equipment and used batteries
These symbols on the products, packaging, and/or accompanying documents mean
that used electrical and electronic products and batteries should not be mixed with
general household waste.
For proper treatment, recovery and recycling of old products and used batteries,
please take them to applicable collection points in accordance with your national
legislation.
By disposing of these products and batteries correctly, you will help to save valuable
resources and prevent any potential negative effects on human health and the
environment which could otherwise arise from inappropriate waste handling.
For more information about collection and recycling of old products and batteries,
please contact your local municipality, your waste disposal service or the point of sale
where you purchased the items.
These symbols are only valid in the European Union.
For countries outside the European Union:
If you wish to discard these items, please contact your local authorities or dealer and
ask for the correct method of disposal.
K058a_A1_En
Symbol examples
for batteries
Symbol for
equipment
Pb
If the AC plug of this unit does not match the AC
outlet you want to use, the plug must be removed
and appropriate one fitted. Replacement and
mounting of an AC plug on the power supply cord of
this unit should be performed only by qualified
service personnel. If connected to an AC outlet, the
cut-off plug can cause severe electrical shock. Make
sure it is properly disposed of after removal.
The equipment should be disconnected by removing
the mains plug from the wall socket when left unused
for a long period of time (for example, when on
vacation).
D3-4-2-2-1a_A1_En
CAUTION
The
STANDBY/ON
switch on this unit will not
completely shut off all power from the AC outlet.
Since the power cord serves as the main disconnect
device for the unit, you will need to unplug it from the
AC outlet to shut down all power. Therefore, make
sure the unit has been installed so that the power
cord can be easily unplugged from the AC outlet in
case of an accident. To avoid fire hazard, the power
cord should also be unplugged from the AC outlet
when left unused for a long period of time (for
example, when on vacation).
D3-4-2-2-2a*_A1_En
POWER-CORD CAUTION
Handle the power cord by the plug. Do not pull out the
plug by tugging the cord and never touch the power
cord when your hands are wet as this could cause a
short circuit or electric shock. Do not place the unit, a
piece of furniture, etc., on the power cord, or pinch the
cord. Never make a knot in the cord or tie it with other
cords. The power cords should be routed such that they
are not likely to be stepped on. A damaged power cord
can cause a fire or give you an electrical shock. Check
the power cord once in a while. When you find it
damaged, ask your nearest PIONEER authorized
service center or your dealer for a replacement.
S002*_A1_En
Page 4

Thank you for buying this Pioneer product.
Please read through these operating instructions so that you will know how to operate your model
properly. After you have finished reading the instructions, put them in a safe place for future
reference.
Contents
01 Before you start
What’s in the box . . . . . . . . . . . . . . . . . . . . . . . 5
Before using the remote control . . . . . . . . . . . . 5
Replace the battery . . . . . . . . . . . . . . . . . . . . 5
Using the remote control . . . . . . . . . . . . . . . . 6
Installing the unit . . . . . . . . . . . . . . . . . . . . . . . 6
Plugging in . . . . . . . . . . . . . . . . . . . . . . . . . . . . 6
02 Controls and displays
Remote control . . . . . . . . . . . . . . . . . . . . . . . . . 7
Front /top panel . . . . . . . . . . . . . . . . . . . . . . . . 8
03 iPod playback
Confirm what iPod models are supported. . . . . 9
Connecting your iPod . . . . . . . . . . . . . . . . . . . . 9
Connecting your TV . . . . . . . . . . . . . . . . . . . 10
Playing your iPod . . . . . . . . . . . . . . . . . . . . . . 11
Using the tone controls . . . . . . . . . . . . . . . . 11
04
Bluetooth
® ADAPTER for Wireless
Enjoyment of Music
Wireless music play . . . . . . . . . . . . . . . . . . . . 13
Remote control operation. . . . . . . . . . . . . . . 13
Connecting Optional Bluetooth ADAPTER . . . 13
Setting the PIN code. . . . . . . . . . . . . . . . . . . . 14
Pairing Bluetooth ADAPTER and Bluetooth
wireless technology device . . . . . . . . . . . . . . . 14
Listening to Music Contents of
wireless technology device with Your System
Bluetooth
. . . 15
05 Other connections
Connecting auxiliary components. . . . . . . . . . 16
07 Sound settings
Using the Soundscape . . . . . . . . . . . . . . . . . . 18
Adjust the Soundscape volume . . . . . . . . . .18
Select the type of environmental sound . . . .18
Using the sound effects . . . . . . . . . . . . . . . . .19
Adjusting the bass and treble . . . . . . . . . . . . . 19
Using the Sound Retriever . . . . . . . . . . . . . . .19
08 Using the timer
Setting the clock . . . . . . . . . . . . . . . . . . . . . . .20
Display mode setting. . . . . . . . . . . . . . . . . . . . 20
Changing the clock’s display mode . . . . . . .20
Setting the wake-up timer . . . . . . . . . . . . . . . .20
Turning the wake-up timer on/off . . . . . . . . . 21
Using the sleep timer . . . . . . . . . . . . . . . . . . .21
09 Additional information
Troubleshooting . . . . . . . . . . . . . . . . . . . . . . .22
Resetting the system. . . . . . . . . . . . . . . . . . . .23
About iPod . . . . . . . . . . . . . . . . . . . . . . . . . . .23
Specifications . . . . . . . . . . . . . . . . . . . . . . . . . 24
Cleaning the unit. . . . . . . . . . . . . . . . . . . . . . . 24
06 Using the tuner
Connect the FM antenna . . . . . . . . . . . . . . . . 17
Listening to the FM radio . . . . . . . . . . . . . . . . 17
Memorizing stations. . . . . . . . . . . . . . . . . . . 17
Listening to station presets . . . . . . . . . . . . . 17
4
En
Page 5

Before you start 01
1
1
3
2
Chapter 1:
Before you start
Replace the battery
What’s in the box
Please confirm that the following accessories
are in the box when you open it.
• Remote control
• Remote control holder
• Lithium battery (CR2025)
•FM wire antenna
•Power cord
• Warranty card
• Operating instructions (This document)
Before using the remote control
The remote control is shipped already set in the
remote control holder.
When replacing the battery, use a
commercially available Lithium CR2025
battery.
1 Push the release tab to the left to open
the battery casing.
2 Pull out the battery casing.
3 Remove the battery from the casing.
4 Place a new battery in the casing.
Make sure the side of the battery is facing
up when you place it in the space provided.
English
FrançaisDeutsch
Italiano Español
Nederlands
The battery supplied with this unit is stored in
the battery casing.
• Remove the protective seal from the
battery casing.
When you notice a decrease in the operating
range, replace the battery (see below).
Caution
When using lithium batteries, please observe
the following:
• T her e is dang er o f ex plo sion if t he b att ery i s
incorrectly replaced. Make sure to replace
only with the same or equivalent type
recommended by the manufacturer.
• Dispose of used battery cells immediately
after replacement. Keep away from
children.
• If swallowed, please contact a doctor
immediately.
• Lithium batteries may present a fire or
chemical burn hazard if misused. Do not
disassemble, heat above 100 °C, or
incinerate.
5
En
Page 6
Before you start01
30°
30°
7 m
• Remove the battery if the unit isn’t going to
be used for a month or more.
• When disposing of used batteries, please
comply with governmental regulations or
environmental public instruction’s rules
that apply in your country or area.
• WARNING
Do not use or store batteries in direct
sunlight or other excessively hot place,
such as inside a car or near a heater. This
can cause batteries to leak, overheat,
explode or catch fire. It can also reduce the
life or performance of batteries.
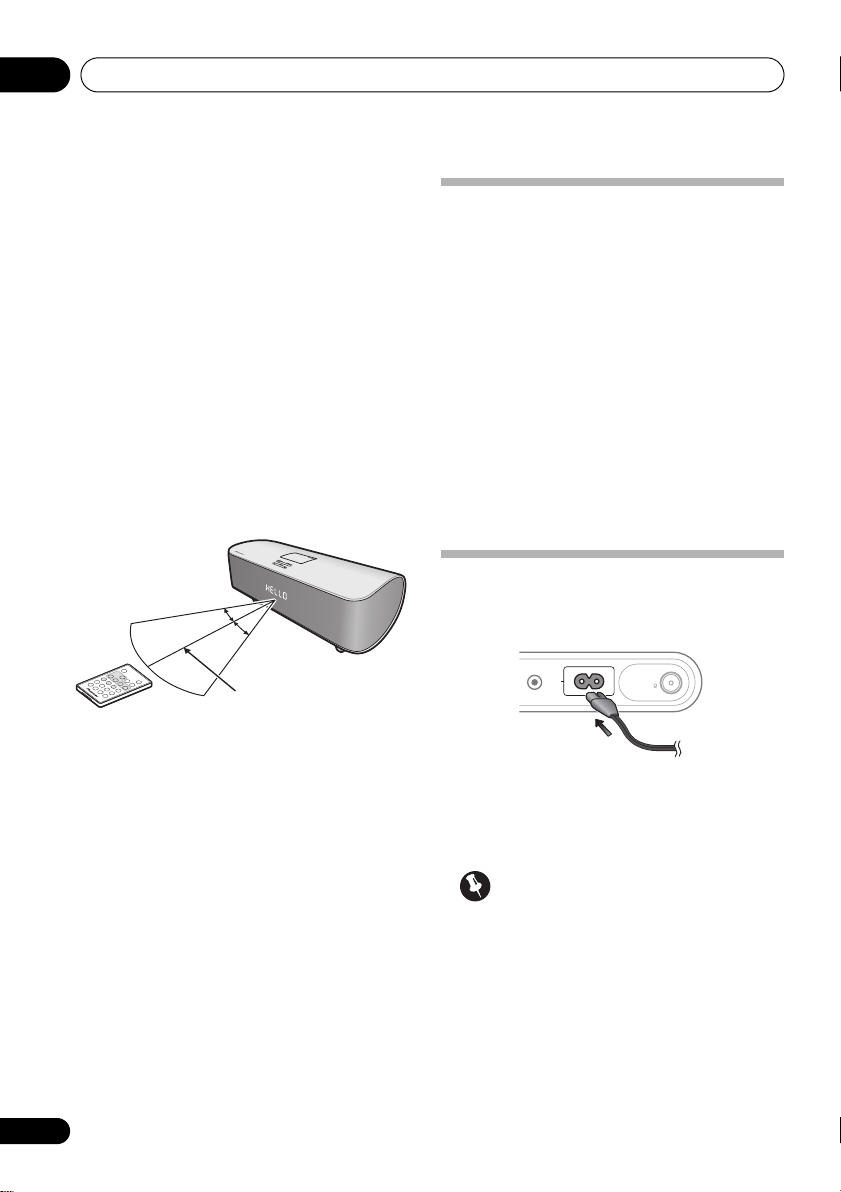
Using the remote control
The remote has a range of about 7 m at an
angle of about 30º from the remote sensor.
Installing the unit
• When installing this unit, make sure to put
it on a level and stable surface.
Don’t install it on the following places:
– on a color TV (the screen may distort)
– near a cassette deck (or close to a device that
gives off a magnetic field). This may interfere
with the sound.
– in direct sunlight
– in damp or wet areas
– in extremely hot or cold areas
– in places where there is vibration or other
movement
– in places that are very dusty
– in places that have hot fumes or oils (such as
a kitchen)
Plugging in
After you’ve finished making all connections,
plug the unit into an AC outlet.
Keep in mind the following when using the
remote control:
• Make sure that there are no obstacles
between the remote and the remote sensor
on the unit.
• Remote operation may become unreliable
if strong sunlight or fluorescent light is
shining on the unit’s remote sensor.
• Remote controllers for different devices
can interfere with each other. Avoid using
remotes for other equipment located close
to this unit.
• Replace the batteries when you notice a fall
off in the operating range of the remote.
6
En
AUDIO IN
AC IN
ANTENNA
FM UNBAL 75
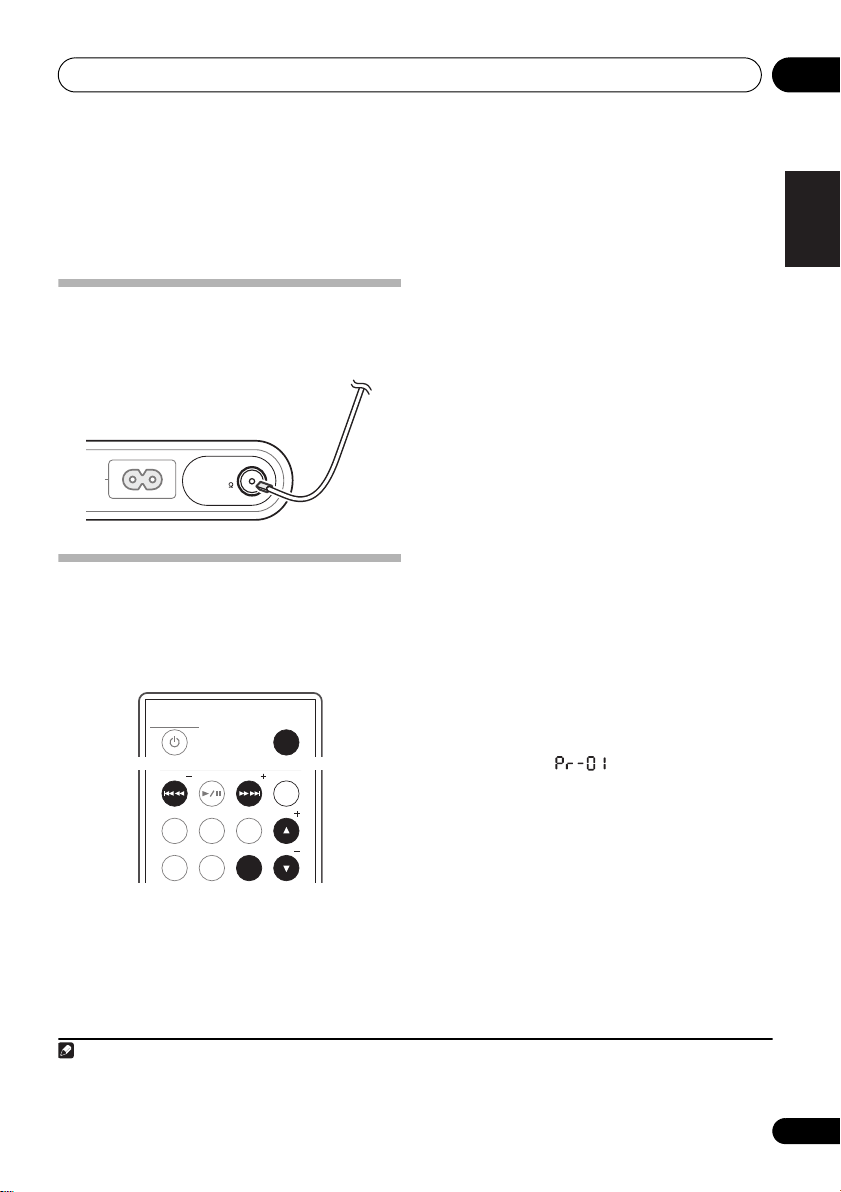
1 Plug the supplied power cord into the
IN
socket on the back of the unit.
2 Plug the other end into a power outlet.
Important
• Before making or changing any
connections, switch off the power and
disconnect the power cord from the AC
outlet.
AC
Page 7
Controls and displays 02
Note
Chapter 2:
Controls and displays
Remote control
5
SLEEP
STANDBY/ON
1
SOUND
/
ON
SCAPE
OFF
PRESET
SLEEP
CLOCK
SELECT
WAKE
UP
SETUP
2
3
4
5
6
VOLUME
MIX BALANCE
PRESET
BASS
/
TREBLE
TUNER
PRESET
INPUT
ENTER
TUNE
TUNE
7
8
9
10
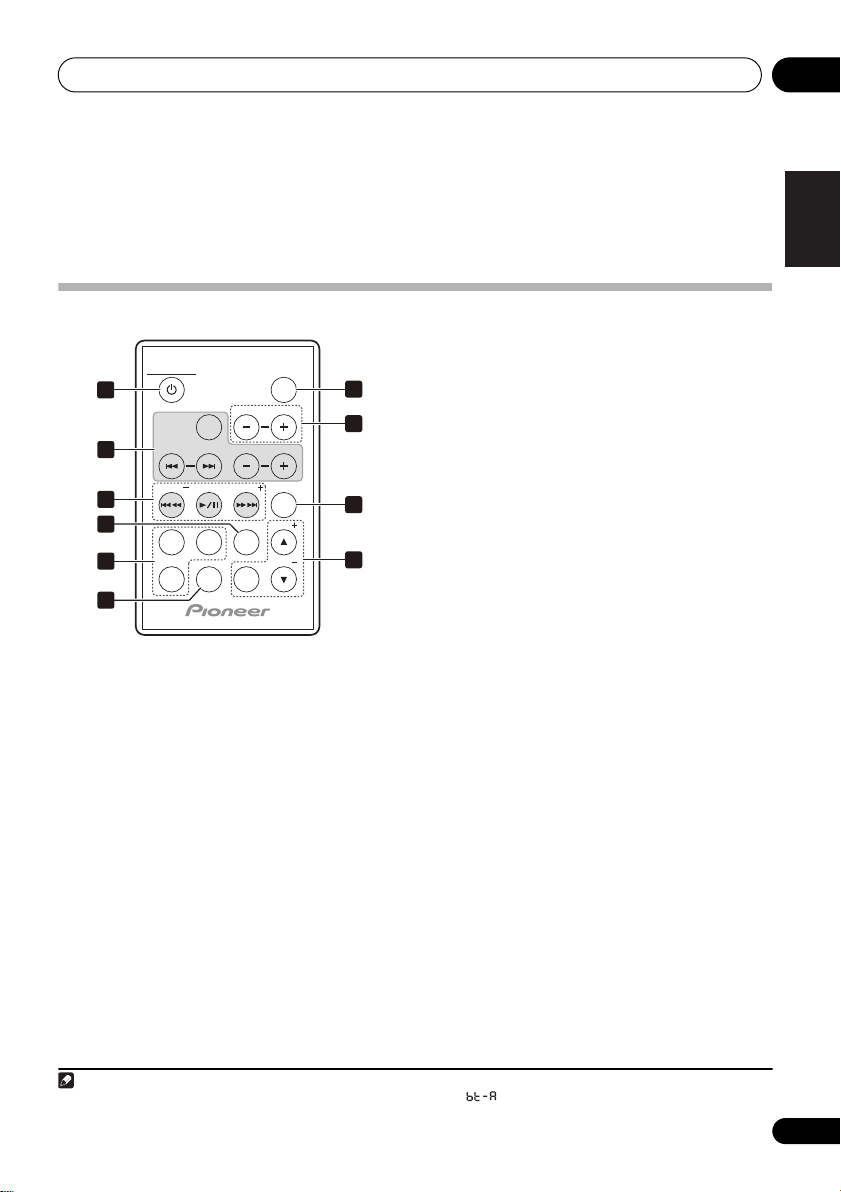
1 STANDBY/ON
Switches the unit between standby and on.
2 Soundscape function/operation buttons
Use to turn the Soundscape (environmental
sound) function ON/OFF, and to switch
between settings (page 18).
3
PRESET +/–
, Playback control buttons
Use to select preset radio stations (page 17).
Use when operating an iPod or Bluetooth
wireless technology device with this remote
control (page 11, 15).
4
BASS/TREBLE
Use the bass and treble controls to adjust the
overall tone.
Use to put the receiver in sleep mode and
select the amount of time before sleep
(page 21).
WAKE UP
Use to turn the wake-up timer function ON/
OFF (page 21).
CLOCK
Use to switch the clock display functions
(page 20).
6
SETUP
Press to make various settings.
7
INPUT
Use to select an input source. Press repeatedly
to switch between iPod, tuner, Bluetooth
ADAPTER
8
1
and external input.
VOLUME +/–
Use to set the listening volume.
9
ENTER
10
TUNE +/–
Use to find radio frequencies (page 17).
TUNER PRESET
Use to store preset ratio stations in
memory, and to call them from memory
(page 17).
English
FrançaisDeutsch
Italiano Español
Nederlands
1 When the Bluetooth ADAPTER is not plugged in the ADAPTER PORT, cannot be selected even if INPUT is pressed.
7
En
Page 8
Controls and displays02
Note
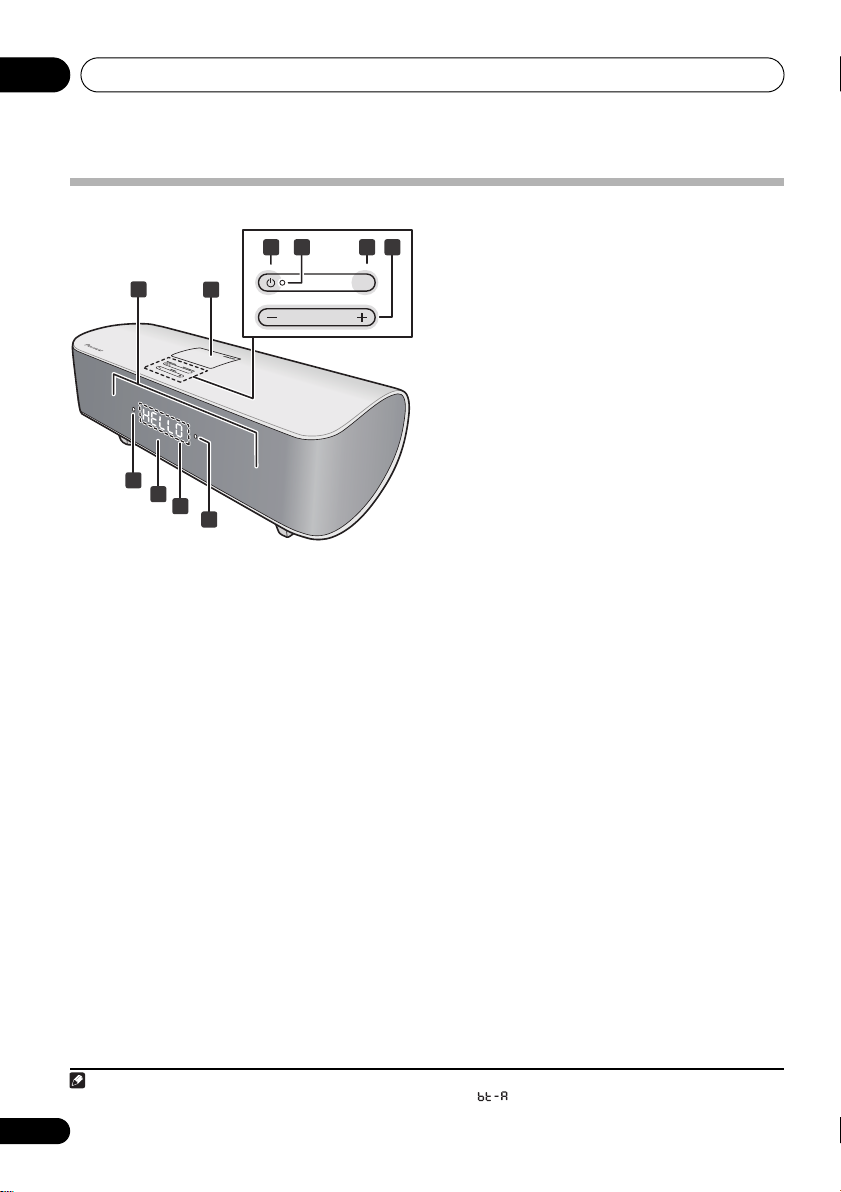
Front /top panel
1
7
2
8
9
10
3 4 5 6
STANDBY/ON INPUT SELECTOR
VOLUME
1 Speaker units
2 iPod connector port
3 STANDBY/ON
Switches the unit between standby and on.
4 Power indicator
5
INPUT SELECTOR
Use to select an input source. Press repeatedly
to switch between iPod, tuner, Bluetooth
ADAPTER
6
1
and external input.
VOLUME +/–
Use to set the listening volume.
7 Timer indicator
8 Remote sensor
9 Character display
10 Tuner indicator
1 When the Bluetooth ADAPTER is not plugged in the ADAPTER PORT, cannot be selected even if INPUT is pressed.
8
En
Page 9
iPod playback 03
Note
MENU
iPod
Dock adaptor
Chapter 3:
iPod playback
Mere ly by connecting your iPod to this speaker
system, you can enjoy high-quality digital
sound direct from your iPod. These speakers
can also be connected to a television set,
letting you view images from your iPod.
Playback and volume level setting for iPod
music and images can be performed from this
unit or the iPod itself.
Confirm what iPod models are
supported
This system is compatible with the audio and
video of the iPod nano third generation and
above, iPod classic and iPod touch. It also
supports audio playback on the iPod nano
second generation.
Always use the most recent version of iPod
software available. Operation compatibility
may vary depending on the version of the
software used. You can confirm your software
version by operating your iPod as follows:
1 Select ‘Settings’ from the top menu.
2 Select ‘About’.
The software version will be displayed.
• Consult the Apple website regarding the
newest software versions and instructions
on how to update your version.
1
Tip
• When using an iPod not supported by this
unit, use a commercially available cable to
connect the iPod to the AUDIO IN
connector of this unit.
Connecting your iPod
Caution
• To prevent damage when connecting an
iPod, always use the Dock adaptor
supplied with your iPod, or a commercially
purchased Dock adaptor designed for your
iPod model.
English
FrançaisDeutsch
Italiano Español
Nederlands
1 • Some functions may be restricted depending on the model or software version.
• iPod is licensed for reproduction of non-copyrighted materials or materials the user is legally permitted to reproduce.
• Features such as the equalizer cannot be controlled using this system, and we recommend switching the equalizer
off before connecting.
• Pioneer cannot under any circumstances accept responsibility for any direct or indirect loss arising from any
inconvenience or loss of recorded material resulting from the iPod failure.
• When connecting an iPod, use the ‘Speaker’ menu’s ‘Backlight’ item to set the iPod’s backlight function. This does
not apply to iPod touch.
9
En
Page 10
iPod playback03
Note
Component
video cable
(commercially
available)
TV
Composite
video cable
(commercially
available)
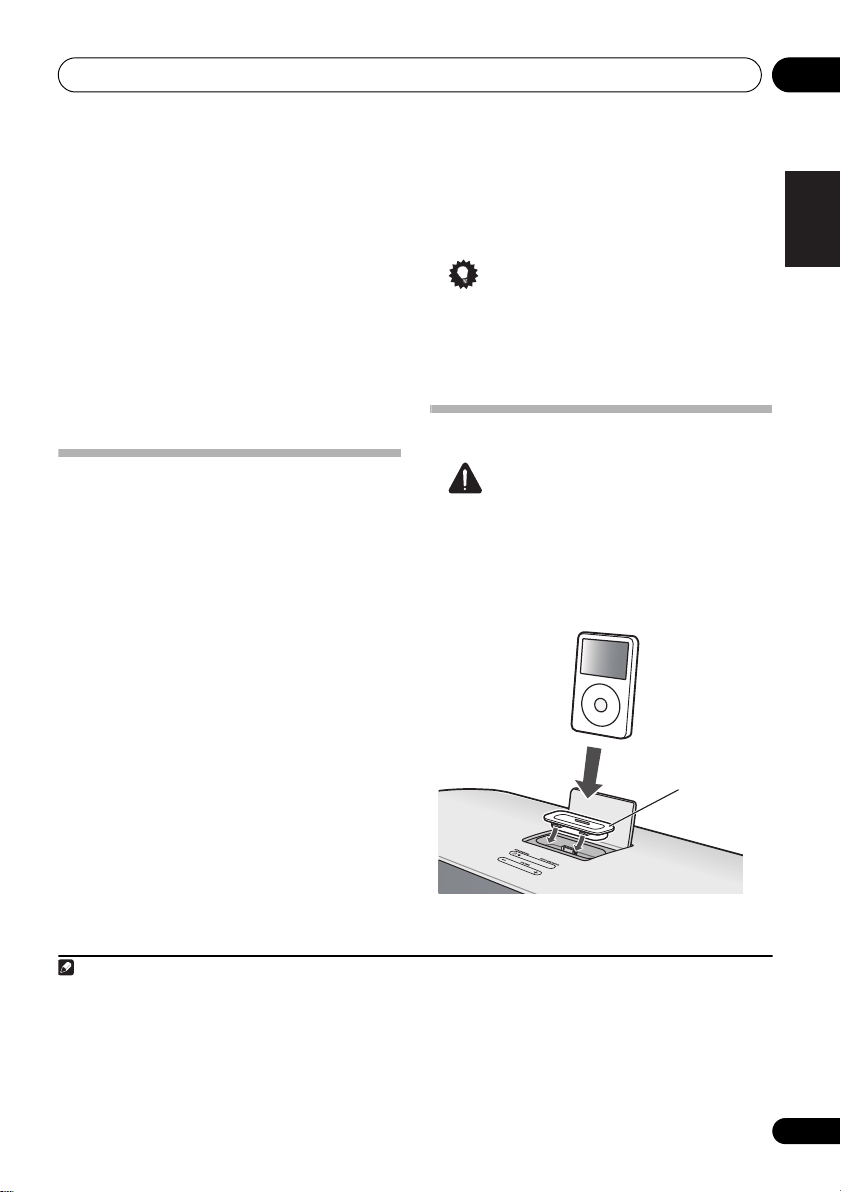
1 Attach the Dock adaptor to iPod
connector port on the top panel of this unit.
• An iPod Dock adaptor is not supplied with
this unit.
When attaching the Dock adaptor, be sure to
orient the front-back directions of the Dock
adaptor correctly. To attach, first place the
protruding tabs on the front side of the adaptor
into the depressions on the iPod connector
port and press into position. When attaching
the adaptor, be careful not to strike the
connectors.
2 Connect your iPod.
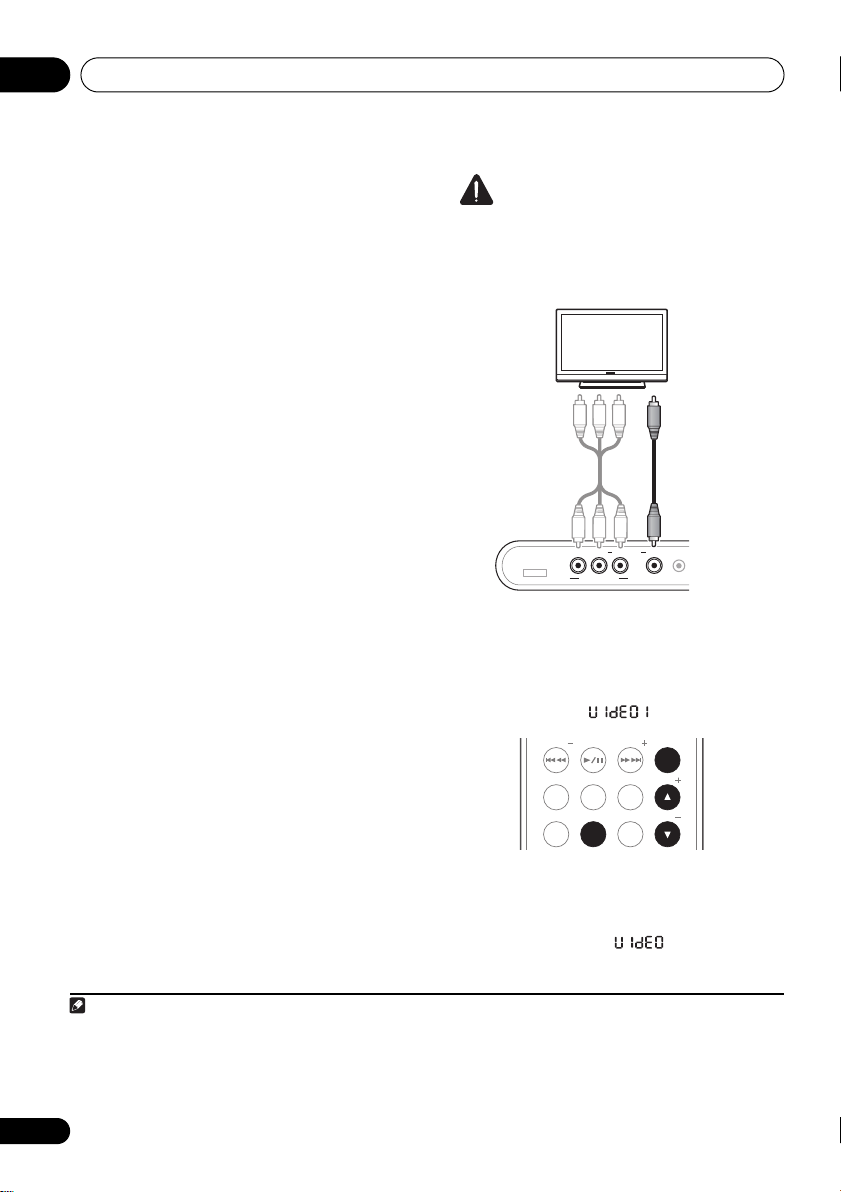
Connecting your TV
To watch iPod images on a television, perform
connections using either a composite video
cable or component video cable.
• When using a component video cable for
connections, it is necessary to adjust the
unit’s video output. See Setting the video
output below.
• When an iPod is connected to this unit, the
iPod’s TV output setting is automatically
set to ON. While connected, the iPod can
be used to switch the TV output setting.
1
Caution
• Before making or changing the
connections, switch off the power and
disconnect the power cord from the power
outlet. Plugging in should be the final step.
MONITOR OUT VIDEO 1VIDEO 2
ADAPTER PORT
YPBP
COMPONENT VIDEO
AUDIO IN
R
Setting the video output
Adjust the video output on this unit in
accordance with the method used to connect
the television.
2
• Default setting: (Composite)
PRESET PRESET
WAKE
SLEEP
UP
CLOCK
SETUP
BASS
TREBLE
TUNER
PRESET
ENTER
TUNE
/
TUNE
1 • This function is limited to iPod models providing TV output settings.
• When the iPod is disconnected from this unit, the iPod’s TV output setting returns to its original state.
2
• Stop the iPod’s video playback before adjusting the video output setting. The setting mode is disabled during playback and
pause.
• During the video output setting process, if no button operation is performed for 3 minutes, the setting will be canceled and
power will return to the standby mode.
10
En
1 Switch the unit into standby.
2 Press
3Use
ENTER
SETUP
.
/
to select ‘ ’, then press
.
Page 11
iPod playback 03
Note
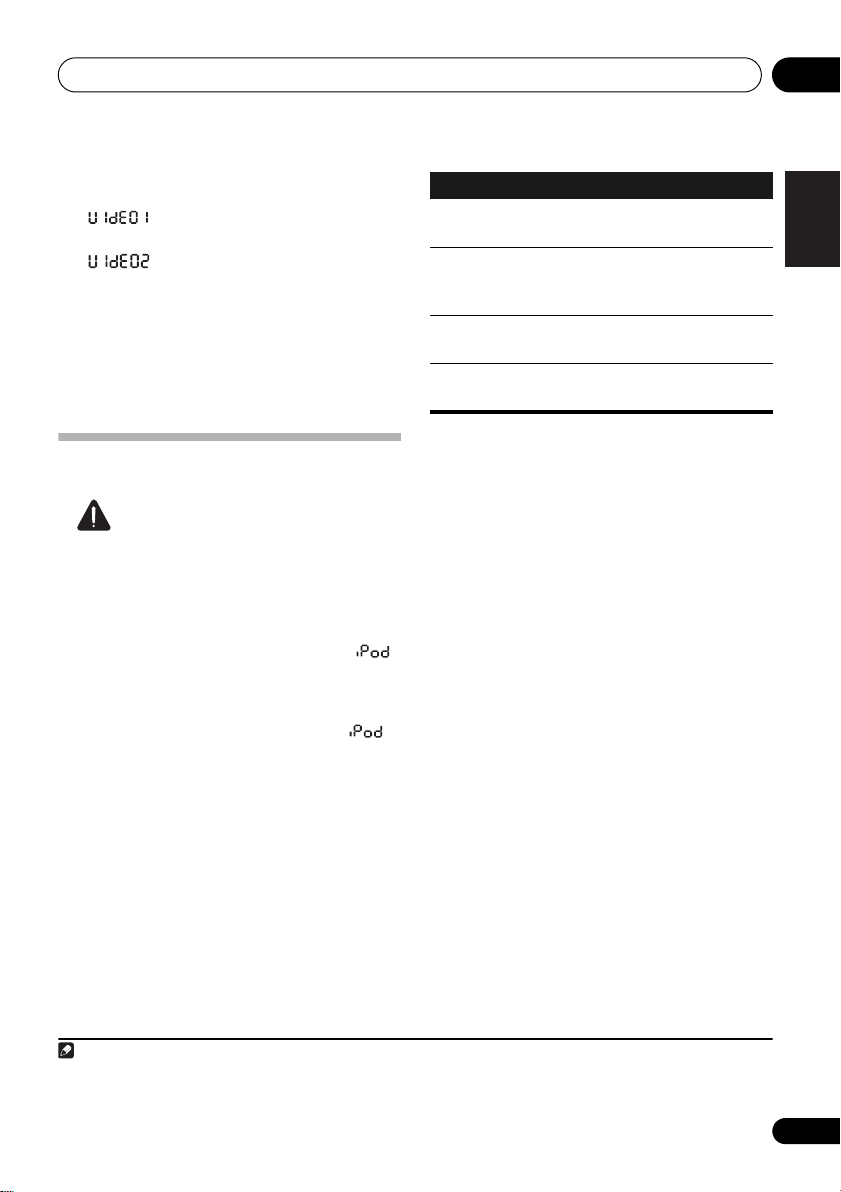
4Use
/
to select the video output
setting.
• – The video output will switch to
Composite.
• – The video output will switch to
Component.
5 Press
ENTER
.
The setting will be completed, and the display
for the newly set value will flash for three
seconds, after which the power will once again
switch to standby mode.
Playing your iPod
Caution
• When your iPod is connected to this unit
and you wish to operate the iPod by
touching it directly, be sure to hold the iPod
steady with the other hand to prevent
malfunctions due to faulty contacts.
When an iPod is connected to this unit,
will flash while the unit confirms the iPod
connection and retrieves data from the iPod.
When INPUT is pressed to change the input to
iPod, the connection is completed and
will light steadily.
Playback and volume level setting for iPod
music and images can be performed from this
unit or the iPod itself.
• When using the iPod to adjust sound
volume, the adjustment will be applied only
to the sound produced from this unit’s
speakers.
this unit, the iPod’s sound volume will
return to its original setting.
The following operations are possible for iPod,
using the remote control.
1
2
If the iPod is disconnected from
Button What it does
/ Starts normal playback and pauses/
VOLUME
+/–
unpauses playback.
Press to skip to the start of the current
file, then previous files. Press and hold
to start fast reverse scanning.
Press to skip to the next file. Press and
hold to start fast forward scanning.
Use to set the listening volume.
Using the tone controls
Adjust the sound tone. Adjustment is
performed from the iPod’s screen.
settings performed here are reflected in the
BASS/TREBLE settings on this unit.
iPod nano or iPod classic:
1 Select ‘Speaker’ from the top menu.
2 Select ‘Tone control’.
3 Select a setting.
iPod touch3:
1 Select ‘Settings’ from the home menu.
2 Select ‘Speaker’.
3 Select ‘Tone control’.
4 Select a setting.
Select one of the following:
• Flat – Revert sound to its natural state.
• Bass ON – Emphasize bass sound.
• Treble ON – Emphasize treble sound.
• Bass/Treble ON
–
Emphasizes bass and
treble sounds.
2
The
English
FrançaisDeutsch
Italiano Español
Nederlands
1 If an iPod is connected when this unit is in standby mode, the power will turn on and iPod input will be selected automatically.
2 These adjustments are applied to all inputs to the unit.
3 This setting may not be supported, depending on the iPod touch software version.
11
En
Page 12
iPod playback03
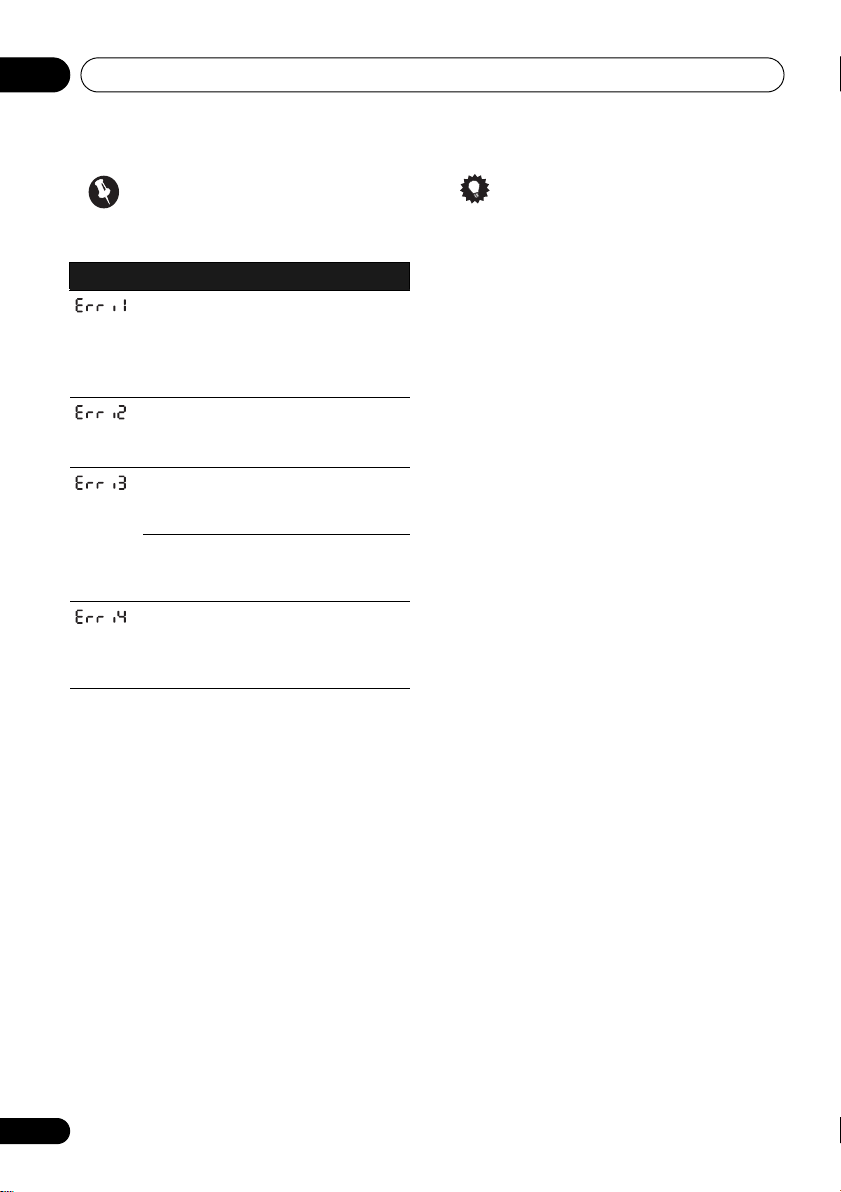
Important
If an error message lights in the front panel, try
following the points below:
Message
What it means
There is a problem with the signal
path from the iPod to the unit.
Reconnect the iPod to the unit. If this
doesn’t seem to work, try resetting
your iPod.
An unsupported device has been
connected.
Check whether the iPod
was supported by this unit.
The iPod that is not supported is
connected. Check whether the iPod
was supported by this unit (page 9).
When the iPod software version is
too old, update the iPod software to
the latest version.
When there is no response from the
iPod, update the iPod software to the
latest version. If this doesn’t seem to
work, try resetting your iPod.
If the iPod cannot be operated, check the
following items:
• Is the iPod connected correctly?
Reconnect the iPod to the unit.
• Is the iPod experiencing a hangup? Try
resetting the iPod, and reconnect it to the
unit.
Tip
• iPod recharging occurs whenever an iPod
is connected to this unit. (This function is
supported in standby mode as well.)
• Whenever an iPod is connected to this
unit, turning the unit’s power ON or
switching input to iPod will cause iPod
playback to begin automatically.
• When input is switched from iPod to
another function, the iPod playback stops
automatically.
• If the unit is set to standby when an iPod is
connected, the iPod’s power will be turned
OFF automatically.
12
En
Page 13
Bluetooth® ADAPTER for Wireless Enjoyment of Music 04
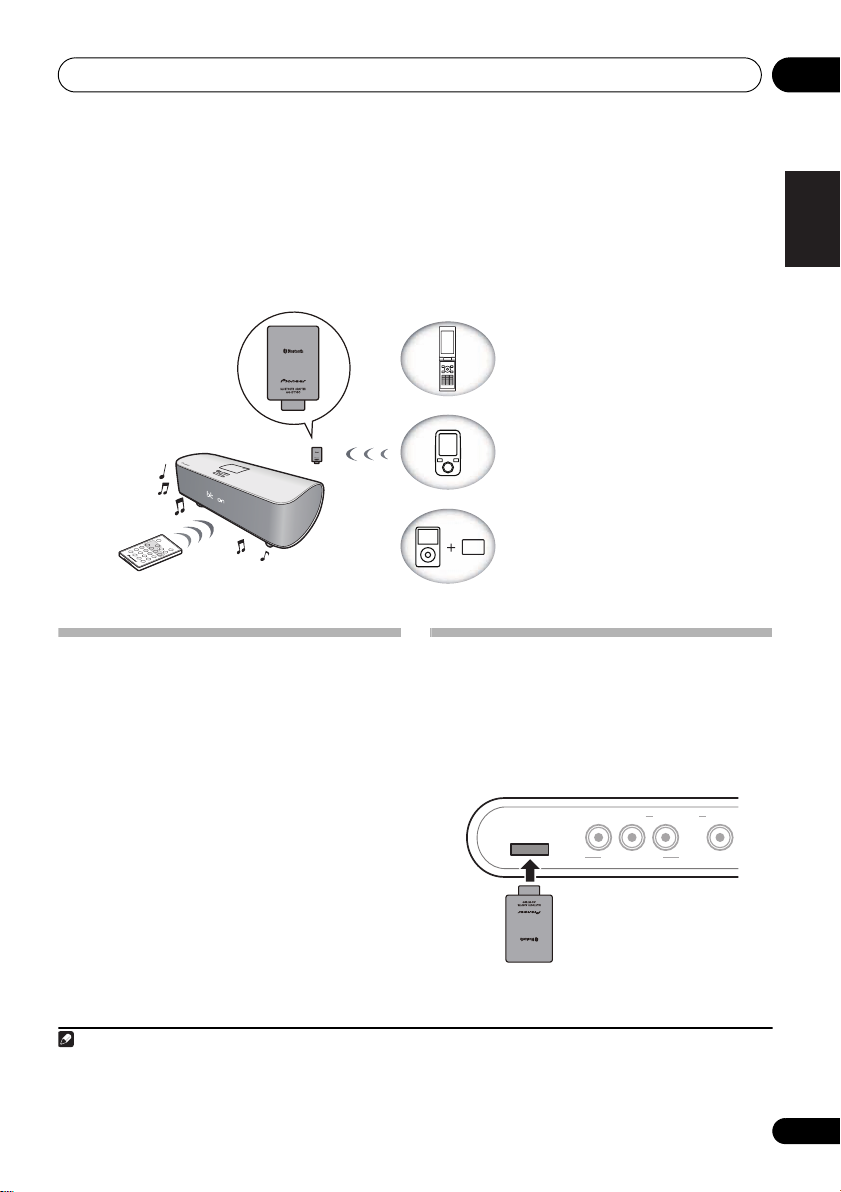
Remote control operation
This unit
Bluetooth
®
ADAPTER
Device not equipped with
Bluetooth wireless technology:
Digital music player
+
Bluetooth audio transmitter (sold
commercially)
Bluetooth
wireless technology
enabled device:
Digital music player
Bluetooth wireless
technology enabled device:
Cell phone
Note
Bluetooth
®
ADAPTER
Chapter 4:
Bluetooth
®
ADAPTER for
Wireless Enjoyment of Music
Wireless music play
When the Bluetooth ADAPTER (Pioneer Model
No. AS-BT100) is connected to this unit, a
product equipped with Bluetooth wireless
technology (portable cell phone, digital music
player, etc.) can be used to listen to music
wirelessly.
available transmitter supporting Bluetooth
wireless technology, you can listen to music on
a device not equipped with Bluetooth wireless
technology. The AS-BT100 model supports
SCMS-T contents protection, so music can
also be enjoyed on devices equipped with
SCMS-T type Bluetooth wireless technology.
Remote control operation
The remote control supplied with this unit
allows you to play and stop media, and perform
other operations.
1 • It must be necessary that the Bluetooth wireless technology enabled device supports A2DP profiles.
• Pioneer does not guarantee proper connection and operation of this unit with all Bluetooth wireless technology enabled
devices.
2 • It must be necessary that the Bluetooth wireless technology enabled device supports AVRCP profiles.
• Remote control operations cannot be guaranteed for all Bluetooth wireless technology enabled devices.
1
Also, by using a commercially
2
Connecting Optional
ADAPTER
• Before making or changing the
connections, switch off the power and
disconnect the power cord from the AC
outlet.
ADAPTER PORT
YPBP
COMPONENT VIDEO
Bluetooth
MONITOR OUT VIDEO 1VIDEO 2
R
English
FrançaisDeutsch
Italiano Español
Nederlands
13
En
Page 14
Bluetooth® ADAPTER for Wireless Enjoyment of Music04
Note
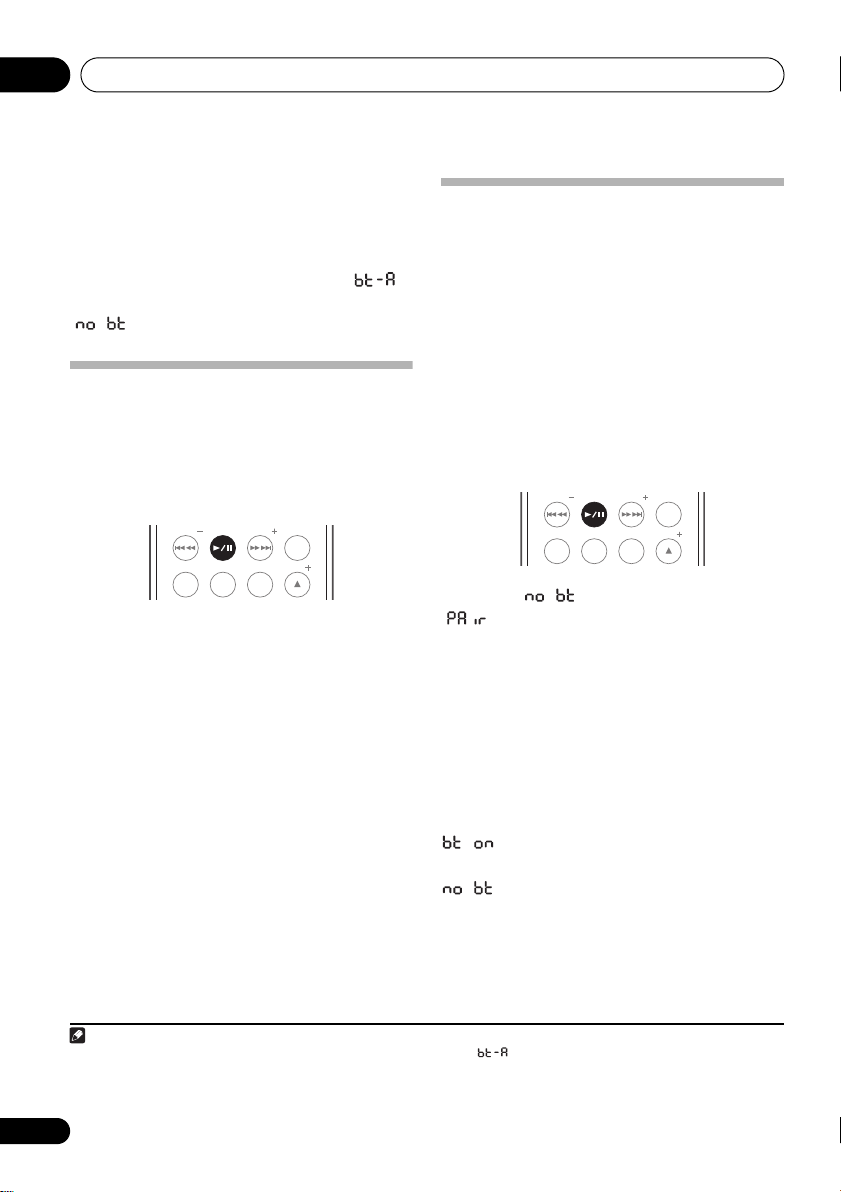
1 Switch the unit into standby and connect
Bluetooth
ADAPTER to the
ADAPTER PORT
located in the rear panel.
2Press
3Press
STANDBY/ON
INPUT
to switch the unit to ‘ ’.
.
When pairing has not been performed,
‘ ’ is displayed.
Setting the PIN code
Set this unit’s PIN code to the same setting as
that for the Bluetooth wireless technology
device used. Supported PIN code setting
values include 0000, 1234 or 8888.
• Default setting: 0000
PRESET PRESET
WAKE
SLEEP
UP
1 Switch the unit into standby.
2 Press and hold
The new PIN code will be displayed, indicating
that the PIN code has been changed.
Repeat step 2 until the PIN code is reset to the
value desired.
ENTER
TUNE
BASS
/
TREBLE
for three seconds.
Pairing
Bluetooth
device
1
“Pairing” must be done before you start
Bluetooth
ADAPTER and
wireless technology
playback of Bluetooth wireless technology
content using Bluetooth ADAPTER. Make sure
to perform pairing first time you operate the
system or any time pairing data is cleared.
“Pairing” is the step necessary to register
Bluetooth wireless technology device to enable
Bluetooth communications.
2
For more details,
see also the operating instructions of your
Bluetooth wireless technology device.
PRESET PRESET
WAKE
SLEEP
UP
BASS
TREBLE
ENTER
TUNE
/
1 When ‘ ’ lights, press .
‘ ’ will flash, and the unit will enter the
pairing standby mode.
2 Switch on the
Bluetooth
wireless
technology device that you want to make
pairing, place it near the system and set it
into the pairing mode.
Pairing begins.
3 Check to see that the
is detected by the
Bluetooth
Bluetooth
wireless
technology device.
lights when Bluetooth wireless
technology device is connected.
lights when Bluetooth wireless
technology device is not connected. In this
case, perform the connection operation from
the side of the Bluetooth wireless technology
device.
ADAPTER
1 When the Bluetooth ADAPTER is not plugged in the ADAPTER PORT, cannot be selected even if INPUT is pressed.
2 • Pairing is required when you first use Bluetooth wireless technology device and Bluetooth ADAPTER.
• To enable Bluetooth communication, pairing should be done with both of your system and Bluetooth wireless technology
device.
14
En
Page 15

Bluetooth® ADAPTER for Wireless Enjoyment of Music 04
Note
Listening to Music Contents of
Bluetooth
wireless technology
device with Your System
English
1 Press
2 Connect the
technology device to the
ADAPTER.
3 Start playback of music contents stored in
Bluetooth
The following operations are now possible for
Bluetooth wireless technology devices, using
the remote control.
Button What it does
/ Starts normal playback and pauses/
VOLUME
+/–
INPUT
to switch the unit to ‘ ’.
Bluetooth
wireless
Bluetooth
wireless technology device.
1
unpauses playback.
Press to skip to the start of the current
file, then previous files. Press and hold
to start fast reverse scanning.
Press to skip to the next file. Press and
hold to start fast forward scanning.
Use to set the listening volume.
FrançaisDeutsch
Italiano Español
Nederlands
1• Bluetooth wireless technology device should be compatible with AVRCP profile.
• Depending on Bluetooth wireless technology device you use, operation may differ from what is shown in this table.
15
En
Page 16
Other connections05
Digital audio
player, etc.
Chapter 5:
Other connections
• Before making or changing the
connections, switch off the power and
disconnect the power cord from the AC
outlet.
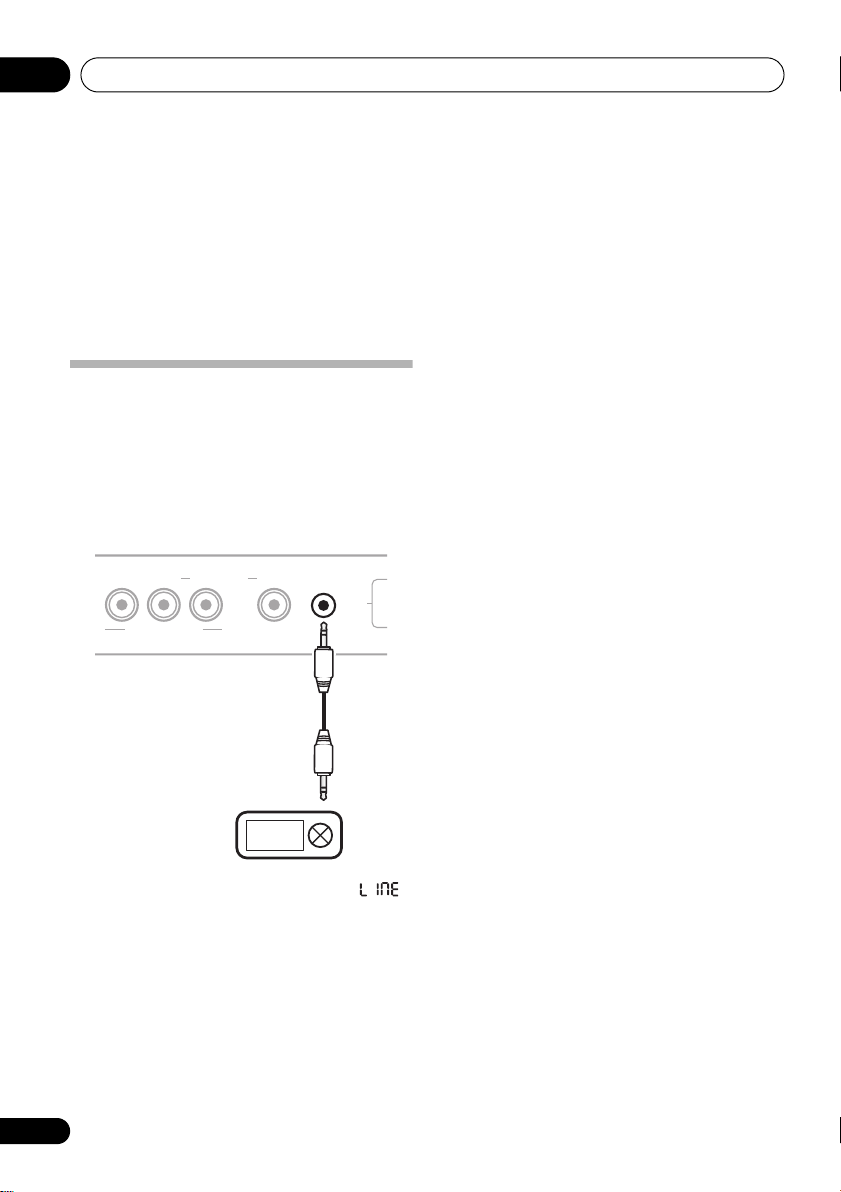
Connecting auxiliary
components
Connect the rear panel AUDIO IN mini-plug
jack to your auxiliary playback component.
• This method can be used to play music on
this unit from iPods that do not support use
of an iPod Dock.
•Press
16
En
YPB PR
COMPONENT VIDEO
INPUT
MONITOR OUT VIDEO 1VIDEO 2
to switch the unit to ‘ ’.
AUDIO IN
AC IN
Page 17
Using the tuner 06
Note
FM wire antenna
Chapter 6:
Using the tuner
Connect the FM antenna
Connect the FM antenna plug onto the center pin
of the FM antenna socket.
AC IN
Listening to the FM radio
The tuner can receive FM broadcasts, and lets
you memorize your favorite stations so you
don’t have to manually tune in every time you
want to listen.
STANDBY/ON
PRESET PRESET
SLEEP
CLOCK
ANTENNA
FM UNBAL 75
WAKE
UP
SETUP
1
BASS
TREBLE
TUNER
PRESET
INPUT
ENTER
TUNE
/
TUNE
Automatic tuning – To search for
stations, press and hold TUNE +/– for
about a second. The receiver will start
searching for the next station, stopping
when it has found one. Repeat to search
for other stations.
Manual tuning – To change the frequency
one step at a time, press TUNE +/–.
High speed tuning – Press and hold
TUNE +/– for high speed tuning. Release
the button at the frequency you want.
Memorizing stations
You can save up to 10 station presets so that
you always have easy access to your favorite
stations without having to tune in manually
each time.
1Press
2
INPUT
to switch to the tuner.
2 Tune to an FM radio station.
3Press
4Use
you want (e.g., ‘ ’) then press
TUNER PRESET
TUNE +/–
to select the station preset
.
ENTER
Listening to station presets
1Press
2Use
INPUT
to switch to the tuner.
PRESET +/–
to select a station preset.
English
FrançaisDeutsch
Italiano Español
Nederlands
.
1 Press
INPUT
to switch to the tuner.
The tuner indicator will light, and the tuned
frequency will be displayed.
2 Tune to a station.
There are three ways to do this:
1 To ensure optimum reception, make sure the FM antenna is fully extended and not coiled or hanging at the rear of the unit.
2 When a new broadcast frequency is stored in a station containing a previously stored frequency, the previous frequency will
be overwritten with the new one.
17
En
Page 18
Sound settings07
Note
Chapter 7:
Sound settings
Using the Soundscape
The Soundscape function lets you add a variety
of environmental sounds to the music you
1
play.
/
ON
OFF
VOLUME
.
to adjust the
SOUND
SCAPE
SELECT MIX BALANCE
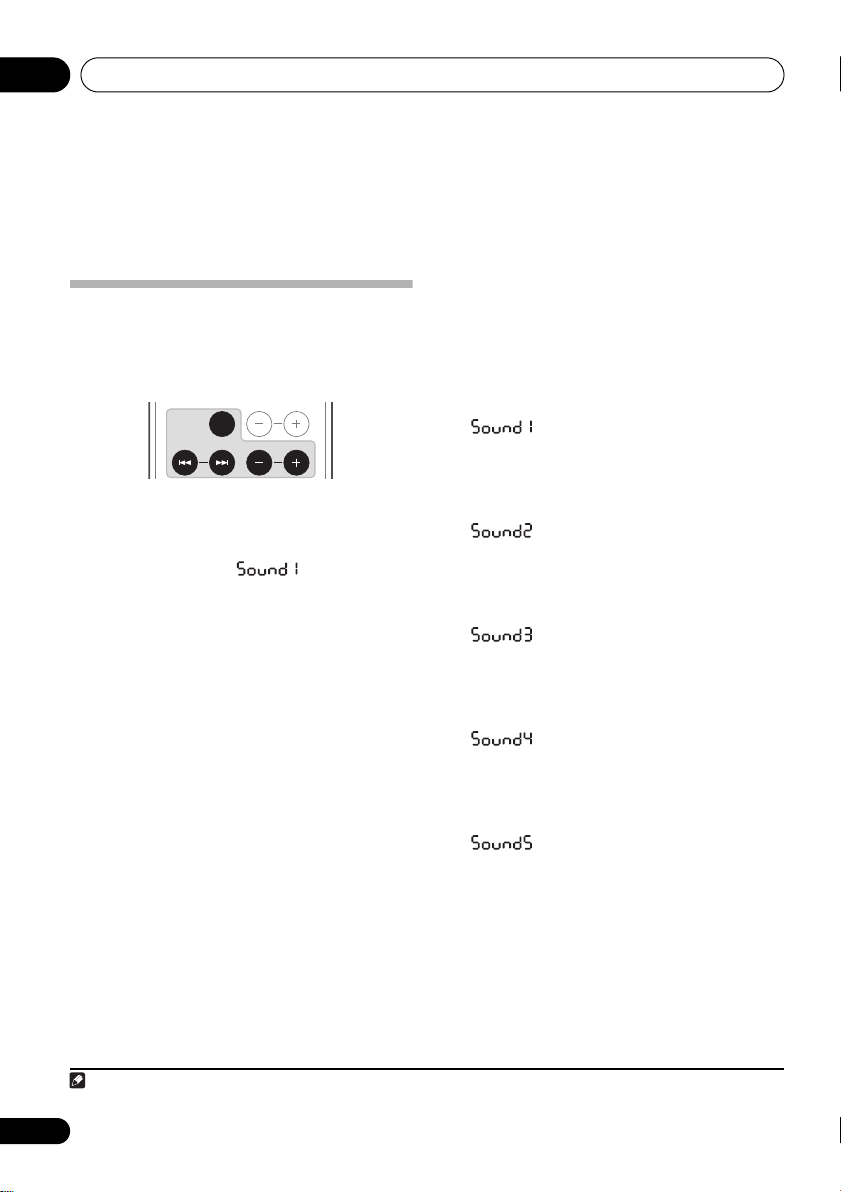
•Press
SOUNDSCAPE ON/OFF
The Soundscape function is activated and
environmental sounds are added to your music
playback. The display ‘ ’ indicates the
type of environmental sound selected.
• The Soundscape function alternates ON/
OFF each time the SOUNDSCAPE ON/OFF
button is pressed.
Adjust the Soundscape volume
• Default setting: 05
•Use
MIX BALANCE +/–
balance between music and Soundscape
effects.
Adjustment can be made between values 00
and 10. Press “+” to increase the volume of
Soundscape environmental sounds and press
“–” to reduce the volume of Soundscape
environmental sounds and increase the
volume of music.
Select the type of environmental
sound
• With the Soundscape function ON, press
SELECT /
environmental sound.
Select one of the following 6 types:
• – The sound of waves at Rio de
Janeiro’s Copacabana. Enjoy the sound of
high surf.
The sound of high surf interspersed with
voices on the beach.
• – European street sounds. Enjoy
the sounds of a sidewalk café on a street
somewhere in Europe.
Cars pass along a flagstone road, mixed
with the sounds of passersby.
• – Coral reef in the tropics. Enjoy
the sound of gentle waves.
Blue sea in Japan’s Okinawa Island. Clear
waves gently roll onto the white sands of a
broken-coral reef.
• – A small forest stream and small
birds. Enjoy the sounds of early morning
alongside a stream flowing through a
forest, together with the chirping of small
wild birds.
• – Walk through a high meadow in
fall. Enjoy sounds of small birds and
footsteps on fallen leaves.
A fall meadow in Nagano, Japan.
to choose a desired
1 If desired, you can choose to listen to Soundscape environmental sounds alone, without mixing with music.
18
En
Page 19
Sound settings 07
PRESET PRESET
ENTER
SLEEP
CLOCK
SETUP
WAKE
UP
TUNER
PRESET
BASS
/
TREBLE
TUNE
TUNE
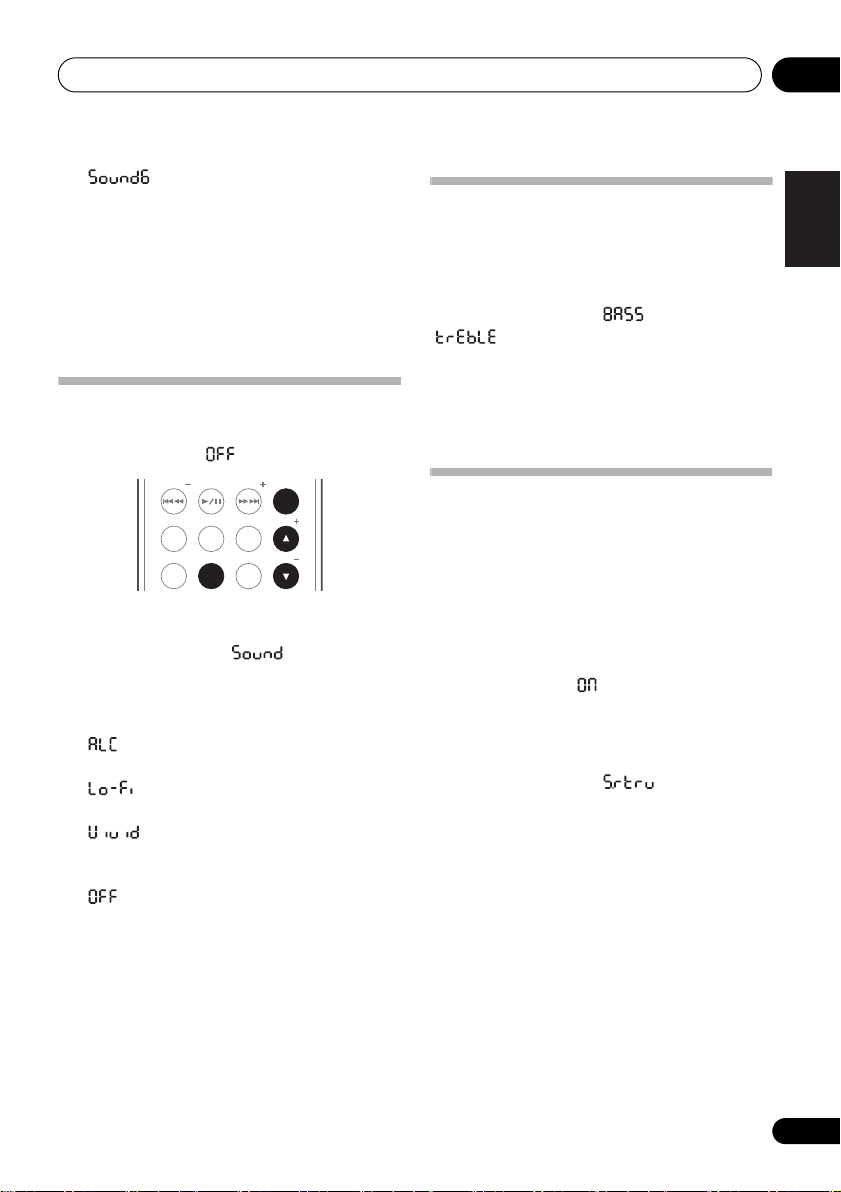
• – Vinyl record sounds. Enjoy the
sound of scratches and hisses from a vinyl
record mixed with music from iPod, radio
tuner, or other external input source. (Even
greater effect is achieved when combined
with Low Fidelity sound mode.)
When mixed with music, even new tracks
produce a retro feel like looking at a sepiatoned photograph.
Using the sound effects
You can add exciting effects to audio sources.
• Default setting: (OFF)
1 Press
2Use
ENTER
3Use
press
SETUP
.
/
to select ‘ ’, then press
.
/
to switch Sound modes, then
ENTER
.
• (Auto Level Control) – This unit
equalizes playback sound levels.
• (Low Fidelity) – Produces a retro-feel
to music play.
• (Vivid) – Produces a sharpened
effect similar to that experienced at a live
concert.
• (OFF) –
Revert sound to its natural state.
Adjusting the bass and treble
Use the bass and treble controls to adjust the
overall tone.
1Press
2Use
‘ ’ (Treble), then press
3Use
press
BASS/TREBLE
/
to select ‘ ’ (Bass) or
.
ENTER
/
to adjust the bass or treble, then
ENTER
.
.
You can adjust low and high sounds on a scale
of –6 to +6.
Using the Sound Retriever
When audio data is removed during the WMA/
MP3/MPEG-4 AAC compression process,
sound quality often suffers from an uneven
sound image. The Sound Retriever feature
employs new DSP technology that helps bring
CD quality sound back to compressed by
restoring sound pressure and smoothing
jagged artifacts left over after compression.
•Default setting: (ON)
1 Switch the unit into standby.
2Press
3Use
ENTER
4Use
or off.
5Press
When the setting is completed, the newly set
value flashes for 3 seconds, then the power
returns to standby mode.
SETUP
.
/
to select ‘ ’, then press
.
/
to switch the sound retriever on
ENTER
.
English
FrançaisDeutsch
Italiano Español
Nederlands
19
En
Page 20
Using the timer08
Note
Chapter 8:
Using the timer
Setting the clock
Setting the clock allows you to use the timer.
PRESET PRESET
WAKE
SLEEP
UP
CLOCK
SETUP
BASS
TREBLE
TUNER
PRESET
ENTER
TUNE
/
TUNE
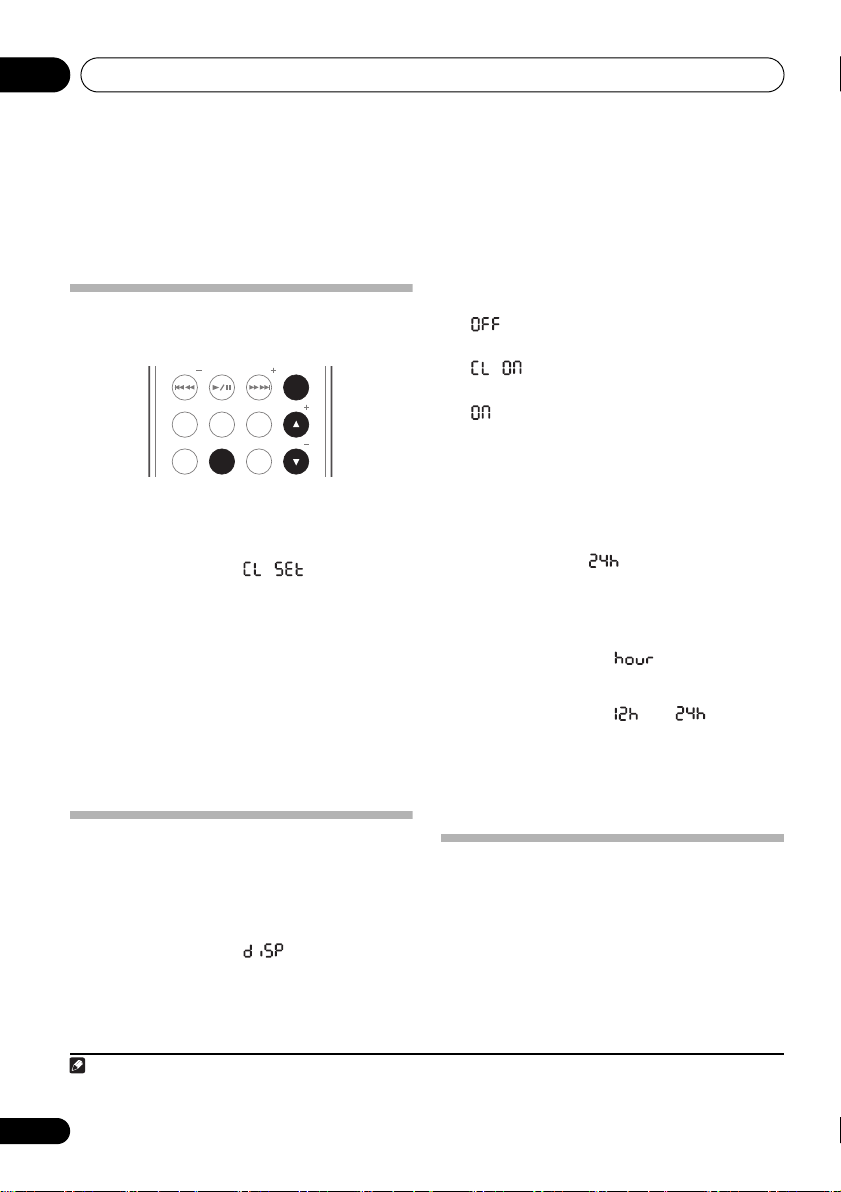
1 Switch the unit into standby.
2Press
3Use
ENTER
SETUP
.
/
to select ‘ ’, then press
.
The current time is displayed.
4Use
/
to set the hour, then press
ENTER
.
5Use
/
to set the minute, then press
ENTER
.
When the setting is completed, the newly set
value flashes for 3 seconds, then the power
returns to standby mode.
Display mode setting
Use to switch the display mode (clock display,
etc.)
1 With the power turned ON, press
/
2Use
ENTER
to select ‘ ’, then press
.
The current time is displayed.
SETUP
3Use
press
1
/
to select display setting, then
ENTER
.
• – Display is turned off except when
entering commands.
2
• – Clock display appears except
when entering commands.
• – Displays values constantly except
when entering commands. When power is
on standby mode, displays clock.
Changing the clock’s display mode
You can choose to display the clock in 12-hour
mode or 24-hour mode.
• Default setting: (24-hour mode)
1 Switch the unit into standby.
2 Press
3Use
ENTER
4Use
press
SETUP
.
/
to select ‘ ’ then press
.
/
to select ‘ ’ or ‘ ’ then
ENTER
.
When the setting is completed, the newly set
value flashes for 3 seconds, then the power
returns to standby mode.
Setting the wake-up timer
Use the wake-up timer to set the unit to switch
on at any time and start playing whatever
.
source you want.
If iPod is selected as the timer sound, when the
wake-up timer operates, the iPod’s power will
automatically turn ON and playback will begin.
2
1 You’ll need to set the clock again if you unplug the unit (or in case of a power failure).
2 When power is ON or in standby mode, the current time can be checked by pressing the CLOCK button.
20
En
Page 21

Using the timer 08
Note
1 With input set to iPod or tuner, press
SETUP
.
2Use
ENTER
Timer setting time is displayed.
3 Set the desired time for the timer.
Use / to set the hour, then press ENTER.
Set the minute in the same way, pressing
ENTER when you’re done.
4Use
used as the timer sound, then press
While selecting the input source, the sound
from that source will be audible (except when
beep is selected). Use the
buttons to adjust the sound volume.
5Use
ON/OFF as desired, then press
The timer time, input setting, snooze setting,
and volume setting will be displayed in order,
thus completing the wake-up timer setting.
/
to select ‘ ’, then press
.
/
to select the input source to be
ENTER
VOLUME +/–
• If is selected, an electronic tone will
sound.
/
to set the snooze function to
ENTER
.
• The timer indicator lights.
When the wake-up timer sounds
If the snooze function is OFF:
Press the main unit’s STANDBY/ON button
to stop the timer playback and turn power off.
Alternately, wait for one hour (when beep is
selected, wait for one minute) and playback will
stop automatically and power will turn off.
If any other button is pressed, the timer
playback stops and normal playback of the
currently selected input source will begin.
• When finished using the timer, set the
timer function to OFF (see below).
If the snooze function is ON:
Press the main unit’s STANDBY/ON button
to stop the timer playback and turn power off.
If any other button is pressed or playback
continues for one minute, the timer sound will
stop, but the snooze function will operate and
five minutes later the timer sound will playback
again.
• While the snooze function is operating, no
buttons can be used other than
and the main unit’s STANDBY/ON. (To
turn the timer function OFF, press the
WAKE UP button two times.)
• The snooze function repeats up to five
.
times. After that, the unit’s power turns off
automatically.
• When finished using the timer, set the
timer function to OFF (see below).
Turning the wake-up timer on/off
•Press
Each time the button is pressed, the timer
function switches alternately to ON/OFF.
• When the timer is set to ON, the timer
WAKE UP
indicator lights.
.
Using the sleep timer
The sleep timer switches off the unit after a
specified time so you can fall asleep without
worrying about it.
•Press
off time.
Choose between 5 min, 15 min, 30 min, 60 min,
90 min or Off.
• The remaining time is displayed while the
SLEEP
repeatedly to select a switch-
sleep timer operates.
1
WAKE UP
English
FrançaisDeutsch
Italiano Español
Nederlands
1 The sleep timer can be reset by pressing the SLEEP button while the sleep timer is operating.
21
En
Page 22

Additional information09
Chapter 9:
Additional information
Troubleshooting
Incorrect operations are often mistaken for trouble and malfunctions. If you think that there is
something wrong with this component, check the points below. Sometimes the trouble may lie in
another component. Investigate the other components and electrical appliances being used. If the
trouble cannot be rectified even after exercising the checks listed below, ask your nearest Pioneer
authorized service center or your dealer to carry out repair work.
• If the unit does not operate normally due to external effects such as static electricity disconnect
the power plug from the outlet and insert again to return to normal operating conditions.
Problem Remedy
The power does not turn on. • Disconnect the power plug from the outlet, and insert again.
Power automatically switches
to standby without user action.
No sound is output when a
function is selected.
Can’t operate the remote
control.
Considerable noise in radio
broadcasts.
Auto tuning does not pick up
some stations.
• If the power shuts off automatically, take the unit to your nearest
Pioneer authorized service center or your dealer for servicing.
• When input is set to iPod, if no iPod is connected for one hour or
more, the unit’s power automatically turns OFF.
• Make sure the component is connected correctly (refer to
Connecting auxiliary components on page 16).
• Replace the battery (refer to page 5).
• Operate within 7 m, 30° of the remote sensor on the front panel
(refer to page 6).
• Remove the obstacle or operate from another position.
• Avoid exposing the remote sensor on the front panel to direct light.
• Fully extend the FM wire antenna, position for best reception, and
secure to a wall. You may also connect an outdoor FM antenna.
• Turn off any other equipment that may be causing the noise or
move it away from the unit.
• The radio signal is weak. Auto tuning will only detect radio stations
with a good signal. For more sensitive tuning, connect an outdoor
antenna.
22
En
Page 23

Additional information 09
Problem Remedy
The Bluetooth wireless
technology device cannot be
connected or operated. Sound
from the Bluetooth wireless
technology device is not
emitted or the sound is
interrupted.
• Check that no object that emits electromagnetic waves in the 2.4
GHz band (microwave oven, wireless LAN device or Bluetooth
wireless technology apparatus) is near the unit. If such an object is
near the unit, set the unit far from it. Or, stop using the object
emitting the electromagnetic waves.
• Check that the Bluetooth wireless technology device is not too far
from the unit and that obstructions are not set between the Bluetooth
wireless technology device and the unit. Set the Bluetooth wireless
technology device and the unit so that the distance between them is
less than about 10 m and no obstructions exist between them.
• Check that the Bluetooth ADAPTER and the ADAPTER PORT of the
unit are correctly connected.
• The Bluetooth wireless technology device may not be set to the
communication mode supporting the Bluetooth wireless technology.
Check the setting of the Bluetooth wireless technology device.
• Check that pairing is correct. The pairing setting was deleted from
this unit or the Bluetooth wireless technology device. Reset the
pairing.
• Check that the profile is correct. Use a Bluetooth wireless
technology device that supports A2DP profile and AVRCP profile.
Resetting the system
Use this procedure to reset all system settings
to the factory default.
• When performing reset, first disconnect all
components connected to this unit.
1 Switch the unit on.
2 Press and hold
panel, and
ON
for three seconds.
Power is set to standby mode.
The next time you switch on, all the system
settings
should be reset.
VOLUME –
then press and hold
on the top
STANDBY/
English
FrançaisDeutsch
Italiano Español
Nederlands
About iPod
“Made for iPod” means that an electronic
accessory has been designed to connect
specifically to iPod and has been certified by
the developer to meet Apple performance
standards.
Apple is not responsible for the operation of
this device or its compliance with safety and
regulatory standards.
iPod is a trademark of Apple Inc., registered in
the U.S. and other countries.
23
En
Page 24

Additional information09
Specifications
• Amplifier section
RMS Power Output:
Front Left/Right. . . . . . . . . . . . . . . 15 W + 15 W
(1 kHz, 10 %, T.H.D., 8 Ω)
Subwoofer . . . . . . . . . . . . . . . . . . . . . . . . . .30 W
(100 Hz, 10 %, T.H.D., 4 Ω)
• Speaker section
Enclosure. . . Bass-reflex (magnetically shielded)
System . . . . . . . . . . . . . . . . . . . . . . . .3-way system
Speakers:
Subwoofer . . . . . . . . . . . . . . . . . . . . 10 cm cone
Mid/Tweeter . . . . . . . . . . . . . . . . . . 5.2 cm cone/
2.6 cm semi-dome
Frequency range . . . . . . . . . . . . . .50 Hz to 30 kHz
• Miscellaneous
Power requirements
. . . . . . . . . . . . . . . AC 220 V to 240 V, 50 Hz/60 Hz
Power consumption . . . . . . . . . . . . . . . . . . . .30 W
In standby . . . .1.0 W (Clock/Wake-up timer ON)
0.5 W (Clock/Wake-up timer OFF)
Dimensions
. . . . . . . 420 mm (W) x 148 mm (H) x 210 mm (D)
Weight (without package) . . . . . . . . . . . . . . 5.0 kg
• Accessories
Remote control . . . . . . . . . . . . . . . . . . . . . . . . . . . 1
Remote control holder . . . . . . . . . . . . . . . . . . . . . 1
Lithium battery (CR2025) . . . . . . . . . . . . . . . . . . . 1
FM wire antenna . . . . . . . . . . . . . . . . . . . . . . . . . . 1
Power cord . . . . . . . . . . . . . . . . . . . . . . . . . . . . . . 1
Warranty card . . . . . . . . . . . . . . . . . . . . . . . . . . . . 1
Operating instructions (This document)
Cleaning the unit
• Use a polishing cloth or dry cloth to wipe
off dust and dirt.
• When the surface is dirty, wipe with a soft
cloth dipped in some neutral cleanser
diluted five or six times with water, and
wrung out well, and then wipe again with a
dry cloth. Do not use furniture wax or
cleansers.
• Never use thinners, benzine, insecticide
sprays or other chemicals on or near this
unit, since these will corrode the surface.
Published by Pioneer Corporation.
Copyright © 2009 Pioneer Corporation.
All rights reserved.
Note
• Specifications and the design are subject
to possible modifications without notice,
due to improvements.
24
En
Page 25

Additional information 09
English
FrançaisDeutsch
Italiano Español
Nederlands
25
En
Page 26

Ce point d’exclamation, placé dans un
triangle équilatéral, a pour but d’attirer
l’attention de l’utilisateur sur la présence,
dans les documents qui accompagnent
l’appareil, d’explications importantes du
point de vue de l’exploitation ou de
l’entretien.
Ce symbole de l’éclair, placé dans un
triangle équilatéral, a pour but d’attirer
l’attention de l’utilisateur sur la présence, à
l’intérieur du coffret de l’appareil, de
“tensions dangereuses” non isolées d’une
grandeur suffisante pour représenter un
risque d’électrocution pour les êtres
humains.
ATTENTION :
POUR ÉVITER TOUT RISQUE
D’ÉLECTROCUTION, NE PAS ENLEVER LE
COUVERCLE (NI LE PANNEAU ARRIÈRE).
AUCUNE PIÈCE RÉPARABLE PAR
L’UTILISATEUR NE SE TROUVE À
L’INTÉRIEUR. CONFIER TOUT ENTRETIEN À
UN PERSONNEL QUALIFIÉ UNIQUEMENT.
ATTENTION
DANGER D´ELECTROCUTION
NE PAS OUVRIR
IMPORTANT
D3-4-2-1-1_A1_Fr
AVERTISSEMENT
Cet appareil n’est pas étanche. Pour éviter les risques
d’incendie et de décharge électrique, ne placez près de
lui un récipient rempli d’eau, tel qu’un vase ou un pot
de fleurs, et ne l’exposez pas à des gouttes d’eau, des
éclaboussures, de la pluie ou de l’humidité.
D3-4-2-1-3_A1_Fr
AVERTISSEMENT
Avant de brancher l’appareil pour la première, lisez
attentivement la section suivante.
La tension de l’alimentation électrique disponible
varie selon le pays ou la région. Assurez-vous que
la tension du secteur de la région où l’appareil sera
utilisé correspond à la tension requise (par ex. 230 V
ou 120 V), indiquée sur le panneau inférieur.
D3-4-2-1-4*_A1_Fr
AVERTISSEMENT
Pour éviter les risques d’incendie, ne placez aucune
flamme nue (telle qu’une bougie allumée) sur
l’appareil.
D3-4-2-1-7a_A1_Fr
Milieu de fonctionnement
Température et humidité du milieu de fonctionnement :
De +5 °C à +35 °C (de +41 °F à +95 °F) ; Humidité
relative inférieure à 85 % (orifices de ventilation non
obstrués)
N’installez pas l’appareil dans un endroit mal ventilé ou
un lieu soumis à une forte humidité ou en plein soleil
(ou à une forte lumière artificielle).
D3-4-2-1-7c*_A1_Fr
PRÉCAUTION DE VENTILATION
Lors de l’installation de l’appareil, veillez à laisser un
espace suffisant autour de ses parois de manière à
améliorer la dissipation de chaleur (au moins 20 cm sur
le dessus, 10 cm à l’arrière et 10 cm de chaque côté).
AVERTISSEMENT
Les fentes et ouvertures du coffret sont prévues pour la
ventilation, pour assurer un fonctionnement stable de
l’appareil et pour éviter sa surchauffe. Pour éviter les
risques d’incendie, ne bouchez jamais les ouvertures et
ne les recouvrez pas d’objets, tels que journaux, nappes
ou rideaux, et n’utilisez pas l’appareil posé sur un tapis
épais ou un lit.
D3-4-2-1-7b*_A1_Fr
Ce produit est destiné à une utilisation domestique
générale. Toute panne due à une utilisation autre qu'à
des fins privées (comme une utilisation à des fins
commerciales dans un restaurant, dans un autocar
ou sur un bateau) et qui nécessite une réparation
sera aux frais du client, même pendant la période de
garantie.
K041_A1_Fr
Lorsque vous utilisez ce produit, vérifiez les
informations concernant la sécurité sous l’appareil.
D3-4-2-2-4_B1_Fr
Page 27

K058a_A1_Fr
Pb
Information à destination des utilisateurs sur la collecte et l’élimination des
équipements et batteries usagés
Ces symboles qui figurent sur les produits, les emballages et/ou les documents
d’accompagnement signifient que les équipements électriques et électroniques et
batteries usagés ne doivent pas être jetés avec les déchets ménagers et font l’objet
d’une collecte sélective.
Pour assurer l’enlèvement et le traitement appropriés des produits et batteries
usagés, merci de les retourner dans les points de collecte sélective habilités
conformément à la législation locale en vigueur.
En respectant les circuits de collecte sélective mis en place pour ces produits, vous
contribuerez à économiser des ressources précieuses et à prévenir les impacts
négatifs éventuels sur la santé humaine et l’environnement qui pourraient résulter
d’une mauvaise gestion des déchets.
Pour plus d’information sur la collecte et le traitement des produits et batteries
usagés, veuillez contacter votre municipalité, votre service de gestion des déchets
ou le point de vente chez qui vous avez acheté ces produits.
Ces symboles ne sont valables que dans les pays de l’Union Européenne.
Pour les pays n’appartenant pas à l’Union Européenne :
Si vous souhaitez jeter ces articles, veuillez contacter les autorités ou revendeurs
locaux pour connaître les méthodes d’élimination appropriées.
Exemples de marquage
pour les batteries
Marquage pour les
équipements
Si la fiche d’alimentation secteur de cet appareil ne
convient pas à la prise secteur à utiliser, la fiche doit
être remplacée par une appropriée. Ce
remplacement et la fixation d’une fiche secteur sur le
cordon d’alimentation de cet appareil doivent être
effectués par un personnel de service qualifié. En cas
de branchement sur une prise secteur, la fiche de
coupure peut provoquer une sérieuse décharge
électrique. Assurez-vous qu’elle est éliminée
correctement après sa dépose.
L’appareil doit être déconnecté en débranchant sa
fiche secteur au niveau de la prise murale si vous
prévoyez une période prolongée de non utilisation
(par exemple avant un départ en vacances).
D3-4-2-2-1a_A1_Fr
ATTENTION
L’interrupteur
STANDBY/ON
de cet appareil ne
coupe pas complètement celui-ci de sa prise secteur.
Comme le cordon d’alimentation fait office de
dispositif de déconnexion du secteur, il devra être
débranché au niveau de la prise secteur pour que
l’appareil soit complètement hors tension. Par
conséquent, veillez à installer l’appareil de telle
manière que son cordon d’alimentation puisse être
facilement débranché de la prise secteur en cas
d’accident. Pour éviter tout risque d’incendie, le
cordon d’alimentation sera débranché au niveau de
la prise secteur si vous prévoyez une période
prolongée de non utilisation (par exemple avant un
départ en vacances).
D3-4-2-2-2a*_A1_Fr
NOTE IMPORTANTE SUR LE CABLE
D’ALIMENTATION
Tenir le câble d’alimentation par la fiche. Ne pas
débrancher la prise en tirant sur le câble et ne pas
toucher le câble avec les mains mouillées. Cela risque
de provoquer un court-circuit ou un choc électrique. Ne
pas poser l’appareil ou un meuble sur le câble. Ne pas
pincer le câble. Ne pas faire de noeud avec le câble ou
l’attacher à d’autres câbles. Les câbles d’alimentation
doivent être posés de façon à ne pas être écrasés. Un
câble abîmé peut provoquer un risque d’incendie ou un
choc électrique. Vérifier le câble d’alimentation de
temps en temps. Contacter le service après-vente
PIONEER le plus proche ou le revendeur pour un
remplacement.
S002*_A1_Fr
Page 28

Nous vous remercions d’avoir acheté ce produit Pioneer.
Veuillez lire attentivement ce mode d’emploi de manière à pouvoir utiliser votre modèle
correctement. Après avoir lu ces explications, conservez-les en lieu sûr pour éventuellement les
consulter plus tard.
Table des matières
01 Avant de commencer
Contenu de la boîte. . . . . . . . . . . . . . . . . . . . . . 5
Avant d’utiliser la télécommande . . . . . . . . . . . 5
Remplacement de la pile . . . . . . . . . . . . . . . . 5
Utilisation de la télécommande . . . . . . . . . . . 6
Installation de l’appareil . . . . . . . . . . . . . . . . . . 6
Branchement . . . . . . . . . . . . . . . . . . . . . . . . . . 6
02 Commandes et afficheur
Télécommande . . . . . . . . . . . . . . . . . . . . . . . . . 7
Panneau avant/supérieur . . . . . . . . . . . . . . . . . 8
03 Lecture de iPod
Vérifiez quels modèles d’iPod sont pris en
charge . . . . . . . . . . . . . . . . . . . . . . . . . . . . . . . 9
Connexion de votre iPod . . . . . . . . . . . . . . . . . . 9
Connexion de votre téléviseur. . . . . . . . . . . . 10
Lecture de votre iPod . . . . . . . . . . . . . . . . . . . 11
Utilisation des commandes de tonalité . . . . 11
04 ADAPTATEUR
Bluetooth
® pour
profiter de la musique sans fil
Lecture de musique sans fil . . . . . . . . . . . . . . 13
Fonctionnement par télécommande . . . . . . 13
Raccordement de l’ADAPTATEUR Bluetooth
optionnel. . . . . . . . . . . . . . . . . . . . . . . . . . . . . 14
Réglage du code PIN . . . . . . . . . . . . . . . . . . . 14
Pairage de l’ADAPTATEUR
et d’un périphérique à technologie sans fil
Bluetooth . . . . . . . . . . . . . . . . . . . . . . . . . . . . 14
Écoute de contenus musicaux d’un
périphérique à technologie sans fil Bluetooth
avec votre système . . . . . . . . . . . . . . . . . . . . . 15
Bluetooth
07 Réglages du son
Utilisation de la fonction Soundscape . . . . . . .18
Réglage du volume de la fonction
Soundscape . . . . . . . . . . . . . . . . . . . . . . . . . 18
Sélection du type de son d’ambiance . . . . . .18
Utilisation des effets sonores . . . . . . . . . . . . .19
Réglage de la tonalité . . . . . . . . . . . . . . . . . . .19
Utilisation de la fonction Sound Retriever . . . . 19
08 Utilisation du minuteur
Réglage de l’horloge . . . . . . . . . . . . . . . . . . . . 20
Réglage du mode d’affichage . . . . . . . . . . . . . 20
Changement du mode d’affichage de
l’horloge . . . . . . . . . . . . . . . . . . . . . . . . . . . .20
Réglage du minuteur de réveil. . . . . . . . . . . . . 20
Activation et désactivation du minuteur de
réveil. . . . . . . . . . . . . . . . . . . . . . . . . . . . . . . 21
Utilisation du minuteur de mise en veille . . . . 21
09 Informations supplémentaires
Guide de dépannage . . . . . . . . . . . . . . . . . . . .22
Réinitialisation du système . . . . . . . . . . . . . . . 23
À propos de l’iPod. . . . . . . . . . . . . . . . . . . . . . 23
Spécifications . . . . . . . . . . . . . . . . . . . . . . . . . 24
Nettoyage de l’appareil . . . . . . . . . . . . . . . . . . 24
05 Autres raccordements
Connexion d’appareils auxiliaires . . . . . . . . . . 16
06 Utilisation du syntoniseur
Connexion d’une antenne FM . . . . . . . . . . . . . 17
Écoute de la radio FM . . . . . . . . . . . . . . . . . . . 17
Mémorisation des stations . . . . . . . . . . . . . . 17
Écoute de stations préréglées . . . . . . . . . . . 17
4
Fr
Page 29

Avant de commencer 01
1
1
3
2
Chapitre 1 :
Avant de commencer
Remplacement de la pile
Contenu de la boîte
Veuillez confirmer que les accessoires
suivants sont présents dans la boîte quand
vous l’ouvrez.
• Télécommande
• Support de télécommande
• Pile lithium (CR2025)
• Antenne à fil FM
• Cordon d’alimentation
• Carte de garantie
• Mode d’emploi (ce document)
Avant d’utiliser la
télécommande
La télécommande se trouve déjà dans le
support de télécommande au moment de
l’expédition.
La pile fournie avec cet appareil est conservée
dans le boîtier à pile.
• Veuillez retirez le film protecteur du
boîtier à pile.
Si vous remarquez une diminution de la portée
de fonctionnement, remplacez la pile (voir cidessous).
Pour remplacer la pile, utilisez une pile lithium
CR2025 en vente dans le commerce.
1 Poussez le loquet d’ouverture vers la
gauche pour ouvrir le boîtier à pile.
2 Retirez le boîtier à pile.
3 Enlevez la pile du boîtier.
4 Placez une pile neuve dans le boîtier.
Assurez-vous que le côté de la pile est
tourné vers le haut quand vous la placez à
l’endroit prévu.
Attention
Lorsque vous utilisez des piles lithium, veuillez
tenir compte des précautions suivantes :
• Il y a un risque d’explosion si la pile n’est
pas correctement remplacée. Assurezvous de les remplacer uniquement par le
même type de pile ou un type équivalent
recommandé par le fabricant.
• Jetez les piles usées immédiatement après
les avoir remplacées. Gardez-les hors de
portée des enfants.
• En cas d’ingestion, veuillez contacter
immédiatement un médecin.
• Les piles lithium présentent des risques de
feu ou de brûlures chimiques si elles sont
mal employées. Ne les démontez pas, ne
les chauffez pas à plus de 100 °C ni ne les
incinérez.
English
Français Español
5
Fr
Page 30

Avant de commencer01
30°
30°
7 m
• Enlevez la pile de l’appareil si vous
prévoyez de ne pas l’utiliser pendant un
mois ou plus.
• Lorsque vous jetez des piles / batteries
usées, veuillez vous conformer aux normes
gouvernementales ou environnementales
en vigueur dans votre pays ou région.
• AVERTISSEMENT
N’utilisez ni ne conservez les piles sous la
lumière directe du soleil ou dans un
endroit excessivement chaud, comme une
voiture ou à proximité d’un appareil de
chauffage. Les piles risqueraient de fuir, de
surchauffer, d’exploser ou de s’enflammer.
Leur durée de vie ou leur performance
pourrait également être réduite.
Utilisation de la télécommande
La télécommande a une portée d’environ
7 mètres avec un angle de 30° par rapport au
capteur de télécommande.
Installation de l’appareil
• Lors de l’installation de l’appareil, assurezvous que ce dernier est posé sur une
surface plane et stable.
N’installez pas l’appareil dans les endroits
suivants :
– sur un téléviseur couleur (les images à
l’écran pourraient être déformées)
– à proximité d’une platine à cassettes (ou d’un
appareil qui produit un champ magnétique). Le
son pourrait s’en trouver affecté.
– à la lumière directe du soleil
– à l’humidité
– à des températures extrêmes
– en présence de vibrations ou autres
mouvements
– à la poussière
– à la fumée ou aux émanations graisseuses
(cuisine par ex.)
Branchement
Après avoir terminé de faire tous les
branchements, branchez l’appareil sur une
prise secteur murale.
Gardez à l’esprit ce qui suit lorsque vous
utilisez la télécommande :
• Assurez-vous de l’absence d’obstacles entre
la télécommande et le capteur de l’appareil.
• La télécommande risque de ne pas
fonctionner correctement si la lumière du
soleil ou une lampe fluorescente puissante
éclaire le capteur de l’appareil.
• Les télécommandes de différents appareils
peuvent interférer entre elles. Evitez
d’utiliser des télécommandes
commandant d’autres équipements situés
à proximité de cet appareil.
• Remplacez les piles lorsque vous constatez
une diminution de la portée de
6
Fr
fonctionnement de la télécommande.
AUDIO IN
AC IN
ANTENNA
FM UNBAL 75
1 Branchez le cordon d’alimentation fourni
sur la prise
AC IN
située à l’arrière de cet
appareil.
2 Branchez l’autre extrémité sur une prise
secteur murale.
Important
• Avant d’effectuer ou de modifier les
raccordements, mettez l’appareil hors
tension et débranchez le cordon
d’alimentation de la prise secteur.
Page 31

Commandes et afficheur 02
Remarque
Chapitre 2 :
Commandes et afficheur
Télécommande
5
SLEEP
STANDBY/ON
1
SOUND
/
ON
SCAPE
OFF
PRESET
SLEEP
CLOCK
SELECT
WAKE
UP
SETUP
2
3
4
5
6
VOLUME
MIX BALANCE
PRESET
BASS
/
TREBLE
TUNER
PRESET
INPUT
ENTER
TUNE
TUNE
7
8
9
10
1 STANDBY/ON
Cette touche permet de mettre l’appareil en
mode de veille et sous tension.
2 Touches de fonctionnement/fonction
Soundscape
Utilisez cette touche pour mettre la fonction
Soundscape (son d’ambiance) en/hors service
et pour modifier les réglages (page 18).
3
PRESET +/–
, touches de commande de la
lecture
Utilisez ces touches pour sélectionner des
stations préréglées (page 17).
Utilisez ces touches pour commander un iPod
ou un périphérique à technologie sans fil
Bluetooth avec cette télécommande
(page 11, 15).
4
BASS/TREBLE
Les commandes de tonalité permettent de régler
les signaux sonores de manière générale.
Utilisez cette touche pour mettre le
récepteur en mode veille et sélectionner la
durée avant la mise en veille (page 21).
WAKE UP
Utilisez cette touche pour mettre en/hors
service la fonction de minuteur de réveil
(page 21).
CLOCK
Utilisez cette touche pour changer
l’affichage de l’horloge (page 20).
6
SETUP
Appuyez sur cette touche pour faire divers
réglages.
7
INPUT
Utilisez ces touches pour sélectionner une
source d’entrée. Appuyez répétitivement sur
cette touche pour choisir l’iPod, le tuner,
l’ADAPTATEUR Bluetooth
1
et l’entrée
extérieure.
8
VOLUME +/–
Permet de régler le volume d’écoute.
9
ENTER
10
TUNE +/–
Utilisez cette touche pour trouver les
fréquences radio (page 17).
TUNER PRESET
Utilisez cette touche pour mémoriser les
stations préréglées et les rappeler de la
mémoire (page 17).
English
Français Español
1 Quand l’ADAPTATEUR Bluetooth n’est pas branché sur le port ADAPTER PORT, ne peut pas être sélectionné même si
vous appuyez sur INPUT.
7
Fr
Page 32

Commandes et afficheur02
Remarque
Panneau avant/supérieur
3 4 5 6
STANDBY/ON INPUT SELECTOR
1
7
2
8
9
10
VOLUME
1 Enceintes
2 Prise de connexion iPod
3 STANDBY/ON
Cette touche permet de mettre l’appareil en
mode de veille et sous tension.
4 Indicateur d’alimentation
5
INPUT SELECTOR
Utilisez ces touches pour sélectionner une
source d’entrée. Appuyez répétitivement sur
cette touche pour choisir l’iPod, le tuner,
l’ADAPTATEUR Bluetooth
1
et l’entrée
extérieure.
6
VOLUME +/–
Permet de régler le volume d’écoute.
7 Indicateur du minuteur
8 Capteur de télécommande
9 Afficheur alphanumérique
10 Indicateur du syntoniseur
1 Quand l’ADAPTATEUR Bluetooth n’est pas branché sur le port ADAPTER PORT, ne peut pas être sélectionné même si
vous appuyez sur INPUT.
8
Fr
Page 33

Lecture de iPod 03
Remarque
Chapitre 3 :
Lecture de iPod
De plus, en connectant votre iPod à ce système
d’enceintes, vous pouvez profiter d’un son
numérique de grande qualité directement à
partir de votre iPod. Ces enceintes peuvent
aussi être raccordées à un téléviseur, vous
permettant de voir les images de votre iPod.
La lecture et le réglage du niveau de volume
pour la musique et les images de l’iPod
peuvent être réalisés à partir de cet appareil ou
de l’iPod lui-même.
Vérifiez quels modèles d’iPod
sont pris en charge
Ce système est compatible avec la lecture
audio et vidéo de l’iPod nano 3e génération et
supérieure, iPod classic et iPod touch. Il prend
au ssi en charge la lect ure au dio de l ’iPod n ano
deuxième génération.
Utilisez toujours la version la plus récente
disponible du logiciel d’iPod. La compatibilité
peut dépendre en fonction de la version du
logiciel utilisé. Vous pouvez vérifier la version
de votre logiciel sur votre iPod de la façon
suivante:
1 Sélectionnez ‘Settings’ sur le menu
principal.
2 Sélectionnez ‘About’.
La version du logiciel est affichée.
1
• Consultez le site Web d’Apple au sujet des
versions les plus récentes du logiciel et des
instructions sur la mise à jour de votre
version.
Note
• Lors de l’utilisation d’un iPod non pris en
charge par cet appareil, utilisez un câble
en vente dans le commerce pour
connecter l’iPod au connecteur AUDIO IN
de cet appareil.
Connexion de votre iPod
Attention
• Pour éviter tout dommage lors de la
connexion d’un iPod, utilisez toujours
l’adaptateur de Dock fourni avec votre iPod
ou un adaptateur de Dock en vente dans le
commerce et conçu spécialement pour
votre modèle de iPod.
English
Français Español
1 • Certaines fonctions peuvent ne pas être accessibles en fonction du modèle et de la version du logiciel.
• iPod a une licence pour la reproduction de contenus non protégés ou de contenus que l’utilisateur est autorisé à
reproduire légalement.
• Les fonctions telles que l’égaliseur ne peuvent pas être commandées en utilisant ce système, et nous
recommandons de mettre l’égaliseur hors service avant la connexion.
• Pioneer ne peut être en aucun cas tenu responsable pour toute perte directe ou indirecte liée à un problème ou une
perte des données enregistrées à la suite d’une défaillance de l’iPod.
• Quand vous raccordez un iPod, utilisez le menu ‘Speaker’ et l’option ‘Backlight’ pour régler la fonction de
rétroéclairage de l’iPod. Cela ne concerne pas l’iPod touch.
9
Fr
Page 34

Lecture de iPod03
iPod
Adaptateur de
Dock
Remarque
Câble vidéo en
composantes
(en vente dans le
commerce)
Téléviseur
Câble vidéo
composite
(en vente dans
le commerce)
• Lors de l’utilisation d’un câble vidéo en
composantes pour les connexions, il est
nécessaire de régler la sortie vidéo de
MENU
1 Attachez l’adaptateur de Dock à la prise
de connexion située sur le panneau supérieur
de cet appareil.
• Aucun adaptateur de Dock n’est fourni
avec cet appareil.
Lors de la fixation de l’adaptateur de Dock,
assurez-vous d’orienter correctement les
directions avant-arrière de l’adaptateur de
Dock. Pour attacher l’adaptateur de Dock,
placez d’abord les parties saillantes de la face
avant de l’adaptateur dans les creux
correspondants de la prise de connexion
d’iPod et poussez pour insérer. Lors de la
fixation de l’adaptateur, faites attention de ne
pas abimer les connecteurs.
2 Raccordez votre iPod.
Connexion de votre téléviseur
Pour regarder les images de l’iPod sur un
téléviseur, faites une connexion en utilisant un
câble vidéo composite ou un câble vidéo en
composantes.
1 • Cette fonction est limitée aux modèles d’iPod possédants des réglages de sortie de téléviseur.
• Quand l’iPod est déconnecté de cet appareil, le réglage de sortie de téléviseur de l’iPod retourne à son réglage d’origine.
2
• Arrêtez la lecture vidéo du iPod avant de changer le réglage de sortie vidéo. Le mode de réglage ne peut pas être changé
pendant la lecture ou une pause.
• Pendant la procédure de réglage de la sortie vidéo, si vous n’appuyez sur aucune touche pendant 3 minutes, le réglage est
annulé et l’appareil retourne en mode veille.
l’appareil. Reportez-vous à Réglage de la
sortie vidéo ci-dessous.
• Quand un iPod est raccordé à cet appareil,
le réglage de sortie du téléviseur est réglé
automatiquement sur ON (en service).
Pendant qu’il est raccordé, l’iPod peut être
utilisé pour modifier le réglage de sortie du
téléviseur.
• Avant d’effectuer ou de modifier les
raccordements, mettez l’appareil hors
tension et débranchez le cordon
d’alimentation de la prise secteur. Les
connexions doivent se faire en tout dernier.
Réglage de la sortie vidéo
Réglez la sortie vidéo sur cet appareil en
fonction de la méthode utilisée pour connecter
le téléviseur.
1
Attention
YPBP
ADAPTER PORT
2
COMPONENT VIDEO
MONITOR OUT VIDEO 1VIDEO 2
AUDIO IN
R
10
Fr
Page 35

Lecture de iPod 03
Remarque
PRESET PRESET
ENTER
SLEEP
CLOCK
SETUP
WAKE
UP
TUNER
PRESET
BASS
/
TREBLE
TUNE
TUNE
• Réglage par défaut : (Composite)
La lecture et le réglage du niveau de volume
pour la musique et les images de l’iPod
peuvent être réalisés à partir de cet appareil ou
de l’iPod lui-même.
• Lors de l’utilisation de l’iPod pour régler le
volume sonore, le réglage appliqué
1 Mettez l’appareil en veille.
2 Appuyez sur
3Utilisez
puis appuyez sur
4Utilisez
SETUP
.
/
pour sélectionner ‘ ’,
ENTER
.
/
pour sélectionner le réglage
de sortie vidéo.
• – La sortie vidéo change sur
Composite.
• – La sortie vidéo change sur
Composantes.
5 Appuyez sur
ENTER
.
Le réglage est terminé et l’affichage de la
nouvelle valeur réglée clignote pendant trois
secondes, puis l’appareil retourne en mode
veille.
uniquement au son produit par les
enceintes de cet appareil.
déconnecté de cet appareil, le volume
sonore de l’iPod revient à son réglage
d’origine.
Les opérations suivantes sont possibles pour
l’iPod en utilisant la télécommande.
Touches Leur rôle
/ Démarre la lecture normale et active/
désactive la mise en pause de la
lecture.
Appuyez sur cette touche pour sauter
au début du fichier en cours, puis aux
fichiers précédents. Maintenez cette
touche enfoncée pour lancer le
défilement rapide arrière.
Appuyez sur cette touche pour sauter
au fichier suivant. Maintenez cette
2
Si l’iPod est
touche enfoncée pour lancer le
défilement rapide avant.
Lecture de votre iPod
VOLUME
+/–
Permet de régler le volume
d’écoute.
Attention
• Quand votre iPod est connecté à cet appareil
et que vous souhaitez commander l’iPod en
le touchant directement, assurez-vous de
tenir solidement l’iPod avec l’autre main
pour éviter un mauvais fonctionnement
causé par un mauvais contact.
Utilisation des commandes de
tonalité
Réglez la tonalité du son. Le réglage est réalisé
à partir de l’écran de l’iPod.
réalisés ici sont réfléchis dans les réglages des
BASS/TREBLE (graves/aigus) de cet appareil.
2
Les réglages
Quand un iPod est raccordé à cet appareil,
clignote pendant que l’appareil vérifie la
connexion avec l’iPod et obtient les données
de l’iPod. Quand vous appuyez sur INPUT pour
changer l’entrée sur l’iPod, la connexion
terminée et reste allumé.
1 Si un iPod est connecté quand cet appareil est en mode veille, il se met sous tension et l’entrée de l’iPod est sélectionnée
automatiquement.
2 Ces réglages sont appliqués à toutes les entrées de l’appareil.
1
English
Français Español
11
Fr
Page 36

Lecture de iPod03
Remarque
iPod nano ou iPod classic:
1 Sélectionnez ‘Speaker’ sur le menu
principal.
2 Sélectionnez ‘Tone control’.
3 Sélectionnez un réglage.
iPod touch1:
1 Sélectionnez ‘Settings’ sur le menu
principal.
2 Sélectionnez ‘Speaker’.
3 Sélectionnez ‘Tone control’.
4 Sélectionnez un réglage.
Sélectionnez un des paramètres suivants :
• Flat – Rétablissement du son à son état
naturel.
• Bass ON – Accentuation des sons graves.
• Treble ON – Accentuation des sons aigus.
• Bass/Treble ON
–
Accentuation des sons
graves et aigus.
Important
Si un message d’erreur s’allume sur le
panneau avant, suivez les points ci-dessous:
Message
Ce qu’il signifie
Il y a un problème avec le trajet du
signal entre l’iPod et l’appareil.
Reconnectez l’iPod et l’appareil. Si
cela ne fonctionne pas, essayez de
refaire les réglages de l’iPod.
Un périphérique non pris en charge a
été connecté.
Vérifiez si l’iPod est
pris en charge par cet appareil.
Message
Ce qu’il signifie
Un iPod qui n’est pas pris en charge
est connecté. Vérifiez si l’iPod est pris
en charge par cet appareil (page 9).
Si la version du logiciel de l’iPod est
trop ancienne, mettez à jour le
logiciel de l’iPod à la dernière version.
S’il n’y a pas de réponse de l’iPod,
mettez à jour le logiciel de l’iPod à la
dernière version. Si cela ne
fonctionne pas, essayez de refaire les
réglages de l’iPod.
Si l’iPod ne peut pas être utilisé, vérifiez les
points suivants:
• L’iPod est-il raccordé correctement?
Reconnectez l’iPod à l’appareil.
• L’iPod est-il bloqué? Essayez de réinitialiser
l’iPod et de le reconnecter à l’appareil.
Note
• L’iPod se charge chaque fois qu’il est
connecté à cet appareil. (C’est aussi
valable quand l’appareil se trouve en mode
veille.)
• Chaque fois qu’un iPod est connecté à cet
appareil, mettre l’appareil sous tension ou
changer l’entrée sur iPod permet de
démarrer la lecture de l’iPod
automatiquement.
• Quand l’entrée est changée de l’iPod sur
une autre fonction, la lecture de l’iPod
s’arrête automatiquement.
• Si l’appareil est mis en veille quand un iPod
est connecté, l’iPod est mis hors tension
automatiquement.
1 Ce réglage peut ne pas être pris en charge en fonction de la version du logiciel de l’iPod touch software version.
12
Fr
Page 37

ADAPTATEUR Bluetooth® pour profiter de la musique sans fil
Fonctionnement par télécommande
Cet appareil
ADAPTATEUR
Bluetooth
®
Périphérique non équipé de la
technologie sans fil Bluetooth :
Lecteur de musique numérique
+
Émetteur audio Bluetooth (en
vente dans le commerce)
Périphérique optimisé pour la
technologie sans fil
Bluetooth
:
Lecteur de musique numérique
Périphérique optimisé
pour la technologie sans fil
Bluetooth :
Téléphone portable
Remarque
04
Chapitre 4 :
ADAPTATEUR
Bluetooth
®
pour
profiter de la musique sans fil
Fonctionnement par télécommande
Lecture de musique sans fil
Lorsque l’ADAPTATEUR Bluetooth (modèle
Pioneer nº AS-BT100) est raccordé à cet
appareil, un produit équipé de la technologie
sans fil Bluetooth (téléphone portable, lecteur
de musique numérique, etc.) peut être utilisé
pour écouter de la musique sans fil.
en utilisant un émetteur disponible dans le
commerce prenant en charge la technologie
sans fil Bluetooth, vous pouvez écouter de la
musique sur un périphérique non équipé de la
technologie sans fil Bluetooth. Le modèle
AS-BT100 prend en charge la protection de
contenus SCMS-T, ainsi il est possible de
profiter de la musique sur des périphériques
équipés de la technologie sans fil Bluetooth de
type SCMS-T.
1 • Il peut s’avérer nécessaire que le périphérique optimisé pour la technologie sans fil Bluetooth prenne en charge les profils
A2DP.
• Pioneer ne garantit pas une connexion et un fonctionnement correct de cet appareil avec tous les périphériques optimisés
pour la technologie sans fil Bluetooth.
2 • Il peut s’avérer nécessaire que le périphérique optimisé pour la technologie sans fil Bluetooth prenne en charge les profils
AVRCP.
• Le fonctionnement de la télécommande ne peut être garanti pour tous les périphériques optimisés pour la technologie sans
fil Bluetooth.
1
De plus,
La télécommande fournie avec cet appareil
vous permet de lire et d’arrêter le support et
d’effectuer d’autres opérations.
2
English
Français Español
13
Fr
Page 38

04
Remarque
ADAPTATEUR
Bluetooth
®
PRESET PRESET
ENTER
SLEEP
WAKE
UP
BASS
/
TREBLE
TUNE
ADAPTATEUR Bluetooth® pour profiter de la musique sans fil
Raccordement de l’ADAPTATEUR
Bluetooth
• Avant d’effectuer ou de modifier les
raccordements, mettez l’appareil hors
tension et débranchez le cordon
d’alimentation de la prise secteur.
optionnel
1 Mettez l’appareil en veille.
2 Appuyez sur
et maintenez enfoncé
pendant trois secondes.
Le nouveau code PIN est affiché indiquant que
le code PIN a bien été changé.
Répétez l’étape 2 jusqu’à ce que le code PIN
soit réglé sur la valeur souhaitée.
COMPONENT VIDEO
MONITOR OUT VIDEO 1VIDEO 2
R
ADAPTER PORT
YPBP
1 Mettez l’appareil en veille et raccordez
l’ADAPTATEUR
PORT
situé sur le panneau arrière.
2 Appuyez sur
3 Appuyez sur
l’appareil sur ‘ ’.
Bluetooth
au port
STANDBY/ON
INPUT
pour commuter
1
ADAPTER
.
Si l’appairage n’a pas été réalisé, ‘ ’ est
affiché.
Réglage du code PIN
Réglez le code PIN de cet appareil sur la même
valeur que celui du périphérique à technologie
sans fil Bluetooth utilisé. Les valeurs prises en
charge pour le code PIN sont du type 0000,
1234 ou 8888.
• Réglage par défaut : 0000
PRESET PRESET
WAKE
SLEEP
UP
BASS
TREBLE
ENTER
TUNE
/
Pairage de l’ADAPTATEUR
Bluetooth
et d’un périphérique à
technologie sans fil
Bluetooth
L’“appairage” doit être effectué avec de
commencer la lecture de contenu à
technologie sans fil Bluetooth à l’aide de
l’ADAPTATEUR Bluetooth. Assurez-vous
d’effectuer l’appairage la première fois que
vous utilisez le système ou à chaque fois que
les données d’appairage sont effacées.
L’“appairage” est l’étape nécessaire pour
enregistrer le périphérique à technologie sans
fil Bluetooth afin de permettre les
communications Bluetooth.
2
Pour plus de
détails, reportez-vous aussi au mode d’emploi
de votre périphérique à technologie sans fil
Bluetooth.
1 Quand ‘ ’ s’allume, appuyez sur
.
‘ ’ clignote et l’appareil entre en mode de
veille d’appairage.
1 Quand l’ADAPTATEUR Bluetooth n’est pas branché sur le port ADAPTER PORT, ne peut pas être sélectionné même si
vous appuyez sur INPUT.
2 • L’appairage est requis la première fois que vous utilisez le périphérique à technologie sans fil Bluetooth et l’ADAPTATEUR
Bluetooth.
• Pour permettre la communication Bluetooth, l’appairage doit être effectué avec votre système ainsi qu’avec le périphérique
à technologie sans fil Bluetooth.
14
Fr
Page 39

ADAPTATEUR Bluetooth® pour profiter de la musique sans fil
Remarque
04
2 Allumez le périphérique à technologie
sans fil
Bluetooth
effectuer l’appairage, placez-le près du
système et réglez-le sur le mode d’appairage.
L’appairage commence.
3 Vérifiez que l’ADAPTATEUR
détecté par le périphérique à technologie
sans fil
Bluetooth
s’allume quand un périphérique à
technologie sans fil Bluetooth est raccordé:
s’allume quand aucun périphérique à
technologie sans fil Bluetooth n’est raccordé:
Dans ce cas, réalisez une connexion à partir du
côté du périphérique à technologie sans fil
Bluetooth.
avec lequel vous souhaitez
Bluetooth
.
est
Écoute de contenus musicaux
d’un périphérique à technologie
sans fil
Bluetooth
avec votre
système
1 Appuyez sur
l’appareil sur ‘ ’.
2 Raccordez le périphérique à technologie
sans fil
Bluetooth
3 Lancez la lecture des contenus musicaux
mémorisés sur le périphérique à technologie
sans fil
Bluetooth
Les opérations suivantes sont maintenant
accessibles pour les périphériques à
technologie sans fil Bluetooth, en utilisant la
télécommande.
INPUT
pour commuter
à l’ADAPTATEUR
.
1
Bluetooth
.
Touches Leur rôle
/ Démarre la lecture normale et active/
VOLUME
+/–
désactive la mise en pause de la
lecture.
Appuyez sur cette touche pour sauter
au début du fichier en cours, puis aux
fichiers précédents. Maintenez cette
touche enfoncée pour lancer le
défilement rapide arrière.
Appuyez sur cette touche pour sauter
au fichier suivant. Maintenez cette
touche enfoncée pour lancer le
défilement rapide avant.
Permet de régler le volume
d’écoute.
English
Français Español
1 • Le périphérique à technologie sans fil Bluetooth doit être compatible avec le profil AVRCP.
• Selon le périphérique à technologie sans fil Bluetooth que vous utilisez, le fonctionnement peut être différent par rapport à
ce qui est indiqué dans le tableau.
15
Fr
Page 40

Autres raccordements05
Lecteur audio
numérique, etc.
Chapitre 5 :
Autres raccordements
• Avant d’effectuer ou de modifier les
raccordements, mettez l’appareil hors
tension et débranchez le cordon
d’alimentation de la prise secteur.
Connexion d’appareils
auxiliaires
Connectez la mini fiche AUDIO IN à votre
appareil de lecture auxiliaire.
• Cette méthode peut être utilisée pour lire
sur cet appareil la musique d’iPod qui ne
peuvent pas être utilisés avec le Dock iPod.
YPB PR
• Appuyez sur
l’appareil sur ‘ ’.
16
Fr
COMPONENT VIDEO
MONITOR OUT VIDEO 1VIDEO 2
INPUT
pour commuter
AUDIO IN
AC IN
Page 41

Utilisation du syntoniseur 06
Remarque
Antenne à fil FM
Chapitre 6 :
Utilisation du syntoniseur
Réglage automatique – Pour chercher
Connexion d’une antenne FM
Connectez la fiche d’antenne FM sur la broche
centrale de la prise d’antenne FM.
AC IN
ANTENNA
FM UNBAL 75
1
Écoute de la radio FM
Le syntoniseur peut recevoir des canaux FM. Il
vous permet de mémoriser vos stations préférées
pour ne pas devoir les rechercher manuellement
chaque fois que vous souhaitez les écouter.
STANDBY/ON
PRESET PRESET
WAKE
SLEEP
UP
CLOCK
SETUP
1 Appuyez sur
INPUT
l’appareil sur le tuner.
L’indicateur du tuner s’allume et la fréquence du
tuner est affichée.
2 Réglez une station.
Vous disposez de trois moyens pour régler une
station :
INPUT
ENTER
TUNE
BASS
/
TREBLE
TUNE
TUNER
PRESET
pour commuter
les stations, maintenez pressée TUNE +/–
pendant environ une seconde. Le
récepteur recherche la station suivante et
s’arrête quand il l’a trouvée. Répétez cette
procédure pour les autres stations.
Réglage manuel – Pour changer de
fréquence étape par étape, appuyez sur
TUNE +/–.
Réglage à grande vitesse – Appuyez sur
TUNE +/– et maintenez enfoncé d’une
manière continue pour un réglage à
grande vitesse. Relâchez la touche à la
fréquence souhaitée.
Mémorisation des stations
Vous pouvez enregistrer jusqu’à 10 stations
préréglées pour un accès toujours aisé à vos
stations préférées sans devoir les régler
manuellement à chaque fois.
1 Appuyez sur
INPUT
2
pour commuter
l’appareil sur le tuner.
2 Faites l’accord sur une station radio FM.
3 Appuyez sur
4 Utilisez
TUNER PRESET
TUNE +/–
.
pour sélectionner la
station préréglée souhaitée (par ex.
‘ ’), puis appuyez sur
ENTER
Écoute de stations préréglées
1 Appuyez sur
l’appareil sur le tuner.
2 Utilisez
station préréglée.
INPUT
PRESET +/–
pour commuter
pour sélectionner une
English
Français Español
.
1 Pour obtenir une réception optimale, assurez-vous que l’antenne FM est complètement déployée et qu’elle ne reste pas
enroulée ou pendante à l’arrière de l’appareil.
2 Quand une nouvelle fréquence est mémorisée sur un emplacement contenant une fréquence mémorisée, la fréquence
précédente est remplacée par la nouvelle.
17
Fr
Page 42

Réglages du son07
Remarque
Chapitre 7 :
Réglages du son
Sélection du type de son d’ambiance
Utilisation de la fonction
Soundscape
La fonction Soundscape vous permet d’ajouter
divers sons d’ambiance à la musique en cours
de lecture.
• Appuyez sur
La fonction Soundscape est mise en service et
les sons d’ambiance sont ajoutés à la musique
en cours de lecture. L’affichage ‘ ’
indique le type de son d’ambiance sélectionné.
• La fonction Soundscape est mise ON/OFF
Réglage du volume de la fonction
Soundscape
• Réglage par défaut : 05
•Utilisez
balance entre la musique et les effets
Soundscape.
Le réglage peut être fait entre les valeurs 00 et
10. Appuyez sur “+” pour augmenter le volume
des sons d’ambiance Soundscape et appuyez
sur “–” pour réduire le volume des sons
d’ambiance Soundscape et augmenter le
volume de la musique.
1
SOUND
SCAPE
SELECT MIX BALANCE
SOUNDSCAPE ON/OFF
VOLUME
/
ON
OFF
.
(en/hors) service chaque fois que vous
appuyez sur la touche SOUNDSCAPE ON/
OFF
.
MIX BALANCE +/–
pour régler la
• Avec la fonction Soundscape ON (en)
service, appuyez sur
choisir le son d’ambiance souhaité.
Sélectionnez un des 6 types suivants :
• – Le son des vagues de
• – Sons des rues d’Europe.
• – Récif corallien dans les
• – Un ruisseau coulant en forêt et
• – Promenade dans une prairie en
SELECT /
pour
Copacabana à Rio de Janeiro. Divertissezvous avec le son du high surf. Le son du
high surf mélangé avec les voix sur la
plage.
Divertissez vous avec les sons d’un café
avec terrasse sur rue quelque part en
Europe.
Le bruit des voitures roulant sur les pavés
sont mélangés à ceux des passants.
tropiques. Divertissez-vous avec le son de
vagues légères.
Mer bleu de l’île d’Okinawa au Japon. Des
vagues transparentes roulent doucement
sur le sable blanc d’un récif corallien.
des petits oiseaux. Divertissez-vous avec le
son d’une matinée le long d’un ruisseau
coulant à travers une forêt et avec les
pépiements de petits oiseaux sauvages.
automne. Divertissez-vous avec les sons
des petits oiseaux et des pas sur les feuilles
mortes.
Une prairie en automne à Nagano au
Japon.
1 Si vous le souhaitez, vous pouvez choisir d’écouter les sons d’ambiance Soundscape tous seuls dans un mixage avec la
musique.
18
Fr
Page 43

Réglages du son 07
• – Sons d’un disque vinyle.
Divertissez-vous avec le son des rayures et
du souffle d’un disque vinyle mélangés
avec la musique d’un iPod, du syntoniseur
radio ou d’une autre source d’entrée
extérieure. (Un effet encore meilleur peut
être obtenu quand l’effet est combiné avec
le mode sonore basse fidélité.)
Quand il est mixé avec de la musique,
même les morceaux les plus récents
donnent l’impression de ressembler à un
vieux tirage sépia.
Utilisation des effets sonores
Vous pouvez ajouter des effets excitants aux
sources audio.
• Réglage par défaut : (hors service)
PRESET PRESET
WAKE
SLEEP
UP
CLOCK
SETUP
1 Appuyez sur
2Utilisez
puis appuyez sur
3Utilisez
SETUP
/
pour sélectionner ‘ ’,
ENTER
/
pour changer le mode
sonore, puis appuyez sur
• (Réglage automatique du niveau) –
Cet appareil égalise les niveaux sonores de
lecture.
• (Basse fidélité) – Donne une
impression rétro à la musique.
• (Vivant) – Produit un effet vivant
similaire à l’expérience d’un concert en
direct.
• (hors service) –
à son état naturel.
ENTER
TUNE
BASS
/
TREBLE
TUNE
TUNER
PRESET
.
.
ENTER
.
Rétablissement du son
Réglage de la tonalité
Les commandes de tonalité permettent de
régler les signaux sonores de manière
générale.
1 Appuyez sur
2 Utilisez
BASS/TREBLE
/
pour sélectionner ‘ ’
.
(graves) ou ‘ ’ (aigus), puis appuyez
sur
ENTER
.
3 Utilisez
aigus, puis appuyez sur
/
pour régler les graves ou les
ENTER
.
Vous pouvez régler les sons graves et aigus
dans une plage de –6 à +6.
Utilisation de la fonction Sound
Retriever
Lorsque des données audio sont supprimées
au cours du processus de compression WMA/
MP3/MPEG-4 AAC, la qualité sonore souffre
souvent d’une image sonore inégale. La
fonction Sound Retriever fait appel à une
nouvelle technologie DSP qui contribue à
restituer la qualité sonore du CD aux sons
comprimés, en rétablissant la pression sonore
et en adoucissant les dentelures restant après
la compression.
• Réglage par défaut : (en service)
1 Mettez l’appareil en veille.
2 Appuyez sur
3 Utilisez
puis appuyez sur
4 Utilisez
fonction Sound Retriever.
5 Appuyez sur
Une fois que le réglage est terminé, la nouvelle
valeur réglée clignote pendant 3 secondes,
puis l’appareil retourne en mode veille.
SETUP
.
/
pour sélectionner ‘ ’,
ENTER
.
/
pour activer ou désactiver la
ENTER
.
English
Français Español
19
Fr
Page 44

Utilisation du minuteur08
Remarque
Chapitre 8 :
Utilisation du minuteur
Réglage de l’horloge
Le réglage de l’horloge vous permet d’utiliser le
minuteur.
1 Mettez l’appareil en veille.
2 Appuyez sur
3Utilisez
puis appuyez sur
L’heure actuelle est affichée.
4Utilisez
appuyez sur
5Utilisez
appuyez sur
Une fois que le réglage est terminé, la nouvelle
valeur réglée clignote pendant 3 secondes,
puis l’appareil retourne en mode veille.
1
PRESET PRESET
WAKE
SLEEP
UP
CLOCK
SETUP
SETUP
/
pour sélectionner ‘ ’,
ENTER
/
pour régler l’heure, puis
ENTER
.
/
pour régler les minutes, puis
ENTER
.
BASS
TREBLE
TUNER
PRESET
.
.
ENTER
TUNE
/
TUNE
Réglage du mode d’affichage
À utiliser pour changer le mode d’affichage
(affichage de l’horloge, etc.)
1 L’appareil étant sous tension, appuyez sur
SETUP
.
2Utilisez
puis appuyez sur
L’heure actuelle est affichée.
/
pour sélectionner ‘ ’,
ENTER
.
3Utilisez
d’affichage, puis appuyez sur
• – L’affichage est hors service sauf
/
pour sélectionner le réglage
ENTER
.
quand vous entrez des commandes.
2
• – L’affichage de l’horloge apparaît
sauf quand vous entrez des commandes.
• – Les valeurs sont affichées en
permanence sauf quand vous entrez des
commandes. Quand l’appareil est en mode
veille, l’horloge est affichée.
2
Changement du mode d’affichage de
l’horloge
Vous pouvez choisir d’afficher l’horloge en
mode 12 heures ou 24 heures.
• Réglage par défaut : (mode 24 heures)
1 Mettez l’appareil en veille.
2 Appuyez sur
3Utilisez
puis appuyez sur
4Utilisez
‘ ’, puis appuyez sur
SETUP
.
/
pour sélectionner ‘ ’,
ENTER
.
/
pour sélectionner ‘ ’ ou
ENTER
.
Une fois que le réglage est terminé, la nouvelle
valeur réglée clignote pendant 3 secondes,
puis l’appareil retourne en mode veille.
Réglage du minuteur de réveil
Le minuteur de réveil vous permet de régler
l’appareil de manière à ce qu’il se mette en
marche à un moment donné et lise la source
de votre choix.
Si l’iPod est sélectionné comme son du
minuteur, quand le minuteur de réveil se
déclenche, l’iPod est mis automatiquement
sous tension et la lecture démarre.
1 Vous aurez besoin de régler de nouveau l’horloge si vous débranchez l’appareil (ou en cas de coupure de courant).
2 Quand l’appareil est sous tension ou en mode de veille, l’heure actuelle peut être affichée en appuyant sur la touche CLOCK.
20
Fr
Page 45

Utilisation du minuteur 08
Remarque
1 Avec l’entrée réglée sur l’iPod ou le tuner,
appuyez sur
2Utilisez
puis appuyez sur
L’heure de réglage du minuteur est affichée.
3 Réglez l’heure souhaitée pour le minuteur.
Utilisez / pour régler l’heure, puis appuyez
sur ENTER. Réglez les minutes de la même
manière et appuyez sur ENTER lorsque vous
avez terminé.
4Utilisez
d’entrée à utiliser comme son du minuteur,
puis appuyez sur
Lors de la sélection de la source d’entrée le son
de cette source est sorti (sauf quand le bip
sonore est sélectionné). Utilisez les touches
VOLUME +/– pour ajuster le volume sonore.
• Si est sélectionné, une tonalité
électronique retentira.
5Utilisez
d’alarme ON/OFF (en/hors) service comme
vous le souhaitez, puis appuyez sur
L’heure du minuteur, le réglage de l’entrée, le
réglage du rappel de minuterie et le réglage du
volume sont affichés dans l’ordre, une fois que
le réglage du minuteur de réveil est terminé.
• L’indicateur du minuteur s’allume.
SETUP
.
/
pour sélectionner ‘ ’,
ENTER
.
/
pour sélectionner la source
ENTER
.
/
pour mettre le rappel
ENTER
Quand le minuteur de réveil se déclenche
Si le rappel d’alarme est hors service:
Appuyez sur la touche STANDBY/ON sur
l’appareil principal pour arrêter le minuteur et
mettre l’appareil hors tension. Ou alors,
attendez une heure (quand le bip sonore est
sélectionné, attendez une minute) et la lecture
s’arrêtera automatiquement puis l’appareil se
mettra hors tension.
Si vous appuyez sur une autre touche, le
minuteur d’arrête et la lecture normale de la
source actuellement choisie démarre.
• Quand vous avez fini d’utiliser le minuteur,
mettez la fonction de minuteur hors service
(voir ci-dessous).
1 Le minuteur de mise en veille peut être réinitialisé en appuyant sur la touche SLEEP pendant que le minuteur de mise en veille
est en service.
Si le rappel d’alarme est en service:
Appuyez sur la touche STANDBY/ON sur
l’appareil principal pour arrêter le minuteur et
mettre l’appareil hors tension.
Si vous appuyez sur une autre touche ou si la
lecture continue pendant une minute, le son du
minuteur s’arrête mais la fonction de rappel
d’alarme fonctionnera et le son du minuteur sera
de nouveau reproduit cinq minutes plus tard.
• Pendant que le rappel d’alarme est en
service, aucune touche ne peut être
utilisée sauf
ON sur l’appareil principal. (Pour mettre la
fonction de minuteur hors service, appuyez
deux fois sur la touche WAKE UP.)
• La fonction de rappel d’alarme se répète
.
un maximum de cinq fois. Ensuite,
l’appareil est mis automatiquement hors
tension.
• Quand vous avez fini d’utiliser le minuteur,
mettez la fonction de minuteur hors service
(voir ci-dessous).
WAKE UP et ’s STANDBY/
Activation et désactivation du
minuteur de réveil
• Appuyez sur
Chaque fois que vous appuyez sur la touche, le
minuteur est mis alternativement en/hors
service.
• Quand le minuteur est mis en service,
l’indicateur de minuteur s’allume.
WAKE UP
.
Utilisation du minuteur de mise
en veille
Le minuteur de mise en veille met l’appareil
hors tension après le délai spécifié pour que
vous puissiez vous endormir l’esprit tranquille.
• Appuyez répétitivement sur
sélectionner une heure d’arrêt.
Choisissez un réglage parmi 5 min, 15 min, 30
min, 60 min, 90 min ou hors service.
• Le temps restant est affichée pendant le
fonction du minuteur de mise en veille.
SLEEP
English
Français Español
pour
1
21
Fr
Page 46

Informations supplémentaires09
Chapitre 9 :
Informations supplémentaires
Guide de dépannage
Des opérations incorrectes sont souvent interprétées comme des problèmes et des mauvais
fonctionnements. Si vous pensez qu’il y a un problème avec ce composant, vérifiez les points cidessous. Parfois le problème peut se trouver dans un autre composant. Examinez les autres
composants et les appareils électriques en usage. Si le problème ne peut pas se résoudre malgré
les indications ci-dessous, consultez votre service après-vente Pioneer le plus proche pour le faire
réparer.
• Si l’appareil ne fonctionne pas normalement en raison d’effets externes comme l’électricité
statique, débranchez la fiche d’alimentation de la prise de courant et insérez-la de nouveau
pour rétablir les conditions normales de fonctionnement.
Problèmes Solutions
Impossible de mettre sous
tension.
L’appareil se met
automatiquement en mode
veille sans intervention de
l’utilisateur.
Aucun son n’est fourni quand
une fonction est sélectionnée.
Impossible de faire
fonctionner la télécommande.
Présence d’un bruit
considérable lors de la
diffusion radio.
La syntonisation automatique
ignore certaines stations.
• Débranchez la fiche d’alimentation de la prise de courant et
insérez-la de nouveau.
• Si le récepteur d’arrête automatiquement, apportez-le au service
après-vente Pioneer ou à votre revendeur le plus proche pour le faire
réviser.
• Quand l’entrée est réglée sur l’iPod et si aucun iPod n’est connecté
pendant une heure ou plus, l’appareil se met automatiquement hors
tension.
• Vérifiez que le composant est raccordé correctement (voir
Connexion d’appareils auxiliaires à la page 16).
• Remplacez les piles (voir page 5).
• Utilisez à moins de 7 m, 30° du capteur de télécommande du
panneau avant (voir page 6).
• Eliminez tout obstacle ou faites-la fonctionner d’une autre position.
• Évitez d’exposer le capteur de télécommande du panneau avant à
la lumière directe.
• Tirez complètement l’antenne filaire FM, positionnez-la pour
bénéficier d’une réception optimale et fixez-la au mur. Vous pouvez
également brancher une antenne FM extérieure.
• Mettez hors tension tout autre appareil pouvant être à l’origine du
bruit ou éloignez-le de cet appareil.
• Le signal radio est faible. La syntonisation automatique ne détecte
que les stations de radio dont le signal est excellent. Pour une
syntonisation plus sensible, connectez une antenne extérieure.
22
Fr
Page 47

Informations supplémentaires 09
Problèmes Solutions
Le périphérique à technologie
sans fil Bluetooth ne peut pas
être raccordé ou utilisé. Le son
en provenance du
périphérique à technologie
sans fil Bluetooth n’est pas
émis ou le son est interrompu.
• Vérifiez qu’aucun objet émettant des ondes électromagnétiques
dans la bande 2,4 GHz (four à micro-ondes, périphérique LAN sans fil
ou appareil à technologie sans fil Bluetooth) n’est à proximité de
l’appareil. Si un tel objet se trouve à proximité de l’appareil, éloignezen l’appareil. Vous pouvez aussi arrêter d’utiliser l’objet émettant les
ondes électromagnétiques.
• Vérifiez que le périphérique à technologie sans fil Bluetooth n’’est
pas trop éloigné de l’appareil et qu’il n’y a pas d’obstructions entre le
périphérique à technologie sans fil Bluetooth et l’appareil. Placez le
périphérique à technologie sans fil Bluetooth et l’appareil de façon à
ce que la distance entre eux soit inférieure à 10 m et qu’il n’y ait pas
d’obstructions entre eux.
• Vérifiez que l’ADAPTATEUR Bluetooth et le port ADAPTER PORT de
l’appareil sont correctement raccordés.
• Il se peut que le périphérique à technologie sans fil Bluetooth ne
soit pas réglé sur le mode de communication prenant en charge la
technologie sans fil Bluetooth. Vérifiez le réglage du périphérique à
technologie sans fil Bluetooth.
• Vérifiez que l’appairage est correct. Le réglage d’appairage a été
supprimé de cet appareil ou du périphérique à technologie sans fil
Bluetooth. Réglez de nouveau l’appairage.
• Vérifiez que le profil est correct. Utilisez un périphérique à
technologie sans fil Bluetooth prenant en charge le profil A2DP et le
profil AVRCP.
Réinitialisation du système
Cette procédure permet de restaurer la
configuration d’usine du système.
• Avant de réinitialiser l’appareil,
débranchez d’abord tous les appareils
connectés à cet appareil.
1 Mettez l’appareil sous tension.
2 Maintenez enfoncé
panneau supérieur et ensuite
enfoncé
secondes.
STANDBY/ON
L’appareil est mis en mode veille.
À la prochaine mise sous tension, tous les
réglages du système
VOLUME –
pendant trois
doivent être réinitialisés.
sur le
maintenez
English
Français Español
À propos de l’iPod
Les accessoires électroniques portant la
mention « Made for iPod » ont été conçus pour
fonctionner avec un iPod et sont certifiés
conformes aux exigences d’Apple par le
fabricant.
Apple n’est pas responsable pour le
fonctionnement de cet appareil ou de sa
compatibilité avec les normes réglementaires
et de sécurité.
iPod est une marque commerciale d’Apple Inc.,
enregistrées aux États-Unis et d’autres pays.
23
Fr
Page 48

Informations supplémentaires09
Spécifications
• Section amplificateur
Puissance de sortie RMS:
Avant gauche/droit . . . . . . . . . . . 15 W + 15 W
(1 kHz, 10 %, T.H.D., 8 Ω)
Caisson de graves
. . . . . . . . . . . 30 W (100 Hz, 10 %, T.H.D., 4 Ω)
• Section des enceintes
Boîtier
. . . . . . . Bass-reflex (avec blindage magnétique)
Système . . . . . . . . . . . . . . . . . . . système à 3 voies
Enceintes :
Caisson de graves. . . . . . . . . . . . côte de 10 cm
Médiums/Aigus . . . . . . . . . . . cône de 5,2 cm/
semi-dôme de 2,6 cm
Gamme de fréquences. . . . . . . . . .50 Hz à 30 kHz
• Divers
Alimentation . . . . 220 V à 240 V c.a., 50 Hz/60 Hz
Consommation . . . . . . . . . . . . . . . . . . . . . . . .30 W
En mode veille
. . . 1,0 W (Horloge/Minuteur de réveil en service)
0,5 W (Horloge/Minuteur de réveil hors service)
Dimensions
. . . . . . . . 420 mm (L) x 148 mm (H) x 210 mm (P)
Poids (sans emballage) . . . . . . . . . . . . . . . . 5,0 kg
• Accessoires
Télécommande . . . . . . . . . . . . . . . . . . . . . . . . . . . 1
Support de télécommande . . . . . . . . . . . . . . . . . 1
Pile lithium (CR2025) . . . . . . . . . . . . . . . . . . . . . . 1
Antenne à fil FM . . . . . . . . . . . . . . . . . . . . . . . . . . 1
Câble d’alimentation . . . . . . . . . . . . . . . . . . . . . . 1
Carte de garantie . . . . . . . . . . . . . . . . . . . . . . . . . 1
Mode d’emploi (ce document)
Nettoyage de l’appareil
• Utilisez un chiffon sec pour essuyer la
poussière et la saleté.
• Lorsque le surface est sale, essuyez avec
un chiffon doux trempé dans un nettoyant
neutre dilué dans une dose cinq ou six fois
supérieure d’eau, et bien essoré. Essuyez
encore avec un chiffon sec. N’utilisez pas
de cire ou nettoyant pour meubles.
• N’utilisez jamais de diluants, benzine,
insecticides en bombe ou autres produits
chimiques sur ou près de cet appareil au
risque d’entraîner une corrosion.
Publication de Pioneer Corporation.
© 2009 Pioneer Corporation.
Tous droits de reproduction et de traduction réservés.
Remarque
• Les spécifications et la conception sont
sujettes à de possibles modifications sans
préavis, suite à des améliorations.
24
Fr
Page 49

Informations supplémentaires 09
English
Français Español
25
Fr
Page 50

El punto exclamativo dentro un triángulo
equilátero convenido para avisar el usuário
de la presencia de importantes
instrucciones sobre el funcionamiento y la
manutención en la libreta que acompaña el
aparato.
La luz intermitente con el símbolo de punta
de flecha dentro un triángulo equilátero.
Está convenido para avisar el usuario de la
presencia de “voltaje peligrosa” no aislada
dentro el producto que podría constituir un
peligro de choque eléctrico para las
personas.
ATENCIÓN:
PARA PREVENIR EL PELIGRO DE CHOQUE
ELÉCTRICO NO REMOVER LA TAPA NI LAS
PARTES DENTRO NO UTILIZADAS,
LLAMAR UNA PERSONA CUALIFICADA.
CAUTION
RISK OF ELECTRIC SHOCK
DO NOT OPEN
IMPORTANTE
D3-4-2-1-1_A1_Es
ADVERTENCIA
Este aparato no es impermeable. Para evitar el riesgo
de incendio y de descargas eléctricas, no ponga ningún
recipiente lleno de líquido (como pueda ser un vaso o
un florero) cerca del aparato ni lo exponga a goteo,
salpicaduras, lluvia o humedad.
D3-4-2-1-3_A1_Es
ADVERTENCIA
Antes de enchufar el aparato a la corriente, lea la sección
siguiente con mucha atención.
La tensión de la red eléctrica es distinta según el
país o región. Asegúrese de que la tensión de la
alimentación de la localidad donde se proponga
utilizar este aparato corresponda a la tensión
necesaria (es decir, 230 V ó 120 V) indicada en el
panel inferior.
D3-4-2-1-4*_A1_Es
ADVERTENCIA
Para evitar el peligro de incendio, no ponga nada con
fuego encendido (como pueda ser una vela) encima del
aparato.
D3-4-2-1-7a_A1_Es
Entorno de funcionamiento
Temperatura y humedad del entorno de funcionamiento
+5 °C a +35 °C; menos del 85 % de humedad relativa
(rejillas de refrigeración no obstruidas)
No instale este aparato en un lugar mal ventilado, ni en
lugares expuestos a alta humedad o a la luz directa del
sol (o de otra luz artificial potente).
D3-4-2-1-7c*_A1_Es
PRECAUCIÓN PARA LA VENTILACIÓN
Cuando instale este aparato, asegúrese de dejar
espacio en torno al mismo para la ventilación con el fin
de mejorar la disipación de calor (por lo menos 20 cm
encima, 10 cm detrás, y 10 cm en cada lado).
ADVERTENCIA
Las ranuras y aberturas de la caja del aparato sirven
para su ventilación para poder asegurar un
funcionamiento fiable del aparato y para protegerlo
contra sobrecalentamiento. Para evitar el peligro de
incendio, las aberturas nunca deberán taparse ni
cubrirse con nada (como por ejemplo, periódicos,
manteles, cortinas) ni ponerse en funcionamiento el
aparato sobre una alfombra gruesas o una cama.
D3-4-2-1-7b*_A1_Es
Este producto es para tareas domésticas generales.
Cualquiera avería debida a otra utilización que tareas
domésticas (tales como el uso a largo plazo para
motivos de negocios en un restaurante o el uso en un
coche o un barco) y que necesita una reparación
hará que cobrarla incluso durante el período de
garantía.
K041_A1_Es
Cuando utilice este producto, confirme la
información de seguridad mostrada en la parte
inferior de la unidad.
D3-4-2-2-4_B1_Es
Page 51

K058a_A1_Es
Pb
Información para los usuarios en la recogida y tratamiento de los equipos al final de
su vida y de las pilas y baterías usadas.
Estos símbolos en los productos, embalaje, y/o en los documentos que los
acompañan significa que los productos eléctricos y electrónicos al final de su vida, las
pilas y baterías no deben mezclarse con los residuos generales de su hogar.
Para el tratamiento adecuado, recuperación y reciclado de los productos viejos y las
pilas usadas, por favor deposítelos en los puntos de recogida de acuerdo con su
legislación nacional.
Mediante el tratamiento correctamente de estos productos y pilas, ayudará a preservar
los recursos y prevenir cualquier efecto negativo en la salud humana y el medioambiente que podría surgir por una inadecuada manipulación de los desperdicios.
Para más información sobre recogida y reciclado de los productos viejos, pilas y
baterías, por favor contacte con su municipio, sobre localización de los puntos limpios
o diríjase al punto de venta donde compró los productos.
Estos símbolos sólo son válidos en la Unión Europea.
Para países fuera de la Unión europea:
Si desea eliminar estos artículos, por favor contactar con las autoridades locales o el
distribuidor y pida por el método correcto de tratamiento.
Símbolo para
pilas y baterías
Símbolo para
equipos
Si la clavija del cable de alimentación de CA de este
aparato no se adapta a la toma de corriente de CA
que usted desea utilizar, deberá cambiar la clavija por
otra que se adapte apropiadamente. El reemplazo y
montaje de una clavija del cable de alimentación de
CA sólo deberá realizarlos personal de servicio
técnico cualificado. Si se enchufa la clavija cortada a
una toma de corriente de CA, puede causar fuertes
descargas eléctricas. Asegúrese de que se tira de la
forma apropiada después de haberla extraído.
El aparato deberá desconectarse desenchufando la
clavija de la alimentación de la toma de corriente
cuando no se proponga utilizarlo durante mucho
tiempo (por ejemplo, antes de irse de vacaciones).
D3-4-2-2-1a_A1_Es
PRECAUCIÓN
El interruptor de la alimentación
STANDBY/ON
de
este aparato no corta por completo toda la
alimentación de la toma de corriente de CA. Puesto
que el cable de alimentación hace las funciones de
dispositivo de desconexión de la corriente para el
aparato, para desconectar toda la alimentación del
aparato deberá desenchufar el cable de la toma de
corriente de CA. Por lo tanto, asegúrese de instalar
el aparato de modo que el cable de alimentación
pueda desenchufarse con facilidad de la toma de
corriente de CA en caso de un accidente. Para evitar
correr el peligro de incendio, el cable de
alimentación también deberá desenchufarse de la
toma de corriente de CA cuando no se tenga la
intención de utilizarlo durante mucho tiempo seguido
(por ejemplo, antes de irse de vacaciones).
D3-4-2-2-2a*_A1_Es
PRECAUCIONES CONCERNIENTES A LA
MANIPULACIÓN DEL CABLE DE ALIMENTACIÓN
Tome el cable de alimentación por la clavija. No
extraiga la clavija tirando del cable. Nunca toque el
cable de alimentación cuando sus manos estén
mojadas, ya que esto podría causar cortocircuitos o
descargas eléctricas. No coloque la unidad, algún
mueble, etc., sobre el cable de alimentación.
Asegúrese de no hacer nudos en el cable ni de unirlo a
otros cables. Los cables de alimentación deberán ser
dispuestos de tal forma que la probabilidad de que
sean pisados sea mínima. Una cable de alimentación
dañado podrá causar incendios o descargas eléctricas.
Revise el cable de alimentación está dañado, solicite el
reemplazo del mismo al centro de servicio autorizado
PIONEER más cercano, o a su distribuidor.
S002*_A1_Es
Page 52

Muchas gracias por la adquisición de este producto
Pioneer.
Lea todo este manual de instrucciones para aprender a operar correctamente su modelo.
Después de haber leído las instrucciones, guarde el manual en un lugar seguro para poderlo
consultar en el futuro.
Contenido
01 Antes de comenzar
Contenido de la caja . . . . . . . . . . . . . . . . . . . . . 5
Antes de emplear del mando a distancia . . . . . 5
Reemplace la pila. . . . . . . . . . . . . . . . . . . . . . 5
Uso del mando a distancia. . . . . . . . . . . . . . . 6
Instalación de la unidad . . . . . . . . . . . . . . . . . . 6
Enchufado . . . . . . . . . . . . . . . . . . . . . . . . . . . . 6
02 Controles y pantallas
Mando a distancia . . . . . . . . . . . . . . . . . . . . . . 7
Panel frontal/superior . . . . . . . . . . . . . . . . . . . . 8
03 Reproducción de iPod
Confirme que los modelos de iPod sean
compatibles . . . . . . . . . . . . . . . . . . . . . . . . . . . 9
Conexión del iPod. . . . . . . . . . . . . . . . . . . . . . . 9
Conexión de un televisor . . . . . . . . . . . . . . . 10
Reproducción del iPod . . . . . . . . . . . . . . . . . . 11
Uso de los controles de tono . . . . . . . . . . . . 11
04 ADAPTADOR
Bluetooth
® para el
disfrute inalámbrico de la música
Reproducción inalámbrica de música . . . . . . 13
Funcionamiento con mando a distancia . . . 13
Conexión del ADAPTADOR Bluetooth
opcional . . . . . . . . . . . . . . . . . . . . . . . . . . . . . 14
Ajuste del código PIN . . . . . . . . . . . . . . . . . . . 14
Cómo emparejar el ADAPTADOR Bluetooth
y el dispositivo de tecnología inalámbrica
Bluetooth . . . . . . . . . . . . . . . . . . . . . . . . . . . . 14
Audición de contenidos musicales de un
dispositivo con tecnología inalámbrica
Bluetooth con su sistema . . . . . . . . . . . . . . . . 15
07 Ajustes del sonido
Uso de Soundscape . . . . . . . . . . . . . . . . . . . .18
Ajusta el volumen de Soundscape . . . . . . . . 18
Seleccione el tipo de sonido ambiental. . . . . 18
Empleo de los efectos de sonido . . . . . . . . . . .19
Ajuste de los graves y agudos . . . . . . . . . . . . .19
Uso del Sound Retriever . . . . . . . . . . . . . . . . .19
08 Uso del temporizador
Ajuste de la hora . . . . . . . . . . . . . . . . . . . . . . .20
Ajuste del modo de visualización . . . . . . . . . .20
Cambio del modo de visualización de la
hora . . . . . . . . . . . . . . . . . . . . . . . . . . . . . . . 20
Uso del temporizador de conexión
automática . . . . . . . . . . . . . . . . . . . . . . . . . . . 21
Encendido y apagado del temporizador de
conexión automática . . . . . . . . . . . . . . . . . .22
Cómo utilizar el temporizador de desconexión
automática . . . . . . . . . . . . . . . . . . . . . . . . . . . 22
09 Información adicional
Resolución de problemas . . . . . . . . . . . . . . . .23
Restablecimiento del sistema . . . . . . . . . . . . .24
Acerca del iPod. . . . . . . . . . . . . . . . . . . . . . . . 24
Especificaciones . . . . . . . . . . . . . . . . . . . . . . .25
Limpieza de la unidad . . . . . . . . . . . . . . . . . . .25
05 Otras conexiones
Conexión de componentes auxiliares . . . . . . . 16
06 Uso del sintonizador
Conecte la antena de FM . . . . . . . . . . . . . . . . 17
Audición de la radio de FM . . . . . . . . . . . . . . . 17
Memorización de emisoras . . . . . . . . . . . . . 17
Audición de presintonías . . . . . . . . . . . . . . . 17
4
Es
Page 53

Antes de comenzar 01
1
1
3
2
Capítulo 1:
Antes de comenzar
Reemplace la pila
Contenido de la caja
Verifique que los siguientes accesorios están
en la caja al abrirla.
• Mando a distancia
• Soporte del mando a distancia
• Pila de litio (CR2025)
• Antena alámbrica de FM
• Cable de alimentación
• Tarjeta de garantía
• Manual de instrucciones (este manual)
Antes de emplear del mando a
distancia
El mando a distancia se suministrada
colocado en el soporte del mando a distancia.
Cuando reemplace la pila, emplee una pila de
litio CR2025 de venta en los establecimientos
del ramo.
1 Presione la pestaña de liberación a la
izquierda para abrir el portapilas.
2 Tire hacia afuera del portapilas.
3 Saque la pila del portapilas.
4 Coloque una nueva pila en el portapilas.
Asegúrese de que el lado de la pila queda
mirando hacia arriba cuando lo coloque en el
espacio previsto para ello.
English
Français Español
La pila que se suministra con esta unidad está
guardada en el portapilas.
• Saque la lámina de protección del
portapilas.
Cuando observe una disminución en la
distancia operativa, recambie la pila (véase
más abajo).
Precaución
Recuerde las siguientes recomendaciones
cuando utilice pilas de litio:
• Existe un peligro de explosión si se
reemplaza incorrectamente la pila. Recuerde
que sólo puede recambiar pilas por otras del
mismo tipo o equivalente, de acuerdo con las
recomendaciones del fabricante.
• Elimine las pilas usadas inmediatamente
después de haberlas recambiado.
Manténgalas alejadas de los niños.
• En caso de ingestión, póngase en contacto
con su médico inmediatamente.
• Las pilas de litio pueden representar un
peligro de incendio o de quemadura química
si se utilizan mal. No desmonte ni caliente
más allá de los 100 °C, ni incinere la pila.
5
Es
Page 54

Antes de comenzar01
30°
30°
7 m
• Quite la pila si la unidad no va a utilizarse
durante un mes o más.
• Asegúrese de satisfacer los requisitos de
los reglamentos gubernamentales y
normas de los organismos públicos de
medioambiente que correspondan a su
país o zona.
• ADVERTENCIA
No utilice o almacene las pilas bajo la luz
solar directa ni en otros lugares
excesivamente calientes, como el interior
de un coche o cerca de una estufa. Esto
puede ocasionar que las pilas goteen, se
sobrecalienten, exploten o se incendien.
También se puede reducir la vida o el
rendimiento de las mismas.
Uso del mando a distancia
El mando a distancia tiene un alcance de unos
7 metros en un ángulo de 30º desde el sensor
remoto.
Instalación de la unidad
• Cuando instale este equipo, asegúrese de
colocarlo sobre una superficie nivelada y
estable.
No lo coloque en los siguientes lugares:
– sobre un televisor en color (puede
distorsionar la pantalla)
– cerca de una pletina (o cerca de un
dispositivo que emita un campo magnético).
Podría interferir en el sonido.
– expuesto a la luz directa del sol
– en zonas húmedas
– en zonas extremadamente frías o calientes
– en lugares donde esté expuesto a vibraciones
u otros movimientos
– en lugares con mucho polvo
– en lugares que tengan humos calientes o
aceites (como una cocina)
Enchufado
Después de haber terminado todas las
conexiones, enchufe la unidad a una toma de
corriente de CA.
Cuando utilice el mando a distancia, tenga en
cuenta lo siguiente:
• Asegúrese de que no haya obstáculos entre
el mando a distancia y el sensor del equipo.
• El funcionamiento del mando a distancia
puede verse alterado si incide sobre el
sensor remoto del equipo la luz fuerte del
sol o de un fluorescente.
• Los mandos a distancia de diferentes
dispositivos pueden interferir entre ellos.
Evite utilizar mandos a distancia de otros
dispositivos cerca de este equipo.
• Cambie las pilas cuando observe que
disminuye el alcance de funcionamiento
del mando a distancia.
6
Es
AUDIO IN
AC IN
ANTENNA
FM UNBAL 75
1 Conecte el cable de alimentación
suministrado a la toma
AC IN
de la parte
posterior de la unidad.
2 Conecte el otro extremo a una toma de
corriente.
Importante
• Antes de hacer o cambiar cualquier
conexión, apague la unidad y desenchufe
el cable de alimentación de la toma de CA.
Page 55

Controles y pantallas 02
Nota
Capítulo 2:
Controles y pantallas
Mando a distancia
5
SLEEP
STANDBY/ON
1
SOUND
/
ON
SCAPE
OFF
PRESET
SLEEP
CLOCK
SELECT
WAKE
UP
SETUP
2
3
4
5
6
VOLUME
MIX BALANCE
PRESET
BASS
/
TREBLE
TUNER
PRESET
INPUT
ENTER
TUNE
TUNE
7
8
9
10
1 STANDBY/ON
Cambia la unidad entre modo de espera y
encendido.
2 Botones de la función Soundscape/
operación
Se emplean para activar/desactivar la función
Soundscape (sonido ambiental) y para
cambiar los ajustes (página 18).
3
PRESET +/–
, Botones de control de
reproducción
Se emplean para seleccionar emisoras de
radio presintonizadas (página 17).
Se emplean para operar un dispositivo de
tecnología inalámbrica iPod o Bluetooth con
este mando a distancia (página 11, 15).
4
BASS/TREBLE
Utilice los controles de graves y agudos para
ajustar el tono general.
Utilice este botón para poner el receptor en
el modo de desconexión automática y
seleccionar el tiempo que debe transcurrir
antes de que el receptor entre en este
modo (página 22).
WAKE UP
Se emplea para activar/desactivar la
función del temporizador de conexión
automática (página 22).
CLOCK
Se emplea para cambiar las funciones de
visualización del reloj (página 20).
6
SETUP
Pulse para efectuar diversos ajustes.
7
INPUT
Se emplea para seleccionar una fuente de
entrada. Púlselo repetidamente para cambiar
entre las fuentes de iPod, sintonizador,
ADAPTADOR Bluetooth
8
VOLUME +/–
Utilícelo para ajustar el volumen de escucha.
9
ENTER
10
TUNE +/–
Se emplea para encontrar frecuencias de
la radio (página 17).
TUNER PRESET
Se emplean para guardar en la memoria
las emisoras de radio presintonizadas y
para sintonizar las emisoras memorizadas
(página 17).
1
y entrada exterior.
English
Français Español
1 Si el ADAPTADOR Bluetooth no está enchufado en el ADAPTER PORT, no podrá seleccionarse aunque se pulse INPUT.
7
Es
Page 56

Controles y pantallas02
Nota
Panel frontal/superior
3 4 5 6
STANDBY/ON INPUT SELECTOR
1
7
2
8
9
10
VOLUME
1 Altavoces
2 Puerto del conector del iPod
3 STANDBY/ON
Cambia la unidad entre modo de espera y
encendido.
4 Indicador de la alimentación
5
INPUT SELECTOR
Se emplea para seleccionar una fuente de
entrada. Púlselo repetidamente para cambiar
entre las fuentes de iPod, sintonizador,
ADAPTADOR Bluetooth
6
VOLUME +/–
1
y entrada exterior.
Utilícelo para ajustar el volumen de escucha.
7 Indicador del temporizador
8 Sensor remoto
9 Pantalla de caracteres
10 Indicador del sintonizador
1Si el ADAPTADOR Bluetooth no está enchufado en el ADAPTER PORT, no podrá seleccionarse aunque se pulse INPUT.
8
Es
Page 57

Reproducción de iPod 03
Nota
iPod
Adaptador de la
base de control
Capítulo 3:
Reproducción de iPod
Conectando simplemente su iPod a este
sistema de altavoces, podrá escuchar el
sonido digital de alta calidad directamente de
su iPod. Estos altavoces también pueden
conectarse a un televisor para poder mirar las
imágenes de su iPod.
La reproducción y el ajuste del nivel del
volumen para la música y las imágenes del
iPod pueden efectuarse desde esta unidad o
en el mismo iPod.
Confirme que los modelos de
iPod sean compatibles
Este sistema es compatible con el audio y el
vídeo de iPod nano de tercera generación y
posteriores, de iPod classic y de iPod touch.
También es compartible con la reproducción
de audio del iPod nano de segunda
generación.
Emplee siempre la versión más reciente que
haya disponible del software del iPod. La
compatibilidad del funcionamiento puede
variar según la versión del software utilizado.
Podrá confirmar la versión de su software
operando su iPod de la forma siguiente:
1 Seleccione ‘Settings’ en el menú inicial.
2 Seleccione ‘About’.
Se visualizará la versión del software.
• Para ver si hay alguna versión de software
1
nueva y para leer las instrucciones para la
actualización de su versión, visite el sitio
Web de Apple.
Sugerencia
• Cuando emplee un iPod que no sea
compatible con esta unidad, utilice un
cable de venta en los establecimientos del
ramo para conectar el iPod al conector
AUDIO IN de esta unidad.
Conexión del iPod
Precaución
• Para evitar daños al conectar un iPod,
emplee siempre el adaptador de la base de
control suministrado con el iPod, o un
adaptador de base de control para su
modelo de iPod adquirido por separado en
el mercado.
English
Français Español
MENU
1 • Dependiendo del modelo o de la versión del software, es posible que algunas funciones estén restringidas.
• El iPod tiene licencia para reproducir material sin derechos de autor o materiales cuya reproducción está legalmente
permitida.
• Algunas funciones, como el ecualizador, no se pueden controlar con este sistema, por lo que le recomendamos
apagar el ecualizador antes de la conexión.
• Pioneer no acepta ninguna responsabilidad, bajo ninguna circunstancia, por las pérdidas directas o indirectas
debidas a inconveniencias o pérdidas de materiales grabados resultantes de fallos en el iPod.
• Cuando conecte un iPod, emplee el elemento ‘Backlight’ del menú ‘Speaker’ para ajustar la función de la luz de
fondo del iPod. Esto no se aplica para el iPod touch.
9
Es
Page 58

Reproducción de iPod03
Nota
Cable de vídeo
de componentes
(de venta en los
establecimientos
del ramo)
Televisor
Cable de vídeo
compuesto
(de venta en los
establecimiento
s del ramo)
1 Conecte el adaptador de la base de
control al puerto del conector del iPod que
hay en el panel superior de esta unidad.
• No se suministra ningún adaptador de
base de control con esta unidad.
Cuando conecte el adaptador de la base de
control, tenga cuidado y oriente correctamente
las direcciones frontal-trasera de la base de
control. Para conectarlo, primero ponga los
apéndices del lado frontal del adaptador en los
huecos del puerto del conector del iPod y
empújelo en esta posición. Cuando conecte el
adaptador deberá tener cuidado para no
golpear los conectores.
2 Conecte el iPod.
Conexión de un televisor
Para mirar las imágenes del iPod en un
televisor, lleve a cabo las conexiones
empleando un cable de vídeo compuesto o un
cable de vídeo de componentes.
• Cuando emplee un cable de vídeo de
componentes para las conexiones, será
necesario ajustar la salida de vídeo de la
unidad. Consulte Configuración de la salida
de vídeo abajo.
• Cuando se ha conectado un iPod a esta
unidad, el ajuste de salida de TV del iPod se
establece automáticamente en el estado
activado. Mientras el iPod esté conectado,
podrá utilizarlo para cambiar el ajuste de
salida de TV.
1
Precaución
• Antes de establecer o modificar las
conexiones, desconecte la alimentación y
desenchufe el cable de alimentación de la
toma de corriente. La conexión debe ser el
último paso.
MONITOR OUT VIDEO 1VIDEO 2
ADAPTER PORT
YPBP
COMPONENT VIDEO
AUDIO IN
R
Configuración de la salida de vídeo
Ajuste la salida de vídeo de esta unidad de
acuerdo con el método utilizado para conectar
el televisor.
2
• Ajuste predeterminado:
(Compuesto)
PRESET PRESET
WAKE
SLEEP
UP
CLOCK
SETUP
BASS
TREBLE
TUNER
PRESET
ENTER
TUNE
/
TUNE
1 • Esta función se limita a los modelos de iPod que ofrecen ajustes de salida de TV.
• Cuando el iPod se desconecta de esta unidad, el ajuste de salida de TV del iPod se repondrá a su estado original.
2
• Detenga la reproducción de vídeo en el iPod antes de realizar el ajuste de la salida de vídeo. Durante la reproducción y el
estado de pausa el modo de ajuste estará inhabilitado.
• Durante el proceso de ajuste de la salida de vídeo, si no se efectúa ninguna operación durante 3 minutos, se cancelará el
ajuste y la alimentación se restablecerá al modo de espera.
10
Es
1 Ponga la unidad en el estado de espera.
2Pulse
3Utilice
continuación, pulse
SETUP
.
/
para seleccionar ‘ ’ y, a
ENTER
.
Page 59

Reproducción de iPod 03
Nota
4Utilice
/
para seleccionar el ajuste de
salida de vídeo.
• – La salida de vídeo cambiará a la
salida de vídeo compuesto.
• – La salida de vídeo cambiará a la
salida de vídeo de componentes.
5Pulse
ENTER
.
Se completará el ajuste y la visualización del
nuevo valor ajustado parpadeará durante tres
segundos, después de lo cual la alimentación
se restablecerá al modo de espera.
Reproducción del iPod
Precaución
• Cuando tenga el iPod conectado a esta
unidad y desee operar el iPod
accionándolo directamente, asegúrese de
tener el iPod en una posición estable con la
otra mano para evitar mal funcionamiento
debido a contactos defectuosos.
Cuando se conecta un iPod a esta unidad,
parpadeará mientras la unidad confirma
la conexión del iPod y busca los datos del iPod.
Cuando se pulse INPUT para cambiar la
entrada al iPod, se completará la conexión y
quedará encendido.
La reproducción y el ajuste del nivel del
volumen para la música y las imágenes del
iPod pueden efectuarse desde esta unidad o
en el mismo iPod.
• Cuando emplee el iPod para ajustar el
volumen del sonido, el ajuste sólo se
aplicará al sonido producido por los
altavoces de esta unidad.
desconecta de esta unidad, el volumen del
sonido del iPod se repondrá a su ajuste
original.
1
2
Si el iPod se
Las operaciones siguientes pueden llevarse a
cabo para el iPod empleando el mando a
distancia.
Botón Función
/ Inicia la reproducción normal y activa
y desactiva la pausa de la
reproducción.
Púlselo para saltar al principio del
archivo actual, y después al principio
de los archivos anteriores. Púlselo y
reténgalo para iniciar la exploración
en retroceso rápido.
VOLUME
+/–
Púlselo para saltar al archivo siguiente.
Púlselo y reténgalo para iniciar la
exploración en avance rápido.
Utilícelo para ajustar el volumen de
audición.
Uso de los controles de tono
Ajusta el tono del sonido. El ajuste se lleva a
cabo desde la pantalla del iPod.
aquí realizados se verán reflejados en los
ajustes de BASS/TREBLE de esta unidad.
iPod nano o iPod classic:
1 Seleccione ‘Speaker’ en el menú inicial.
2 Seleccione ‘Tone control’.
3 Seleccione un ajuste.
iPod touch3:
1 Seleccione ‘Settings’ en el menú inicial.
2 Seleccione ‘Speaker’.
3 Seleccione ‘Tone control’.
4 Seleccione un ajuste.
2
Los ajustes
English
Français Español
1 Si se conecta un iPod cuando esta unidad está en el modo de espera, se conectará la alimentación y la entrada del iPod se
seleccionará automáticamente.
2 Estos ajustes se aplican a todas las entradas de la unidad.
3 Es posible que este ajuste no sea compatible, dependiendo de la versión del software del iPod touch.
11
Es
Page 60

Reproducción de iPod03
Seleccione uno de los siguientes:
• Flat – Hacer retornar el sonido a su estado
natural.
• Bass ON – Acentúa el sonido de los graves.
• Treble ON – Acentúa el sonido de los
agudos.
• Bass/Treble ON
–
Acentúa el sonido de los
graves y los agudos.
Importante
Si se enciende un mensaje de error en el panel
frontal, pruebe primero seguir los puntos
siguientes:
Mensaje
Significado
Hay un problema con la ruta de la
señal desde el iPod a la unidad. Vuelva
a conectar el iPod a la unidad. Si esto
no funciona, pruebe a reiniciar el iPod.
Se ha conectado un dispositivo
incompatible.
Verifique si el iPod es
compatible con esta unidad.
Se ha conectado un iPod que no es
compatible. Verifique si el iPod es
compatible con esta unidad
(página 9).
Cuando la versión del software del
iPod es demasiado antigua, actualice
el software del iPod a la versión más
reciente.
Cuando no haya respuesta del iPod,
actualice el software del iPod a la
versión más reciente. Si esto no
funciona, pruebe a reiniciar el iPod.
Si no puede operar el iPod, compruebe los
puntos siguientes:
• ¿Se ha conectado correctamente el iPod?
Vuelva a conectar el iPod a la unidad.
• ¿Se ha parado inesperadamente el iPod?
Efectúe la reposición del iPod y vuélvalo a
conectar a la unidad.
Sugerencia
• La recarga del iPod se lleva a cabo siempre
que se conecta el iPod a esta unidad. (Esta
función también está disponible en el
modo de espera.)
• Siempre que hay un iPod conectado a esta
unidad, al conectar la alimentación de la
unidad o al cambiar su entrada a la de iPod
causará el inicio automático de la
reproducción del iPod.
• Cuando se cambia la entrada desde la de
iPod a otra función, la reproducción del
iPod se detiene automáticamente.
• Si la unidad se ajusta al modo de espera
cuando hay un iPod conectado, la
alimentación del iPod se desconectará
automáticamente.
12
Es
Page 61

ADAPTADOR Bluetooth® para el disfrute inalámbrico de la música
Funcionamiento con mando a distancia
Esta unidad
ADAPTADOR
Bluetooth
®
Dispositivo no equipado con tecnología
Bluetooth inalámbrica:
Reproductor de música digital
+
Transmisor de audio Bluetooth (de
venta en los establecimientos del ramo)
Dispositivo habilitado de tecnología
Bluetooth
inalámbrica:
Reproductor de música digital
Dispositivo habilitado de
tecnología Bluetooth inalámbrica:
Teléfono móvil
Nota
04
Capítulo 4:
ADAPTADOR
Bluetooth
®
para el
disfrute inalámbrico de la
música
con la protección de contenidos SCMS-T, de
Reproducción inalámbrica de
música
Cuando el ADAPTADOR Bluetooth (Modelo de
Pioneer N.º AS-BT100) está conectado a esta
unidad, puede utilizarse un producto equipado
con tecnología inalámbrica Bluetooth (teléfono
móvil, reproductor de música digital portátil,
etc.) para escuchar música de forma
inalámbrica.
transmisor disponible en tiendas con
tecnología inalámbrica Bluetooth, puede
escuchar música en un dispositivo no
equipado con tecnología inalámbrica
Bluetooth. El modelo AS-BT100 es compatible
1
Además, utilizando un
modo que la música también puede
disfrutarse en dispositivos equipados con
tecnología inalámbrica Bluetooth SCMS-T.
Funcionamiento con mando a
distancia
El mando a distancia suministrado con esta
unidad le permite reproducir y detener medios
y realizar otras operaciones.
English
Français Español
2
1 • Es posible que sea necesario que el dispositivo con tecnología inalámbrica Bluetooth sea compatible con perfiles A2DP.
• Pioneer no garantiza la conexión y la operación correctas de esta unidad con todos los dispositivos con tecnología
inalámbrica Bluetooth.
2 • Es posible que sea necesario que el dispositivo con tecnología inalámbrica Bluetooth sea compatible con perfiles AVRCP.
• No pueden garantizarse las operaciones con mando a distancia para todos los dispositivos con tecnología inalámbrica
Bluetooth.
13
Es
Page 62

04
Nota
ADAPTADOR
Bluetooth
®
ADAPTADOR Bluetooth® para el disfrute inalámbrico de la música
Conexión del ADAPTADOR
Bluetooth
• Antes de hacer o cambiar las conexiones,
apague la unidad y desenchufe el cable de
alimentación de la toma de CA.
1 Ponga la unidad en el modo de espera y
conecte el ADAPTADOR
ADAPTER PORT
2Pulse
3Pulse
‘’.
Cuando no se ha efectuado el apareamiento,
se visualiza ‘ ’.
opcional
ADAPTER PORT
situado en el panel trasero.
STANDBY/ON
INPUT
1
para cambiar la unidad a
YPBP
COMPONENT VIDEO
Bluetooth
.
MONITOR OUT VIDEO 1VIDEO 2
R
Ajuste del código PIN
Ajuste el código PIN de esta unidad al mismo
ajuste que para el dispositivo de tecnología
Bluetooth inalámbrica utilizado. Los valores del
ajuste del código PIN compatibles incluyen los
0000, 1234 y 8888.
• Ajuste predeterminado: 0000
PRESET PRESET
WAKE
SLEEP
UP
BASS
TREBLE
ENTER
TUNE
/
al
1 Ponga la unidad en el estado de espera.
2 Mantenga pulsado
durante tres
segundos.
Se visualizará el nuevo código PIN indicando
que se ha cambiado el código PIN.
Repita el paso 2 hasta que el código PIN se
reponga al valor deseado.
Cómo emparejar el ADAPTADOR
Bluetooth
y el dispositivo de
tecnología inalámbrica
Bluetooth
“Debe emparejarlos” antes de que comience la
reproducción del contenido de la tecnología
inalámbrica Bluetooth utilizando el
ADAPTADOR Bluetooth. Asegúrese de realizar
el emparejamiento la primera vez que opere
con el sistema o cada vez que se eliminen los
datos de emparejamiento. “El
emparejamiento” es el paso necesario para
registrar el aparato con tecnología inalámbrica
Bluetooth para permitir las comunicaciones
mediante Bluetooth.
consulte las instrucciones de funcionamiento
de su dispositivo con tecnología inalámbrica
Bluetooth.
1 Cuando se encienda ‘ ’, pulse .
‘ ’ parpadeará y la unidad se establecerá
en el modo de espera de apareamiento.
2
Para más información,
PRESET PRESET
BASS
/
WAKE
SLEEP
TREBLE
UP
ENTER
TUNE
1Si el ADAPTADOR Bluetooth no está enchufado en el ADAPTER PORT, no podrá seleccionarse aunque se pulse INPUT.
2 • Se requiere el emparejamiento la primera vez que se utiliza el dispositivo de tecnología inalámbrica Bluetooth y el
ADAPTADOR Bluetooth.
• Para permitir la comunicación mediante Bluetooth, el emparejamiento debe realizarse tanto con su sistema como con el
dispositivo de tecnología inalámbrica Bluetooth.
14
Es
Page 63

ADAPTADOR Bluetooth® para el disfrute inalámbrico de la música
Nota
04
2 Encienda el dispositivo con tecnología
inalámbrica
colóquelo cerca del sistema y ajústelo al
modo de emparejamiento.
Comienza el apareamiento.
3 Compruebe que el ADAPTADOR
Bluetooth
dispositivo con tecnología inalámbrica
Bluetooth
dispositivo con tecnología inalámbrica
Bluetooth.
ningún dispositivo con tecnología inalámbrica
Bluetooth. En este caso, efectúe la operación
de conexión desde el lado del dispositivo con
tecnología inalámbrica Bluetooth.
Bluetooth
haya sido detectado por el
.
se enciende cuando hay conectado un
se enciende cuando no hay conectado
que quiera emparejar,
Botón Función
/ Inicia la reproducción normal y activa
VOLUME
+/–
Audición de contenidos
musicales de un dispositivo con
tecnología inalámbrica
Bluetooth
1Pulse
‘’
2 Conecte el dispositivo de tecnología
inalámbrica
Bluetooth
3 Comience la reproducción de contenidos
musicales almacenados en el dispositivo con
tecnología inalámbrica
Las operaciones siguientes pueden entonces
llevarse a cabo para los dispositivos con
tecnología inalámbrica Bluetooth empleando
el mando a distancia.
con su sistema
INPUT
para cambiar la unidad a
Bluetooth
.
al ADAPTADOR
Bluetooth
1
.
y desactiva la pausa de la
reproducción.
Púlselo para saltar al principio del
archivo actual, y después al principio
de los archivos anteriores. Púlselo y
reténgalo para iniciar la exploración
en retroceso rápido.
Púlselo para saltar al archivo
siguiente. Púlselo y reténgalo para
iniciar la exploración en avance
rápido.
Utilícelo para ajustar el volumen de
audición.
English
Français Español
1 • El dispositivo con tecnología inalámbrica Bluetooth deberá ser compatible con el perfil AVRCP.
• Según el dispositivo con tecnología Bluetooth que utilice, el funcionamiento puede diferir del mostrado en esta tabla.
15
Es
Page 64

Otras conexiones05
Reproductor de
audio digital, etc.
Capítulo 5:
Otras conexiones
• Antes de hacer o cambiar las conexiones,
apague la unidad y desenchufe el cable de
alimentación de la toma de CA.
Conexión de componentes
auxiliares
Conecte la toma de miniclavija AUDIO IN del
panel posterior al componente auxiliar de
reproducción.
• Este método puede utilizarse para
reproducir música de iPods que no están
preparados para emplear una base de
control de iPod.
YPB PR
•Pulse
‘’
16
Es
COMPONENT VIDEO
INPUT
MONITOR OUT VIDEO 1VIDEO 2
para cambiar la unidad a
AUDIO IN
AC IN
Page 65

Uso del sintonizador 06
Nota
Antena
alámbrica de FM
Capítulo 6:
Uso del sintonizador
Sintonización automática – Para buscar
Conecte la antena de FM
Conecte la clavija de la antena de FM en el
contacto central
AC IN
de la toma de antena de FM.
ANTENNA
FM UNBAL 75
Audición de la radio de FM
El sintonizador recibe señales de FM y le
permite memorizar sus emisoras favoritas de
forma que no tenga que sintonizarlas
manualmente cada vez.
STANDBY/ON
PRESET PRESET
WAKE
SLEEP
UP
CLOCK
SETUP
BASS
TREBLE
TUNER
PRESET
INPUT
ENTER
TUNE
/
TUNE
1
emisoras, pulse y mantenga pulsado
TUNE +/– durante un segundo
aproximadamente. El receptor comenzará
a buscar la siguiente emisora disponible y
se detendrá cuando localice una. Repita la
operación para buscar otras emisoras.
Sintonización manual – Para cambiar la
frecuencia un intervalo cada vez, pulse
TUNE +/–.
Sintonización rápida – Pulse y mantenga
pulsado TUNE +/– para que la operación
de sintonización se realice a alta velocidad.
Suelte el botón en la frecuencia que desea
sintonizar.
Memorización de emisoras
Puede guardar hasta un máximo de 10
presintonías a fin de acceder siempre de forma
fácil a sus emisoras favoritas sin tener que
sintonizarlas manualmente cada vez.
1Pulse
2 Sintonice una emisora de la banda de FM.
3Pulse
4 Utilice
presintonía que dese (por ejemplo, ‘ ’)
y pulse entonces
INPUT
para cambiar al sintonizador.
TUNER PRESET
TUNE +/–
.
para seleccionar la
ENTER
.
English
Français Español
2
1Pulse
INPUT
para cambiar al sintonizador.
Se encenderá el indicador del sintonizador y se
visualizará la frecuencia sintonizada.
2 Sintonice una emisora.
Hay tres formas de hacerlo:
1 Para asegurar una óptima recepción, cerciórese de que la antena de FM esté completamente extendida y no enrollada ni
colgada en la parte posterior de la unidad.
2 Cuando se guarda una nueva frecuencia de difusión en una emisora que ya contiene una frecuencia previamente guardada,
la frecuencia anterior quedará sobrescrita por la nueva.
Audición de presintonías
1Pulse
2 Utilice
estación presintonizada.
INPUT
para cambiar al sintonizador.
PRESET +/–
para seleccionar una
17
Es
Page 66

Ajustes del sonido07
Nota
Capítulo 7:
Ajustes del sonido
Seleccione el tipo de sonido
Uso de Soundscape
La función Soundscape le permitirá añadir una
amplia variedad de sonidos ambientales a la
música que reproduzca.
SOUND
SCAPE
•Pulse
SOUNDSCAPE ON/OFF
La función Soundscape se activa y se añaden
los sonidos ambientales a su reproducción
musical. La visualización ‘ ’ indica el
tipo de sonido ambiental seleccionado.
• La función del Soundscape se activa/
desactiva cada vez que se pulsa el botón
SOUNDSCAPE ON/OFF
Ajusta el volumen de Soundscape
• Ajuste predeterminado: 05
• Emplee
balance entre la música y los efectos de
Soundscape.
El ajuste puede realizarse entre los valores 00 y
10
. Pulse “+” para subir el volumen de los
sonidos ambientales de Soundscape y pulse “
para bajar el volumen de los sonidos
ambientales de Soundscape y subir el volumen
de la música.
MIX BALANCE +/–
1
VOLUME
/
ON
OFF
SELECT MIX BALANCE
.
.
para ajustar el
ambiental
• Con la función Soundscape activada,
pulse
SELECT /
sonido ambiental deseado.
Seleccione uno de los 6 tipos siguientes:
• – El sonido de las olas de
Copacabana en Río de Janeiro. Disfrute del
sonido de la tabla hawaiana sobre altas
olas.
El sonido de la tabla hawaiana sobre altas
olas con voces de fondo de la playa.
• – Sonidos de la calle de Europa.
Disfrute de los sonidos de la terraza de una
cafetería de alguna calle de Europa.
Los vehículos pasan por la calle enlosada
mezclado con los sonidos de los
transeúntes.
• – Arrecifes de coral en un mar
tropical. Disfrute del sonido de las suaves
olas.
Mar azul de una isla japonesa de Okinawa.
Las olas transparentes llegan a la blanca
arena de un arrecife abierto de coral.
• – Un pequeño arroyo del bosque
y pequeños pajaritos. Disfrute del sonido
–
”
del amanecer en la orilla de un arroyo que
fluye por el bosque, junto con el canto de
pequeños pajaritos silvestres.
• – Pasee por un prado de la
montaña en otoño. Disfrute con el sonido
de pequeños pajaritos y de los pasos sobre
las hojas caídas de los árboles.
Un prado otoñal en Nagano, Japón.
para seleccionar el
1 Si lo desea, podrá optar por escuchar sólo sonidos ambientales de Soundscape, sin mezclarlos con la música.
18
Es
Page 67

Ajustes del sonido 07
• – Sonidos de discos de vinilo.
Disfrute del sonido de las rayadas y los
siseos de los discos de vinilo mezclados
con la música del iPod, del sintonizador de
radio, o de otra fuente de entrada externa.
(Conseguirá efectos todavía mayores
cuando lo combine con el modo de sonido
Baja fidelidad.)
Cuando se mezcla con la música, hasta las
nuevas canciones producen una
sensación retro como la que producen las
fotografías en color sepia.
Empleo de los efectos de sonido
Podrá añadir efectos emocionantes a las
fuentes de audio.
• Ajuste predeterminado: (OFF)
PRESET PRESET
WAKE
SLEEP
UP
CLOCK
SETUP
1Pulse
2Utilice
continuación, pulse
3Pulse
SETUP
.
/
para seleccionar ‘ ’ y, a
ENTER
/
para cambiar los modos del
sonido, y luego pulse
• (Control automático del nivel) – Esta
unidad efectúa la ecualización de los
niveles del sonido de reproducción.
• (Baja fidelidad) – Produce una
sensación retro en la reproducción
musical.
• (Vívido) – Produce un efecto agudo
similar al que se siente en un concierto en
directo.
• (OFF) –
estado natural.
Hacer retornar el sonido a su
BASS
/
TREBLE
TUNER
PRESET
.
ENTER
ENTER
TUNE
TUNE
.
Ajuste de los graves y agudos
Utilice los controles de graves y agudos para
ajustar el tono general.
1Pulse
2 Utilice
BASS/TREBLE
/
para seleccionar ‘ ’
.
(graves) o ‘ ’ (agudos) y, a
continuación, pulse
3 Utilice
/
los agudos y, a continuación, pulse
ENTER
.
para seleccionar los graves o
ENTER
.
Podrá ajustar los sonidos graves y los agudos
en una escala de –6 a +6.
Uso del Sound Retriever
Cuando se han extraído datos de audio
durante el proceso de compresión WMA/MP3/
MPEG-4 AAC, la calidad del sonido resulta
frecuentemente en una imagen del sonido con
falta de uniformidad. La función Sound
Retriever emplea nueva tecnología DSP que
ayuda a recuperar la calidad del sonido de CD
para el audio comprimido restaurando la
presión sonora y uniformando el nivel de las
aberraciones rasgadas que quedan después
de la compresión.
• Ajuste predeterminado: (ON)
1 Ponga la unidad en el estado de espera.
2Pulse
3 Utilice
continuación, pulse
4 Emplee
extractor de sonido.
5Pulse
Cuando se haya completado el ajuste, el nuevo
valor ajustado parpadeará durante 3
segundos, y luego la alimentación se repondrá
al modo de espera.
SETUP
.
/
para seleccionar ‘ ’ y, a
ENTER
.
/
para activar o desactivar el
ENTER
.
English
Français Español
19
Es
Page 68

Uso del temporizador08
Nota
Capítulo 8:
Uso del temporizador
1 Con el interruptor de la alimentación
Ajuste de la hora
Para utilizar el temporizador, es necesario
ajustar el reloj.
1 Ponga la unidad en el estado de espera.
2Pulse
3Utilice
continuación, pulse
Se visualizará la hora actual.
4Utilice
continuación, pulse
5Utilice
continuación, pulse
Cuando se haya completado el ajuste, el nuevo
valor ajustado parpadeará durante 3
segundos, y luego la alimentación se repondrá
al modo de espera.
1
PRESET PRESET
WAKE
SLEEP
UP
CLOCK
SETUP
SETUP
.
/
para seleccionar ‘ ’ y, a
ENTER
/
para ajustar la hora, y, a
ENTER
/
para ajustar los minutos, y, a
ENTER
BASS
TREBLE
TUNER
PRESET
ENTER
TUNE
/
TUNE
.
.
.
conectado, pulse
2Utilice
continuación, pulse
Se visualizará la hora actual.
3Utilice
visualización y presione luego
• – La visualización se apaga excepto
cuando se introducen comandos.
• – La visualización del reloj aparece
excepto cuando se introducen comandos.
• – Visualiza constantemente los valores
excepto cuando se introducen comandos.
Cuando la alimentación está en el modo de
espera, visualiza el reloj.
Cambio del modo de visualización de
la hora
Podrá seleccionar para que la hora se muestre
en el modo de 12 o en el modo de 24 horas.
• Ajuste predeterminado: (Modo de 24
horas)
1 Ponga la unidad en el estado de espera.
2Pulse
SETUP
/
para seleccionar ‘ ’ y, a
/
para seleccionar el ajuste de
SETUP
.
.
ENTER
.
2
ENTER
.
2
/
para seleccionar ‘ ’ y, a
ENTER
.
/
para seleccionar ‘ ’ o ‘ ’
ENTER
Ajuste del modo de visualización
Se emplea para cambiar el modo de
visualización (visualización del reloj, etc.).
3Utilice
continuación, pulse
4Utilice
y, a continuación, pulse
Cuando se haya completado el ajuste, el nuevo
valor ajustado parpadeará durante 3
segundos, y luego la alimentación se repondrá
al modo de espera.
1 Será necesario volver a ajustar la hora después de haber desenchufado el cable de la unidad (o en caso de un apagón).
2 Cuando la alimentación está conectada en el modo de espera, puede comprobarse la hora actual pulsando el botón CLOCK.
20
Es
.
Page 69

Uso del temporizador 08
Uso del temporizador de
conexión automática
Emplee el temporizador de conexión
automática para ajustar la unidad para que se
encienda a la hora deseada y reproduzca la
fuente que usted prefiera.
Si se selecciona el iPod como sonido de
temporizador, cuando opere el temporizador
de conexión automática, se conectará
automáticamente la alimentación del iPod y
comenzará la reproducción.
1 Con la entrada ajustada a la de iPod o
sintonizador, pulse
2Utilice
continuación, pulse
Se visualiza la hora del ajuste del
temporizador.
3 Ajuste la hora deseada para el
temporizador.
Utilice / para ajustar la hora, y, a
continuación, pulse ENTER. Ajuste los
minutos de la misma manera y pulse ENTER
cuando haya terminado.
4 Emplee
entrada que desee utilizar como sonido del
temporizador y luego pulse
Mientras selecciona la fuente de entrada,
podrá oír el sonido de esta fuente (excepto
cuando se haya seleccionado el pitido).
Emplee los botones
el volumen del sonido.
• Si selecciona , sonará un tono
/
/
electrónico.
SETUP
.
para seleccionar ‘ ’ y, a
ENTER
.
para seleccionar la fuente de
ENTER
.
VOLUME +/– para ajustar
5 Utilice
desactivar) la función de sueño ligero como
desee y, a continuación, pulse
La hora del temporizador, el ajuste de la
entrada, el ajuste para sueño ligero y el
volumen se visualizarán en orden,
completándose así el ajuste del temporizador
de conexión automática.
• Se enciende el indicador del temporizador.
/
para ON/OFF (activar/
ENTER
.
Cuando suena el temporizador de
conexión automática
Si la función de sueño ligero está desactivada:
Pulse el botón STANDBY/ON de la unidad
principal para detener la reproducción del
temporizador y desconectar la alimentación.
Alternativamente, podrá esperar una hora
(cuando haya seleccionado el pitido, deberá
esperar un minuto) y la reproducción se
detendrá automáticamente y se desconectará
la alimentación.
Si se pulsa cualquier otro botón, se detendrá la
reproducción con temporizador y se iniciará la
reproducción normal de la fuente de entrada
actualmente seleccionada.
• Cuando haya terminado de utilizar el
temporizador, desactive la función del
temporizador (véase más abajo).
Si la función de sueño ligero está activada:
Pulse el botón STANDBY/ON de la unidad
principal para detener la reproducción del
temporizador y desconectar la alimentación.
Si se pulsa cualquier otro botón o si continúa
la reproducción durante un minuto, el sonido
del temporizador se detendrá, pero la función
de sueño ligero funcionará y cinco minutos
después se reproducirá de nuevo el sonido del
temporizador.
English
Français Español
21
Es
Page 70

Uso del temporizador08
Nota
• Mientras está operando la función de
sueño ligero, no puede utilizarse ningún
botón que no sea
STANDBY/ON de la unidad principal.
(Para desactivar la función del
temporizador, pulse dos veces el botón
WAKE UP.)
• La función de sueño ligero se repetirá
hasta cinco veces. Después de este
proceso, la alimentación de la unidad se
desconectará automáticamente.
• Cuando haya terminado de utilizar el
temporizador, desactive la función del
temporizador (véase más abajo).
Encendido y apagado del
temporizador de conexión automática
•Pulse
Cada vez que presione el botón, se activará y
desactivará alternativamente la función del
temporizador.
WAKE UP
• El indicador del temporizador se enciende
cuando el temporizador está activado.
WAKE UP y
.
Cómo utilizar el temporizador
de desconexión automática
El temporizador de desconexión automática
apaga la unidad después de un tiempo
especificado para poder irse a dormir sin tener
que preocuparse del mismo.
• Pulse repetidamente
seleccionar un tiempo hasta la desconexión.
Seleccione uno de los ajustes de 5 min, 15 min,
30 min, 60 min, 90 min o desactivación.
• El tiempo que queda se visualiza mientras
opera el temporizador de desconexión
automática.
1 El temporizador de desconexión automática puede reponerse a cero presionando el botón SLEEP mientras opera el
temporizador de desconexión automática.
1
22
Es
SLEEP
para
Page 71

Información adicional 09
Capítulo 9:
Información adicional
Resolución de problemas
Las operaciones incorrectas se malinterpretan a menudo como problemas y errores de
funcionamiento. Si cree que este componente presenta algún defecto, compruebe los puntos
siguientes. En ocasiones, el problema puede estar en otro componente. Investigue los demás
componentes y electrodomésticos que estén utilizándose. Si no puede rectificarse el problema
incluso después de haber efectuado las comprobaciones enumeradas abajo, solicite al centro de
servicio Pioneer más cercano o a su establecimiento que lleven a cabo tareas de reparación.
• Si la unidad no funciona con normalidad debido a efectos externos como la electricidad
estática, desconecte el enchufe de la toma de corriente e introdúzcalo de nuevo para volver a
las condiciones de funcionamiento normales.
Problema Solución
La unidad no se enciente. • Desconecte el enchufe de la toma de corriente e introdúzcalo de
nuevo.
• Si la unidad se apaga automáticamente, llévela al centro de
servicio Pioneer más cercano o a su establecimiento que realicen un
servicio.
La alimentación cambia
automáticamente al modo de
espera sin que el usuario
tenga que tocar nada.
No se emite ningún sonido
cuando se selecciona una
función.
El mando a distancia no
funciona.
Hay demasiado ruido en las
emisiones radiofónicas.
La sintonización automática
no capta algunas emisoras.
• Cuando se ajusta la entrada en iPod, si no se conecta ningún iPod
durante una hora o más, la alimentación de la unidad se
desconectará automáticamente.
• Asegúrese de que el componente está conectado correctamente
(consulte Conexión de componentes auxiliares en la página 16).
• Cambie las pilas (consulte página 5).
• Utilícelo en un rango de 7 m, 30° del sensor remoto del panel
delantero (consulte página 6).
• Retire el obstáculo o utilícelo desde otra posición.
• Evite exponer el sensor remoto del panel delantero a la luz directa.
• Extienda al máximo la antena de cable FM, oriéntela correctamente
y fíjela a una pared. También puede conectar una antena FM externa.
• Apague los otros aparatos que podrían estar causando el ruido o
aléjelos de la unidad.
• La señal de radio es débil. La sintonización automática sólo detecta
emisoras con una buena señal. Para una sintonización más sensible,
conecte una antena exterior.
English
Français Español
23
Es
Page 72

Información adicional09
Problema Solución
El dispositivo de tecnología
inalámbrica Bluetooth no
puede conectarse ni
manejarse. El dispositivo de
tecnología inalámbrica
Bluetooth no emite sonido o el
sonido se interrumpe.
• Compruebe que no haya ningún objeto que emita ondas
electromagnéticas en la banda de 2,4 GHz (horno microondas,
dispositivo inalámbrico LAN o un aparato de tecnología inalámbrica
Bluetooth) cerca de la unidad. Si dicho objeto está cerca de la
unidad, configure la unidad lejos de él. O deje de utilizar el objeto que
emite ondas electromagnéticas.
• Compruebe que el dispositivo de tecnología inalámbrica Bluetooth
no está demasiado lejos de la unidad y que no hay obstáculos entre
el dispositivo de tecnología inalámbrica Bluetooth y la unidad. Ajuste
el dispositivo de tecnología inalámbrica Bluetooth y la unidad, de
modo que la distancia entre ambos sea inferior a 10 m y no exista
ningún obstáculo entre ellos.
• Compruebe que el ADAPTADOR Bluetooth y el ADAPTER PORT de
la unidad estén correctamente conectados.
• Puede que el dispositivo de tecnología inalámbrica Bluetooth no
esté ajustado en el modo de comunicación compatible con la
tecnología inalámbrica Bluetooth. Compruebe la configuración del
dispositivo de tecnología inalámbrica Bluetooth.
• Compruebe que el emparejamiento se haya realizado
correctamente. La configuración del emparejamiento se ha borrado
de esta unidad o del dispositivo de tecnología inalámbrica Bluetooth.
Reinicie el emparejamiento.
• Compruebe que el perfil sea correcto. Utilice un dispositivo de
tecnología inalámbrica Bluetooth que sea compatible con los perfiles
A2DP y AVRCP.
Restablecimiento del sistema
Use este procedimiento para restablecer todos
los valores del sistema a los predeterminados
de fábrica.
• Cuando desee llevar a cabo la reposición,
primero desconecte todos los
componentes que estén conectados a esta
unidad.
1 Encienda la unidad.
2 Pulse y mantenga pulsado VOLUME – en el
panel superior, y
pulsado
Establece la alimentación en el modo de espera.
La próxima vez que encienda la unidad, todos
los valores
24
Es
luego pulse y mantenga
STANDBY/ON
estarán restablecidos.
durante tres segundos.
Acerca del iPod
“Made for iPod” significa que un accesorio
electrónico ha sido diseñado para ser
conectado específicamente a un iPod y ha sido
homologado por el fabricante para cumplir con
las normas de funcionamiento de Apple.
Apple no es responsable del funcionamiento
de este aparato ni de que cumpla con las
normas de seguridad y reguladoras.
iPod es una marca comercial de Apple Inc.,
registrada en los EE.UU. y en otros países.
Page 73

Información adicional 09
Especificaciones
• Sección del amplificador
Potencia de salida RMS:
Delantero izquierdo/derecho . . . 15 W + 15 W
(1 kHz, 10 %, T.H.D., 8 Ω)
Altavoz de subgraves. . . . . . . . . . . . . . . . . 30 W
(100 Hz, 10 %, T.H.D., 4 Ω)
• Sección de altavoces
Caja acústica de . . . . . . . . . . . . .reflejo de graves
(magnéticamente protegida)
Sistema. . . . . . . . . . . . . . . . . . . . Sistema de 3 vías
Altavoces:
Altavoz de subgraves. . . . . . . . . Cono de 10 cm
Altavoz de medios/agudos . . . Cono de 5,2 cm/
Semidomo de 2,6 cm
Gama de frecuencias . . . . . . . . . . 50 Hz a 30 kHz
• Misceláneo
Alimentación
. . . . . . . . . . . . . . . . CA 220 V a 240 V, 50 Hz/60 Hz
Consumo energético. . . . . . . . . . . . . . . . . . . 30 W
En espera. . . . . . . 1,0 W (Reloj/Temporizador de
conexión automática activado)
0,5 W (Reloj/Temporizador de
conexión automática desactivado)
Dimensiones
. . . . . . 420 mm (An) x 148 mm (Al) x 210 mm (Pr)
Peso (sin paquete). . . . . . . . . . . . . . . . . . . . .5,0 kg
•Accesorios
Mando a distancia . . . . . . . . . . . . . . . . . . . . . . . .1
Soporte del mando a distancia . . . . . . . . . . . . . .1
Pila de litio (CR2025) . . . . . . . . . . . . . . . . . . . . . . . 1
Antena alámbrica de FM . . . . . . . . . . . . . . . . . . .1
Cable de alimentación . . . . . . . . . . . . . . . . . . . . .1
Tarjeta de garantía . . . . . . . . . . . . . . . . . . . . . . . .1
Manual de instrucciones (este manual)
Limpieza de la unidad
• Utilice un paño de pulir o uno seco para
limpiar el polvo y la suciedad.
• Cuando la superficie esté sucia, límpiela
con un paño suave mojado con un
limpiador neutro, diluido con cinco o seis
partes de agua, y bien escurrido, y limpie
después con un paño seco. No utilice cera
para muebles ni detergentes.
• No utilice nunca disolventes, benceno,
pulverizadores insecticidas ni otros
productos químicos en esta unidad o
cerca de ella, puesto que corroen la
superficie.
Publicado por Pioneer Corporation.
Copyright © 2009 Pioneer Corporation.
Todos los derechos reservados.
English
Français Español
Nota
• Las características técnicas y el diseño
están sujetos a modificaciones sin previo
aviso, debido a mejoras.
25
Es
Page 74

Printed in / Imprimé au
http://www.pioneer.co.uk
http://www.pioneer.fr
http://www.pioneer.es
http://www.pioneer.eu
Published by Pioneer Corporation.
Copyright © 2009 Pioneer Corporation.
All rights reserved.
Publication de Pioneer Corporation.
© 2009 Pioneer Corporation.
Tous droits de reproduction et de traduction réservés.
<XRE3258-B>
PIONEER CORPORATION
4-1, Meguro 1-Chome, Meguro-ku, Tokyo 153-8654, Japan
PIONEER ELECTRONICS (USA) INC.
P.O. BOX 1540, Long Beach, California 90801-1540, U.S.A. TEL: (800) 421-1404
PIONEER ELECTRONICS OF CANADA, INC.
300 Allstate Parkway, Markham, Ontario L3R 0P2, Canada TEL: 1-877-283-5901, 905-479-4411
PIONEER EUROPE NV
Haven 1087, Keetberglaan 1, B-9120 Melsele, Belgium TEL: 03/570.05.11
PIONEER ELECTRONICS ASIACENTRE PTE. LTD.
253 Alexandra Road, #04-01, Singapore 159936 TEL: 65-6472-7555
PIONEER ELECTRONICS AUSTRALIA PTY. LTD.
178-184 Boundary Road, Braeside, Victoria 3195, Australia, TEL: (03) 9586-6300
PIONEER ELECTRONICS DE MEXICO S.A. DE C.V.
Blvd.Manuel Avila Camacho 138 10 piso Col.Lomas de Chapultepec, Mexico,D.F. 11000 TEL: 55-9178-4270
K002_B_En
 Loading...