

Pioneer K093 User Manual

AVH-4850BT
DVD AV RECEIVER
English
Owner's Manual

Contents
■ Precaution ........................................ 4
• IMPORTANT SAFEGUARDS ...................................4
• To ensure safe driving ............................................4
• About this unit .........................................................4
• Information to User..................................................5
• DVD video disc region numbers ............................5
■ Basic operation ................................ 6
• Head Unit ..................................................................6
• Remote control ........................................................6
• Use and care of the remote control .......................7
Using the remote control............................................7
Replacing the battery .................................................7
• Adjusting the LCD panel angle...............................7
• Inserting/ejecting/connecting media .....................7
Insert a disc ...............................................................7
Ejecting a disc............................................................7
Plugging and unplugging a USB storage device .......7
• How to Use the screens ..........................................8
■ Radio ................................................. 9
• Select radio as playing source ...............................9
• Select one radio band .............................................9
• Tune ..........................................................................9
Auto tuning.................................................................9
Manual tuning ............................................................9
Preset station .............................................................9
Storing the strongest stations ....................................9
Manual store ..............................................................9
Search Stations Automatically ...................................9
Recalling a station .....................................................9
Displays the preset channel list .................................9
2
Local/Distance ...........................................................9
Setting the FM tuning step .........................................9
Setting the AM tuning step.........................................9
■ Disc ................................................. 10
DVD title/chapter select ...........................................10
VCD track select ......................................................10
CD track select ........................................................10
■ Registration and connection of
Bluetooth device ............................ 12
Pairing......................................................................12
Displaying the “Bluetooth” screen ............................12
Registering your Bluetooth devices .........................12
Connecting to a Bluetooth device automatically ......12
Deleting a registered device ....................................12
Connecting a registered Bluetooth device manually 12
Switching visibility ....................................................12
Entering the PIN code for Bluetooth wireless
connection ...............................................................12
Displaying the device information ............................12
Clearing the Bluetooth memory ...............................12
■ Hands-free phoning ....................... 13
Displaying the Phone menu screen .........................13
Making a phone call .................................................13
Direct dialing ............................................................13
Calling a number in the phone book ........................13
Dialing from the history ............................................13
Using the preset dial lists .........................................13
Receiving a phone call.............................................13
Changing the phone settings ...................................13
Answering a call automatically.................................13
Switching the ring tone ............................................13
Setting the private mode ..........................................13

Contents
Notes for hands-free phoning ..................................14
■ Bluetooth audio player .................. 15
• Selectinglesfromthelenamelist ..................15
■ Compressedles ........................... 16
Selecting le category..............................................16
Selecting a folder .....................................................16
Selecting le ............................................................16
Selecting a le of other folder ..................................16
• Playingaudioles .................................................16
• Playingvideoles .................................................17
• Playingphotoles .................................................17
■ Other source .................................. 18
• AUX source ............................................................18
• AV source ...............................................................18
• Camera View ..........................................................18
Rear view camera ....................................................18
Camera for Camera View mode ..............................18
■ Settings ........................................... 19
• Setting menu ..........................................................19
• Favorites settings ..................................................19
• System settings .....................................................19
Touch Panel Calibration ..........................................19
Dimmer Duration......................................................19
Steering Wheel Control............................................20
• Adjust Audio settings............................................20
Graphic EQ ..............................................................20
Source Level Adjuster..............................................20
• Adjust Video Settings............................................20
Setting parental lock ...............................................21
Displaying the DivX
®
VOD registration code ............21
Displaying the deregistration code ..........................21
• Adjust Bluetooth Settings.....................................21
■ Connection/Installation ................. 22
• Connecting the unit ...............................................22
Notes of connection .................................................22
Wiring diagram.........................................................23
Control Cables .........................................................24
Parking Brake Cable Connections ...........................24
Reverse Driving Cable Connections ........................24
• Installation ..............................................................25
Notes of installation .................................................25
Unit Installation ........................................................25
Trim Ring installation ...............................................25
Uninstall ..................................................................25
Disassemble the unit ...............................................25
■ Appendix ........................................ 26
• Troubleshooting ...................................................26
Common ..................................................................26
Error messages .......................................................26
• Handling guidelines...............................................27
• Specications ........................................................31
3
Precaution
Thank you for purchasing this PIONEER product.
To ensure proper use, please read through this manual before
using this product. It is especially important that you read and
observe WARNINGs and CAUTIONs in this manual. Please
keep the manual in a safe and accessible place for future
reference.
IMPORTANT SAFEGUARDS
Please read all of these instructions regarding your display and
retain them for future reference.
1. Do not install the display where it may (i) obstruct the driver's
vision, (ii) impair the performance of any of the vehicle's
operating systems or safety features or (iii) impair the driver's
ability to safety operate the vehicle.
2. Do not operate this display if doing so in any way will divert
your attention from the safe operation of your vehicle.
Always observe safe driving rules and follow all existing
traffic regulations. If you experience difficulty in operating
the system or reading the display, park your vehicle in a safe
location and make necessary adjustments.
3. Please remember to wear your seat belt at all times while
operating your vehicle. If you are ever in an accident, your
injuries can be considerably more severe if your seat belt is
not properly buckled.
4. Never use headphones while driving.
5. To promote safety, certain functions are disabled unless the
parking brake is on, and the vehicle is not in motion.
6. Never set the volume of your display so high that you cannot
hear outside trafc and emergency vehicles.
WARNING
Do not attempt to install or service your display by yourself.
Installation or servicing of the display by persons without
training and experience in electronic equipment and automotive
accessories may be dangerous and could expose you to the
risk of electric shock or other hazards.
To ensure safe driving
WARNING
• LIGHT GREEN LEAD AT POWER CONNECTOR IS DESIGNED
TO DETECT PARKED STATUS AND MUST BE CONNECTED
TO THE POWER SUPPLY SIDE OF THE PARKING BRAKE
SWITCH. IMPROPER CONNECTION OR USE OF THIS LEAD
MAY VIOLATE APPLICABLE LAW AND MAY RESULT IN
4
SERIOUS INJURY OR DAMAGE.
• To avoid the risk of damage and injury and the potential
violation of applicable laws, this unit is not for use with video
that is visible to the driver.
• To avoid the risk of accident and the potential violation of
applicable laws, no viewing of front seat video should ever
occur while the vehicle is being driven.
• In some countries or states the viewing of images on a
display inside a vehicle even by persons other than the driver
may be illegal. Where such regulations apply, they must be
obeyed and this unit's video features should not be used.
When you attempt to watch a video image while driving, the
warning “Viewing of front seat video source while driving is
strictly prohibited.” will appear on the front display. To watch
a video image on the front display, park your vehicle in a safe
place and apply the parking brake.
When using a displayconnected to rear monitor output
The rear monitor output on this unit (REAR MONITOR
OUTPUT) is used to connect a rear display that allows
passengers in the rear seats to watch videos.
WARNING
Never install the rear display in a location where the driver can watch
videos while driving.
When using the rear view camera
With an optional rear view camera, this unit can be used as
an aid to keep an eye on trailers, or when backing into a tight
parking spot.
WARNING
• SCREENIMAGEMAYAPPEARREVERSED.
• USEINPUTONLYFORREVERSEORMIRRORIMAGEREAR
VIEWCAMERA.OTHERUSEMAYRESULTININJURYOR
DAMAGE.
CAUTION
• The rear view camera function is to be used as an aid to keep an
eye on trailers, or while backing up. Do not use for entertainment
purposes.
• Please note that the edges of the rear view camera images
may differ slightly according to whether full screen images are
displayed when backing up, and whether the images are used for
checking the rear when the vehicle is moving forward.
To avoid battery exhaustion
Keep the vehicle engine running when using this unit to avoid
draining the battery power.
• When no power is supplied to this unit, such as when the
vehicle battery is being replaced, the microcomputer of this
unit returns to its initial condition. We recommend that you
transcribe the audio adjustment data.
WARNING
Do not use with vehicles that do not feature an ACC position.
About this unit
CAUTION: USE OF CONTROLS OR
ADJUSTMENTS OR PERFORMANCE OF
PROCEDURES OTHER THAN THOSE SPECIFIED
HEREIN MAY RESULT IN HAZARDOUS
RADIATION EXPOSURE.
CAUTION: THE USE OF OPTICAL INSTRUMENTS
WITH THIS PRODUCT WILL INCREASE EYE
HAZARD.
CAUTION
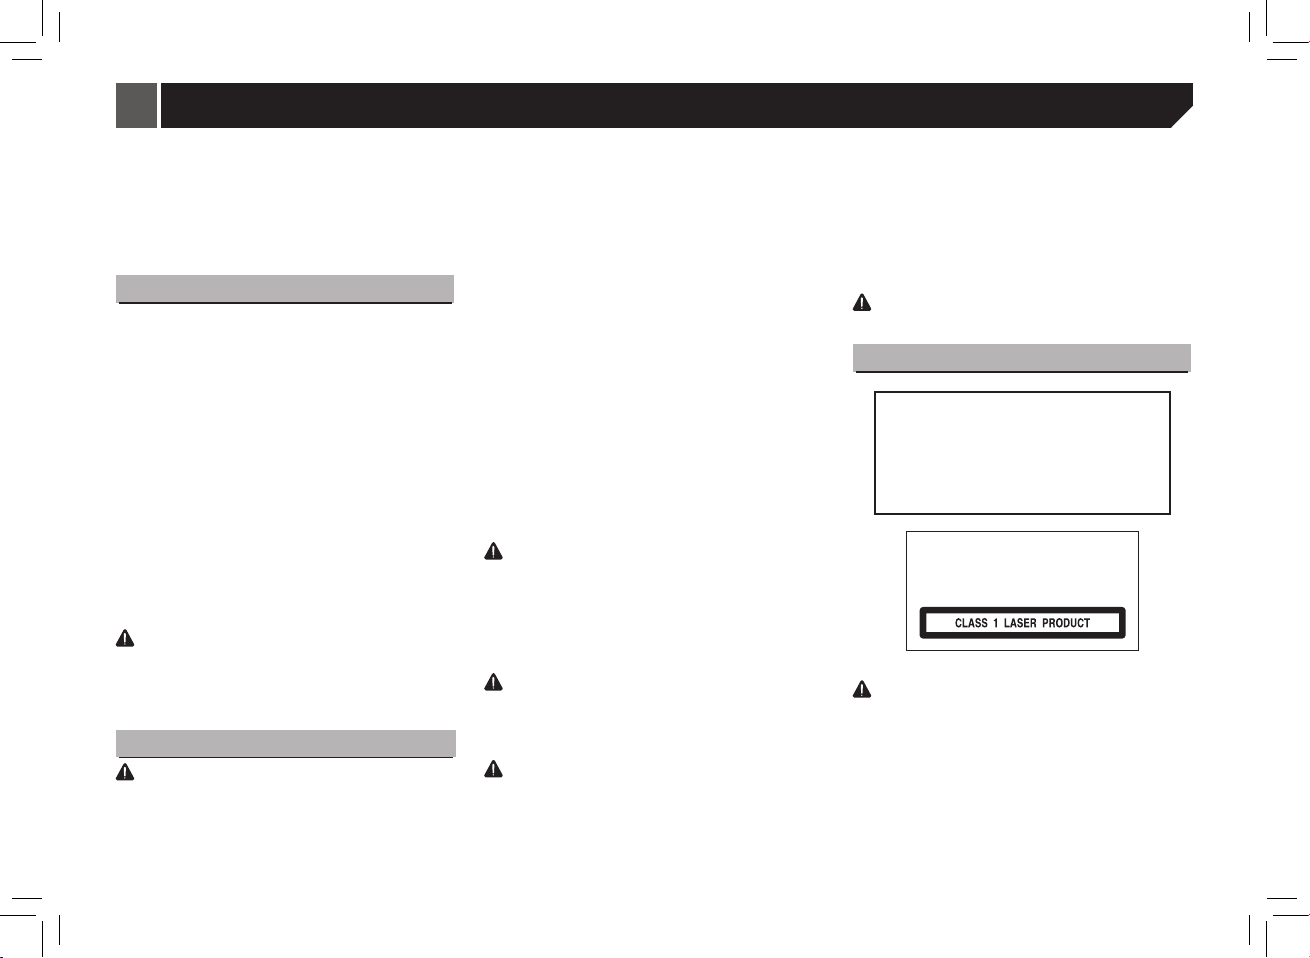
This product is a class 1 laser product
classied under the Safety of laser
products, IEC 60825-1:2007.
CAUTION
• Do not allow this unit to come into contact with liquids. Electrical
shock sould result.
Also, damage to this unit, smoke, and overheating could result
from contact with liquids.
• Keep this manual handy for future reference.
• Always keep the volume low enough to hear outside sounds.
• Avoid exposure to moisture.
• If the battery is disconnected or discharged, any preset memory
will be erased.

Precaution
Information to User
This device complies with part 15 of the FCC Rules. Operation
is subject to the following two conditions: (1) This device may
not cause harmful interference, and (2) this device must accept
any interference received, including interference that may cause
undesired operation.
This transmitter must not be co-located or operated in
conjunction with any other antenna or transmitter.
This equipment complies with FCC radiation exposure limits
set forth for an uncontrolled environment and meets the FCC
radio frequency (RF) Exposure Guidelines in Supplement C to
OET65. This equipment has very low levels of RF energy that
it deemed to comply without maximum permissive exposure
evaluation (MPE). But it is desirable that it should be installed
and operated keeping the radiator at least 20cm or more away
from person’s body (excluding extremities: hands, wrists, feet
and ankles).
Information to User - Alteration or modifications carried out
without appropriate authorization may invalidate the user’s right
to operate the equipment.
NOTE: This equipment has been tested and found to comply with
the limits for a Class B digital device, pursuant to Part 15 of the FCC
Rules. These limits are designed to provide reasonable protection
against harmful interference in a residential installation. This
equipment generates, uses and can radiate radio frequency energy
and, if not installed and used in accordance with the instructions,
may cause harmful interference to radio communications. However,
there is no guarantee that interference will not occur in a particular
installation. If this equipment does cause harmful interference to
radio or television reception, which can be determined by turning the
equipment off and on, the user is encouraged to try to correct the
interference by one or more of the following measures:
- Reorient or relocate the receiving antenna.
- Increase the separation between the equipment and
receiver.
- Connect the equipment into an outlet on a circuit different
from that to which the receiver is connected.
- Consult the dealer or an experienced radio/TV technician for
help.
- Consult the dealer or an experienced radio/TV technician for
help.
DVD video disc region numbers
Only DVD video discs with compatible region numbers can be
played on this player. You can find the region number of the
player on the bottom of this unit and in this manual.
5
Basic operation
1
2
3
4 5
6
7
8
9
10
11
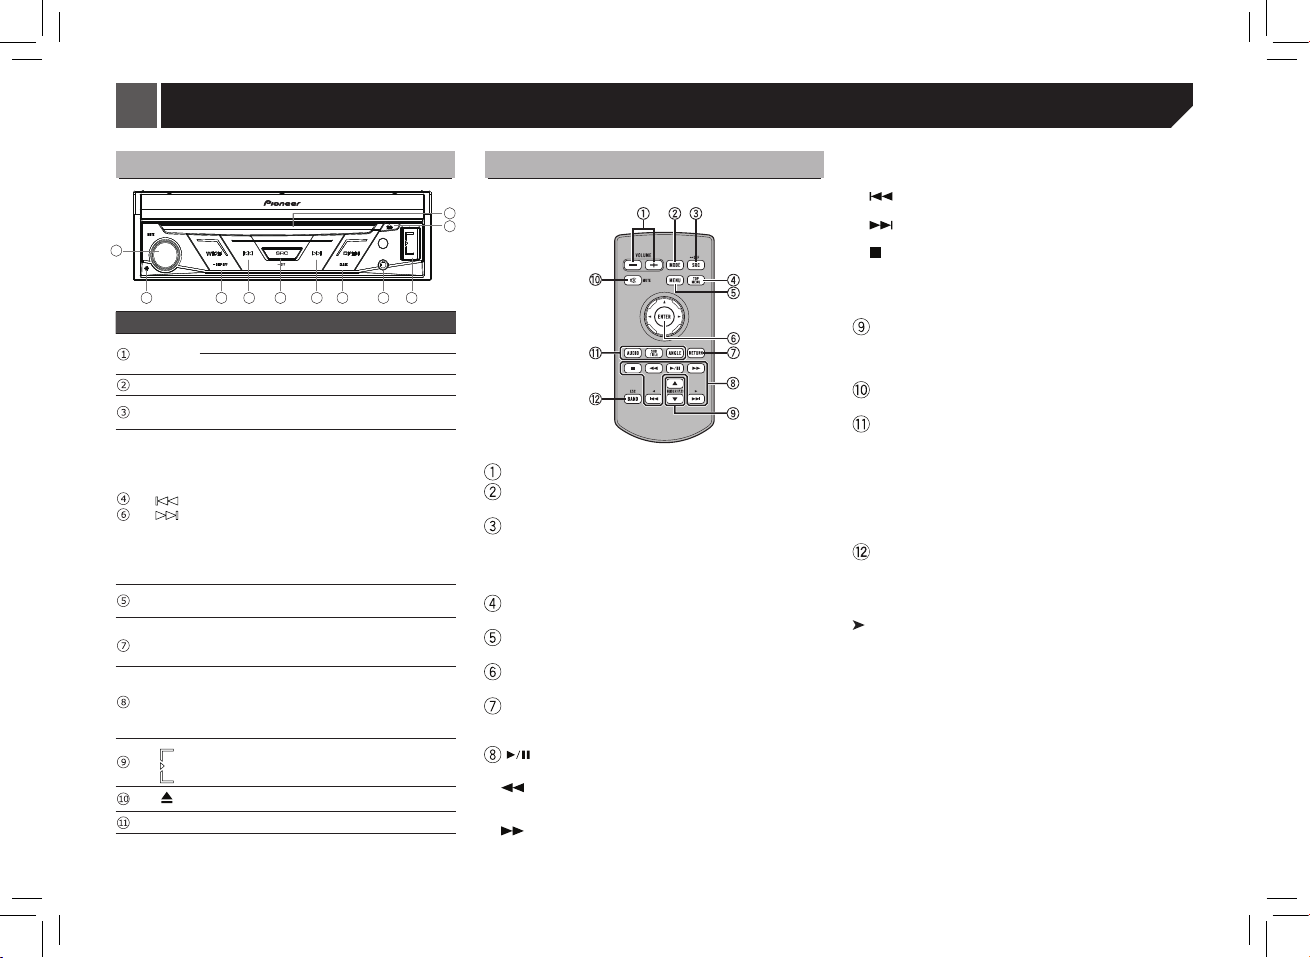
Head Unit
Part Operation
• Turn to adjust the volume.
ROTARY
• Press to mute on/off.
RESET • Reset the unit
• Change display mode (press)
WIDE
• Display off (press and hold)
• Radio:
Preset down/up (press)
Auto search down (press and hold)
• Disc (when disc inserted):
Chapter down/up (press)
Fast reverse / forward (press and hold)
• USB (when USB connected):
The function same to the DISC.
• Bluetooth Audio
Chapter down/up (press)
• Press the button to return the source menu
SRC
• Press and hold SRC button to be OFF
• Open/close the LCD panel
OPEN
• By pressing and holding the key, the unit
/CLOSE
AUX input
jack
(3.5mm
stereo
/video jack)
Disc loading slot
6
becomes LCD panel angle adjustment mode.
Use to connect an auxiliary device.
Slip the cover of the USB connector to the right.
Insert a USB device into the USB slot.
Eject button
(when BT connected)
Remote control
+/-(VOLUME)
MODE
No use in this model.
SRC/OFF
• Select playing mode:
Radio / Disc (when disc inserted)/USB (when USB
connected) / AUX / BT/ AV / Camera View
• Press and hold SRC button to be OFF.
TOP MENU
Press to return to the top menu during DVD playback.
MENU
Press to display the DVD menu during DVD playback.
Thumb pad
Use to select a menu on the DVD menu.
RETURN
Press to display the PBC (playback control) menu during
PBC playback.
Press to pause or resume playback.
Press to perform fast reverse.
Press to change the fast reverse speed.
Press to perform fast forward.
Press to change the fast forward speed.
Press to return to the previous track (chapter).
Press to go to the next track (chapter).
Press to stop playback.
If you resume playback, playback will start from the point
where you stopped.
Touch the key again to stop playback completely.
FOLDER/P.CH
Press to select the next or previous disc or folder.
Press to recall radio station frequencies assigned to preset
tuning keys.
MUTE
Press to mute. Press again to unmute.
AUDIO
Press to change the audio language during DVD playback.
Press to switch audio output for Divx/MPEG-4.
SUBTITLE
Press to change the subtitle language during DVD/Divx/
MPEG-4 playback.
ANGLE
Press to change the viewing angle during DVD playback.
BAND/ESC
Press to select the tuner band when tuner is selected as a
source.
Important
• Do not store the remote control in high temperatures or direct
sunlight.
• The remote control may not function properly in direct sunlight.
• Do not let the remote control fall onto the oor, where it may
become jammed under the brake or accelerator pedal.
Basic operation
Use and care of the remote
control
Using the remote control
Point the remote control in the direction of the front panel to
operate.
When using for the rst time, pull out the lm protruding from
the tray.
Replacing the battery
Slide the tray on the back of the remote control out and insert
the battery with the plus (+) and minus (–) poles aligned
properly.
• When using for the rst time, pull out the lm protruding from
the tray.
WARNING
• Keep the battery out of the reach of children.
Should the battery be swallowed, consult a doctor
immediately.
• Batteries (battery pack or batteries installed) must not be
exposed to excessive heat such as sunshine, re or the like.
CAUTION
• Remove the battery if the remote control is not used for a
month or longer.
• There is a danger of explosion if the battery is incorrectly
replaced. Replace only with the same or equivalent type.
• Do not handle the battery with metallic tools.
• Do not store the battery with metallic objects.
• If the battery leaks, wipe the remote control completely clean
and install a new battery.
• When disposing of used batteries, comply with governmental
regulations or environmental public institutions’ rules that
apply in your country/area.
CR2025(3V)
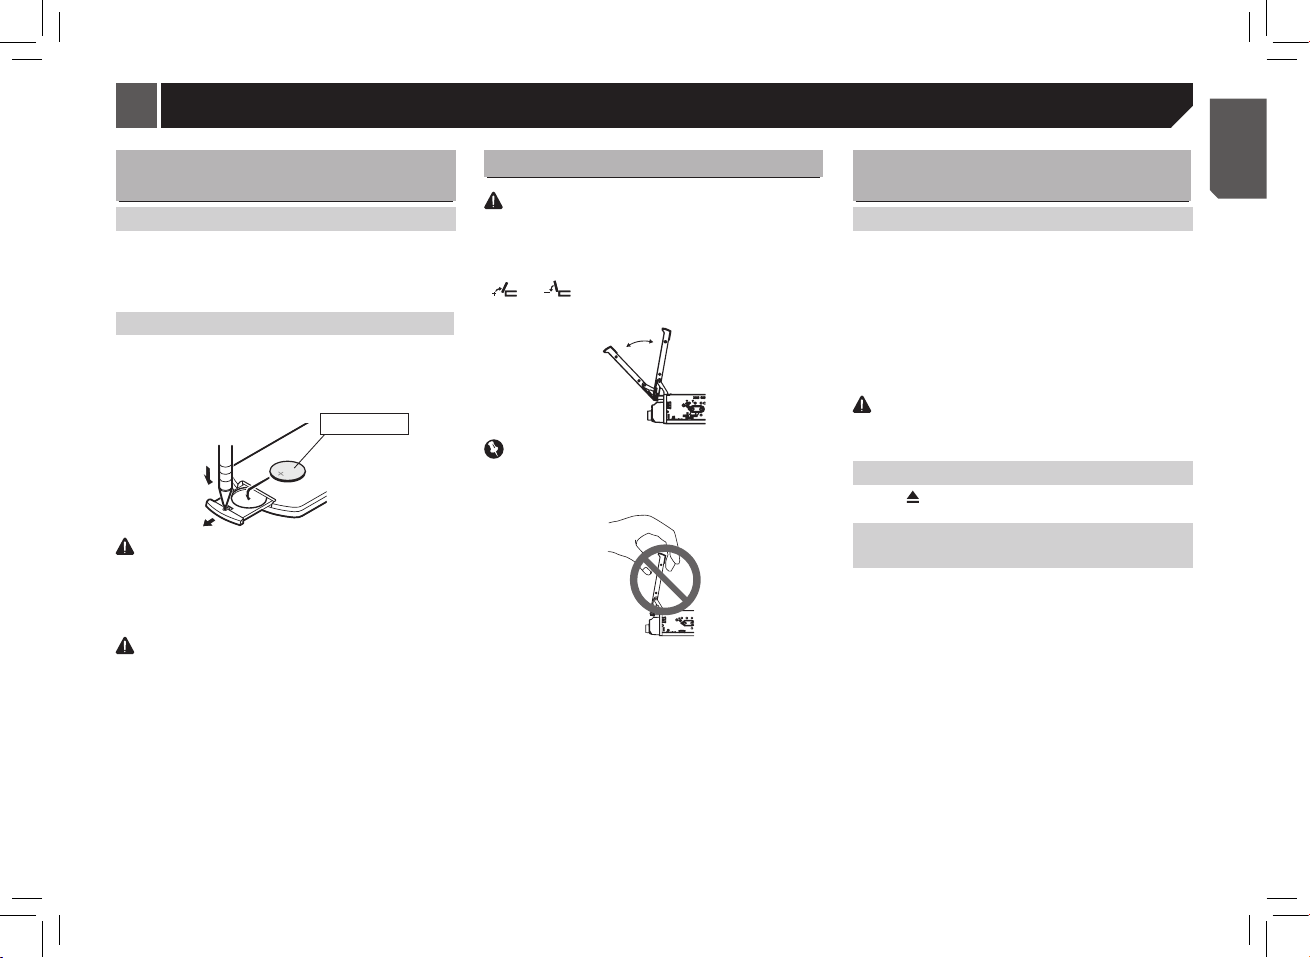
Adjusting the LCD panel angle
CAUTION
Keep hands and ngers clear of the unit when opening, closing,
or adjusting the display. Be especially cautious of children's
hands and ngers.
Press and hold the OPEN/CLOSE button until display the
] / [ ] icon on the screen, touch them to adjust the
[
LCD panel angle position.
Important
• When adjusting the LCD panel angle, be sure to press and
hold OPEN/CLOSE button. Forcibly adjusting the LCD panel
by hand may damage it.
• As the set angle is saved, the LCD panel will automatically
be adjusted to the same position the next time the LCD
panel is opened.
Inserting/ejecting/connecting
media
Insert a disc
1. Insert a disc into the disc loading slot.
2. Disc can be inserted without opening LCD panel.
3. The unit will change to disc mode automatically.
Notes:
• Please confirm whether there is a disc in the unit before you
insert another one.
• The unit will exit current playing source and enter DVD mode
when one disc is inserted.
• The following format disc will be support: CD-R, CD-RW,
DVD-R, DVD+R, DVD-RW, DVD+RW .
CAUTION
Do not insert anything other than a disc into the disc-loading
slot.
Ejecting a disc
Press the button on the front panel to eject the disc.
Plugging and unplugging a USB
storage device
• This product may not achieve optimum performance with
some USB storage devices.
• Connection via a USB hub is not possible.
1. Slip the USB cover from left to right.
2. Plug in the USB storage device using an appropriate cable.
• Check that no data is being accessed before pulling out the
USB storage device.
7
Basic operation
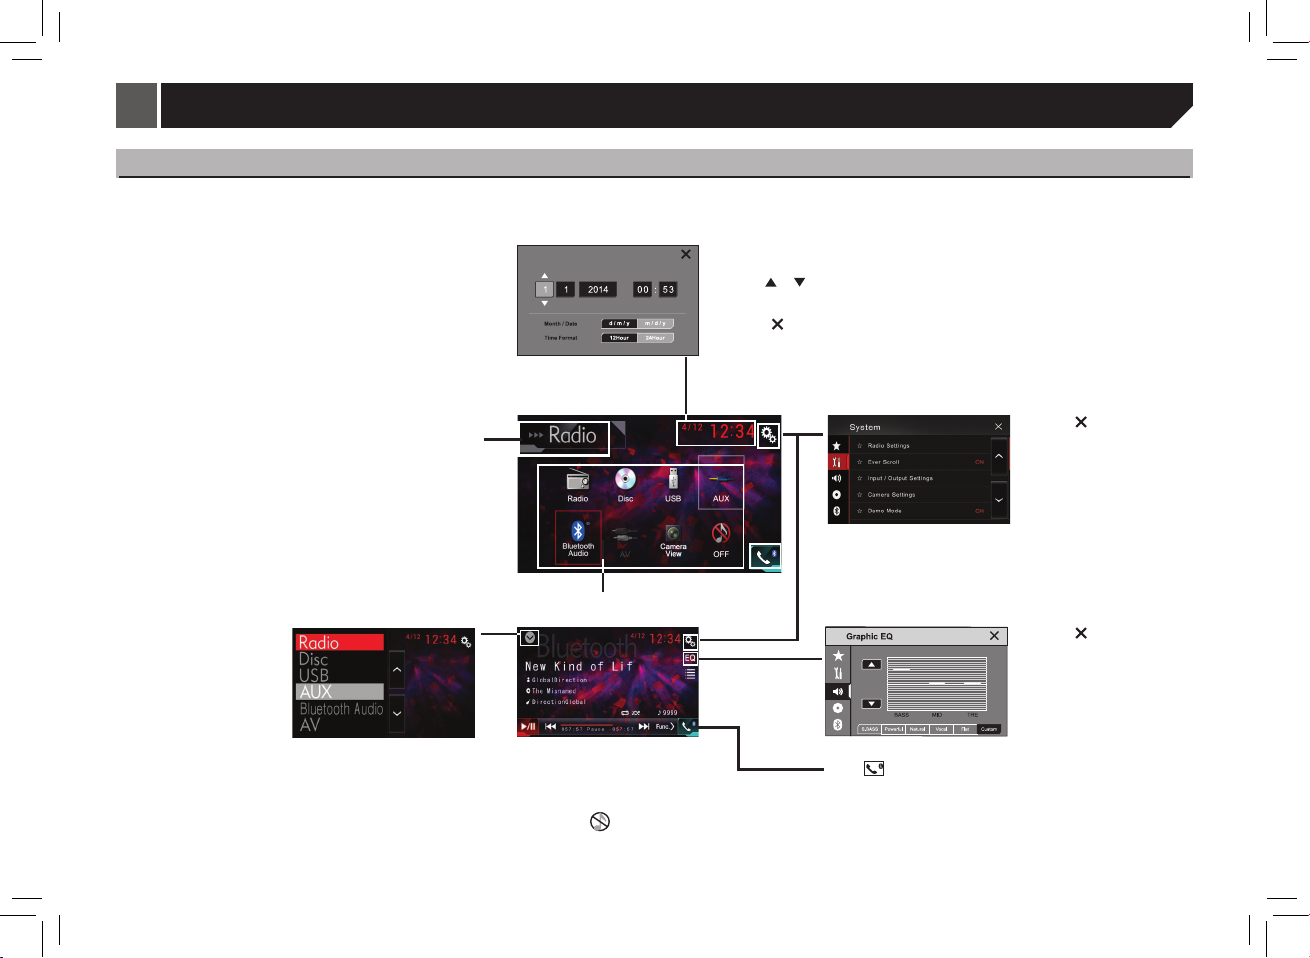
How to Use the screens
Press SRC button to display Top menu screen.
Time and date setting screen
Switching to clock adjustment display.
Select the Month or Date.
• Touch
Select the time format.
• Touch 12Hour or 24Hour to set the correct time.
• Touch [
or to set the correct time.
] on the upper right of the screen to exit.
Selecting a source using the
touch panel keys
Touch the source icon and then
touch the desired source name.
• Radio-radio
• Disc-Built -in DVD player
• USB-USB
• AUX-AUX
• AV-AV input
• Bluetooth Audio
• Camera View-Camera View
8
Top menu screen
Setting menu screen
Current Source display
AV source list screen AV operation screen EQ setup screen
Selecting a favorite source.
When the source icon is not
displayed, it can be displayed by
pressing the source key.
• Touch [
source off.
] to turn the
Touch [
menu screen
], displaying the phone
• Touch [ ] on the upper right
of the screen to exit.
Refer to System settings on page
19.
• Touch [
Refer to Audio settings on page
19.
] on the upper right
of the screen to exit.
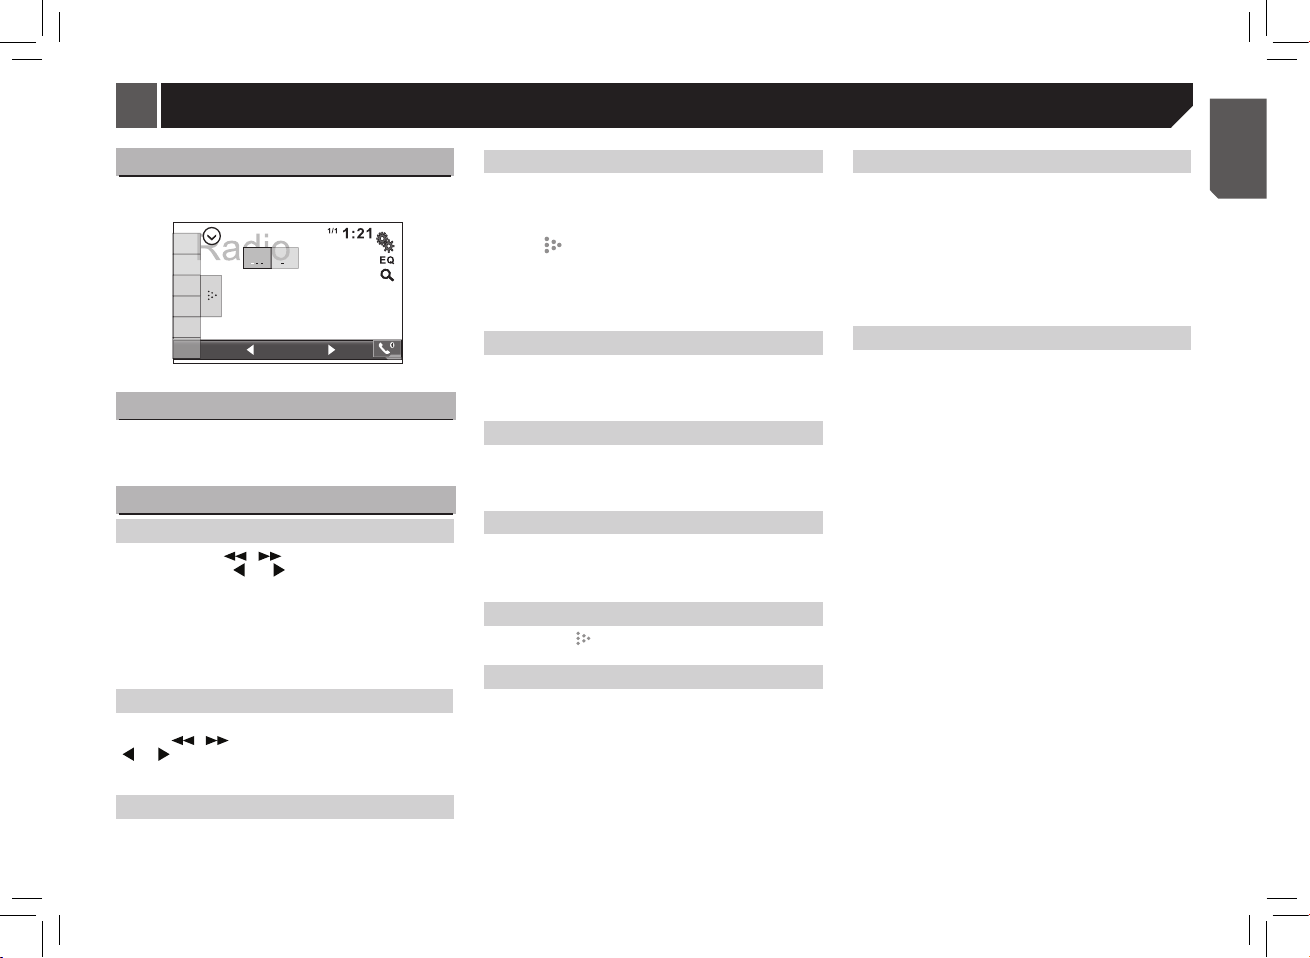
Radio
Select radio as playing source
Touch [Radio] on the source menu to the radio mode.
1
2
FM1
AM
3
4
5
6
108.00
MHz
Select one radio band
Press the BAND button on the remote control or touch the [FM1]
/ [AM] icon on the user interface to select one radio band among
FM1, FM2, FM3, and AM.
Tune
Auto tuning
Press and hold the / button on the remote control or
touch and hold the [
seek a higher / lower station.
To stop searching, repeat the operation above or press other
keys having radio functions.
Note:
When a station is received, searching stops and the station is
played.
Manual tuning
During manual tuning, the frequency will be changed in steps.
Press the
] / [ ] icon on the user interface to tune in a higher / lower
[
station.
Preset station
The unit has 4 bands, such as FM1, FM2, FM3 and AM, and
each band can store 6 stations; hence the unit can store 24
stations in total.
] / [ ] icon on the user interface to
/ button on the remote control or touch the
Storing the strongest stations
BSM (best stations memory) automatically stores the six
strongest stations in the order of their signal strength.
Storing broadcast frequencies with BSM may replace broadcast
frequencies you have saved using the preset tuning keys.
1. Touch [
2. Touch [ BSM ] to begin a search.
The six strongest broadcast frequencies will be stored under
preset tuning keys in order of their signal strength.
• To cancel the storage process, touch any key on the screen.
].
Manual store
1. Tune to a station.
2. Touch and hold one of the channels 1 to 6 to save the
selected band.
Search Stations Automatically
1. Touch [BSM] to search and store stations.
2. The unit will scan play the preset stations automatically.
3. To cancel, touch any key on the user interface.
Recalling a station
1. Select a band (if needed).
2. Touch an on-screen preset button to select the
corresponding stored station.
Displays the preset channel list
If you touch the [ ] to display the preset channel list.
Local/Distance
Select Local to receive only stations with extremely strong
signal.
1. Touch [Local/Distance] in Radio settings menu of System
setup.
• How to enter Radio Setting, please refer to the System
setting page 19.
2. Touch [Local/Distance] to switch "Local" or
"Distance"(default).
Setting the FM tuning step
You can switch the seek tuning step for FM band.
• The tuning step remains at 50 kHz during manual tuning.
1. Touch [FM Step] in Radio settings menu of System setup to
select the FM tuning step.
• How to enter Radio Setting, please refer to the System
setting page 19.
2. Touching FM step will switch the FM tuning step between 50
kHz and 100 kHz(default). The selected FM tuning step will
appear.
Setting the AM tuning step
You can switch the seek tuning step for AM band.
1. Touch [AM Step] in Radio settings menu of System setup to
select the AM tuning step.
• How to enter Radio Setting, please refer to the System
setting page 19.
2. Touching AM Step will switch the AM tuning step between 9
kHz and 10 kHz. The selected AM tuning step will appear in
the display.
Latin America model:10kHz
Middle East Asia models: 9kHz
When the setting is changed, the frequency and preset
channels are initialized.
9
album
Disc
DVD title/chapter select
VCD track select
CD track select
Return the source menu key
Returning to the source menu during DVD playback.
Currect disc type
MENU key (DVD)
Displaying the DVD menu during DVD playback.
Frame-by-frame playback key (DVD/VCD)
To return to normal playback, touch [ ].
Slow-motion playback key (DVD/VCD)
1. Touch and hold down the [ ] to start the slow
motion playback.
2. Each time you touch [ ] it changes the speed in six
steps in the following order: x1/2 x1/3 x1/4 x1/5 x1/6
x1/7.
Stop playback entirely (DVD/VCD)
1. During playback, touch [ ] once to stop the
playback and the relevant location on the disc is
saved, touch [
saved disc location.
2. Touch [
[
] to start the playback from the very beginning
the Title page of the DVD or the rst track of VCD /
CD.
Changing the wide-screen mode (DVD/VCD)
Selecting the appropriate screen ratio for the playback
video.
Touch [
Touch the desired wide mode setting.
FULL (full screen)
The 4:3 picture is enlarged in the horizontal direction
only, granting viewers a 4:3 TV picture (normal picture)
without any omissions.
NORMAL (normal)
The 4:3 picture is displayed as is, granting viewers no
sense of disparity as the proportions are the same as
that of the normal picture.
Notes:
• You cannot operate this function while driving.
• When a video is viewed in a wide screen mode that does
not match its original aspect ratio, it may appear different.
• Remember that using the wide mode feature of this
system for commercial or public viewing purposes may
constitute an infringement on the author’s rights protected
by the Copyright Law.
] to resume the playback from the
] twice to cease the playback. Touch
] to select the [Full] / [Normal].
10
 Loading...