

Using hands-free phoning
Chapter
12
Making a call home easily
You can call home without taking the time to
enter the phone number if the phone number
has been registered.
1 Display the “Phone Menu ” screen.
2 Touch [Call Home].
Dialing home starts.
p If you have not registered your home num-
ber, a message appears. Touch [Yes]to
start registration.
= For more details about “Set Home”,
refer to How to use the navigation menu
screens on page 34.
Calling a number in the
“Contacts List”
After finding the entry you want to call in the
“Contacts List” screen, you can select the
number and make the call.
p Before using this function, you need to set
the phone number from the phone book to
“Contacts”.
= For details, refer to Transferring the phone
book on page 84.
1 Display the “Phone Menu ” screen.
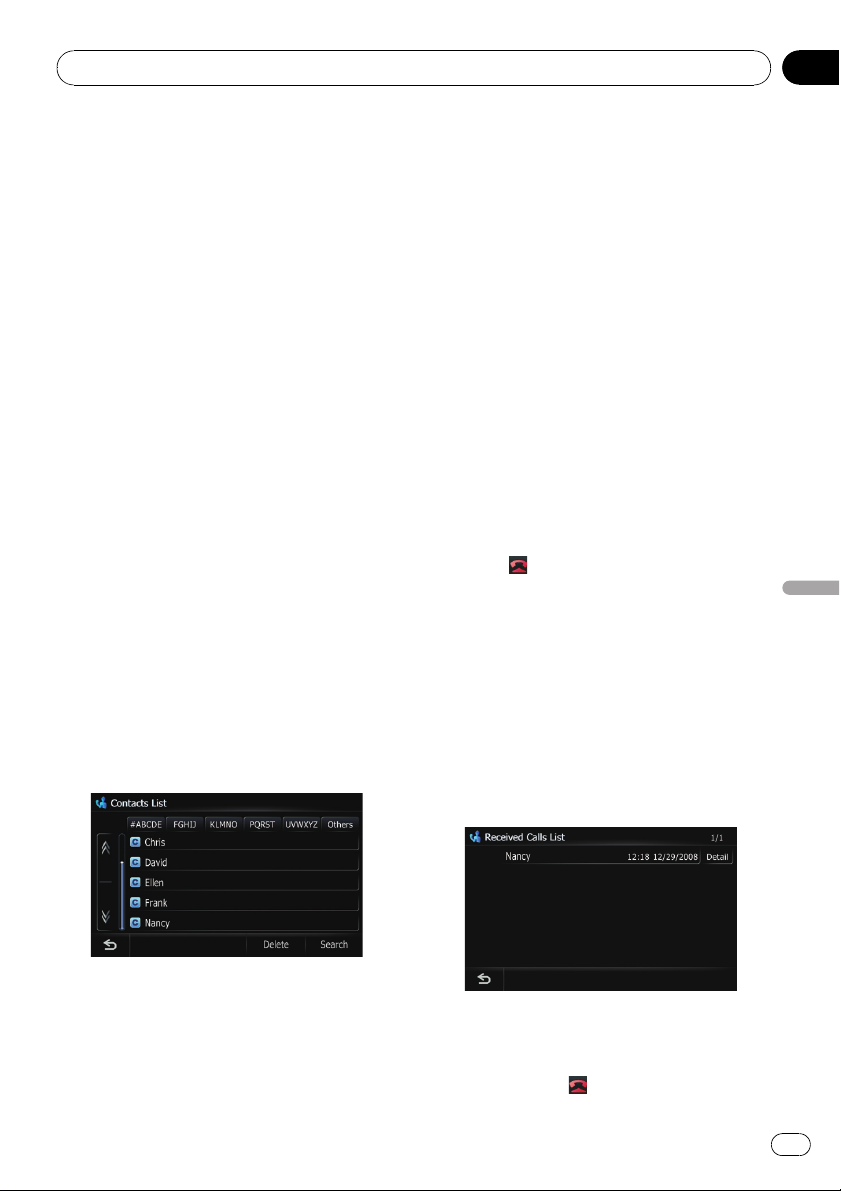
2 Touch [Contacts].
The “Contacts List” screen appears.
Alphabet tabs
Makes the screen jump to the beginning of
the page including the entry whose names
start with any of selected alphabets.
Touching [#ABCDE ] also displays the page including the entry whose names start with primary symbols or numbers.
Touching [Others] displays the page including
entries that are not assigned to any of the
other tabs.
4 Touch the desired entry on the list to
make a call.
! New translation required.
# Touch [Search].
The “Contacts Name Search” screen appears.
New translation required.
# Touch [Delete].
The “Delete from Contacts” screen appears.
New translation required.
5 Touch to end the call.
Using hands-free phoning
Making a phone call using the
received call history
The received call history saves 30 calls per registered cellular phone. If the number of calls
exceeds 30, the oldest entry will be deleted.
1 Display the “Phone Menu ” screen.
2 Touch [Received Calls].
The “Received Calls List” screen appears.
3 Switch the page of the list to display
the desired entry.
If you touch an alphabet tab, you can jump to
the first page of the contacts whose names
start with that letter.
3 Touch an entry on the list.
Dialing starts.
p To cancel the call after the system starts
dialing, touch
.
En
81
Chapter
12
Using hands-free phoning
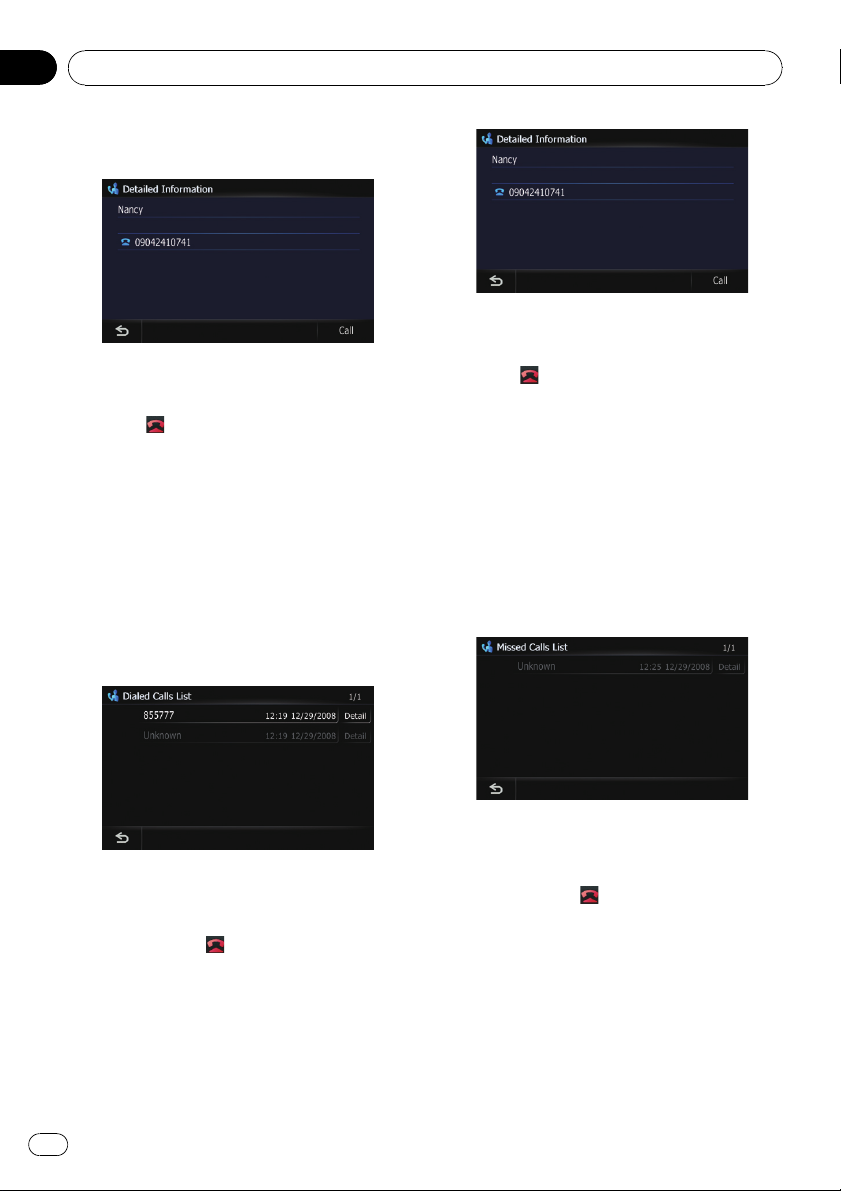
# Touch [Detail].
The “Detail Information” screen appears.
You can check the details of the party before making a phone call.
You can check the details of the party before making a phone call.
4 Touch to end the call.
4 Touch to end the call.
Making a phone call using the
dialed number history
The dialed number history saves 30 calls per
registered cellular phone. If the entries exceed
30, the oldest one will be deleted.
1 Display the “Phone Menu ” screen.
2 Touch [Dialled Calls].
The “Dialed Calls List” screen appears.
3 Touch an entry on the list.
Dialing starts.
p To cancel the call after the system starts
dialing, touch
# Touch [Detail].
The “Detail Information” screen appears.
.
Making a phone call using
missed call history
The missed call history saves 30 calls per registered cellular phone. If the number of calls
exceeds 30, the oldest entry will be deleted.
1 Display the “Phone Menu ” screen.
2 Touch [Missed Calls].
The “Missed Calls List” screen appears.
3 Touch an entry on the list.
Dialing starts.
p To cancel the call after the system starts
dialing, touch
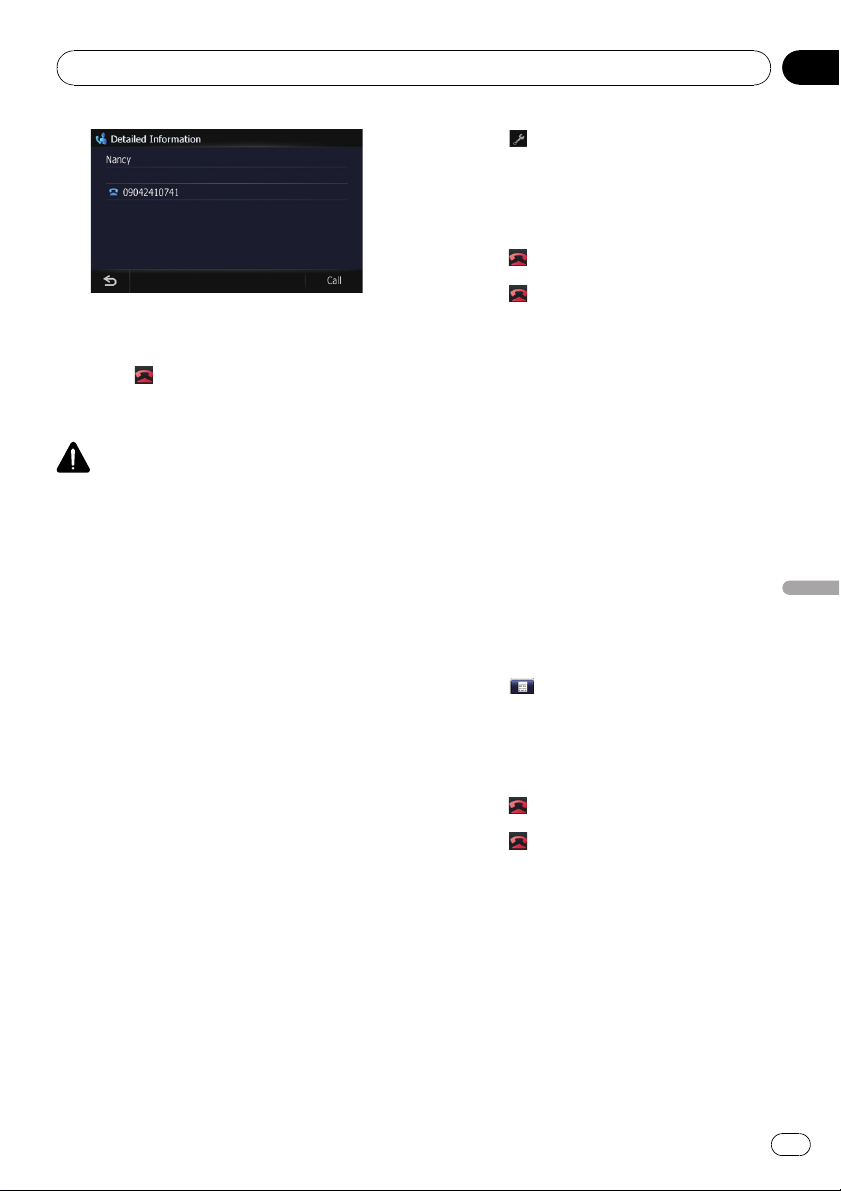
# Touch [Detail].
The “Detail Information” screen appears.
.
82
En
Using hands-free phoning
Chapter
12
You can check the details of the party before making a phone call.
4 Touch to end the call.
Dialing GOOG-411
CAUTION
Local and/or long distance charges for making a
phone call may apply.
You can dial GOOG-411 to dial the free business listing service of Googleä with one
touch.
1 Touch [GOOG-411] on the “Phone
Menu”.
= For details, refer to Displaying the Phone
Menu on page 80.
Dialing GOOG-411 starts.
2 You can now use the GOOG-411 phone
service.
For details about GOOG-411 service and availability, contact Googleä.
3 Touch
want to make a call.
The “Address Book Edit” screen appears.
4 Touch [Call] to make a call.
To cancel the call after the system starts dialing, touch
5 Touch
next to the location that you
.
to end the call.
Dialing a facility’s phone number
You can make a call to facilities with phone
number data.
p You cannot make a call to locations or POIs
that have no phone number data.
1 Display the “Destination Menu” screen.
2 Touch [POI].
The “POI Search” screen appears.
3 Search for the POI.
The “POI List” screen appears.
= For details concerning operations, refer to
Searching for Points of Interest (POI) on
page 58.
4 Touch .
The “Detailed POI Information” screen appears.
5 Touch [Call] to make a call.
To cancel the call after the system starts dialing, touch
.
Using hands-free phoning
Dialing the entry in the
“Address Book”
You can make a call to the entry registered in
the “Address Book”.
1 Display the “Destination Menu” screen.
2 Touch [Address Book].
The “Address Book List” screen appears.
6 Touch
to end the call.
Dialing from the map
You can make a call by selecting the icon of a
registered location or a POI icon from the map
screen.
p You cannot make a call to locations or POIs
that have no phone number data.
1 Scroll the map, and place the cursor on
an icon on the map.
En
83
Chapter
12
Using hands-free phoning
2 Touch .
The “Detailed POI Information” screen appears.
3 Touch [Call] to make a call.
To cancel the call after the system starts dialing, touch
4 Touch
.
to end the call.
Receiving a phone call
You can perform hands-free answering by
using the navigation system.
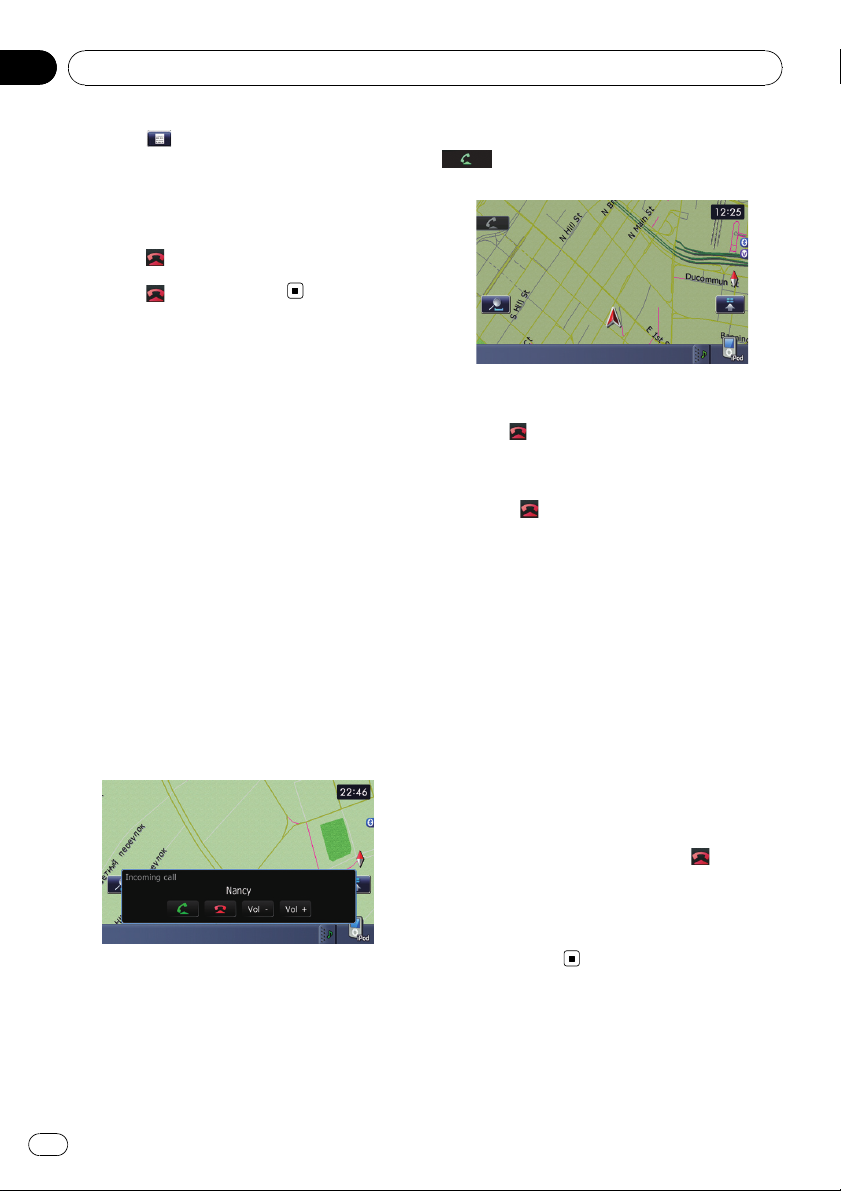
Answering an incoming call
The system informs you that it is receiving a
call by displaying a message and producing a
ring sound once.
If [Auto Answer Preference] is set to [Off],
answer the call manually. Answering is available if any screen is displayed, such as the
map screen or the setting screen.
p You can set this navigation system to auto-
matically answer incoming calls.
= For details, refer to Answering a call
automatically on page 86.
2 To answer an incoming call, touch
.
New translation required.
# Touch [Vol -]or[Vol +].
You can adjust volume when you are talking.
# Touch
# New translation required.
New translation required.
3 Touch to end the call.
The call ends.
p If the voice on the other end of the call is
p You may hear a noise when you hang up
to reject an incoming call.
too quiet to hear, you can adjust the volume
of the received voice.
= For more details about “Phone Vo-
lume”, refer to Setting the Volume for
Guidance and Phone on page 96.
the phone.
1 When a call comes in, the answering
operation menu appears on the screen.
p The registered name appears if the phone
number of the received call is already registered in “Contacts”.
p Depending on the caller ID service, the
phone number of the received call may not
be displayed. “Unknown” appears instead.
84
En
Rejecting an incoming call
You can reject an incoming call.
= For details, refer to Registering your Blue-
tooth devices on page 76.
% When a call comes in, touch
The call is rejected.
p The rejected call is recorded in the missed
call history list.
= For details, refer to Editing the device name
on page 86.
.
Transferring the phone book
You can transfer the numbers in a registered
user phone’s address book into the Contacts.
Using hands-free phoning
Chapter
12
p Depending on the cellular phone, “Phone
Book” may be called a name such as “Contacts”, “Business card” or something else.
p With some cellular phones, it may not be
possible to transfer the entire phone book
at once. In this case, transfer addresses
one at a time from your phone book using
your cellular phone.
p The maximum 1 000 entries can be trans-
ferred per cellular phone. If the entries exceed 1 000, the extra entries will not be
transferred. If more than one number is registered for one person, such as work place
and home, each number is counted separately.
p Each entry can hold up to 5 phone num-
bers.
p Depending on the cellular phone that is
connected to this navigation system via
Bluetooth technology, this navigation system may not be able to display the phone
book correctly. (Some characters may be
garbled.)
p If the phone book in the cellular phone con-
tains image data, the phone book may not
be correctly transferred.
p The transferred data can not be edited on
the navigation system.
1 Connect the cellular phone that has the
phone book to transfer.
= For details, refer to Connecting a registered
Bluetooth device on page 79.
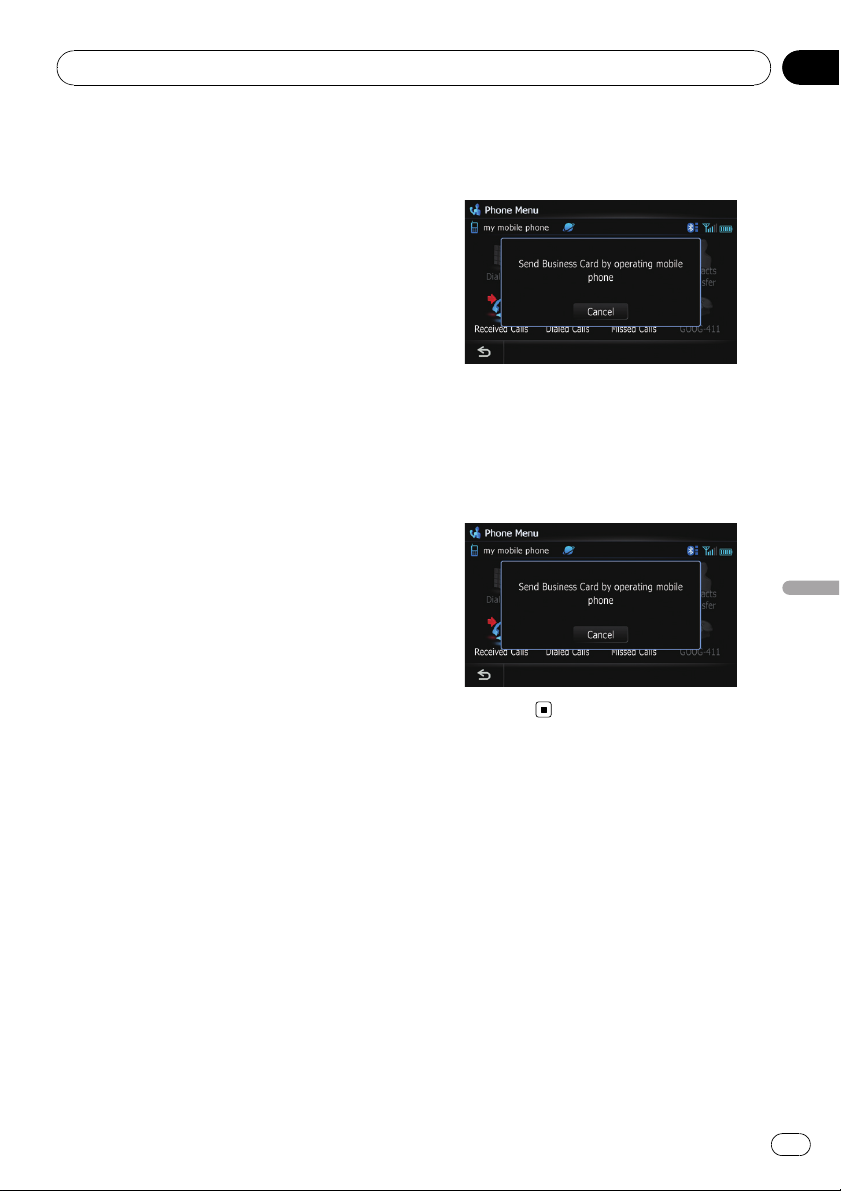
2 Touch [Contacts Transfer] on the
“Phone Menu” screen.
3 Check that the following screen is displayed, and operate your cellular phone to
transfer the phone book entries.
New translation required.
4 Touch [No].
Transfer starts. It may take time depending on
how many entries will be transferred.
5 New translation required.
Using hands-free phoning
Transfer ends.
Setting the “Bluetooth
Settings”
To set the “Bluetooth Settings”, display the
“Bluetooth Settings” screen.
1 Press the HOME button to display the
“Top Menu”.
2 Touch [Settings].
The “Settings Menu” screen appears.
3 Touch [Bluetooth Settings].
The “Bluetooth Settings” screen appears.
En
85
Chapter
12
Using hands-free phoning
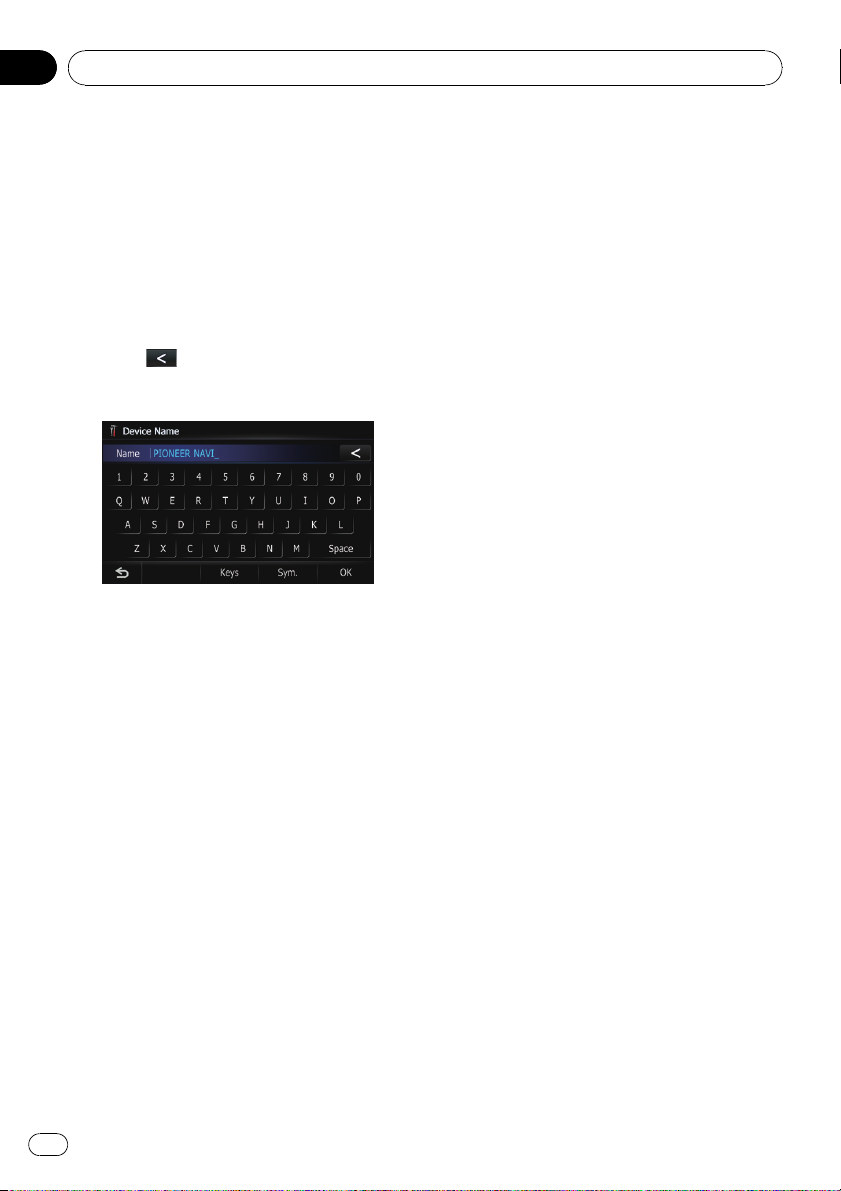
Editing the device name
You can change the device name to be displayed on your cellular phone. (Default is
[PIONEER NAVI].)
1 Display the “Bluetooth Settings”
screen.
2 Touch [Device Name].
The keyboard to enter the name appears.
3 Touch
and enter the new name by using the keyboard.
4 Touch [OK].
The name is changed.
p Up to 16 characters can be entered for a de-
vice name.
to delete the current name,
Stopping Bluetooth wave
transmission
You can stop transmission of electric waves by
turning off the Bluetooth function. If you do
not use the Bluetooth wireless technology, we
recommend selecting [Off].
1 Display the “Bluetooth Settings”
screen.
2 Touch [Bluetooth On/Off].
Touching [Bluetooth On/Off] switching between [On] and [Off].
Echo canceling and noise reduction
When you are operating hands-free phoning
in the vehicle, you may hear an undesirable
echo. This function reduces the echo and
noise while you are using hands-free phoning,
and maintains a certain sound quality.
1 Display the “Bluetooth Settings”
screen.
2 Touch [Echo Cancel].
Touching [Echo Cancel] switches between
[On] and [Off].
Editing the password
You can change the password to be used for
authentication on your cellular phone. (Default is [1111].)
p Four to eight characters can be entered for
a password.
1 Display the “Bluetooth Settings”
screen.
2 Touch [Password].
The “Set Password” screen appears.
3 Touch any key to enter the password
you want to set and then touch [OK].
86
En
Answering a call automatically
The navigation system automatically answers
incoming calls to the cellular phone, so you
can answer a call while driving without taking
your hands off the steering wheel.
1 Display the “Bluetooth Settings”
screen.
2 Touch [Auto Answer Preference].
The “Auto Answer Preference” screen appears.
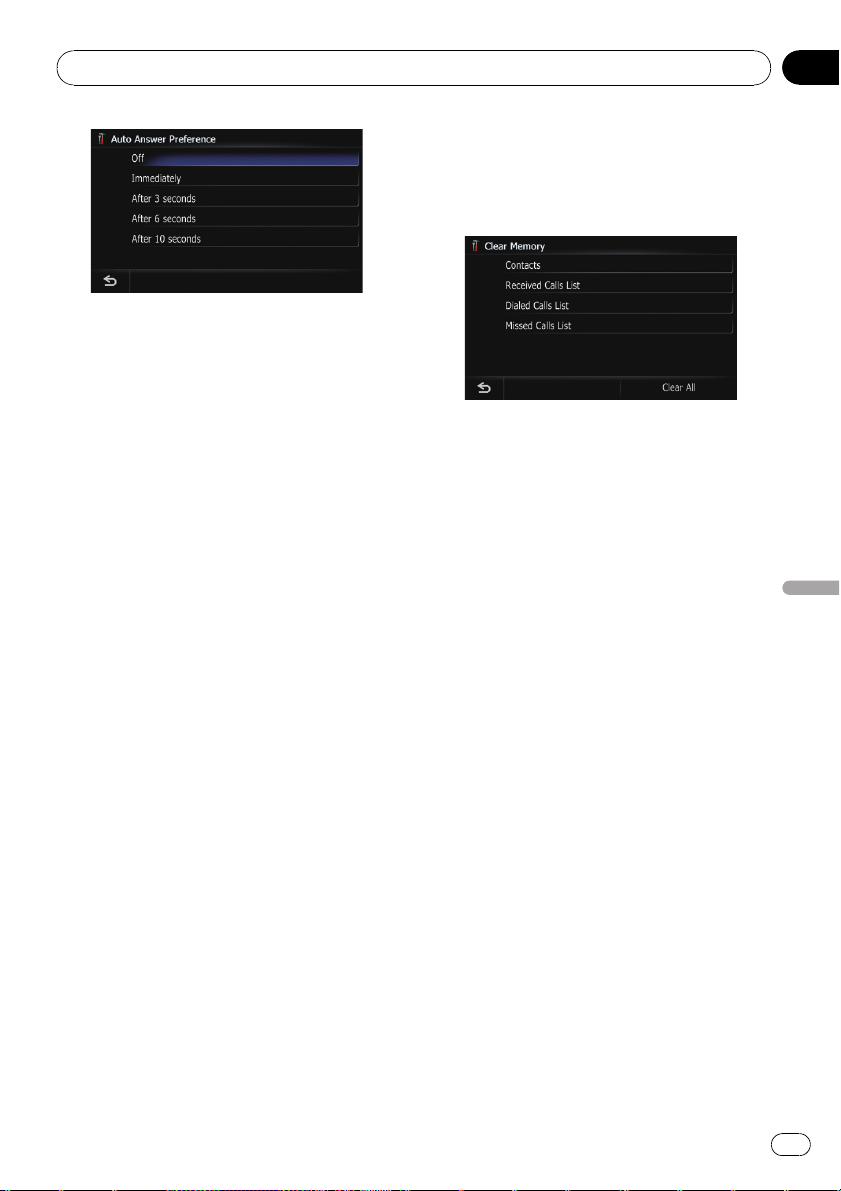
Using hands-free phoning
3 Touch the desired option.
! [Off]: No automatic response. Respond
manually
! [Immediately]: Answers immediately
! [After 3 seconds]: Answers after three sec-
onds
! [After 6 seconds]: Answers after six sec-
onds
! [After 10 seconds]: Answers after ten sec-
onds
Setting the automatic rejection
function
If this function is on, the navigation system
automatically rejects all incoming calls.
1 Display the “Bluetooth Settings”
screen.
2 Touch [Refuse All Calls].
Touching [Refuse All Calls] switches between
[On] and [Off].
p If both “Refuse All Calls” and “Auto An-
swer Preference” are activated, “Refuse
All Calls” is prioritized and all incoming
calls are automatically rejected.
p If “Refuse All Calls” is set to [On], rejected
incoming calls will not be stored in the
missed call list.
Clearing memory
You can clear the memory of each item that
corresponds to the connected cellular phone:
phone book, dialed/received/missed call history list and preset dials.
1 Display the “Bluetooth Settings”
screen.
2 Touch [Clear Memory].
The “Clear Memory” screen appears.
On this screen, you can select the following
items:
! Contacts:
You can clear the registered phone book.
! Received Calls List:
You can clear the received call history list.
! Dialed Calls List:
You can clear the dialed call history list.
! Missed Calls List:
You can clear the missed call history list.
# Touch [Clear All].
It clears all the data that correspond to the connected cellular phone.
3 Touch [OK].
Data on the selected item is cleared from this
navigation system’s memory.
p If you do not want to clear memory that you
have selected, touch [No].
Updating the Bluetooth
wireless technology software
Update files will be available for download in
the future. You will be able to download the latest update from an appropriate website to
your PC.
p Before you download the files and install
the update, read through the instructions
on the website. Follow the instructions on
the website for steps until [Firmware Up-
date] becomes active.
Chapter
12
Using hands-free phoning
En
87
Chapter
12
Using hands-free phoning
1 Insert an SD memory card into the SD
card slot.
= For more details of the operation, refer to In-
serting and ejecting an SD memory card on
page 29.
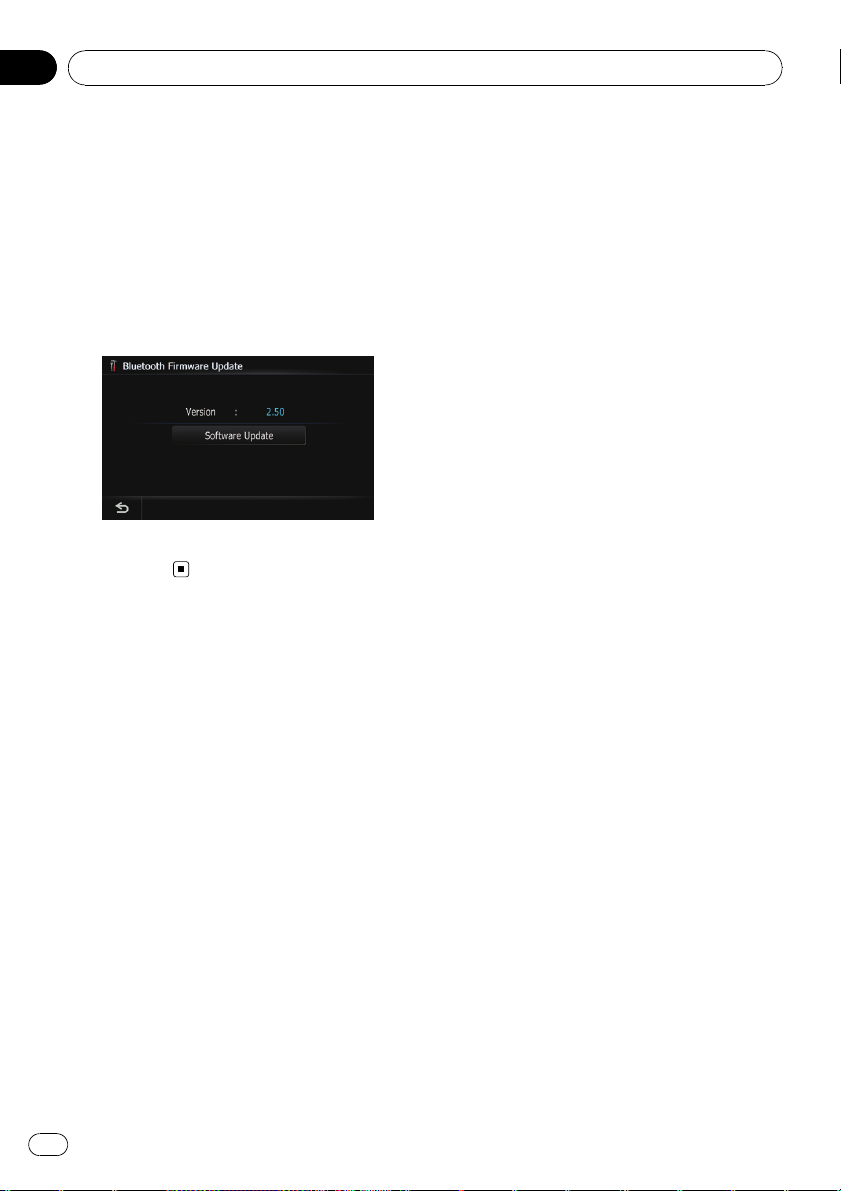
2 Display the “Bluetooth Settings”
screen.
3 Touch [Firmware Update].
The current version is displayed.
4 Touch [Firmware Update].
Update starts.
Notes for hands-free phoning
General notes
! Connection to all cellular phones featuring
Bluetooth wireless technology is not guaranteed.
! The line-of-sight distance between this na-
vigation system and your cellular phone
must be 10 meters or less when sending
and receiving voice and data via Bluetooth
technology. However, the actual transmission distance may be shorter than the estimated distance, depending on the usage
environment.
! With some cellular phones, the speakers of
the system may not produce a ring sound.
! If private mode is selected on the cellular
phone, hands-free phoning may be disabled.
Registration and connection
! Cellular phone operations vary depending
on the type of cellular phone. Refer to the
instruction manual that came with your cellular phone for detailed instructions.
! With cellular phones, phone book transfer
may not work even though your phone is
paired with the navigation system. In that
case, disconnect your phone, perform pairing again from your phone to the navigation system, and then perform the phone
book transfer.
Making and receiving calls
! You may hear a noise in the following situa-
tions:
— When you answer the phone by using
the button on the phone.
— When the person on the other end of
line hangs up the phone.
! If the person on the other end of the phone
call cannot hear the conversation due to an
echo, decrease the volume level for handsfree phoning. This may reduce the echo.
! With some cellular phones, even if you
press the accept button on the cellular
phone when a call comes in, hands-free
phoning may not be performed.
! The registered name appears if the phone
number of the received call is already registered in the phone book. When one phone
number is registered under different
names, the name that comes first alphabetically is displayed.
! If the phone number of the received call is
not registered in the phone book, the
phone number of the received call appears.
The received call history and the dialed
number history
! Calls made or editing performed only on
your cellular phone will not be reflected to
the dialed number history or phone book in
the navigation system.
! You cannot make a call to the entry of an
unknown user (no phone number) in the received call history.
! If calls are made by operating your cellular
phone, no history data will be recorded in
the navigation system.
88
En

Using hands-free phoning
Phone book transfers
! If there are more than 1 000 phone book en-
tries on your cellular phone, all entries may
not be able to be downloaded completely.
! With some cellular phones, it may not be
possible to transfer all items in the phone
book at one time. In this case, transfer
items one by one from your cellular phone.
! Depending on the cellular phone, this navi-
gation system may not display the phone
book correctly. (Some characters may be
garbled, or first name and last name may
be in reverse order.)
! If the phone book in the cellular phone con-
tains image data, the phone book may not
be transferred correctly. (Image data cannot be transferred from the cellular phone.)
! Depending on the cellular phone, phone
book transfer may not be available.
Chapter
12
Using hands-free phoning
En
89
Chapter
13
Customizing preferences
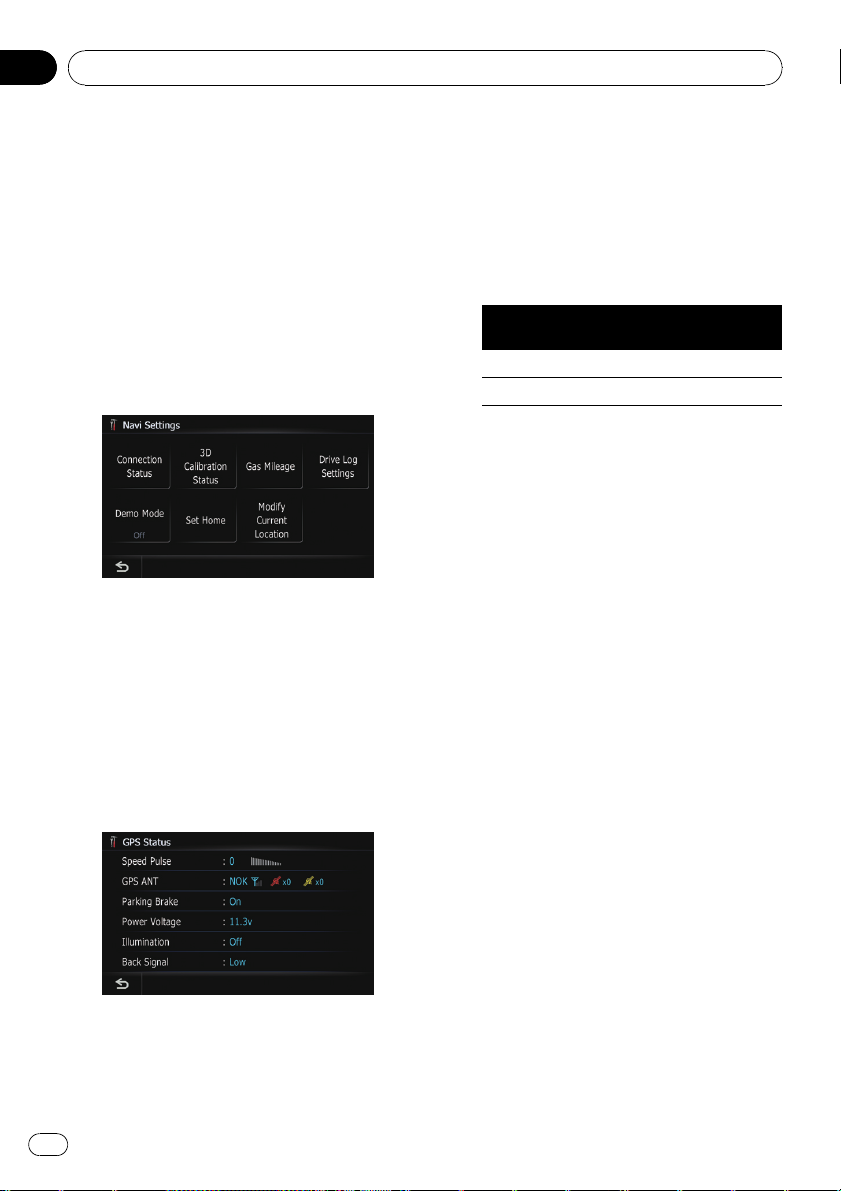
The options in the “Navi
Settings” menu
Displaying the “Navi Settings”
screen
1 Press the HOME button to display the
“Top Menu”.
2 Touch [Settings].
The “Settings Menu” screen appears.
3 Touch [Navi Settings].
The “Navi Settings” menu appears.
Checking the connections of leads
Check that leads are properly connected between the navigation system and the vehicle.
Please also check whether they are connected
in the correct positions.
1 Display the “Navi Settings” screen.
2 Touch [Connection Status].
The “GPS Status” screen appears.
2 GPS Aerial
Indicates the connection status of the GPS
antenna, the reception sensitivity, and from
how many satellites the signal is received. If
the signal is received correctly, [OK] is displayed. If reception is poor, [NOK] appears.
In such case, please change the installation
position of the GPS antenna.
Color
Orange Yes Yes
Yellow Yes No
3 Hand brake
When the parking brake is applied, [On]is
displayed. When the parking brake is released, [Off] is displayed.
4 Power Voltage
The power voltage (reference value) provided from the vehicle battery to the navigation system is shown. If the voltage goes
out of the range from 11 V to 15 V, check
that power cable connection is correct.
5 Illumination
When the headlights or small lamps of a vehicle are on, [On] is displayed. When the
small lamps of a vehicle are off, [Off] is displayed. (If the orange/white lead is not connected, [Off] appears.)
6 Back Signal
When the gear lever is shifted to “R”, the
signal switches to [High]or[Low]. (One of
these is displayed depending on the vehicle.)
Signal communication
Used in positioning
1 Speed Pulse
90
En
The Speed Pulse value detected by the navigation system is shown. [0] is shown while
the vehicle is stationary.
Checking sensor learning
status and driving status
p The navigation system can automatically
use its sensor memory based on the outer
dimensions of the tires.
1 Display the “Navi Settings” screen.
2 Touch [3D Calibration Status].
The “3D Calibration Status” screen appears.

Customizing preferences
Chapter
13
1 Distance
Driving distance is indicated.
2 Speed Pulse
Total number of speed pulses is indicated.
3 Learning Status
Current driving mode is indicated.
4 Degree of learning
Sensor learning situations for distance
(Distance), right turn (Right Turn), left turn
(Left Turn) and 3D detection (3D Detec-
tion) are indicated by the length of bars.
p When tires have been changed or
chains fitted, turning on the Speed
Pulse allows the system to detect the
fact that the tire diameter has changed,
and automatically replaces the value for
calculating distance.
p If ND-PG1 is connected, the distance
calculation value cannot be replaced
automatically.
5 Speed
The speed detected by the navigation system is indicated. (This indication may be
different from the actual speed of your vehicle, so please do not use this instead of the
speedometer.)
6 Acceleration or deceleration/Rotational
speed
Acceleration or deceleration velocity of your
vehicle is indicated. Also, rotational speed
when your vehicle turns to left or right is
shown.
7 Inclination
Degree of slope of the street that you are
currently running is indicated.
Clearing status
You can delete the learned results stored in
[Distance], [Speed Pulse]or[Learning Sta-
tus].
1 Touch [Distance] or [Speed Pulse].
The following message appears.
2 Touch [Yes].
Clears the learned results stored in [Distance]
or [Speed Pulse].
3 Touch [Learning Status].
The following message appears.
4 Touch [All].
Clears all learning statuses.
p Touch [All] for the following cases:
— After changing the installation position
of the navigation system
— After changing the installation angle of
the navigation system
— After moving the navigation system to
another vehicle
# Touch [Distance].
Clears the learned results stored in [Distance].
p When the distance accuracy is low, touch
[Distance].
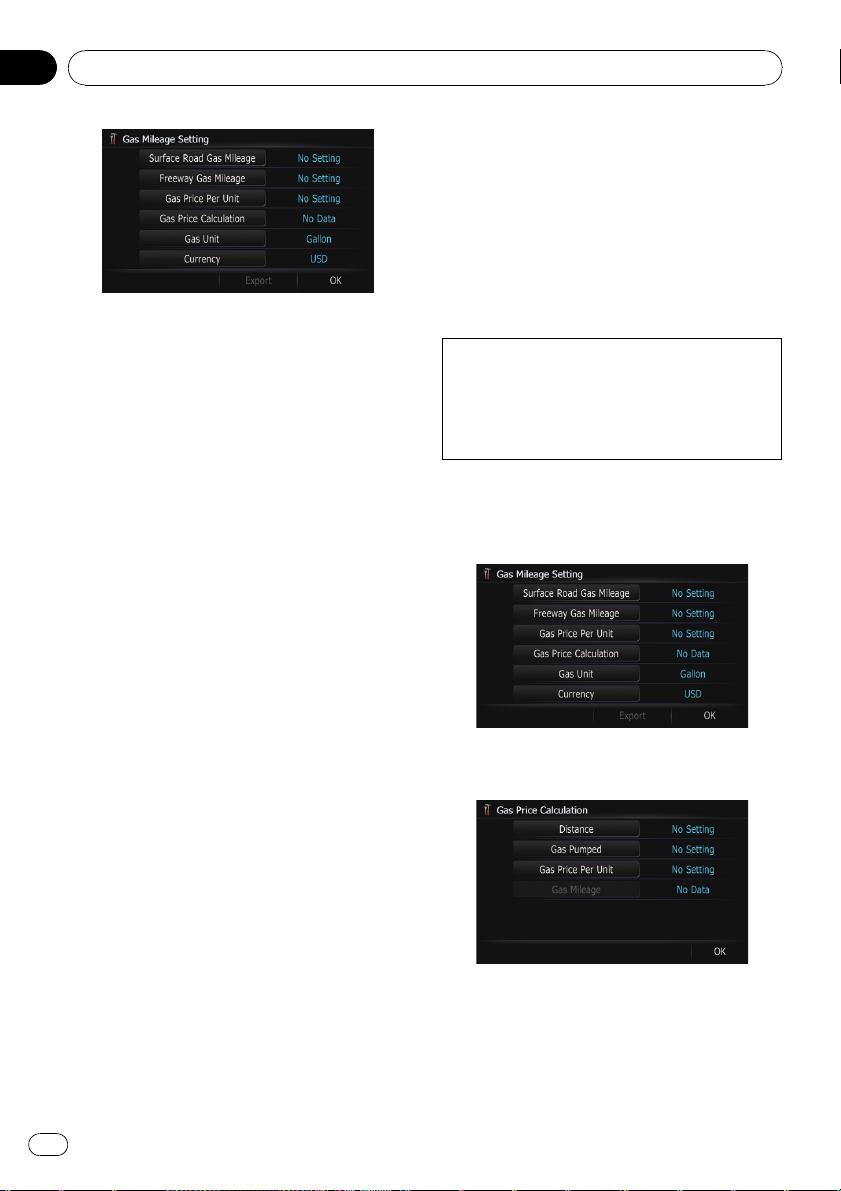
Using the “Gas Mileage” function
Inputting the fuel consumption
information for calculating the fuel cost
You can estimate the fuel cost to your destination by entering the fuel consumption information in the navigation system.
1 Display the “Navi Settings” screen.
2 Touch [Gas Mileage].
The “Gas Mileage Setting” screen appears.
Customizing preferences
En
91
Chapter
13
Customizing preferences
3 Enter the fuel consumption information.
Enter the following items:
! [Surface Road Gas Mileage]:
Enter the fuel cost when you drive on the ordinary road.
p The entering the fuel cost depends on
the setting of [Gas Unit].
— When [Gas Unit] is set to [Liter].
Enter how much fuel you need to travel 100 kilometers (60 miles).
— When [Gas Unit] is set to [Gallon].
Enter how many kilometers (miles)
you get to a gallon.
! [Freeway Gas Mileage]:
Enter the fuel cost when you drive on the
freeway.
p The entering the fuel cost depends on
the setting of [Gas Unit].
— When [Gas Unit] is set to [Liter].
Enter how much fuel you need to travel 100 kilometers (60 miles).
— When [Gas Unit] is set to [Gallon].
Enter how many kilometers (miles)
you get to a gallon.
! [Gasl Price Per Unit]:
Enter the fuel unit price.
! [Gas Unit]:
Set the fuel unit.
! [Currency]:
Set the unit of currency.
When all the items are entered, inputting the
fuel consumption information is complete.
Entering the fueling information
When you enter the fueling information to the
navigation system, and export the data to SD
memory cards, you can check the fuel consumption information by using the utility program “NavGate FEEDS” which is available
separately, on your PC.
p Up to 24 sets of “Gas Mileage Manage-
ment” entries can be stored. You can also
export the data, as described below.
If the entries reach the maximum number,
a new entry will overwrite the oldest one.
Gas Mileage Management function only assists you to calculate your average mileage
based on the information you input. The function does not receive data directly from the vehicle.
1 Display the “Navi Settings” screen.
2 Touch [Gas Mileage].
The “Gas Mileage Setting” screen appears.
3 Touch [Gas Price Calculation].
The “Gas Price Calculation” screen appears.
4 Enter the following settings:
! [Distance]:
Enter the distance traveled since the previous fueling.
92
En
 Loading...