

Page 1

CD RDS RECEIVER
AUTORADIO CD RDS
SINTOLETTORE CD RDS
REPRODUCTOR DE CD CON RECEPTOR RDS
CD RDS-EMPFÄNGER
CD RDS-ONTVANGER
CD RDS ПРИЕМНИК
DEH-X6600DAB
English NederlandsDeutschEspañolItalianoFrançais Русский
Owner’s Manual
Mode d’emploi
Manuale d’istruzioni
Manual de instrucciones
Bedienungsanleitung
Handleiding
Руководство пользователя
Page 2
Section
Before you start
01
Before you start
Thank you for purchasing this PIONEER
product
To ensure proper use, please read through this
manual before using this product. It is especially
important that you read and observe WARN-
INGs and CAUTIONs in this manual. Please
keep the manual in a safe and accessible place for
future reference.
If you want to dispose this product, do not
mix it with general household waste. There is
a separate collection system for used electronic products in accordance with legislation
that requires proper treatment, recovery and
recycling.
Private households in the member states of the
EU, in Switzerland and Norway may return their
used electronic products free of charge to designated collection facilities or to a retailer (if you
purchase a similar new one).
For countries not mentioned above, please contact your local authorities for the correct method
of disposal.
By doing so you will ensure that your disposed
product undergoes the necessary treatment, recovery and recycling and thus prevent potential
negative effects on the environment and human
health.
About this unit
The tuner frequencies on this unit are allocated
for use in Western Europe, Asia, the Middle
East, Africa and Oceania. Use in other areas
may result in poor reception. The RDS (radio
data system) function only works in areas that
broadcast RDS signals for FM stations.
WARNING
! Do not attempt to install or service this
product by yourself. Installation or servicing of this product by persons without
training and experience in electronic
equipment and automotive accessories
may be dangerous and could expose you
to the risk of electric shock, injury or
other hazards.
! Do not attempt to operate the unit while driv-
ing. Make sure to pull off the road and park
your vehicle in a safe location before attempting to use the controls on the device.
CAUTION
! Do not allow this unit to come into contact
with liquids. Electrical shock could result.
Also, damage to this unit, smoke, and overheating could result from contact with
liquids.
! The Pioneer CarStereo-Pass is for use only in
Germany.
! Always keep the volume low enough to hear
outside sounds.
! Avoid exposure to moisture.
CAUTION
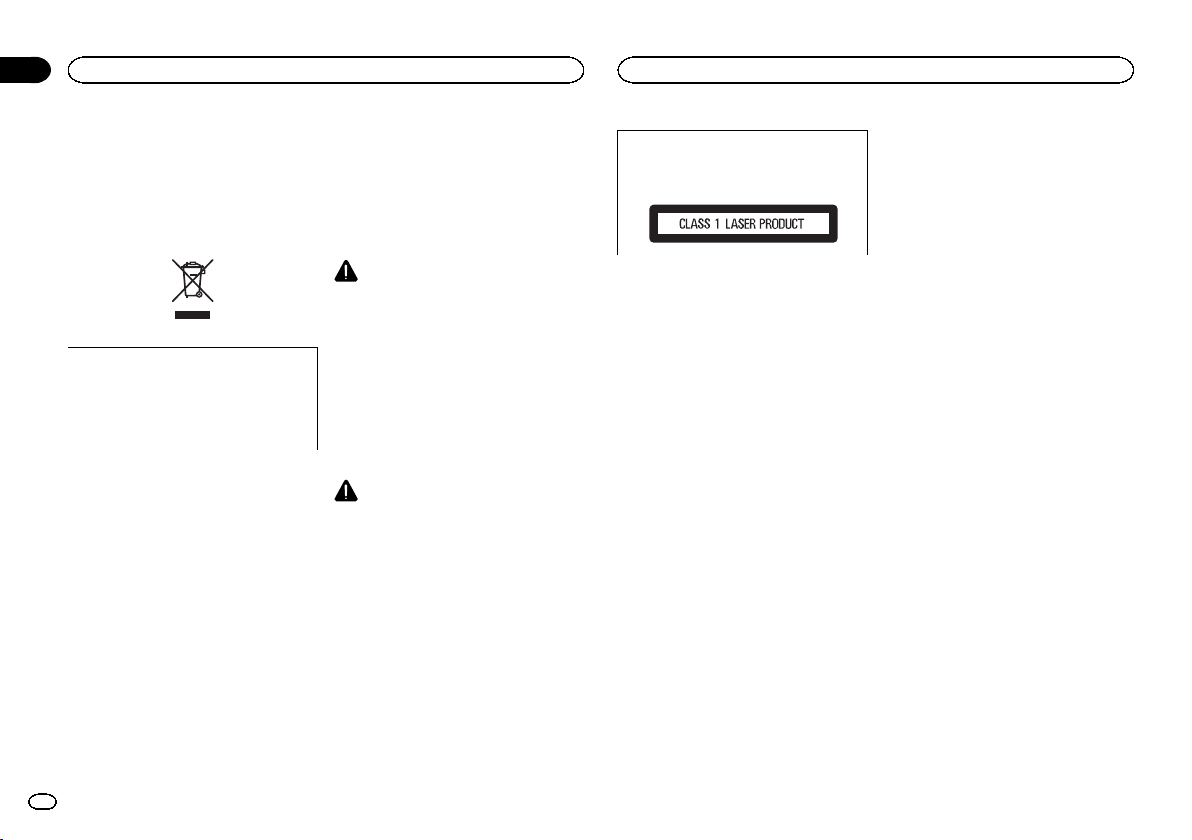
This product is a class 1 laser product classified under the Safety of laser products, IEC
60825-1:2007.
If you experience problems
Should this unit fail to work properly, please contact your dealer or nearest authorized PIONEER
Service Station.
2
En
Page 3
d8 9 e
a
6 8 a
Using this unit
Using this unit
Section
02
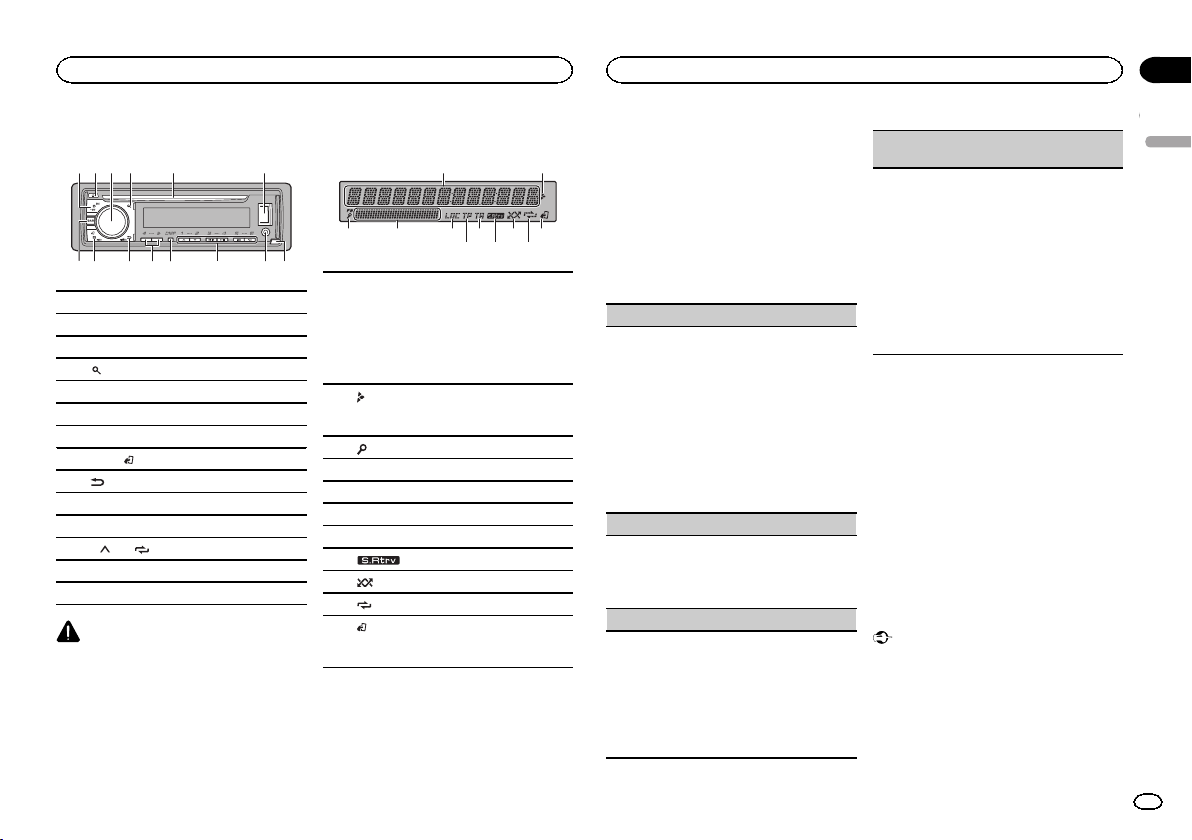
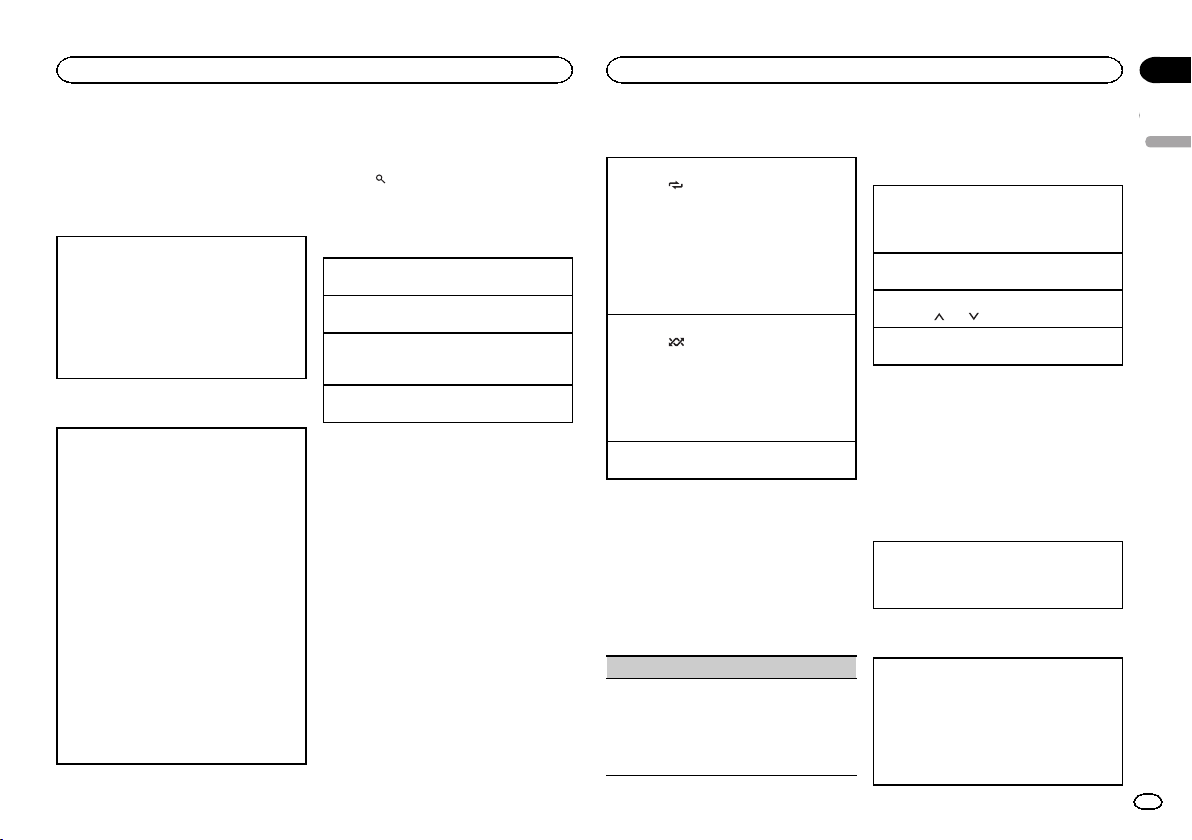
Head unit
2 4
3
1
7
1 SRC/OFF
2 h (eject)
3 MULTI-CONTROL (M.C.)
(list)
4
5 Disc loading slot
6 USB port
7 DAB
8 BAND/
9
a c/d
b DISP
c 1/
d AUX input jack (3.5 mm stereo jack)
e Detach button
CAUTION
Use an optional Pioneer USB cable (CD-U50E)
to connect the USB storage device as any device
connected directly to the unit will protrude out
from the unit, which could be dangerous.
5
b c
(iPod control)
(back)/DIMMER (dimmer)
to 6/
6
Display indication
1
7 b9
3
Main information section
! Tuner: band and frequency
! RDS: program service name, PTY infor-
1
mation and other literal information
! CD player, USB storage device and iPod:
elapsed playback time and text information
Appears when a lower tier of folder or menu
2
exists.
3
(list)
4 Sub information section
5 LOC (local seek tuning)
6 TP (traffic program identification)
7 TA (traffic announcements)
8
(random/shuffle)
9
a
(repeat)
(iPod control)
This unit ’s iPod function is operated from
b
your iPod.
54
(sound retriever)
Set up menu
1 After installation of this unit, turn the
ignition switch to ON.
SET UP appears.
2 Turn M.C. to switch to YES.
# If you do not use the unit for 30 seconds, the set
2
up menu will not be displayed.
# If you prefer not to set up at this time, turn M.C.
to switch to NO.
3 Press M.C. to select.
4 Follow these steps to set the menu.
To proceed to the next menu option, you need to
confirm your selection.
LANGUAGE (multi-language)
This unit can display the text information from a
compressed audio file even for information embedded in English, Russian or Turkish.
! If the embedded language and the selected
language setting are not the same, text information may not display properly.
! Some characters may not be displayed prop-
erly.
1 Turn M.C. to select the desired setting.
ENG (English)— РУС (Russian)—TUR (Turk-
ish)
2 Press M.C. to confirm the selection.
CLOCK SET (setting the clock)
1 Turn M.C. to adjust hour.
2 Press M.C. to select minute.
3 Turn M.C. to adjust minute.
4 Press M.C. to confirm the selection.
FM STEP (FM tuning step)
Use FM STEP to set FM tuning step options (seek
step settings).
1 Turn M.C. to select the FM tuning step.
100 (100 kHz)—50 (50kHz)
2 Press M.C. to confirm the selection.
! The manual tuning step is fixed at 50 kHz.
! When AF and TA are turned off, the seek step
is fixed at 50 kHz even if set to 100.
DAB ANT PW (DAB antenna power supply set-
ting)
Use DAB ANT PW to select whether to output
power to a connected DAB antenna.
1 Turn M.C. to select the desired setting.
! ON – Use this option to enable the supply
of power to a DAB antenna. Select when
using the optional DAB antenna (ANDAB1, sold separately) with the unit.
! OFF – Use this option to disable the supply
of power. Select when using a passive antenna with no booster.
2 Press M.C. to confirm the selection.
QUIT appears.
5 To finish your settings, turn M.C. to select
YES.
# If you prefer to change your setting again, turn
M.C. to switch to NO.
6 Press M.C. to select.
Notes
! You can set up the menu options from the
system menu and initial menu. For details
about the settings, refer to System menu on
page 10 and Initial menu on page 12.
! You can cancel set up menu by pressing
SRC/OFF.
Basic operations
Important
! Handle the front panel with care when re-
moving or attaching it.
! Avoid subjecting the front panel to excessive
shock.
! Keep the front panel out of direct sunlight
and high temperatures.
! To avoid damaging the device or vehicle inte-
rior, remove any cables and devices attached
to the front panel before detaching it.
English
3
En
Page 4
Section
02
Using this unit
Using this unit
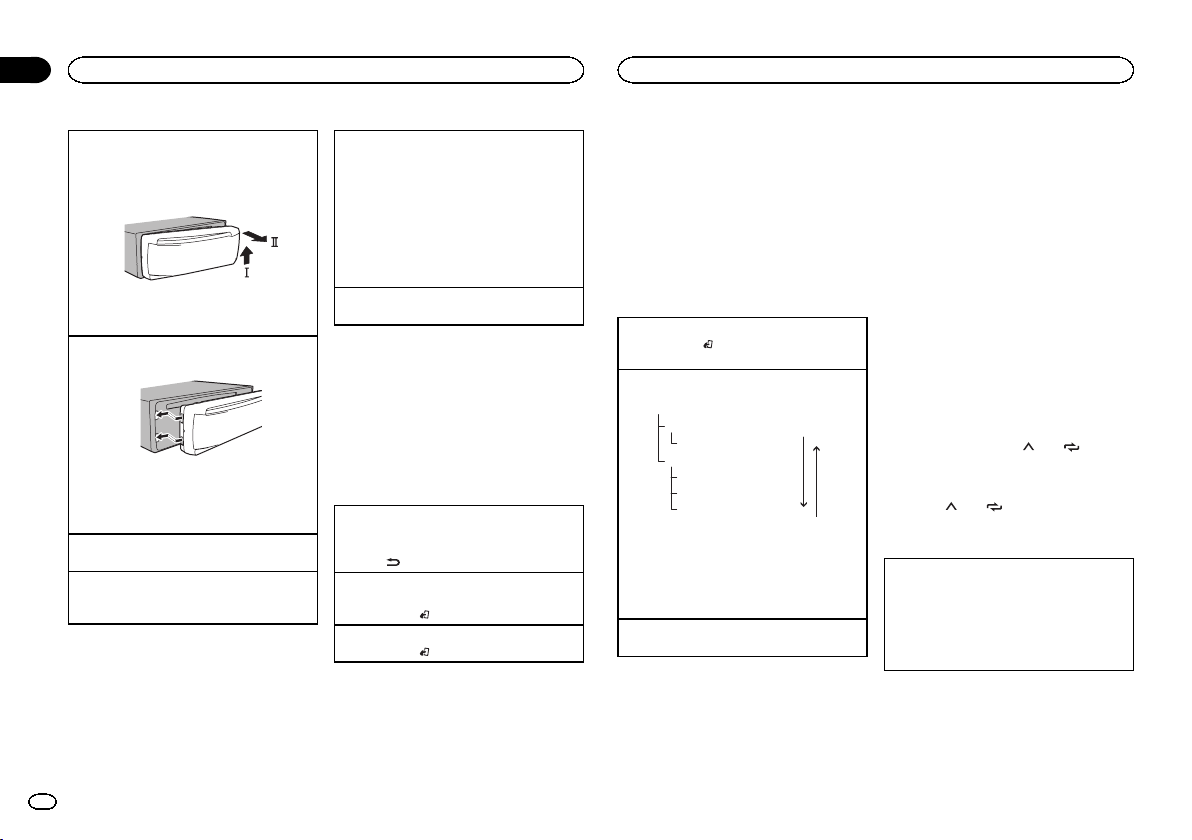
Removing the front panel
1 Press the detach button to release the front
panel.
2 Push the front panel upward (M) and then pull
it toward (N) you.
3 Always store the detached front panel in a pro-
tective case or bag.
Re-attaching the front panel
1 Slide the front panel to the left.
2 Press the right side of the front panel until it is
firmly seated.
Forcing the front panel into place may result in
damage to the front panel or head unit.
Turning the unit on
1 Press SRC/OFF to turn the unit on.
Turning the unit off
1 Press and hold SRC/OFF until the unit turns
off.
4
En
Selecting a source
1 Press SRC/OFF to cycle between:
DIGITAL RADIO (digital audio broadcasting)
—RADIO—CD—USB/iPod—APP (application)
—AUX
! If a source other than DIGITAL RADIO is se-
lected, you can switch to DIGITAL RADIO by
pressing DAB.
! USB MTP displays while the MTP connection
is in use.
Adjusting the volume
1 Turn M.C. to adjust the volume.
Note
When this unit’s blue/white lead is connected to
the vehicle’s auto-antenna relay control terminal, the vehicle’s antenna extends when this
unit’s source is turned on. To retract the antenna, turn the source off.
Frequently used menu
operations
Returning to the previous display
Returning to the previous list (the folder one level
higher)
/DIMMER.
1 Press
Returning to the ordinary display
Canceling the main menu
1 Press BAND/
Returning to the ordinary display from the list
1 Press BAND/
.
.
Digital Radio (Digital Audio
Broadcasting)
To receive DAB signals, connect a DAB antenna
(AN-DAB1) sold separately to the unit.
DAB stands for Digital Audio Broadcasting and
has the following features:
! High sound quality (nearly as high as for
CDs, although it may be reduced in some
cases in order to allow more services to be
broadcast)
! Interference-free reception
Note
Some stations perform broadcast testing.
Basic operations
Selecting a band
1 Press BAND/
or D3) is displayed.
Manual tuning (step by step)
1 Press c or d.
Ensemble
Some individual services in an ensemble may be
further subdivided into Service Components. The
main Ser vice Component is called the Primary
Service Component, and any auxiliary Service
Components are called Secondary Service Components.
Seeking
1 Press and hold c or d, and then release.
until the desired band (D1, D2,
Service
Primary Service Component
Service
Primary Service Component
Secondary Service Component
Secondary Service Component
Press .
Press .
Pausing
You can use the pause function to temporarily
stop listening to a DAB.
% Press DAB to pause or resume.
! This unit stores recent broadcasts to memory
automatically. The memory capacity of this
unit will vary depending on the bit rate of the
Service Component used. The approximate
memory capacity is five minutes for 192 kbps.
! If the duration that a selection is paused ex-
ceeds the length of the memory capacity,
playback will resume from the beginning of
the selection in memory.
This function is disabled while time shift is on.
For more details about time shift, refer to Listen-
ing to a recent broadcast (time shift) on page 5.
Storing and recalling stations
for each band
Using preset tuning buttons
1 To store: Press and hold down one of the
preset tuning buttons (1/
the number stops flashing.
2 To recall: Press one of the preset tuning
buttons (1/
to 6/ ).
to 6/ ) until
Switching the display
Selecting the desired text information
1 Press DISP to cycle between the following:
! SERVICE LABEL (service label or channel)
! BRDCST INFO (service label/PTY label/en-
semble label/channel and frequency)
! DYNAMIC LABEL (dynamic label)
! CLOCK (source name and clock)
Notes
! If the service label cannot be acquired in
SERVICE LABEL, the channel is displayed instead. If the service label is detected, the
service label will be displayed.
! For more details about PTY list, refer to PTY
list on page 6.
Page 5

Using this unit
Using this unit
Section
02
! This function is disabled while pausing. For
more details about pausing, refer to Pausing
on page 4.
! Depending on the band, text information can
be changed.
! Text information items that can be changed
depend on the area.
Listening to a recent broadcast
(time shift)
You can navigate through recent broadcasts
from the selected Service Component.
1 Press
mode.
Press again to resume the live broadcast.
2 Press c or d to adjust the playback point.
This unit stores recent broadcasts to memory
automatically. The memory capacity of this unit
will vary depending on the bit rate of the Service
Component used. The approximate memory capacity is five minutes for 192 kbps.
Stored selections that are older than what can
be stored in the memory will not be available.
/DIMMER to switch to time shift
! Press c to skip back one minute.
! Press d to skip forward one minute.
Selecting a Service Component
You can select a Service Component from the
following service list.
1 Press
mode.
2 Turn M.C. to change the service list and
press to select.
Once selected, the following Service Component
functions can be adjusted.
(list) to switch to the service list
SERVICE (service label)
You can select a Service Component from the list
of all components.
1 Turn M.C. to select a Service Component.
2 Press M.C. to receive a broadcast from the se-
lected Service Component.
Using alphabet search
1 Press
2 Turn M.C. to select a letter.
3 Press M.C. to display the alphabetical list.
4 Turn M.C. to select a Service Component.
5 Press M.C. to receive a broadcast from the se-
PROGRAM TYPE (PTY label)
You can select a Service Component from PTY information.
1 Turn M.C. to scroll to the desired PTY informa-
2 Turn M.C. to select a Service Component.
3 Press M.C. to receive a broadcast from the se-
ENSEMBLE (ensemble label)
You can select a Service Component from the relevant ensemble.
1 Turn M.C. to scroll to the desired ensemble
2 Turn M.C. to select a Service Component.
3 Press M.C. to receive a broadcast from the se-
(list).
lected Service Component.
tion and press it to select.
NEWS/INFO—POPULAR—CLASSICS—
OTHERS
lected Service Component.
and press it to select.
lected Service Component.
Updating service list information
You can receive updates to the service list.
% Press and hold down
To cancel, press
(list) again.
(list).
Function settings
1 Press M.C. to display the main menu.
2 Turn M.C. to change the menu option
and press to select FUNCTION.
Once selected, the function below can be adjusted.
S.FOLLOW (alternative Service Component
search)
If the tuner cannot get good reception, the unit
will automatically search for another ensemble
that supports the same Service Component. If no
alternative Service Component can be found or reception remains poor, this function will automatically switch to an identical FM broadcast.
1 Press M.C. to turn alternative Service Compo-
nent search on or off.
Radio
Basic operations
Selecting a band
1 Press BAND/
FM2,FM3 for FM or MW/LW) is displayed.
Switching preset stations
1 Press c or d.
! Select PCH (preset channel) under SEEK to
use this function.
until the desired band (FM1,
Manual tuning (step by step)
1 Press c or d.
! Select MAN (manual tuning) under SEEK to
use this function.
Seeking
1 Press and hold c or d, and then release.
You can cancel seek tuning by briefly pressing
c or d.
While pressing and holding c or d , you can
skip stations. Seek tuning starts as soon as
you release c or d.
Notes
! For details about SEEK, refer to SEEK (left/
right key setting) on page 6.
! This unit’s AF (alternative frequencies
search) function can be turned on and off.
AF should be off for normal tuning operation
(refer to AF (alternative frequencies search)
on page 6).
Storing and recalling stations
for each band
Using preset tuning buttons
1 To store: Press and hold down one of the
preset tuning buttons (1/
the number stops flashing.
2 To recall: Press one of the preset tuning
buttons (1/
to 6/ ).
to 6/ ) until
Switching the display
Selecting the desired text information
1 Press DISP to cycle between the following:
! FREQUENCY (program service name or
frequency)
! BRDCST INFO (program service name/PTY
information)
! CLOCK (source name and clock)
English
5
En
Page 6
Section
02
Using this unit
Using this unit
Notes
! If the program service name cannot be ac-
quired in FREQUENCY, the broadcast frequency is displayed instead. If the program
service name is detected, the program service name will be displayed.
! Depending on the band, text information can
be changed.
! Text information items that can be changed
depend on the area.
Using PTY functions
You can tune in to a station using PTY (program
type) information.
Searching for an RDS station by PTY information
1 Press
2 Turn M.C. to select a program type.
3 Press M.C. to begin the search.
(list).
NEWS/INFO—POPULAR—CLASSICS—
OTHERS
The unit searches for a station broadcasting
that type of program. When a station is found,
its program service name is displayed.
! To cancel the search, press M.C. again.
! The program of some stations may differ
from that indicated by the transmitted PTY.
! If no station is broadcasting the type of
program you searched for, NOT FOUND is
displayed for about two seconds and then
the tuner returns to the original station.
PTY list
For more details about PTY list, visit the following site:
http://www.pioneer.eu/eur/products/25/121/tech/
CarAudio/PTY.html
Function settings
1 Press M.C. to display the main menu.
6
En
2 Turn M.C. to change the menu option
and press to select FUNCTION.
3 Turn M.C. to select the function.
Once selected, the following functions can be
adjusted.
# If MW/LW band is selected, only BSM, LOCAL
and SEEK are available.
FM SETTING (FM sound quality settings)
The sound quality level can be set to match the
broadcast signal conditions of the FM band signal.
1 Press M.C. to display the setting mode.
2 Turn M.C. to select the desired setting.
! STANDARD – This is the standard setting.
! HI-FI – This is the setting to use to prioritize
the high quality of stereo sound.
! STABLE – This is the setting to use to priori-
tize the low noise of monaural sound.
BSM (best stations memory)
BSM (best stations memory) automatically stores
the six strongest stations in the order of their signal strength.
1 Press M.C. to turn BSM on.
To cancel, press M.C. again.
REGION (regional)
When AF is used, the regional function limits the
selection of stations to those broadcasting regional programs.
1 Press M.C. to turn the regional function on or
off.
LOCAL (local seek tuning)
Local seek tuning allows you to tune in to only
those radio stations with sufficiently strong signals for good reception.
1 Press M.C. to select the desired setting.
FM: OFF— LV1 —LV2 —LV 3—LV 4
MW/LW: OFF—LV 1 —LV2
The highest level setting allows reception of
only the strongest stations, while lower levels
allow the reception of weaker stations.
TA (traffic announcement standby)
1 Press M.C. to turn traffic announcement
standby on or off.
AF (alternative frequencies search)
1 Press M.C. to turn AF on or off.
NEWS (news program interruption)
1 Press M.C. to turn the NEWS function on or
off.
SEEK (left/right key setting)
You can assign a function to the left and right keys
of the unit.
Select MAN (manual tuning) to tune up or down
manually or select PCH (preset channel) to switch
between preset channels.
1 Press M.C. to select MAN or PCH.
CD/CD-R/CD-RW and USB
storage devices
MTP connection
MTP-compatible Android devices (running
Android OS 4.0 or higher) can be connected by
MTP connection using the USB source. To connect an Android device, use the cable that came
with the device.
Notes
! This function is not compatible with MIX-
TRAX.
! This function is not compatible with WAV.
Basic operations
Playing a CD/CD-R/CD-RW
1 Insert the disc into the disc loading slot with
the label side up.
Ejecting a CD/CD-R/CD-RW
1 Press h.
Playing songs on a USB storage device
1 Open the USB port cover.
2 Plug in the USB storage device using a USB
cable.
Stopping playback of files on a USB storage device
1 Youmay disconnect the USB storage device at
any time.
Selecting a folder
1 Press 1/
Selecting a track
1 Press c or d.
Fast forwarding or reversing
1 Press and hold c or d.
! When playing compressed audio, there is no
Returning to root folder
1 Press and hold BAND/
Switching between compressed audio and CD-DA
1 Press BAND/
Switching between playback memory devices
You can switch between playback memory devices
on USB storage devices with more than one Mass
Storage Device-compatible memory device.
1 Press BAND/
! You can switch between up to 32 different
or 2 / .
sound during fast forward or reverse.
.
.
.
memory devices.
Page 7
Using this unit
Using this unit
Section
02
Note
Disconnect USB storage devices from the unit
when not in use.
Operations using the MIXTRAX
button
Turning MIXTRAX on or off
You can use this function when USB is selected as
the source.
You cannot use this function with USB MTP.
1 Press 3/MIX to turn MIXTRAX on or off.
! For more details about MIXTRAX, refer to
About MIXTRAX on page 11.
! When MIXTRAX is in use, the sound retriever
function is disabled.
Switching the display
Selecting the desired text information
1 Press DISP to cycle between the following:
CD-DA
! ELAPSED TIME (track number and play-
back time)
! CLOCK (source name and clock)
! SPEANA (spectrum analyzer)
CD-TEXT
! TRACK INFO (track title/track artist/disc
title)
! ELAPSED TIME (track number and play-
back time)
! CLOCK (source name and clock)
! SPEANA (spectrum analyzer)
MP3/WMA/WAV/AAC
! TRACK INFO (track title/artist name/album
title)
! FILE INFO (file name/folder name)
! ELAPSED TIME (track number and play-
back time)
! CLOCK (source name and clock)
! SPEANA (spectrum analyzer)
Selecting and playing files/
tracks from the name list
1 Press to switch to the file/track name
list mode.
2 Use M.C. to select the desired file name
(or folder name).
Selecting a file or folder
1 Turn M.C.
Playing
1 When a file or track is selected, press M.C.
Viewing a list of the files (or folders) in the selected folder
1 When a folder is selected, press M.C.
Playing a song in the selected folder
1 When a folder is selected, press and hold M.C.
Operations using special buttons
Selecting a repeat play range
1 Press 6/
Playing tracks in random order
1 Press 5/
! To change songs during random play, press d
Pausing playback
1 Press 4/PAUSE to pause or resume.
to cycle between the following:
CD/CD-R/CD-RW
! ALL – Repeat all tracks
! ONE – Repeat the current track
! FLD – Repeat the current folder
USB storage device
! ALL – Repeat all files
! ONE – Repeat the current file
! FLD – Repeat the current folder
to turn random play on or off.
Tracks in a selected repeat range are played in
random order.
to switch to the next track. Pressing c restarts
playback of the current track from the beginning of the song.
Function settings
1 Press M.C. to display the main menu.
2 Turn M.C. to change the menu option
and press to select FUNCTION.
Once selected, the function below can be adjusted.
! S.RTRV is not available when MIXTRAX is
turned on.
S.RTRV (sound retriever)
Automatically enhances compressed audio and
restores rich sound.
1 Press M.C. to select the desired setting.
1—2—OFF (off)
1 is effective for low compression rates, and 2
is effective for high compression rates.
iPod
Basic operations
Playing songs on an iPod
1 Open the USB port cover.
2 Connect an iPod to USB input.
Playback is performed automatically.
Selecting a song (chapter)
1 Press c or d.
Selecting an album
1 Press 1/
Fast forwarding or reversing
1 Press and hold c or d.
Notes
! The iPod cannot be turned on or off when the
! Disconnect headphones from the iPod be-
! The iPod will turn off about two minutes after
Operations using the MIXTRAX
button
Turning MIXTRAX on or off
1 Press 3/MIX to turn MIXTRAX on or off.
! For more details about MIXTRAX, refer to
Switching the display
Selecting the desired text information
1 Press DISP to cycle between the following:
or 2 / .
control mode is set to CONTROL AUDIO.
fore connecting it to this unit.
the ignition is switched off.
About MIXTRAX on page 11.
! TRACK INFO (track title/artist name/album
title)
! ELAPSED TIME (track number and play-
back time)
! CLOCK (source name and clock)
! SPEANA (spectrum analyzer)
English
7
En
Page 8
Section
02
Using this unit
Using this unit
Browsing for a song
1 Press to switch to the top menu of list
search.
2 Use M.C. to select a category/song.
Changing the name of the song or category
1 Turn M.C.
Playlists—artists—albums—songs—podcasts
—genres—composers—audiobooks
Playing
1 When a song is selected, press M.C.
Viewing a list of songs in the selected category
1 When a category is selected, press M.C.
Playing a song in the selected category
1 When a category is selected, press and hold
M.C.
Searching the list by alphabet
1 When a list for the selected category is dis-
played, press
mode.
! You also can switch to alphabet search
mode by turning M.C. twice.
2 Turn M.C. to select a letter.
3 Press M.C. to display the alphabetical list.
! To cancel searching, press
Notes
! You can play playlists created with the com-
puter application (MusicSphere). The application will be available on our website.
! Playlists that you created with the computer
application (MusicSphere) are displayed in
abbreviated form.
to switch to alphabet search
/DIMMER.
Operations using special buttons
Selecting a repeat play range
1 Press 6/
! When the control mode is set to CONTROL
Selecting a random play range (shuffle)
1 Press 5/
Playing all songs in random order (shuffle all)
1 Press and hold 5/
! To turn off shuffle all, select OFF in shuffle. For
Pausing playback
1 Press 4/PAUSE to pause or resume.
to cycle between the following:
! ONE – Repeat the current song
! ALL – Repeat all songs in the selected list
iPod, the repeat play range will be same as
what is set for the connected iPod.
to cycle between the following:
! SNG – Play back songs in the selected list
in random order.
! ALB – Play back songs from a randomly se-
lected album in order.
! OFF – Not play back in random order.
to turn shuffle all on.
details, refer to Selecting a random play range
(shuffle) on page 8.
Playing songs related to the
currently playing song
You can play songs from the following lists.
• Album list of the currently playing artist
• Song list of the currently playing album
• Album list of the currently playing genre
1 Press and hold
mode.
2 Turn M.C. to change the mode; press to
select.
! ARTIST – Plays an album by the artist cur-
rently playing.
! ALBUM – Plays a song from the album cur-
rently being played.
to switch to link play
! GENRE – Plays an album from the genre cur-
rently being played.
The selected song/album will be played after the
currently playing song.
Notes
! The selected song/album may be canceled if
you use functions other than link search (e.g.
fast forward and reverse).
! Depending on the song selected to play, the
end of the currently playing song and the beginning of the selected song/album may be
cut off.
Using this unit’s iPod function
from your iPod
This unit’s iPod function can be controlled by
using the connected iPod.
CONTROL iPod is not compatible with the following iPod models.
! iPod nano 1st generation
! iPod with video
% Press BAND/
mode.
! CONTROL iPod – This unit’s iPod function
can be operated from the connected iPod.
! CONTROL AUDIO – This unit’s iPod function
can be controlled by using this unit.
Notes
! Switching the control mode to
CONTROL iPod pauses song playback. Use
the iPod to resume playback.
! The following operations are still accessible
from the unit even if the control mode is set
to CONTROL iPod.
— Pausing
— Fast forward/reverse
— Selecting a song (chapter)
! The volume can only be adjusted from this
unit.
to switch the control
Function settings
1 Press M.C. to display the main menu.
2 Turn M.C. to change the menu option
and press to select FUNCTION.
3 Turn M.C. to select the function.
Once selected, the following functions can be
adjusted.
! AUDIO BOOK is not available when
CONTROL iPod is selected in the control
mode. For details, refer to Using this unit’s
iPod function from your iPod on page 8.
AUDIO BOOK (audiobook speed)
1 Press M.C. to display the setting mode.
2 Turn M.C. to select your favorite setting.
! FASTER – Playback at a speed faster than
normal
! NORMAL – Playback at normal speed
! SLOWER – Playback at a speed slower
than normal
S.RTRV (sound retriever)
1 Press M.C. to select the desired setting.
1—2—OFF (off)
1 is effective for low compression rates, and 2
is effective for high compression rates.
Using connected device
applications
You can use this unit to perform streaming playback of and control tracks in iPhone applications or just for streaming playback.
8
En
Page 9
Using this unit
Using this unit
Section
02
Important
Use of third party apps may involve or require
the provision of personally identifiable information, whether through the creation of a
user account or otherwise, and for certain applications, the provision of geolocation data.
ALL THIRD PARTY APPS ARE THE SOLE RESPONSIBILITY OF THE PROVIDERS, INCLUDING WITHOUT LIMITATION COLLECTION AND
SECURITY OF USER DATA AND PRIVACY
PRACTICES. BY ACCESSING THIRD PARTY
APPS, YOU AGREE TO REVIEW THE TERMS
OF SERVICE AND PRIVACY POLICIES OF THE
PROVIDERS. IF YOU DO NOT AGREE WITH
THE TERMS OR POLICIES OF ANY PROVIDER
OR DO NOT CONSENT TO THE USE OF GEOLOCATION DATA WHERE APPLICABLE, DO
NOT USE THAT THIRD PARTYAPP.
Information for compatibility of
connected devices
The following is the detailed information regarding the terminals required to use the application
for iPhone on this unit.
For iPhone users
! This function is compatible with iPhone and
iPod touch.
! The device has iOS 5.0 or higher.
Notes
! Please check our website for a list of sup-
ported iPhone applications for this unit.
! Pioneer is not liable for any issues that may
arise from incorrect or flawed app-based
content.
! The content and functionality of the sup-
ported applications are the responsibility of
the App providers.
Starting procedure for iPhone users
1 Connect an iPhone to USB input.
2 Switch the source to APP.
3 Start up the application on the iPhone
and initiate playback.
Basic operations
Selecting a track
1 Press c or d.
Fast forwarding or reversing
1 Press and hold c or d.
Pausing playback
1 Press BAND/
to pause or resume.
Switching the display
Selecting the desired text information
1 Press DISP to cycle between the following:
! TRACK INFO (track title/artist name/album
title)
! APP NAME (application name)
! ELAPSED TIME (playback time)
! CLOCK (source name and clock)
! SPEANA (spectrum analyzer)
Function settings
1 Press M.C. to display the main menu.
2 Turn M.C. to change the menu option
and press to select FUNCTION.
3 Turn M.C. to select the function.
Once selected, the following functions can be
adjusted.
PAUSE (pause)
1 Press M.C. to pause or resume.
S.RTRV (sound retriever)
1 Press M.C. to select the desired setting.
1—2—OFF (off)
1 is effective for low compression rates, and 2
is effective for high compression rates.
Audio adjustments
1 Press M.C. to display the main menu.
2 Turn M.C. to change the menu option
and press to select AUDIO.
3 Turn M.C. to select the audio function.
Once selected, the following audio functions
can be adjusted.
! FADER is not available when SUB.W/SUB.W
is selected in SP-P/O MODE. For details, refer
to SP-P/O MODE (rear output and preout set-
ting) on page 12.
! SUB.W and SUB.W CTRL are not available
when REAR/REAR is selected in
SP-P/O MODE. For details, refer to
SP-P/O MODE (rear output and preout set-
ting) on page 12.
! SUB.W CTRL is not available when SUB.W is
selected in OFF. For details, refer to SUB.W
(subwoofer on/off setting) on page 9.
! SLA is not available when FM is selected as
the source.
FADER (fader adjustment)
1 Press M.C. to display the setting mode.
2 Turn M.C. to adjust the front/rear speaker bal-
ance.
BALANCE (balance adjustment)
1 Press M.C. to display the setting mode.
2 Turn M.C. to adjust the left/right speaker bal-
ance.
EQ SETTING (equalizer recall)
1 Press M.C. to display the setting mode.
2 Turn M.C. to select the equalizer.
POWERFUL—NATURAL—VOCAL—CUSTOM1—CUSTOM2—FLAT—SUPER BASS
The equalizer band and equalizer level can be
customized when CUSTOM1 or CUSTOM2 is
selected.
If selecting CUSTOM1 or CUSTOM2, complete
the procedures outlined below. If selecting
other options, press M.C. to return to the previous display.
! CUSTOM1 can be set separately for each
source. However, USB, iPod and APP are
all set to the same setting automatically.
! CUSTOM2 is a shared setting used in com-
mon for all sources.
3 Press M.C. to display the setting mode.
4 Press M.C. to cycle between the following:
Equalizer band—Equalizer level
5 Turn M.C. to select the desired setting.
Equalizer band: 80HZ—250HZ—800HZ—
2.5KHZ—8KHZ
Equalizer level: +6 to –6
LOUDNESS (loudness)
Loudness compensates for deficiencies in the lowfrequency and high-frequency ranges at low volume.
1 Press M.C. to select the desired setting.
OFF (off)— LOW (low)—MID (mid)—HI (high)
SUB.W (subwoofer on/off setting)
This unit is equipped with a subwoofer output
which can be turned on or off.
1 Press M.C. to select the desired setting.
NOR (normal phase)—REV (reverse phase)—
OFF (subwoofer off)
English
9
En
Page 10
Section
02
Using this unit
Using this unit
SUB.W CTRL (subwoofer adjustment)
Only frequencies lower than those in the selected
range are outputted from the subwoofer.
1 Press M.C. to display the setting mode.
2 Press M.C. to cycle between the following:
Cut-off frequency—Output level—Slope level
Rates that can be adjusted will flash.
3 Turn M.C. to select the desired setting.
Cut-off frequency: 50HZ—63HZ—80HZ—
100HZ—125HZ—160HZ—200HZ
Output level: –24 to +6
Slope level: –12— –24
BASS BOOST (bass boost)
1 Press M.C. to display the setting mode.
2 Turn M.C. to select a desired level.
0 to +6 is displayed as the level is increased or
decreased.
HPF SETTING (high pass filter adjustment)
Use this function when wanting to listen only to
high-frequency sounds. Only frequencies higher
than the high-pass filter (HPF) cutoff are output
from the speakers.
1 Press M.C. to display the setting mode.
2 Press M.C. to cycle between the following:
Cut-off frequency—Slope level
3 Turn M.C. to select the desired setting.
Cut-off frequency: OFF—50HZ—63HZ—80HZ
—100HZ—125HZ—160HZ—200HZ
Slope level: –12— –24
SLA (source level adjustment)
This function prevents the volume from changing
too dramatically when the source switches.
! Settings are based on the FM volume level,
which remains unchanged.
! The MW/LW volume level can also be adjusted
with this function.
! USB, iPod and APP are all set to the same set-
ting automatically.
1 Press M.C. to display the setting mode.
2 Turn M.C. to adjust the source volume.
Adjustment range: +4 to –4
System menu
Important
PW SAVE (power saving) is canceled if the vehicle battery is disconnected and will need to be
turned back on once the battery is reconnected.
When PW SAVE (power saving) is off, depending on connection methods, the unit may continue to draw power from the battery if your
vehicle’s ignition doesn’t have an ACC (accessory) position.
1 Press M.C. to display the main menu.
2 Turn M.C. to change the menu option
and press to select SYSTEM.
3 Turn M.C. to select the system menu
function.
Once selected, the following system menu functions can be adjusted.
LANGUAGE (multi-language)
This unit can display the text information from a
compressed audio file even for information embedded in English, Russian or Turkish.
! If the embedded language and the selected
language setting are not the same, text information may not display properly.
! Some characters may not be displayed prop-
erly.
1 Turn M.C. to select the desired setting.
ENG (English)— РУС (Russian)—TUR (Turk-
ish)
CLOCK SET (setting the clock)
1 Press M.C. to display the setting mode.
2 Press M.C. to select the segment of the clock
display you wish to set.
Hour—Minute
3 Turn M.C. to adjust the clock.
12H/24H (time notation)
1 Press M.C. to select the desired setting.
12H (12-hour clock)—24H (24-hour clock)
INFO DISPLAY (sub information)
The type of text information displayed in the sub
information section can be toggled.
1 Press M.C. to display the setting mode.
2 Turn M.C. to select the desired setting.
SPEANA—LEVEL METER—SOURCE—CLOCK
—OFF
! The signal bar indicator displays for SPEANA
or LEVEL METER when the source is set to
DIGITAL RADIO or RADIO.
AUTO PI (auto PI seek)
The unit can automatically search for a different
station with the same programming, even during
preset recall.
1 Press M.C. to turn Auto PI seek on or off.
AUX (auxiliar y input)
Activate this setting when using an auxiliary device connected to this unit.
1 Press M.C. to turn AUX on or off.
DIMMER (dimmer)
1 Press M.C. to turn the dimmer on or off.
! You can also change the dimmer setting by
pressing and holding
BRIGHTNESS (brightness adjustment)
You can use this setting to adjust the display
brightness.
The range of settings available for BRIGHTNESS
will var y depending on whether DIMMER is on or
off. For details, refer to DIMMER (dimmer) on page
10.
1 Press M.C. to display the setting mode.
2 Turn M.C. to select the desired setting.
DIMMER on: 1 to 4
DIMMER off: 1 to 5
MUTE MODE (mute mode)
Sound from this system is automatically muted or
attenuated when a signal from equipment with a
mute function is received.
1 Press M.C. to display the setting mode.
2 Turn M.C. to select the desired setting.
! MUTE – Muting
! 20dB ATT – Attenuation (20dB ATT has a
stronger effect than 10dB ATT)
! 10dB ATT – Attenuation
PW SAVE (power saving)
Switching this function on enables you to reduce
the consumption of battery power.
! Turning on the source is the only operation al-
lowed when this function is on.
1 Press M.C. to turn the power save on or off.
/DIMMER.
10
En
Page 11
Using this unit
Using this unit
Section
02
Selecting the illumination color
Illumination function menu
1 Press M.C. to display the main menu.
2 Turn M.C. to display ILLUMI and press to
select.
3 Turn M.C. to select the illumination function.
Once selected, the following audio functions
can be adjusted.
KEY COLOUR (key section color setting)
You can select desired colors for the keys of this
unit.
1 Press M.C. to display the setting mode.
2 Turn M.C. to select the illumination color.
! Preset colors (ranging from WHITE to
BLUE)
! SCAN (cycle through a variety of colors au-
tomatically)
! CUSTOM (customized illumination color)
DISP COLOUR (display section color setting)
You can select the desired colors for the display of
this unit.
1 Press M.C. to display the setting mode.
2 Turn M.C. to select the illumination color.
! Preset colors (ranging from WHITE to
BLUE)
! SCAN (cycle through a variety of colors au-
tomatically)
! CUSTOM (customized illumination color)
BOTH COLOUR (key and display color setting)
You can select the desired colors for the keys and
display of this unit.
1 Press M.C. to display the setting mode.
2 Turn M.C. to select the illumination color.
! Preset colors (ranging from WHITE to
BLUE)
! SCAN (cycle through a variety of colors au-
tomatically)
ILLUMI FX (illumination effect mode)
In this mode, an illumination effect can be seen
on the display at certain times such as when the
ACC power is turned on/off or a CD is inserted/
ejected.
1 Press M.C. to turn ILLUMI FX on or off.
! The illumination effect will activate when the
ACC power is turned on/off regardless of
whether the ILLUMI FX setting is on or off.
Note
When CUSTOM is selected, the customized
color saved is selected.
Customizing the illumination color
You can create custom illumination colors for
both KEY COLOUR and DISP COLOUR.
1 Press M.C. to display the main menu.
2 Turn M.C. to display ILLUMI and press to
select.
3 Turn M.C. to display KEY COLOUR or
DISP COLOUR. Press to select.
4 Press M.C. and hold until the customizing
illumination color setting appears in the display.
5 Press M.C. to select the primary color.
R (red)—G (green)—B (blue)
6 Turn M.C. to adjust the brightness level.
Adjustment range: 0 to 60
# You cannot select a level below 20 for all three of
R (red), G (green), and B (blue) at the same time.
# You can also perform the same operation on
other colors.
Note
You cannot create a custom illumination color
while SCAN is selected.
About MIXTRAX
MIXTRAX technology is used to insert a variety
of sound effects in between songs, allowing you
to experience your music as a nonstop mix complete with visual effects.
Notes
! Depending on the file/song, sound effects
may not be available.
! Turn MIXTRAX off if the visual effects it pro-
duces have adverse effects on driving. Refer
to Operations using the MIXTRAX button on
page 7.
MIXTRAX menu
1 Press M.C. to display the main menu.
2 Turn M.C. to change the menu option
and press to select MIXTRAX.
3 Turn M.C. to select the MIXTRAX function.
Once selected, the following MIXTRAX functions
can be adjusted. The function is enabled when
MIXTRAX is on.
SHORT PLAYBCK (short playback mode)
You can select the length of the playback time.
1 Press M.C. to display the setting mode.
2 Turn M.C. to select the desired setting.
1.0 MIN (1.0 minute)—1.5 MIN (1.5 minutes)—
2.0 MIN (2.0 minutes)—2.5 MIN (2.5 minutes)
—3.0 MIN (3.0 minutes)—OFF (off)
FLASH AREA (flash area)
You can select areas for flashing colors.
1 Press M.C. to display the setting mode.
2 Turn M.C. to select the desired setting.
KEY/DISPLAY (key and display)—KEY (key)—
OFF (off)
! When OFF is selected, the color set under IL-
LUMI is used as the display color.
FLASH PATTERN (flash pattern)
The flashing color and MIXTRAX special effects
display change with changes in the sound and
bass levels.
1 Press M.C. to display the setting mode.
2 Turn M.C. to select the desired setting.
! SOUND LEVEL 1 to SOUND LEVEL 6 – The
flash pattern changes according to the
sound level. Select a desired mode.
! LOW PASS 1 to LOW PASS 6 – The flash
pattern changes according to the bass
level. Select a desired mode.
! RANDOM 1 – The flash pattern changes
randomly according to the sound level
mode and low pass mode.
! RANDOM 2 – The flash pattern changes
randomly according to the sound level
mode.
! RANDOM 3 – The flash pattern changes
randomly according to the low pass mode.
DISPLAY FX (display effect)
The MIXTRAX special effects display can be turned
on or off.
1 Press M.C. to select the desired setting.
ON (MIXTRAX special effects display)—OFF
(normal display)
CUT IN FX (manual cut-in effect)
You can turn on or off the MIXTRAX sound effects
while manually changing tracks.
1 Press M.C. to select the desired setting.
ON (on)—OFF (off)
English
11
En
Page 12

Section
02
Using this unit
Using this unit
Initial menu
1 Press and hold SRC/OFF until the unit
turns off.
2 Press and hold SRC/OFF until the main
menu appears in the display.
3 Turn M.C. to change the menu option
and press to select INITIAL.
4 Turn M.C. to select the initial menu function.
Once selected, the following initial menu functions can be adjusted.
FM STEP (FM tuning step)
1 Press M.C. to select the FM tuning step.
100 (100 kHz)—50 (50kHz)
SP-P/O MODE (rear output and preout setting)
The rear speaker leads output and the RCA output
of this unit can be used to connect a full-range
speaker or subwoofer. Select a suitable option for
your connection.
1 Press M.C. to display the setting mode.
2 Turn M.C. to select the desired setting.
! REAR/SUB.W – Select when there is a full-
range speaker connected to the rear speaker leads output and there is a subwoofer
connected to the RCA output.
! SUB.W/SUB.W – Select when there is a
subwoofer connected directly to the rear
speaker leads output without any auxiliary
amp and there is a subwoofer connected
to the RCA output.
! REAR/REAR – Select when there is a full-
range speaker connected to the rear speaker leads output and the RCA output.
If there is a full-range speaker connected to
the rear speaker leads output and the RCA
output is not used, you may select either
REAR/SUB.W or REAR/REAR.
DAB ANT PW (DAB antenna power supply set-
ting)
1 Press M.C. to select the desired setting.
! ON – Use this option to enable the supply
of power to a DAB antenna. Select when
using the optional DAB antenna (ANDAB1, sold separately) with the unit.
! OFF – Use this option to disable the supply
of power. Select when using a passive antenna with no booster.
System menu
1 Press and hold SRC/OFF until the unit
turns off.
2 Press and hold SRC/OFF until the main
menu appears in the display.
3 Turn M.C. to change the menu option
and press to select SYSTEM.
4 Turn M.C. to select the system menu
function.
For details, refer to System menu on page 10.
Using an AUX source
1 Insert the stereo mini plug into the AUX
input jack.
2 Press SRC/OFF to select AUX as the
source.
Note
AUX cannot be selected unless the auxiliary setting is turned on. For more details, refer to AUX
(auxiliary input) on page 10.
Switching the display
Selecting the desired text information
1 Press DISP to cycle between the following:
! Source name
! Source name and clock
If an unwanted display appears
Turn off the unwanted display using the procedures listed below.
1 Press M.C. to display the main menu.
2 Turn M.C. to change the menu option
and press to select SYSTEM.
3 Turn M.C. to display DEMO OFF and press
to select.
4 Turn M.C. to switch to YES.
5 Press M.C. to select.
12
En
Page 13
5 67
d
Installation
Installation
Section
03
Connections
Important
! When installing this unit in a vehicle without
an ACC (accessory) position on the ignition
switch, failure to connect the red cable to the
terminal that detects operation of the ignition
key may result in battery drain.
ACC position No ACC position
! Use of this unit in conditions other than the
following could result in fire or malfunction.
— Vehicles with a 12-volt battery and negative
grounding.
— Speakers with 50 W (output value) and 4 W to
8 W (impedance value).
! To prevent a short-circuit, overheating or mal-
function, be sure to follow the directions
below.
— Disconnect the negative terminal of the bat-
tery before installation.
— Secure the wiring with cable clamps or adhe-
sive tape. Wrap adhesive tape around wiring
that comes into contact with metal parts to
protect the wiring.
— Place all cables away from moving parts,
such as the shift lever and seat rails.
— Place all cables away from hot places, such
as near the heater outlet.
— Do not connect the yellow cable to the batter y
by passing it through the hole to the engine
compartment.
— Cover any disconnected cable connectors
with insulating tape.
— Do not shorten any cables.
— Never cut the insulation of the power cable of
this unit in order to share the power with
other devices. The current capacity of the
cable is limited.
— Use a fuse of the rating prescribed.
— Never wire the negative speaker cable directly
to ground.
— Never band together negative cables of multi-
ple speakers.
! When this unit is on, control signals are sent
through the blue/white cable. Connect this
cable to the system remote control of an external power amp or the vehicle’s auto-anten-
O
F
N
F
O
S
T
A
R
T
na relay control terminal (max. 300 mA
12 V DC). If the vehicle is equipped with a
glass antenna, connect it to the antenna
booster power supply terminal.
! Never connect the blue/white cable to the
power terminal of an external power amp.
Also, never connect it to the power terminal
of the auto antenna. Doing so may result in
battery drain or a malfunction.
! The black cable is ground. Ground cables for
this unit and other equipment (especially,
high-current products such as power amps)
must be wired separately. If they are not, an
accidental detachment may result in a fire or
malfunction.
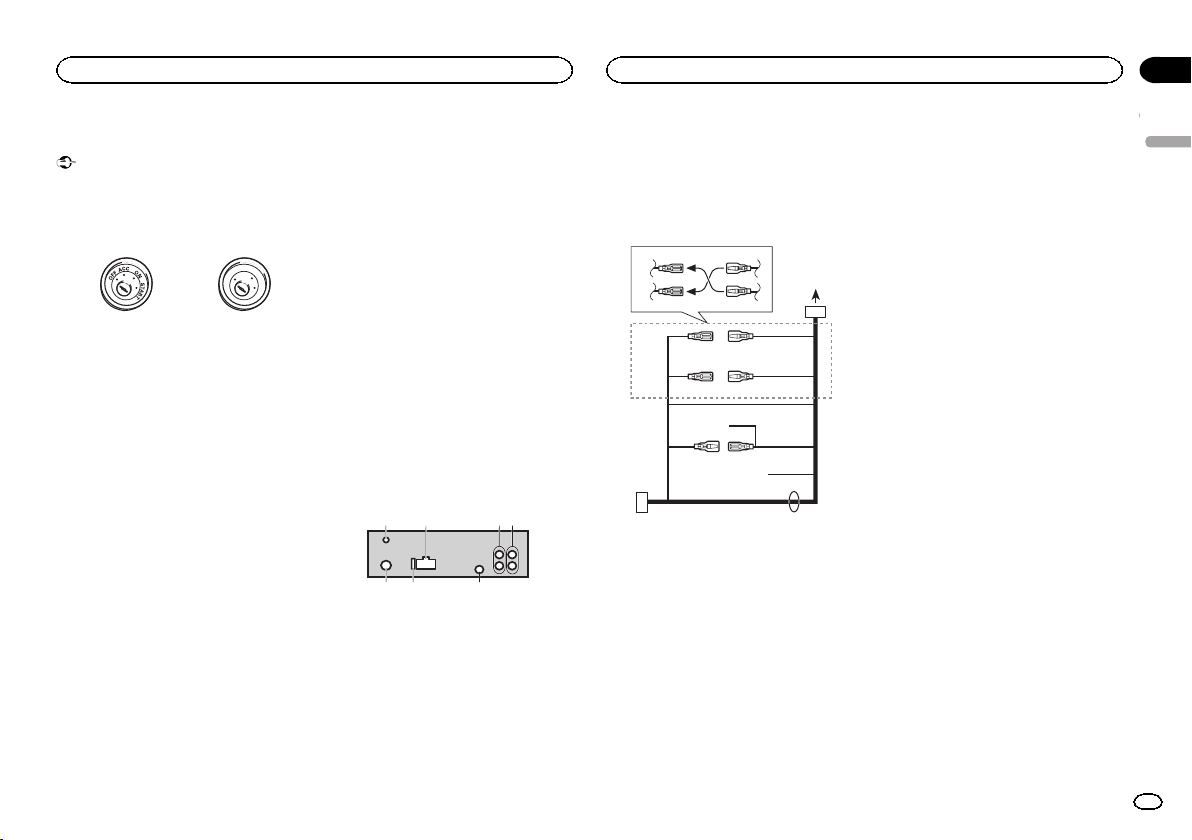
This unit
1
2
1 DAB antenna input
To receive DAB signals, connect a DAB antenna (AN-DAB1) sold separately to the unit.
For improved DAB reception, make sure a
DAB antenna with phantom power input (active type) is used. Pioneer recommends
using “AN-DAB1” (sold separately). Current
consumption of DAB antenna should be
100 mA or less.
2 Power cord input
3 Rear output or subwoofer output
4 Front output
3
4
5 Antenna input
6 Fuse (10 A)
7 Wired remote input
Hard-wired remote control adapter can be
connected (sold separately).
Power cord
3
4
1
c
3
556
6
4
a
b89
2
7
e
1 To power cord input
2 Depending on the kind of vehicle, the func-
tion of 3 and 5 may be different. In this
case, be sure to connect 4 to 5 and 6 to
3.
3 Yellow
Back-up (or accessory)
4 Yellow
Connect to the constant 12 V supply terminal.
5 Red
Accessory (or back-up)
6 Red
Connect to terminal controlled by ignition
switch (12 V DC).
7 Connect leads of the same color to each
other.
8 Black (chassis ground)
9 Blue/white
The pin position of the ISO connector will differ depending on the type of vehicle. Connect
9 and b when Pin 5 is an antenna control
type. In another type of vehicle, never connect 9 and b.
a Blue/white
Connect to system control terminal of the
power amp (max. 300mA 12 V DC).
b Blue/white
Connect to auto-antenna relay control terminal (max. 300 mA 12 V DC).
c Yellow/black
If you use an equipment with Mute function,
wire this lead to the Audio Mute lead on that
equipment. If not, keep the Audio Mute lead
free of any connections.
d Speaker leads
White: Front left +
White/black: Front left *
Gray: Front right +
Gray/black: Front right *
Green: Rear left + or subwoofer +
Green/black: Rear left * or subwoofer *
Violet: Rear right + or subwoofer +
Violet/black: Rear right * or subwoofer *
e ISO connector
In some vehicles, the ISO connector may be
divided into two. In this case, be sure to connect to both connectors.
Notes
! Change the initial menu of this unit. Refer to
SP-P/O MODE (rear output and preout setting) on page 12.
The subwoofer output of this unit is monaural.
! When using a subwoofer of 70 W (2 W), be
sure to connect the subwoofer to the violet
and violet/black leads of this unit. Do not
connect anything to the green and green/
black leads.
English
13
En
Page 14

5cmcm
Section
03
Installation
Installation
Power amp (sold separately)
Perform these connections when using the optional amplifier.
2
2
3
55
3
77
4
6
1
1
1 System remote control
Connect to Blue/white cable.
2 Power amp (sold separately)
3 Connect with RCA cables (sold separately)
4 To Front output
5 Front speaker
6 To Rear output or subwoofer output
7 Rear speaker or subwoofer
Installation
Important
! Check all connections and systems before
final installation.
! Do not use unauthorized parts as this may
cause malfunctions.
! Consult your dealer if installation requires
drilling of holes or other modifications to the
vehicle.
! Do not install this unit where:
— it may interfere with operation of the vehicle.
— it may cause injury to a passenger as a result
of a sudden stop.
! The semiconductor laser will be damaged if
it overheats. Install this unit away from hot
places such as near the heater outlet.
! Optimum performance is obtained when the
unit is installed at an angle of less than 60°.
60°
! When installing, to ensure proper heat dis-
persal when using this unit, make sure you
leave ample space behind the rear panel and
wrap any loose cables so they are not blocking the vents.
Leave ample
5 cm
space
5 cm
DIN front/rear mount
This unit can be properly installed using either
front-mount or rear-mount installation.
Use commercially available parts when installing.
DIN Front-mount
1 Insert the mounting sleeve into the dashboard.
For installation in shallow spaces, use the supplied mounting sleeve. If there is enough space,
use the mounting sleeve that came with the vehicle.
2 Secure the mounting sleeve by using a
screwdriver to bend the metal tabs (90°) into
place.
1
2
1 Dashboard
2 Mounting sleeve
# Make sure that the unit is installed securely in
place. An unstable installation may cause skipping
or other malfunctions.
DIN Rear-mount
1 Determine the appropriate position
where the holes on the bracket and the side
of the unit match.
2 Tighten two screws on each side.
1
2
1 Tapping screw (5 mm × 8 mm)
2 Mounting bracket
3 Dashboard or console
3
Removing the unit
1 Remove the trim ring.
1 Trim ring
2 Notched tab
! Releasing the front panel allows easier ac-
cess to the trim ring.
! When reattaching the trim ring, point the
side with the notched tab down.
2 Insert the supplied extraction keys into
both sides of the unit until they click into
place.
3 Pull the unit out of the dashboard.
Removing and re-attaching the front
panel
You can remove the front panel to protect your
unit from theft.
For details, refer to Removing the front panel and
Re-attaching the front panel on page 4.
14
En
Page 15
Additional information
Appendix
Additional information
Troubleshooting
Symptoms are written in bold and causes in regular, non-indented text. Regular, indented text is
used to indicate actions to be taken.
The display automatically returns to the ordinary
display.
You did not perform any operation within about 30
seconds.
Perform operation again.
The repeat play range changes unexpectedly.
Depending on the repeat play range, the selected
range may change when another folder or track is
being selected or during fast forwarding/reversing.
Select the repeat play range again.
A subfolder is not played back.
Subfolders cannot be played when FLD (folder repeat) is selected.
Select another repeat play range.
NO XXXX appears when a display is changed
(NO TITLE, for example).
There is no embedded text information.
Switch the display or play another track/file.
The unit is malfunctioning.
There is interference.
You are using a device, such as a cellular phone,
that may cause audible interference.
Move electrical devices that may be causing the
interference away from the unit.
Error messages
When you contact your dealer or your nearest
Pioneer Service Center, be sure to note the error
message.
Symptoms are written in bold and causes in regular, non-indented text. Regular, indented text is
used to indicate actions to be taken.
Common
AMP ERROR
This unit fails to operate or the speaker connection is
incorrect; the protective circuit is activated.
Check the speaker connection. If the message
fails to disappear even after the engine is
switched off/on, contact your dealer or an
authorized Pioneer Service Station for
assistance.
DAB tuner
ANTENNA ERROR
The antenna connection is incorrect.
Check the antenna connection. If the message
fails to disappear even after the engine is
switched off/on, contact your dealer or an
authorized Pioneer Service Station for
assistance.
CD player
ERROR-07, 11, 12, 17, 30
The disc is dirty.
Clean the disc.
The disc is scratched.
Replace the disc.
ERROR-07, 10, 11, 12, 15, 17, 30, A0
There is an electrical or mechanical error.
Turn the ignition switch OFF and back ON, or
switch to a different source, then back to the CD
player.
ERROR-15
The inserted disc is blank.
Replace the disc.
ERROR-23
Unsupported CD format.
Replace the disc.
FORMAT READ
Sometimes there is a delay between the start of playback and when you start to hear any sound.
Wait until the message disappears and you hear
sound.
NO AUDIO
The inserted disc does not contain any playable files.
Replace the disc.
SKIPPED
The inserted disc contains DRM protected files.
The protected files are skipped.
PROTECT
All the files on the inserted disc are embedded with
DRM.
Replace the disc.
USB storage device/iPod
FORMAT READ
Sometimes there is a delay between the start of playback and when you start to hear any sound.
Wait until the message disappears and you hear
sound.
NO AUDIO
There are no songs.
Transfer the audio files to the USB storage device
and connect.
The connected USB storage device has security enabled.
Follow the USB storage device instructions to
disable the security.
SKIPPED
The connected USB storage device contains DRM
protected files.
The protected files are skipped.
PROTECT
All the files on the connected USB storage device
are embedded with DRM.
Replace the USB storage device.
N/A USB
The connected USB device is not supported by this
unit.
! Connect a USB Mass Storage Class compliant
device.
! Disconnect your device and replace it with a
compatible USB storage device.
CHECK USB
The USB connector or USB cable has shortcircuited.
Check that the USB connector or USB cable is
not caught in something or damaged.
CHECK USB
The connected USB storage device consumes more
than maximum allowable current.
Disconnect the USB storage device and do not
use it. Turn the ignition switch to OFF, then to
ACC or ON and then connect only compliant
USB storage devices.
English
15
En
Page 16

Appendix
Additional information
Additional information
CHECK USB
The iPod operates correctly but does not charge.
Make sure the connection cable for the iPod has
not shorted out (e.g., not caught in metal
objects). After checking, turn the ignition switch
OFF and back ON, or disconnect the iPod and
reconnect.
ERROR-19
Communication failed.
Perform one of the following operations.
–Turn the ignition switch OFF and back ON.
–Disconnect the USB storage device.
–Change to a different source.
Then, return to the USB source.
iPod failure.
Disconnect the cable from the iPod. Once the
iPod’s main menu is displayed, reconnect the
iPod and reset it.
ERROR-23
USB storage device was not formatted with FAT12,
FAT16 or FAT32.
USB storage device should be formatted with
FAT12, FAT16 or FAT32.
ERROR-16
The iPod firmware version is old.
Update the iPod version.
iPod failure.
Disconnect the cable from the iPod. Once the
iPod’s main menu is displayed, reconnect the
iPod and reset it.
STOP
There are no songs in the current list.
Select a list that contains songs.
NOT FOUND
No related songs.
Transfer songs to the iPod.
Apps
START UP APP
The application has not started running yet.
Follow the instructions that appear on the
screen.
Handling guidelines
Discs and player
Use only discs that feature either of the following
two logos.
Use 12-cm discs.
Use only conventional, fully circular discs.
The following types of discs cannot be used with
this unit:
! DualDiscs
! 8-cm discs: Attempts to use such discs with
an adaptor may cause the unit to malfunction.
! Oddly shaped discs
! Discs other than CDs
! Damaged discs, including discs that are
cracked, chipped or warped
! CD-R/RW discs that have not been finalized
Do not touch the recorded surface of the discs.
Store discs in their cases when not in use.
Do not attach labels, write on or apply chemicals
to the surface of the discs.
To clean a CD, wipe the disc with a soft cloth outward from the center.
Condensation may temporarily impair the player’s
performance. Let it rest for about one hour to adjust to a warmer temperature. Also, wipe any
damp discs off with a soft cloth.
Playback of discs may not be possible because of
disc characteristics, disc format, recorded application, playback environment, storage conditions,
and so on.
Road shocks may interrupt disc playback.
When using discs that can be printed on label surfaces, check the instructions and the warnings of
the discs. Depending on the discs, inserting and
ejecting may not be possible. Using such discs
may result in damage to this equipment.
Do not attach commercially available labels or
other materials to the discs.
! The discs may warp making the disc unplay-
able.
! The labels may come off during playback and
prevent ejection of the discs, which may result
in damage to the equipment.
USB storage device
Connections via USB hub are not supported.
Do not connect anything other than a USB storage device.
Firmly secure the USB storage device when driving. Do not let the USB storage device fall onto the
floor, where it may become jammed under the
brake or accelerator pedal.
Depending on the USB storage device, the following problems may occur.
! Operations may vary.
! The storage device may not be recognized.
! Files may not be played back properly.
! The device may cause audible interference
when you are listening to the radio.
iPod
Do not leave the iPod in places with high temperatures.
Firmly secure the iPod when driving. Do not let the
iPod fall onto the floor, where it may become
jammed under the brake or accelerator pedal.
About iPod settings
! When an iPod is connected, this unit changes
the EQ (equalizer) setting of the iPod to off in
order to optimize the acoustics. When you disconnect the iPod, the EQ returns to the original
setting.
! You cannot set Repeat to off on the iPod when
using this unit. Repeat is automatically
changed to All when the iPod is connected to
this unit.
Incompatible text saved on the iPod will not be displayed by the unit.
16
En
Page 17
Additional information
Appendix
Additional information
Compressed audio
compatibility (disc, USB)
WMA
File extension: .wma
Bit rate: 48 kbps to 320 kbps (CBR), 48 kbps to
384 kbps (VBR)
Sampling frequency: 32 kHz, 44.1 kHz, 48 kHz
Windows Mediaä Audio Professional, Lossless,
Voice/DRM Stream/Stream with video: Not compatible
MP3
File extension: .mp3
Bit rate: 8 kbps to 320 kbps (CBR), VBR
Sampling frequency: 8 kHz to 48 kHz (32 kHz,
44.1 kHz, 48 kHz for emphasis)
Compatible ID3 tag version: 1.0, 1.1, 2.2, 2.3, 2.4
(ID3 tag Version 2.x is given priority over Version
1.x.)
M3u playlist: Not compatible
MP3i (MP3 interactive), mp3 PRO: Not compatible
WAV
File extension: .wav
Quantization bits: 8 and 16 (LPCM), 4 (MS
ADPCM)
Sampling frequency: 16 kHz to 48 kHz (LPCM),
22.05 kHz and 44.1kHz (MS ADPCM)
! You cannot use this function with USB MTP.
AAC
Compatible format: AAC encoded by iTunes
File extension: .m4a
Sampling frequency: 11.025 kHz to 48 kHz
Transmission rate: 16 kbps to 320 kbps, VBR
Apple Lossless: Not compatible
AAC file bought from the iTunes Store (.m4p file
extension): Not compatible
Supplemental information
Only the first 32 characters can be displayed as a
file name (including the file extension) or a folder
name.
Russian text to be displayed on this unit should be
encoded in one of the following character sets:
! Unicode (UTF-8, UTF-16)
! A character set other than Unicode that is
used in a Windows environment and is set to
Russian in the multi-language setting
This unit may not work properly depending on the
application used to encode WMA files.
There may be a slight delay at the start of playback
of audio files embedded with image data or audio
files stored on a USB storage device that has numerous folder hierarchies.
Disc
Playable folder hierarchy: up to eight tiers (A practical hierarchy is less than two tiers.)
Playable folders: up to 99
Playable files: up to 999
File system: ISO 9660 Level 1 and 2, Romeo, Joliet
Multi-session playback: Compatible
Packet write data transfer: Not compatible
Regardless of the length of blank sections between the songs from the original recording, compressed audio discs play with a short pause
between songs.
USB storage device
Playable folder hierarchy: up to eight tiers (A practical hierarchy is less than two tiers.)
Playable folders: up to 500
Playable files: up to 15 000
Playback of copyright-protected files: Not compatible
Partitioned USB storage device: Only the first partition can be played.
There may be a slight delay when starting playback of audio files on a USB storage device with
numerous folder hierarchies.
CAUTION
! Pioneer cannot guarantee compatibility with
all USB mass storage devices and assumes
no responsibility for any loss of data on
media players, smart phones, or other devices while using this product.
! Do not leave discs or a USB storage device
in any place that is subject to high temperatures.
iPod compatibility
This unit supports only the following iPod models. Supported iPod software versions are shown
below. Older versions may not be supported.
Made for
! iPod touch (5th generation)
! iPod touch (4th generation)
! iPod touch (3rd generation)
! iPod touch (2nd generation)
! iPod touch (1st generation)
! iPod classic
! iPod with video
! iPod nano (7th generation)
! iPod nano (6th generation)
! iPod nano (5th generation)
! iPod nano (4th generation)
! iPod nano (3rd generation)
! iPod nano (2nd generation)
! iPod nano (1st generation)
! iPhone 5
! iPhone 4S
! iPhone 4
! iPhone 3GS
! iPhone 3G
! iPhone
Depending on the generation or version of the
iPod, some functions may not be available.
Operations may vary depending on the software
version of iPod.
Users of iPod with the Lightning Connector should
use the Lightning to USB Cable (supplied with
iPod).
Users of iPod with the Dock Connector should use
CD-IU51. For details, consult your dealer.
About the file/format compatibility, refer to the
iPod manuals.
Audiobook, Podcast: Compatible
CAUTION
Pioneer accepts no responsibility for data lost
on the iPod, even if that data is lost while this
unit is used.
English
17
En
Page 18

Appendix
Additional information
Additional information
Sequence of audio files
The user cannot assign folder numbers and
specify playback sequences with this unit.
Example of a hierarchy
01
02
03
04
05
Level 1 Level 2 Level 3 Level 4
Disc
Folder selection sequence or other operation
may differ depending on the encoding or writing
software.
USB storage device
Playback sequence is the same as recorded sequence in the USB storage device.
To specify the playback sequence, the following
method is recommended.
1 Create a file name that includes numbers
that specify the playback sequence (e.g.,
001xxx.mp3 and 099yyy.mp3).
2 Put those files into a folder.
3 Save the folder containing files on the USB
storage device.
However,depending on the system environment,
you may not be able to specify the playback sequence.
For USB portable audio players, the sequence is
different and depends on the player.
audio file
01 to 05: Folder
number
1 to 6: Playback
sequence
: Folder
: Compressed
Russian character chart
D: C D: C D: C D: C D: C
: А : Б : В : Г : Д
: Е, Ё : Ж : З : И, Й : К
: Л : М : Н : О : П
: Р : С : Т : У : Ф
: Х : Ц : Ч
: Ы : Ь : Э : Ю : Я
: Ш,
: Ъ
Щ
D: Display C: Character
Copyright and trademark
iTunes
Apple and iTunes are trademarks of Apple Inc.,
registered in the U.S. and other countries.
MP3
Supply of this product only conveys a license for
private, non-commercial use and does not convey a license nor imply any right to use this product in any commercial (i.e. revenue-generating)
real time broadcasting (terrestrial, satellite,
cable and/or any other media), broadcasting/
streaming via internet, intranets and/or other
networks or in other electronic content distribution systems, such as pay-audio or audio-on-demand applications. An independent license for
such use is required. For details, please visit
http://www.mp3licensing.com.
WMA
Windows Media is either a registered trademark
or trademark of Microsoft Corporation in the
United States and/or other countries.
This product includes technology owned by
Microsoft Corporation and cannot be used or
distributed without a license from Microsoft
Licensing, Inc.
iPod & iPhone
iPhone, iPod, iPod classic, iPod nano, and iPod
touch are trademarks of Apple Inc., registered in
the U.S. and other countries.
Lightning is a trademark of Apple Inc.
“Made for iPod” and “Made for iPhone” mean
that an electronic accessory has been designed
to connect specifically to iPod or iPhone, respectively, and has been certified by the developer to
meet Apple performance standards. Apple is
not responsible for the operation of this device
or its compliance with safety and regulatory
standards. Please note that the use of this accessory with iPod or iPhone may affect wireless
performance.
Androidä
Android is a trademark of Google Inc.
MIXTRAX
MIXTRAX is a trademark of the PIONEER
CORPORATION.
18
En
Page 19

Additional information
Appendix
Additional information
Specifications
General
Power source ................... 14.4 V DC (10.8 V to 15.1 V al-
Grounding system ............ Negative type
Maximum curre nt consumption
................................... 10.0 A
Dimensions (W × H × D):
DIN
Chassis ............................ 178mm × 50mm × 165 mm
Nose ................................ 188mm × 58 mm × 15 mm
D
Chassis ............................ 178mm × 50mm × 165 mm
Nose ................................ 170mm × 46 mm × 15 mm
Weight ............................. 1 kg
Audio
Maximum power output ... 50 W × 4
Continuous power output
................................... 22W × 4 (50Hz to 15000 Hz,
Load impedance .............. 4 W (4 W to 8W allowable)
Preout maximum output level
................................... 2.0V
Loudness contour ............ +10 dB (100 Hz), +6.5 dB
Equalizer (5-Band Graphic Equalizer):
Frequency ........................ 80 Hz/250 Hz/800 Hz/2.5 kHz/
Equalization range ........... ±12 dB (2 dB step)
Subwoofer (mon o):
Frequency ........................ 50 Hz/63 Hz/80 Hz/100 Hz/
Slope ............................... –12 dB/oct, –24 dB/oct
Gain ................................ +6dB to –24 dB
Phase .............................. Normal/Reverse
CD player
System ............................ Compact disc audio system
Usable discs .................... Compact disc
Signal-to-noise ratio ......... 94 dB (1kHz) (IEC-A network)
Number of channels ........ 2 (stereo)
MP3 decoding format ...... MPEG-1 & 2 Aud io Layer 3
lowable)
70 W × 1/2 W (for subwoofer)
5 % THD, 4 W load, both channels driven)
(10 kHz) (volume: –30 dB)
8 kHz
125 Hz/160 Hz/200 Hz
WMA decoding format ..... Ver.7, 7.1, 8, 9, 10, 11, 12 (2 ch
AAC decoding format ....... MPEG-4 AAC (iTunes encoded
WAV signal format ........... Linear PCM & MS ADPCM
USB
USB standard specification
................................... USB 2.0 full speed
Maximum curre nt supply
................................... 1A
USB Class ....................... MSC (Mass Storage Class)
File system ....................... FAT12, FAT16, FAT32
MP3 decoding format ...... MPEG-1 & 2 Aud io Layer 3
WMA decoding format ..... Ver.7, 7.1, 8, 9, 10, 11, 12 (2 ch
AAC decoding format ....... MPEG-4 AAC (iTunes encoded
WAV signal format ........... Linear PCM & MS ADPCM
FM tuner
Frequency range .............. 87.5 MHz to 108.0 MHz
Usable sensitivity ............. 9 dBf (0.8 µV/75 W, mono, S/N:
Signal-to-noise ratio ......... 72 dB (IEC-Anetwork)
MW tuner
Frequency range .............. 531kHz to 1602 kHz
Usable sensitivity ............. 25 µV (S/N: 20 dB)
Signal-to-noise ratio ......... 62 dB (IEC-Anetwork)
LW tuner
Frequency range .............. 153kHz to 281kHz
Usable sensitivity ............. 28 µV (S/N: 20 dB)
Signal-to-noise ratio ......... 62 dB (IEC-Anetwork)
audio)
(Windows Media Player)
only)
(Ver.10.6 and earlier)
(Non-compressed)
audio)
(Windows Media Player)
only)
(Ver.10.6 and earlier)
(Non-compressed)
30 dB)
DAB tuner
Frequency range (Band C)
................................... 174.928 MHz to 239.200 MHz
Frequency range (L Band)
................................... 1452.960 MHz to
Usable sensitivity (Band C)
................................... –96 dBm
Usable sensitivity (L Band)
................................... –94 dBm
Signal-to-noise ratio ......... 85 dB
(5A to 13F)
1 490.624 MHz (LA to LW)
Note
Specifications and the design are subject to
modifications without notice.
English
19
En
Page 20
Section
Avant de commencer
01
Avant de commencer
Nous vous remercions d’avoir acheté cet ap-
pareil PIONEER
Pour garantir une utilisation correcte, lisez bien
ce mode d’emploi avant d’utiliser cet appareil. Il
est particulièrement important que vous lisiez et
respectiez les indications ATTENTION et PRÉ-
CAUTION de ce mode d’emploi. Conservez-le
dans un endroit sûr et facilement accessible pour
toute consultation ultérieure.
Si vous souhaitez vous débarrasser de cet appareil, ne le mettez pas à la poubelle avec vos
ordures ménagères. Il existe un système de
collecte séparé pour les appareils électroniques usagés, qui doivent être récupérés, traités et recyclés conformément à la législation.
Dans les états membres de l’UE, en Suisse et en
Norvège, les foyers domestiques peuvent rapporter leurs produits électroniques usagés gratuitement à des points de collecte spécifiés ou à
un revendeur (sous réserve d’achat d’un produit
similaire).
Dans les pays qui ne sont pas mentionnés cidessus, veuillez contacter les autorités locales
pour vous informer de la méthode correcte de
mise au rebut.
En agissant ainsi vous assurerez que le produit
que vous mettez au rebut est soumis au processus de traitement, de récupération et de recyclage nécessaire et éviterez ainsi les effets
négatifs potentiels sur l’environnement et la
santé publique.
Quelques mots sur cet appareil
Les fréquences du syntoniseur de cet appareil
sont attribuées pour une utilisation en Europe
de l’Ouest, Asie, Moyen-Orient, Afrique et Océanie. Son utilisation dans d’autres régions peut
se traduire par une réception de mauvaise qualité. La fonction RDS (radio data system) n’est
opérationnelle que dans les régions où des signaux RDS sont diffusés pour les stations FM.
ATTENTION
! N’essayez pas d’installer cet appareil ou
d’en faire l’entretien vous-même. L’installation ou l’entretien de cet appareil par
des personnes sans formation et sans expérience en équipement électronique et
en accessoires automobiles peut être
dangereux et vous exposer à des risques
d’électrocution ou à d’autres dangers.
! N’essayez pas de démonter ou de modifier
cet appareil. Veillez à quitter la route et garer
votre véhicule en lieu sûr avant d’essayer d’utiliser les commandes de l’appareil.
PRÉCAUTION
! Ne laissez pas cet appareil entrer en contact
avec des liquides. Cela pourrait provoquer
une électrocution. Tout contact avec des liquides pourrait également provoquer des
dommages, de la fumée et une surchauffe
de l’appareil.
! Le Pioneer CarStereo-Pass est utilisable seu-
lement en Allemagne.
! Maintenez le niveau d’écoute à une valeur
telle que vous puissiez entendre les sons provenant de l’extérieur.
! Évitez tout contact avec l’humidité.
PRÉCAUTION
Cet appareil est un produit laser de Classe 1,
classé selon l’article IEC 60825-1:2007 relatif à
la Sécurité des produits laser.
APPAREIL À LASER DE CLASSE 1
Si vous rencontrez des
problèmes
En cas d’anomalie, veuillez contacter votre revendeur ou le centre d’entretien agréé par
PIONEER le plus proche.
20
Fr
Page 21
d8 9 e
a
6 8 a
Utilisation de cet appareil
Utilisation de cet appareil
Section
02
Appareil central
2 4
3
1
7
1 SRC/OFF
2 h (éjection)
3 MULTI-CONTROL (M.C.)
(liste)
4
5 Fente de chargement des disques
6 Port USB
7 DAB
8 BAND/
9
nosité)
a c/d
b DISP
c 1/
d Jack d’entrée AUX (jack stéréo 3,5 mm)
e Touche de retrait de la face avant
PRÉCAUTION
Utilisez un câble USB Pioneer optionnel (CDU50E) pour connecter le périphérique de stockage USB, faute de quoi ce dernier, comme
n’importe quel périphérique relié directement à
l’appareil, dépasserait de l’ appareil et pourrait
s’avérer dangereux.
5
b c
(contrôle de l’iPod)
(retour)/DIMMER (atténuateur de lumi-
à 6/
6
Indications affichées
1
7 b9
3
Section d’ informations principales
! Syntoniseur : gamme et fréquence
! RDS : nom du service de programme, in-
formations PTY et autres informations
1
textuelles
! Lecteur de CD, périphérique de stockage
USB et iPod : temps de lecture écoulé et
informations textuelles
Apparaît lorsqu’un niveau inférieur de dos-
2
sier ou de menu existe.
3
(liste)
4 Section d’ informations secondaires
LOC (accord automatique sur une station lo-
5
cale)
TP (identification des programmes d’infor-
6
mations routières)
7 TA (bulletins d’informations routières)
8
(lecture aléatoire)
9
a
(répétition de la lecture)
(contrôle de l’iPod)
La fonction iPod de cet appareil est utilisée
b
à partir de votre iPod.
54
(sound retriever)
Menu de configuration
2
1 Après avoir installé l’appareil, mettez le
contact d’allumage sur ON.
SET UP s’affiche.
2 Tournez M.C. pour passer à YES.
# Si vous n’utilisez pas l’appareil dans les 30 secon-
des environ, le menu de configuration ne s’affichera
pas.
# Si vous préférez ne pas effectuer la configuration
pour l’instant, tournez M.C. pour passer à NO.
3 Appuyez sur M.C. pour sélectionner.
4 Procédez comme suit pour définir le
menu.
Pour passer à la prochaine option de menu,
vous devez confirmer votre sélection.
LANGUAGE (multilingue)
Cet appareil peut afficher les informations textuelles d’un fichier audio compressé même si elles
sont incorporées en anglais, en russe ou en turc.
! Si la langue incorporée et la langue sélection-
née sont différentes, les informations textuelles peuvent ne pas s’afficher correctement.
! Certains caractères peuvent ne pas s’afficher
correctement.
1 Tournez M.C. pour sélectionner le réglage sou-
haité.
ENG (Anglais)—РУС (Russe)—TUR (Turc)
2 Appuyez sur M.C. pour confirmer la sélection.
CLOCK SET (réglage de l’horloge)
1 Tournez M.C. pour régler l’heure.
2 Appuyez sur M.C. pour sélectionner les minu-
tes.
3 Tournez M.C. pour régler les minutes.
4 Appuyez sur M.C. pour confirmer la sélection.
FM STEP (incrément d’accord FM)
Utilisez FM STEP pour régler les options d’incrément d’accord FM (recherchez les réglages de l’incrément).
1 Tournez M.C. pour choisir l’incrément d’accord
FM.
100 (100 kHz) — 50 (50 kHz)
2 Appuyez sur M.C. pour confirmer la sélection.
! L’incrément d’accord manuel est défini sur
50 kHz.
! Quand les fonctions AF et TA sont toutes deux
désactivées, l’incrément d’accord est défini
sur 50kHz même s’il est réglé sur 100.
DAB ANT PW (réglage de l’alimentation de l’an-
tenne DAB)
Utilisez DAB ANT PW pour indiquer si l’alimentation doit être émise en sortie vers une antenne
DAB connectée.
1 Tournez M.C. pour sélectionner le réglage sou-
haité.
! ON – Utilisez cette option pour activer l’ali-
mentation vers une antenne DAB. Sélectionnez-la lorsque vous utilisez l’antenne
DAB en option (AN-DAB1 vendue séparément) avec l’appareil.
! OFF – Utilisez cette option pour désactiver
l’alimentation. Sélectionnez-la lorsque
vous utilisez une antenne passive sans amplification.
2 Appuyez sur M.C. pour confirmer la sélection.
QUIT s’affiche.
5 Pour terminer la configuration, tournez
M.C. pour sélectionner YES.
# Si vous souhaitez modifier à nouveau le réglage,
tournez M.C. pour passer à NO.
6 Appuyez sur M.C. pour sélectionner.
Français
21
Fr
Page 22
Section
Utilisation de cet appareil
02
Utilisation de cet appareil
Remarques
! Vous pouvez configurer les options de menu
à partir du menu système et du menu initial.
Pour des détails sur les réglages, reportezvous à la page 30, Menu système et la page
32, Menu initial.
! Vous pouvez annuler le menu de configura-
tion en appuyant sur SRC/OFF.
Opérations de base
Important
! Manipulez la face avant avec précaution
lorsque vous l’enlevez ou la remontez.
! Évitez de heurter la face avant.
! Conservez la face avant à l’abri des tempéra-
tures élevées et de la lumière directe du soleil.
! Pour éviter d’endommager le périphérique
ou l’intérieur du véhicule, retirez tous les câbles et périphériques connectés à la face
avant, avant d’enlever cette dernière.
22
Fr
Retrait de la face avant
1 Appuyez sur la touche de retrait pour libérer la
face avant.
2 Poussez la face avant vers le haut (M), puis
tirez-la vers vous (N).
3 Conservez toujours la face avant retirée dans
un boîtier ou un sac de protection.
Remontage de la face avant
1 Faitesglisser la face avant vers la gauche.
2 Appuyez sur le côté droit de la face avant jus-
qu’àcequ’elle soit bien en place.
Forcer la face avant en position risque de l’endommager ou d’endommager l’appareil central.
Mise en service de l’appareil
1 Appuyez sur SRC/OFF pour mettre en service
l’appareil.
Mise hors ser vice de l’appareil
1 Maintenez la pression sur SRC/OFF jusqu’àce
que l’appareil soit mis hors tension.
Choix d’une source
1 Appuyez sur SRC/OFF pour parcourir les op-
tions disponibles :
DIGITAL RADIO (radio numérique)—RADIO—
CD—USB/iPod—APP (application)—AUX
! Si une source autre que DIGITAL RADIO est
sélectionnée, vous pouvez basculer sur DIGI-
TAL RADIO en appuyant sur DAB.
! USB MTP apparaît lorsque la connexion MTP
est en cours d’utilisation.
Réglage du volume
1 Tournez M.C. pour régler le volume.
Remarque
Si le fil bleu/blanc de l’appareil est relié à la
prise de commande du relais de l’antenne motorisée du véhicule, celle-ci se déploie lorsque la
source est mise en service. Pour rétracter l’antenne, mettez la source hors service.
Opérations de menu
fréquemment utilisées
Retour à l’affichage précédent
Retour à la liste précédente (le dossier de niveau
immédiatement supérieur)
1 Appuyez sur
Retour à l’affichage ordinaire
Annulation du menu principal
1 Appuyez sur BAND/
Retour à l’affichage ordinaire à partir de la liste
1 Appuyez sur BAND/
/DIMMER.
.
.
Radio numérique (Digital
Audio Broadcasting)
Pour recevoir des signaux DAB, connectez une
antenne DAB (AN-DAB1) vendue séparément à
l’appareil.
DAB signifie Digital Audio Broadcasting (radio
numérique) et présente les fonctions suivantes :
! Son de qualité supérieure (quasiment aussi
élevée que pour les CD, même si elle peut
être réduite dans certains cas pour permettre
l’émission de services supplémentaires)
! Réception sans interférences
Remarque
Certaines stations procèdent à un test de l’émission.
Opérations de base
Sélection d’une gamme
1 Appuyez sur BAND/
gamme désirée (D1, D2 ou D3), soit affichée.
Accord manuel (pas à pas)
1 Appuyez sur c ou d.
Ensemble
Service
Composant de service primaire
Service
Composant de service primaire
Composant de service secondaire
Composant de service secondaire
Certains services d’un ensemble peuvent en outre
être subdivisés en Composants de service. Le
Composant de service principal est appelé le
Composant de service primaire et les Composants
de service auxiliaires sont appelés les Composants de service secondaires.
Recherche
1 Appuyez de manière prolongée sur c ou d,
puis relâchez.
jusqu’à ce que la
Appuyez sur .
Appuyez sur .
Pause
Vous pouvez utiliser la fonction pause pour arrêter temporairement l’écoute d’une radio DAB.
Page 23
Utilisation de cet appareil
Utilisation de cet appareil
Section
02
% Appuyez sur DAB pour mettre en pause
ou reprendre la lecture.
! Cet appareil enregistrement automatique-
ment les émissions récentes en mémoire. La
capacité de mémoire de cet appareil varie en
fonction du débit binaire du Composant de
service utilisé. La capacité de mémoire est
d’environ cinq minutes pour 192 kbit/s.
! Si la durée de mise en pause d’une sélection
est supérieure à la capacité de mémoire, la
lecture reprend à partir du début de la sélection en mémoire.
Cette fonction est désactivée lorsque la fonction
de changement temporel est activée. Pour avoir
plus d’informations sur la fonction de changement temporel, reportez-vous à la page 23,
Écoute d’une émission récente (changement
temporel).
Enregistrement et rappel des
stations pour chaque gamme
Utilisation des touches de présélection
1 Pour la mise en mémoire : Appuyez de
façon prolongée sur l’une des touches de
présélection (1/
numéro cesse de clignoter.
2 Pour le rappel : Appuyez sur une des touches de présélection (1/
à6/ ) jusqu’à ce que le
à6/ ).
Changement de l’affichage
Sélection des informations textuelles souhaitées
1 Appuyez sur DISP pour parcourir les options
disponibles :
! SERVICE LABEL (étiquette de service ou
canal)
! BRDCST INFO (étiquette de service/éti-
quette PTY/étiquette d’ensemble/canal et
fréquence)
! DYNAMIC LABEL (étiquette dynamique)
! CLOCK (nom de la source et horloge)
Remarques
! Si l’étiquette de service ne peut pas être ac-
quise dans SERVICE LABEL, le canal s’affiche alors. Si l’étiquette de service est
détectée, celle-ci s’affiche.
! Pour avoir plus d’informations sur la liste
PTY, reportez-vous à la page 24, Liste des
codes PTY.
! Cette fonction est désactivée lors de la pause
de la lecture. Pour plus de détails sur la
pause, reportez-vous à la page 22, Pause.
! En fonction de la gamme sélectionnée, les
informations textuelles peuvent être différentes.
! Les informations textuelles pouvant être mo-
difiées dépendent de la région.
Écoute d’une émission récente
(changement temporel)
Vous pouvez parcourir les émissions récentes à
partir du Composant de service sélectionné.
1 Appuyez sur
mode de changement temporel.
Appuyez à nouveau pour reprendre l’émission
en direct.
/DIMMER pour passer en
2 Appuyez sur c ou d pour régler le point
de lecture.
! Appuyez sur c pour passer à une minute pré-
cédente.
! Appuyez sur d pour passer à une minute sui-
vante.
Cet appareil enregistrement automatiquement
les émissions récentes en mémoire. La capacité
de mémoire de cet appareil varie en fonction du
débit binaire du Composant de service utilisé.
La capacité de mémoire est d’environ cinq minutes pour 192 kbit/s.
Les sélections enregistrées antérieures à ce que
peut être enregistré en mémoire ne sont pas disponibles.
Sélection d’un Composant de
service
Vous pouvez sélectionner un Composant de service dans la liste des services suivante.
1 Appuyez sur
mode liste des services.
2 Tournez M.C. pour changer la liste des
services et appuyez pour sélectionner.
Une fois sélectionnées, les fonctions des
Composants de service peuvent être ajustées.
(liste) pour passer en
SERVICE (étiquette de service)
Vous pouvez sélectionner un Composant de service dans la liste de tous les composants.
1 Tournez M.C. pour sélectionner un Composant
de service.
2 Appuyez sur M.C. pour recevoir une émission
du Composant de service sélectionné.
Utilisation de la recherche par ordre alphabétique
1 Appuyez sur
2 Tournez M.C. pour sélectionner une lettre.
3 Appuyez sur M.C. pour afficher la liste alpha-
bétique.
4 Tournez M.C. pour sélectionner un Composant
de service.
5 Appuyez sur M.C. pour recevoir une émission
du Composant de service sélectionné.
PROGRAM TYPE (étiquette PTY)
Vous pouvez sélectionner un Composant de service dans les informations PTY.
1 Tournez M.C. pour accéder aux informations
PTY souhaitées et appuyez pour sélectionner.
NEWS/INFO—POPULAR—CLASSICS—
OTHERS
2 Tournez M.C. pour sélectionner un Composant
de service.
3 Appuyez sur M.C. pour recevoir une émission
du Composant de service sélectionné.
ENSEMBLE (étiquette d’ensemble)
Vous pouvez sélectionner un Composant de service dans l’ensemble approprié.
1 Tournez M.C. pour accéder à l’ensemble sou-
haité et appuyez pour sélectionner.
2 Tournez M.C. pour sélectionner un Composant
de service.
3 Appuyez sur M.C. pour recevoir une émission
du Composant de service sélectionné.
(liste).
Français
23
Fr
Page 24
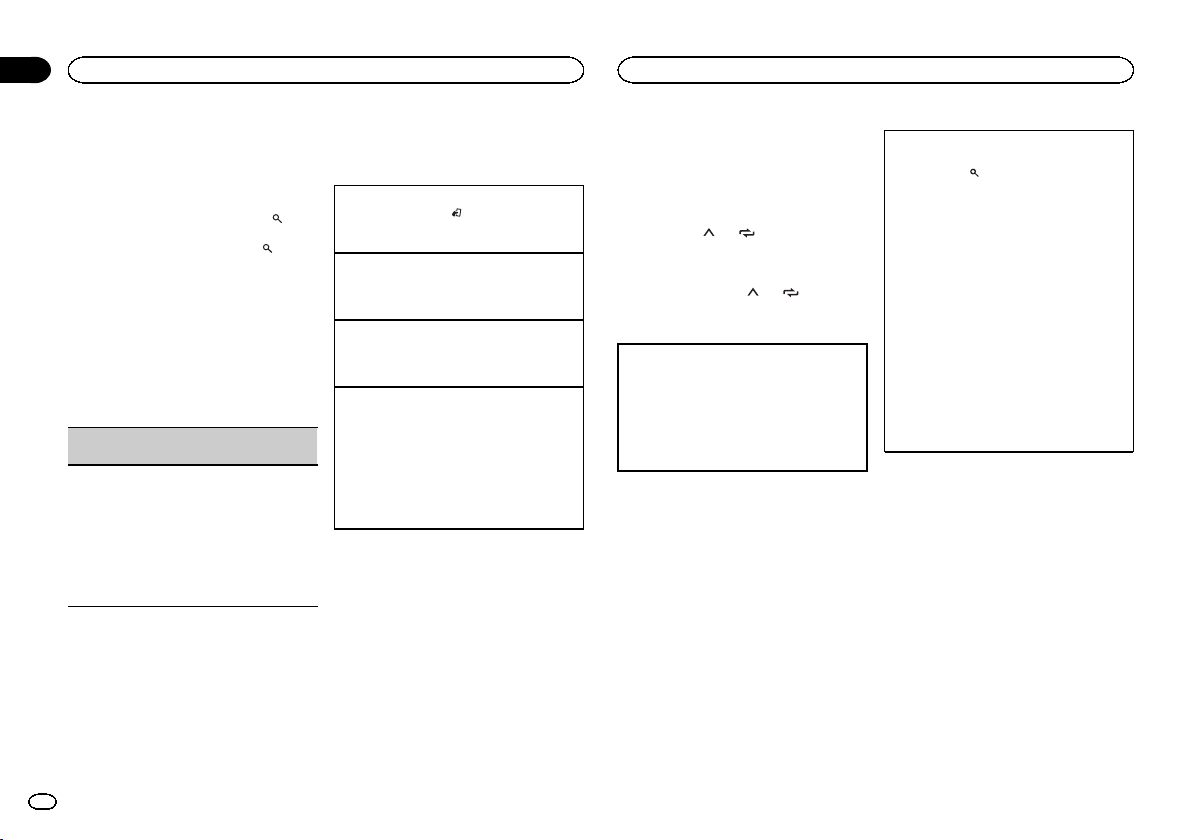
Section
Utilisation de cet appareil
02
Utilisation de cet appareil
Mise à jour des informations de
la liste des services
Vous pouvez recevoir des mises à jour de la liste
des services.
% Appuyez de façon prolongée sur
(liste).
Pour annuler, appuyez à nouveau sur
(liste).
Réglages des fonctions
1 Appuyez sur M.C. pour afficher le menu
principal.
2 Tournez M.C. pour changer l’option de
menu et appuyez pour sélectionner
FUNCTION.
Une fois sélectionnée, la fonction ci-dessous
peut être ajustée.
S.FOLLOW (recherche d’un autre Composant de
service)
Si le syntoniseur ne parvient pas à obtenir une réception correcte, l’appareil recherche automatiquement un autre ensemble prenant en charge le
même Composant de service. Si aucun autre
Composant de service ne peut être trouvé ou si la
réception reste médiocre, cette fonction bascule
automatiquement sur une émission FM identique.
1 Appuyez sur M.C. pour activer ou désactiver la
recherche d’un autre Composant de service.
Radio
Opérations de base
Sélection d’une gamme
1 Appuyez sur BAND/
gamme désirée (FM1, FM2, FM3 en FM ou
MW/LW (PO/GO)) s’affiche.
Changement de fréquence en mémoire
1 Appuyez sur c ou d.
! Sélectionnez PCH (canal présélectionné) sous
SEEK pour utiliser cette fonction.
Accord manuel (pas à pas)
1 Appuyez sur c ou d.
! Sélectionnez MAN (accord manuel) sous
SEEK pour utiliser cette fonction.
Recherche
1 Appuyez de manière prolongée sur c ou d,
puis relâchez.
Vous pouvez annuler l’accord automatique en
appuyant brièvement sur c ou d.
Lorsque vous appuyez de manière prolongée
sur c ou d, vous pouvez sauter des stations.
L’accord automatique démarre dès que vous
relâchez c ou d.
Remarques
! Pour des détails sur SEEK, reportez-vous à la
page 25, SEEK (réglage de la touche droite/
gauche).
! La fonction AF (recherche des autres fré-
quences possibles) de cet appareil peut être
mise en service ou hors service. La fonction
AF doit être hors service pendant une opération d’accord normal (reportez-vous à la
page 25, AF (recherche des autres fréquences
possibles)).
jusqu’à ce que la
Enregistrement et rappel des
stations pour chaque gamme
Utilisation des touches de présélection
1 Pour la mise en mémoire : Appuyez de
façon prolongée sur l’une des touches de
présélection (1/
numéro cesse de clignoter.
2 Pour le rappel : Appuyez sur une des touches de présélection (1/
à6/ ) jusqu’à ce que le
à6/ ).
Changement de l’affichage
Sélection des informations textuelles souhaitées
1 Appuyez sur DISP pour parcourir les options
disponibles :
! FREQUENCY (nom du service de pro-
gramme ou fréquence)
! BRDCST INFO (nom du service de pro-
gramme/informations PTY)
! CLOCK (nom de la source et horloge)
Remarques
! Si le nom du service de programme ne peut
pas être acquis dans FREQUENCY, la fréquence d’émission s’affiche alors. Si le nom
du service de programme est détecté, celuici s’affiche.
! En fonction de la gamme sélectionnée, les
informations textuelles peuvent être différentes.
! Les informations textuelles pouvant être mo-
difiées dépendent de la région.
Utilisation des fonctions PTY
Vous pouvez rechercher une station à l’aide de
son code PTY (type de programme).
Recherche d’une station RDS en utilisant le code
PTY
1 Appuyez sur
2 Tournez M.C. pour sélectionner le type de pro-
gramme.
NEWS/INFO—POPULAR—CLASSICS—
OTHERS
3 Appuyez sur M.C. pour lancer la recherche.
Cet appareil recherche une station qui diffuse
ce type de programme. Quand une station est
trouvée, son nom de service de programme
est affiché.
! Appuyez à nouveau sur M.C. pour aban-
! Le type de l’émission captée peut différer
! Si aucune station ne diffuse d’émission du
(liste).
donner la recherche.
de celui indiqué par le code PTY transmis.
type choisi, l’indication NOT FOUND s’affiche pendant environ deux secondes puis
le syntoniseur s’accorde sur la fréquence
d’origine.
Liste des codes PTY
Pour plus de détails sur la liste PTY, visitez le site
suivant :
http://www.pioneer.eu/eur/products/25/121/tech/
CarAudio/PTY.html
Réglages des fonctions
1 Appuyez sur M.C. pour afficher le menu
principal.
2 Tournez M.C. pour changer l’option de
menu et appuyez pour sélectionner
FUNCTION.
3 Tournez M.C. pour sélectionner la fonction.
Une fois sélectionnées, les fonctions suivantes
peuvent être ajustées.
24
Fr
Page 25
Utilisation de cet appareil
Utilisation de cet appareil
Section
02
# Si la gamme MW/LW (PO/GO) est sélectionnée,
seuls BSM, LOCAL et SEEK sont disponibles.
FM SETTING (réglages de qualité sonore FM)
Le niveau de qualité sonore peut être réglé afin de
correspondre aux conditions du signal d’émission
de la gamme FM.
1 Appuyez sur M.C. pour afficher le mode de ré-
glage.
2 Tournez M.C. pour sélectionner le réglage sou-
haité.
! STANDARD – Il s’agit du réglage standard.
! HI-FI – Il s’agit du réglage à utiliser pour
donner la priorité à la qualité supérieure du
son stéréo.
! STABLE – Il s’agit du réglage à utiliser pour
donner la priorité au faible bruit du son
monaural.
BSM (mémoire des meilleures stations)
La fonction BSM (mémoire des meilleures stations) mémorise automatiquement les six stations
les plus fortes dans l’ordre de la force du signal.
1 Appuyez sur M.C. pour mettre la fonction BSM
en service.
Pour annuler, appuyez à nouveau sur M.C.
REGION (stations régionales)
Quand la fonction AF est utilisée, la fonction de recherche des stations régionales limite la sélection
aux stations qui diffusent des programmes régionaux.
1 Appuyez sur M.C. pour mettre la fonction de
recherche des stations régionales en service
ou hors service.
LOCAL (accord automatique sur une station locale)
L’accord automatique sur une station locale ne
s’intéresse qu’aux stations de radio dont le signal
reçu est suffisamment puissant pour garantir une
réception de bonne qualité.
1 Appuyez sur M.C. pour sélectionner le réglage
souhaité.
FM : OFF—LV1 —LV2—LV 3—LV 4
MW/LW (PO/GO) : OFF—LV 1—LV 2
La valeur la plus élevée permet la réception
des seules stations très puissantes ; les autres
valeurs autorisent la réception de stations
moins puissantes.
TA (attente de bulletins d’informations routières)
1 Appuyez sur M.C. pour mettre en service ou
hors ser vice l’attente d’un bulletin d’informations routières.
AF (recherche des autres fréquences possibles)
1 Appuyez sur M.C. pour mettre la fonction AF
en service ou hors service.
NEWS (interruption pour réception d’un bulletin
d’informations)
1 Appuyez sur M.C. pour mettre la fonction
NEWS (bulletin d’informations) en service ou
hors ser vice.
SEEK (réglage de la touche droite/gauche)
Vous pouvez assigner une fonction aux touches
droite et gauche de l’appareil.
Sélectionnez MAN (accord manuel) pour effectuer
un accord de fréquence manuellement ou sélectionnez PCH (canaux présélectionnés) pour changer de canal présélectionné.
1 Appuyez sur M.C. pour sélectionner MAN ou
PCH.
CD/CD-R/CD-RW et
périphériques de stockage USB
Connexion MTP
Il est possible de connecter des périphériques
Android compatibles MTP (utilisant le système
d’exploitation Android 4.0 ou version supérieure)
via une connexion MTP à l’aide de la source
USB. Pour connecter un périphérique Android,
utilisez le câble fourni avec l’appareil.
Remarques
! Cette fonction n’est pas compatible avec
MIXTRAX.
! Cette fonction n’est pas compatible avec
WAV.
Opérations de base
Lecture d’un CD/CD-R/CD-RW
1 Introduisez un disque, l’étiquette vers le haut,
dans le logement de chargement des disques.
Éjection d’un CD/CD-R/CD-RW
1 Appuyez sur h.
Lecture de plages musicales sur un périphérique
de stockage USB
1 Ouvrez le capot du port USB.
2 Branchez le périphérique de stockage USB en
utilisant un câble USB.
Arrêt de la lecture de fichiers sur un périphérique
de stockage USB
1 Vous pouvez débrancher le périphérique de
stockage USB à tout moment.
Sélection d’un dossier
1 Appuyez sur 1/
Sélection d’une plage
1 Appuyez sur c ou d.
ou 2/ .
Avance ou retour rapide
1 Appuyez de manière prolongée sur c ou d.
! Lors de la lecture d’un disque d’audio
compressé, aucun son n’est émis pendant l’a-
vance ou le retour rapide.
Retour au dossier racine
1 Appuyez sur BAND/
Commutation entre les modes audio compressé
et CD-DA
1 Appuyez sur BAND/
Changement de périphérique de mémoire de lecture
Vous pouvez basculer entre les périphériques de
mémoire sur les périphériques de stockage USB
ayant plus d’un périphérique de mémoire compatible avec la norme Mass Storage Class pour effectuer la lecture.
1 Appuyez sur BAND/
! Vous pouvez basculer entre 32 différents péri-
phériques de mémoire maximum.
de façon prolongée.
.
.
Remarque
Débranchez les périphériques de stockage USB
de l’appareil lorsque vous ne l’utilisez pas.
Opérations à l’aide de la touche
MIXTRAX
Mise en service ou hors service de MITRAX
Vous pouvez utiliser cette fonction lorsque USB
est sélectionné comme source.
Vous ne pouvez pas utiliser cette fonction avec
USB MTP.
1 Appuyez sur 3/MIX pour mettre MIXTRAX en
service ou hors service.
! Pour plus de détails sur MIXTRAX, reportez-
vous à la page 31, À propos de MIXTRAX.
! Lors de l’utilisation de MIXTRAX, la fonction
de correction du son est désactivée.
Français
25
Fr
Page 26
Section
Utilisation de cet appareil
02
Utilisation de cet appareil
Changement de l’affichage
Sélection des informations textuelles souhaitées
1 Appuyez sur DISP pour parcourir les options
disponibles :
CD-DA
! ELAPSED TIME (numéro de plage et temps
de lecture)
! CLOCK (nom de la source et horloge)
! SPEANA (analyseur de spectre)
CD-TEXT
! TRACK INFO (titre de la plage/interprète
de la plage/titre du disque)
! ELAPSED TIME (numéro de plage et temps
de lecture)
! CLOCK (nom de la source et horloge)
! SPEANA (analyseur de spectre)
MP3/WMA/WAV/AAC
! TRACK INFO (titre de la plage/nom de l’in-
terprète/nom de l’album)
! FILE INFO (nom du fichier/nom du dossier)
! ELAPSED TIME (numéro de plage et temps
de lecture)
! CLOCK (nom de la source et horloge)
! SPEANA (analyseur de spectre)
Sélection et lecture des fichiers/
plages à partir de la liste des noms
1 Appuyez sur pour passer en mode
liste des noms de fichiers/plages.
2 Utilisez M.C. pour sélectionner le nom de
fichier (ou nom de dossier) souhaité.
Sélection d’un fichier ou d’un dossier
1 Tournez M.C.
Lecture
1 Lorsqu’un fichier ou une plage est sélection-
né(e), appuyez sur M.C.
Affichage d’une liste des fichiers (ou des dossiers)
dans le dossier sélectionné
1 Quand un dossier est sélectionné, appuyez sur
M.C.
Lecture d’une plage musicale dans le dossier sélectionné
1 Quand un dossier est sélectionné, appuyez de
manière prolongée sur M.C.
Opérations à l’aide de touches
spéciales
Sélection d’une étendue de répétition de lecture
1 Appuyez sur 6/
disponibles :
CD/CD-R/CD-RW
! ALL – Répétition de toutes les plages
! ONE – Répétition de la plage en cours de
lecture
! FLD – Répétition du dossier en cours de
lecture
Périphérique de stockage USB
! ALL – Répétition de tous les fichiers
! ONE – Répétition du fichier en cours de
lecture
! FLD – Répétition du dossier en cours de
lecture
Lecture des plages dans un ordre aléatoire
1 Appuyez sur 5/
la lecture aléatoire.
Les plages d’une étendue de répétition sélectionnée sont lues dans un ordre aléatoire.
! Pour changer de plage musicale pendant une
lecture aléatoire, appuyez sur d pour passer à
la plage suivante. Appuyez sur c pour redémarrer la lecture de la plage en cours au
début de la plage musicale.
Pause de la lecture
1 Appuyez sur 4/PAUSE pour mettre en pause
ou reprendre la lecture.
pour parcourir les options
pour activer ou désactiver
Réglages des fonctions
1 Appuyez sur M.C. pour afficher le menu
principal.
2 Tournez M.C. pour changer l’option de
menu et appuyez pour sélectionner
FUNCTION.
Une fois sélectionnée, la fonction ci-dessous
peut être ajustée.
! S.RTRV n’est pas disponible lorsque la fonc-
tion MIXTRAX est en service.
S.RTRV (sound retriever)
Améliore automatiquement l’audio compressé et
restaure un son riche.
1 Appuyez sur M.C. pour sélectionner le réglage
souhaité.
1—2—OFF (hors ser vice)
1 est efficace pour les faibles taux de compres-
sion et 2 est efficace pour les taux de compression élevés.
iPod
Opérations de base
Lecture de plages musicales sur un iPod
1 Ouvrez le capot du port USB.
2 Connectez un iPod à l’entrée USB.
La lecture s’effectue automatiquement.
Sélection d’une plage musicale (d’un chapitre)
1 Appuyez sur c ou d.
Sélection d’un album
1 Appuyez sur 1/
Avance ou retour rapide
1 Appuyez de manière prolongée sur c ou d.
ou 2/ .
Remarques
! L’iPod ne peut pas être mis en service ou
hors service lorsque le mode de commande
est réglé sur CONTROL AUDIO.
! Débranchez les écouteurs de l ’iPod avant de
le connecter à cet appareil.
! L’iPod sera mis hors service environ deux mi-
nutes après que le contact d’allumage est
coupé.
Opérations à l’aide de la touche
MIXTRAX
Mise en service ou hors service de MITRAX
1 Appuyez sur 3/MIX pour mettre MIXTRAX en
service ou hors service.
! Pour plus de détails sur MIXTRAX, reportez-
vous à la page 31, À propos de MIXTRAX.
Changement de l’affichage
Sélection des informations textuelles souhaitées
1 Appuyez sur DISP pour parcourir les options
disponibles :
! TRACK INFO (titre de la plage/nom de l’in-
terprète/nom de l’album)
! ELAPSED TIME (numéro de plage et temps
de lecture)
! CLOCK (nom de la source et horloge)
! SPEANA (analyseur de spectre)
Recherche d’une plage musicale
1 Appuyez sur pour passer au menu
principal de la recherche par liste.
26
Fr
Page 27
Utilisation de cet appareil
Utilisation de cet appareil
Section
02
2 Utilisez M.C. pour sélectionner une catégorie/plage musicale.
Modification du nom d’une plage musicale/catégorie
1 Tournez M.C.
Listes de lecture—interprètes—albums—plages musicales—podcasts—genres—compositeurs—livres audio
Lecture
1 Quand une plage musicale est sélectionnée,
appuyez sur M.C.
Affichage d’une liste des plages musicales dans
la catégorie sélectionnée
1 Quand une catégorie est sélectionnée, ap-
puyez sur M.C.
Lecture d’une plage musicale dans la catégorie
sélectionnée
1 Quand une catégorie est sélectionnée, ap-
puyez sur M.C. de façon prolongée.
Recherche par ordre alphabétique dans la liste
1 Lorsque la liste de la catégorie sélectionnée
s’affiche, appuyez sur
de recherche par ordre alphabétique.
! Vous pouvez également passer en mode
de recherche par ordre alphabétique en
tournant M.C. deux fois.
2 Tournez M.C. pour sélectionner une lettre.
3 Appuyez sur M.C. pour afficher la liste alpha-
bétique.
! Pour annuler la recherche, appuyez sur
/DIMMER.
pour activer le mode
Remarques
! Vous pouvez lire les listes de lecture créées à
l’aide de l’application de l’ordinateur
(MusicSphere). L’application sera disponible
sur notre site web.
! Les listes de lecture créées à l’aide de l’appli-
cation de l’ordinateur (MusicSphere) sont affichées sous forme abrégée.
Opérations à l’aide de touches
spéciales
Sélection d’une étendue de répétition de lecture
1 Appuyez sur 6/
disponibles :
! ONE – Répétition de la plage musicale en
cours de lecture
! ALL – Répétition de toutes les plages musi-
cales de la liste sélectionnée
! Lorsque le mode de commande est défini sur
CONTROL iPod,l’étendue de répétition de lec-
ture reste identique à celle définie pour l’iPod
connecté.
Sélection d’une plage de lecture aléatoire (shuffle)
1 Appuyez sur 5/
disponibles :
! SNG – Lecture des plages musicales dans
un ordre aléatoire à l’intérieur de la liste sélectionnée.
! ALB – Lecture dans l’ordre de plages musi-
cales à partir d’un album sélectionné au
hasard.
! OFF – Pas de lecture dans un ordre aléa-
toire.
Lecture de toutes les plages musicales dans un
ordre aléatoire (lecture aléatoire de toutes les plages)
1 Appuyez de façon prolongée sur 5/
mettre en service la fonction de lecture aléatoire de toutes les plages.
! Pour mettre hors service la lecture aléatoire de
toutes les plages, sélectionnez OFF pour la lecture aléatoire. Pour les détails, reportez-vous à
la page 27, Sélection d’une plage de lecture
aléatoire (shuffle).
Pause de la lecture
1 Appuyez sur 4/PAUSE pour mettre en pause
ou reprendre la lecture.
pour parcourir les options
pour parcourir les options
pour
Lecture de plages musicales
liées à la plage musicale en
cours de lecture
Vous pouvez lire des plages musicales dans les
listes suivantes.
• Liste d’albums de l’interprète en cours de lecture
• Liste de plages musicales de l’album en cours
de lecture
• Liste d’albums du genre en cours de lecture
1 Appuyez de façon prolongée sur
activer le mode de lecture en liaison.
2 Tournez M.C. pour changer le mode, appuyez pour sélectionner.
! ARTIST – Lit un album de l’interprète en
cours de lecture.
! ALBUM – Lit une plage musicale de l’album
en cours de lecture.
! GENRE – Lit un album du genre en cours de
lecture.
La plage musicale/l’album sélectionné sera lu
après la lecture de la plage musicale en cours.
pour
Remarques
! La plage musicale/l’album sélectionné peut
être annulé si vous utilisez d’autres fonctions
que la fonction de recherche de liaison (retour rapide et avance rapide, par exemple).
! En fonction de la plage musicale sélection-
née pour la lecture, la fin de la plage en
cours de lecture et le début de la plage musicale/de l’album sélectionné peuvent être
tronqués.
Utilisation de la fonction iPod
de cet appareil sur votre iPod
La fonction iPod de cet appareil peut être contrôlée à l’aide de l’iPod connecté.
CONTROL iPod n’est pas compatible avec les
modèles d’iPod suivants.
! iPod nano 1ère génération
! iPod avec vidéo
% Appuyez sur BAND/
mode de commande.
! CONTROL iPod – La fonction iPod de cet ap-
pareil peut être utilisée à partir de l’iPod
connecté.
! CONTROL AUDIO – La fonction iPod de cet
appareil peut être contrôlée à l’aide de cet appareil.
pour changer le
Remarques
! Régler le mode de commande sur
CONTROL iPod met en pause la lecture
d’une plage musicale. Utilisez l’iPod pour reprendre la lecture.
! Les opérations suivantes sont toujours ac-
cessibles à partir de l’ appareil même si le
mode de commande est réglé sur
CONTROL iPod.
— Pause
— Avance/retour rapide
— Sélection d’une plage musicale (d’un chapi-
tre)
! Le volume ne peut être réglé qu’à partir de
cet appareil.
Réglages des fonctions
1 Appuyez sur M.C. pour afficher le menu
principal.
2 Tournez M.C. pour changer l’option de
menu et appuyez pour sélectionner
FUNCTION.
3 Tournez M.C. pour sélectionner la fonction.
Une fois sélectionnées, les fonctions suivantes
peuvent être ajustées.
Français
27
Fr
Page 28
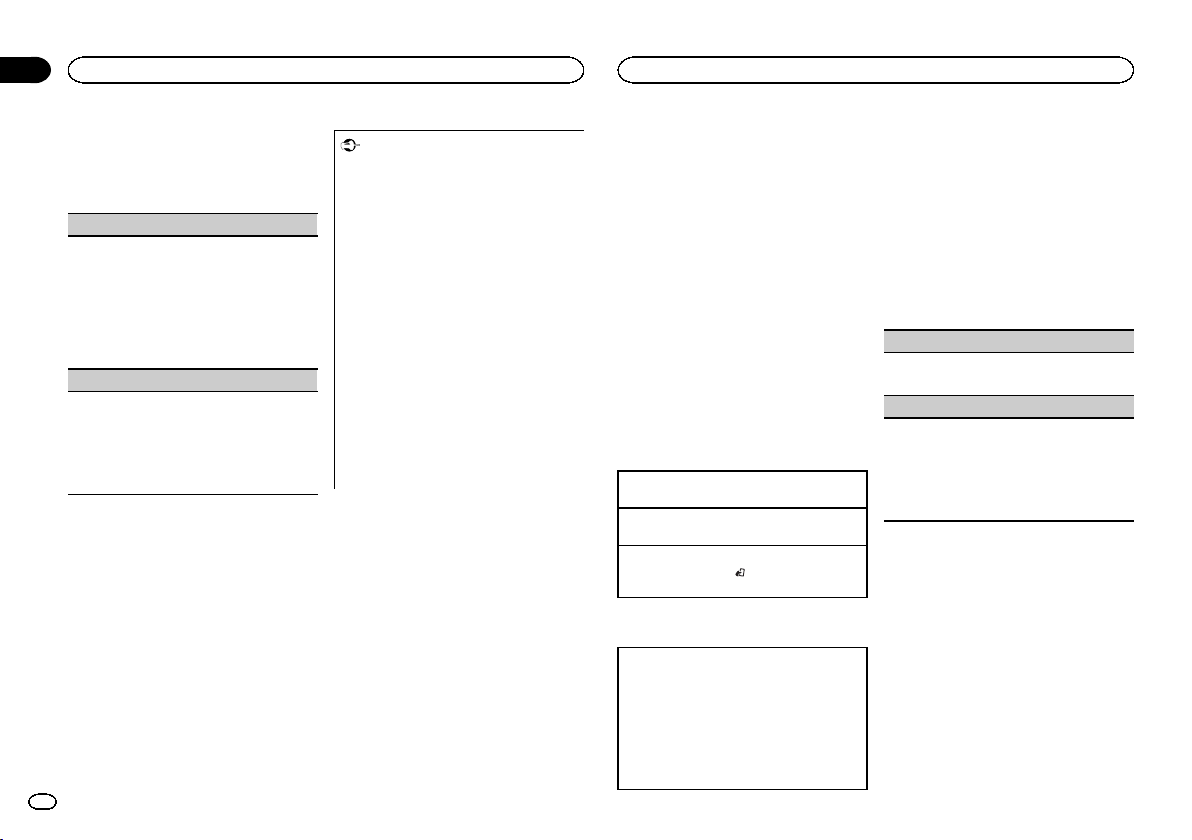
Section
Utilisation de cet appareil
02
Utilisation de cet appareil
! AUDIO BOOK n’est pas disponible lorsque
CONTROL iPod est sélectionné en mode de
commande. Pour les détails, reportez-vous à
la page 27, Utilisation de la fonction iPod de
cet appareil sur votre iPod.
AUDIO BOOK (vitesse du livre audio)
1 Appuyez sur M.C. pour afficher le mode de ré-
glage.
2 Tournez M.C. pour choisir le réglage désiré.
! FASTER – Lecture plus rapide que la vi-
tesse normale
! NORMAL – Lecture à la vitesse normale
! SLOWER – Lecture plus lente que la vitesse
normale
S.RTRV (sound retriever)
1 Appuyez sur M.C. pour sélectionner le réglage
souhaité.
1—2—OFF (hors ser vice)
1 est efficace pour les faibles taux de compres-
sion et 2 est efficace pour les taux de compression élevés.
Utilisation des applications
de l’appareil connecté
Vous pouvez utiliser cet appareil pour la lecture
en continu et le contrôle de plages d’applications iPhone ou simplement pour la lecture en
continu.
28
Fr
Important
L’utilisation d’applications tierces peut impli-
quer ou nécessiter la fourniture d’ informations personnelles, que ce soit en créant un
compte d’utilisateur ou une autre méthode
ainsi que, pour certaines applications, la fourniture de données de géolocalisation.
TOUTES LES APPLICATIONS TIERCES RELÈVENT DE L’ENTIÈRE RESPONSABILITÉ DES
FOURNISSEURS, NOTAMMENT MAIS SANS
S’Y LIMITER, LA COLLECTE ET LA PROTECTION DES DONNÉES UTILISATEUR ET LES
BONNES PRATIQUES DE CONFIDENTIALITÉ.
EN ACCÉDANT À UNE APPLICATION TIERCE,
VOUS ACCEPTEZ DE PRENDRE CONNAISSANCE DES CONDITIONS DE SERVICE ET
DES RÈGLES DE CONFIDENTIALITÉ DES
FOURNISSEURS. SI VOUS N’ACCEPTEZ PAS
LES CONDITIONS OU RÈGLES D’UN FOURNISSEUR OU SI VOUS N’ACCEPTEZ PAS L’UTILISATION DES DONNÉES DE
GÉOLOCALISATION, LE CAS ÉCHÉANT, N’UTILISEZ PAS CETTE APPLICATION TIERCE.
Informations relatives à la
compatibilité des appareils
connectés
Vous trouverez ci-dessous les informations détaillées relatives aux bornes nécessaires pour
utiliser l’application pour iPhone sur cet appareil.
Pour les utilisateurs d’iPhone
! Cette fonction est compatible avec iPhone et
iPod touch.
! iOS 5.0 ou supérieure est installé sur l’appa-
reil.
Remarques
! Veuillez consulter notre site Web pour obte-
nir la liste des applications iPhone prises en
charge pour cet appareil.
! Pioneer ne pourra être tenu responsable des
problèmes résultant d’un contenu incorrect
ou reposant sur une mauvaise application.
! Le contenu et les fonctionnalités des applica-
tions prises en charge sont de la responsabilité des fournisseurs de l’ application.
Procédure de démarrage des
utilisateurs d’un iPhone
1 Connectez un iPhone à l’entrée USB.
2 Basculez la source sur APP.
3 Démarrez l’application sur l’iPhone et
lancez la lecture.
Opérations de base
Sélection d’une plage
1 Appuyez sur c ou d.
Avance ou retour rapide
1 Appuyez de manière prolongée sur c ou d.
Pause de la lecture
1 Appuyez sur BAND/
ou reprendre la lecture.
pour mettre en pause
Changement de l’affichage
Sélection des informations textuelles souhaitées
1 Appuyez sur DISP pour parcourir les options
disponibles :
! TRACK INFO (titre de la plage/nom de l’in-
terprète/nom de l’album)
! APP NAME (nom de l’application)
! ELAPSED TIME (temps de lecture)
! CLOCK (nom de la source et horloge)
! SPEANA (analyseur de spectre)
Réglages des fonctions
1 Appuyez sur M.C. pour afficher le menu
principal.
2 Tournez M.C. pour changer l’option de
menu et appuyez pour sélectionner
FUNCTION.
3 Tournez M.C. pour sélectionner la fonction.
Une fois sélectionnées, les fonctions suivantes
peuvent être ajustées.
PAUSE (pause)
1 Appuyez sur M.C. pour mettre en pause ou re-
prendre la lecture.
S.RTRV (sound retriever)
1 Appuyez sur M.C. pour sélectionner le réglage
souhaité.
1—2—OFF (hors ser vice)
1 est efficace pour les faibles taux de compres-
sion et 2 est efficace pour les taux de compression élevés.
Réglages sonores
1 Appuyez sur M.C. pour afficher le menu
principal.
2 Tournez M.C. pour changer l’option de
menu et appuyez pour sélectionner AUDIO.
3 Tournez M.C. pour sélectionner la fonction audio.
Une fois sélectionnées, les fonctions audio suivantes peuvent être ajustées.
Page 29
Utilisation de cet appareil
Utilisation de cet appareil
Section
02
! FADER n’est pas disponible lorsque
SUB.W/SUB.W est sélectionné dans
SP-P/O MODE. Pour les détails, reportez-vous
à la page 32, SP-P/O MODE (réglage de la sor-
tie arrière et du préamp).
! SUB.W et SUB.W CTRL ne sont pas disponi-
bles lorsque REAR/REAR est sélectionné
dans SP-P/O MODE. Pour les détails, reportez-vous à la page 32, SP-P/O MODE (réglage
de la sortie arrière et du préamp).
! SUB.W CTRL n’est pas disponible lorsque
SUB.W est sélectionné dans OFF. Pour les
détails, reportez-vous à la page 29, SUB.W (ré-
glage en ser vice/hors service du haut-parleur
d’extrêmes graves).
! SLA n’est pas disponible lorsque FM est sé-
lectionné comme source.
FADER (réglage de l’équilibre avant-arrière)
1 Appuyez sur M.C. pour afficher le mode de ré-
glage.
2 Tournez M.C. pour régler l’équilibre sonore
entre les haut-parleurs avant et arrière.
BALANCE (réglage d’équilibre sonore)
1 Appuyez sur M.C. pour afficher le mode de ré-
glage.
2 Tournez M.C. pour régler l’équilibre sonore
entre les haut-parleurs gauche/droite.
EQ SETTING (rappel de l’égaliseur)
1 Appuyez sur M.C. pour afficher le mode de ré-
glage.
2 Tournez M.C. pour sélectionner l’égaliseur.
POWERFUL—NATURAL—VOCAL—CUSTOM1—CUSTOM2—FLAT—SUPER BASS
La bande et le niveau de l’égalisateur peuvent
être personnalisés lorsque CUSTOM1 ou CUS-
TOM2 est sélectionné.
Si CUSTOM1 ou CUSTOM2 est sélectionné,
suivez les procédures décrites ci-dessous. Si
d’autres options sont sélectionnées, appuyez
sur M.C. pour revenir à l’affichage précédent.
! CUSTOM1 peut être défini séparément
pour chaque source. Cependant, USB,
iPod et APP sont définis automatiquement
sur le même réglage.
! CUSTOM2 est un réglage partagé et
commun à toutes les sources.
3 Appuyez sur M.C. pour afficher le mode de ré-
glage.
4 Appuyez sur M.C. pour parcourir les options
disponibles :
Bande de l’égaliseur—Niveau de l’égaliseur
5 Tournez M.C. pour sélectionner le réglage sou-
haité.
Bande de l’égaliseur : 80HZ—250HZ—800HZ
—2.5KHZ—8KHZ
Niveau de l’égaliseur : +6 à –6
LOUDNESS (correction physiologique)
La correction physiologique a pour objet d’accentuer les hautes et les basses fréquences à bas niveaux d’écoute.
1 Appuyez sur M.C. pour sélectionner le réglage
souhaité.
OFF (hors service)—LOW (faible)—MID
(moyen)—HI (élevé)
SUB.W (réglage en service/hors service du hautparleur d’extrêmes graves)
Cet appareil est équipé d’une sortie haut-parleur
d’extrêmes graves qui peut être mise en service
ou hors service.
1 Appuyez sur M.C. pour sélectionner le réglage
souhaité.
NOR (phase normale) — REV (phase inversée)
— OFF (haut-parleur d’extrêmes graves désac-
tivé)
SUB.W CTRL (réglage du haut-parleur d’extrêmes
graves)
Seules les fréquences inférieures à celles de la
plage sélectionnée sont produites par le haut-parleur d’extrêmes graves.
1 Appuyez sur M.C. pour afficher le mode de ré-
glage.
2 Appuyez sur M.C. pour parcourir les options
disponibles :
Fréquence de coupure—Niveau de sortie—Niveau de pente
Les débits pouvant être réglés clignotent.
3 Tournez M.C. pour sélectionner le réglage sou-
haité.
Fréquence de coupure : 50HZ—63HZ—80HZ
—100HZ—125HZ—160HZ—200HZ
Niveau de sortie : –24 à +6
Niveau de pente : –12— –24
BASS BOOST (accentuation des graves)
1 Appuyez sur M.C. pour afficher le mode de ré-
glage.
2 Tournez M.C. pour sélectionner le niveau dé-
siré.
0 à +6 sont les valeurs affichées tandis que le
niveau augmente ou diminue.
HPF SETTING (réglage du filtre passe-haut)
Utilisez cette fonction lorsque vous souhaitez uniquement écouter des sons aigus. Seules les fréquences supérieures à la coupure du filtre passehaut (HPF) sont émises en sortie via les haut-parleurs.
1 Appuyez sur M.C. pour afficher le mode de ré-
glage.
2 Appuyez sur M.C. pour parcourir les options
disponibles :
Fréquence de coupure—Niveau de pente
3 Tournez M.C. pour sélectionner le réglage sou-
haité.
Fréquence de coupure : OFF—50HZ—63HZ—
80HZ—100HZ—125HZ—160HZ—200HZ
Niveau de pente : –12— –24
SLA (réglage du niveau de la source)
Cette fonction empêche une modification trop importante du volume lors du basculement de
source.
! Les réglages sont basés sur le niveau du vo-
lume FM qui lui, demeure inchangé.
! Le niveau du volume MW/LW (PO/GO) peut
également être réglé avec cette fonction.
! USB, iPod et APP sont définis automatique-
ment sur le même réglage.
1 Appuyez sur M.C. pour afficher le mode de ré-
glage.
2 Tournez M.C. pour régler le volume de la
source.
Plage de réglage : +4 à –4
Français
29
Fr
Page 30

Section
Utilisation de cet appareil
02
Utilisation de cet appareil
Menu système
Important
La fonction PW SAVE (économie d’énergie) est
annulée si la batterie du véhicule est déconnectée et devra être réactivée une fois la batterie reconnectée. Quand PW SAVE est hors service, il
est possible que selon la méthode de connexion
utilisée l’appareil continue à consommer du
courant de la batterie si le commutateur de
contact de votre véhicule ne possède pas de position ACC (accessoire).
1 Appuyez sur M.C. pour afficher le menu
principal.
2 Tournez M.C. pour changer l’option de
menu et appuyez pour sélectionner SYSTEM.
3 Tournez M.C. pour sélectionner la fonction du menu système.
Une fois sélectionnées, les fonctions du menu
système suivantes peuvent être ajustées.
LANGUAGE (multilingue)
Cet appareil peut afficher les informations textuelles d’un fichier audio compressé même si elles
sont incorporées en anglais, en russe ou en turc.
! Si la langue incorporée et la langue sélection-
née sont différentes, les informations textuelles peuvent ne pas s’afficher correctement.
! Certains caractères peuvent ne pas s’afficher
correctement.
1 Tournez M.C. pour sélectionner le réglage sou-
haité.
ENG (Anglais)—РУС (Russe)—TUR (Turc)
CLOCK SET (réglage de l’horloge)
30
Fr
1 Appuyez sur M.C. pour afficher le mode de ré-
glage.
2 Appuyez sur M.C. pour sélectionner le seg-
ment de l’affichage de l’horloge que vous souhaitez régler.
Heure—Minute
3 Tournez M.C. pour régler l’horloge.
12H/24H (notation temporelle)
1 Appuyez sur M.C. pour sélectionner le réglage
souhaité.
12H (horloge 12 heures)—24H (horloge
24 heures)
INFO DISPLAY (informations secondaires)
Le type d’informations textuelles affichées dans la
section des informations secondaires peut être
changé.
1 Appuyez sur M.C. pour afficher le mode de ré-
glage.
2 Tournez M.C. pour sélectionner le réglage sou-
haité.
SPEANA—LEVEL METER—SOURCE—CLOCK
—OFF
! L’indicateur de signal s’affiche pour SPEANA
ou LEVEL METER lorsque la source est réglée
sur DIGITAL RADIO ou RADIO.
AUTO PI (recherche automatique PI)
L’appareil peut rechercher automatiquement une
autre station avec le même type de programme, y
compris si l’accord a été obtenu par le rappel
d’une fréquence en mémoire.
1 Appuyez sur M.C. pour mettre en service ou
hors ser vice la recherche automatique PI.
AUX (entrée auxiliaire)
Activez ce réglage lorsque vous utilisez un appareil auxiliaire connecté à cet appareil.
1 Appuyez sur M.C. pour mettre AUX en service
ou hors service.
DIMMER (atténuateur de luminosité)
1 Appuyez sur M.C. pour mettre l’atténuateur de
luminosité en ser vice ou hors service.
! Vous pouvez également changer le réglage de
l’atténuateur de luminosité en appuyant de
façon prolongée sur
BRIGHTNESS (réglage de la luminosité)
Vous pouvez utiliser ce réglage pour ajuster la luminosité de l’écran.
La plage des réglages possibles pour BRIGHT-
NESS varie selon que DIMMER est en service ou
hors ser vice. Pour les détails, reportez-vous à la
page 30, DIMMER (atténuateur de luminosité).
1 Appuyez sur M.C. pour afficher le mode de ré-
glage.
2 Tournez M.C. pour sélectionner le réglage sou-
haité.
DIMMER en service : 1 à 4
DIMMER hors ser vice : 1 à 5
MUTE MODE (mode sourdine)
Le son émis par l’appareil est automatiquement
coupé ou atténué quand un signal en provenance
d’un équipement possédant la fonction silencieux
est reçu.
1 Appuyez sur M.C. pour afficher le mode de ré-
glage.
2 Tournez M.C. pour sélectionner le réglage sou-
haité.
! MUTE – Silencieux
! 20dB ATT – Atténuation (20dB ATTaun
effet plus fort que 10dB ATT)
! 10dB ATT – Atténuation
PW SAVE (économie d’énergie)
Activer cette fonction vous permet de réduire la
consommation de la batterie.
! La mise en ser vice de la source est la seule
opération permise quand cette fonction est en
service.
1 Appuyez sur M.C. pour mettre l’économie d’é-
nergie en ser vice ou hors service.
/DIMMER.
Choix de la couleur de
l’éclairage
Menu des fonctions d’éclairage
1 Appuyez sur M.C. pour afficher le menu
principal.
2 Tournez M.C. pour afficher ILLUMI, puis
appuyez pour sélectionner.
3 Tournez M.C. pour sélectionner la fonction d’éclairage.
Une fois sélectionnées, les fonctions audio suivantes peuvent être ajustées.
KEY COLOUR (réglage de couleur de section des
touches)
Vous pouvez sélectionner les couleurs souhaitées
pour les touches de cet appareil.
1 Appuyez sur M.C. pour afficher le mode de ré-
glage.
2 Tournez M.C. pour choisir la couleur d’éclai-
rage.
! Couleurs présélectionnées (de WHITE à
BLUE)
! SCAN (parcourir de nombreuses couleurs
automatiquement)
! CUSTOM (couleur d’éclairage personnali-
sée)
DISP COLOUR (réglage de couleur de section d’af-
fichage)
Page 31

Utilisation de cet appareil
Utilisation de cet appareil
Section
02
Vous pouvez sélectionner les couleurs souhaitées
pour l’afficheur de cet appareil.
1 Appuyez sur M.C. pour afficher le mode de ré-
glage.
2 Tournez M.C. pour choisir la couleur d’éclai-
rage.
! Couleurs présélectionnées (de WHITE à
BLUE)
! SCAN (parcourir de nombreuses couleurs
automatiquement)
! CUSTOM (couleur d’éclairage personnali-
sée)
BOTH COLOUR (réglage de couleur des touches
et de l’affichage)
Vous pouvez sélectionner les couleurs souhaitées
pour les touches et l’afficheur de cet appareil.
1 Appuyez sur M.C. pour afficher le mode de ré-
glage.
2 Tournez M.C. pour choisir la couleur d’éclai-
rage.
! Couleurs présélectionnées (de WHITE à
BLUE)
! SCAN (parcourir de nombreuses couleurs
automatiquement)
ILLUMI FX (mode d’effet d’éclairage)
Dans ce mode, il est possible d’afficher un effet
d’éclairage sur l’écran à certains moments
comme lorsque l’alimentation ACC est en/hors
service ou qu’un CD est inséré/éjecté.
1 Appuyez sur M.C. pour mettre ILLUMI FX en
service ou hors service.
! L’effet d’éclairage sera activé lorsque l’alimen-
tation ACC est mise en/hors service, que le réglage ILLUMI FX soit activé ou désactivé.
Remarque
Quand CUSTOM est sélectionné, la couleur personnalisée enregistrée est sélectionnée.
Personnalisation de la couleur
d’éclairage
Vous pouvez personnaliser les couleurs d’éclairage pour KEY COLOUR et DISP COLOUR.
1 Appuyez sur M.C. pour afficher le menu
principal.
2 Tournez M.C. pour afficher ILLUMI, puis
appuyez pour sélectionner.
3 Tournez M.C. pour afficher KEY COLOUR
ou DISP COLOUR. Appuyez pour sélectionner.
4 Appuyez sur M.C. jusqu’à ce que le réglage de la couleur d’éclairage personnalisée
apparaisse sur l’afficheur.
5 Appuyez sur M.C. pour sélectionner la
couleur primaire.
R (rouge)—G (vert)—B (bleu)
6 Tournez M.C. pour régler le niveau de la
luminosité.
Plage de réglage: 0 à 60
# Vous ne pouvez pas sélectionner un niveau endessous de 20 pour les trois couleurs R (rouge), G
(vert) et B (bleu) en même temps.
# Vous pouvez aussi effectuer la même opération
sur d’autres couleurs.
Remarque
Vous ne pouvez pas créer de couleur d’éclairage
personnalisée lorsque SCAN est sélectionné.
À propos de MIXTRAX
La technologie MIXTRAX permet d’insérer divers
effets sonores entre les plages musicales, vous
permettant ainsi de profiter d’ un mixage en boucle complet de votre musique avec des effets visuels.
Remarques
! Selon le fichier/la plage musicale, des effets
sonores peuvent ne pas être disponibles.
! Désactivez MIXTRAX si les effets visuels pro-
duits ont une influence néfaste sur la
conduite. Reportez-vous à la page 25, Opéra-
tions à l’aide de la touche MIXTRAX.
Menu MIXTRAX
1 Appuyez sur M.C. pour afficher le menu
principal.
2 Tournez M.C. pour changer l’option de
menu et appuyez pour sélectionner
MIXTRAX.
3 Tournez M.C. pour sélectionner la fonction MIXTRAX.
Une fois sélectionnées, les fonctions MIXTRAX
suivantes peuvent être ajustées. La fonction est
activée lorsque la technologie MIXTRAX est en
service.
SHORT PLAYBCK (mode de lecture courte)
Vous pouvez sélectionner la longueur de la durée
de lecture.
1 Appuyez sur M.C. pour afficher le mode de ré-
glage.
2 Tournez M.C. pour sélectionner le réglage sou-
haité.
1.0 MIN (1,0 minute)—1.5 MIN (1,5 minutes)—
2.0 MIN (2,0 minutes)—2.5 MIN (2,5 minutes)
—3.0 MIN (3,0 minutes)—OFF (hors service)
FLASH AREA (zone de clignotement)
Vous pouvez sélectionner des zones pour les couleurs clignotantes.
1 Appuyez sur M.C. pour afficher le mode de ré-
glage.
2 Tournez M.C. pour sélectionner le réglage sou-
haité.
KEY/DISPLAY (touches et écran)—KEY (tou-
ches)—OFF (hors service)
! Lorsque OFF est sélectionné, la couleur définie
sous ILLUMI est utilisée pour l’écran.
FLASH PATTERN (modèle de clignotement)
L’affichage de la couleur clignotante et des effets
spéciaux MIXTRAX changent suivant l’évolution
du niveau sonore et des graves.
1 Appuyez sur M.C. pour afficher le mode de ré-
glage.
2 Tournez M.C. pour sélectionner le réglage sou-
haité.
! SOUND LEVEL 1 à SOUND LEVEL 6 – le
modèle de clignotement change en fonction du niveau sonore. Sélectionnez un
mode désiré.
! LOW PASS 1 à LOW PASS 6 – le modèle
de clignotement change en fonction du niveau des graves. Sélectionnez un mode désiré.
! RANDOM 1 – Le modèle de clignotement
change de manière aléatoire en fonction
du mode niveau sonore et mode passebas.
! RANDOM 2 – le modèle de clignotement
change de manière aléatoire en fonction
du mode niveau sonore.
! RANDOM 3 – le modèle de clignotement
change de manière aléatoire en fonction
du mode passe-bas.
DISPLAY FX (effet d ’écran)
Français
31
Fr
Page 32

Section
Utilisation de cet appareil
02
Utilisation de cet appareil
L’écran d’effets spéciaux MIXTRAX peut être mis
en ou hors service.
1 Appuyez sur M.C. pour sélectionner le réglage
souhaité.
ON (écran d’effets spéciaux MIXTRAX)—OFF
(affichage normal)
CUT IN FX (effet de coupure manuelle)
Vous pouvez activer ou désactiver les effets sonores MIXTRAX pendant le changement manuel de
plage.
1 Appuyez sur M.C. pour sélectionner le réglage
souhaité.
ON (en service)—OFF (hors service)
Menu initial
1 Maintenez la pression sur SRC/OFF jusqu’à ce que l’appareil soit mis hors tension.
2 Appuyez de façon prolongée sur SRC/
OFF jusqu’à ce que le menu principal apparaisse sur l’afficheur.
3 Tournez M.C. pour changer l’option de
menu et appuyez pour sélectionner INITIAL.
4 Tournez M.C. pour sélectionner la fonction du menu initial.
Une fois sélectionnées, les fonctions du menu
initial suivantes peuvent être ajustées.
FM STEP (incrément d’accord FM)
1 Appuyez sur M.C. pour choisir l’incrément
d’accord FM.
100 (100 kHz) — 50 (50 kHz)
SP-P/O MODE (réglage de la sortie arrière et du
préamp)
32
Fr
La sortie des bornes du haut-parleur arrière et la
sortie RCA de cet appareil peuvent être utilisées
pour connecter un haut-parleur pleine gamme ou
un haut-parleur d’extrêmes graves. Sélectionnez
l’option appropriée à votre connexion.
1 Appuyez sur M.C. pour afficher le mode de ré-
glage.
2 Tournez M.C. pour sélectionner le réglage sou-
haité.
! REAR/SUB.W – Sélectionnez cette option
lorsqu’un haut-parleur pleine gamme est
connecté aux bornes du haut-parleur arrière et qu’un haut-parleur d’extrêmes graves est connecté à la sortie RCA.
! SUB.W/SUB.W – Sélectionnez cette option
lorsqu’un haut-parleur d’extrêmes graves
est connecté directement aux bornes du
haut-parleur arrière sans amplificateur auxiliaire et qu’un haut-parleur d’extrêmes
graves est connecté à la sortie RCA.
! REAR/REAR – Sélectionnez cette option
lorsqu’un haut-parleur pleine gamme est
connecté aux bornes du haut-parleur arrière et à la sortie RCA.
Si un haut-parleur pleine gamme est
connecté à la sortie des bornes du hautparleur arrière et que la sortie RCA n’est
pas utilisée, vous pouvez sélectionner
REAR/SUB.W ou REAR/REAR.
DAB ANT PW (réglage de l’alimentation de l’an-
tenne DAB)
1 Appuyez sur M.C. pour sélectionner le réglage
souhaité.
! ON – Utilisez cette option pour activer l’ali-
mentation vers une antenne DAB. Sélectionnez-la lorsque vous utilisez l’antenne
DAB en option (AN-DAB1 vendue séparément) avec l’appareil.
! OFF – Utilisez cette option pour désactiver
l’alimentation. Sélectionnez-la lorsque
vous utilisez une antenne passive sans amplification.
Menu système
1 Maintenez la pression sur SRC/OFF jusqu’à ce que l’appareil soit mis hors tension.
2 Appuyez de façon prolongée sur SRC/
OFF jusqu’à ce que le menu principal apparaisse sur l’afficheur.
3 Tournez M.C. pour changer l’option de
menu et appuyez pour sélectionner SYSTEM.
4 Tournez M.C. pour sélectionner la fonction du menu système.
Pour les détails, reportez-vous à la page 30,
Menu système.
Utilisation d’ une source AUX
1 Insérez la mini prise stéréo dans le jack
d’entrée AUX.
2 Appuyez sur SRC/OFF pour choisir AUX
comme source.
Remarque
Vous ne pouvez pas sélectionner AUX à moins
que le réglage auxiliaire soit activé. Pour plus de
détails, reportez-vous à la page 30, AUX (entrée
auxiliaire).
Changement de l’affichage
Sélection des informations textuelles souhaitées
1 Appuyez sur DISP pour parcourir les options
disponibles :
! Nom de la source
! Nom de la source et horloge
Si un écran non souhaité
s’affiche
Mettez l’écran non souhaité hors service à l’aide
des procédures répertoriées ci-dessous.
1 Appuyez sur M.C. pour afficher le menu
principal.
2 Tournez M.C. pour changer l’option de
menu et appuyez pour sélectionner SYSTEM.
3 Tournez M.C. pour afficher DEMO OFF,
puis appuyez pour sélectionner.
4 Tournez M.C. pour passer à YES.
5 Appuyez sur M.C. pour sélectionner.
Page 33

5 67
d
Installation
Installation
Section
03
Connexions
Important
! Lors de l’installation de cet appareil dans un
véhicule sans position ACC (accessoire) sur
le contact d’allumage, ne pas connecter le
câble rouge à la borne qui détecte l’utilisation de la clé de contact peut entraîner le déchargement de la batterie.
Avec position ACC Sans position ACC
! L’utilisation de cet appareil dans des condi-
tions autres que les conditions suivantes
pourrait provoquer un incendie ou un mauvais fonctionnement.
— Véhicules avec une batterie 12 volts et mise à
la masse du négatif.
— Haut-parleurs avec une puissance de sortie
de 50W et une impédance de 4W à8W.
! Pour éviter un court-circuit, une surchauffe
ou un dysfonctionnement, assurez-vous de
respecter les instructions suivantes.
— Déconnectez la borne négative de la batterie
avant l’installation.
— Fixez le câblage avec des serre-fils ou de la
bande adhésive. Pour protéger le câblage, enroulez dans du ruban adhésif les parties du
câblage en contact avec des pièces en métal.
— Placez les câbles à l’écart de toutes les par-
ties mobiles, telles que le levier de vitesse et
les rails des sièges.
— Placez les câbles à l’écart de tous les endroits
chauds, par exemple les sorties de chauffage.
— Ne reliez pas le câble jaune à la batterie à tra-
vers le trou dans le compartiment moteur.
— Recouvrez tous les connecteurs de câbles qui
ne sont pas connectés avec du ruban adhésif
isolant.
— Ne raccourcissez pas les câbles.
— Ne coupez jamais l’isolation du câble d’ali-
mentation de cet appareil pour partager l’alimentation avec d’autres appareils. La
capacité en courant du câble est limitée.
— Utilisez un fusible correspondant aux caracté-
ristiques spécifiées.
— Ne câblez jamais le câble négatif du haut-par-
leur directement à la masse.
— Ne réunissez jamais ensemble les câbles né-
O
F
N
F
O
S
T
A
R
T
gatifs de plusieurs haut-parleurs.
! Lorsque cet appareil est sous tension, les si-
gnaux de commande sont transmis via le
câble bleu/blanc. Connectez ce câble à la télécommande du système d’un amplificateur
de puissance externe ou à la borne de
commande du relais de l’antenne motorisée
du véhicule (max. 300mA 12 V CC). Si le véhicule est équipé d’une antenne intégrée à la
lunette arrière, connectez-le à la borne d’alimentation de l’amplificateur d’ antenne.
! Ne reliez jamais le câble bleu/blanc à la
borne d’alimentation d’un amplificateur de
puissance externe. De même, ne le reliez pas
à la borne d’alimentation de l’antenne motorisée. Dans le cas contraire, il peut en résulter un déchargement de la batterie ou un
dysfonctionnement.
! Le câble noir est la masse. Les câbles de
terre de cet appareil et d’autres produits (particulièrement les produits avec des courants
élevés tels que l’amplificateur de puissance)
doivent être câblés séparément. Dans le cas
contraire, ils peuvent se détacher accidentellement et provoquer un incendie ou un dysfonctionnement.
Cet appareil
1
2
3
4
1 Entrée antenne DAB
Pour recevoir des signaux DAB, connectez
une antenne DAB (AN-DAB1) vendue séparément à l’appareil.
Pour une meilleure réception DAB, vérifiez
qu’une antenne DAB avec entrée d’alimentation fantôme est utilisée. Pioneer recommande l’utilisation de “AN-DAB1” (vendue
séparément). La consommation électrique
de l’antenne DAB doit être de 100 mA maximum.
2 Entrée cordon d’alimentation
3 Sortie arrière ou haut-parleur d’extrêmes gra-
ves
4 Sortie avant
5 Entrée antenne
6 Fusible (10 A)
7 Entrée télécommande câblée
Un adaptateur de télécommande câblée
(vendu séparément) peut être connecté.
Cordon d’alimentation
3
4
1
c
3
556
6
4
a
b89
2
7
e
1 Vers l’entrée cordon d’alimentation
2 Selon le type de véhicule, 3 et 5 peuvent
avoir une fonction différente. Dans ce cas,
assurez-vous de connecter 4 à 5 et 6 à 3.
3 Jaune
Alimentation de secours (ou accessoire)
4 Jaune
Connectez à la borne d’alimentation 12 V permanente.
5 Rouge
Accessoire (ou alimentation de secours)
6 Rouge
Connectez à la borne contrôlée par le
contact d’allumage (12 V CC).
7 Connectez les fils de même couleur en-
semble.
8 Noir (masse du châssis)
9 Bleu/blanc
La position des broches du connecteur ISO
est différente selon le type de véhicule.
Connectez 9 et b lorsque la broche 5 est de
type commande de l’antenne. Dans un type
différent de véhicule, ne connectez jamais 9
et b.
a Bleu/blanc
Connectez à la borne de commande du système de l’amplificateur de puissance (max.
300 mA 12 V CC).
b Bleu/blanc
Connectez à la borne de commande du relais
de l’antenne motorisée (max. 300 mA 12 V
CC).
c Jaune/noir
Si vous utilisez un équipement avec la fonction Coupure du son, câblez ce fil au fil Coupure Audio de cet équipement. Sinon, ne
connectez rien au fil Coupure Audio.
d Fils des haut-parleurs
Blanc : Avant gauche +
Blanc/noir : Avant gauche *
Gris : Avant droite +
Gris/noir : Avant droite *
Vert: Arrière gauche + ou haut-parleur d’extrêmes graves +
Français
33
Fr
Page 34

5cmcm
Section
03
Installation
Installation
Vert/noir: Arrière gauche * ou haut-parleur
d’extrêmes graves *
Violet : Arrière droite + ou haut-parleur d’extrêmes graves +
Violet/noir: Arrière droite * ou haut-parleur
d’extrêmes graves *
e Connecteur ISO
Dans certains véhicules, il est possible que
le connecteur ISO soit divisé en deux. Dans
ce cas, assurez-vous de connecter les deux
connecteurs.
Remarques
! Changez le menu initial de cet appareil. Re-
portez-vous à la page 32, SP-P/O MODE (ré-
glage de la sortie arrière et du préamp).
La sortie haut-parleur d’extrêmes graves de
cet appareil est monaurale.
! Lors de l’utilisation d’un haut-parleur d’extrê-
mes graves de 70 W (2 W), assurez-vous de
connecter le haut-parleur d’extrêmes graves
aux fils violet et violet/noir de cet appareil. Ne
connectez aucun périphérique aux fils vert et
vert/noir.
Amplificateur de puissance
(vendu séparément)
Réalisez ces connexions lors de l’utilisation d’un
amplificateur optionnel.
2
2
3
55
3
77
1
1
1 Télécommande du système
Connectez au câble bleu/blanc.
2 Amplificateur de puissance (vendu séparé-
ment)
34
Fr
3 Connectez avec des câbles RCA (vendus sé-
parément)
4 Vers la sortie avant
5 Haut-parleur avant
6 Vers la sortie arrière ou la sortie du haut-par-
leur d’extrêmes graves
7 Haut-parleur arrière ou haut-parleur d’extrê-
mes graves
Installation
Important
! Vérifiez toutes les connexions et tous les sys-
tèmes avant l’installation finale.
! N’utilisez pas de pièces non autorisées car il
peut en résulter des dysfonctionnements.
! Consultez votre revendeur si l’ installation né-
cessite le perçage de trous ou d’autres modifications du véhicule.
! N’installez pas cet appareil là où :
— il peut interférer avec l’utilisation du véhicule.
— il peut blesser un passager en cas d’arrêt
soudain du véhicule.
! Le laser à semi-conducteur sera endommagé
s’il devient trop chaud. Installez cet appareil
àl’écart de tous les endroits chauds, par
exemple les sorties de chauffage.
! Des performances optimales sont obtenues
quand l’appareil est installé à un angle inférieur à 60°.
4
6
60°
! Lors de l’installation, pour assurer une dis-
persion correcte de la chaleur quand cet appareil est utilisé, assurez-vous de laisser un
espace important derrière la face arrière et
enroulez les câbles volants de façon qu’ils ne
bloquent pas les orifices d’aération.
Laissez suffisamment
d’espace
5 cm
5 cm
Montage avant/arrière DIN
Cet appareil peut être installé correctement soit
en montage frontal ou en montage arrière.
Utilisez des pièces disponibles dans le
commerce lors de l’installation.
Montage frontal DIN
1 Insérez le manchon de montage dans le
tableau de bord.
Lors de l’installation de cet appareil dans un espace peu profond, utilisez le manchon de montage fourni. Si l’espace est suffisant, utilisez le
manchon de montage fourni avec le véhicule.
2 Fixez le manchon de montage en utilisant
un tournevis pour courber les pattes métalliques (90°) en place.
1
2
1 Tableau de bord
2 Manchon de montage
# Assurez-vous que l’appareil est correctement mis
en place. Toute installation instable peut entraîner
des sauts ou autres dysfonctionnements.
Montage arrière DIN
1 Déterminez la position appropriée où les
trous sur le support et sur le côté de l’appareil se correspondent.
2 Serrez deux vis de chaque côté.
1
2
1 Vis taraudeuse (5 mm × 8 mm)
2 Support de montage
3 Tableau de bord ou console
3
Retrait de l’appareil
1 Retirez l’anneau de garniture.
1 Anneau de garniture
2 Encoche
! Retirer la face avant permet d’accéder plus
facilement à l’anneau de garniture.
Page 35

Installation
Informations complémentaires
Section
03
! Quand vous remontez l’anneau de garniture,
pointez le côté avec l’encoche vers le bas.
2 Insérez les clés d’extraction fournies dans
les deux côtés de l’appareil jusqu’àcequ’el-
les s’enclenchent en place.
3 Tirez l’appareil hors du tableau de bord.
Retrait et remontage de la face avant
Vous pouvez retirer la face avant pour protéger
l’appareil contre le vol.
Pour les détails, reportez-vous à Retrait de la face
avant et à la page 22, Remontage de la face
avant.
Dépannage
Les symptômes apparaissent en gras et les causes sous la forme de texte régulier non indenté.
Le texte régulier indenté est utilisé pour indiquer
les actions à mettre en œuvre.
L’écran revient automatiquement à l’affichage
ordinaire.
Vous n’avez exécuté aucune opération pendant 30
secondes.
Réexécutez l’opération.
L’étendue de répétition de lecture change de manière inattendue.
En fonction de l’étendue de répétition de lecture, l’étendue sélectionnée peut changer lors de la sélection d’un autre dossier ou d’une autre plage ou
pendant l’avance ou le retour rapide.
Resélectionnez l’étendue de répétition de lecture.
Un sous-dossier n’est pas lu.
Il est impossible de lire les sous-dossiers lorsque
FLD (répétition du dossier) est sélectionné.
Sélectionnez une autre étendue de répétition de
lecture.
NO XXXX s’affiche lors de la modification de l’affichage (par exemple NO TITLE).
Aucune information textuelle n’est intégrée.
Basculez l’affichage ou la lecture sur une autre
plage/un autre fichier.
L’appareil ne fonctionne pas correctement.
Il y a des interférences.
Vous utilisez un périphérique, un téléphone portable
par exemple, qui peut générer des interférences sonores.
Éloignez tous les appareils électriques qui
pourrait provoquer des interférences.
Messages d’erreur
Quand vous contactez votre distributeur ou le
Service d’entretien agréé par Pioneer le plus
proche, n’oubliez pas de noter le message d’erreur.
Les symptômes apparaissent en gras et les causes sous la forme de texte régulier non indenté.
Le texte régulier indenté est utilisé pour indiquer
les actions à mettre en œuvre.
Commun
AMP ERROR
Une anomalie de fonctionnement de l’appareil s’est
produite ou la connexion des haut-parleurs est incorrecte. Le circuit de protection est activé.
Vérifiez la connexion des haut-parleurs. Si le
message ne disparaît pas même après avoir
éteint puis démarré le moteur, consultez votre
distributeur ou un centre d’entretien agréé par
Pioneer.
Syntoniseur DAB
ANTENNA ERROR
La connexion de l’antenne est incorrecte.
Vérifiez la connexion de l’antenne. Si le message
ne disparaît pas même après avoir éteint puis
démarré le moteur, consultez votre distributeur
ou un centre d’entretien agréé par Pioneer.
Lecteur de CD
ERROR-07, 11, 12, 17, 30
Le disque est sale.
Nettoyez le disque.
Le disque est rayé.
Utilisez un autre disque.
Français
35
Fr
Page 36

Annexe
Informations complémentaires
Informations complémentaires
ERROR-07, 10, 11, 12, 15, 17, 30, A0
Une erreur mécanique ou électrique est survenue.
Coupez et remettez le contact d’allumage ou
choisissez une autre source, puis revenez au
lecteur de CD.
ERROR-15
Le disque inséré est vierge.
Utilisez un autre disque.
ERROR-23
Format CD non pris en charge.
Utilisez un autre disque.
FORMAT READ
Le début de la lecture et le début de l’émission des
sons sont parfois décalés.
Attendez que le message disparaisse pour
entendre les sons.
NO AUDIO
Le disque inséré ne contient pas de fichiers pouvant
être lus.
Utilisez un autre disque.
SKIPPED
Le disque inséré contient des fichiers protégés par
DRM.
Les fichiers protégés sont sautés.
PROTECT
Tous les fichiers sur le disque inséré intègrent la protection par DRM.
Utilisez un autre disque.
Périphérique de stockage USB/iPod
FORMAT READ
Le début de la lecture et le début de l’émission des
sons sont parfois décalés.
Attendez que le message disparaisse pour
entendre les sons.
NO AUDIO
Absence de plages musicales.
Transférez les fichiers audio vers le périphérique
de stockage USB et procédez à la connexion.
La sécurité est activée sur le périphérique de stockage USB.
Suivez les instructions du périphérique de
stockage USB pour désactiver la sécurité.
SKIPPED
Le périphérique de stockage USB connecté contient
des fichiers protégés par DRM.
Les fichiers protégés sont sautés.
PROTECT
Tous les fichiers sur le périphérique de stockage
USB connecté intègrent la protection par DRM.
Remplacez le périphérique de stockage USB.
N/A USB
Le périphérique USB connecté n’est pas pris en
charge par cet appareil.
! Connectez un périphérique de stockage de
masse USB compatible.
! Déconnectez votre périphérique et remplacezle par un périphérique de stockage USB
compatible.
CHECK USB
Le connecteur USB ou le câble USB est en court-circuit.
Vérifiez que le connecteur USB ou le câble USB
n’est pas coincé ou endommagé.
CHECK USB
Le périphérique de stockage USB connecté
consomme plus que le courant maximal autorisé.
Déconnectez le périphérique de stockage USB et
ne l’utilisez pas. Mettez le contact sur OFF, puis
sur ACC ou ON, et ne connectez que des
périphériques de stockage USB compatibles.
CHECK USB
L’iPod fonctionne correctement mais n’est pas
chargé.
Assurez-vous que le câble de connexion de l’iPod
n’est pas en court-circuit (par exemple, qu’il
n’est pas coincé dans des objets métalliques).
Après avoir vérifié, mettez le contact d’allumage
sur OFF puis sur ON, ou déconnectez l’iPod et
reconnectez-le.
ERROR-19
Panne de communication.
Effectuez une des opérations suivantes.
–Coupez et remettez le contact d’allumage.
–Déconnectez le périphérique de stockage USB.
–Choisissez une autre source.
Revenez ensuite à la source USB.
Panne iPod.
Déconnectez le câble de l’iPod. Quand le menu
principal de l’iPod est affiché, reconnectez et
réinitialisez l’iPod.
ERROR-23
Le périphérique de stockage USB n’a pas été formaté avec FAT12, FAT16ou FAT32.
Le périphérique de stockage USB doit être
formaté avec FAT12, FAT16ou FAT32.
ERROR-16
La version du firmware de l’iPod est ancienne.
Mettez à jour la version de l’iPod.
Panne iPod.
Déconnectez le câble de l’iPod. Quand le menu
principal de l’iPod est affiché, reconnectez et
réinitialisez l’iPod.
STOP
Aucune plage musicale dans la liste en cours.
Sélectionnez une liste qui contient les plages
musicales.
NOT FOUND
Aucune plage musicale connexe.
Transférez les plages musicales sur l’iPod.
Applications
START UP APP
L’application n’a pas encore démarré.
Suivez les instructions qui s’affichent à l’écran.
Conseils sur la manipulation
Disques et lecteur
Utilisez uniquement des disques affichant l’un ou
l’autre des logos suivants.
Utilisez des disques 12 cm.
Utilisez seulement des disques conventionnels de
forme circulaire.
36
Fr
Page 37

Informations complémentaires
Annexe
Informations complémentaires
Les types de disques suivants ne peuvent pas être
utilisés avec cet appareil.
! DualDiscs
! Disques 8 cm : les tentatives d’utilisation de
tels disques avec un adaptateur peuvent entraîner un dysfonctionnement de l’appareil.
! Disques de forme bizarre
! Disques autres que les CD
! Disques endommagés, y compris les disques
fendillés, ébréchés ou voilés
! Disques CD-R/RW non finalisés
Ne touchez pas la surface enregistrée des disques.
Rangez les disques dans leur coffret dès que vous
ne les écoutez plus.
Ne posez aucune étiquette sur la surface des disques, n’écrivez pas sur un disque, n’appliquez
aucun agent chimique sur un disque.
Pour nettoyer un CD, essuyez le disque avec un
chiffon doux en partant du centre vers l’extérieur.
La condensation peut perturber temporairement
le fonctionnement du lecteur. Laissez celui-ci s’adapter à la température plus élevée pendant une
heure environ. Essuyez également les disques humides avec un chiffon doux.
La lecture de certains disques peut être impossible en raison des caractéristiques du disque, de
son format, de l’application qui l’a enregistré, de
l’environnement de lecture, des conditions de
stockage ou d’autres conditions.
Les cahots de la route peuvent interrompre la lecture d’un disque.
Lors de l’utilisation de disques dont la surface de
l’étiquette est imprimable, vérifiez les instructions
et les avertissements des disques. L’insertionet
l’éjection peuvent ne pas être possibles selon les
disques. L’utilisation d’un tel disque risque d’endommager cet appareil.
Ne posez aucune étiquette disponible dans le
commerce ou tout autre matériau sur la surface
des disques.
! Les disques pourraient se déformer et devenir
injouables.
! Les étiquettes pourraient se décoller pendant
la lecture et empêcher l’éjection des disques,
ce qui pourrait endommager l’appareil.
Périphérique de stockage USB
Les connexions via un concentrateur USB ne sont
pas prises en charge.
Ne connectez aucun périphérique autre qu’un périphérique de stockage USB.
Fixez fermement le périphérique de stockage USB
lors de la conduite. Ne laissez pas le périphérique
de stockage USB tomber sur le plancher,où il
pourrait gêner le bon fonctionnement de la pédale
de frein ou d’accélérateur.
En fonction du périphérique de stockage USB, les
problèmes suivants peuvent survenir.
! Le fonctionnement peut varier.
! Le périphérique de stockage peut ne pas être
reconnu.
! Les fichiers peuvent ne pas être lus correcte-
ment.
! Le périphérique peut générer des interférences
sonores lorsque vous écoutez la radio.
iPod
Ne laissez pas l’iPod dans un endroit soumis à
une température élevée.
Attachez fermement l’iPod pendant que vous
conduisez. Ne laissez pas l’iPod tomber sur le
plancher, où il pourrait gêner le bon fonctionnement de la pédale de frein ou d’accélérateur.
Quelques mots sur les réglages de l’iPod
! Lorsqu’un iPod est connecté, cet appareil dés-
active le réglage EQ (égaliseur) de l’iPod afin
d’optimiser l’acoustique. Le réglage EQ original est rétabli lorsque l’iPod est déconnecté.
! Vous ne pouvez pas mettre la fonction de répé-
tition hors service sur l’iPod quand vous utilisez cet appareil. La fonction de répétition est
positionnée automatiquement sur répétition
de toutes les plages quand vous connectez
l’iPod à cet appareil.
Tout texte incompatible enregistré sur l’iPod ne
sera pas affiché par cet appareil.
Formats audio compressés
compatibles (disque, USB)
WMA
Extension de fichier : .wma
Débit binaire: 48kbit/s à 320 kbit/s (CBR), 48 kbit/s
à 384kbit/s (VBR)
Fréquence d’échantillonnage : 32 kHz, 44,1 kHz,
48 kHz
Windows Mediaä Audio Professional, Lossless,
Voice/DRM Stream/Stream avec vidéo : incompatible
MP3
Extension de fichier : .mp3
Débit binaire: 8 kbit/s à 320 kbit/s (CBR), VBR
Fréquence d’échantillonnage : 8 kHz à 48 kHz
(32 kHz, 44,1 kHz, 48 kHz pour accentuation)
Version étiquette ID3 compatible : 1.0, 1.1, 2.2, 2.3,
2.4 (la Version 2.x de l’étiquette ID3 a priorité sur la
Version 1.x.)
Liste de lecture m3u : incompatible
MP3i (MP3 interactif), mp3 PRO : incompatible
WAV
Extension de fichier : .wav
Bits de quantification : 8 et 16 (LPCM), 4 (MS
ADPCM)
Fréquence d’échantillonnage : 16 kHz à 48 kHz
(LPCM), 22,05 kHz et 44,1 kHz (MS ADPCM)
! Vous ne pouvez pas utiliser cette fonction
avec USB MTP.
AAC
Format compatible : AAC encodé par iTunes
Extension de fichier : .m4a
Fréquence d’échantillonnage : 11,025 kHz à 48 kHz
Débit de transmission : 16 kbit/s à 320 kbit/s, VBR
Apple Lossless: incompatible
Fichier AAC acheté sur le iTunes Store (extension
de fichier.m4p) : incompatible
Français
37
Fr
Page 38

Annexe
Informations complémentaires
Informations complémentaires
Informations supplémentaires
Seuls les 32 premiers caractères d’un nom de fichier (incluant l’extension de fichier) ou d’un nom
de dossier peuvent être affichés.
Les textes russes à afficher sur cet appareil doivent être codés avec un des jeux de caractères suivants :
! Unicode (UTF-8, UTF-16)
! Un jeu de caractères autre que Unicode qui
est utilisé dans un environnement Windows et
qui est paramétré sur Russe dans le réglage
multilingue
Cet appareil peut ne pas fonctionner correctement
selon l’application utilisée pour encoder les fichiers WMA.
Il peut se produire un léger retard au début de la
lecture de fichiers audio intégrés avec des données image ou de fichiers audio stockés sur un périphérique de stockage USB avec de nombreuses
hiérarchies de dossiers.
Disque
Hiérarchie des dossiers pouvant être lus : jusqu’à
8 niveaux (dans la pratique, la hiérarchie compte
moins de 2 niveaux).
Dossiers pouvant être lus : jusqu’à99
Fichiers pouvant être lus : jusqu’à 999
Système de fichiers : ISO 9660 Niveau 1 et 2,
Romeo, Joliet
Lecture multi-session: compatible
Transfert des données en écriture par paquet : incompatible
Quelle que soit la durée du silence entre les plages musicales de l’enregistrement original, la lecture des disques d’audio compressé s’effectue
avec une courte pause entre les plages musicales.
Périphérique de stockage USB
Hiérarchie des dossiers pouvant être lus : jusqu’à
8 niveaux (dans la pratique, la hiérarchie compte
moins de 2 niveaux).
Dossiers pouvant être lus : jusqu’à 500
Fichiers pouvant être lus : jusqu’à 15 000
Lecture des fichiers protégés par des droits d’auteur : incompatible
Périphérique de stockage USB partitionné : Seule
la première partition peut être lue.
Il peut se produire un léger retard au début de la
lecture de fichiers audio sur un périphérique de
stockage USB avec de nombreuses hiérarchies de
dossiers.
PRÉCAUTION
! Pioneer ne garantit pas la compatibilité avec
tous les périphériques de stockage de masse
USB et décline toute responsabilité en cas
de perte de données sur des lecteurs multimédia, smartphones ou autres périphériques
lors de l’utilisation de ce produit.
! Ne laissez pas de disques ou un périphérique
de stockage USB dans un lieu où les températures sont élevées.
Compatibilité iPod
Cet appareil prend en charge uniquement les
modèles d’iPod suivants. Les versions du logiciel
iPod prises en charge sont indiquées ci-dessous. Les versions antérieures ne sont pas prises en charge.
Conçu pour
! iPod touch (5ème génération)
! iPod touch (4ème génération)
! iPod touch (3ème génération)
! iPod touch (2ème génération)
! iPod touch (1ère génération)
! iPod classic
! iPod avec vidéo
! iPod nano (7ème génération)
! iPod nano (6ème génération)
! iPod nano (5ème génération)
! iPod nano (4ème génération)
! iPod nano (3ème génération)
! iPod nano (2ème génération)
! iPod nano (1ère génération)
! iPhone 5
! iPhone 4S
! iPhone 4
! iPhone 3GS
! iPhone 3G
! iPhone
Selon la génération ou la version de l’iPod, certaines fonctions peuvent ne pas être disponibles.
Les opérations peuvent différer selon la version du
logiciel iPod.
Les utilisateurs d’un iPod avec connecteur Lightning doivent utiliser le câble Lightning vers USB
(fourni avec l’iPod).
Les utilisateurs d’un iPod avec Dock Connector
doivent utiliser le CD-IU51. Pour plus de détails,
consultez votre revendeur.
Pour des détails sur la compatibilité fichier/format,
reportez-vous aux manuels de l’iPod.
Livre audio, podcast : compatible
PRÉCAUTION
Pioneer n’accepte aucune responsabilité en cas
de perte de données sur l’iPod, même si la perte
de données se produit pendant l’utilisation de
cet appareil.
Séquence des fichiers audio
Sur cet appareil, l’utilisateur ne peut pas affecter
de numéros de dossier ni spécifier les séquences de lecture.
Exemple de hiérarchie
01
02
1
2
03
04
5
6
05
Niveau 1 Niveau 2 Niveau 3 Niveau 4
Disque
La séquence de sélection des dossiers ou d’autres opérations peut différer en fonction du logiciel de codage ou d’écriture.
Périphérique de stockage USB
La séquence de lecture est identique à la séquence enregistrée dans le périphérique de
stockage USB.
Pour spécifier la séquence de lecture, la méthode suivante est recommandée.
1 Créez un nom de fichier en incluant des
nombres qui spécifient la séquence de lecture (par exemple, 001xxx.mp3 et
099yyy.mp3).
2 Placez ces fichiers dans un dossier.
3 Enregistrez le dossier contenant les fichiers
sur le périphérique de stockage USB.
Toutefois, avec certains environnements système, vous ne pouvez pas spécifier la séquence
de lecture.
Pour les lecteurs audio portables USB, la séquence est différente et dépend du lecteur.
: Dossier
: Fichier d’audio
3
compressé
4
01 à 05 : Numéro de
dossier
1 à 6 : Séquence
de lecture
38
Fr
Page 39

Informations complémentaires
Annexe
Informations complémentaires
Tableau des caractères
cyrilliques
D:C D: C D: C D: C D:C
: А : Б : В : Г : Д
: Е, Ё : Ж : З : И, Й : К
: Л : М : Н : О : П
: Р : С : Т : У : Ф
: Х : Ц : Ч
: Ы : Ь : Э : Ю : Я
: Ш,
: Ъ
Щ
D : Affichage C : Caractère
Droits d’auteur et marques
commerciales
iTunes
Apple et iTunes sont des marques commerciales
d’Apple Inc., enregistrées aux États-Unis et dans
d’autres pays.
MP3
La vente de ce produit comporte seulement une
licence d’utilisation privée, non commerciale, et
ne comporte pas de licence ni n’implique aucun
droit d’utilisation de ce produit pour une diffusion commerciale (c’est-à-dire générant des revenus) en temps réel (terrestre, par satellite,
câble et/ou tout autre média), diffusion/streaming via internet, des intranets et/ou d’autres systèmes électroniques de distribution de contenu,
telles que les applications audio payante ou
audio à la demande. Une licence indépendante
est requise pour de telles utilisations. Pour les
détails, veuillez visiter le site
http://www.mp3licensing.com.
WMA
Windows Media est une marque déposée ou
une marque commerciale de Microsoft
Corporation aux États-Unis et/ou dans d’autres
pays.
Ce produit intègre une technologie détenue par
Microsoft Corporation, qui ne peut être utilisée
et distribuée que sous licence de Microsoft
Licensing, Inc.
iPod et iPhone
iPhone, iPod, iPod classic, iPod nano et iPod
touch sont des marques commerciales
d’Apple Inc., déposées aux États-Unis et dans
d’autres pays.
Lightning est une marque commerciale
d’Apple Inc.
Les accessoires électroniques portant la mention « Made for iPod » et « Made for iPhone »
ont été conçus pour fonctionner respectivement
avec un iPod ou un iPhone et sont certifiés
conformes aux exigences d’Apple par le fabricant. Apple n’est pas responsable pour le fonctionnement de cet appareil ou de sa
compatibilité avec les normes réglementaires et
de sécurité. Veuillez noter que l’emploi de cet
accessoire avec un iPod ou un iPhone peut affecter les performances sans fil.
Androidä
Android est une marque commerciale de
Google Inc.
MIXTRAX
MIXTRAX est une marque commerciale de
PIONEER CORPORATION.
Caractéristiques techniques
Généralités
Tension d’alimentation ..... 14,4 V CC (10,8 V à 15,1 V ac-
Mise à la masse ............... Pôle négatif
Consommation maximale
................................... 10,0 A
Dimensions (L × H × P) :
DIN
Châssis ............................ 178mm × 50mm × 165 mm
Panneau avant ................. 188 mm × 58 mm × 15mm
D
Châssis ............................ 178mm × 50mm × 165 mm
Panneau avant ................. 170 mm × 46 mm × 15mm
Poids ............................... 1 kg
Audio
Puissance de sortie maximale
................................... 50 W × 4
Puissance de sortie continue
................................... 22W × 4 (50Hz à 15000 Hz,
Impédance de charge ...... 4 W (4 W à8Wacceptable)
Niveau de sortie maximum de la sortie préamp
................................... 2,0V
Correction physiologique
................................... +10dB (100 Hz), +6,5 dB
Égaliseur (Égaliseur graphique à 5 bandes) :
Fréquence ........................ 80 Hz/250 Hz/800 Hz/2,5 kHz/
Plage d’égalisation .......... ±12 dB (par pas de 2 dB)
Haut-parleur d’extrêmes graves (mono) :
Fréquence ........................ 50 Hz/63 Hz/80 Hz/100 Hz/
Pente ............................... –12 dB/oct, –24 dB/oct
Gain ................................ +6dB à –24 dB
Phase .............................. Normale/Inverse
Lecteur de CD
Système ........................... Compact Disc Digital Audio
Disques utilisables ........... Disques compacts
Rapport signal/bruit ......... 94 dB (1 kHz) (réseau IEC-A)
ceptable)
70 W × 1/2 W (pour le hautparleur d’extrêmes graves)
THD 5 %, impédance de
charge 4 W,avec les deux canaux entraînés )
(10 kHz) (volume : –30 dB)
8 kHz
125 Hz/160 Hz/200 Hz
Nombre de canaux ........... 2 (stéréo)
Format de décodage MP3
................................... MPEG-1 & 2 Couche Audio 3
Format de décodage WMA
................................... Ver. 7, 7.1,8, 9, 10, 11, 12 (2 ca-
Format de décodage AAC
................................... MPEG-4 AAC (fichiers enco-
Format du signal WAV ...... PCM Linéaire & MS ADPCM
USB
Spécification standard USB
................................... USB 2.0 vitesse pleine
Alimentation maximale .... 1 A
Classe USB ...................... MSC (Mass Storage Class)
Système de fichiers .......... FAT12, FAT16, FAT32
Format de décodage MP3
................................... MPEG-1 & 2 Couche Audio 3
Format de décodage WMA
................................... Ver. 7, 7.1,8, 9, 10, 11, 12 (2 ca-
Format de décodage AAC
................................... MPEG-4 AAC (fichiers enco-
Format du signal WAV ...... PCM Linéaire & MS ADPCM
Syntoniseur FM
Gamme de fréquence ....... 87,5 MHz à 108,0 MHz
Sensibilité utile ................ 9 dBf (0,8 µV/75 W, mono, S/B :
Rapport signal/bruit ......... 72 dB (réseau IEC-A)
Syntoniseur MW (PO)
Gamme de fréquence ....... 531 kHz à 1 602 kHz
Sensibilité utile ................ 25 µV (S/B : 20 dB)
Rapport signal/bruit ......... 62 dB (réseau IEC-A)
Syntoniseur LW (GO)
Gamme de fréquence ....... 153 kHz à 281 kHz
Sensibilité utile ................ 28 µV (S/B : 20 dB)
naux audio)
(Windows Media Player)
dés iTunes seulement)
(Ver.10.6 et antérieures)
(Non compressé)
naux audio)
(Windows Media Player)
dés iTunes seulement)
(Ver.10.6 et antérieures)
(Non compressé)
30 dB)
Français
39
Fr
Page 40

Annexe
Informations complémentaires
Rapport signal/bruit ......... 62 dB (réseau IEC-A)
Syntoniseur DAB
Gamme de fréquence (Gamme C)
................................... 174,928 MHz à 239,200 MHz
Gamme de fréquence (Gamme L)
................................... 1452,960 MHz à
Sensibilité utile (Gamme C)
................................... –96 dBm
Sensibilité utile (Gamme L)
................................... –94 dBm
Rapport signal/bruit ......... 85 dB
Remarque
Les caractéristiques et la présentation peuvent
être modifiées sans avis préalable.
(5A à 13F)
1 490,624 MHz (LA à LW)
40
Fr
Page 41

Français
41Fr
Page 42

Sezione
Prima di iniziare
01
Prima di iniziare
Grazie per aver acquistato questo prodotto
PIONEER
Leggere attentamente questo manuale prima di
utilizzare il prodotto, per assicurarne il corretto
utilizzo. È particolarmente importante leggere e
osservare le precauzioni contrassegnate da AV-
VERTENZA e ATTENZIONE contenute in
questo manuale. Conservare il manuale in un
luogo sicuro e accessibile, per consultazione futura.
Se si vuole eliminare questo prodotto, non
gettarlo insieme ai rifiuti domestici. Esiste un
sistema di raccolta differenziata in conformità
alle leggi che richiedono appositi trattamenti,
recupero e riciclo.
Gli utenti privati dei Paesi membri dell’Unione
Europea, della Svizzera e della Norvegia possono portare i propri prodotti elettronici gratuitamente presso i centri di raccolta specificati o
presso il rivenditore al dettaglio (se l’acquisto è
stato eseguito presso un rivenditore di questo
tipo).
Per i Paesi non specificati in precedenza, contattare le autorità locali per informazioni sul corretto metodo di smaltimento.
In questo modo si garantirà che il prodotto
smaltito subisca i processi di trattamento, recupero e riciclaggio necessari per prevenire i potenziali effetti negativi per l’ambiente e la salute
umana.
Informazioni sull’unità
Le frequenze del sintonizzatore di questa unità
sono destinate all’uso in Europa occidentale, in
Asia, nel Medio Oriente, in Africa e in Oceania.
L’uso in altre aree può dare come risultato una
ricezione non adeguata. La funzione RDS (Radio
Data System) è utilizzabile solo nelle aree in cui
vengono trasmessi segnali RDS per stazioni FM.
AVVERTENZA
! Non cercare di installare o effettuare in-
terventi di manutenzione sul prodotto.
L’installazione o l’esecuzione di interven-
ti di manutenzione sul prodotto da parte
di persone sprovviste delle qualifiche o
dell’esperienza richiesta per apparecchi
elettronici e accessori automobilistici potrebbe risultare pericolosa ed esporre a
rischi di scosse elettriche e di altre situazioni pericolose.
! Non cercare di utilizzare i comandi dell’unità
durante la guida. Prima di utilizzare i comandi dell’unità, parcheggiare il veicolo in un
luogo sicuro.
ATTENZIONE
! Non lasciare che questa unità entri in contat-
to con liquidi, in caso contrario possono verificarsi scosse elettriche. Inoltre, se questa
unità entra in contatto con liquidi, può subire
danni oppure emettere fumo o surriscaldarsi.
! Il CarStereo-Pass Pioneer può essere usato
solo in Germania.
! Mantenere sempre il volume basso abba-
stanza da poter udire i suoni provenienti dall’esterno.
! Evitare l’esposizione all’umidità.
ATTENZIONE
Questo apparecchio è un prodotto al laser di
Classe 1 secondo le norme di sicurezza dei
prodotti al laser IEC 60825-1:2007.
PRODOTTO LASER DI CLASSE 1
In caso di problemi
Nel caso che questa unità non funzioni correttamente, contattare il rivenditore o il Centro di assistenza autorizzato PIONEER più vicino.
42
It
Page 43

d8 9 e
a
6 8 a
Uso dell’unità
Uso dell’unità
Sezione
02
Unità principale
2 4
3
1
7
1 SRC/OFF
2 h (espulsione)
3 MULTI-CONTROL (M.C.)
(lista)
4
5 Vano d’inserimento dei dischi
6 Porta USB
7 DAB
8 BAND/
9
a c/d
b DISP
c Da 1/
Connettore di ingresso ausiliario (AUX) (con-
d
nettore stereo da 3,5 mm)
e Tasto Rimozione
ATTENZIONE
Utilizzare un cavo USB Pioneer opzionale (CDU50E) per collegare un lettore audio USB o un
dispositivo di memoria USB, in quanto se i dispositivi vengono collegati direttamente all’unità, sporgeranno dalla stessa e potrebbero
risultare pericolosi.
5
b c
(controllo iPod)
(indietro)/DIMMER (varialuce)
a 6/
6
Indicazioni sul display
1
7 b9
3
Sezione delle informazioni principali
! Sintonizzatore: banda e frequenza
! RDS: nome di servizio del programma,
informazioni PTY e altre informazioni let-
1
terali
! Sintolettore, dispositivo di memoria USB
e iPod: tempo di riproduzione trascorso
e informazioni di testo
Viene visualizzato quando esiste una cartella
2
o un menu di livello inferiore.
3
(lista)
4 Sezione delle informazioni secondarie
5 LOC (ricerca di sintonia in modo locale)
TP (identificazione dei programmi sul traffi-
6
co)
7 TA (notiziari sul traffico)
8
(riproduzione casuale/shuffle)
9
(ripetizione)
a
(controllo iPod)
b
La funzione iPod di questa unità è controllata dall’iPod stesso.
54
(Sound Retriever)
Menu di configurazione
2
1 Dopo aver installato l’unità, portare l’interruttore della chiave di avviamento su ON.
Viene visualizzata l’indicazione SET UP.
2 Ruotare M.C. per selezionare YES.
# Se non si effettuano operazioni con l’unità per 30
secondi, il menu di configurazione non sarà visualizzato.
# Se non si desidera eseguire la configurazione in
questo momento, ruotare M.C. per selezionare NO.
3 Premere M.C. per selezionare.
4 Per configurare il menu, eseguire questa
procedura.
Per passare all’opzione di menu successiva, occorre confermare la selezione.
LANGUAGE (multilingue)
Questa unità è in grado di visualizzare le informazioni di testo dei file audio compressi se sono
state incorporate in inglese, russo o turco.
! Se la lingua incorporata e l’impostazione della
lingua selezionata non corrispondono, le informazioni di testo potrebbero non essere visualizzate correttamente.
! Alcuni caratteri potrebbero non essere visualiz-
zati correttamente.
1 Ruotare M.C. per selezionare l’impostazione
desiderata.
ENG (Inglese)—РУС (Russo)—TUR (Turco)
2 Premere M.C. per confermare la selezione.
CLOCK SET (impostazione dell’orologio)
1 Ruotare M.C. per regolare le ore.
2 Premere M.C. per selezionare i minuti.
3 Ruotare M.C. per regolare i minuti.
4 Premere M.C. per confermare la selezione.
FM STEP (passo di sintonizzazione FM)
Utilizzare FM STEP per impostare le opzioni relative al passo di sintonizzazione FM (impostazioni
per il passo di ricerca).
1 Ruotare M.C. per selezionare il passo di sinto-
nizzazione FM.
100 (100 kHz)—50 (50kHz)
2 Premere M.C. per confermare la selezione.
! Il passo di sintonizzazione manuale è fissato a
50 kHz.
! Se le opzioni AF e TA sono disattivate, il passo
di ricerca è fissato a 50 kHz, anche se è stato
impostato su 100.
DAB ANT PW (impostazione per la sorgente di alimentazione dell’antenna DAB)
Utilizzare l’impostazione DAB ANT PW per selezionare se trasmettere o meno l’alimentazione all’eventuale antenna DAB collegata.
1 Ruotare M.C. per selezionare l’impostazione
desiderata.
! ON – Utilizzare questa opzione per attivare
l’alimentazione dell’antenna DAB. Selezionare se con l’unità si usa un’antenna DAB
opzionale (AN-DAB1, venduta a parte).
! OFF – Utilizzare questa opzione per disatti-
vare la trasmissione dell’alimentazione. Selezionare se si usa un’antenna passiva
senza alimentazione di potenza.
2 Premere M.C. per confermare la selezione.
Viene visualizzata l’indicazione QUIT.
5 Per completare le impostazioni, ruotare
M.C. per selezionare YES.
# Se si desidera modificare ancora l’impostazione,
ruotare M.C. per selezionare NO.
6 Premere M.C. per selezionare.
Italiano
43
It
Page 44

Sezione
02
Uso dell’unità
Uso dell’unità
Note
! È possibile configurare le opzioni di menu
dal menu di sistema e dal menu iniziale. Per
informazioni dettagliate sulle impostazioni,
vedere Menu di sistema a pagina 51 e Menu
iniziale a pagina 53.
! È possibile annullare il menu di configurazio-
ne premendo SRC/OFF.
Funzionamento di base
Importante
! Quando si rimuove o si inserisce il frontalino,
maneggiarlo con cura.
! Evitare di sottoporre il frontalino a urti ecces-
sivi.
! Mantenere il frontalino lontano dalla luce so-
lare diretta e dalle alte temperature.
! Per evitare danni ai dispositivi o agli interni
del veicolo, accertarsi di scollegare gli eventuali cavi e i dispositivi collegati al frontalino,
prima di rimuoverlo.
Rimozione del frontalino
1 Premere il tasto di rimozione per sganciare il
frontalino.
2 Spingere il frontalino verso l’alto (M) e quindi ti-
rarlo verso l’esterno (N).
3 Conservare sempre il frontalino in una custo-
dia o una borsa protettiva, dopo averlo rimosso.
Reinserimento del frontalino
1 Fare scorrere il frontalino verso sinistra.
2 Premere il lato destro del frontalino fino a
quando è saldamente installato.
Se il frontalino viene inserito con forza eccessiva, l ’unità o il frontalino potrebbero subire
danni.
Accensione dell’unità
1 Premere SRC/OFF per accendere l’unità.
Spegnimento dell’unità
1 Premere e tenere premuto SRC/OFF fino a
quando l’unità non si spegne.
Selezione di una sorgente
1 Premere SRC/OFF per passare in rassegna:
DIGITAL RADIO (trasmissione audio digitale)
—RADIO—CD—USB/iPod—APP (applicazio-
ne)—AUX
! Se è selezionata una sorgente diversa da DIGI-
TAL RADIO, è possibile passare a DIGITAL
RADIO premendo DAB.
! Quando è in uso la connessione MTP, viene vi-
sualizzata l’indicazione USB MTP.
Regolazione del volume
1 Ruotare M.C. per regolare il volume.
Nota
Quando il conduttore isolato blu/bianco di questa unità viene collegato al terminale di controllo
del relè dell’antenna automatica, l’antenna dell’automobile si estende quando si accende l’unità. Per ritirare l’antenna, spegnere la sorgente.
Operazioni col menu più
frequentemente utilizzate
Ritorno al display precedente
Ritorno all’elenco precedente (la cartella superiore di un livello)
1 Premere
Ritorno al display normale
Annullamento del menu principale
1 Premere BAND/
Ritorno al display normale dall’elenco
1 Premere BAND/
/DIMMER.
.
.
Radio digitale (trasmissione
audio digitale)
Per ricevere segnali DAB, collegare all’unità un’antenna DAB (AN-DAB1) venduta a parte.
DAB è l’acronimo di Digital Audio Broadcasting
(Trasmissione audio digitale), un tipo di segnale
che presenta le seguenti caratteristiche:
! Alta qualità del suono (elevata quasi quanto
quella dei CD, anche se in alcuni potrebbe risultare ridotta per consentire la trasmissione
di un numero più elevato di servizi)
! Ricezione esente da interferenze
Nota
Alcune stazioni svolgono prove tecniche di trasmissione.
Funzionamento di base
Selezione di una banda
1 Premere BAND/
lizzata la banda desiderata (D1, D2 o D3).
Sintonizzazione manuale (passo per passo)
1 Premere c o d.
Insieme
Servizio
Servizio
Alcuni singoli ser vizi raggruppati in un insieme
potrebbero essere ulteriormente suddivisi in componenti di servizio. La componente di servizio più
importante è denominata Componente del servizio principale, mentre le componenti di servizi ausiliari sono denominate Componenti dei servizi
secondari.
Ricerca
1 Premere e tenere premuto c o d e poi rilascia-
re.
fino a quando viene visua-
Componente del servizio principale
Componente del servizio principale
Componente del servizio secondario
Componente del servizio secondario
Premere .
Premere
.
44
It
Page 45

Uso dell’unità
Uso dell’unità
Sezione
02
Pausa
È possibile utilizzare la funzione Pausa per interrompere temporaneamente l’ascolto dei segnali
DAB.
% Premere DAB per attivare o disattivare la
pausa.
! Questa unità memorizza automaticamente le
trasmissioni più recenti. La capacità di memorizzazione di questa unità varia a seconda
della velocità in bit della componente del servizio utilizzata. La capacità di memorizzazione
è di circa cinque minuti per velocità in bit
pari a 192 kbps.
! Se la durata della pausa di una selezione su-
pera la capacità di memorizzazione, la riproduzione riprenderà dall’inizio della selezione
memorizzata.
Questa funzione è disattivata se è attiva la funzione Time shift di ascolto differito. Per ulteriori
informazioni sulla funzione Time shift, vedere
Ascolto delle trasmissioni recenti (funzione Time
shift) a pagina 45.
Memorizzazione e richiamo delle
stazioni per ciascuna banda
Uso dei tasti di preselezione sintonia
1 Per memorizzare: Premere e tenere premuto uno dei tasti di preselezione sintonia
(da 1/
a6/ ) fino a quando il numero
smette di lampeggiare.
2 Per richiamare: Premere uno dei tasti di
preselezione sintonia (da 1/
a6/ ).
Commutazione del display
Selezione delle informazioni di testo desiderate
1 Premere DISP per alternare le seguenti impo-
stazioni:
! SERVICE LABEL (etichetta del servizio o ca-
nale)
! BRDCST INFO (etichetta del servizio/eti-
chetta PTY/etichetta dell’insieme/canale e
frequenza)
! DYNAMIC LABEL (etichetta dinamica)
! CLOCK (nome della sorgente e orologio)
Note
! Se non è possibile ottenere l’etichetta del ser-
vizio in SERVICE LABEL, al suo posto viene visualizzato il canale. Se invece l’etichetta del
servizio viene rilevata, verrà visualizzata.
! Per ulteriori informazioni sull’elenco PTY, ve-
dere Elenco PTY a pagina 46.
! Questa funzione è disattivata durante la
pausa. Per ulteriori informazioni sulla funzione di pausa, vedere Pausa a pagina 45.
! È possibile modificare le informazioni a se-
conda della banda.
! Le informazioni di testo che possono essere
modificate dipendono dall’area.
Ascolto delle trasmissioni
recenti (funzione Time shift)
È possibile selezionare le trasmissioni recenti
dalla componente del servizio selezionata.
1 Premere
dalità Time shift di ascolto differito.
Premere nuovamente per tornare alla trasmissione dal vivo.
2 Premere c o d per regolare il punto di riproduzione.
! Premere c per passare indietro di un minuto.
! Premere d per passare avanti di un minuto.
/DIMMER per passare alla mo-
Questa unità memorizza automaticamente le
trasmissioni più recenti. La capacità di memorizzazione di questa unità varia a seconda della velocità in bit della componente del servizio
utilizzata. La capacità di memorizzazione è di
circa cinque minuti per velocità in bit pari a
192 kbps.
Non saranno disponibili le selezioni memorizzate meno recenti della capacità di memorizzazione.
Selezione di una componente
del servizio
È possibile selezionare una componente del servizio dal seguente elenco dei servizi.
1 Premere
dalità dell’elenco dei servizi.
2 Ruotare M.C. per cambiare l’elenco dei
servizi e premere per selezionare.
Dopo aver effettuato la selezione, è possibile regolare le funzioni della componente del servizio
descritte di seguito.
SERVICE (etichetta del servizio)
È possibile selezionare una componente del servizio dall’elenco di tutte le componenti.
1 Ruotare M.C. per selezionare una componente
del servizio.
2 Premere M.C. per ricevere una trasmissione
dalla componente del servizio selezionata.
Uso della ricerca alfabetica
1 Premere
2 Ruotare M.C. per selezionare una lettera.
3 Premere M.C. per visualizzare l’elenco in ordi-
ne alfabetico.
4 Ruotare M.C. per selezionare una componente
del servizio.
5 Premere M.C. per ricevere una trasmissione
dalla componente del servizio selezionata.
PROGRAM TYPE (etichetta PTY)
(elenco) per passare alla mo-
(elenco).
È possibile selezionare una componente del servizio dalle informazioni PTY.
1 Ruotare M.C. per scorrere le informazioni PTY
e premerlo per selezionarle.
NEWS/INFO—POPULAR—CLASSICS—
OTHERS
2 Ruotare M.C. per selezionare una componente
del servizio.
3 Premere M.C. per ricevere una trasmissione
dalla componente del servizio selezionata.
ENSEMBLE (etichetta dell’insieme)
È possibile selezionare una componente del servizio dal relativo insieme.
1 Ruotare M.C. per scorrere gli insiemi e premer-
lo per selezionare.
2 Ruotare M.C. per selezionare una componente
del servizio.
3 Premere M.C. per ricevere una trasmissione
dalla componente del servizio selezionata.
Aggiornamento delle informazioni
dell’elenco dei servizi
È possibile ricevere aggiornamenti dell’elenco
dei servizi.
% Premere e tenere premuto
Per annullare l’operazione, premere di nuovo
(elenco).
(elenco).
Impostazioni delle funzioni
1 Premere M.C. per visualizzare il menu
principale.
2 Ruotare M.C. per modificare l’opzione di
menu; premere per selezionare FUNCTION.
Dopo aver effettuato la selezione, è possibile regolare la funzione descritta di seguito.
Italiano
45
It
Page 46

Sezione
02
Uso dell’unità
Uso dell’unità
S.FOLLOW (ricerca delle componenti del servizio
alternative)
Se il sintonizzatore non può ottenere una buona ricezione, l’unità ricercherà automaticamente un
altro insieme che supporti la stessa componente
del servizio. Se non è possibile trovare una componente del ser vizio alternativa o la ricezione rimane
non adeguata, questa funzione selezionerà automaticamente una trasmissione FM identica.
1 Premere M.C. per attivare o disattivare la ricer-
ca delle componenti del servizio alternative.
Radio
Funzionamento di base
Selezione di una banda
1 Premere BAND/
lizzata la banda desiderata (FM1, FM2, FM3
per FM o MW/LW).
Selezione delle stazioni preselezionate
1 Premere c o d.
! Selezionare PCH (canale preselezionato) in
SEEK per utilizzare questa funzione.
Sintonizzazione manuale (passo per passo)
1 Premere c o d.
! Selezionare MAN (sintonizzazione manuale)
in SEEK per utilizzare questa funzione.
Ricerca
1 Premere e tenere premuto c o d e poi rilascia-
re.
È possibile annullare la ricerca di sintonia premendo brevemente c o d.
Se si spinge e si tiene premuto c o d, è possibile saltare le stazioni. La ricerca di sintonia
viene avviata non appena si rilascia c o d.
fino a quando viene visua-
Note
! Per ulteriori dettagli sulla funzione SEEK, ve-
dere SEEK (impostazione tasto sinistro/de-
stro) a pagina 47.
! È possibile attivare e disattivare (on/off) la
funzione AF (ricerca delle frequenze alternative) di questa unità. Per le operazioni normali
di sintonizzazione, la funzione AF deve essere
disattivata (vedere AF (ricerca delle frequenze
alternative) a pagina 47).
Memorizzazione e richiamo delle
stazioni per ciascuna banda
Uso dei tasti di preselezione sintonia
1 Per memorizzare: Premere e tenere premuto uno dei tasti di preselezione sintonia
(da 1/
a6/ ) fino a quando il numero
smette di lampeggiare.
2 Per richiamare: Premere uno dei tasti di
preselezione sintonia (da 1/
a6/ ).
Commutazione del display
Selezione delle informazioni di testo desiderate
1 Premere DISP per alternare le seguenti impo-
stazioni:
! FREQUENCY (nome di servizio del pro-
gramma o frequenza)
! BRDCST INFO (nome di servizio del pro-
gramma/Informazioni PTY)
! CLOCK (nome della sorgente e orologio)
Note
! Se non è possibile ottenere il nome di servi-
zio del programma in FREQUENCY, al suo
posto viene visualizzata la frequenza di trasmissione. Se invece il nome di servizio del
programma viene rilevato, verrà visualizzato.
! È possibile modificare le informazioni a se-
conda della banda.
! Le informazioni di testo che possono essere
modificate dipendono dall’area.
Uso delle funzioni PTY
È possibile sintonizzarsi su una stazione usando
le informazioni PTY (tipo di programma).
Ricerca di una stazione RDS tramite le informazioni PTY
1 Premere
2 Ruotare M.C. per selezionare un tipo di pro-
3 Premere M.C. per avviare la ricerca.
(elenco).
gramma.
NEWS/INFO—POPULAR—CLASSICS—
OTHERS
L’unità ricerca una stazione che trasmette il
tipo di programma selezionato. Quando viene
trovata una stazione, viene visualizzato il nome
di ser vizio del programma.
! Per annullare la ricerca premere nuova-
mente M.C.
! Il programma di alcune stazioni può essere
diverso da quello indicato dal PTY (tipo di
programma) trasmesso.
! Se nessuna stazione trasmette il tipo di
programma ricercato, per circa due secondi viene visualizzata l’indicazione NOT
FOUND e poi il sintonizzatore torna alla
stazione originale.
Elenco PTY
Per ulteriori dettagli sull’elenco PTY, visitare il
sito:
http://www.pioneer.eu/eur/products/25/121/tech/
CarAudio/PTY.html
Impostazioni delle funzioni
1 Premere M.C. per visualizzare il menu
principale.
2 Ruotare M.C. per modificare l’opzione di
menu; premere per selezionare FUNCTION.
3 Ruotare M.C. per selezionare la funzione.
Dopo aver effettuato la selezione, è possibile regolare le funzioni descritte di seguito.
# Se è selezionata la banda MW/LW,è possibile selezionare solo BSM, LOCAL o SEEK.
FM SETTING (impostazioni della qualità dell’audio
FM)
È possibile impostare il livello della qualità dell’audio in modo che corrisponda alle condizioni del
segnale trasmesso della banda FM.
1 Premere M.C. per visualizzare la modalità di
impostazione.
2 Ruotare M.C. per selezionare l’impostazione
desiderata.
! STANDARD – Corrisponde all’impostazio-
ne standard.
! HI-FI – Utilizzare questa impostazione per
dare la priorità all’alta qualità dell’audio
stereo.
! STABLE – Utilizzare questa impostazione
per dare la priorità alla riduzione dei disturbi dell’audio mono.
BSM (memorizzazione delle stazioni migliori)
La funzione BSM (memorizzazione delle stazioni
migliori) memorizza automaticamente le sei stazioni più forti in ordine di forza del segnale.
1 Premere M.C. per attivare la funzione BSM.
Per annullare, premere nuovamente M.C.
REGION (regionale)
Quando si utilizza la funzione AF, la funzione regionale limita la selezione alle stazioni che trasmettono programmi regionali.
1 Premere M.C. per attivare o disattivare la fun-
zione regionale.
LOCAL (ricerca di sintonia in modo locale)
46
It
Page 47

Uso dell’unità
Uso dell’unità
Sezione
02
La ricerca di sintonia in modo locale consente di
sintonizzare solo le stazioni radio con segnali
radio sufficientemente potenti per una buona ricezione.
1 Premere M.C. per selezionare l’impostazione
desiderata.
FM: OFF— LV1 —LV2 —LV 3—LV 4
MW/LW: OFF—LV 1 —LV2
L’impostazione di livello massimo consente la
ricezione solo delle stazioni più forti, mentre i
livelli più bassi consentono di ricevere stazioni
più deboli.
TA (attesa di notiziari sul traffico)
1 Premere M.C. per attivare o disattivare l’attesa
di notiziari sul traffico.
AF (ricerca delle frequenze alternative)
1 Premere M.C. per attivare e disattivare la fun-
zione AF.
NEWS (interruzione dei programmi per i notiziari)
1 Premere M.C. per attivare o disattivare la fun-
zione NOTIZIE.
SEEK (impostazione tasto sinistro/destro)
È possibile assegnare una funzione ai tasti sinistro
e destro dell’unità.
Selezionare MAN (sintonizzazione manuale) per
eseguire la sintonizzazione manuale o PCH (canali
preselezionati) per scegliere i canali preselezionati.
1 Premere M.C. per selezionare MAN o PCH.
CD/CD-R/CD-RW e dispositivi
di memoria USB
Collegamento MTP
È possibile connettere i dispositivi Android compatibili MTP (che eseguono Android OS 4.0 o
versione successiva) tramite collegamento MTP,
utilizzando la sorgente USB. Per collegare il dispositivo Android, utilizzare il cavo fornito col dispositivo.
Note
! Questa funzione non è compatibile con le
funzionalità MIXTRAX.
! Questa funzione non è compatibile con i file
WAV.
Funzionamento di base
Riproduzione di CD/CD-R/CD-RW
1 Inserire un disco nel vano d’inserimento dei di-
schi, con il lato dell’etichetta rivolto verso
l’alto.
Espulsione dei CD/CD-R/CD-RW
1 Premere h.
Riproduzione dei brani registrati su un dispositivo
di memoria USB
1 Sollevare la copertura della porta USB.
2 Collegare il dispositivo di memoria USB utiliz-
zando un cavo USB.
Arresto della riproduzione dei file sul dispositivo di
memoria USB
1 È possibile scollegare il dispositivo di memoria
USB in qualsiasi momento.
Selezione di una cartella
1 Premere 1/
Selezione di una traccia
1 Premere c o d.
o 2/ .
Esegue l’avanzamento rapido/la modalità inversa
rapida
1 Premere e tenere premuto c o d.
! Quando si riproducono file audio compressi,
durante l’avanzamento rapido e la modalità inversa non viene emesso audio.
Ritorno alla cartella principale
1 Premere e tenere premuto BAND/
Passaggio da audio compresso a CD-DA
1 Premere BAND/
Passaggio da un dispositivo di memoria per la riproduzione ad un altro
Se sono disponibili più dispositivi di memorizzazione di massa conformi con lo standard Mass
Storage Class USB, è possibile alternare i dispositivi di memoria per la riproduzione.
1 Premere BAND/
! È possibile alternare fino a 32 differenti dispo-
sitivi di memoria.
.
.
.
Nota
Quando non utilizzati, scollegare i dispositivi di
memoria USB dall’unità.
Operazioni col pulsante MIXTRAX
Attivazione e disattivazione della funzione MIXTRAX
È possibile utilizzare questa funzione se come sorgente è selezionata USB.
Non è possibile utilizzare questa funzione con
l’opzione USB MTP.
1 Premere 3/MIX per attivare e disattivare la fun-
zione MIXTRAX.
! Per ulteriori informazioni sulla funzione MIX-
TRAX, vedere Informazioni sulle funzioni MIX-
TRAX a pagina 53.
! Quando la funzione MIXTRAX è attiva, la fun-
zione sound retriever è disabilitata.
Commutazione del display
Selezione delle informazioni di testo desiderate
1 Premere DISP per alternare le seguenti impo-
stazioni:
CD-DA
! ELAPSED TIME (numero di brano e tempo
di riproduzione)
! CLOCK (nome della sorgente e orologio)
! SPEANA (analizzatore di spettro)
CD-TEXT
! TRACK INFO (titolo del brano/artista del
brano/titolo del disco)
! ELAPSED TIME (numero di brano e tempo
di riproduzione)
! CLOCK (nome della sorgente e orologio)
! SPEANA (analizzatore di spettro)
MP3/WMA/WAV/AAC
! TRACK INFO (titolo del brano/nome del-
l’artista/titolo dell’album)
! FILE INFO (nome del file/nome della cartel-
la)
! ELAPSED TIME (numero di brano e tempo
di riproduzione)
! CLOCK (nome della sorgente e orologio)
! SPEANA (analizzatore di spettro)
Selezione e riproduzione di file/
brani dall’elenco dei nomi
1 Premere per passare alla modalità dell’elenco dei nomi file/brani.
2 Utilizzare M.C. per selezionare il nome
del file (o il nome della cartella) desiderato.
Selezione di un file o di una cartella
1 Ruotare M.C.
Riproduzione
1 Quando è selezionato un file o un brano, pre-
mere M.C.
Italiano
47
It
Page 48

Sezione
02
Uso dell’unità
Uso dell’unità
Visualizzazione di un elenco dei file (o delle cartelle) nella cartella selezionata
1 Quando è selezionata una cartella, premere
M.C.
Riproduzione di un brano nella cartella selezionata
1 Quando è selezionata una cartella, premere e
tenere premuto M.C.
Operazioni con i pulsanti speciali
Selezione di un intervallo di ripetizione
1 Premere 6/
CD/CD-R/CD-RW
! ALL – Ripete tutti i brani
! ONE – Ripete il brano corrente
! FLD – Ripete la cartella corrente
Dispositivo di memoria USB
! ALL – Ripete tutti i file
! ONE – Ripete il file corrente
! FLD – Ripete la cartella corrente
Riproduzione di brani in ordine casuale
1 Premere 5/
produzione casuale.
I brani contenuti nell’intervallo di ripetizione
selezionato vengono riprodotti in ordine casuale.
! Per cambiare brano durante la riproduzione
casuale, premere d per passare al brano successivo. Se si preme c, viene riavviata la riproduzione del brano corrente dall’inizio.
Messa in pausa della riproduzione
1 Premere 4/PAUSE per attivare o disattivare la
pausa.
per alternare:
per attivare o disattivare la ri-
Impostazioni delle funzioni
1 Premere M.C. per visualizzare il menu
principale.
2 Ruotare M.C. per modificare l’opzione di
menu; premere per selezionare FUNCTION.
Dopo aver effettuato la selezione, è possibile regolare la funzione descritta di seguito.
! La funzione S.RTRV non è disponibile quando
la funzione MIXTRAX è attiva.
S.RTRV (Sound Retriever)
Questa funzione migliora automaticamente l’audio compresso e ripristina il suono completo.
1 Premere M.C. per selezionare l’impostazione
desiderata.
1—2—OFF (disattivata)
1 è efficace per le velocità di compressione
basse, mentre 2 è efficace per le velocità di
compressione alte.
iPod
Funzionamento di base
Riproduzione di brani da un iPod
1 Sollevare la copertura della porta USB.
2 Collegare un iPod all’ingresso USB.
La riproduzione viene eseguita automaticamente.
Selezione di un brano (capitolo)
1 Premere c o d.
Selezione di un album
1 Premere 1/
Esegue l’avanzamento rapido/la modalità inversa
rapida
1 Premere e tenere premuto c o d.
Note
! Non è possibile accendere o spegnere l’iPod
se la modalità di controllo è impostata su
CONTROL AUDIO.
! Scollegare gli auricolari dall’iPod prima di
collegarlo a questa unità.
o 2/ .
! L’iPod si spegne circa due minuti dopo che
l’interruttore della chiave di avviamento è
stato portato in posizione OFF.
Operazioni col pulsante MIXTRAX
Attivazione e disattivazione della funzione MIXTRAX
1 Premere 3/MIX per attivare e disattivare la fun-
zione MIXTRAX.
! Per ulteriori informazioni sulla funzione MIX-
TRAX, vedere Informazioni sulle funzioni MIX-
TRAX a pagina 53.
Commutazione del display
Selezione delle informazioni di testo desiderate
1 Premere DISP per alternare le seguenti impo-
stazioni:
! TRACK INFO (titolo del brano/nome del-
l’artista/titolo dell’album)
! ELAPSED TIME (numero di brano e tempo
di riproduzione)
! CLOCK (nome della sorgente e orologio)
! SPEANA (analizzatore di spettro)
Scorrimento dei brani
1 Per passare al menu superiore della ricerca delle liste, premere
2 Utilizzare M.C. per selezionare una categoria/brano.
Modifica del nome del brano o della categoria
1 Ruotare M.C.
Liste di riproduzione—artisti—album— brani
—podcast—generi—compositori—audiolibri
Riproduzione
1 Mentre è selezionato un brano, premere M.C.
.
Visualizzazione di un elenco dei brani nella categoria selezionata
1 Mentre è selezionata una categoria, premere
M.C.
Riproduzione di un brano nella categoria selezionata
1 Mentre è selezionata una categoria, premere e
tenere premuto M.C.
Ricerca alfabetica nella lista
1 Quando viene visualizzata una lista per la cate-
goria selezionata, premere
modalità di ricerca alfabetica.
! È possibile anche passare alla modalità di
ricerca alfabetica ruotando M.C. due volte.
2 Ruotare M.C. per selezionare una lettera.
3 Premere M.C. per visualizzare l’elenco in ordi-
ne alfabetico.
! Per annullare la ricerca, premere
per passare alla
/DIMMER.
Note
! È possibile riprodurre le liste di riproduzione
create con l’applicazione per computer
(MusicSphere). L’applicazione sarà disponibi-
le sul nostro sito web.
! Le liste di riproduzione create con l’applica-
zione per computer (MusicSphere) vengono
visualizzate in forma abbreviata.
48
It
Page 49

Uso dell’unità
Uso dell’unità
Sezione
02
Operazioni con i pulsanti speciali
Selezione di un intervallo di ripetizione
1 Premere 6/
! ONE – Ripete il brano corrente
! ALL – Ripete tutti i brani dell’elenco sele-
! Se la modalità di controllo è impostata su
CONTROL iPod,l’intervallo di riproduzione ri-
petuta sarà uguale a quello impostato per
l’iPod collegato.
Selezione di un intervallo di riproduzione casuale
(modalità shuffle)
1 Premere 5/
! SNG – Riproduce in ordine casuale i brani
! ALB – Riproduce i brani contenuti in un
! OFF – Non viene eseguita la riproduzione
Riproduzione casuale di tutti i brani (shuffle all)
1 Premere e tenere premuto 5/
riproduzione casuale di tutti i brani.
! Per disattivare la riproduzione casuale di tutti i
brani, selezionare OFF nella riproduzione casuale. Per ulteriori dettagli, vedere Selezione di
un inter vallo di riproduzione casuale (modalità
shuffle) a pagina 49.
Messa in pausa della riproduzione
1 Premere 4/PAUSE per attivare o disattivare la
pausa.
per alternare:
zionato
per alternare:
contenuti nella lista selezionata.
album selezionato in ordine casuale.
casuale.
per attivare la
Riproduzione di brani correlati al
brano attualmente in riproduzione
È possibile riprodurre i brani dalle liste seguenti.
• Lista degli album dell’artista correntemente in
riproduzione
• Lista dei brani dell’album correntemente riprodotto
• Lista degli album del genere correntemente in
riproduzione
1 Premere e tenere premuto
alla modalità di riproduzione collegamento.
2 Ruotare M.C. per modificare la modalità;
premere per selezionare.
! ARTIST – Riproduce un album dell’artista at-
tualmente in riproduzione.
! ALBUM – Riproduce un brano dell’album at-
tualmente in riproduzione.
! GENRE – Riproduce un album del genere at-
tualmente in riproduzione.
Dopo il brano attualmente in riproduzione, verrà
riprodotto il brano/album selezionato.
per passare
Note
! È possibile annullare il brano/album selezio-
nato, se si utilizzano funzioni diverse dalla ricerca collegamento (ad esempio
l’avanzamento o la modalità inversa rapidi).
! A seconda del brano selezionato per la ripro-
duzione, la fine del brano attualmente in riproduzione e l’inizio del brano/album
selezionato potrebbero essere tagliati.
Utilizzo della funzione iPod
dell’unità dall’iPod
È possibile controllare la funzione iPod di questa
unità tramite l’apparecchio iPod collegato.
CONTROL iPod non è compatibile con i seguenti modelli di iPod.
! iPod nano di prima generazione
! iPod con video
% Premere BAND/
tà di controllo.
! CONTROL iPod – È possibile utilizzare la fun-
zione iPod di questa unità tramite l’apparecchio iPod collegato.
! CONTROL AUDIO – È possibile controllare la
funzione iPod direttamente da questa unità.
per alternare la modali-
Note
! Se si passa alla modalità di controllo
CONTROL iPod, il brano attualmente in riproduzione viene messo in pausa. Utilizzare i
comandi dell’iPod per riprendere la riproduzione.
! Anche se la modalità di controllo è impostata
su CONTROL iPod, è possibile controllare le
seguenti funzioni da questa unità.
— Pausa
— Avanzamento rapido/modalità inversa rapida
— Selezione di un brano (capitolo)
! È possibile controllare il volume solo da que-
sta unità.
Impostazioni delle funzioni
1 Premere M.C. per visualizzare il menu
principale.
2 Ruotare M.C. per modificare l’opzione di
menu; premere per selezionare FUNCTION.
3 Ruotare M.C. per selezionare la funzione.
Dopo aver effettuato la selezione, è possibile regolare le funzioni descritte di seguito.
! AUDIO BOOK non è disponibile se come mo-
dalità di controllo è selezionata l’impostazione CONTROL iPod. Per ulteriori dettagli,
vedere Utilizzo della funzione iPod dell’unità
dall’iPod a pagina 49.
AUDIO BOOK (velocità audiolibri)
1 Premere M.C. per visualizzare la modalità di
impostazione.
2 Ruotare M.C. per selezionare l’impostazione
preferita.
! FASTER – Riproduzione più veloce del nor-
male
! NORMAL – Riproduzione normale
! SLOWER – Riproduzione più lenta del nor-
male
S.RTRV (Sound Retriever)
1 Premere M.C. per selezionare l’impostazione
desiderata.
1—2—OFF (disattivata)
1 è efficace per le velocità di compressione
basse, mentre 2 è efficace per le velocità di
compressione alte.
Uso delle applicazioni del
dispositivo collegato
È possibile utilizzare questa unità per eseguire
riproduzioni in streaming e controllare i brani
nelle applicazioni per iPhone o solo per riproduzioni in streaming.
Importante
L’utilizzo di applicazioni di terze parti potrebbe
comportare o richiedere di fornire informazioni personali di identificazione attraverso la
creazione di un account utente o in altro
modo e, per alcune applicazioni, attraverso
l’invio di dati di geolocalizzazione.
TUTTE LE APPLICAZIONI DI TERZE PARTI
SONO DI RESPONSABILITÀ ESCLUSIVA DEI
RISPETTIVI FORNITORI, INCLUSI MA NON LIMITATAMENTE ALLA GESTIONE E SICUREZZA DEI DATI UTENTE E ALLE PROCEDURE DI
TUTELA DELLA PRIVACY. ACCEDENDO AD
APPLICAZIONI DI TERZE PARTI, SI ACCETTA
DI ESAMINARE I TERMINI DEL SERVIZIO E I
CRITERI SULLA PRIVACY DEI FORNITORI. SE
NON SI ACCETTANO I TERMINI O I CRITERI
DI QUALSIASI FORNITORE O NON SI ACCONSENTE, DOVE SIA APPLICABILE, ALL’U-
SO DEI DATI DI GEOLOCALIZZAZIONE, NON
UTILIZZARE TALI APPLICAZIONI DI TERZE
PARTI.
Italiano
49
It
Page 50

Sezione
02
Uso dell’unità
Uso dell’unità
Informazioni sulla compatibilità
dei dispositivi collegati
Di seguito sono riportate informazioni dettagliate relative ai terminali richiesti per utilizzare le
applicazioni per iPhone su questa unità.
Per gli utenti iPhone
! Questa funzione è compatibile con dispositi-
vi iPhone e iPod touch.
! Il dispositivo deve eseguire iOS 5.0 o versione
successiva.
Note
! Per l’elenco delle applicazioni per iPhone
supportate da questa unità, consultare il nostro sito web.
! Pioneer non è responsabile di eventuali pro-
blemi che possono derivare da errori o difetti
del contenuto delle applicazioni.
! Il contenuto e la funzione delle applicazioni
supportate sono di responsabilità dei fornitori delle applicazioni.
Procedura di inizio per utenti
iPhone
1 Collegare un iPhone all’ingresso USB.
2 Selezionare APP come sorgente.
3 Avviare l’applicazione sull’iPhone e avviare la riproduzione.
Funzionamento di base
Selezione di una traccia
1 Premere c o d.
Esegue l’avanzamento rapido/la modalità inversa
rapida
1 Premere e tenere premuto c o d.
Messa in pausa della riproduzione
1 Premere BAND/
prendere la riproduzione.
per attivare la pausa o ri-
Commutazione del display
Selezione delle informazioni di testo desiderate
1 Premere DISP per alternare le seguenti impo-
stazioni:
! TRACK INFO (titolo del brano/nome del-
l’artista/titolo dell’album)
! APP NAME (nome dell’applicazione)
! ELAPSED TIME (tempo di riproduzione)
! CLOCK (nome della sorgente e orologio)
! SPEANA (analizzatore di spettro)
Impostazioni delle funzioni
1 Premere M.C. per visualizzare il menu
principale.
2 Ruotare M.C. per modificare l’opzione di
menu; premere per selezionare FUNCTION.
3 Ruotare M.C. per selezionare la funzione.
Dopo aver effettuato la selezione, è possibile regolare le funzioni descritte di seguito.
PAUSE (pausa)
1 Premere M.C. per attivare o disattivare la
pausa.
S.RTRV (Sound Retriever)
1 Premere M.C. per selezionare l’impostazione
desiderata.
1—2—OFF (disattivata)
1 è efficace per le velocità di compressione
basse, mentre 2 è efficace per le velocità di
compressione alte.
Regolazione dell’audio
1 Premere M.C. per visualizzare il menu
principale.
2 Ruotare M.C. per modificare l’opzione di
menu; premere per selezionare AUDIO.
3 Ruotare M.C. per selezionare la funzione
audio.
Dopo aver effettuato la selezione, è possibile regolare le funzioni audio descritte di seguito.
! FADER non è disponibile se l’impostazione
SUB.W/SUB.W è selezionata in
SP-P/O MODE. Per ulteriori dettagli, vedere
SP-P/O MODE (uscita posteriore e impostazio-
ne pre-out) a pagina 53.
! SUB.W e SUB.W CTRL non sono disponibili
se l’impostazione REAR/REAR è selezionata
in SP-P/O MODE. Per ulteriori dettagli, vedere SP-P/O MODE (uscita posteriore e imposta-
zione pre-out) a pagina 53.
! SUB.W CTRL non è disponibile se l’imposta-
zione SUB.W è selezionata in OFF. Per ulteriori dettagli, vedere SUB.W (impostazione
on/off del subwoofer) a pagina 51.
! SLA non è disponibile se come sorgente è se-
lezionata FM.
FADER (regolazione dissolvenza)
1 Premere M.C. per visualizzare la modalità di
impostazione.
2 Ruotare M.C. per regolare il bilanciamento
degli altoparlanti anteriori/posteriori.
BALANCE (regolazione del bilanciamento)
1 Premere M.C. per visualizzare la modalità di
impostazione.
2 Ruotare M.C. per regolare il bilanciamento del-
l’altoparlante sinistro/destro.
EQ SETTING (richiamo dell’equalizzatore)
50
It
Page 51

Uso dell’unità
Uso dell’unità
Sezione
02
1 Premere M.C. per visualizzare la modalità di
impostazione.
2 Ruotare M.C. per selezionare l’equalizzatore.
POWERFUL—NATURAL—VOCAL—CUSTOM1—CUSTOM2—FLAT—SUPER BASS
La banda di equalizzazione e il livello dell’equalizzatore possono essere personalizzati se è selezionata l’impostazione CUSTOM1 o
CUSTOM2.
Se si seleziona CUSTOM1 o CUSTOM2, completare la procedure descritta di seguito. Se si
selezionano altre opzioni, premere M.C. per
tornare al display precedente.
! L’impostazione CUSTOM1 può essere im-
postata separatamente per ciascuna sorgente. Tuttavia,USB, iPod e APP vengono
automaticamente configurate sulla stessa
impostazione.
! CUSTOM2 èun’impostazione condivisa
utilizzata per tutte le sorgenti.
3 Premere M.C. per visualizzare la modalità di
impostazione.
4 Premere M.C. per alternare le seguenti impo-
stazioni:
Banda d’equalizzazione—Livello equalizzatore
5 Ruotare M.C. per selezionare l’impostazione
desiderata.
Banda d’equalizzazione: 80HZ—250HZ—
800HZ—2.5KHZ—8KHZ
Livello equalizzatore: +6 a –6
LOUDNESS (sonorità)
La sonorità compensa le deficienze nelle gamme
delle frequenze basse e alte a basso volume.
1 Premere M.C. per selezionare l’impostazione
desiderata.
OFF (non attiva)—LOW (bassa)—MID (media)
—HI (alta)
SUB.W (impostazione on/off del subwoofer)
Questa unità è dotata di un’uscita subwoofer che
può essere attivata o disattivata.
1 Premere M.C. per selezionare l’impostazione
desiderata.
NOR (fase normale)—REV (fase invertita)—
OFF (subwoofer disattivato)
SUB.W CTRL (regolazione del subwoofer)
Solo frequenze più basse di quelle presenti nell’intervallo selezionato vengono emesse dal subwoofer.
1 Premere M.C. per visualizzare la modalità di
impostazione.
2 Premere M.C. per alternare le seguenti impo-
stazioni:
Frequenza di taglio—Livello di uscita—Livello
pendenza
I valori regolabili lampeggiano.
3 Ruotare M.C. per selezionare l’impostazione
desiderata.
Frequenza di taglio: 50HZ—63HZ—80HZ—
100HZ—125HZ—160HZ—200HZ
Livello di uscita: da –24 a +6
Livello pendenza: –12— –24
BASS BOOST (incremento dei bassi)
1 Premere M.C. per visualizzare la modalità di
impostazione.
2 Ruotare M.C. per selezionare il livello desidera-
to.
A seconda se il livello aumenta o diminuisce,
viene visualizzata l’indicazione da 0 a +6.
HPF SETTING (regolazione del filtro passa alto)
Utilizzare questa funzione se si desidera ascoltare
solo il segnale audio ad alta frequenza. Dagli altoparlanti verranno emesse solo le frequenze superiori al limite del filtro passa alto (HPF).
1 Premere M.C. per visualizzare la modalità di
impostazione.
2 Premere M.C. per alternare le seguenti impo-
stazioni:
Frequenza di taglio—Livello pendenza
3 Ruotare M.C. per selezionare l’impostazione
desiderata.
Frequenza di taglio: OFF—50HZ—63HZ—
80HZ—100HZ—125HZ—160HZ—200HZ
Livello pendenza: –12— –24
SLA (regolazione del livello della sorgente)
Questa funzione impedisce che il volume cambi in
modo eccessivo quando viene selezionata una sorgente diversa.
! Le impostazioni sono basate sul livello di volu-
me FM, che rimane immutato.
! Con questa funzione è anche possibile regola-
re il livello di volume MW/LW.
! USB, iPod e APP vengono automaticamente
configurate sulla stessa impostazione.
1 Premere M.C. per visualizzare la modalità di
impostazione.
2 Ruotare M.C. per regolare il volume della sor-
gente.
Intervallo di regolazione: da +4 a –4
Menu di sistema
Importante
La modalità PW SAVE (risparmio energetico)
viene annullata se la batteria del veicolo viene
scollegata e sarà necessario riattivarla dopo
aver ricollegato la batteria. Se la funzione
PW SAVE (risparmio energetico) è disattivata, a
seconda del metodo di collegamento, l’unità potrebbe continuare a consumare energia dalla
batteria se l’interruttore della chiave di avviamento del veicolo non è dotato di posizione ACC
(accessori).
1 Premere M.C. per visualizzare il menu
principale.
2 Ruotare M.C. per modificare l’opzione di
menu; premere per selezionare SYSTEM.
3 Ruotare M.C. per selezionare la funzione
del menu di sistema.
Dopo aver effettuato la selezione, è possibile regolare le funzioni del menu di sistema descritte
di seguito.
LANGUAGE (multilingue)
Questa unità è in grado di visualizzare le informazioni di testo dei file audio compressi se sono
state incorporate in inglese, russo o turco.
! Se la lingua incorporata e l’impostazione della
lingua selezionata non corrispondono, le infor-
mazioni di testo potrebbero non essere visua-
lizzate correttamente.
! Alcuni caratteri potrebbero non essere visualiz-
zati correttamente.
1 Ruotare M.C. per selezionare l’impostazione
desiderata.
ENG (Inglese)—РУС (Russo)—TUR (Turco)
CLOCK SET (impostazione dell’orologio)
Italiano
51
It
Page 52

Sezione
02
Uso dell’unità
Uso dell’unità
1 Premere M.C. per visualizzare la modalità di
impostazione.
2 Premere M.C. per selezionare il segmento del
display dell’orologio che si desidera impostare.
Ora—Minuto
3 Ruotare M.C. per regolare l’orologio.
12H/24H (nota temporale)
1 Premere M.C. per selezionare l’impostazione
desiderata.
12H (formato orologio a 12 ore)—24H (formato
orologio a 24 ore)
INFO DISPLAY (informazioni secondarie)
È possibile alternare il tipo di informazioni di testo
visualizzate nella sezione delle informazioni secondarie.
1 Premere M.C. per visualizzare la modalità di
impostazione.
2 Ruotare M.C. per selezionare l’impostazione
desiderata.
SPEANA—LEVEL METER—SOURCE—CLOCK
—OFF
! L’indicatore della barra del segnale viene visua-
lizzato per le impostazioni SPEANA o LEVEL
METER quando la sorgente è impostata su DIGITAL RADIO o RADIO.
AUTO PI (ricerca automatica PI)
L’unità può ricercare automaticamente una stazio-
ne diversa con la stessa programmazione, anche
durante il richiamo delle preselezioni.
1 Premere M.C. per attivare o disattivare la ricer-
ca automatica PI.
AUX (ingresso ausiliario)
Attivare questa impostazione se a questa unità
viene collegato un dispositivo ausiliario.
1 Premere M.C. per attivare o disattivare AUX.
DIMMER (varialuce)
52
It
1 Premere M.C. per attivare e disattivare il varia-
luce.
! È inoltre possibile modificare l’impostazione
del varialuce premendo e tenendo premuto
/DIMMER.
BRIGHTNESS (regolazione della luminosità)
È possibile utilizzare questa impostazione per regolare la luminosità del display.
La gamma delle impostazioni disponibili per
BRIGHTNESS varia a seconda di se l’opzione DIMMER è attivata o disattivata. Per ulteriori dettagli,
vedere DIMMER (varialuce) a pagina 52.
1 Premere M.C. per visualizzare la modalità di
impostazione.
2 Ruotare M.C. per selezionare l’impostazione
desiderata.
DIMMER attivata: 1 - 4
DIMMER disattivata: 1 - 5
MUTE MODE (modalità di silenziamento)
Il suono del sistema viene silenziato o attenuato
automaticamente quando viene ricevuto un segnale da un apparecchio dotato di funzione di silenziamento.
1 Premere M.C. per visualizzare la modalità di
impostazione.
2 Ruotare M.C. per selezionare l’impostazione
desiderata.
! MUTE – Silenziamento
! 20dB ATT – Attenuazione (20dB ATT ha un
effetto più accentuato rispetto a 10dB ATT)
! 10dB ATT – Attenuazione
PW SAVE (risparmio energetico)
Attivando questa funzione, è possibile ridurre il
consumo di energia della batteria.
! L’attivazione della sorgente è l’unica operazio-
ne consentita quando questa funzione è attiva.
1 Premere M.C. per attivare o disattivare la mo-
dalità di risparmio energetico.
Selezione del colore
dell’illuminazione
Menu delle funzioni di
illuminazione
1 Premere M.C. per visualizzare il menu
principale.
2 Ruotare M.C. per visualizzare ILLUMI,
quindi premere per selezionare.
3 Ruotare M.C. per selezionare la funzione
di illuminazione.
Dopo aver effettuato la selezione, è possibile regolare le funzioni audio descritte di seguito.
KEY COLOUR (impostazione colore sezione tasti)
È possibile scegliere il colore desiderato per i tasti
di questa unità.
1 Premere M.C. per visualizzare la modalità di
impostazione.
2 Ruotare M.C. per selezionare il colore dell’illu-
minazione.
! Colori preselezionati (da WHITE a BLUE)
! SCAN (alterna automaticamente una varie-
tà di diversi colori)
! CUSTOM (colore dell’illuminazione perso-
nalizzato)
DISP COLOUR (impostazione colore sezione display)
È possibile scegliere il colore desiderato per il display di questa unità.
1 Premere M.C. per visualizzare la modalità di
impostazione.
2 Ruotare M.C. per selezionare il colore dell’illu-
minazione.
! Colori preselezionati (da WHITE a BLUE)
! SCAN (alterna automaticamente una varie-
tà di diversi colori)
! CUSTOM (colore dell’illuminazione perso-
nalizzato)
BOTH COLOUR (impostazione del colore dei tasti
e del display)
È possibile scegliere il colore desiderato per i tasti
e per il display di questa unità.
1 Premere M.C. per visualizzare la modalità di
impostazione.
2 Ruotare M.C. per selezionare il colore dell’illu-
minazione.
! Colori preselezionati (da WHITE a BLUE)
! SCAN (alterna automaticamente una varie-
tà di diversi colori)
ILLUMI FX (modalità effetto di illuminazione)
In questa modalità, un effetto di illuminazione
verrà visualizzato sul display in diverse circostanze, ad esempio quando l’interruttore della chiave
di avviamento attiva o disattiva l’alimentazione
ACC o viene inserito o espulso un CD.
1 Premere M.C. per attivare o disattivare ILLUMI
FX.
! L’effetto di illuminazione verrà visualizzato
quando l’interruttore della chiave di avviamento attiva o disattiva l’alimentazione ACC, indipendentemente da se l’impostazione ILLUMI
FX è attivata o disattivata.
Nota
Scegliendo CUSTOM, il colore personalizzato
salvato viene selezionato.
Personalizzazione del colore
dell’illuminazione
È possibile creare un colore dell’illuminazione
personalizzato per KEY COLOUR e
DISP COLOUR.
1 Premere M.C. per visualizzare il menu
principale.
2 Ruotare M.C. per visualizzare ILLUMI,
quindi premere per selezionare.
Page 53

Uso dell’unità
Uso dell’unità
Sezione
02
3 Ruotare M.C. per visualizzare
KEY COLOUR o DISP COLOUR. Premere per
selezionare.
4 Premere M.C. e mantenerlo premuto sino
a quando sul display appare l’impostazione
del colore dell’illuminazione personalizzato.
5 Premere M.C. per selezionare il colore primario.
R (rosso)—G (verde)—B (blu)
6 Ruotare M.C. per regolare il livello della
luminosità.
Intervallo di regolazione: da 0 a 60
# Non è possibile selezionare un livello inferiore a
20 per tutti e tre i colori R (rosso), G (verde) e B (blu)
allo stesso tempo.
# È inoltre possibile eseguire la stessa operazione
da sui colori.
Nota
Non è possibile creare un colore dell’illuminazione personalizzato se è selezionata l’opzione
SCAN.
Informazioni sulle funzioni
MIXTRAX
La tecnologia MIXTRAX viene utilizzata per inserire diversi effetti sonori tra i brani e consente di
sperimentare la musica come un mix nonstop,
completo di effetti visivi.
Note
! A seconda del file/brano, gli effetti sonori po-
trebbero non essere disponibili.
! Se gli effetti visivi prodotti distraggono dalla
guida, disattivare la funzione MIXTRAX. Vedere Operazioni col pulsante MIXTRAX a pagina
47.
Menu MIXTRAX
1 Premere M.C. per visualizzare il menu
principale.
2 Ruotare M.C. per modificare l’opzione di
menu; premere per selezionare MIXTRAX.
3 Ruotare M.C. per selezionare la funzione
MIXTRAX.
Dopo aver effettuato la selezione, è possibile regolare le funzioni MIXTRAX descritte di seguito.
La funzione è attivata se l’impostazione MIXTRAX è abilitata.
SHORT PLAYBCK (modalità riproduzione breve)
È possibile selezionare la durata del tempo di riproduzione.
1 Premere M.C. per visualizzare la modalità di
impostazione.
2 Ruotare M.C. per selezionare l’impostazione
desiderata.
1.0 MIN (1 minuto)—1.5 MIN (1,5 minuti)—
2.0 MIN (2 minuti)—2.5 MIN (2,5 minuti)—
3.0 MIN (3 minuti)—OFF (disattivata)
FLASH AREA (area flash)
È possibile selezionare le aree per i colori lampeggianti.
1 Premere M.C. per visualizzare la modalità di
impostazione.
2 Ruotare M.C. per selezionare l’impostazione
desiderata.
KEY/DISPLAY (tasto e display)—KEY (tasto)—
OFF (disattivata)
! Se è impostata l’opzione OFF, il colore impo-
stato in ILLUMI verrà usato come colore del display.
FLASH PATTERN (schema flash)
I colori lampeggianti e gli effetti speciali MIXTRAX
possono variare in base ai livelli del suono e dei
bassi.
1 Premere M.C. per visualizzare la modalità di
impostazione.
2 Ruotare M.C. per selezionare l’impostazione
desiderata.
! Da SOUND LEVEL 1 a SOUND LEVEL 6 –
Lo schema lampeggiante varia in base al livello del suono. Selezionare la modalità desiderata.
! Da LOW PASS 1 a LOW PASS 6 – Lo sche-
ma lampeggiante varia in base al livello dei
bassi. Selezionare la modalità desiderata.
! RANDOM 1 – Lo schema lampeggiante
varia casualmente in base al livello del
suono e alla modalità del livello dei bassi.
! RANDOM 2 – Lo schema lampeggiante
varia casualmente in base al livello del
suono.
! RANDOM 3 – Lo schema lampeggiante
varia casualmente in base al livello dei
bassi.
DISPLAY FX (effetto display)
È possibile attivare o disattivare gli effetti speciali
MIXTRAX per il display.
1 Premere M.C. per selezionare l’impostazione
desiderata.
ON (display degli effetti speciali MIXTRAX)—
OFF (display normale)
CUT IN FX (effetto taglio manuale)
È possibile attivare o disattivare gli effetti sonori
MIXTRAX quando si cambiano manualmente i
brani.
1 Premere M.C. per selezionare l’impostazione
desiderata.
ON (attivato)—OFF (disattivato)
Menu iniziale
1 Premere e tenere premuto SRC/OFF fino
a quando l’unità non si spegne.
2 Premere e tenere premuto SRC/OFF fino
a visualizzare sul display il menu principale.
3 Ruotare M.C. per modificare l’opzione di
menu; premere per selezionare INITIAL.
4 Ruotare M.C. per selezionare la funzione
del menu iniziale.
Dopo aver effettuato la selezione, è possibile regolare le funzioni del menu iniziale descritte di
seguito.
FM STEP (passo di sintonizzazione FM)
1 Premere M.C. per selezionare il passo di sinto-
nizzazione FM.
100 (100 kHz)—50 (50kHz)
SP-P/O MODE (uscita posteriore e impostazione
pre-out)
Italiano
53
It
Page 54

Sezione
02
Uso dell’unità
Uso dell’unità
Le uscite degli altoparlanti posteriori e l’uscita
RCA di questa unità possono essere utilizzate per
collegare altoparlanti a gamma completa o un
subwoofer. Selezionare l’opzione più adatta alla
configurazione.
1 Premere M.C. per visualizzare la modalità di
impostazione.
2 Ruotare M.C. per selezionare l’impostazione
desiderata.
! REAR/SUB.W – Selezionare quando alle
uscite degli altoparlanti posteriori sono collegati altoparlanti a gamma completa e all’uscita RCA è collegato un subwoofer.
! SUB.W/SUB.W – Selezionare quando alle
uscite degli altoparlanti posteriori è collegato direttamente un subwoofer senza un
amplificatore ausiliario e all’uscita RCA è
collegato un subwoofer.
! REAR/REAR – Selezionare quando alle
uscite degli altoparlanti posteriori e all’uscita RCA sono collegati altoparlanti a
gamma completa.
Se alle uscite degli altoparlanti posteriori è
collegato un altoparlante a gamma completa e l’uscita RCA non viene utilizzata, è
possibile selezionare REAR/SUB.W o
REAR/REAR.
DAB ANT PW (impostazione per la sorgente di ali-
mentazione dell’antenna DAB)
1 Premere M.C. per selezionare l’impostazione
desiderata.
! ON – Utilizzare questa opzione per attivare
l’alimentazione dell’antenna DAB. Selezionare se con l’unità si usa un’antenna DAB
opzionale (AN-DAB1, venduta a parte).
! OFF – Utilizzare questa opzione per disatti-
vare la trasmissione dell’alimentazione. Selezionare se si usa un’antenna passiva
senza alimentazione di potenza.
Menu di sistema
1 Premere e tenere premuto SRC/OFF fino
a quando l’unità non si spegne.
2 Premere e tenere premuto SRC/OFF fino
a visualizzare sul display il menu principale.
3 Ruotare M.C. per modificare l’opzione di
menu; premere per selezionare SYSTEM.
4 Ruotare M.C. per selezionare la funzione
del menu di sistema.
Per ulteriori dettagli, vedere Menu di sistema a
pagina 51.
Uso della sorgente AUX
1 Collegare il cavo mini plug stereo al connettore di ingresso ausiliario (AUX).
2 Premere SRC/OFF per selezionare AUX
come sorgente.
Nota
Non è possibile selezionare la sorgente AUX se
non viene attivata l’impostazione dell’apparecchio ausiliario. Per ulteriori dettagli, vedere AUX
(ingresso ausiliario) a pagina 52.
Commutazione del display
Selezione delle informazioni di testo desiderate
1 Premere DISP per alternare le seguenti impo-
stazioni:
! Nome sorgente
! Nome della sorgente e orologio
Se viene visualizzato un
display indesiderato
Per disattivare il display indesiderato, utilizzare
la procedura descritta di seguito.
1 Premere M.C. per visualizzare il menu
principale.
2 Ruotare M.C. per modificare l’opzione di
menu; premere per selezionare SYSTEM.
3 Ruotare M.C. per visualizzare DEMO OFF,
quindi premere per selezionare.
4 Ruotare M.C. per selezionare YES.
5 Premere M.C. per selezionare.
54
It
Page 55

5 67
d
Installazione
Installazione
Sezione
03
Collegamenti
Importante
! Quando si installa questa unità in un veicolo
che non dispone della posizione ACC (accessoria) per l’interruttore della chiave di avviamento, se non si collega il cavo rosso a un
terminale accoppiato al funzionamento dell’interruttore della chiave di avviamento, la
batteria potrebbe scaricarsi.
Con posizione ACC Senza posizione ACC
! Se questa unità viene utilizzata in condizione
diverse dalle seguenti, potrebbero verificarsi
incendi o malfunzionamenti.
— Veicoli dotati di batteria da 12 volt e messa a
terra negativa.
— Altoparlanti con uscita nominale da 50 W e
impedenza nominale compresa tra 4 W e8W.
! Per evitare rischi di cortocircuito, surriscalda-
mento o malfunzionamento, accertarsi di seguire le indicazioni riportate di seguito.
— Prima dell’installazione, scollegare il morset-
to negativo della batteria.
— Assicurare i cavi con morsetti per cavi o na-
stro adesivo. Per proteggere i cavi, avvolgere
nastro adesivo attorno agli stessi nei punti in
cui entrano in contatto con parti metalliche.
— Posizionare tutti i cavi in modo che non pos-
sano entrare in contatto con componenti mobili, come la leva del cambio e i binari dei
sedili.
— Non posizionare i cavi in luoghi soggetti a
surriscaldamento, come le bocchette dell’impianto di riscaldamento.
— Non collegare il cavo giallo alla batteria fa-
cendolo passare attraverso fori nel vano motore.
— Rivestire tutti i connettori scollegati con na-
stro isolante.
— Non accorciare i cavi.
— Non condividere mai l’alimentazione con altri
dispositivi tagliando l’isolante del cavo di alimentazione dell’unità. La capacità di carico
di corrente del cavo è limitata.
— Utilizzare esclusivamente un fusibile con la
portata prescritta.
— Non collegare mai direttamente a terra il
cavo negativo dell’altoparlante.
— Non legare mai assieme cavi negativi di più
O
F
N
F
O
S
T
A
R
T
altoparlanti.
! Quando questa unità è accesa, i segnali di
controllo vengono trasmessi dal cavo blu/
bianco. Collegarlo al telecomando del sistema di amplificazione di potenza o al terminale di controllo del relè dell’antenna
automatica del veicolo (max. 300mA
12 V CC). Se il veicolo è dotato di un’antenna
a vetro, collegarla al terminale di alimentazione di potenza dell’antenna.
! Non collegare mai il cavo blu/bianco al ter-
minale di alimentazione dell’amplificatore di
potenza esterno. Inoltre, non collegarlo mai
al terminale di alimentazione dell’antenna
automatica. In caso contrario, la batteria potrebbe scaricarsi o potrebbero verificarsi malfunzionamenti.
! Il cavo nero è la messa a terra. I cavi di
messa a terra di questa unità e di altre apparecchiature (soprattutto per i prodotti ad alta
tensione, quali amplificatori di potenza) devono essere collegati separatamente. In caso
contrario, se scollegati accidentalmente, potrebbero provocare incendi o malfunzionamenti.
Questa unità
1
2
3
4
1 Ingresso antenna DAB
Per ricevere segnali DAB, collegare all’unità
un’antenna DAB (AN-DAB1) venduta a parte.
Per una migliore ricezione dei segnali DAB,
assicurarsi di utilizzare un’antenna DAB con
ingresso ad alimentazione phantom (tipo attivo). Pioneer raccomanda il modello “ANDAB1” (venduto a parte). Il consumo massimo di corrente dell’antenna DAB dovrebbe
essere di 100 mA.
2 Ingresso cavo di alimentazione
3 Uscita posteriore o del subwoofer
4 Uscita anteriore
5 Ingresso antenna
6 Fusibile (10 A)
7 Ingresso telecomando cablato
È possibile collegare un adattatore per telecomando cablato (venduto a parte).
Cavo di alimentazione
3
4
1
c
3
556
6
4
a
b89
2
7
e
1 All’ingresso del cavo di alimentazione
2 A seconda del tipo di veicolo, la funzione di
3 e 5 potrebbe essere diversa. In questo
caso, accertarsi di collegare 4 a 5 e 6 a 3.
3 Giallo
Riserva (o accessorio)
4 Giallo
Collegare al terminale di alimentazione costante 12 V.
5 Rosso
Accessorio (o riserva)
6 Rosso
Collegare al terminale controllato dall’interruttore di accensione (12 V CC).
7 Collegare insieme i cavi dello stesso colore.
8 Nero (messa a terra telaio)
9 Blu/bianco
La posizione dei pin del connettore ISO sarà
diversa a seconda del tipo di veicolo. Collegare 9 e b quando il Pin 5 è del tipo controllo
antenna. In un altro tipo di veicolo, non collegare mai 9 e b.
a Blu/bianco
Collegare al terminale di controllo del sistema dell’amplificatore di potenza (max.
300 mA 12 V CC).
b Blu/bianco
Collegare al terminale di controllo del relè
dell’antenna automatica (max. 300mA 12 V
CC).
c Giallo/nero
Se si utilizza un apparecchio dotato di funzione di silenziamento, collegare questo cavo al
cavo di silenziamento audio di tale apparecchio. In caso contrario, non collegare il cavo
di silenziamento audio.
d Cavi altoparlanti
Bianco: Anteriore sinistro +
Bianco/nero: Anteriore sinistro *
Grigio: Anteriore destro +
Grigio/nero: Anteriore destro *
Verde: Posteriore sinistro + o subwoofer +
Verde/nero: Posteriore sinistro * o subwoofer *
Viola: Posteriore destro + o subwoofer +
Viola/nero: Posteriore destro * o subwoofer
*
Italiano
55
It
Page 56

5cmcm
Sezione
03
Installazione
Installazione
e Connettore ISO
In alcuni veicoli, il connettore ISO potrebbe
essere diviso in due. In questo caso, accertarsi di collegare entrambi i connettori.
Note
! Modifica delle impostazioni di menu iniziali
di questa unità. Vedere SP-P/O MODE (usci-
ta posteriore e impostazione pre-out) a pagina
53.
L’uscita subwoofer di questa unità è mono.
! Se si usa un subwoofer da 70 W (2W), assicu-
rarsi di collegarlo ai fili viola e viola/nero di
questa unità. Non collegare niente ai fili
verde e verde/nero.
Amplificatore di potenza
(venduto a parte)
Eseguire questi collegamenti quando si usa
l’amplificatore opzionale.
2
2
3
55
3
77
4
6
1
1
1 Telecomando sistema
Collegare al cavo Blu/bianco.
2 Amplificatore di potenza (venduto a parte)
3 Collegare con cavi RCA (venduti a parte)
4 All’uscita anteriore
5 Altoparlante anteriore
6 All’uscita posteriore o del subwoofer
7 Altoparlanti posteriori o subwoofer
Installazione
Importante
! Controllare tutti i collegamenti e i sistemi
prima dell’installazione finale.
! Non utilizzare componenti non approvati,
poiché potrebbero provocare malfunzionamenti.
! Consultare il rivenditore se l’ installazione ri-
chiede la trapanatura di fori o altre modifiche
del veicolo.
! Non installare questa unità se:
— potrebbe interferire con il funzionamento del
veicolo.
— potrebbe procurare lesioni al passeggero in
caso di arresto improvviso del veicolo.
! Se si surriscalda il laser a semiconduttore
potrebbe subire danni. Non installare questa
unità in luoghi soggetti a surriscaldamento,
come in prossimità delle bocchette dell’impianto di riscaldamento.
! Le prestazioni ottimali si ottengono quando
l’unità viene installata con un’angolazione inferiore a 60°.
60°
! Durante l’installazione, per assicurare la cor-
retta dissipazione del calore quando si utilizza l’unità, accertarsi di lasciare ampio spazio
dietro il pannello posteriore e avvolgere eventuali cavi allentati in modo che non ostruiscano le aperture.
Lasciare ampio spazio
5 cm
5 cm
Montaggio DIN anteriore/posteriore
Questa unità può essere installata correttamente sia dalla posizione di montaggio anteriore, sia
dalla posizione di montaggio posteriore.
Durante l’installazione utilizzare componenti disponibili in commercio.
Montaggio DIN anteriore
1 Inserire la fascetta di montaggio nel cruscotto.
Se l’unità viene installata in uno spazio poco
profondo, utilizzare la fascetta di montaggio fornita. Se dietro l’unità vi è spazio sufficiente, utilizzare la fascetta di montaggio fornita con il
veicolo.
2 Assicurare la fascetta di montaggio utilizzando un cacciavite per piegare le linguette
metalliche (90°) in posizione.
1
2
1 Cruscotto
2 Fascetta di montaggio
# Accertarsi che l’unità sia saldamente installata
in posizione. Un’installazione instabile potrebbe causare salti audio o altri malfunzionamenti.
Montaggio DIN posteriore
1 Determinare la posizione appropriata, in
modo che i fori sulla staffa e sul lato dell’unità corrispondano.
2 Serrare due viti su ciascun lato.
1
2
1 Vite autofilettante (5 mm × 8 mm)
2 Staffa di montaggio
3 Cruscotto o console
3
56
It
Page 57

Installazione
Informazioni supplementari
Sezione
03
Rimozione dell’unità
1 Rimuovere la guarnizione.
1 Guarnizione
2 Linguetta intaccata
! La rimozione del frontalino permette di acce-
dere facilmente alla guarnizione.
! Quando si riapplica la guarnizione, spingere
il lato con la linguetta intaccata verso il
basso.
2 Inserire le chiavi di estrazione fornite su
entrambi i lati dell’unità fino a che non scattano in posizione.
3 Estrarre l’unità dal cruscotto.
Rimozione e reinserimento del frontalino
È possibile rimuovere il frontalino per proteggere l’unità dai furti.
Per ulteriori dettagli, vedere Rimozione del fronta-
lino e Reinserimento del frontalino a pagina 44.
Risoluzione dei problemi
In questo manuale i sintomi dei problemi sono
riportati in testo grassetto, mentre le cause sono
riportate in testo normale, non rientrato. Il testo
normale, ma rientrato indica le azioni da intraprendere.
Il display torna automaticamente alla
visualizzazione normale.
Non è stata eseguita alcuna operazione per 30 secondi.
Eseguire nuovamente l’operazione.
L’intervallo di riproduzione ripetuta cambia imprevedibilmente.
A seconda dell’intervallo di riproduzione ripetuta,
l’intervallo selezionato potrebbe cambiare quando si
seleziona una cartella o un brano diverso, o quando
si procede all’avanzamento rapido/modalità inversa.
Selezionare nuovamente l’intervallo di
riproduzione ripetuta.
I brani di una sottocartella non vengono riprodotti.
Non è possibile riprodurre i brani delle sottocartelle
se è selezionata l’opzione FLD (ripetizione della cartella).
Selezionare un altro intervallo di riproduzione
ripetuta.
Quando cambia il display, viene visualizzata
un’indicazione NO XXXX (ad esempio, NO TITLE).
Nel brano non è incorporata alcuna informazione di
testo.
Modificare la visualizzazione o riprodurre un altro
brano/file.
Malfunzionamento dell’unità.
Ci sono interferenze.
Si utilizza un dispositivo, come un telefono cellulare,
che potrebbe provocare interferenze audio.
Spostare il dispositivo elettrico che causa
interferenze lontano dall’unità.
Messaggi di errore
Se si contatta il rivenditore o il Centro assistenza
Pioneer più vicino, accertarsi di annotare il messaggio di errore.
In questo manuale i sintomi dei problemi sono
riportati in testo grassetto, mentre le cause sono
riportate in testo normale, non rientrato. Il testo
normale, ma rientrato indica le azioni da intraprendere.
Problemi comuni
AMP ERROR
L’unità non funziona o l’altoparlante non è collegato
correttamente; è stato attivato il circuito di protezione.
Controllare il collegamento degli altoparlanti. Se
il messaggio non scompare anche dopo aver
disattivato e riattivato l’alimentazione, contattare
il rivenditore o la stazione assistenza PIONEER
più vicino.
Sintonizzatore DAB
ANTENNA ERROR
L’antenna non è collegata correttamente.
Controllare il collegamento dell’antenna. Se il
messaggio non scompare anche dopo aver
disattivato e riattivato l’alimentazione, contattare
il rivenditore o la stazione assistenza PIONEER
più vicino.
Italiano
57
It
Page 58

Appendice
Informazioni supplementari
Informazioni supplementari
Lettore CD
ERROR-07, 11, 12, 17, 30
Il disco è sporco.
Pulire il disco.
Il disco è graffiato.
Sostituire il disco.
ERROR-07, 10, 11, 12, 15, 17, 30, A0
Si è verificato un errore elettrico o meccanico.
Spegnere e accendere il motore oppure passare
a una sorgente diversa e poi di nuovo al lettore
CD.
ERROR-15
Il disco inserito è vuoto.
Sostituire il disco.
ERROR-23
Il formato del CD non è supportato.
Sostituire il disco.
FORMAT READ
A volte si verifica ritardo tra quando la riproduzione
viene avviata e quando si inizia a percepire il suono.
Attendere che il messaggio scompaia.
NO AUDIO
Il disco inserito non contiene file riproducibili.
Sostituire il disco.
SKIPPED
Il disco inserito contiene file protetti con tecnologia
DRM.
I file protetti vengono saltati.
PROTECT
Tutti i file nel disco inserito sono protetti da tecnologia DRM.
Sostituire il disco.
Dispositivo di memoria USB/iPod
FORMAT READ
A volte si verifica ritardo tra quando la riproduzione
viene avviata e quando si inizia a percepire il suono.
Attendere che il messaggio scompaia.
NO AUDIO
Assenza di brani.
Trasferire i file audio nel dispositivo di memoria
USB e stabilire il collegamento.
Il dispositivo di memoria USB collegato ha la protezione attivata.
Seguire le istruzioni del dispositivo di memoria
USB per disattivare la protezione.
SKIPPED
Il dispositivo di memoria USB collegato contiene file
protetti da tecnologia DRM.
I file protetti vengono saltati.
PROTECT
Tutti i file sul dispositivo di memoria USB collegato
sono protetti da tecnologia DRM.
Sostituire il dispositivo di memoria USB.
N/A USB
Il dispositivo USB collegato non è supportato da questa unità.
! Collegare un dispositivo USB compatibile con
lo standard MSC (Mass Storage Class).
! Scollegare il dispositivo e sostituirlo con un
dispositivo di memoria USB compatibile.
CHECK USB
Il connettore USB o il cavo USB è in cortocircuito.
Verificare che il connettore USB o il cavo USB
non sia incastrato o danneggiato.
CHECK USB
Il dispositivo di memoria USB collegato consuma
più della potenza massima consentita.
Scollegare il dispositivo di memoria USB e non
utilizzarlo. Portare l’interruttore della chiave di
avviamento in posizione OFF, quindi su ACC o
ON e infine collegare solo dispositivi di memoria
USB compatibili.
CHECK USB
L’iPod funziona correttamente ma non si ricarica.
Accertarsi che il cavo di collegamento dell’iPod
non sia in cortocircuito (ad esempio, bloccato da
oggetti di metallo). Dopo aver verificato, portare
l’interruttore della chiave di avviamento su OFF e
quindi su ON, oppure scollegare l’iPod e
collegarlo nuovamente.
ERROR-19
Errore di comunicazione.
Eseguire una delle operazioni riportate di
seguito.
–Portare l’interruttore della chiave di avviamento
in posizione OFF e quindi di nuovo su ON.
–Scollegare il dispositivo di memoria USB.
–Passare a una sorgente diversa.
Quindi, tornare alla sorgente USB.
Errore dell’iPod.
Scollegare il cavo dall’iPod. Quando viene
visualizzato il menu principale dell’iPod,
collegare l’ iPod e reimpostarlo.
ERROR-23
Il dispositivo di memoria USB non è formattato in
FAT12, FAT16 o FAT32.
Il dispositivo di memoria USB deve essere
formattato in FAT12, FAT16o FAT32.
ERROR-16
La versione del firmware dell’iPod è obsoleta.
Aggiornare la versione dell’iPod.
Errore dell’iPod.
Scollegare il cavo dall’iPod. Quando viene
visualizzato il menu principale dell’iPod,
collegare l’ iPod e reimpostarlo.
STOP
Nessun brano presente nella lista corrente.
Selezionare una lista che contenga brani.
NOT FOUND
Non esistono brani correlati.
Scaricare i brani sull’iPod.
Applicazioni
START UP APP
L’applicazione non è stata ancora avviata.
Seguire le istruzioni visualizzate sullo schermo.
Linee guida per l’uso corretto
Dischi e lettori
Utilizzare esclusivamente dischi che riportino uno
dei due seguenti loghi.
Utilizzare dischi da 12 cm.
Utilizzare esclusivamente dischi convenzionali,
completamente circolari.
58
It
Page 59

Informazioni supplementari
Appendice
Informazioni supplementari
Questa unità non può riprodurre i seguenti tipi di
dischi:
! DualDisc
! Dischi da 8 cm: Se si cerca di utilizzare tali di-
schi con un adattatore, potrebbero verificarsi
malfunzionamenti dell’unità.
! Dischi di forma irregolare
! Dischi diversi da CD
! Dischi danneggiati, inclusi dischi crepati,
scheggiati o piegati
! Dischi CD-R/RW non finalizzati
Non toccare la superficie registrata dei dischi.
Quando non si utilizzano, conservare i dischi nelle
rispettive custodie.
Non attaccare etichette, non scrivere e non applicare prodotti chimici sulla superficie dei dischi.
Per pulire un CD, passare delicatamente un
panno morbido sul disco procedendo dal centro
verso l’esterno.
La formazione di condensa potrebbe temporaneamente limitare le prestazioni del lettore. In tal
caso, lasciarlo raggiungere una temperatura più
alta per circa un’ora. Inoltre, pulire i dischi che dovessero presentare condensa con un panno morbido.
La riproduzione dei dischi potrebbe non essere
possibile a causa delle caratteristiche del disco,
del formato del disco, dell’applicazione di registrazione, dell’ambiente di riproduzione, delle condizioni di conservazione e così via.
Le asperità della strada possono far interrompere
la riproduzione di un disco.
Se si utilizzano dischi sui quali è possibile applicare etichette, controllare le istruzioni e le avvertenze
dei dischi. L’inserimento e l’espulsione potrebbe
non riuscire, a seconda dei dischi. L’ uso di dischi
di questo tipo potrebbe danneggiare questa unità.
Non affiggere sui dischi etichette o altri materiali
disponibili in commercio.
! I dischi potrebbero deformarsi e non sarà più
possibile riprodurli.
! Le etichette potrebbero staccarsi durante la ri-
produzione, impedendo l’espulsione dei dischi. Ciò potrebbe danneggiare questa unità.
Dispositivo di memoria USB
I collegamenti tramite hub USB non sono supportati.
Non collegare dispositivi diversi dai dispositivi di
memoria USB.
Durante la guida fissare saldamente il dispositivo
di memoria USB. Non lasciar cadere il dispositivo
di memoria USB sul fondo della vettura, dove potrebbe incastrarsi sotto il pedale del freno o dell’acceleratore.
A seconda del dispositivo di memoria USB, potrebbero verificarsi i problemi seguenti.
! Le operazioni potrebbero risultare diverse.
! Il dispositivo di memoria potrebbe non essere
riconosciuto.
! I file potrebbero non essere riprodotti corretta-
mente.
! Il dispositivo potrebbe provocare interferenze
audio mentre si ascolta la radio.
iPod
Non lasciare l’iPod in luoghi soggetti a temperature elevate.
Durante la guida fissare saldamente l’iPod. Non
lasciar cadere l’iPod sul fondo della vettura, dove
potrebbe incastrarsi sotto il pedale del freno o dell’acceleratore.
Informazioni sulle impostazioni dell’iPod
! Quando un iPod è collegato, questa unità di-
sattiva la funzione EQ (equalizzatore) dell’iPod
per ottimizzare l’acustica. Quando si scollega
l’iPod, l’impostazione EQ ritorna al valore originale.
! Non è possibile disattivare l’opzione di ripeti-
zione dell’iPod se il dispositivo viene utilizzato
con questa unità. L’opzione di ripetizione viene
automaticamente modificata su Tutti quando
si collega l’iPod a questa unità.
Se il testo salvato sull’iPod non è compatibile, non
verrà visualizzato da questa unità.
Compatibilità audio
compresso (dischi, USB)
WMA
Estensione file: .wma
Velocità in bit: da 48 kbps a 320kbps (CBR), da
48 kbps a 384kbps (VBR)
Frequenza di campionamento: 32 kHz, 44,1 kHz,
48 kHz
Windows Mediaä Audio Professional, Lossless,
Voice/DRM Stream/Stream con video: Non compatibile
MP3
Estensione file: .mp3
Velocità in bit: da 8 kbps a 320kbps (CBR), VBR
Frequenza di campionamento: da 8 kHz a 48kHz
(32 kHz, 44,1 kHz, 48 kHz per l’enfatizzazione)
Versioni tag ID3 compatibili: 1.0, 1.1, 2.2, 2.3, 2.4
(alla tag ID3 Versione 2.x viene data la priorità rispetto alla Versione 1.x.)
Compatibilità lista di riproduzione m3u: non compatibile
Compatibilità MP3i (MP3 interattivo), mp3 PRO:
non compatibile
WAV
Estensione file: .wav
Bit di quantizzazione lineare: 8 e 16 (LPCM), 4 (MS
ADPCM)
Frequenza di campionamento: da 16 kHz a 48kHz
(LPCM), 22,05 kHz e 44,1 kHz (MS ADPCM)
! Non è possibile utilizzare questa funzione
con l’opzione USB MTP.
AAC
Formato compatibile: AAC codificato da iTunes
Estensione file: .m4a
Frequenza di campionamento: da 11,025 kHz a 48
kHz
Velocità di trasmissione: da 16 kbps a 320 kbps,
VBR
Apple Lossless: non compatibile
File AAC acquistati su iTunes Store (estensione
file .m4p): non compatibile
Italiano
59
It
Page 60

Appendice
Informazioni supplementari
Informazioni supplementari
Informazioni supplementari
Per i nomi dei file (incluse le estensioni) o i nomi
delle cartelle, è possibile visualizzare esclusivamente i primi 32 caratteri.
Il testo cirillico da visualizzare su questa unità
deve essere codificato con uno dei seguenti set di
caratteri:
! Unicode (UTF-8, UTF-16)
! Un set di caratteri diverso da Unicode utilizzato
in ambiente Windows e impostato come cirillico nell’impostazione multilingue
A seconda dell’applicazione utilizzata per codificare i file WMA, questa unità potrebbe non funzionare correttamente.
In alcuni casi possono intercorrere alcuni istanti
prima dell’avvio della riproduzione di file incorporati con dati immagine o file audio su dispositivi di
memoria USB con numerose gerarchie di cartelle.
Disco
Gerarchia delle cartelle riproducibili: fino a otto livelli (una gerarchia pratica non dovrebbe prevedere più di due livelli.)
Cartelle riproducibili: fino a 99
File riproducibili: fino a 999
File system: ISO 9660 di livello 1 e 2, Romeo, Joliet
Riproduzione multi-sessione: compatibile
Trasferimento dati con scrittura a pacchetti: non
compatibile
Indipendentemente dalla durata degli intervalli
vuoti tra i brani della registrazione originale, i dischi contenenti file audio compresso verranno riprodotti con una breve pausa tra i brani.
Dispositivo di memoria USB
Gerarchia delle cartelle riproducibili: fino a otto livelli (una gerarchia pratica non dovrebbe prevedere più di due livelli.)
Cartelle riproducibili: fino a 500
File riproducibili: fino a 15 000
Riproduzione dei file con protezione del copyright:
non compatibile
Dispositivo di memoria USB partizionato: verrà riprodotta solo la prima partizione riproducibile.
In alcuni casi possono intercorrere alcuni istanti
prima dell’avvio della riproduzione di file audio su
un dispositivo di memoria USB con numerose gerarchie di cartelle.
ATTENZIONE
! Pioneer non garantisce la compatibilità con
tutti i dispositivi di memoria USB e non si assume alcuna responsabilità per l’eventuale
perdita di dati da lettori di file multimediali,
smart phone o altri dispositivi anche se i dati
vengono persi durante l’uso con questa
unità.
! Non lasciare dischi o dispositivi di memoria
USB in luoghi esposti ad alte temperature.
Compatibilità iPod
L’unità è compatibile esclusivamente con i se-
guenti modelli di iPod. Le versioni compatibili
del software iPod sono riportate di seguito. È
possibile che le versioni anteriori non siano
compatibili.
Compatibile con
! iPod touch (di quinta generazione)
! iPod touch (di quarta generazione)
! iPod touch (di terza generazione)
! iPod touch (di seconda generazione)
! iPod touch (di prima generazione)
! iPod classic
! iPod con video
! iPod nano (di settima generazione)
! iPod nano (di sesta generazione)
! iPod nano (di quinta generazione)
! iPod nano (di quarta generazione)
! iPod nano (di terza generazione)
! iPod nano (di seconda generazione)
! iPod nano (di prima generazione)
! iPhone 5
! iPhone 4S
! iPhone 4
! iPhone 3GS
! iPhone 3G
! iPhone
A seconda della generazione o della versione
dell’iPod, alcune funzioni potrebbero non essere
disponibili.
Il funzionamento può variare a seconda della versione del software di iPod.
Gli utenti di iPod dotato di connettore Lightning
devono utilizzare il cavo adattatore da Lightning a
USB (fornito con l’iPod).
Gli utenti di iPod dotato di connettore Dock devono utilizzare il cavo CD-IU51. Consultare il rivenditore per ulteriori dettagli.
Per informazioni dettagliate sulla compatibilità di
file/formati, vedere i manuali dell’iPod.
Audiolibro, Podcast: compatibile
ATTENZIONE
Pioneer non si assume alcuna responsabilità
per l’eventuale perdita di dati dall’iPod, anche se
i dati vengono persi durante l’uso di questa
unità.
Riproduzione in sequenza
dei file audio
Con questa unità, l’utente non può assegnare i
numeri alle cartelle e specificare sequenze di riproduzione.
Esempio di gerarchia
01
02
1
2
03
04
5
6
05
Livello 1 Livello 2 Livello 3 Livello 4
Disco
La sequenza di selezione delle cartelle o altre
operazioni potrebbero risultare differenti, a seconda del software utilizzato per la codifica o la
scrittura.
Dispositivo di memoria USB
La sequenza di riproduzione è la stessa della sequenza di registrazione sul dispositivo di memoria USB.
Per specificare la sequenza di riproduzione, si
consiglia di utilizzare il seguente metodo.
1 Creare un nome file includendo i numeri che
specificano la sequenza di riproduzione (ad
esempio, 001xxx.mp3 e 099yyy.mp3).
2 Inserire tali file in una cartella.
3 Salvare la cartella contenente i file nel dispo-
sitivo di memoria USB.
Tuttavia, a seconda dell’ambiente di sistema, potrebbe non essere possibile specificare la sequenza di riproduzione.
Per i lettori audio portatili USB, la sequenza è diversa e dipende dal tipo di lettore.
: cartella
: file audio com-
3
presso
4
da 01 a 05: numero
della cartella
da 1 a 6: sequenza
di riproduzione
60
It
Page 61

Informazioni supplementari
Appendice
Informazioni supplementari
Tabella dei caratteri cirillici
D: C D: C D: C D: C D: C
: А : Б : В : Г : Д
: Е, Ё : Ж : З : И, Й : К
: Л : М : Н : О : П
: Р : С : Т : У : Ф
: Х : Ц : Ч
: Ы : Ь : Э : Ю : Я
: Ш,
: Ъ
Щ
D: Display C: Carattere
Copyright e marchi registrati
iTunes
Apple ed iTunes sono marchi di fabbrica di
Apple Inc., registrati negli Stati Uniti ed in altri
Paesi.
MP3
La fornitura di questo prodotto prevede il trasferimento di una licenza esclusivamente per uso
privato, non-commerciale e non prevede la concessione di una licenza, né implica qualsiasi diritto a utilizzare questo prodotto in qualsiasi
trasmissione in diretta commerciale (ovvero,
che generi profitti) terrestre, via satellite, cavo e/
o tramite altro mezzo, trasmissioni/diffusioni tramite Internet, Intranet e/o altre reti o in altri sistemi elettronici di distribuzione di contenuti,
come applicazioni di trasmissione audio a pagamento o audio-on-demand. Per tali usi è necessaria una licenza specifica. Per dettagli, visitare
http://www.mp3licensing.com.
WMA
Windows Media è un marchio di fabbrica o marchio di fabbrica depositato della Microsoft
Corporation negli Stati Uniti ed in altri paesi.
Questo prodotto include tecnologie di proprietà
della Microsoft Corporation e non è utilizzbile
senza licenza della Microsoft Licensing, Inc.
iPod e iPhone
iPhone, iPod, iPod classic, iPod nano, e iPod
touch sono marchi di Apple Inc., registrati negli
Stati Uniti e in altri Paesi.
Lightning è un marchio di fabbrica di Apple Inc.
“Fatto per l'iPod” e “Fatto per l'iPhone” significano che un accessorio elettronico è stato progettato specificamente rispettivamente per il
collegamento con l'iPod o l'iPhone ed è stato
certificato dal suo sviluppatore corrispondere
agli standard operativi stabiliti da Apple. Apple
non può essere considerata responsabile di questo dispositivo o della sua osservanza delle
norme di sicurezza e dei vari regolamenti. Tenere
presente che l'uso di questo accessorio con
l'iPod o l'iPhone può peggiorare le prestazioni
wireless.
Androidä
Android è un marchio di fabbrica di Google Inc.
MIXTRAX
MIXTRAX è un marchio registrato di PIONEER
CORPORATION.
Dati tecnici
Generali
Alimentazione .................. 14,4 V di c.c. (variazioni con-
Messa a terra ................... Negativa
Consumo massimo .......... 10,0 A
Dimensioni (L × A × P):
DIN
Unità principale ............... 178 mm × 50 mm × 165mm
Pannello anteriore ............ 188 mm × 58mm × 15 mm
D
Unità principale ............... 178 mm × 50 mm × 165mm
Pannello anteriore ............ 170 mm × 46mm × 15 mm
Peso ................................ 1 kg
Audio
Potenza d’uscita massima
................................... 50 W × 4
Potenza d’uscita continua
................................... 22W × 4 (da 50 Hz a
Impedenza di carico ......... 4 W (variazioni consentite da
Livello massimo di uscita
................................... 2,0V
Contorno della sonorità .... +10 dB (a 100Hz), +6,5 dB (a
Equalizzatore (equalizzatore grafico a 5 bande):
Frequenza ........................ 80 Hz/250 Hz/800 Hz/2,5 kHz/
Gamma di equalizzazione
................................... ±12 dB (a passi di 2 dB)
Subwoofer (mon o):
Frequenze ........................ 50 Hz/63 Hz/80 Hz/100 Hz/
Pendenza ......................... –12 dB per ottava, –24 dB per
Guadagno ........................ da +6 dB a –24 dB
Fase ................................. Normale e invertita
Lettore CD
Sistema ........................... Sistema audio per compact
Dischi utilizzabili .............. Compact disc
sentite da 10,8 V a 15,1 V)
70 W × 1/2 W (per il subwoofer)
15 000 Hz, 5% THD, carico 4 W,
entrambi i canali)
4 W a8W)
10 kHz) (volume: –30 dB)
8 kHz
125 Hz/160 Hz/200 Hz
ottava
disc
Rapporto segnale/rumore
................................... 94dB (a 1 kHz) (rete IEC-A)
Numero di canali ............. 2 (stereo)
Formato di decodifica MP3
................................... MPEG-1 & 2 Audio Layer 3
Formato di decodifica WMA
................................... Ver. 7, 7.1,8, 9, 10, 11, 12 (2 ca-
Formato di decodifica AAC
................................... AAC MPEG-4 (codifica solo
Formato segnale WAV ...... PCM lineare & MS ADPCM
USB
Specifiche standard USB
................................... USB 2.0 massima velocità
Alimentazione massima ... 1A
Classe USB ...................... MSC (Mass Storage Class)
File system ....................... FAT12, FAT16, FAT32
Formato di decodifica MP3
................................... MPEG-1 & 2 Audio Layer 3
Formato di decodifica WMA
................................... Ver. 7, 7.1,8, 9, 10, 11, 12 (2 ca-
Formato di decodifica AAC
................................... AAC MPEG-4 (codifica solo
Formato segnale WAV ...... PCM lineare & MS ADPCM
Sintonizzatore FM
Gamma di frequenze ........ da 87,5MHz a 108,0 MHz
Sensibilità ........................ 9 dBf (0,8 µV/75 W, mono, rap-
Rapporto segnale/rumore
................................... 72dB (rete IEC-A)
Sintonizzatore MW
Gamma di frequenze ........ da 531kHz a 1 602 kHz
Sensibilità ........................ 25µV (rapporto S/R: 20 dB)
Rapporto segnale/rumore
................................... 62dB (rete IEC-A)
nali audio)
(Windows Media Player)
tramite iTunes)
(Ver.10.6 e precedenti)
(Non compresso)
nali audio)
(Windows Media Player)
tramite iTunes)
(Ver.10.6 e precedenti)
(Non compresso)
porto S/R: 30 dB)
Italiano
61
It
Page 62

Appendice
Informazioni supplementari
Sintonizzatore LW
Gamma di frequenze ........ da 153kHz a 281 kHz
Sensibilità ........................ 28µV (rapporto S/R: 20 dB)
Rapporto segnale/rumore
................................... 62dB (rete IEC-A)
Sintonizzatore DAB
Gamma di frequenza (Banda C)
................................... da 174,928 MHz a
Gamma di frequenza (Banda L)
................................... da 1 452,960 MHz a
Sensibilità (Banda C) ....... –96 dBm
Sensibilità (Banda L) ........ –94 dBm
Rapporto segnale/rumore
................................... 85dB
Nota
Caratteristiche tecniche e design sono soggetti
a eventuali modifiche senza preavviso.
239,200 MHz (da 5A a 13F)
1 490,624 MHz (da LA a LW)
62
It
Page 63

63It
Italiano
Page 64

Sección
Antes de comenzar
01
Antes de comenzar
Gracias por haber adquirido este producto
PIONEER
Lea con detenimiento este manual antes de utilizar el producto por primera vez para que pueda
darle el mejor uso posible. Es muy importante
que lea y cumpla con la información que aparece bajo los mensajes de ADVERTENCIA y
PRECAUCIÓN de este manual. Una vez leído,
guarde el manual en un lugar seguro y a mano
para poder consultarlo en el futuro.
Si desea deshacerse de este producto, no lo
mezcle con los residuos generales de su
hogar. De conformidad con la legislación vigente, existe un sistema de recogida distinto
para los productos electrónicos que requieren
un procedimiento adecuado de tratamiento,
recuperación y reciclado.
Las viviendas privadas en los estados miembros
de la UE, en Suiza y Noruega pueden devolver
gratuitamente sus productos electrónicos usados en los centros de recolección previstos o
bien en una tienda minorista (si adquieren un
producto similar nuevo).
En el caso de los países que no se han mencionado en el párrafo anterior, póngase en contacto
con las autoridades locales a fin de conocer el
método de eliminación correcto.
Al actuar siguiendo estas instrucciones, se asegurará de que el producto eliminado se someta
a los procesos de tratamiento, recuperación y
reciclaje necesarios, evitando de este modo
efectos potencialmente negativos en el entorno
y la salud humana.
Acerca de esta unidad
Las frecuencias del sintonizador de esta unidad
están asignadas para su uso en Europa Occidental, Asia, Oriente Próximo, África y Oceanía.
El uso en otras áreas puede causar una recepción deficiente. La función RDS (sistema de
datos de radio) opera sólo en áreas con emisoras de FM que trasmitan señales de RDS.
ADVERTENCIA
! No trate de instalar o reparar este pro-
ducto usted mismo. La instalación o la
reparación de este producto por parte de
personas sin cualificación ni experiencia
en equipos electrónicos y accesorios
para automóviles puede ser peligrosa y
puede exponerle al riesgo de sufrir una
descarga eléctrica u otros peligros.
! No intente utilizar la unidad mientras esté
conduciendo. Asegúrese de salir de la carretera y aparcar su vehículo en un lugar seguro
antes de intentar utilizar los controles del dispositivo.
PRECAUCIÓN
! Evite que esta unidad entre en contacto con
líquidos, ya que puede producir una descarga eléctrica. Además, el contacto con líquidos puede causar daños en la unidad, humo
y recalentamiento.
! El CarStereo-Pass de Pioneer solo debe usar-
se en Alemania.
! Mantenga siempre el volumen lo suficiente-
mente bajo como para poder escuchar los
sonidos que provienen del exterior.
! Evite la exposición a la humedad.
PRECAUCIÓN
Este aparato es un producto de láser de clase
1 clasificado como tal en Seguridad de productos de láser,IEC 60825-1:2007.
PRODUCTO LASER CLASE 1
En caso de problemas con el
dispositivo
Si esta unidad no funcionase correctamente,
póngase en contacto con su concesionario o
con el centro de servicio PIONEER autorizado
más cercano.
64
Es
Page 65

d8 9 e
a
6 8 a
Durante el uso de la unidad
Durante el uso de la unidad
Sección
02
Unidad principal
2 4
3
1
7
1 SRC/OFF
2 h (expulsar)
3 MULTI-CONTROL (M.C.)
(lista)
4
5 Ranura de carga de discos
6 Puerto USB
7 DAB
8 BAND/
9
luz)
a c/d
b DISP
c 1/
Conector de entrada AUX (conector estéreo
d
de 3,5mm)
e Botón de soltar
PRECAUCIÓN
Utilice un cable USB Pioneer opcional (CDU50E) para conectar el dispositivo de almacenamiento USB, ya que cualquier dispositivo conectado directamente a la unidad sobresaldrá de
ésta y podría resultar peligroso.
5
b c
(control de iPod)
(parte posterior)/DIMMER (reductor de
a 6/
6
Indicaciones de la pantalla
1
7 b9
3
Sección de información principal
! Sintonizador: banda y frecuencia
! RDS: nombre del ser vicio del programa,
información PTY y otro tipo de informa-
1
ción de texto
! Reproductor de CD, dispositivo de alma-
cenamiento USB y iPod: tiempo de reproducción transcurrido e información
de texto
2
Aparece cuando existe un nivel, carpeta o
menú inferior.
3
(lista)
4 Sección de información secundaria
5 LOC (sintonización por búsqueda local)
6 TP (identificación de programa de tráfico)
7 TA (anuncios de tráfico)
8
(aleatorio/reproducción aleatoria)
9
(repetición)
a
(control de iPod)
b
La función iPod de la unidad se controlará
desde el iPod.
54
(recuperador de sonido)
2
Menú de configuración
1 Una vez instalada la unidad, gire la llave
de encendido hasta la posición ON.
Aparecerá SET UP.
2 Pulse M.C. para cambiar a YES.
# El menú de configuración desaparece si no utiliza la unidad durante 30 segundos.
# Si prefiere dejar la configuración para más tarde,
gire M.C. para cambiar a NO.
3 Pulse M.C. para seleccionarlo.
4 Para configurar el menú, siga estos
pasos.
Para avanzar a la siguiente opción del menú
debe confirmar primero su selección.
LANGUAGE (idiomas múltiples)
Esta unidad puede mostrar la información de
texto de un archivo de audio comprimido incluso
para aquella información integrada en inglés,
ruso o turco.
! Si el idioma integrado y el idioma seleccionado
no coinciden, puede que la información de
texto no se muestre correctamente.
! Es posible que algunos caracteres no se visua-
licen correctamente.
1 Gire M.C. para seleccionar el ajuste deseado.
ENG (Inglés)— РУС (Ruso)—TUR (Turco)
2 Pulse M.C. para confirmar la selección.
CLOCK SET (ajuste del reloj)
1 Gire M.C. para ajustar la hora.
2 Presione M.C. para seleccionar el minuto.
3 Gire M.C. para ajustar el minuto.
4 Pulse M.C. para confirmar la selección.
FM STEP (paso de sintonía de FM)
Utilice FM STEP para ajustar las opciones de paso
de sintonía FM (ajustes del paso de búsqueda).
1 Gire M.C. para seleccionar el paso de sintonía
de FM.
100 (100 kHz)—50 (50kHz)
2 Pulse M.C. para confirmar la selección.
! El paso de sintonía manual está fijado en
50 kHz.
! Cuando se desactivan AF y TA, el paso de bús-
queda se fija en 50 kHz incluso si está ajustado
en 100.
DAB ANT PW (ajuste de la alimentación de la antena DAB)
Utilice DAB ANT PW para seleccionar si se ha de
emitir alimentación a una antena DAB conectada.
1 Gire M.C. para seleccionar el ajuste deseado.
! ON – Utilice esta opción para permitir la
alimentación de corriente a una antena
DAB. Seleccione esta opción cuando se
utilice la antena DAB opcional (AN-DAB1,
se vende por separado) con la unidad.
! OFF – Utilice esta opción para desactivar la
alimentación de corriente. Se selecciona al
utilizar una antena pasiva sin intensificador.
2 Pulse M.C. para confirmar la selección.
Aparecerá QUIT.
5 Para cerrar la configuración, gire M.C. y
seleccione YES.
# Si prefiere volver a cambiar la configuración, gire
M.C. para cambiar a NO.
6 Pulse M.C. para seleccionarlo.
Notas
! Se pueden configurar las opciones del menú
desde el menú del sistema y desde el menú
de inicio. Si desea más información sobre
los ajustes, consulte Menú del sistema en la
página 73 y Menú inicial en la página 75.
Español
65
Es
Page 66

Sección
Durante el uso de la unidad
02
Durante el uso de la unidad
! Si desea cancelar el menú de configuración,
pulse SRC/OFF.
Funcionamiento básico
Importante
! Maneje con cuidado el panel frontal cuando
lo quite o ponga.
! Evite someter el panel delantero a impactos
excesivos.
! Mantenga el panel delantero alejado de la
luz solar directa y no lo exponga a altas temperaturas.
! Para evitar que el dispositivo o el interior del
vehículo sufran daños, retire todos los cables
o dispositivos conectados al panel delantero
antes de extraerlo.
Extracción del panel frontal
1 Pulse el botón de soltar para liberar el panel
delantero.
2 Empuje el panel delantero hacia arriba (M)y
tire de él hacia usted (N).
3 Coloque siempre el panel frontal en la funda o
bolsa protectora.
Colocación del panel delantero
1 Deslice el panel hacia la izquierda.
2 Pulse el lado derecho del panel delantero
hasta que se asiente firmemente.
Si aplica una fuerza excesiva para fijar el
panel delantero, puede que resulte dañado el
panel delantero o la unidad principal.
Encendido de la unidad
1 Pulse SRC/OFF para encender la unidad.
Apagado de la unidad
1 Mantenga pulsado SRC/OFF hasta que se apa-
gue la unidad.
Selección de una fuente
1 Pulse SRC/OFF para desplazarse entre:
DIGITAL RADIO (radiodifusión de audio digi-
tal)—RADIO—CD—USB/iPod—APP (aplicación)—AUX
! Si se selecciona una fuente diferente a DIGI-
TAL RADIO, se podrá cambiar a DIGITAL
RADIO pulsando DAB.
! Se muestra USB MTP mientras está en uso la
conexión MTP.
Ajuste del volumen
1 Gire M.C. para ajustar el volumen.
Nota
Si el cable azul/blanco de esta unidad está conectado al terminal de control del relé de la antena automática del vehículo, la antena se
extenderá cuando se encienda el equipo. Para
retraer la antena, apague la fuente.
Operaciones del menú
utilizadas frecuentemente
Retorno a la visualización anterior
Para volver a la lista anterior (la carpeta de un
nivel superior)
/DIMMER.
1 Pulse
Retorno a la visualización normal
Acceso al menú principal
1 Pulse BAND/
Retorno a la visualización normal desde la lista
1 Pulse BAND/
.
.
Radio digital (radiodifusión
de audio digital)
Para recibir señales DAB, conecte una antena
DAB (AN-DAB1), se vende por separado.
DAB significa emisión de audio digital y cuenta
con las características siguientes:
! Calidad de sonido alta (casi tan alta como
los CD, aunque es posible que se vea reducida en algunos casos para permitir la emisión
de más servicios)
! Recepción sin interferencias
Nota
Algunas emisoras realizan pruebas de emisión.
Funcionamiento básico
Selección de una banda
1 Presione BAND/
banda deseada (D1, D2 o D3).
Sintonización manual (paso a paso)
1 Pulse c o d.
Conjunto
Servicio
Servicio
Es posible que los servicios de algún conjunto se
subdividan más en Componentes de servicio; el
principal se denomina Componente de servicio
principal y cualquier Componente de servicio auxiliar se denomina Componente de ser vicio secundario.
Búsqueda
1 Mantenga pulsado c o d y luego suéltelo.
hasta que visualice la
Componente de servicio principal
Componente de servicio principal
Componente de servicio secundario
Componente de servicio secundario
Pulse .
Pulse
.
Pausa
Se puede pausar la función para dejar de escuchar un DAB temporalmente.
66
Es
Page 67

Durante el uso de la unidad
Durante el uso de la unidad
Sección
02
% Pulse DAB para pausar o reanudar.
! Esta unidad memoriza automáticamente las
emisiones recientes; la capacidad de memoria de la unidad variará según la tasa de bits
del Componente de servicio que se utilice; la
capacidad de memoria aproximada es de
cinco minutos para 192 kbps.
! Si la duración de una selección pausada su-
pera la capacidad de la memoria, la reproducción se volverá a activar desde el
principio de la selección de la memoria.
Esta función se desactiva mientras el cambio de
tiempo esté activado. Para más información
sobre la pausa en directo, consulte Para escu-
char una emisora reciente (pausa en directo) en
la página 67.
Almacenamiento y recuperación
de emisoras para cada banda
Uso de los botones de ajuste de
presintonías
1 Para guardar: mantenga pulsado uno de
los botones de ajuste de presintonías (1/
6/
) hasta que el número deje de parpa-
dear.
2 Para recuperar emisoras: pulse uno de los
botones de ajuste de presintonías (1/
).
a6/
Cambio de la visualización
Selección de la información de texto deseada
1 Pulse DISP para desplazarse entre las siguien-
tes opciones:
! SERVICE LABEL (etiqueta de servicio o
canal)
! BRDCST INFO (etiqueta de servicio/etique-
ta PTY/etiqueta de conjunto/canal y frecuencia)
! DYNAMIC LABEL (etiqueta dinámica)
! CLOCK (nombre de la fuente y reloj)
Notas
! Si no se puede adquirir la etiqueta de servi-
cio en SERVICE LABEL, se visualizará el
canal en su lugar. Si se detecta la etiqueta de
servicio, se visualizará la etiqueta de servicio.
! Para obtener más información sobre la lista
de PTY, consulte Lista PTY en la página 68.
! Esta función se desactiva al estar en pausa.
Para más detalles sobre la pausa, consulte
Pausa en la página 66.
! Dependiendo de la banda, puede cambiarse
la información de texto.
a
! Los elementos de información de texto pue-
den cambiar según la zona.
Para escuchar una emisora
reciente (pausa en directo)
Se puede navegar a través de las emisoras recientes desde el Componente de servicio seleccionado.
1 Pulse
de pausa en directo.
Vuelva a pulsar para volver a la emisión en directo.
2 Presione c o d para ajustar el punto de
reproducción.
/DIMMER para cambiar al modo
! Pulse c para retroceder un minuto.
! Pulse d para avanzar un minuto.
Esta unidad memoriza automáticamente las
emisiones recientes; la capacidad de memoria
de la unidad variará según la tasa de bits del
Componente de servicio que se utilice; la capacidad de memoria aproximada es de cinco minutos para 192 kbps.
Las selecciones almacenadas más antiguas de
lo que se puede almacenar en la memoria no estarán disponibles.
Selección de un Componente de
servicio
Se puede seleccionar un Componente de servicio desde la lista de servicios siguiente.
1 Pulse
lista de servicios.
2 Gire M.C. para cambiar la lista de servicio
y púlselo para realizar la selección.
Una vez seleccionado, se pueden ajustar los siguientes componentes de servicio.
SERVICE (etiqueta de servicio)
Se puede seleccionar un Componente de servicio
desde la lista de todos los componentes.
1 Gire M.C. para seleccionar un Componente de
2 Pulse M.C. para recibir una emisión desde el
Uso de la búsqueda alfabética
1 Pulse
2 Haga girar M.C. para seleccionar una letra.
3 Pulse M.C. para visualizar la lista alfabética.
4 Gire M.C. para seleccionar un Componente de
5 Pulse M.C. para recibir una emisión desde el
PROGRAM TYPE (etiqueta PTY)
(lista) para cambiar al modo de
servicio.
Componente de servicio seleccionado.
(lista).
servicio.
Componente de servicio seleccionado.
Se puede seleccionar un Componente de servicio
desde la información PTY.
1 Gire M.C. para desplazarse hasta la informa-
ción PTY deseada y púlsela para seleccionarla.
NEWS/INFO—POPULAR—CLASSICS—OT-
HERS
2 Gire M.C. para seleccionar un Componente de
servicio.
3 Pulse M.C. para recibir una emisión desde el
Componente de servicio seleccionado.
ENSEMBLE (etiqueta de conjunto)
Se puede seleccionar un Componente de servicio
desde el conjunto relevante.
1 Gire M.C. para desplazarse hasta el conjunto
deseado y púlselo para seleccionarlo.
2 Gire M.C. para seleccionar un Componente de
servicio.
3 Pulse M.C. para recibir una emisión desde el
Componente de servicio seleccionado.
Actualización de la información
de la lista de servicios
Se pueden recibir actualizaciones en la lista de
servicios.
% Mantenga pulsado
Para cancelar, vuelva a pulsar
(lista).
(lista).
Ajustes de funciones
1 Pulse M.C. para acceder al menú principal.
2 Gire M.C. para cambiar la opción de
menú y pulse para seleccionar FUNCTION.
Una vez seleccionado, se puede ajustar la función de abajo.
Español
67
Es
Page 68

Sección
Durante el uso de la unidad
02
Durante el uso de la unidad
S.FOLLOW (búsqueda de Componente de servicio
alternativa)
Si el sintonizador no obtiene una buena recepción, la unidad buscará automáticamente otro
conjunto que sea compatible con el mismo Componente de servicio; en caso de no encontrar una
alternativa o si la recepción sigue siendo pobre,
esta función cambiará automáticamente a una
emisora FM idéntica.
1 Pulse M.C. para activar o desactivar la búsque-
da de Componentes de servicio alternativos.
Radio
Funcionamiento básico
Selección de una banda
1 Pulse BAND/
banda deseada (FM1, FM2, FM3 para FM o
MW/LW).
Cambio de emisoras presintonizadas
1 Pulse c o d.
! Para utilizar esta función, seleccione PCH
(canal presintonizado) en SEEK.
Sintonización manual (paso a paso)
1 Pulse c o d.
! Para utilizar esta función, seleccione MAN
(sintonización manual) en SEEK.
Búsqueda
1 Mantenga pulsado c o d y luego suéltelo.
Se puede cancelar la sintonización por búsqueda pulsando brevemente c o d.
Mientras mantiene pulsado c o d se pueden
saltar las emisoras. La sintonización por búsqueda comienza inmediatamente después de
que suelte c o d.
hasta que se visualice la
Notas
! Para obtener detalles sobre SEEK, consulte
SEEK (ajuste tecla izquierda/derecha) en la pá-
gina 69.
! Se puede activar y desactivar la función AF
(búsqueda de frecuencias alternativas) de
esta unidad; se debe desactivar la función
AF para la sintonización normal (consulte AF
(búsqueda de frecuencias alternativas) en la
página 69).
Almacenamiento y recuperación
de emisoras para cada banda
Uso de los botones de ajuste de
presintonías
1 Para guardar: mantenga pulsado uno de
los botones de ajuste de presintonías (1/
6/
) hasta que el número deje de parpa-
dear.
2 Para recuperar emisoras: pulse uno de los
botones de ajuste de presintonías (1/
).
a6/
Cambio de la visualización
Selección de la información de texto deseada
1 Pulse DISP para desplazarse entre las siguien-
tes opciones:
! FREQUENCY (nombre del servicio de pro-
grama o frecuencia)
! BRDCST INFO (nombre del servicio de pro-
grama/información PTY)
! CLOCK (nombre de la fuente y reloj)
Notas
! Si no se puede adquirir el nombre del servi-
cio de programa en FREQUENCY, se visualizará la frecuencia en su lugar. Si se detecta
el nombre del servicio de programa, se visualizará el nombre del servicio de programa.
! Dependiendo de la banda, puede cambiarse
la información de texto.
! Los elementos de información de texto pue-
den cambiar según la zona.
Uso de las funciones PTY
Se puede sintonizar una emisora utilizando la
información PTY (tipo de programa).
Búsqueda de una emisora RDS por información
PTY
1 Pulse
2 Gire M.C. para seleccionar el tipo de progra-
3 Pulse M.C. para comenzar la búsqueda.
a
(lista).
ma.
NEWS/INFO—POPULAR—CLASSICS—OTHERS
La unidad busca una emisora que transmita
ese tipo de programa, cuando la encuentra, se
visualiza el nombre del servicio de programa.
! Para cancelar la búsqueda, vuelva a pulsar
M.C.
! El programa de algunas emisoras puede
ser distinto al programa indicado por el
PTY transmitido.
! Si ninguna emisora está transmitiendo el
tipo de programa que busca, se visualizará
NOT FOUND durante unos dos segundos
y el sintonizador volverá a la emisora original.
Lista PTY
Para obtener más detalles sobre la lista PTY, visite la siguiente página web:
http://www.pioneer.eu/eur/products/25/121/tech/
CarAudio/PTY.html
Ajustes de funciones
1 Pulse M.C. para acceder al menú principal.
2 Gire M.C. para cambiar la opción de
menú y pulse para seleccionar FUNCTION.
3 Gire M.C. para seleccionar la función.
Una vez seleccionado, se pueden ajustar las siguientes funciones.
# Si se selecciona la banda MW/LW,solo estarán
disponibles BSM, LOCAL y SEEK.
FM SETTING (ajustes de calidad de sonido FM)
Puede ajustar el nivel de calidad del sonido para
que coincida con las condiciones de las señales
de emisión de la señal de banda FM.
1 Pulse M.C. para mostrar el modo de ajuste.
2 Gire M.C. para seleccionar el ajuste deseado.
! STANDARD – Es el ajuste estándar.
! HI-FI – Es el ajuste que debe utilizar para
dar prioridad a la alta calidad del sonido
estéreo.
! STABLE – Es el ajuste que debe utilizar
para dar prioridad al ruido bajo del sonido
monoaural.
BSM (memoria de las mejores emisoras)
BSM (memoria de las mejores emisoras) guarda
automáticamente las seis emisoras más fuertes
ordenadas por la intensidad de la señal.
1 Pulse M.C. para activar la función BSM.
Para cancelar, vuelva a pulsar M.C.
REGION (regional)
Cuando se usa la función AF, la función regional limita la selección de las emisoras a aquellas que
transmiten programas regionales.
1 Pulse M.C. para activar o desactivar la función
regional.
LOCAL (sintonización por búsqueda local)
68
Es
Page 69

Durante el uso de la unidad
Durante el uso de la unidad
Sección
02
La sintonización por búsqueda local le permite
sintonizar sólo las emisoras de radio con señales
lo suficientemente intensas como para asegurar
una correcta recepción.
1 Pulse M.C. para seleccionar el ajuste deseado.
FM: OFF— LV1 —LV2 —LV 3—LV 4
MW/LW: OFF—LV 1 —LV2
El ajuste de nivel superior solo permite recibir
las emisoras con las señales más intensas,
mientras que los ajustes más bajos permiten
recibir las emisoras con señales más débiles.
TA (espera por anuncio de tráfico)
1 Pulse M.C. para activar o desactivar la espera
por anuncio de tráfico.
AF (búsqueda de frecuencias alternativas)
1 Pulse M.C. para activar o desactivar la función
AF.
NEWS (interrupción por programa de noticias)
1 Pulse M.C. para activar o desactivar la función
NEWS.
SEEK (ajuste tecla izquierda/derecha)
Es posible asignar funciones a las teclas derecha
e izquierda de la unidad.
Seleccione MAN (sintonización manual) para
subir o bajar la frecuencia de forma manual o seleccione PCH (canales presintonizados) para cambiar entre los canales presintonizados.
1 Presione M.C. para seleccionar MAN o PCH.
CD/CD-R/CD-RW y dispositivos
de almacenamiento USB
Conexión MTP
Los dispositivos Android compatibles con MTP
(al ejecutar el sistema operativo Android 4.0 o
superior) se pueden conectar a través de la conexión MTP utilizando la fuente USB. Para conectar un dispositivo Android, utilice el cable
suministrado con el dispositivo.
Notas
! Esta función no es compatible con MIX-
TRAX.
! Esta función no es compatible con WAV.
Funcionamiento básico
Reproducción de un CD/CD-R/CD-RW
1 Inserte el disco en la ranura de carga de dis-
cos con el lado de la etiqueta hacia arriba.
Expulsión de un CD/CD-R/CD-RW
1 Pulse h.
Reproducción de canciones de un dispositivo de
almacenamiento USB
1 Abra la tapa del puerto USB.
2 Conecte el dispositivo de almacenamiento
USB mediante un cable USB.
Detención de la reproducción de archivos en un
dispositivo de almacenamiento USB
1 Puede desconectar el dispositivo de almace-
namiento USB en cualquier momento.
Selección de una carpeta
1 Pulse 1/
Selección de una pista
1 Pulse c o d.
Avance rápido o retroceso
1 Mantenga pulsado c o d.
! Al reproducir audio comprimido, no hay soni-
o 2/ .
do durante el avance rápido o el retroceso.
Regreso a la carpeta raíz
1 Mantenga pulsado BAND/
Cambio entre audio comprimido y CD-DA
1 Pulse BAND/
Cambio entre dispositivos de memoria de reproducción
Se puede cambiar entre dispositivos de memoria
de reproducción en dispositivos de almacenamiento USB con más de un dispositivo de memoria compatible con uno de almacenamiento
masivo.
1 Pulse BAND/
! Se puede cambiar hasta 32 dispositivos de
memoria diferentes.
.
.
.
Nota
Desconecte los dispositivos de almacenamiento
USB de la unidad cuando no los utilice.
Operaciones con el botón MIXTRAX
Activación o desactivación de MIXTRAX
Se puede utilizar esta función cuando se selecciona USB como fuente.
No puede usar esta función con USB MTP.
1 Presione 3/MIX para activar o desactivar MIX-
TRAX.
! Para obtener más información sobre MIX-
TRAX, consulte Sobre MIXTRAX en la página 74.
! Cuando se usa MIXTRAX, la función sound re-
triever se desactiva.
Cambio de la visualización
Selección de la información de texto deseada
1 Pulse DISP para desplazarse entre las siguien-
tes opciones:
CD-DA
! ELAPSED TIME (número de pista y tiempo
de reproducción)
! CLOCK (nombre de la fuente y reloj)
! SPEANA (analizador de espectro)
CD-TEXT
! TRACK INFO (título de la pista/artista de la
pista/título del disco)
! ELAPSED TIME (número de pista y tiempo
de reproducción)
! CLOCK (nombre de la fuente y reloj)
! SPEANA (analizador de espectro)
MP3/WMA/AAC/WAV
! TRACK INFO (título de la pista/nombre del
artista/título del álbum)
! FILE INFO (nombre del fichero/nombre de
la carpeta)
! ELAPSED TIME (número de pista y tiempo
de reproducción)
! CLOCK (nombre de la fuente y reloj)
! SPEANA (analizador de espectro)
Selección y reproducción de
archivos/pistas de la lista de
nombres
1 Pulse para cambiar al modo de lista
por nombre de archivo/pista.
2 Utilice M.C. para seleccionar el nombre
del archivo deseado (o de la carpeta).
Selección de un archivo o una carpeta
1 Gire M.C.
Reproducción
1 Tras seleccionar un archivo o una pista, pulse
M.C.
Español
69
Es
Page 70

Sección
Durante el uso de la unidad
02
Durante el uso de la unidad
Visualización de una lista de los archivos (o las
carpetas) de la carpeta seleccionada
1 Tras seleccionar una carpeta, pulse M.C.
Reproducción de una canción de la carpeta seleccionada
1 Tras seleccionar una carpeta, mantenga pulsa-
do M.C.
Operaciones con botones especiales
Selección de un intervalo de repetición de reproducción
1 Pulse 6/
Reproducción de las pistas en orden aleatorio
1 Pulse 5/
! Para cambiar de canciones durante la repro-
Pausa de la reproducción
1 Pulse 4/PAUSE para pausar o reanudar.
para desplazarse entre las siguien-
tes opciones:
CD/CD-R/CD-RW
! ALL – Repite todas las pistas
! ONE – Repite la pista actual
! FLD – Repite la carpeta actual
Dispositivo de almacenamiento USB
! ALL – Repite todos los archivos
! ONE – Repite el archivo actual
! FLD – Repite la carpeta actual
para activar o desactivar la reproducción aleatoria.
Las pistas de una gama de repetición seleccionada se reproducen en orden aleatorio.
ducción aleatoria, pulse d para cambiar a la
pista siguiente; si se pulsa c se reiniciará la
reproducción de la pista actual desde el principio de la canción.
Ajustes de funciones
1 Pulse M.C. para acceder al menú principal.
2 Gire M.C. para cambiar la opción de
menú y pulse para seleccionar FUNCTION.
Una vez seleccionado, se puede ajustar la función de abajo.
! S.RTRV no está disponible cuando se activa
MIXTRAX.
S.RTRV (recuperador de sonido)
Mejora automáticamente el audio comprimido y
restaura el sonido óptimo.
1 Pulse M.C. para seleccionar el ajuste deseado.
1—2—OFF (desactivado)
1 es efectivo para tasas de compresión baja, y
2 para tasas de compresión alta.
iPod
Funcionamiento básico
Reproducción de canciones en un iPod
1 Abra la tapa del puerto USB.
2 Conecte un iPod a la entrada USB.
La reproducción se inicia automáticamente.
Selección de una canción (capítulo)
1 Pulse c o d.
Selección de un álbum
1 Pulse 1/
Avance rápido o retroceso
1 Mantenga pulsado c o d.
Notas
! El iPod no puede encenderse o apagarse
! Desconecte los auriculares del iPod antes de
! El iPod se apagará aproximadamente dos mi-
o 2/ .
cuando el modo de control está ajustado en
CONTROL AUDIO.
conectarlo a esta unidad.
nutos después de que la llave de encendido
del automóvil se ponga en OFF.
Operaciones con el botón MIXTRAX
Activación o desactivación de MIXTRAX
1 Presione 3/MIX para activar o desactivar MIX-
TRAX.
! Para obtener más información sobre MIX-
TRAX, consulte Sobre MIXTRAX en la página 74.
Cambio de la visualización
Selección de la información de texto deseada
1 Pulse DISP para desplazarse entre las siguien-
tes opciones:
! TRACK INFO (título de la pista/nombre del
artista/título del álbum)
! ELAPSED TIME (número de pista y tiempo
de reproducción)
! CLOCK (nombre de la fuente y reloj)
! SPEANA (analizador de espectro)
Para buscar una canción
1 Para ir al menú superior de la búsqueda
de listas, pulse
2 Utilice M.C. para seleccionar una categoría/canción.
Cambio del nombre de la canción o la categoría
1 Gire M.C.
Listas de reproducción—artistas—álbumes—
canciones—podcasts—géneros—compositores—audiolibros
Reproducción
1 Tras seleccionar una canción, pulse M.C.
Visualización de una lista de canciones de la categoría seleccionada
1 Tras seleccionar una categoría, pulse M.C.
.
Reproducción de una canción de la categoría seleccionada
1 Tras seleccionar una categoría, mantenga pul-
sado M.C.
Búsqueda alfabética en las listas
1 Cuando se visualice una lista de la categoría
seleccionada, pulse
de búsqueda alfabética.
! Es posible cambiar al modo de búsqueda
por orden alfabético girando M.C. dos
veces.
2 Haga girar M.C. para seleccionar una letra.
3 Pulse M.C. para visualizar la lista alfabética.
! Para cancelar la búsqueda, pulse
MER.
para cambiar al modo
/DIM-
Notas
! Es posible reproducir listas de reproducción
creadas con el programa de ordenador
(MusicSphere). Dicho programa estará disponible en nuestro sitio web.
! Las listas de reproducción creadas con el
programa de ordenador (MusicSphere) se
muestran de forma abreviada.
70
Es
Page 71

Durante el uso de la unidad
Durante el uso de la unidad
Sección
02
Operaciones con botones especiales
Selección de un intervalo de repetición de reproducción
1 Pulse 6/
! Cuando el modo de control se ha ajustado en
Selección de un intervalo de reproducción aleatorio (shuffle)
1 Pulse 5/
Reproducción de todas las canciones en orden
aleatorio (shuffle all)
1 Mantenga presionado 5/
! Para desactivar la reproducción de todas las
Pausa de la reproducción
1 Pulse 4/PAUSE para pausar o reanudar.
para desplazarse entre las siguien-
tes opciones:
! ONE – Repite la canción actual
! ALL – Repite todas las canciones de la
lista seleccionada
CONTROL iPod, el intervalo de repetición de
reproducción será el mismo que el que se
ajustó para el iPod conectado.
para desplazarse entre las siguientes opciones:
! SNG – Reproduce canciones siguiendo un
orden aleatorio dentro de la lista.
! ALB – Reproduce canciones siguiendo un
orden aleatorio dentro del álbum.
! OFF – No se reproduce en orden aleatorio.
función de reproducción de todas las canciones en orden aleatorio (shuffle all).
canciones en orden aleatorio, seleccione OFF
en reproducción aleatoria. Para más información, consulte Selección de un intervalo de re-
producción aleatorio (shuffle) en la página 71.
para activar la
Reproducción de canciones
relacionadas con la canción que
se está reproduciendo
Se pueden reproducir canciones de las siguientes listas:
• Lista de álbumes del artista que se está reproduciendo
• Lista de canciones del álbum que se está reproduciendo
• Lista de álbumes del género que se está reproduciendo
1 Mantenga pulsado
modo de reproducción de enlace.
2 Haga girar M.C. para cambiar el modo y
pulse para seleccionarlo.
! ARTIST – Reproduce un álbum del artista
que se está reproduciendo.
! ALBUM – Reproduce una canción del álbum
que se está reproduciendo.
! GENRE – Reproduce un álbum del género
que se está reproduciendo.
La canción o el álbum seleccionado se reproducirá después de la canción que se esté reproduciendo en ese momento.
para cambiar al
Notas
! Se puede cancelar la canción o el álbum se-
leccionado mediante funciones diferentes a
la búsqueda de enlace (p. ej., avance rápido
y retroceso).
! Según la canción seleccionada, pueden cor-
tarse el final de la canción que se esté reproduciendo o el principio de la canción o del
álbum seleccionados.
Uso de la función iPod de la
unidad desde el iPod
La función iPod de esta unidad se puede controlar desde el iPod conectado.
CONTROL iPod no es compatible con los siguientes modelos de iPod:
! iPod nano 1ª generación
! iPod con vídeo
% Pulse BAND/
control.
! CONTROL iPod – La función iPod de esta
unidad se puede utilizar desde el iPod conectado.
! CONTROL AUDIO – La función iPod de esta
unidad se puede controlar desde esta unidad.
para cambiar el modo de
Notas
! Al cambiar el modo de control a
CONTROL iPod, se pausa la reproducción de
la canción. Utilice el iPod para reanudar la
reproducción.
! Las siguientes operaciones estarán disponi-
bles en esta unidad aunque se ajuste el
modo de control en CONTROL iPod.
— Pausa
— Avance rápido/retroceso
— Selección de una canción (capítulo)
! El volumen solo se puede controlar desde
esta unidad.
Ajustes de funciones
1 Pulse M.C. para acceder al menú principal.
2 Gire M.C. para cambiar la opción de
menú y pulse para seleccionar FUNCTION.
3 Gire M.C. para seleccionar la función.
Una vez seleccionado, se pueden ajustar las siguientes funciones.
! AUDIO BOOK no está disponible cuando se
selecciona CONTROL iPod en modo de control. Para más información, consulte Uso de
la función iPod de la unidad desde el iPod en la
página 71.
AUDIO BOOK (velocidad del audiolibro)
1 Pulse M.C. para mostrar el modo de ajuste.
2 Gire M.C. para seleccionar su ajuste favorito.
! FASTER – Reproducción con velocidad su-
perior a la normal
! NORMAL – Reproducción con velocidad
normal
! SLOWER – Reproducción con velocidad in-
ferior a la normal
S.RTRV (recuperador de sonido)
1 Pulse M.C. para seleccionar el ajuste deseado.
1—2—OFF (desactivado)
1 es efectivo para tasas de compresión baja, y
2 para tasas de compresión alta.
Uso de las aplicaciones del
dispositivo conectado
Puede utilizar la unidad para reproducir y controlar las pistas en aplicaciones de iPhone o
simplemente para reproducir música.
Español
71
Es
Page 72

Sección
Durante el uso de la unidad
02
Durante el uso de la unidad
Importante
El uso de aplicaciones de terceros puede implicar o necesitar la puesta a disposición de
información de identificación personal, bien
mediante la creación de una cuenta de usuario o de algún otro modo, y, para ciertas aplicaciones, la puesta a disposición de datos de
geoubicación.
TODAS LAS APLICACIONES DE TERCEROS
SON RESPONSABILIDAD EXCLUSIVA DE
LOS PROVEEDORES, INCLUIDAS SIN LIMITACIÓN LA RECOPILACIÓN Y LA SEGURIDAD DE LOS DATOS DE USUARIO Y LAS
PRÁCTICAS DE PRIVACIDAD. AL ACCEDER
A APLICACIONES DE TERCEROS, USTED SE
MANIFIESTA DE ACUERDO EN REVISAR LOS
TÉRMINOS DE SERVICIO Y LAS POLÍTICAS
DE PRIVACIDAD DE LOS PROVEEDORES. SI
NO ESTÁ DE ACUERDO CON LOS TÉRMINOS
O LAS POLÍTICAS DE ALGÚN PROVEEDOR O
NO CONSIENTE EL USO DE DATOS DE
GEOUBICACIÓN DONDE SEA APLICABLE,
NO UTILICE ESTAS APLICACIONES DE TERCEROS.
Información acerca de la
compatibilidad de dispositivos
conectados
A continuación se muestra información detallada acerca de las terminales necesarias para utilizar la aplicación para iPhone en esta unidad.
Para usuarios de iPhone
! Esta función es compatible tanto con iPhone
como con iPod touch.
! El dispositivo tiene un iOS 5.0 o superior.
Notas
! Compruebe en nuestra página web la lista
de las aplicaciones de iPhone compatibles
con esta unidad.
! Pioneer no se responsabiliza de cualquier
problema que pueda surgir a causa de un
contenido incorrecto o defectuoso de la aplicación.
! El contenido y funcionamiento de las aplica-
ciones compatibles son responsabilidad de
los proveedores de las mismas.
Procedimiento de inicio para
usuarios de iPhone
1 Conecte un iPhone a una salida USB.
2 Cambie la fuente a APP.
3 Inicie la aplicación en el iPhone e inicie la
reproducción.
Funcionamiento básico
Selección de una pista
1 Pulse c o d.
Avance rápido o retroceso
1 Mantenga pulsado c o d.
Pausa de la reproducción
1 Pulse BAND/
para pausar o reanudar.
Cambio de la visualización
Selección de la información de texto deseada
1 Pulse DISP para desplazarse entre las siguien-
tes opciones:
! TRACK INFO (título de la pista/nombre del
artista/título del álbum)
! APP NAME (nombre de la aplicación)
! ELAPSED TIME (tiempo de reproducción)
! CLOCK (nombre de la fuente y reloj)
! SPEANA (analizador de espectro)
Ajustes de funciones
1 Pulse M.C. para acceder al menú principal.
2 Gire M.C. para cambiar la opción de
menú y pulse para seleccionar FUNCTION.
3 Gire M.C. para seleccionar la función.
Una vez seleccionado, se pueden ajustar las siguientes funciones.
PAUSE (pausar)
1 Pulse M.C. para pausar o reanudar.
S.RTRV (recuperador de sonido)
1 Pulse M.C. para seleccionar el ajuste deseado.
1—2—OFF (desactivado)
1 es efectivo para tasas de compresión baja, y
2 para tasas de compresión alta.
Ajustes de audio
1 Pulse M.C. para acceder al menú principal.
2 Gire M.C. para cambiar la opción de
menú y pulse para seleccionar AUDIO.
3 Gire M.C. para seleccionar la función de
audio.
Una vez seleccionado, se pueden ajustar las siguientes funciones de audio.
! FADER no está disponible cuando se selec-
ciona SUB.W/SUB.W en SP-P/O MODE. Para
más información, consulte SP-P/O MODE
(ajuste de la salida posterior y del preamplificador) en la página 75.
! SUB.W y SUB.W CTRL no están disponibles
cuando se selecciona REAR/REAR en
SP-P/O MODE. Para más información, consulte SP-P/O MODE (ajuste de la salida poste-
rior y del preamplificador) en la página 75.
! SUB.W CTRL no está disponible cuando se
selecciona SUB.W en OFF. Para más información, consulte SUB.W (ajuste de subgra-
ves activado/desactivado) en la página 73.
! SLA no está disponible si se ha seleccionado
FM como fuente.
FADER (ajuste de ecualizador)
1 Pulse M.C. para mostrar el modo de ajuste.
2 Gire M.C. para ajustar el balance entre los alta-
voces delanteros/traseros.
BALANCE (ajuste del balance)
1 Pulse M.C. para mostrar el modo de ajuste.
2 Gire M.C. para ajustar el balance de los altavo-
ces izquierdo o derecho.
EQ SETTING (recuperación de ecualizador)
72
Es
Page 73

Durante el uso de la unidad
Durante el uso de la unidad
Sección
02
1 Pulse M.C. para mostrar el modo de ajuste.
2 Gire M.C. para seleccionar el ecualizador.
POWERFUL—NATURAL—VOCAL—CUSTOM1—CUSTOM2—FLAT—SUPER BASS
La banda y el nivel de ecualización se pueden
personalizar si se selecciona CUSTOM1 o
CUSTOM2.
Si selecciona CUSTOM1 o CUSTOM2, complete los pasos que se describen más abajo. Si
selecciona otras opciones, pulse M.C. para
volver a la pantalla anterior.
! CUSTOM1 se puede ajustar por separado
para cada fuente; no obstante, USB, iPod y
APP se ajustan igual automáticamente.
! CUSTOM2 es una configuración comparti-
da que se utiliza para todas las fuentes.
3 Pulse M.C. para mostrar el modo de ajuste.
4 Pulse M.C. para desplazarse entre las siguien-
tes opciones:
Banda de ecualización—Nivel de ecualización
5 Gire M.C. para seleccionar el ajuste deseado.
Banda de ecualización: 80HZ—250HZ—
800HZ—2.5KHZ—8KHZ
Nivel de ecualización: +6 a –6
LOUDNESS (sonoridad)
La sonoridad compensa las deficiencias en los intervalos de frecuencias bajas y altas cuando se escucha a un volumen bajo.
1 Pulse M.C. para seleccionar el ajuste deseado.
OFF (desactivado)—LOW (bajo)—MID
(medio)—HI (alto)
SUB.W (ajuste de subgraves activado/desactiva-
do)
Esta unidad está equipada con una salida de subgraves que se puede activar o desactivar.
1 Pulse M.C. para seleccionar el ajuste deseado.
NOR (fase normal)—REV (fase inversa)—OFF
(subgraves desactivados)
SUB.W CTRL (ajuste de subgraves)
Solo las frecuencias más bajas que aquellas en el
intervalo seleccionado se generan por el altavoz
de subgraves.
1 Pulse M.C. para mostrar el modo de ajuste.
2 Pulse M.C. para desplazarse entre las siguien-
tes opciones:
Frecuencia de corte—Nivel de salida—Nivel de
pendiente
Las tasas que se puedan ajustar parpadearán.
3 Gire M.C. para seleccionar el ajuste deseado.
Frecuencia de corte: 50HZ—63HZ—80HZ—
100HZ—125HZ—160HZ—200HZ
Nivel de salida: de –24 a +6
Nivel de pendiente: –12— –24
BASS BOOST (intensificación de graves)
1 Pulse M.C. para mostrar el modo de ajuste.
2 Gire M.C. para seleccionar el nivel que desee.
Se visualiza 0 a +6 mientras se aumenta o disminuye el nivel.
HPF SETTING (ajuste del filtro de paso alto)
Utilice esta función si desea escuchar solo sonidos de alta frecuencia. Solamente se emiten por
los altavoces frecuencias más altas que el corte
del filtro de paso alto (HPF).
1 Pulse M.C. para mostrar el modo de ajuste.
2 Pulse M.C. para desplazarse entre las siguien-
tes opciones:
Frecuencia de corte—Nivel de pendiente
3 Gire M.C. para seleccionar el ajuste deseado.
Frecuencia de corte: OFF—50HZ—63HZ—
80HZ—100HZ—125HZ—160HZ—200HZ
Nivel de pendiente: –12— –24
SLA (ajuste del nivel de fuente)
Esta función evita que el volumen cambie demasiado drásticamente cuando se cambia de fuente.
! Los ajustes se basan en el nivel de volumen de
FM, que se mantiene inalterado.
! El nivel del volumen de MW/LW también se
puede ajustar con esta función.
! USB, iPod y APP reciben el mismo ajuste auto-
máticamente.
1 Pulse M.C. para mostrar el modo de ajuste.
2 Gire M.C. para ajustar el volumen de la fuente.
Gama de ajuste: de +4 a –4
Menú del sistema
Importante
PW SAVE (ahorro de energía) se cancela si la
batería del vehículo se desconecta, y se debe activar de nuevo cuando se vuelva a conectar la
batería. Dependiendo de los métodos de conexión, cuando PW SAVE (ahorro de energía) está
desactivado, la unidad puede seguir obteniendo
energía de la batería si la llave de encendido de
su vehículo no tiene posición ACC (accesorio).
1 Pulse M.C. para acceder al menú principal.
2 Gire M.C. para cambiar la opción de
menú y pulse para seleccionar SYSTEM.
3 Gire M.C. para seleccionar la función del
menú del sistema.
Una vez seleccionado, se pueden ajustar las siguientes funciones del menú de sistema.
LANGUAGE (idiomas múltiples)
Esta unidad puede mostrar la información de
texto de un archivo de audio comprimido incluso
para aquella información integrada en inglés,
ruso o turco.
! Si el idioma integrado y el idioma seleccionado
no coinciden, puede que la información de
texto no se muestre correctamente.
! Es posible que algunos caracteres no se visua-
licen correctamente.
1 Gire M.C. para seleccionar el ajuste deseado.
ENG (Inglés)— РУС (Ruso)—TUR (Turco)
CLOCK SET (ajuste del reloj)
1 Pulse M.C. para mostrar el modo de ajuste.
2 Pulse M.C. para seleccionar el segmento de la
pantalla del reloj que desea ajustar.
Hora—Minuto
3 Gire M.C. para ajustar el reloj.
12H/24H (anotación de la hora)
1 Pulse M.C. para seleccionar el ajuste deseado.
12H (reloj de 12 horas)—24H (reloj de 24
horas)
INFO DISPLAY (información secundaria)
El tipo de información de texto que se visualiza en
la sección de información secundaria se puede
cambiar.
1 Pulse M.C. para mostrar el modo de ajuste.
2 Gire M.C. para seleccionar el ajuste deseado.
SPEANA—LEVEL METER—SOURCE—CLOCK
—OFF
! La barra de señales muestra SPEANA o LEVEL
METER cuando la fuente está seleccionada en
DIGITAL RADIO o RADIO.
AUTO PI (búsqueda PI automática)
Español
73
Es
Page 74

Sección
Durante el uso de la unidad
02
Durante el uso de la unidad
La unidad puede buscar automáticamente una
emisora diferente con el mismo programa, incluso
durante la recuperación de emisoras presintonizadas.
1 Pulse M.C. para activar o desactivar la función
de búsqueda PI automática.
AUX (entrada auxiliar)
Active este ajuste si utiliza un dispositivo auxiliar
conectado a esta unidad.
1 Pulse M.C. para activar o desactivar AUX.
DIMMER (atenuador de luz)
1 Pulse M.C. para activar o desactivar el atenua-
dor de luz.
! También se puede cambiar la configuración de
atenuador de luz manteniendo pulsado
/DIMMER.
BRIGHTNESS (ajuste de brillo)
Puede utilizar este ajuste para modificar el brillo
de la pantalla.
La variedad de ajustes disponibles para BRIGHT-
NESS variarán dependiendo si DIMMER está activado o no. Para más información, consulte
DIMMER (atenuador de luz) en la página 74.
1 Pulse M.C. para mostrar el modo de ajuste.
2 Gire M.C. para seleccionar el ajuste deseado.
DIMMER activado: de 1 a 4
DIMMER desactivado: de 1 a 5
MUTE MODE (modo de silencio)
El sonido proveniente de este sistema se silencia
o atenúa automáticamente cuando se recibe una
señal desde un equipo con función de silenciamiento.
1 Pulse M.C. para mostrar el modo de ajuste.
2 Gire M.C. para seleccionar el ajuste deseado.
! MUTE – Silenciamiento
! 20dB ATT – Atenuación (20dB ATT tiene
un efecto más potente que 10dB ATT)
! 10dB ATT – Atenuación
PW SAVE (ahorro de energía)
La activación de esta función le permite reducir el
consumo de la batería.
! Cuando esta función está activada, la única
operación que se permite es el encendido de
la fuente.
1 Pulse M.C. para activar o desactivar el ahorro
de energía.
Selección de la iluminación
en color
Menú de funciones de iluminación
1 Pulse M.C. para acceder al menú principal.
2 Gire M.C. para visualizar ILLUMI y púlselo
para realizar la selección.
3 Gire M.C. para seleccionar la función de
iluminación.
Una vez seleccionado, se pueden ajustar las siguientes funciones de audio.
KEY COLOUR (configuración del color de la sección de teclas)
Es posible elegir los colores de las teclas de esta
unidad.
1 Pulse M.C. para mostrar el modo de ajuste.
2 Gire M.C. para seleccionar el color de la ilumi-
nación.
! Colores predefinidos (de WHITE a BLUE)
! SCAN (ver una variedad de colores auto-
máticamente)
! CUSTOM (color de iluminación personali-
zado)
DISP COLOUR (configuración del color de la sección de pantalla)
Es posible elegir los colores de la pantalla de esta
unidad.
1 Pulse M.C. para mostrar el modo de ajuste.
2 Gire M.C. para seleccionar el color de la ilumi-
nación.
! Colores predefinidos (de WHITE a BLUE)
! SCAN (ver una variedad de colores auto-
máticamente)
! CUSTOM (color de iluminación personali-
zado)
BOTH COLOUR (configuración del color de pantalla y teclado)
Es posible elegir los colores de las teclas y de la
pantalla de esta unidad.
1 Pulse M.C. para mostrar el modo de ajuste.
2 Gire M.C. para seleccionar el color de la ilumi-
nación.
! Colores predefinidos (de WHITE a BLUE)
! SCAN (ver una variedad de colores auto-
máticamente)
ILLUMI FX (modo de efecto de iluminación)
En este modo, se puede ver un efecto de iluminación en la pantalla en diferentes momentos, como
cuando se enciende/apaga la alimentación ACC o
cuando se introduce o se expulsa un CD.
1 Pulse M.C. para activar o desactivar ILLUMI
FX.
! El efecto de iluminación se activa cuando se
enciende/apaga la alimentación ACC independientemente de si el ajuste ILLUMI FX está activado o desactivado.
Nota
Para seleccionar el color personalizado que ha
guardado, seleccione CUSTOM.
Personalización de la
iluminación en color
Es posible crear iluminación en colores personalizados tanto para KEY COLOUR como para
DISP COLOUR.
1 Pulse M.C. para acceder al menú principal.
2 Gire M.C. para visualizar ILLUMI y púlselo
para realizar la selección.
3 Gire M.C. para visualizar KEY COLOUR o
DISP COLOUR. Púlselo para realizar la selección.
4 Mantenga pulsado M.C. hasta que el
ajuste de la iluminación personalizada aparezca en la pantalla.
5 Pulse M.C. para seleccionar el color primario.
R (rojo)—G (verde)—B (azul)
6 Gire M.C. para ajustar el nivel de brillo.
Gama de ajuste: de 0 a 60
# No puede seleccionar un nivel por debajo de 20
en R (rojo), G (verde) y B (azul) a la vez.
# Puede realizar la misma operación en otros colores.
Nota
No es posible crear un color de iluminación personalizado mientras está seleccionado SCAN.
Sobre MIXTRAX
La tecnología MIXTRAX se utiliza para introducir
diversos efectos de sonido entre las canciones,
lo que permite experimentar la música como
una mezcla ininterrumpida que se complementa con una sucesión de efectos visuales.
74
Es
Page 75

Durante el uso de la unidad
Durante el uso de la unidad
Sección
02
Notas
! Según el archivo/canción, es posible que los
efectos de sonido no estén disponibles.
! Apague MIXTRAX si los efectos visuales que
produce tienen efectos adversos en la conducción. Consulte Operaciones con el botón
MIXTRAX en la página 69.
Menú MIXTRAX
1 Pulse M.C. para acceder al menú principal.
2 Gire M.C. para cambiar la opción de
menú y pulse para seleccionar MIXTRAX.
3 Gire M.C. para seleccionar la función MIXTRAX.
Una vez seleccionado, pueden ajustarse las siguientes funciones de MIXTRAX. La función
está activada cuando MIXTRAX está activado.
SHORT PLAYBCK (modo de reproducción corto)
Se puede seleccionar la duración del tiempo de reproducción.
1 Pulse M.C. para mostrar el modo de ajuste.
2 Gire M.C. para seleccionar el ajuste deseado.
1.0 MIN (1,0 minutos)—1.5 MIN (1,5 minutos)
—2.0 MIN (2,0 minutos)—2.5 MIN (2,5 minu-
tos)—3.0 MIN (3,0 minutos)—OFF (desactivado)
FLASH AREA (área de parpadeo)
Puede seleccionar áreas para el parpadeo de colores.
1 Pulse M.C. para mostrar el modo de ajuste.
2 Gire M.C. para seleccionar el ajuste deseado.
KEY/DISPLAY (tecla y pantalla)—KEY (tecla)
—OFF (desactivado)
! Si se selecciona OFF, el color ajustado en
ILLUMI se utiliza como color de pantalla.
FLASH PATTERN (patrón de parpadeo)
El color parpadeante y la visualización de los efectos especiales de MIXTRAX cambian si se efectúan cambios en los niveles de graves y de sonido.
1 Pulse M.C. para mostrar el modo de ajuste.
2 Gire M.C. para seleccionar el ajuste deseado.
! SOUND LEVEL 1 a SOUND LEVEL 6 – El
patrón de parpadeo cambia de acuerdo
con el nivel de sonido. Seleccione el modo
deseado.
! LOW PASS 1 a LOW PASS 6 – El patrón de
parpadeo cambia de acuerdo con el nivel
de graves. Seleccione el modo deseado.
! RANDOM 1 – El patrón de parpadeo cam-
bia aleatoriamente de acuerdo con el
modo de nivel de sonido y el modo de paso
bajo.
! RANDOM 2 – El patrón de parpadeo cam-
bia aleatoriamente de acuerdo con el
modo de nivel de sonido.
! RANDOM 3 – El patrón de parpadeo cam-
bia aleatoriamente de acuerdo con el
modo de paso bajo.
DISPLAY FX (efecto de pantalla)
La visualización de los efectos especiales MIXTRAX se puede activar o desactivar.
1 Pulse M.C. para seleccionar el ajuste deseado.
ON (visualización de los efectos especiales
MIXTRAX)—OFF (visualización normal)
CUT IN FX (efecto de interrupción manual)
Puede activar o desactivar los efectos de MIXTRAX
mientras cambia de pista manualmente.
1 Pulse M.C. para seleccionar el ajuste deseado.
ON (activado)—OFF (desactivado)
Menú inicial
1 Mantenga pulsado SRC/OFF hasta que se
apague la unidad.
2 Mantenga pulsado SRC/OFF hasta que
aparezca el menú principal en la pantalla.
3 Gire M.C. para cambiar la opción de
menú y pulse para seleccionar INITIAL.
4 Gire M.C. para seleccionar la función del
menú de inicio.
Una vez seleccionado, se pueden ajustar las siguientes funciones del menú inicial.
FM STEP (paso de sintonía de FM)
1 Pulse M.C. para seleccionar el paso de sinto-
nía de FM.
100 (100 kHz)—50 (50kHz)
SP-P/O MODE (ajuste de la salida posterior y del
preamplificador)
La salida de cables de altavoces traseros y la salida RCA de esta unidad se puede usar para conectar altavoces de gama completa o de
subgraves. Seleccione la opción adecuada para
su conexión.
1 Pulse M.C. para mostrar el modo de ajuste.
2 Gire M.C. para seleccionar el ajuste deseado.
! REAR/SUB.W – Seleccione cuando haya
conectado un altavoz de gama completa a
la salida de cables de altavoces traseros y
un subgrave a la salida RCA.
! SUB.W/SUB.W – Seleccione cuando haya
conectado un subgrave directamente a la
salida de cables de altavoces traseros, sin
ningún amplificador auxiliar, y un subgrave
a la salida RCA.
! REAR/REAR – Seleccione cuando exista
un altavoz de gama completa conectado a
la salida de cables de los altavoces traseros y a la salida RCA.
Si hay un altavoz de gama completa conectado a la salida de cables de los altavoces
traseros y la salida RCA no se utiliza, podrá
seleccionar REAR/SUB.W o REAR/REAR.
DAB ANT PW (ajuste de la alimentación de la antena DAB)
1 Pulse M.C. para seleccionar el ajuste deseado.
! ON – Utilice esta opción para permitir la
alimentación de corriente a una antena
DAB. Seleccione esta opción cuando se
utilice la antena DAB opcional (AN-DAB1,
se vende por separado) con la unidad.
! OFF – Utilice esta opción para desactivar la
alimentación de corriente. Se selecciona al
utilizar una antena pasiva sin intensificador.
Menú del sistema
1 Mantenga pulsado SRC/OFF hasta que se
apague la unidad.
2 Mantenga pulsado SRC/OFF hasta que
aparezca el menú principal en la pantalla.
3 Gire M.C. para cambiar la opción de
menú y pulse para seleccionar SYSTEM.
4 Gire M.C. para seleccionar la función del
menú del sistema.
Para obtener más información, consulte Menú
del sistema en la página 73.
Uso de una fuente AUX
1 Inserte el miniconector estéreo en el conector de entrada AUX.
2 Pulse SRC/OFF para seleccionar AUX
como fuente.
Nota
No se puede seleccionar AUX si no se activa el
ajuste auxiliar.Para obtener más información,
consulte AUX (entrada auxiliar) en la página 74.
Español
75
Es
Page 76

5 67
Sección
Durante el uso de la unidad
02
Instalación
03
Cambio de la visualización
Selección de la información de texto deseada
1 Pulse DISP para desplazarse entre las siguien-
tes opciones:
! Nombre de la fuente
! Nombre de la fuente y reloj
Si aparece un display no
deseado
Desactive el display no deseado mediante los
pasos que se indican a continuación.
1 Pulse M.C. para acceder al menú principal.
2 Gire M.C. para cambiar la opción de
menú y pulse para seleccionar SYSTEM.
3 Gire M.C. para visualizar DEMO OFF y
púlselo para realizar la selección.
4 Pulse M.C. para cambiar a YES.
5 Pulse M.C. para seleccionarlo.
76
Es
Conexiones
Importante
! Cuando esta unidad se instale en un ve-
hículo sin posición ACC (accesorio) en la
llave de encendido, el cable rojo se debe conectar al terminal que pueda detectar la operación de la llave de encendido. De lo
contrario, puede descargarse la batería.
O
F
N
F
O
S
T
A
R
T
Posición ACC Sin posición ACC
! El uso de esta unidad en unas condiciones
distintas de las indicadas a continuación podría causar incendios o fallos de funcionamiento.
— Vehículos con una batería de 12 voltios y co-
nexión a tierra negativa.
— Altavoces con 50 W (valor de salida) y 4 W a
8 W (valor de impedancia).
! Para evitar cortocircuitos, sobrecalentamien-
to o fallos de funcionamiento, asegúrese de
seguir las siguientes instrucciones.
— Desconecte el terminal negativo de la batería
antes de la instalación.
— Asegure el cableado con pinzas para cables
o cinta adhesiva. Envuelva con cinta adhesiva
las partes en contacto con piezas metálicas
para proteger el cableado.
— Mantenga los cables alejados de las partes
móviles, como la palanca de cambios y los
raíles de los asientos.
— Coloque todos los cables alejados de lugares
calientes, como cerca de la salida del calefactor.
— No conecte el cable amarillo a la batería pa-
sándolo a través del orificio hasta el compartimiento del motor.
— Cubra con cinta aislante los conectores de
cables que queden desconectados.
— No acorte ningún cable.
— Nunca corte el aislamiento del cable de ali-
mentación de esta unidad para compartir la
corriente con otros equipos. La capacidad de
corriente del cable es limitada.
— Utilice un fusible con la intensidad nominal
indicada.
— Nunca conecte el cable negativo de los alta-
voces directamente a tierra.
— Nunca empalme los cables negativos de va-
rios altavoces.
! Cuando se enciende esta unidad, se emite
una señal de control a través del cable azul/
blanco. Conecte este cable al mando a distancia del sistema de un amplificador de potencia externo o al terminal de control del
relé de la antena automática del vehículo
(máx. 300 mA 12 V cc). Si el vehículo posee
una antena integrada en el cristal del parabrisas, conéctela al terminal de la fuente de
alimentación del amplificador de la antena.
! Nunca conecte el cable azul/blanco al termi-
nal de potencia de un amplificador de potencia externo, ni al terminal de potencia de la
antena automática, de lo contrario, puede
descargarse la batería o producirse un fallo
de funcionamiento.
! El cable negro es el cable a tierra. Los cables
a tierra de esta unidad y de otros productos
(especialmente productos de alta tensión,
como amplificadores de potencia) se deben
conectar por separado, de lo contrario,
puede producirse un incendio o un fallo de
funcionamiento si se desconectan por accidente.
Esta unidad
1
2
1 Entrada de la antena DAB
3
4
Page 77

d
Instalación
Instalación
Sección
03
Para recibir señales DAB, conecte una antena DAB (AN-DAB1), se vende por separado.
Para una recepción DAB mejorada, asegúrese de que se utiliza una antena DAB con entrada de alimentación fantasma (tipo activo).
Pioneer recomienda utilizar “AN-DAB1” (se
vende por separado). El consumo de corriente de la antena DAB ha de ser de 100 mA o
inferior.
2 Entrada del cable de alimentación
3 Salida trasera o salida de subgraves
4 Salida delantera
5 Entrada de la antena
6 Fusible (10 A)
7 Entrada remota conectada
Es posible conectar un adaptador de mando
a distancia físicamente conectado (se vende
por separado).
Cable de alimentación
3
4
1
c
3
556
8
9
6
4
a
b
2
7
e
1 A la toma del cable de alimentación
2 Según el tipo de vehículo, las funciones de
3 y 5 pueden ser diferentes. En este caso,
conecte 4 a 5 y 6 a 3.
3 Amarillo
Reserva (o accesorio)
4 Amarillo
Conectar al terminal de alimentación constante de 12 V.
5 Rojo
Accesorio (o reserva)
6 Rojo
Conectar al terminal controlado por la llave
de encendido (12 V CC).
7 Conecte entre sí los cables del mismo color.
8 Negro (Toma de tierra del chasis)
9 Azul/blanco
La posición de las patillas del conector ISO
será diferente según el tipo de vehículo. Conecte 9 y b cuando la patilla 5 sea del tipo
control de antena. En otro tipo de vehículo,
no se deben conectar nunca 9 y b.
a Azul/blanco
Conectar al terminal de control del sistema
del amplificador de potencia (máx. 300 mA
12 V CC).
b Azul/blanco
Conectar al terminal de control del relé de la
antena automática (máx. 300mA 12 V CC).
c Amarillo/negro
Si utiliza un equipo con función de silenciamiento, conecte este cable con el cable de silenciamiento de audio de ese equipo. En
caso contrario, mantenga el cable de silenciamiento de audio sin ninguna conexión.
d Cables de altavoces
Blanco: delantero izquierdo +
Blanco/negro: delantero izquierdo *
Gris: delantero derecho +
Gris/negro: delantero derecho *
Verde: trasero izquierdo + o altavoz de subgraves +
Verde/negro: trasero izquierdo * o altavoz de
subgraves *
Violeta: trasero derecho + o altavoz de subgraves +
Violeta/negro: trasero derecho * o altavoz
de subgraves *
e Conector ISO
En algunos vehículos, el conector ISO puede
estar dividido en dos. En este caso, asegúrese de conectar los dos conectores.
Notas
! Cambie el menú inicial de esta unidad. Con-
sulte SP-P/O MODE (ajuste de la salida pos-
terior y del preamplificador) en la página 75.
La salida de graves de esta unidad es monoaural.
! Al usar un altavoz de subgraves de 70 W
(2 W), conecte el mismo a los cables violeta y
violeta/negro de esta unidad. No conecte
nada al cable verde ni al verde/negro.
Amplificador de potencia (se
vende por separado)
Realice estas conexiones cuando utilice el amplificador opcional.
1
1
1 Control remoto del sistema
Conexión a cable azul/blanco.
2 Amplificador de potencia (se vende por sepa-
rado)
3 Conectar con cables RCA (se venden por se-
parado)
4 Salida delantera
5 Altavoz delantero
6 A la salida trasera o salida de subgraves
7 Altavoz trasero o altavoz de subgraves
3
2
55
3
2
77
4
6
Instalación
Importante
! Compruebe todas las conexiones y sistemas
antes de la instalación final.
! No utilice piezas no autorizadas, ya que pue-
den causar fallos de funcionamiento.
! Consulte a su distribuidor si para la instala-
ción es necesario taladrar orificios o hacer
otras modificaciones al vehículo.
! No instale esta unidad en un lugar donde:
— Pueda interferir con el manejo del vehículo.
— Pueda lesionar a un pasajero como conse-
cuencia de un frenazo brusco.
! El láser semiconductor se dañará si se sobre-
calienta. Instale esta unidad alejada de
zonas que alcancen altas temperaturas,
como cerca de la salida del calefactor.
! Se logra un rendimiento óptimo si la unidad
se instala en un ángulo inferior a 60°.
60°
! Cuando instale, para asegurar la dispersión
apropiada del calor durante el uso de esta
unidad, asegúrese de dejar un amplio espacio por detrás del panel trasero y enrolle los
cables sueltos de modo que no bloqueen las
aberturas de ventilación.
Deje un amplio espacio
5 cm
5 cm
Español
77
Es
Page 78

Sección
03
Instalación
Instalación
Montaje delantero/posterior de DIN
Esta unidad puede instalarse correctamente
tanto si se realiza una instalación frontal o trasera.
En la instalación, emplee piezas disponibles en
el mercado.
Montaje delantero DIN
1 Inserte el manguito de montaje en el salpicadero.
Si realiza la instalación en un espacio poco profundo, utilice el manguito de montaje suministrado. Si hay suficiente espacio, utilice el
manguito de montaje que venía con el vehículo.
2 Fije el manguito de montaje utilizando
un destornillador para doblar las pestañas
metálicas (90°) y colocarlas en su lugar.
1
2
1 Salpicadero
2 Manguito de montaje
# Asegúrese de que la unidad esté firmemente instalada en su lugar. Una instalación inestable puede
causar saltos en el audio o un mal funcionamiento
de la unidad.
Montaje trasero DIN
1 Determine la posición correcta, de modo
que los orificios del soporte y del lateral de
la unidad coincidan.
2 Apriete los dos tornillos en cada lado.
1
2
1 Tornillo con rosca cortante (5 mm × 8 mm)
2 Carcasa
3 Salpicadero o consola
3
Extracción de la unidad
1 Retire el anillo de guarnición.
1 Anillo de guarnición
2 Pestaña con muesca
! Libere el panel delantero para acceder más
fácilmente al anillo de guarnición.
! Al volver a colocar el anillo de guarnición,
oriente hacia abajo la pestaña con muesca.
2 Inserte en ambos lados de la unidad las
llaves de extracción provistas hasta que se
escuche un ligero chasquido.
3 Extraiga la unidad del salpicadero.
Retirada y colocación del panel delantero
Puede extraer el panel delantero para proteger
la unidad contra robo.
Para obtener más información, consulte Extrac-
ción del panel frontal y Colocación del panel delantero en la página 66.
78
Es
Page 79

Información adicional
Apéndice
Información adicional
Solución de problemas
Los síntomas se escriben en negrita y las causas en escritura normal sin sangría. El texto normal con sangría se utiliza para indicar las
acciones que se han de tomar.
La pantalla vuelve automáticamente a la
visualización normal.
No ha realizado ninguna operación en aproximadamente 30 segundos.
Realice la operación de nuevo.
El intervalo de repetición de reproducción cambia
de manera inesperada.
Dependiendo del intervalo de repetición de reproducción, el intervalo seleccionado puede cambiar
cuando se selecciona otra carpeta o pista o cuando
se utilice el avance rápido/retroceso.
Seleccione de nuevo el intervalo de repetición de
reproducción.
No se reproduce una subcarpeta.
No se pueden reproducir las subcarpetas cuando se
selecciona FLD (repetición de carpeta).
Seleccione otro inter valo de repetición de
reproducción.
NO XXXX aparece cuando se cambia una pantalla
(NO TITLE, por ejemplo).
No hay información de texto incorporada.
Cambie la pantalla o reproduzca otra pista/
archivo.
La unidad no funciona correctamente.
Hay una interferencia.
Está utilizando un dispositivo, como un teléfono
móvil, que puede causar interferencias.
Aleje de la unidad los dispositivos eléctricos que
puedan estar causando interferencias.
Mensajes de error
Anote el mensaje de error antes de contactar
con su concesionario o con el servicio técnico
oficial de Pioneer más cercano.
Los síntomas se escriben en negrita y las causas en escritura normal sin sangría. El texto normal con sangría se utiliza para indicar las
acciones que se han de tomar.
Comunes
AMP ERROR
La unidad no funciona o la conexión de los altavoces
es incorrecta; se activa el circuito de protección.
Compruebe la conexión de los altavoces. Si el
mensaje no desaparece aun después de apagar
y volver a encender el motor, contacte con su
distribuidor o con el Servicio técnico oficial
Pioneer.
Sintonizador DAB
ANTENNA ERROR
La conexión de la antena es incorrecta.
Compruebe la conexión de la antena. Si el
mensaje no desaparece aun después de apagar
y volver a encender el motor, contacte con su
distribuidor o con el Servicio técnico oficial
Pioneer.
Reproductor de CD
ERROR-07, 11, 12, 17, 30
El disco está sucio.
Limpie el disco.
El disco está rayado.
Sustituya el disco.
ERROR-07, 10, 11, 12, 15, 17, 30, A0
Se ha producido un error eléctrico o mecánico.
Coloque la llave de encendido del automóvil en
la posición de desactivación y luego pase de
nuevo a activación, o cambie a una fuente
diferente y, a continuación, vuelva a activar el
reproductor de CD.
ERROR-15
El disco insertado aparece en blanco.
Sustituya el disco.
ERROR-23
Formato de CD no compatible.
Sustituya el disco.
FORMAT READ
A veces se produce un retraso entre el comienzo de
la reproducción y la emisión del sonido.
Espere hasta que el mensaje desaparezca y oiga
sonido.
NO AUDIO
El disco insertado no contiene archivos reproducibles.
Sustituya el disco.
SKIPPED
El disco insertado contiene archivos protegidos con
DRM.
Los archivos protegidos se saltan.
PROTECT
Todos los archivos del disco insertado tienen DRM
integrado.
Sustituya el disco.
Dispositivo de almacenamiento USB o
iPod
FORMAT READ
A veces se produce un retraso entre el comienzo de
la reproducción y la emisión del sonido.
Espere hasta que el mensaje desaparezca y oiga
sonido.
NO AUDIO
No hay canciones.
Transfiera los archivos de audio al dispositivo de
almacenamiento USB y conéctelo.
El dispositivo de almacenamiento USB conectado
tiene la seguridad activada.
Para desactivar la seguridad, siga las
instrucciones del dispositivo de almacenamiento
USB.
SKIPPED
El dispositivo de almacenamiento USB conectado
tiene archivos protegidos con DRM.
Los archivos protegidos se saltan.
PROTECT
Todos los archivos en el dispositivo de almacenamiento USB conectado tienen DRM integrado.
Cambie el dispositivo de almacenamiento USB.
N/A USB
El dispositivo USB conectado no es compatible con
esta unidad.
! Conecte un dispositivo que cumpla con la
clase de almacenamiento masivo USB.
! Desconecte su dispositivo y sustitúyalo por un
dispositivo de almacenamiento USB compatible.
CHECK USB
El conector USB o el cable USB está cortocircuitado.
Compruebe que el conector USB o el cable USB
no esté enganchado en algo ni dañado.
Español
79
Es
Page 80

Apéndice
Información adicional
Información adicional
CHECK USB
El dispositivo de almacenamiento USB consume
más de la corriente máxima admisible.
Desconecte el dispositivo de almacenamiento
USB y no lo utilice. Coloque la llave de
encendido del automóvil en posición OFF, luego
en ACC u ON y, a continuación, conecte
únicamente dispositivos de almacenamiento
USB compatibles.
CHECK USB
El iPod funciona correctamente pero no se carga.
Compruebe que el cable de conexión del iPod no
esté cortocircuitado (p. ej., atrapado entre
objetos metálicos). Una vez confirmado, cambie
la llave de encendido del automóvil a la posición
de desactivación y luego pase de nuevo a
activación; o bien desconecte una vez el iPod y
conéctelo de nuevo.
ERROR-19
Error de comunicación.
Realice una de las siguientes operaciones:
–Cambie la llave de encendido del automóvil a la
posición de desactivación y luego pase de nuevo
a activación.
–Desconecte el dispositivo de almacenamiento
USB.
–Cambie a una fuente diferente.
Después vuelva a la fuente USB.
Fallo del iPod.
Desconecte el cable del iPod. Una vez que
aparezca el menú principal del iPod, vuelva a
conectar el iPod y reinícielo.
ERROR-23
El dispositivo de almacenamiento USB no está formateado con FAT12, FAT16ni FAT32.
El dispositivo de almacenamiento USB debe
formatearse con FAT12, FAT16o FAT32.
80
Es
ERROR-16
La versión de firmware del iPod es antigua.
Actualice la versión del iPod.
Fallo del iPod.
Desconecte el cable del iPod. Una vez que
aparezca el menú principal del iPod, vuelva a
conectar el iPod y reinícielo.
STOP
No hay canciones en la lista actual.
Seleccione una lista que contenga canciones.
NOT FOUND
No hay canciones relacionadas.
Transfiera canciones al iPod.
Aplicaciones
START UP APP
La aplicación no se ha iniciado aún.
Siga las instrucciones que aparecen en la
pantalla.
Pautas para el manejo
Discos y reproductor
Utilice únicamente discos que tengan uno de
estos dos logotipos:
Utilice discos de 12 cm.
Utilice sólo discos convencionales y completamente circulares.
Los siguientes tipos de discos no se pueden utilizar con esta unidad:
! DualDisc
! Discos de 8 cm: Si se intenta reproducir este
tipo de discos con una adaptador, la unidad
puede no funcionar correctamente.
! Discos con formas extrañas
! Discos que no sean CD
! Discos dañados, incluido discos que estén
partidos, desconchados o deformados
! Discos CD-R/RW que no se han finalizado
No toque la superficie grabada de los discos.
Cuando no utilice los discos, guárdelos en sus
cajas.
No fije etiquetas, no escriba ni aplique sustancias
químicas en la superficie de los discos.
Para limpiar un CD, pásele un paño suave desde
el centro hacia afuera.
La condensación puede afectar temporalmente al
rendimiento del reproductor. Deje de usarlo durante una hora aproximadamente para que se adapte
a la temperatura más cálida. Además, si los discos tienen humedad, séquelos con un paño
suave.
Quizá no pueda reproducir algunos discos debido
a sus características, formato, programas grabados, entorno de reproducción, condiciones de almacenamiento u otras causas.
Las vibraciones en las carreteras pueden interrumpir la reproducción de un disco.
Al usar discos de superficie imprimible para etiquetas, lea primero las instrucciones y las advertencias de los discos. Es posible que algunos
discos no puedan insertarse ni expulsarse. La utilización de este tipo de discos puede dañar el equipo.
No pegue etiquetas compradas por separado ni
otro tipo de material a los discos.
! Los discos podrían combarse y no podrán re-
producirse.
! Las etiquetas pueden despegarse durante la
reproducción, evitando la expulsión del disco y
causando de este modo daños en el equipo.
Dispositivo de almacenamiento
USB
No se admiten las conexiones a través de un concentrador USB.
No conecte ningún otro objeto que no sea un dispositivo de almacenamiento USB.
Cuando conduzca, fije el dispositivo de almacenamiento USB firmemente. No deje caer el dispositivo de almacenamiento USB al suelo, ya que
puede quedar atascado debajo del freno o del acelerador.
Se pueden producir los siguientes problemas
según el dispositivo de almacenamiento USB que
se utilice.
! Las operaciones pueden variar.
! Es posible que no se reconozca el dispositivo
de almacenamiento.
! Puede que los archivos no se reproduzcan co-
rrectamente.
! El dispositivo puede causar interferencias al
escuchar la radio.
Page 81

Información adicional
Apéndice
Información adicional
iPod
No deje el iPod en lugares expuestos a una temperatura elevada.
Cuando conduzca, fije el iPod firmemente. No
deje caer el iPod al suelo, ya que puede quedar
atascado debajo del freno o del acelerador.
Acerca de los ajustes del iPod
! Cuando el iPod está conectado, esta unidad
desactiva el ajuste EQ (ecualizador) del iPod
para mejorar la acústica; al desconectar el
iPod, el EQ retoma su valor original.
! No puede desactivar la Repetición del iPod
cuando utiliza esta unidad. La Repetición se
cambiará automáticamente a Todo cuando el
iPod esté conectado a esta unidad.
La unidad no mostrará el texto incompatible guardado en el iPod.
Compatibilidad con audio
comprimido (disco, USB)
WMA
Extensión de archivo: .wma
Velocidad de grabación: de 48 kbps a 320kbps
(CBR) y de 48 kbps a 384 kbps (VBR)
Frecuencia de muestreo: 32 kHz, 44,1 kHz, 48 kHz
Windows Mediaä Audio Professional, Lossless,
Voice/DRM Stream/Stream con vídeo: no compatible
MP3
Extensión de archivo: .mp3
Velocidad de grabación: de 8 kbps a 320kbps
(CBR), VBR
Frecuencia de muestreo: de 8 kHz a 48 kHz
(32 kHz, 44,1 kHz, 48 kHz para énfasis)
Versiones de etiqueta ID3 compatibles: 1.0, 1.1,
2.2, 2.3, 2.4 (la etiqueta ID3 versión 2.x tiene prioridad sobre la versión 1.x)
Lista de reproducción M3u: no compatible
MP3i (MP3 interactivo), mp3 PRO: no compatible
WAV
Extensión de archivo: .wav
Bits de cuantificación: 8 y 16 (LPCM), 4 (MS
ADPCM)
Frecuencia de muestreo: 16 kHz a 48 kHz (LPCM),
22,05 kHz y 44,1kHz (MS ADPCM)
! No puede usar esta función con USB MTP.
AAC
Formato compatible: AAC codificado con iTunes
Extensión de archivo: .m4a
Frecuencia de muestreo: de 11,025 kHz a 48 kHz
Velocidad de transmisión: de 16 kbps a 320 kbps,
VBR
Apple Lossless: no compatible
Archivo AAC adquirido en iTunes Store (extensión
del archivo .m4p): no compatible
Información complementaria
Solo se pueden visualizar los primeros 32 caracteres como nombre de archivo (incluida la extensión) o nombre de carpeta.
Los textos en ruso que se visualizarán en esta unidad se deben codificar con los siguientes conjuntos de caracteres:
! Unicode (UTF-8, UTF-16)
! Los conjuntos de caracteres distintos de Uni-
code que se usan en el entorno Windows y
que están ajustados en ruso en la configuración de idiomas múltiples.
Esta unidad puede no funcionar correctamente,
según la aplicación utilizada para codificar archivos WMA.
Puede producirse una pequeña demora cuando
se inicie la reproducción de archivos de audio que
contienen datos de imágenes o archivos de audio
almacenados en un dispositivo USB con numerosas jerarquías de carpetas.
Disco
Jerarquía de carpetas reproducibles: hasta ocho
niveles (una jerarquía práctica de carpetas tiene
menos de dos niveles).
Carpetas reproducibles: hasta 99
Archivos reproducibles: hasta 999
Sistema de archivos: ISO 9660 Nivel 1 y 2, Romeo,
Joliet
Reproducción multisesión: compatible
Transferencia de datos en formato Packet Write:
no compatible
Independientemente de la longitud de la secciones en blanco que haya entre las canciones de la
grabación original, los discos de audio comprimidos se reproducirán con una breve pausa entre
cada canción.
Dispositivo de almacenamiento
USB
Jerarquía de carpetas reproducibles: hasta ocho
niveles (una jerarquía práctica de carpetas tiene
menos de dos niveles).
Carpetas reproducibles: hasta 500
Archivos reproducibles: hasta 15 000
Reproducción de archivos protegidos por derechos de autor: no compatible
Dispositivo de almacenamiento USB particionado:
solo se puede reproducir la primera partición.
Puede producirse cierto retraso cuando se inicie
la reproducción de archivos de audio en un dispositivo de almacenamiento USB con numerosas jerarquías de carpetas.
PRECAUCIÓN
! Pioneer no garantiza la compatibilidad con
todos los dispositivos de almacenamiento
masivo USB y no se hace responsable de la
pérdida de los datos en los reproductores
multimedia, smartphones u otros dispositivos, mientras se utilicen con este producto.
! No deje discos ni dispositivos de almacena-
miento USB en lugares expuestos a altas
temperaturas.
Español
81
Es
Page 82

Apéndice
Información adicional
Información adicional
Compatibilidad con iPod
Esta unidad solo es compatible con los siguientes modelos de iPod. Las versiones compatibles
del software iPod se muestran abajo; es posible
que las versiones más antiguas no sean compatibles.
Fabricado para
! iPod touch (5.ª generación)
! iPod touch (4.ª generación)
! iPod touch (3.ª generación)
! iPod touch (2.ª generación)
! iPod touch (1.ª generación)
! iPod classic
! iPod con vídeo
! iPod nano (7.ª generación)
! iPod nano (6.ª generación)
! iPod nano (5.ª generación)
! iPod nano (4.ª generación)
! iPod nano (3.ª generación)
! iPod nano (2.ª generación)
! iPod nano (1.ª generación)
! iPhone 5
! iPhone 4S
! iPhone 4
! iPhone 3GS
! iPhone 3G
! iPhone
Según la generación o versión del iPod, es posible
que algunas funciones no estén disponibles.
Las funciones pueden variar según la versión de
software del iPod.
Los usuarios de iPod con conector Lightning deberían usar el cable Lightning a USB (suministrado
con el iPod).
Los usuarios de iPod con el conector del Dock deberían utilizar CD-IU51. Para más información,
consulte a su proveedor.
82
Es
Si desea más información sobre la compatibilidad
de archivos y formatos, consulte los manuales del
iPod.
Audiolibro, podcast: compatible
PRECAUCIÓN
Pioneer no asume ninguna responsabilidad por
la pérdida de datos en el iPod, incluso si la pérdida ocurre durante el uso de esta unidad.
Secuencia de archivos de audio
El usuario no puede asignar números de carpeta ni especificar secuencias de reproducción
con esta unidad.
Ejemplo de una jerarquía
01
02
1
2
03
04
5
6
05
Nivel 1 Nivel 2 Nivel 3 Nivel 4
Disco
La secuencia de selección de carpetas u otras
operaciones pueden diferir, dependiendo del
software de codificación o escritura.
Dispositivo de almacenamiento
USB
La secuencia de reproducción es la misma que
la secuencia grabada en el dispositivo de almacenamiento USB.
Para especificar la secuencia de reproducción,
se recomienda el siguiente método.
: archivo de audio
3
comprimido
4
01 a 05: número de
carpeta
1 a 6: secuencia
de reproducción
: carpeta
1 Cree un nombre del archivo que incluya nú-
meros que especifiquen la secuencia de reproducción (p. ej., 001xxx.mp3 y 099yyy.mp3).
2 Coloque esos archivos en una carpeta.
3 Guarde la carpeta que contiene los archivos
en el dispositivo de almacenamiento USB.
Sin embargo, dependiendo del entorno del sistema, tal vez no pueda especificar la secuencia de
reproducción.
Para reproductores de audio portátiles USB, la
secuencia es diferente y depende del reproductor.
Tabla de caracteres rusos
D: C D: C D: C D: C D: C
: А : Б : В : Г : Д
: Е, Ё : Ж : З : И, Й : К
: Л : М : Н : О : П
: Р : С : Т : У : Ф
: Х : Ц : Ч
: Ы : Ь : Э : Ю : Я
: Ш,
: Ъ
Щ
D: Visualización C: Carácter
Copyright y marcas registradas
iTunes
Apple e iTunes son marcas comerciales de
Apple Inc., registradas en los EE.UU. y en otros
países.
MP3
La venta de este producto solo otorga una licencia para su uso privado, no comercial. No otorga
ninguna licencia ni concede ningún derecho a
utilizar este producto en transmisiones comerciales (es decir,lucrativas) en tiempo real (terrestres, vía satélite, por cable y/o por cualquier
otro medio), transmisiones/streaming por Internet, intranets u otras redes o en otros sistemas
de distribución de contenido electrónico, como
por ejemplo, aplicaciones de pago por escucha
(pay-audio) o audio bajo demanda (audio-on-demand). Se necesita una licencia independiente
para su uso comercial. Para obtener más información, visite
http://www.mp3licensing.com.
WMA
Windows Media es una marca registrada o una
marca de fábrica de Microsoft Corporation en
los Estados Unidos y/u otros países.
Este producto incluye tecnología propiedad de
Microsoft Corporation, y no se puede usar ni distribuir sin una licencia de Microsoft Licensing,
Inc.
iPod y iPhone
iPhone, iPod, iPod classic, iPod nano y iPod
touch son marcas comerciales de Apple Inc., registradas en los EE. UU. y en otros países.
Lightning es una marca comercial de Apple Inc.
“Made for iPod” y “Made for iPhone” significan
que un accesorio electrónico ha sido diseñado
para ser conectado específicamente a un iPod o
a un iPhone, respectivamente, y ha sido homologado por quien lo desarrolló para cumplir con
las normas de funcionamiento de Apple. Apple
no es responsable del funcionamiento de este
aparato ni de que cumpla con las normas de seguridad y reguladoras. Tenga presente que el
empleo de este accesorio con un iPod o iPhone
puede afectar la operación inalámbrica.
Androidä
Android es una marca comercial de Google Inc.
MIXTRAX
MIXTRAX es una marca comercial de PIONEER
CORPORATION.
Page 83

Información adicional
Apéndice
Información adicional
Especificaciones
Generales
Fuente de alimentación .... 14,4 V cc (10,8 V a 15,1 V per-
Sistema de derivación a tierra
................................... Tipo negativo
Consumo máximo de corriente
................................... 10,0 A
Dimensiones (An × Al × Pr):
DIN
Bastidor ........................... 178mm × 50 mm × 165 mm
Cara anterior .................... 188mm × 58mm × 15 mm
D
Bastidor ........................... 178mm × 50 mm × 165 mm
Cara anterior .................... 170mm × 46mm × 15 mm
Peso ................................ 1 kg
Audio
Potencia de salida máxima
................................... 50 W × 4
Potencia de salida continua
................................... 22W × 4 (50Hz a 15000 Hz,
Impedancia de carga ....... 4 W (4 W a8W permisibles)
Nivel de salida máxima del preamplificador
................................... 2,0V
Contorno de sonoridad ..... +10 dB (100 Hz), +6,5 dB
Ecualizador (ecualizador gráfico de 5 bandas):
Frecuencia ....................... 80Hz/250 Hz/800 Hz/2,5 kHz/
Gama de ecualización ...... ±12 dB (pasode 2 dB )
Altavoz de subgraves (mono):
Frecuencia ....................... 50Hz/63 Hz/80 Hz/100 Hz/
Pendiente ........................ –12 dB/oct, –24 dB/oct
Ganancia ......................... +6 dB a –24 dB
Fase ................................. Normal/Inversa
Reproductor de CD
Sistema ........................... Sistema de audio de discos
Discos utilizables ............. Disco compacto
misible)
70 W × 1/2 W (para altavoz de
subgraves)
5 % THD, 4 W de carga, ambos
canales activados)
(10 kHz) (volumen: –30 dB)
8 kHz
125 Hz/160 Hz/200 Hz
compactos
Relación de señal a ruido
................................... 94dB (1 kHz) (red IEC-A)
Número de canales .......... 2 (estéreo)
Formato de decodificación MP3
................................... MPEG-1 & 2 Audio Layer 3
Formato de decodificación WMA
................................... Ver. 7, 7.1,8, 9, 10, 11, 12
Formato de decodificación AAC
................................... MPEG-4 AAC (sólo codificado
Formato de señal WAV ..... PCM lineal & MS ADPCM
USB
Especificación de la norma USB
................................... USB 2.0 velocidad máxima
Consumo máximo de corriente
................................... 1A
Clase USB ....................... MCS (Clase de almacena-
Sistema de archivos ......... FAT12, FAT16, FAT32
Formato de decodificación MP3
................................... MPEG-1 & 2 Audio Layer 3
Formato de decodificación WMA
................................... Ver. 7, 7.1,8, 9, 10, 11, 12
Formato de decodificación AAC
................................... MPEG-4 AAC (sólo codificado
Formato de señal WAV ..... PCM lineal & MS ADPCM
Sintonizador de FM
Intervalo de frecuencias . .. de 87,5 MHz a 108,0 MHz
Sensibilidad utilizable ...... 9 dBf (0,8 µV/75 W, mono,
Relación de señal a ruido
................................... 72dB (red IEC-A)
Sintonizador de MW
Intervalo de frecuencias . .. de 531 kHz a 1 602 kHz
Sensibilidad utilizable ...... 25 µV (señal/ruido: 20dB)
(audio 2 canales)
(Windows Media Player)
con iTunes)
(Ver.10.6 y anteriores)
(No comprimido)
miento masivo)
(audio 2 canales)
(Windows Media Player)
con iTunes)
(Ver.10.6 y anteriores)
(No comprimido)
señal/ruido: 30 dB)
Relación de señal a ruido
................................... 62dB (red IEC-A)
Sintonizador de LW
Intervalo de frecuencias . .. de 153 kHz a 281 kHz
Sensibilidad utilizable ...... 28 µV (señal/ruido: 20dB)
Relación de señal a ruido
................................... 62dB (red IEC-A)
Sintonizador DAB
Rango de frecuencias (Banda C)
................................... 174,928 MHz a 239,200 MHz
Rango de frecuencias (Banda L)
................................... 1452,960 MHz a
Sensibilidad utilizable (Banda C)
................................... –96 dBm
Sensibilidad utilizable (Banda L)
................................... –94 dBm
Relación de señal a ruido
................................... 85dB
(5A a 13F)
1 490,624 MHz (LA a LW)
Nota
Las especificaciones y el diseño están sujetos a
modificaciones sin previo aviso.
Español
83
Es
Page 84

Abschnitt
Bevor Sie beginnen
01
Bevor Sie beginnen
Vielen Dank, dass Sie sich für dieses
PIONEER-Produkt entschieden haben
Bitte lesen Sie diese Anleitung vor der Verwendung dieses Produkts zur Gewährleistung seiner
ordnungsgemäßen Verwendung durch. Lesen
und befolgen Sie dabei insbesondere die Hinweise WARNUNG und VORSICHT. Bewahren
Sie die Anleitung zur zukünftigen Bezugnahme sicher und griffbereit auf.
Mischen Sie dieses Produkt, wenn Sie es entsorgen wollen, nicht mit gewöhnlichen Haushaltsabfällen. Es gibt ein getrenntes
Sammelsystem für gebrauchte elektronische
Produkte, über das die richtige Behandlung,
Rückgewinnung und Wiederverwertung
gemäß der bestehenden Gesetzgebung gewährleistet wird.
Privathaushalte in den Mitgliedstaaten der EU,
in der Schweiz und in Norwegen können ihre gebrauchten elektronischen Produkte kostenfrei
bei speziell dafür eingerichteten Sammelstellen
abgeben oder zu einem Fachhändler zurückbringen (sofern sie ein vergleichbares neues Produkt
kaufen).
In den Ländern, die hier nicht aufgeführt sind,
wenden Sie sich hinsichtlich der zu beachtenden Entsorgungsweise bitte an die zuständige
Gemeindeverwaltung.
Auf diese Weise stellen Sie sicher, dass das zu
entsorgende Produkt der erforderlichen Verarbeitung, Rückgewinnung und Wiederverwertung zugeführt wird, und verhindern damit
potenziell negative Auswirkungen auf die Umwelt sowie Gesundheitsschäden.
Zu diesem Gerät
Die Tuner-Frequenzen dieses Geräts sind für
Westeuropa, Asien, den Mittleren Osten, Afrika
und Ozeanien bestimmt. Der Gebrauch in anderen Gebieten kann zu mangelhaftem Empfang
führen. Die RDS-Funktion (Radio-Datensystem)
funktioniert nur in Gebieten mit UKW-Sendern,
die RDS-Signale ausstrahlen.
Wichtig
Bitte tragen Sie die folgenden Informationen
in das dafür vorgesehene Formular auf der
Rückseite der Anleitung ein:
— 14-stellige Seriennummer (an der Unterseite
des Geräts angegeben)
— Kaufdatum (Datum der Quittung)
— Stempel des Händlers
Diese Informationen dienen als Eigentumsnachweis. Im Fall eines Diebstahls teilen Sie
der Polizei die 14-stellige Seriennummer und
das Kaufdatum des Geräts mit.
Bewahren Sie die Bedienungsanleitung an
einem sicheren Ort auf.
WARNUNG
! Versuchen Sie nicht, dieses Produkt
selbst zu montieren oder zu warten. Werden Montage- oder Wartungsarbeiten
des Produkts von Personen ohne Ausbildung und Erfahrung hinsichtlich elektronischer Geräte und Fahrzeugzubehör
vorgenommen, kann dies gefährlich sein
und möglicherweise zu elektrischen
Schlägen, Verletzungen oder anderen
Gefahren führen.
! Bedienen Sie das Gerät niemals während der
Fahrt. Fahren Sie an den Straßenrand und
parken Sie Ihr Fahrzeug zuerst an einem sicheren Ort, bevor Sie die Bedienelemente
des Geräts bedienen.
VORSICHT
! Dieses Gerät darf nicht mit Flüssigkeiten in
Kontakt kommen. Dies könnte einen Stromschlag verursachen. Darüber hinaus kann
der Kontakt mit Flüssigkeit eine Beschädigung des Geräts, Rauchentwicklung und
Überhitzung nach sich ziehen.
! Wählen Sie stets eine Lautstärke, bei der Sie
Umgebungsgeräusche noch deutlich wahrnehmen können.
! Setzen Sie dieses Gerät keiner Feuchtigkeit
aus.
VORSICHT
Bei diesem Gerät handelt es sich zwar um ein
Laserprodukt der Klasse 1, das entsprechend
dem Standard Sicherheit für Laserprodukte
IEC 60825-1:2007 klassifiziert ist.
LASER KLASSE 1
Im Problemfall
Sollte dieses Gerät nicht ordnungsgemäß funktionieren, dann wenden Sie sich an Ihren Händler oder an die nächstgelegene PIONEERKundendienststelle.
84
De
Page 85

d8 9 e
a
6 8 a
Gebrauch dieses Geräts
Gebrauch dieses Geräts
Abschnitt
02
Hauptgerät
2 4
3
1
7
1 SRC/OFF
2 h (Auswurf)
3 MULTI-CONTROL (M.C.)
(Liste)
4
5 Disc-Ladeschacht
6 USB-Anschluss
7 DAB
8 BAND/
9
a c/d
b DISP
c 1/
d AUX-Eingang (3,5-mm-Stereoanschluss)
e Taste zum Entriegeln der Frontplatte
VORSICHT
Verwenden Sie für den Anschluss eines USBSpeichergeräts ein optionales USB-Kabel von
Pioneer (CD-U50E), da direkt an diese Einheit
angeschlossene Zusatzgeräte hervorstehen und
eine Gefahr darstellen könnten.
5
b c
(iPod-Steuerung)
(Zurück)/DIMMER (Dimmer)
bis 6/
6
Display-Anzeige
1
7 b9
3
Hauptinformationsbereich
! Tuner: Frequenzband und Frequenz
! RDS: Programm-Service-Name, PTY-In-
1
formation und andere Textinformationen
! CD-Player, USB-Speichermedium und
iPod: verstrichene Wiedergabezeit und
Textinformationen
Erscheint, wenn eine untergeordnete Ord-
2
ner- oder Menüebene vorhanden ist.
3
(Liste)
4 Unterinformationsbereich
5 LOC (Lokal-Suchlaufabstimmung)
6 TP (Verkehrsprogramm-Identifizierung)
7 TA (Verkehrsdurchsagen)
8
(Zufall/Shuffle)
9
a
(Wiederholwiedergabe)
(iPod-Steuerung)
Die iPod-Funktionen dieses Geräts werden
b
über Ihren iPod bedient.
54
(Sound Retriever)
2
Setup-Menü
1 Drehen Sie nach der Installation des Geräts den Zündschalter auf EIN.
Die Angabe SET UP erscheint.
2 Drehen Sie M.C., um zu YES umzuschalten.
# Wenn Sie das Gerät nicht innerhalb von 30 Sekunden bedienen, wird das Setup-Menü nicht angezeigt.
# Wenn Sie es vorziehen, die Einstellungen nicht
jetzt vorzunehmen, drehen die den M.C.-Regler auf
NO.
3 Drücken Sie zur Auswahl M.C.
4 Befolgen Sie diese Schritte, um das Menü
einzurichten.
Sie müssen Ihre Auswahl bestätigen, um die
nächste Menüoption aufrufen zu können.
LANGUAGE (Spracheinstellung)
Das Gerät kann Textinformationen komprimierter
Audiodateien auch dann anzeigen, wenn sie auf
Englisch, Russisch oder Türkisch aufgezeichnet
wurden.
! Falls die für die Aufzeichnung verwendete
Sprache und die gewählte Spracheinstellung
nicht übereinstimmen, werden die Textinformationen ggf. nicht richtig angezeigt.
! Bestimmte Zeichen werden ggf. nicht ord-
nungsgemäß angezeigt.
1 Drehen Sie M.C., um die gewünschte Einstel-
lung zu wählen.
ENG (Englisch)—РУС (Russisch)—TUR (Türkisch)
2 Drücken Sie M.C., um die Auswahl zu bestäti-
gen.
CLOCK SET (Einstellen der Uhrzeit)
1 Drehen Sie M.C., um die Stunde einzustellen.
2 Drücken Sie auf M.C., um die Minuten auszu-
wählen.
3 Drehen Sie M.C., um die Minuten einzustellen.
4 Drücken Sie M.C., um die Auswahl zu bestäti-
gen.
FM STEP (UKW-Kanalraster)
Verwenden Sie FM STEP, um die UKW-Kanalraste-
roptionen (Suchschritteinstellungen) einzustellen.
1 Drehen Sie M.C., um die UKW-Kanalraster-
Funktion zu wählen.
100 (100 kHz)—50 (50kHz)
2 Drücken Sie M.C., um die Auswahl zu bestäti-
gen.
! Bei der manuellen Abstimmung ist das Kanal-
raster auf 50 kHz fest eingestellt.
! Wenn AF und TA deaktiviert sind, ist für das
Suchlauf-Kanalraster 50kHz fest eingestellt,
selbst wenn 100 ausgewählt ist.
DAB ANT PW (Stromversorgungseinstellung für
DAB-Antenne)
Verwenden Sie DAB ANT PW, um auszuwählen,
ob eine angeschlossene DAB-Antenne mit Strom
versorgt werden soll.
1 Drehen Sie M.C., um die gewünschte Einstel-
lung zu wählen.
! ON – Verwenden Sie diese Option, damit
eine DAB-Antenne mit Strom versorgt wird
und wenn eine optionale DAB-Antenne
(AN-DAB1, als Sonderzubehör erhältlich)
mit diesem Gerät verwendet wird.
! OFF – Verwenden Sie diese Option, um die
Stromversorgung zu deaktivieren und
wenn eine passive Antenne ohne Verstärker genutzt wird.
2 Drücken Sie M.C., um die Auswahl zu bestäti-
gen.
Die Angabe QUIT erscheint.
5 Um die Einstellungen abzuschließen, drehen Sie M.C., um zu YES zu wechseln.
# Möchten Sie Ihre Einstellungen wieder ändern,
drehen Sie M.C.,umNO auszuwählen.
6 Drücken Sie zur Auswahl M.C.
Deutsch
85
De
Page 86

Abschnitt
Gebrauch dieses Geräts
02
Gebrauch dieses Geräts
Hinweise
! Sie können die Menüoptionen über das Sys-
temmenü und Grundmenü einstellen. Für
Details zu den Einstellungen siehe System-
menü auf Seite 94 und Grundmenü auf Seite
96.
! Das Einstellmenü kann durch Drücken von
SRC/OFF abgebrochen werden.
Grundlegende Bedienvorgänge
Wichtig
! Handhaben Sie die Frontplatte beim Entfer-
nen oder Anbringen vorsichtig.
! Setzen Sie die Frontplatte keinen übermäßi-
gen Stößen aus.
! Setzen Sie die Frontplatte weder direkter Son-
nenbestrahlung noch hohen Temperaturen
aus.
! Entfernen Sie alle etwaigen angeschlosse-
nen Kabel und Geräte, bevor Sie die Frontplatte abnehmen, um eine Beschädigung
des Geräts oder des Fahrzeuginneren zu vermeiden.
Abnehmen der Frontplatte
1 Drücken Sie die Taste zum Entriegeln der
Frontplatte.
2 Drücken Sie die Frontplatte nach oben (M) und
ziehen Sie sie in Ihre Richtung (N).
3 Bewahren Sie die entfernte Frontplatte immer
in einem Schutzgehäuse oder einem Beutel
auf.
Wiederanbringen der Frontplatte
1 Schieben Sie die Frontplatte nach links.
2 Drücken Sie dann gegen die rechte Seite der
Frontplatte, bis sie sicher einrastet.
Wenden Sie keine Gewalt beim Anbringen der
Frontplatte an, da diese oder das Hauptgerät
sonst beschädigt werden könnten.
Einschalten des Geräts
1 Drücken Sie die Taste SRC/OFF,um das Gerät
einzuschalten.
Ausschalten des Geräts
1 Drücken und halten Sie SRC/OFF gedrückt, bis
sich das Gerät ausschaltet.
Wählen einer Programmquelle
1 Drücken Sie SRC/OFF,um zwischen den fol-
genden Optionen umzuschalten:
DIGITAL RADIO (Digital-Audio-Rundfunk)—
RADIO—CD—USB/iPod—APP (Anwendung)
—AUX
! Wenn eine andere Quelle als DIGITAL RADIO
gewählt ist, können Sie durch Drücken von
DAB zu DIGITAL RADIO wechseln.
! USB MTP wird angezeigt, während die MTP-
Verbindung hergestellt ist.
Regeln der Lautstärke
1 Drehen Sie M.C., um die Lautstärke anzupas-
sen.
Hinweis
Wenn das blau/weiße Kabel dieses Geräts an
die Steuerklemme des Automatikantennenrelais
des Kraftfahrzeugs angeschlossen wird, wird die
Antenne ausgefahren, sobald das Gerät eingeschaltet wird. Zum Einfahren der Antenne schalten Sie die Programmquelle aus.
Häufig verwendete
Menüschritte
Zurückschalten zur vorherigen Anzeige
Zum Zurückschalten zur vorherigen Liste (bzw.
zum übergeordneten Ordner)
1 Drücken Sie
Zurückschalten zur normalen Anzeige
Beenden des Hauptmenüs
1 Drücken Sie BAND/
Zurückschalten zur normalen Anzeige von der
Liste
1 Drücken Sie BAND/
/DIMMER.
.
.
Digitalradio (Digital-AudioRundfunk)
Um DAB-Signale empfangen zu können, schließen Sie eine separat erhältliche DAB-Antenne
(AN-DAB1) an diese Einheit an.
DAB ist die Abkürzung für „Digital Audio Broadcasting“ (Digitalradio) und verfügt über die folgenden Leistungsmerkmale:
! Hohe Tonqualität(beinahe so hoch wie bei
CDs, obwohl die Qualität in einigen Fälle vermindert sein kann, damit mehr Dienste gesendet werden können)
! Störungsfreier Empfang
Hinweis
Einige Sender führen einen Sendetest durch.
86
De
Page 87

Gebrauch dieses Geräts
Gebrauch dieses Geräts
Abschnitt
02
Grundlegende Bedienvorgänge
Wahl eines Bands (Wellenbereich)
1 Drücken Sie auf BAND/
Wellenbereich (D1, D2 oder D3) angezeigt
wird.
Manuelle (schrittweise) Abstimmung
1 Drücken Sie c oder d.
Ensemble
Dienst
Primäre Servicekomponente
Dienst
Primäre Servicekomponente
Sekundäre Servicekomponente
Sekundäre Servicekomponente
Einige individuelle Dienste in einem Ensemble
können möglicherweise in weitere Servicekomponenten aufgeteilt sein. Die Hauptservicekomponente wird als primäre Servicekomponente
bezeichnet und die Nebenservicekomponenten
als sekundäre Ser vicekomponenten.
Suchlauf
1 Drücken und halten Sie c oder d gedrückt
und lassen Sie die Taste dann wieder los.
, bis der gewünschte
Drücken Sie .
Drücken Sie
.
Pause
Sie können die Pausefunktion verwenden, um
DAB vorübergehend zu unterbrechen.
% Drücken Sie auf DAB, um die Wiedergabe
anzuhalten oder fortzusetzen.
! Diese Einheit speichert die kürzlichen Sender
automatisch im Speicher. Die Speicherkapazität dieser Einheit variiert je nach der Bitrate
der verwendeten Servicekomponente. Die
maximale Speicherkapazität beträgt fünf Minuten bei 192 Kbit/s.
! Wenn die Dauer, während der die Auswahl
pausiert wird, die Dauer der Speicherkapazität überschreitet, beginnt die Wiedergabe
vom Anfang der Auswahl im Speicher.
Diese Funktion ist deaktiviert, während die Zeitversetzung angeschaltet ist. Detaillierte Informationen zur Zeitversetzung finden Sie unter
Abspielen einer kürzlichen Sendung (Zeitversetzung) auf Seite 87.
Speichern und Abrufen von
Radiostationen für jedes Band
Verwendung der Stationstasten
1 Zum Speichern: Drücken Sie eine der
Stationstasten (1/
diese gedrückt, bis die Stationsnummer nicht
mehr blinkt.
2 Zum Abrufen: Drücken Sie eine der
Stationstasten (1/
bis 6/ ) und halten
bis 6/ ).
Umschalten der Anzeige
Wählen der gewünschten Textinformationen
1 Drücken Sie auf DISP, um zwischen den fol-
genden Optionen umzuschalten:
! SERVICE LABEL (Service-Kennsatz oder
Kanal)
! BRDCST INFO (Service-Kennsatz/PTY-
Kennsatz/Ensemble-Kennsatz/Kanal und
Frequenz)
! DYNAMIC LABEL (Dynamik-Kennsatz)
! CLOCK (Programmquellname und Uhr)
Hinweise
! Wenn der Service-Kennsatz nicht unter
SERVICE LABEL abgerufen werden kann,
wird stattdessen der Kanal angezeigt. Der
Service-Kennsatz wird bei einer Erkennung
angezeigt.
! Detaillierte Informationen zur PTY-Liste fin-
den Sie unter PTY-Liste auf Seite 89.
! Diese Funktion ist während der Pause deakti-
viert. Für weitere Einzelheiten zur Pause
siehe Pause auf Seite 87.
! Je nach dem Band kann die Textinformation
geändert werden.
! Welche Textinformationen geändert werden
können, hängt vom Bereich ab.
Abspielen einer kürzlichen
Sendung (Zeitversetzung)
Sie können kürzliche Sendungen unter der ausgewählten Servicekomponente durchsuchen.
1 Drücken Sie auf
Zeitversatzmodus zu wechseln.
Drücken Sie erneut, um mit dem Abspielen der
Live-Sendung fortzufahren.
2 Drücken Sie c oder d , um den Wiedergabepunkt anzupassen.
! Drücken Sie auf c, um eine Minute zurückzu-
gehen.
! Drücken Sie auf d, um eine Minute vorzu-
springen.
Diese Einheit speichert die kürzlichen Sender
automatisch im Speicher.Die Speicherkapazität
dieser Einheit variiert je nach der Bitrate der verwendeten Servicekomponente. Die maximale
Speicherkapazität beträgt fünf Minuten bei
192 Kbit/s.
Eine gespeicherte Auswahl, die älter als die
mögliche Speicherdauer ist, steht nicht zur Verfügung.
/DIMMER, um in den
Wählen einer Servicekomponente
Sie können eine Servicekomponente aus der folgenden Serviceliste wählen.
1 Drücken Sie auf
vice-Listenmodus umzuschalten.
(Liste), um in den Ser-
2 Drehen Sie M.C., um die Serviceliste zu
ändern und drücken Sie darauf, um sie zu
wählen.
Nach der Auswahl können die folgenden Servicekomponenten-Funktionen angepasst werden.
SERVICE (Service-Kennsatz)
Sie können eine Servicekomponente aus der Liste
aller Komponenten wählen.
1 Drehen Sie M.C., um eine Servicekomponente
zu wählen.
2 Drücken Sie auf M.C., um eine Sendung von
der ausgewählten Servicekomponente zu empfangen.
Gebrauch der alphabetischen Suche
1 Drücken Sie auf
2 Drehen Sie M.C., um einen Buchstaben zu
wählen.
3 Drücken Sie M.C., um eine alphabetisch sor-
tierte Liste anzuzeigen.
4 Drehen Sie M.C., um eine Servicekomponente
zu wählen.
5 Drücken Sie auf M.C., um eine Sendung von
der ausgewählten Servicekomponente zu empfangen.
PROGRAM TYPE (PTY-Kennsatz)
Sie können eine Servicekomponente aus der PTYInformation wählen.
1 Drehen Sie M.C., um zur gewünschten PTY-In-
formation zu blättern, und drücken Sie sie zur
Auswahl.
NEWS/INFO—POPULAR—CLASSICS—
OTHERS
2 Drehen Sie M.C., um eine Servicekomponente
zu wählen.
3 Drücken Sie auf M.C., um eine Sendung von
der ausgewählten Servicekomponente zu empfangen.
(Liste).
Deutsch
87
De
Page 88

Abschnitt
Gebrauch dieses Geräts
02
Gebrauch dieses Geräts
ENSEMBLE (Ensemble-Kennsatz)
Sie können eine Servicekomponente aus dem relevanten Ensemble wählen.
1 Drehen Sie M.C., um zum gewünschten En-
semble zu blättern, und drücken Sie sie zur
Auswahl.
2 Drehen Sie M.C., um eine Servicekomponente
zu wählen.
3 Drücken Sie auf M.C., um eine Sendung von
der ausgewählten Servicekomponente zu empfangen.
Aktualisieren der Servicelisteninformation
Sie können Aktualisierungen der Serviceliste
empfangen.
% Drücken und halten Sie
drückt.
Drücken Sie zum Abbrechen erneut auf
(Liste).
(Liste) ge-
Funktionseinstellungen
1 Drücken Sie auf M.C., um das Hauptmenü
anzuzeigen.
2 Drehen Sie M.C., um die Menüoption zu
wechseln, und drücken Sie auf FUNCTION,
um die angezeigte Option zu wählen.
Nach der Auswahl kann die unten stehende
Funktion angepasst werden.
S.FOLLOW (Alternative Servicekomponentensu-
che)
Bei mangelhaftem Rundfunkempfang sucht das
Gerät automatisch nach einem anderen Ensem-
ble, welches die gleiche Servicekomponente un-
terstützt. Wenn keine alternative
Servicekomponente gefunden werden kann oder
der Empfang schlecht bleibt, wechselt diese Funk-
tion automatisch zu einer identischen FM-Sen-
dung.
1 Drücken Sie auf M.C., um die alternative Ser-
vicekomponentensuche ein- oder auszuschalten.
Radio
Grundlegende Bedienvorgänge
Wahl eines Bands (Wellenbereich)
1 Drücken Sie BAND/
Wellenbereich angezeigt wird (FM1, FM2,
FM3 für UKW bzw. MW/LW).
Wechseln der voreingestellten Sender
1 Drücken Sie c oder d.
! Wählen Sie PCH (voreingesteller Kanal) unter
SEEK, um diese Funktion verwenden zu kön-
nen.
, bis der gewünschte
Manuelle (schrittweise) Abstimmung
1 Drücken Sie c oder d.
! Wählen Sie MAN (manuelle Abstimmung)
unter SEEK, um diese Funktion verwenden zu
können.
Suchlauf
1 Drücken und halten Sie c oder d gedrückt
und lassen Sie die Taste dann wieder los.
Durch kurzes Drücken von c oder d kann die
Suchlaufabstimmung aufgehoben werden.
Durch Drücken und Gedrückthalten von c
oder d können Sender übersprungen werden.
Die Suchlaufabstimmung beginnt, sobald c
bzw. d losgelassen wird.
Hinweise
! Details zu SEEK finden Sie unter SEEK (Ein-
stellen der linken/rechten Tasten) auf Seite 89.
! Der Alternativfrequenz-Suchlauf (AF) dieses
Geräts kann ein- und ausgeschaltet werden.
Für den normalen Abstimmbetrieb sollte AF
ausgeschaltet sein (siehe AF (Alternativfre-
quenz-Suchlauf) auf Seite 89).
Speichern und Abrufen von
Radiostationen für jedes Band
Verwendung der Stationstasten
1 Zum Speichern: Drücken Sie eine der
Stationstasten (1/
diese gedrückt, bis die Stationsnummer nicht
mehr blinkt.
2 Zum Abrufen: Drücken Sie eine der
Stationstasten (1/
bis 6/ ) und halten
bis 6/ ).
Umschalten der Anzeige
Wählen der gewünschten Textinformationen
1 Drücken Sie auf DISP, um zwischen den fol-
genden Optionen umzuschalten:
! FREQUENCY (Programm-Service-Name
oder Frequenz)
! BRDCST INFO (Programm-Service-Name/
PTY-Information)
! CLOCK (Programmquellname und Uhr)
Hinweise
! Wenn der Programm-Service-Name nicht
unter FREQUENCY abgerufen werden kann,
wird stattdessen die Sendefrequenz angezeigt. Der Programm-Service-Name wird bei
einer Erkennung angezeigt.
! Je nach dem Band kann die Textinformation
geändert werden.
! Welche Textinformationen geändert werden
können, hängt vom Bereich ab.
Gebrauch der ProgrammtypFunktionen (PTY)
Sie können einen Sender anhand eines Programmtyps (PTY) abstimmen.
88
De
Page 89

Gebrauch dieses Geräts
Gebrauch dieses Geräts
Abschnitt
02
Suchen nach RDS-Stationen anhand eines Programmtyps
1 Drücken Sie auf
2 Drehen Sie M.C., um einen Programmtyp zu
wählen.
NEWS/INFO—POPULAR—CLASSICS—
OTHERS
3 Drücken Sie M.C., um die Suche zu starten.
Das Gerät sucht nach einer Station, die ein
Programm des gewählten Typs ausstrahlt.
Wenn eine solche Station gefunden wird, wird
deren Stationsname angezeigt.
! Zum Aufheben des Suchlaufs drücken Sie
M.C. erneut.
! Das Programm mancher Sender kann von
dem tatsächlich übertragenen Programmtyp (PTY) abweichen.
! Wird kein Sender gefunden, der ein Pro-
gramm des gewählten Typs ausstrahlt,
dann erscheint zwei Sekunden lang NOT
FOUND und der Tuner schaltet auf die ursprüngliche Station zurück.
(Liste).
PTY-Liste
Detaillierte Informationen zur PTY-Liste finden
Sie auf folgender Website:
http://www.pioneer.eu/eur/products/25/121/tech/
CarAudio/PTY.html
Funktionseinstellungen
1 Drücken Sie auf M.C., um das Hauptmenü
anzuzeigen.
2 Drehen Sie M.C., um die Menüoption zu
wechseln, und drücken Sie auf FUNCTION,
um die angezeigte Option zu wählen.
3 Drehen Sie M.C., um die gewünschte
Funktion zu wählen.
Nach der Auswahl können die folgenden Funktionen angepasst werden.
# Wenn das MW/LW-Band gewählt ist, stehen nur
BSM, LOCAL und SEEK zur Verfügung.
FM SETTING (Einstellungen für die UKW-Klang-
qualität)
Die Klangqualität kann so eingestellt werden,
dass sie den Sendesignalbedingungen des UKWFrequenzbereichsignals entspricht.
1 Drücken Sie auf M.C., um den Einstellmodus
aufzurufen.
2 Drehen Sie M.C., um die gewünschte Einstel-
lung zu wählen.
! STANDARD – Dies ist die Standardeinstel-
lung.
! HI-FI – Diese Einstellung sollte verwendet
werden, um vorzugsweise eine hohe Stereo-Klangqualität zu verwenden.
! STABLE – Diese Einstellung sollte verwen-
det werden, um vorzugsweise einen MonoKlang mit geringem Rauschen zu verwenden.
BSM (Best-Sender-Memory)
BSM (Best-Sender-Memory) speichert die sechs
stärksten Sender automatisch in der Reihenfolge
ihrer Signalstärke.
1 Drücken Sie M.C., um BSM einzuschalten.
Zum Abbrechen des Speichervorgangs drücken Sie M.C. erneut.
REGION (Regional)
Bei Verwendung des Alternativfrequenz-Suchlaufs
beschränkt die Regionalfunktion die Auswahl auf
Sender, die regionale Programme ausstrahlen.
1 Drücken Sie M.C., um die Regionalfunktion
ein- oder auszuschalten.
LOCAL (Lokal-Suchlaufabstimmung)
Mit der Lokal-Suchlaufabstimmung wird nur nach
Stationen mit ausreichender Signalstärke für
einen guten Empfang gesucht.
1 Drücken Sie auf M.C., um die gewünschte Ein-
stellung zu wählen.
UKW: OFF—LV1 —LV2—LV 3—LV 4
MW/LW: OFF—LV 1 —LV2
Bei Auswahl der höchsten Stufe werden nur
die stärksten Sender empfangen, während bei
Auswahl der niedrigeren Stufen schwächere
Sender zugelassen werden.
TA (Verkehrsdurchsagebereitschaft)
1 Drücken Sie M.C., um die Verkehrsdurchsage-
bereitschaft ein- oder auszuschalten.
AF (Alternativfrequenz-Suchlauf)
1 Drücken Sie M.C., um den Alternativfrequenz-
Suchlauf ein- oder auszuschalten.
NEWS (Nachrichtenunterbrechung)
1 Drücken Sie M.C., um die Nachrichtenfunk-
tion ein- oder auszuschalten.
SEEK (Einstellen der linken/rechten Tasten)
Sie können den linken und rechten Tastendes
Gerät eine Funktion zuweisen.
Wählen Sie MAN (manuelle Abstimmung) zur manuellen Abstimmung oder PCH (vorprogrammierter Kanal) zum Umschalten zwischen den
vorprogrammierten Kanälen.
1 Drücken Sie M.C.,umMAN oder PCH zu wäh-
len.
CD/CD-R/CD-RW-Discs und
USB-Speichermedien
MTP-Verbindung
MTP-kompatible Android-Geräte (mit AndroidBetriebssystem 4.0 oder höher) können über
eine MTP-Verbindung unter Verwendung einer
USB-Quelle verbunden werden. Um ein
Android-Gerät anzuschließen, verwenden Sie
das dem Gerät beiliegende Kabel.
Hinweise
! Diese Funktion ist nicht mit MIXTRAX kom-
patibel.
! Diese Funktion ist nicht mit WAV kompatibel.
Grundlegende Bedienvorgänge
Wiedergabe einer CD/CD-R/CD-RW-Disc
1 Legen Sie die Disc mit der Etikettenseite nach
oben in den Ladeschacht.
Auswerfen einer CD/CD-R/CD-RW-Disc
1 Drücken Sie auf h.
Wiedergabe von Musiktiteln eines USB-Speichermediums
1 Öffnen Sie die Abdeckung des USB-Anschlus-
ses.
2 Schließen Sie das USB-Speichermedium über
ein USB-Kabel an.
Wiedergabe der Musiktitel auf einem USB-Speichermedium abbrechen
1 Das USB-Speichermedium kann jederzeit vom
Gerät getrennt werden.
Wählen eines Ordners
1 Drücken Sie 1/
Wahl eines Titels
1 Drücken Sie c oder d.
oder 2/ .
Deutsch
89
De
Page 90

Abschnitt
Gebrauch dieses Geräts
02
Gebrauch dieses Geräts
Schnellvorlauf bzw. -rücklauf
1 Drücken und halten Sie c oder d gedrückt.
! Bei der Wiedergabe von Dateien im kompri-
mierten Audio-Format wird beim schnellen
Vor- und Rücklauf kein Tonausgegeben.
Rückkehr zum Stammordner
1 Drücken und halten Sie BAND/
Umschalten zwischen dem komprimierten Audioformat und CD-DA
1 Drücken Sie BAND/
Umschalten zwischen Wiedergabespeichergeräten
Sie können zwischen Wiedergabespeichereinheiten eines USB-Speichermediums wechseln, welches über mehrere Massenspeicherklasse
kompatible Einheiten verfügt.
1 Drücken Sie BAND/
! Sie können zwischen bis zu 32 verschiedenen
Speichergeräten wechseln.
.
.
Hinweis
Trennen Sie USB-Speichermedien bei Nichtverwendung von diesem Gerät ab.
Bedienung mithilfe der
MIXTRAX-Taste
MIXTRAX ein- oder ausschalten
Sie können diese Funktion verwenden, wenn USB
als Programmquelle gewählt ist.
Diese Funktion kann nicht mit USB MTP verwendet werden.
1 Drücken Sie 3/MIX, um MIXTRAX ein- oder
auszuschalten.
! Für weitere Einzelheiten zu MIXTRAX siehe
Über MIXTRAX auf Seite 95.
! Wenn MIXTRAX verwendet wird, ist die „Sound
Retriever“-Funktion deaktiviert.
90
De
gedrückt.
Umschalten der Anzeige
Wählen der gewünschten Textinformationen
1 Drücken Sie auf DISP, um zwischen den fol-
genden Optionen umzuschalten:
CD-DA
! ELAPSED TIME (Titelnummer und Wieder-
gabezeit)
! CLOCK (Programmquellname und Uhr)
! SPEANA (Spektralanalysator)
CD-TEXT
! TRACK INFO (Titelname/Titel-Künstler/
Disc-Titel)
! ELAPSED TIME (Titelnummer und Wieder-
gabezeit)
! CLOCK (Programmquellname und Uhr)
! SPEANA (Spektralanalysator)
MP3/WMA/WAV/AAC
! TRACK INFO (Titelname/Künstlername/Al-
bumtitel)
! FILE INFO (Dateiname/Ordnername)
! ELAPSED TIME (Titelnummer und Wieder-
gabezeit)
! CLOCK (Programmquellname und Uhr)
! SPEANA (Spektralanalysator)
Auswählen und Wiedergeben von
Dateien/Titeln der Namensliste
1 Drücken Sie , um in den Datei-/Titellistenmodus umzuschalten.
2 Verwenden Sie M.C., um den Namen der
gewünschten Datei (bzw. des gewünschten
Ordners) zu wählen.
Auswählen einer Datei oder eines Ordners
1 Drehen Sie M.C.
Wiedergabe
1 Drücken Sie nach Auswahl einer Datei oder
eines Titels auf M.C.
Anzeige einer Liste der Dateien (oder Ordner) im
gewählten Ordner
1 Drücken Sie nach Auswahl eines Ordners auf
M.C.
Wiedergabe eines Musiktitels im gewählten Ordner
1 Drücken und halten Sie M.C. nach Auswahl
des Ordners gedrückt.
Bedienvorgänge mit speziellen
Tasten
Wählen eines Wiederholbereichs
1 Drücken Sie 6/
den Optionen umzuschalten:
CD/CD-R/CD-RW-Discs
! ALL – Wiederholung aller Titel
! ONE – Wiederholung des momentanen Ti-
tels
! FLD – Wiederholung des momentanen
Ordners
USB-Speichermedium
! ALL – Wiederholung aller Dateien
! ONE – Wiederholung der momentanen
Datei
! FLD – Wiederholung des momentanen
Ordners
Abspielen von Titeln in zufälliger Reihenfolge
1 Drücken Sie 5/
Wiedergabe ein- oder auszuschalten.
Die Titel innerhalb des gewählten Wiederholbereichs werden in einer zufälligen Reihenfolge gespielt.
! Um Titel während der zufälligen Wiedergabe
zu ändern, drücken Sie auf d, um zum nächsten Titel zu wechseln. Durch Drücken von c
wird die Wiedergabe des aktuellen Titels von
seinem Anfang neu gestartet.
Pausieren der Wiedergabe
1 Drücken Sie 4/PAUSE, um die Wiedergabe an-
zuhalten oder fortzusetzen.
, um zwischen den folgen-
, um die zufallsgesteuerte
Funktionseinstellungen
1 Drücken Sie auf M.C., um das Hauptmenü
anzuzeigen.
2 Drehen Sie M.C., um die Menüoption zu
wechseln, und drücken Sie auf FUNCTION,
um die angezeigte Option zu wählen.
Nach der Auswahl kann die unten stehende
Funktion angepasst werden.
! S.RTRV steht nicht zur Verfügung, wenn
MIXTRAX eingeschaltet ist.
S.RTRV (Sound Retriever)
Verbessert komprimierte Audiodaten und stellt ein
reiches Klangbild wieder her.
1 Drücken Sie auf M.C., um die gewünschte Ein-
stellung zu wählen.
1—2—OFF (Aus)
1 wirkt bei einem niedrigen und 2 bei einem
hohen Kompressionsfaktor.
iPod
Grundlegende Bedienvorgänge
Wiedergabe von Musiktiteln eines iPods
1 Öffnen Sie die Abdeckung des USB-Anschlus-
ses.
2 Schließen Sie einen iPod an den USB-Eingang
an.
Die Wiedergabe erfolgt automatisch.
Wahl eines Musiktitels (Kapitels)
1 Drücken Sie c oder d.
Auswählen eines Albums
1 Drücken Sie 1/
Schnellvorlauf bzw. -rücklauf
1 Drücken und halten Sie c oder d gedrückt.
oder 2/ .
Page 91

Gebrauch dieses Geräts
Gebrauch dieses Geräts
Abschnitt
02
Hinweise
! Der iPod kann nicht ein- bzw. ausgeschaltet
werden, wenn der Steuermodus
CONTROL AUDIO gewählt wurde.
! Trennen Sie die Kopfhörer vom iPod, bevor
Sie ihn mit diesem Gerät verbinden.
! Wenn die Zündung des Wagens ausgeschal-
tet wird, schaltet sich der iPod nach etwa
zwei Minuten aus.
Bedienung mithilfe der
MIXTRAX-Taste
MIXTRAX ein- oder ausschalten
1 Drücken Sie 3/MIX, um MIXTRAX ein- oder
auszuschalten.
! Für weitere Einzelheiten zu MIXTRAX siehe
Über MIXTRAX auf Seite 95.
Umschalten der Anzeige
Wählen der gewünschten Textinformationen
1 Drücken Sie auf DISP, um zwischen den fol-
genden Optionen umzuschalten:
! TRACK INFO (Titelname/Künstlername/Al-
bumtitel)
! ELAPSED TIME (Titelnummer und Wieder-
gabezeit)
! CLOCK (Programmquellname und Uhr)
! SPEANA (Spektralanalysator)
Suchen nach Musiktiteln
1 Drücken Sie , um zum Hauptmenü der
Listensuche zu wechseln.
2 Verwenden Sie M.C., um eine Kategorie
bzw. einen Musiktitel auszuwählen.
Musiktitel- oder Kategorienname ändern
1 Drehen Sie M.C.
Spiellisten—Künstler—Alben—Musiktitel—
Podcasts—Musik-Genres—Komponisten—
Hörbücher
Wiedergabe
1 Drücken Sie nach Auswahl eines Musiktitels
auf M.C.
Wiedergabe einer Musiktitelliste der ausgewählten Kategorie
1 Drücken Sie nach Auswahl einer Kategorie
auf M.C.
Wiedergabe eines Musiktitels der gewählten Kategorie
1 Drücken und halten Sie M.C. nach Auswahl
der Kategorie gedrückt.
Alphabetische Listensuche
1 Sobald die Liste der gewählten Kategorie an-
gezeigt wird, drücken Sie die Taste
den alphabetischen Suchmodus umzuschalten.
! Durch zweimaliges Drehen von M.C. kann
in den alphabetischen Suchmodus gewechselt werden.
2 Drehen Sie M.C., um einen Buchstaben zu
wählen.
3 Drücken Sie M.C., um eine alphabetisch sor-
tierte Liste anzuzeigen.
! Zum Abbrechen des Suchvorgangs drücken
Sie auf
/DIMMER.
,umin
Hinweise
! Sie können Spiellisten mithilfe einer auf un-
serer Website erhältlichen Computer-Anwen-
dung (MusicSphere) erstellen.
! Die mithilfe dieser Computer-Anwendung
(MusicSphere) erstellten Spiellisten werden
abgekürzt angezeigt.
Bedienvorgänge mit speziellen
Tasten
Wählen eines Wiederholbereichs
1 Drücken Sie 6/
den Optionen umzuschalten:
! ONE – Wiederholung des momentanen
Musiktitels
! ALL – Wiederholung aller Musiktitel in der
gewählten Liste
! Wenn als Steuermodus CONTROL iPod ge-
wählt wurde, ist der Wiederholbereich der gleiche wie im angeschlossenen iPod.
Auswählen des zufälligen Wiederholbereichs
(Shuffle)
1 Drücken Sie 5/
den Optionen umzuschalten:
! SNG – Zufallsgesteuerte Wiedergabe der
Musiktitel der gewählten Liste
! ALB – Wiedergabe in der richtigen Reihen-
folge der Musiktitel in einem nach dem Zufallsprinzip gewählten Album
! OFF – Kein Abspielen in zufälliger Reihen-
folge
Abspielen aller Musiktitel in zufälliger Reihenfolge
(Shuffle All)
1 Drücken und halten Sie 5/
die Funktion „Shuffle All“ (zufällige Wiedergabe aller Titel) einzuschalten.
! Zum Ausschalten der Funktion „Shuffle All“
wählen Sie OFF im Shuffle-Modus. Für detaillierte Informationen hierzu siehe Auswählen
des zufälligen Wiederholbereichs (Shuffle) auf
Seite 91.
Pausieren der Wiedergabe
1 Drücken Sie 4/PAUSE, um die Wiedergabe an-
zuhalten oder fortzusetzen.
, um zwischen den folgen-
, um zwischen den folgen-
gedrückt, um
Wiedergabe von Musiktiteln mit
Bezug zum momentan
spielenden Titel
Es können Musiktitel der folgenden Listen abgespielt werden:
• Albumliste des momentan spielenden Künstlers
• Musiktitelliste des momentan spielenden Albums
• Albumliste des momentan spielenden MusikGenres
1 Drücken und halten Sie
in den Modus der verknüpften Wiedergabe
umzuschalten.
2 Drehen Sie M.C., um den Modus zu wechseln, und drücken Sie ihn, um den angezeigten Modus zu wählen.
! ARTIST – Wiedergabe eines Albums des mo-
mentan spielenden Künstlers
! ALBUM – Wiedergabe eines Musiktitels
eines Albums des momentan spielenden
Künstlers
! GENRE – Wiedergabe eines Albums aus dem
Genre des momentan spielenden Künstlers
Der ausgewählte Musiktitel bzw. das ausgewählte Album wird nach dem gerade spielenden Musiktitel wiedergegeben.
Hinweise
! Die Wiedergabe des ausgewählten Musikti-
tels/Albums wird ggf. abgebrochen, wenn
Sie eine andere Funktion als die Verbindungssuche (wie z. B. Schnellvorlauf oder
-rücklauf) wählen.
! Je nach dem für die Wiedergabe gewählten
Musiktitel können das Ende des momentan
spielenden Musiktitels und der Anfang des
ausgewählten Musiktitels/Albums abgeschnitten werden.
gedrückt, um
Deutsch
91
De
Page 92

Abschnitt
Gebrauch dieses Geräts
02
Gebrauch dieses Geräts
Verwenden der iPod-Funktionen
dieses Geräts über den iPod
Die iPod-Funktionen dieses Geräts können über
den angeschlossenen iPod gesteuert werden.
CONTROL iPod ist nicht mit den folgenden
iPod-Modellen kompatibel:
! iPod nano der 1. Generation
! iPod mit Videos
% Drücken Sie auf BAND/
Funktionssteuermodus zu wechseln.
! CONTROL iPod – Die iPod-Funktionen dieses
Geräts können über den angeschlossenen
iPod bedient werden.
! CONTROL AUDIO – Die iPod-Funktionen die-
ses Geräts können über das Gerät gesteuert
werden.
Hinweise
! Wenn Sie den Steuermodus auf
CONTROL iPod umschalten, wird die Musiktitelwiedergabe unterbrochen. Verwenden
Sie den iPod, um mit der Wiedergabe fortzufahren.
! Selbst wenn CONTROL iPod als Steuermo-
dus gewählt wurde, können die folgenden
Vorgänge direkt über dieses Gerät vorgenommen werden:
— Pause
— Schnellvorlauf/-rücklauf
— Wahl eines Musiktitels (Kapitels)
! Die Lautstärke kann nur über das Hauptgerät
angepasst werden.
, um in den
Funktionseinstellungen
1 Drücken Sie auf M.C., um das Hauptmenü
anzuzeigen.
2 Drehen Sie M.C., um die Menüoption zu
wechseln, und drücken Sie auf FUNCTION,
um die angezeigte Option zu wählen.
3 Drehen Sie M.C., um die gewünschte
Funktion zu wählen.
Nach der Auswahl können die folgenden Funktionen angepasst werden.
! AUDIO BOOK steht nicht zur Verfügung,
wenn im Steuermodus CONTROL iPod gewählt wurde. Für detaillierte Informationen
hierzu siehe Verwenden der iPod-Funktionen
dieses Geräts über den iPod auf Seite 92.
AUDIO BOOK (Hörbuch-Abspielgeschwindigkeit)
1 Drücken Sie auf M.C., um den Einstellmodus
aufzurufen.
2 Drehen Sie M.C., um die von Ihnen bevorzugte
Einstellung zu wählen.
! FASTER – Schnellere Wiedergabe als nor-
male Wiedergabegeschwindigkeit
! NORMAL – Normale Wiedergabege-
schwindigkeit
! SLOWER – Langsamere Wiedergabe als
normale Wiedergabegeschwindigkeit
S.RTRV (Sound Retriever)
1 Drücken Sie auf M.C., um die gewünschte Ein-
stellung zu wählen.
1—2—OFF (Aus)
1 wirkt bei einem niedrigen und 2 bei einem
hohen Kompressionsfaktor.
Arbeiten mit Anwendungen
angeschlossener Geräte
Dieses Gerät können Sie zur Streaming-Wiedergabe und zum Steuern von Titeln in iPhone-Anwendungen oder nur für die StreamingWiedergabe verwenden.
Wichtig
Die Verwendung von Apps von Dritten kann
eventuell die Angabe personenbezogener
Daten nach sich ziehen oder notwendig machen entweder durch das Eröffnen eines Benutzerkontos o.Ä. und für bestimmte
Anwendungen die Angabe von Geolokationsdaten.
ALLE APPS VON DRITTEN UNTERLIEGEN
DER ALLEINIGEN VERANTWORTUNG DER
ANBIETER EINSCHLIESSLICH UND OHNE
EINSCHRÄNKUNG DEM SAMMELN UND SICHERN DER ANWENDERDATEN UND DATENSCHUTZMASSNAHMEN. DURCH
ZUGRIFF AUF APPS VON DRITTEN ERKLÄREN SIE SICH MIT DEN NUTZUNGSBEDINGUNGEN UND DATENSCHUTZRICHTLINIEN
DER JEWEILIGEN ANBIETER EINVERSTANDEN. WENN SIE DEN NUTZUNGSBEDINGUNGEN UND RICHTLINIEN EINES
ANBIETERS ODER DER VERWENDUNG VON
GEOLOKATIONSDATEN, WO ZUTREFFEND,
NICHT ZUSTIMMEN, DANN SEHEN SIE VON
DER VERWENDUNG VON APPS VON DRITTEN AB.
Informationen zur Kompatibilität
von angeschlossenen Geräten
Im Folgenden finden Sie detaillierte Informationen über die erforderlichen Anschlüsse, um die
Anwendung für das iPhone auf diesem Gerät
verwenden zu können.
Für iPhone-Anwender
! Diese Funktion ist mit dem iPhone und dem
iPod touch kompatibel.
! Das Gerät läuft unter dem iOS-Betriebssys-
tem 5.0 oder höher.
Hinweise
! Besuchen Sie unsere Website, um eine Liste
der unterstützten iPhone-Anwendungen für
dieses Gerät zu erhalten.
! Pioneer übernimmt keine Haftung für jegli-
che von inkorrekten oder fehlerhaften appbasierten Inhalten verursachte Probleme.
! Inhalt und Funktionalität der unterstützten
Anwendungen liegen in der Verantwortlichkeit der App-Anbieter.
Einrichtverfahren für iPhoneAnwender
1 Schließen Sie ein iPhone an den USB-Eingang an.
2 Ändern Sie die Quelle zu APP.
3 Starten Sie die Anwendung auf dem
iPhone, und beginnen Sie mit der Wiedergabe.
Grundlegende Bedienvorgänge
Wahl eines Titels
1 Drücken Sie c oder d.
Schnellvorlauf bzw. -rücklauf
1 Drücken und halten Sie c oder d gedrückt.
Pausieren der Wiedergabe
1 Drücken Sie BAND/
zuhalten oder fortzusetzen.
, um die Wiedergabe an-
92
De
Page 93

Gebrauch dieses Geräts
Gebrauch dieses Geräts
Abschnitt
02
Umschalten der Anzeige
Wählen der gewünschten Textinformationen
1 Drücken Sie auf DISP, um zwischen den fol-
genden Optionen umzuschalten:
! TRACK INFO (Titelname/Künstlername/Al-
bumtitel)
! APP NAME (Anwendungsname)
! ELAPSED TIME (Wiedergabezeit)
! CLOCK (Programmquellname und Uhr)
! SPEANA (Spektralanalysator)
Funktionseinstellungen
1 Drücken Sie auf M.C., um das Hauptmenü
anzuzeigen.
2 Drehen Sie M.C., um die Menüoption zu
wechseln, und drücken Sie auf FUNCTION,
um die angezeigte Option zu wählen.
3 Drehen Sie M.C., um die gewünschte
Funktion zu wählen.
Nach der Auswahl können die folgenden Funktionen angepasst werden.
PAUSE (Pause)
1 Drücken Sie M.C., um die Wiedergabe anzu-
halten oder fortzusetzen.
S.RTRV (Sound Retriever)
1 Drücken Sie auf M.C., um die gewünschte Ein-
stellung zu wählen.
1—2—OFF (Aus)
1 wirkt bei einem niedrigen und 2 bei einem
hohen Kompressionsfaktor.
Audio-Einstellungen
1 Drücken Sie auf M.C., um das Hauptmenü
anzuzeigen.
2 Drehen Sie M.C., um die Menüoption zu
wechseln, und drücken Sie auf AUDIO, um
die angezeigte Option zu wählen.
3 Drehen Sie M.C., um die gewünschte
Audio-Funktion zu wählen.
Nach der Auswahl können die folgenden Audiofunktionen angepasst werden.
! FADER steht nicht zur Verfügung, wenn in
SP-P/O MODE die Option SUB.W/SUB.W ge-
wählt wurde. Für detaillierte Informationen
hierzu siehe SP-P/O MODE (Heckausgang-
und Preout-Einstellungen) auf Seite 96.
! SUB.W und SUB.W CTRL stehen nicht zur
Verfügung, wenn in SP-P/O MODE die Option REAR/REAR gewählt wurde. Für Details
siehe SP-P/O MODE (Heckausgang- und
Preout-Einstellungen) auf Seite 96.
! SUB.W CTRL steht nicht zur Verfügung,
wenn in OFF die Option SUB.W gewählt
wurde. Für Details siehe SUB.W (Subwoofer
Ein/Aus) auf Seite 93.
! SLA steht nicht zur Verfügung, wenn als
Quelle FM gewählt wurde.
FADER (Überblendeinstellung)
1 Drücken Sie auf M.C., um den Einstellmodus
aufzurufen.
2 Drehen Sie M.C., um die Front-/Heck-Lautspre-
cherbalance einzustellen.
BALANCE (Balance-Einstellung)
1 Drücken Sie auf M.C., um den Einstellmodus
aufzurufen.
2 Drehen Sie M.C., um die Links-/Rechts-Laut-
sprecherbalance einzustellen.
EQ SETTING (Equalizer-Abruf)
1 Drücken Sie auf M.C., um den Einstellmodus
aufzurufen.
2 Drehen Sie M.C., um einen Equalizer zu wäh-
len.
POWERFUL—NATURAL—VOCAL—CUSTOM1—CUSTOM2—FLAT—SUPER BASS
Das Equalizer-Band und der Equalizer-Pegel
können individuell angepasst werden, wenn
CUSTOM1 oder CUSTOM2 gewählt ist.
Schließen Sie bei Wahl von CUSTOM1 oder
CUSTOM2 den unten genannten Vorgang ab.
Kehren Sie bei Wahl einer anderen Option
durch Drücken auf M.C. zur vorherigen Anzeige zurück.
! CUSTOM1 kann für jede Quelle separat
eingestellt werden. USB, iPod und APP
sind hingegen automatisch auf die gleiche
Einstellung gesetzt.
! Bei CUSTOM2 handelt es sich um eine ge-
meinsam verwendete Einstellung für alle
Quellen.
3 Drücken Sie auf M.C., um den Einstellmodus
aufzurufen.
4 Drücken Sie M.C., um zwischen den folgenden
Optionen umzuschalten:
Equalizerband—Equalizer-Pegel
5 Drehen Sie M.C., um die gewünschte Einstel-
lung zu wählen.
Equalizer-Band: 80HZ—250HZ—800HZ—
2.5KHZ—8KHZ
Equalizer-Pegel: +6 bis –6
LOUDNESS (Loudness)
Die Loudness-Funktion kompensiert die verminderte Wahrnehmung von niedrigen und hohen
Frequenzen bei geringer Lautstärke.
1 Drücken Sie auf M.C., um die gewünschte Ein-
stellung zu wählen.
OFF (Aus)—LOW (Niedrig)—MID (Mittel)—HI
(Hoch)
SUB.W (Subwoofer Ein/Aus)
Dieses Gerät ist mit einem Subwoofer-Ausgang
ausgestattet, der ein- und ausgeschaltet werden
kann.
1 Drücken Sie auf M.C., um die gewünschte Ein-
stellung zu wählen.
NOR (Normalphase) —REV (Gegenphase)—
OFF (Subwoofer Aus)
SUB.W CTRL (Subwoofer-Einstellungen)
Vom Subwoofer werden nur solche Frequenzen
ausgegeben, die unter dem gewählten Bereich liegen.
1 Drücken Sie auf M.C., um den Einstellmodus
aufzurufen.
2 Drücken Sie M.C., um zwischen den folgenden
Optionen umzuschalten:
Trennfrequenz—Ausgabepegel—Pegelder
Steilheit
Einstellbare Werte blinken.
3 Drehen Sie M.C., um die gewünschte Einstel-
lung zu wählen.
Trennfrequenz: 50HZ—63HZ—80HZ—100HZ
—125HZ—160HZ—200HZ
Ausgangspegel: –24 bis +6
Pegel der Steilheit: –12— –24
BASS BOOST (Bassverstärkung)
1 Drücken Sie auf M.C., um den Einstellmodus
aufzurufen.
2 Drehen Sie M.C., um den gewünschten Pegel
zu wählen.
Während der Erhöhung bzw. Verminderung
des Pegels wird 0 bis +6 angezeigt.
HPF SETTING (Hochpassfilter-Anpassung)
Deutsch
93
De
Page 94

Abschnitt
Gebrauch dieses Geräts
02
Gebrauch dieses Geräts
Verwenden Sie diese Funktion, um nur Hochfrequenztöne anzuhören. Nur Frequenzen, die höher
als die Trennfrequenz des Hochpassfilters (HPF)
sind, werden über die Lautsprecher ausgegeben.
1 Drücken Sie auf M.C., um den Einstellmodus
aufzurufen.
2 Drücken Sie M.C., um zwischen den folgenden
Optionen umzuschalten:
Trennfrequenz—Pegelder Steilheit
3 Drehen Sie M.C., um die gewünschte Einstel-
lung zu wählen.
Trennfrequenz: OFF—50HZ—63HZ—80HZ—
100HZ—125HZ—160HZ—200HZ
Pegel der Steilheit: –12— –24
SLA (Programmquellen-Pegeleinstellung)
Diese Funktion verhindert, dass sich die Lautstärke beim Wechseln der Programmquelle dramatisch ändert.
! Die Einstellungen basieren auf der UKW-Laut-
stärke, die unverändert bleibt.
! Der MW/LW-Lautstärkepegel kann ebenfalls
mit dieser Funktion eingestellt werden.
! USB, iPod und APP sind automatisch auf die
gleiche Einstellung gesetzt.
1 Drücken Sie auf M.C., um den Einstellmodus
aufzurufen.
2 Drehen Sie M.C., um die Lautstärke für die
Programmquelle einzustellen.
Einstellbereich: +4 bis –4
Systemmenü
Wichtig
Die Funktion PW SAVE (Energiesparmodus)
wird deaktiviert, wenn die Fahrzeugbatterie abgeklemmt wird und muss neu aktiviert werden,
sobald die Batterie wieder angeschlossen wird.
Wenn PW SAVE (Energiesparmodus) deaktiviert
ist, kann das Gerät je nach Anschlussart Batterieleistung in Anspruch nehmen, sollte die Zündung des Fahrzeugs über keine ACC-Position
(Zubehörposition) verfügen.
1 Drücken Sie auf M.C., um das Hauptmenü
anzuzeigen.
2 Drehen Sie M.C., um die Menüoption zu
wechseln, und drücken Sie auf SYSTEM, um
die angezeigte Option zu wählen.
3 Drehen Sie M.C., um die SystemmenüFunktion zu wählen.
Nach der Auswahl können die folgenden Systemmenüfunktionen angepasst werden.
LANGUAGE (Spracheinstellung)
Das Gerät kann Textinformationen komprimierter
Audiodateien auch dann anzeigen, wenn sie auf
Englisch, Russisch oder Türkisch aufgezeichnet
wurden.
! Falls die für die Aufzeichnung verwendete
Sprache und die gewählte Spracheinstellung
nicht übereinstimmen, werden die Textinformationen ggf. nicht richtig angezeigt.
! Bestimmte Zeichen werden ggf. nicht ord-
nungsgemäß angezeigt.
1 Drehen Sie M.C., um die gewünschte Einstel-
lung zu wählen.
ENG (Englisch)—РУС (Russisch)—TUR (Türkisch)
CLOCK SET (Einstellen der Uhrzeit)
1 Drücken Sie auf M.C., um den Einstellmodus
aufzurufen.
2 Drücken Sie M.C., um den Teil der Zeitanzeige
zu wählen, der eingestellt werden soll.
Stunden—Minuten
3 Drehen Sie M.C., um die Uhrzeit einzustellen.
12H/24H (Uhrzeitformat)
1 Drücken Sie auf M.C., um die gewünschte Ein-
stellung zu wählen.
12H (12-Stunden-Uhr)—24H (24-Stunden-Uhr)
INFO DISPLAY (Unterinformationsbereich)
Zwischen der Art der Textinformation, die im Unterinformationsbereich angezeigt wird, kann gewechselt werden.
1 Drücken Sie auf M.C., um den Einstellmodus
aufzurufen.
2 Drehen Sie M.C., um die gewünschte Einstel-
lung zu wählen.
SPEANA—LEVEL METER—SOURCE—CLOCK
—OFF
! Wenn als Quelle DIGITAL RADIO oder RADIO
ausgewählt ist, wird bei den Optionen SPEA-
NA und LEVEL METER ein Signalbalken eingeblendet.
AUTO PI (Automatische PI-Suche)
Das Gerät kann selbst bei einem Stationsabruf automatisch nach einer anderen Station mit derselben Programmierung suchen.
1 Drücken Sie M.C., um den Auto-PI-Suchlauf
ein- oder auszuschalten.
AUX (Zusatzeingang)
Aktivieren Sie diese Einstellung, wenn ein zusätzliches, mit diesem Gerät verbundenes Gerät verwendet wird.
1 Drücken Sie M.C.,umAUX ein- oder auszu-
schalten.
DIMMER (Dimmer)
1 Drücken Sie M.C., um den Dimmer ein- bzw.
auszuschalten.
! Sie können die Dimmer-Einstellung auch
durch Drücken und Halten von
ändern.
BRIGHTNESS (Regeln der Helligkeit)
Mithilfe dieser Einstellung können Sie die Helligkeit des Displays anpassen.
Die für BRIGHTNESS verfügbaren Einstellungsbereiche hängen davon ab, ob DIMMER aktiviert
oder deaktiviert ist. Für detaillierte Informationen
hierzu siehe DIMMER (Dimmer) auf Seite 94.
1 Drücken Sie auf M.C., um den Einstellmodus
aufzurufen.
2 Drehen Sie M.C., um die gewünschte Einstel-
lung zu wählen.
DIMMER ein: 1 bis 4
DIMMER aus: 1 bis 5
MUTE MODE (Stummschaltung)
Die Klangwiedergabe dieses Geräts wird automatisch stummgeschaltet oder gedämpft, wenn das
Signal eines Geräts mit Stummschaltung empfangen wird.
1 Drücken Sie auf M.C., um den Einstellmodus
aufzurufen.
2 Drehen Sie M.C., um die gewünschte Einstel-
lung zu wählen.
! MUTE – Stummschaltung
! 20dB ATT – Dämpfung (20dB ATT hat eine
stärkere Wirkung als 10dB ATT)
! 10dB ATT – Dämpfung
PW SAVE (Energiesparmodus)
Wenn Sie diese Funktion einschalten, reduzieren
Sie den Verbrauch von Batterieleistung.
! Bei aktiviertem Energiesparmodus kann nur
die Programmquelle eingeschaltet werden.
1 Drücken Sie M.C., um den Energiesparmodus
ein- oder auszuschalten.
/DIMMER
94
De
Page 95

Gebrauch dieses Geräts
Gebrauch dieses Geräts
Abschnitt
02
Wählen der Beleuchtungsfarbe
Beleuchtungsfunktionsmenü
1 Drücken Sie auf M.C., um das Hauptmenü
anzuzeigen.
2 Drehen Sie M.C., um die Option ILLUMI
zur Anzeige zu bringen, und drücken Sie
dann darauf, um Ihre Auswahl zu bestätigen.
3 Drehen Sie M.C., um die Beleuchtungsfunktion zu wählen.
Nach der Auswahl können die folgenden Audiofunktionen angepasst werden.
KEY COLOUR (Tastenbereich-Farbeinstellung)
Sie können gewünschte Farben für die Tasten dieses Geräts auswählen.
1 Drücken Sie auf M.C., um den Einstellmodus
aufzurufen.
2 Drehen Sie M.C., um die Beleuchtungsfarbe
zu wählen.
! Voreingestellte Farben (von WHITE bis
BLUE)
! SCAN (Automatisches Durchlaufen einer
Vielzahl an Farben)
! CUSTOM (benutzerdefinierte Beleuch-
tungsfarbe)
DISP COLOUR (Displaybereich-Farbeinstellung)
Sie können für das Display dieses Geräts eine gewünschte Farbe auswählen.
1 Drücken Sie auf M.C., um den Einstellmodus
aufzurufen.
2 Drehen Sie M.C., um die Beleuchtungsfarbe
zu wählen.
! Voreingestellte Farben (von WHITE bis
BLUE)
! SCAN (Automatisches Durchlaufen einer
Vielzahl an Farben)
! CUSTOM (benutzerdefinierte Beleuch-
tungsfarbe)
BOTH COLOUR (Tasten- und Displayfarbeinstellung)
Sie können für die Tasten und das Display dieses
Geräts gewünschte Farben auswählen.
1 Drücken Sie auf M.C., um den Einstellmodus
aufzurufen.
2 Drehen Sie M.C., um die Beleuchtungsfarbe
zu wählen.
! Voreingestellte Farben (von WHITE bis
BLUE)
! SCAN (Automatisches Durchlaufen einer
Vielzahl an Farben)
ILLUMI FX (Beleuchtungseffektmodus)
In diesem Modus wird zu unterschiedlichen Zeiten
ein Beleuchtungseffekt auf dem Display angezeigt, z.B. wenn der Zubehörstrom (ACC) ein-/ausgeschaltet oder eine CD eingelegt/ ausgeworfen
wird.
1 Drücken Sie M.C.,umILLUMI FX ein- bzw.
auszuschalten.
! Der Beleuchtungseffekt wird aktiviert, wenn
der Zubehörstrom (ACC) ein-/ausgeschaltet
wird, unabhängig davon, ob die ILLUMI FXEinstellung ein- oder ausgeschaltet ist.
Hinweis
Bei Auswahl von CUSTOM wird die gespeicherte benutzerdefinierte Farbe verwendet.
Individuelle Einstellung der
Beleuchtungsfarbe
Sie können Beleuchtungsfarben für sowohl
KEY COLOUR als auch DISP COLOUR individuell anpassen.
1 Drücken Sie auf M.C., um das Hauptmenü
anzuzeigen.
2 Drehen Sie M.C., um die Option ILLUMI
zur Anzeige zu bringen, und drücken Sie
dann darauf, um Ihre Auswahl zu bestätigen.
3 Drehen Sie M.C., um KEY COLOUR oder
DISP COLOUR zur Anzeige zu bringen. Drücken Sie den Regler, um die Auswahl zu bestätigen.
4 Drücken und halten Sie M.C. gedrückt,
bis die benutzerdefinierte Beleuchtungsfarbeinstellung im Display angezeigt wird.
5 Berühren Sie M.C., um die Grundfarbe zu
wählen.
R (Rot)—G (Grün)—B (Blau)
6 Drehen Sie M.C., um das Helligkeitsniveau einzustellen.
Einstellbereich: 0 bis 60
# Es kann nicht gleichzeitig für alle drei Grundfarben R (Rot), G (Grün) und B (Blau) ein Wert unter 20
gewählt werden.
# Sie können denselben Bedienvorgang auch für
andere Farben ausführen.
Hinweis
Wenn SCAN ausgewählt wurde, kann die Beleuchtungsfarbe nicht vom Anwender angepasst werden.
Über MIXTRAX
Mit der MIXTRAX-Technologie können Sie verschiedene Soundeffekte in den Pausen zwischen den Titeln einblenden, und dadurch einen
Nonstopp-Musikmix mit visuellen Effekten kreieren.
Hinweise
! Je nach Datei/Musiktitel stehen die Soundef-
fekte möglicherweise nicht zur Verfügung.
! Deaktivieren Sie MIXTRAX, wenn die dabei
kreierten visuellen Effekte den Fahrer beeinträchtigen. Siehe Bedienung mithilfe der
MIXTRAX-Taste auf Seite 90.
MIXTRAX-Menü
1 Drücken Sie auf M.C., um das Hauptmenü
anzuzeigen.
2 Drehen Sie M.C., um die Menüoption zu
wechseln, und drücken Sie auf MIXTRAX, um
die angezeigte Option zu wählen.
3 Drehen Sie M.C., um die MIXTRAX-Funktion zu wählen.
Nach der Auswahl können die folgenden MIXTRAX-Funktionen angepasst werden. Diese Funktion ist aktiviert, wenn MIXTRAX eingeschaltet
ist.
SHORT PLAYBCK (Kurzwiedergabemodus)
Sie können die Länge der Wiedergabedauer wählen.
1 Drücken Sie auf M.C., um den Einstellmodus
aufzurufen.
2 Drehen Sie M.C., um die gewünschte Einstel-
lung zu wählen.
1.0 MIN (1,0 Minuten)—1.5 MIN (1,5 Minuten)
—2.0 MIN (2,0 Minuten)—2.5 MIN (2,5 Minu-
ten)—3.0 MIN (3,0 Minuten)—OFF (Aus)
FLASH AREA (Blinkbereich)
Deutsch
95
De
Page 96

Abschnitt
Gebrauch dieses Geräts
02
Gebrauch dieses Geräts
Es kann festgelegt werden, für welche Optionen
die blinkenden Farben angezeigt werden.
1 Drücken Sie auf M.C., um den Einstellmodus
aufzurufen.
2 Drehen Sie M.C., um die gewünschte Einstel-
lung zu wählen.
KEY/DISPLAY (Taste und Anzeige)—KEY
(Taste)—OFF (Aus)
! Bei der Wahl von OFF wird die für ILLUMI aus-
gewählte Farbe als Anzeigefarbe verwendet.
FLASH PATTERN (Blinkmuster)
Die blinkende Farbe und MIXTRAX-Sondereffektanzeige ändern sich aufgrund von Änderungen
der Lautstärke und des Bass-Pegels.
1 Drücken Sie auf M.C., um den Einstellmodus
aufzurufen.
2 Drehen Sie M.C., um die gewünschte Einstel-
lung zu wählen.
! SOUND LEVEL 1 bis SOUND LEVEL 6 –
Das Blinkmuster ändert sich entsprechend
der Lautstärke. Wählen Sie den gewünschten Modus.
! LOW PASS 1 bis LOW PASS 6 – Das Blink-
muster ändert sich entsprechend dem
Bass-Pegel. Wählen Sie den gewünschten
Modus.
! RANDOM 1 – Das Blinkmuster ändert sich
zufällig je nach Lautstärkemodus und Tiefpassmodus.
! RANDOM 2 – Das Blinkmuster ändert sich
zufällig je nach Lautstärkemodus.
! RANDOM 3 – Das Blinkmuster ändert sich
zufällig je nach Tiefpassmodus.
DISPLAY FX (Anzeigeeffekte)
Die MIXTRAX-Sondereffekte können ein- und ausgeschaltet werden.
1 Drücken Sie auf M.C., um die gewünschte Ein-
stellung zu wählen.
ON (MIXTRAX-Sondereffektanzeige)—OFF
(normale Anzeige)
CUT IN FX (manuelle Einblendeffekte)
Die MIXTRAX-Soundeffekte können beim manuel-
len Wechseln der Titel aus- oder eingeschaltet
werden.
1 Drücken Sie auf M.C., um die gewünschte Ein-
stellung zu wählen.
ON (Ein)—OFF (Aus)
Grundmenü
1 Drücken und halten Sie SRC/OFF gedrückt, bis sich das Gerät ausschaltet.
2 Drücken und halten Sie SRC/OFF gedrückt, bis das Hauptmenü im Display erscheint.
3 Drehen Sie M.C., um die Menüoption zu
wechseln, und drücken Sie auf INITIAL, um
die angezeigte Option zu wählen.
4 Drehen Sie M.C., um die GrundmenüFunktion zu wählen.
Nach der Auswahl können die folgenden Grundmenüfunktionen angepasst werden.
FM STEP (UKW-Kanalraster)
1 Drücken Sie M.C., um die UKW-Kanalraster-
Funktion zu wählen.
100 (100 kHz)—50 (50kHz)
SP-P/O MODE (Heckausgang- und Preout-Einstel-
lungen)
Der Hecklautsprecher-Leitungsausgang und
Cinch-Ausgang dieses Geräts können zum Anschluss eines Vollbereichslautsprechers oder Subwoofers verwendet werden. Wählen Sie für Ihren
Anschluss eine geeignete Option.
1 Drücken Sie auf M.C., um den Einstellmodus
aufzurufen.
2 Drehen Sie M.C., um die gewünschte Einstel-
lung zu wählen.
! REAR/SUB.W – Wählen Sie diese Option,
wenn ein Vollbereichslautsprecher an den
Hecklautsprecher-Leitungsausgang und
ein Subwoofer an den Cinch-Ausgang angeschlossen ist.
! SUB.W/SUB.W – Wählen Sie diese Option,
wenn ein Subwoofer an den Hecklautsprecher-Leitungsausgang ohne Verwendung
eines zusätzlichen Verstärkers und ein Subwoofer an den Cinch-Ausgang angeschlossen ist.
! REAR/REAR – Wählen Sie diese Option,
wenn ein Vollbereichslautsprecher an den
Hecklautsprecher-Leitungsausgang und
den Cinch-Ausgang angeschlossen ist.
Wenn ein Vollbereichslautsprecher an den
Hecklautsprecher-Leitungsausgang angeschlossen ist und der Cinch-Ausgang nicht
verwendet wird, können Sie entweder
REAR/SUB.W oder REAR/REAR auswählen.
DAB ANT PW (Stromversorgungseinstellung für
DAB-Antenne)
1 Drücken Sie auf M.C., um die gewünschte Ein-
stellung zu wählen.
! ON – Verwenden Sie diese Option, damit
eine DAB-Antenne mit Strom versorgt wird
und wenn eine optionale DAB-Antenne
(AN-DAB1, als Sonderzubehör erhältlich)
mit diesem Gerät verwendet wird.
! OFF – Verwenden Sie diese Option, um die
Stromversorgung zu deaktivieren und
wenn eine passive Antenne ohne Verstärker genutzt wird.
Systemmenü
1 Drücken und halten Sie SRC/OFF gedrückt, bis sich das Gerät ausschaltet.
2 Drücken und halten Sie SRC/OFF gedrückt, bis das Hauptmenü im Display erscheint.
3 Drehen Sie M.C., um die Menüoption zu
wechseln, und drücken Sie auf SYSTEM, um
die angezeigte Option zu wählen.
4 Drehen Sie M.C., um die SystemmenüFunktion zu wählen.
Für detaillierte Informationen hierzu siehe Systemmenü auf Seite 94.
Verwendung der AUXProgrammquelle
1 Verbinden Sie den Stereo-Mini-Klinkenstecker mit dem AUX-Eingang.
2 Drücken Sie die Taste SRC/OFF, um AUX
als Programmquelle zu wählen.
96
De
Page 97

Gebrauch dieses Geräts
Installation
Abschnitt
02
Hinweis
AUX kann nur gewählt werden, wenn die AUXEinstellung eingeschaltet wurde. Für weitere
Einzelheiten siehe AUX (Zusatzeingang) auf
Seite 94.
Umschalten der Anzeige
Wählen der gewünschten Textinformationen
1 Drücken Sie auf DISP, um zwischen den fol-
genden Optionen umzuschalten:
! Programmquellenname
! Programmquellname und Uhr
Bei Anzeige einer
unerwünschten Anzeige
Schalten Sie die unerwünschte Anzeige anhand
des unten beschriebenen Vorgangs aus.
1 Drücken Sie auf M.C., um das Hauptmenü
anzuzeigen.
2 Drehen Sie M.C., um die Menüoption zu
wechseln, und drücken Sie auf SYSTEM, um
die angezeigte Option zu wählen.
3 Drehen Sie M.C., um die Option
DEMO OFF zur Anzeige zu bringen, und drücken Sie dann darauf, um Ihre Auswahl zu
bestätigen.
4 Drehen Sie M.C., um zu YES umzuschalten.
5 Drücken Sie zur Auswahl M.C.
Anschlüsse
Wichtig
! Bei der Installation des Geräts in einem
Kraftfahrzeug, das am Zündschalter keine
Position ACC aufweist, kann es je nach Anschlusstyp zu einer Entleerung der Fahrzeugbatterie kommen, wenn das rote Kabel nicht
mit dem Anschluss verbunden wurde, der
für die Erkennung des Zündschlüsselbetriebs verantwortlich ist.
O
F
N
F
O
S
T
A
R
T
Zündung mit Position
ACC
! Der Einsatz dieses Geräts in einer anderen
als der nachstehend angegebenen Betriebsumgebung kann einen Brand auslösen oder
eine Funktionsstörung zur Folge haben:
— Kraftfahrzeuge mit 12-Volt-Batterie und nega-
tiver Erdung.
— Lautsprecher mit 50 W (Ausgabe) und 4 W bis
8 W (Impedanz).
! Um Kurzschluss, Überhitzung oder Funk-
tionsstörungen zu vermeiden, halten Sie sich
stets an die nachstehend aufgeführten Anweisungen:
— Trennen Sie die Verbindung zur negativen An-
schlussklemme der Fahrzeugbatterie, bevor
Sie das Gerät installieren.
— Sichern Sie die Kabel mit Kabelklemmen
oder Klebeband. Zum Schutz der Verkabelung sollten die Kabel an allen Stellen, an
denen sie mit Metallteilen in Berührung kommen, mit Isolierband umwickelt werden.
— Bringen Sie die Kabel in sicherer Entfernung
von beweglichen Fahrzeugkomponenten, wie
z. B. Schalthebel und Sitzschienen, an.
— Bringen Sie die Kabel in größtmöglicher Ent-
fernung von Stellen an, die sich erhitzen, wie
z. B. die Heizungsöffnung.
Zündung ohne Posi-
tion ACC
— Führen Sie das gelbe Batteriekabel nicht
durch ein Loch in den Motorraum, um die
Verbindung mit der Fahrzeugbatterie herzustellen.
— Kleben Sie freie Kabelanschlüsse mit Isolier-
band ab.
— Kürzen Sie die Kabel nicht.
— Entfernen Sie niemals die Isolierung des
Stromkabels dieses Geräts, um die Stromzufuhr mit einem anderen Gerät zu teilen. Dadurch wird die Stromversorgungsleistung des
Kabels beeinträchtigt.
— Verwenden Sie eine Sicherung, die den vorge-
gebenen Leistungsmerkmalen entspricht.
— Verdrahten Sie das negative Lautsprecherka-
bel niemals direkt mit der Erde.
— Gruppieren Sie niemals die negativen Kabel
mehrerer Lautsprecher.
! Wenn dieses Gerät eingeschaltet wird, liegen
Steuersignale am blau/weißen Kabel an. Verbinden Sie dieses Kabel mit der Systemfernbedienung eines externen
Leistungsverstärkers oder der Steuerklemme
des Automatikantennenrelais des Kraftfahrzeugs (max. 300 mA, 12 V Gleichspannung).
Wenn das Fahrzeug mit einer in die Heckscheibe integrierten Radioantenne ausgestattet ist, verbinden Sie das Kabel mit der
Versorgungsklemme des Antennenboosters.
! Verbinden Sie das blau/weiße Kabel niemals
mit der Leistungsklemme des externen Leistungsverstärkers. Darüber hinaus darf das
Kabel keinesfalls mit der Leistungsklemme
der Fahrzeugantenne verbunden werden. Andernfalls kann es zu einer Entleerung oder
Funktionsstörung der Fahrzeugbatterie kommen.
03
Deutsch
97
De
Page 98

5 67
d
Abschnitt
03
Installation
Installation
! Das schwarze Kabel gewährleistet die Er-
dung. Dieses Kabel wie auch die Erdungskabel anderer Produkte (insbesondere von
Hochstromprodukten wie Leistungsverstärker) müssen separat verdrahtet werden. Anderenfalls kann es zu einem Brand oder
einer Funktionsstörung kommen, wenn sich
die Kabel versehentlich lösen.
Dieses Gerät
1
2
1 DAB-Antenneneingang
Um DAB-Signale empfangen zu können,
schließen Sie eine separat erhältliche DABAntenne (AN-DAB1) an diese Einheit an.
Stellen Sie für einen verbesserten DAB-Empfang sicher, dass eine DAB-Antenne mit
Phantomspeisung (aktiver Typ) verwendet
wird. Pioneer empfiehlt den Gebrauch von
„AN-DAB1“ (separat erhältlich). Die Leistungsaufnahme der DAB-Antenne sollte
100 mA oder weniger betragen.
2 Netzkabelzugang
3 Heck- oder Subwooferausgang
4 Frontausgang
5 Antenneneingang
6 Sicherung (10 A)
7 Eingang der festverdrahteten Fernbedienung
Es besteht die Möglichkeit, einen (separat erhältlichen) festverdrahteten Fernbedienungsadapter anzuschließen.
98
De
Netzkabel
3
4
1
c
3
556
8
9
6
4
a
b
2
3
4
7
e
1 Zum Netzzugang
2 Je nach Fahrzeugtyp können die Funktionen
3 und 5 variieren. Stellen Sie in diesem Fall
sicher, dass der Anschluss von 4 nach 5
und 6 nach 3 erfolgt.
3 Gelb
Reserveversorgung (oder Zubehör)
4 Gelb
Verbindung mit der Klemme der konstanten
12-V-Spannungsversorgung.
5 Rot
Zubehör (oder Reserveversorgung)
6 Rot
Verbindung mit der Klemme der zündungsgesteuerten Spannungsversorgung (12 V
Gleichspannung).
7 Verbinden Sie jeweils Anschlüsse derselben
Farbe miteinander.
8 Schwarz (Fahrgestell-Erdung)
9 Blau/Weiß
Die Pin-Position des ISO-Anschlusses variiert
je nach Fahrzeugtyp. Wird Pin 5 zur Steuerung der Antenne verwendet, verbinden Sie
9 und b. Verbinden Sie in jedem anderen
Fahrzeugtyp niemals 9 und b.
a Blau/Weiß
Verbindung mit der Systemsteuerungsklemme des Leistungsverstärkers (max. 300 mA,
12 V Gleichspannung).
b Blau/Weiß
Verbindung mit der Steuerungsklemme des
Automatikantennenrelais (max. 300mA 12 V
Gleichspannung).
c Gelb/Schwarz
Wenn Sie ein Gerät mit Stummschaltfunktion verwenden, verbinden Sie diesen Draht
mit dem Draht der Audio-Stummschaltung
dieses Geräts. Andernfalls sollte der Draht
der Audio-Stummschaltung (Mute) frei bleiben.
d Lautsprecherkabel
Weiß: Vorn links +
Weiß/Schwarz: Vorn links *
Grau: Vorn rechts +
Grau/Schwarz: Vorn rechts *
Grün: Hinten links + oder Subwoofer +
Grün/Schwarz: Hinten links * oder Subwoofer *
Violett: Hinten rechts + oder Subwoofer +
Violett/Schwarz: Hinten rechts * oder Subwoofer *
e ISO-Anschluss
Bei manchen Fahrzeugtypen kann der ISOAnschluss zweigeteilt sein. Stellen Sie in diesem Fall sicher, dass zu beiden Anschlüssen
Verbindungen hergestellt werden.
Hinweise
! Ändern Sie das Grundeinstellmenü dieses
Geräts. Siehe SP-P/O MODE (Heckausgang-
und Preout-Einstellungen) auf Seite 96.
Die Subwoofer-Ausgabe dieses Geräts erfolgt
in Mono.
! Bei Verwendung eines 70-W-Subwoofers
(2 W) muss sichergestellt werden, dass der
Subwoofer am violetten und violett/schwarzen-Anschluss dieses Geräts angeschlossen
wird. Schließen Sie nichts an den grünen
und grün/schwarzen-Anschluss an.
Leistungsverstärker (separat
erhältlich)
Führen Sie diese Verkabelungen beim Gebrauch
eines optionalen Verstärkers durch.
1
1
1 Systemfernbedienung
Verbindung mit blau/weißem Kabel.
2 Leistungsverstärker (separat erhältlich)
3 Verbindung mit Cinch-Kabeln (separat er-
hältlich)
4 Zum Frontausgang
5 Vorderer Lautsprecher
6 Zum Heck- oder Subwooferausgang
7 Hecklautsprecher oder Subwoofer
3
2
55
3
2
77
4
6
Installation
Wichtig
! Überprüfen Sie vor der endgültigen Installa-
tion alle Anschlüsse und Systeme.
! Die Verwendung nicht zugelassener Teile
kann eine Funktionsstörung zur Folge haben.
! Wenden Sie sich an Ihren Fachhändler, wenn
für die Installation Löcher gebohrt oder andere Änderungen am Fahrzeug vorgenommen
werden müssen.
Page 99

5cmcm
Installation
Installation
Abschnitt
03
! Installieren Sie dieses Gerät keinesfalls an
folgenden Orten:
— Orte, an denen das Gerät die Steuerung des
Fahrzeugs behindern könnte.
— Orte, an denen das Gerät die Insassen des
Fahrzeugs im Anschluss an eine Schnellbremsung verletzen könnte.
! Der Halbleiterlaser kann durch Überhitzung
beschädigt werden. Installieren Sie dieses
Gerät deshalb in sicherer Entfernung von Hitzequellen, wie z.B. Heizöffnungen.
! Optimale Leistung kann durch eine Installa-
tion des Geräts in einem Winkel unter 60° erzielt werden.
60°
! Um beim Gebrauch des Geräts eine ord-
nungsgemäße Wärmezerstreuung zu gewährleisten, ist bei der Installation genügend
Freiraum hinter der Rückseite vorzusehen.
Lose Kabel sind aufzuwickeln, damit sie die
Lüftung nicht behindern.
Reichlich Platz lassen
5 cm
5 cm
Front-/Rückmontage nach DIN
Dieses Gerät kann sowohl über die Front- als
auch über die Rückmontage installiert werden.
Verwenden Sie für die Montage im Handel erhältliches Zubehör.
DIN-Frontmontage
1 Führen Sie den Montagerahmen in das
Armaturenbrett ein.
Verwenden Sie den mitgelieferten Montagerahmen, wenn bei der Installation wenig Platz zur
Verfügung steht. Bei ausreichendem Platz kann
der mit dem Fahrzeug mitgelieferte Montagerahmen verwendet werden.
2 Befestigen Sie den Montagerahmen mithilfe eines Schraubendrehers: Die Metallklammern sind in eine sichere Position (90°)
zu biegen.
1
2
1 Armaturenbrett
2 Montagerahmen
# Stellen Sie sicher, dass das Gerät fest angebracht
ist. Ein instabiler Einbau kann zum Aussetzen von
Tönen führen oder andere Fehlfunktionen verursachen.
DIN-Rückmontage
1 Bestimmen Sie die geeignete Position,
damit die Löcher an der Klammer und den
Geräteseiten ordnungsgemäß ausgerichtet
sind.
2 Ziehen Sie auf jeder Seite zwei Schrauben fest.
1
2
1 Blechschraube (5 × 8 mm)
2 Montageklammer
3 Armaturenbrett oder Konsole
3
Entfernen des Geräts
1 Entfernen Sie den Einpassungsring.
1 Einpassungsring
2 Aussparung
! Bei entriegelter Bedienfläche lässt sich der
Einpassungsring einfacher erreichen.
! Halten Sie beim Wiederanbringen des Ein-
passungsrings die Seite mit der Aussparung
nach unten.
2 Führen Sie die mitgelieferten Extraktionsschlüssel an beiden Geräteseiten ein,
bis sie in der richtigen Position einrasten.
3 Ziehen Sie das Gerät aus dem Armaturenbrett.
Abnehmen und Wiederanbringen der
Frontplatte
Sie können die Frontplatte zum Schutz vor Diebstahl abnehmen.
Detaillierte Informationen hierzu finden Sie
unter Abnehmen der Frontplatte und Wiederan-
bringen der Frontplatte auf Seite 86.
Deutsch
99
De
Page 100

Anhang
Zusätzliche Informationen
Zusätzliche Informationen
Fehlerbehebung
Symptome sind in Fett, Ursachen in normalem,
nicht eingerückten Text und Abhilfemaßnahmen
in normalem, eingerückten Text geschrieben.
Das Display schaltet automatisch in die normale
Anzeige um.
Sie haben keinen Bedienvorgang innerhalb von 30
Sekunden durchgeführt.
Wiederholen Sie den Vorgang.
Der Wiederholbereich ändert sich unerwartet.
Ja nach Wiederholbereich kann sich der ausgewählte Bereich ändern, sobald ein anderer Ordner oder
Musiktitel ausgewählt wird oder während des
schnellen Vor- und Rücklaufs.
Wählen Sie den Wiederholbereich erneut aus.
Ein Unterordner wird nicht wiedergegeben.
Unterordner können nicht wiedergegeben werden,
wenn FLD (Ordner-Wiederholung) ausgewählt ist.
Wählen Sie einen anderen Wiederholbereich.
NO XXXX erscheint, wenn sich die Anzeige ändert (z. B. NO TITLE).
Es sind keine Textinformationen eingebettet.
Schalten Sie die Anzeige um oder spielen Sie
einen anderen Titel bzw. eine andere Datei ab.
Im Gerät ist eine Fehlfunktion aufgetreten.
Es liegen Funkstörungen vor.
Sie verwenden ein Gerät, wie z. B. ein Mobiltelefon,
welches Störgeräusche verursachen könnte.
Lassen Sie einen ausreichenden Abstand
zwischen dieser Einheit und den Geräten, die die
Funkstörung verursachen.
Fehlermeldungen
Vor der Kontaktaufnahme mit Ihrem Händler
oder der nächstgelegenen Pioneer-Kundendienststelle sollten Sie sich die angezeigte Fehlermeldung notieren.
Symptome sind in Fett, Ursachen in normalem,
nicht eingerückten Text und Abhilfemaßnahmen
in normalem, eingerückten Text geschrieben.
Allgemeines
AMP ERROR
Betriebsstörung des Geräts oder falsche Lautsprecherverbindung; Schutzschaltung ist aktiviert.
Überprüfen Sie die Lautsprecherverbindung.
Wenn die Meldung selbst nach dem Aus-/
Einschalten des Motors weiterhin angezeigt wird,
wenden Sie sich zur Unterstützung an Ihren
Händler oder eine Pioneer-Kundendienststelle.
DAB-Tuner
ANTENNA ERROR
Die Antennenverbindung ist inkorrekt.
Überprüfen Sie die Antennenverbindung. Wenn
die Meldung selbst nach dem Aus-/Einschalten
des Motors weiterhin angezeigt wird, wenden Sie
sich zur Unterstützung an Ihren Händler oder
eine Pioneer-Kundendienststelle.
CD-Player
ERROR-07, 11, 12, 17, 30
Die Disc ist verschmutzt.
Reinigen Sie die Disc.
Die Disc ist verkratzt.
Wechseln Sie die Disc aus.
ERROR-07, 10, 11, 12, 15, 17, 30, A0
Es liegt ein elektrischer oder mechanischer Fehler
vor.
Schalten Sie die Zündung aus (OFF) und wieder
ein (ON) oder schalten Sie auf eine andere
Programmquelle um und dann wieder zum CDPlayer zurück.
ERROR-15
Die eingelegte Disc ist leer.
Wechseln Sie die Disc aus.
ERROR-23
Nicht unterstütztes CD-Format.
Wechseln Sie die Disc aus.
FORMAT READ
Nach dem Wiedergabestart ist der Ton in manchen
Fällen erst nach einer Verzögerung zu hören.
Warten Sie bis die Anzeige erlischt und Sie einen
Ton hören.
NO AUDIO
Die eingelegte Disc enthält keine abspielbaren Dateien.
Wechseln Sie die Disc aus.
SKIPPED
Die eingelegte Disc enthält Dateien mit DRM-Schutz
(digitale Rechteverwaltung).
Die geschützten Dateien werden übersprungen.
PROTECT
Alle Dateien auf der eingelegten Disc weisen einen
DRM-Schutz (digitale Rechteverwaltung) auf.
Wechseln Sie die Disc aus.
USB-Speichermedium/iPod
FORMAT READ
Nach dem Wiedergabestart ist der Ton in manchen
Fällen erst nach einer Verzögerung zu hören.
Warten Sie bis die Anzeige erlischt und Sie einen
Ton hören.
NO AUDIO
Es sind keine Musiktitel vorhanden.
Übertragen Sie die Audio-Dateien auf das USBSpeichermedium und schließen Sie das Gerät
dann an.
Es wurde ein USB-Speichermedium mit aktivierter
Sicherheitsfunktion angeschlossen.
Halten Sie sich an die Anweisungen in der
Bedienungsanleitung des USBSpeichermediums, um die Sicherheitsfunktion
zu deaktivieren.
SKIPPED
Das verbundene USB-Speichermedium enthält Dateien mit DRM-Schutz.
Die geschützten Dateien werden übersprungen.
PROTECT
Alle Dateien auf dem verbundenen USB-Speichermedium sind mit DRM geschützt.
Tauschen Sie das USB-Speichermedium aus.
N/A USB
Das angeschlossene USB-Gerät wird von diesem
Gerät nicht unterstützt.
! Schließen Sie ein dem Standard USBMassenspeicher-Klasse entsprechendes Gerät
an.
! Trennen Sie das Gerät ab und schließen Sie ein
kompatibles USB-Speichermedium an.
100
De
 Loading...