

Page 1

Multi-CD control High power CD player
with FM/AM tuner
Syntoniseur FM/AM et lecteur de CD,“Puissance élevée”,
avec contrôleur pour lecteur de CD à chargeur
Operation Manual
DEH-P430
DEH-P330
Mode d’emploi
ENGLISH
FRANÇAIS DEUTSCH FRANÇAIS
ITALIANO NEDERLANDS
Page 2

1
Contents
Dear Customer ............................................ 3
Key Finder .................................................... 4
-
Head Unit
-
Remote Controller
Before Using This Product ...................... 5
About This Product .......................................... 5
About This Manual ............................................ 5
Important .......................................................... 5
Precaution .......................................................... 5
After-sales Service for Pioneer Products .......... 6
When using the 50-Disc Type
Multi-CD Player ........................................ 6
About the XM READY Mark .......................... 6
Remote Controller and Care .................... 7
Using the Remote Controller ............................ 7
Battery .............................................................. 7
Basic Operation ........................................ 8
To Listen to Music ............................................ 8
Basic Operation of Tuner ................................ 10
-
Manual and Seek Tuning
-
Preset Tuning
-
Band
Basic Operation of Built-in CD Player .......... 11
-
Switching the Display
-
Open
-
Track Search and Fast Forward/Reverse
-
CD Loading Slot
-
Eject
Basic Operation of Multi-CD Player .............. 13
-
Track Search and Fast Forward/Reverse
-
Disc Search
-
Disc Number Search
(for 6-Disc, 12-Disc types)
Corresponding Display Indications and
Buttons .................................................... 14
Entering the Function Menu ............................ 14
Function Menu Functions ................................ 15
Entering the Detailed Setting Menu ................ 16
Detailed Setting Menu Functions .................... 17
PGM Button Functions .................................... 17
Tuner Operation ...................................... 18
-
Local Seek Tuning (LOCAL)
-
Best Stations Memory (BSM)
Using the Built-in CD Player .................. 19
-
Repeat Play (REPEAT)
-
Random Play (RANDOM)
-
Scan Play (T-SCAN)
-
Pause (PAUSE)
-
Disc Title Input (TITLE IN)
Using Multi-CD Players .......................... 21
-
Repeat Play (REPEAT)
-
Random Play (RANDOM)
-
Scan Play (SCAN)
-
Pause (PAUSE)
ITS (Instant Track Selection) .......................... 23
-
ITS Programming (ITS)
-
ITS Play (ITS-P)
-
Erase a Track Program
-
Erase a Disc Program
Disc Title ........................................................ 25
-
Disc Title Input (TITLE IN)
-
Selecting Discs by Disc Title List
(TITLE LIST)
-
Displaying Disc Title
Compression and DBE (COMP) .................... 27
-
COMP/DBE ON/OFF Switching
CD TEXT Function (for CD TEXT
compatible type) ...................................... 28
-
Title Display Switching
-
Title Scroll
Page 3

Audio Adjustment .................................... 29
Setting the Sound Focus Equalizer (SFEQ) .... 29
-
About the Sound Focus Equalizer (SFEQ)
Selecting the Equalizer Curve ........................ 30
-
About the Custom Curves
Entering the Audio Menu ................................ 31
Audio Menu Functions .................................... 31
-
Balance Adjustment (FADER)
-
Equalizer Curve Adjustment
(EQ-LOW/EQ-MID/EQ-HIGH)
-
Equalizer Curve Fine Adjustment
-
Bass Adjustment (BASS)
-
Treble Adjustment (TRE)
-
Loudness Adjustment (LOUD)
-
Subwoofer Output (SUB.W)
-
Subwoofer Setting Adjustment (80HZ 0)
-
Non Fading Output (NON FAD)
-
Non Fading Output Level Adjustment
(NON FAD)
-
High Pass Filter (HPF)
-
Source Level Adjustment (SLA)
Detaching and Replacing the
Front Panel .......................................... 39
Theft Protection .............................................. 39
-
Detaching the Front Panel
-
Replacing the Front Panel
-
Warning Tone
Initial Setting ............................................ 40
Entering the Initial Setting Menu .................... 40
Initial Setting Menu Functions ........................ 41
-
Setting the Time
-
Setting the Warning Tone (WARN)
-
Switching the AUX Mode (AUX)
-
Setting the Dimmer (DIMMER)
-
Setting the Rear Output and Subwoofer
Controller (REAR SP)
Other Functions ........................................ 43
Displaying the Time ........................................ 43
Using the AUX Source .................................... 43
-
Selecting the AUX Source
-
AUX Title Input (TITLE IN)
CD Player and Care .................................. 44
Precaution ........................................................ 44
Built-in CD Player’s Error Message .............. 45
Specifications .......................................... 46
2
ENGLISH ESPAÑOL DEUTSCH FRANÇAIS
ITALIANO NEDERLANDS
Page 4

3
Selecting fine audio equipment such as the unit you’ve just purchased is only the start of your
musical enjoyment. Now it’s time to consider how you can maximize the fun and excitement your
equipment offers. This manufacturer and the Electronic Industries Association’s Consumer
Electronics Group want you to get the most out of your equipment by playing it at a safe level.
One that lets the sound come through loud and clear without annoying blaring or distortion—and,
most importantly, without affecting your sensitive hearing.
Sound can be deceiving. Over time your hearing “comfort level” adapts to higher volumes of
sound. So what sounds “normal” can actually be loud and harmful to your hearing. Guard against
this by setting your equipment at a safe level BEFORE your hearing adapts.
To establish a safe level:
• Start your volume control at a low setting.
• Slowly increase the sound until you can hear it comfortably and clearly, and without distor-
tion.
Once you have established a comfortable sound level:
• Set the dial and leave it there.
Taking a minute to do this now will help to prevent hearing damage or loss in the future. After all,
we want you listening for a lifetime.
W e Want You Listening For A Lifetime
Used wisely, your new sound equipment will provide a lifetime of fun and enjoyment. Since
hearing damage from loud noise is often undetectable until it is too late, this manufacturer and the
Electronic Industries Association’s Consumer Electronics Group recommend you avoid prolonged exposure to excessive noise. This list of sound levels is included for your protection.
Decibel
Level Example
30 Quiet library, soft whispers
40 Living room, refrigerator, bedroom away from traffic
50 Light traffic, normal conversation, quiet office
60 Air conditioner at 20 feet, sewing machine
70 Vacuum cleaner, hair dryer, noisy restaurant
80 Average city traffic, garbage disposals, alarm clock at two feet.
THE FOLLOWING NOISES CAN BE DANGEROUS UNDER CONSTANT EXPOSURE
90 Subway, motorcycle, truck traffic, lawn mower
100 Garbage truck, chain saw, pneumatic drill
120 Rock band concert in front of speakers, thunderclap
140 Gunshot blast, jet plane
180 Rocket launching pad
Information courtesy of the Deafness Research Foundation.
Page 5
Key Finder
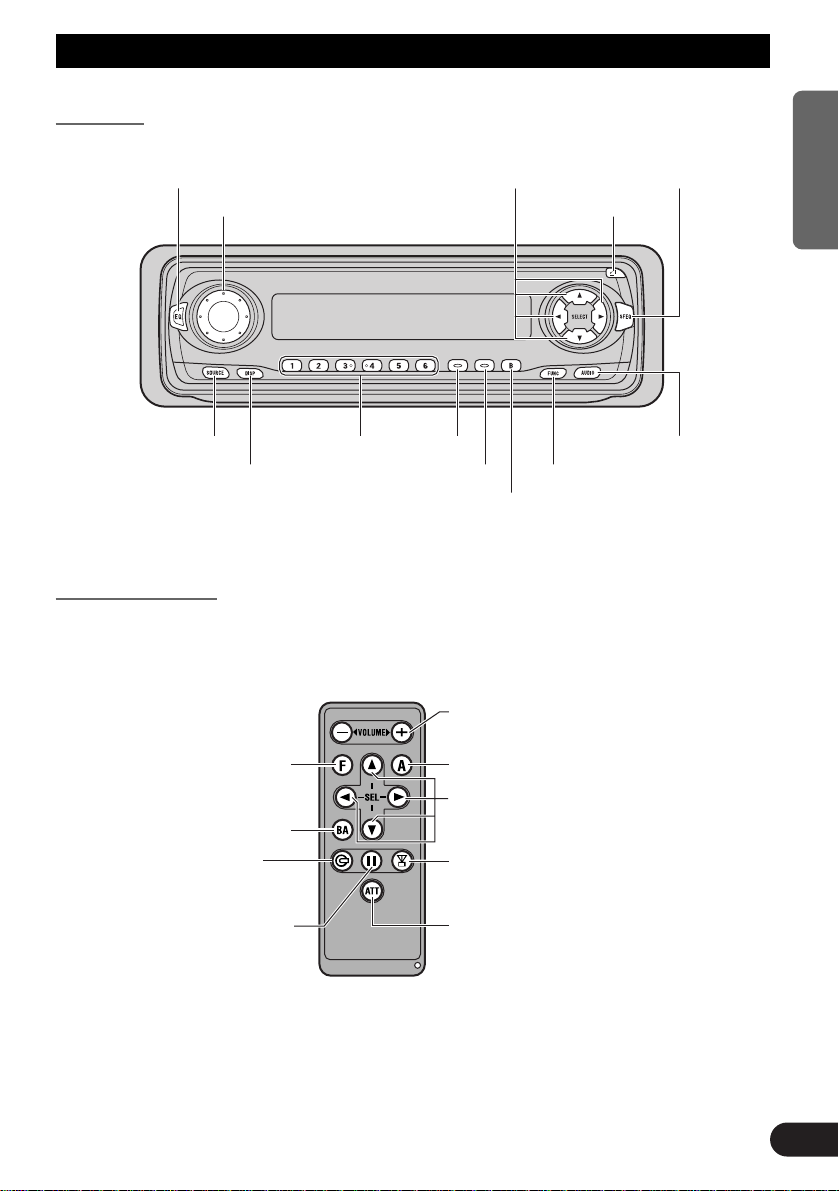
Head Unit
Remote Controller
A remote controller that enables remote operation of the head unit is supplied. Operation is
the same as when using buttons on the head unit.
4
ENGLISH ESPAÑOL DEUTSCH FRANÇAIS
ITALIANO NEDERLANDS
EQ button
VOLUME
OPEN button
AUDIO button
SFEQ button
5/∞/2/3 buttons
BAND button
Buttons 1–6
FUNCTION button
DISPLAY button
CLOCK button
PGM buttonSOURCE button
+/– button
Raise or lower the volume.
AUDIO button
FUNCTION button
5/∞/2/3 buttons
TUNER button
Press once to
select a tuner.
ATT button
This lets you quickly
lower volume level
(by about 90%). Press
once more to return to
the original volume
level.
BAND button
CD button
Press once to
select a CD.
PAUSE button
Press once to
pause play.
Page 6

About This Product
The tuner frequencies on this product are allocated for use in North America. Use in other
areas may result in improper reception.
About This Manual
This product features a number of sophisticated functions ensuring superior reception and
operation. All are designed for the easiest possible use, but many are not self-explanatory.
This operation manual is intended to help you benefit fully from their potential and to
maximize your listening enjoyment.
We recommend that you familiarize yourself with the functions and their operation by
reading through the manual before you use this product. It is especially important that you
read and observe the “Precaution” on this page and in other sections.
This manual explains head unit operation. You can perform the same operations with the
remote controller.
Important
The serial number of this device is located on the bottom of this product. For your own
security and convenience, be sure to record this number on the enclosed warranty card.
Precaution
• Keep this manual handy as a reference for operating procedures and precautions.
• Always keep the volume low enough for outside sounds to be audible.
• Protect the product from moisture.
• If the battery is disconnected, the preset memory will be erased and must be reprogrammed.
5
Before Using This Product
CAUTION: USE OF CONTROL OR ADJUSTMENT OR PERFOR-
MANCE OF PROCEDURES OTHER THAN THOSE SPECIFIED HEREIN MAY RESULT IN HAZARDOUS RADIATION EXPOSURE.
CAUTION: THE USE OF OPTICAL INSTRUMENTS WITH THIS
PRODUCT WILL INCREASE EYE HAZARD.
Page 7
6
ENGLISH ESPAÑOL DEUTSCH FRANÇAIS
ITALIANO NEDERLANDS
After-sales Service for Pioneer Products
Please contact the dealer or distributor from where you purchased the product for its aftersales service (including warranty conditions) or any other information. In case the necessary
information is not available, please contact the companies listed below:
Please do not ship your product to the companies at the addresses listed below for repair
without advance contact.
For warranty information please see the Limited Warranty sheet included with your product.
When using the 50-Disc Type Multi-CD Player
The available functions of the 50-Disc Type Multi-CD Player are described in this
Operation Manual. Note that other 50-Disc Type Multi-CD Player functions cannot be
used with this product.
About the XM READY Mark
The “XM READY” mark printed on the front panel of this product indicates that the
Pioneer XM tuner (sold separately) can be controlled using this product.
Please inquire of your dealer or nearest authorized Pioneer service station regarding the
XM tuner that can be connected to this product.
For operation of the XM tuner, refer to the XM tuner owner’s manual.
Note:
• XM Satellite Radio is developing a new band of radio in the U.S.A. The system will use direct
satellite-to-receiver broadcasting technology to provide listeners in their cars and at home with
crystal-clear sound seamlessly from coast to coast. XM will create and package up to 100 channels
of digital-quality music, news, sports, talk and children’s programming.
• When this product is connected to the XM tuner, do not connect it to any other external unit. (Refer
to page 8.)
7 U.S.A.
Pioneer Electronics Service, Inc.
CUSTOMER SERVICE
DEPARTMENT
P.O. Box 1760
Long Beach, CA 90801
800-421-1404
7 CANADA
Pioneer Electronics of Canada, Inc.
CUSTOMER SERVICE DEPARTMENT
300 Allstate Parkway
Markham, Ontario L3R OP2
(905) 479-4411
1-877-283-5901
Page 8
7
Remote Controller and Care
Using the Remote Controller
This product is equipped with a remote controller for convenient operation.
• Point the controller in the direction of the front panel to operate.
Precaution:
• Do not store the remote controller in high temperatures or direct sunlight.
• The controller may not function properly in direct sunlight.
• Do not let the remote controller fall onto the floor, where it may become jammed under the brake or
accelerator pedal.
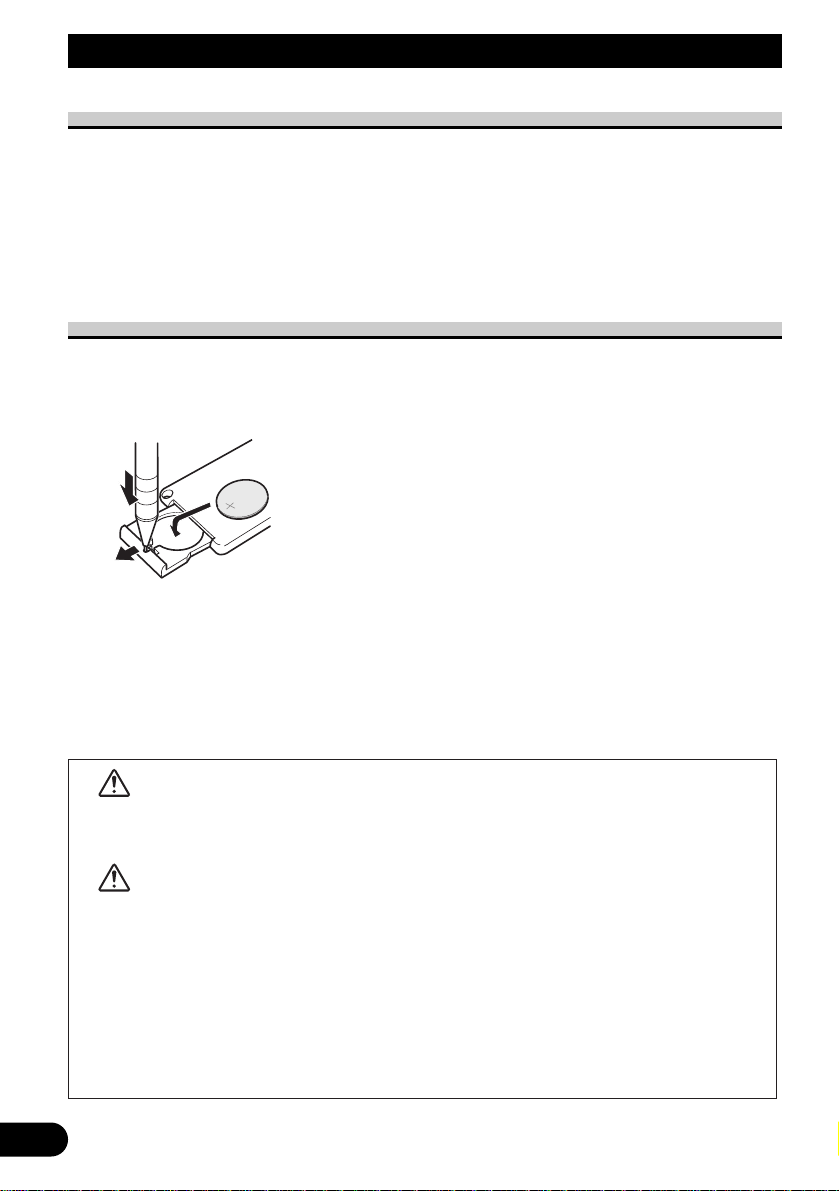
Battery
• Slide the tray out on the back of the remote controller and insert the battery
with the (+) and (–) poles pointing in the proper direction.
Replacing the Lithium Battery:
• Use only lithium battery “CR2025”, 3 V.
Precaution:
• Remove the battery if the remote controller is not used for a month or longer.
• If the event of battery leakage, wipe the remote controller completely clean and install a new bat-
tery.
WARNING:
• Keep the Lithium Battery out of reach of children. Should the Battery be swallowed,
immediately consult a doctor.
CAUTION:
• Do not recharge, disassemble, heat or dispose of battery in fire.
• Use a CR2025 (3 V) Lithium Battery only. Never use other types of battery with this
product.
• Do not handle the battery with metallic tools.
• Do not store the Lithium Battery with metallic materials.
• When disposing of used batteries, please comply with governmental regulations or envi-
ronmental public institution’s rules that apply in your country/area.
• Always check carefully that you are loading battery with its (+) and (–) poles facing in
the proper directions.
Page 9
Basic Operation
8
ENGLISH ESPAÑOL DEUTSCH FRANÇAIS
ITALIANO NEDERLANDS
To Listen to Music
The following explains the initial operations required before you can listen to music.
Note:
• Loading a disc in this product. (Refer to page 11.)
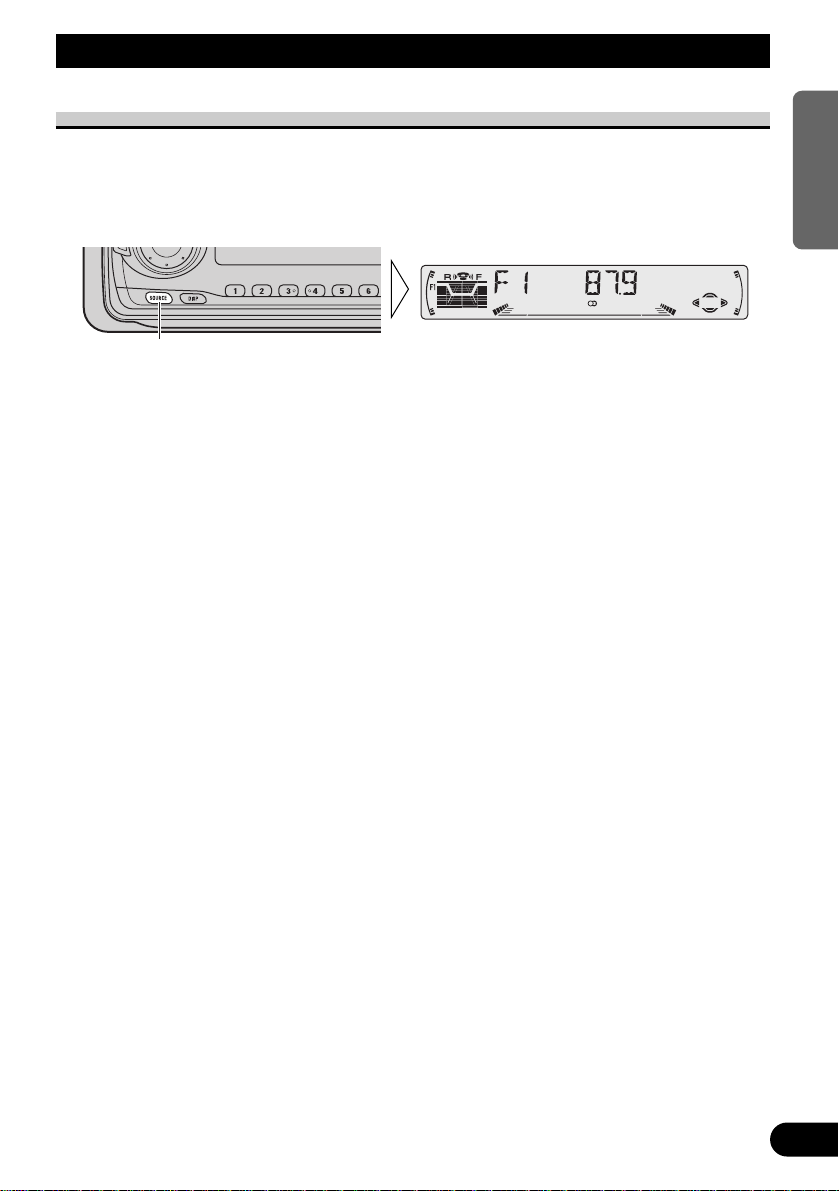
1. Select the desired source. (e.g. Tuner)
7 Head Unit
Each press of the SOURCE button selects the desired source in the following order:
Built-in CD player = TV = Tuner = Multi-CD player = External Unit = AUX
7 Remote Controller
Each press of the button selects the desired source in the following order:
TUNER button : TV = Tuner = OFF
CD button : Built-in CD player = Multi-CD player = OFF
Note:
• External Unit refers to a Pioneer product (such as one available in the future) that, although incompatible as a source, enables control of basic functions by this product. Only one External Unit can
be controlled by this product.
• In the following cases, the sound source will not change:
* When a product corresponding to each source is not connected to this product.
* When no disc is set in this product.
* When no magazine is set in the Multi-CD player.
* When the AUX (external input) is set to OFF. (Refer to page 41.)
• When this product’s blue/white lead is connected to the car’s Auto-antenna relay control terminal,
the car’s Auto-antenna extends when this product’s source is switched ON. To retract the antenna,
switch the source OFF.
Continued overleaf.
Each press changes the Source ...
Page 10
9
Basic Operation
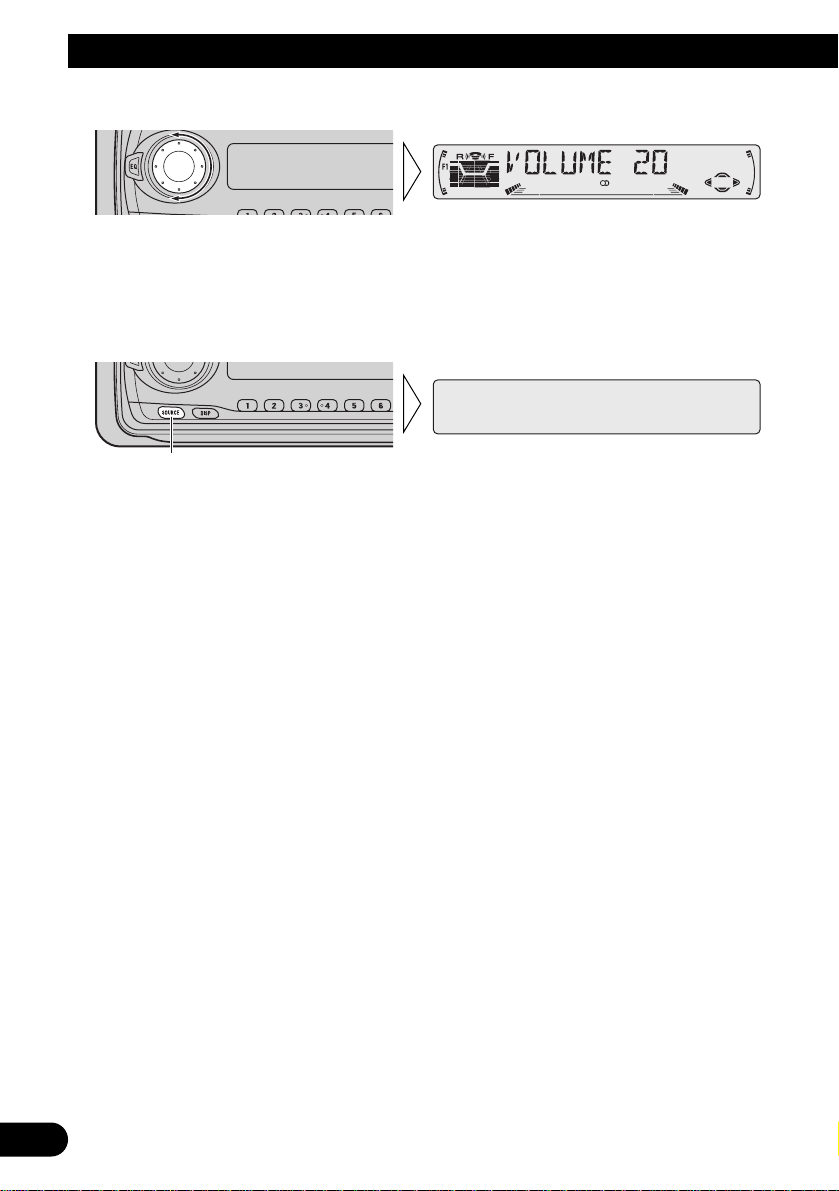
2. Raise or lower the volume.
Rolling the VOLUME changes the volume level.
Note:
• Roll clockwise to raise the volume level.
• Roll counterclockwise to lower the volume level.
3. Turn the source OFF.
Hold for 1 second
Page 11

10
ENGLISH ESPAÑOL DEUTSCH FRANÇAIS
ITALIANO NEDERLANDS
Basic Operation of Tuner
Manual and Seek Tuning
• You can select the tuning method by changing the length of
time you press the 2/3 button.
Manual Tuning (step by step) 0.5 seconds or less
Seek Tuning 0.5 seconds or more
Note:
• If you continue pressing the button for longer than 0.5 seconds, you can skip
broadcasting stations. Seek Tuning starts as soon as you release the button.
• Stereo indicator “” lights when a stereo station is selected.
Band
F1 (FM1) = F2 (FM2)
= F3 (FM3) = AM
Preset Number Indicator
Band Indicator
Frequency Indicator
Preset Tuning
• You can memorize broadcast stations in buttons
1 through 6 for easy, one-touch station recall.
Preset station recall 2 seconds or less
Broadcast station preset memory 2 seconds or more
Note:
• Up to 18 FM stations (6 in F1 (FM1), F2 (FM2) and F3
(FM3)) and 6 AM stations can be stored in memory.
• You can also use the 5 or ∞ buttons to recall broadcast sta-
tions memorized in buttons 1 through 6.
Page 12
11
Basic Operation
Basic Operation of Built-in CD Player
Note:
• Be sure to close the front panel after loading or ejecting a disc.
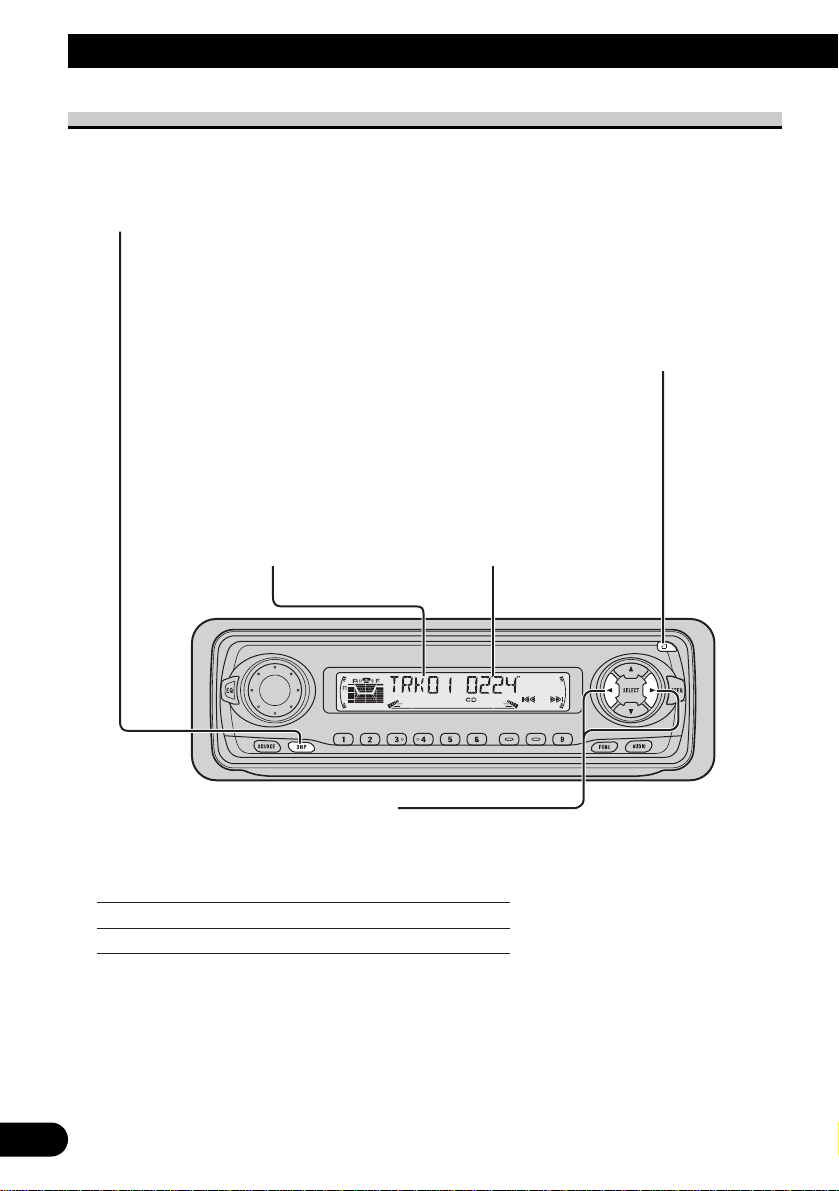
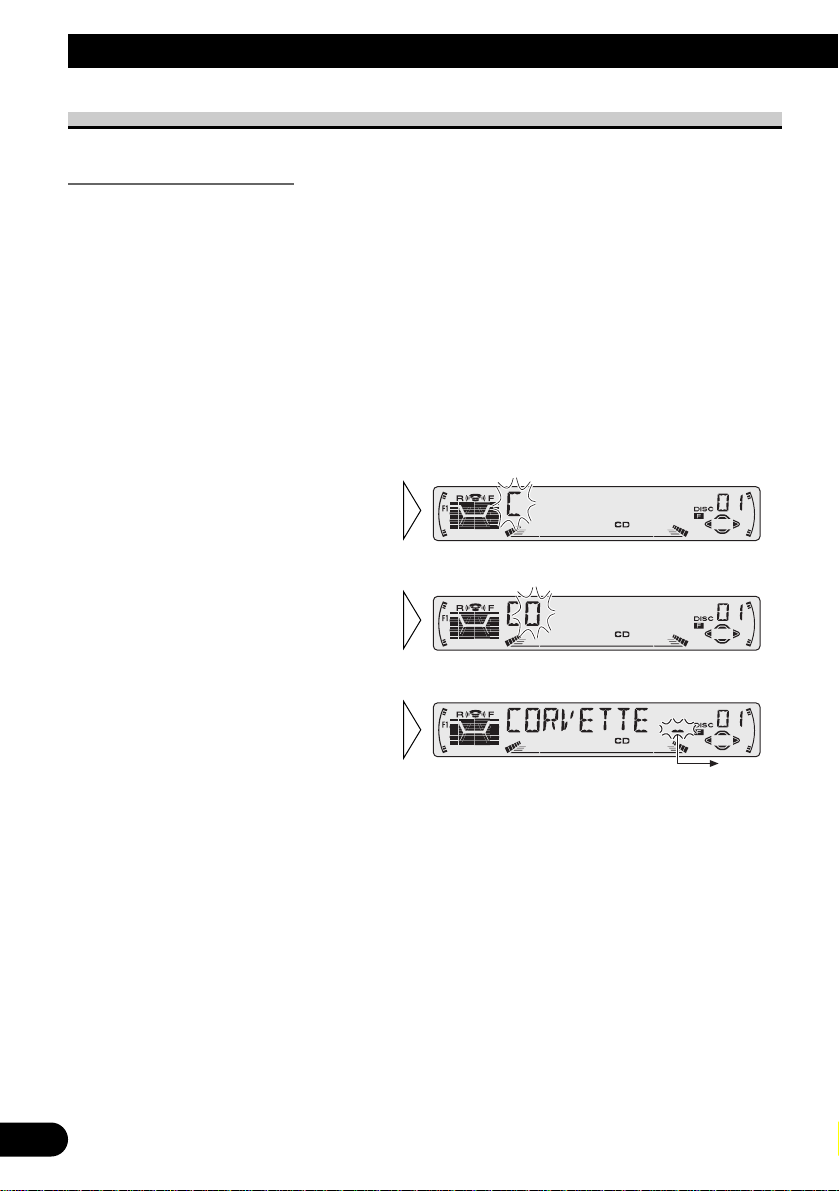
Switching the Display
Each press of the DISPLAY button changes
the display in the following order:
Playback mode (Play time)
= Disc Title
Note:
• If you switch displays when disc titles have
not been input, “NO TITLE” is displayed.
Open
Note:
• Use to open the front panel
when loading or ejecting a CD.
(The illustration on the right
shows the front panel open.)
Play Time Indicator
Track Number Indicator
Track Search and Fast Forward/Reverse
• You can select between Track Search or Fast Forward/Reverse by pressing
the 2/3 button for a different length of time.
Track Search 0.5 seconds or less
Fast Forward/Reverse Continue pressing
Page 13
12
ENGLISH ESPAÑOL DEUTSCH FRANÇAIS
ITALIANO NEDERLANDS
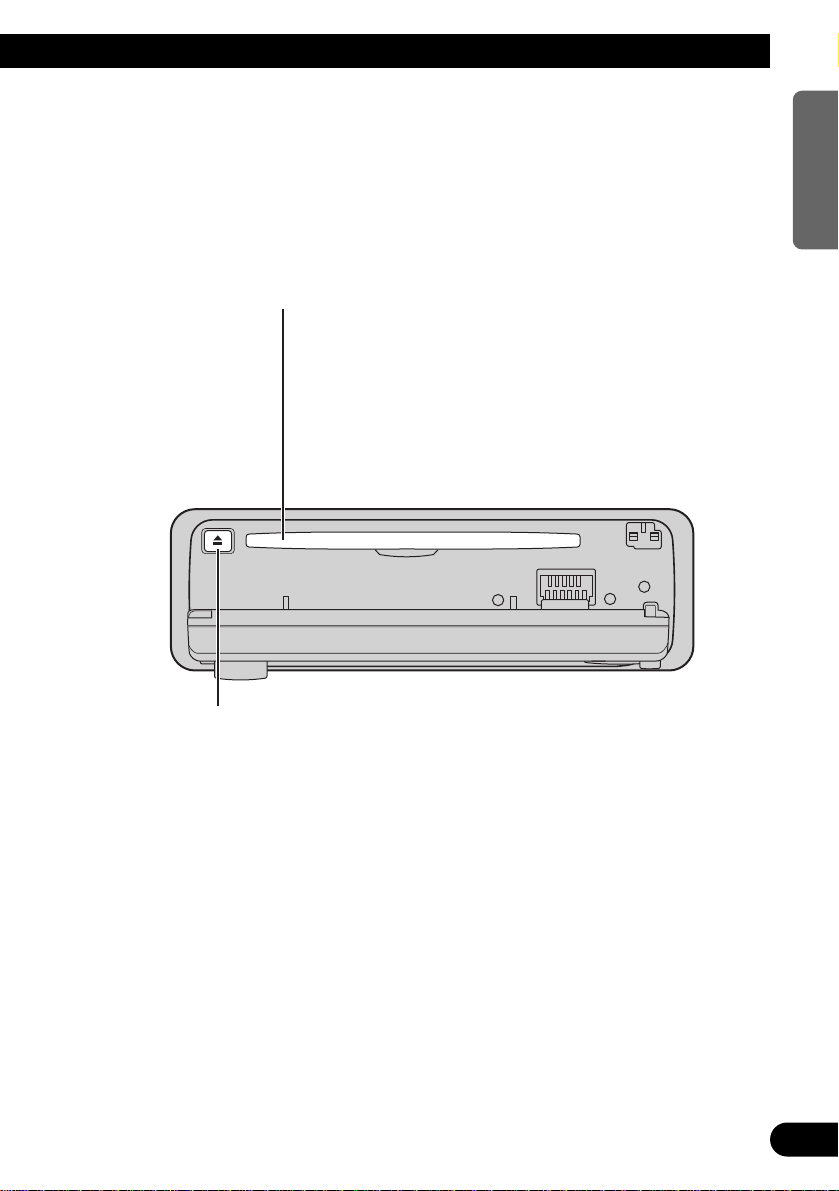
CD Loading Slot
Note:
• The Built-in CD player plays one standard 12 cm or 8 cm
(single) CD at a time. Do not use an adapter when playing
8 cm CD.
• Do not insert anything other than a CD into the CD
Loading Slot.
Eject
Note:
• The CD function can be turned ON/OFF with the
disc remaining in this product. (Refer to page 8.)
• A disc left partially inserted after ejection may
incur damage or fall out.
Note:
• If a disc cannot be inserted fully or playback fails, make sure the recorded side is down. Press the
EJECT button and check the disc for damage before reinserting it.
• If the Built-in CD player cannot operate properly, an error message (such as “ERROR-14”) appears
on the display. Refer to “Built-in CD Player’s Error Message” on page 45.
• The Built-in CD player is not equipped with CD TEXT function.
• A CD TEXT disc is a CD featuring recorded text information such as Disc Title, Artist Name and
Track Title.
Page 14
13
Basic Operation
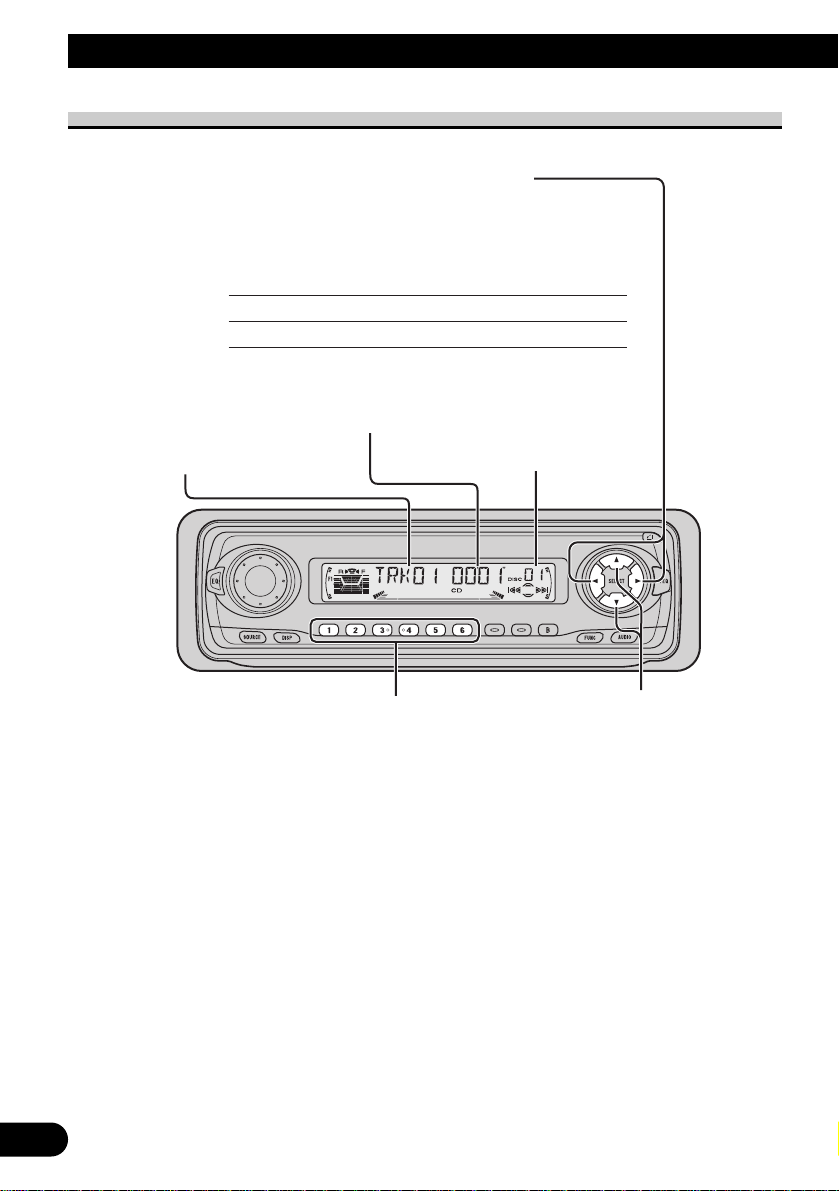
Basic Operation of Multi-CD Player
This product can control a Multi-CD player (sold separately).
Disc Number Search (for 6-Disc, 12-Disc types)
• You can select discs directly with the 1 to 6 buttons. Just press the number corresponding to the disc you want to listen to.
Note:
• When a 12-Disc Multi-CD Player is connected and you want to select disc 7 to 12, press the
1 to 6 buttons for 2 seconds.
Note:
• The Multi-CD player may perform a preparatory operation, such as verifying the presence of
a disc or reading disc information, when the power is turned ON or a new disc is selected for
playback. “READY” is displayed.
• If the Multi-CD player cannot operate properly, an error message such as “ERROR-14” is
displayed. Refer to the Multi-CD player owner’s manual.
• If there are no discs in the Multi-CD player magazine, “NO DISC” is displayed.
Play Time Indicator
Track Number Indicator
Disc Number Indicator
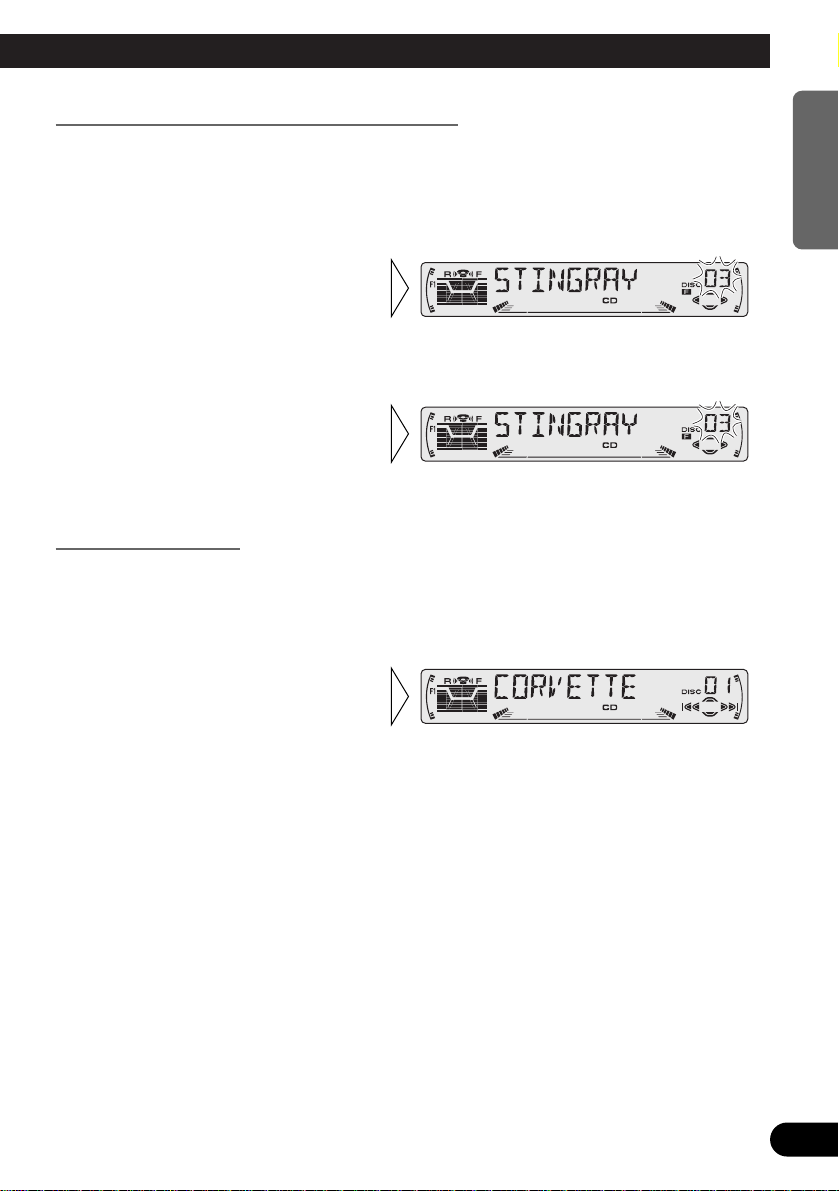
Disc Search
Track Search and Fast Forward/Reverse
• You can select between Track Search or Fast
Forward/Reverse by pressing the 2/3 button
for a different length of time.
Track Search 0.5 seconds or less
Fast Forward/Reverse Continue pressing
Page 15
14
ENGLISH ESPAÑOL DEUTSCH FRANÇAIS
ITALIANO NEDERLANDS
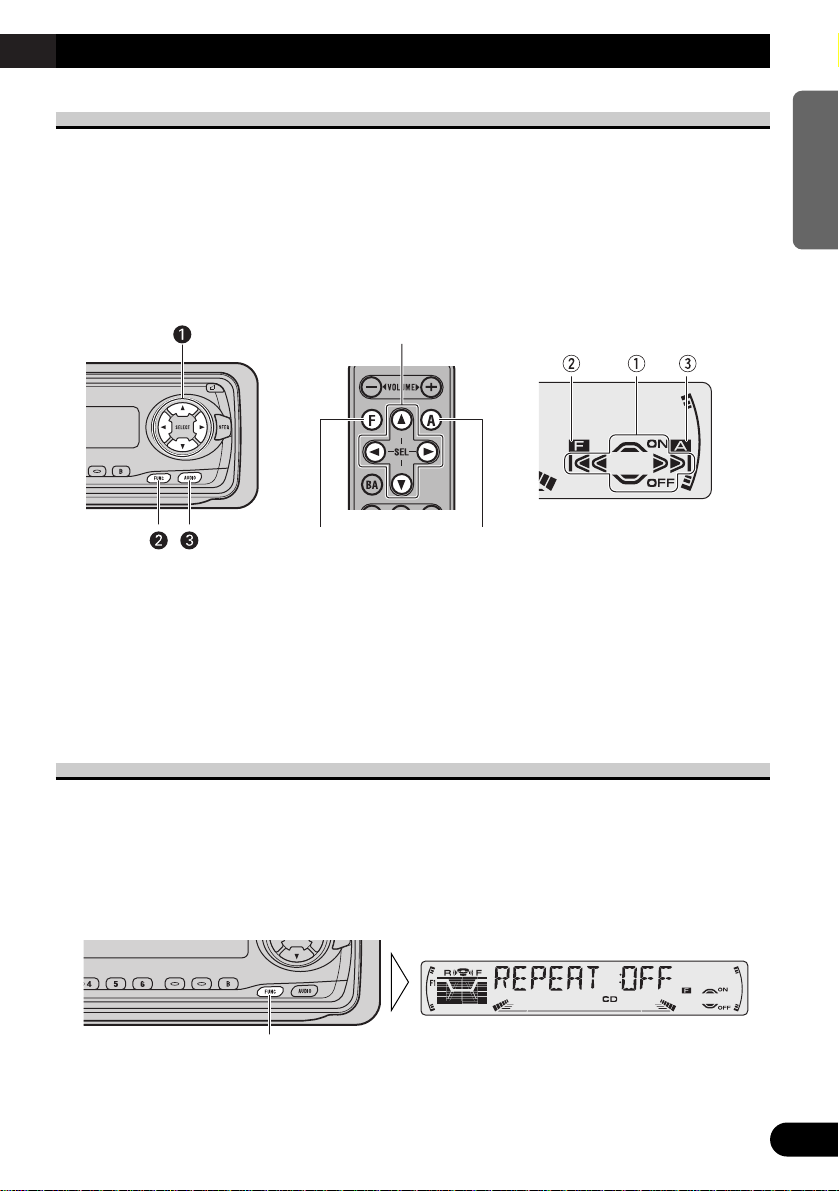
Corresponding Display Indications and Buttons
This product’s display features Key Guidance Indicators. These light to indicate which of
the 5/∞/2/3, FUNCTION and AUDIO buttons you can use. When you’re in the
Function Menu (refer to next section), Detailed Setting Menu (refer to page 16), Initial
Setting Menu (refer to page 40) or Audio Menu (refer to page 31), they also make it easy
to see which 5/∞/2/3 buttons you can use to switch functions ON/OFF, switch repeat
selections and perform other operations.
Indicator and corresponding buttons are shown below.
7 Head Unit 7 Remote Controller 7 Display
When 1 is lit in the display, perform appropriate operations with the z buttons.
When 2 is lit in the display, it indicates that you are in the Function Menu, Detailed
Setting Menu or Initial Setting Menu. You can switch between each of these menus and
between different modes in the menus using button x on the head unit or remote controller.
When 3 is lit in the display, it indicates you are in the Audio Menu. You can switch
between modes in the Audio Menu using button c on the head unit or remote controller.
Entering the Function Menu
The Function Menu lets you operate simple functions for each source.
Note:
• After entering the Function Menu, if you do not perform an operation within about 30 seconds, the
Function Menu is automatically canceled.
1. Select the desired mode in the Function Menu. (Refer to next section,
“Function Menu Functions”.)
Continued overleaf.
Each press changes the Mode ...
z
c
x
Page 16

2. Operate a mode. (e.g. Repeat Play)
3. Cancel the Function Menu.
Function Menu Functions
The following chart shows functions for each source in the Function Menu. The chart also
shows indications for each function, operations and buttons used to perform operations.
For more details, or when you want to know about an operation, refer to the page number
indicated in the chart.
7 Tuner
Function name (Display) Button: Operation Page
Best Stations Memory (BSM) 5: ON 18
∞: OFF
Local Seek Tuning (LOCAL) 1 5: ON 18
3 ∞: OFF
2 2 or 3: Select (Sensitivity)
7 Built-in CD Player
Function name (Display) Button: Operation Page
Repeat Play (REPEAT) 5: ON 19
∞: OFF
Random Play (RANDOM) 5: ON 19
∞: OFF
Scan Play (T-SCAN) 5: ON 20
∞: OFF
Pause (PAUSE) 5: ON 20
∞: OFF
The button used and the operation it performs are
indicated by the key guidance indicator. Press the
5 button to switch the key guidance indicator ON,
and the ∞ button to switch it OFF.
15
Basic Operation
Page 17

16
ENGLISH ESPAÑOL DEUTSCH FRANÇAIS
ITALIANO NEDERLANDS
7 Multi-CD Player
Function name (Display) Button: Operation Page
Repeat Play (REPEAT) 2 or 3: Select (Play range) 21
Selecting Discs by Disc Title List 1 2 or 3: Select (Disc Title) 26
(TITLE LIST) 2 5: Play
Random Play (RANDOM) 5: ON 21
∞: OFF
Scan Play (SCAN) 5: ON 22
∞: OFF
ITS Play (ITS-P) 5: ON 23
∞: OFF
Pause (PAUSE) 5: ON 22
∞: OFF
Compression and DBE (COMP) 5 or ∞: Select 27
(Sound Quality Function)
Entering the Detailed Setting Menu
In the Detailed Setting Menu, you can operate convenient, complex functions for each
source.
1. Enter the Detailed Setting Menu.
2. Select the desired mode. (Refer to next section, “Detailed Setting Menu
Functions”.)
3. Operate a mode.
Continued overleaf.
Each press changes the Mode ...
Hold for 2 seconds
Page 18

4. Cancel the Detailed Setting Menu.
Note:
• You can cancel the Detailed Setting Menu by pressing the FUNCTION button again for 2 seconds.
Detailed Setting Menu Functions
The following chart shows functions for each source in the Detailed Setting Menu. The
chart also shows indications for each function, operations and buttons used to perform
operations. For more details, or when you want to know about an operation, refer to the
page number indicated in the chart.
Note:
• Tuner has no Detailed Setting Menu.
7 Built-in CD Player
Function name (Display) Button: Operation Page
Disc Title Input (TITLE IN) 1 5 or ∞: Select (Letter) 20
2 2 or 3: Select (Position)
3 3: Memory
7 Multi-CD Player
Function name (Display) Button: Operation Page
Disc Title Input (TITLE IN) 1 5 or ∞: Select (Letter) 25
2 2 or 3: Select (Position)
3 3: Memory
ITS Programming (ITS) 5: Memory 23
PGM Button Functions
The following chart shows functions for each source by presssing PGM button.
For more details, or when you want to know about an operation, refer to the page number
indicated in the chart.
7 PGM
Source Function name Page
Tuner Best Stations Memory (OFF) 18
Best Stations Memory (ON)
(Hold for 2 seconds) 18
Built-in CD player Pause 20
Multi-CD player Pause 22
TV Best Station Sequential Memory (OFF) —
Best Station Sequential Memory (ON)
(Hold for 2 seconds) —
Note:
• For the details of TV functions, refer to the TV’s manual.
17
Basic Operation
Page 19
Tuner Operation
18
ENGLISH ESPAÑOL DEUTSCH FRANÇAIS
ITALIANO NEDERLANDS
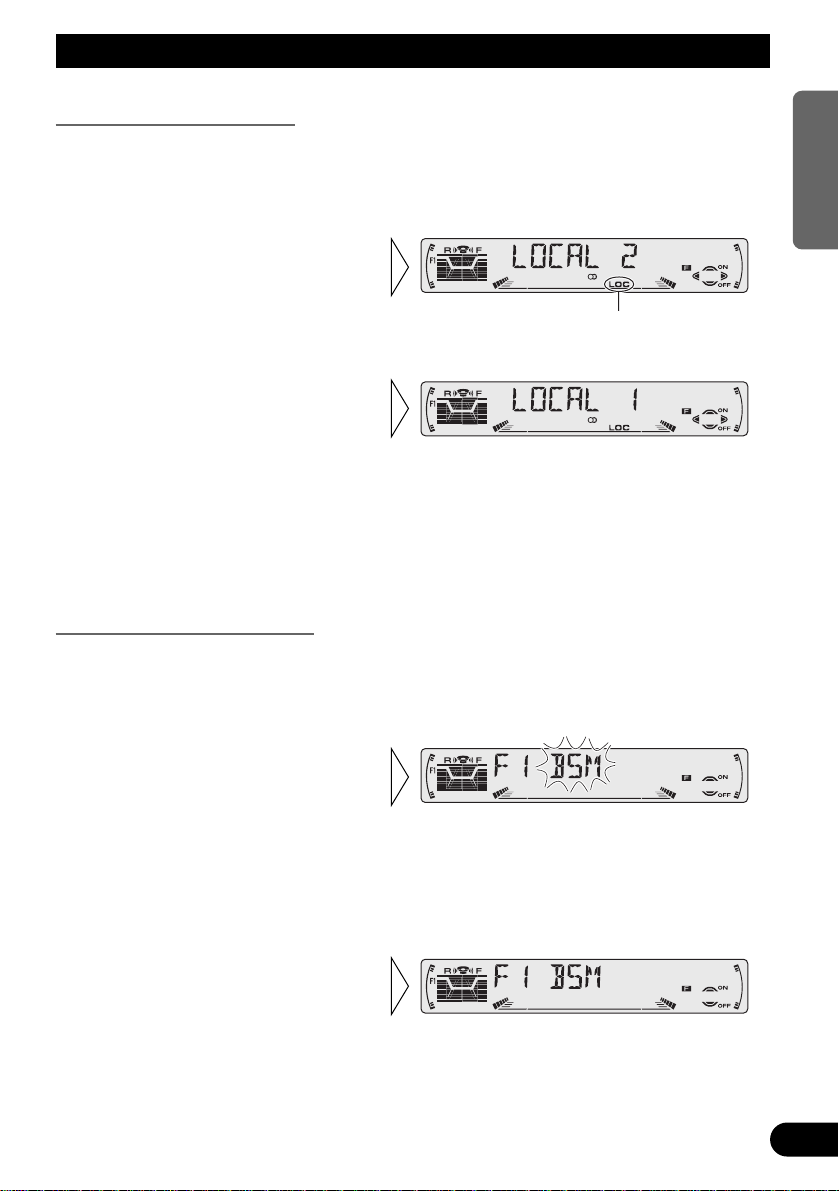
Local Seek Tuning (LOCAL)
When Local is ON, you can only select broadcast stations providing strong reception.
1. Press the FUNCTION button and select the Local mode (LOCAL) in the
Function Menu.
FM : LOCAL 1 Ô LOCAL 2 Ô LOCAL 3 Ô LOCAL 4
AM : LOCAL 1 Ô LOCAL 2
Note:
• The LOCAL 4 setting allows reception of only the strongest stations, while lower settings let you
receive progressively weaker stations.
Best Stations Memory (BSM)
The BSM function stores stations in memory automatically.
1. Press the FUNCTION button and select the BSM mode (BSM) in the
Function Menu.
Note:
• You can also switch the BSM function ON by pressing the PGM button for 2 seconds.
Note:
• You can also switch the BSM function OFF by pressing the PGM button.
• To cancel the process, press
the ∞ button in the Function
Menu before memorization is
complete.
2. Switch the BSM ON with the
5 button.
The stations with the strongest signals will be stored under buttons 1–6
and in order of their signal strength.
3. Select the desired Local Seek
sensitivity with the 2/3 but-
tons.
“LOC”
2. Switch the Local ON/OFF with
the 5/∞ buttons.
Page 20

19
Using the Built-in CD Player
Repeat Play (REPEAT)
Repeat Play plays the same track repeatedly.
Note:
• If you perform Track Search or Fast Forward/Reverse, Repeat Play is automatically canceled.
Random Play (RANDOM)
Random Play plays the tracks on a CD in random order for variety.
2. Switch the Random Play
ON/OFF with the 5/∞
buttons.
1. Press the FUNCTION button and select the Random mode (RANDOM) in
the Function Menu.
“RPT ”
2. Switch the Repeat Play
ON/OFF with the 5/∞
buttons.
1. Press the FUNCTION button and select the Repeat mode (REPEAT) in
the Function Menu.
Page 21
20
ENGLISH ESPAÑOL DEUTSCH FRANÇAIS
ITALIANO NEDERLANDS
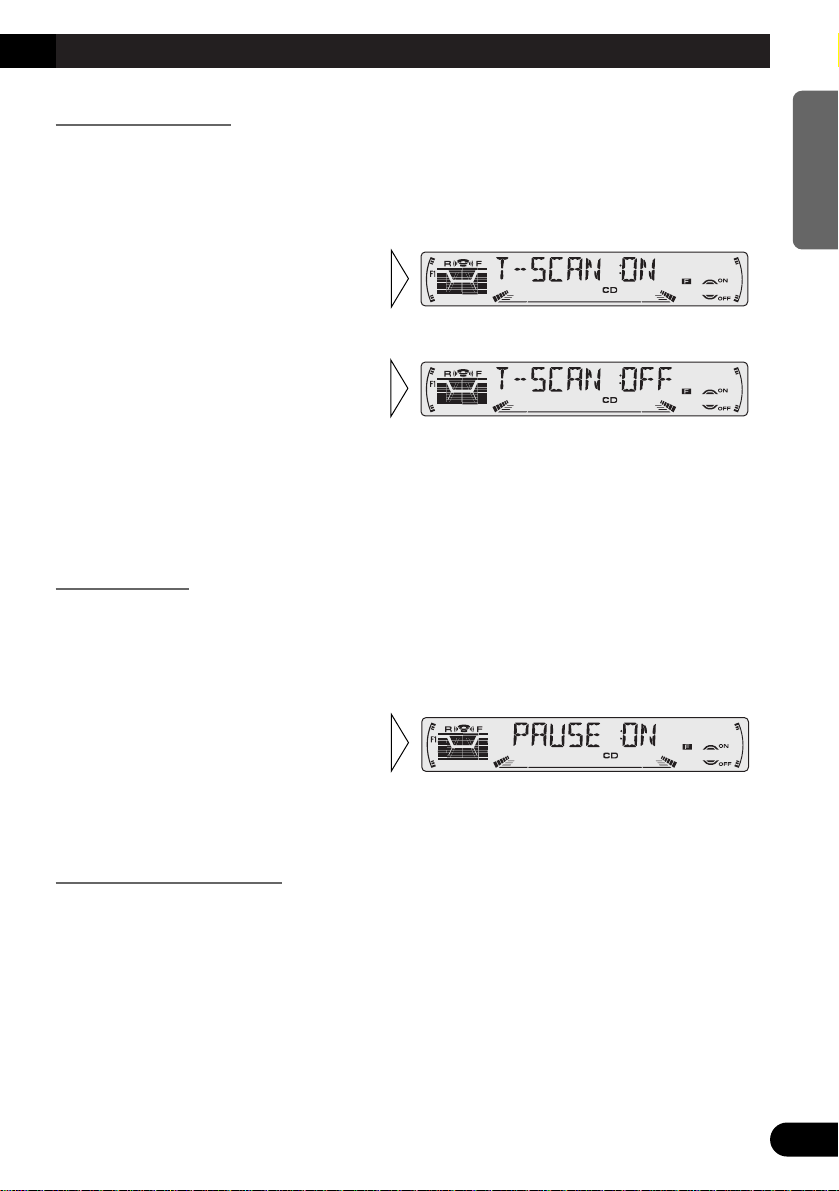
Scan Play (T-SCAN)
Scan Play plays the first 10 seconds or so of each track on a CD in succession.
Note:
• Scan Play is canceled automatically after all the tracks on a disc have been scanned.
Pause (PAUSE)
Pause pauses the currently playing track.
Note:
• You can also switch the Pause function ON/OFF by pressing the PGM button.
Disc Title Input (TITLE IN)
You can use “TITLE IN” to input up to 48 disc titles for CDs in the Built-in CD player.
(Perform the same operation as (described) on page 25 under “Using Multi-CD Players”.)
Note:
• After the title for 48 discs have been entered, data for a new disc will overwrite the oldest one.
• If you connect a Multi-CD player, you can input disc titles for up to 100 discs.
2. Switch the Pause ON/OFF
with the 5/∞ buttons.
1. Press the FUNCTION button and select the Pause mode (PAUSE) in the
Function Menu.
3. When you find the desired
track, cancel the Scan Play
with the ∞ button.
If the Function Menu has been canceled automatically, select the Scan
mode in the Function Menu again.
2. Switch the Scan Play ON with
the 5 button.
1. Press the FUNCTION button and select the Scan mode (T-SCAN) in the
Function Menu.
Page 22
Using Multi-CD Players
21
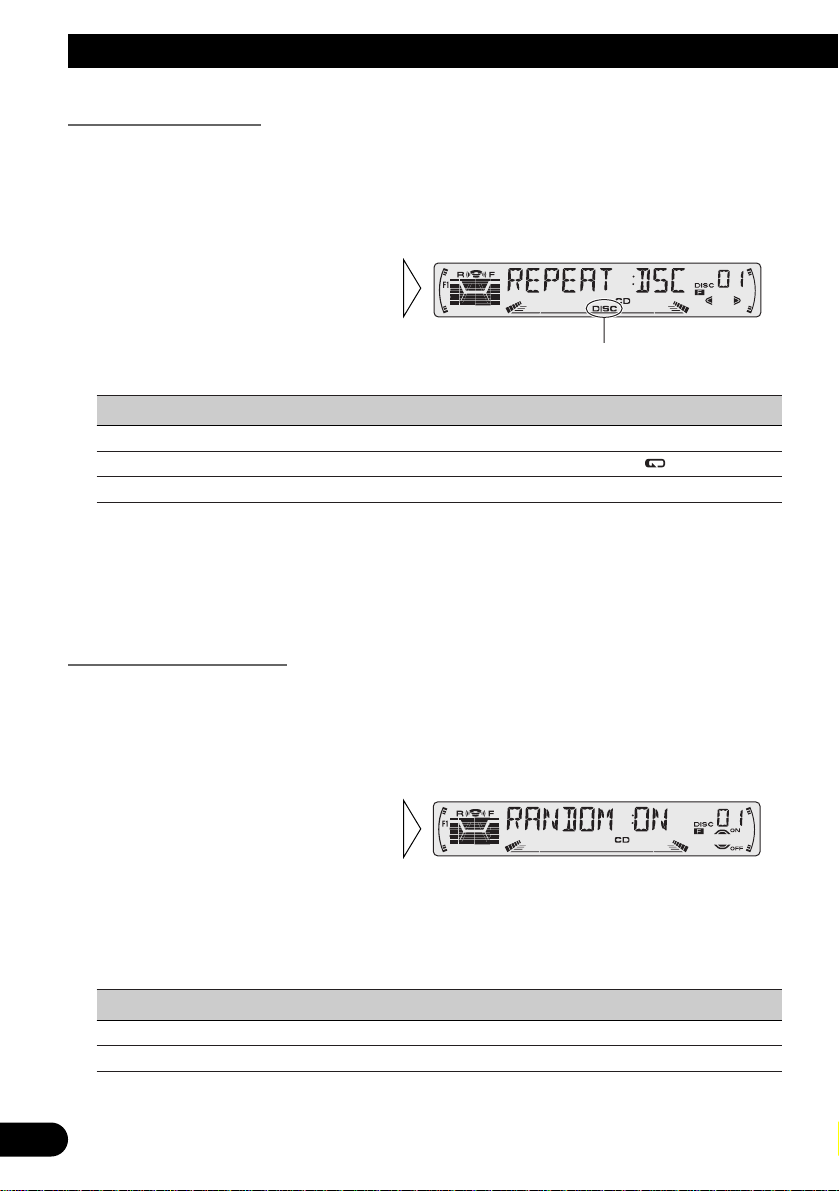
Repeat Play (REPEAT)
There are three repeat play ranges: One-track Repeat, Disc Repeat and Multi-CD player
Repeat. Default repeat play range is Multi-CD player Repeat.
1. Press the FUNCTION button and select the Repeat mode (REPEAT) in the
Function Menu.
Play range Display Indicator
Multi-CD player Repeat MCD
-One-track Repeat TRK RPT
Disc Repeat DSC DISC
Note:
• If you select other discs during the repeat play, the repeat play range changes to Multi-CD player
Repeat.
• If you perform Track Search or Fast Forward/Reverse during One-track Repeat, the repeat play
range changes to Disc Repeat.
Random Play (RANDOM)
Tracks are played at random within the selected repeat play range as explained in “Repeat
Play” above.
1. Press the FUNCTION button and select the Random mode (RANDOM) in
the Function Menu.
Display Play range
DRDM Disc Repeat
RDM Multi-CD player Repeat
Note:
• One-track Repeat changes to the Disc Repeat when you switch the Random Play ON.
2. Switch the Random Play
ON/OFF with the 5/∞ buttons.
After selecting the desired repeat
play range from those referred to in
“Repeat Play” above, switch MultiCD Player Random Play ON.
“DISC”
2. Select the desired repeat play
range with the 2/3 buttons.
Multi-CD player Repeat = One-
track Repeat
= Disc Repeat
Page 23

22
ENGLISH ESPAÑOL DEUTSCH FRANÇAIS
ITALIANO NEDERLANDS
Scan Play (SCAN)
In the Disc Repeat, the beginning of each track on the selected disc is scanned for about 10
seconds. In the Multi-CD player Repeat, the beginning of the first track on each disc is
scanned for about 10 seconds.
1. Press the FUNCTION button and select the Scan mode (SCAN) in the
Function Menu.
Display Play range
DSCN Disc Repeat
SCAN Multi-CD player Repeat
Note:
• Scan Play is canceled automatically after all the tracks or discs have been scanned.
• One-track Repeat changes to the Disc Repeat when you switch the Scan Play ON.
Pause (PAUSE)
Pause pauses the currently playing track.
1. Press the FUNCTION button and select the Pause mode (PAUSE) in the
Function Menu.
Note:
• You can also switch the Pause function ON/OFF by pressing the PGM button.
2. Switch the Pause ON/OFF
with the 5/∞ buttons.
3. When you find the desired
track (or disc), cancel the Scan
Play with the ∞ button.
If the Function Menu has been canceled automatically, select the Scan
mode in the Function Menu again.
2. Switch the Scan Play ON with the
5 button.
After selecting the desired repeat
play range from those referred to in
“Repeat Play” on page 21, switch
Multi-CD Player Scan Play ON.
Page 24

23
Using Multi-CD Players
ITS (Instant Track Selection)
The ITS function allows you to search for the track you wish to play when a Multi-CD
player is installed. You can use ITS to program automatic playback of up to 24 tracks per
disc from up to 100 discs. (You can store ITS program and Disc Title data for up to 100
discs in memory.)
ITS Programming (ITS)
Programmed tracks are played within the selected repeat play range in the “Repeat Play”
on page 21.
1. Play the track you wish to program.
2. Select the ITS Programming mode (ITS) in the Detailed Setting Menu.
(Refer to page 16.)
Note:
• After 100 discs have been programmed, data for a new disc will overwrite the data for the disc that
has not been played back for the longest time.
ITS Play (ITS-P)
ITS Play of tracks is performed within the play range explained in the “Repeat Play” section.
1. Press the FUNCTION button and select the ITS Play mode (ITS-P) in the
Function Menu.
Note:
• If no track in the current range is programmed for ITS Play, “ITS EMPTY” is displayed.
2. Switch the ITS Play ON/OFF
with the 5/∞ buttons.
After selecting the desired repeat
play range from those referred to in
“Repeat Play” on page 21, switch
ITS Play ON.
3. Program the desired track
with the 5 button.
Page 25

24
ENGLISH ESPAÑOL DEUTSCH FRANÇAIS
ITALIANO NEDERLANDS
Erase a Track Program
1. Select the track you wish to erase, during ITS Play.
2. Select the ITS Programming mode (ITS) in the Detailed Setting Menu.
(Refer to page 16.)
Erase a Disc Program
1. Select the disc you wish to erase, while the disc is playing.
2. Select the ITS Programming mode (ITS) in the Detailed Setting Menu.
(Refer to page 16.)
3. Erase the disc program with
the ∞ button.
3. Erase the track program with
the ∞ button.
ITS is canceled and playback of the
next ITS-programmed track begins.
If there are no more programmed
tracks in the current range, “ITS
EMPTY” is displayed and normal
play resumes.
Page 26
Using Multi-CD Players
25
Disc Title
Disc Title Input (TITLE IN)
You can input Titles up to 10 letters long for up to 100 discs. Using this function lets you
easily search for and select a desired disc for play. (You can store ITS program and Disc
Title data for up to 100 discs in memory.)
1. Play the disc you wish to input the disc title.
2. Select the Disc Title Input mode (TITLE IN) in the Detailed Setting Menu.
(Refer to page 16.)
Note:
• When playing a CD TEXT disc on a CD TEXT compatible Multi-CD player, you cannot switch to
this mode.
• A CD TEXT disc is a CD featuring recorded text information such as Disc Title, Artist Name and
Track Title.
Note:
• Titles remain in memory, even after the disc has been removed from the magazine, and are recalled
when the disc is reinserted.
• After the titles for 100 discs have been entered, data for a new disc will overwrite the data for the
disc that has not been played back for the longest time.
• You can display the disc title of the disc currently playing. For details, refer to “Displaying Disc
Title” on page 26.
5. When you have completed title
input, make the 10th letter
flash, then memorize by pressing the 3 button.
4. Move the box left and right
with the 2/3 buttons.
3. Select letters, numbers and
symbols with the 5/∞ buttons.
To insert a space, select the flashing
cursor “_”.
Page 27
26
ENGLISH ESPAÑOL DEUTSCH FRANÇAIS
ITALIANO NEDERLANDS
Selecting Discs by Disc Title List (TITLE LIST)
Follow the procedures below to play a disc for which you have input the title in a MultiCD player or a CD TEXT disc on a CD TEXT compatible Multi-CD player.
1. Press the FUNCTION button and select the Disc Title List mode (TITLE LIST)
in the Function Menu.
Displaying Disc Title
You can display the currently playing Disc Title.
Note:
• You can also display the currently playing Disc Title when playing a CD TEXT disc on a CD
TEXT compatible Multi-CD player. (Refer to page 28.)
Note:
• If you switch displays when disc titles have not been input, “NO TITLE” is displayed.
• Switch the Disc Title
Display with the DISPLAY
button.
Each press of the DISPLAY button
changes the display in the following
order:
Playback mode (Play Time)
= Disc Title
3. Play the selected disc with the
5 button.
2. Select the desired disc title
with the 2/3 buttons.
Nothing is displayed for disc whose
titles have not been input.
Page 28
27
Using Multi-CD Players
Compression and DBE (COMP)
Using the COMP (Compression) and DBE (Dynamic Bass Emphasis) functions enables
Multi-CD player sound quality adjustment. Each of the functions enables two-step adjustment.
7 COMP
The COMP (Compression) function adjusts imbalances between loud and subdued sounds
at higher volumes.
7 DBE
DBE (Dynamic Bass Emphasis) boosts bass levels to give a fuller sound.
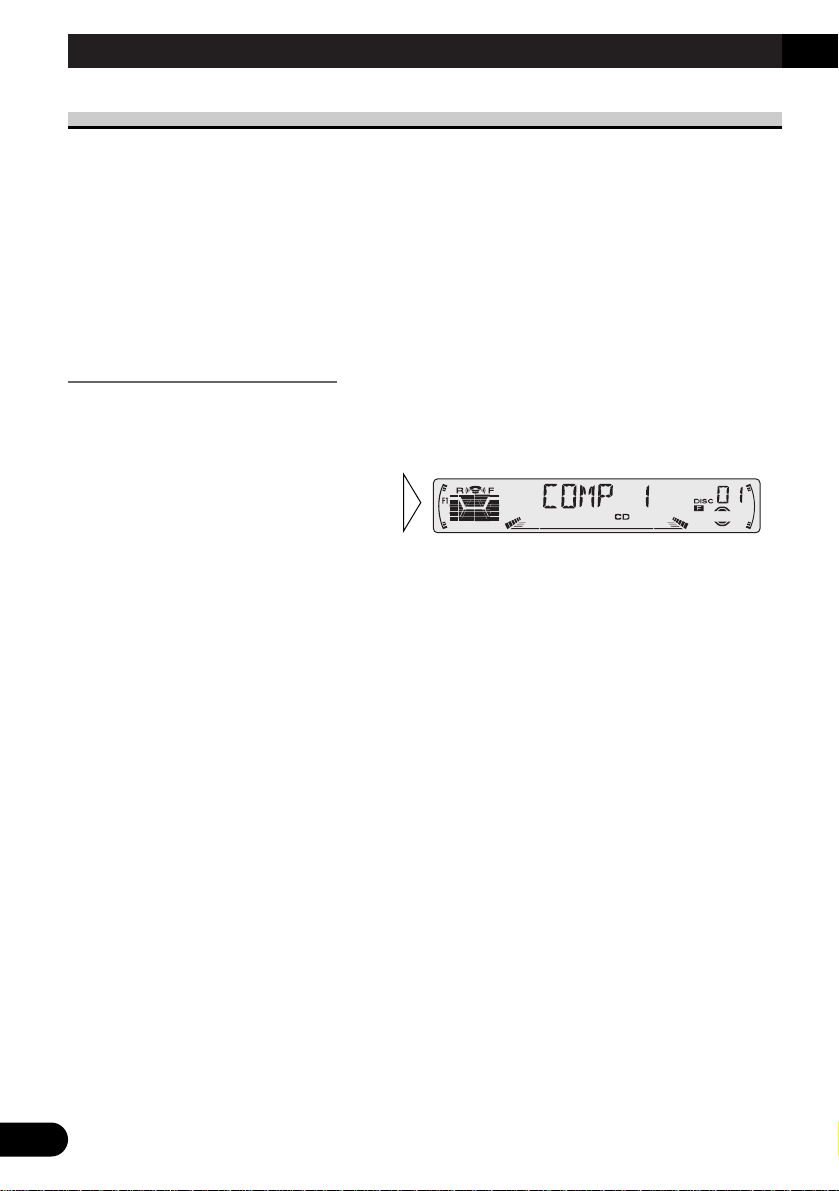
COMP/DBE ON/OFF Switching
1. Press the FUNCTION button and select the COMP/DBE switching mode
(COMP) in the Function Menu.
Note:
• You can use these functions with a Multi-CD player that has them. If the player does not feature the
COMP/DBE functions, “NO COMP” is displayed if you try to use them.
2. Select the desired mode with
the 5/∞ buttons.
COMP OFF = COMP 1 = COMP 2
= COMP OFF = DBE 1 = DBE 2
Page 29
28
ENGLISH ESPAÑOL DEUTSCH FRANÇAIS
ITALIANO NEDERLANDS
CD TEXT Function (for CD TEXT compatible type)
You can use these functions when playing a CD TEXT disc on a CD TEXT compatible
Multi-CD player.
Title Display Switching
Note:
• If certain text information is not recorded on a CD TEXT disc, “NO ~” (e.g. “NO T-TITLE”) is displayed.
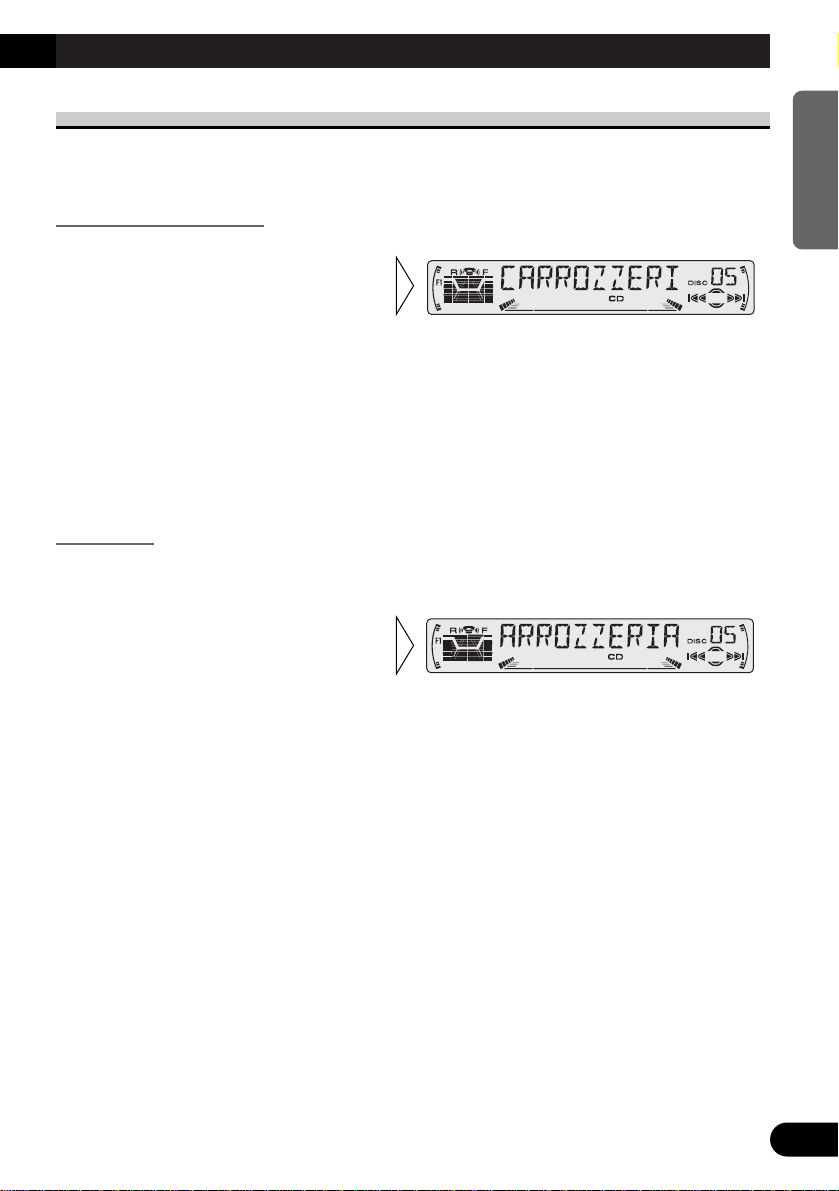
Title Scroll
This product displays the first 10 letters only of Disc Title, Artist Name and Track Title.
With text longer than 10 letters, you can see the rest of the text by scrolling.
• Scroll the title display by pressing the DISPLAY button for 2
seconds.
• Select the desired title display
with the DISPLAY button.
Each press of the DISPLAY button
changes the display in the following
order:
Playback mode (Play Time)
= Disc Title = Disc Artist Name
= Track Title = Track Artist Name
Page 30

Setting the Sound Focus Equalizer (SFEQ)
Clarifying the sound image of vocals and instruments allows the simple staging of a natural, pleasant sound environment.
Even greater listening enjoyment will be obtained if seating positions are chosen carefully.
About the Sound Focus Equalizer (SFEQ)
“FRT1” boosts the treble on the front output and the bass on the rear output.
“FRT2” boosts the treble and the bass on the front output and the bass on the rear output.
(The bass boost is the same for both front and rear.)
For both “FRT1” and “FRT2” the “HI” setting provides a more pronounced effect than the
“LOW” setting.
1. Select the desired SFEQ mode.
FRT1-HI (front 1-high) = FRT1-LOW (front 1-low) = FRT2-HI (front 2-high)
= FRT2-LOW (front 2-low) = CUSTOM (custom) = SFEQ OFF (off)
2. Select the desired Position.
L (left) Ô C (center) Ô R (right)
Note:
• If you adjust the bass or treble, “CUSTOM” memorizes an SFEQ mode in which the bass and treble are adjusted for personal preference.
• If you select a mode other than “SFEQ OFF”, the H.P.F. function is automatically switched OFF.
By switching the H.P.F. function ON after selecting the SFEQ mode, you can combine H.P.F. function with SFEQ function.
“F1”
29
Audio Adjustment
Page 31

30
ENGLISH ESPAÑOL DEUTSCH FRANÇAIS
ITALIANO NEDERLANDS
Selecting the Equalizer Curve
You can switch between Equalizer curves.
• Select the desired Equalizer curve.
POWERFUL (powerful) = NATURAL (natural) = VOCAL (vocal)
= CUSTOM 1 (custom 1) = CUSTOM 2 (custom 2) = EQ FLAT (flat)
= SUPER BASS (super bass)
About the Custom Curves
“CUSTOM 1” and “CUSTOM 2” are adjustable equalizer curves. (Refer to “Equalizer
Curve Adjustment” on page 32 and “Equalizer Curve Fine Adjustment” on page 33.)
7 CUSTOM 1
A separate “CUSTOM 1” curve can be created for each source. (The Built-in CD player
and Multi-CD player are set to the same Equalizer Curve Adjustment setting automatically.)
If you make adjustments when a curve other than “CUSTOM 2” is selected, the equalizer
curve settings are memorized in “CUSTOM 1”.
7 CUSTOM 2
A “CUSTOM 2” curve can be created common to all sources.
If you make adjustments when the “CUSTOM 2” curve is selected, the “CUSTOM 2”
curve is updated.
Page 32

31
Audio Adjustment
Entering the Audio Menu
With this Menu, you can adjust the sound quality.
Note:
• After entering the Audio Menu, if you do not perform an operation within about 30 seconds, the
Audio Menu is automatically canceled.
• Audio Menu functions change depending on the Rear Output and Subwoofer Controller setting in
the Initial Setting Menu. (Refer to “Setting the Rear Output and Subwoofer Controller ” on page
42.)
1. Select the desired mode in the Audio Menu.
2. Operate a mode.
3. Cancel the Audio Menu.
Audio Menu Functions
The Audio Menu features the following functions.
Balance Adjustment (FADER)
This function allows you to select a Fader/Balance setting that provides ideal listening conditions in all occupied seats.
1. Press the AUDIO button and select the Fader/Balance mode (FADER) in the
Audio Menu.
2. Adjust front/rear speaker balance with the 5/∞ buttons.
“FADER :F 15” – “FADER :R 15”
is displayed as it moves from front
to rear.
Each press changes the Mode ...
Page 33

32
ENGLISH ESPAÑOL DEUTSCH FRANÇAIS
ITALIANO NEDERLANDS
Note:
• When the Rear Output setting is “REAR SP:S/W”, you cannot adjust front/rear speaker balance.
(Refer to page 42.)
• “FADER :0” is the proper setting when 2 speakers are in use.
Equalizer Curve Adjustment (EQ-LOW/EQ-MID/EQ-HIGH)
You can adjust the currently selected equalizer curve settings as desired.
1. Press the AUDIO button and select the Equalizer mode
(EQ-LOW/EQ-MID/EQ-HIGH) in the Audio Menu.
Note:
• If you make adjustments when a curve other than “CUSTOM 2” is selected, “CUSTOM 1” curve is
updated.
“CUSTOM”
3. Boost or attenuate the selected
band with the 5/∞ buttons.
The display shows “+6” – “–6”.
2. Select the band you want to
adjust with the 2/3 buttons.
EQ-LOW (low) += EQ-MID (mid)
+= EQ-HIGH (high)
3. Adjust left/right speaker balance with the 2/3 buttons.
“BAL :L 9” – “BAL :R 9” is displayed as it moves from left to right.
Page 34

33
Audio Adjustment
Equalizer Curve Fine Adjustment
You can adjust the center frequency and the Q factor (curve characteristics) of each currently selected curve band (EQ-LOW/EQ-MID/EQ-HIGH).
1. Press the AUDIO button for 2 seconds to select Equalizer Curve Fine
Adjustment.
Note:
• If you make adjustments when a curve other than “CUSTOM 2” is selected, “CUSTOM 1” curve is
updated.
4. Select the desired Q factor with
the 5/∞ buttons.
2N += 1N += 1W += 2W
3. Select the desired frequency with
the 2/3 buttons.
LOW: 40 Ô 80 Ô 100 Ô 160 (Hz)
MID: 200
Ô 500 Ô 1K Ô 2K (Hz)
HIGH: 3K
Ô 8K Ô 10K Ô 12K (Hz)
2. Press the AUDIO button to select
the desired band for adjustment.
Level (dB)
Center frequency
Frequency (Hz)
Q=2N Q=2W
Page 35

34
ENGLISH ESPAÑOL DEUTSCH FRANÇAIS
ITALIANO NEDERLANDS
Bass Adjustment (BASS)
You can adjust the cut-off frequency and the Bass level.
In “FRT1” mode, bass adjustment affects only the rear output: front output cannot be
adjusted.
1. Press the AUDIO button and select the Bass mode (BASS) in the Audio
Menu.
Treble Adjustment (TRE)
You can adjust the cut-off frequency and the Treble level.
In “FRT1” and “FRT2” modes, treble adjustment affects only the front output: rear output
cannot be adjusted.
1. Press the AUDIO button and select the Treble mode (TRE) in the Audio
Menu.
3. Boost or attenuate the treble
level with the 5/∞ buttons.
The display shows “+6” – “–6”.
2. Select the desired frequency with
the 2/3 buttons.
2K Ô 4K Ô 6K Ô 10K (Hz)
3. Boost or attenuate the bass level
with the 5/∞ buttons.
The display shows “+6” – “–6”.
2. Select the desired frequency with
the 2/3 buttons.
40 Ô 63 Ô 100 Ô 160 (Hz)
Page 36

35
Audio Adjustment
Loudness Adjustment (LOUD)
The Loudness function compensates for deficiencies in the low and high sound ranges at
low volume. You can select a desired Loudness level.
1. Press the AUDIO button and select the Loudness mode (LOUD) in the Audio
Menu.
Subwoofer Output (SUB.W)
When a Subwoofer is connected, switch Subwoofer output ON.
Initially, Subwoofer output is ON.
The Subwoofer output phase can be switched between normal, or 0˚ (“NOR”), and reverse,
or 180˚(“REV”). 0˚ is the default phase.
Note:
• When the Subwoofer Controller setting is “S/W CTL:EXT”, you cannot switch the Subwoofer
ON/OFF mode. In this case, this setting is not necessary. (Refer to page 42.)
• Select the OFF setting when you do not want the Subwoofer to operate.
1. Press the AUDIO button and select the Subwoofer ON/OFF mode
(SUB.W) in the Audio Menu.
3. Change the phase of Subwoofer
output with the 2/3 buttons.
“SW”
2. Switch the Subwoofer output
ON/OFF with the 5/∞
buttons.
3. Select the desired level with
the 2/3 buttons.
LOW (low) += MID (mid) +=
HI (high)
“LOUD”
2. Switch the Loudness function
ON/OFF with the 5/∞ buttons.
Page 37

Subwoofer Setting Adjustment (80HZ 0)
When the Subwoofer output is ON, you can adjust the cut-off frequency and the output
level of Subwoofer.
Note:
• You can select the Subwoofer setting mode only when Subwoofer output is switched ON in the
Subwoofer ON/OFF mode.
Non Fading Output (NON FAD)
When the Non Fading Output setting is ON, the audio signal does not pass through this
unit’s low pass filter (for the Subwoofer), but is output through the RCA output.
Note:
• When the Subwoofer Controller setting is only “S/W CTL:EXT”, you can switch the Non Fading
Output ON/OFF mode. (Refer to page 42.)
1. Press the AUDIO button and select the Non Fading Output ON/OFF mode
(NON FAD) in the Audio Menu.
2. Switch the Non Fading output
ON/OFF with the 5/∞ buttons.
3. Increase or decrease the output
level with the 5/∞ buttons.
The display shows “+6” – “–6”.
2. Select the frequency to 50 Hz,
80 Hz or 125 Hz with the 2/3
buttons.
1. Press the AUDIO button and select the Subwoofer setting mode
(80HZ 0) in the Audio Menu.
36
ENGLISH ESPAÑOL DEUTSCH FRANÇAIS
ITALIANO NEDERLANDS
Page 38

37
Audio Adjustment
Non Fading Output Level Adjustment (NON FAD)
When the Non Fading output is ON, you can adjust the level of Non Fading output.
1. Press the AUDIO button and select the Non Fading Output setting mode
(NON FAD) in the Audio Menu.
Note:
• You can select the Non Fading Output setting mode only when Non Fading Output is switched ON
in the Non Fading Output ON/OFF mode.
High Pass Filter (HPF)
When you do not want sound in the Subwoofer output frequency range output from the
front or rear speakers, switch the High Pass Filter ON. Only higher frequencies than those
in the selected range are output from the front and rear speakers.
1. Press the AUDIO button and select the H.P.F. mode (HPF) in the Audio
Menu.
Note:
• If you select a mode other than “SFEQ OFF”, the H.P.F. function is automatically switched OFF.
By switching the H.P.F. function ON after selecting the SFEQ mode, you can combine H.P.F. function with SFEQ function.
3. Select the desired frequency
with the 2/3 buttons.
50 += 80 += 125 (Hz)
2. Switch the H.P.F. function
ON/OFF with the 5/∞ buttons.
2. Increase or decrease the output
level with the 5/∞ buttons.
The display shows “+6” – “–6”.
Page 39

Source Level Adjustment (SLA)
The SLA (Source Level Adjustment) function prevents radical leaps in volume level when
switching between sources. Settings are based on the FM volume level, which remains
unchanged.
1. Compare the FM volume with the volume of the other source.
(e.g. Built-in CD player.)
2. Press the AUDIO button and select the SLA mode (SLA) in the Audio Menu.
Note:
• Since the FM volume is the control, SLA is not possible in the FM modes.
• The AM volume level, which is different from the FM base setting volume level, can also be
adjusted similar to sources other than tuner.
• The Built-in CD player and Multi-CD player are set to the same volume adjustment setting auto-
matically.
3. Increase or decrease the level
with the 5/∞ buttons.
The display shows “+4” – “–4”.
38
ENGLISH ESPAÑOL DEUTSCH FRANÇAIS
ITALIANO NEDERLANDS
Page 40

39
A Title (English)Detaching and Replacing the Front Panel
Theft Protection
The front panel of the head unit is detachable to discourage theft.
• Keep the front panel closed while driving.
Detaching the Front Panel
Replacing the Front Panel
Precaution:
• Never use force or grip the display tightly when removing or replacing the front panel.
• Avoid subjecting the front panel to excessive shocks.
• Keep the front panel out of direct sunlight and high temperatures.
Warning Tone
If the front panel is not detached within 5 seconds after the ignition is turned off, a warning
tone will sound.
Note:
• You can cancel the warning tone function. (Refer to page 41.)
• Replace the front panel by
holding it upright to this
product and clipping it
securely into the mounting
hooks.
3. Use the protective case provided to store/carry the
detached front panel.
2. Grip and pull the front
panel gently outward.
Take care not to grip it tightly or
drop it.
1. Open the front panel.
Page 41

A Title (English)
40
ENGLISH ESPAÑOL DEUTSCH FRANÇAIS
ITALIANO NEDERLANDS
Initial Setting
Entering the Initial Setting Menu
With this menu, you can perform initial settings for this product.
1. Turn the source OFF.
2. Enter the Initial Setting Menu.
3. Select a desired mode.
4. Operate a mode.
5. Cancel the Initial Setting Menu.
Note:
• Holding down the FUNCTION button for 2 seconds also cancels the Initial Setting Menu.
Each press changes the Mode ...
Hold for 2 seconds
Page 42

41
A Title (English)
Initial Setting Menu Functions
The Initial Setting Menu features the following functions.
Setting the Time
This is the mode for setting the time on the unit’s clock display. (Refer to page 43 for
details concerning the clock display.)
As soon as you switch to “Minute”, the seconds start counting from 00.
Setting the Warning Tone (WARN)
You can switch the Warning Tone function ON/OFF. (Refer to “Warning Tone” on page
39.)
1. Press the FUNCTION button and select the Warning Tone mode (WARN) in
the Initial Setting Menu.
Switching the AUX Mode (AUX)
It is possible to use auxiliary (AUX) equipment with this product.
Activate the AUX mode when using external equipment with this product.
1. Press the FUNCTION button and select the AUX Setting mode (AUX) in the
Initial Setting Menu.
2. Switch the AUX Setting
ON/OFF with the 5/∞ buttons.
2. Switch the Warning Tone
ON/OFF with the 5/∞ buttons.
3. Set as desired with the 5/∞
buttons.
2. Select “Hour” or “Minute”
with the 2/3 buttons.
1. Press the FUNCTION button and select the Time setting mode in the Initial
Setting Menu.
Initial Setting
Page 43

42
ENGLISH ESPAÑOL DEUTSCH FRANÇAIS
ITALIANO NEDERLANDS
Setting the Dimmer (DIMMER)
To enable this product’s display from being too bright at night, when the vehicle’s head
lights are turned ON the display is dimmed.
You can switch this function ON/OFF.
1. Press the FUNCTION button and select the Dimmer mode (DIMMER) in
the Initial Setting Menu.
Setting the Rear Output and Subwoofer Controller (REAR SP)
This product’s rear output (rear speaker leads output and RCA Rear output) can be used
for full-range speaker (“REAR SP:FUL”) or Subwoofer (“REAR SP:S/W”) connection. If
you switch Rear Output setting to the “REAR SP:S/W”, you can connect a rear speaker
lead directly to a Subwoofer without using an auxiliary amp.
Initially, the unit is set for rear full-range speaker connection (“REAR SP:FUL”).
When rear output are connected to full range speakers (when “REAR SP:FUL” is selected), you can connect the RCA Subwoofer output to a Subwoofer. In this case, you can
select whether to use the Subwoofer controller’s (Low Pass Filter, Phase) built-in
“S/W CTL:INT” or the auxiliary “S/W CTL:EXT”.
Note:
• Even if you change this setting, there is no output unless you switch the Non Fading Output (refer
to page 36) or Subwoofer Output (refer to page 35) in the Audio Menu ON.
• If you change the Subwoofer Controller, Subwoofer output and Non Fading output in the Audio
Menu return to the factory settings.
• Both rear speaker leads output and RCA Rear output are switched simultaneously in this setting
mode.
1. Press the FUNCTION button and select the Rear Output and Subwoofer
Controller setting mode (REAR SP) in the Initial Setting Menu.
Note:
• When no Subwoofer is connected to the rear output, select “REAR SP:FUL”.
• When a Subwoofer is connected to the rear output, set for Subwoofer “REAR SP:S/W”.
• When the Rear Output setting is “REAR SP:S/W”, you cannot change the Subwoofer controller.
3. Change the Subwoofer controller with the 2/3 buttons.
2. Change the Rear Output setting with the 5/∞ buttons.
2. Switch the Dimmer ON/OFF
with the 5/∞ buttons.
Page 44

43
Other Functions
Displaying the Time
• To turn the time display ON.
The time display disappears temporarily when you perform another operation, but the time
indication returns to the display after 25 seconds.
Note:
• Even when the sources are OFF, the Time appears on the display. Pressing the CLOCK button
switches the Time display ON/OFF.
Using the AUX Source
An IP-BUS-RCA-Interconnector such as CD-RB20 or CD-RB10 (sold separately) enables
you to connect this product to auxiliary equipment featuring an RCA output.
For more details, refer to the IP-BUS-RCA Interconnector’s Owner’s Manual.
Selecting the AUX Source
• Select AUX. (Refer to page 8.)
AUX Title Input (TITLE IN)
The display title for AUX source can be changed.
1. Select the AUX Title Input mode (TITLE IN) in the Detailed Setting Menu.
2. Input the AUX Title.
Refer to “Disc Title Input” on page 25, and perform procedures 3 to 5 in the same way.
Hold for 2 seconds
Each press changes the Source ...
Page 45

A Title (English)
44
ENGLISH ESPAÑOL DEUTSCH FRANÇAIS
ITALIANO NEDERLANDS
CD Player and Care
Precaution
• Play only CDs bearing the Compact Disc Digital
Audio mark.
• This product is designed for use with conventional,
fully circular CDs only. Use of shaped CDs are not
recommended for this product.
• Check all CDs before playing and discard cracked, scratched or warped discs.
• Normal playback of CD-R discs other than those recorded with a music CD recorder
may not be possible.
• Playback of music CD-R discs, even those recorded with a music CD recorder, may not
be possible with this product due to disc characteristics or scratches or dirt on the disc.
Dirt or condensation on the lens inside this product may also prevent playback.
• Titles and other text information recorded on a CD-R disc may not be displayed by this
product.
• This product conforms to the track skip function of the CD-R disc. The tracks containing
the track skip information are skipped over automatically.
• Read the precautions with the CD-R discs before using.
• Wipe dirty or damp discs outward from the center
with a soft cloth.
• Avoid touching the recorded (iridescent) surface when handling discs.
• Store discs in their cases when not in use.
• Keep discs out of direct sunlight and high temperatures.
• Do not affix labels or apply chemicals to discs.
• Condensation may collect inside the player when using the heater in cold weather, interfering with playback. Turn it off for an hour or so and wipe damp discs with a soft cloth.
• Road shocks may interrupt CD playback.
COMPACT
DIGITAL AUDIO
Page 46

45
A Title (English)CD Player and Care
Built-in CD Player’s Error Message
When problems occur with CD playback, an error message appears on the display. Refer
to the table below to identify the problem, then take the suggested corrective action. If the
error persists, contact your dealer or your nearest PIONEER Service Center.
Message Possible cause Recommended action
ERROR- 11, 12, 17, 30 Dirty disc. Clean the disc.
ERROR- 11, 12, 17, 30 Scratched disc. Replace the disc.
ERROR- 14 Unrecorded CD. Check the disc.
ERROR- 10, 11, 12, 14, Electrical or mechanical Turn the ignition ON and OFF, or
17, 30, A0 problem. switch to a different source, then back
to the CD player.
ERROR- 44 All tracks are setting track skip. Replace the disc.
HEAT CD player overheating. Discontinue play until the machine
temperature drops.
Page 47

A Title (English)
46
ENGLISH ESPAÑOL DEUTSCH FRANÇAIS
ITALIANO NEDERLANDS
Specifications
General
Power source .......... 14.4 V DC (10.8 – 15.1 V allowable)
Grounding system ........................................ Negative type
Max. current consumption ...................................... 10.0 A
Dimensions
(DIN) (chassis) ...... 178 (W) ×50 (H) × 157 (D) mm
[7 (W) × 2 (H) × 6-1/8 (D) in]
(nose) ............ 188 (W) × 58 (H) × 19 (D) mm
[7-3/8 (W) × 2-1/4 (H) × 3/4 (D) in]
(D) (chassis) ...... 178 (W) × 50 (H) × 162 (D) mm
[7 (W) × 2 (H) × 6-3/8 (D) in]
(nose) ............ 170 (W) × 46 (H) × 14 (D) mm
[6-3/4 (W) × 1-3/4 (H) × 1/2 (D) in]
Weight ........................................................ 1.5 kg (3.3 lbs)
Amplifier
Continuous power output is 22 W per channel min. into 4
ohms, both channels driven 50 to 15,000 Hz with no more
than 5% THD.
Maximum power output ...................................... 50 W × 4
50 W × 2 ch/4 Ω + 70 W × 1 ch/2 Ω (for Subwoofer)
Load impedance
...................... 4 Ω (4 – 8 Ω [2 Ω for 1 ch] allowable)
Preout maximum output level/
output impedance .................................... 2.2 V/1 kΩ
Equalizer (3-Band Parametric Equalizer)
(Low) .......................... Frequency: 40/80/100/160 Hz
Q Factor: 0.35/0.59/0.95/1.15
(+6 dB when boosted)
Level: ±12 dB
(Mid) .......................... Frequency: 200/500/1k/2k Hz
Q Factor: 0.35/0.59/0.95/1.15
(+6 dB when boosted)
Level: ±12 dB
(High) ................ Frequency: 3.15k/8k/10k/12.5k Hz
Q Factor: 0.35/0.59/0.95/1.15
(+6 dB when boosted)
Level: ±12 dB
Loudness contour
(Low) .................. +3.5 dB (100 Hz), +3 dB (10 kHz)
(Mid) ................ +10 dB (100 Hz), +6.5 dB (10 kHz)
(High) ................ +11 dB (100 Hz), +11 dB (10 kHz)
(volume: –30 dB)
Tone controls
(Bass) .......................... Frequency: 40/63/100/160 Hz
Level: ±12 dB
(Treble) .................. Frequency: 2.5k/4k/6.3k/10k Hz
Level: ±12 dB
HPF
Frequency ............................................ 50/80/125 Hz
Slope ........................................................ –12 dB/oct.
Subwoofer output
Frequency ............................................ 50/80/125 Hz
Slope ........................................................ –18 dB/oct
Gain ................................................................ ±12 dB
CD player
System .................................... Compact disc audio system
Usable discs .................................................. Compact disc
Signal format .................... Sampling frequency: 44.1 kHz
Number of quantization bits: 16; linear
Frequency characteristics .............. 5 – 20,000 Hz (±1 dB)
Signal-to-noise ratio ...... 94 dB (1 kHz) (IHF-A network)
Dynamic range ............................................ 92 dB (1 kHz)
Number of channels ............................................ 2 (stereo)
FM tuner
Frequency range .................................... 87.9 – 107.9 MHz
Usable sensitivity ...................................................... 9 dBf
(0.8 µV/75 Ω, mono, S/N: 30 dB)
50 dB quieting sensitivity .... 15 dBf (1.5 µV/75 Ω, mono)
Signal-to-noise ratio .................... 70 dB (IHF-A network)
Distortion ........................ 0.3% (at 65 dBf, 1 kHz, stereo)
Frequency response ...................... 30 – 15,000 Hz (±3 dB)
Stereo separation ........................ 40 dB (at 65 dBf, 1 kHz)
Selectivity .................................................. 70 dB (2ACA)
Three-signal intermodulation
(desired signal level) ...................................... 30 dBf
(two undesired signal level: 100 dBf)
AM tuner
Frequency range ...................... 530 – 1,710 kHz (10 kHz)
Usable sensitivity .............................. 18 µV (S/N: 20 dB)
Selectivity ................................................ 50 dB (±10 kHz)
Note:
• Specifications and the design are subject to possi-
ble modification without notice due to improvements.
Page 48

1
Table des matières
Cher Client .................................................. 3
Tableau des commandes .......................... 4
-
Élément central
-
Télécommande
Avant d’utiliser cet appareil .................... 5
Quelques mots concernant cet appareil ............ 5
Quelques mots concernant ce mode d’emploi .... 5
Précaution .......................................................... 5
Service après-vente des produits PIONEER .... 6
Lors de l’utilisation du lecteur de CD
à changeur 50 disques ................................ 6
À propos de la marque XM READY ................ 6
Remarques concernant le boîtier
de télécommande ................................ 7
Utilisation du boîtier de télécommande ............ 7
Pile .................................................................... 7
Opérations de base .................................... 8
Pour écouter de la musique .............................. 8
Opérations de base sur le syntoniseur ............ 10
-
Accord manuel et accord automatique
-
Mise en mémoire des fréquences
-
Gamme
Opérations de base sur le lecteur de
CD intégré ................................................ 11
-
Choix des indications affichées
-
Ouverture
-
Recherche d’une plage musicale
et déplacement rapide du capteur
-
Fente pour le CD
-
Ejection
Opérations de base sur les lecteurs de
CD à chargeur .......................................... 13
-
Recherche d’une plage musicale et
déplacement rapide du capteur
-
Recherche d’un disque
-
Recherche d’un disque par son numéro
(lecteurs à chargeur 6 disques ou
chargeur 12 disques)
Correspondance entre les indications
affichées et les touches ............................ 14
Affichage du menu des fonctions .................... 14
Fonctions du menu des fonctions .................... 15
Affichage du menu des réglages détaillés ...... 16
Fonctions du menu des réglages détaillés ...... 17
Fonctions de la touche PGM .......................... 17
Utilisation du syntoniseur ...................... 18
-
Accord automatique sur les seules
stations puissantes (LOCAL)
-
Mémoire des meilleures stations (BSM)
Utilisation du lecteur de CD intégré .... 19
-
Répétition de la lecture (REPEAT)
-
Lecture au hasard (RANDOM)
-
Examen rapide du disque (T-SCAN)
-
Pause (PAUSE)
-
Frappe du titre d’un disque (TITLE IN)
Utilisation des lecteurs de CD
à chargeur .......................................... 21
-
Répétition de la lecture (REPEAT)
-
Lecture au hasard (RANDOM)
-
Examen rapide des disques (SCAN)
-
Pause (PAUSE)
ITS (Programmation en temps réel) ................ 23
-
Programmation en temps réel (ITS)
-
Lecture ITS (ITS-P)
-
Pour effacer un numéro de plage musicale
-
Pour effacer un numéro de disque
Titre d’un disque ............................................ 25
-
Frappe du titre d’un disque (TITLE IN)
-
Choix d’un disque sur la liste des titres
(TITLE LIST)
-
Affichage du titre du disque
Compression et DBE (COMP) ........................ 27
-
Mise en/hors service de la fonction
(COMP/DBE)
Fonction CD TEXT (pour les disques
compatibles CD TEXT) .......................... 28
-
Affichage, ou non, du titre
-
Défilement du titre
Page 49

Réglages du son ...................................... 29
Réglage de l’égaliseur de focalisation sonore
(SFEQ) .................................................... 29
-
À propos de l’égaliseur de focalisation
sonore (SFEQ)
Choix de la courbe d’égalisation .................... 30
-
À propos des courbes personnalisées
Affichage du menu des réglages sonores ........ 31
Paramètres du menu des réglages sonores ...... 31
-
Réglage de l’équilibrage (FADER)
-
Réglage de la courbe d’égalisation
(EQ-LOW/EQ-MID/EQ-HIGH)
-
Réglage fin de la courbe d’égalisation
-
Réglage des graves (BASS)
-
Réglage des aigus (TRE)
-
Mise en service de la correction
physiologique (LOUD)
-
Sortie vers le haut-parleur d’extrêmes
graves (SUB.W)
-
Réglage de la sortie vers le haut-parleur
d’extrêmes graves (80HZ 0)
-
Sortie de ligne préamplifiée (NON FAD)
-
Ajustement du niveau de la sortie de ligne
préamplifiée (NON FAD)
-
Filtre passe-haut (HPF)
-
Réglage du niveau de la source sonore
(SLA)
Dépose et pose de la face avant .......... 39
Protection contre le vol .................................. 39
-
Dépose de la face avant
-
Pose de la face avant
-
Tonalité d’alarme
Réglages initiaux .................................... 40
Affichage du menu des réglages initiaux ........ 40
Paramètres du menu des réglages initiaux ...... 41
-
Réglage de l’heure
-
Réglage de la tonalité d’alarme (WARN)
-
Utilisation, ou non, de la source auxiliaire
(AUX)
-
Réglage de la luminosité (DIMMER)
-
Réglage de la sortie arrière et du
contrôleur de l’enceinte d’extrêmes
graves (REAR SP)
Autres fonctions ...................................... 43
Affichage de l’heure ........................................ 43
Utilisation de l’entrée AUX ............................ 43
-
Choix de l’entrée AUX
-
Frappe du nom de l’entrée AUX
(TITLE IN)
Lecteur de CD et entretien .................... 44
Précaution ........................................................ 44
Messages d’erreur fournis par
le lecteur de CD ........................................ 45
Caractéristiques techniques ................ 46
2
ENGLISH
FRANÇAIS DEUTSCH FRANÇAIS
ITALIANO NEDERLANDS
Page 50

3
Cher Client:
La sélection d’un équipement audio de qualité comme l’unité que vous venez d’acheter n’est
que le début de votre plaisir musical. Maintenant, il est temps de penser à la manière de profiter
au maximum des plaisirs que vous offre votre équipement. Ce fabricant et le Groupe “Consumer
Electronics Group” de l’Association des Industries Electroniques veut que vous profitiez au maximum de votre équipement en l’utilisation à un niveau sûr. Un niveau qui permet au son d’être fort
et clair, sans beuglement ennuyant ou distorsion — et, ce qui est plus important, sans affecter
votre ouïe sensible.
Le son peut être décevant. Avec le temps, le “niveau de confort” de votre ouïe s’adapte aux volumes sonores plus élevés. Ainsi, les sons “normaux” peuvent en fait être forts et affecter votre
ouïe. Protégez-vous contre cela en réglant votre équipement à un niveau sûr AVANT l’adaptation
de votre ouïe.
Pour établir un niveau sûr:
• Démarrer votre commande de volume à un réglage bas.
• Augmentez lentement le son jusqu’à ce que vous l’entendiez confortablement et clairement,
sans distorsion.
Lorsque vous avez établi un niveau sonore confortable:
• Réglez le cadran et laissez-le tel quel.
En prenant une minute pour faire cela, vous pourrez éviter des dommages ou des pertes de
sensibilités d’écoute dans le futur. Après tout, nous voulons que vous écoutiez pendant toute
votre vie.
Nous voulons que vous écoutiez pendant toute votre vie
Utilisé avec sagesse, votre nouvel équipement sonore sera une source de plaisir pendant toute
votre vie. Comme les dommages de l’ouïe provenant d’un bruit fort ne sont souvent détectables
que lorsqu’il est trop tard, ce fabricant et le Groupe “Consumer Electronics Group” de
l’Association des Industries Electroniques vous recommandent d’éviter toute exposition prolongée à un bruit excessif. Cette liste de niveaux sonores est incluse pour votre protection.
Niveau de
Décibels Exemple
30 Bibliothèque tranquille, chuchotement
40 Salon, réfrigérateur, chambre à distance de la circulation
50 Circulation légère, conversation normale, bureau tranquille
60 Climatiseur à 20 pieds, machine à coudre
70 Aspirateur, sèche-cheveux, restaurant bruyant
80 Circulation moyenne en ville, évacuateurs de déchets, réveils à deux pied
s
LES BRUITS SUIVANTS PEUVENT ETRE DANGEREUX DANS LE CAS D’UNE
EXPOSITION CONSTANTE
90 Métro, motocyclette, circulation de camion, tondeuse à gazon
100 Collecteurs de poubelle, scie à chaîne, perceuse pneumatique
120 Concert de groupe rock devant les haut-parleurs, coup de tonnerre
140 Coup de pistolet, avion à réaction
180 Aire de lancement d’une fusée
Ces informations ont été gracieusement fournies par la Fondation de la Recherche pour les Sourds.
Page 51

Tableau des commandes
Élément central
Télécommande
Un boîtier de télécommande est fourni avec l’élément central. Il permet les mêmes opérations que celles possibles au moyen des touches de l’élément central.
4
ENGLISH
FRANÇAIS DEUTSCH FRANÇAIS
ITALIANO NEDERLANDS
Touche DISPLAY
Touche FUNCTION
VOLUME
Touches 1-6
Touche AUDIO
Touche PGMTouche SOURCE
Touche EQ
Touche CLOCK
Touche OPEN
Touche SFEQ
Touche BAND
Touches
5/∞/2/3
Touche +/–
Augmentez ou diminuez le
niveau d’écoute.
Touche AUDIO
Touches
5/∞/2/3
Touche TUNER
Appuyez une fois sur cette touche
pour choisir le syntoniseur.
Touche ATT
Cette touche permet d’atténuer
rapidment le niveau de sortie
(environ 90%). Appuyez une nouvelle fois sur cette touche pour
rétablir le nivaeu d’origine.
Touche FUNCTION
Touche BAND
Touche CD
Appuyez une fois sur cette
touche pour choisir un CD.
Touche PAUSE
Appuyez une fois sur cette
touche pour commander
une pause.
Page 52

5
Avant d’utiliser cet appareil
Quelques mots concernant cet appareil
Les fréquences d’accord de cet appareil sont attribuées pour une utilisation en Amérique
du Nord. Il s’ensuit que l’utilisation de l’appareil dans d’autres régions peut donner lieu à
des anomalies de réception.
Quelques mots concernant ce mode d’emploi
Cet appareil est doté de nombreuses fonctions qui permettent la réception dans les
meilleures conditions. Ces fonctions sont conçues pour que leur emploi soit aussi aisé que
possible mais certaines exigent quelques explications. Ce mode d’emploi a pour objet de
vous aider à tirer le meilleur parti des possibilités de l’appareil de façon que votre plaisir
d’écouter de la musique soit aussi grand que possible.
Nous vous conseillons de lire attentivement ce mode d’emploi afin de vous familiariser
avec les fonctions et les modes opératoires. Il est tout spécialement important de lire et de
respecter la “Précaution” qui figure à la cette page et dans d’autres sections de ce mode
d’emploi.
Ce mode d’emploi traite de l’élément central, encastré dans le tableau de bord. Le boîtier
de télécommande permet d’effectuer les mêmes opérations.
Précaution
• Conservez ce mode d’emploi à portée de main de façon à pouvoir vous y reporter en cas
de besoin.
• Maintenez le niveau d’écoute à une valeur telle que les bruits extérieurs ne soient pas
masqués.
• Veillez à ce que l’appareil soit à l’abri de l’humidité.
• Si la batterie est débranchée, le contenu de la mémoire des fréquences d’accord est
effacé et la remise en mémoire des fréquences est nécessaire.
Page 53

6
ENGLISH
FRANÇAIS DEUTSCH FRANÇAIS
ITALIANO NEDERLANDS
Service après-vente des produits PIONEER
Veuillez contacter votre revendeur ou distributeur en ce qui concerne le service après-vente
(et les conditions de garantie) ou tout autre information. En cas de nécessité ou lorsque l’information recherchée n’est pas disponible, veuillez contacter Pioneer aux adresses suivantes;
N’envoyez pas le produit à réparer sans avoir, au préalable, contacté nos bureaux.
Pour de plus amples informations relatives à la garantie, référez-vous au feuillet Garantie
Limitée livrée avec l’appareil.
Lors de l’utilisation du lecteur de CD à changeur 50 disques
Les fonctions disponibles du lecteur de CD à changeur 50 disques sont décrites dans ce
mode d’emploi. Notez que les autres fonctions du lecteur de CD à changeur 50 disques ne
peuvent pas être utilisées avec ce produit.
À propos de la marque XM READY
La marque “XM READY” imprimée sur la face avant de cet appareil indique que le tuner
XM de Pioneer (vendu séparément) peut être commandé à l’aide de cet appareil.
Veuillez vous renseigner auprès de votre revendeur ou du centre de service autorisé
Pioneer le plus proche en ce qui concerne le tuner XM pouvant être connecté à cet
appareil.
Pour le fonctionnement du tuner XM, reportez-vous à son mode d’emploi.
Remarque:
• La radio satellite XM utilise une nouvelle bande radio aux États-Unis. Le système utilisera une
technologie de diffusion directe du satellite à l’utilisateur et offrira aux auditeurs dans leur voiture
un son pur comme du cristal, sans raccord d’une côte à l’autre. XM créera et proposera jusqu’à 100
canaux de programmes de qualité numérique de musique, d’informations, de sports, de discussions
et pour enfants.
• Quand ce produit est connecté au tuner XM, ne le connectez pas à un autre appareil extérieur.
(Reportez-vous à la page 8.)
7 U.S.A.
Pioneer Electronics Service, Inc.
CUSTOMER SERVICE
DEPARTMENT
P.O. Box 1760
Long Beach, CA 90801
800-421-1404
7 CANADA
Pioneer Electronics of Canada, Inc.
CUSTOMER SERVICE
DEPARTMENT
300 Allstate Parkway
Markham, Ontario L3R OP2
(905) 479-4411
1-877-283-5901
Page 54

7
Remarques concernant le boîtier de télécommande
Utilisation du boîtier de télécommande
Cet appareil est livré avec un boîtier de télécommande qui en facilite l’emploi.
• Pointez la télécommande vers le panneau avant pour l’utiliser.
Précaution:
• Ne rangez pas la télécommande dans un endroit tès chaud ou sous les rayons directs du soleil.
• La télécommande peut ne pas fonctionner correctement sous les rayons directs du soleil.
• Ne laissez pas la télécommande tomber sur le plancher où elle peut se coincer sous la pédale de
frein ou d’accélérateur.
Pile
• Sortez le logement de la pile, au dos de la télécommande, et introduisez la
pile en respectant les polarités (+) et (–) indiquées.
Remplacement de la pile au lithium:
• Remplacez la pile par une pile au lithium CR2025 (3 V).
Précaution:
• Retirez la pile si la télécommande n’est pas utilisée pendant un mois ou plus.
• En cas de fuite de pile, essuyez bien la télécommande et chargez de pile neuves.
ATTENTION:
• Conservez les piles au lithium hors de portée des enfants. En cas d’ingestion d’une pile,
consultez immédiatement un médecin.
PRÉCAUTION:
• Ne tentez pas de charger, démonter, chauffer la pile; ne la jeter pas dans un feu.
• N’utilisez que des piles au lithium type CR2025 (3V). Tous les autres types de pile sont
à proscrire.
• Ne saisissez pas la pile à l’aide d’un outil métallique.
• Ne stockez pas les piles au lithium au voisinage de matériaux métalliques.
• Lors de la mise au rebut des piles usagées, respectez les règlements en vigueur dans le
pays en matière de conservation ou de protection de l’environnement.
• Lors de la mise en place d’une pile pile, veillez à respecter les polarités (+) et (–)
indiquées.
Page 55

Opérations de base
Pour écouter de la musique
Voici les opérations de base que vous devez effectuer avant de pouvoir écouter de la
musique.
Remarque:
• Mise en place d’un disque. (Reportez-vous à la page 11.)
1. Choisissez la source (par exemple, choisissez le syntoniseur).
7 Élément central
Chaque pression sur cette touche SOURCE, provoque le choix d’une autre source, comme suit:
Lecteur de CD intégré = Téléviseur = Syntoniseur = Lecteur de CD à chargeur
= L’appareil extérieur = AUX
7 Télécommande
Chaque pression sur la touche provoque la sélection d’une autre source, dans l’ordre qui
suit:
Touche TUNER : Téléviseur = Syntoniseur = Hors service
Touche CD : Lecteur de CD intégré = Lecteur de CD à chargeur = Hors service
Remarque:
• L’appareil extérieur fait référence à un appareil Pioneer (disponible dans le futur) qui, bien
qu’incompatible en tant que source, permet de commander les fonctions de base de cet appareil.
Un seul appareil extérieur peut être commandé par cet appareil.
• Dans les cas suivants, la source n’est pas modifiée:
* Quand un appareil correspondant à une source n’est pas connecté à cet appareil.
* L’appareil ne contient aucun disque.
* Le lecteur de CD à chargeur ne contient aucun chargeur.
* L’entrée AUX (entrée extérieure) n’est pas en service. (Reportez-vous à la page 41.)
• Si le fil bleu/blanc de cet appareil est connecté à la prise de commande du relais de l’antenne
automatique, celle-ci s’étend automatiquement quand l’appareil source est mis en service. Pour
rétracter l’antenne, mettez l’appareil source hors service.
(à suivre)
Chaque pression change la source ...
8
ENGLISH
FRANÇAIS DEUTSCH FRANÇAIS
ITALIANO NEDERLANDS
Page 56

9
Opérations de base
2. Augmentez ou diminuez le niveau d’écoute.
Rouler la commande VOLUME, change le niveau d’écoute.
Remarque:
• Roulez la commande dans le sens des aiguilles d’une montre pour augmenter le niveau d’écoute.
• Roulez la commande dans le sens contraire des aiguilles d’une montre pour diminuer le niveau
d’écoute.
3. Mettez la source hors service.
Appuyez pendant 1 seconde
Page 57

Opérations de base sur le syntoniseur
10
ENGLISH
FRANÇAIS DEUTSCH FRANÇAIS
ITALIANO NEDERLANDS
Accord manuel et accord automatique
• Vous pouvez choisir la méthode de syntonisation en appuyant plus
ou moins longuement sur les touches 2/3.
Accord manuel (pas à pas) Pression égale ou inférieure à 0,5 seconde
Accord automatique Pression égale ou supérieure à 0,5 seconde
(automatiquement)
Remarque:
• Si vous maintenez la pression d’un doigt sur la touche pendant plus de 0,5 seconde,
les stations de radiodiffusion sont sautées. L’accord automatique commence dès que
vous cessez d’appuyer sur la touche.
• Le témoin “” s’éclaire quand vous choisissez une station émettant en stéréophonie.
Numéro de présélection
Gamme
F1 (FM1) = F2 (FM2)
= F3 (FM3) = AM
Indicateur de gamme
Fréquence
Mise en mémoire des fréquences
• Les mémoires associées aux touches 1 à 6 permettent de conserver les fréquences des stations.
Rappel d’une présélection 2 secondes ou moins
Mise en mémoire d’une fréquence 2 secondes ou plus
Remarque:
• La mémoire peut contenir 18 fréquences de station FM (6
fréquences pour la gamme F1 (FM1), 6 pour la gamme F2
(FM2) et 6 pour la gamme F3 (FM3)) et 6 fréquences de
station AM.
• Pour le rappel des fréquences mises en mémoire grâce aux
touches 1 à 6, vous pouvez également utiliser les touches
5 ou ∞.
Page 58

11
Opérations de base
Opérations de base sur le lecteur de CD intégré
Remarque:
• Après la mise en place ou d’ejecter un disque, n’oubliez pas de refermer le panneau avant.
Choix des indications affichées
Chaque pression sur la touche DISPLAY
change les indications affichées, dans
l’ordre suivant:
Lecture (Durée de lecture)
= Titre du disque
Remarque:
• Si vous commandez d’afficher des informations alors que le disque ne porte pas de
titre, l’indication “NO TITLE”, s’affiche.
Ouverture
Remarque:
• Utilisez cette commande pour
ouvrir la face avant afin de mettre en place ou d’éjecter un CD.
(L’illustration de droite montre
la face avant quand elle est
ouverte.)
Indicateur de temps de lectureNuméro de plage musicale
Recherche d’une plage musicale et déplacement rapide du capteur
• Vous pouvez choisir de rechercher une plage musicale ou de déplacer rapidement le capteur, en appuyant plus ou moins longuement sur les touches
2/3.
Recherche d’une plage musicale 0,5 seconde ou moins
Déplacement rapide du capteur Pression continue
Page 59

12
ENGLISH
FRANÇAIS DEUTSCH FRANÇAIS
ITALIANO NEDERLANDS
Fente pour le CD
Remarque:
• Le lecteur de CD intégré accepte un seul disque (12 cm ou 8
cm). N’utilisez aucun adaptateur pour la lecture d’un disque de
8 cm.
• N’introduisez aucun objet autre qu’un CD dans la fente pour le
CD.
Ejection
Remarque:
• Il n’est pas nécessaire de retirer le disque pour
mettre le lecteur de CD en service, ou hors
service. (Reportez-vous à la page 8.)
• Ne conservez pas le disque partiellement
introduit dans le lecteur (après son éjection) car
il pourrait être endommagé.
Remarque:
• Si vous ne parvenez pas à introduire complètement le disque, ou encore si la lecture est impossible,
assurez-vous que la face gravée est bien tournée vers le bas, appuyez sur la touche EJECT et contrôlez l’état du disque avant de le réintroduire.
• Si le lecteur de CD intégré ne peut pas fonctionner normalement, un message d’erreur (par exemple “ERROR-14”) s’affiche. Reportez-vous à la page 45, “Messages d’erreur fournis par le lecteur
de CD”.
• Le lecteur CD intégré n’est pas équipé de la fonction CD TEXT.
• Un CD TEXT est un disque compact qui porte en outre des informations alphanumériques telles
que le titre du disque, le nom de l’artiste et le titre de chaque plage musicale.
Page 60

13
Opérations de base
Opérations de base sur les lecteurs de CD à chargeur
Cet appareil peut commander le fonctionnement d’un lecteur de CD à chargeur (vendu
séparément).
Indicateur de temps
de lecture
Numéro de disque
Numéro de plage musicale
Recherche d’un disque par son numéro
(lecteurs à chargeur 6 disques ou chargeur 12 disques)
•
Vous pouvez choisir un disque directement grâce aux touches 1 à 6. Il vous suffit
pour cela d’appuyer sur la touche correspondant au numéro du disque.
Remarque:
• Si vous possédez un lecteur à chargeur 12 disques et si vous désirez choisir un disque dont le
numéro est compris entre 7 et 12, il vous suffit d’appuyer pendant 2 secondes sur la touche 1 à 6
correspondante.
Remarque:
• Quand vous mettez l’appareil sous tension ou choisissez un autre disque, le lecteur de CD à
chargeur peut procéder à diverses opérations préliminaires (vérification de la présence du disque,
lecture des données relatives au disque, etc.). Pendant ce temps, l’indication “READY” s’affiche.
• Si le lecteur de CD à chargeur ne fonctionne pas normalement, un message d’erreur tel que
“ERROR-14” s’affiche. Reportez-vous alors au mode d’emploi du lecteur de CD à chargeur.
• L’indication “NO DISC” s’affiche si le lecteur de CD à chargeur ne contient aucun disque.
Recherche d’un disque
Recherche d’une plage musicale et déplacement
rapide du capteur
• Vous pouvez choisir de rechercher une plage
musicale ou déplacer rapidement le capteur, en
appuyant plus ou moins longuement sur les
touches 2/3.
Recherche d’une plage musicale 0,5 seconde ou moins
Déplacement rapide du capteur Pression continue
Page 61

14
ENGLISH
FRANÇAIS DEUTSCH FRANÇAIS
ITALIANO NEDERLANDS
Correspondance entre les indications affichées et les touches
L’afficheur de cet appareil est pourvu d’un système de témoins d’aide. Ils s’éclairent pour
vous signaler laquelle des touches 5/∞/2/3, FUNCTION et AUDIO vous pouvez utiliser. Lorsque le menu des fonctions (reportez-vous à la section suivante), ou le menu des
réglages détaillés (reportez-vous à la page 16), ou le menu des réglages initiaux (reportezvous à la page 40), ou le menu de réglage du son (reportez-vous à la page 31), est affiché,
ces témoins permettent également de savoir aisément quelles touches 5/∞/2/3 vous pou-
vez utiliser pour mettre en service, ou hors service, une source, répéter une plage musicale
et effectuer d’autres opérations.
Les témoins et les touches correspondantes sont indiqués ci-dessous.
7 Élément central 7 Télécommande 7 Affichage
Lorsque le témoin 1 est éclairé, effectuez les opérations au moyen de la touche z.
Lorsque le témoin 2 est éclairé, cela signifie que le menu des fonctions, le menu des
réglages détaillés ou le menu des réglages initiaux, est affiché. Vous pouvez passer d’un
menu à l’autre, et au sein de chaque menu d’une fonction à une autre, en utilisant la touche
x de l’élément central ou de la télécommande.
Lorsque le témoin 3 est éclairé, le menu de réglage du son est affiché. Vous pouvez
passer d’une fonction à une autre de ce menu en appuyant sur la touche c de l’élément
central ou de la télécommande.
Affichage du menu des fonctions
Le menu des fonctions permet de choisir les conditions de fonctionnement pour chaque source.
Remarque:
• Si vous ne procédez à aucune opération dans les 30 secondes qui suivent l’affichage du menu des
fonctions, ce menu disparaît automatiquement.
1. Choisissez le mode de fonctionnement grâce au menu des fonctions.
(Reportez-vous à la section suivante, “Fonctions du menu des fonctions”.)
(à suivre)
Chaque pression change le mode ...
z
c
x
Page 62

15
Opérations de base
2. Procédez aux réglages requis. (par exemple, la répétition de la lecture)
3. Abandonnez le menu des fonctions.
Fonctions du menu des fonctions
Le tableau qui suit précise les fonctions disponibles, sur le menu des fonctions, pour les
diverses sources.
Ce tableau donne également la liste des noms, opérations et touches concernées. Pour de
plus amples détails concernant une opération, reportez-vous à la page mentionnée dans le
tableau.
7 Syntoniseur
Fonction (Indication affichée) Touche: Résultat Page
Mémoire des meilleures stations (BSM) 5: En 18
∞: Hors
Accord automatique sur les seules stations 1 5: En 18
puissantes (LOCAL) 3 ∞: Hors
2 2 ou 3: Choisissez (Sensibilité)
7 Lecteur de CD intégré
Fonction (Indication affichée) Touche: Résultat Page
Répétition de la lecture (REPEAT) 5: En 19
∞: Hors
Lecture au hasard (RANDOM) 5: En 19
∞: Hors
Examen rapide du disque (T-SCAN) 5: En 20
∞: Hors
Pause (PAUSE) 5: En 20
∞: Hors
La touche utilisée et l’opération réalisée, sont alors
indiquées sur l’appareil par les témoins d’aide.
Appuyez sur la touche 5 pour disposer de ces
informations, ou sur la touche ∞ si vous ne désirez
pas les afficher.
Page 63

7 Lecteur de CD à chargeur
Fonction (Indication affichée) Touche: Résultat Page
Répétition de la lecture (REPEAT) 2 ou 3: Choisissez (Possibilité de lecture) 21
Choix d’un disque sur la liste des titres 1 2 ou 3: Choisissez (Titre du disque) 26
(TITLE LIST) 2 5: Lecture
Lecture au hasard (RANDOM) 5: En 21
∞: Hors
Examen rapide des disques (SCAN) 5: En 22
∞: Hors
Lecture ITS (ITS-P) 5: En 23
∞: Hors
Pause (PAUSE) 5: En 22
∞: Hors
Compression et DBE (COMP) 5 ou ∞: Choisissez 27
(Fonction de réglage de la restitution)
Affichage du menu des réglages détaillés
Le menu des réglages détaillés permet d’avoir accès aux diverses fonctions propres à
chaque source.
1. Affichez le menu des réglages détaillés.
2. Choisissez le mode de fonctionnement désiré. (Reportez-vous à la section
suivante, “Fonctions du menu des réglages détaillés”.)
3. Procédez aux réglages requis.
(à suivre)
Chaque pression change le mode ...
Appuyez pendant 2 secondes
16
ENGLISH
FRANÇAIS DEUTSCH FRANÇAIS
ITALIANO NEDERLANDS
Page 64

17
Opérations de base
4. Abandonnez le menu des réglages détaillés.
Remarque:
• Vous pouvez abandonner le menu des réglages détaillés en appuyant une nouvelle fois, pendant
2 secondes, sur la touche FUNCTION.
Fonctions du menu des réglages détaillés
Le tableau qui suit indique les fonctions correspondant aux diverses sources du menu des réglages
détaillés. Ce tableau fournit également la liste des fonctions, opérations et touches. Pour de plus
amples détails concernant une opération, reportez-vous à la page mentionnée dans le tableau.
Remarque:
• Le syntoniseur ne possède pas de menu des réglages détaillés.
7 Lecteur de CD intégré
Fonction (Indication affichée) Touche: Résultat Page
Frappe du titre d’un disque (TITLE IN) 1 5 ou ∞: Choisissez (Caractère) 20
2 2 ou 3: Choisissez (Position)
3 3: Mémoire
7 Lecteur de CD à chargeur
Fonction (Indication affichée) Touche: Résultat Page
Frappe du titre d’un disque (TITLE IN) 1 5 ou ∞: Choisissez (Caractère) 25
2 2 ou 3: Choisissez (Position)
3 3: Mémoire
Programmation ITS (ITS) 5: Mémoire 23
Fonctions de la touche PGM
Le tableau suivant montre les fonctions de chaque source lorsque vous appuyez sur la touche PGM.
Pour plus de détails ou si vous souhaitez en savoir plus sur une fonction, reportez-vous au
numéro de page indiqué.
7 PGM
Source Fonction Page
Syntoniseur Mémoire des meilleures stations (Hors) 18
Mémoire des meilleures stations (En)
(Appuyez pendant 2 secondes.) 18
Lecteur de CD intégré Pause 20
Lecteur de CD à changeur Pause 22
Téléviseur Mémoire séquentielle des meilleures stations (Hors) —
Mémoire séquentielle des meilleures stations (En)
(Appuyez pendant 2 secondes.) —
Remarque:
• Pour plus de détails sur les fonctions du téléviseur, reportez-vous au mode d’emploi du téléviseur.
Page 65

Utilisation du syntoniseur
Accord automatique sur les seules stations puissantes (LOCAL)
Avec le réglage Local, vous ne pouvez choisir que des stations dont le signal reçu est puissant.
FM : LOCAL 1 Ô LOCAL 2 Ô LOCAL 3 Ô LOCAL 4
AM : LOCAL 1 Ô LOCAL 2
Remarque:
• Le réglage LOCAL 4 permet la réception des seules stations très puissantes; les autres réglages
autorisent, dans l’ordre décroissant, la réception de stations de moins en moins puissantes.
Mémoire des meilleures stations (BSM)
Grâce à cette fonction BSM, les fréquences des stations les plus puissantes sont mises en
mémoire automatiquement.
Remarque:
• Vous pouvez aussi mettre en service la fonction BSM en appuyant sur la touche PGM pendant 2
secondes.
Remarque:
• Vous pouvez aussi mettre hors service la fonction BSM en appuyant sur la touche PGM.
•
Pour interrompre la mise en
mémoire, appuyez sur la touche
∞, le menu des fonctions étant
affiché, avant que cette mise en
mémoire ne soit terminée.
2. Mettez la mémoire des meilleures
stations en service au moyen de
la touche 5.
Les fréquences des stations dont le
signal reçu par le syntoniseur est
puissant sont sauvegardées par les
mémoires des touches 1 à 6, dans
l’ordre décroissant de puissance.
1. Appuyez sur la touche FUNCTION puis choisissez le mode de BSM (BSM)
grâce au menu des fonctions.
3. Choisissez la sensibilité convenable pour l’accord sur les
stations puissantes au moyen
des touches 2/3.
“LOC”
2. Mettez la réception des stations puissantes en service, ou
hors service, au moyen des
touches 5/∞.
1. Appuyez sur la touche FUNCTION puis choisissez le mode de réception des
stations puissantes (LOCAL) grâce au menu des fonctions.
18
ENGLISH
FRANÇAIS DEUTSCH FRANÇAIS
ITALIANO NEDERLANDS
Page 66

Utilisation du lecteur de CD intégré
Répétition de la lecture (REPEAT)
Dans le cas présent, la répétition de la lecture concerne une seule plage musicale.
Remarque:
• Si vous recherchez une plage musicale ou si vous commandez le déplacement rapide du capteur, la
répétition de la lecture est abandonnée.
Lecture au hasard (RANDOM)
Les plages musicales du disque sont lues au hasard, ce qui apporte quelque variété.
2. Mettez la lecture au hasard en
service, ou hors service, au
moyen des touches 5/∞.
1. Appuyez sur la touche FUNCTION puis choisissez le mode de lecture au
hasard (RANDOM) grâce au menu des fonctions.
“RPT ”
2. Mettez la répétition de la lecture
en service, ou hors service, au
moyen des touches 5/∞.
1. Appuyez sur la touche FUNCTION puis choisissez le mode de répétition
(REPEAT) grâce au menu des fonctions.
19
Page 67

20
ENGLISH
FRANÇAIS DEUTSCH FRANÇAIS
ITALIANO NEDERLANDS
Examen rapide du disque (T-SCAN)
Pendant l’examen rapide du disque, les 10 premières secondes de chaque plage musicale
sont lues successivement.
Remarque:
• L’examen rapide du disque est automatiquement abandonné lorsque toutes les plages musicales ont
été passées en revue.
Pause (PAUSE)
Pause permet d’arrêter momentanément la lecture d’une plage musicale.
Remarque:
• Vous pouvez aussi mettre en/hors service la fonction de pause en appuyant sur la touche PGM.
Frappe du titre d’un disque (TITLE IN)
La fonction “TITLE IN” du lecteur de CD intégré permet la frappe de 48 titres de disque.
(Réalisez la procédure décrite à la page 25 dans la section “Utilisation des lecteurs de CD à
chargeur”.)
Remarque:
•
Après avoir entré les titres de 48 titres, les données d’un nouveau disque écraseront le plus ancien titre.
• Si l’installation comporte un lecteur de CD à chargeur, le nombre de disques que vous pouvez titrer
est porté à 100.
2. Mettez la pause en service, ou
hors service, au moyen des
touches 5/∞.
1. Appuyez sur la touche FUNCTION puis choisissez le mode de pause
(PAUSE) grâce au menu des fonctions.
3. Lorsque se présente la plage
musicale que vous désirez
écouter, abandonnez l’examen
rapide du disque en appuyant sur
la touche ∞.
Si le menu des fonctions a été abandonné automatiquement, choisissez à
nouveau le mode d’examen rapide du
disque sur le menu des fonctions.
2. Mettez la lecture d’examen
rapide des disques en service au
moyen de la touche 5.
1. Appuyez sur la touche FUNCTION puis choisissez le mode d’examen
rapide du disque (T-SCAN) grâce au menu des fonctions.
Page 68

Utilisation des lecteurs de CD à chargeur
Répétition de la lecture (REPEAT)
Il y a trois champs de lecture répétée: répétition d’une plage musicale, répétition d’un
disque et répétition des disques d’un chargeur. Le mode par défaut est la répétition des
disques d’un chargeur.
Possibilité de lecture Indication affichée Indicateur
Répétition des disques d’un chargeur MCD
-Répétition d’une plage musicale TRK RPT
Répétition d’un disque DSC DISC
Remarque:
• Si vous choisissez un autre disque pendant la lecture répétée, le champ de la lecture répétée change
sur le lecteur de CD à chargeur.
• Si vous réalisez une recherche de plage musicale ou un déplacement rapide du capteur pendant la
répétition d’une seule plage, la plage de la lecture répétée change sur le disque entier.
Lecture au hasard (RANDOM)
Les plages musicales du disque sont lues au hasard, à l’intérieur du champ de la lecture
répétée, comme l’explique “Répétition de la lecture” ci-dessus.
Indication affichée Possibilité de lecture
DRDM Répétition d’un disque
RDM Répétition des disques d’un chargeur
Remarque:
• La répétition d’une plage musicale change à la répétition d’un disque quand vous mettez la lecture
au hasard en service.
2. Mettez la lecture au hasard, en
service, ou hors service, au
moyen des touches 5/∞.
Après avoir choisi le champ de la
lecture répétée parmi ceux mentionnés
ci-dessus au paragraphe “Répétition de
la lecture”, mettez en service la
fonction de lecture au hasard du lecteur
de CD à chargeur.
1. Appuyez sur la touche FUNCTION puis choisissez le mode de hasard
(RANDOM) grâce au menu des fonctions.
“DISC”
2. Choisissez le champ de la lecture
répétée avec les touches 2/3.
Répétition des disques d’un chargeur
= Répétition d’une plage musicale
= Répétition d’un disque
1. Appuyez sur la touche FUNCTION puis choisissez le mode de répétition
(REPEAT) grâce au menu des fonctions.
21
Page 69

22
ENGLISH
FRANÇAIS DEUTSCH FRANÇAIS
ITALIANO NEDERLANDS
Examen rapide des disques (SCAN)
Avec la répétition d’un disque, le lecteur ne s’intéresse qu’aux 10 premières secondes de
chaque plage musicale d’un disque. Avec la répétition des disques d’un chargeur, le lecteur
s’intéresse aux 10 premières secondes de la première plage musicale de chaque disque.
Indication affichée Possibilité de lecture
DSCN Répétition d’un disque
SCAN Répétition des disques d’un chargeur
Remarque:
• L’examen rapide du disque est automatiquement abandonné lorsque toutes les plages musicales ont
été passées en revue.
• La répétition d’une plage musicale change à la répétition d’un disque quand vous mettez la lecture
d’examen rapide du disque.
Pause (PAUSE)
Pause permet d’arrêter momentanément la lecture d’une plage musicale.
Remarque:
• Vous pouvez aussi mettre en/hors service la fonction de pause en appuyant sur la touche PGM.
2. Mettez la pause en service, ou
hors service, au moyen des
touches 5/∞.
1. Appuyez sur la touche FUNCTION puis choisissez le mode de pause
(PAUSE) grâce au menu des fonctions.
3. Lorsque se présente la plage
musicale que vous désirez écouter
(ou le disque), abandonnez
l’examen rapide des disques en
appuyant sur la touche ∞∞.
Si le menu des fonctions a été
abandonné automatiquement, choisissez
à nouveau le mode d’examen rapide du
disque sur le menu des fonctions.
2. Mettez la lecture d’examen
rapide des disques en service
au moyen de la touche 5.
Après avoir choisi le champ de la
lecture répétée parmi ceux mentionnés
au paragraphe “Répétition de la
lecture” de la page 21, commandez
l’examen rapide des disques que
contient le lecteur de CD à chargeur.
1. Appuyez sur la touche FUNCTION puis choisissez le mode d’examen
rapide du disque (SCAN) grâce au menu des fonctions.
Page 70

23
Utilisation des lecteurs de CD à chargeur
ITS (Programmation en temps réel)
Lorsque l’installation comporte un lecteur de CD à chargeur, la fonction ITS vous permet
de sélectionner les plages musicales que vous désirez écouter et composer un programme
d’écoute qui peut comprendre 24 plages musicales choisies parmi 100 disques. (La
mémoire peut contenir le programme ITS et les titres de 100 disques.)
Programmation en temps réel (ITS)
Les plages musicales programmées sont lues, à l’intérieur du champ de la lecture répétée
“Répétition de la lecture” décrit à la page 21.
Remarque:
• Après la programmation de la lecture du 100e disque, toutes les données concernant un nouveau
disque remplacent celles du disque dont la lecture est la plus ancienne.
Lecture ITS (ITS-P)
La lecture ITS tient compte des conditions définies au paragraphe “Répétition de la
lecture”.
Remarque:
• Si vous commandez la lecture d’une plage musicale qui ne fait pas partie du programme ITS,
l’indication “ITS EMPTY” s’affiche.
2. Mettez la lecture ITS en service,
ou hors service, au moyen des
touches 5/∞.
Après avoir choisi le champ de la
lecture répétée parmi ceux mentionnés
au paragraphe “Répétition de la
lecture” de la page 21, commandez la
lecture ITS.
1. Appuyez sur la touche FUNCTION puis choisissez le mode de lecture ITS
(ITS-P) grâce au menu des fonctions.
3. Programmez la lecture de la
plage musicale en appuyant
sur la touche 5.
2. Choisissez le mode de programmation ITS (ITS) grâce au menu des réglages
détaillés. (Reportez-vous à la page 16.)
1. Commandez la lecture de la plage musicale que vous désirez programmer.
Page 71

24
ENGLISH
FRANÇAIS DEUTSCH FRANÇAIS
ITALIANO NEDERLANDS
Pour effacer un numéro de plage musicale
Pour effacer un numéro de disque
3. Appuyez sur la touche ∞ pour
effacer le numéro du disque.
2. Grâce au menu des réglages détaillés, choisissez le mode de programmation
en temps réel (ITS). (Reportez-vous à la page 16.)
1. Pendant la lecture d’un disque, choisissez le disque dont le numéro doit être
effacé.
3. Appuyez sur la touche ∞ pour
effacer la référence à cette
plage musicale.
La lecture ITS se poursuit avec la
plage musicale suivante dont le
numéro est en mémoire.
Si la lecture d’aucune autre plage
musicale parmi celles concernées
n’est programmée, l’indication “ITS
EMPTY” s’affiche et la lecture
normale reprend.
2. Grâce au menu des réglages détaillés, choisissez le mode de programmation
en temps réel (ITS). (Reportez-vous à la page 16.)
1. Pendant la lecture ITS, choisissez la plage musicale qui ne doit plus faire
partie du programme.
Page 72

Utilisation des lecteurs de CD à chargeur
25
Titre d’un disque
Frappe du titre d’un disque (TITLE IN)
Vous avez la possibilité de taper 100 titres de 10 caractères. Cette disposition vous permet
ensuite de localiser aisément le disque que vous désirez écouter. (La mémoire peut
contenir le programme ITS et les titres de 100 disques.)
Remarque:
• Si vous écoutez un CD TEXT sur un lecteur de CD à chargeur compatible CD TEXT, vous ne
pouvez pas faire usage de ce mode.
• Un CD TEXT est un disque compact qui porte en outre des informations alphanumériques telles
que le titre du disque, le nom de l’artiste et le titre de chaque plage musicale.
Remarque:
• Les titres demeurent en mémoire, même après le retrait des disques; ils sont de nouveau affichés si
les disques sont remis en place.
• Après la frappe du titre du 100e disque, toutes les données concernant un nouveau disque
remplacent celles du disque dont la lecture est la plus ancienne.
• Vous pouvez afficher le titre du disque en cours de lecture. Pour de plus amples détails
reportez-vous à la page 26, “Affichage du titre du disque”.
5. Lorsque vous avez terminé la
frappe du titre, faites clignoter
le 10e caractère puis validez le
titre en appuyant sur la
touche 3.
4. Déplacez le curseur vers la
gauche ou vers la droite au
moyen des touches 2/3.
3. Choisissez lettres, chiffres ou
symboles au moyen des touches
5/∞.
Pour taper une espace, choisissez le
curseur clignotant “_”.
2. Grâce au menu des réglages détaillés, choisissez le mode de frappe d’un titre
de disque (TITLE IN). (Reportez-vous à la page 16.)
1. Commandez la lecture du disque à titrer.
Page 73

26
ENGLISH
FRANÇAIS DEUTSCH FRANÇAIS
ITALIANO NEDERLANDS
Choix d’un disque sur la liste des titres (TITLE LIST)
Procédez de la manière indiquée ci-dessous pour écouter un disque d’un lecteur de CD à
chargeur dont vous avez tapé le titre, ou un disque CD TEXT sur un lecteur compatible
CD TEXT.
Affichage du titre du disque
Vous pouvez afficher le titre du disque en cours de lecture.
Remarque:
• Vous pouvez aussi afficher le titre du disque en cours de lecture lors de la reproduction d’un CD
TEXT sur un lecteur de CD à chargeur compatible CD TEXT. (Reportez-vous à la page 28.)
Remarque:
• Si vous commandez d’afficher des informations alors que le disque ne porte pas de titre,
l’indication “NO TITLE”, s’affiche.
• Commutation de l’affichage du
titre du disque avec la touche
DISPLAY.
Chaque pression sur la touche
DISPLAY change les indications
affichées, dans l’ordre suivant:
Mode de lecture (Durée de lecture)
= Titre du disque
3. Commandez la lecture du disque
en appuyant sur la touche 5.
2. Choisissez le disque souhaité avec
les touches 2/3.
Rien ne s’affiche pour les disques
qui ne portent pas de titre.
1. Appuyez sur la touche FUNCTION puis choisissez le mode d’affichage de la
liste des titres des disques (TITLE LIST) grâce au menu des fonctions.
Page 74

27
Utilisation des lecteurs de CD à chargeur
Compression et DBE (COMP)
Les fonctions COMP (Compression) et DBE (Dynamic Bass Emphasis) des lecteurs de
CD à chargeur, permettent d’améliorer la qualité de la restitution. Chaque fonction offre
deux niveaux de réglage.
7 COMP
La fonction COMP (Compression) ajuste les déséquilibres entre les sons forts et bas à
volume élevé.
7 DBE
La fonction DBE (Dynamic Bass Emphasis) accentue les niveaux des graves pour donner
un son plus étoffé.
Mise en/hors service de la fonction (COMP/DBE)
Remarque:
• Vous pouvez utiliser ces fonctions pour les lecteurs de CD à chargeur qui en sont pourvus. Si le
lecteur ne possède pas les fonctions COMP/DBE, l’indication “NO COMP” s’affiche au moment
où vous tentez de les utiliser.
2. Choisissez le mode au moyen
des touches 5/∞.
COMP OFF = COMP 1 = COMP 2
= COMP OFF = DBE 1 =DBE 2
1.
Appuyez sur la touche FUNCTION puis choisissez le mode permettant la
sélection COMP ou DBE (COMP) grâce au menu des fonctions.
Page 75

28
ENGLISH
FRANÇAIS DEUTSCH FRANÇAIS
ITALIANO NEDERLANDS
Fonction CD TEXT (pour les disques compatibles CD TEXT)
Vous pouvez utiliser ces fonctions lorsque vous écoutez un disque CD TEXT à l’aide d’un
lecteur de CD à chargeur compatible CD TEXT.
Affichage, ou non, du titre
Remarque:
• Si certaines informations ne sont pas gravées sur le disque CD TEXT, “NO ~ ” (par exemple
“NO T-TITLE”) s’affiche.
Défilement du titre
Cet appareil ne peut afficher que 10 caractères du titre du disque, du nom de l’interprète et
du titre de la plage musicale. Si le texte comporte plus de 10 caractères, vous devez le faire
défiler pour en prendre connaissance.
• Faites défiler le texte en
appuyant sur la touche
DISPLAY pendant 2 secondes.
• Choisissez l’affichage convenable avec la touche DISPLAY.
Chaque pression sur la touche
DISPLAY change les indications
affichées, dans l’ordre suivant:
Mode de lecture (Durée de lecture)
= Titre du disque = Nom de
l’interprète du disque
= Titre de la
plage musicale
= Nom de l’interprète
de la plage musicale
Page 76

29
Réglage de l’égaliseur de focalisation sonore (SFEQ)
En clarifiant l’image sonore des voix et des instruments il permet une mise en scène simple
d’un environnement sonore naturel et plaisant.
Un plaisir d’écoute encore plus grand sera obtenu si la position d’écoute est choisie avec
attention.
À propos de l’égaliseur de focalisation sonore (SFEQ)
“FRT1” accentue les aigus de la sortie avant et les graves de la sortie arrière.
“FRT2” accentue les aigus et les graves de la sortie avant et les graves de la sortie arrière.
(L’accentuation des graves est la même pour l’avant et l’arrière.)
Pour “FRT1” et “FRT2” le réglage “HI” offre un effet plus prononcé que le réglage
“LOW”.
1. Choisissez le mode SFEQ désirée.
FRT1-HI (avant 1-fort) = FRT1-LOW (avant 1-faible) = FRT2-HI (avant 2-fort)
= FRT2-LOW (avant 2-faible) = CUSTOM (personnalisé) = SFEQ OFF (hors service)
2. Choisissez la position désirée.
L (gauche) Ô C (centre) Ô R (droite)
Remarque:
• Si vous ajustez les graves ou les aigus, “CUSTOM” mémorise un mode SFEQ pour lequel les
graves et les aigus sont ajustés à votre goût.
• Si vous choisissez un autre mode que “SFEQ OFF”, la fonction H.P.F. est mis automatiquement
hors service. En mettant en service la fonction H.P.F. après avoir choisi le mode SFEQ, vous pouvez utiliser de façon combinée la fonction H.P.F. et le mode SFEQ.
“F1”
Réglages du son
Page 77

30
ENGLISH
FRANÇAIS DEUTSCH FRANÇAIS
ITALIANO NEDERLANDS
Choix de la courbe d’égalisation
Vous pouvez choisir la courbe d’égalisation.
• Choisissez la courbe d’égalisation désirée.
POWERFUL (puissante) = NATURAL (naturelle) = VOCAL (vocales)
= CUSTOM 1 (personnalisé 1) = CUSTOM 2 (personnalisé 2) = EQ FLAT (plate)
= SUPER BASS (super graves)
À propos des courbes personnalisées
“CUSTOM1” et “CUSTOM2” sont des courbes d’égalisation ajustables. (Reportez-vous à
“Réglage de la courbe d’égalisation” à la page 32 et à “Réglage fin de la courbe d’égalisation” à la page 33.)
7 CUSTOM 1
Une courbe “CUSTOM 1” séparée peut être créée pour chaque source. (Le lecteur de CD
intégré et le lecteur de CD à changeur sont réglés automatiquement sur le même réglage
d’ajustement de courbe d’égalisation.)
Si vous réalisez un ajustement quand une autre courbe que “CUSTOM 2” est choisie, les
réglages de la courbe d’égalisation sont mémorisés sur “CUSTOM 1”.
7 CUSTOM 2
Une courbe “CUSTOM 2” peut être créée en commun pour toutes les sources.
Si vous réalisez un ajustement lorsque “CUSTOM 2” est choisi, la courbe “CUSTOM 2”
est mise à jour.
Page 78

31
Réglages du son
Affichage du menu des réglages sonores
Ce menu permet de régler au mieux la qualité de la reproduction.
Remarque:
• Si vous ne procédez à aucune opération dans les 30 secondes qui suivent l’affichage du menu des
réglages sonores, ce menu disparaît.
• Les fonctions du menu Audio changent selon le réglage de la sortie arrière et du contrôleur de
l’enceinte d’extrêmes graves dans le menu des réglages initiaux. (Reportez-vous à “Réglage de la
sortie arrière et du contrôleur de l’enceinte d’extrêmes graves” à la page 42.)
1. Grâce au menu des réglages sonores, choisissez le paramètre à régler.
2. Procédez aux réglages requis.
3. Abandonnez le menu des réglages sonores.
Paramètres du menu des réglages sonores
Le menu des réglages sonores permet d’agir sur les paramètres suivants.
Réglage de l’équilibrage (FADER)
Le réglage de l’équilibrage permet d’obtenir les conditions d’écoute optimales quel que
soit le siège occupé.
1. Appuyez sur la touche AUDIO puis choisissez le mode d’équilibrage
avant/arrière (FADER) grâce au menu des réglages sonores.
2. Réglez l’équilibrage entre les
haut-parleurs avant et arrière
au moyen des touches 5/∞.
L’indication affichée varie de “FADER
:F 15” à “FADER :R 15” tandis que la
puissance est émise par les haut-parleurs
avant puis par les haut-parleurs arrière.
Chaque pression change le mode ...
Page 79

Remarque:
• Lorsque le réglage de la sortie arrière est “REAR SP:S/W”, vous ne pouvez pas régler l’équilibrage
entre les haut-parleurs avant et arrière. (Reportez-vous à la page 42.)
• “FADER :0” est la réglage convenable si l’installation ne comportant que 2 haut-parleurs.
Réglage de la courbe d’égalisation (EQ-LOW/EQ-MID/EQ-HIGH)
Vous pouvez modifier comme bon vous semble la courbe d’égalisation présentement
choisie.
1. Appuyez sur la touche AUDIO puis choisissez le mode d’égalisation
(EQ-LOW/EQ-MID/EQ-HIGH) grâce au menu des réglages sonores.
Remarque:
• Si vous modifiez une courbe d’égalisation autre que “CUSTOM 2”, la courbe “CUSTOM 1” set
mise à jour.
“CUSTOM”
3. Augmentez ou diminuez l’amplitude dans la plage de fréquence au
moyen des touches 5/∞.
La plage de réglage varie entre
“+6” à “–6”.
2. Au moyen des touches 2/3
choisissez la plage de
fréquence que vous désirez
modifier.
EQ-LOW (graves) += EQ-MID
(médium)
+= EQ-HIGH (aigus)
3. Réglez l’équilibre entre les
haut-parleurs gauche et droit
au moyen des touches 2/3.
L’indication affichée varie de “BAL :L
9” à “BAL :R 9” tandis que la
puissance est émise par les hautparleurs gauche puis par les hautparleurs de droit.
32
ENGLISH
FRANÇAIS DEUTSCH FRANÇAIS
ITALIANO NEDERLANDS
Page 80

33
Réglages du son
Réglage fin de la courbe d’égalisation
Vous pouvez régler la fréquence centrale et le facteur de surtension (caractéristique de la
courbe) de chaque courbe présentement sélectionnée par bande (EQ-LOW/EQ-MID/EQHIGH).
1. Appuyez, pendant 2 secondes, sur la touche AUDIO pour choisir le mode
permettant le réglage fin de la courbe d’égalisation.
Remarque:
• Si vous modifiez une courbe d’égalisation autre que “CUSTOM 2”, la courbe “CUSTOM 1” set
mise à jour.
4. Choisissez le facteur Q qui convient au moyen des touches 5/∞.
2N += 1N += 1W += 2W
3. Choisissez la fréquence qui convient au moyen des touches 2/3.
LOW: 40 += 80 += 100 += 160 (Hz)
MID: 200
+= 500 += 1K += 2K (Hz)
HIGH: 3K
+= 8K += 10K += 12K (Hz)
2. Appuyez sur la touche AUDIO
pour choisir la plage de
fréquence à régler.
Niveau (dB)
Fréquence centrale
Fréquence (Hz)
Q=2N Q=2W
Page 81

Réglage des graves (BASS)
Vous pouvez ajuster la fréquence de coupure et le niveau des graves.
En mode “FRT1”, l’ajustement des graves affecte uniquement la sortie arrière: la sortie
avant ne peut pas être ajustée.
1. Appuyez sur la touche AUDIO puis choisissez le mode de réglage des graves
(BASS) grâce au menu des réglages sonores.
Réglage des aigus (TRE)
Vous pouvez ajuster la fréquence de coupure et le niveau des aigus.
En mode “FRT1” et “FRT2”, l’ajustement des aigus affecte uniquement la sortie avant: la
sortie arrière ne peut pas être ajustée.
1. Appuyez sur la touche AUDIO puis choisissez le mode de réglage des aigus
(TRE) grâce au menu des réglages sonores.
3. Accentuez ou atténuez le niveau
des aigus avec les touches 5/∞.
L’affichage change de “+6” à “–6”.
2. Choisissez la fréquence qui convient au moyen des touches 2/3.
2K Ô 4K Ô 6K Ô 10K (Hz)
3. Accentuez ou atténuez le niveau
des graves avec les touches 5/∞.
L’affichage change de “+6” à “–6”.
2. Choisissez la fréquence qui convient au moyen des touches 2/3.
40 Ô 63 Ô 100 Ô 160 (Hz)
34
ENGLISH
FRANÇAIS DEUTSCH FRANÇAIS
ITALIANO NEDERLANDS
Page 82

35
Réglages du son
Mise en service de la correction physiologique (LOUD)
La correction physiologique permet de compenser les pertes d’intelligibilité dues à la
faiblesse du niveau d’écoute. Vous pouvez choisir un niveau de correction physiologique
donné.
1. Appuyez sur la touche AUDIO puis choisissez le mode de correction
physiologique (LOUD) grâce au menu des réglages sonores.
Sortie vers le haut-parleur d’extrêmes graves (SUB.W)
Si l’enceinte d’extrêmes graves est connectée, mettez en service la sortie de l’enceinte des
extrêmes graves.
Au moment de quitter l’usine, l’appareil est réglé de manière que la sortie vers le haut-parleur d’extrêmes graves soit en service (ON).
La phase du signal de sortie vers le haut-parleur d’extrêmes graves peut être normale
(0 degré, “NOR”) ou inversée (180 degrés, “REV”). Par défaut, la phase est normale
(0 degré).
Remarque:
• Quand le réglage du contrôleur de l’enceinte d’extrêmes graves est sur “S/W CTL:EXT”, vous ne
pouvez pas mettre en/hors service (ON/OFF) le mode de l’enceinte d’extrêmes graves. Dans ce cas,
ce réglage n’est pas nécessaire. (Reportez-vous à la page 42.)
• Mettez hors service (OFF) la sortie vers le haut-parleur d’extrêmes graves si vous ne désirez pas
exciter ce haut-parleur.
1. Appuyez sur la touche AUDIO puis choisissez le mode permettant de mettre
en service, ou hors service, la sortie le haut-parleur d’extrêmes graves
(SUB.W) grâce au menu des réglages sonores.
3. Changez la phase de la sortie
de l’enceinte d’extrêmes graves
avec les touches 2/3.
“SW”
2. Mettez la sortie vers le hautparleur d’extrêmes graves en
service, ou hors service, au
moyen des touches 5/∞.
3. Choisissez le niveau désiré au
moyen des touches 2/3.
LOW (graves) += MID (médium)
+= HI (aigus)
“LOUD”
2. Mettez la correction physiologique en service, ou hors service, au moyen des touches 5/∞.
Page 83

Réglage de la sortie vers le haut-parleur d’extrêmes graves (80HZ 0)
Lorsque la sortie vers le haut-parleur d’extrêmes graves est en service (ON), vous pouvez
choisir la fréquence de coupure et le niveau de sortie vers le haut-parleur d’extrêmes graves.
Remarque:
• Vous ne pouvez choisir le mode de réglage de la sortie vers le haut-parleur d’extrêmes graves que
si cette sortie a été mise en service (ON) grâce au paramètre qui convient.
Sortie de ligne préamplifiée (NON FAD)
Quand le réglage de la sortie de ligne préamplifiée est sur ON (en service), le signal audio
ne passe pas à travers le filtre passe-bas de cet appareil (pour l’enceinte d’extrêmes
graves), mais est sorti directement par les prises de sortie RCA.
Remarque:
• Quand le réglage du contrôleur de l’enceinte d’extrêmes graves n’est que “S/W CTL:EXT”, vous
pouvez mettre en/hors service la sortie de ligne préamplifiée. (Reportez-vous à la page 42.)
2. Mettez en/hors service la sortie
de ligne préamplifiée avec les
touches 5/∞.
1. Appuyez sur la touche AUDIO puis choisissez le mode de mise en/hors service de la sortie de ligne préamplifiée (NON FAD) grâce au menu des
réglages sonores.
3. Augmentez ou diminuez le
niveau de sortie au moyen des
touches 5/∞.
La valeur affichée varie entre “+6”
et “–6”.
2. Choisissez la fréquence de
coupure 50 Hz, 80 Hz ou 125
Hz au moyen des touches 2/3.
1. Appuyez sur la touche AUDIO puis choisissez le mode de réglage de la
sortie vers le haut-parleur d’extrêmes graves (80HZ 0) grâce au menu des
réglages sonores.
36
ENGLISH
FRANÇAIS DEUTSCH FRANÇAIS
ITALIANO NEDERLANDS
Page 84

37
Réglages du son
Ajustement du niveau de la sortie de ligne préamplifiée (NON FAD)
Quand la sortie de ligne préamplifiée est en service (ON), vous pouvez ajuster son niveau.
Remarque:
• Vous pouvez choisir le mode de réglage de la sortie de ligne préamplifiée (NON FAD) uniquement
quand celle-ci a été mise en service (ON) avec le mode de mise en/hors service (ON/OFF) de la
sortie préamplifiée.
Filtre passe-haut (HPF)
Si vous ne souhaitez pas que le son de la plage de fréquences sortie par l’enceinte d’extrêmes graves sorte par les enceintes avant ou arrière, mettez le filtre passe-haut en service.
Seule les fréquences supérieures à celles de la plages choisies sont sorties par les enceintes
avant et arrière.
Remarque:
• Si vous choisissez un autre mode que “SFEQ OFF”, la fonction H.P.F. est mis automatiquement
hors service. En mettant en service la fonction H.P.F. après avoir choisi le mode SFEQ, vous pouvez utiliser de façon combinée la fonction H.P.F. et le mode SFEQ.
3. Choisissez la fréquence
souhaitée avec les touches 2/3.
50 += 80 += 125 (Hz)
2. Mettez le filtre passe-haut
en/hors service avec les touches
5/∞.
1. Appuyez sur la touche AUDIO puis choisissez le mode du filtre passe-haut
(HPF) grâce au menu des réglages sonores.
2. Augmentez ou diminuez le niveau
de sortie avec les touches 5/∞.
L’indication affichée varie de
“+6” à “–6”.
1. Appuyez sur la touche AUDIO puis choisissez le mode de réglage de la sortie
de ligne préamplifiée (NON FAD) grâce au menu des réglages sonores.
Page 85

Réglage du niveau de la source sonore (SLA)
La fonction SLA (Source Level Adjustment), évite que ne se produisent de fortes variations d’amplitude sonore lorsque vous passez d’une source à l’autre. Le réglage est basé
sur le niveau du signal FM qui, lui, demeure inchangé.
1. Comparez le niveau de sortie du signal en FM à celui d’une autre source (par
exemple le lecteur de CD intégré).
2. Appuyez sur la touche AUDIO puis choisissez le mode de réglage du niveau
de la source (SLA) grâce au menu des réglages sonores.
Remarque:
• Etant donné que le niveau du signal FM sert de référence, l’emploi de la fonction SLA n’est pas
possible en mode FM.
• Le niveau d’écoute en AM, qui est différent du niveau réglé pour la FM, peut également être réglé à
une valeur similaire à celle des sources autre que le syntoniseur.
• Le niveau d’écoute du lecteur de CD intégré et du lecteur de CD à changeur est réglé automatique-
ment sur la même valeur.
3. Augmentez ou diminuez le
niveau de la source au moyen
des touches 5/∞.
L’indication affichée varie de
“+4” à “–4”.
38
ENGLISH
FRANÇAIS DEUTSCH FRANÇAIS
ITALIANO NEDERLANDS
Page 86

39
A Title (English)Dépose et pose de la face avant
Protection contre le vol
La face avant est amovible de manière à décourager le vol.
• Laissez la face avant fermée pendant que vous conduisez.
Dépose de la face avant
Pose de la face avant
Précaution:
• Lors de la pose ou de la dépose de la face avant, n’exercez aucune force excessive.
• Evitez de heurter la face avant.
• Conservez la face avant à l’abri de la lumière directe du soleil et des températures élevées.
Tonalité d’alarme
La tonalité d’alarme retentit si la face avant n’est pas retirée dans les 5 secondes qui
suivent la coupure de l’allumage.
Remarque:
• Il est possible de supprimer la tonalité d’alarme. (Reportez-vous à la page 41.)
• Replacez la face avant en la
tenant droite par rapport à
l’appareil puis en l’engageant
soigneusement dans les
crochets de montage.
3. Rangez la face avant dans le
coffret de protection qui
vous servira également à la
transporter.
2. Saisissez la face avant et
tirez-la doucement à vous.
Veillez à ne pas l’endommager et
à ne pas la laisser tomber.
1. Abaissez la face avant.
Page 87

A Title (English)
40
ENGLISH
FRANÇAIS DEUTSCH FRANÇAIS
ITALIANO NEDERLANDS
Réglages initiaux
Affichage du menu des réglages initiaux
Ce menu permet de définir les conditions de fonctionnement de base de ce produit.
1. Mettez la source hors service.
2. Affichez le menu des réglages initiaux.
3. Choisissez le mode de fonctionnement désiré.
4. Procédez aux réglages requis.
5. Abandonnez le menu des réglages initiaux.
Remarque:
• Pour abandonner le menu des réglages initiaux, appuyez, pendant 2 secondes, sur la touche
FUNCTION.
Chaque pression change le mode ...
Appuyez pendant 2 secondes
Page 88

41
A Title (English)Réglages initiaux
Paramètres du menu des réglages initiaux
Le menu des réglages initiaux permet d’agir sur les paramètres suivants.
Réglage de l’heure
Choisissez le mode permettant le réglage de l’heure de la pendulette de l’appareil. (Pour de
plus amples détails concernant la pendulette, reportez-vous à la page 43.)
1. Appuyez sur la touche FUNCTION puis, choisissez le mode permettant le
réglage de l’heure grâce au menu des réglages initiaux.
Dès que vous choisissez de régler les minutes, les secondes sont comptées à partir de 00.
Réglage de la tonalité d’alarme (WARN)
Vous pouvez mettre en service, ou hors service, la tonalité d’alarme. (Reportez-vous à la
page 39, “Tonalité d’alarme”.)
Utilisation, ou non, de la source auxiliaire (AUX)
Vous pouvez décider d’utiliser la source auxiliaire (AUX) reliée à cet appareil.
Pour cela, vous devez mettre en service l’entrée AUX.
2. Mettez le réglage de l’entrée
auxiliaire en service, ou hors
service, au moyen des touches
5/∞.
1. Appuyez sur la touche FUNCTION puis choisissez le mode de fonctionnement de l’entrée auxiliaire (AUX) grâce au menu des réglages initiaux.
2. Mettez la tonalité d’alarme en
service, ou hors service, au
moyen des touches 5/∞.
1. Appuyez sur la touche FUNCTION puis choisissez le mode de fonctionnement de la tonalité d’alarme (WARN) sur le menu des réglages initiaux.
3. Précisez le nombre des heures
puis le nombre des minutes à
l’aide des touches 5/∞.
2. A l’aide des touches 2/3 choisissez le réglage des heures, ou
le réglage des minutes.
Page 89

42
ENGLISH
FRANÇAIS DEUTSCH FRANÇAIS
ITALIANO NEDERLANDS
Réglage de la luminosité (DIMMER)
Un réglage est prévu, qui permet de modifier la luminosité de l’afficheur de l’appareil de
façon qu’elle ne soit pas gênante, en particulier la nuit, après allumage des feux de route.
Vous pouvez mettre en service, ou hors service, l’atténuateur de luminosité.
Réglage de la sortie arrière et du contrôleur de l’enceinte d’extrêmes graves (REAR SP)
La sortie arrière (sortie par les câbles d’enceinte arrière et les prises RCA) de cet appareil
peut être utilisée pour connecter des enceintes couvrant toute la gamme (“REAR
SP:FUL”) ou une enceinte d’extrêmes graves (“REAR SP:S/W”). Si vous mettez le
réglage de la sortie arrière sur “REAR SP:S/W”, vous pouvez connecter un câble d’enceinte arrière directement à une enceinte d’extrêmes graves sans utiliser d’amplificateur
supplémentaire.
Initialement, l’appareil est réglé pour la connexion d’enceintes couvrant toute la gamme
(“REAR SP:FUL”).
Quand la sortie arrière sont connectés à des enceintes couvrant toute la gamme (quand
“REAR SP:FUL” est choisi), vous pouvez connecter la sortie d’enceinte d’extrêmes graves
RCA à une enceinte d’extrêmes graves. Dans ce cas, vous pouvez choisir d’utiliser ou non,
le contrôleur (filtre passe-bas, phase) intégré “S/W CTL:INT” ou l’auxiliaire “S/W
CTL:EXT”.
Remarque:
• Même si vous changez ce réglage, aucun signal n’est présent en sortie aussi longtemps que vous
n’avez pas mis en service la sortie sans équilibrage (reportez-vous à la page 36), ou la sortie vers le
haut-parleur d’extrêmes graves (reportez-vous à la page 35), à l’aide du menu des réglages sonores.
• Si vous modifiez le réglage du contrôleur de l’enceinte d’extrêmes graves, la sortie pour l’enceinte
d’extrêmes graves et la sortie de ligne préamplifiée du menu audio retrouvent leurs valeurs usine.
• La sortie des câbles d’enceintes arrières et la sortie arrière RCA sont toutes les deux mises en service simultanément dans ce mode de réglage.
Remarque:
• Quand aucune enceinte d’extrêmes graves n’est connectée à la sortie arrière, choisissez “REAR
SP:FUL”.
•
Quand une enceinte d’extrêmes graves est connectée à la sortie arrière, choisissez “REAR SP:S/W”.
• Quand le réglage de la sortie arrière est “REAR SP:S/W”, vous ne pouvez pas changer le contrôleur
d’enceinte d’extrêmes graves.
3. Changez le contrôleur d’enceinte
d’extrêmes graves avec les
touches 2/3.
2. Changez le réglage de la sortie
arrière avec les touches 5/∞.
1. Appuyez sur la touche FUNCTION puis choisissez le mode de réglage de la
sortie arrière et du contrôleur de l’enceinte d’extrêmes graves (REAR SP)
dans le menu des réglages initiaux.
2.
Mettez l’atténuateur de luminosité en service, ou hors service, au moyen des touches 5/∞.
1. Appuyez sur la touche FUNCTION puis choisissez le mode d’atténuation de
la luminosité (DIMMER) grâce au menu des réglages initiaux.
Page 90

43
Autres fonctions
Affichage de l’heure
• Pour afficher l’heure alors qu’une source est utilisée.
L’heure s’efface pendant tout le temps où vous effectuez une opération, mais elle s’affiche
à nouveau 25 secondes plus tard.
Remarque:
• Même quand les sources sont hors service, l’heure apparaît sur l’afficheur. Appuyer sur la touche
CLOCK affiche et efface l’heure sur l’afficheur.
Utilisation de l’entrée AUX
Un connecteur RCA IP-BUS tel que CD-RB20 ou CD-RB10 (vendus séparément) vous
permet de relier cet appareil à un équipement doté d’une sortie RCA.
Pour de plus amples détails concernant cette question, reportez-vous au mode d’emploi du
connecteur RCA IP-BUS.
Choix de l’entrée AUX
• Choisissez l’entrée AUX. (Reportez-vous à la page 8.)
Frappe du nom de l’entrée AUX (TITLE IN)
Vous avez la possibilité de modifier le nom affiché de l’entrée AUX.
1. Choisissez le mode permettant de frapper le nom de l’entrée auxiliaire
(TITLE IN) grâce an menu des réglages détaillés.
2. Tapez le nom de cette entrée.
Reportez-vous à la page 25, “Frappe du titre d’un disque” et effectuez les opérations 3 à 5.
Appuyez pendant 2 secondes
Chaque pression change la source ...
Page 91

A Title (English)
44
ENGLISH
FRANÇAIS DEUTSCH FRANÇAIS
ITALIANO NEDERLANDS
Lecteur de CD et entretien
Précaution
• N’utilisez que les disques portant la marque
Compact Disc Digital Audio.
• Cet Appareil n’est conçu que pour recevoir les disques compacts circulaires. L’utilisation d’un disque
ayant une forme autre n’est pas conseillée.
• Vérifiez les disques avant de les écouter et rejetez tout disque fendu, rayé ou voilé.
• La lecture normale d’un disque CD-R qui n’a pas été gravé à l’aide d’un graveur de
musique pour CD, peut être impossible.
• La lecture d’un CD-R, y compris dans le cas où il a été gravé avec un graveur de
musique pour CD, peut être impossible en raison des caractéristiques du disque, ou bien
de rayures ou de poussières. Les poussières et la condensation d’humidité sur l’optique
du lecteur, peuvent également empêcher la lecture.
• Les titres et autres informations gravées sur un CD-R ne sont pas toujours affichés par
l’appareil.
• Ce produit est conforme avec la fonction de saut de plage des disques CD-R. Les plages
contenant des informations de saut de plage sont sautées automatiquement.
• Lisez les précautions relatives aux disques CD-R avant d’utiliser de tels disques.
• Essuyez soigneusement tout disque sale ou humide
en déplaçant le chiffon du centre vers la périphérie.
• Pendant la manipulation des disques, évitez de toucher leur face gravée (irisée).
• Rangez les disques dans leur coffret dès que vous ne les écoutez plus.
• Conservez les disques à l’abri de la lumière directe du soleil et des températures élevées.
• Ne collez aucune étiquette sur un disque; n’appliquez aucun produit chimique sur sa surface.
• L’humidité ambiante peut se condenser à l’intérieur du lecteur, en particulier si le véhicule
est chauffé, ce qui peut perturber le fonctionnement du lecteur. En ce cas, mettez le lecteur
hors service pendant environ une heure et si le disque est humide, essuyez-la à l’aide d’un
chiffon doux.
• Les cahots dus à la chaussée peuvent empêcher momentanément le fonctionnement du lecteur.
COMPACT
DIGITAL AUDIO
Page 92

45
A Title (English)Lecteur de CD et entretien
Messages d’erreur fournis par le lecteur de CD
Lorsqu’une anomalie survient pendant la lecture d’un CD, un message d’erreur s’affiche. Pour
déterminer la cause de l’anomalie, reportez-vous au tableau qui suit puis procédez aux actions
correctives suggérées. Si ces opérations ne permettent pas de résoudre le problème qui se pose
à vous, prenez contact avec le distributeur PIONEER ou un centre d’entretien agréé.
Messages Causes possibles Actions correctives
ERROR- 11, 12, 17, 30 Disque sale. Nettoyez le disque.
ERROR- 11, 12, 17, 30 Disque rayé. Utilisez un autre disque.
ERROR- 14 Disque non enregistré. Vérifiez le disque.
ERROR- 10, 11, 12, 14, Anomalie électrique ou Coupez le contact au moyen de la clé
17, 30, A0 mécanique. pour rétablissez le contact et choisissez
à nouveau le lecteur de CD comme
source.
ERROR- 44 Toutes les plages sont réglées Utilisez un autre disque.
comme plage à sauter.
HEAT Surchauffe du lecteur de CD. Arrêter le fonctionnement du lecteur et
attendez qu’il ait repris une
température normale.
Page 93

Généralités
Alimentation ............ 14,4 V CC (10,8 à 15,1 V possibles)
Mise à la masse .............................................. Pôle négatif
Consommation maximale ........................................ 10,0 A
Dimensions
(DIN) (Châssis) ...... 178 (L) × 50 (H) × 157 (P) mm
(Panneau avant)
........................ 188 (L) × 58 (H) × 19 (P) mm
(D) (Châssis) ...... 178 (L) × 50 (H) × 162 (P) mm
(Panneau avant)
........................ 170 (L) × 46 (H) × 14 (P) mm
Poids ........................................................................ 1,5 kg
Amplificateur
Puissance de sourtie continue de 22 W per canal min. sous
4 ohms, les deux canaux en charge, 50 à 15.000 Hz, avec
une DHT ne dépassant pas 5%.
Puissance maximale de sortie .............................. 50 W × 4
50 W × 2 canaux/4 Ω + 70 W × 1 canal/2 Ω
(Pour l’enceinte d’extrêmes graves)
Impédance de charge
................ 4 Ω (4 à 8 Ω [2 Ω pour 1 canal] possibles)
Niveau maximum/impédance de sortie de
l’étage de préamplification ...................... 2,2 V/1 kΩ
Egaliseur (Egaliseur paramétrique à 3 bandes)
(Graves) ...................... Fréquence: 40/80/100/160 Hz
Facteur de surtension (Q): 0,35/0,59/0,95/1,15
(+6 dB avec accentuation)
Niveau: ±12 dB
(Médium) .................... Fréquence: 200/500/1k/2k Hz
Facteur de surtension (Q): 0,35/0,59/0,95/1,15
(+6 dB avec accentuation)
Niveau: ±12 dB
(Aigus) ................ Fréquence: 3,15k/8k/10k/12,5k Hz
Facteur de surtension (Q): 0,35/0,59/0,95/1,15
(+6 dB avec accentuation)
Niveau: ±12 dB
Correction physiologique
(Graves) .............. +3,5 dB (100 Hz), +3 dB (10 kHz)
(
Médium
) .......... +10 dB (100 Hz), +6,5 dB (10 kHz)
(Aigus) .............. +11 dB (100 Hz), +11 dB (10 kHz)
(Niveau: –30 dB)
Commandes de tonalité
(Graves) ...................... Fréquence: 40/63/100/160 Hz
Niveau: ±12 dB
(Aigus) .................... Fréquence: 2,5k/4k/6,3k/10k Hz
Niveau: ±12 dB
FPH
Fréquence ............................................ 50/80/125 Hz
Pente .................................................... –12 dB/octave
Sortie enceinte d’extrêmes graves
Fréquence ............................................ 50/80/125 Hz
Pente .................................................... –18 dB/octave
Gain ................................................................ ±12 dB
Lecteur de CD
Système ............................ Système audio disque compact
Disques utilisables .................................... Disque compact
Format du signal
......................Fréquence d’échantillonnage: 44,1 kHz
Nombre de bits de quantification: 16; linéaires
Caractéristiques de fréquences ...... 5 – 20.000 Hz (±1 dB)
Rapport signal/bruit .......... 94 dB (1 kHz) (Réseau IHF-A)
Gamme dynamique .................................... 92 dB (1 kHz)
Nombre de canaux .............................................. 2 (stéréo)
Syntoniseur FM
Gamme de fréquence ............................ 87,9 – 107,9 MHz
Sensibilité utile .......................................................... 9 dBf
(0,8 µV/75 Ω, mono, S/B: 30 dB)
Seuil de sensibilité 50 dB .... 15 dBf (1,5 µV/75 Ω, mono)
Rapport signal/bruit ...................... 70 dB (Réseau IHF-A)
Distorsion .......................... 0,3% (à 65 dBf, 1 kHz, stéréo)
Réponse en fréquence ................ 30 – 15.000 kHz (±3 dB)
Séparation stéréophonique .......... 40 dB (à 65 dBf, 1 kHz)
Sélectivité .................................................. 70 dB (2ACA)
Inermodulation trois signaux
(niveau de signal désiré) .................................. 30 dBf
(niveau deux signaux indésirés: 100 dBf)
Syntoniseur AM
Gamme de fréquence .............. 530 – 1.710 kHz (10 kHz)
Sensibilité utile .................................... 18 µV (S/B: 20 dB)
Sélectivité ................................................ 50 dB (±10 kHz)
Remarque:
• Les caractéristiques et la présentation peuvent être
modifiées sans avis préalable à fin d’amélioration.
A Title (English)
46
ENGLISH
FRANÇAIS DEUTSCH FRANÇAIS
ITALIANO NEDERLANDS
Caractéristiques techniques
Page 94

Page 95

Page 96

Printed in
Imprimé
<CRD3300-A/JS> UC
<KMMUU/00I00000>
PIONEER CORPORATION
4-1, MEGURO 1-CHOME, MEGURO-KU, TOKYO 153-8654, JAPAN
PIONEER ELECTRONICS (USA) INC.
P.O. Box 1760, Long Beach, California 90801, U.S.A.
TEL: (800) 421-1404
PIONEER EUROPE NV
Haven 1087, Keetberglaan 1, B-9120 Melsele, Belgium
TEL: (0) 3/570.05.11
PIONEER ELECTRONICS AUSTRALIA PTY. LTD.
178-184 Boundary Road, Braeside, Victoria 3195, Australia
TEL: (03) 9586-6300
PIONEER ELECTRONICS OF CANADA, INC.
300 Allstate Parkway, Markham, Ontario L3R OP2, Canada
TEL: (905) 479-4411
PIONEER ELECTRONICS DE MEXICO, S.A. de C.V.
San Lorenzo 1009 3er. Piso Desp. 302
Col. Del Valle Mexico, D.F. C.P. 03100
TEL: 5-688-52-90
Published by Pioneer Corporation.
Copyright © 2000 by Pioneer Corporation.
All rights reserved.
Publication de Pioneer Corporation.
Copyright © 2000 Pioneer Corporation.
Tous droits de reproduction et de traduction réservés.
 Loading...