

Pioneer AVH-X4800BS, AVH-X2800BS, AVH-X1800S, AVH-X5800BHS, AVH-X3800BHS User Manual
AVH-X5800BHS
Important (Serial number)
The serial number is located on the bottom of this unit. For your own security and
convenience, be sure to record this number on the enclosed warranty card
Le numéro de série se trouve sous cet appareil. Pour votre sécurité et votre
commodité, pensez à inscrire ce numéro sur la carte de garantie fournie.
El número de serie está ubicado en la parte inferior de esta unidad. Para su
seguridad y comodidad, asegúrese de registrar este número en la tarjeta de
garantía incluida.
AVH-X4800BS
AVH-X3800BHS
AVH-X2800BS
AVH-X1800S
DVD RDS AV RECEIVER
RÉCEPTEUR A/V RDS DVD
RADIO AV RDS CON DVD
English Français Español
Important (numéro de série)
Importante (Número de serie)
.
Owner’s Manual
Manuel du propriétaire
Manual de Instrucciones

Contents
Thank you for buying this Pioneer product.
Please read through these instructions so you
will know how to operate your model properly.
After you have finished reading the instructions, keep this document in a safe place for
future reference.
Important
The screens shown in the examples may
differ from actual screens, which may be
changed without notice for performance and
function improvements.
■ Precaution ..........................4
Information to User ..........................................4
License, Warranty Disclaimer & Limitation of
........................................................5
Liability
Important safety information
Parking brake interlock
When using a display connected to V OUT
To avoid battery exhaustion
Rear view camera
Handling the USB connector
Failure to operate
Visit our website
Protecting the LCD panel and screen...............6
Notes on internal memory
About this manual
Use and care of the remote control
...............................................6
............................5
.....................................5
..............................6
............................................6
............................6
.............................................6
................................6
............................................7
■ Basic operation ..................7
Checking part names and functions .................7
Remote control
Notes on using the LCD panel
Adjusting the LCD panel angle
Inserting/ejecting/connecting media.................8
On rst-time startup
How to use the screens
Supported AV source
Displaying the AV operation screen
Selecting a source
Changing the display order of sources
Using the touch panel
2
................................................8
.........................................11
.........................8
.........................8
.........................................9
..................................10
.....................................11
....................................11
......6
..................7
................11
...........11
■ Registration and
connection of Bluetooth®
device ...............................12
Displaying the “Bluetooth” screen ...................12
Registering your Bluetooth devices
Connecting a registered Bluetooth device
Switching visibility
Entering the PIN code for Bluetooth wireless
Displaying the device information
Clearing the Bluetooth memory......................13
Updating Bluetooth software
Displaying the Bluetooth software version
Switching the connected Bluetooth device
...................................................12
manually
connection
..........................................13
................................................13
................12
...................13
..........................13
......13
.....13
■ Hands-free phoning .........14
Displaying the Phone menu screen ................14
Making a phone call
Receiving a phone call
Minimizing the dial conrmation screen
Changing the phone settings
Using the voice recognition function (for
iPhone)
Setting phone book auto synchronization
Notes for hands-free phoning
.......................................14
...................................15
.....................................................15
.........15
.........................15
.........................16
......15
■ Setup for iPod / iPhone or
smartphone ......................16
The basic ow of iPod / iPhone or smartphone
.........................................................16
setup
Setting the device connection method............16
iPod compatibility
Android
Information on the connections and functions
for each device
...........................................17
™
device compatibility.........................17
..........................................18
■ Radio ................................19
Starting procedure .........................................19
Storing the strongest broadcast
frequencies
Tuning into strong frequencies
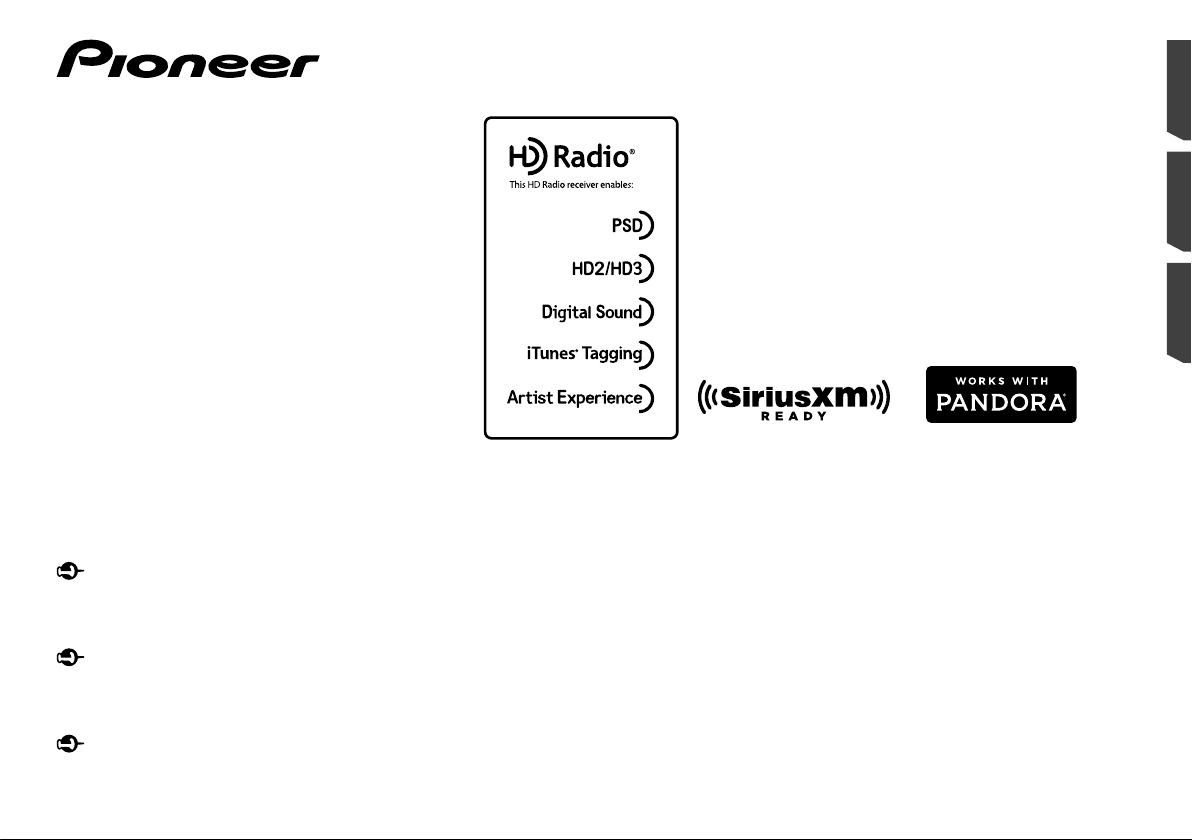
■ HD Radio
HD Radio stations ..........................................20
Starting procedure
Storing the strongest broadcast
frequencies
...............................................19
™
.........................................21
...............................................21
.......................19
........................20
Display the Radio settings screen
..................21
■ Disc ...................................21
Starting procedure .........................................23
Selecting les from the le name list
Switching the media le type
Searching for the part you want to play
Operating the DVD menu
Switching the subtitle/audio language
Operating the DVD menu using touch panel
..........................................................23
keys
..............23
..........................23
...............................23
..........23
............23
■Compressedles .............24
Starting procedure (for Disc) ..........................26
Starting procedure (for USB)
Operations common to all le types
Audio le operations.......................................26
Still image le operations
..........................26
...............26
...............................26
■ iPod ..................................27
Connecting your iPod .....................................28
Starting procedure
Selecting song or video sources from the
playlist screen
Using this product’s iPod function from your
iPod
Selecting a song from the list related to the
song currently playing (link search)
.........................................28
...........................................28
...........................................................28
...........28
■ AppRadioOne ..................29
Using AppRadioOne ......................................29
Using the audio mix function
■ Pandora
Pandora operations ........................................31
Starting procedure
Selecting a Pandora station from the list
Adding a station
Storing the preset stations
■ Spotify
Using Spotify with your Pioneer car audio/
video
Starting procedure
Selecting a track or station from the list
®
.............................................31
®
.............................32
.........................................................33
..........................29
..........................30
.........................................31
.............................31
.........................................33
........31
..........33
■ Bluetooth audio player ....34
Starting procedure .........................................34
Selecting les from the le name list
..............34
■ SiriusXM
®
Satellite
Radio ................................35
SiriusXM tuner operations ..............................35
Starting procedure
Selecting a channel from a list of all
channels
Selecting a channel from the category list
Switching the displayed list
Setting TuneStart
Using TuneScan
Using category scan
Using TuneMix
About SmartFavorites
Using iTunes Tagging
Activating the Trafc & Weather Now
Displaying the “SiriusXM settings” screen
Using SportsFlash
Using Featured Favorites Band
Restoring the “SiriusXM Settings” to the
default
.........................................36
...................................................36
............................36
™
.........................................36
™
...........................................36
......................................36
™
.............................................36
....................................36
.....................................36
™
list ..................................37
.......................................................38
......36
..............37
......37
......................37
■ AUX source ......................38
Starting procedure .........................................38
Setting the video signal
..................................39
■ AV input ............................39
Starting procedure (for AV source) .................39
Starting procedure (for camera)
Setting the video signal
.....................39
..................................39
■ MIXTRAX ..........................40
MIXTRAX operation .......................................40
MIXTRAX EZ operation..................................40
Displaying the “MIXTRAX Settings” screen
Setting the ash pattern
.................................40
....40
■ System settings ...............41
Displaying the “System” setting screen ..........41
Setting Bluetooth audio source activation
Setting Spotify source activation
Setting the ever scroll
Setting the beep tone
Setting the auto audio mix function
Setting the rear view camera
Setting the demo mode
Selecting the system language
Setting the keyboard language with the
application for iPhone................................42
.....................................41
.....................................41
..........................41
..................................41
......41
....................41
................41
......................42

Contents
Adjusting the response positions of the touch
panel (touch panel calibration)
Setting the dimmer
Adjusting the picture
Displaying the rmware version
Displaying the open source licenses
Updating rmware
.........................................42
......................................43
..........................................43
■ Audio adjustments ..........44
Displaying the “Audio” setting screen .............44
Using fader/balance adjustment
Switching sound muting/attenuation
Adjusting source levels
Using the auto level control
Adjusting loudness
Setting the subwoofer output..........................44
Adjusting the cutoff frequency value
Switching the rear speaker output
Using BASS Boost
Selecting the listening position
Adjusting the speaker output levels nely
Adjusting the time alignment
Switching the time alignment preset
Using the equalizer
Adjusting the equalizer curve automatically
(Auto EQ)
Saving the sound settings
Loading the sound settings
.........................................44
.........................................45
........................................46
..................................................46
■ Theme menu ....................47
Selecting the background display ...................47
Setting the illumination color
Selecting the theme color
Selecting the clock image
■ Setting up the video
player ................................48
Setting the top-priority languages ..................48
Setting the angle icon display
Setting the aspect ratio
Setting parental lock
Displaying your DivX VOD registration
..........................................................49
code
Displaying your DivX VOD deregistration
..........................................................49
code
Automatic playback of DVDs
Setting the video signal for the rear view
camera
......................................49
......................................................50
■ Favorite menu ..................50
..................42
.....................43
..............43
.....................44
..................................44
..................................49
..............44
............................44
..............44
..................45
.......................45
..........................45
..............................47
............................47
..........................47
...............................48
..............................48
.........................48
..........................50
.......45
...............45
Creating a shortcut ........................................50
Selecting a shortcut
Removing a shortcut
.......................................50
......................................50
■ Common operations ........51
Setting the time and date ...............................51
Storing song information to an iPod (iTunes
Setting the “Sound Retriever” function
Changing the wide screen mode
....................................................51
Tagging)
............51
....................51
■ Other functions ................52
Restoring this product to the default
.....................................................52
settings
■ Connection .......................52
Precautions ....................................................52
Precautions before connecting the system
Before installing this product
To prevent damage
Notice for the blue/white lead
This product
Power cord
Speaker leads
Power amp (sold separately)
iPhone and smartphone
iPhone with Lightning connector
iPhone with 30-pin connector
Android device
Camera
External video component and the display
...................................................53
.....................................................54
................................................54
...............................................56
..........................................................56
..........................53
........................................53
.........................53
..........................55
.................................55
.........................55
.....52
....................55
.....56
■ Installation .......................57
Precautions before installation .......................57
Before installing
Installation notes
Installation using the screw holes on the side of
this product
Installing the microphone
Mounting on the sun visor
Installation on the steering column
Adjusting the microphone angle
.............................................57
............................................57
...............................................57
...............................58
..............................58
.................58
.....................58
■ Appendix ..........................59
Troubleshooting .............................................59
Error messages
Handling and care of discs
Playable discs
Detailed information for playable media
Bluetooth
.............................................60
................................................62
.......................................................65
.............................62
.........63
®
SiriusXM
satellite radio .................................65
™
Technology ..................................65
HD Radio
..............................................................65
WMA
..............................................................66
FLAC
...............................................................66
DivX
...............................................................66
AAC
™
........................................................66
Android
Detailed information regarding connected iPod
......................................................66
devices
Using app-based connected content
®
........................................................67
Pandora
®
..........................................................67
Spotify
Notice regarding video viewing
Notice regarding DVD-Video viewing
Notice regarding MP3 le usage
Using the LCD screen correctly
Specications.................................................68
..............66
......................67
.............67
....................67
......................67
3
Precaution Precaution
Information to User
MODEL NO. : AVH-X5800BHS, AVH-X4800BS, AVH-
X3800BHS, AVH-X2800BS
Contains FCC ID : AJDK071
Contains/Contient IC : 775E-K071
This device complies with Part 15 of FCC Rules and
Industry Canada licence-exempt RSS standard(s).
Operation is subject to the following two conditions: (1)
this device may not cause interference, and (2) this device
must accept any interference, including interference that
may cause undesired operation of this device.
The Bluetooth antenna cannot be removed (or replaced)
by user.
This equipment complies with FCC/IC radiation exposure
limits set forth for an uncontrolled environment and
meets the FCC radio frequency (RF) Exposure Guidelines
and RSS-102 of the IC radio frequency (RF) Exposure
rules. This equipment has very low levels of RF energy
that it deemed to comply without maximum permissive
exposure evaluation (MPE). But it is desirable that it
should be installed and operated keeping the radiator at
least 20 cm or more away from person’s body (excluding
extremities: hands, wrists, feet and ankles).
MODEL NO.: AVH-X1800S
This device complies with Part 15 of the FCC Rules.
Operation is subject to the following two conditions:
(1) this device may not cause harmful interference, and (2)
this device must accept any interference received, including
interference that may cause undesired operation.
This transmitter must not be co-located or operated in
conjunction with any other antenna or transmitter.
Alteration or modifications carried out without
appropriate authorization may invalidate the user’s right
to operate the equipment.
NOTE: This equipment has been tested and found to
comply with the limits for a Class B digital device,
pursuant to Part 15 of the FCC Rules. These limits are
designed to provide reasonable protection against
harmful interference in a residential installation. This
equipment generates, uses and can radiate radio
frequency energy and, if not installed and used in
accordance with the instructions, may cause harmful
interference to radio communications. However, there
is no guarantee that interference will not occur in a
particular installation. If this equipment does cause
harmful interference to radio or television reception,
which can be determined by turning the equipment
off and on, the user is encouraged to try to correct the
interference by one or more of the following measures:
Reorient or relocate the receiving antenna.
Increase the separation between the equipment and
receiver.
Connect the equipment into an outlet on a circuit
different from that to which the receiver is connected.
Consult the dealer or an experienced radio/TV technician
for help.
CAUTION:
USE OF CONTROL OR ADJUSTMENT OR PERFORMANCE
OF PROCEDURES OTHER THAN THOSE SPECIFIED HEREIN
MAY RESULT IN HAZARDOUS RADIATION EXPOSURE.
CAUTION:
THE USE OF OPTICAL INSTRUMENTS WITH THIS PRODUCT
WILL INCREASE EYE HAZARD.
CAUTION
This product is a Class 1 laser product classified under the
Safety of laser products, IEC 60825-1:2007, and contains a
class 1M laser module. To ensure continued safety, do not
remove any covers or attempt to gain access to the inside of
the product. Refer all servicing to qualified personnel.
CAUTION—CLASS 1M VISIBLE AND INVISIBLE
LASER RADIATION WHEN OPEN, DO NOT VIEW
DIRECTLY WITH OPTICAL INSTRUMENTS.
WARNING
This product contains chemicals known to the State of
California and other governmental entities to cause cancer
and birth defects or other reproductive harm. Wash hands
after handling.
The Safety of Your Ears is in Your
Hands
Get the most out of your equipment by playing it at a safe level—
a level that lets the sound come through clearly without annoying blaring or distortion and, most importantly, without affecting
your sensitive hearing. Sound can be deceiving. Over time, your
hearing “comfort level” adapts to higher volumes of sound, so
what sounds “normal” can actually be loud and harmful to your
hearing. Guard against this by setting your equipment at a safe
level BEFORE your hearing adapts.
ESTABLISH A SAFE LEVEL:
Set your volume control at a low setting.
Slowly increase the sound until you can hear it comfortably
and clearly, without distortion.
Once you have established a comfortable sound level, set
the dial and leave it there.
4

BE SURE TO OBSERVE THE FOLLOWING
GUIDELINES:
Do not turn up the volume so high that you can’t hear what’s
around you.
Use caution or temporarily discontinue use in potentially
hazardous situations.
Do not use headphones while operating a motorized vehicle;
the use of headphones may create a traffic hazard and is
illegal in many areas.
License, Warranty Disclaimer &
Limitation of Liability
SAFETY PROVISIONS
Disclaimer
THE WARRANTIES SET FORTH IN PIONEER’S LIMITED
WARRANTY ARE THE ONLY WARRANTIES MADE BY PIONEER
OR ANY OF ITS LICENSORS, AS APPLICABLE. PIONEER
AND ITS LICENSORS EXPRESSLY DISCLAIM ALL OTHER
WARRANTIES, EXPRESS OR IMPLIED, INCLUDING, WITHOUT
LIMITATION, WARRANTIES OF MERCHANTABILITY AND
FITNESS FOR A PARTICULAR PURPOSE.
Limitation of Liability
TO THE MAXIMUM EXTENT PERMISSIBLE UNDER
APPLICABLE LAW, NEITHER PIONEER NOR ITS LICENSORS
WILL BE LIABLE TO YOU OR TO ANY OTHER PARTY FOR
ANY INDIRECT, CONSEQUENTIAL, INCIDENTAL, PUNITIVE,
OR SPECIAL DAMAGES, REGARDLESS OF THE FORM OF
ACTION, WHETHER IN CONTRACT OR IN TORT, INCLUDING
NEGLIGENCE, EVEN IF SUCH PARTIES HAVE BEEN ADVISED
OF THE POSSIBILITY OF SUCH DAMAGES.
TO THE MAXIMUM EXTENT PERMISSIBLE UNDER APPLICABLE
LAW, PIONEER’S, OR ITS LICENSORS’, TOTAL LIABILITY OF
ANY KIND ARISING OUT OF OR RELATED TO YOUR USE
OF THE PRODUCTS, INCLUDING, BUT NOT LIMITED TO,
ANY WARRANTY CLAIMS, OR ANY CLAIMS FOR PROPERTY
DAMAGE, DEATH OR DISABILITY, REGARDLESS OF THE
FORUM AND REGARDLESS OF WHETHER ANY ACTION
OR CLAIM IS BASED ON CONTRACT, TORT, (INCLUDING
NEGLIGENCE), STRICT PRODUCT LIABILITY, OR ANY OTHER
LEGAL THEORY, WILL NOT EXCEED ONE THOUSAND DOLLARS
(USD$1 000).
SOME JURISDICTIONS DO NOT ALLOW THE EXCLUSION
OF DAMAGES OR LIMITATION OF LIABILITY, SO THE ABOVE
EXCLUSIONS OR LIMITATIONS, TO THE EXTENT PROHIBITED
BY APPLICABLE LAW, MAY NOT APPLY TO YOU. YOUR SPECIFIC
RIGHTS MAY VARY FROM JURISDICTION TO JURISDICTION.
Important safety information
WARNING
Do not attempt to install or service this product by yourself.
Installation or servicing of this product by persons without
training and experience in electronic equipment and
automotive accessories may be dangerous and could
expose you to the risk of electric shock, injury or other
hazards.
Do not allow this product to come into contact with liquids.
Electrical shock could result. Also, damage to the product,
smoke, and overheating could result from contact with
liquids.
If liquid or foreign matter should get inside this product,
park your vehicle in a safe place, turn the ignition switch
off (ACC OFF) immediately and consult your dealer or the
nearest authorized Pioneer Service Station. Do not use this
product in this condition because doing so may result in a
fire, electric shock, or other failure.
If you notice smoke, a strange noise or odor from this
product, or any other abnormal signs on the LCD screen,
turn off the power immediately and consult your dealer or
the nearest authorized Pioneer Service Station. Using this
product in this condition may result in permanent damage
to the system.
Do not disassemble or modify this product, as there
are high-voltage components inside which may cause
an electric shock. Be sure to consult your dealer or the
nearest authorized Pioneer Service Station for internal
inspection, adjustments or repairs.
Before using this product, be sure to read and fully understand
the following safety information:
Do not operate this product, any applications, or the rear
view camera option (if purchased) if doing so will divert your
attention in any way from the safe operation of your vehicle.
Always observe safe driving rules and follow all existing
traffic regulations. If you experience difficulty in operating
this product or reading the display, park your vehicle in a
safe location and apply the parking brake before making the
necessary adjustments.
Never set the volume of this product so high that you cannot
hear outside traffic and emergency vehicles.
To promote safety, certain functions are disabled unless the
vehicle is stopped and/or the parking brake is applied.
Keep this manual handy as a reference for operating proce-
dures and safety information.
Do not install this product where it may (i) obstruct the
driver’s vision, (ii) impair the performance of any of the
vehicle’s operating systems or safety features, including air
bags or hazard lamp buttons or (iii) impair the driver’s ability
to safely operate the vehicle.
Please remember to fasten your seat belt at all times while
operating your vehicle. If you are ever in an accident, your
injuries can be considerably more severe if your seat belt is
not properly buckled.
Never use headphones while driving.
Parking brake interlock
Certain functions (such as viewing of video image and certain
touch panel key operations) offered by this product could be
dangerous (possibly resulting in serious injury or death) and/
or unlawful if used while driving. To prevent such functions from
being used while the vehicle is in motion, there is an interlock
system that senses when the parking brake is set and when the
vehicle is moving. If you attempt to use the functions described
above while driving, they will become disabled until you stop
the vehicle in a safe place, and (1) apply the parking brake, (2)
release the parking brake, and then (3) apply the parking brake
again. Please keep the brake pedal pushed down before releasing the parking brake.
To ensure safe driving
WARNING
LIGHT GREEN LEAD AT POWER CONNECTOR
IS DESIGNED TO DETECT PARKED STATUS
AND MUST BE CONNECTED TO THE POWER
SUPPLY SIDE OF THE PARKING BRAKE SWITCH.
IMPROPER CONNECTION OR USE OF THIS LEAD
MAY VIOLATE APPLICABLE LAW AND MAY RESULT
IN SERIOUS INJURY OR DAMAGE.
Do not take any steps to tamper with or disable the
parking brake interlock system which is in place for
your protection. Tampering with or disabling the
parking brake interlock system could result in serious
injury or death.
To avoid the risk of damage and injury and the
potential violation of applicable laws, this product is
not for use with a video image that is visible to the
5

X0000BT
HOLD
Precaution Precaution
driver.
In some countries the viewing of video image on a display
inside a vehicle even by persons other than the driver may
be illegal. Where such regulations apply, they must be
obeyed.
If you attempt to watch video image while driving, the warning
“Viewing of front seat video source while driving is strictly
prohibited.” will appear on the screen. To watch video image
on this display, stop the vehicle in a safe place and apply the
parking brake. Please keep the brake pedal pushed down before
releasing the parking brake.
When using a display connected to V OUT
The video output terminal (V OUT) is for connection of a display
to enable passengers in the rear seats to watch video images.
WARNING
NEVER install the rear display in a location that enables the
driver to watch video images while driving.
To avoid battery exhaustion
Be sure to run the vehicle engine while using this product. Using
this product without running the engine can drain the battery.
WARNING
Do not install this product in a vehicle that does not have an
ACC wire or circuitry available.
Rear view camera
With an optional rear view camera, you are able to use this
product as an aid to keep an eye on trailers, or backing into a
tight parking spot.
WARNING
SCREEN IMAGE MAY APPEAR REVERSED.
USE INPUT ONLY FOR REVERSE OR MIRROR IMAGE
REAR VIEW CAMERA. OTHER USE MAY RESULT IN
INJURY OR DAMAGE.
CAUTION
The rear view mode is to use this product as an aid to keep
an eye on the trailers, or while backing up. Do not use this
function for entertainment purposes.
6
Handling the USB connector
CAUTION
To prevent data loss and damage to the storage device,
never remove it from this product while data is being
transferred.
Pioneer cannot guarantee compatibility with all USB mass
storage devices and assumes no responsibility for any loss
of data on media players, iPhone, smartphone, or other
devices while using this product.
Failure to operate
After-sales service for Pioneer products
Please contact the dealer or distributor from which you
purchased the product for after-sales service (including
warranty conditions) or any other information. In case the
necessary information is not available, please contact the
companies listed below.
Please do not ship your product to the companies at the
addresses listed below for repair without making advance
contact.
USA&CANADA
Pioneer Electronics (USA) Inc.
CUSTOMER SUPPORT DIVISION
P.O. Box 1760 Long Beach, CA 90801-1760
800-421-1404
For warranty information, please see the Limited Warranty
sheet included with your product.
Visit our website
Visit us at the following site:
http://www.pioneerelectronics.com
http://www.pioneerelectronics.ca
1 Register your product.
2 Receive updates on the latest products and technologies.
3 Download owner’s manuals, order product catalogs,
research new products, and much more.
4 Receive notices of software upgrades and software updates.
Protecting the LCD panel and
screen
Do not expose the LCD screen to direct sunlight when this
product is not used. This may result in LCD screen malfunction due to the resulting high temperatures.
When using a cellular phone, keep the antenna of the cel-
lular phone away from the LCD screen to prevent disruption
of the video in the form of spots, colored stripes, etc.
To protect the LCD screen from damage, be sure to touch the
touch panel keys only with your finger and do so gently.
Notes on internal memory
Before removing the vehicle battery
Some of the settings and recorded contents will not be reset.
Data subject to erasure
The information is erased by disconnecting the yellow lead from
the battery (or removing the battery itself).
Some of the settings and recorded contents will not be reset.
Resetting the microprocessor
CAUTION
Pressing the RESET button resets settings and recorded
contents to the factory settings.
Do not perform this operation when a device is connected
to this product.
Some of the settings and recorded contents will not be
reset.
The microprocessor must be reset under the following
conditions:
Prior to using this product for the first time after installation.
If this product fails to operate properly.
If there appears to be problems with the operation of the
system.
If your vehicle position is shown on the map with a signifi-
cant positioning error.
1 Turn the ignition switch OFF.
2 Press the RESET button with a pen tip or other
pointed implement.
Refer to Checking part names and functions on page 7
X0000BT
HOLD
123 4 5678
9
Settings and recorded contents are reset to the factory settings.
About this manual
This manual uses diagrams of actual screens to describe operations. However, the screens on some units may not match those
shown in this manual depending on the model used.
Meanings of Symbols Used in This
Manual
This indicates model name that are supported
the described operations.
This indicates to touch an appropriate soft key
on the touch screen.
This indicates to touch and hold an appropriate
soft key on the touch screen.
This indicates that there is a reference or
supplementary for the key or screen.
Use and care of the remote
control
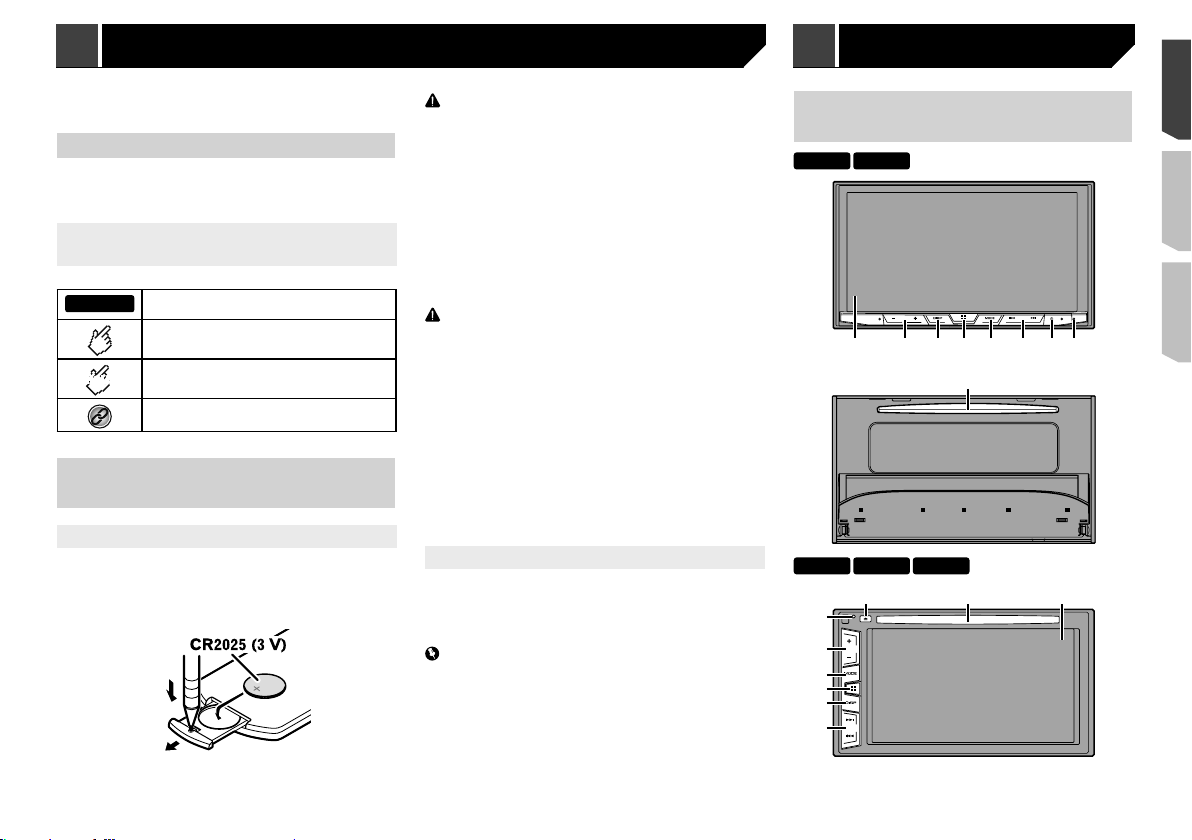
Installing the battery
Slide the tray on the back of the remote control out and insert the
battery with the plus (+) and minus (–) poles aligned properly.
When using for the first time, pull out the film protruding
from the tray.
WARNING
Do not ingest the battery, Chemical Burn Hazard.
This product, including the supplied remote control,
contains a coin/button cell battery. If the coin/button cell
battery is swallowed, it can cause severe internal burns in
just two hours and can lead to death.
Keep new or used batteries out of the reach of children.
If the battery is swallowed or placed inside any part of the
body, consult a doctor immediately.
If the battery compartment does not close securely, stop
using the product and keep it away from children.
Batteries (battery pack or batteries installed) must not be
exposed to excessive heat such as sunshine, fire or the
like.
CAUTION
Remove the battery if the remote control is not used for a
month or longer.
There is a danger of explosion if the battery is incorrectly
replaced. Replace only with the same or equivalent type.
Do not handle the battery with metallic tools.
Do not store the battery with metallic objects.
If the battery leaks, wipe the remote control completely
clean and install a new battery.
When disposing of used batteries, comply with
governmental regulations or environmental public
institutions’ rules that apply in your country/area.
“Perchlorate Material – special handling may apply. See
www.dtsc.ca.gov/hazardouswaste/perchlorate. (Applicable
to California, U.S.A.)”
Using the remote control
Point the remote control in the direction of the front panel to
operate.
The remote control may not function properly in direct
sunlight.
Important
Do not store the remote control in high temperatures or
direct sunlight.
Do not let the remote control fall onto the floor, where it
may become jammed under the brake or gas pedal.
Checking part names and
functions
X5800BHS X4800BS
X3800BHS X2800BS X1800S
97 1
8
2
5
4
3
6
7
2
1
Basic operation Basic operation
1 LCD screen
2 Volume (+/–) button
3 DISP
button
4
button
5 MODE
button
6
TRK (
/ )
button
7
button
8 RESET
button
9 Disc-
loading
slot
Remote control
7
8
On the AV operation screen, press to turn the
display off.
On the Application screen or navigation mode,
press to display the side control bar. Press and
hold to turn the display off.
When the display is turned off, touch the
p
screen to revert to the original screen.
Press to display the top menu screen.
Press and hold to activate the voice recognition
function.
Refer to Using the voice recognition func-
tion (for iPhone) on page 15
Press to switch between the Application screen
and the AV operation screen.
Press and hold to switch to the camera view
mode.
Press to return to the previous track (chapter)
or go to the next track (chapter).
Press and hold to perform fast reverse or fast
forward.
Press to answer or end a call.
Refer to Resetting the microprocessor on
page 6
Refer to Inserting and ejecting a disc on
page 8
123
8
4
9
5
6
1 Volume (+/–)
MODE
2
SRC
3
TOP
4
MENU
MENU
5
6 Thumb
pad
MUTE
7
8 AUDIO
SUBTITLE
ANGLE
BAND/
9
ESC
RETURN
10
11
FOLDER/P.
a
12
CH
b
c
Notes on using the LCD panel
Press to switch between the Application screen
and the AV operation screen.
Press and hold to switch to the camera view
mode.
Press to cycle through all the available sources.
Press and hold to turn the source off.
Returns to the top menu during DVD playback.
Displays the DVD menu during DVD playback.
Selects a menu on the DVD menu.
Changes the audio language, subtitle language
or viewing angle during DVD playback.
Selects the tuner band when tuner is selected
as a source.
Cancels the control mode of functions.
Switches between media file types when playing the data of Disc, USB.
Returns to the specified point and begins
playback from there.
Pauses or resumes playback.
For audio: Press and hold to perform fast
or
reverse or fast forward.
For video: Press to perform fast reverse or fast
forward.
Press to return to the previous track (chapter)
or
or go to the next track (chapter).
Press to answer or end a call.
Stops playback.
If you resume playback, playback will start from
the point where you stopped. Touch the key
again to stop playback completely.
Selects the next or previous disc or folder.
Recalls radio station frequencies assigned to
preset channel keys.
WARNING
Keep hands and fingers clear of this product when
opening, closing, or adjusting the LCD panel. Be especially
cautious of children’s hands and fingers.
Do not use with the LCD panel left open. It may result in
injury in the event of an accident.
CAUTION
Do not open or close the LCD panel by force. It may cause
a malfunction.
Do not operate this product until the LCD panel has
completely opened or closed. The LCD panel may stop at
that angle for safety.
Do not place a glass or can on the open LCD panel.
Adjusting the LCD panel angle
X5800BHS X4800BS
1 Press the button.
2 Touch or to adjust the angle of the
LCD panel.
3 Touch .
Returns to the previous screen.
Inserting/ejecting/connecting media
CAUTION
Do not insert anything other than a disc into the disc-loading
slot.
Inserting and ejecting a disc
Inserting a disc
X5800BHS X4800BS
1 Press the button.
2 Touch to open the LCD panel.
3 Insert a disc into the disc-loading slot.
Ejecting a disc
X5800BHS X4800BS
1 Press the button.
2 Touch to open the LCD panel.
3 Remove the disc, and press the button.
Inserting a disc
X3800BHS X2800BS X1800S
1 Insert a disc into the disc-loading slot.
Ejecting a disc
X3800BHS X2800BS X1800S
1 Press button to eject a disc.
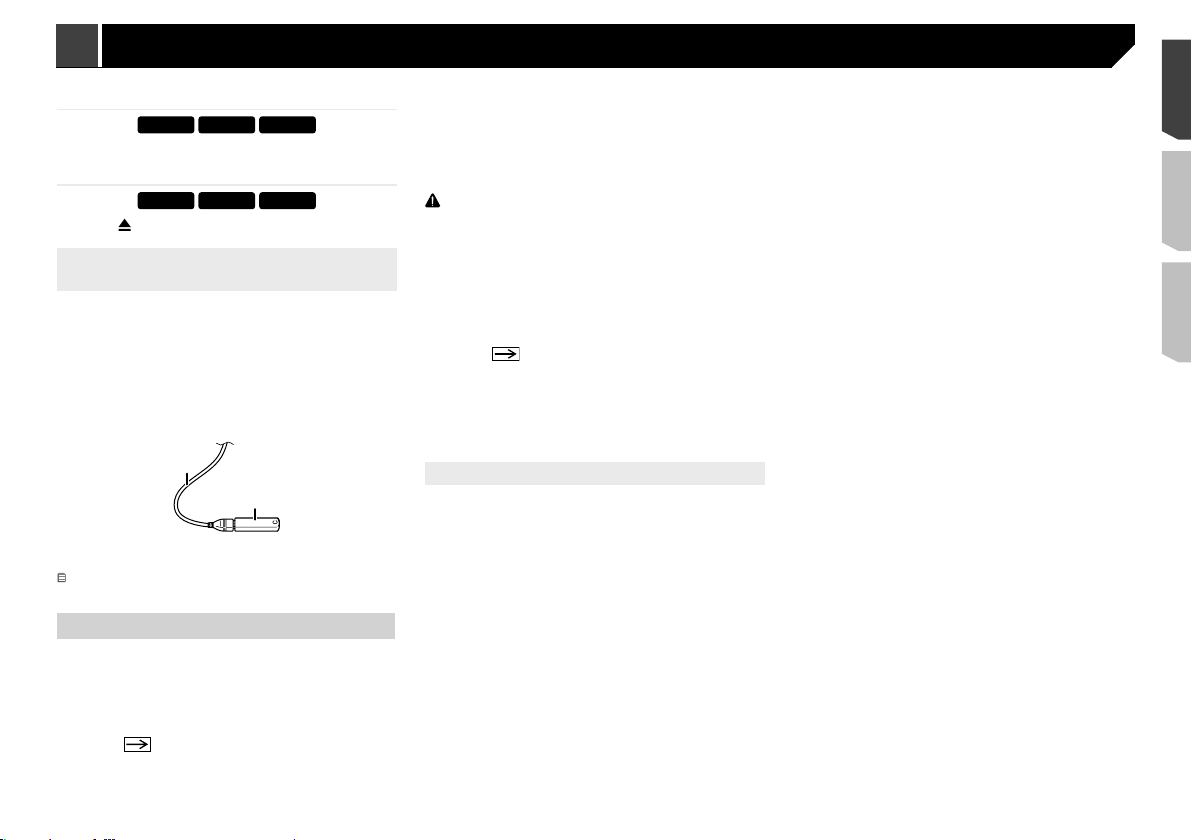
Plugging and unplugging a USB storage device
p This product may not achieve optimum performance with
some USB storage devices.
Connection via a USB hub is not possible.
p
p A USB cable is required for connection.
1 Pull out the plug from the USB port of the USB
cable.
2 Plug a USB storage device into the USB cable.
1
2
1 USB cable
2 USB storage device
Check that no data is being accessed before pulling out the
USB storage device.
On rst-time startup
1 Start the engine to boot up the system.
The “Select Program Language” screen appears.
From the second time on, the screen shown will differ
p
depending on the previous conditions.
2 Touch the language.
3 Touch .
The “Speaker Mode Settings” screen appears.
4 Touch the speaker modes.
Standard Mode
4-speaker system with front and rear speakers, or a
6-speaker system with front and rear speakers and
subwoofers.
Network Mode
3-way system with a high range speaker, middle range
speaker and subwoofer (low range speaker) for reproduction
of high, middle and low frequencies (bands).
WARNING
Do not use the unit in standard mode when a speaker system
for 3-way network mode is connected to this unit. This may
cause damage to the speakers.
5 Touch [OK].
The “Smartphone Setup” screen appears.
6 Touch the item.
Refer to Information on the connections and functions for
each device on page 18
7 Touch .
The top menu screen appears.
Once the speaker mode is set, the setting cannot be
p
changed unless this product is restored to the default
settings. Restore the default settings to change the speaker
mode setting.
Refer to Restoring the default settings on page 52
Switching the speaker mode
To change the speaker mode, you need to restore this product to
the default settings.
1 Restore the default setting.
Refer to Restoring the default settings on page 52
9
*1*2*3
*4
*5
*4
Basic operation Basic operation
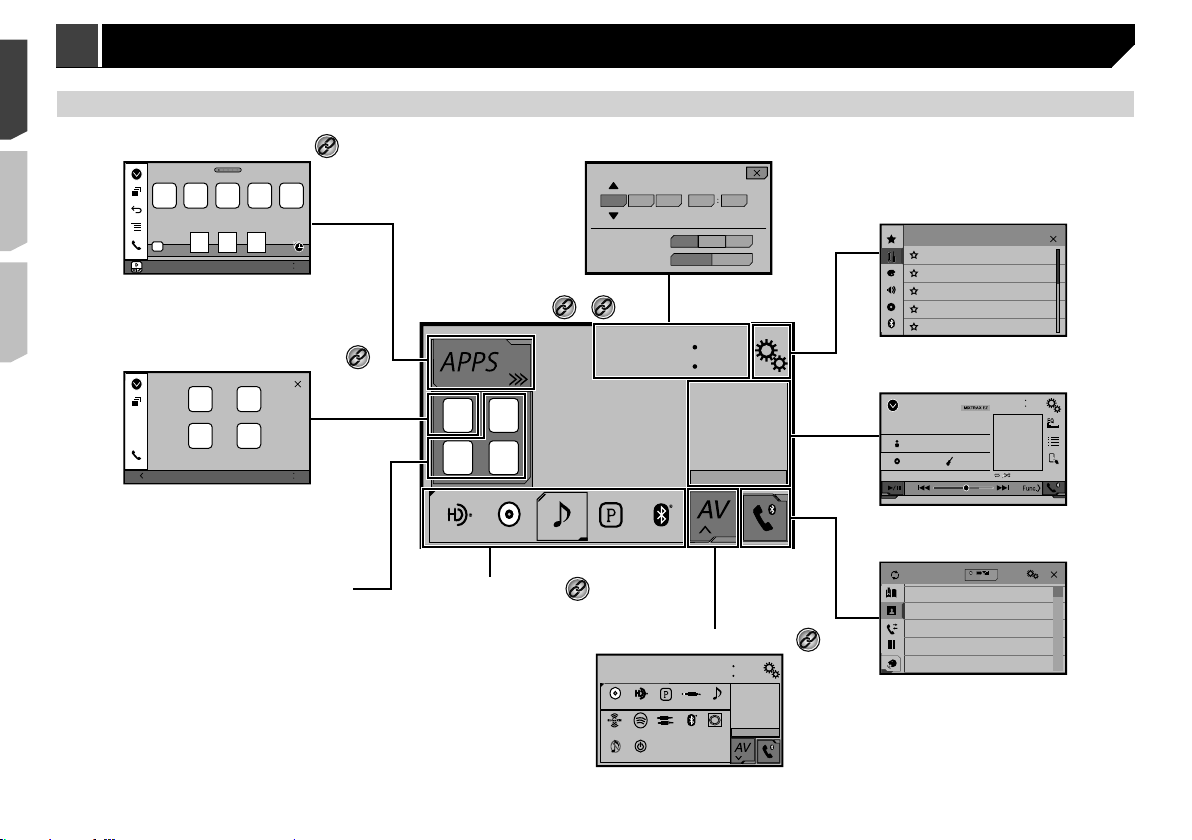
How to use the screens
Application menu screen
Abcdefg Abcdefg Abcdefg Abcdefg Abcdefg
Depending on the connection
method, the "smartphone setup"
screen is displayed.
6/10
4821
Application operation screen
Source Select
Abcdefg Abcdefg
Abcdefg Abcdefg
6/10
4821
You can control the iPhone or
smartphone applications directly
on this product.
Top menu screen
*4
Favorite source icons Recent application icons
Time and date setting screen
10 620162148
Month/Date d/m/y
Time Format
*1
*2
m/d/yy/m/d
12hour 24hour
6/10
4821
iPod
*3
AV source selection screen
6/10
4821
HD RadioDiscPandoraAUX iPod
Bluetooth
SiriusXM AV
Spotify
Power
SourceOFF
OFF
Camera
Audio
HD Radio
View
Setting menu screen
AV operation screen
iPod
Abcdefghi
Abcdefghi
ABC
Phone menu screen
*5
System
Phone Book
abcdefghi
abcdefghi
abcdefghi
abcdefghi
abcdefghi
Pops
9999’99” -9999’99”
3
abcdefghi...
6/10
99999/99999
ABC
4821
A
B
C
D
E
F
G
10
*1
The top menu screen of this manual is the screen
*2
*3
*4
*5
1
when using the AppRadioOne. The items displayed
on the screen may vary depending on the connecting
device or mode. When you connect an iPhone via
Bluetooth wireless technology or a smartphone via
USB cable, “Smartphone Setup” screen appears by
touching [APPS].
By pressing the button on any screen you can
display the Top menu screen.
When you connect the external navigation system to
this unit, the navigation mode key is displayed at the
left bottom of the display.
By pressing the MODE button you can switch
between the Application screen and the AV operation
screen.
If you select “Power OFF”, you can turn off almost all
functions. The “Power OFF” mode is released in the
following cases:
An incoming call is received.
A rear view camera image is input when the
vehicle reverses.
A button on this product is pressed.
The ignition switch is turned off (ACC OFF), then
turned on (ACC ON).
Supported AV source
You can play or use the following sources with this product.
Radio (AVH-X4800BS)(AVH-X2800BS)(AVH-X1800S)
HD Radio (HD Radio™ tuner) (AVH-X5800BHS)
(AVH-X3800BHS)
CD
ROM (compressed audio files)
DVD-Video
USB
The following sources can be played back or used by connecting
an auxiliary device.
iPod
®
Spotify
Pandora
Bluetooth audio (AVH-X5800BHS)(AVH-X4800BS)(AVH-
AUX
®
X3800BHS)(AVH-X2800BS)
SiriusXM® Satellite Radio
AV input (AV)
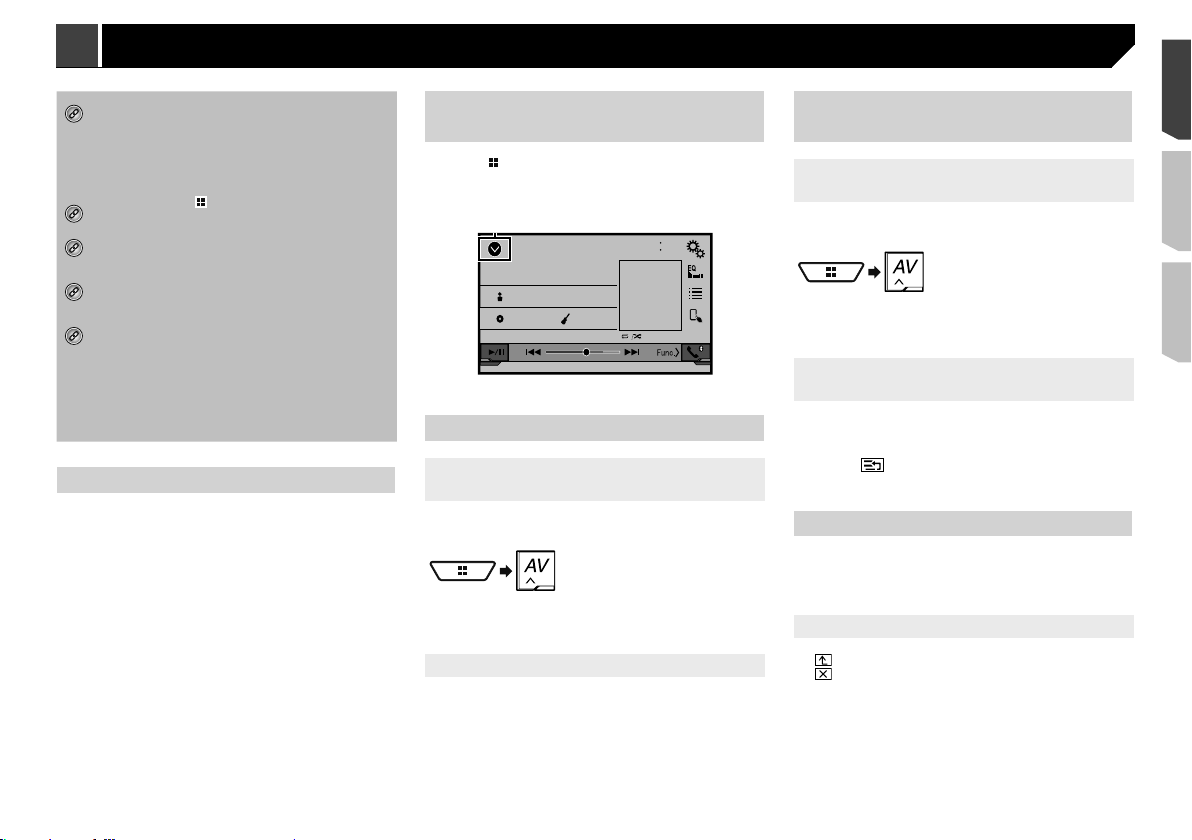
Displaying the AV operation screen
1 Press .
2 Touch the AV operation key.
The AV operation screen appears.
6/10
4821
iPod
Abcdefghi
Abcdefghi
ABC
1 Displays the source list.
Pops
9999’99” -9999’99”
99999/99999
Selecting a source
Source on the AV source selection
screen
1 Display the “AV source selection” screen.
2 Touch the source icon.
p When you select “Source OFF”, the AV source is turned off.
Source on the source list
1 Display the source list.
Refer to Displaying the AV operation screen on page 11
2 Touch the source key.
p When you select “Source OFF”, the AV source is turned off.
Changing the display order of
sources
Changing the display order of source
icons
1 Display the “AV source selection” screen.
2 Touch and hold a source icon, and drag the icon
to the desired position.
Changing the display order of source
keys
1 Display the source list.
Refer to Displaying the AV operation screen on page 11
2 Touch .
3 Drag the source key to the desired position.
Using the touch panel
You can operate this product by touching the keys on the screen
directly with your fingers.
To protect the LCD screen from damage, be sure to touch the
p
screen only with your finger gently.
Common touch panel keys
: Returns to the previous screen.
: Closes the screen.
11
1 2
3
1
Basic operation Registration and connection of
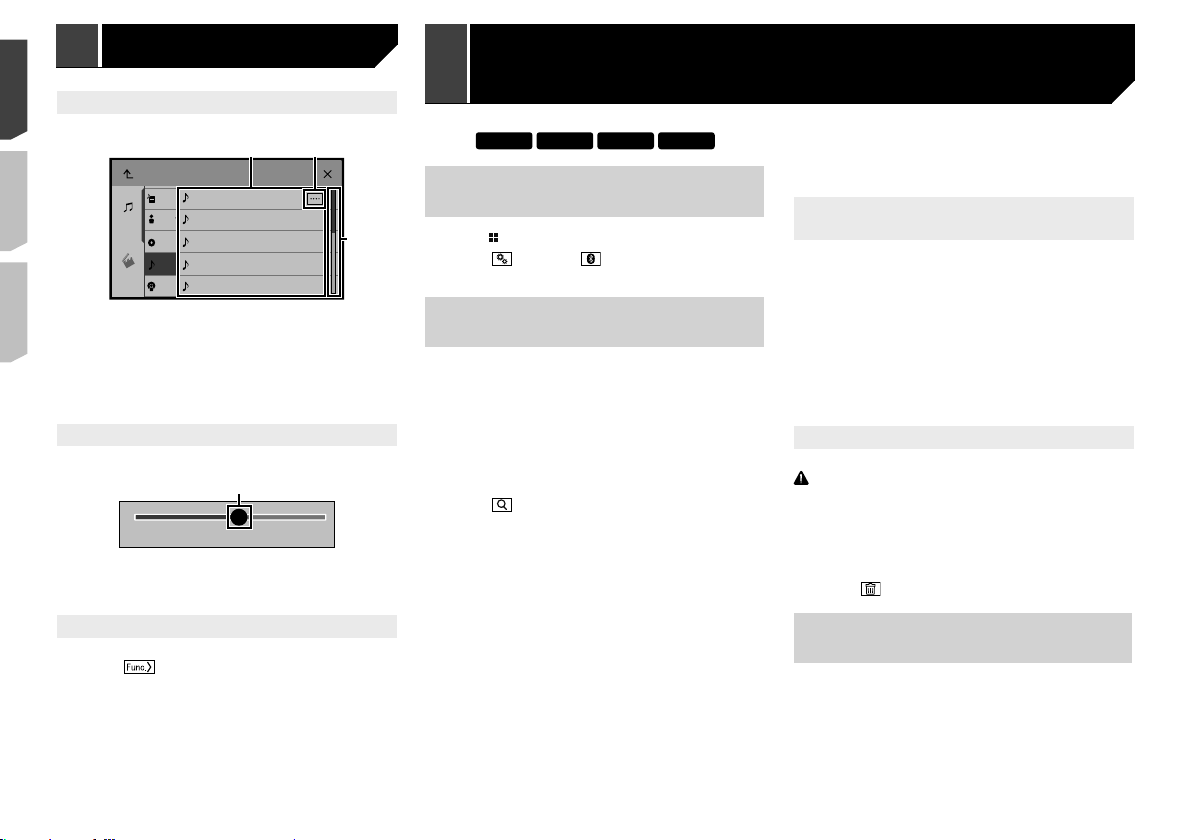
Operating list screens
Songs
abcdefghi
Playlist
Music
Artist
abcdefghi
abcdefghi
Alburm
abcdefghi
Songs
Video
1 Touching an item on the list allows you to narrow down the
options and proceed to the next operation.
Appears when all characters are not displayed on the display
2
area.
If you touch the key, the rest are scrolled for display.
Appears when items cannot be displayed on a single page.
3
Drag the slider bar or the list to view any hidden items.
Podcast
abcdefghi
Operating the time bar
9999’99” -9999’99”
1 You can change the playback point by dragging the key.
p Playback time corresponding to the position of the key is
displayed while dragging the key.
Switching the operation panel
1 Touch .
The hidden function keys appears.
This key does not appear for some AV sources.
p
12
Bluetooth® device
X5800BHS X4800BS X3800BHS X2800BS
Displaying the “Bluetooth”
screen
1 Press .
2 Touch , and then .
The “Bluetooth” screen appears.
Registering your Bluetooth
devices
p If three devices are already paired, “Memory Full” is dis-
played. Delete a paired device first.
Refer to Deleting a registered device on page 12
1 Activate the Bluetooth wireless technology on
your devices.
2 Display the “Bluetooth” screen.
Refer to Displaying the “Bluetooth” screen on page 12
3 Touch [Connection].
4 Touch .
The system searches for Bluetooth devices waiting for a connection and displays them in the list if a device is found.
5 Touch the Bluetooth device name.
After the device is successfully registered, a Bluetooth connection is established by the system. Once the connection is established, the device name is displayed on the list.
If your device supports SSP (Secure Simple Pairing), a six-
p
digit number appears on the display of this product. Touch
[Yes ] to pair the device.
The Bluetooth connection can be also made by detecting
p
this product from the Bluetooth device. Before registration,
make sure that “Visibility” in the “Bluetooth” menu is set
to “On”. For details on a Bluetooth device operations, refer
to the operating instructions supplied with the Bluetooth
device.
Refer to Switching visibility on page 13
Two cellular phones can be connected to this product at the
p
same time.
Refer to Switching the connected Bluetooth device on page
13
If you try to connect an unconnected cellular phone while
p
two cellular phones are already connected, the first one of
the two connected cellular phones will be disconnected and
the unconnected cellular phone will be connected instead.
Setting Bluetooth device auto
connection
This function connects the last connected Bluetooth device to
this product automatically as soon as the two devices are less
than a few meters apart.
The default setting is “On”.
If two Bluetooth devices were connected the last time, the
p
two devices are connected to this product automatically in
the order that they are registered in the device list.
1 Display the “Bluetooth” screen.
Refer to Displaying the “Bluetooth” screen on page 12
2 Touch [Auto Connect] to switch “On” or “Off”.
Deleting a registered device
CAUTION
Never turn this product off while the paired Bluetooth device
is being deleted.
1 Display the “Bluetooth” screen.
Refer to Displaying the “Bluetooth” screen on page 12
2 Touch [Connection].
3 Touch .
Connecting a registered
Bluetooth device manually
Connect the Bluetooth device manually in the following cases:
Two or more Bluetooth devices are registered, and you want
to manually select the device to be used.
You want to reconnect a disconnected Bluetooth device.
Connection cannot be established automatically for some
reason.
1 Activate the Bluetooth wireless technology on
your devices.

Registration and connection of Bluetooth® device
2 Display the “Bluetooth” screen.
Refer to Displaying the “Bluetooth” screen on page 12
3 Touch [Connection].
4 Touch the name of the device.
p To disconnect the device, touch the name of the connected
device in the list.
Switching visibility
This function sets whether or not to make this product visible to
the other device.
The default setting is “On”.
1 Display the “Bluetooth” screen.
Refer to Displaying the “Bluetooth” screen on page 12
2 Touch [Visibility] to switch “On” or “Off”.
Entering the PIN code for
Bluetooth wireless connection
To connect your Bluetooth device to this product, you need to
enter a PIN code.
You can change the PIN code with this function.
The default PIN code is “0000”.
p
1 Display the “Bluetooth” screen.
Refer to Displaying the “Bluetooth” screen on page 12
2 Touch [PIN Code Input].
3 Touch [0] to [9] to input the pin code (up to
8 -digits).
4 Touch .
Displaying the device
information
1 Display the “Bluetooth” screen.
Refer to Displaying the “Bluetooth” screen on page 12
2 Touch [Device Information].
The device name and address of the Bluetooth device on this
product are displayed.
Clearing the Bluetooth memory
p This setting is available only when you stop your vehicle in a
safe place and apply the parking brake.
CAUTION
Never turn this product off while the Bluetooth memory is
being cleared.
1 Display the “Bluetooth” screen.
Refer to Displaying the “Bluetooth” screen on page 12
2 Touch [Bluetooth Memory Clear].
3 Touch [Clear].
The confirmation screen appears.
Updating Bluetooth software
This function is used to update this product with the latest
Bluetooth software. For details on Bluetooth software and updating, refer to our website.
The source is turned off and the Bluetooth connection is
p
disconnected before the process starts.
This setting is available only when you stop your vehicle in a
p
safe place and apply the parking brake.
You need to store the version update file to the USB storage
p
device in advance.
CAUTION
Never turn this product off and never disconnect the phone
while the software is being updated.
1 Connect the USB storage device stored the ver-
sion update file to this unit.
Refer to Plugging and unplugging a USB storage device on
page 9
2 Display the “Bluetooth” screen.
Refer to Displaying the “Bluetooth” screen on page 12
3 Touch [BT Software Update].
4 Touch [Start].
Follow the on-screen instructions to finish updating the
Bluetooth software.
Displaying the Bluetooth software version
If this product fails to operate properly, you may need to consult
your dealer for repair.
In such cases, perform the following procedure to check the
software version on this unit.
1 Display the “Bluetooth” screen.
Refer to Displaying the “Bluetooth” screen on page 12
2 Touch [Bluetooth Version Information].
The version of this product’s Bluetooth module appears.
Switching the connected
Bluetooth device
After registering and connecting the Bluetooth devices to this
product, you can switch among the devices using the switch
devices key in the phone function and some audio sources.
You can register up to three Bluetooth devices on this
p
product.
Refer to Registering your Bluetooth devices on page 12
You can connect one of the registered devices to this prod-
p
uct. In cases where the registered device is equipped with
a phone function, a total of two devices can be connected
at the same time when using the phone function. If two of
the three registered devices are already connected, you can
connect the remaining third device to use the audio function
only from the switch devices key on the audio source screen.
The icon for the cellular phone currently being used is
p
displayed on the “Phone menu” screen. If you connect two
cellular phones to this product at the same time, you can
switch between the cellular phones using the switch devices
key. The contents of the phone menu are memorized for each
connected cellular phone.
Refer to Hands-free phoning on page 14
The switch devices key will appear for some audio sources.
p
The audio source may automatically switch to another
source depending on the selected device.
13
Switches the search language to
Synchronizes the contacts on this
*1
*2
*3
*4
*5
*6
Hands-free phoning Hands-free phoning
X5800BHS X4800BS X3800BHS X2800BS
product's phone book with the
contacts on your phone manually.
Phone Book
*1
abcdefghi
*2
abcdefghi
*3
abcdefghi
*4
abcdefghi
*5
abcdefghi
abcdefghi...
English or system language.
Switches to the preset dial screen.
14
Refer to Using the preset dial lists on page 14
Switches to the phone book list.
Refer to Calling a number in the phone book on
page 14
Switches to the missed, received and dialed call lists.
Refer to Dialing from the history on page 14
Switches the mode to enter the phone number
directly.
Refer to Direct dialing on page 14
Switches to the voice recognition function (for
iPhone).
Refer to Using the voice recognition function (for
iPhone) on page 15
If you connect two cellular phones to this product at
the same time, you can switch between the cellular
phones using the switch devices key. The following
3
ABC
A
B
C
D
E
F
G
*6
items are displayed on the key.
Name of the current cellular phone
List number of the current cellular phone
Battery status of the current cellular phone
Reception status of the current cellular phone
Refer to Switching the connected Bluetooth device
on page 13
CAUTION
For your safety, avoid talking on the phone as much as
possible while driving.
To use this function you need to connect your cellular phone to
this product via Bluetooth in advance.
Refer to Registration and connection of Bluetooth® device on
page 12
Displaying the Phone menu
screen
1 Press .
2 Touch .
The Phone menu screen appears.
Making a phone call
You can make a phone call in many different ways.
Direct dialing
1 Display the “Phone menu” screen.
Refer to Displaying the Phone menu screen on page 14
2 Touch .
3 Touch the number keys to enter the phone
number.
4 Touch to make a call.
5 Touch to end the call.
p You may hear a noise when you hang up the phone.
Calling a number in the phone book
p The contacts on your phone will be automatically transferred
to this product.
“Visibility” of the “Bluetooth” screen should be on.
p
Refer to Switching visibility on page 13
If two cellular phones are automatically connected to this
p
product with the Bluetooth device auto connect function, the
phone book of the second phone is displayed.
1 Display the “Phone menu” screen.
Refer to Displaying the Phone menu screen on page 14
2 Touch .
3 Touch the desired name on the list.
4 Touch the phone number.
The dial screen appears and dialing starts.
5 Touch to end the call.
Dialing from the history
1 Display the “Phone menu” screen.
Refer to Displaying the Phone menu screen on page 14
2 Touch .
3 Touch the item to switch the history list.
The following items are available:
: Received call list
: Dialed call list
: Missed call list
4 Touch the desired entry on the list to make a
call.
The dial screen appears and dialing starts.
5 Touch to end the call.
Using the preset dial lists
Registering a phone number
You can easily store up to six phone numbers per device as
presets.
1 Display the “Phone menu” screen.
Refer to Displaying the Phone menu screen on page 14
2 Touch or .
On the “Phone Book” screen, touch the desired name to display
the contact’s phone number.
3 Touch .
Dialing from the preset dial list
1 Display the “Phone menu” screen.
Refer to Displaying the Phone menu screen on page 14
2 Touch .
3 Touch the desired item.
The dial screen appears and dialing starts.
Receiving a phone call
p When two phones are connected at the same time, if an
incoming call is received on the second phone while you are
talking on the first phone, the dial confirmation screen for
the second phone will be displayed.
1 Touch to answer the call.
If you touch while getting a call waiting, you
can switch to the talking person.
Touch to reject the call.
2 Touch to end the call.
Minimizing the dial conrmation screen
p The dial confirmation screen cannot be minimized on the AV
operation screen.
AV sources cannot be selected even if the dial confirmation
p
screen is minimized while talking on the phone or receiving
an incoming call.
1 Touch .
Touch to display the dial confirmation screen
again.
Changing the phone settings
Setting auto answering
You can select whether or not to answer a call automatically.
The default setting is “Off”.
Even if an incoming call is received on the other connected
p
phone while you are talking on the phone, the incoming call
will not be answered automatically.
1 Display the “Bluetooth” screen.
Refer to Displaying the “Bluetooth” screen on page 12
2 Touch [Auto Answer] to switch “On” or “Off”.
Switching the ring tone
You can select whether or not to use this product’s ring tone.
The default setting is “On”.
1 Display the “Bluetooth” screen.
Refer to Displaying the “Bluetooth” screen on page 12
2 Touch [Ring Tone] to switch “On” or “Off”.
Inverting names in the phone book
You can use this function to change the order of the first and last
names in the phone book.
1 Display the “Bluetooth” screen.
Refer to Displaying the “Bluetooth” screen on page 12
2 Touch [Invert Name].
Setting the private mode
During a conversation, you can switch to private mode (talk
directly on your cellular phone).
1 Touch or to turn private mode on or
off.
p If two cellular phones are connected to this product and the
first phone is set to private mode, you can receive incoming
calls on the second phone while maintaining the call in prog-
ress on the first phone.
When two cellular phones are connected to this product
p
and private mode of the first phone is turned off, if an incom-
ing call on the second phone is answered while a call is in
progress on the first phone or while dialing or receiving a
call on the first phone, the call, dialing, or receiving on the
first phone is ended.
Adjusting the other party’s listening
volume
This product can be adjusted to the other party’s listening
volume.
1 Touch to switch between the three vol-
ume levels.
p Settings can be stored for each device.
Using the voice recognition
function (for iPhone)
By connecting your iPhone to this product, you can use the voice
recognition function (Siri Eyes Free Mode) on this product.
When an iPhone running iOS 6.1 or higher is used, Siri Eyes
p
Free Mode is available with this product.
In this chapter, iPhone and iPod touch will be referred to as
p
“iPhone”.
1 Display the “Phone menu” screen.
Refer to Displaying the Phone menu screen on page 14
2 Touch .
The voice recognition function launches and the voice control
screen appears.
You can also launch the voice recognition function by press-
p
ing and holding
p If two cellular phones are automatically connected to this
product with the Bluetooth device auto connect function, the
voice recognition function (Siri Eyes Free Mode) will be set
on the second phone.
If you want to use the voice recognition function (Siri Eyes
p
Free Mode) on another connected iPhone, touch
to switch to the other iPhone. The iPhone that you switch to
will be set as the current device.
.
1
2
Setting phone book auto
synchronization
You can select whether or not to synchronize the the phone book
with the contacts on your phone automatically when you connect the phone to this product.
The default setting is “Off”.
1 Display the “Bluetooth” screen.
Refer to Displaying the “Bluetooth” screen on page 12
3
15

Hands-free phoning Setup for iPod
2 Touch [Phone Book Auto Synchronize] to
switch “On” or “Off”.
Notes for hands-free phoning
General notes
Connection to all cellular phones featuring Bluetooth wire-
less technology is not guaranteed.
The line-of-sight distance between this product and your
cellular phone must be 10 meters or less when sending and
receiving voice and data via Bluetooth technology.
With some cellular phones, the ring sound may not be
output from the speakers.
If private mode is selected on the cellular phone, hands-free
phoning may be disabled.
Registration and connection
Cellular phone operations vary depending on the type of cel-
lular phone. Refer to the instruction manual that came with
your cellular phone for detailed instructions.
When phone book transfer does not work, disconnect your
phone and then perform pairing again from your phone to
this product.
Making and receiving calls
You may hear a noise in the following situations:
— When you answer the phone using the button on the
phone.
— When the person on the other end of the line hangs up the
phone.
If the person on the other end of the line cannot hear the
conversation due to an echo, decrease the volume level for
hands-free phoning.
With some cellular phones, even after you press the accept
button on the cellular phone when a call comes in, handsfree phoning may not be performed.
The registered name will appear if the phone number is
already registered in the phone book. When one phone
number is registered under different names, only the phone
number will be displayed.
The received call and the dialed number histories
You cannot make a call to the entry of an unknown user (no
phone number) in the received call history.
If calls are made by operating your cellular phone, no history
data will be recorded in this product.
Phone book transfers
If there are more than 1 000 phone book entries on your cel-
lular phone, not all entries may download completely.
Depending on the phone, this product may not display the
phone book correctly.
16
If the phone book in the phone contains image data, the
phone book may not be transferred correctly.
Depending on the cellular phone, phone book transfer may
not be available.
/ iPhone or
smartphone
When using an iPod / iPhone or a smartphone with this product,
configure the settings of this product according to the device to
be connected.
This section describes the settings required for each device.
The basic ow of iPod / iPhone
or smartphone setup
1 Select the method for connecting your device.
Refer to Setting the device connection method on page
16
Connect your device to this product.
2
Refer to Connection on page 52
If necessary, connect your device to this product via
3
Bluetooth connection.
Refer to Registration and connection of Bluetooth® device
on page 12
Setting the device connection
method
To use the application for iPhone or smartphone on this product,
select the method for connecting your device.
Settings are required according to the connected device.
1 Display the “System” setting screen.
2 Touch [Input/Output settings].
3 Touch [Smartphone Setup].
4 Touch the following settings.
Device: Select the device to be connected.
Connection / Application: Select the connection method.
Refer to Information on the connections and functions for
each device on page 18
The setting will change after the following processes are
automatically executed.
— The source is turned off.

Setup for iPod / iPhone or smartphone
— AppRadioOne is exited.
— The smartphone connection (USB and Bluetooth) is
disconnected.
iPod compatibility
This product supports only the following iPod models and iPod
software versions. Others may not work correctly.
iPhone 4, 4s, 5, 5c, 5s, 6, 6 Plus: iOS 7.0 or later.
iPhone 3GS: iOS 6.0.1
iPod touch (4th, 5th generation): iOS 6.0.1
iPod touch (3rd generation): iOS 5.1.1
iPod touch (2nd generation): iOS 4.2.1
iPod classic 160GB (2009): Ver. 2.0.4
iPod classic 160GB (2008): Ver. 2.0.1
iPod classic 80GB: Ver. 1.1.2
iPod nano (7th generation)
iPod nano (6th generation): Ver. 1.2
iPod nano (5th generation): Ver. 1.0.2
iPod nano (4th generation): Ver. 1.0.4
iPod nano (3rd generation): Ver. 1.1.3
p You can connect and control an iPod compatible with this
product by using separately sold connector cables.
Operation methods may vary depending on the iPod model
p
and the software version.
Depending on the software version of the iPod, it may not be
p
compatible with this product.
For details about iPod compatibility with this product, refer to the
information on our website.
This manual applies to the following iPod models.
iPod with 30-pin connector
iPhone 3GS, 4, 4s
iPod touch 2nd, 3rd, 4th generation
iPod classic 80GB, 160GB
iPod nano 3rd, 4th, 5th, 6th generation
iPod with Lightning connector
iPhone 6, 6 Plus
iPhone 5, 5c, 5s
iPod touch 5th generation
iPod nano 7th generation
Android™ device compatibility
p Operation methods may vary depending on the Android
device and the software version of the Android OS.
Depending on the version of the Android OS, it may not be
p
compatible with this product.
Compatibility with all Android devices is not guaranteed.
p
For details about Android device compatibility with this product,
refer to the information on our website.
17
Radio
4821
1
2
3
4
5
6
6/10
AMFM1
Abcdefghi
Abcdefghi
Abcdefghi
000.00
MHz
Selects the FM1, FM2, FM3
or AM band.
Performs manual tuning.
Performs seek tuning or
non stop seek tuning.
Releasing the key in a few seconds, skips
to the nearest station from the current
frequency.
Keeping holding the key for a long
seconds, performs non stop seek tuning.
Displays the preset channel list.
Select an item on the list ("1" to "6")
to switch to the preset channel.
Recalls the preset channel
stored to a key from memory.
Stores the current broadcast
frequency to a key.
HOLD
HOLD
Setup for iPod / iPhone or smartphone Radio
Information on the connections and functions for each device
The settings and cables required for connecting each device, and the available sources are as follows.
iPod / iPhone with a 30-pin connector
Device connection method When connecting via Bluetooth
Smartphone Setup Device
Bluetooth connection Bluetooth connection is required. — —
Available sources iPod (audio)
Connection Wireless via BT USB USB
iPod (video) —
Pandora
Spotify
(AVH-X5800BHS) (AVH-X4800BS) (AVHX3800BHS) (AVH-X2800BS)
iPhone / iPod iPhone / iPod iPhone / iPod
iPod / iPhone with a Lightning connector
Device connection method When connecting via Bluetooth
Connection Wireless via BT USB
iPod (video) — —
Pandora
Spotify
AppRadioOne
Application
Pandora
Spotify
AppRadioOne
Smartphone Setup Device
Bluetooth connection Bluetooth connection is required. —
Available sources iPod (audio)
Android device
Device connection method When connecting via Bluetooth
Smartphone Setup Device Others Others
Bluetooth connection Bluetooth connection is required. —
Available sources
(AVH-X5800BHS) (AVH-X4800BS) (AVH-X3800BHS)
(AVH-X2800BS)
iPhone / iPod iPhone / iPod
—
(AVH-X5800BHS) (AVH-X4800BS) (AVH-X3800BHS)
(AVH-X2800BS)
USB/MTP
—
18
When connecting via CD-IU201V (sold
separately)
When connecting via CD-IU51 (sold
separately)
—
When connecting via CD-IU52 (sold separately)
When connecting via CD-MU200 (sold separately)
AppRadioOne
—
—
When “Application” of “Smartphone Setup” is set to
“AppRadioOne”.
X4800BS X2800BS X1800S
Releasing the key in a few seconds, skips
Displays the preset channel list.
Select an item on the list ("1" to "6")
to switch to the preset channel.
Selects the FM1, FM2, FM3
or AM band.
6/10
1
Radio
2
3
4
AMFM1
Abcdefghi
Abcdefghi
Abcdefghi
4821
5
000.00
6
Performs manual tuning.
Performs seek tuning or
HOLD
non stop seek tuning.
to the nearest station from the current
frequency.
Keeping holding the key for a long
seconds, performs non stop seek tuning.
Recalls the preset channel
stored to a key from memory.
Stores the current broadcast
HOLD
frequency to a key.
Stores song information to an iPod.
Refer to Storing song information to an iPod
(iTunes Tagging) on page 51
By pressing or , you can also switch the preset
p
channels.
By pressing and hold or and release, you can
p
also perform seek tuning.
MHz
By keeping touching and holding or , you can perform
p
non stop seek tuning. Touch again to cancel.
Starting procedure
1 Display the “AV source selection” screen.
2 Touch [Radio].
The “Radio” screen appears.
Storing the strongest broadcast
frequencies
The BSM (best stations memory) function automatically stores
the six strongest broadcast frequencies under the preset tuning
keys “1” to “6”.
Storing broadcast frequencies with BSM may replace those
p
you have already saved.
Previously stored broadcast frequencies may remain stored
p
if the number of frequencies stored has not reached the
limit.
1 Touch .
2 Touch to begin a search.
While the message is displayed, the six strongest broadcast
frequencies will be stored under the preset tuning keys in order
of their signal strength.
If you touch [Cancel], the storage process is
canceled.
Tuning into strong frequencies
p This setting is available only when “Radio” is selected as the
source.
Local seek tuning allows you to only tune into those radio stations with sufficiently strong signals.
1 Display the “System” setting screen.
2 Touch [AV Source Settings].
3 Touch [Radio settings].
4 Touch [Local].
5 Touch the item.
Off (default):
Turns the seek tuning setting off.
Level1 to Level4:
Sets the level of sensitivity for FM to Level1 to Level4 (for
AM Level1 or Level2).
The FM “Level4” (AM “Level2”) setting allows reception of
p
only stations with the strongest signals.
19
Switches the text display between
HOLD
seconds, performs non stop seek tuning.
HD Radio indicator and
HOLD
: Sub channel
AM band
HD Radio
™
X5800BHS X3800BHS
the main channel and sub channels.
Displays the preset channel list.
Select an item on the list ("1" to "6")
to switch to the preset channel.
Selects the FM1, FM2, FM3
or AM band.
1
HD Radio
2
3
4
AMFM1
Abcdefghi
Abcdefghi
Abcdefghi
5
000.0
6
Recalls the preset channel
stored to a key from memory.
Stores the current broadcast
20
frequency to a key.
MHz
ᵦᵢᵏ
6/10
ᵦᵢ ᵢᵧᵥᵧᵲᵟᵪ
Signal type indicator
6/10
1
HD Radio
2
3
4
AMFM1
Abcdefghi
Abcdefghi
Abcdefghi
5
000.0
6
MHz
4821
ᵦᵢ ᵢᵧᵥᵧᵲᵟᵪ
ᵦᵢᵏ
4821
Performs manual tuning.
Performs seek tuning or
Analog AM
Analog AM Digital AM
FM band
Analog FM
Analog FM Digital FM
Analog FM Digital FM-1ch
Digital FM-2ch
: Main channel
Digital FM-3ch
non stop seek tuning.
Releasing the key in a few seconds, skips
to the nearest station from the current
frequency.
Keeping holding the key for a long
Stores song information to an iPod.
Refer to Storing song information to an iPod
(iTunes Tagging) on page 51
By pressing or , you can also switch the preset
p
channels.
By pressing and hold or and release, you can
p
also perform seek tuning.
By keeping touching and holding or , you can perform
p
non stop seek tuning. Touch again to cancel.
HD Radio stations
HD Radio stations offer high quality audio and data services.
HD Radio stations are brought to you by your local FM or AM
stations.
HD Radio stations feature the following:
High quality audio
FM multicasting
Data service
Digital, CD-quality sound. HD Radio Technology enables local
radio stations to broadcast a clean digital signal. AM sounds like
today’s FM and FM sounds like a CD.
Program Service Data: Contributes to the superior user experience of HD Radio Technology. Presents song name, artist,
station IDs, HD2/HD3 Channel Guide, and other relevant data
streams.
Adjacent to traditional main stations are extra local FM channels. These HD2/HD3 Channels provide new, original music as
well as deep cuts into traditional genre.
iTunes® Tagging provides you the opportunity to discover a wide
range of content and the means to “tag” that content for later
review and purchase from the iTunes
®
Store.
Track number indicator
Audio source screen
Audio source screen
HD Radio
Visual information related to content being played on your HD
Radio receiver, such as Album Art, historical photographs, still
art from live broadcasts, among other related content.
™
Starting procedure
1 Display the “AV source selection” screen.
2 Touch [HD Radio].
The “HD Radio” screen appears.
Storing the strongest broadcast
frequencies
The BSM (best stations memory) function automatically stores
the six strongest broadcast frequencies under the preset tuning
keys “1” to “6”.
Storing broadcast frequencies with BSM may replace those
p
you have already saved.
Previously stored broadcast frequencies may remain stored
p
if the number of frequencies stored has not reached the
limit.
1 Touch the preset channel list display key.
2 Touch to begin a search.
The six strongest broadcast frequencies will be stored under the
preset tuning keys in the order of their signal strength.
Touch [Cancel] to cancel the storage process.
Display the Radio settings
screen
1 Display the “System” setting screen.
2 Touch [AV Source Settings].
3 Touch [Radio settings].
The radio settings screen appears.
Tuning into strong frequencies
Local seek tuning allows you to only tune into those radio stations with sufficiently strong signals.
1 Display the Radio settings screen.
Refer to Display the Radio settings screen on page 21
2 Touch [Local].
3 Touch the item.
Off (default):
Turns the seek tuning setting off.
Level1 to Level4:
Sets the level of sensitivity for FM to level1 to level4 (for AM
level 1 or 2).
The FM “Level4” (AM “Level2”) setting allows you to receive
p
the only stations with the strongest signals.
Switching the seek mode
You can select the method of seek tuning.
1 Display the Radio settings screen.
Refer to Display the Radio settings screen on page 21
2 Touch [Seek] to select an item.
Seek All (default):
Seeks stations from both analog and digital broadcasting.
Seek HD:
Only seeks stations from digital broadcasting.
Switching the reception mode
You can set whether the tuner automatically switches to the
analog broadcast of the same frequency level when reception of
a digital broadcast becomes weak.
The default setting is “On”.
1 Display the Radio settings screen.
Refer to Display the Radio settings screen on page 21
2 Touch [Blending] to switch “On” or “Off”.
Disc
1
6/10
4821
CD
ẂTrack 99
9999’99” -9999’99”
Pause
*2
Skips files forward
or backward.
Switches between playback
and pause.
Plays files in random order.
This function is available for music CD.
: Does not play tracks in random order.
: Plays all tracks in random order.
2
6/10
4821
CD
ẂTrack 99
Sets a repeat play range.
: Repeats the current disc.
: Repeats the current track.
*1
21
*5
*6
Video source screen 2
Video source screen 2
*1
*2
*3
*4
Disc Disc
Performs frame-by-frame playback.
HOLD
Performs slow-motion playback.
Each time you touch it changes
the speed in four steps in the following
order: 1/16 →1/8 → 1/4 → 1/2
Video source screen 1
DVD
Stop
99 99
9999’99” -9999’99”
Performs fast reverse
or fast forward.
Touch again to change play back
the speed.
Stops playback.
Hides the touch panel keys.
To display again the keys,
touch anywhere on the screen.
6/10
4821
ᵫᵮᵣᵥᵋᵟ ᵒᵖᶉᵦᶘᴾᵏᵔᶀᶇᶒ
ᵫᶓᶊᶒᶇᴾᶁᶆ
Pause
ᵏᵍᵐ
OFFFull 01
DVD
Stop
99 99
01
L+R
9999’99” -9999’99”
6/10
4821
DVD
Stop
ᵫᵮᵣᵥᵋᵟ ᵒᵖᶉᵦᶘᴾᵏᵔᶀᶇᶒ
ᵫᶓᶊᶒᶇᴾᶁᶆ
Pause
ᵰᶃᶒᶓᶐᶌ
ᵐᵍᵐ
99 99
01
L+R
9999’99” -9999’99”
6/10
4821
ᵫᵮᵣᵥᵋᵟ ᵒᵖᶉᵦᶘᴾᵏᵔᶀᶇᶒ
ᵫᶓᶊᶒᶇᴾᶁᶆ
Pause
*6
ᵰᶃᶒᶓᶐᶌ
ᵐᵍᵐ
Sets a repeat play range.
: Repeats all files.
*3
*4
*5
: Repeats the current chapter.
: Repeats the current title.
Changes the viewing
angle (Multi-angle).
This function is available for DVDs
featuring multi-angle recordings.
Selects the audio output from
[L+R], [Left], [Right], [Mix].
This function is available for Video-CDs
and DVDs recorded with LPCM audio.
Resumes playback (Bookmark).
This function is available for DVD-Video.
You can memorize one point as a
Bookmark for a disc (up to five discs).
To clear the bookmark on the disc,
touch and hold this key.
Returns and begins playback from
the specified point.
This function is available for DVD-Video
and Video-CDs featuring PBC (playback
control).
Selects a track from the list.
Refer to Selecting files from the file name list on
page 23
Switches the media file type.
Refer to Switching the media file type on page
23
Searches for the part you want to play.
Refer to Searching for the part you want to play on
page 23
Displays the DVD menu.
Refer to Operating the DVD menu on page 23
22
 Loading...