

3
1
A
B
C
D
E
F
G
H
I
J
K

4

ENGLISH 6
DEUTSCH 22
ESPAÑOL 39
FRANÇAIS 56
ITALIANO 73
NEDERLANDS 90
PORTUGUÊS 107
TÜRKÇE 124
RQ1091, RQ1061, RQ1053, RQ1051
6
ENGLISH
Introduction
Thank you for buying this Philips shaver. Please read
this user manual, as it contains information about the
wonderful features of this shaver as well as some tips
to make shaving easier and more enjoyable.
Important
Read this user manual carefully before you use the
shaver and the charger. Save the user manual for
future reference.
Danger
- Make sure the adapter does not get wet.
Warning
- Be careful with hot water. Always check if the
water is not too hot, to prevent your hands from
getting burnt.
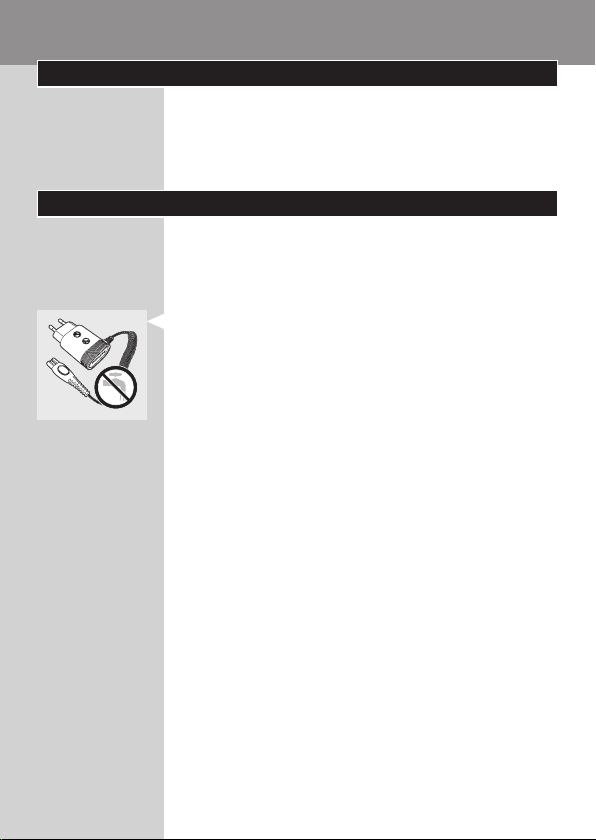
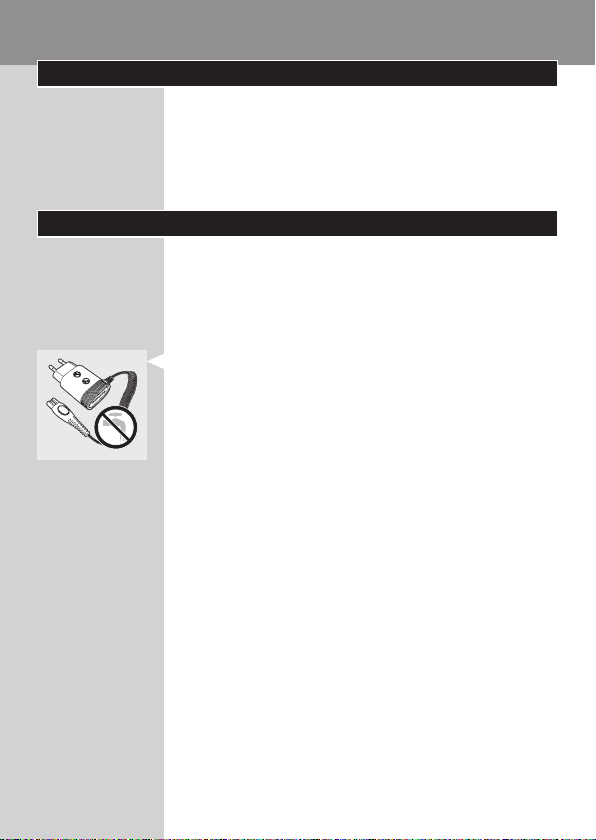
- The adapter contains a transformer. Do not cut
off the adapter to replace it with another plug, as
this causes a hazardous situation.
- The shaver and the charger are not intended for
use by persons (including children) with reduced
physical, sensory or mental capabilities, or lack of
experience and knowledge, unless they have been
given supervision or instruction concerning use of
the appliances by a person responsible for their
safety.
- Children should be supervised to ensure that they
do not play with the shaver and the charger.
Caution
- Do not use the shaver, the charger or the adapter
if it is damaged.
- Charge and store the shaver at a temperature
between 5°C and 35°C.
ENGLISH 7
- Always put the protection cap on the shaver
to protect the shaving heads when you are
travelling.
- Never use scouring pads, abrasive cleaning agents
or aggressive liquids such as petrol or acetone to
clean the appliance.
- Only use the adapter supplied.
- If the adapter is damaged, always have it replaced
with one of the original type in order to avoid a
hazard.
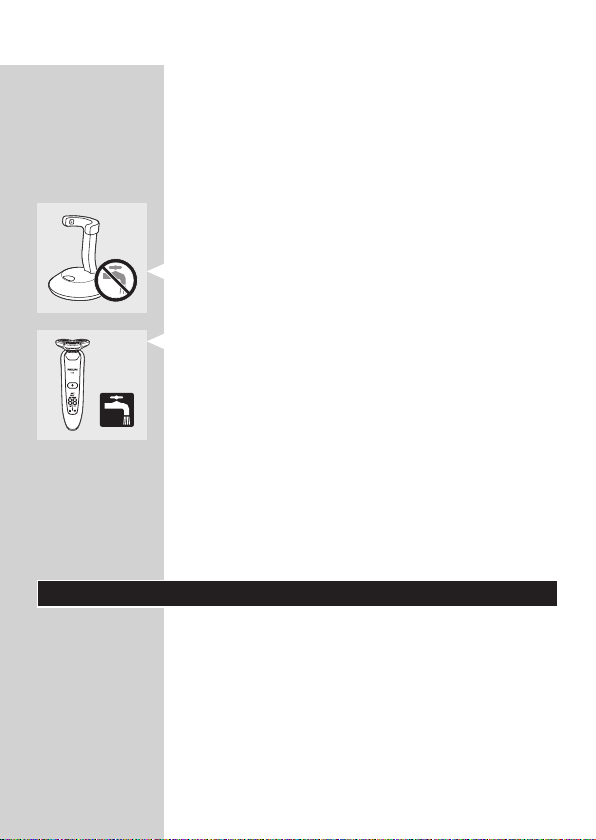
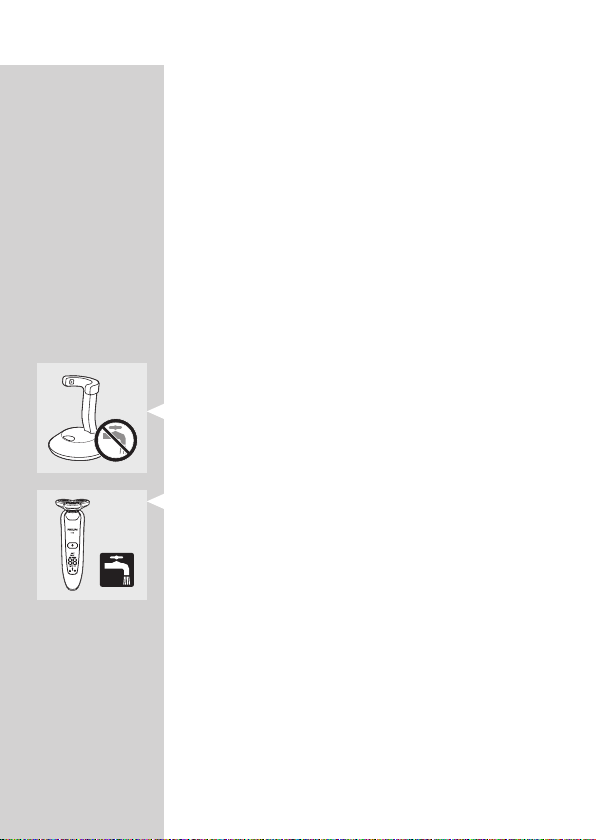
- Never immerse the charger in water, nor rinse it
under the tap.
Compliance with standards
- The shaver complies with the internationally
approved IEC safety regulations and can be safely
cleaned under the tap.
- These Philips appliances comply with all standards
regarding electromagnetic elds (EMF). If handled
properly and according to the instructions in this
user manual, the appliances are safe to use based
on scientic evidence available today.
General
- The adapter transforms 100-240 volts to a safe
low voltage of less than 24 volts.
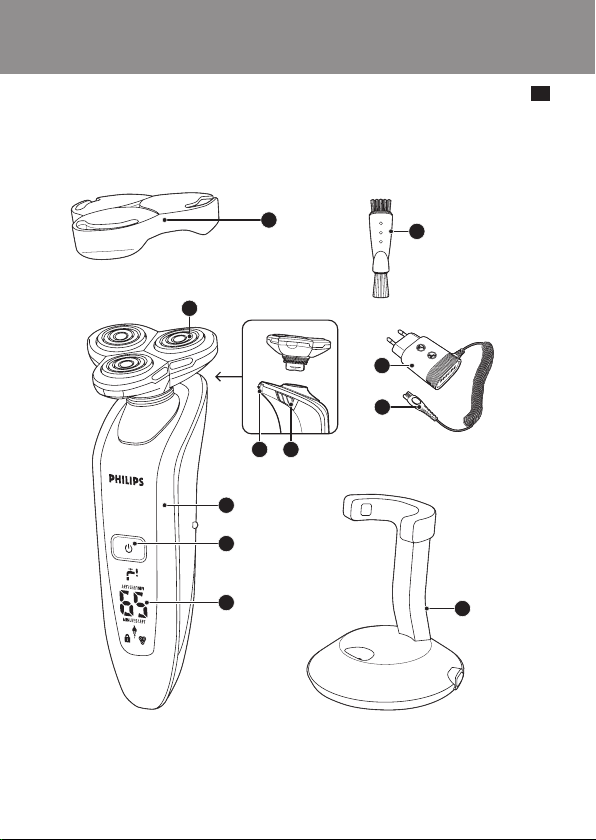
Overview (Fig. 4)
A Protection cap
B Shaving unit
C Trimmer
D Trimmer on/off slide
E Shaver (RQ1090/RQ1060/RQ1053/RQ1050)
F Shaver on/off button
G Display
H Cleaning brush
I Adapter
ENGLISH8
J Small plug
K Charger
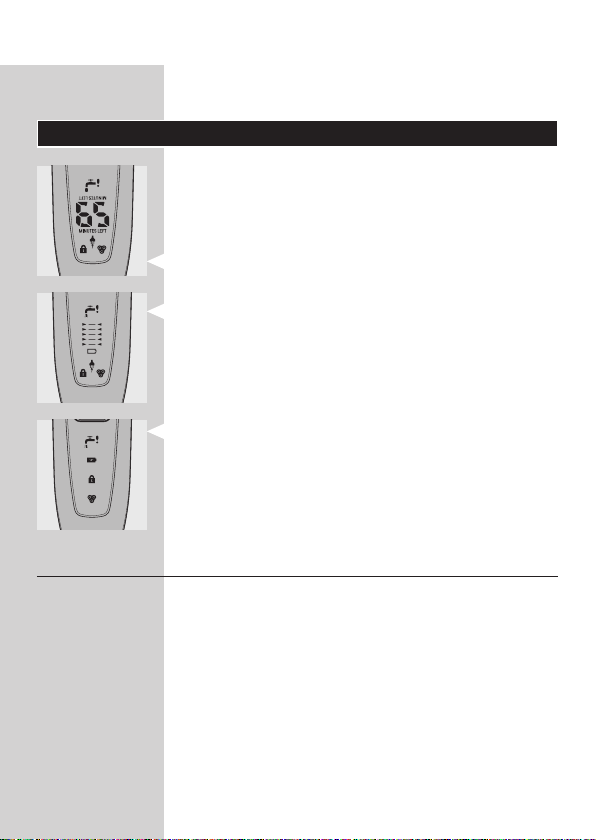
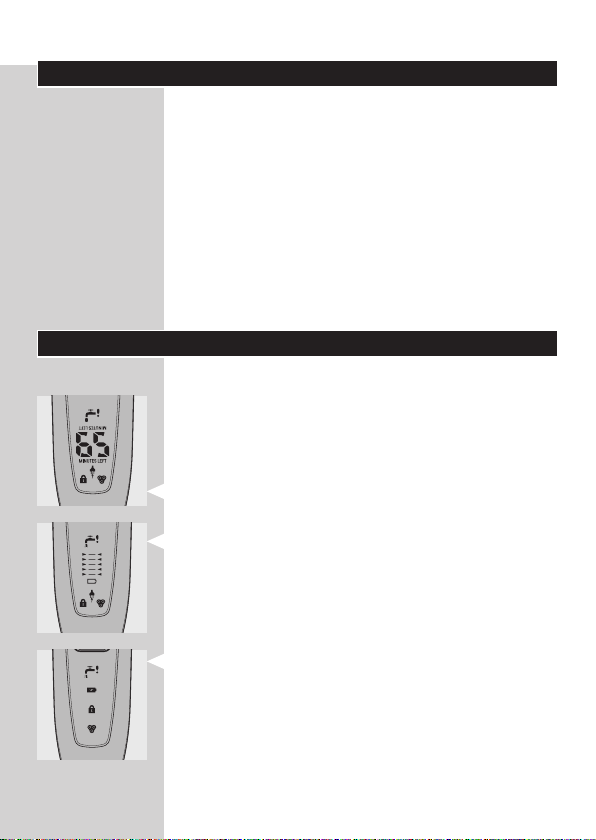
The display
Before you use the shaver for the rst time, remove
the protective foil from the display.
The three shaver types (RQ1090, RQ1060, RQ1053
and RQ1050) have different displays, which are
shown in the gures below.
- RQ1090
- RQ1060
- RQ1053/RQ1050
Charging
- Charging takes approx. 1 hour.
- When you place the shaver in the charger, the
display automatically switches off after approx. 5
hours.
ENGLISH 9
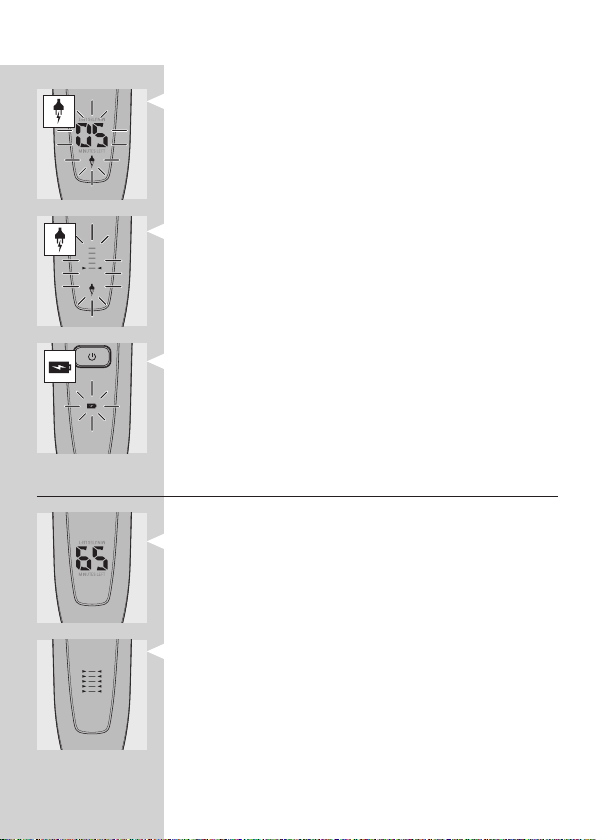
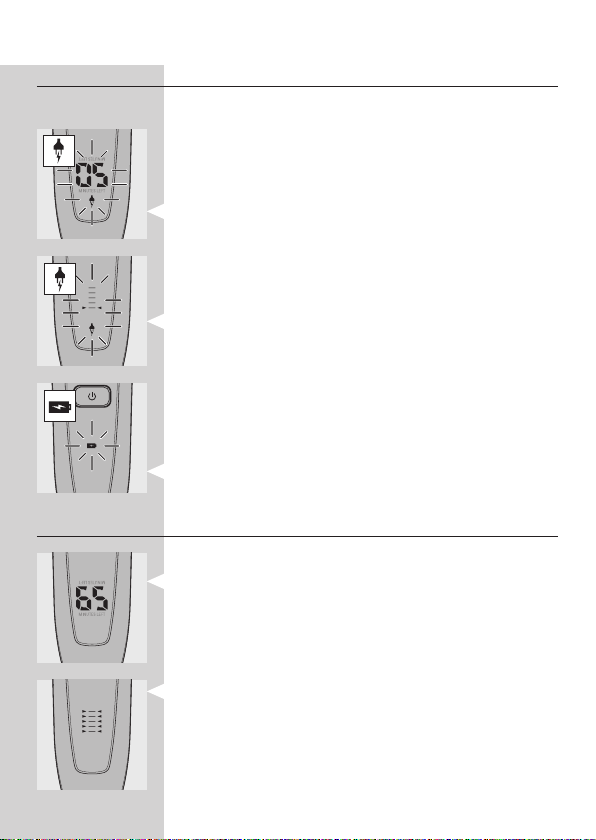
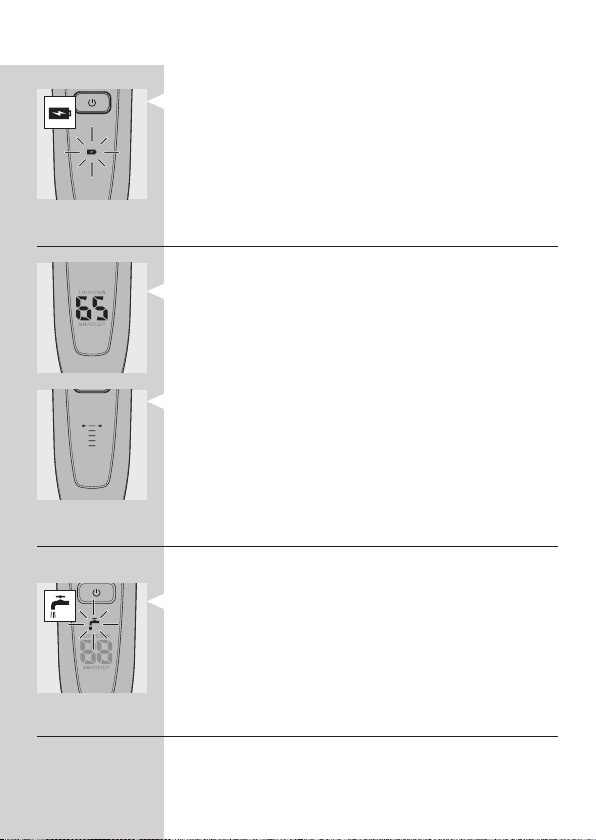
RQ1090
- When the shaver is charging, the minutes
indication and the plug symbol ash.
- The shaving minutes increase until the shaver is
fully charged.
RQ1060
- When the shaver is charging, the plug
symbol ashes.
- First the arrowheads of the bottom charge level
ash, then the arrowheads of the second level
ash, and so on until the shaver is fully charged.
RQ1053/RQ1050
- When the shaver is charging, the battery symbol
ashes blue.
Battery fully charged
RQ1090
- When the battery is fully charged, the minutes
indication is visible on the display and the plug
symbol disappears from the display.
RQ1060
- When the battery is fully charged, all arrowheads
and all charge level lights light up blue continuously
and the plug symbol disappears from the display.
ENGLISH10
- When you remove the shaver from the charger,
the arrowheads of the top charge level light up
blue to indicate that the battery is full.
RQ1053/RQ1050
- When the battery is fully charged, the battery
symbol lights up blue continuously.
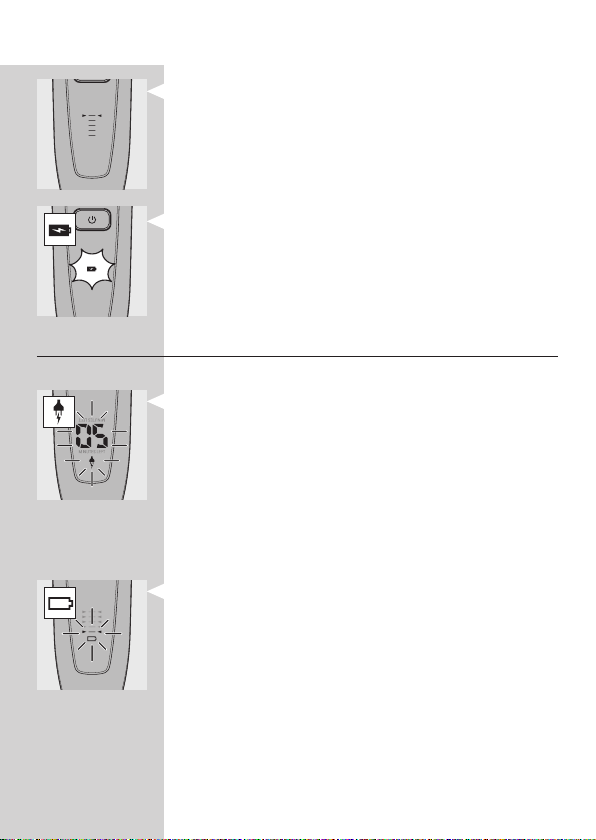
Battery low
RQ1090
- When the battery is almost empty (when there
are only 5 or fewer shaving minutes left), the
minutes indication and the plug symbol start to
ash.
- When you switch off the shaver, the shaving
minutes and the plug symbol continue to ash for
a few more seconds. You hear a beep when there
are no minutes left.
RQ1060
- When the battery is almost empty (when there
are only 5 or fewer shaving minutes left), the
battery symbol ashes red and the arrowheads of
the bottom charge level ash blue.
- When you switch off the shaver, the battery
symbol and the arrowheads of the bottom charge
level continue to ash for a few seconds.
ENGLISH 11
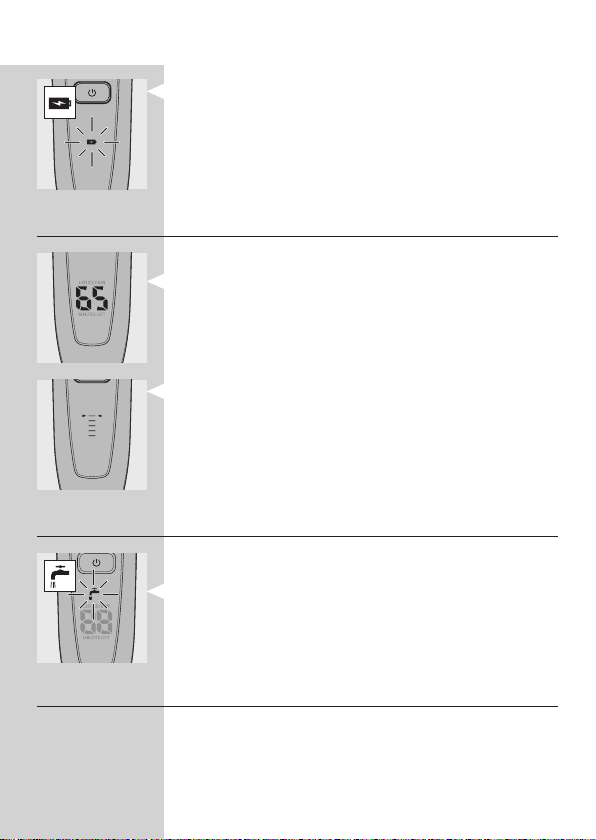
RQ1053/RQ1050
- When the battery is almost empty (when there
are only 5 or fewer shaving minutes left), the
battery symbol lights up red.
- When you switch off the shaver, the battery
symbol starts to ash for a few seconds.
Remaining battery capacity
RQ1090
- The remaining battery capacity is indicated by the
number of shaving minutes shown on the display.
RQ1060
- The remaining battery capacity is indicated by the
ashing arrowheads of a particular charge level
Clean shaver
For optimal shaving performance, we advise you to
clean the shaver after every use.
- The tap symbol ashes to remind you to clean the
shaver.
Note: The displays of types RQ1060, RQ1053 and
RQ1050 look different but show the same indication.
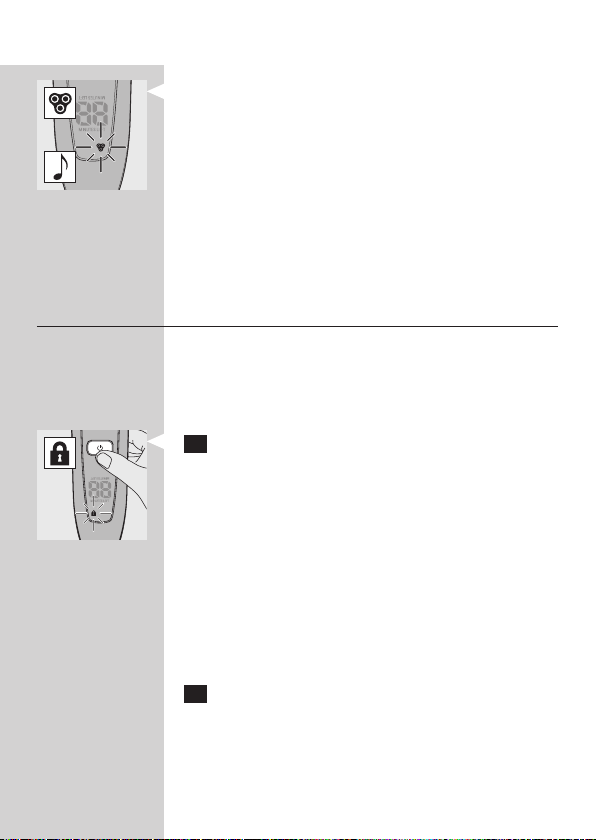
Replace shaving unit
For maximum shaving performance, we advise you
to replace the shaving unit every two years.
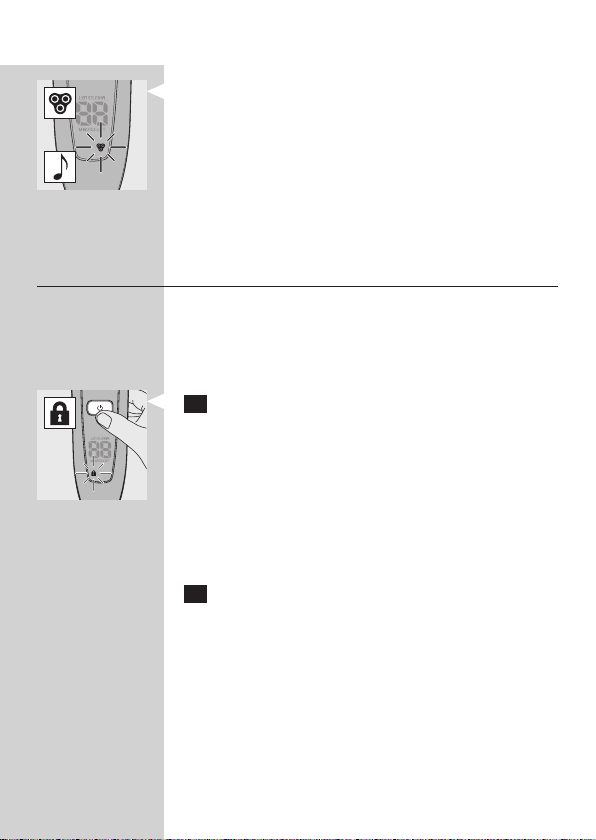
ENGLISH12
- To remind you to replace the shaving unit, the
shaving unit symbol ashes (all types) and you
hear a beep when you switch off the shaver
(RQ1090 only). This happens at the end of 7
successive shaves to remind you to replace the
shaving unit.
Note: The displays of types RQ1060, RQ1053 and
RQ1050 look different but show the same indication.
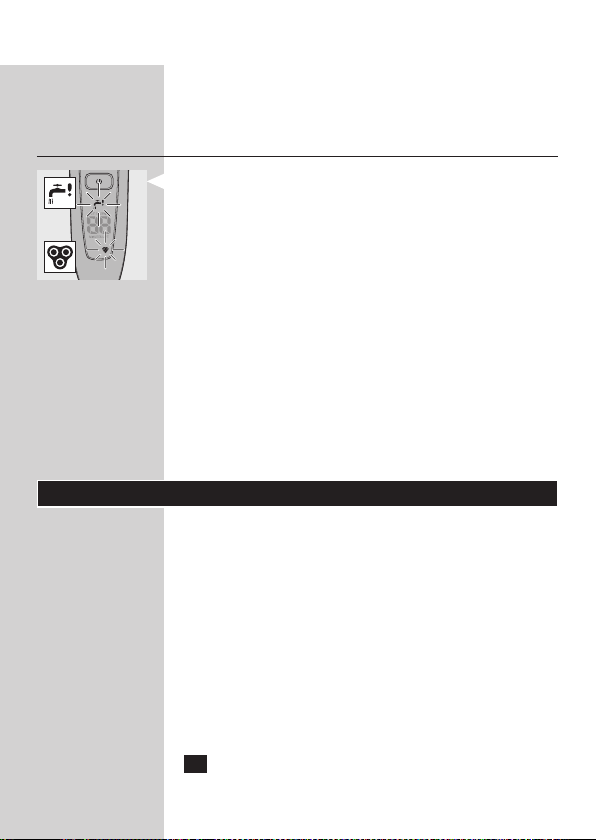
Travel lock
You can lock the shaver when you are going to
travel. The travel lock prevents the shaver from being
switched on by accident.
Activating the travel lock
1 Press the on/off button for 3 seconds to enter
the travel lock mode.
, The lock symbol appears on the display (all
types) and you hear a beep (RQ1090 only) to
indicate that the travel lock has been activated.
Note: The displays of types RQ1060, RQ1053 and
RQ1050 look different but show the same indication.
Deactivating the travel lock
1 Press the on/off button for 3 seconds.
, The motor starts running to indicate that the
travel lock has been deactivated.
The shaver is now ready for use again.
Note: When you place the shaver in the plugged-in
charger, the travel lock is automatically deactivated.
ENGLISH 13
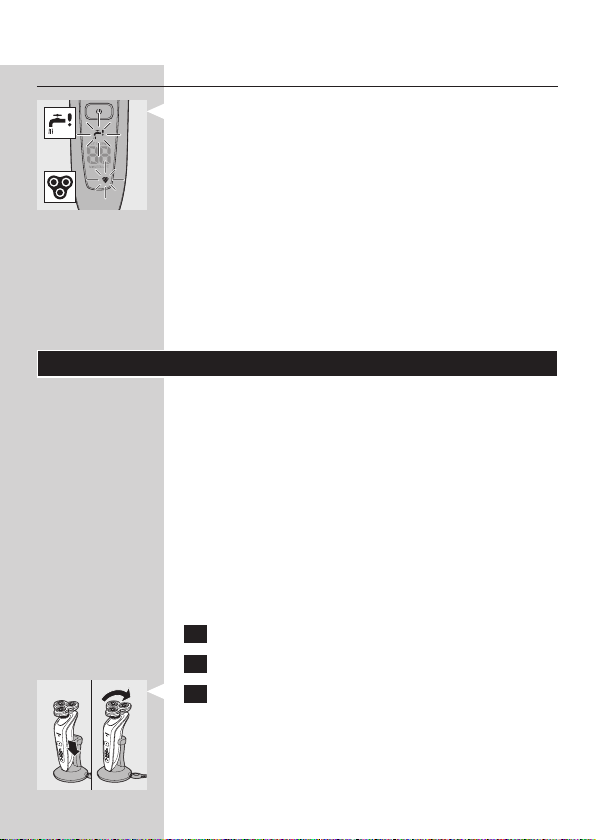
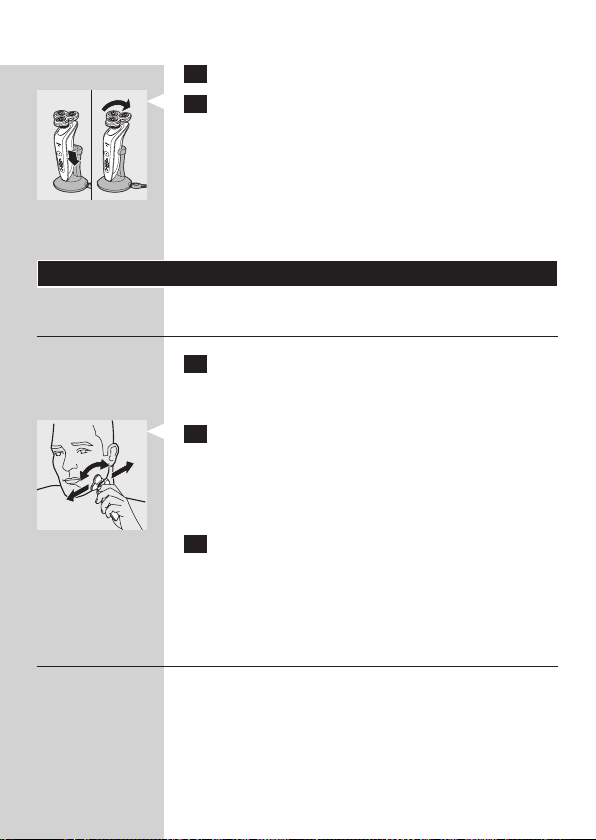
Blocked shaving heads
- If the shaving heads are blocked, the shaving unit
symbol and the tap symbol with exclamation mark
ash. In this case, the motor cannot run because
the shaving heads are soiled or damaged.
Note: The displays of types RQ1060, RQ1053 and
RQ1050 look different show the same indication.
- When this happens, you have to clean the shaving
unit or replace it.
- The shaving unit symbol and the tap symbol
with exclamation mark continue to ash until you
unblock the shaving heads.
Charging
Charging takes approx. 1 hour.
A fully charged shaver has a shaving time of up to 65
minutes, which is enough for approx. 21 shaves.
The actual shaving time is calculated by the shaver.
If you have a heavy beard, the shaving time may be
less than 65 minutes. The shaving time may also vary
over time, depending on your shaving behaviour and
beard type.
Quick charge
After the shaver has charged for 5 minutes,
it contains enough energy for one shave.
1 Put the small plug in the charger.
2 Put the adapter in the wall socket.
3 Place the shaver in the charger. Press the
shaver tightly into the holder to lock into place.
Note: RQ1090 only: If the shaver is placed correctly,
you hear a beep.
ENGLISH14
, The display shows that the shaver is charging
(see chapter ‘The display’).
Using the shaver
Shaving
1 Press the on/off button once to switch on the
shaver.
, The display lights up for a few seconds.
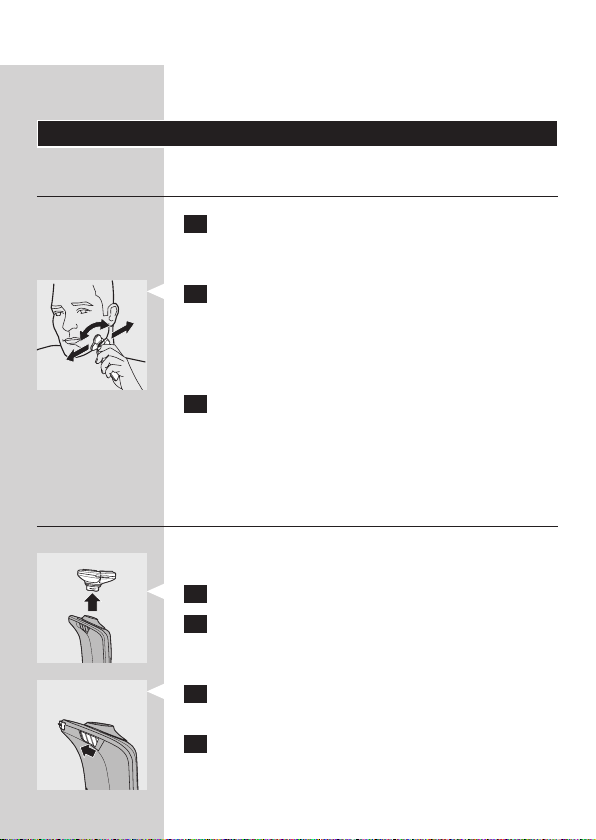
2 Move the shaving heads over your skin. Make
both straight and circular movements.
- Shaving on a dry face gives the best results.
- Your skin may need 2 or 3 weeks to get
accustomed to the Philips shaving system.
3 Press the on/off button once to switch off the
shaver.
, The display lights up for a few seconds and then
shows the remaining battery capacity (RQ1090/
RQ1060 only).
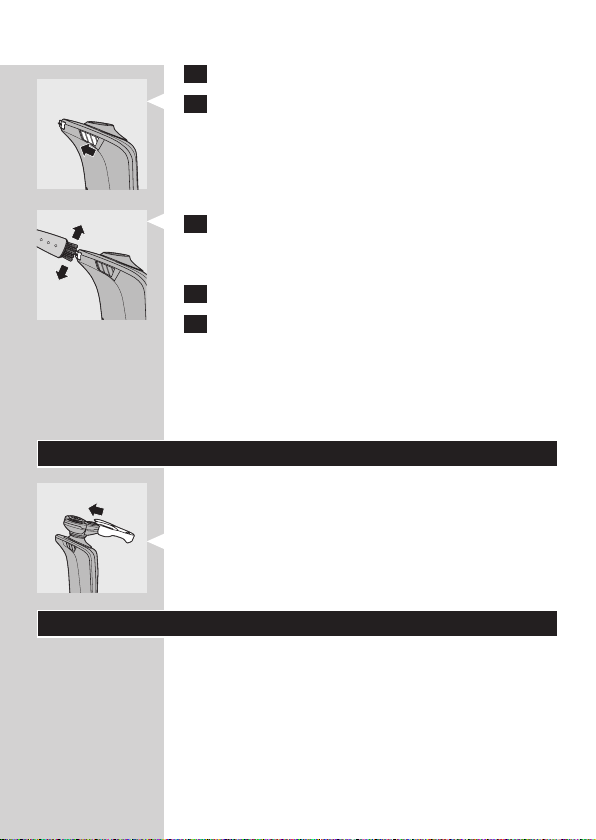
Trimming
You can use the trimmer to groom your sideburns
and moustache.
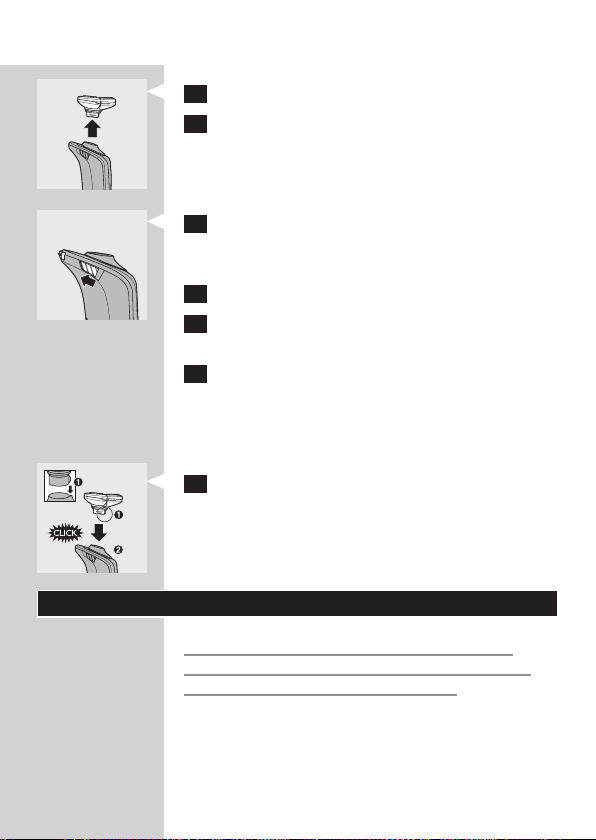
1 Pull the shaving unit off the shaver.
2 Press the on/off button once to switch on the
shaver.
, The display lights up for a few seconds.
3 Press the trimmer slide forwards to slide out
the trimmer.
4 You can now start trimming.
ENGLISH 15
5 Press the trimmer slide backwards to retract
the trimmer.
6 Press the on/off button once to switch off the
shaver.
, The display lights up for a few seconds and then
shows the remaining battery capacity (RQ1090/
RQ1060 only).
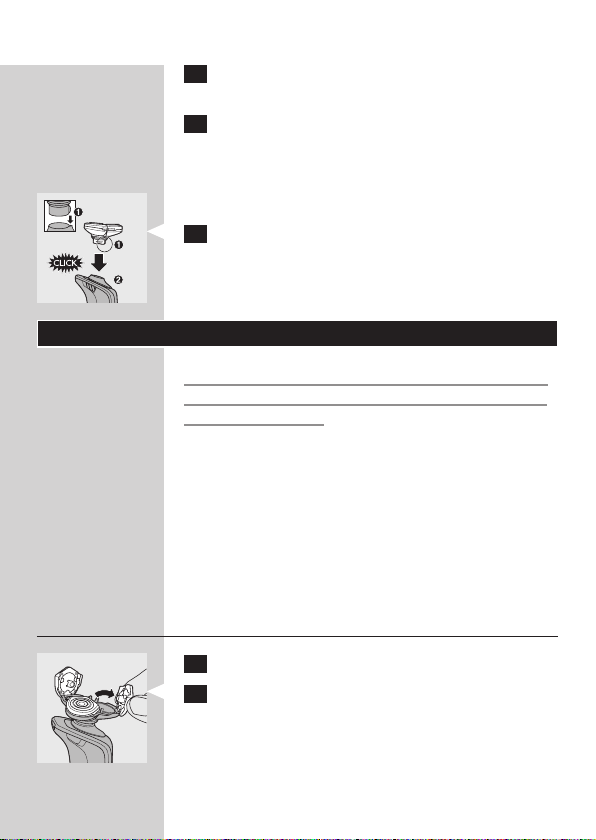
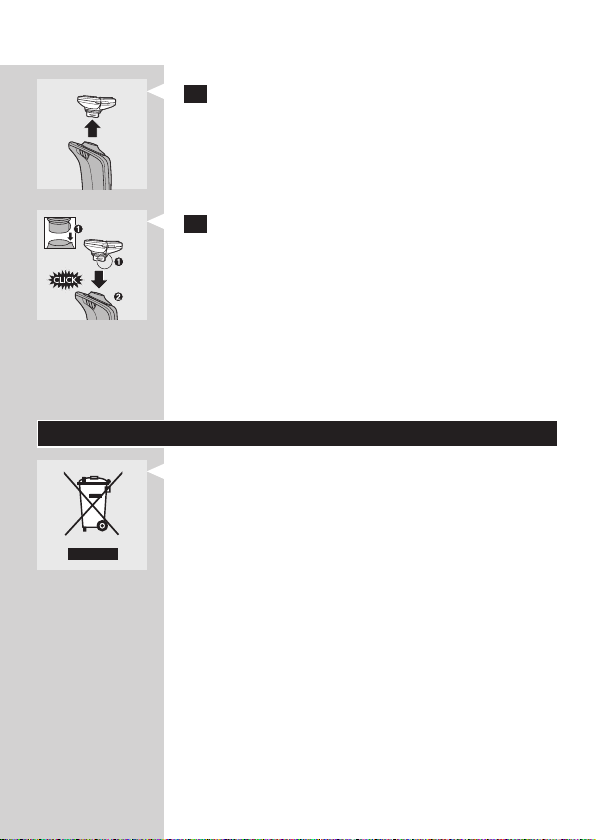
7 Insert the lug of the shaving unit into the slot
in the top of the shaver (1). Then press the
shaving unit downwards (2) to attach it to the
shaver (‘click’).
Cleaning and maintenance
Never use scouring pads, abrasive cleaning agents
or aggressive liquids such as petrol or acetone to
clean the appliance.
- Be careful with hot water. Always check if the
water is not too hot, to prevent your hands from
getting burnt.
- Clean the shaver after every shave for optimal
shaving performance.
- You can clean the outside of the shaver with a
damp cloth.
- Regular cleaning guarantees better shaving
performance.
Cleaning the shaving unit under the tap
1 Switch off the shaver.
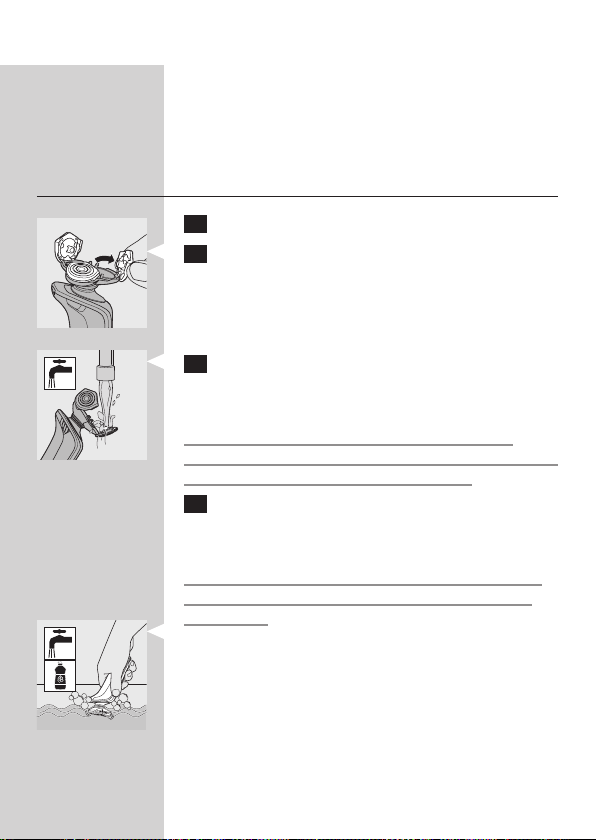
2 Pull open the three shaving heads one by one.
ENGLISH16
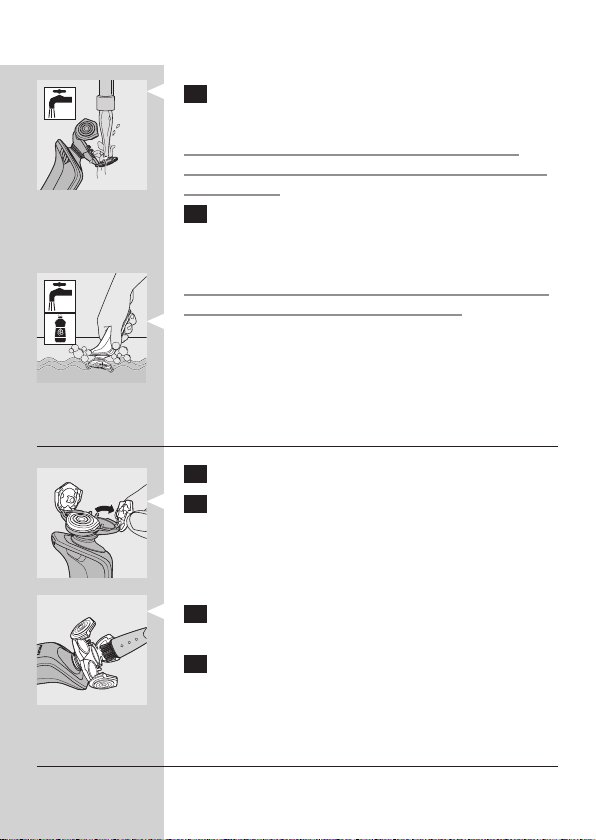
3 Rinse all three shaving heads and all three hair
chambers under a hot tap for 30 seconds.
Be careful with hot water. Always check if the
water is not too hot, to prevent your hands from
getting burnt.
4 Carefully shake off excess water and leave the
shaving heads open to let the shaving unit dry
completely.
Never dry the shaving unit with a towel or tissue,
as this may damage the shaving heads.
, For thorough cleaning, switch on the shaver and
immerse the shaving unit in hot water with some
liquid soap for 30 seconds. You can also clean the
shaving unit with some alcohol.
Cleaning the shaving unit with the brush supplied
1 Switch off the shaver.
2 Pull open the three shaving heads one by one.
3 Clean the shaving heads and the hair chambers
with the brush supplied.
4 Close the shaving heads.
Cleaning the trimmer with the brush supplied
Clean the trimmer every time you have used it.
ENGLISH 17
1 Switch off the shaver.
2 Press the trimmer slide forwards to slide out
the trimmer.
3 Clean the trimmer with the short-bristled side
of the brush supplied. Brush up and down along
the trimmer teeth.
4 Switch the shaver on and off and repeat step 3.
5 Press the trimmer slide backwards to retract
the trimmer.
Tip: For optimal trimmer performance, lubricate the
trimmer teeth with a drop of sewing machine oil every
six months.
Storage
There are two ways to store the shaver or to take it
with you when you travel:
- put the shaver in the charger.
- slide the protection cap onto the shaving unit to
prevent damage to the shaving heads.
Replacement
Replace the shaving unit when the shaving unit
symbol appears on the display. Replace a damaged
shaving unit right away.
For maximum shaving performance, we advise you
to replace the shaving unit every two years.
Only replace the shaving unit with an original RQ10
Philips arcitec Shaving Unit.
ENGLISH18
1 Pull the old shaving unit off the shaver.
2 Insert the lug of the new shaving unit into the
slot in the top of the shaver (1). Then press the
shaving unit downwards (2) to attach it to the
shaver (‘click’).
Ordering parts
The following parts are available:
- HQ8500 adapter
- RQ10 Philips arcitec Shaving Unit
- HQ110 Philips Shaving Head Cleaning Spray
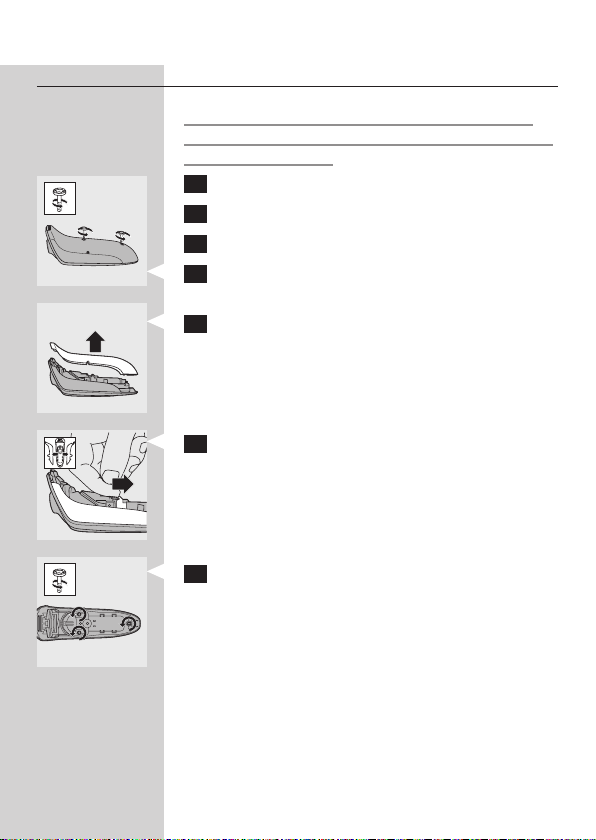
Environment
- Do not throw away the appliances with the
normal household waste at the end of their life,
but hand them in at an ofcial collection point for
recycling. By doing this, you help to preserve the
environment.
- The built-in rechargeable shaver battery contains
substances that may pollute the environment.
Always remove the battery before you discard or
hand in the shaver at an ofcial collection point.
Dispose of the battery at an ofcial collection
point for batteries. If you have trouble removing
the battery, you can also take the appliance to a
Philips service centre. The staff of this centre will
remove the battery for you and will dispose of it
in an environmentally safe way.
ENGLISH 19
Disposal of the shaver battery
Only remove the battery when you discard the
shaver. Make sure the battery is completely empty
when you remove it.
1 Remove the shaver from the charger.
2 Let the shaver run until it stops.
3 Pull the shaving unit off the shaver.
4 Undo the 2 screws on the back of the shaver.
5 Insert a screwdriver between the front and
back panel to open the shaver.
6 Remove the side panels.
7 Unscrew the 3 screws on the inside of the
shaver and remove the back cover.
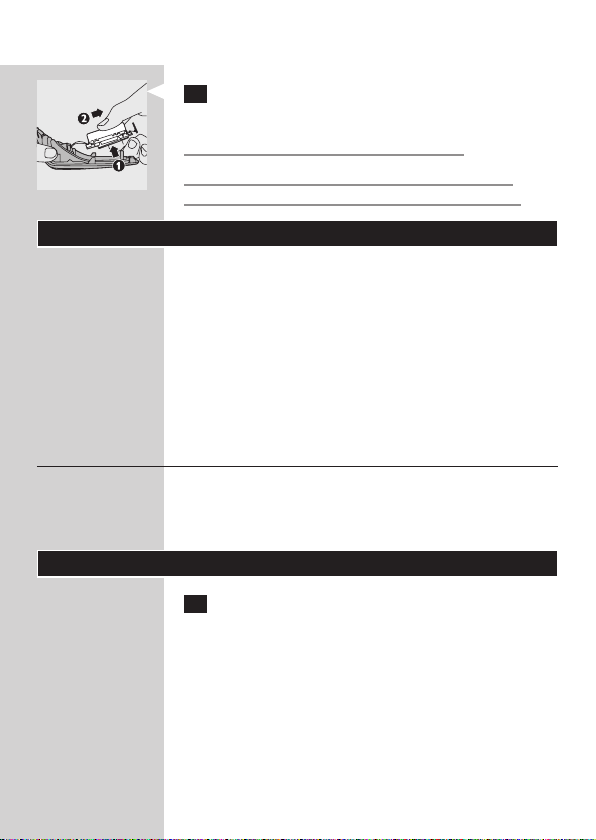
ENGLISH20
8 Pull the wires out of the motor unit and
remove the battery.
Be careful, the battery strips are sharp.
Do not put the shaver back into the plugged-
in charger after you have removed the battery.
Guarantee & service
If you need information or if you have a problem,
please visit the Philips website at
www.philips.com or contact the Philips Customer
Care Centre in your country (you nd its phone
number in the worldwide guarantee leaet). If there
is no Customer Care Centre in your country, go
to your local Philips dealer or contact the Service
Department of Philips Domestic Appliances and
Personal Care BV.
Guarantee restrictions
The shaving heads (cutters and guards) are not
covered by the terms of the international guarantee
because they are subject to wear.
Frequently asked questions
1 Why doesn’t the shaver shave as well as it used
to?
- The shaver may not be properly clean. Switch
on the shaver and immerse the shaving unit in
hot water with some liquid soap (see chapter
‘Cleaning and maintenance’).
- The shaving heads may be damaged or
worn. Replace the shaving unit (see chapter
‘Replacement’).

ENGLISH 21
2 Why doesn’t the shaver work when I press the
on/off button?
- The battery may be empty. Recharge the battery
(see chapter ‘Charging’).
- The travel lock may be activated. Press the on/off
button for 3 seconds to deactivate the travel lock.
- The shaving unit is soiled or damaged to such an
extent that the motor cannot run. In this case,
the shaving unit symbol, the tap symbol and
the exclamation mark ash. When this happens,
you have to clean the shaving unit or replace it.
Immerse the shaving unit in hot water with some
liquid soap.
- The temperature of the shaver may be too high.
In this case, the shaver does not work and the
exclamation mark on the display ashes. As soon
as the temperature of the shaver has dropped
sufciently, you can switch on the shaver again.
3 Why is the shaver not fully charged after I
charged it in the charger?
- You may not have placed the shaver in the charger
properly. Make sure you press the shaver until it
locks into place.
22
DEUTSCH
Einführung
Herzlichen Glückwunsch zu Ihrem neuen Philips
Rasierer! Lesen Sie bitte diese Bedienungsanleitung
sorgfältig durch, da sie nützliche Informationen zu
den Funktionen dieses Rasierers sowie Tipps für eine
noch einfachere und angenehmere Rasur enthält.
Wichtig
Lesen Sie diese Bedienungsanleitung vor dem
Gebrauch des Rasierers und des Ladegeräts
aufmerksam durch, und bewahren Sie sie für eine
spätere Verwendung auf.
Gefahr
- Achten Sie darauf, dass der Adapter nicht nass
wird.
Warnhinweis
- Gehen Sie vorsichtig mit heißem Wasser um.
Achten Sie darauf, dass das Wasser nicht zu heiß
ist und Sie sich nicht die Hände verbrühen.
- Der Adapter enthält einen Transformator. Ersetzen
Sie den Adapter keinesfalls durch einen anderen
Stecker. Dies kann den Benutzer gefährden.
- Der Rasierer und das Ladegerät sind für Benutzer
(einschl. Kinder) mit eingeschränkten physischen,
sensorischen oder psychischen Fähigkeiten bzw.
ohne jegliche Erfahrung oder Vorwissen nur dann
geeignet, wenn eine angemessene Aufsicht oder
ausführliche Anleitung zur Benutzung der Geräte
durch eine verantwortliche Person sichergestellt
ist.
- Achten Sie darauf, dass Kinder nicht mit dem
Rasierer und dem Ladegerät spielen.
DEUTSCH 23
Achtung
- Benutzen Sie den Rasierer, das Ladegerät bzw.
den Adapter nicht, wenn Beschädigungen daran
erkennbar sind.
- Laden und verwahren Sie den Rasierer bei
Temperaturen zwischen 5°C und 35°C.
- Um eine Beschädigung der Scherköpfe zu
vermeiden, sollten Sie auf Reisen immer die
Schutzkappe auf den Rasierer setzen.
- Benutzen Sie zum Reinigen des Geräts keine
Scheuerschwämme und -mittel oder aggressive
Flüssigkeiten wie Benzin oder Azeton.
- Verwenden Sie ausschließlich den
mitgelieferten Adapter.
- Wenn der Adapter defekt oder beschädigt ist, darf
er nur durch ein Original-Ersatzteil ausgetauscht
werden, um Gefährdungen zu vermeiden.
- Tauchen Sie das Ladegerät keinesfalls in Wasser.
Spülen Sie es auch nicht unter ießendem Wasser
ab.
Normerfüllung
- Der Rasierer erfüllt die internationalen IECSicherheitsvorschriften und kann ohne Bedenken
unter ießendem Wasser gereinigt werden.
- Diese Philips Geräte erfüllen sämtliche Normen
bezüglich elektromagnetischer Felder (EMF).
Nach aktuellen wissenschaftlichen Erkenntnissen
sind die Geräte sicher im Gebrauch, sofern
sie ordnungsgemäß und entsprechend den
Anweisungen in dieser Bedienungsanleitung
gehandhabt werden.
Allgemeines
- Der Adapter wandelt Netzspannungen von 100
bis 240 Volt in eine sichere Betriebsspannung von
unter 24 Volt um.
DEUTSCH24
Übersicht (Abb. 4)
A Schutzkappe
B Schereinheit
C Langhaarschneider
D Ein-/Ausschalter Langhaarschneider
E Rasierer (RQ1090/RQ1060/RQ1053/RQ1050)
F Ein-/Ausschalter Rasierer
G Display
H Reinigungsbürste
I Adapter
J Gerätestecker
K Ladegerät
Das Display
Entfernen Sie vor dem ersten Gebrauch des
Rasierers die Schutzfolie vom Display.
Die Rasierermodelle (RQ1090, RQ1060, RQ1053
und RQ1050) verfügen über unterschiedliche
Displays, wie auf den nachstehenden Abbildungen
dargestellt.
- RQ1090
- RQ1060
- RQ1053/RQ1050
DEUTSCH 25
Laden
- Die Ladedauer beträgt ca. 1 Stunde.
- Wenn Sie den Rasierer in das Ladegerät stellen,
schaltet sich das Display nach ca. fünf Stunden
automatisch aus.
RQ1090
- Während des Ladevorgangs blinken
die Minutenanzeige und das Steckersymbol.
- Die in Minuten angegebene Rasierzeit verlängert
sich, bis der Rasierer vollständig aufgeladen ist.
RQ1060
- Das Steckersymbol blinkt während des
Ladevorgangs.
- Zunächst blinkt die unterste Reihe der
Pfeilsymbole der Ladestandsanzeige, dann die
zweite und so weiter, bis der Rasierer vollständig
aufgeladen ist.
RQ1053/RQ1050
- Während des Ladevorgangs blinkt das
Batteriesymbol blau.
Akku voll aufgeladen
RQ1090
- Bei voll geladenem Akku gibt das Display
die verfügbare Rasierzeit in Minuten an, das
Steckersymbol erlischt.
RQ1060
- Bei voll geladenem Akku leuchten alle Pfeile
und alle Ladestandsanzeigen konstant blau, das
Steckersymbol im Display erlischt.

DEUTSCH26
- Wenn Sie den Rasierer aus dem Ladegerät
herausnehmen, leuchtet die oberste Pfeilreihe der
Ladestandsanzeige blau. Daran erkennen Sie, dass
der Akku vollständig geladen ist.
RQ1053/RQ1050
- Ist der Akku vollständig geladen, leuchtet das
Batteriesymbol konstant blau.
Akku fast leer
RQ1090
- Ist der Akku fast leer (es verbleiben nur noch 5
Minuten oder weniger an Rasierzeit), beginnen die
Minutenanzeige und das Steckersymbol zu blinken.
- Wenn Sie den Rasierer ausschalten, blinken die
Minutenanzeige und das Steckersymbol einige
Sekunden lang weiter. Sind keine weiteren
Rasierminuten übrig, ertönt ein akustisches Signal.
RQ1060
- Ist der Akku fast leer (es verbleiben nur noch 5
Minuten oder weniger an Rasierzeit), blinkt das
Batteriesymbol rot und die unterste Pfeilreihe der
Ladestandsanzeige blau.
- Wenn Sie den Rasierer ausschalten, blinken das
Batteriesymbol und die unterste Pfeilreihe der
Ladestandsanzeige einige Sekunden lang weiter.
DEUTSCH 27
RQ1053/RQ1050x
- Ist der Akku fast leer (es verbleiben nur noch 5
Minuten oder weniger an Rasierzeit), leuchtet das
Batteriesymbol rot.
- Wenn Sie den Rasierer ausschalten, blinkt das
Batteriesymbol einige Sekunden lang.
Verbleibende Akkukapazität
RQ1090
- Die verbleibende Akkukapazität ist anhand der
Rasierzeit erkennbar, die im Display in Minuten
angegeben ist.
RQ1060
- Die verbleibende Akkukapazität erkennen Sie
daran, welche Pfeilreihe der Ladestandsanzeige
blinkt.
Den Rasierer reinigen
Für eine optimale Rasierleistung empfehlen wir, den
Rasierer nach jedem Gebrauch zu reinigen.
- Das blinkende Wasserhahnsymbol erinnert
Sie daran, dass der Rasierer gereinigt werden muss.
Hinweis: Die Displays der Modelle RQ1060, RQ1053
und RQ1050 sehen zwar unterschiedlich aus, verfügen
aber über die gleichen Anzeigen.
Die Schereinheit auswechseln
Für eine optimale Rasierleistung empfehlen wir, die
Schereinheit alle zwei Jahre auszuwechseln.
DEUTSCH28
- Wenn es an der Zeit ist, die Schereinheit
auszuwechseln, blinkt das Schereinheitssymbol
(alle Modelle), und beim Ausschalten des Rasierers
ertönt ein akustisches Signal (nur RQ1090). Dies
geschieht nach jeweils 7 aufeinander folgenden
Rasuren, um Sie an das Austauschen der
Schereinheit zu erinnern.
Hinweis: Die Displays der Modelle RQ1060, RQ1053
und RQ1050 sehen zwar unterschiedlich aus, verfügen
aber über die gleichen Anzeigen.
Reisesicherung
Sie können den Rasierer für die Reise sichern.
Dadurch verhindern Sie ein versehentliches
Einschalten des Geräts.
Die Reisesicherung aktivieren
1 Halten Sie den Ein-/Ausschalter 3 Sekunden
lang gedrückt, um in den Reisesicherungsmodus
zu gelangen.
, Das Sicherungssymbol erscheint im Display (alle
Modelle), ein akustisches Signal (nur RQ1090)
zeigt Ihnen an, dass die Reisesicherung aktiviert
wurde.
Hinweis: Die Displays der Modelle RQ1060, RQ1053
und RQ1050 sehen zwar unterschiedlich aus, verfügen
aber über die gleichen Anzeigen.
Die Reisesicherung deaktivieren
1 Halten Sie den Ein-/Ausschalter 3 Sekunden
lang gedrückt.
, Der Motor beginnt zu laufen. Daran erkennen
Sie, dass die Reisesicherung deaktiviert ist.
Der Rasierer ist nun wieder einsatzbereit.
DEUTSCH 29
Hinweis: Wenn Sie den Rasierer in das angeschlossene
Ladegerät setzen, wird die Reisesicherung automatisch
deaktiviert.
Blockierte Scherköpfe
- Wenn die Scherköpfe blockiert sind,
blinken das Schereinheitssymbol und
das Wasserhahnsymbol mit Ausrufezeichen. Dies
zeigt an, dass der Motor nicht laufen kann, weil die
Scherköpfe verschmutzt oder beschädigt sind.
Hinweis: Die Displays der Modelle RQ1060, RQ1053
und RQ1050 sehen zwar unterschiedlich aus, verfügen
aber über die gleichen Anzeigen.
- In diesem Fall müssen Sie die Schereinheit reinigen
oder auswechseln.
- Das Schereinheitssymbol und das
Wasserhahnsymbol mit dem Ausrufezeichen
blinken weiter, bis Sie die Blockade der Scherköpfe
gelöst haben.
Laden
Die Ladedauer beträgt ca. 1 Stunde.
Ein voll aufgeladener Rasierer hat eine Rasierzeit von
bis zu 65 Minuten. Das reicht für etwa 21 Rasuren.
Die tatsächliche Rasierzeit wird vom Rasierer
berechnet. Bei starkem Bartwuchs beträgt sie unter
Umständen weniger als 65 Minuten. Zudem kann sie
je nach Rasierverhalten oder Barttyp im Laufe der
Zeit variieren.
Schnellauadung
Nachdem das Gerät 5 Minuten lang aufgeladen
wurde, reicht die Akkukapazität für eine Rasur.
1 Stecken Sie den kleinen Stecker in das
Ladegerät.
DEUTSCH30
2 Stecken Sie den Adapter in die Steckdose.
3 Setzen Sie den Rasierer in das Ladegerät ein.
Drücken Sie in fest in die Halterung, damit der
Kontakt hergestellt wird.
Hinweis: Nur RQ1090: Wenn der Rasierer richtig
eingesetzt ist, ertönt ein akustisches Signal.
, Das Display zeigt an, dass der Rasierer geladen
wird (siehe Kapitel “Das Display”).
Den Rasierer benutzen
Rasieren
1 Drücken Sie den Ein-/Ausschalter einmal, um
den Rasierer einzuschalten.
, Das Display leuchtet für einige Sekunden auf.
2 Führen Sie die Scherköpfe mit geraden und
kreisenden Bewegungen über die Haut.
- Die beste Rasur erzielen Sie bei trockener Haut.
- Es kann 2 bis 3 Wochen dauern, bis sich Ihre Haut
an das Philips Schersystem gewöhnt hat.
3 Drücken Sie den Ein-/Ausschalter einmal, um
den Rasierer auszuschalten.
, Das Display leuchtet einige Sekunden lang auf
und zeigt dann die verbleibende Akkukapazität
an (nur RQ1090/RQ1060).
Schneiden
Der Langhaarschneider eignet sich zum Schneiden
von Koteletten und Schnurrbart.
DEUTSCH 31
1 Ziehen Sie die Schereinheit vom Rasierer ab.
2 Drücken Sie den Ein-/Ausschalter einmal, um
den Rasierer einzuschalten.
, Das Display leuchtet für einige Sekunden auf.
3 Schieben Sie den Schiebeschalter für
den Langhaarschneider nach vorne. Der
Langhaarschneider wird herausgeschoben.
4 Nun können Sie mit dem Schneiden beginnen.
5 Schieben Sie den Schiebeschalter zurück, um
den Langhaarschneider wieder einzuziehen.
6 Drücken Sie den Ein-/Ausschalter einmal, um
den Rasierer auszuschalten.
, Das Display leuchtet einige Sekunden lang auf
und zeigt dann die verbleibende Akkukapazität
an (nur RQ1090/RQ1060).
7 Stecken Sie die Führung der Schereinheit in
den Schlitz oben am Rasierer (1). Drücken
Sie die Schereinheit dann nach unten (2), so
dass sie mit einem “Klick” auf dem Rasierer
einrastet.
Reinigung und Wartung
Benutzen Sie zum Reinigen des Geräts keine
Scheuerschwämme und -mittel oder aggressive
Flüssigkeiten wie Benzin oder Azeton.
- Gehen Sie vorsichtig mit heißem Wasser um.
Achten Sie darauf, dass das Wasser nicht zu heiß
ist und Sie sich nicht die Hände verbrühen.
- Für eine optimale Rasierleistung empfehlen wir,
den Rasierer nach jedem Gebrauch zu reinigen.
DEUTSCH32
- Sie können den Rasierer von außen mit einem
feuchten Tuch reinigen.
- Regelmäßige Reinigung sorgt für eine bessere
Leistung des Geräts.
Die Schereinheit unter ießendem Wasser
reinigen
1 Schalten Sie den Rasierer aus.
2 Öffnen Sie die drei Scherköpfe nacheinander,
indem Sie daran ziehen.
3 Spülen Sie alle drei Scherköpfe sowie alle drei
Haarauffangkammern unter ießendem heißem
Wasser 30 Sekunden lang aus.
Gehen Sie vorsichtig mit heißem Wasser um.
Achten Sie darauf, dass das Wasser nicht zu heiß ist
und Sie sich nicht die Hände verbrühen.
4 Schütteln Sie überschüssiges Wasser sorgfältig
ab und lassen Sie die Scherköpfe offen, bis die
Schereinheit vollständig getrocknet ist.
Trocknen Sie die Schereinheit niemals mit einem
Tuch ab, um Beschädigungen der Scherköpfe zu
vermeiden.
, Um den Rasierer gründlich zu reinigen, schalten
Sie ihn ein und tauchen Sie die Schereinheit
30 Sekunden lang in heißes Wasser, in das Sie
etwas Flüssigseife gegeben haben. Alternativ dazu
können Sie die Schereinheit auch mit Alkohol
reinigen.

DEUTSCH 33
Die Schereinheit mit der mitgelieferten Bürste reinigen
1 Schalten Sie den Rasierer aus.
2 Öffnen Sie die drei Scherköpfe nacheinander,
indem Sie daran ziehen.
3 Reinigen Sie die Scherköpfe und die
Haarauffangkammern mit der mitgelieferten
Bürste.
4 Schließen Sie die Scherköpfe.
Den Langhaarschneider mit der mitgelieferten Bürste reinigen
Reinigen Sie den Langhaarschneider nach jedem
Gebrauch.
1 Schalten Sie den Rasierer aus.
2 Schieben Sie den Schiebeschalter für
den Langhaarschneider nach vorne. Der
Langhaarschneider wird herausgeschoben.
3 Reinigen Sie den Langhaarschneider mit den
kurzen Borsten der mitgelieferten Bürste.
Führen Sie dabei die Bürste auf und ab den
Zähnen entlang.
4 Schalten Sie den Rasierer ein und aus und
wiederholen Sie Schritt 3.
5 Schieben Sie den Schiebeschalter zurück, um
den Langhaarschneider wieder einzuziehen.

DEUTSCH34
Tipp: Ölen Sie die Zähne des Langhaarschneiders alle
sechs Monate mit einem Tropfen Nähmaschinenöl.
Aufbewahrung
Sie können Ihren Rasierer auf zwei Arten
aufbewahren oder auf Reisen mitnehmen:
- Stellen Sie den Rasierer in das Ladegerät.
- Setzen Sie die Schutzkappe auf die Schereinheit,
um eine Beschädigung der Scherköpfe zu
vermeiden.
Ersatz
Wechseln Sie die Schereinheit aus, wenn das
Schereinheitssymbol im Display erscheint. Eine
beschädigte Schereinheit sollte unverzüglich
ausgewechselt werden.
Für eine optimale Rasierleistung empfehlen wir, die
Schereinheit alle zwei Jahre auszuwechseln.
Tauschen Sie die Schereinheit nur durch eine RQ10
Philips arcitec Schereinheit aus.
1 Ziehen Sie die alte Schereinheit vom Rasierer
ab.
2 Stecken Sie die Führung der neuen
Schereinheit in den Schlitz oben am Rasierer
(1). Drücken Sie die Schereinheit dann nach
unten (2), so dass sie mit einem “Klick” auf
dem Rasierer einrastet.
Teile bestellen
Die folgenden Teile sind erhältlich:
- Adapter HQ8500
- Schereinheit RQ10 Philips arcitec
- Philips Reinigungsspray für Scherköpfe HQ110

DEUTSCH 35
Umweltschutz
- Werfen Sie die Geräte am Ende der Lebensdauer
nicht in den normalen Hausmüll. Bringen Sie sie
zum Recycling zu einer ofziellen Sammelstelle.
Auf diese Weise helfen Sie, die Umwelt zu
schonen.
- Der integrierte Rasierer-Akku enthält Substanzen,
die die Umwelt verschmutzen können. Entfernen
Sie den Akku, bevor Sie den Rasierer an einer
ofziellen Recyclingstelle abgeben. Geben Sie
den gebrauchten Akku bei einer ofziellen
Batteriesammelstelle ab. Falls Sie beim Entfernen
des Akkus Probleme haben, können Sie den
Rasierer auch an ein Philips Service-Center geben.
Dort wird der Akku herausgenommen und
umweltgerecht entsorgt.
Den Rasierer-Akku entsorgen
Nehmen Sie den Akku nur zur Entsorgung des
Rasierers heraus. Vergewissern Sie sich, dass der
Akku beim Herausnehmen vollständig entladen ist.
1 Nehmen Sie den Rasierer vom Ladegerät.
2 Lassen Sie den Rasierer laufen, bis er stillsteht.
3 Ziehen Sie die Schereinheit vom Rasierer ab.
4 Lösen Sie die zwei Schrauben auf der Rückseite
des Rasierers.
5 Öffnen Sie den Rasierer, indem Sie die vordere
und rückwärtige Abdeckung mithilfe eines
Schraubendrehers voneinander trennen.

DEUTSCH36
6 Nehmen Sie die seitlichen Abdeckungen ab.
7 Lösen Sie die drei Schrauben innen im Rasierer
und nehmen Sie die Rückseite ab.
8 Ziehen Sie die Drähte aus der Motoreinheit
und nehmen Sie den Akku heraus.
Vorsicht: Die Schienen am Akku sind scharf!
Stellen Sie den Rasierer nicht mehr in das
angeschlossene Ladegerät, nachdem Sie den Akku
herausgenommen haben.
Garantie und Kundendienst
Benötigen Sie weitere Informationen oder treten
Probleme auf, wenden Sie sich bitte an Ihren
Philips Händler, oder setzen Sie sich mit einem
Philips Service-Center in Ihrem Land in Verbindung
(Telefonnummer siehe Garantieschrift). Besuchen
Sie auch die Philips Website www.philips.com.
Sie können auch direkt die Service-Abteilung von
Philips Domestic Appliances and Personal Care BV
kontaktieren.
Garantieeinschränkungen
Die Scherköpfe (Schermesser und Scherkörbe)
unterliegen nicht den Bedingungen der

DEUTSCH 37
internationalen Garantie, da sie einem normalen
Verschleiß ausgesetzt sind.
Häug gestellte Fragen
1 Weshalb rasiert der Rasierer nicht mehr so gut
wie bisher?
- Möglicherweise ist der Rasierer nicht sauber.
Schalten Sie ihn ein und tauchen Sie die
Schereinheit in heißes Wasser, in das Sie etwas
Flüssigseife gegeben haben (siehe Kapitel
“Reinigung und Wartung”).
- Möglicherweise sind die Scherköpfe beschädigt
oder abgenutzt. Wechseln Sie sie aus (siehe Kapitel
“Ersatz”).
2 Warum funktioniert der Rasierer nicht, wenn
ich den Ein-/Ausschalter drücke?
- Möglicherweise ist der Akku leer. Laden Sie ihn
wieder auf (siehe Kapitel “Laden”).
- Möglicherweise ist die Reisesicherung aktiviert.
Halten Sie den Ein-/Ausschalter drei Sekunden
lang gedrückt, um die Reisesicherung zu
deaktivieren.
- Die Schereinheit ist so stark verschmutzt
oder beschädigt, dass der Motor nicht
mehr laufen kann. In diesem Fall blinken das
Schereinheits- und das Wasserhahnsymbol
sowie das Ausrufezeichen. Sie müssen dann die
Schereinheit reinigen oder auswechseln. Tauchen
Sie sie zum Reinigen in heißes Wasser, in das Sie
etwas Flüssigseife gegeben haben.
- Möglicherweise ist der Rasierer heiß gelaufen.
Dann funktioniert er nicht, und das Ausrufezeichen
im Display blinkt. Nach entsprechender Abkühlung
können Sie den Rasierer wieder einschalten.

DEUTSCH38
3 Warum ist der Rasierer nicht vollständig
geladen, nachdem ich ihn über das Ladegerät
aufgeladen habe?
- Sie haben den Rasierer ggf. nicht richtig in das
Ladegerät eingesetzt. Drücken Sie den Rasierer
hinein, bis er einrastet.

ESPAÑOL
Introducción
Gracias por adquirir esta afeitadora Philips. Lea
atentamente este manual del usuario, en el cual
encontrará información sobre las excelentes
características de esta afeitadora, así como algunos
consejos para que el afeitado le resulte más fácil y
agradable.
Importante
Antes de usar la afeitadora y el cargador, lea
atentamente este manual del usuario y consérvelo
por si necesitara consultarlo en el futuro.
Peligro
- Asegúrese de que el adaptador no se moje.
Advertencia
- Tenga cuidado con el agua caliente. Compruebe
siempre que el agua no esté demasiado caliente
para evitar quemarse las manos.
- El adaptador incorpora un transformador. No
corte el adaptador para sustituirlo por otra clavija,
ya que podría provocar situaciones de peligro.
- La afeitadora y el cargador no deben ser usados
por personas (adultos o niños) con su capacidad
física, psíquica o sensorial reducida, ni por quienes
no tengan los conocimientos y la experiencia
necesarios, a menos que sean supervisados o
instruidos acerca del uso de los aparatos por una
persona responsable de su seguridad.
- Asegúrese de que los niños no jueguen con la
afeitadora ni con el cargador.
Precaución
- No utilice la afeitadora, el cargador o el adaptador
si están dañados.
39

ESPAÑOL40
- Cargue y guarde la afeitadora a una temperatura
entre 5 °C y 35 °C.
- Siempre que lleve la afeitadora de viaje, póngale
su tapa protectora con el n de proteger los
cabezales de afeitado.
- No utilice estropajos, agentes abrasivos ni líquidos
agresivos, como gasolina o acetona, para limpiar el
aparato.
- Utilice únicamente el adaptador que se suministra.
- Si el adaptador está dañado, sustitúyalo siempre
por otro del modelo original para evitar
situaciones de peligro.
- No sumerja nunca el cargador en agua ni lo
enjuague bajo el grifo.
Cumplimiento de normas
- La afeitadora cumple las normas de seguridad IEC
aprobadas internacionalmente y se puede limpiar
bajo el grifo de forma segura.
- Estos aparatos Philips cumplen todos los
estándares sobre campos electromagnéticos
(CEM). Si se utilizan correctamente y de acuerdo
con las instrucciones de este manual, los aparatos
se pueden usar de forma segura según los
conocimientos cientícos disponibles hoy en día.
General
- El adaptador transforma la corriente de 100
- 240 voltios en un bajo voltaje de seguridad
inferior a 24 voltios.
Vista general (g. 4)
A Tapa protectora
B Unidad de afeitado
C Cortapatillas
D Botón de encendido/apagado del cortapatillas

ESPAÑOL 41
E Afeitadora (RQ1090/RQ1060/RQ1053/
RQ1050)
F Botón de encendido/apagado de la afeitadora
G Pantalla
H Cepillo de limpieza
I Adaptador de corriente
J Clavija pequeña
K Cargador
El display
Antes de utilizar la afeitadora por primera vez, quite
la lámina protectora del display.
El display de los tres modelos de afeitadora
(RQ1090, RQ1060, RQ1053 and RQ1050) es
diferente, tal y como muestran los siguientes dibujos.
- RQ1090
- RQ1060
- RQ1053/RQ1050
Carga
- La afeitadora tarda aproximadamente 1 hora en
cargarse.

ESPAÑOL42
- Cuando se coloca la afeitadora en el cargador,
el display se apaga automáticamente después de
aproximadamente 5 horas.
RQ1090
- Mientras la afeitadora se está cargando, la
indicación de minutos y el símbolo de la clavija
parpadean.
- Los minutos de afeitado aumentan hasta que la
afeitadora está completamente cargada.
RQ1060
- Mientras la afeitadora se está cargando, el símbolo
de la clavija parpadea.
- Primero parpadean las puntas de echa del nivel
inferior de carga, luego las del segundo nivel, y
así sucesivamente hasta que la afeitadora esté
completamente cargada.
RQ1053/RQ1050
- Mientras la afeitadora se está cargando, el símbolo
de la batería parpadea en azul.
Batería completamente cargada
RQ1090
- Cuando la batería está completamente cargada,
el símbolo de la clavija desaparece del display y se
muestra la indicación de minutos.
RQ1060
- Cuando la batería está completamente cargada,
todas las puntas de echa y todos los pilotos de
nivel de carga se iluminan en color azul de forma
continua, y el símbolo de la clavija desaparece del
display.

ESPAÑOL 43
- Cuando quite la afeitadora del cargador, las puntas
de echa del nivel superior de carga se iluminarán
en color azul para indicar que la batería está
completamente cargada.
RQ1053/RQ1050
- Cuando la batería está completamente cargada, el
símbolo de la misma se ilumina en color azul de
forma continua.
Batería baja
RQ1090
- Cuando la batería está casi descargada (cuando
quedan 5 minutos o menos de afeitado), la
indicación de minutos y el símbolo de la clavija
comienzan a parpadear.
- Al apagar la afeitadora, la indicación de minutos
de afeitado y el símbolo de la clavija continúan
parpadeando durante unos segundos. Cuando no
quedan más minutos de afeitado se oye un pitido.
RQ1060
- Cuando la batería está casi descargada (cuando
quedan 5 minutos o menos de afeitado), el
símbolo de la batería parpadea en rojo y las
puntas de echa del nivel inferior de carga
parpadean en azul.
- Al apagar la afeitadora, el símbolo de la batería
y las puntas de echa del nivel inferior de carga
continúan parpadeando durante unos segundos.

ESPAÑOL44
RQ1053/RQ1050
- Cuando la batería está casi descargada (cuando
quedan 5 minutos o menos de afeitado), el
símbolo de la batería se ilumina en rojo.
- Al apagar la afeitadora, el símbolo de la batería
comienza a parpadear durante unos segundos.
Carga disponible en la batería
RQ1090
- El número de minutos de afeitado que se muestra
en el display indica la carga disponible en la
batería.
RQ1060
- Las puntas de echa que parpadean en un
determinado nivel de carga indican la carga
disponible en la batería.
Limpieza de la afeitadora
Para conseguir un rendimiento de afeitado óptimo,
le aconsejamos que limpie la afeitadora después de
cada uso.
- El símbolo del grifo parpadea para recordarle que
debe limpiar la afeitadora.
Nota: Los displays de los modelos RQ1060, RQ1053 y
RQ1050 son diferentes, pero muestran la misma
indicación.

ESPAÑOL 45
Sustituya la unidad de afeitado
Para un rendimiento de afeitado óptimo, le
aconsejamos que sustituya la unidad de afeitado
cada dos años.
- El símbolo de la unidad de afeitado parpadea
(en todos los modelos) y se oye un pitido al
apagar la afeitadora (sólo en el modelo RQ1090)
para recordarle que debe cambiar la unidad
de afeitado. Esto ocurrirá al nal de 7 afeitados
consecutivos.
Nota: Los displays de los modelos RQ1060, RQ1053
y RQ1050 son diferentes, pero muestran la misma
indicación.
Bloqueo para viajes
Puede bloquear la afeitadora cuando vaya de viaje.
Con ello evitará que la afeitadora se encienda
accidentalmente.
Activación del bloqueo para viajes
1 Para activar el modo de bloqueo para viajes,
mantenga pulsado el botón de encendido/
apagado durante 3 segundos.
, El símbolo de bloqueo aparecerá en el display
(en todos los modelos) y se oirá un pitido (sólo
en el modelo RQ1090) para indicar que se ha
activado el modo de bloqueo para viajes.
Nota: Los displays de los modelos RQ1060, RQ1053
y RQ1050 son diferentes, pero muestran la misma
indicación.
Desactivación del bloqueo para viajes
1 Pulse el botón de encendido/apagado durante
3 segundos.

ESPAÑOL46
, El motor comienza a funcionar para indicar que
se ha desactivado el bloqueo para viajes.
La afeitadora está lista para usar de nuevo.
Nota: El bloqueo para viajes se desactiva
automáticamente al colocar la afeitadora en el
cargador si éste está enchufado.
Cabezales de afeitado bloqueados
- El símbolo de la unidad de afeitado y el
símbolo del grifo con un signo de exclamación
parpadean cuando los cabezales de afeitado están
bloqueados. En ese caso, el motor no funciona
porque los cabezales están sucios o dañados.
Nota: Los displays de los modelos RQ1060, RQ1053
y RQ1050 son diferentes, pero muestran la misma
indicación.
- Si esto sucede, deberá limpiar o sustituir la unidad
de afeitado.
- El símbolo de la unidad de afeitado y el símbolo
del grifo con un signo de exclamación continuarán
parpadeando hasta que se desbloqueen los
cabezales.
Carga
La afeitadora tarda aproximadamente 1 hora en
cargarse.
Una afeitadora completamente cargada proporciona
un tiempo de afeitado de hasta 65 minutos,
suciente para aproximadamente 21 afeitados.
La afeitadora calcula el tiempo de afeitado real. Si su
barba es muy fuerte, el tiempo de afeitado puede
ser inferior a 65 minutos. Este tiempo es variable,
dependiendo de cómo se afeite y del tipo de barba.

ESPAÑOL 47
Carga rápida
Tras un tiempo de carga de 5 minutos, la afeitadora
dispone de energía suciente para un afeitado.
1 Enchufe la clavija pequeña al cargador.
2 Enchufe el adaptador a la toma de corriente.
3 Coloque la afeitadora en el cargador. Presione
la afeitadora rmemente en el soporte para
jarla bien.
Nota: Sólo en el modelo RQ1090: si la afeitadora se ha
colocado correctamente, se oirá un pitido.
, El display indica que la afeitadora se está
cargando (consulte el capítulo “El display”).
Utilización de la afeitadora
Afeitado
1 Pulse el botón de encendido/apagado una vez
para encender la afeitadora.
, La pantalla se ilumina durante unos segundos.
2 Desplace los cabezales de afeitado sobre la piel,
haciendo movimientos rectos y circulares.
- Para obtener los mejores resultados, aféitese con
la piel seca.
- Puede que su piel necesite de 2 a 3 semanas para
acostumbrarse al sistema de afeitado Philips.
3 Pulse el botón de encendido/apagado una vez
para apagar la afeitadora.
, El display se ilumina durante unos segundos y
luego muestra la carga disponible en la batería
(sólo en los modelos RQ1090 y RQ1060).

ESPAÑOL48
Cómo recortar la barba
Puede utilizar el cortapatillas para recortar las patillas
y el bigote.
1 Quite la unidad de afeitado de la afeitadora.
2 Pulse el botón de encendido/apagado una vez
para encender la afeitadora.
, La pantalla se ilumina durante unos segundos.
3 Deslice el botón del cortapatillas hacia delante
para sacarlo.
4 Ya puede comenzar a utilizar el cortapatillas.
5 Deslice el botón del cortapatillas hacia atrás
para retraerlo.
6 Pulse el botón de encendido/apagado una vez
para apagar la afeitadora.
, El display se ilumina durante unos segundos y
luego muestra la carga disponible en la batería
(sólo en los modelos RQ1090 y RQ1060).
7 Inserte el saliente de la unidad de afeitado en la
ranura de la parte superior de la afeitadora (1).
Luego presione la unidad de afeitado hacia
abajo (2) para jarla a la afeitadora (“clic”).
Limpieza y mantenimiento
No utilice estropajos, agentes abrasivos ni líquidos
agresivos, como gasolina o acetona, para limpiar el
aparato.
- Tenga cuidado con el agua caliente. Compruebe
siempre que el agua no esté demasiado caliente
para evitar quemarse las manos.
- Para conseguir un rendimiento de afeitado óptimo,
limpie la afeitadora después de cada uso.

ESPAÑOL 49
- Puede limpiar el exterior de la afeitadora con un
paño húmedo.
- Una limpieza frecuente garantiza mejores
resultados en el afeitado.
Limpieza de la unidad de afeitado bajo el grifo
1 Apague la afeitadora.
2 Abra los tres cabezales de afeitado uno a uno.
3 Enjuague los tres cabezales de afeitado y las
tres cámaras de recogida del pelo bajo el grifo
con agua caliente durante 30 segundos.
Tenga cuidado con el agua caliente. Compruebe
siempre que el agua no esté demasiado caliente
para evitar quemarse las manos.
4 Sacuda el exceso de agua y deje los cabezales
de afeitado abiertos para que la unidad de
afeitado se seque completamente.
No seque nunca la unidad de afeitado con una
toalla o un paño, ya que esto podría dañar los
cabezales de afeitado.
, Para realizar una limpieza completa, encienda
la afeitadora y sumerja la unidad de afeitado
en agua caliente con un poco de jabón líquido
durante 30 segundos. También puede utilizar
alcohol para limpiar la unidad de afeitado.

ESPAÑOL50
Limpieza de la unidad de afeitado con el cepillo que se suministra
1 Apague la afeitadora.
2 Abra los tres cabezales de afeitado uno a uno.
3 Limpie los cabezales de afeitado y las cámaras
de recogida del pelo con el cepillo que se
suministra.
4 Cierre los cabezales de afeitado.
Limpieza del cortapatillas con el cepillo que se suministra
Limpie el cortapatillas cada vez que lo utilice.
1 Apague la afeitadora.
2 Deslice el botón del cortapatillas hacia delante
para sacarlo.
3 Limpie el cortapatillas con el lado de cerdas
cortas del cepillo que se suministra. Cepille
hacia arriba y hacia abajo a lo largo de los
dientes del cortapatillas.
4 Encienda y apague la afeitadora y repita el
paso 3.
5 Deslice el botón del cortapatillas hacia atrás
para retraerlo.

ESPAÑOL 51
Consejo: Para conseguir unos resultados óptimos,
lubrique los dientes del cortapatillas con una gota de
aceite de máquina de coser cada seis meses.
Almacenamiento
Hay 2 formas distintas de guardar la afeitadora o
llevársela de viaje:
- Coloque la afeitadora en el cargador.
- Coloque la tapa protectora en la unidad de
afeitado para evitar que se deterioren los
cabezales de afeitado.
Sustitución
Sustituya la unidad de afeitado cuando el símbolo de
la unidad de afeitado aparezca en el display. Sustituya
una unidad de afeitado dañada de forma inmediata.
Para un rendimiento de afeitado óptimo, le
aconsejamos que sustituya la unidad de afeitado
cada dos años.
Sustituya la unidad de afeitado únicamente por una
unidad de afeitado original Philips arcitec RQ10.
1 Quite la unidad de afeitado usada de la
afeitadora.
2 Inserte el saliente de la nueva unidad de
afeitado en la ranura de la parte superior de
la afeitadora (1). Luego presione la unidad
de afeitado hacia abajo (2) para jarla a la
afeitadora (“clic”).
Solicitud de repuestos
Las siguientes piezas de repuesto están disponibles:
- Adaptador HQ8500
- Unidad de afeitado Philips arcitec RQ10
- Spray limpiador para cabezales de afeitado Philips
HQ110

ESPAÑOL52
Medio ambiente
- Al nal de su vida útil, no tire los aparatos junto
con la basura normal del hogar. Llévelos a un
punto de recogida ocial para su reciclado.
De esta manera ayudará a conservar el medio
ambiente.
- La batería recargable de la afeitadora contiene
sustancias que pueden contaminar el medio
ambiente. Quite siempre la batería antes de
deshacerse de la afeitadora o de llevarla a un
punto de recogida ocial. Deposite la batería en
un lugar de recogida ocial. Si no puede quitar la
batería, puede llevar la afeitadora a un centro de
servicio de Philips. El personal del mismo extraerá
la batería y se deshará de ella de forma no
perjudicial para el medio ambiente.
Cómo deshacerse de la batería
Quite la batería únicamente cuando deseche
la afeitadora. Asegúrese de que la batería esté
completamente descargada cuando la quite del
aparato.
1 Quite la afeitadora del cargador.
2 Deje que la afeitadora funcione hasta que se
pare.
3 Quite la unidad de afeitado de la afeitadora.
4 Desenrosque los dos tornillos de la parte
posterior de la afeitadora.

ESPAÑOL 53
5 Inserte un destornillador entre el panel frontal
y el posterior para abrir la afeitadora.
6 Quite los paneles laterales.
7 Desenrosque los tres tornillos del interior de
la afeitadora y quite la tapa trasera.
8 Extraiga los cables de la unidad motora y quite
la batería.
Tenga cuidado con las tiras de la batería ya que
están aladas.
No vuelva a poner la afeitadora en el cargador
enchufado tras haber quitado la batería.
Garantía y servicio
Si necesita información o tiene algún problema, visite
la página Web de Philips en www.philips.com, o
póngase en contacto con el Servicio de Atención al
Cliente de Philips en su país (hallará el número de
teléfono en el folleto de la garantía mundial). Si no
hay Servicio de Atención al Cliente de Philips en su

ESPAÑOL54
país, diríjase a su distribuidor local Philips o póngase
en contacto con el Service Depar tment de Philips
Domestic Appliances and Personal Care BV.
Restricciones de la garantía
Los cabezales de afeitado (cuchillas y protectores)
no están cubiertos por las condiciones de la garantía
internacional debido a que están sujetos a desgaste.
Preguntas más frecuentes
1 ¿Por qué la afeitadora no afeita igual de bien
que antes?
- Es posible que la afeitadora no esté bien limpia.
Encienda la afeitadora y sumerja la unidad
de afeitado en agua caliente con un poco de
jabón líquido (consulte el capítulo “Limpieza y
mantenimiento”).
- Es posible que los cabezales de afeitado estén
dañados o gastados. Sustituya la unidad de
afeitado (consulte el capítulo “Sustitución”).
2 ¿Por qué no funciona la afeitadora al pulsar el
botón de encendido/apagado?
- Puede que la batería esté descargada. Vuelva a
cargarla (consulte el capítulo “Carga”).
- El bloqueo para viajes podría estar activado.
Mantenga pulsado el botón de encendido/
apagado durante 3 segundos para desactivar el
bloqueo.
- La unidad de afeitado está tan sucia o dañada que
el motor no funciona. En ese caso, el símbolo de
la unidad de afeitado y el símbolo del grifo con un
signo de exclamación parpadearán. Cuando esto
ocurra, será necesario limpiar o sustituir la unidad
de afeitado. Sumérjala en agua caliente con un
poco de jabón líquido.

ESPAÑOL 55
- Es posible que la temperatura de la afeitadora
sea demasiado elevada. En ese caso, la afeitadora
no funciona y en el display se muestra un signo
de exclamación parpadeando. Podrá encender
de nuevo la afeitadora tan pronto como su
temperatura haya bajado lo suciente.
3 ¿Por qué la afeitadora no está completamente
cargada tras haberla cargado en el cargador?
- Es posible que no haya colocado correctamente la
afeitadora en el cargador. Asegúrese de presionar
bien la afeitadora hasta que encaje en su sitio.

56
FRANÇAIS
Introduction
Merci d’avoir acheté ce rasoir Philips. Veuillez lire ce
mode d’emploi, qui contient des informations sur
les fonctionnalités remarquables de ce rasoir, ainsi
que des conseils pour un rasage plus facile et plus
agréable.
Important
Lisez ce mode d’emploi attentivement avant d’utiliser
le rasoir et le chargeur. Conservez-le pour un usage
ultérieur.
Danger
- Veillez à ce que l’adaptateur ne soit pas en contact
avec de l’eau.
Avertissement
- Veillez à ce que l’eau ne soit pas trop chaude pour
ne pas vous brûler.
- L’adaptateur contient un transformateur. An
d’éviter tout accident, n’essayez pas de remplacer
la che de l’adaptateur.
- Le rasoir et le chargeur ne sont pas destinés
à être utilisés par des personnes (notamment
des enfants) dont les capacités physiques,
sensorielles ou intellectuelles sont réduites, ou
par des personnes manquant d’expérience ou
de connaissances, à moins que celles-ci ne soient
sous surveillance ou qu’elles n’aient reçu des
instructions quant à l’utilisation des appareils par
une personne responsable de leur sécurité.
- Veillez à ce que les enfants ne puissent pas jouer
avec le rasoir et le chargeur.
Attention
- N’utilisez jamais le rasoir, le chargeur ou
l’adaptateur s’il est endommagé.

FRANÇAIS 57
- Chargez et conservez le rasoir à une température
comprise entre 5 °C et 35 °C.
- Placez toujours le capot de protection sur le
rasoir an de protéger les têtes de rasoir lorsque
vous êtes en voyage.
- N’utilisez jamais de tampons à récurer, de produits
abrasifs ou de détergents agressifs tels que
l’essence ou l’acétone pour nettoyer l’appareil.
- Utilisez exclusivement l’adaptateur fourni.
- Si l’adaptateur est endommagé, remplacez-le
toujours par un adaptateur de même type pour
éviter tout accident.
- Ne plongez jamais le chargeur dans l’eau et ne le
rincez pas sous le robinet.
Conformité aux normes
- Ce rasoir est conforme aux normes
internationales CEI et peut être nettoyé à l’eau en
toute sécurité.
- Ces appareils Philips sont conformes à toutes les
normes relatives aux champs électromagnétiques
(CEM). Ils répondent aux règles de sécurité
établies sur la base des connaissances scientiques
actuelles s’ils sont manipulés correctement et
conformément aux instructions de ce mode
d’emploi.
Général
- L’adaptateur transforme la tension de 100-240 V
en une tension de sécurité de moins de 24 V.
Aperçu (g. 4)
A Coque de protection
B Unité de rasage
C Tondeuse
D Bouton coulissant marche/arrêt de la tondeuse
E Rasoir (RQ1090/RQ1060/RQ1053/RQ1050)

FRANÇAIS58
F Bouton marche/arrêt du rasoir
G Afcheur
H Brosse de nettoyage
I Adaptateur
J Petite che
K Chargeur
Afcheur
Avant d’utiliser le rasoir pour la première fois, retirez
le lm de protection de l’afcheur.
Les trois types de rasoir (RQ1090, RQ1060,
RQ1053 et RQ1050) possèdent des afcheurs
différents, illustrés sur les gures ci-dessous.
- RQ1090
- RQ1060
- RQ1053/RQ1050
Charge
- La charge dure environ 1 heure.
- Lorsque vous placez le rasoir sur le chargeur,
l’afcheur s’éteint automatiquement au bout
5 heures (environ).

FRANÇAIS 59
RQ1090
- Lorsque le rasoir est en charge, le nombre de
minutes et le symbole de la che clignotent.
- Le nombre de minutes de rasage augmente
jusqu’à ce que le rasoir soit entièrement chargé.
RQ1060
- Lorsque le rasoir est en charge, le symbole de la
che clignote.
- Les èches du niveau de charge inférieur
clignotent, puis celles du second niveau de charge,
et ainsi de suite jusqu’à ce que le rasoir soit
entièrement chargé.
RQ1053/RQ1050
- Lorsque le rasoir est en charge, le symbole de la
batterie clignote en bleu.
Batterie entièrement chargée
RQ1090
- Lorsque la batterie est entièrement chargée, le
nombre de minutes apparaît sur l’afcheur et le
symbole de la che disparaît de l’afcheur.
RQ1060
- Lorsque la batterie est entièrement chargée,
toutes les èches et tous les témoins de niveau de
charge s’allument en bleu et restent allumés, et le
symbole de la che disparaît de l’afcheur.

FRANÇAIS60
- Lorsque vous retirez le rasoir du chargeur, les
èches du niveau de charge supérieur s’allument
en bleu pour indiquer que la batterie est
entièrement chargée.
RQ1053/RQ1050
- Lorsque la batterie est entièrement chargée, le
symbole de la batterie s’allume en bleu et reste
allumé.
Batterie faible
RQ1090
- Lorsque la batterie est presque vide (5 minutes
ou moins de rasage restantes), le nombre de
minutes et le symbole de la che se mettent à
clignoter.
- Lorsque vous éteignez le rasoir, le nombre de
minutes de rasage et le symbole de la che
continuent à clignoter pendant quelques secondes.
Vous entendez un bip lorsque le nombre de
minutes de rasage arrive à zéro.
RQ1060
- Lorsque la batterie est presque vide (5 minutes
ou moins de rasage restantes), le symbole de la
batterie clignote en rouge et les èches du niveau
de charge inférieur clignotent en bleu.
- Lorsque vous éteignez le rasoir, le symbole de
la batterie et les èches du niveau de charge
inférieur continuent à clignoter pendant quelques
secondes.

FRANÇAIS 61
RQ1053/RQ1050
- Lorsque la batterie est presque vide (5 minutes
ou moins de rasage restantes), le symbole de la
batterie s’allume en rouge.
- Lorsque vous éteignez le rasoir, le symbole de
la batterie se met à clignoter pendant quelques
secondes.
Niveau de charge de la batterie
RQ1090
- Le niveau de charge de la batterie est indiqué par
le nombre de minutes de rasage restantes gurant
sur l’afcheur.
RQ1060
- Le niveau de charge de la batterie est indiqué
par les èches clignotantes d’un niveau de charge
donné.
Nettoyage du rasoir
Pour garantir des performances de rasage optimales,
nous vous recommandons de nettoyer le rasoir
après chaque utilisation.
- Le symbole du robinet clignote pour vous
rappeler de nettoyer le rasoir.
Remarque : Les afcheurs des rasoirs de type RQ1060,
RQ1053 et RQ1050 se présentent différemment, mais
afchent les mêmes informations.

FRANÇAIS62
Remplacement de l’unité de rasage
Pour garantir des performances de rasage optimales,
nous vous recommandons de remplacer l’unité de
rasage tous les deux ans.
- Pour vous rappeler de remplacer l’unité de
rasage, le symbole de l’unité de rasage clignote
(tous types) et vous entendez un bip lorsque
vous éteignez le rasoir (RQ1090 seulement). Ce
signal vous avertit au bout de 7 séances de rasage
successives que vous devez remplacer l’unité de
rasage.
Remarque : Les afcheurs des rasoirs de type RQ1060,
RQ1053 et RQ1050 se présentent différemment, mais
afchent les mêmes informations.
Système de verrouillage pour voyage
Vous pouvez verrouiller le rasoir si vous partez en
voyage. Le verrouillage empêche le rasoir de se
mettre en marche accidentellement.
Activation du verrouillage
1 Appuyez sur le bouton marche/arrêt pendant
3 secondes pour activer le verrouillage.
, Le symbole de la clé apparaît sur l’afcheur
(tous types) et vous entendez un bip (RQ1090
seulement), signalant que le verrouillage a été
activé.
Remarque : Les afcheurs des rasoirs de type RQ1060,
RQ1053 et RQ1050 se présentent différemment, mais
afchent les mêmes informations.
Désactivation du verrouillage
1 Maintenez enfoncé le bouton marche/arrêt
pendant 3 secondes.

FRANÇAIS 63
, Le moteur commence à fonctionner pour
indiquer que le verrouillage a été désactivé.
Le rasoir est de nouveau prêt à l’emploi.
Remarque : Lorsque vous placez le rasoir sur le
chargeur branché, le verrouillage est automatiquement
désactivé.
Têtes de rasage bloquées
- Si les têtes de rasage sont bloquées, le symbole
de l’unité de rasage et le symbole du robinet avec
un point d’exclamation clignotent. Dans ce cas, le
moteur ne peut pas fonctionner car les têtes de
rasage sont sales ou endommagées.
Remarque : Les afcheurs des rasoirs de type RQ1060,
RQ1053 et RQ1050 se présentent différemment, mais
afchent les mêmes informations.
- Vous devez alors nettoyer l’unité de rasage ou la
remplacer.
- Le symbole de l’unité de rasage et le symbole du
robinet avec un point d’exclamation continuent
de clignoter jusqu’à ce que vous déverrouilliez les
têtes de rasage.
Charge
La charge dure environ 1 heure.
Un rasoir entièrement chargé offre une autonomie
de rasage de 65 minutes, ce qui permet d’effectuer
environ 21 séances de rasage.
L’autonomie de rasage réelle est calculée par le
rasoir. Si vous avez une barbe fournie, l’autonomie
de rasage peut être inférieure à 65 minutes.
L’autonomie de rasage peut également varier au l
du temps, selon votre style de rasage et votre type
de barbe.

FRANÇAIS64
Charge rapide
Après 5 minutes de charge, le rasoir est
sufsamment chargé pour une séance de rasage.
1 Insérez la petite che dans le chargeur.
2 Branchez l’adaptateur sur la prise secteur.
3 Placez le rasoir sur le chargeur. Appuyez
fermement sur le rasoir pour le positionner
sur le support.
Remarque : RQ1090 uniquement : si le rasoir est placé
correctement, vous entendrez un bip.
, L’afcheur indique que le rasoir est en cours de
charge (voir la section « Afcheur »).
Utilisation du rasoir
Rasoir
1 Mettez le rasoir en marche en appuyant sur le
bouton marche/arrêt.
, L’afcheur s’allume pendant quelques secondes.
2 Déplacez les têtes de rasoir sur la peau en
effectuant des mouvements rectilignes et
circulaires.
- Vous obtiendrez de meilleurs résultats de rasage
sur peau sèche.
- Votre peau pourrait avoir besoin de 2 ou
3 semaines pour s’habituer au système de rasage
Philips.
3 Arrêtez le rasoir en appuyant sur le bouton
marche/arrêt.
, L’afcheur s’allume pendant quelques secondes,
puis afche le niveau de charge de la batterie
(RQ1090/RQ1060 uniquement).

FRANÇAIS 65
Tondeuse
Vous pouvez utiliser la tondeuse pour tailler les
favoris et la moustache.
1 Détachez l’unité de rasage du rasoir.
2 Mettez le rasoir en marche en appuyant sur le
bouton marche/arrêt.
, L’afcheur s’allume pendant quelques secondes.
3 Faites glisser le taquet vers l’avant pour
dégager la tondeuse.
4 Vous pouvez commencer à vous tailler les
favoris et la moustache.
5 Faites glisser le taquet vers l’arrière pour
replier la tondeuse.
6 Arrêtez le rasoir en appuyant sur le bouton
marche/arrêt.
, L’afcheur s’allume pendant quelques secondes,
puis afche le niveau de charge de la batterie
(RQ1090/RQ1060 uniquement).
7 Insérez la languette de l’unité de rasage dans la
fente située sur la partie supérieure du rasoir
(1). Fixez ensuite l’unité de rasage sur le rasoir
en la faisant glisser vers le bas (2) (clic).
Nettoyage et entretien
N’utilisez jamais de tampons à récurer, de produits
abrasifs ou de détergents agressifs tels que
l’essence ou l’acétone pour nettoyer l’appareil.
- Veillez à ce que l’eau ne soit pas trop chaude pour
ne pas vous brûler.

FRANÇAIS66
- Pour garantir des performances de rasage
optimales, nettoyez le rasoir après chaque
utilisation.
- Vous pouvez utiliser un chiffon humide pour
nettoyer l’extérieur du rasoir.
- Nettoyez régulièrement l’appareil pour obtenir
des résultats de rasage optimaux.
Nettoyage de l’unité de rasage à l’eau courante
1 Éteignez le rasoir.
2 Ouvrez les trois têtes de rasage une à une.
3 Rincez à l’eau chaude les trois têtes de rasage
et les trois compartiments à poils pendant
30 secondes.
Veillez à ce que l’eau ne soit pas trop chaude pour
ne pas vous brûler.
4 Secouez les têtes de rasage pour en retirer
l’excès d’eau, puis laissez-les sécher à l’air libre
pour obtenir une unité de rasage parfaitement
sèche.
Ne séchez jamais l’unité de rasage à l’aide d’une
serviette au risque d’endommager les têtes de
rasoir.
, Pour un nettoyage en profondeur, mettez le
rasoir en marche et plongez l’unité de rasage
dans une eau chaude et savonneuse pendant
30 secondes. Vous pouvez également utiliser de
l’alcool pour nettoyer l’unité de rasage.

FRANÇAIS 67
Nettoyage de l’unité de rasage à l’aide de la brosse fournie
1 Éteignez le rasoir.
2 Ouvrez les trois têtes de rasage une à une.
3 Nettoyez les têtes de rasage et les
compartiments à poils à l’aide de la brosse
fournie.
4 Fermez les têtes de rasage.
Nettoyage de la tondeuse à l’aide de la brosse fournie
Nettoyez la tondeuse après chaque utilisation.
1 Éteignez le rasoir.
2 Faites glisser le taquet vers l’avant pour
dégager la tondeuse.
3 Nettoyez la tondeuse avec le côté à poils
courts de la brosse fournie. Brossez les dents
de la tondeuse de haut en bas.
4 Mettez le rasoir en marche, arrêtez-le, puis
répétez l’étape 3.
5 Faites glisser le taquet vers l’arrière pour
replier la tondeuse.

FRANÇAIS68
Conseil : Pour garantir des performances de rasage
optimales, appliquez une goutte d’huile pour machine
à coudre sur la tondeuse sous les six mois.
Rangement
Le rasoir peut se ranger de deux manières lorsque
vous l’emportez avec vous en voyage :
- Placez le rasoir dans le chargeur.
- Faites glisser le capot de protection sur l’unité de
rasage pour éviter d’endommager les têtes de
rasage.
Remplacement
Remplacez l’unité de rasage lorsque le symbole
de l’unité de rasage apparaît sur l’afcheur.
N’attendez pas pour remplacer une unité de rasage
endommagée.
Pour garantir des performances de rasage optimales,
nous vous recommandons de remplacer l’unité de
rasage tous les deux ans.
L’unité de rasage ne peut être remplacée que par
une unité de rasage arcitec RQ10 Philips.
1 Détachez l’ancienne unité de rasage du rasoir.
2 Insérez la languette de la nouvelle unité de
rasage dans la fente du rasoir prévue à cet effet
(1). Fixez ensuite l’unité de rasage sur le rasoir
en faisant glisser le taquet vers le bas (2) (clic).
Commande de pièces
Les pièces suivantes sont disponibles :
- Adaptateur HQ8500
- Unité de rasage arcitec RQ10 Philips
- Spray Philips Shaving Head Cleaner HQ110

FRANÇAIS 69
Environnement
- Lorsqu’il ne fonctionnera plus, ne jetez pas
l’appareil avec les ordures ménagères, mais
déposez-le à un endroit assigné à cet effet, où il
pourra être recyclé. Vous contribuerez ainsi à la
protection de l’environnement.
- La batterie intégrée contient des substances qui
peuvent nuire à l’environnement. Veillez à toujours
retirer la batterie avant de mettre le rasoir au
rebut ou de le déposer à un endroit assigné à
cet effet. Déposez la batterie usagée à un endroit
assigné à cet effet. Si vous n’arrivez pas à retirer la
batterie, vous pouvez apporter l’appareil dans un
Centre Service Agréé Philips qui se chargera de
l’opération en veillant à le faire dans le respect de
l’environnement.
Mise au rebut de la batterie du rasoir
Retirez la batterie uniquement lorsque vous
mettez le rasoir au rebut. Assurez-vous que la
batterie est complètement déchargée lorsque vous
la jetez.
1 Retirez le rasoir du chargeur.
2 Laissez le rasoir fonctionner jusqu’à l’arrêt du
moteur.
3 Détachez l’unité de rasage du rasoir.
4 Dévissez les 2 vis à l’arrière du rasoir.

FRANÇAIS70
5 Pour ouvrir le rasoir, insérez un tournevis
entre le panneau avant et le panneau arrière.
6 Retirez les panneaux latéraux.
7 Dévissez les 3 vis situées à l’intérieur du rasoir
et retirez la plaque de protection arrière.
8 Sortez les ls du bloc moteur et retirez la
batterie.
Soyez prudent car les languettes de la batterie sont
coupantes.
Ne replacez pas le rasoir sur le chargeur branché
après avoir retiré la batterie.
Garantie et service
Si vous souhaitez obtenir des informations
supplémentaires ou si vous rencontrez un problème,
visitez le site Web de Philips à l’adresse
www.philips.com ou contactez le
Service Consommateurs Philips de votre pays (vous
trouverez le numéro de téléphone correspondant

FRANÇAIS 71
sur le dépliant de garantie internationale). S’il n’existe
pas de Service Consommateurs Philips dans votre
pays, renseignez-vous auprès de votre revendeur
Philips local ou contactez le « Service Depar tment
of Philips Domestic Appliances and
Personal Care BV ».
Limites de la garantie
Étant susceptibles de s’user, les têtes de rasoir (lames
et grilles) ne sont pas couvertes par la garantie
internationale.
Foire aux questions
1 Pourquoi les résultats de rasage ne sont-ils pas
aussi satisfaisants que d’habitude ?
- Le rasoir n’est peut-être pas complètement
propre. Mettez le rasoir en marche et plongez
l’unité de rasage dans de l’eau chaude savonneuse
(voir le chapitre « Nettoyage et entretien »).
- Les têtes de rasage sont peut-être endommagées
ou usées. Remplacez l’unité de rasage (voir le
chapitre « Remplacement »).
2 Pourquoi le rasoir ne fonctionne-t-il pas
lorsque j’appuie sur le bouton marche/arrêt ?
- La batterie est peut-être vide. Rechargez la
batterie (voir le chapitre « Charge »).
- Le verrouillage est peut-être activé. Appuyez sur
le bouton marche/arrêt pendant 3 secondes pour
désactiver le verrouillage.
- L’unité de rasage est sale ou endommagée et
le moteur ne peut pas fonctionner. Dans ce cas,
le symbole de l’unité de rasage, le symbole du
robinet et le point d’exclamation clignotent. Dans
ce cas, nettoyez l’unité de rasage ou remplacez-la.

FRANÇAIS72
Plongez l’unité de rasage dans de l’eau chaude
savonneuse.
- La température du rasoir est peut-être trop
élevée. Dans ce cas, le rasoir ne fonctionne pas et
le point d’exclamation clignote sur l’afcheur. Dès
que la température du rasoir est sufsamment
basse, vous pouvez rallumer le rasoir.
3 Pourquoi le rasoir n’est-il pas entièrement
chargé lorsqu’il vient d’être chargé à l’aide du
chargeur ?
- Vous n’avez peut-être pas placé le rasoir
correctement sur le chargeur. Assurez-vous que le
rasoir y est bien enclenché.

ITALIANO
Introduzione
Grazie per aver acquistato questo rasoio Philips.
Leggete questo manuale utente contenente
informazioni sulle straordinarie funzioni di questo
rasoio e utili suggerimenti per rendere la rasatura più
semplice e agevole.
Importante
Prima di utilizzare il rasoio e il caricabatterie,
leggete attentamente il presente manuale utente e
conservatelo per eventuali riferimenti futuri.
Pericolo
- Evitate assolutamente il contatto della spina con
l’acqua.
Avvertenza
- Prestate particolare attenzione quando utilizzate
l’acqua calda: vericate sempre che non sia troppo
calda per evitare di scottarvi.
- L’adattatore contiene un trasformatore. Non
tagliate l’adattatore per sostituirlo con un’altra
spina onde evitare situazioni pericolose.
- Il rasoio e il caricabatterie non sono destinati a
persone (inclusi bambini) con capacità mentali,
siche o sensoriali ridotte, fatti salvi i casi in cui tali
persone abbiano ricevuto assistenza o formazione
per l’uso degli apparecchi da una persona
responsabile della loro sicurezza.
- Adottate le precauzioni necessarie per evitare che
i bambini giochino con il rasoio e caricabatterie.
Attenzione
- Non utilizzate il rasoio, il caricabatterie o
l’adattatore se danneggiati.
- Ricaricate e riponete il rasoio a una temperatura
tra 5°C e 35°C.
73

ITALIANO74
- Riponete sempre il cappuccio di protezione
sul rasoio per proteggere le testine di rasatura
durante gli spostamenti.
- Non usate prodotti o sostanze abrasive o
detergenti aggressivi, come benzina o acetone, per
pulire l’apparecchio.
- Utilizzate esclusivamente l’adattatore in dotazione.
- Nel caso in cui l’adattatore fosse danneggiato,
dovrà essere sostituito esclusivamente con un
adattatore originale al ne di evitare situazioni
pericolose.
- Non immergete mai il caricabatterie nell’acqua e
non risciacquatelo sotto l’acqua corrente.
Conformità agli standard
- Il rasoio è conforme alle norme di sicurezza IEC
approvate a livello internazionale e può essere
lavato tranquillamente sotto l’acqua corrente.
- Questi apparecchi Philips sono conformi a tutti gli
standard relativi ai campi elettromagnetici (EMF).
Se utilizzati in modo appropriato seguendo le
istruzioni contenute nel presente manuale utente,
gli apparecchi consentono un utilizzo sicuro come
confermato dai risultati scientici attualmente
disponibili.
Indicazioni generali
- L’adattatore trasforma la tensione a 100-240 volt
in una tensione più bassa e sicura inferiore ai 24
volt.
Panoramica (g. 4)
A Cappuccio di protezione
B Unità di rasatura
C Tagliabasette
D Cursore tagliabasette on/off
E Rasoio (RQ1090/RQ1060/RQ1053/RQ1050)

ITALIANO 75
F Pulsante on/off rasoio
G Display
H Spazzolina per la pulizia
I Adattatore
J Spinotto
K Caricabatterie
Il display
Prima di utilizzare il rasoio la prima volta, rimuovete
la pellicola protettiva dal display.
I tre tipi di rasoio (RQ1090, RQ1060, RQ1053/
RQ1050) hanno display diversi, illustrati nelle
immagini di seguito.
- RQ1090
- RQ1060
- RQ1053/RQ1050
Come ricaricare l’apparecchio
- La ricarica richiede circa 1 ora.
- Quando si collega il rasoio al caricabatterie, il
display si spegne automaticamente dopo circa 5
ore.

ITALIANO76
RQ1090
- Quando il rasoio viene ricaricato, sul display
lampeggiano i minuti e il simbolo della spina.
- I minuti di rasatura aumentano nché il rasoio non
è completamento carico.
RQ1060
- Quando il rasoio viene ricaricato, sul display
lampeggia il simbolo della spina.
- Iniziano a lampeggiare prima le frecce nel livello
inferiore, poi quelle del secondo livello e così via
nché il rasoio non è completamente ricaricato.
RQ1053/RQ1050
- Quando il rasoio è in ricarica, sul display lampeggia
il simbolo della batteria.
Ricarica completa della batteria
RQ1090
- Quando la batteria è completamente carica,
sul display vengono visualizzati i minuti mentre
scompare il simbolo della spina.
RQ1060
- Quando la batteria è completamente carica, tutte
le frecce e le spie di livello di carica si accendono
in blu a luce ssa e il simbolo della spina scompare
dal display.

ITALIANO 77
- Quando il rasoio viene scollegato dal
caricabatterie, le frecce del livello di ricarica
superiori si accendono in blu per indicare che la
batteria è completamente carica.
RQ1053/RQ1050
- Quando la batteria è completamente carica, il
simbolo della batteria si accende in blu a luce ssa.
Batteria scarica
RQ1090
- Quando la batteria è quasi vuota (ossia quando
il rasoio ha un’autonomia di al massimo 5
minuti), i minuti e il simbolo della spina iniziano a
lampeggiare.
- Quando il rasoio viene spento, i minuti di rasatura
e il simbolo della spina continuano a lampeggiare
per alcuni secondi. Viene emesso un segnale
acustico quando i minuti sono esauriti.
RQ1060
- Quando la batteria è quasi vuota (ossia quando il
rasoio ha un’autonomia di al massimo 5 minuti),
il simbolo della batteria lampeggia in rosso e le
frecce del livello di carica inferiore lampeggiano
in blu.
- Quando il rasoio viene spento, il simbolo della
batteria e le frecce del livello di carica inferiore
continuano a lampeggiare per alcuni secondi.

ITALIANO78
RQ1053/RQ1050
- Quando la batteria è quasi vuota (ossia quando il
rasoio ha un’autonomia di al massimo 5 minuti),
i minuti e il simbolo della spina si accendono in
rosso.
- Quando il rasoio viene spento, il simbolo della
batteria inizia a lampeggiare per alcuni secondi.
Batteria residua
RQ1090
- La batteria residua viene indicata dal numero dei
minuti di rasatura visualizzati sul display.
RQ1060
- La batteria residua viene indicata dalle frecce
lampeggianti di un particolare livello di carica.
Pulizia del rasoio
Per ottenere prestazioni di rasatura ottimali, si
consiglia di pulire il rasoio dopo ogni utilizzo.
- Il simbolo del rubinetto lampeggia per indicare
che è necessario pulire il rasoio.
Nota I display dei modelli RQ1060, RQ1053 e
RQ1050 sono diversi ma presentano la stessa
indicazione.
Sostituzione dell’unità di rasatura
Per ottenere prestazioni di rasatura ottimali, si
consiglia di sostituire l’unità di rasatura ogni due anni.

ITALIANO 79
- Per ricordarvi di sostituire l’unità di rasatura, il
simbolo dell’unità di rasatura inizia a lampeggiare
(tutti i modelli) e viene emesso un segnale
acustico quando il rasoio viene spento (solo
RQ1090). Questo si verica, alla ne delle 7
sessioni di rasatura successiva per ricordar vi di
sostituire l’unità di rasatura.
Nota I display dei modelli RQ1060, RQ1053 e
RQ1050 sono diversi ma presentano la stessa
indicazione.
Blocco da viaggio
Per portare l’apparecchio in viaggio, è possibile
bloccare il rasoio. Il blocco da viaggio impedisce che
il rasoio venga acceso accidentalmente.
Come attivare il blocco da viaggio
1 Per attivare il blocco da viaggio, tenete
premuto il pulsante on/off per circa 3 secondi.
, Il simbolo del blocco viene visualizzato sul
display (tutti i modelli) e viene emesso un
segnale acustico (solo RQ1090) per indicare che
il blocco da viaggio è stato attivato.
Nota I display dei modelli RQ1060, RQ1053 e
RQ1050 sono diversi ma presentano la stessa
indicazione.
Disattivazione della funzione di blocco da viaggio
1 Tenete premuto il pulsante on/off per 3
secondi.
, Il motore viene avviato per indicare che il blocco
da viaggio è stato disattivato.
Il rasoio è di nuovo pronto per l’uso.

ITALIANO80
Nota quando si collega il rasoio al caricabatterie, il
blocco da viaggio viene automaticamente disattivato.
Testine di rasatura bloccate
- Se le testine di rasatura si bloccano, il simbolo
dell’unità di rasatura e il simbolo del rubinetto con
un punto esclamativo iniziano a lampeggiare. In tal
caso, il motore non può essere avviato perché le
testine di rasatura sono sporche o danneggiate.
Nota I display dei modelli RQ1060, RQ1053 e
RQ1050 sono diversi ma presentano la stessa
indicazione.
- In tal caso, è necessario pulire l’unità di rasatura o
sostituirla.
- Il simbolo dell’unità di rasatura e il simbolo del
rubinetto con un punto esclamativo continuano a
lampeggiare nché non si sbloccano le testine di
rasatura.
Come ricaricare l’apparecchio
La ricarica richiede circa 1 ora.
Un rasoio completamente carico ha un’autonomia
di rasatura no a 65 minuti, sufcienti per circa 21
sessioni di rasatura.
Il tempo di rasatura viene calcolato dal rasoio e varia
in base alle modalità di rasatura e al tipo di barba. In
caso di barba dura, l’autonomia di rasatura potrebbe
essere inferiore a 65 minuti.
Ricarica rapida
Dopo una ricarica di 5 minuti, il rasoio dispone di
una autonomia per una rasatura.
1 Inserite lo spinotto nel caricabatterie.

ITALIANO 81
2 Inserite la spina dell’adattatore nella presa di
corrente a muro.
3 Posizionate il rasoio sul caricabatterie, quindi
spingete il rasoio nel supporto no a farlo
scattare in posizione.
Nota solo RQ1090: se il rasoio è posizionato
correttamente, viene emesso un segnale acustico.
, Sul display viene visualizzata l’indicazione del
rasoio in fase di carica (consultate il capitolo “Il
display”).
Modalità d’uso del rasoio
Modalità di depilazione
1 Premete il pulsante on/off per accendere il
rasoio.
, Il display si illumina per alcuni secondi.
2 Fate scorrere le testine di rasatura sulla pelle,
compiendo movimenti lineari e circolari.
- Per ottenere risultati ottimali, assicuratevi che la
pelle sia asciutta.
- Può essere necessario un periodo di adattamento
di 2 o 3 settimane per consentire alla pelle di
abituarsi al sistema di rasatura Philips.
3 Premete il pulsante on/off per spegnere il
rasoio.
, Il display si illumina per alcuni secondi, quindi
viene visualizzata l’autonomia residua della
batteria (solo RQ1090/RQ1060).
Rinitura
Potete utilizzare il tagliabasette per regolare basette
e baf.

ITALIANO82
1 Estraete l’unità di rasatura dal rasoio.
2 Premete il pulsante on/off per accendere il
rasoio.
, Il display si illumina per alcuni secondi.
3 Premete il cursore tagliabasette in avanti per
estrarre il tagliabasette.
4 A questo punto, potete iniziare a rinire la
barba.
5 Premete il cursore tagliabasette indietro per
ritrarre il tagliabasette.
6 Premete il pulsante on/off per spegnere il
rasoio.
, Il display si illumina per alcuni secondi, quindi
viene visualizzata l’autonomia residua della
batteria (solo RQ1090/RQ1060).
7 Inserite la linguetta nell’unità di rasatura nella
fessura posta nella parte superiore del rasoio
(1). A questo punto, premete l’unità di rasatura
verso il basso (2) nché il rasoio non scatta in
posizione.
Pulizia e manutenzione
Non usate prodotti o sostanze abrasive o
detergenti aggressivi, come benzina o acetone, per
pulire l’apparecchio.
- Prestate particolare attenzione quando utilizzate
l’acqua calda: vericate sempre che non sia troppo
calda per evitare di scottarvi.
- Pulite il rasoio dopo ogni sessione di rasatura per
ottenere prestazioni ottimali.

ITALIANO 83
- Usate un panno umido per pulire la parte esterna
del rasoio.
- Una pulizia regolare assicura risultati di rasatura
ottimali.
Pulizia del rasoio sotto l’acqua corrente
1 Spegnete il rasoio.
2 Aprite le tre testine di rasatura una alla volta.
3 Sciacquate tutte e tre le testine di rasatura e
le altrettanti vaschette di raccolta peli sotto
acqua corrente calda per circa 30 secondi.
Prestate particolare attenzione quando utilizzate
l’acqua calda: vericate sempre che non sia troppo
calda per evitare di scottarvi.
4 Eliminate con cura l’acqua in eccesso e
attendete che le testine di rasatura si
asciughino completamente prima di rimontarle.
Non asciugate l’unità di rasatura con un panno o
asciugamano per evitare di danneggiare le testine
di rasatura.
, Per una pulizia accurata, accendete il rasoio e
immergete l’unità di rasatura in acqua calda e
sapone liquido per circa 30 secondi. Per pulire
l’unità di rasatura, potete utilizzare anche un po’
di alcool.
Pulizia del rasoio mediante la spazzola in dotazione
1 Spegnete il rasoio.

ITALIANO84
2 Aprite le tre testine di rasatura una alla volta.
3 Pulite le testine di rasatura e le vaschette di
raccolta peli con la spazzola in dotazione.
4 Chiudete le testine di rasatura.
Pulizia del tagliabasette mediante la spazzola in dotazione
Pulite il tagliabasette dopo ogni utilizzo.
1 Spegnete il rasoio.
2 Premete il cursore tagliabasette in avanti per
estrarre il tagliabasette.
3 Pulite il tagliabasette servendovi della parte
a setole corte della spazzola seguendo dei
movimenti verticali lungo i dentini.
4 Accendete e spegnete il rasoio e ripetete il
passo 3.
5 Premete il cursore tagliabasette indietro per
ritrarre il tagliabasette.
Consiglio per ottenere prestazioni ottimali, lubricate i
dentini del tagliabasette ogni sei mesi, utilizzando una
goccia di olio per macchina da cucire.

ITALIANO 85
Conservazione
Potete riporre il rasoio in due modi o portarlo con
voi in viaggio:
- posizionate il rasoio nel caricabatterie.
- Inserite il cappuccio di protezione sull’unità di
rasatura per evitare di danneggiare le testine di
rasatura.
Sostituzione
Sostituite l’unità di rasatura quando il relativo
simbolo viene visualizzato sul display. Sostituite
immediatamente un’unità danneggiata.
Per ottenere prestazioni di rasatura ottimali, si
consiglia di sostituire l’unità di rasatura ogni due anni.
Sostituite l’unità di rasatura esclusivamente con
un’unità di rasatura originale Philips modello RQ10
arcitec.
1 Estraete la vecchia unità di rasatura dal rasoio
2 Inserite la linguetta della nuova unità di
rasatura nella fessura posta nella parte
superiore del rasoio (1). A questo punto,
premete l’unità di rasatura verso il basso (2)
nché il rasoio non scatta in posizione.
Come ordinare le parti di ricambio
Parti di ricambio disponibili:
- Adattatore HQ8500
- Unità di rasatura Philips RQ10 arcitec
- Spray detergente per testine HQ110 Philips

ITALIANO86
Tutela dell’ambiente
- Per contribuire alla tutela dell’ambiente, non
smaltite l’apparecchio tra i riuti domestici ma
consegnatelo a un centro di raccolta ufciale.
- La batteria ricaricabile integrata contiene sostanze
potenzialmente nocive per l’ambiente. Rimuovete
sempre la batteria prima di smaltire il rasoio
e consegnarlo a un centro di raccolta ufciale.
Smaltite la batteria in un apposito centro di
raccolta. In caso di difcoltà durante la rimozione
della batteria, consegnate l’apparecchio a un
centro di assistenza Philips, che si occuperà della
rimozione della batteria e dello smaltimento
dell’apparecchio.
Come smaltire le batterie
Rimuovete la batteria solo quando avete deciso di
eliminare il rasoio. Prima di rimuoverla, assicuratevi
che sia completamente scarica.
1 Rimuovete il rasoio dal caricabatterie.
2 Lasciate in funzione il rasoio no all’arresto.
3 Estraete l’unità di rasatura dal rasoio.
4 Svitate le 2 viti sul retro del rasoio.
5 Inserite un cacciavite tra il pannello anteriore e
posteriore per aprire il rasoio.

ITALIANO 87
6 Rimuovete i pannelli laterali.
7 Svitate le 3 viti all’interno del rasoio e
rimuovete il coperchio posteriore.
8 Estraete i cavi dal gruppo motore e rimuovete
la batteria.
Attenzione: le estremità delle batterie sono molto
aflate!
Dopo aver rimosso la batteria, non inserite il
rasoio nel caricabatterie.
Garanzia e assistenza
Per ulteriori informazioni o eventuali problemi,
visitate il sito Web Philips all’indirizzo
www.philips.com oppure contattate il Centro
Assistenza Clienti Philips locale (il numero di
telefono è riportato nell’opuscolo della garanzia).
Qualora non fosse disponibile un Centro Assistenza
Clienti locale, rivolgetevi al rivenditore autorizzato
Philips oppure contattate il Reparto assistenza Philips
Domestic Appliances & Personal Care BV.

ITALIANO88
Limitazioni della garanzia
L’unità di rasatura (lame e portalame) non è
coperta dalla garanzia internazionale perché è un
componente soggetto a usura.
Domande frequenti
1 Perché il rasoio non funziona come al solito?
- Il rasoio potrebbe non essere perfettamente
pulito. Spegnete il rasoio e immergete l’unità
di rasatura in acqua calda e sapone liquido
(consultate il capitolo “Pulizia e manutenzione”).
- L’unità di rasatura potrebbe essere danneggiata
o usurata. Sostituite l’unità di rasatura (consultate
capitolo “Sostituzione”).
2 Perché il rasoio non funziona premendo il
pulsante on/off?
- La batteria potrebbe essere scarica. Ricaricate
la batteria (vedere il capitolo “Come ricaricare
l’apparecchio”).
- È possibile che il blocco da viaggio sia attivato.
Tenete premuto il pulsante on/off per 3 secondi
per disattivare il blocco da viaggio.
- L’unità di rasatura è sporca o danneggiata a tal
punto da impedire il funzionamento del motore. In
tal caso, il simbolo dell’unità di rasatura, il simbolo
del rubinetto e il punto esclamativo iniziano a
lampeggiare sul display. In tal caso, è necessario
pulire o sostituire l’unità di rasatura. Immergete
l’unità di rasatura in acqua calda e sapone liquido.
- La temperatura del rasoio potrebbe essere
troppo elevata. In tal caso, il rasoio non funziona
e un punto esclamativo inizia a lampeggiare sul
display. Non appena la temperatura del rasoio

ITALIANO 89
diminuisce a sufcienza, potete riaccendere il
rasoio.
3 Perché il rasoio non si carica completamente
anche dopo averlo ricaricato tramite il
caricabatterie?
- È possibile che il rasoio non sia stato posizionato
correttamente sul caricabatterie. Assicuratevi di
inserire il rasoio no a farlo scattare in posizione.

90
NEDERLANDS
Inleiding
Hartelijk dank voor de aanschaf van dit Philipsscheerapparaat. Lees deze gebruiksaanwijzing door,
want deze bevat informatie over de geweldige
kenmerken van dit scheerapparaat en een aantal tips
om het scheren gemakkelijker en prettiger te maken.
Belangrijk
Lees deze gebruiksaanwijzing goed door voordat u
het scheerapparaat en de oplader gaat gebruiken.
Bewaar de gebruiksaanwijzing om deze indien nodig
te kunnen raadplegen.
Gevaar
- Voorkom dat de adapter nat wordt.
Waarschuwing
- Wees voorzichtig met heet water. Controleer
altijd of het water niet te heet is om te
voorkomen dat u uw handen verbrandt.
- De adapter bevat een transformator. Knip de
adapter niet af om deze te vervangen door een
andere stekker, aangezien dit een gevaarlijke
situatie oplevert.
- Het scheerapparaat en de oplader zijn niet
bedoeld voor gebruik door personen (waaronder
kinderen) met verminderde lichamelijke,
zintuiglijke of geestelijke vermogens, of die gebrek
aan ervaring of kennis hebben, tenzij iemand die
verantwoordelijk is voor hun veiligheid toezicht
op hen houdt of hen heeft uitgelegd hoe de
apparaten dienen te worden gebruikt.
- Houd toezicht op kinderen om te voorkomen dat
ze met het scheerapparaat en de oplader gaan
spelen.

NEDERLANDS 91
Let op
- Gebruik het scheerapparaat, de oplader of de
adapter niet als deze zijn beschadigd.
- Laad het scheerapparaat op en bewaar het bij een
temperatuur tussen 5°C en 35°C.
- Plaats altijd de beschermkap op het
scheerapparaat om de scheerhoofden te
beschermen wanneer u op reis bent.
- Gebruik nooit schuursponzen, schurende
schoonmaakmiddelen of agressieve vloeistoffen
zoals benzine of aceton om het apparaat schoon
te maken.
- Gebruik uitsluitend de bijgeleverde adapter.
- Als de adapter beschadigd is, moet u deze altijd
laten vervangen door een adapter van het
oorspronkelijke type om gevaar te voorkomen.
- Dompel de oplader nooit in water en spoel deze
nooit af onder de kraan.
Naleving van richtlijnen
- Het scheerapparaat voldoet aan de internationaal
erkende IEC-veiligheidsvoorschriften en kan veilig
onder de kraan worden gereinigd.
- Deze Philips-apparaten voldoen aan alle richtlijnen
met betrekking tot elektromagnetische velden
(EMV). Mits de apparaten op de juiste wijze en
volgens de instructies in deze gebruiksaanwijzing
worden gebruikt, zijn deze veilig te gebruiken
volgens het nu beschikbare wetenschappelijke
bewijs.
Algemeen
- De adapter zet 100-240 volt om in een veilige
laagspanning van minder dan 24 volt.
Overzicht (g. 4)
A Beschermkap

NEDERLANDS92
B Scheerunit
C Trimmer
D Aan/uitknop trimmer
E Scheerapparaat (RQ1090/RQ1060/RQ1053/
RQ1050)
F Aan/uitknop scheerapparaat
G Display
H Schoonmaakborsteltje
I Adapter
J Kleine stekker
K Oplader
Het display
Als u het scheerapparaat voor de eerste keer
gebruikt, verwijder dan eerst de beschermfolie van
het display.
De drie apparaattypen (RQ1090, RQ1060, RQ1053
en RQ1050) hebben elk een ander display. U ziet de
displays op de volgende plaatjes.
- RQ1090
- RQ1060
- RQ1053/RQ1050

NEDERLANDS 93
Opladen
- Opladen duurt ongeveer 1 uur.
- Als u het scheerapparaat in de oplader
plaatst, schakelt het display na ongeveer 5 uur
automatisch uit.
RQ1090
- Tijdens het opladen van het scheerapparaat
knipperen de minuutaanduiding en het
stekkersymbool.
- Het aantal scheerminuten stijgt totdat het
scheerapparaat volledig is opgeladen.
RQ1060
- Tijdens het opladen van het scheerapparaat
knippert het stekkersymbool.
- Eerst knipperen de pijlpunten van het onderste
oplaadniveau en vervolgens gaan de pijlpunten van
het tweede oplaadniveau knipperen. Dit gaat door
tot het scheerapparaat volledig is opgeladen.
RQ1053/RQ1050
- Tijdens het opladen van het scheerapparaat
knippert het accusymbool blauw.
Accu vol
RQ1090
- Wanneer de accu volledig is opgeladen, verschijnt
de minuutaanduiding op het display en verdwijnt
het stekkersymbool.

NEDERLANDS94
RQ1060
- Wanneer de accu volledig is opgeladen, branden
alle pijlpunten en lampjes van de oplaadniveaus
continu blauw en verdwijnt het stekkersymbool
van het display.
- Wanneer u het scheerapparaat uit de oplader
haalt, gaan de pijlpunten van het bovenste
oplaadniveau blauw branden. Dit betekent dat de
accu volledig is opgeladen.
RQ1053/RQ1050
- Wanneer de accu volledig is opgeladen, brandt het
accusymbool continu blauw.
Accu bijna leeg
RQ1090
- Wanneer de accu bijna leeg is (zodra er 5 of
minder scheerminuten over zijn), beginnen de
minuutaanduiding en het stekkersymbool te
knipperen.
- Wanneer u het scheerapparaat uitschakelt, blijven
de minuutaanduiding en het stekkersymbool nog
enkele seconden knipperen. U hoort een piepje
wanneer er geen scheerminuten meer over zijn.

NEDERLANDS 95
RQ1060
- Wanneer de accu bijna leeg is (zodra er 5
of minder scheerminuten over zijn), gaat het
accusymbool rood knipperen en knipperen de
pijlpunten van het onderste oplaadniveau blauw.
- Als u het scheerapparaat uitschakelt, blijven het
accusymbool en de pijlpunten van het onderste
oplaadniveau enkele seconden knipperen.
RQ1053/RQ1050
- Wanneer de accu bijna leeg is (zodra er 5
of minder scheerminuten over zijn), gaat het
accusymbool rood branden.
- Wanneer u het scheerapparaat uitschakelt,
knippert het accusymbool enkele seconden.
Resterende accucapaciteit
RQ1090
- De resterende accucapaciteit wordt op het display
aangegeven door het aantal scheerminuten.
RQ1060
- De resterende accucapaciteit wordt aangegeven
door de knipperende pijlpunten van een bepaald
oplaadniveau.
Scheerapparaat schoonmaken
Voor een optimaal scheerresultaat adviseren wij u
het scheerapparaat na elk gebruik schoon te maken.

NEDERLANDS96
- Het knipperende kraansymbool herinnert u eraan
het scheerapparaat schoon te maken.
Opmerking: De displays van de typen RQ1060,
RQ1053 en RQ1050 zien er anders uit, maar tonen
dezelfde aanduiding.
Scheerunit vervangen
Voor maximaal scheerresultaat adviseren wij u de
scheerunit om de twee jaar te vervangen.
- Om u eraan te helpen herinneren de scheerunit
te vervangen, gaat het scheerunitsymbool
knipperen (alle typen) en hoort u een piepje als u
het scheerapparaat uitschakelt (alleen RQ1090).
Dit gebeurt aan het einde van 7 opeenvolgende
scheerbeurten om u eraan te herinneren dat de
scheerunit moet worden vervangen.
Opmerking: De displays van de typen RQ1060,
RQ1053 en RQ1050 zien er anders uit, maar tonen
dezelfde aanduiding.
Reisvergrendeling
U kunt het scheerapparaat vergrendelen als u
het meeneemt op reis. Deze reisvergrendeling
voorkomt dat het scheerapparaat per ongeluk wordt
ingeschakeld.
De reisvergrendeling activeren
1 Houd de aan/uitknop 3 seconden ingedrukt om
de reisvergrendelingsmodus in te schakelen.
, Op het display verschijnt het sleutelsymbool
(alle typen) en u hoort een piepje (alleen
RQ1090). Dit geeft aan dat de reisvergrendeling
is geactiveerd.

NEDERLANDS 97
Opmerking: De displays van de typen RQ1060,
RQ1053 en RQ1050 zien er anders uit, maar tonen
dezelfde aanduiding.
De reisvergrendeling deactiveren
1 Druk 3 seconden op de aan/uitknop.
, De motor begint te draaien. Dit geeft aan dat de
reisvergrendeling is gedeactiveerd.
Het scheerapparaat kan nu weer worden gebruikt.
Opmerking: Als u het scheerapparaat in de oplader
plaatst en deze is aangesloten op netspanning, dan
wordt de reisvergrendeling automatisch gedeactiveerd.
Geblokkeerde scheerhoofden
- Als de scheerhoofden zijn geblokkeerd, knipperen
het scheerunitsymbool en het kraansymbool
met uitroepteken. In dat geval kan de motor
niet draaien, omdat de scheerhoofden vuil of
beschadigd zijn.
Opmerking: De displays van de typen RQ1060,
RQ1053 en RQ1050 zien er anders uit, maar tonen
dezelfde aanduiding.
- Wanneer dit gebeurt, dient u de scheerunit
schoon te maken of te vervangen.
- Het scheerunitsymbool en het kraansymbool
met uitroepteken blijven knipperen totdat u de
scheerhoofden deblokkeert.
Opladen
Opladen duurt ongeveer 1 uur.
Een volledig opgeladen scheerapparaat heeft
een scheertijd van maximaal 65 minuten. Dit is
voldoende voor ongeveer 21 scheerbeurten.

NEDERLANDS98
Het scheerapparaat berekent zelf de werkelijke
scheertijd. Hebt u een zware baard, dan kan de
scheertijd minder dan 65 minuten zijn. De scheertijd
kan in de loop van de tijd ook variëren, afhankelijk
van uw scheergedrag en uw baardtype.
Snel opladen
Als u het scheerapparaat 5 minuten hebt opgeladen,
bevat de accu voldoende energie voor één
scheerbeurt.
1 Steek de kleine stekker in de oplader.
2 Steek de adapter in het stopcontact.
3 Plaats het scheerapparaat in de oplader. Duw
het scheerapparaat goed vast in de houder.
Opmerking: Alleen RQ1090: als het scheerapparaat
goed is geplaatst, dan hoort u een piepje.
, Het display geeft aan dat het scheerapparaat
wordt opgeladen (zie hoofdstuk ‘Het display’).
Het scheerapparaat gebruiken
Scheren
1 Druk een keer op de aan/uitknop om het
scheerapparaat in te schakelen.
, Het display licht op gedurende enkele seconden.
2 Beweeg de scheerhoofden over de huid. Maak
zowel rechte als draaiende bewegingen.
- Scheren op een droog gezicht geeft het beste
resultaat.
- Uw huid kan 2 tot 3 weken nodig hebben om aan
dit Philips-scheersysteem te wennen.

NEDERLANDS 99
3 Druk een keer op de aan/uitknop om het
scheerapparaat uit te schakelen.
, Het display licht op gedurende enkele
seconden en toont vervolgens de resterende
accucapaciteit (alleen RQ1090/RQ1060).
Trimmen
U kunt de trimmer gebruiken voor het bijwerken
van uw bakkebaarden en snor.
1 Trek de scheerunit van het scheerapparaat af.
2 Druk een keer op de aan/uitknop om het
scheerapparaat in te schakelen.
, Het display licht op gedurende enkele seconden.
3 Duw de trimmerknop naar voren om de
trimmer uit te schuiven.
4 Nu kunt u de trimmer gebruiken.
5 Duw de trimmerknop naar achteren om de
trimmer terug te schuiven.
6 Druk een keer op de aan/uitknop om het
scheerapparaat uit te schakelen.
, Het display licht op gedurende enkele
seconden en toont vervolgens de resterende
accucapaciteit (alleen RQ1090/RQ1060).
7 Plaats het nokje van de scheerunit in de sleuf
aan de bovenkant van het scheerapparaat (1).
Druk de scheerunit vervolgens omlaag (2) om
deze weer op het scheerapparaat te bevestigen
(‘klik’).
Schoonmaken en onderhoud
Gebruik nooit schuursponzen, schurende
schoonmaakmiddelen of agressieve vloeistoffen

NEDERLANDS100
zoals benzine of aceton om het apparaat schoon
te maken.
- Wees voorzichtig met heet water. Controleer
altijd of het water niet te heet is om te
voorkomen dat u uw handen verbrandt.
- Voor een optimaal scheerresultaat dient u het
scheerapparaat na elke scheerbeurt te schoon
maken.
- Maak de buitenkant van het scheerapparaat
schoon met een vochtige doek.
- Regelmatig schoonmaken geeft een beter
scheerresultaat.
De scheerunit schoonmaken onder de kraan
1 Schakel het scheerapparaat uit.
2 Trek de drie scheerhoofden één voor één
open.
3 Spoel de drie scheerhoofden en de drie
haarkamers gedurende 30 seconden onder de
hete kraan.
Wees voorzichtig met heet water. Controleer altijd
of het water niet te heet is om te voorkomen dat
u uw handen verbrandt.
4 Schud er voorzichtig het water vanaf en laat
de scheerhoofden open zodat de scheerunit
helemaal kan drogen.
Droog de scheerunit nooit met een handdoek
of een papieren doekje omdat de scheerhoofden
hierdoor beschadigd kunnen raken.

NEDERLANDS 101
, Voor een grondige reiniging schakelt u het
scheerapparaat in en dompelt u de scheerunit
gedurende 30 seconden in warm water met
wat vloeibare zeep. U kunt de scheerunit ook
schoonmaken met wat alcohol.
De scheerunit schoonmaken met het bijgeleverde borsteltje
1 Schakel het scheerapparaat uit.
2 Trek de drie scheerhoofden één voor één
open.
3 Maak de scheerhoofden en de haarkamers
schoon met het bijgeleverde borsteltje.
4 Sluit de scheerhoofden.
De trimmer schoonmaken met het bijgeleverde borsteltje
Maak de trimmer altijd na gebruik schoon.
1 Schakel het scheerapparaat uit.
2 Duw de trimmerknop naar voren om de
trimmer uit te schuiven.

NEDERLANDS102
3 Maak de trimmer schoon met de korte haren
van het bijgeleverde borsteltje. Beweeg het
borsteltje omhoog en omlaag langs de tanden
van de trimmer.
4 Schakel het scheerapparaat in en uit en herhaal
stap 3.
5 Duw de trimmerknop naar achteren om de
trimmer terug te schuiven.
Tip Voor een optimaal resultaat, smeer de tanden van
de trimmer om de zes maanden met een druppeltje
naaimachineolie.
Opbergen
Er zijn twee manieren om het scheerapparaat op te
bergen of mee te nemen op reis:
- Plaats het scheerapparaat in de oplader.
- Schuif de beschermkap op de scheerunit
om beschadiging van de scheerhoofden te
voorkomen.
Vervangen
Vervang de scheerunit als het scheerunitsymbool
op het display verschijnt. Bij beschadiging dient u de
scheerunit direct te vervangen.
Voor maximaal scheerresultaat adviseren wij u de
scheerunit om de twee jaar te vervangen.
Vervang de scheerunit alleen door een originele
RQ10 Philips arcitec-scheerunit.
 Loading...