

User Manual
Pocket Projector
PPX5110
PicoPix
Register your product and get support at
www.philips.com/welcome

Table of contents
Introduction ..................................................3
Dear customer ............................................................3
About this user manual ............................................ 3
What's in the box ....................................................... 3
Product highlights ...................................................... 3
1 General safety information .................. 4
Setting up the device ................................................ 4
Repairs ..........................................................................4
Power supply ..............................................................5
2 Overview ...................................................6
Back and bottom view .............................................6
Side view .......................................................................6
Front and side view ...................................................6
3 Initial operation ...................................... 7
Setting up the device ................................................ 7
Connecting power supply ....................................... 7
Charging the battery ................................................. 7
Initial installation ........................................................ 7
4 Connect to playback device ................. 8
Connecting to devices with HDMI output ..........8
Connecting to external speakers or headphones
8
5 Wireless projection with Miracast-
compatible Android devices ................9
6 Projection with iOS devices ...............10
Wireless Screen Mirroring ..................................... 10
USB Screen Mirroring (iOS) ................................... 11
7 Connecting the phone to the Wi-Fi
network created by the projector .... 13
8 Service ..................................................... 15
Care instructions for the battery ......................... 15
Battery deep discharge .......................................... 15
Cleaning ...................................................................... 15
Wireless firmware update ..................................... 16
Troubleshooting ........................................................17
9 Appendix ................................................. 19
Technical data .......................................................... 19
Introduction
Quick Start
Guide
Quick Start
Guide
Quick Start
Guide
Quick Start
Guide
d
e
c
a
b
Notice
DANGER!
CAUTION!
Dear customer
Thank you for purchasing this projector.
We hope you enjoy your device and its many
ctions!
fun
About this user manual
With the quick start guide that is supplied with
your device, you can start using your device
quickly and easily. Detailed descriptions can be
found in the following sections of this user manual.
Read the entire user manual carefully. Follow all
safe
ty instructions in order to ensure proper
operation of your device (see General safety
information, page 4). The manufacturer accepts
no liability if these instructions are not followed.
Symbols used
Troubleshooting
This symbol indicates tips that will help
you to use your device more effectively
and easily.
Danger of personal injury!
This symbol gives warning of danger of
personal injury. Physical injury or damage can result from improper handling.
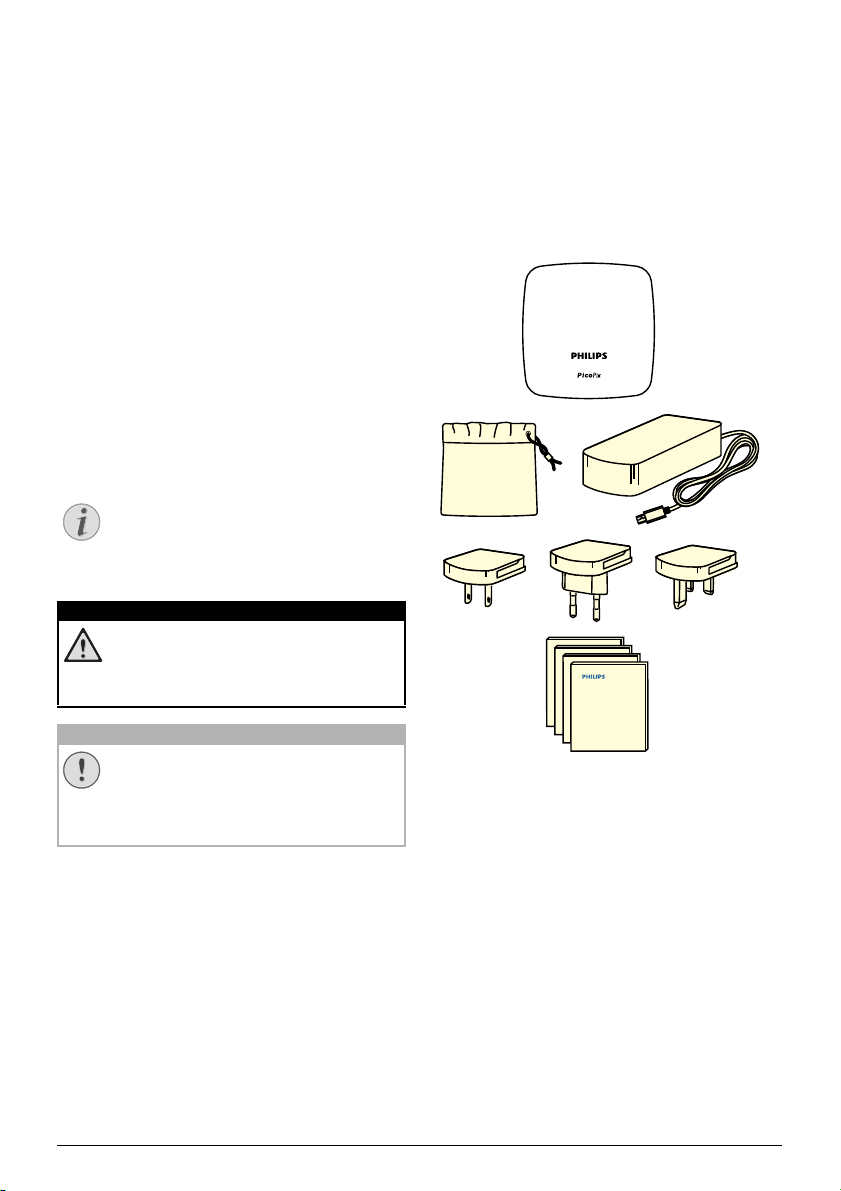
What's in the box
1 – Pico Projector (PPX 5110)
/C Power adapter
2 – A
3 –
Power plugs (EU, UK, US)
uick start guide
4 – Q
arrying pouch
5 – C
Damage to the device or loss of data!
This symbol gives warning of damage to
the device and possible loss of data.
Damage can result from improper handling.
Product highlights
Connecting to devices with HDMI output
With the HDMI to mini HDMI cable you can connect the projector to a playback device (
necting to devices with
Wireless Screen Mirroring (Android and iOS)
With the Wireless Screen Mi
can share your screen without a cable. In order
to allow screen mirroring, your smartphone
must support Miracast or Airplay. The projector
is compatible with Miracast-compatible
Android phones and iPhones with iOS 7/8/9/10
and 11.
USB Screen Mirroring (iOS)
With this function you can share your screen
with
the Lightning to USB cable.
HDMI output, page 8
rroring function you
3
see Con-
).

1 General safety information
DANGER!
Do not make any changes or settings that are
not described in this user manual. Physical
injury, damage to the device or loss of data can
result from improper handling. Take note of all
warning and safety notes indicated.
Setting up the device
The device is for indoor use only. The device
should be placed securely on a stable, flat surface. Position all cables in such a way that no
one
will trip over them, thus avoiding possible
injuries to persons or damage to the device
itself.
Do not operate the device in damp rooms.
Ne
ver touch the main cable or the main connec-
tion with wet hands.
The device must have sufficient ventilation and
may
not be covered. Do not put your device in
closed cabinets or boxes if it is in use.
Protect the device from direct sunlight, heat,
inte
nse temperature fluctuations and moisture.
Do not place the device in the vicinity of heaters
or air conditioners. Observe the information on
temperature and humidity in the technical data
(see Technical data, page 19).
When the device is on for a long time, the surface becomes hot and a warning symbol
a
ppears. The device switches automatically to
stand-by mode when it gets too hot.
Do not allow liquids to leak into the device. Turn
device and disconnect it from the main
off the
supply if liquids or foreign substances leak into
the device. Have the device inspected by an
authorised service centre.
Always handle the device with care.
touching the lens. Never place heavy or sharp
objects on the device or the power cable.
If the projector gets too hot or emits smoke, shut
it down i
cable. Have your device checked by an authorised service centre. Keep device away from fire.
The battery is integrated with the device. Do not
issemble and modify. The battery should be
d
replaced by qualified service staff only.
mmediately and unplug the power
Avoid
Under the following conditions, a layer of moisture can appear inside the device whi
lead to malfunctions:
• if the device is moved from a cold to a
warm area;
• after a cold room is heated;
• when this device is placed in a damp
room.
Proceed as follows to avoid any moisture buildup
:
1 Seal this device in a plastic bag before mov-
ing it to another room, in order for it to adapt
o room conditions.
t
2 Wait one to two hours before you take the
vice out of the plastic bag.
de
The device should not be used in a very dusty
e
nvironment. Dust particles and other foreign
objects may damage the device.
Do not expose the device to extreme vibrations.
It may damage the internal
Do not allow children to ha ndle t he device with -
out supervision. The packing materials should
kept out of the hands of children.
be
For your own safety, do not use the device dur-
ing thunderstorms wi
components.
th lightning.
ch can
Repairs
Do not repair the device yourself. Improper
maintenance can result in injuries or damage to
the device. Your device must be repaired by an
authorised service centre.
Find details of authorised s
warranty card.
Do not remove the type label from your device;
is will void the warranty.
th
ervice centres on the
Risk of explosion with incorrect type of
batteries!
Do not try to replace the battery yourself.
4 Philips · PPX5110

Power supply
CAUTION!
DANGER!
Use only a power adapter which is certified for
this product (see Technical data, page 19).
Check whether the mains vo
supply matches the mains voltage available at
the setup location. This device complies with
the voltage type specified on the device.
The capacity of the battery diminishes with
me. If the device functions only with the power
ti
supply, the battery is defective. Contact an
authorised service centre to replace the battery.
Always use the B button to turn off the
projector.
Turn off the device and unplug from the power
outlet before cleaning the surface (see Clean-
ing, page 15). Use a soft, lint-free cloth. Never
use liquid, gaseous or easily flammable cleansers (sprays, abrasives, polishes, alcohol). Do not
allow any moisture to reach the interior of the
device.
Risk of eye irritation!
This device is equipped with a high
power LED (Light Emitting Diode),
which emits very bright light. Do not
look directly into the projector lens during operation. This could cause eye irritation or damage.
ltage of the power
General safety information 5

2Overview
Back and bottom view
1 – Tripod socket
2 – On/Off/charging LED
The blue charging LED blinks during charging. If the projector is fully charged the LED
stops blinking.
3 – DC-IN for power supply
4 – Audio out socket (headphone)
5 – USB port to allow wired screen mirroring
with iOS
6 – HDMI input
Side view
Front and side view
1 – Vents
2 – Projection lens
3 – Focus wheel to adjust image sharpness
4– Speaker
1 – Reset hole
2 – B Power / Mode
To turn on and off the device, press the
B button for eight seconds.
To switch between iOS and Android mode
press the B button for one second.
3 – Vents
6 Philips · PPX5110

3Initial operation
US UK
EU
a
b
CAUTION!
DANGER!
Setting up the device
Place the projector on a flat surface in front of
the projection surface.
Connecting power supply
Risk of explosion with incorrect type of
batteries!
Do not try to replace the battery yourself.
Always use the
off the projector.
1 Slide the appropriate plug (EU, UK, US) onto
the power adapter.
2 Connect one end of the power cable to the
DC IN socket on the rear side of your device
(1).
3 Plug the power cable to outlet in the wall (2).
B
button to turn on and
Initial installation
Turning on the projector
1 To turn on (and off) the device, press the
B button for ei
screen appears.
2 Turn the projector towards a suitable projec-
tion surface or wall. Note that the distance to
th
e projection surface must be a minimum of
0.5 metres and a maximum of approx.
3 metres. Make sure the projector is in a
se
cure position.
The distance between the projector and the
een determines the actual size of the
scr
image.
3 Use the focus wheel on the left side to adjust
he image sharpness.
t
ght seconds till the initial
Charging the battery
The projector is built with an embedded battery
for mobile use. The battery will be charged only
when the device is not in use (Power off).
Before using the first time, charge the projector
for five hou
The blue charging LED blinks during charging. If
the projector is fully charged the LED stops
blinking.
Initial operation 7
rs.
 Loading...