

Page 1
Quick Start Guide
MCM761
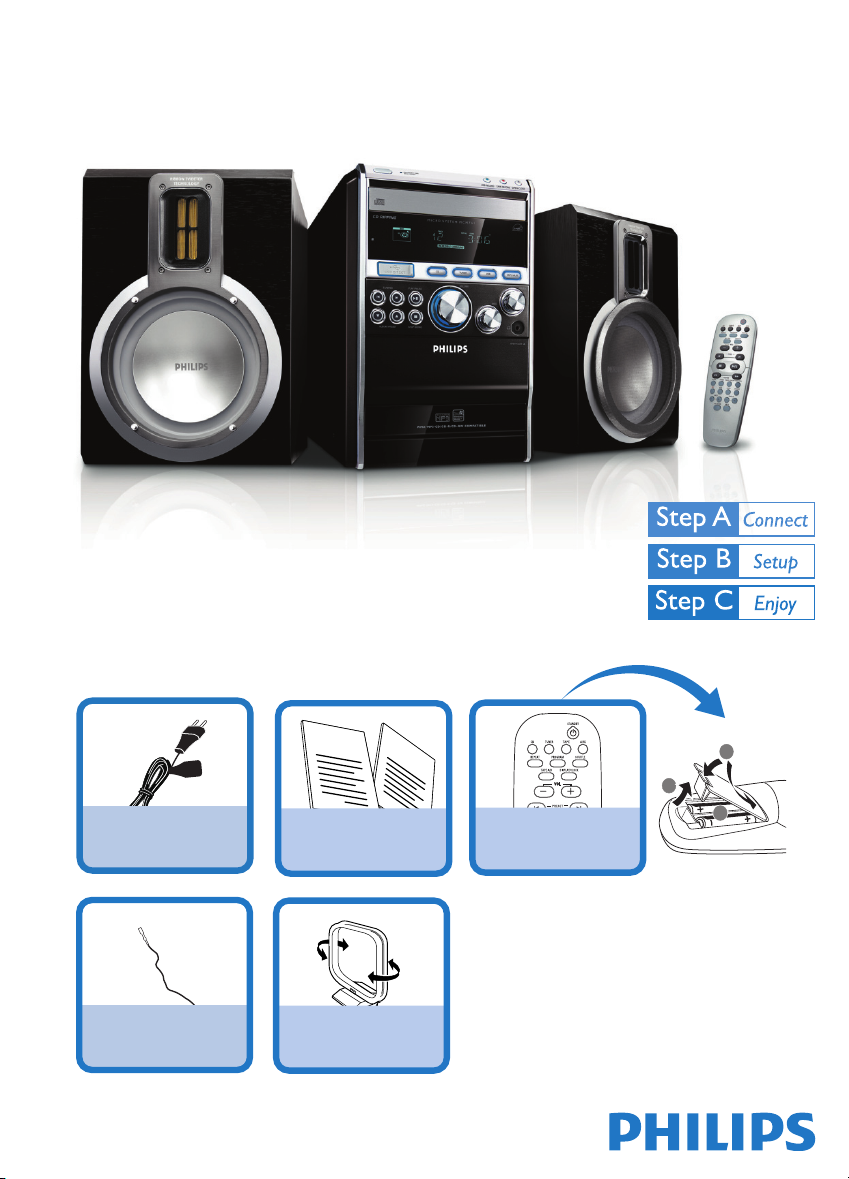
What’s in the Box?
You should fi nd these items upon opening the box.
2
User Manual
1 x AC power cable
1 x FM wire antenna 1 x MW loop antenna
Quick start guide
User manual
Quick Start Guide
1
3
1
2
Remote control with
2 AA batteries
Page 2
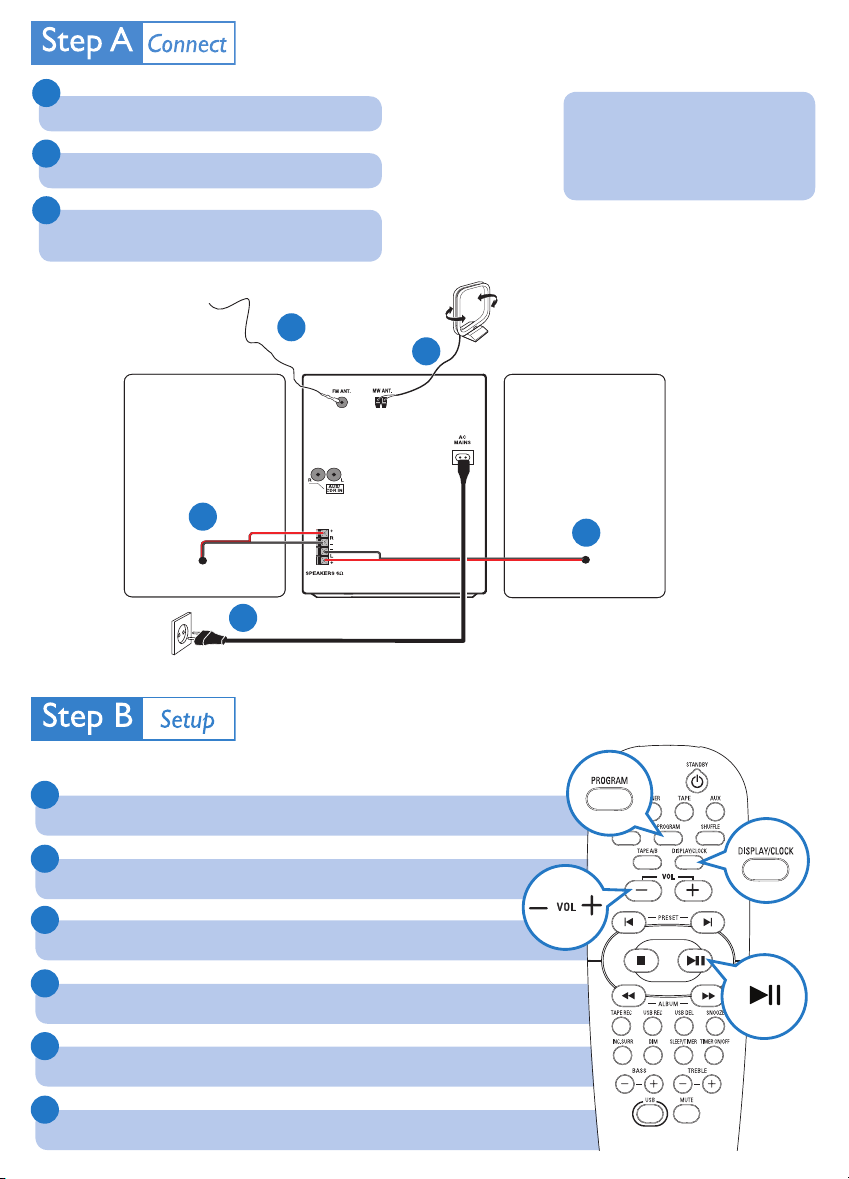
1
Connect the speaker cables.
2
Connect the MW and FM antennas.
3
Connect the supplied AC power cable to the main
unit and the wall socket.
Tip
See the User Manual on how to
connect other equipment to this
system.
FM wire antenna
2
2
Speaker
(right)
1
3
AC power cable
Set clock
1
In the standby mode, press DISPLAY/CLOCK to activate the clock setting mode.
2
Press PROGRAM repeatedly to select 12 hour or 24 hour format.
MW loop antenna
Speaker
(left)
1
3
Press VOL +/- to set the hour.
4
Press
5
Press VOL +/- to set the minute.
6
Press DISPLAY/CLOCK to confi rm.
ÉÅ
to confi rm.
Page 3

Play disc
1
Press CD to select the disc source.
2
Press OPEN/CLOSE 0 on the main unit to open the disc compartment.
3
Insert a disc with the printed side facing up, then close the disc compartment.
4
If the disc doesn’t play, pressÉÅ.
5
To stop play, press 9.
Listen to radio
1
Press TUNER repeatedly to select FM or MW.
2
Press PROGRAM for more than two seconds to program all available stations in
order of waveband.
3
Press PRESET
to select a preset number.
J/K
Page 4

Play USB
With this Hi-Fi, you can use USB fl ash memory (USB 2.0 or USB1.1),
USB fl ash players (USB 2.0 or USB1.1)
additional card reader to work with this Mini Hi-Fi).
1
Insert the USB device into the socket
,
memory cards (requires an
on the main unit.
2
Press USB to select the USB source.
3
Play the USB’s audio fi les as you do with the albums/tracks on a CD.
USB record
1
Insert the USB device into the socket
on the main unit.
2
Load a disc.
3
Press USB RECORD to start recording.
4
To stop recording, press 9.
Tip
Detailed play features and additional functions are described in the supplied user
manual.
Royal Philips Electronics N.V. 2009
C
All rights reserved.
http://www.philips.com
EN
PDCC-JH/ZYL-0912
 Loading...