

Philips MCM595 19 Quick Start Guide
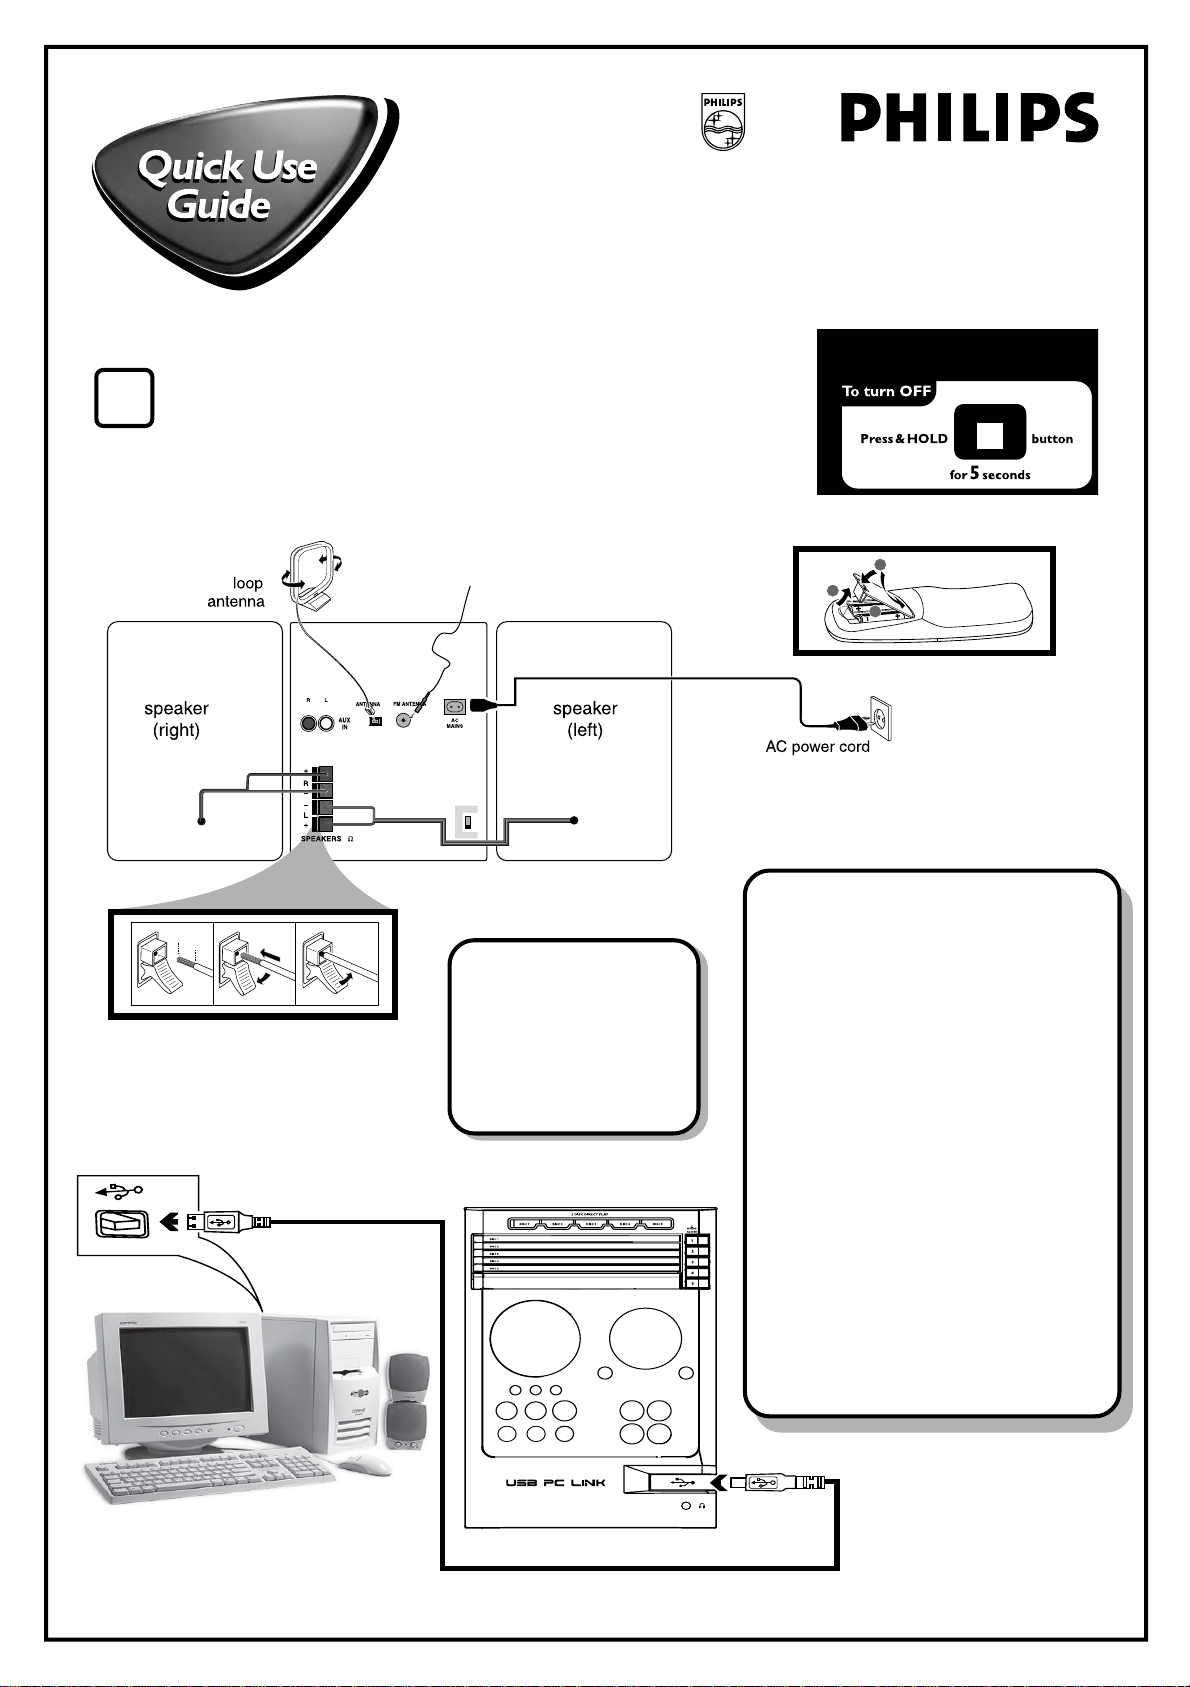
Connections-MCM595
DEMO MODE
(DEMO STOP)
VOLTAGE
NOT FOR ALL
VERSIONS
SELECTOR
110V127V
220V240V
12 mm
abc
push
down
push IN
1
3
2
8
MW
FM wire antenna
MW
A
Use this simple and quick guide to get started
listening to your favorite music.
Please note that the voltage
selector located at the rear of
this system is preset at 220V
form the factory. for countries
that operate at 110V-127V,
please adjust to 110V-127V
before you switch on the
system.
Software installationUSB PC Link
1. Turn on your PC and insert the
installer disc into your PC’s CDROM drive.
2. The installation guide will appear
automatically. If not, double click the
setup.exe under Windows Explorer.
3. Select your desired language
from the list and select Install
Software.
4. Connect the USB cable provided
to the PC and Audio system and
press USB PC Link button.
5. Follow the instructions as
prompted on the screen.
Philips Sound Agent 2 is only applicable
for Windows 2000/XP.
1
2
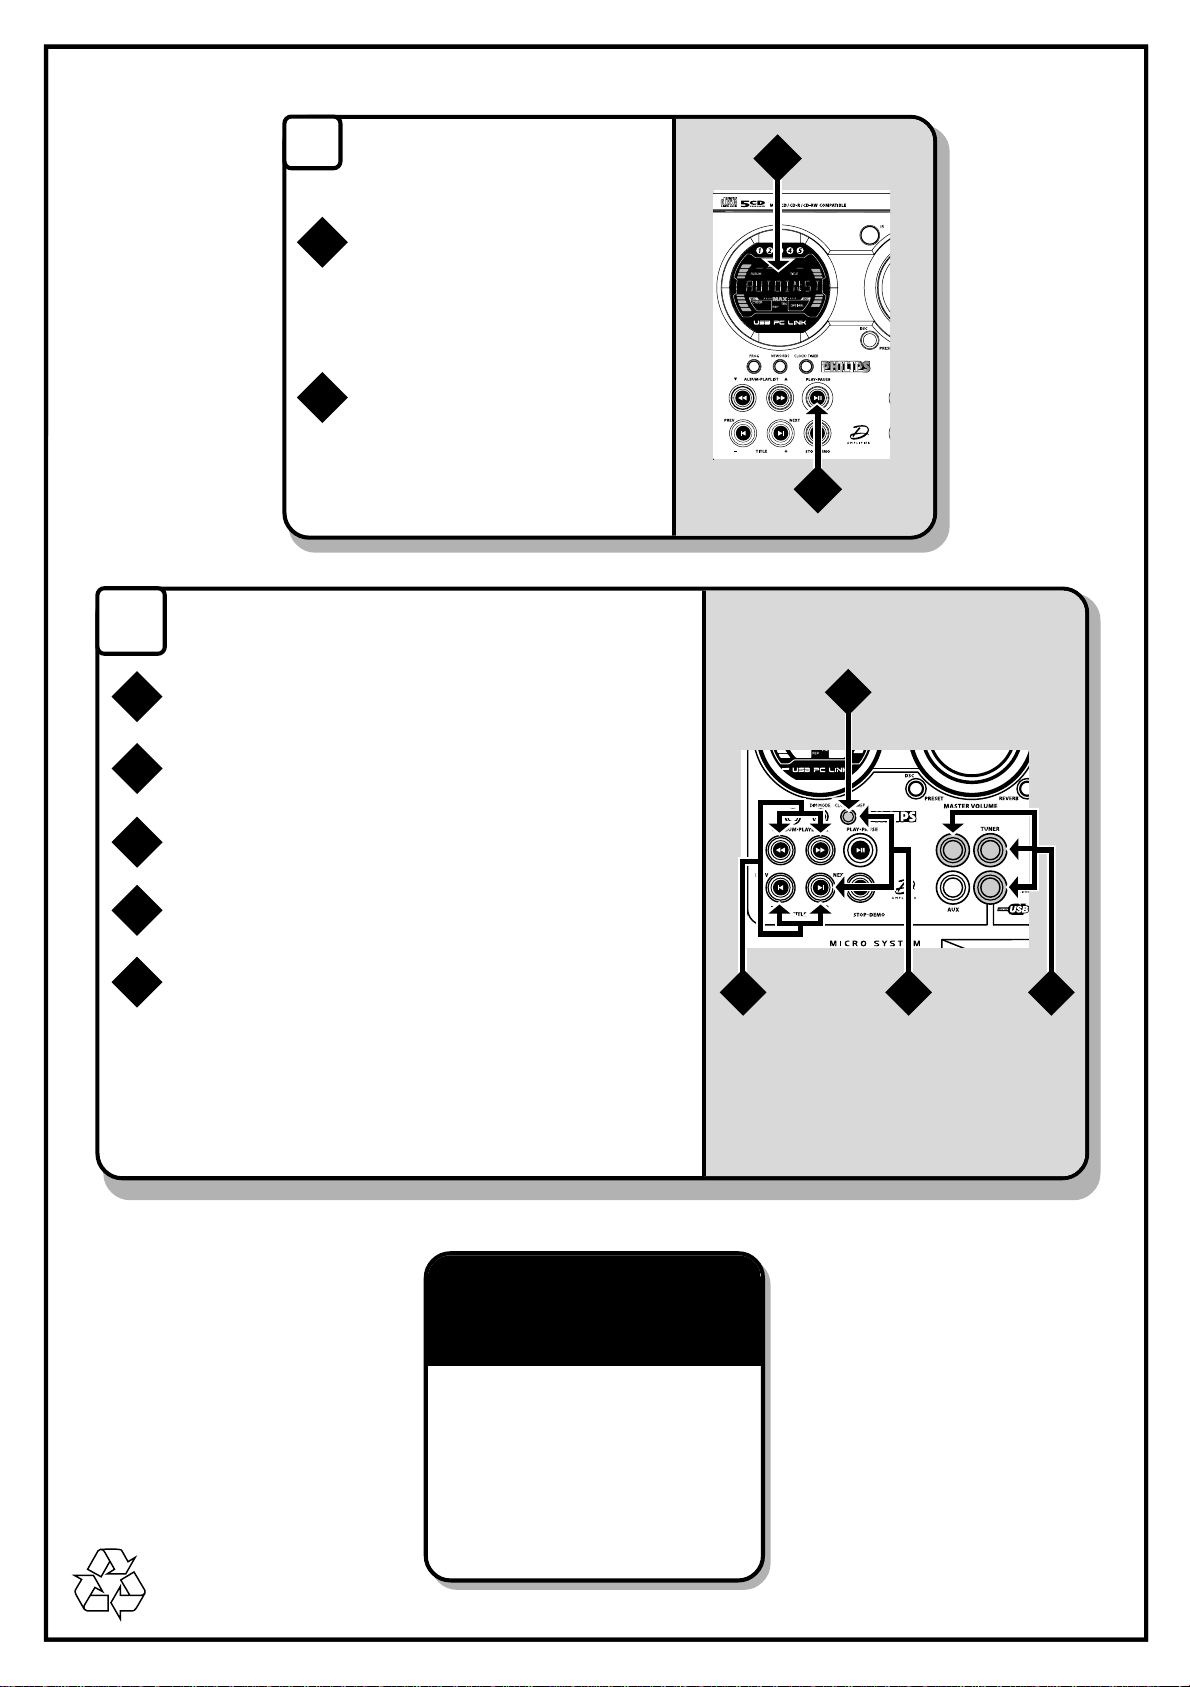
Timer Operations
1,5
324
C
Press and hold CLK/TIMER (or CLOCK•TIMER on main
1
unit) until “SELECT CLOCK OR TIMER” is displayed.
B
1
2
Tuner installationPlug and Play
When you turn on the mains supply,
"AUTO INSTALL - PRESS PLAY" is
displayed. Or in standby mode, press
and hold ÉÅ on the system, until
the message is displayed.
PressÉÅ on the system to start
installation automatically. "INSTALL"
is displayed. Once completed, the
last tuned radio station (or the first
available RDS station) will be played.
Press ë to change the display to “TIMER” and press
2
CLOCK•TIMER again to confirm.
Press CD or TUNER or USB PC LINK to select the
3
wake-up source.
Press à or á (for hours) and í or ë (for minutes)
4
repeatedly to set the wake-up time.
Press CLOCK•TIMER to store the setting.
5
To exit without storing the setting
● Press Çon the system.
Note:
Before setting the timer, ensure that the clock is set
correctly.
For more detailed
instrustions, see the following
pages in the User Guide.
USB PC Link .............................. 12~14
Philips Sound Agent 2 ..................... 14
Basic Operations ...................... 15~16
Disc Operations........................ 17~19
Tuner Operations ..................... 20~21
Timer Operations .................... 22~23
Tr oubleshooting ........................25~26
 Loading...