

Philips HS 190 BROCHURE
HS190

2

ENGLISH 4
한국어 12
BAHASA MELAYU 21
繁體中文 29
简体中文 36
HS190

4
ENGLISH
Important
Read this user manual carefully before you use the
appliance and save it for future reference.
Keep the appliance dry.
This appliance is not intended for use by persons
(including children) with reduced physical, sensory
or mental capabilities, or lack of experience
and knowledge, unless they have been given
supervision or instruction concerning use of the
appliance by a person responsible for their safety.
Children should be supervised to ensure that they
do not play with the appliance.
Use and store the appliance at a temperature
between 5°C and 35°C.
Electromagnetic elds (EMF)
This Philips appliance complies with all standards
regarding electromagnetic elds (EMF). If handled
properly and according to the instructions in this
user manual, the appliance is safe to use based on
scientic evidence available today.
Inserting batteries
The appliance runs on two R6 AA 1.5-volt batteries.
Preferably use Philips alkaline batteries.
Make sure that your hands are dry when inserting
the batteries.
1 Remove the cap of the battery compartment
by pushing on the rib of the cap (1) and then
lifting the cap off the appliance (2).

ENGLISH 5
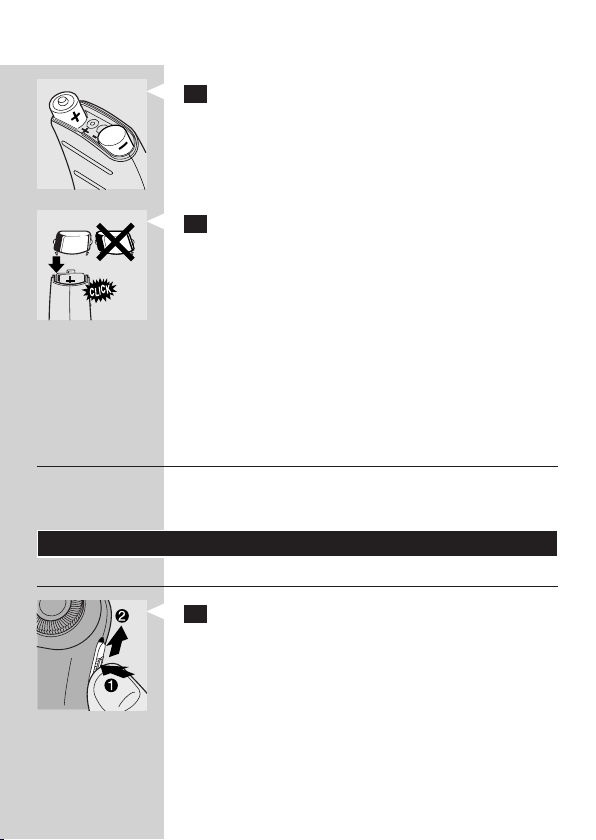
2 Place two batteries in the battery
compartment.
Make sure the + and - indications on the batteries
match the indications in the battery compar tment.
The shaver does not work if the batteries have been
placed incorrectly.
3 Put the cap of the battery compartment back
onto the appliance.
The cap only ts onto the appliance in one way (you
will hear a click).
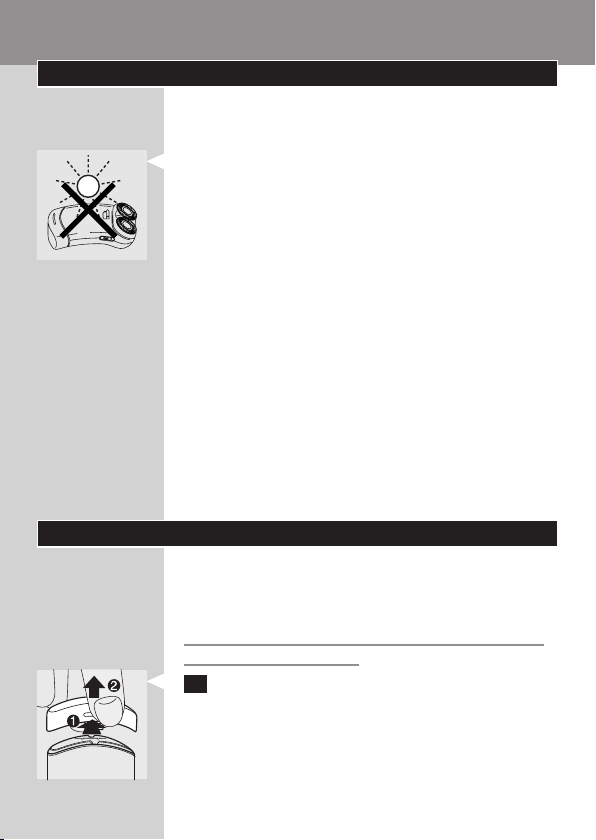
To avoid damage due to battery leakage:
,
do not expose the appliance to temperatures
higher than 35 cC;
remove the batteries if the appliance is not going
to be used for a month or more;
do not leave empty batteries in the appliance.
-
Cordless shaving time
Two new batteries offer a cordless shaving time of
60 minutes.
Using the appliance
Shaving
1 Switch on the shaver by pressing the switch
lock (1) and pushing the on/off slide upwards
(2).

ENGLISH6
2 Move the shaving heads quickly over your skin,
making both straight and circular movements.
Shaving on a dry face gives the best results.
Your skin may need 2 or 3 weeks to get accustomed
to the Philips shaving system.
3 Switch off the shaver by pushing the on/off
slide downwards.
4 Put the protection cap on the shaver every
time you have used it, to prevent damage.
Cleaning and maintenance
Regular cleaning guarantees better shaving
performance.
For easy and optimal cleaning, the Philips Action
,
Clean (shaving head cleaner, type HQ100) is
available. Ask your Philips dealer for information.
Note: The Philips Action Clean may not be available in
all countries. Contact the Customer Care Centre in your
country about the availability of this accessory.
You can also clean the shaver in the following way:
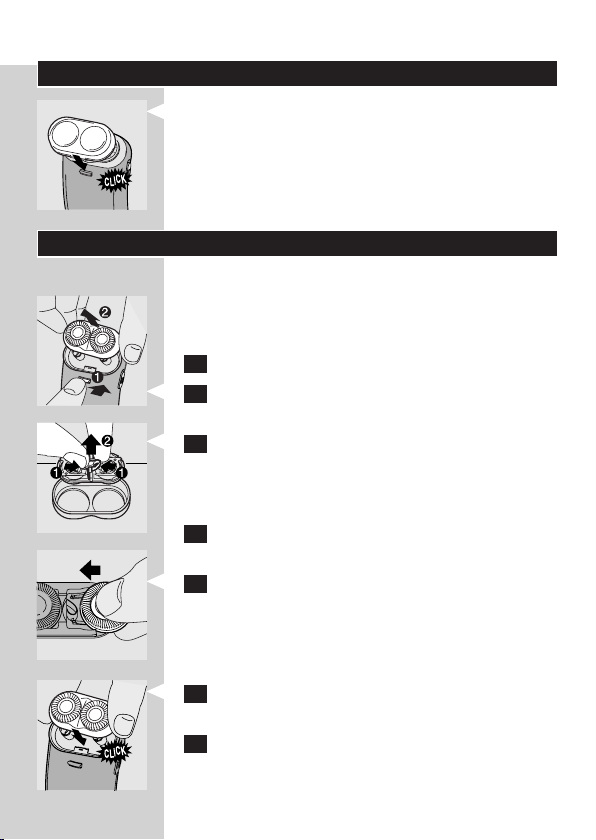
Every week: shaving unit and hair chamber
1 Switch off the shaver.
2 Cleanthetopoftheappliancerst,usingthe
brush supplied.

ENGLISH 7
3 Press the release button (1) and remove the
shaving unit (2).
4 Clean the inside of the shaving unit and the
hair chamber with the brush.
5 Put the shaving unit back onto the shaver.
Every two months: shaving heads
1 Switch off the shaver.
2 Press the release button (1) and remove the
shaving unit (2).
3 Remove the retaining frame by pushing the
sides of the central spring towards each other
(1) and lifting the retaining frame out of the
shaving unit (2).

ENGLISH8
4 Slide the shaving heads out of the retaining
frame and clean them one by one.
Hold your nger underneath the shaving head to
prevent the cutter from falling out.
Do not mix up the cutters and the guards.
This is essential since each cutter has been
ground with its corresponding guard for optimal
performance. If you accidentally mix the sets up, it
could take several weeks before optimal shaving
performance is restored.
5 Clean the cutter with the short-bristled side of
the brush.
Brush carefully in the direction of the arrow.
6 Brush the guard.
7 Slide the shaving heads back into the retaining
frame and put the retaining frame back into the
shaving unit.
8 Put the shaving unit back onto the shaver.
For extra thorough cleaning, clean the shaving
,
heads by putting them in a degreasing liquid (e.g.
alcohol) every six months. To remove the shaving
heads, follow steps 1 to 4 described above. After
cleaning, lubricate the central point on the inside
of the guards with a drop of sewing machine oil
to prevent wear of the shaving heads.
ENGLISH 9
Storage
Put the protection cap on the shaver to prevent
,
damage.
Replacement
Replace the shaving heads every two years for
optimal shaving results.
Replace damaged or worn shaving heads with HQ4
Ç Philips shaving heads only.
1 Switch off the shaver.
2 Press the release button (1) and remove the
shaving unit (2).
3 Remove the retaining frame by pushing the
sides of the central spring towards each other
(1) and lifting the retaining frame out of the
shaving unit (2).
4 Slide the shaving heads out of the retaining
frame.
5 Slide new shaving heads into the retaining
frame.
6 Put the retaining frame back into the shaving
unit.
7 Put the shaving unit back onto the shaver.

ENGLISH10
Accessories
The following accessories are available:
HQ4 Ç Philips shaving heads.
HQ100 Philips Shaving Head Cleaner (not
available in China).
HQ101 Philips Shaving Head Cleaning Fluid (not
available in China).
HQ110 Philips Shaving Head Cleaning Spray (not
available in China).
Environment
Batteries contain substances that may pollute the
environment. Remove the batteries when they
are empty or when you discard the appliance. Do
not throw away the batteries with the normal
household waste, but hand them in at an ofcial
collection point.
Do not throw away the appliance with the normal
household waste at the end of its life, but hand
it in at an ofcial collection point for recycling. By
doing this, you help to preserve the environment.
Guarantee & service
If you need information or if you have a problem,
please visit the Philips website at www.philips.com
or contact the Philips Customer Care Centre
in your country (you nd its phone number in
the worldwide guarantee leaet). If there is no
Customer Care Centre in your country, go to
your local Philips dealer or contact the Service
Department of Philips Domestic Appliances and
Personal Care BV.

ENGLISH 11
Guarantee restrictions
The shaving heads (cutters and guards) are not
covered by the terms of the international guarantee
because they are subject to wear.
Frequently asked questions
1
Why doesn’t the shaver shave as well as it used
to?
The shaver may not have been cleaned properly.
,
Thoroughly clean the shaver (see chapter
‘Cleaning and maintenance’).
Long hairs may be obstructing the shaving
,
heads. Clean the cutters and guards with the
brush supplied (see chapter ‘Cleaning and
maintenance’).
The shaving heads may be damaged or
,
worn. Replace the shaving heads (see chapter
‘Replacement’).
2 Why doesn’t the shaver work when the on/off
slide is pushed upwards?
The batteries may be empty. Replace the
,
batteries (see chapter ‘Inserting the batteries’).
12
한국어
중요사항
본 제품을 사용하기 전에 이 사용 설명서를 주
의 깊게 읽고 나중에 참조할 수 있도록 잘 보관
하십시오.
제품에 물이 묻지 않도록 주의하십시오.
-
신체적인 감각 및 정신적인 능력이 떨어지거
-
나 경험과 지식이 풍부하지 않은 사용자(어
린이 포함)는 혼자 제품을 사용하지 말고 제
품 사용과 관련하여 안전에 책임 질 수 있도
록 지시사항을 충분히 숙지한 사람의 도움을
받으십시오.
어린이가 제품을 가지고 놀지 못하도록 지도
-
해 주십시오.
제품은 5°C - 35°C 사이의 온도에서 사
-
용 및 보관하는 것이 적합합니다.
EMF(전자기장)
이 필립스 제품은 EMF(전자기장)와 관련된 모
든 기준을 준수합니다. 이 사용 설명서의 지침
에 따라 적절하게 취급할 경우 이 제품은 안전
하게 사용할 수 있으며 이는 현재까지의 과학
적 증거에 근거하고 있습니다.
배터리 삽입
이 제품은 2개의 R6 AA 1.5V 배터리로 작동됩
니다. 필립스 알칼리 건전지를 사용하는 것이
가장 좋습니다.
배터리를 삽입할 때에는 반드시 손이 마른 상
태인지 확인하십시오.
1 뚜껑의 가로대를 눌러 배터리함의 뚜껑을
열은 다음(1) 뚜껑을 들어올려 제품에서 분
리하십시오(2).
한국어 13
2 배터리함에 배터리 2개를 넣으십시오.
배터리함에 표시된 배터리의 극성(+/-)에 맞
게 끼우십시오.
배터리를 잘못 넣으면 면도기가 작동하지 않
습니다.
3 배터리함의 뚜껑을 제품에 다시 끼우십시
오.
뚜껑은 한쪽 방향으로만 끼울 수 있습니다
(‘딸각’ 소리가 들림).
배터리 누액에 의한 손상 방지:
,
35cC도 이상의 고온에 노출시키지 마십시
-
오.
한 달 이상 제품을 사용하지 않을 경우에는
-
배터리를 꺼낸 후 보관하십시오.
수명이 다 된 배터리를 제품에 넣은 상태로
-
두지 마십시오.
무선 면도 시간
새 배터리 2개로 약 60분간 무선으로 면도할
수 있습니다.
제품 사용
면도
1 스위치 잠금 장치(1)를 누르면서 전원 스위
치를 위로 밀어올려(2) 면도기를 켜십시오.

한국어14
2 쉐이빙 헤드를 피부에 대고 직선 또는 원을
그리듯이 고루 문지르십시오.
피부가 건조한 상태에서 사용하시면 면도가 더
잘 됩니다.
필립스 면도 시스템에 피부가 익숙해지려면 약
2-3주 정도 걸립니다.
3 전원 버튼을 아래로 밀어서 면도기를 끄십
시오.
4 쉐이빙 헤드가 손상되지 않도록 사용 후 항
상 보호용 캡을 씌우십시오.
청소 및 유지관리
면도기를 정기적으로 청소하면 더 좋은 면도
효과를 얻을 수 있습니다.
필립스 액션 클린(쉐이빙 헤드 세척기, 모델
,
명 HQ100)을 이용하면 쉽게 말끔히 세척할
수 있습니다. 면도기 구입처나 필립스 고객
상담실로 문의하십시오.
참고: 필립스 액션 클린을 구입하시려면 필립
스 고객 상담실로 문의하십시오. *고객 상담
실: (080)600-6600 (수신자부담), (02)7091200
다음과 같은 방법으로 면도기를 청소할 수도
있습니다.
매주: 쉐이빙유닛과 수염받이
1 면도기를 끄십시오.
 Loading...