

Page 1
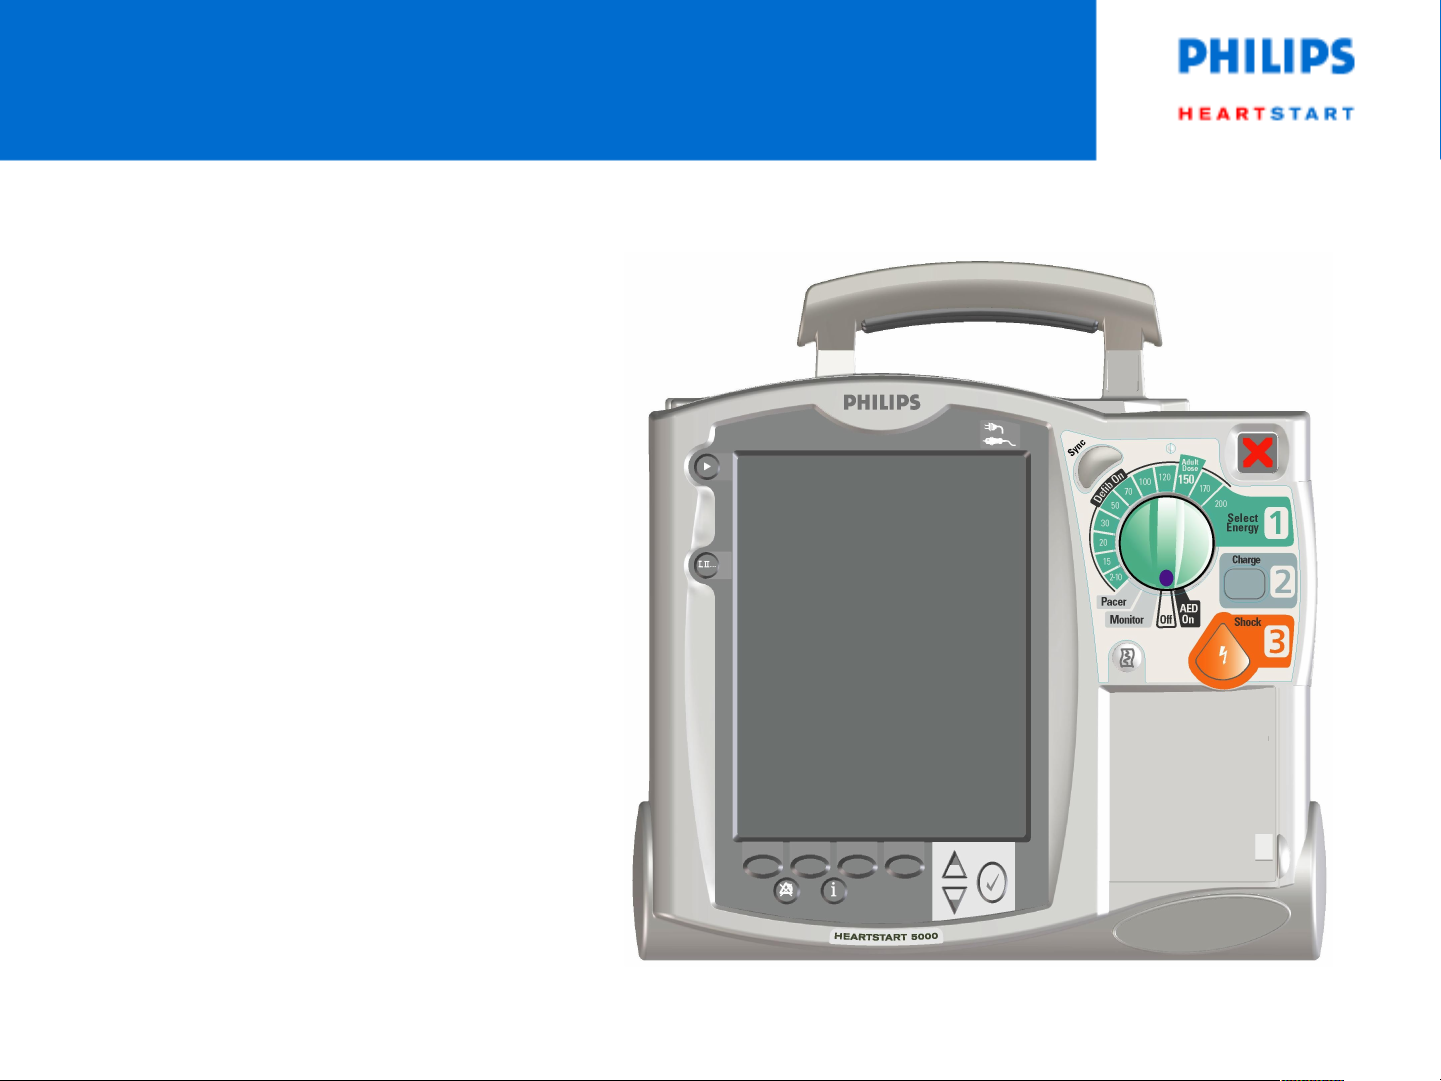
Maintenance
Page 2

Maintenance Activities
•
Observe Ready for Use indicator.
•
Perform Operational Checks.
•
Care for batteries.
•
Clean MRx and order supplies and accessories.
Call service for calibration of CO2 and NBP.
•
Page 3

Automated Tests
Test Name Description: Frequency
Hourly Tests batteries &/or internal
power supplies.
Daily Hourly plus defib (low energy
internal discharge), pacing, ECG
SpO2, CO2, NBP and printer.
ECG cable, if attached.
Weekly Daily plus delivers a high energy
internal discharge.
Hourly.
Daily, at
midnight.
Weekly on
Sunday, at
midnight.
Page 4
Automated Test Summary
•
Can print automatically at
completion of tests.
•
Print at other times by
selecting Other from the
main menu, then
Operational Check, then
Automated Test Summary.
Page 5

Automated Test Summary Results
Result Definition Required Action
Pass All tests passed. None
CF A critical failure was detected.
Critical failures impact lifesaving
functionality (defibrillation, pacing,
ECG acquisition). RFU displays a
solid red “X” and chirps.
NCF A non-critical failure was
detected. Non-critical failures do
not impact life-saving functions.
Respond to the RFU
indicator.
Turn the MRx to
Monitor and observe
the inop statement(s).
Page 6

Ready For Use Indicator
Blinking Black Hourglass – shock, pacing, and
ECG are ready for use and sufficient battery power is
available.
Blinking Red X with a periodic chirp – low battery that is
X
X
not being charged.
Blinking Red X without a periodic chirp – low battery
that is being charged.
Solid Red X with a chirp – a failure has been detected
that prevents delivery of a shock, pacing, or ECG
acquisition.
Solid Red X without a chirp – No power or device failure.
Page 7

Operational Check
1. Performs a Weekly test plus verifies:
Therapy cables
•
ECG cables
•
Paddles
•
2. Prompts for check of supplies and accessories.
•
Buttons
•
Audio
•
Display
3. Notifies you if NBP or CO2 calibration is due.
4. Should be performed at least daily.
Page 8

Performing an Operational Check
1. Disconnect from AC/DC power.
2. Attach pads or paddles.
3. Attach an ECG cable.
4. Turn the Therapy Knob to Monitor.
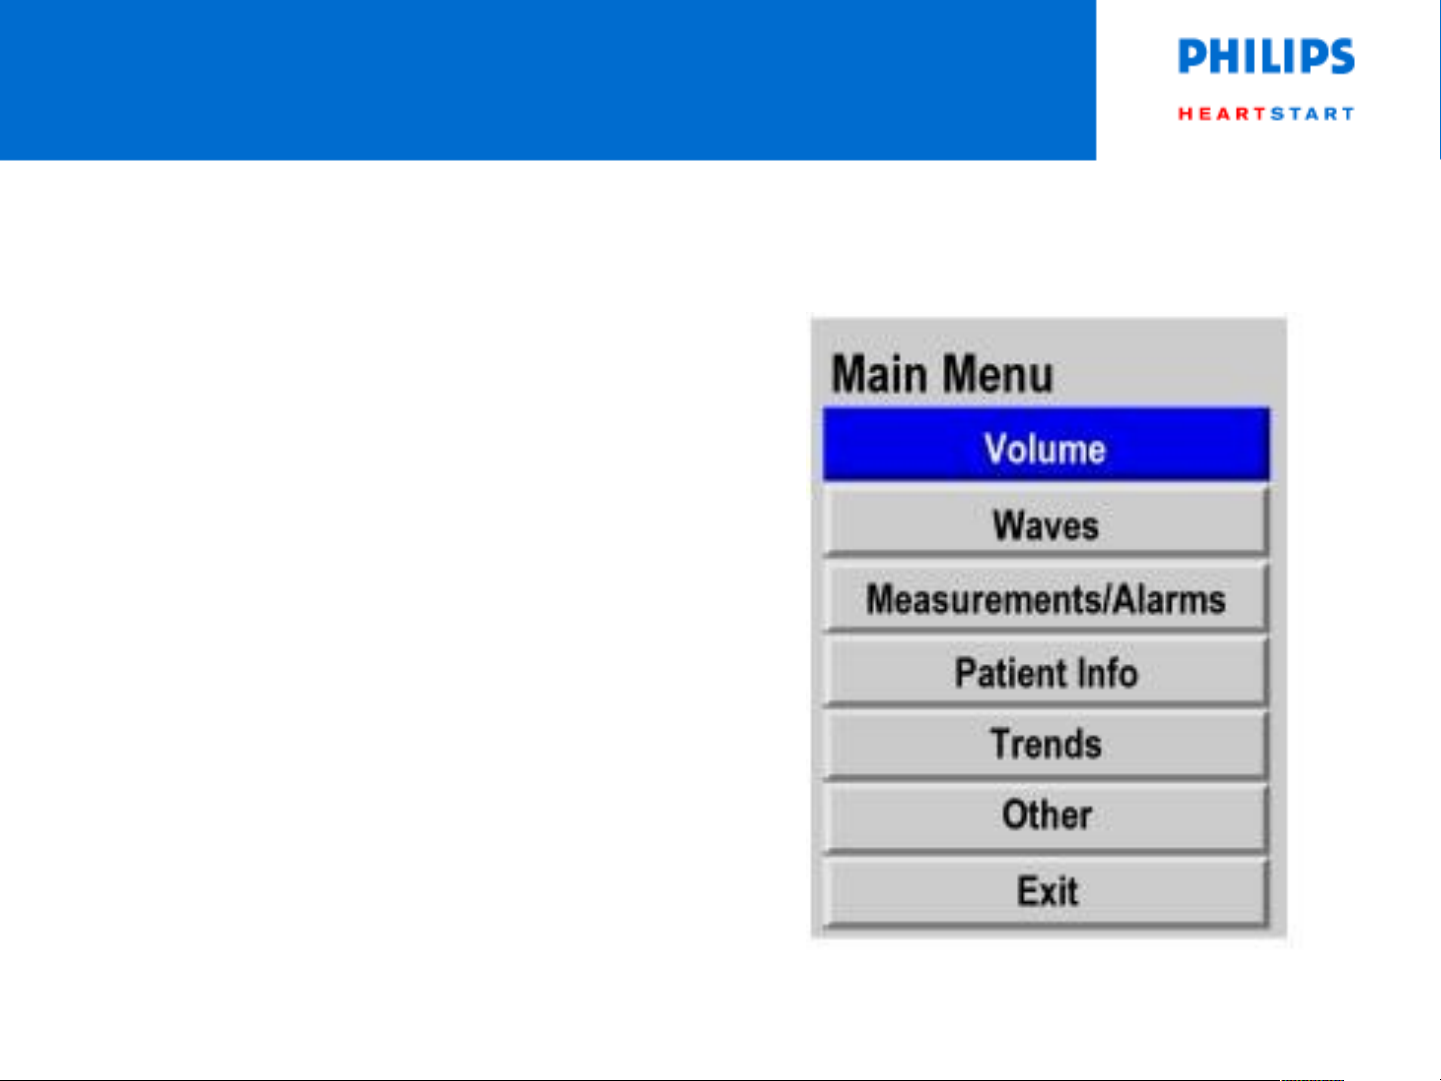
5. Select Other from the Main menu.
6. Select Run Operational Check.
7. Respond to the prompts.
Page 9

Operational Check (cont.)
•
Tests are displayed as they
run.
•
Be sure to test all therapy
cables used.
•
Rerun the check if additional
ECG cables need to be tested.
•
Refer to the Instructions for Use
on actions to take for failed
tests.
•
Batteries pass if > 20%
capacity.
Page 10

Operational
Check Report
Page 11

User Checks
•
Defibrillator – clean, no damage.
•
Cables/connectors/paddles/electrodes – no cracks, broken
wires, damage; good connections; not expired.
•
Batteries – charged and spare available.
•
AC Power – indicator lights when no battery.
•
Printer paper – sufficient paper and acceptable print quality.
•
Data card – inserted, if needed.
•
SpO2 sensor/cable – no damage.
•
NBP cuff and tubing – no damage
•
CO2 FilterLine – unopened, sterile package available.
Page 12

Operational Check Summary
Shows results of the last 60 Operational Checks.
To print:
1. Select Other from the Main menu.
2. Select Op Check Summary.
3. Press the [Print] soft key.
Page 13

Battery Maintenance
Activity When to Perform
Perform a visual inspection. As part of the Operational Check.
Charge the battery. Upon receipt, after use, or if the
message Batteries Low is displayed.
Perform a calibration. When the Operational Check test results
state Calibration recommended, or every
6 months.
Store batteries in a state of
charge in the range of 20% 30%.
Discard the battery. When there are visual signs of damage
When not in use for an extended period
of time
or calibration reports less than 70%
capacity.
Page 14

Charging Batteries
•
Charge in either the MRx or a Philips approved
battery support system.
•
When charging in the MRx, use either AC or DC
power.
•
The External Power indicator is lit when the MRx
is charging.
•
It takes approximately 2 hours to charge a fully
discharged battery to 80% of its capacity in the
MRx; 3 hours to 100%.
Page 15

Charge Status
Check the batteries charge by:
•
Pushing the battery fuel gauge button. Each LED
represents a charge of approximately 20%
capacity.
•
Turning the Therapy Knob to any mode of
operation and observing the battery power
indicators displayed in the General Status area.
Page 16

Battery Calibration
•
Checks to see if the battery is nearing its useful end of life
and should be discarded.
•
Ensures the fuel gauge is accurate, based on the total
capacity.
•
Performed by selecting Other from the Main menu, then
Battery Calibration.
•
Takes approximately 11 hours in the MRx, significantly
less in a battery a battery support system.
•
Discard the battery if the capacity is < 70%.
 Loading...