

Philips HDR1000, HDR1000-01 User Manual

TABLE OF CONTENTS
INFORMATION . . . . . . . . . . . . . . . . . . . . . . . 2
LASER SAFETY. . . . . . . . . . . . . . . . . . . . . . 2
IMPORTANT SAFEGUARDS . . . . . . . . . . . . 3
PRECAUTIONS . . . . . . . . . . . . . . . . . . . . . . 4
FEATURES . . . . . . . . . . . . . . . . . . . . . . . . . . 7
ABOUT THE DISCS . . . . . . . . . . . . . . . . . . . 8
HANDLING PRECAUTIONS . . . . . . . . . . . . . 9
OPERATING CONTROLS AND FUNCTIONS
. . 10
CONNECTIONS . . . . . . . . . . . . . . . . . . . . . 12
• ANTENNA CONNECTION . . . . . . . . . . . . . . . . . . . 12
• SCART (EURO A/V) CONNECTORS . . . . . . . . . . . 12
• CONNECT TO A TV WITH Y/C INPUT
CONNECTOR OR STEREO SYSTEM . . . . . . . . . . 12
• EXTERNAL INPUT MODE . . . . . . . . . . . . . . . . . . . 12
• CONNECT TO AN AMPLIFIER EQUIPPED
WITH DIGITAL INPUT CONNECTORS . . . . . . . . . 13
• CONNECT TO A DOLBY DIGITAL DECODER,
DTS DECODER, OR MPEG DECODER . . . . . . . . 14
INITIAL SETTINGS . . . . . . . . . . . . . . . . . . . 15
CHANGE THE SETTINGS . . . . . . . . . . . . . 16
• CLOCK SETTING . . . . . . . . . . . . . . . . . . . . . . . . . 16
• LANGUAGE SETTING. . . . . . . . . . . . . . . . . . . . . . 18
• TIME SHIFT. . . . . . . . . . . . . . . . . . . . . . . . . . . . . . 19
• SKIP TIME SETTING. . . . . . . . . . . . . . . . . . . . . . . 20
• TUNER SETUP . . . . . . . . . . . . . . . . . . . . . . . . . . . 21
• MODULATOR SETUP . . . . . . . . . . . . . . . . . . . . . . 23
HDD RECORDING . . . . . . . . . . . . . . . . . . . 24
• MANUAL RECORDING . . . . . . . . . . . . . . . . . . . . . 24
• OTR (One Touch Recording) . . . . . . . . . . . . . . . . . 24
• RECORDING ONE PROGRAM WHILE
VIEWING ANOTHER VIA THE TV . . . . . . . . . . . . . 24
• SET THE TITLE NAME . . . . . . . . . . . . . . . . . . . . . 24
• SELECT THE RECORDING MODE . . . . . . . . . . . . 24
HDD NAVIGATION . . . . . . . . . . . . . . . . . . . 25
• PLAYBACK VIDEO TITLES . . . . . . . . . . . . . . . . . . 25
• SPECIAL PLAYBACK. . . . . . . . . . . . . . . . . . . . . . . 25
• RESUMING PLAYBACK. . . . . . . . . . . . . . . . . . . . . 25
• DELETE TITLE STORED ON HDD . . . . . . . . . . . . 25
TIMER RECORDING . . . . . . . . . . . . . . . . . 26
• AUTOMATIC TIMER RECORDING . . . . . . . . . . . . . 26
• TIMER REVIEW. . . . . . . . . . . . . . . . . . . . . . . . . . . 29
THE SHOWVIEW®SYSTEM . . . . . . . . . . . . . . 30
• TIMER RECORDING USING THE
S
HOWVIEW SYSTEM . . . . . . . . . . . . . . . . . . . . . . . 30
VPS (Video Program System) /
PDC (Program Delivery Control). . . . . . . . 31
THE INFORMATION DISPLAY . . . . . . . . . . 32
RECORDING FROM DVD DISC TO HDD
. . . 33
DVD OPERATION . . . . . . . . . . . . . . . . . . . . 34
• PLAYING A DVD VIDEO, AN AUDIO CD, OR
A VIDEO CD . . . . . . . . . . . . . . . . . . . . . . . . . . . . . 34
• DISC MENUS . . . . . . . . . . . . . . . . . . . . . . . . . . . . 34
• TITLE MENU . . . . . . . . . . . . . . . . . . . . . . . . . . . . . 34
• PAUSE. . . . . . . . . . . . . . . . . . . . . . . . . . . . . . . . . . 35
• STEP BY STEP PLAYBACK . . . . . . . . . . . . . . . . . 35
• RESUME . . . . . . . . . . . . . . . . . . . . . . . . . . . . . . . . 35
• FAST FORWARD/REVERSE SEARCH . . . . . . . . . 35
• SLOW MOTION. . . . . . . . . . . . . . . . . . . . . . . . . . . 35
• ZOOM . . . . . . . . . . . . . . . . . . . . . . . . . . . . . . . . . . 36
• STARTING FROM A DESIRED TRACK . . . . . . . . . 36
• TITLE/CHAPTER . . . . . . . . . . . . . . . . . . . . . . . . . . 36
• TIME SEARCH . . . . . . . . . . . . . . . . . . . . . . . . . . . 36
• REPEAT PLAYBACK . . . . . . . . . . . . . . . . . . . . . . . 37
• REPEAT TRACK . . . . . . . . . . . . . . . . . . . . . . . . . . 37
• A-B REPEAT . . . . . . . . . . . . . . . . . . . . . . . . . . . . . 37
• PROGRAM . . . . . . . . . . . . . . . . . . . . . . . . . . . . . . 37
• RANDOM PLAYBACK . . . . . . . . . . . . . . . . . . . . . . 37
• MP3 PLAYBACK . . . . . . . . . . . . . . . . . . . . . . . . . . 38
• DISPLAY INFORMATION(MP3) . . . . . . . . . . . . . . . 38
• TRACK SELECTION(MP3). . . . . . . . . . . . . . . . . . . 38
• RANDOM PLAYBACK(MP3) . . . . . . . . . . . . . . . . . 38
• PROGRAM(MP3). . . . . . . . . . . . . . . . . . . . . . . . . . 38
• AUDIO LANGUAGE . . . . . . . . . . . . . . . . . . . . . . . . 39
• STEREO SOUND MODE. . . . . . . . . . . . . . . . . . . . 39
• SUBTITLE LANGUAGE . . . . . . . . . . . . . . . . . . . . . 39
• CAMERA ANGLE . . . . . . . . . . . . . . . . . . . . . . . . . 39
• CHANGE THE ON-SCREEN DISPLAY. . . . . . . . . . 39
• PARENTAL LOCK . . . . . . . . . . . . . . . . . . . . . . . . . 40
• PARENTAL LEVEL. . . . . . . . . . . . . . . . . . . . . . . . . 40
• MARKER SETUP SCREEN . . . . . . . . . . . . . . . . . . 41
CHANGE THE DVD PLAYER SETTINGS . . 42
• AUDIO SETTINGS FOR DVD. . . . . . . . . . . . . . . . . 42
• TRUSURROUND SETTING . . . . . . . . . . . . . . . . . . 42
• DISPLAY SETTINGS . . . . . . . . . . . . . . . . . . . . . . . 43
• LANGUAGE SETTINGS. . . . . . . . . . . . . . . . . . . . . 44
TROUBLESHOOTING GUIDE. . . . . . . . . . . 45
SPECIFICATIONS. . . . . . . . . . . . . . . . . . . . 46
SUPPLIED ACCESSORIES . . . . . . . . . . . . 46
– 6 –
EN / 2A01
INFORMATION
CLASS 1
LASER PRODUCT
CAUTION - VISIBLE LASER
RADIATION WHEN OPEN AND
INTERLOCK DEFEATED.
AVOID EXPOSURE TO BEAM.
This unit employs TruSurround system
of SRS Labs, Inc. as virtual technology.
TruSurround and symbol are trademarks of
SRS Labs, Inc.
TruSurround technology is incorporated under license
from SRS Labs, Inc.
R
Congratulations on purchasing your new Hard Disc Video Recorder with DVD Player (HDR1000). Spare a
few moments to read this instruction manual to get better results, and to avoid any costly mistakes.
WARNING:
TO REDUCE THE RISK OF FIRE OR ELECTRIC SHOCK, DO NOT EXPOSE THIS APPLIANCE TO RAIN
OR MOISTURE.
The lightning flash with arrowhead symbol,
CAUTION
RISK OF ELECTRIC SHOCK
DO NOT OPEN
CAUTION:
TO REDUCE THE RISK OF ELECTRIC SHOCK, DO
NOT REMOVE COVER (OR BACK). NO USER SERVICEABLE PARTS INSIDE. REFER SERVICING TO
QUALIFIED SERVICE PERSONNEL.
SHOWVIEW is a registered trademark of Gemstar
Development Corporation.
The SHOWVIEW system is manufactured under licence
from Gemstar Development Corporation.
within an equilateral triangle, is intended to
alert the user to the presence of uninsulated
“dangerous voltage” within the product’s
enclosure that may be of sufficient magnitude to constitute a risk of electric shock to
persons.
The exclamation point within an equilateral
triangle is intended to alert the user to the
presence of important operating and maintenance (servicing) instructions in the literature
accompanying the appliance.
LASER SAFETY
This unit employs a laser. Only a qualified service person should remove the cover or attempt to service this
device, due to possible eye injury.
CAUTION: USE OF CONTROLS OR ADJUST-
MENTS OR PERFORMANCE OF PROCEDURES OTHER THAN THOSE SPECIFIED HEREIN MAY RESULT IN HAZARDOUS RADIATION EXPOSURE.
CAUTION: VISIBLE LASER RADIATION WHEN
OPEN AND INTERLOCK DEFEATED.
AVOID EXPOSURE TO BEAM.
Manufactured under license from Dolby Laboratories.
“Dolby” and the double-D symbol are trademarks of
Dolby Laboratories.
“DTS” and “DTS Digital Out” are trademarks of Digital
Theater Systems, Inc.
LOCATION:
* PRINTED ON THE BACK
* INSIDE, TOP OF THE MECHANISM
– 2 –
EN / 2A01

1) Read Instructions - All the safety and operating
PORTABLE CART WARNING
(Symbol provided by RETAC)
S3125A
2) Retain Instructions - The safety and operating
3) Heed Warnings - All warnings on the product and
4) Follow Instructions - All operating and use
5) Cleaning - Unplug this product from the wall out-
6) Water and Moisture - Do not use this product
7) Accessories - Do not place this product on an
8) A product and cart combination
9) Ventilation - Slots and openings in the cabinet are
10) Power Sources - This product should be operated
11) Lightning - For added protection for this product
instructions should be read before the product is
operated.
instructions should be retained for future reference.
in the operating instructions should be adhered
to.
instructions should be followed.
let before cleaning. Do not use liquid cleaners or
aerosol cleaners. Use a damp cloth for cleaning.
near water - for example, near a bath tub, wash
bowl, kitchen sink, or laundry tub; in a wet basement; or near a swimming pool; and the like.
unstable cart, stand, tripod, bracket, or table. The
product may fall, causing serious injury to a child
or adult, and serious damage to
the product.
should be moved with care.
Quick stops, excessive force,
and uneven surfaces may cause
the product and cart combination to overturn.
provided for ventilation and to ensure reliable
operation of the product and to protect it from
overheating, and these openings must not be
blocked or covered. The openings should never
be blocked by placing the product on a bed, sofa,
rug, or other similar surface. This product should
not be placed in a built-in installation such as a
bookcase or rack unless proper ventilation is provided.
only from the type of power source indicated on
the marking label. If you are not sure of the type
of power supply to your home, consult your product dealer or local power company. For products
intended to operate from battery power, or other
sources, refer to the operating instructions.
during a lightning storm, or when it is left unattended and unused for long periods of time,
unplug it from the wall outlet and disconnect the
antenna or cable system. This will prevent damage to the product due to lightning and power-line
surges.
IMPORTANT SAFEGUARDS
12) Power lines - An outside antenna system should
not be located in the vicinity of overhead power
lines or other electric light or power circuits, or
where it can fall into such power lines or circuits.
When installing an outside antenna system,
extreme care should be taken to keep from touching such power lines or circuits as contact with
them might be fatal.
13) Overloading - Do not overload wall outlets, extension cords, or integral convenience receptacles
as this can result in a risk of fire or electric shock.
14) Object and Liquid Entry - Never push objects of
any kind into this product through openings as
they may touch dangerous voltage points or
short-out parts that could result in a fire or electric shock. Never spill liquid of any kind on the
product.
15) Servicing - Do not attempt to service this product
yourself as opening or removing covers may
expose you to dangerous voltage or other hazards. Refer all servicing to qualified service personnel.
16) Damage Requiring Service - Unplug this product
from the wall outlet and refer servicing to qualified
service personnel under the following conditions:
a) When the power-supply cord or plug is dam-
aged,
b) If liquid has been spilled, or objects have fallen
into the product,
c) If the product has been exposed to rain or
water,
d) If the product does not operate normally by fol-
lowing the operating instructions. Adjust only
those controls that are covered by the operating instructions as an improper adjustment of
other controls may result in damage and will
often require extensive work by a qualified
technician to restore the product to its normal
operation,
e) If the product has been dropped or damaged in
any way, and
f) When the product exhibits a distinct change in
performance - this indicates a need for service.
17) Replacement Parts - When replacement parts are
required, be sure the service technician has used
replacement parts specified by the manufacturer
or have the same characteristics as the original
part. Unauthorized substitutions may result in fire,
electric shock, or other hazards.
18) Safety Check - Upon completion of any service or
repairs to this product, ask the service technician
to perform safety checks to determine that the
product is in proper operating condition.
19) Heat - The product should be situated away from
heat sources such as radiators, heat registers,
stoves, or other products (including amplifiers)
that produce heat.
English
– 3 –
EN / 2A01

PRECAUTIONS
POWER SUPPLY
• The main power supply is engaged when the mains
plug is plugged into a 220-240V/50Hz AC outlet. To
operate the unit, press the STANDBY button to turn
on the unit.
WARNING:
LIVE PARTS INSIDE.
DO NOT REMOVE ANY SCREWS.
DEW WARNING
• Moisture condensation may occur inside the unit
when it is moved from a cold place to a warm place,
or after heating a cold room or under conditions of
high humidity. Do not use the unit for at least 2 hours
until the inside has dried out.
ABOUT COPYRIGHT
• Unauthorised copying, broadcasting, public performance and lending of discs are prohibited. This
product incorporates copyright protection technology that is protected by method claims of certain
U.S. patents and other intellectual property rights
owned by Macrovision Corporation and other rights
owners. Use of this copyright protection technology
must be authorised by Macrovision Corporation,
and is intended for home and other limited viewing
uses only unless otherwise authorised by
Macrovision Corporation. Reverse engineering or
disassembly is prohibited.
A NOTE ABOUT RECYCLING
This product’s packaging materials are recyclable and
can be reused. Please dispose of any materials in
accordance with your local recycling regulations.
Batteries should never be thrown away or incinerated
but disposed of in accordance with your local regulations concerning chemical wastes.
DECLARATION OF CONFORMITY
This product complies with the requirement of the
directives
EMC-Directive: 89 / 336 / EEC
Low Voltage Directive: 73 / 23 / EEC
CE Marking: 93 / 68 / EEC
declare that the
HDR1000
are in compliance with following norms:
EN 55013:1990+A12:1994+A13:1996+A14:1999
EN 55020:1994+A11:1996+A12:1999+A13:1999+A14:1999
EN 61000-3-2/ 1995+A1:1998+A2:1998+A14:2000
EN 61000-3-3/ 1995
EN 60065:1998
– 4 –
EN / 2A01

PRECAUTIONS
CAUTION
1) Do not attempt to open the cabinet. There are no
parts you can service inside. Refer all servicing to
qualified service personnel.
2) Slot and openings in the cabinet and at the side or
bottom are provided for ventilation. To ensure reliable
operation and to protect the unit from overheating
these opening must not be blocked or covered. Avoid
enclosed spaces such as book cases unless proper
ventilation is provided.
3) Keep the unit away from the radiator heat sources.
4) Avoid using near strong magnetic fields.
5) Do not push objects of any kind through the cabinet
slot as they could touch current carrying parts or short
circuit parts resulting in a fire or electric shock.
6) Never spill liquid of any kind on this unit.
If liquid is spilled into the unit, consult a qualified service engineer.
7) Use this unit in a horizontal (flat) position only.
8) This unit is in Stand-by mode when it turns off whilst
the power cord is connected.
9) This equipment may generate or use radio frequency
energy. Changes or modifications to this equipment may
cause harmful interference unless the modifications are
expressly approved in the instruction manual. The user
could lose the authority to operate this equipment if an
unauthorised change or modification is made.
SYMBOLS USED IN THIS MANUAL
The following symbols appear below in some
headings and notes in this manual, with the following meanings!
:Description refers to playback of DVD video discs.
:Description refers to playback of audio CDs.
:Description refers to playback of VIDEO CDs.
:Description refers to playback of Hard Disc Video
Recorder.
:Description refers to playback of MP3 Discs.
English
BUILT-IN HARD DISC
This unit has a built-in hard disc. The hard disc is
susceptible to environmental conditions such as
shocks, vibrations and temperature. There may be
cases where recorded data is damaged. Take the following precautions.
• Avoid physical shock or vibrations.
• Do not use the unit in any vibratory or unstable area.
• Do not block the ventilation hole for the internal
cooling fan (rearside).
• Do not use the unit in any area where the tempera-
ture is high or temperature changes rapidly.
• Do not disconnect the mains plug from the wall out-
let with the unit turned on.
• Do not disconnect the mains plug from the wall out-
let or do not turn off this unit during recording or
playback. Be sure to press STANDBY button to
complete the termination process and turn off the
power to the unit completely before disconnecting
the mains plug.
• We assume no responsibility for damage or loss
of recorded data caused by shock, vibration or
malfunction.
– 5 –
EN / 2A01

• On-screen display
Information about the current operation can be displayed on a TV screen.
mode
• PLL Synthesiser Tuner with 99 Presets.
• Time Shift Playback
You can playback a title even before the recording is
finished.
• 1 Year, 20 Events Timer Recording
The built-in timer allows you to record up to 20 programs at different times on different programs up to 1
year in advance. The daily timer
from Monday through Friday, and the weekly timer
allows recording to be made once a week. The
episode setting allows recording of the same preset
allows recordings
for programmed times, -starting at the same time
and records for the same length of time.
• The SHOWVIEW System
You can program the timer recording using the
SHOWVIEW programming number that is printed in
many newspaper TV listings and TV Guide magazines.
• VPS (Video Program System)/
PDC (Program Delivery Control)
If your HDR1000 is fitted with VPS/PDC and the TV
program you have programmed for timer recording is
broadcasting the VPS or PDC signal, then this system
is able to record exactly from beginning to the end of
the program, even if the actual broadcasting time differs from the scheduled time.
mode
• DRC (Dynamic range control)
You can control the range of sound volume.
• Dolby Digital sound
This player can handle Dolby Digital surround sound
having 5.1 channels when connected to a Dolby
Digital decoder.
• DTS (Digital Theatre System)
You can enjoy 5.1channel surround system developed
by the Digital Theater System co. which reproduces
the original sound as faithfully as possible.
• MPEG sound
This player can handle a disc that supports MPEG
audio and the player is connected to an external
MPEG audio decoder.
• Still/fast/slow/step playback
Various playback modes are available including still
pictures, fast forward/reverse, slow motion and step
frames.
• Playing an MP3 disc
You can enjoy MP3 files which are recorded on CDR/RW.
• Random playback for audio CD and MP3
This player can shuffle the order of tracks to play them
in random order.
• Program playback for audio CD and MP3
You can program the order of tracks to play them in
any desired order.
• DVD menus in a desired language
You can display DVD menus in a desired language, if
available on a DVD.
FEATURES
.• Subtitles in a desired language
You can select a desired language for the display subtitles, if that language is available on a disc.
• Selecting a camera angle
You can select the desired camera angle, if a disc
contains sequences recorded from different angles.
• Choices for audio language and sound mode
You can select the desired audio language and sound
mode, if different languages and modes are available
on a disc.
• Parental lock
You can set the control level to limit playback of discs
which may not be suitable for children.
• Automatic detection of discs
This player automatically detects if a loaded disc is
DVD, audio CD, MP3, or VIDEO CD.
• Search
Chapter search: Search for the chapter designated by
Title search: Search for the title designated by user.
Track search: Search for the track designated by
Time search: Search for the time designated by
• Repeat
Chapter: Repeated playback of the chapter of the
Title: Repeated playback of the title of the disc
Tr ack : Repeated playback of the track of the disc
Disc
(audio CD)
(MP3
A-B: Repeated playback of the part between A
Album: Repeated playback of the folder of the
• Zoom
2-time or 4-time magnified screen can be displayed.
• Marker
The part designated by user can be recalled.
• Resume Play
You can resume play from the part at which the playback was stopped.
• SRS TruSurround
You can enjoy stereophonic virtual sound on your
existing stereo system.
• Dimmer Display
Brightness of the display can be varied.
• Bit rate indication
• Dynamic range control
user.
user.
user.
disc being played.
being played.
being played.
: Repeated playback of the entire disc
)
being played.
and B designated by user.
MP3 disc being played.
English
– 7 –
EN / 2A01

ABOUT THE DISCS
DVD
Video
12 cm
12 cm
Approx. 4 h
(single-sided)
Approx. 8 h
(double-sided)
Approx. 80 min
(single-sided)
Approx. 160 min
(double-sided)
20 min
8 cm
8 cm
(singles)
Logo
Maximum
Playback Time
Contents
Disc
Type
Disc
Size
Sound
and
Pictures
Sound
and
Pictures
Audio
CD
Sound
Video
CD
74 min
12 cm
20 min
8 cm
(singles)
74 min
DIGITAL VIDEO
ReWritable
Recordable
Example
Title 1 Title 2
Chapter 1 Chapter 2 Chapter 1 Chapter 2Chapter 3 Chapter 4
Example
Track 1 Track 2 Track 5 Track 6Track 3 Track 4
2
Example
Track 1 Track 2 Track 5 Track 6Track 3 Track 4
Album 1 Album 2
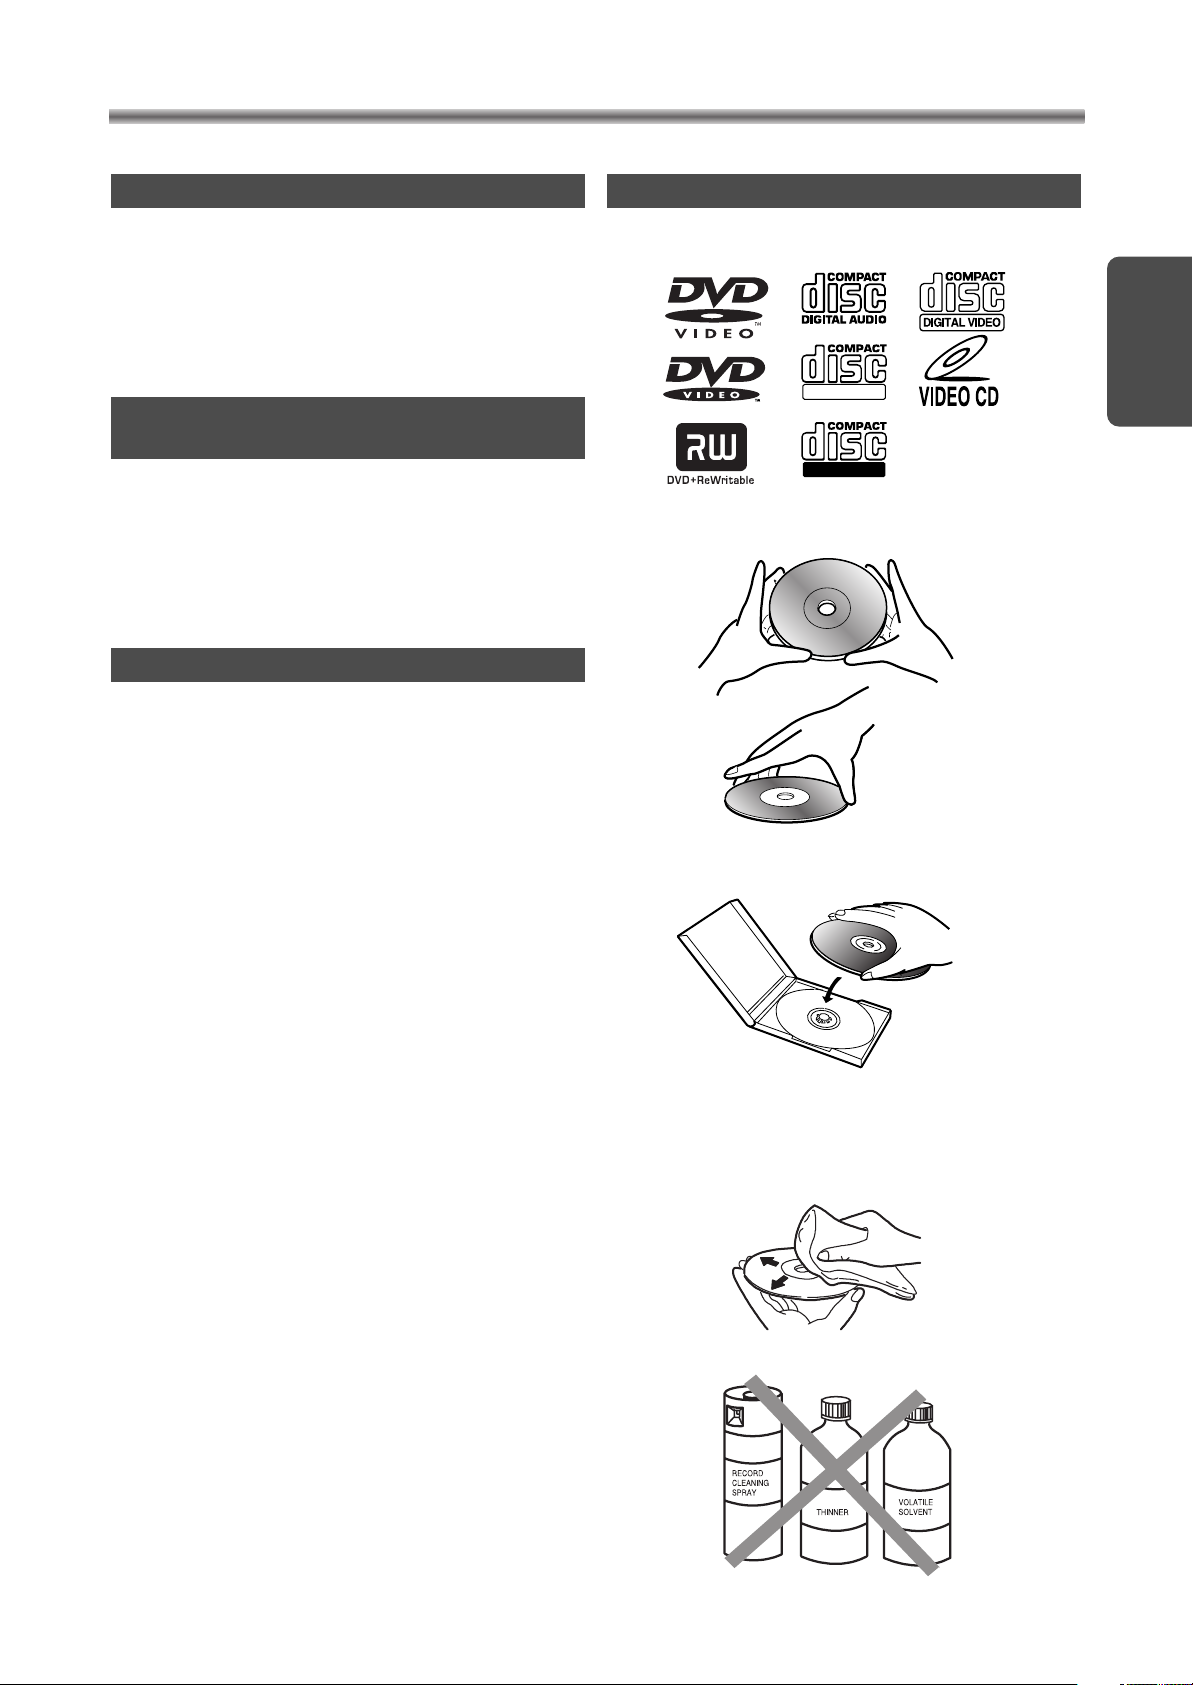
PLAYABLE DISCS
• The following discs can be played back on this unit.
• Some discs include region codes as shown below.
DISC TYPES
• Data on a DVD is divided into sections called
"titles", and then into subsections called "chapters",
each of which is given a title or chapter number.
Playback conditions are preset on some DVD video
discs, and these playback conditions take priority
over user operations on this player. If a function you
selected does not perform as desired, refer to the
manual accompanying the disc.
• Data on an audio CD or a VIDEO CD is divided into
sections called “tracks”, each of which is given a
track number.
• The number inside the symbol refers to a region of
the world, and a disc encoded in a specific region
format can only be played back on DVD players with
the same region code.
The following discs cannot be played back on
this unit.
• DVD with region codes other than 2 or ALL.
• DVD-ROM
• DVD-RAM
• CD-ROM
• VSD
• CDV
(Only plays back the audio part.)
• CD-G
(Only plays back the sound.)
• CD-R/CD-RW
(Only plays back the discs which audio CD and
MP3 is recorded.)
• CD-I
• SACD
• Photo CD
Any other discs without compatibility indications
ABOUT THE PBC FUNCTION OF VIDEO CD
This unit conforms to ver.1.1 and ver.2.0 of VIDEO
CD standard, with PBC function.
Ver.1.1 (without PBC function): You can enjoy playback picture as well as music CD.
Ver.2.0 (with PBC function): Whilst using a VIDEO CD with
PBC function, “PBC” appears on the screen and the display.
What is PBC? “PBC” stands for the PlayBack Control.
You can play in interactive software using a menu
screens. Refer to instructions packaged in your
VIDEO CD.
NOTE:
• When you play the VIDEO CD with PBC function,
you cannot choose a specified track and set
Repeat.
Data on a MP3 is divided into sections called "albums",
and then into subsections called "tracks", each of
which is given an album or track number.
– 8 –
EN / 2A01
HANDLING PRECAUTIONS
ReWritable
Recordable
SERVICING
• When your unit become inoperative and “System
Error!” message appears on the TV screen, do not
try to correct the problem by yourself. There are no
user-serviceable parts inside. Turn off, unplug the
power cord, and take the complete unit in the original packaging to dealer or an Authorized Service
Centre for servicing.
IF THE DVD PLAYER OF HDR1000
DOES NOT PERFORM PROPERLY
• If the DVD player still does not perform properly
even after having referred to the relevant sections
and to “TROUBLESHOOTING GUIDE” in this
Owner’s Manual, the laser optical pickup unit may
be dirty. Consult your dealer or an Authorised
Service Centre for inspection and cleaning of the
laser optical pickup unit.
CABINET SERVICING
• Wipe the front panel and other exterior surfaces of
the unit with a soft cloth immersed in lukewarm
water and wrung dry.
• Never use a solvent or alcohol. Do not spray
insecticide liquid near the unit. Such
chemicals may cause damage and discolouration to
the exposed surfaces.
DISC HANDLING
• Use discs which have the following logos on them.
(Optical audio digital discs.)
English
• Handle the discs so that fingerprints and dust do
not adhere to the surfaces of the discs.
• Always store the disc in its protective case when it
is not used.
• To clean disc, use a soft cloth.
• Do not use a hard cloth since this will damage the
disc.
• Wipe the disc in a straight line from centre to edge.
• Never wipe with a circular motion.
• Do not use detergent or abrasive cleaning agents.
– 9 –
EN / 2A01

OPERATING CONTROLS AND FUNCTIONS
1
2 3 4 6 7 8 95
10
111213
14
15
R
STANDBY
OPEN/CLOSE
NAVI
1
2
3
4
5
6
ANGLE
ZOOM
MODE
SEARCH
MODE
A–B
89
7
0
+10
RETURN
DISPLAY
SET UP
CLEAR SLOW AUDIO
STOP
REC/OTR GO TO
MENU
OK
DVD HDD
TIMER
SKIP
PAUSE
P
+
P
TITLE SUB T. REPEAT
PLAY
SKIP
37
23
34
38
39
22
20
9
21
26
35
33
25
4
10
24
28
29
17
32
6
8
31
2
30
16
7
36
1
27
19
18
ANT.
OUTPUT
DVD
DIGITAL OUT
OUT
IN
SCART1 (TV)
SCART2 (DEC.)
R
L
YC
COAXIAL
OPTICAL
43 444846
47
454142 49
50
40
FRONT PANEL
REMOTE CONTROL
1. STANDBY Button
2. PROG (+ or -) Button
3. HDD/DVD Button
4. OPEN/CLOSE Button
5. Disc loading tray
6. PLAY Button
7. STOP Button
8. PAUSE Button
Press to turn the unit on or off.
STANDBY Indicator (only on the main unit)
Lights up if the HDR1000 is plugged in. Turns off if the
HDR1000 is switched on.
HDD: Press to select the program for viewing or record-
ing.
Use to select HDD mode or DVD mode.
DVD: Press to open or close the tray.
Press to start playback.
DVD: Press to stop the operation of Disc.
HDD: Press to stop playback or recording.
DVD: Press to pause the current disc operation.
HDD: Press to pause playback.
REAR VIEW
9. 1or 0
Press for a fast forward or fast reverse playback.
DVD: Press PAUSE button, then press 1 button to
begin slow motion playback.
10. REC/OTR Button
DVD: Press to start recording from DVD to HDD.
HDD: Press to start a recording.
11. TIMER SET Light
This light glows when you set a timer recording.
While HDR1000 detects the VPS/PDC signal, this light
will blink.
12. RECORD Light
This light appears during a recording.
13. DVD Digital Display
This display appears when the HDR1000 is in DVD
mode. In this mode, you can watch the DVD operations
or discs on the TV screen. Details are on page 11.
14. HDD Light (Blue)
This light appears when the HDR1000 is in HDD mode.
In this mode, you can watch the HDD operations or
HDD titles on the TV screen.
15. Remote Sensor Window
Receives the infrared control signals from the remote
control unit.
16. AUDIO Button
DVD: Press to select a desired audio language or
HDD: Press to select sound mode (stereo, main, sub).
17. ZOOM Button
DVD: Enlarges part of a DVD-reproduced image.
18. SLOW Button
HDD: Press to view the picture in slow motion.
19. HDD Button
Press before using the remote control for HDD features.
20. MENU Button
Displays the menus.
21. Arrow Buttons
Use when making settings whilst watching the display
on a TV screen.
22. NAVI Button
HDD: Press to turn on the Navigation screen.
23. SETUP Button
DVD: Press to turn on the Setup screen.
24. SUB T. Button
DVD: Press to select a desired subtitle.
25. TITLE Button
DVD: Press to show the table of contents.
HDD: Press to turn on the Enter Name screen.
26. Number Buttons
DVD: Press to directly select a Track for playback.
HDD: Use to set up HDD features (such as the clock).
Press to select TV programs at the HDR1000.
– 10 –
(Forward or Reverse)
sound mode.
Button
EN / 2A01

CD: Lights up when an audio CD is
inserted.
VCD: Lights up when a VIDEO CD is
inserted.
Lights up when the A-B repeat function is on.
Lights up when the inserted disc
is being played back.
Displays the elapsed playback time of the current
title or track.
When a chapter or track has switched, the number
of a new title, chapter or track is displayed.
(in the search mode or when the skip up/down button
is pressed.)
Lights up when the repeat function is on.
Lights up when a DVD is inserted.
Lights up when disc
playback is paused.
Lights up when
a PlayBack
Control is on.
TITLE
REPEAT
A – B
CHP. TRK.
DVD
VCD
PBC
This display appears when the HDR1000 is in DVD
mode.
Power on
No disc inserted
Tray open
Tray closed
Loading the Disc
27. TIMER Button
HDD: Press to turn on the Timer screen.
28. ANGLE Button
DVD: Press to change the camera angle to see the
sequence being played back from a different
angle.
29. MODE Button
DVD: Activates program playback or random playback
mode when playing CDs or MP3.
TruSurround during DVD playback .
HDD: Press to select Recording mode(HQ,SQ or LP)
30. SEARCH MODE Button
DVD: Press to locate a desired point.
31. A-B REPEAT Button
DVD: Repeats playback of a selected section.
32. REPEAT Button
DVD: Repeats playback of the current disc, title, chap-
ter or track.
33. RETURN Button
DVD: Returns to the previous operation.
HDD: Press to clear window, or go to previous menu.
34. CLEAR Button
Reset a setting.
35. DISPLAY Button
DVD: Press to display the current status on the TV
screen.
HDD: Press to turn On Screen Display on and off.
36. OK Button
Press to execute the selection.
37. DVD Button
Press before using the remote control for DVD features.
38. GO TO Button
HDD: Press to move to LIVE broadcasting.
39. SKIP or (Forward or Backward) Button
DVD: Press during playback to go to previous or subsequent track or chapter.
HDD: Press to skip forward or backward.
40. Mains Cord
Connect to a standard AC outlet to supply the main
power to the HDR1000.
41. OPTICAL DVD DIGITAL OUT Connector
DVD: Connect to the Optical Digital Audio In connector
of a decoder or audio receiver.
42. COAXIAL DVD DIGITAL OUT Connector
DVD: Connect to the Coaxial Digital Audio In connector of a decoder or audio receiver.
43. Y/C OUTPUT Connector
Connect to the Y/C Input connector of a TV.
44. AUDIO OUTPUT (L/R) Connectors
Connect to the Audio Input connectors of a TV or other
audio equipment.
45. Euro SCART1 Connector (To the TV)
Connect to the 21-pin scart connector of a TV.
46. Euro SCART2 Connector (From decoder)
Connect to the 21-pin scart connector of a decoder.
47. ANT(enna) IN Connector
Connect your antenna or cable here.
48. ANT(enna) OUT Connector
Connect to the ANTENNA IN connector on your TV.
49. Ventilating Holes
There is a cooling fan in the unit. Take care not to
block the ventilating holes.
50. Reset Button
When the HDR1000 does not operate at all even if you
press any buttons, press this button with the tip of a
pen etc. The hard disc setting of HDR1000 will reset.
Then, press STANDBY button to turn on the
HDR1000.
OPERATING CONTROLS AND FUNCTIONS
LOADING THE BATTERIES
Open the battery compartment cover.
Insert two R6 (AA) batteries, as
Sets the SRS
– 11 –
indicated inside the battery
compartment.
Close the cover.
NOTE
• Do not mix alkaline and manganese batteries.
• Do not mix old and new batteries.
DVD DIGITAL DISPLAY
DISPLAY DURING OPERATION
EN / 2A01
English
ANT.
OUTPUT
DVD
DIGITAL OUT
OUT
IN
SCART1 (TV)
SCART2 (DEC.)
R
L
YC
COAXIAL
OPTICAL
to ANT.IN
to ANT.OUT
[Back of the HDD/DVD]
to aerial socket
[TV]
[Antenna]
CONNECTIONS
ANT.
OUTPUT
DVD
DIGITAL OUT
OUT
IN
SCART1 (TV)
SCART2 (DEC.)
R
L
YC
COAXIAL
OPTICAL
to 21-Pin Scart Connector
[Decoder (Not supplied)]
[TV]
to ANT.OUT
to aerial connector
to 21-Pin
Scart Connector
to SCART1
to SCART2
[Back of the HDR1000]
ANT.
OUTPUT
DVD
DIGITAL OUT
OUT
IN
SCART1 (TV)
SCART2 (DEC.)
R
L
YC
COAXIAL
OPTICAL
To Right (red) and
Left (white)
AUDIO INPUT
connectors
To Right (red) and Left (white)
AUDIO INPUT connectors
To Right (red) and Left (white)
AUDIO OUTPUT connectors
[TV]
To Y/C
INPUT connector
[Stereo system]
to 21-Pin
Scart connector
to SCART1
[Back of the HDR1000]
OR
OR
To Y/C
OUTPUT connector
NOTE
• Connect this unit directly to a TV. If the HDR1000
output is connected to the TV via a VCR, the pictures
may be distorted due to the copy protection system.
• Be sure to turn off the power to all components in
the system before connecting another component.
• Refer to the Owner's Manuals for your TV, stereo
system and any other components to be connected
to this unit.
ANTENNA CONNECTION
Remove the VHF/UHF TV aerial coaxial cable from
the TV receiver and connect it to the HDR1000 as
shown in the drawing. The HDR1000 is now ready to
receive broadcasted programs. Connect the
HDR1000 to the TV receiver using the coaxial cable
(supplied) as shown in the drawing. Now the TV
receiver is ready to receive A/V signals from
HDR1000.
SCART1 CONNECTION TO TV
If your TV has an audio/video connector, you may
connect your unit SCART1 connector to the
audio/video connector on back of your TV. Please
see your TV’s owner’s manual.
SCART2 CONNECTION FOR OTHER
EXTERNAL DEVICES
The second audio/video connector SCART2 is designated for other external devices e. g. Decoder,
Satellite Tuner, another VCR, Video Camera and so
on.
NOTE
• If you want to connect a TV with audio/video connector to your HDR1000, the TV must be connected to SCART1. A connection to SCART2 will not
function correctly.
CONNECT TO A TV WITH
Y/C INPUT CONNECTOR OR
STEREO SYSTEM
Your HDR1000 is fitted with two audio/video connectors which you may connect to other external devices
with audio/video connectors. We recommend this
connection to ensure a better audio and picture quality. Additional Euro audio/video cables are obtainable
from your dealer.
SCART (EURO A/V) CONNECTORS
EXTERNAL INPUT MODE
To receive the signal from an external input (decoder,
video camera, satellite tuner, another VCR etc.), connect to SCART2 connector, and press PROG + or –
button or enter “00” with Number button. “LINE2”
appears on the TV screen.
If you use the SCART1 connector, press PROG + or
– button or enter “0” with Number button. “LINE1”
appears on the TV screen.
– 12 –
EN / 2A01

CONNECTIONS
ANT.
OUTPUT
DVD
DIGITAL OUT
OUT
IN
SCART1 (TV)
SCART2 (DEC.)
R
L
YC
COAXIAL
OPTICAL
to 21-Pin Scart connector
[Back of the HDR1000]
To COAXIAL DIGITAL AUDIO INPUT connector
To OPTICAL DIGITAL AUDIO INPUT
connector
To OPTICAL
DVD DIGITAL
OUT connector
Amplifier equipped with digital
input connectors
OR
To SCART1 connector
To Y/C
OUTPUT connector
OR
To COAXIAL
DVD DIGITAL
OUT connector
To Y/C INPUT
connector
CONNECT TO AN AMPLIFIER EQUIPPED WITH
DIGITAL INPUT CONNECTORS
Use an audio coaxial digital cable or an audio optical cable (available from your dealer) for the audio connection
• If you use the OPTICAL connector, remove the protective cap.
.
English
NOTE
• The audio source on a disc in a 5.1 channel Dolby Digital surround format cannot be recorded as digital
sound.
• Be sure to turn off the power to all components in the system before connecting another component.
• Refer to the Owner’s Manuals for the components to be connected to this unit.
• Set Dolby Digital and DTS to Off for audio output in the setup mode. Playing a DVD using incorrect settings
may generate noise distortion, and may also damage the speakers.
• OPTICAL and COAXIAL connectors are only useful in DVD mode and have no function in HDD mode.
Hint for Optical cable (not supplied)
• Optical cable (not supplied) may be damaged when bent at sharp angles. Ensure cables are coiled in
loops with a diameter of 15 cm or more when storing them.
• Use a cable which is 3m or shorter.
• Insert cable plugs firmly into the connectors when making connections.
• If a plug has minor scratches or is dirty, clean it with a soft cloth before inserting it into a connector.
• Replace the protective cap on the OPTICAL connector when it is not in use.
– 13 –
EN / 2A01

CONNECTIONS
ANT.
OUTPUT
DVD
DIGITAL OUT
OUT
IN
SCART1 (TV)
SCART2 (DEC.)
R
L
YC
COAXIAL
OPTICAL
Center
speaker for
MPEG (left)
Center
speaker for
MPEG(right)
Front speaker
(left)
Center
speaker
Front speaker
(right)
Surround
speaker
(left)
Surround
speaker
(right)
Subwoofer
To COAXIAL DVD DIGITAL OUT connector
To COAXIAL DIGITAL
AUDIO INPUT connector
Dolby Digital, DTS
or MPEG decoder
To SCART1 connector
To Y/C INPUT connector
to 21-Pin Scart connector
OR
To Y/C OUTPUT
connector
CONNECT TO A DOLBY DIGITAL DECODER,
DTS DECODER, OR MPEG DECODER
For DVD playback, If available on the DVD disc this unit outputs a Dolby Digital, DTS, or MPEG data stream
from its COAXIAL DIGITAL AUDIO OUT connector. By connecting the player to a Dolby Digital, DTS
decoder, or MPEG decoder, you can enjoy a more convincing, realistic sound of a professional standard
such as can be heard in a cinema.
Use an audio coaxial digital cable or an audio optical cable (available from your dealer) for the audio connection.
• If you use the OPTICAL connector, remove the protective cap.
NOTE
• Be sure to turn off the power to all components in the system before connecting another component.
• Refer to the Owner’s Manuals for the components to be connected to this unit.
• If you play a disc that supports Dolby Digital audio and the HDR1000 is connected to a Dolby Digital
decoder then set Dolby Digital to On for audio output in the DVD setup mode.
• If you play a disc that supports DTS audio and the HDR1000 is connected to a DTS decoder then set DTS
to On for audio output in the DVD setup mode.
• If you play a disc that supports MPEG audio and the HDR1000 is connected to a MPEG decoder then set
MPEG to On for audio output in the DVD setup mode.
• Unless connected to a Dolby Digital decoder a DTS decoder or a MPEG decoder, set Dolby Digital, DTS,
and MPEG to Off for audio output in the DVD setup mode. Playing a DVD using incorrect settings may generate noise distortion, and may also damage the speakers.
• OPTICAL and COAXIAL connectors are only useful in DVD mode and have no function in HDD mode.
– 14 –
EN / 2A01
Before turning on your HDR1000, make sure batter-
Language
Language English
Country Netherlands
Store
Language
Language English
Country Netherlands
Store
Language
Language English
Country Netherlands
Store
Auto Search
Please wait
0% 100%
Stop : CLEAR
Press OK for Auto Search
or
Press PLAY to skip Auto Search
Language
Language English
Country Netherlands
Store
Language
Language English
Country Netherlands
Store
ies are in the remote control and the HDR1000 and
TV are connected correctly.
If you have connected the HDR1000 to
the TV set without a scart cable
Connect the mains cord.
• Connect the mains cord into the wall
socket.
Turn on the TV. Set it to video program
(TV channel 36 / frequency 591 MHz).
• Please look in the instruction book of your TV how
to tune and add a program.
• If the TV channel 36 / frequency 591 MHz is used
for broadcasting, or interference lines appear on the
picture. Details are on page 23.
Press HDD button, then, press
STANDBY button.
• After around 15 seconds, the HDR1000 will turn on
and the language set up display will appear. (If the
display does not appear, check your connections.)
Move the cursor
to setting position.
• Press B button to move
the cursor.
Select your desired Language for the
on-screen menu.
• Press K or L button to
select your desired language.
Then, press B button
twice to move the cursor.
Select Country.
• Press K or L button to
select the country where
you live.
Then, press B button to
move the cursor.
INITIAL SETTING
Save the data.
• Confirm that “Store” is
selected.
Then, press OK button.
Press OK button
to start Auto
Search.
• Wait until the status bar
reaches 100%. It will take
up to 15 minutes. When
this is complete, “Clock”
menu will appear on the
screen. Go to step [9].
• If “No TV signals found.”
appears on the TV
screen after Auto Search,
press RETURN button,
then, go to step [9]. After
that you can install programs as described on
page 21.
Continue with step [4] on next page
to set the clock.
If you have connected the HDR1000 to
the TV set with a scart cable
Connect the mains cord.
• Connect the mains cord into the wall socket.
Set the TV to line input mode.
• Please refer to your TV owner’s manual for details.
• If you don’t have clear picture or sound interference
despite optimisation, you can switch off the built-in
modulator. Details are on page 23.
Continue with step [3] on left side in
this page for the initial setting.
• Once you have stored the initial setting, the
HDR1000 stores it after you turn off the power.
• You need to set up the on-screen language of HDD
and DVD separately. Details are on page 44.
• To skip Auto Search feature at step [8], press
PLAY button. Programs will not be programmed.
• The TV channels / frequencies are stored under
the program numbers.
– 15 –
INITIAL SETTINGS
English
Helpful Hints
EN / 2A01
 Loading...