

Philips GC4549-00 operation manual
GC4549
User manual
Benutzerhandbuch

ENGLISH 3
DEUTSCH 20
GC4549

Table of contents
Important .............................................................................................4
Product overview ...........................................................................8
Before rst use ..................................................................................9
Using your steam iron ..................................................................9
- Filling the water tank ...........................................................9
- Temperature and steam setting ..................................10
- Ironing ........................................................................................... 11
Features .............................................................................................. 12
- Spray function ......................................................................... 12
- Steam boost function ......................................................... 12
- Ironing with extra steam ................................................... 12
- Vertical steam .......................................................................... 12
Ironing tips ......................................................................................... 13
Auto shut o (for specic types only) ............................... 13
Cleaning and maintenance .................................................... 14
- Cleaning ...................................................................................... 14
- Quick Calc Release .............................................................. 15
Storage .................................................................................................17
Guarantee and support ............................................................18
Troubleshooting ............................................................................ 18
Technical information ................................................................. 19
3ENGLISH

4
ENGLISH
Important
Congratulations on your purchase and
welcome to Philips! To fully benet from
the support that Philips oers, register your
product at www.philips.com/welcome.
Read this user manual and the important
inormation carefully before you use the
appliance. Save them for future reference.
Danger
- Never immerse the iron in water.
Warning
- Check if the voltage indicated on the
appliance corresponds to the local mains
voltage before you connect the appliance.
- Do not use the appliance if the plug,
the mains cord or the appliance itself
shows visible damage, or if the appliance
functions abnormally in any way, or if the
appliance has been dropped or leaks.
- If the mains cord is damaged, you must
have it replaced by Philips, a service centre
authorised by Philips or similarly qualied
persons in order to avoid a hazard.
- Never leave the appliance unattended
when it is connected to the mains.
- Always unplug the appliance from the
socket outlet before you ll the water tank
with water.
- This appliance can be used by children
aged 8 or above and by persons with
reduced physical, sensory or mental
capabilities or lack of experience and

ENGLISH
knowledge if they have been given
instructions in safe use of the appliance
or supervision to establish safe use and
if they have been made aware of the
hazards involved.
- Do not allow children to play with the
appliance.
- Older children are only allowed to clean
the appliance and perform the Calc-Clean
procedure under supervision.
- Keep the iron and its mains cord out of
the reach of children less than 8 years of
age when the appliance is switched on or
cooling down.
- Always place and use the iron on a stable,
level and horizontal surface.
- Do not let the mains cord come into
contact with the hot soleplate of the iron.
- Cleaning and user maintenance shall not
be made by children without supervision.
- Your appliance gives o steam which can
cause burns. Handle your iron carefully.
Never direct the steam towards persons or
animals.
5
Warning: For Iron models with
Quick Calc Release feature
- Do not open and remove the Quick Calc
Release tray from the appliance during use.
- Do not use other collectors on the
appliance than the Quick Calc Release
collector that has been supplied with the
appliance.

6
ENGLISH
- Do not ll water at the channel of the
Quick Calc Release opening.
- Do not insert your nger and pointed
objects into the Quick Calc Release
opening.
CAUTION: Hot surface
Surfaces are liable to get
hot during use (for irons with
‘hot’ symbol marked on the
appliance).
Caution
- Only connect the appliance to an earthed
wall socket and do not use adaptors.
- The plug must only be connected
to a socket with the same technical
characteristics as plug.
- Check the mains cord regularly for
possible damage.
- The appliance must be used and placed
on a at, stable, heat-resistant surface.
When you place the iron on its heel or its
stand, make sure that the surface on which
you place it is stable.
- Fully unwind the mains cord before you
plug it in the wall socket.
- The soleplate of the iron can become
extremely hot and may cause burns if
touched.
- Descale the iron regularly according to
the instructions in chapter ‘Cleaning and
maintenance’ in the user manual.
ENGLISH
- When you have nished ironing, when you
clean the appliance, when you ll or empty
the water tank and also when you leave
the iron even for a short while: set the
steam control to the ‘dry ironing’ position,
put the iron on its heel and remove the
mains plug from the wall socket.
- Do not put perfume, vinegar, starch,
descaling agents, ironing aids or other
chemicals in the water tank.
- This appliance is intended for household
use only.
Electromagnetic elds (EMF)
This Philips appliance complies with all applicable standards
and regulations regarding exposure to electromagnetic elds
Recycling
- This symbol means that this product shall not be disposed
of with normal household waste (2012/19/EU).
- Follow your country’s rules for the separate collection of
electrical and electronic products. Correct disposal helps
prevent negative consequences for the environment and
human health.
7
8
ENGLISH
c
g
l
d
e
f
a
b
k
j
h
i
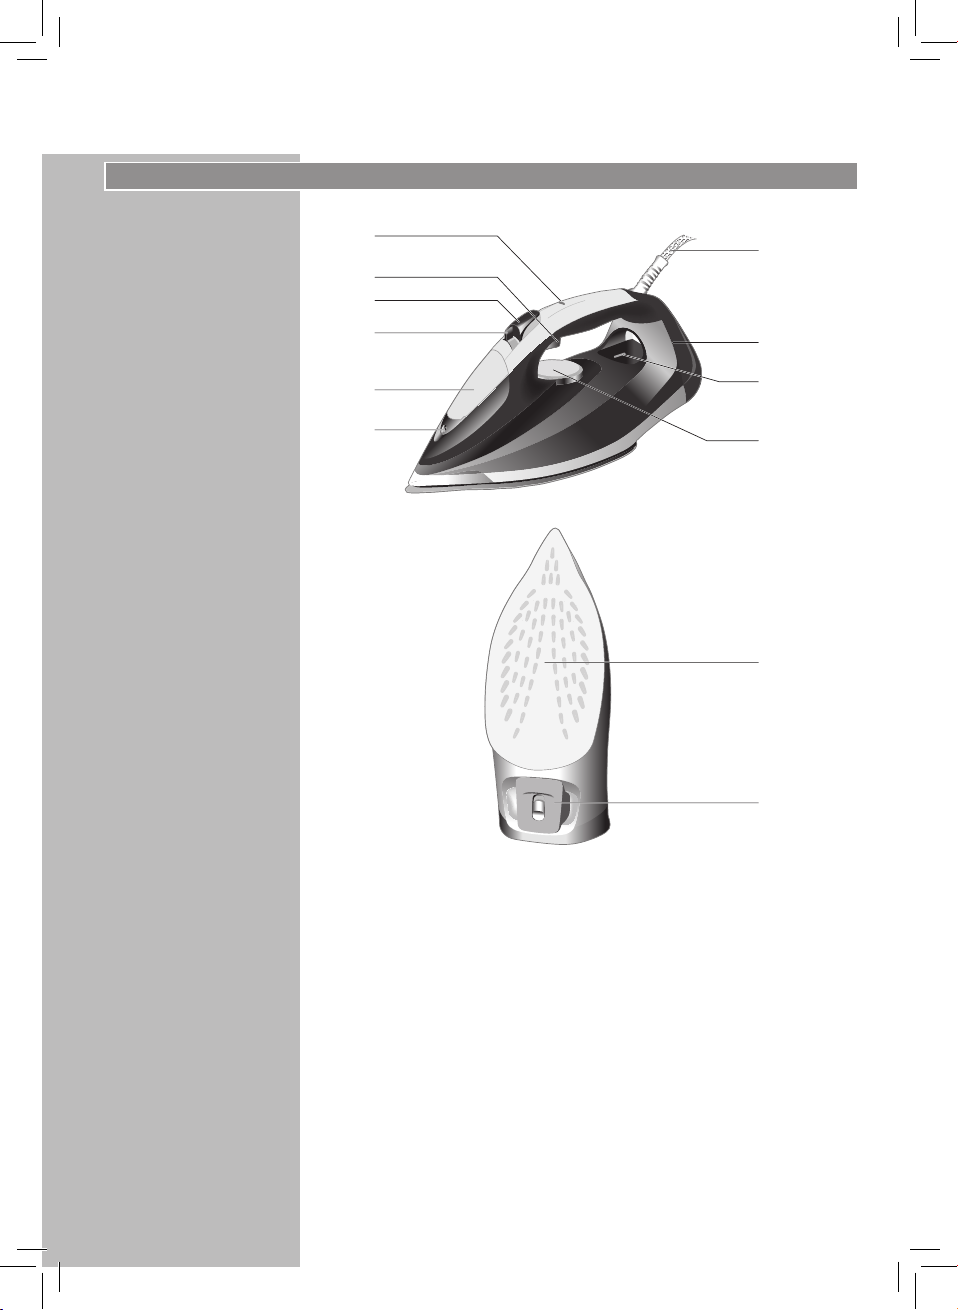
Product overview
1 Spray nozzle
2 Water tank lid
3 Steam slider
4 Spray button
5 Steam boost trigger
6 Auto shut o
7 Mains cord
8 Cord winding
9 Temperature indicator light
10 Temperature dial
11 Soleplate
12 Quick Calc Release
ENGLISH
Before rst use
This steam iron is intended for ironing and refreshing fabrics only.
Always place the steam iron on a stable and horizontal surface.
Fill in the water tank before every use (see Chapter ‘Using your
steam iron’ , section ‘Filling the water tank’).
Using your steam iron
Filling the water tank
Note: Your appliance has been designed to be used with
tap water. If you live in an area with hard water, fast scale
build-up may occur. Therefore, it is recommended to use
distilled or demineralized water to prolong the lifetime of
your appliance.
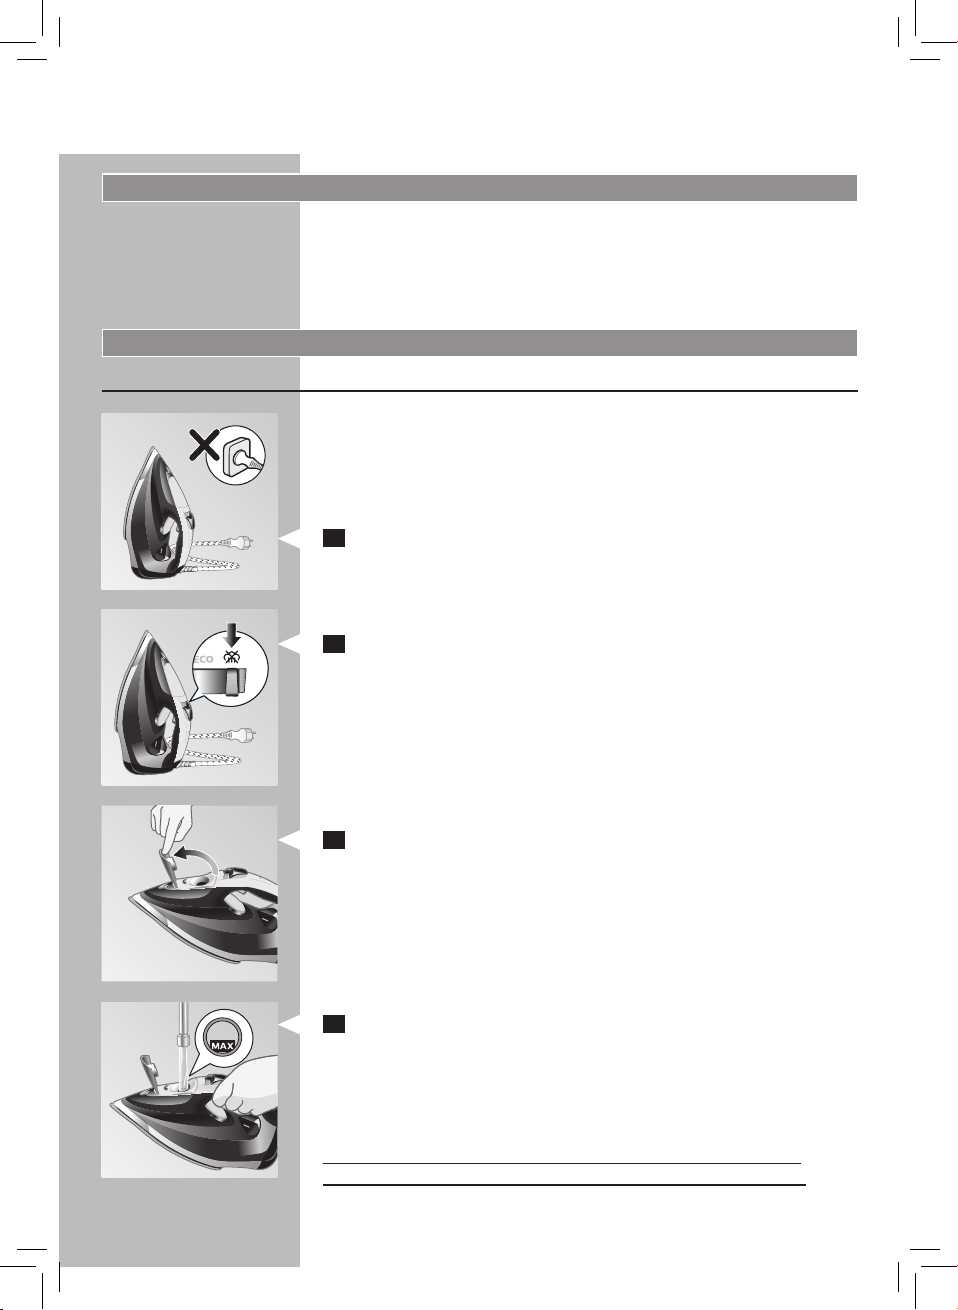
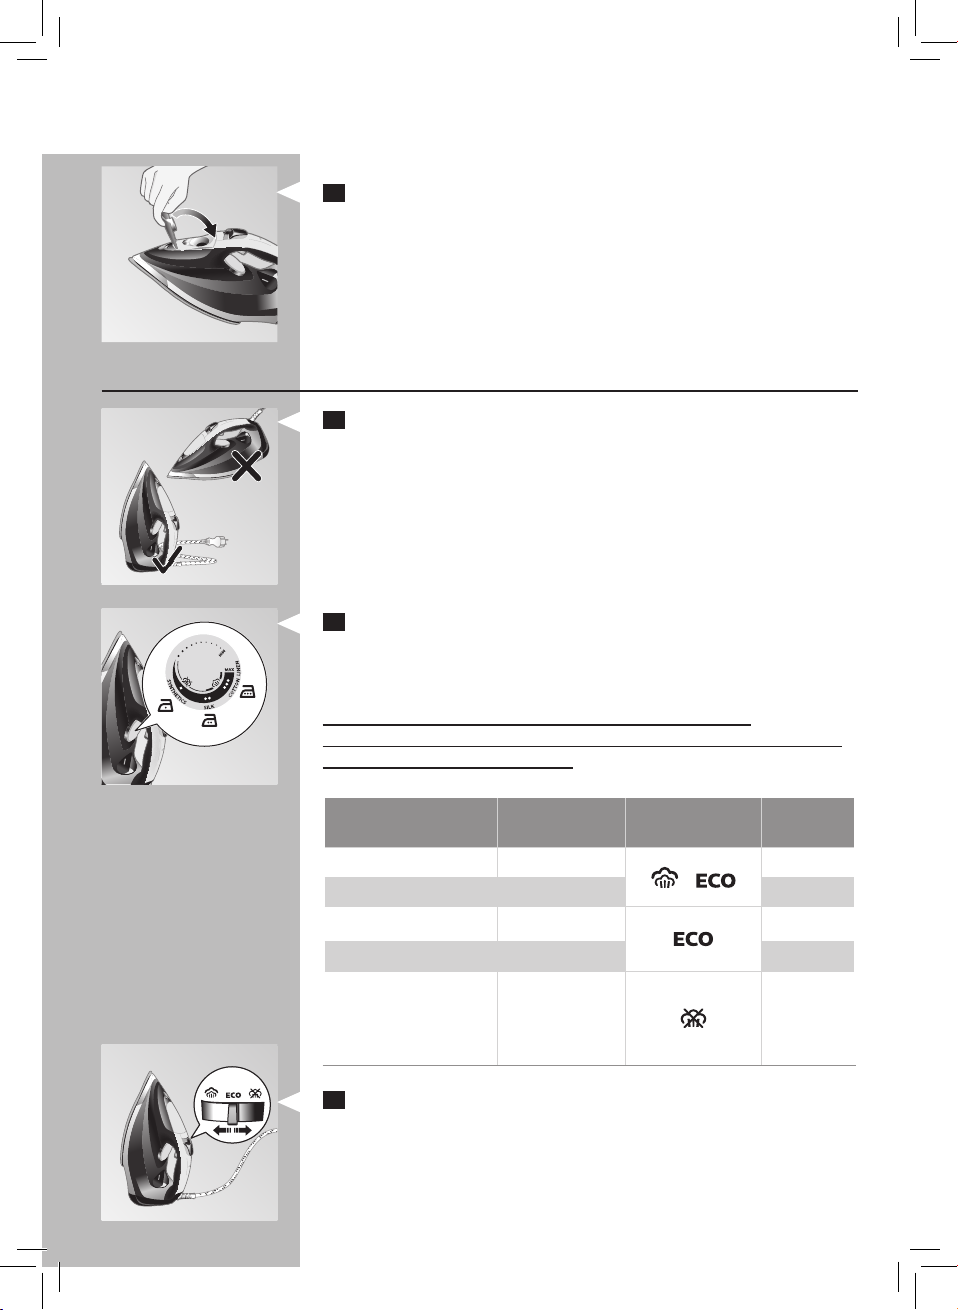
1 Make sure the appliance is unplugged.
2 Set steam setting to Dry.
9
3 Open the water tank lid.
4 Tilt the iron backwards and ll the water tank with tap
water up to the maximum level.
Note: Do not ll the water tank beyond the MAX indication to
avoid spillage. If you have overlled the water tank, empty it
until the water level drops below the MAX indication.
Warning: Do not put perfume, vinegar, starch, descaling
agents, ironing aids or other chemicals in the water tank.
10
ENGLISH
5 Close the water tank lid ( ‘click’).
Temperature and steam setting
1 Put the iron on its heel.
2 Consult table 1 to set the temperature dial to the
appropriate setting for your garment.
Table 1:
Warning: Do not use steam or steam boost at low
temperature, as indicated in the below table. Otherwise, hot
water may leak from the iron.
Fabric type Temperature
setting
Linen MAX
Cotton
Wool
Silk
Synthetic fabric
(e.g. acrylic,
nylon, polyamide,
polyester)
3 Select the steam setting with the steam slider.
- ECO: This steam setting enables you to reduce the steam
output to save energy and still have sucient steam to iron
your garments.
- Dry: This steam setting enables you to iron without steam or
to stop steam when the iron is not in use.
●●●
●●
●●
●
Auto steam
control
/
Steam
boost
Yes
Yes
No
No
No
ENGLISH
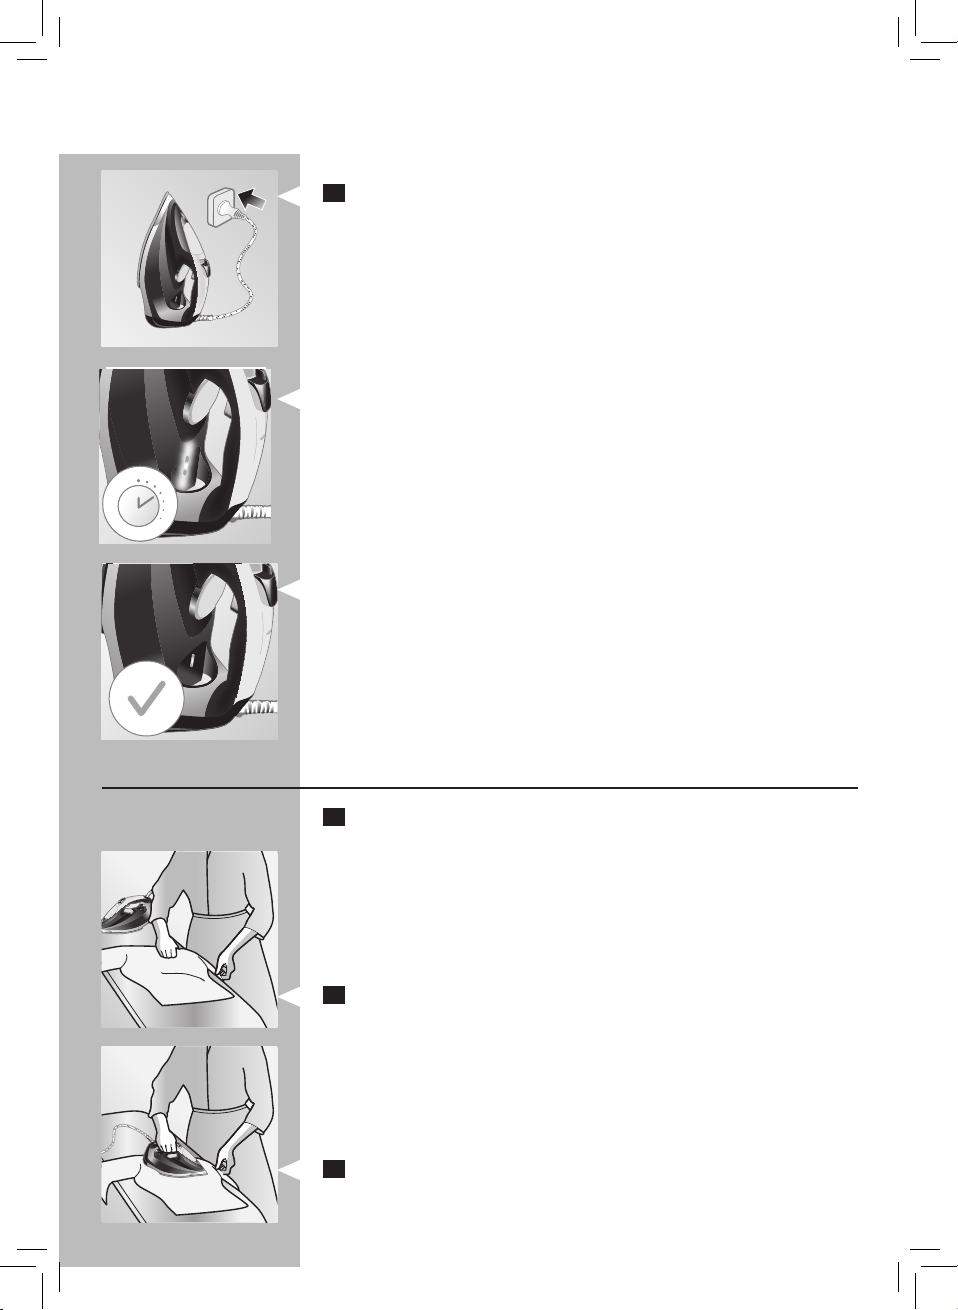
4 Put the mains plug into an earthed wall socket.
- The temperature indicator light goes on while the iron is
heating up.
- When the temperature indicator light goes o, the steam
iron is ready to use.
Note: This light goes on from time to time during ironing.
11
Ironing
1 Unfold your ironing board and set it to the appropriate
height.
2 Place the garment you want to iron on the ironing board.
3 Start ironing when the temperature indicator light goes o.
12
ENGLISH
Features
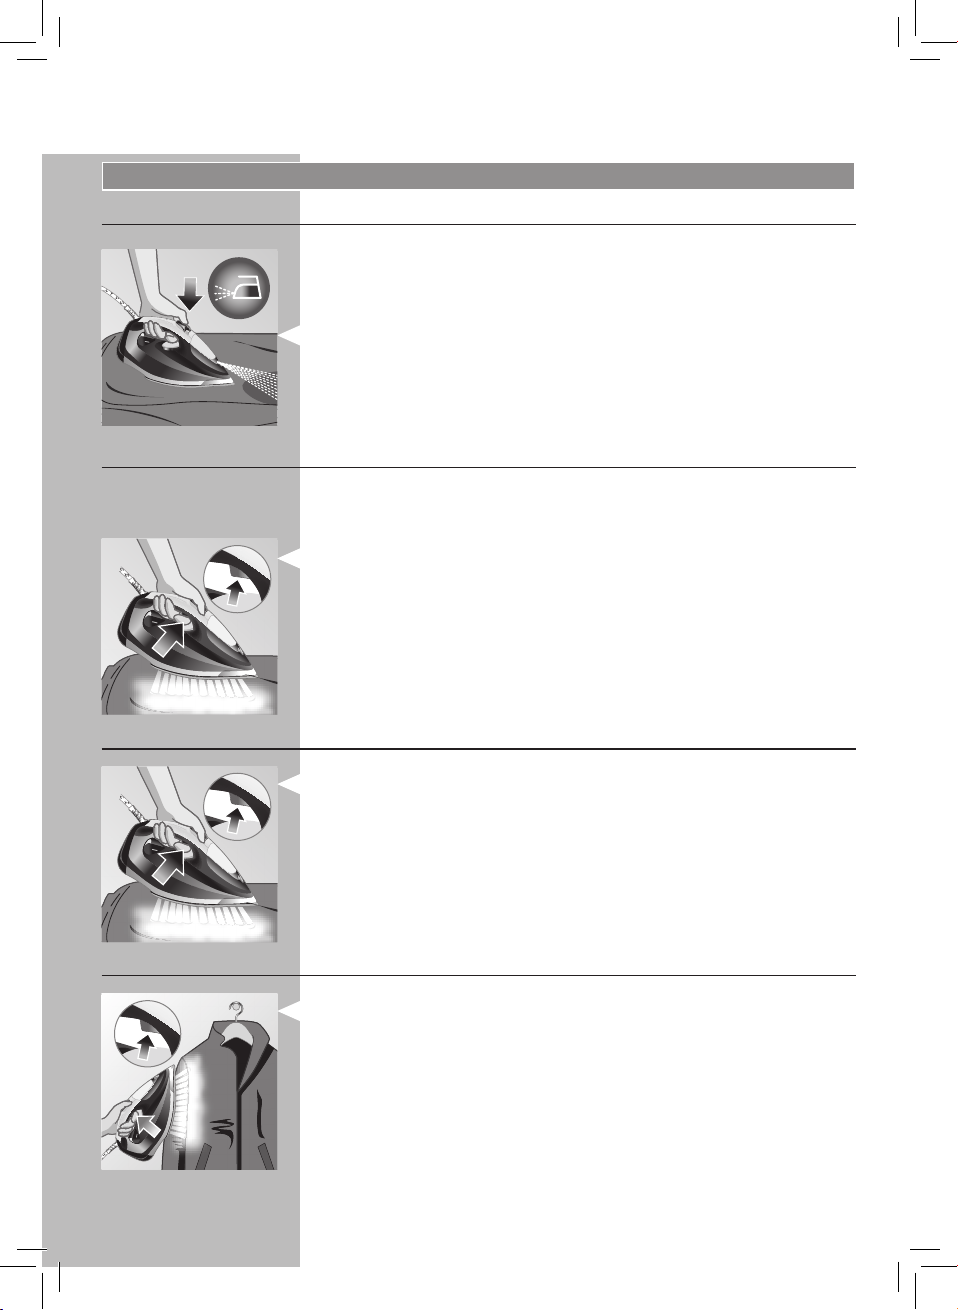
Spray function
You can use the spray function at any temperature to moisten
the garments to be ironed. This helps remove the stubborn
creases.
- Press the spray button several times to moisten the
garments to be ironed.
Steam boost function
You can use a powerful boost of steam to remove targeted
stubborn creases.
- Press and release the steam boost trigger for a powerful
boost of steam to remove stubborn creases.
Note: The steam boost function should only be used at
temperature setting between ●●● to MAX. Leaking may
appear if you use steam boost at too low a temperature.
Ironing with extra steam
- For extra steam during ironing, press and hold the steam
boost trigger.
Vertical steam
- Hold the iron in vertical position, press and release the
steam boost trigger to remove creases from a hanged
garment.
Tip: Pull the garment with one hand to stretch it for more
eective wrinkle removal. Move the iron up and down to
apply steam to dierent parts of the hanged garment.
 Loading...