

Page 1

GC2225, GC2220, GC2215,
GC2130, GC2126, GC2125, GC2120, GC2115, GC2110, GC2105
Page 2

2
Page 3
3
F
J
G
H
1
Page 4

4
Page 5

ENGLISH 6
NORSK 14
SVENSKA 22
SUOMI 30
DANSK 38
INDONESIA 46
GC2225, GC2220, GC2215,
GC2130, GC2126, GC2125, GC2120, GC2115, GC2110, GC2105
Page 6

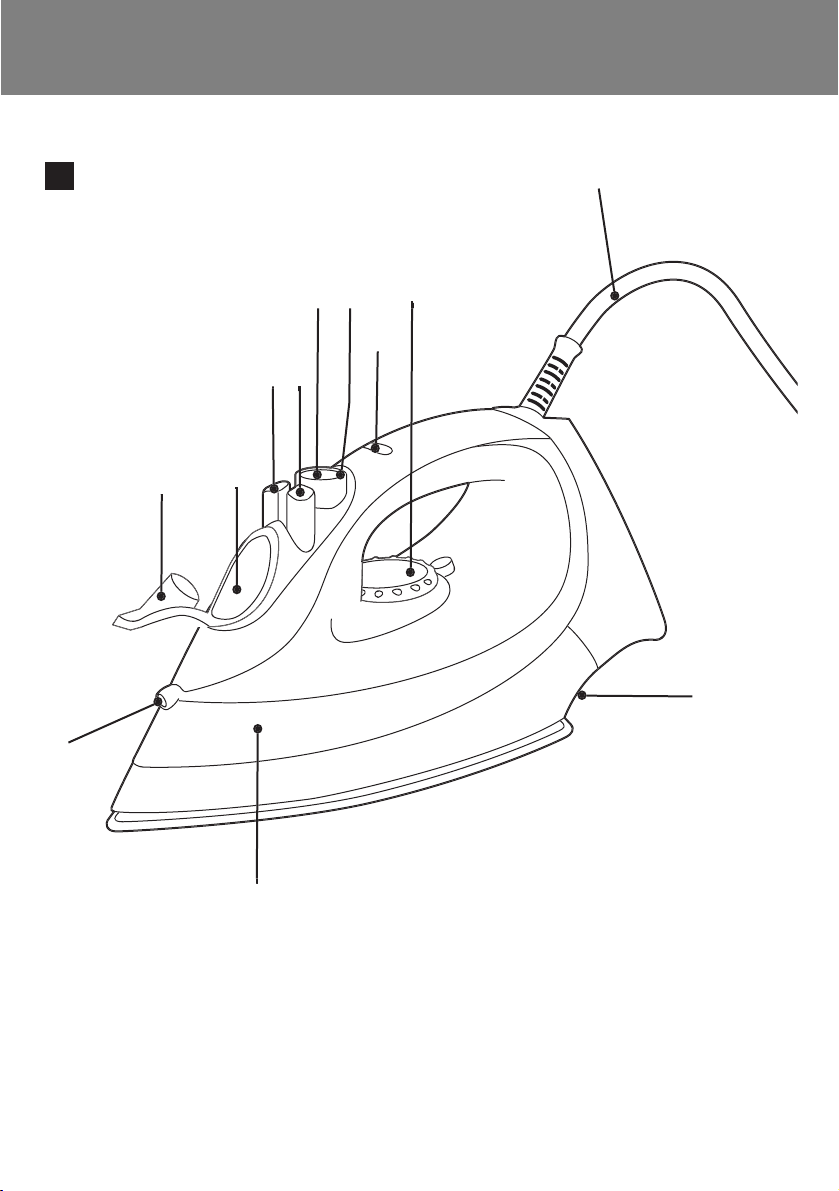
General description (fig. 1)
A Spray nozzle
B Filling cap (GC2225/2220/2215/GC2130/2126/2125/2120 only)
C Filling opening
D Shot-of-steam button 9
(GC2225/2220/2215/GC2130/2126/2125/2120/2115/2110 only)
E Spray button T
F Steam control
- O = no steam
- Á = minimum steam
- q = moderate steam
(GC2225/2220/2215/GC2130/2126/2125/2120 only)
- w = maximum steam
- 1 = Calc-Clean function
G Extra-steam function (GC2105 only)
H Temperature light (all types) and automatic shut-off light
(GC2225/GC2130 only)
I Temperature dial
J Mains cord
K Type plate
L Water tank
Important
Read these instructions for use carefully before using the appliance and
save them for future reference.
◗ Check if the voltage indicated on the type plate corresponds to
the local mains voltage before you connect the appliance.
◗ Only connect the appliance to an earthed wall socket.
◗ Do not use the appliance if the plug, the cord or the appliance
itself shows visible damage, or if the appliance has been dropped
or is leaking.
◗ Check the cord regularly for possible damage.
◗ If the mains cord is damaged, it must be replaced by Philips,a
service centre authorised by Philips or similarly qualified persons
in order to avoid a hazard.
◗ Never leave the appliance unattended when it is connected to the
mains.
◗ Never immerse the iron and the stand, if provided, in water.
◗ Keep the appliance out of the reach of children.
◗ The soleplate of the iron can become extremely hot and may
cause burns if touched.
◗ Do not allow the cord to come into contact with the soleplate
when it is hot.
◗ When you have finished ironing,when you clean the appliance,
when you fill or empty the water tank and also when you leave
the iron even for a short while:set the steam control to position
O,put the iron on its heel and remove the mains plug from the
wall socket.
ENGLISH6
Page 7

◗ Always place and use the iron and the stand, if provided, on a
stable, level and horizontal surface.
◗ Do not put perfume, vinegar, starch,descaling agents, ironing aids
or other chemicals in the water tank.
◗ This appliance is intended for household use only.
Preparing for use
Filling the water tank
1 Remove the mains plug from the wall socket.
C
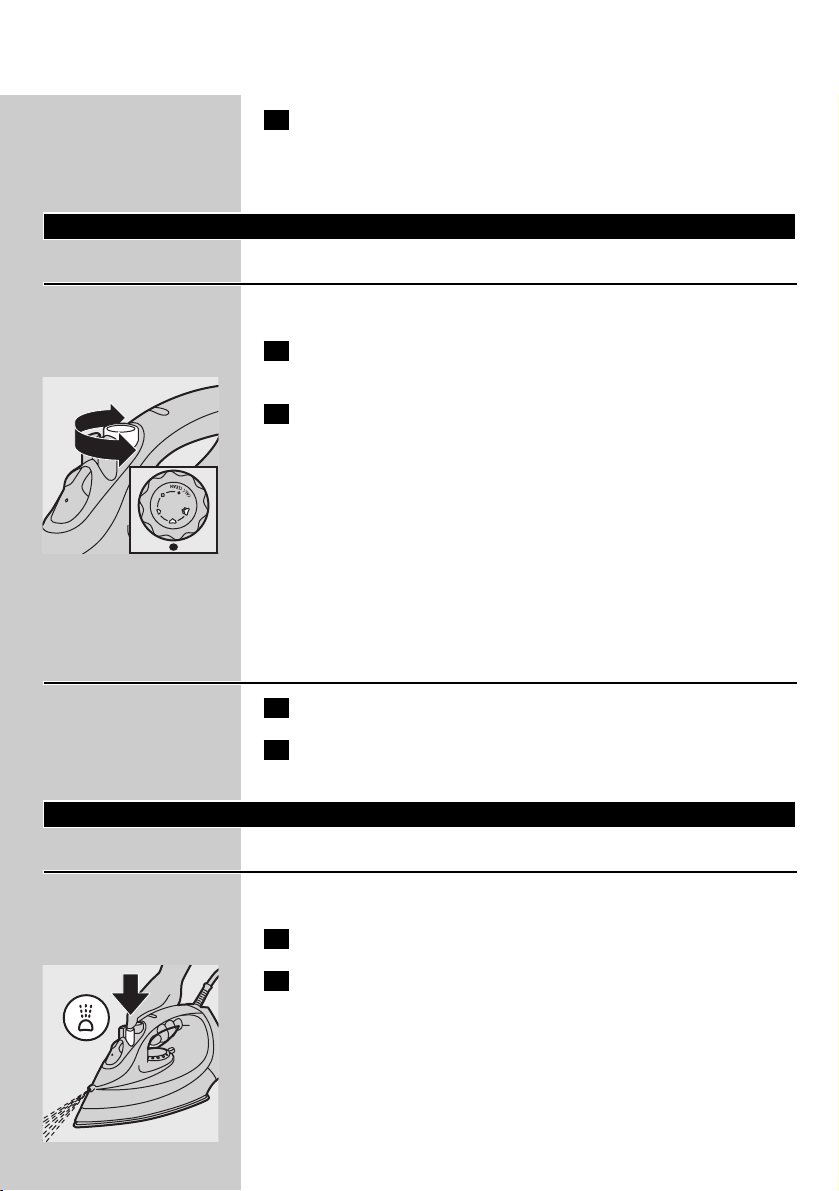
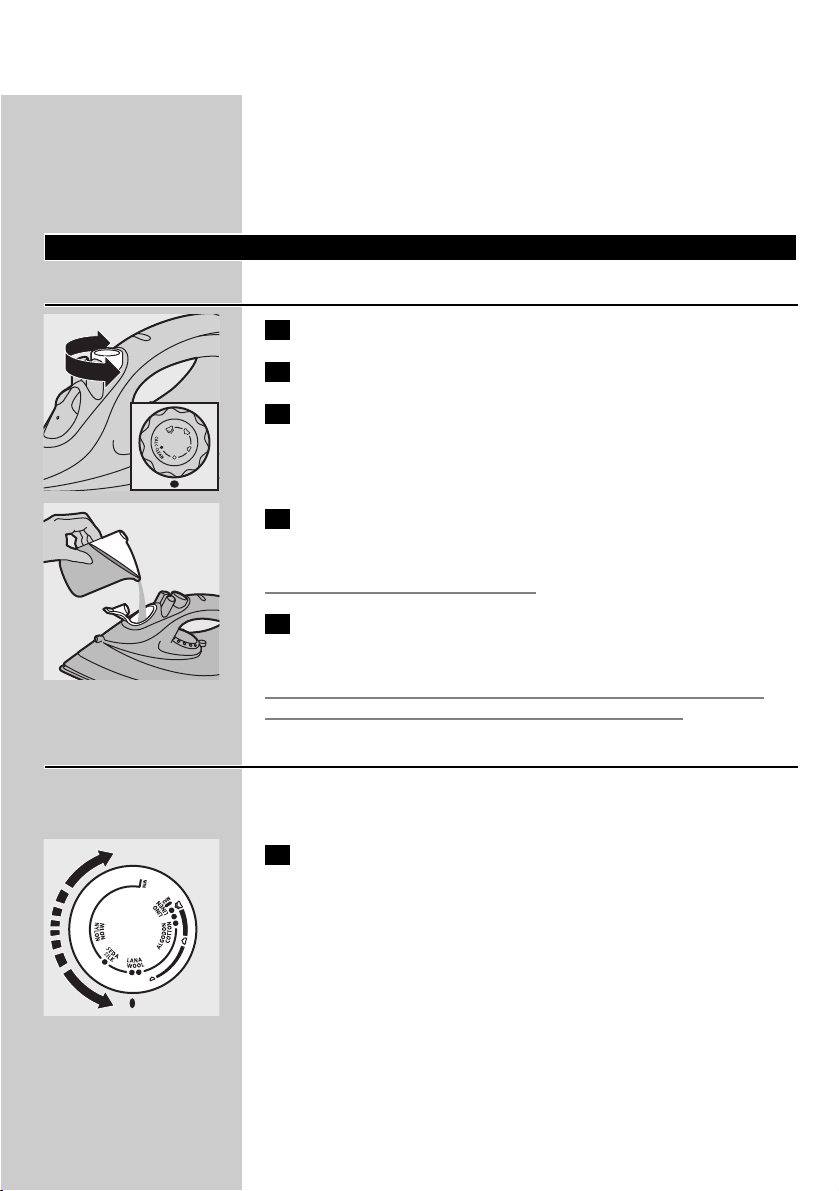
2 Set the steam control to position O (= no steam).
3 Open the filling cap (specific types only).
C
4 Tilt the iron and fill the water tank up to maximum level.
Do not fill the water tank beyond the MAX indication.
5 Close the filling cap (click!) (specific types only).
If the tap water in your area is very hard, we advise you to use distilled
water. Do not use vinegar, starch or chemically descaled water.
Setting the temperature
◗ The iron may give off some smoke when you use it for the first
time.This will cease after a short while.
C
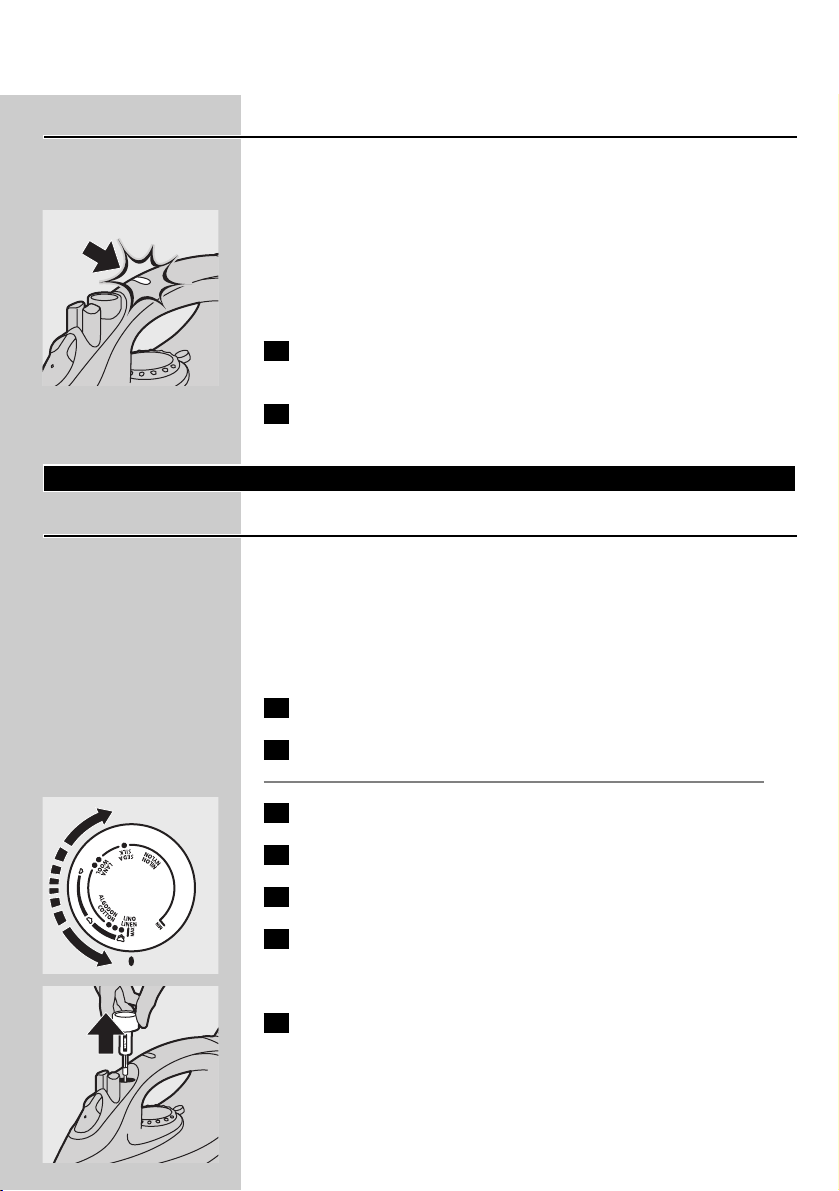
1 Put the iron on its heel and set the temperature dial to the
required ironing temperature by turning it to the appropriate
position.
- Check the garment label for the required ironing temperature.
- 1 Synthetic fabrics (e.g. acrylic, viscose, polyamide, polyester)
- 1 Silk
- 2 Wool
- 3 Cotton, linen
- If you do not know what kind or kinds of fabric an article is made of,
determine the right ironing temperature by ironing a part that will
not be visible when you wear or use the article.
- Silk, woollen and synthetic materials: iron the reverse side of the
fabric to prevent shiny patches.Avoid using the spray function to
prevent stains.
2 Put the mains plug in an earthed wall socket.
ENGLISH 7
Page 8
3 When the temperature light has gone out, wait a while before
you start ironing.
B
The temperature light will go on from time to time during ironing.
Using the appliance
Steam ironing
Make sure that there is enough water in the water tank.
1 Set the temperature dial to the recommended position.
See 'Setting the temperature'.
C
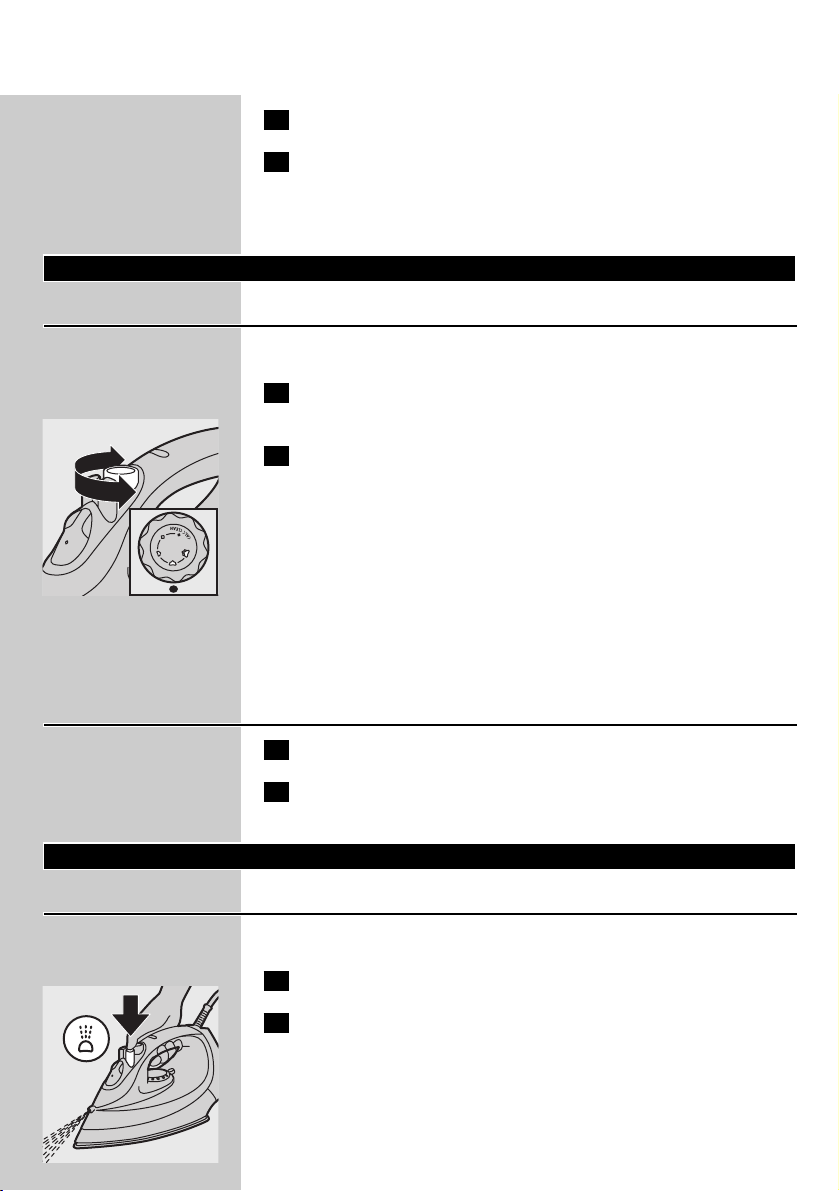
2 Set the steam control to the appropriate steam position.
- Á for minimum steam (temperature settings 2 and 3).
- Ë for moderate steam (temperature settings 3 to MAX)
(specific types only).
- È for maximum steam (temperature settings 3 to MAX).
B
Steaming will start as soon as the set temperature has been reached.
GC2215/2120/2115/2110/2105 only:
Water may leak from the soleplate if the set temperature is too low
(MIN to 2).
Ironing without steam
1 Set the steam control to position O (= no steam).
2 Set the temperature dial to the recommended position.
See 'Setting the temperature'.
Features
Spraying
To remove stubborn creases at any temperature
1 Make sure that there is enough water in the water tank.
C
2 Press the spray button several times to moisten the garment to
be ironed.
ENGLISH8
Page 9

Extra Steam (specific types only)
This function provides extra steam to remove really stubborn creases.
The Extra Steam function only works at temperature settings between
3 and MAX.
C
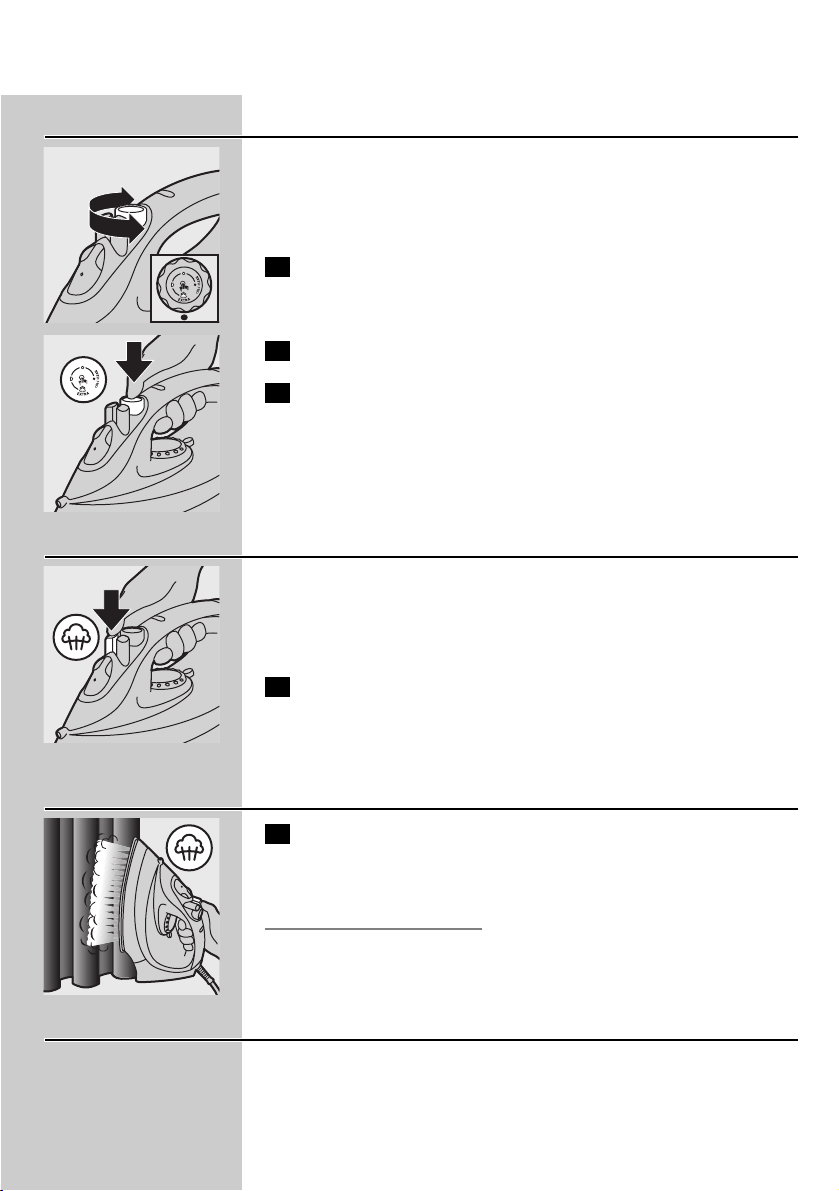
1 Set the steam control to maximum position È.
C
2 Press and hold the Steam Control button down for
max. 5 seconds.
3 Wait at least 1 minute before using Extra Steam again to
prevent water from dripping out of the soleplate.
Shot of Steam (specific types only)
A powerful shot of steam helps to remove very stubborn creases.
The Shot-of-Steam function only works at temperature settings
between 2 and MAX.
C
1 Press and release the Shot-of-Steam button.
Vertical Shot of Steam
(GC2225/2220/2215/2130/2126/2125/2120/2115 only)
C
1 The Shot-of-Steam function can also be used when you are
holding the iron in vertical position.This is useful for removing
creases from hanging clothes,curtains, etc.
Never direct the steam towards people.
Drip stop (GC2225/2220/GC2130/2126/2125 only)
This iron is equipped with a drip stop function: the iron automatically
stops steaming when the temperature is too low to prevent water
from dripping out of the soleplate. When this happens you will hear a
click.
ENGLISH 9
Page 10
Automatic shut-off (specific types only)
An electronic safety device will automatically switch the heating
element off if the iron has not been moved for a while.
C
◗ To indicate that the heating element has been switched off, the
automatic shut-off light will start blinking.
To heat up the iron again: pick it up or move it slightly.The automatic
shut-off light will go out.
1 If the temperature light goes on, wait for it to go out before
you start ironing.
2 If the temperature light does not go on, the iron is ready for
use.
Cleaning and maintenance
Calc-Clean function
◗ The Calc-Clean function removes the scale particles.
Use the Calc-Clean function once every two weeks. If the water in
your area is very hard (i.e. when flakes come out of the soleplate
during ironing), the Calc-Clean function should be used more
frequently.
1 Set the steam control to position O.
2 Fill the water tank to the maximum level.
Do not pour vinegar or other descaling agents into the water tank..
C
3 Set the temperature dial to MAX.
4 Put the plug in the wall socket.
5 Unplug the iron when the temperature light has gone out.
6 Hold the iron over the sink and set the steam control to
position 1 (Calc-Clean).The steam control knob will spring up
slightly.
C
7 Pull the steam control knob upwards to remove the steam
control needle.
ENGLISH10
Page 11
C
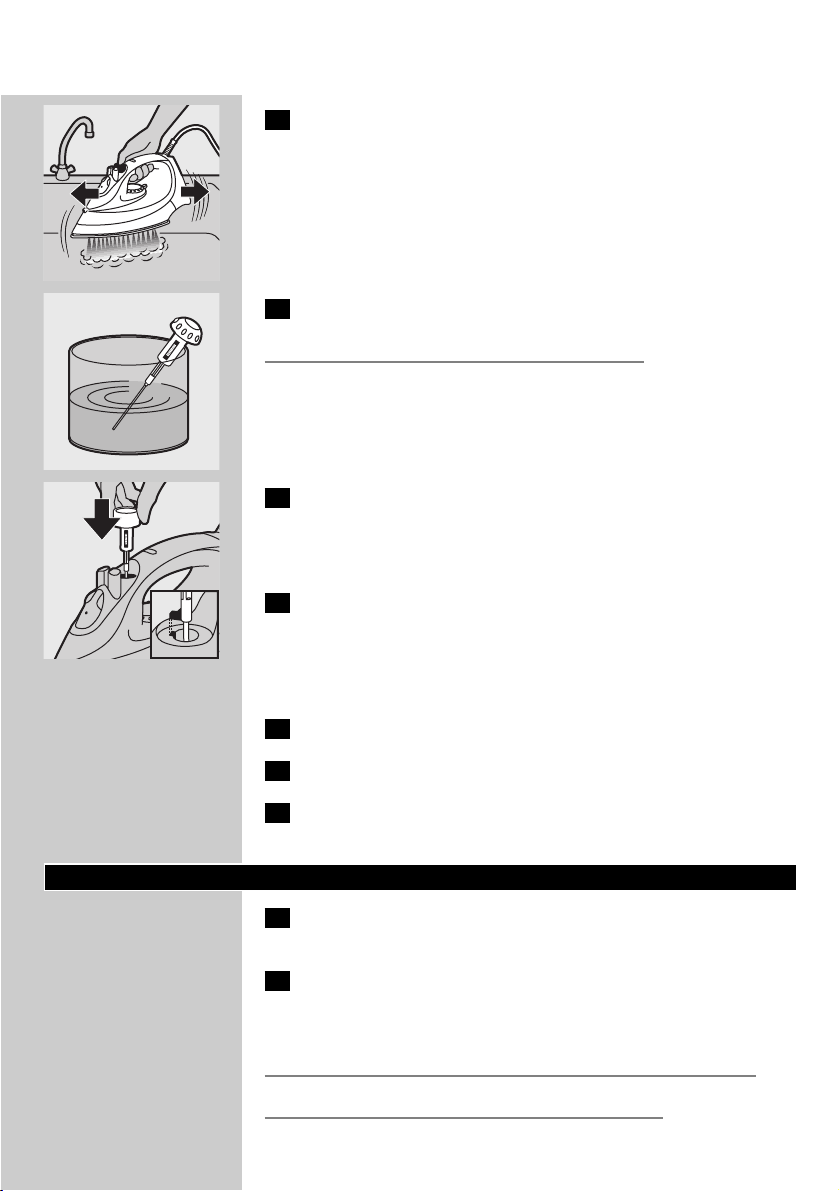
8 Hold the iron over the sink and move it to and fro.
B
Steam and boiling water will come out of the soleplate. Impurities and
scale (if any) will be flushed out.
C
9 Use vinegar to remove scale, if any, from the needle.
Do not bend or damage the steam control needle.
C
10 Put the steam control needle back by inserting the point of the
needle exactly in the centre of the hole and by fitting the small
projection on the side of the needle into the slot. Set the
steam control knob to position O.
11 Repeat the Calc-Clean process if the iron still contains a lot of
impurities.
After the Calc-Clean process
1 Plug the iron in to let the soleplate dry up.
2 Unplug the iron when the temperature light has gone out.
3 Move the iron gently over a piece of used cloth to remove any
water stains that may have formed on the soleplate.
Storage
1 Remove the mains plug from the wall socket, let the iron cool
down and set the steam control to position O.
2 Clean the appliance and wipe scale and any other deposits off
the soleplate with a damp cloth and a non-abrasive (liquid)
cleaner.
Keep the soleplate smooth: avoid hard contact with metal objects.
Never use a scouring pad, vinegar or other chemicals.
ENGLISH 11
Page 12
C
3 Regurarly rinse the water tank with water and empty it after
cleaning.
C
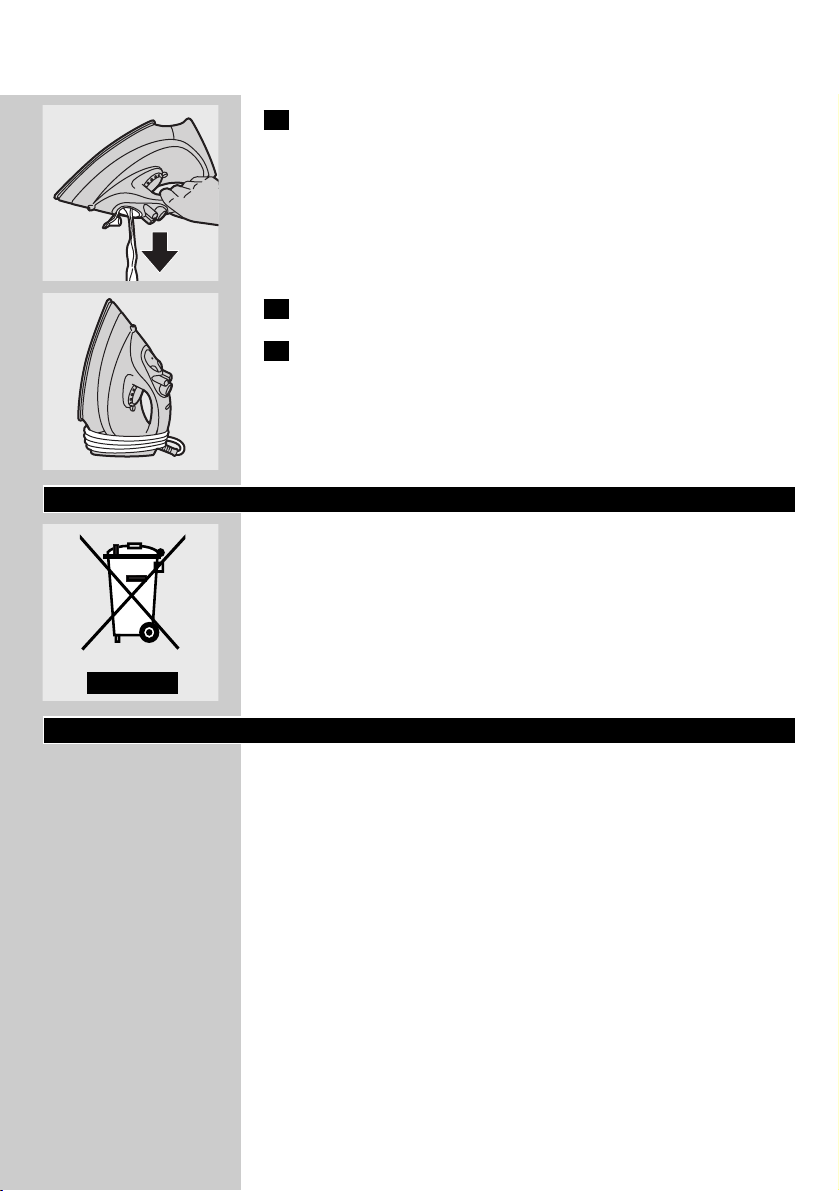
4 Wind the mains cord round the cord storage facility.
5 Always store the iron standing on its heel in a safe and dry
place.
Environment
C
◗ Do not throw the appliance away with the normal household
waste at the end of its life, but hand it in at an official collection
point for recycling. By doing this you will help to preserve the
environment.
Guarantee & service
If you need information or if you have a problem, please visit the Philips
website at www.philips.com or contact the Philips Customer Care
Centre in your country (you will find its phone number in the
worldwide guarantee leaflet). If there is no Customer Care Centre in
your country, turn to your local Philips dealer or contact the Service
Department of Philips Domestic Appliances and Personal Care BV.
ENGLISH12
Page 13

Solution
Check the mains cord, the plug and
the wall socket.
Set the temperature dial to the
required position.
Fill the water tank (see 'Preparing for
use'; section 'Filling the watertank'.)
Set the steam position to Á, Ë or È
(see 'Using the appliance', section
'Steam ironing').
Set the temperature dial to a position
in the steam area (2 to MAX). Put
the iron on its heel and wait until the
temperature light has gone out before
you start ironing.
Put the iron in horizontal position and
wait a while before using the (Vertical)
Shot of Steam function again.
Set the temperature dial to a position
in the steam area (2 to MAX). Put
the iron on its heel and wait until the
temperature light has gone out before
you start ironing.
Use the Calc-Clean function a few
times (see 'Cleaning and maintenance',
section 'Calc-Clean').
Pick the iron up or move it slightly to
deactivate the automatic shut-off
function: the red light will stop blinking.
Press the filling cap until you hear a
click.
Set the temperature dial to a position
in the steam area (2 to MAX). Put
the iron on its heel and wait until the
temperature light has gone out before
you start ironing.
Empty the water tank and set the
steam control to position O after use.
Store the iron on its heel.
Possible cause(s)
Connection problem
Temperature dial set at MIN
Not enough water in the water tank.
The steam control has been set to
position O.
The soleplate is not hot enough
and/or the drip stop function (specific
types only) has been activated.
The (Vertical) Shot of Steam function
has been used too often within a very
short period.
The soleplate is not hot enough.
Hard water forms flakes inside the
soleplate.
The automatic shut-off function has
been activated (see 'Other features',
section 'Automatic shut-off').
The filling cap has not been closed
properly.
The temperature has been set too
low.
The iron has been put in horizontal
position while there was still water in
the water tank.
Problem
The iron is plugged in but the soleplate
is cold.
No steam
No shot of steam or no Vertical Shot
of Steam (specific types only).
Flakes and impurities come out of the
soleplate during ironing.
Red light is blinking (GC2225 and
GC2130 only).
Water droplets on fabric
(GC2225/2220/2215/GC2130/2126/2
125/2120 only)
Water droplets on fabric
(GC2215/2120/2115/2110/2105 only)
Water drips from the soleplate after
the iron has cooled down or has been
stored.
Troubleshooting
This chapter summarises the most common problems you could encounter with your iron. Please
read the different sections for more details. If you are unable to solve the problem, please contact the
Philips Customer Care Centre in your country.
ENGLISH 13
Page 14

Generell beskrivelse (fig. 1)
A Spraymunnstykke
B Påfyllingshette (gjelder kun
GC2225/2220/2215/GC2130/2126/2125/2120)
C Påfyllingsåpning
D Dampstøtknapp 9 (kun
GC2225/2220/2215/GC2130/2126/2125/2120/2115/2110)
E Sprayknapp T
F Dampbryter
- O = ingen damp
- Á = minimal damp
- q = litt damp (gjelder kun
GC2225/2220/2215/GC2130/2126/2125/2120)
- w = maksimal damp
- 1 = kalkrensfunksjon
G Ekstradampfunksjon (bare GC2105)
H Temperaturlampe (alle typer) og indikatorlampe for automatisk
av-funksjon (kun GC2225/GC2130)
I Temperaturvelger
J Ledning
K Merkeplate
L Vanntank
Viktig
Les denne bruksanvisningen nøye før apparatet tas i bruk, og ta vare på
den for senere referanse.
◗ Kontroller at spenningen som er angitt på merkeplaten, er den
samme som nettspenningen, før du kobler til apparatet.
◗ Bruk kun jordet stikkontakt til dette apparatet.
◗ Ikke bruk apparatet hvis støpselet, ledningen eller selve apparatet
har synlig skade, eller hvis apparatet har falt i gulvet eller lekker.
◗ Kontroller ledningen regelmessig for mulig skade.
◗ Hvis ledningen er ødelagt, må den skiftes ut av Philips, et
servicesenter godkjent av Philips eller liknende kvalifisert
personell, slik at man unngår farlige situasjoner.
◗ La aldri apparatet stå uten tilsyn når det er koblet til strømnettet.
◗ Strykejernet eller holderen (hvis det følger med) må aldri dyppes i
vann.
◗ Oppbevar apparatet utilgjengelig for barn.
◗ Strykesålen på strykejernet kan bli ekstremt varm,og du kan
brenne deg hvis du tar på den.
◗ Ledningen må ikke komme i kontakt med strykesålen når denne
er varm.
◗ Sett dampbryteren på O, sett strykejernet i oppreist stilling og dra
ut støpselet fra stikkontakten når du er ferdig med å stryke, når
du rengjør apparatet, når du fyller eller tømmer vannbeholderen
og også når du forlater strykejernet et øyeblikk.
NORSK14
Page 15
◗ Plasser og bruk alltid strykejernet og holderen, hvis det følger
med, på et stødig,jevnt og horisontalt underlag.
◗ Ikke ha parfyme, eddik, stivelse,avkalkingsmidler, strykemidler eller
andre kjemikalier i vannbeholderen.
◗ Dette apparatet skal bare brukes i husholdningen.
Før bruk
Fylle vannbeholderen
1 Ta ut støpselet av stikkontakten.
C
2 Sett dampbryteren i posisjon 0 (= ingen damp).
3 Åpne påfyllingshetten (gjelder kun bestemte typer).
C
4 Vipp strykejernet bakover og fyll vannbeholderen til
maksimumsnivået.
Ikke fyll vann over maksimumsnivået.
5 Lukk påfyllingshetten (du vil høre et klikk) (gjelder kun
bestemte typer).
Hvis vannet i springen er veldig hardt, anbefaler vi å bruke destillert
vann. Ikke bruk eddik, stivelse eller kjemisk avkalket vann.
Stille inn temperaturen
◗ Strykejernet kan ryke litt ved første gangs bruk.Dette vil avta
etter en liten stund.
C
1 Sett strykejernet i oppreist stilling og angi ønsket
stryketemperatur ved å vri temperaturvelgeren til riktig
posisjon.
- Se på vaskeanvisningen på plagget for å finne den riktige
stryketemperaturen.
- 1 Syntetiske stoffer (f.eks. akryl, viskose, polyamid,polyester)
- 1 Silke
- 2 Ull
- 3 Bomull, lin
- Hvis du ikke vet hva slags stoff et plagg består av,kan du finne riktig
stryketemperatur ved å stryke en del som ikke vil være synlig når du
bruker plagget.
- Silke, ull og syntetiske stoffer: stryk på vrangen for å unngå blanke
områder. Unngå å bruke sprayfunksjonen, slik at det ikke blir flekker.
NORSK 15
Page 16
2 Sett støpselet i en jordet stikkontakt.
3 Når temperaturlampen slukkes, må du vente litt før du
begynner å stryke.
B
Temperaturlampen tennes med jevne mellomrom under strykingen.
Bruke apparatet
Dampstryking
Kontroller at det er nok vann i vannbeholderen.
1 Sett temperaturvelgeren på anbefalt temperatur.
Se avsnittet "Stille inn temperatur"
C
2 Sett dampbryteren i riktig posisjon.
- Á for minimal damp (temperaturinnstilling 2 og 3).
- Ë for litt damp (temperaturinnstilling 3 til MAX) (gjelder kun
bestemte typer).
- È for maksimal damp (temperaturinnstilling 3 til MAX).
B
Dampen vil starte så fort angitt temperatur er nådd.
Gjelder kun GC2215/2120/2115/2110/2105:
Det kan lekke vann fra strykesålen dersom innstilt temperatur er for lav
(MIN til 2).
Stryking uten damp
1 Sett dampbryteren til O (= ingen damp).
2 Sett temperaturvelgeren på anbefalt temperatur.
Se avsnittet "Stille inn temperatur"
Funksjoner
Spraying
For å glatte ut vanskelige skrukker ved alle temperaturer.
1 Kontroller at det er nok vann i vannbeholderen.
C
2 Trykk flere ganger på sprayknappen for å fukte plagget som skal
strykes.
NORSK16
Page 17
Ekstra damp (gjelder kun bestemte typer)
Denne funksjonen gir ekstra damp for fjerning av vanskelige skrukker.
Funksjonen for ekstra damp virker bare ved temperaturinnstillinger
mellom 3 og MAX.
C
1 Sett dampbryteren til maksimalstillingen È.
C
2 Trykk på og hold nede dampbryteren i maks. fem sekunder.
3 Vent minst ett minutt før du bruker ekstra damp igjen for å
unngå at vann drypper ut av strykesålen.
Dampstøt (gjelder kun bestemte typer)
Et kraftig dampstøt gjør det lettere å få vekk vanskelige skrukker.
Dampstøtfunksjonen fungerer bare ved temperaturer mellom 2 og
MAX.
C
1 Trykk på og slipp dampstøtknappen.
Vertikalt dampstøt (gjelder kun
GC2225/2220/2215/2130/2126/2125/2120/2115)
C
1 Dampstøtfunksjonen kan også brukes når strykejernet holdes
loddrett (vertikalt). Dette er nyttig ved fjerning av skrukker fra
klær på henger, gardiner osv.
Rett aldri dampen mot noen.
Dryppstopp (gjelder kun GC2225/2220/GC2130/2126/2125)
Dette strykejernet er utstyrt med en dryppstoppfunksjon. Strykejernet
slutter automatisk å produsere damp når temperaturen er for lav.
Dette hindrer at vann drypper fra strykesålen. Når dette skjer, hører du
et klikk.
NORSK 17
Page 18

Automatisk av-funksjon (gjelder kun bestemte typer)
En elektronisk sikkerhetsinnretning vil automatisk slå av
varmeelementet hvis strykejernet ikke er flyttet på en stund.
C
◗ Indikatorlampen for den automatiske av-funksjonen begynner å
blinke for å vise at varmeelementet har vært slått av.
Hvis du vil varme opp strykejernet igjen, tar du det opp eller flytter litt
på det. Indikatorlampen for den automatiske av-funksjonen slukkes.
1 Hvis temperaturlampen lyser, må du vente til det slukker før du
kan begynne å stryke.
2 Hvis temperaturlampen ikke lyser, er strykejernet klart til bruk.
Rengjøring og vedlikehold
Kalkrensfunksjon
◗ Kalkrensfunksjonen fjerner kalkpartiklene.
Bruk kalkrensfunksjonen én gang annenhver uke. Hvis vannet i området
ditt er veldig hardt (dvs. at det kommer kalk ut av strykesålen under
strykingen), bør du bruke kalkrensfunksjonen oftere.
1 Sett dampbryteren til O.
2 Fyll vannbeholderen til maksimumsnivået.
Ikke hell eddik eller andre avkalkingsmidler i vannbeholderen.
C
3 Sett temperaturvelgeren til MAX.
4 Sett støpselet inn i stikkontakten.
5 Trekk ut støpselet når temperaturlampen er slukket.
6 Hold strykejernet over vasken og sett dampbryteren til 1
(kalkrens). Dampbryteren spretter litt opp.
C
7 Trekk dampbryteren oppover for å fjerne dampbryternålen.
C
8 Hold strykejernet over vasken og rist forsiktig på det.
B
Det vil komme ut damp og kokende vann fra strykesålen. Urenheter og
kalk (hvis det er noen) vil komme ut samtidig.
NORSK18
Page 19

C
9 Fjern eventuell kalk fra nålen med eddik.
Ikke bøy eller skad dampbryternålen.
C
10 Sett dampbryternålen tilbake ved å sette nålspissen nøyaktig
midt i hullet og tilpasse den lille kanten på siden av nålen i
sporet. Sett dampbryteren til O.
11 Gjenta avkalkingsprosessen hvis det fortsatt er mye urenheter i
strykejernet.
Etter avkalkingsprosessen
1 Sett inn støpselet i stikkontakten slik at strykesålen tørker.
2 Trekk ut støpselet når temperaturlampen er slukket.
3 Beveg strykejernet forsiktig over et brukt tøystykke for å fjerne
vannflekker som kan ha blitt dannet på strykesålen.
Oppbevaring
1 Trekk støpselet ut av stikkontakten,la strykejernet avkjøles og
sett dampbryteren til O.
2 Rengjør apparatet, og tørk kalk og andre avleiringer av
strykesålen med en fuktig klut og et (flytende) vaskemiddel
uten skureeffekt.
Hold strykesålen glatt: unngå hard kontakt med metallgjenstander.
Bruk aldri skuresvamper, eddik eller andre kjemikalier.
C
3 Skyll vannbeholderen regelmessig med vann.Tøm
vannbeholderen etter rengjøringen.
C
4 Snurr ledningen rundt lagringsenheten for ledningen.
5 Oppbevar alltid strykejernet vertikalt på et trygt og tørt sted.
NORSK 19
Page 20

Miljø
C
◗ Ikke kast apparatet som vanlig husholdningsavfall når det ikke kan
brukes lenger. Lever det på en gjenvinningsstasjon.Ved å gjøre
dette hjelper du til med å ta vare på miljøet.
Garanti og service
Hvis du trenger service eller informasjon, kan du gå til Philips' Internettsider på www.philips.com eller ta kontakt med Philips' kundestøtte der
du er (du finner telefonnummeret i garantiheftet). Hvis det ikke finnes
noen Philips-kundestøtte der du bor, kan du ta kontakt med den lokale
Philips-forhandleren eller serviceavdelingen ved Philips Domestic
Appliances and Personal Care BV.
NORSK20
Page 21

Løsning
Undersøk ledningen, støpslet og
stikkontakten.
Sett temperaturvelgeren i ønsket
posisjon.
Fyll vannbeholderen (se avsnittet Før
bruk, under Fylle vannbeholderen).
Sett dampbryteren til Á, Ë eller È (se
avsnittet Bruke apparatet, under
Dampstryking).
Sett temperaturvelgeren i en av
posisjonene for damp (2 til MAX).
Sett strykejernet i oppreist stilling og
vent til temperaturlampen slukkes før
du begynner å stryke.
Sett strykejernet i horisontal posisjon,
og vent litt før du bruker (den
vertikale) dampstøtfunksjonen igjen.
Sett temperaturvelgeren i en av
posisjonene for damp (2 til MAX).
Sett strykejernet i oppreist stilling og
vent til temperaturlampen slukkes før
du begynner å stryke.
Bruk kalkrensfunksjonen noen ganger
(se avsnittet Rengjøring og vedlikehold,
under Kalkrensfunksjon).
Ta opp strykejernet eller flytt litt på
det for å deaktivere den automatiske
av-funksjonen. Det røde lyset vil da
slutte å blinke.
Trykk på påfyllingshetten til det høres
et klikk.
Sett temperaturvelgeren i en av
posisjonene for damp (2 til MAX).
Sett strykejernet i oppreist stilling og
vent til temperaturlampen slukkes før
du begynner å stryke.
Tøm vannbeholderen og sett
dampbryteren til O etter bruk.
Oppbevar strykejernet i oppreist
stilling (vertikalt).
Mulig årsak
Problemer med tilkoblingen.
Temperaturvelgeren står på MIN.
Ikke nok vann i vannbeholderen.
Dampbryteren er satt i posisjon O.
Strykesålen er ikke tilstrekkelig varm,
og/eller dryppstoppfunksjonen (gjelder
kun bestemte typer) er aktivert.
(Den vertikale) dampstøtfunksjonen
har blitt brukt for mye på kort tid.
Strykesålen er ikke varm nok.
Hardt vann danner kalk inne i
strykesålen.
Den automatiske av-funksjonen er
aktivert (se avsnittet Andre funksjoner,
under Automatisk av-funksjon).
Påfyllingshetten er ikke ordentlig lukket.
Temperaturen er satt for lavt.
Strykejernet har blitt satt i horisontal
posisjon mens det ennå var vann i
vannbeholderen.
Problem
Strykejernet er koblet til, men
strykesålen er kald.
Ingen damp.
Funksjonen for dampstøt eller vertikalt
dampstøt (gjelder kun enkelte typer)
virker ikke.
Kalk og urenheter kommer ut av
strykesålen under stryking.
Det røde lyset blinker (gjelder kun
GC2225 og GC2130).
Vanndråper på stoffet (gjelder kun
GC2225/2220/2215/GC2130/2126/21
25/2120)
Vanndråper på stoffet (gjelder kun
GC2215/2120/2115/2110/2105)
Det drypper vann fra strykesålen etter
at strykejernet er blitt avkjølt eller er
blitt satt bort for oppbevaring.
Feilsøking
Dette kapitlet gir en oversikt over de vanligste problemene som kan oppstå med strykejernet. Se de
enkelte avsnittene for nærmere opplysninger. Hvis du ikke finner løsningen på problemet, tar du
kontakt med Philips' kundestøtte i landet ditt.
NORSK 21
Page 22

Allmän beskrivning (bild 1)
A Spraymunstycke
B Påfyllningslock (endast
GC2225/2220/2215/GC2130/2126/2125/2120)
C Påfyllningsöppning
D Ångpuffknapp 9 (endast
GC2225/2220/2215/GC2130/2126/2125/2120/2115/2110)
E Sprayknapp T
F Ångvred
- O = ingen ånga
- Á = minimal ånga
- q = måttlig ånga (endast
GC2225/2220/2215/GC2130/2126/2125/2120)
- w = maximal ånga
- 1 = avkalkningsfunktion
G Funktion för extra ånga (endast GC2105)
H Temperaturlampa (alla typer) och lampa för automatisk avstängning
(endast GC2225/GC2130)
I Temperaturvred
J Nätsladd
K Märkplåt
L Vattentank
Viktigt
Läs användningsinstruktionerna noga innan du använder apparaten, och
spara dem ifall du behöver dem igen.
◗ Kontrollera att nätspänningen som anges på märkplåten
motsvarar den lokala nätspänningen innan du ansluter apparaten.
◗ Apparaten får endast anslutas till ett jordat vägguttag.
◗ Använd inte apparaten om kontakten, sladden eller själva
apparaten har synliga skador eller om apparaten har tappats i
golvet eller läcker.
◗ Kontrollera nätsladden regelbundet för att se om den är skadad.
◗ Om nätsladden är skadad måste den bytas ut av Philips, ett av
Philips auktoriserade serviceombud eller en lika kvalificerad
person för att undvika fara.
◗ Lämna aldrig apparaten utan uppsikt när den är ansluten till
elnätet.
◗ Sänk aldrig ned strykjärnet och stället, om sådant finns, i vatten.
◗ Förvara apparaten utom räckhåll för barn.
◗ Järnets stryksula kan bli mycket het och vid beröring orsaka
brännskada.
◗ Låt inte nätsladden komma i beröring med stryksulan när den är
varm.
◗ När du har strukit klart, när du rengör strykjärnet, när du fyller på
eller tömmer vattentanken och också när du lämnar strykjärnet
för en kort stund: vrid ångvredet till läge O, ställ strykjärnet på
hälen och dra ut stickkontakten ur vägguttaget.
SVENSKA22
Page 23

◗ Järnet och stället, om sådant finns,ska alltid placeras och användas
på ett stabilt, jämnt och horisontellt underlag.
◗ Häll inte parfym, vinäger, stärkelse, avkalkningsmedel,
strykhjälpmedel eller andra kemikalier i vattentanken.
◗ Apparaten är endast avsedd för hushållsbruk.
Förberedelser inför användning
Fylla vattentanken
1 Ta ut stickkontakten ur vägguttaget.
C
2 Vrid ångvredet till läge O (=ingen ånga).
3 Öppna påfyllningslocket (endast vissa modeller).
C
4 Luta strykjärnet och fyll vattentanken upp till maxnivån.
Fyll inte vattentanken över MAX-markeringen.
5 Stäng påfyllningslocket så att ett klickljud hörs (endast vissa
modeller).
Om kranvattnet där du bor är mycket hårt bör du använda destillerat
vatten.Använd inte ättika, stärkelse eller kemiskt avkalkat vatten.
Ställa in temperaturen
◗ Strykjärnet kan avge lite rök när du använder det första gången.
Det upphör efter en kort stund.
C
1 Ställ strykjärnet på hälen och ställ in temperaturvredet på
önskad stryktemperatur genom att vrida det till lämpligt läge.
- Rätt stryktemperatur hittar du på plaggets tvättetikett.
- 1 Syntetmaterial (t.ex. akryl, viskos, polyamid, polyester)
- 1 Siden
- 2 Ylle
- 3 Bomull, linne
- Om du inte vet vilket tyg en artikel är tillverkad av avgör du rätt
stryktemperatur genom att stryka en bit som inte syns när du bär
eller använder artikeln.
- För siden, ylle och syntetmaterial: stryk på materialets insida så att du
undviker glansiga fläckar. Använd inte sprayfunktionen, den kan orsaka
fläckar.
2 Sätt in stickkontakten i ett jordat vägguttag.
SVENSKA 23
Page 24

3 Vänta en stund efter att temperaturlampan har slocknat innan
du börjar stryka.
B
Temperaturlampan tänds då och då under strykningen.
Använda apparaten
Ångstrykning
Se till att det finns tillräckligt med vatten i vattentanken.
1 Vrid temperaturvredet till rekommenderat läge.
Se avsnittet Ställa in temperaturen.
C
2 Vrid ångvredet till rätt ångläge.
- Á om du vill ha lite ånga (temperaturinställningarna 2 och 3).
- Ë om du vill ha måttligt med ånga (temperaturinställningarna 3
till MAX) (endast vissa modeller).
- È om du vill ha mycket ånga (temperaturinställningarna 3 till
MAX).
B
Strykjärnet börjar ånga när den inställda temperaturen har uppnåtts.
Endast GC2215/2120/2115/2110/2105:
Det kan rinna vatten från stryksulan om den inställda temperaturen är
för låg (MIN till 2).
Strykning utan ånga
1 Vrid ångvredet till läge O (=ingen ånga).
2 Vrid temperaturvredet till rekommenderat läge.
Se avsnittet Ställa in temperaturen.
Funktioner
Spray
Ta bort envisa veck vid alla temperaturer
1 Se till att det finns tillräckligt med vatten i vattentanken.
C
2 Tryck på sprayknappen flera gånger så att plagget som ska
strykas fuktas ordentligt.
SVENSKA24
Page 25

Extra ånga (endast vissa modeller)
Den här funktionen ger extra ånga så att du kan ta bort envisa veck.
Funktionen för extra ånga kan bara användas vid
temperaturinställningar mellan 3 och MAX.
C
1 Vrid ångvredet till det högsta läget È.
C
2 Tryck på och håll ned ångknappen i max. fem sekunder.
3 Vänta i minst en minut innan du använder funktionen för extra
ånga igen för att förhindra att vatten droppar ut från
stryksulan.
Ångpuff (endast vissa modeller)
En kraftfull ångpuff hjälper dig att ta bort envisa veck.
Ångpuffsfunktionen kan bara användas vid temperaturinställningar
mellan 2 och MAX.
C
1 Tryck in och släpp ångpuffknappen.
Vertikal ångpuff (endast
GC2225/2220/2215/2130/2126/2125/2120/2115)
C
1 Ångpuffsfunktionen kan också användas när du håller
strykjärnet i vertikalt läge. Det är praktiskt när du tar bort
veck från upphängda kläder, gardiner etc.
Rikta aldrig ångan mot människor.
Droppstopp (endast GC2225/2220/GC2130/2126/2125)
Det här strykjärnet är utrustat med droppstopp. Strykjärnet slutar
automatiskt att ånga när temperaturen är för låg för att hindra vatten
från att droppa från stryksulan. När detta sker hör du ett klickljud.
SVENSKA 25
Page 26

Automatisk avstängning (endast vissa modeller)
Med en elektronisk säkerhetsanordning stängs värmeelementet av
automatiskt om strykjärnet har stått stilla en stund.
C
◗ Lampan för automatisk avstängning börjar blinka för att visa att
värmeelementet har stängts av.
Ta upp strykjärnet eller flytta det något när du vill värma upp det igen.
Lampan för automatisk avstängning släcks.
1 Om temperaturlampan tänds ska du vänta tills den slocknar
innan du börjar stryka.
2 Om temperaturlampan inte tänds är strykjärnet klart att
användas.
Rengöring och underhåll
Avkalkningsfunktion
◗ Avkalkningsfunktionen avlägsnar kalkpartiklarna.
Använd avkalkningsfunktionen varannan vecka. Om vattnet där du bor
är mycket hårt (t.ex. om det kommer ut flagor ur stryksulan medan du
stryker) bör du använda avkalkningsfunktionen oftare.
1 Vrid ångvredet till läge O.
2 Fyll vatten i behållaren till MAX-markeringen.
Häll inte ättika eller andra avkalkningsmedel i vattentanken.
C
3 Ställ in temperaturvredet på MAX.
4 Sätt i stickkontakten i vägguttaget.
5 Dra ut stickkontakten när temperaturlampan har slocknat.
6 Håll strykjärnet över vasken och ställ in ångvredet på läge 1
(avkalkning). Ångvredet skjuts upp en aning.
C
7 Dra ångvredet uppåt för att ta bort ångvredsnålen.
SVENSKA26
Page 27

C
8 Håll strykjärnet över vasken och rör det fram och tillbaka.
B
Ånga och kokande vatten kommer ut ur stryksulan. Smuts och eventuella
kalkavlagringar sköljs ut.
C
9 Ta bort eventuella kalkavlagringar från nålen med hjälp av ättika.
Böj inte nålen och skada den inte på något annat sätt.
C
10 Sätt tillbaka ångvredsnålen genom att placera nålens spets
exakt i mitten av hålet och passa in den lilla upphöjningen på
nålens sida i skåran.Vrid ångvredet till läge O.
11 Upprepa avkalkningsprocessen om det fortfarande finns mycket
smuts kvar i strykjärnet.
Efter avkalkningen
1 Koppla in strykjärnet så att stryksulan torkar.
2 Dra ut stickkontakten när temperaturlampan har slocknat.
3 För försiktigt strykjärnet över en tygbit för att få bort
eventuella vattenfläckar som kan ha bildats på stryksulan.
Förvaring
1 Ta ut stickkontakten ur vägguttaget, låt strykjärnet svalna och
ställ in ångvredet på läge O.
2 Rengör apparaten och torka bort kalkavlagringar och annan
smuts från stryksulan med en fuktad trasa och rengöringsmedel
utan slipmedel.
Håll stryksulan slät genom att inte låta den komma i kontakt med
metallföremål.
Använd aldrig skursvamp, ättika eller andra kemikalier.
SVENSKA 27
Page 28

C
3 Skölj vattentanken regelbundet med vatten och töm den efter
rengöring.
C
4 Linda nätsladden runt sladdhållaren.
5 Förvara alltid strykjärnet stående på hälen på en säker och torr
plats.
Miljön
C
◗ Kasta inte apparaten i hushållssoporna när den är förbrukad.
Lämna in den för återvinning vid en officiell återvinningsstation, så
hjälper du till att skydda miljön.
Garanti och service
Om du behöver information eller har problem med apparaten kan du
besöka Philips webbplats på www.philips.com eller kontakta Philips
kundtjänstcenter i ditt land (du hittar telefonnumret i
garantibroschyren). Om det inte finns något kundtjänstcenter i ditt land
vänder du dig till din lokala Philips-återförsäljare eller kontaktar
serviceavdelningen på Philips Domestic Appliances and Personal
Care BV.
SVENSKA28
Page 29

Lösning
Kontrollera nätsladden, stickkontakten
och vägguttaget.
Vrid temperaturvredet till rätt läge.
Fyll vattentanken (se Förberedelser
inför användning, avsnittet Fylla
vattentanken).
Vrid ångvredet till läge Á, Ë eller È
(se Använda apparaten, avsnittet
Ångstrykning).
Ställ in temperaturvredet på ett
ångläge (2 till MAX). Ställ strykjärnet
på hälen och vänta tills
temperaturlampan har slocknat innan
du börjar stryka.
Placera strykjärnet i liggande läge och
vänta en stund innan du använder (den
vertikala) ångpuffsfunktionen igen.
Ställ in temperaturvredet på ett
ångläge (2 till MAX). Ställ strykjärnet
på hälen och vänta tills
temperaturlampan har slocknat innan
du börjar stryka.
Använd avkalkningsfunktionen några
gånger (se Rengöring och underhåll,
avsnittet Avkalkning).
Ta upp strykjärnet eller flytta det något
för att avaktivera den automatiska
avstängningsfunktionen. Den röda
lampan slutar blinka.
Tryck ned påfyllningslocket över
öppningen tills du hör ett klick.
Ställ in temperaturvredet på ett
ångläge (2 till MAX). Ställ strykjärnet
på hälen och vänta tills
temperaturlampan har slocknat innan
du börjar stryka.
Töm vattentanken och vrid ångvredet
till läge O efter användning. Förvara
strykjärnet stående på hälen.
Möjlig orsak
Anslutningsproblem
Temperaturvredet är inställt på MIN
Det finns inte tillräckligt med vatten i
tanken.
Ångvredet har vridits till läge O.
Stryksulan är inte tillräckligt varm
och/eller droppstoppet (endast vissa
modeller) har aktiverats.
Ångpuffsfunktionen (den vertikala) har
använts för ofta under för kort period.
Stryksulan är inte tillräckligt varm.
Hårt vatten bildar flagor i str yksulan.
Den automatiska
avstängningsfunktionen har aktiverats
(se Övriga funktioner,avsnittet
Automatisk avstängning).
Påfyllningslocket har inte stängts
ordentligt.
Den inställda temperaturen är för låg.
Strykjärnet har placerats i liggande läge
medan det fortfarande fanns vatten i
vattentanken.
Problem
Strykjärnet är anslutet till vägguttaget
men stryksulan är kall.
Ingen ånga
Ingen ångpuff eller vertikal ångpuff
(endast vissa modeller).
Det kommer flagor och smuts ur
stryksulan vid strykning.
En röd lampa blinkar (endast GC2225
och GC2130).
Det droppar vatten på tyget (endast
GC2225/2220/2215/GC2130/2126/21
25/2120)
Det droppar vatten på tyget (endast
GC2215/2120/2115/2110/2105)
Det droppar vatten från stryksulan när
strykjärnet har svalnat eller ställts
undan för förvaring.
Felsökning
I det här avsnittet finns en översikt över de vanligaste problemen du kan stöta på med ditt strykjärn.
Läs de olika avsnitten om du vill ha mer information. Om du inte kan lösa problemet kontaktar du
Philips kundtjänstcenter i ditt land.
SVENSKA 29
Page 30

Laitteen osat (kuva 1)
A Spray-nokka
B Täyttökorkki (vain malleissa
GC2225/2220/2215/GC2130/2126/2125/2120)
C Täyttöaukon korkki
D Höyrysuihkauspainike 9(vain malleissa
GC2225/2220/2215/GC2130/2126/2125/2120/2115/2110)
E Suihkutuspainike T
F Höyrynvalitsin
- O = ei höyryä
- Á = vähän höyryä
- q = kohtalaisesti höyryä (vain malleissa
GC2225/2220/2215/GC2130/2126/2125/2120)
- w= paljon höyryä
- 1 = CalcClean-toiminto
G Lisähöyrytoiminto (vain mallissa GC2105)
H Lämpötilan merkkivalo (kaikissa malleissa) ja automaattisen
virrankatkaisun merkkivalo (vain mallissa GC2225/GC2130)
I Lämpötilanvalitsin
J Verkkojohto
K Tyyppikilpi
L Vesisäiliö
Tärkeää
Lue tämä käyttöohje huolellisesti ennen laitteen käyttöönottoa ja säilytä
ohje vastaisen varalle.
◗ Tarkista, että laitteen arvokilven jännitemerkintä vastaa paikallista
verkkojännitettä,ennen kuin liität laitteen pistorasiaan.
◗ Yhdistä laite vain maadoitettuun pistorasiaan.
◗ Älä käytä laitetta, jos sen johto, pistoke tai jokin muu osa on
viallinen tai jos laite on pudonnut tai vuotaa.
◗ Tarkista liitosjohdon kunto säännöllisesti.
◗ Jos virtajohto on vaurioitunut, se on vaaratilanteiden välttämiseksi
vaihdatettava Philipsin valtuuttamassa huoltoliikkeessä.
◗ Laitetta ei saa koskaan jättää ilman valvontaa silloin kun se on
liitetty sähköverkkoon.
◗ Älä upota höyryrautaa tai sen mukana mahdollisesti toimitettua
telinettä veteen.
◗ Pidä laite poissa lasten ulottuvilta.
◗ Höyryraudan pohja tulee hyvin kuumaksi ja koskettaessa se voi
aiheuttaa palovamman.
◗ Pidä huoli, ettei höyryraudan kuuma pohja kosketa johtoa.
◗ Aseta höyrynvalitsin asentoon O, aseta höysilitysryrauta
pystyasentoon ja irrota pistoke pistorasiasta aina, kun lopetat
silittämisen, kun puhdistat laitetta,kun täytät tai tyhjennät
vesisäiliötä tai kun hetkeksikin poistut höyrysilitysraudan luota.
◗ Säilytä ja käytä höyryrautaa ja sen mukana mahdollisesti
toimitettua telinettä tukevalla,tasaisella ja vaakasuoralla pinnalla.
SUOMI30
Page 31

◗ Älä pane vesisäiliöön hajusteita, etikkaa, kalkinpoistoaineita,
silitysaineita tai muitakaan kemikaaleja.
◗ Tämä laite on tarkoitettu vain kotitalouksien käyttöön.
Käyttöönotto
Vesisäiliön täyttäminen
1 Irrota pistoke pistorasiasta.
C
2 Aseta höyrynvalitsin asentoon O (= ei höyryä).
3 Avaa täyttökorkki (vain tietyt mallit).
C
4 Kallista höyryrautaa ja täytä vesisäiliö
Täytä vesisäiliö enintään MAX-merkkiin asti.
5 Sulje täyttökorkki (vain tietyt mallit), jolloin kuuluu napsahdus.
Jos paikallinen vesijohtovesi on hyvin kovaa, suosittelemme käytettäväksi
tislattua vettä. Älä käytä etikkaa, tärkkiä tai kemiallisesti puhdistettua
vettä.
Lämpötilan valinta
◗ Höyryraudasta voi ensimmäisellä käyttökerralla tulla hieman
käryä.Tämä loppuu kuitenkin nopeasti.
C
1 Aseta rauta pystyasentoon ja valitse haluttu silityslämpötila
lämpötilanvalitsinta kääntämällä.
- Varmista oikea silityslämpötila vaatteen silitysohjeesta.
- 1 Tekokuitu (esimerkiksi akryyli, viskoosi, polyamidi,polyesteri)
- 1 Silkki
- 2 Villa
- 3 Puuvilla, pellava
- Jos et tiedä mitä materiaalia tekstiili on, kokeile silittämistä varovasti
sellaisesta kohdasta, joka ei näy päällepäin.
- Silkki, villa ja tekokuidut: silitä nurjalta puolelta, ettei kangas ala kiiltää.
Vältä spray-toiminnon käyttämistä, ettei vaatteeseen tule läikkiä.
2 Työnnä pistoke maadoitettuun pistorasiaan.
3 Kun lämpötilan merkkivalo on sammunut,odota hetki ennen
silityksen aloittamista.
B
Lämpötilan merkkivalo syttyy ajoittain uudelleen silityksen aikana.
SUOMI 31
Page 32

Käyttö
Höyrysilitys
Varmista että vesisäiliössä on riittävästi vettä.
1 Aseta lämpötilanvalitsin suositeltuun asentoon.
Katso kohta Lämpötilan valinta.
C
2 Aseta höyrynvalitsin sopivaan höyryasentoon.
- Á vähän höyryä (lämpötila-asetukset 2ja 3).
- Ë kohtalaisesti höyryä (lämpötila-asetukset 3 ¯ MAX)
(vain tietyt mallit).
- È paljon höyryä (lämpötila-asetukset 3 ¯ MAX).
B
Höyryä alkaa tulla heti, kun asetettu lämpötila on saavutettu.
Vain malleissa GC2215/2120/2115/2110/2105:
Vettä saattaa vuotaa pohjasta,jos lämpötila on asetettu liian matalaksi
(MIN ¯ 2).
Silittäminen ilman höyryä
1 Aseta höyrynvalitsin asentoon O(= ei höyryä).
2 Aseta lämpötilanvalitsin suositeltuun asentoon.
Katso kohta Lämpötilan valinta.
Ominaisuudet
Suihkutus
Itsepintaisten laskosten poistamiseen kaikissa lämpötiloissa.
1 Varmista että vesisäiliössä on riittävästi vettä.
C
2 Kostuta silitettävä vaate painamalla suihkutuspainiketta useita
kertoja.
Lisähöyry (vain tietyt mallit)
Tällä toiminnolla saat lisää höyryä itsepintaisten laskosten poistamiseen.
Lisähöyry toimii vain lämpötila-asetuksilla 3 ¯ MAX.
C
1 Aseta höyrynvalitsin suurimpaan asentoon È.
SUOMI32
Page 33

C
2 Pidä höyrynvalitsinta painettuna enintään 5 sekuntia.
3 Odota vähintään 1 minuutti, ennen kuin käytät taas lisähöyryä,
ettei vesipisaroita valu pohjasta.
Höyrysuihkaus (vain tietyt mallit)
Voimakas höyrysuihkaus auttaa poistamaan itsepintaiset laskokset.
Höyrysuihkaus toimii vain lämpötila-asetuksilla 2 ¯ MAX.
C
1 Paina höyrysuihkauspainiketta lyhyesti.
Höyrysuihkaus pystyasennossa (vain malleissa
GC2225/2220/2215/2130/2126/2125/2120/2115)
C
1 Höyrysuihkausta voidaan käyttää myös pidettäessä höyryrautaa
pystyasennossa.Tällä tavalla voidaan poistaa laskoksia mm.
verhoista.
Älä koskaan suuntaa höyryä ihmisiä päin.
Tippalukko (vain malleissa GC2225/2220/GC2130/2126/2125)
Tässä höyryraudassa on tippalukko: kun lämpötila on liian matala,
höyryntulo lakkaa automaattisesti, ettei pohjasta ala valua vettä. Kun
tämä tapahtuu, kuuluu napsahdus.
Automaattinen virrankatkaisu (vain tietyt mallit)
Elektroninen turvalaite katkaisee automaattisesti lämmitysvastuksen
toiminnan, jos höyryrauta on pidempään liikuttamatta.
C
◗ Automaattisen virrankatkaisun merkkivalo alkaa vilkkua, kun
lämmitysvastuksen toiminta katkaistaan automaattisesti.
Kun haluat raudan lämpiävän uudelleen, nosta tai liikuta sitä hieman.
Automaattisen virrankatkaisun merkkivalo sammuu.
SUOMI 33
Page 34

1 Jos lämpötilan merkkivalo syttyy, odota sen sammumista,ennen
kuin alat silittää.
2 Jos lämpötilan merkkivalo ei syty, rauta on valmis käyttöön.
Puhdistus ja hoito
CalcClean-toiminto
◗ CalcClean-toiminto poistaa kalkkihiukkaset.
Käytä CalcClean-toimintoa joka toinen viikko. Jos paikallinen vesi on
hyvin kovaa (esimerkiksi jos silityksen aikana pohjasta tulee hiutaleita),
CalcClean-toimintoa tulisi käyttää useammin.
1 Aseta höyrynvalitsin asentoon O.
2 Kaada vesisäiliöön vettä MAX-merkkiin asti.
Älä kaada vesisäiliöön etikkaa tai muita kalkinpoistoaineita.
C
3 Aseta lämpötilan valitsin asentoon MAX.
4 Työnnä pistoke pistorasiaan.
5 Irrota pistoke pistorasiasta,kun lämpötilan merkkivalo on
sammunut.
6 Pidä höyryrautaa pesualtaan päällä ja aseta höyrynvalitsin
asentoon 1(CalcClean). Höyrynvalitsin nousee hieman ylös.
C
7 Vedä höyrynvalitsinta ylöspäin ja poista neula.
C
8 Pidä rautaa pesualtaan päällä ja liikuta sitä samalla edestakaisin.
B
Pohjasta alkaa tulla höyryä ja kuumaa vettä. Epäpuhtaudet ja kalkki (jos
niitä on) huuhtoutuvat pois.
C
9 Poista neulasta mahdollinen kalkki etikalla.
Varo taivuttamasta tai vahingoittamasta höyrynvalitsimen neulaa.
SUOMI34
Page 35

C
10 Aseta neula takaisin työntämällä neulan kärki aivan reiän
keskelle ja sovittamalla neulan sivussa oleva pieni uloke
aukkoon.Aseta höyrynvalitsin asentoon O.
11 Toista nämä toimenpiteet, jos höyryraudassa on vielä paljon
epäpuhtauksia.
CalcClean-toimenpiteen jälkeen
1 Liitä höyryrauta pistorasiaan, jotta sen pohja kuivuu.
2 Irrota pistoke pistorasiasta,kun lämpötilan merkkivalo on
sammunut.
3 Liikuta höyryrautaa käytetyn kankaan päällä hitaasti, jotta
vesitahrat häviävät pohjasta.
Säilytys
1 Irrota pistoke pistorasiasta,anna raudan jäähtyä ja aseta
höyrynvalitsin asentoon O.
2 Puhdista laite ja pyyhi pohjaan tarttunut kalkki ja muu lika
kostealla liinalla ja naarmuttamattomalla (nestemäisellä)
puhdistusaineella.
Pidä pohja sileänä: varo, ettei pohja kosketa metallia.
Älä käytä hankaustyynyjä, etikkaa tai muita kemikaaleja.
C
3 Huuhtele vesisäiliö säännöllisesti vedellä ja tyhjennä se
puhdistamisen jälkeen.
C
4 Kierrä virtajohto höyryraudan ympärille.
5 Säilytä höyryrauta pystyasennossa turvallisessa ja kuivassa
paikassa.
SUOMI 35
Page 36

Ympäristöasiaa
C
◗ Älä hävitä vanhoja laitteita tavallisen talousjätteen mukana, vaan
toimita ne valtuutettuun kierrätyspisteeseen. Näin autat
vähentämään ympäristölle aiheutuvia haittavaikutuksia.
Takuu & huolto
Jos haluat lisätietoja tai laitteen suhteen on ongelmia, käy Philipsin
Internet-sivuilla osoitteessa www.philips.com tai ota yhteys Philipsin
asiakaspalveluun (puhelinnumero löytyy takuulehtisestä).Voit myös
ottaa yhteyden Philips-myyjään tai Philips Kodinkoneiden valtuuttamaan
huoltoliikkeeseen tai suoraan Philips Domestic Appliances and Personal
Care BV:n huolto-osastoon.
SUOMI36
Page 37

Ratkaisu
Tarkasta vir tajohto, pistoke ja
pistorasia.
Aseta lämpötilanvalitsin oikeaan
asentoon.
Täytä vesisäiliö (katso Käyttöönotto,
kohta Vesisäiliön täyttö).
Aseta höyrynvalitsin asentoon Á, Ëtai
È(katso Käyttö, kohta Höyr ysilitys).
Aseta lämpötilanvalitsin asentoon, joka
sopii höyrysilitykseen (2 ¯ MAX).
Aseta rauta pystyasentoon ja odota,
kunnes lämpötilan merkkivalo sammuu,
ennen kuin aloitat silittämisen.
Aseta höyryrauta vaaka-asentoon ja
odota hetki, ennen kuin käytät
(pystysuoraa) höyrysuihkausta
uudelleen.
Aseta lämpötilanvalitsin asentoon, joka
sopii höyrysilitykseen (2 ¯ MAX).
Aseta rauta pystyasentoon ja odota,
kunnes lämpötilan merkkivalo sammuu,
ennen kuin aloitat silittämisen.
Käytä CalcClean-toimintoa muutama
kerta (katso Puhdistus ja hoito, kohta
CalcClean-toiminto).
Nosta rauta tai liikuta sitä hieman,
jolloin automaattinen virrankatkaisu
keskeytyy ja merkkivalo sammuu.
Paina korkkia, kunnes kuulet
napsahduksen.
Aseta lämpötilanvalitsin asentoon, joka
sopii höyrysilitykseen (2 ¯ MAX).
Aseta rauta pystyasentoon ja odota,
kunnes lämpötilan merkkivalo sammuu,
ennen kuin aloitat silittämisen.
Tyhjennä vesisäiliö käytön jälkeen ja
aseta höyrynvalitsin asentoon O.
Säilytä rauta pystyasennossa.
Mahdolliset syyt
Virtaa ei tule.
Lämpötilanvalitsin MIN-asennossa.
Vesisäiliössä ei ole tarpeeksi vettä.
Höyrynvalitsin on asetettu asentoon
O.
Pohja ei ole tarpeeksi kuuma ja/tai
tippalukko on toiminnassa (vain tietyt
mallit).
(Pystysuoraa) höyrysuihkausta on
käytetty liian usein kovin lyhyen ajan
kuluessa.
Pohja ei ole tarpeeksi kuuma.
Kova vesi aiheuttaa kalkkihiutaleiden
muodostumista pohjan sisään.
Automaattinen virrankatkaisu on
katkaissut lämmitysvastuksen toiminnan
(katso Ominaisuudet, kohta
Automaattinen virrankatkaisu).
Täyttöaukon korkki ei ole kunnolla
kiinni.
Lämpötila on asetettu liian matalaksi.
Höyryrauta on asetettu vaakaasentoon, kun sen vesisäiliössä on vielä
ollut vettä.
Ongelma
Höyryrauta on liitetty pistorasiaan
mutta pohja on kylmä.
Höyryä ei tule.
Höyrysuihkausta ei tule normaalisti tai
pystyasennossa (vain tietyissä
malleissa).
Pohjasta tulee silityksen aikana
kalkkihiutaleita ja muita epäpuhtauksia.
Punainen valo vilkkuu (vain malleissa
GC2225 ja GC2130).
Vesipisaroita kankaalla (vain malleissa
GC2225/2220/2215/GC2130/2126/21
25/2120)
Vesipisaroita kankaalla (vain malleissa
GC2215/2120/2115/2110/2105)
Vesipisaroita valuu pohjasta,kun
höyryrauta on jäähtynyt tai siirretty
säilytyspaikkaansa.
Vianmääritys
Tähän kohtaan on koottu tavallisimmat ongelmat, joita höyryrautaa käytettäessä saattaa tulla esiin.
Katso tarkemmat ohjeet vastaavista tekstikohdista. Ellei ongelma ratkea, ota yhteys Philipsin
asiakaspalveluun.
SUOMI 37
Page 38

Generel beskrivelse (fig. 1)
A Spray-dyse
B Dæksel til vandtank (kun
GC2225/2220/2215/GC2130/2126/2125/2120)
C Påfyldningsåbning
D Dampskuds-knap 9 (kun
GC2225/2220/2215/GC2130/2126/2125/2120/2115/2110)
E Spray-knap T
F Dampvælger
- O = ingen damp
- Á = minimal dampmængde
- q = moderat dampmængde (kun
GC2225/2220/2215/GC2130/2126/2125/2120)
- w = maksimal dampmængde
- 1 = Calc-Clean-funktion
G Ekstra damp-funktion (kun GC2105)
H Temperaturindikator med lys (alle typer) og auto-sluk indikator
med lys (kun GC2225/GC2130)
I Temperaturvælger
J Netledning
K Typeskilt
L Vandtank
Vigtigt
Læs brugsvejledningen omhyggeligt igennem, inden apparatet tages i
brug, og gem den til eventuel senere brug.
◗ Kontrollér, at spændingsangivelsen på typeskiltet svarer til den
lokale netspænding, før du tilslutter apparatet.
◗ Apparatet må kun sluttes til en stikkontakt med jordforbindelse.
◗ Brug ikke apparatet, hvis stik,ledning eller selve apparatet viser
tegn på beskadigelse, eller hvis apparatet er blevet tabt,eller det
er utæt.
◗ Kontrollér med jævne mellemrum,at ledningen er hel og
ubeskadiget.
◗ Hvis ledningen beskadiges, må den kun udskiftes af Philips,et
autoriseret Philips-serviceværksted eller af en kvalificeret fagmand
for at undgå enhver risiko ved efterfølgende brug.
◗ Hold altid apparatet under opsyn, når det er sluttet til lysnettet.
◗ Kom aldrig strygejern eller eventuel stander ned i vand.
◗ Hold apparatet uden for børns rækkevidde.
◗ Strygesålen kan blive utrolig varm og forårsage brandsår ved
berøring.
◗ Netledningen må ikke komme i kontakt med strygesålen, når
denne er varm.
◗ Når du er færdig med at stryge, når du rengør apparatet, fylder
eller tømmer vandtanken, og når du forlader strygejernet - selv
om det kun er i et kort øjeblik - skal dampvælgeren altid sættes i
DANSK38
Page 39

position O,strygejernet stilles på højkant, og stikket tages ud af
stikkontakten.
◗ Placér og anvend altid strygejernet og en eventuel stander på et
stabilt, plant og vandret underlag.
◗ Kom aldrig parfume, eddike, stivelse,afkalkningsmiddel,
strygemiddel eller andre kemikalier i vandtanken.
◗ Dette apparat er kun beregnet til husholdningsbrug.
Klargøring
Påfyldning af vandtanken
1 Tag stikket ud af stikkontakten.
C
2 Sæt dampvælgeren i position O (= ingen damp)
3 Luk dækslet til vandtanken op (ikke alle modeller).
C
4 Hold strygejernet lidt på skrå og fyld vandtanken op til MAX-
markeringen.
Fyld aldrig vandtanken til op over MAX-mærket.
5 Luk dækslet til vandtanken (klik!) (ikke alle modeller).
Hvis vandet i dit område er meget hårdt, anbefales det at bruge
destilleret vand. Brug aldrig hverken eddike, stivelse eller kemisk afkalket
vand.
Temperaturindstilling
◗ Første gang strygejernet tages i brug, kan der komme lidt
røgudvikling. Dette varer dog kun et øjeblik.
C
1 Stil strygejernet på "hælen" og drej temperaturvælgeren til den
ønskede strygetemperatur.
- Se den rette strygetemperatur på tøjets vaskemærke.
- 1 Syntetiske materialer (f.eks. akryl, viskose, polyamid, polyester).
- 1 Silke
- 2 Uld
- 3 Bomuld, linned
- Er du i tvivl om, hvilket materiale et stykke tøj er fremstillet af, må du
finde den rette strygetemperatur ved at prøve dig frem et sted, som
ikke er synligt, når du har tøjet på.
- Silke, uld og syntetiske materialer: Stryges på vrangen for at undgå
blanke skjolder. Undlad brug af spray-funktionen for at undgå
skjolder/stænk.
DANSK 39
Page 40

2 Sæt netstikket i en stikkontakt med jordforbindelse.
3 Når temperaturindikatoren er slukket,skal du vente et øjeblik,
inden strygningen påbegyndes.
B
Temperaturindikatoren tænder fra tid til anden under strygningen.
Sådan bruges apparatet
Dampstrygning
Kontrollér, at der er tilstrækkeligt vand i vandtanken.
1 Indstil temperaturvælgeren til den ønskede temperatur.
Se "Temperaturindstilling".
C
2 Indstil dampvælgeren til den ønskede dampmængde.
- Á for minimal dampmængde (temperaturindstillinger mellem 2 og
3).
- Ë for moderat dampmængde (temperaturindstillinger mellem 3
og MAX) (ikke alle modeller).
- È for maksimal dampmængde (temperaturindstillinger mellem 3
og MAX).
B
Så snart den indstillede temperatur er nået, begynder strygejernet at
producere damp.
Kun GC2215/2120/2115/2110/2105:
Der kan lække vand fra strygesålen ved for lavt indstillet
strygetemperatur (MIN til 2).
Tørstrygning (uden damp)
1 Sæt dampvælgeren i position O (= ingen damp).
2 Indstil temperaturvælgeren til den ønskede temperatur.
Se "Temperaturindstilling".
Funktioner
Spray
Sådan fjernes vanskelige folder ved alle temperaturindstillinger
1 Kontrollér,at der er tilstrækkeligt vand i vandtanken.
C
2 Tryk nogle gange på spray-knappen for at fugte strygetøjet.
DANSK40
Page 41

Ekstra damp (ikke alle modeller)
Denne funktion giver ekstra damp til at fjerne specielt vanskelige krøller
og folder.
Ekstra damp-funktionen virker kun ved temperaturindstillinger mellem
3 og MAX.
C
1 Sæt dampvælgeren på maksimumindstilling È.
C
2 Tryk og hold dampvælgeren nede i maks. 5 sekunder.
3 Vent med at bruge ekstra kraftig damp igen, til der er gået
mindst 1 minut. Derved undgås det,at der drypper vand ud af
strygesålen.
Dampskud (ikke alle modeller)
Et kraftigt dampskud kan fjerne ekstra besværlige folder.
Der kan kun produceres dampskud ved temperaturindstillinger mellem
2 og MAX.
C
1 Tryk og slip dampskuds-knappen.
Lodret dampskud (kun
GC2225/2220/2215/2130/2126/2125/2120/2115)
C
1 Dampskuds-funktionen kan også anvendes, når strygejernet
holdes lodret. Dette er ideelt til tøj,der hænger på bøjle,
gardiner og lign.
Ret aldrig dampstrålen mod mennesker.
Drypstop (kun GC2225/2220/GC2130/2126/2125)
Strygejernet er forsynet med en dryp-stop-funktion. Hvis temperaturen
bliver for lav, holder strygejernet automatisk op med at producere
damp. Derved undgås det, at der drypper vand ud af strygesålen. Når
dette sker, høres et klik.
DANSK 41
Page 42

Auto-sluk (ikke alle modeller)
En elektronisk sikkerforanstaltning slukker automatisk for varmelegemet,
hvis strygejernet ikke har været i bevægelse i et stykke tid.
C
◗ For at indikere, at varmelegemet er blevet slukket, begynder auto-
sluk indikatoren at blinke.
Genopvarmning af strygejernet: Løft eller bevæg det en lille smule.
Auto-sluk indikatoren slukkes.
1 Tænder temperaturindikatoren, skal du vente med at fortsætte
strygningen, til den slukker.
2 Hvis temperaturindikatoren ikke tænder, er strygejernet klar til
brug.
Rengøring og vedligeholdelse
Calc-Clean-funktion
◗ Calc-Clean funktionen fjerner kalkpartiklerne.
Det anbefales at bruge Calc-Clean-funktionen et par gange om
måneden - eller oftere, hvis vandet i dir område er meget hårdt (der
drysser kalkpar tikler ud fra strygesålen under strygningen).
1 Sæt dampvælgeren i position O.
2 Fyld vandtanken op til MAX-markeringen.
Kom aldrig eddike eller andre afkalkningsmidler i vandtanken.
C
3 Indstil temperaturvælgeren på MAX.
4 Sæt stikket i en stikkontakt.
5 Tag stikket ud af stikkontakten,når temperaturindikatoren
slukker.
6 Hold strygejernet ind over vasken, og sæt dampvælgeren i
stilling 1 (Calc-Clean). Dampvælgeren springer lidt op.
C
7 Træk dampvælgeren op for at fjerne ventilnålen.
DANSK42
Page 43

C
8 Hold strygejernet ind over vasken og bevæg det frem og
tilbage.
B
Der vil nu komme damp og kogende vand ud fra strygesålen. Samtidig
sprøjtes eventuelle urenheder og kalkpartikler med ud.
C
9 Er der kalkaflejringer på nålen, fjernes disse med eddike.
Pas på ikke at komme til at bøje eller beskadige ventilnålen.
C
10 Sæt ventilnålen på plads igen. Spidsen af nålen sættes ned
nøjagtigt midt i åbningen, således at det lille hak på siden af
nålen passer ned i recessen. Sæt dampvælgeren i stilling O.
11 Gentag Calc-Clean-processen, hvis der stadig er urenheder i
strygejernet.
Efter Calc-Clean-processen
1 Tænd for strygejernet for at lade strygesålen tørre.
2 Tag stikket ud af stikkontakten,når temperaturindikatoren
slukker.
3 Før strygejernet let hen over en klud for at fjerne vandstænk
fra strygesålen.
Opbevaring
1 Tag stikket ud af stikkontakten,lad strygejernet afkøle, og sæt
dampvælgeren i stilling O.
2 Rengør strygejernet og tør kalkpartikler og andre urenheder af
strygesålen med en fugtig klud med lidt ikke-ridsende
(flydende) rengøringsmiddel.
Undgå kontakt med metalgenstande, så strygesålen bevares glat.
Brug aldrig skuremidler, eddike eller andre kemikalier.
DANSK 43
Page 44

C
3 Skyl vandtanken regelmæssigt med vand,og tøm den helt
bagefter.
C
4 Rul netledningen op omkring den bageste del af strygejernet.
5 Opbevar altid strygejernet opretstående på et sikkert og tørt
sted.
Miljøhensyn
C
◗ Apparatet må ikke smides ud sammen med det almindelige
husholdningsaffald, når det til sin tid kasseres.Aflevér det i stedet
på den kommunale genbrugsstation.På den måde er du med til at
beskytte miljøet.
Reklamationsret og service
For alle yderligere oplysninger eller ved eventuelle problemer med
apparatet henvises til Philips' hjemmeside på adressen www.philips.com
eller det lokale Philips Kundecenter (telefonnumre findes i vedlagte
"World-Wide Guarantee" folder). Hvis der ikke findes et kundecenter i
dit land, bedes du venligst kontakte din lokale Philips-forhandler eller
Serviceafdelingen i Philips Domestic Appliances and Personal Care BV.
DANSK44
Page 45

Løsning
Kontrollér netledning, stik og
stikkontakt.
Indstil temperaturvælgeren på den
ønskede strygetemperatur.
Fyld vandtanken (se afsnittet
"Klargøring" under "Vandpåfyldning").
Sæt dampvælgeren i stilling Á, Ë eller
È (se afsnittet "Sådan bruges
apparatet" under "Dampstrygning").
Indstil temperaturvælgeren til
dampstrygning (mellem 2 og MAX).
Stil strygejernet på dets hæl, og vent
med at begynde strygningen, til
temperaturindikatoren slukker.
Stil strygejernet vandret, og vent lidt,
inden en af dampskuds-funktionerne
bruges igen.
Indstil temperaturvælgeren til
dampstrygning (mellem 2 og MAX).
Stil strygejernet på dets hæl, og vent
med at begynde strygningen, til
temperaturindikatoren slukker.
Brug Calc-Clean-funktionen et par
gange (se afsnittet "Rengøring og
vedligeholdelse" under "Calc-Cleanfunktion").
Løft eller bevæg strygejernet en smule
for at deaktivere auto-sluk funktionen:
Den røde lampe holder op med at
blinke.
Tryk på dækslet, til der høres et klik.
Indstil temperaturvælgeren til
dampstrygning (mellem 2 og MAX).
Stil strygejernet på dets hæl, og vent
med at begynde strygningen, til
temperaturindikatoren slukker.
Tøm vandtanken og sæt
dampvælgeren i position O efter brug.
Opbevar strygejernet stående på
"hælen".
Mulig(e) årsag(er)
Der er problemer med tilslutningen
Temperaturvælgeren er sat på MIN
Der er ikke nok vand i vandtanken.
Dampkontrollen er sat i position O.
Strygesålen er ikke varm nok og/eller
Drypstop-funktionen (kun bestemte
typer) er aktiveret.
Dampskuds-funktionen (eller det
vertikale dampskud) har været anvendt
for mange gange inden for et kort
tidsrum.
Strygesålen er ikke varm nok.
Hårdt vand danner kalkaflejringer inde
i strygesålen.
Auto-sluk funktionen er aktiveret (se
afsnittet "Ekstra funktioner" under
"Auto-sluk").
Dækslet til vandtanken er ikke lukket
ordentligt.
Den indstillede temperatur er for lav.
Strygejernet er stillet i vandret
position, med vand i vandtanken.
Problem
Strygejernet er tændt, men strygesålen
er kold.
Ingen damp
Ingen dampskud eller intet vertikalt
dampskud (ikke alle modeller).
Der drysser små kalkpar tikler og
urenheder ud fra strygesålen.
Den røde kontrollampe blinker (kun
GC2225 og GC2130).
Vanddråber på stoffet (kun
GC2225/2220/2215/GC2130/2126/21
25/2120)
Vanddråber på stoffet (kun
GC2215/2120/2115/2110/2105)
Der drypper vand ud af strygesålen,
efter at strygejernet er kølet af eller
stillet væk.
Fejlfinding
Dette kapitel opsummerer de mest almindelige problemer, der kan forekomme ved brug af
strygejernet. Læs venligst de enkelte afsnit for detaljerede oplysninger.Hvis du efterfølgende ikke er i
stand til selv at løse problemet, bedes du kontakte nærmeste Philips Kundecenter.
DANSK 45
Page 46

Keterangan umum (gbr. 1)
A Nozel semprot
B Tutup lubang pengisian (hanya
GC2225/2220/2215/GC2130/2126/2125/2120)
C Lubang pengisian
D Tombol penyembur uap 9 (hanya
GC2225/2220/2215/GC2130/2126/2125/2120/2115/2110)
E Tombol Semprot T
F Kontrol uap
- O = tak ada uap
- Á = uap minimum
- q = uap sedang (hanya
GC2225/2220/2215/GC2130/2126/2125/2120)
- w = uap maksimum
- 1 = fungsi Calc-Clean
G Fungsi uap ekstra (hanya GC2105)
H Lampu suhu (semua tipe) dan lampu mati otomatis (hanya
GC2225/GC2130)
I Dial [Pengatur] suhu
J Kabel listrik
K Plat jenis
L Tangki air
Penting
Bacalah petunjuk penggunaan ini dengan saksama sebelum
menggunakan alat dan simpanlah untuk referensi jika dibutuhkan kelak.
◗ Periksa apakah tegangan listrik yang tertera pada pelat sesuai
dengan tegangan listrik setempat sebelum Anda menghubungkan
alat ini.
◗ Alat hanya boleh dihubungkan ke stopkontak yang memiliki arde.
◗ Jangan menggunakan alat jika steker, kabel atau alat itu sendiri
menunjukkan kerusakan atau jika alat pernah terjatuh atau bocor
◗ Periksa kabel secara teratur kalau-kalau ada kerusakan.
◗ Jika kabel listrik rusak, maka harus diganti oleh Philips,pusat servis
resmi Philips atau orang yang mempunyai keahlian sejenis agar
terhindar dari bahaya.
◗ Jangan sekali-kali meninggalkan setrika ini tanpa ditunggui ketika
sedang dihubungkan dengan listrik.
◗ Jangan sekali-kali merendam setrika dan dudukannya, jika
disediakan, di dalam air.
◗ Jauhkan alat dari jangkauan anak.anak.
◗ Pelat tapak setrika dapat menjadi sangat panas dan menyebabkan
luka bakar jika tersentuh.
◗ Jangan sampai kabel listrik mengenai tapak setrika saat sedang
panas.
◗ Apabila Anda sudah selesai menyetrika, ketika membersihkan alat,
mengisi atau mengosongkan tangki airnya dan juga saat Anda
INDONESIA46
Page 47

meninggalkan setrika meskipun hanya sebentar: setel kontrol uap ke
posisi O,berdirikan setrika pada tumitnya dan cabut steker listrik
dari stopkontak dinding.
◗ Selalu meletakkan dan menggunakan setrika serta dudukannya, jika
disediakan, pada permukaan horizontal yang stabil.
◗ Jangan memasukkan parfum, cuka,kanji, zat pembersih kerak,
bahan pelembut penyetrikaan atau bahan kimia lainnya ke dalam
tangki air.
◗ Alat ini hanya untuk keperluan rumah tangga.
Persiapan untuk penggunaan
Mengisi tangki air.
1 Lepaskan steker listrik dari stopkontak di dinding.
C
2 Setel kontrol uap ke posisi O (=tanpa uap).
3 Buka tutup lubang pengisian (hanya tipe tertentu).
C
4 Miringkan setrika dan isi tangki air hingga batas maksimal.
Jangan mengisi tangki air melewati tanda batas MAX.
5 Pasang tutup lubang pengisian (klik!) (hanya tipe tertentu).
Jika air keran di daerah Anda memiliki kesadahan yang sangat tinggi
kami sarankan agar Anda menggunakan air yang didistilasi. Jangan
menggunakan cuka, kanji, atau air yang mengandung bahan kimia.
Menyetel temperatur
◗ Setrika ini mungkin akan mengeluarkan asap ketika pertama kali
digunakan. Ini akan berhenti dengan sendirinya setelah beberapa
saat.
C
1 Letakkan setrika pada tumitnya dan setel pengatur suhu pada
suhu penyetrikaan yang diinginkan dengan memutarnya ke
posisi yang sesuai.
- Periksa suhu penyetrikaan yang disyaratkan pada label pakaian.
- 1 Kain sintetis (umpamanya akrilik, viskose, poliamide, poliester).
- 1 Sutera
- 2 Wol
- 3 Katun, linen
- Jika Anda tidak tahu jenis kain atau bahannya terbuat dari apa, cari
suhu yang sesuai dengan cara menyetrika pada bagian yang tak
terlihat apabila Anda mengenakannya
INDONESIA 47
Page 48

- Sutra, bahan seperti wol dan sintetis: balikkan kain saat menyetrikanya
guna mencegah bercak-bercak yang mengkilap. Hindari menggunakan
fungsi semprot untuk mencegah noda.
2 Masukkan steker listrik pada stopkontak dinding yang memiliki
arde.
3 Apabila lampu suhu padam, tunggu sebentar sebelum mulai
menyetrika.
B
Lampu suhu sesekali akan menyala selagi Anda menyetrika.
Menggunakan alat
Menyetrika dengan uap
Jaga supaya isi tangki air cukup.
1 Setel tombol suhu ke posisi yang disarankan.
Lihat 'Menyetel suhu'.
C
2 Setel kontrol uap ke posisi uap yang sesuai.
- Á untuk uap minimum (setelan suhu 2 dan 3).
- Ë untuk uap sedang (setelan suhu 3 hingga MAX) (hanya tipe
tertentu).
- È untuk uap maksimum (setelan suhu 3 hingga MAX).
B
Penguapan akan segera dimulai saat suhu yang disetel tercapai.
Hanya GC2215/2120/2115/2110/2105:
Air dapat bocor dari pelat tapak apabila suhu disetel terlalu rendah
(MIN hingga 2).
Penyetrikaan tanpa uap
1 Setel kontrol uap ke posisi O (= tak ada uap).
2 Setel tombol suhu ke posisi yang disarankan.
Lihat 'Menyetel suhu'.
Fitur
Penyemprotan
Untuk menghilangkan kusut atau lipatan yang membandel pada suhu
berapa saja.
1 Jaga supaya isi tangki air cukup.
INDONESIA48
Page 49

C
2 Tekan tombol semprot beberapa kali untuk melembabkan
pakaian yang akan disetrika.
Uap Ekstra (hanya tipe tertentu)
Fungsi ini memberikan uap ekstra untuk menghilangkan kusut yang
benar-benar membandel.
Fungsi Uap Ekstra ini hanya bekerja pada penyetelan suhu antara 3
dan MAX.
C
1 Setel kontrol uap ke posisi maksimum È.
C
2 Tekan dan tahan tombol Kontrol Uap selama maksimum 5
detik.
3 Tunggu paling tidak 1 menit sebelum menggunakan lagi Uap
Ekstra agar air tidak menetes dari pelat tapak.
Semburan Uap (hanya jenis tertentu)
Semburan uap yang kuat dapat membantu menghilangkan kusut yang
sangat membandel.
Fungsi Semburan Uap hanya bekerja pada penyetelan suhu antara 2
dan MAX
C
1 Tekan dan lepaskan tombol Semprotan Uap.
INDONESIA 49
Page 50

Semburan Uap Vertikal (hanya
GC2225/2220/2215/2130/2126/2125/2120/2115)
C
1 Fungsi Semburan Uap dapat pula digunakan ketika Anda
memegang setrika pada posisi vertikal. Ini berguna untuk
menghilangkan kusut pada pakaian, gorden,dll. yang tergantung.
Jangan mengarahkan uap kepada orang.
Penghenti Tetesan Air (hanya
GC2225/2220/GC2130/2126/2125 /2125)
Setrika ini dilengkapi dengan fungsi penghenti tetesan air: setrika akan
berhenti mengeluarkan uap secara otomatis apabila suhunya terlalu
rendah untuk mencegah agar air tidak menetes keluar dari pelat tapak
seterika. Apabila ini terjadi,Anda akan mendengar bunyi klik.
Pemutus panas otomatis (hanya tipe tertentu)
Sebuah alat pengaman elektronik akan secara otomatis mematikan
elemen panas jika setrika tidak digerakkan selama beberapa saat.
C
◗ Untuk menandakan bahwa elemen pemanas telah dimatikan, lampu
pemutus panas otomatis akan berkedip.
Untuk memanaskan kembali setrika: angkat atau geser setrika sedikit.
Lampu pemutus panas otomatis akan padam.
1 Jika lampu suhu menyala, tunggu hingga padam sebelum mulai
menyetrika.
2 Jika lampu suhu padam, setrika sudah siap digunakan.
Pembersihan dan perawatan
Fungsi Calc-Clean
◗ Fungsi Calc-Clean menghilangkan partikel-partikel kerak.
Gunakan fungsi 'Calc-Clean' dua minggu sekali. Jika air di daerah Anda
sangat sadah (yaitu apabila serpihan-serpihan kotor keluar dari pelat
tapak setrika selama penyetrikaan berlangsung), fungsi 'Calc-Clean'
harus digunakan lebih sering.
1 Setel kontrol uap ke posisi O.
INDONESIA50
Page 51

51
2 Isi tangki air sampai tingkat maksimum.
Jangan menuangkan cuka atau zat pembersih kerak lainnya ke dalam
tangki air.
C
3 Setel tombol suhu ke MAX.
4 Masukkan steker ke stopkontak.
5 Cabut steker setrika setelah lampu suhu padam.
6 Pegang setrika di atas bak cuci piring dan setel kontrol uapnya
ke posisi 1 (Calc-Clean). Kenop kontrol uap akan sedikit
menonjol keluar.
C
7 Tarik kenop kontrol uap ke atas untuk melepaskan jarum
kontrol uap.
C
8 Pegang setrika di atas bak cuci lalu gerakkan maju-mundur.
B
Uap dan air yang mendidih akan keluar dari tapak alat. Kotoran dan
kerak air (kalau ada) akan dibilas keluar.
C
9 Gunakan cuka untuk membersihkan kerak, kalau ada, dari
jarum.
Jangan sampai jarum kontrol uap bengkok atau rusak.
C
10 Pasang kembali jarum kontrol uap dengan menyisipkan ujung
jarum tersebut tepat di tengah lubang dan dengan
memposisikan secara tepat tonjolan kecil pada sisi jarum ke
dalam selot. Setel kenop kontrol uap ke posisi O.
11 Ulangi proses 'Calc-Clean' jika setrika masih kotor.
INDONESIA
Page 52

52
Setelah proses 'Calc-Clean'
1 Masukkan steker listrik pada stopkontak untuk mengeringkan.
2 Cabut steker setrika setelah lampu suhu padam.
3 Gerakkan setrika perlahan-lahan di atas selembar kain bekas
untuk menghilangkan noda air yang mungkin terbentuk pada
pelat tapaknya.
Penyimpanan
1 Cabut steker listrik dari stop kontak dinding,biarkan setrika
mendingin lalu setel kontrol uap ke posisi O.
2 Bersihkan alat dan seka kerak atau kotoran lainnya pada pelat
tapak dengan kain lembab dan cairan pembersih (cair) yang
tidak kasar.
Jaga aga tapak setrika tetap licin: hindari kontak dengan benda logam.
Jangan sekali-kali menggunakan bahan penggosok dari baja, cuka, atau
bahan kimia lainnya.
C
3 Cuci tangki air secara berkala dengan air kemudian kosongkan
setelah dibersihkan.
C
4 Gulung kabel listrik dalam wadahnya.
5 Selalu simpan setrika dengan posisi berdiri pada tumitnya di
tempat yang aman dan kering.
Lingkungan
C
◗ Jangan membuang alat bersama limbah rumah tangga biasa jika alat
sudah tidak bisa dipakai lagi, tetapi serahkan ke tempat
pengumpulan barang bekas yang resmi untuk didaur ulang. Dengan
melakukan hal ini,Anda ikut membantu melestarikan lingkungan.
INDONESIA
Page 53

53
Garansi & servis
Jika Anda memerlukan informasi atau mengalami masalah, silakan
kunjungi situs web Philips di www.philips.com atau hubungi Pusat
Layanan Pelanggan Philips di negara Anda (Anda dapat memperoleh
nomor teleponnya dalam leaflet garansi yang berlaku di seluruh dunia).
Jika tidak ada Pusat Layanan Pelanggan di negara Anda, silakan datang ke
dealer Philips setempat atau hubungi Bagian Servis dari Philips
Domestic Appliances and Personal Care BV.
INDONESIA
Page 54

54
Solusi
Periksa kabel listrik, steker dan
stopkontak dinding.
Setel tombol suhu pada posisi yang
ditentukan.
Isi tangki air (lihat 'Persiapan
menggunakan'; bagian 'Mengisi tangki
air'.)
Setel posisi uap ke Á, Ë atau È (lihat
'Menggunakan seterika', bagian
'Menyetrika dengan uap').
Setel pengatur suhu ke posisi pada
bagian uap (2 sampai MAX).
Letakkan setrika pada tumitnya lalu
tunggu hingga lampu suhu padam
sebelum Anda mulai menyetrika.
Kembalikan setrika ke posisi horisontal
dan tunggu sebentar sebelum
menggunakan lagi fungsi Semburan
Uap (Vertikal).
Setel pengatur suhu ke posisi pada
bagian uap (2 sampai MAX).
Letakkan setrika pada tumitnya lalu
tunggu hingga lampu suhu padam
sebelum Anda mulai menyetrika.
Gunakan fungsi Calc-Clean beberapa
kali (lihat 'Membersihkan dan
memelihara setrika', bagian 'CalcClean').
Angkat setrika atau gerakkan sedikit
untuk mematikan fungsi pemutus
panas otomatis: lampu merah akan
berhenti berkedip.
Tekan tutup lubang pengisian sampai
terdengar bunyi klik.
Setel pengatur suhu ke posisi pada
bagian uap (2 sampai MAX).
Letakkan setrika pada tumitnya lalu
tunggu hingga lampu suhu padam
sebelum Anda mulai menyetrika.
Kosongkan tangki air dan setel kontrol
uap ke posisi O setelah digunakan.
Simpan setrika pada tumitnya.
Kemungkinan penyebab
Masalah penyambungan.
Pengatur suhu disetel ke MIN
Air di dalam tangki tidak cukup.
Kontrol uap telah disetel ke posisi O.
Pelat tapak setrika tidak cukup panas
dan/atau fungsi penghenti tetes air
(hanya tipe tertentu) sudah diaktifkan.
Fungsi Semprotan Uap (Vertikal) telah
digunakan terlalu sering dalam waktu
yang sangat singkat.
Pelat tapak seterika tidak cukup panas.
Air sadah membentuk serpihan di
dalam pelat tapak setrika.
Fungsi mati otomatis diaktifkan (lihat
bab 'Fitur lain' bagian 'Mati Otomatis')..
Tutup lubang pengisian belum dipasang
dengan rapat.
Suhu telah disetel terlalu rendah.
Setrika sudah diletakkan dengan posisi
horisontal ketika masih ada air di
dalam tangki airnya.
Masalah
Setrika tersambung ke listrik tetapi
tapak alat dingin.
Tidak ada uap
Tidak ada semburan uap atau
Semburan Uap Vertikal (hanya tipe
tertentu).
Serpihan dan kotoran keluar dari pelat
tapak setrika selama penyetrikaan
berlangsung.
Lampu merah berkedip (hanya
GC2225 dan GC2130).
Air menetes pada kain (hanya
GC2225/2220/2215/GC2130/2126/21
25/2120)
Air menetes pada kain (hanya
GC2215/2120/2115/2110/2105)
Air menetes dari pelat tapak setelah
setrika dingin atau disimpan.
Mengatasi Masalah
Bab ini merangkum masalah paling umum yang bisa Anda hadapi pada setrika Anda. Bacalah semua
bagian untuk rincian selengkapnya. Jika Anda tidak dapat menyelesaikan masalah, silakan menghubungi
Pusat Layanan Pelanggan Philips di negara Anda.
INDONESIA
Page 55

555657
Page 56

Page 57

Page 58

u
4239 000 51933
www.philips.com
 Loading...