

Philips DVR5100, DVR7100, DVR5100-75 User Manual
High De nition Digital Video Recorder DVR5100
DVR7100
Quick Start Guide
Connect
Set up
Enjoy
1
2
3
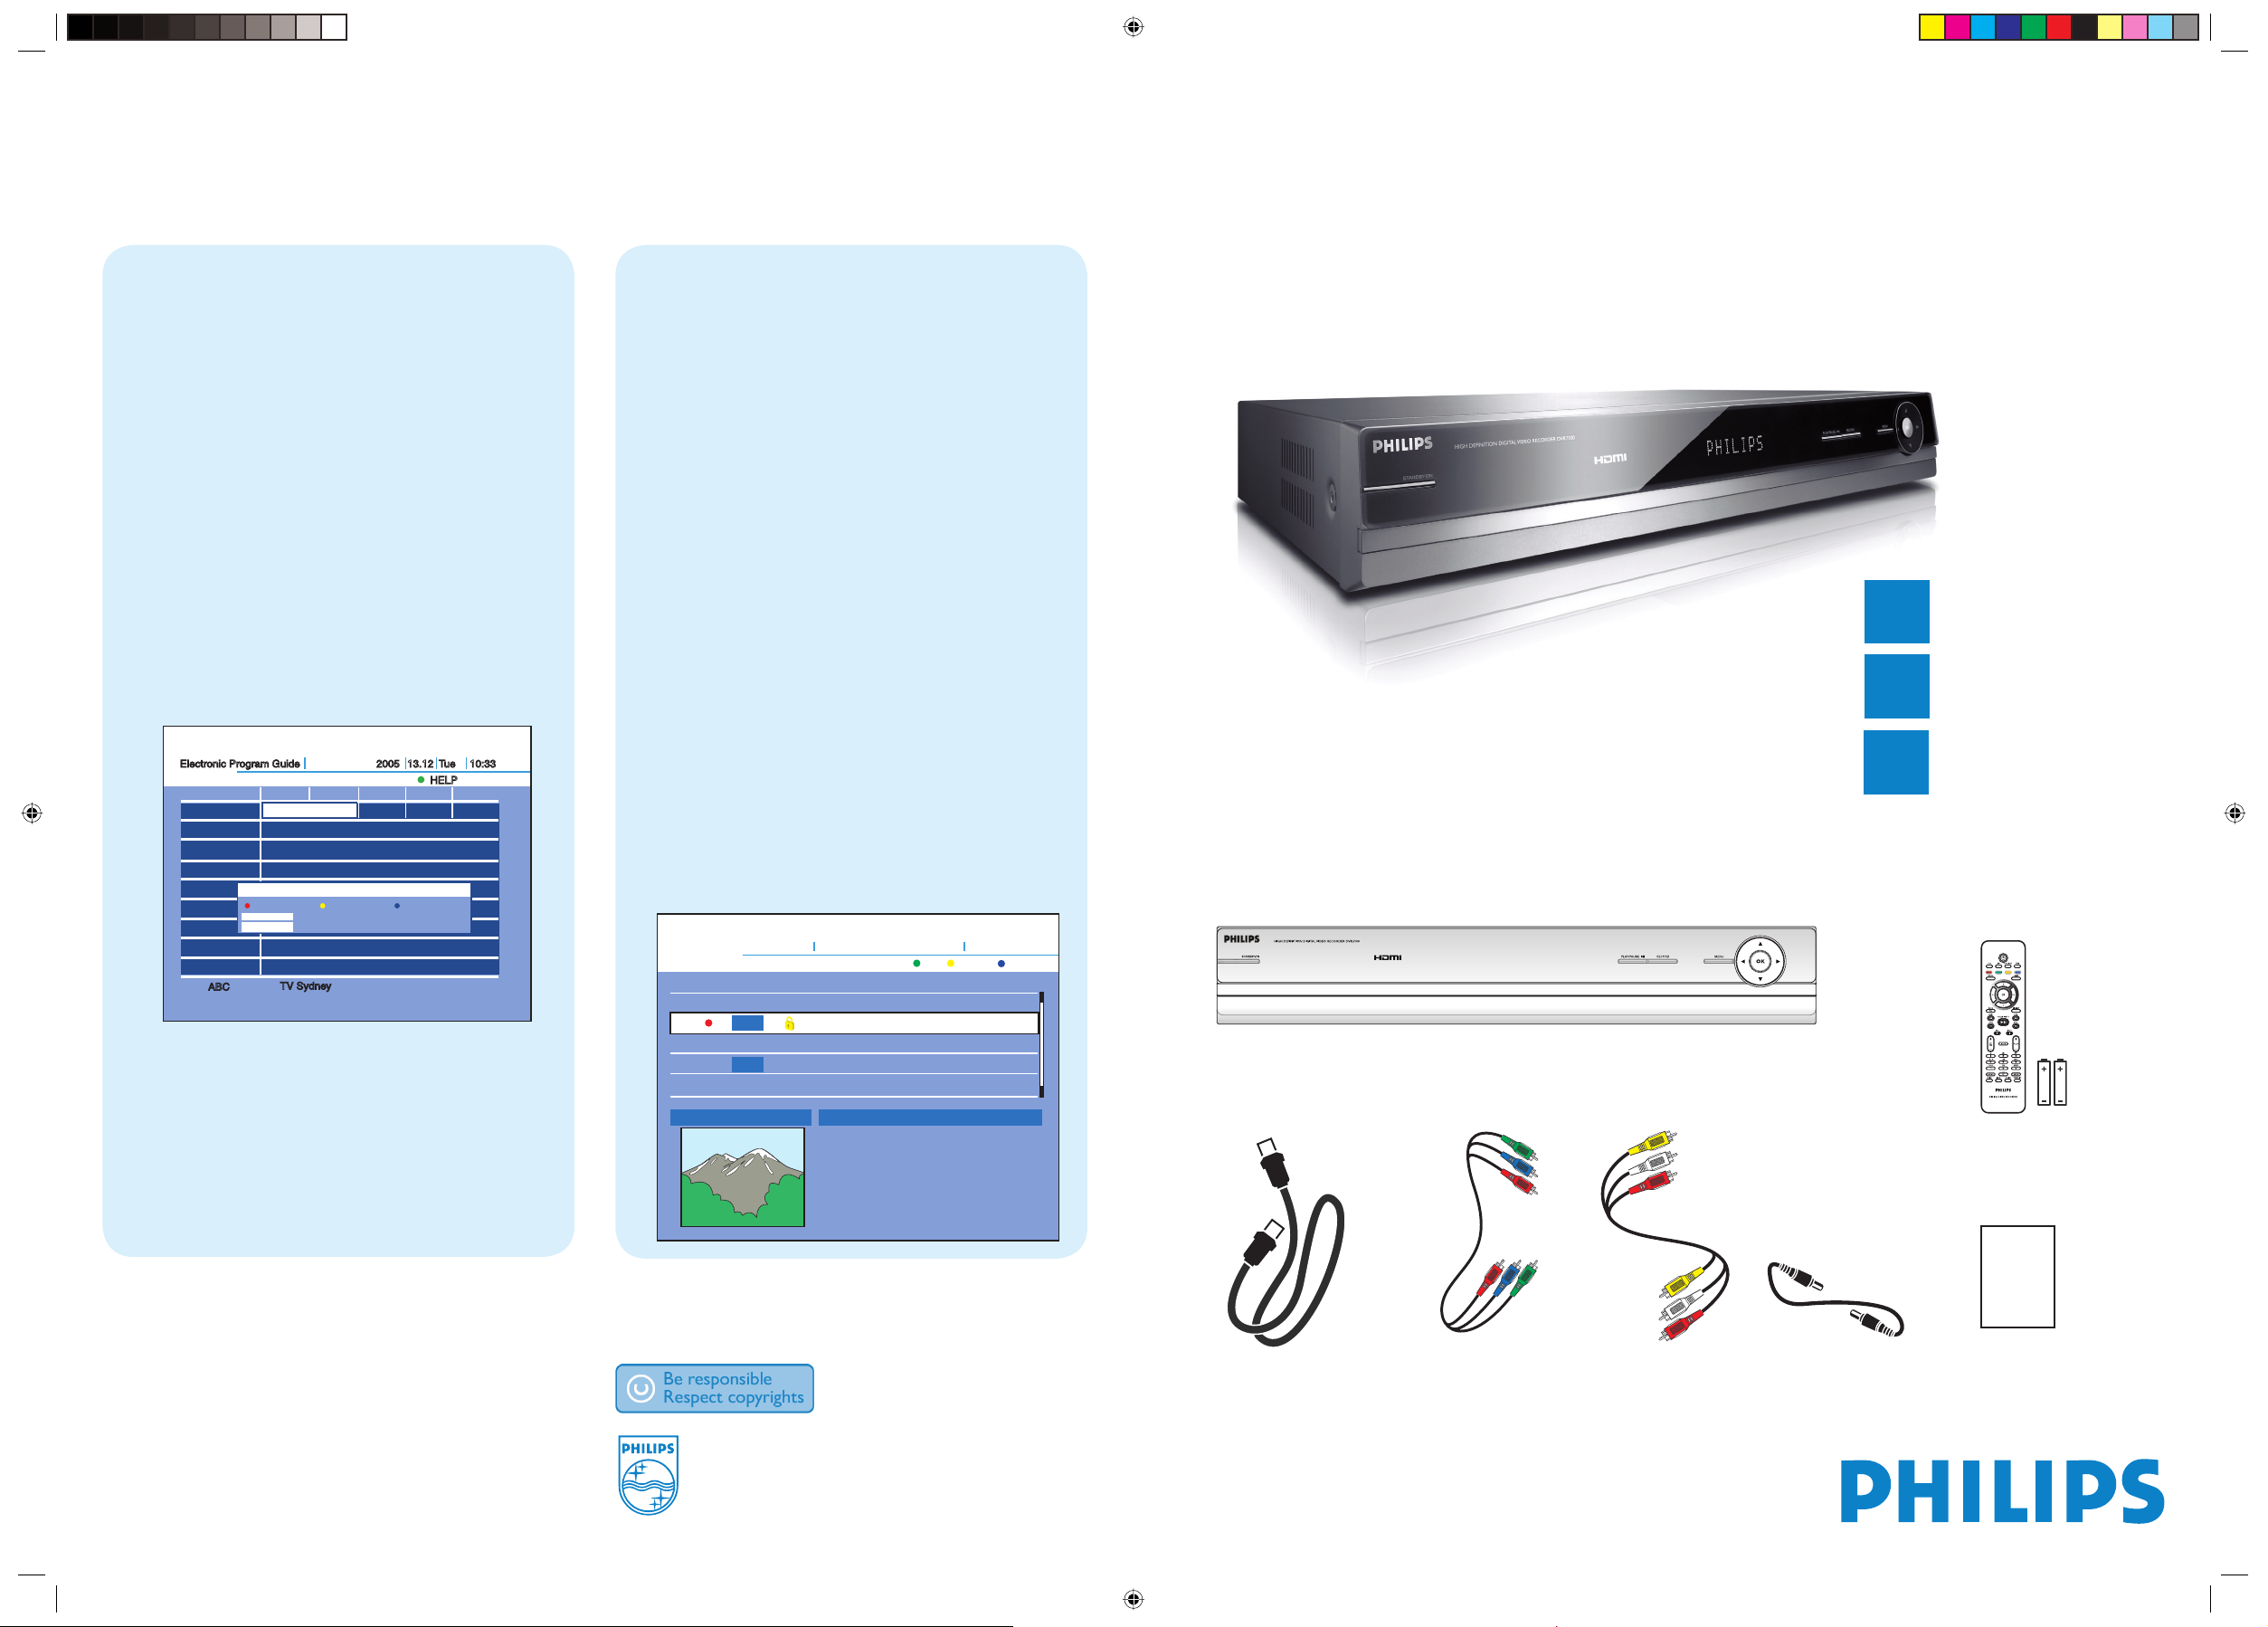
What’s in the box?
Digital Video Recorder
RF antenna cable
(connect between
recorder and TV)
Remote Control
and 2 batteries
User
Manual
Component
video cable
Audio/Video
cable
Antenna
interconnected
cable
Start Recording
A
Recording the programme you are
watching
A Press P +/- to scroll through the channels that
you want to record.
B Press REC
z
to start recording.
C To end recording, press STOP
x
.
B
Recording TV from GUIDE
(Electronic Programme GUIDE)
A Press GUIDE to display the seven channel
programme list covering a two hour period.
B Press cursor S T keys to select a current TV
broadcast or future programme.
C Press RED button to start recording.
Start Playback
A Press HDD and { HDD List } screen will
appears.
B Press cursor S T keys to scroll through the
HDD List that you had recorded before.
C Press OK to sub menu appears.Select one of
the options and press OK.
{ Close }
Turn off the menu.
{ Play }
Plays the selected title.
If you select after you stop playback, playback
starts from the point where you stopped
(Resume Play).
{ Play Beginning }
Plays from the beginning of the title.
{ Repeat Play }
Plays the selected title repeatedly.
{ Protect }
To protects a title.
{ Delete }
To delete the title from HDD List.
Need help?
User Manual
See the user manual that came with your Philips recorder.
Online
Go to www.philips.com/support.
2007 © Koninklijke Philips N.V.
All rights reserved.
12 NC 3139 245 XXXXX
www.philips.com
No.
Status Viewed Protect Program Name
Nine Digital
Channel 7
Nine Digital
Nine Digital
Nine Digital
Date
Time
Length
Size
HD/SD
23 Nov
02 : 00
03 : 30
0.2 GB
HD
Channel 7
File Information
NEW
NEW
Date
23 Nov
23 Nov
23 Nov
23 Nov
23 Nov
190 / 250GB
HD D Li st
Help
Rename
Sort
Electronic Program Guide
13.12 Tue 10:30
ABC
Seven
Nine
Ten
SBS
ABC
Help
Record
OK
BACK
TV Sydney
TV Sydney
2005
13.12 Tu e
11:00 11:30 12:00 12:30
ABC-HDTV
ABC TV ABC 2
-24 Hour
: Program Info
: EXIT
+24 Hour
10:33
HELP
HDD List
ǂ
No.
Status Viewed Protect Program Name
1
2
3
4
5
Channel 7
NEW
NEW
Nine Digital
Channel 7
Nine Digital
Nine Digital
Nine Digital
Date
Time
Length
Size
HD/SD
File Information
23 Nov
02 : 00
03 : 30
0.2 GB
HD
Help
190 / 250GB
Rename
Date
23 Nov
23 Nov
23 Nov
23 Nov
23 Nov
Sort
ǂ
dvdr5500_eu_qsg_eng7.indd 1dvdr5500_eu_qsg_eng7.indd 1 4/16/2007 4:35:00 PM4/16/2007 4:35:00 PM
1
Connect
2
Set up
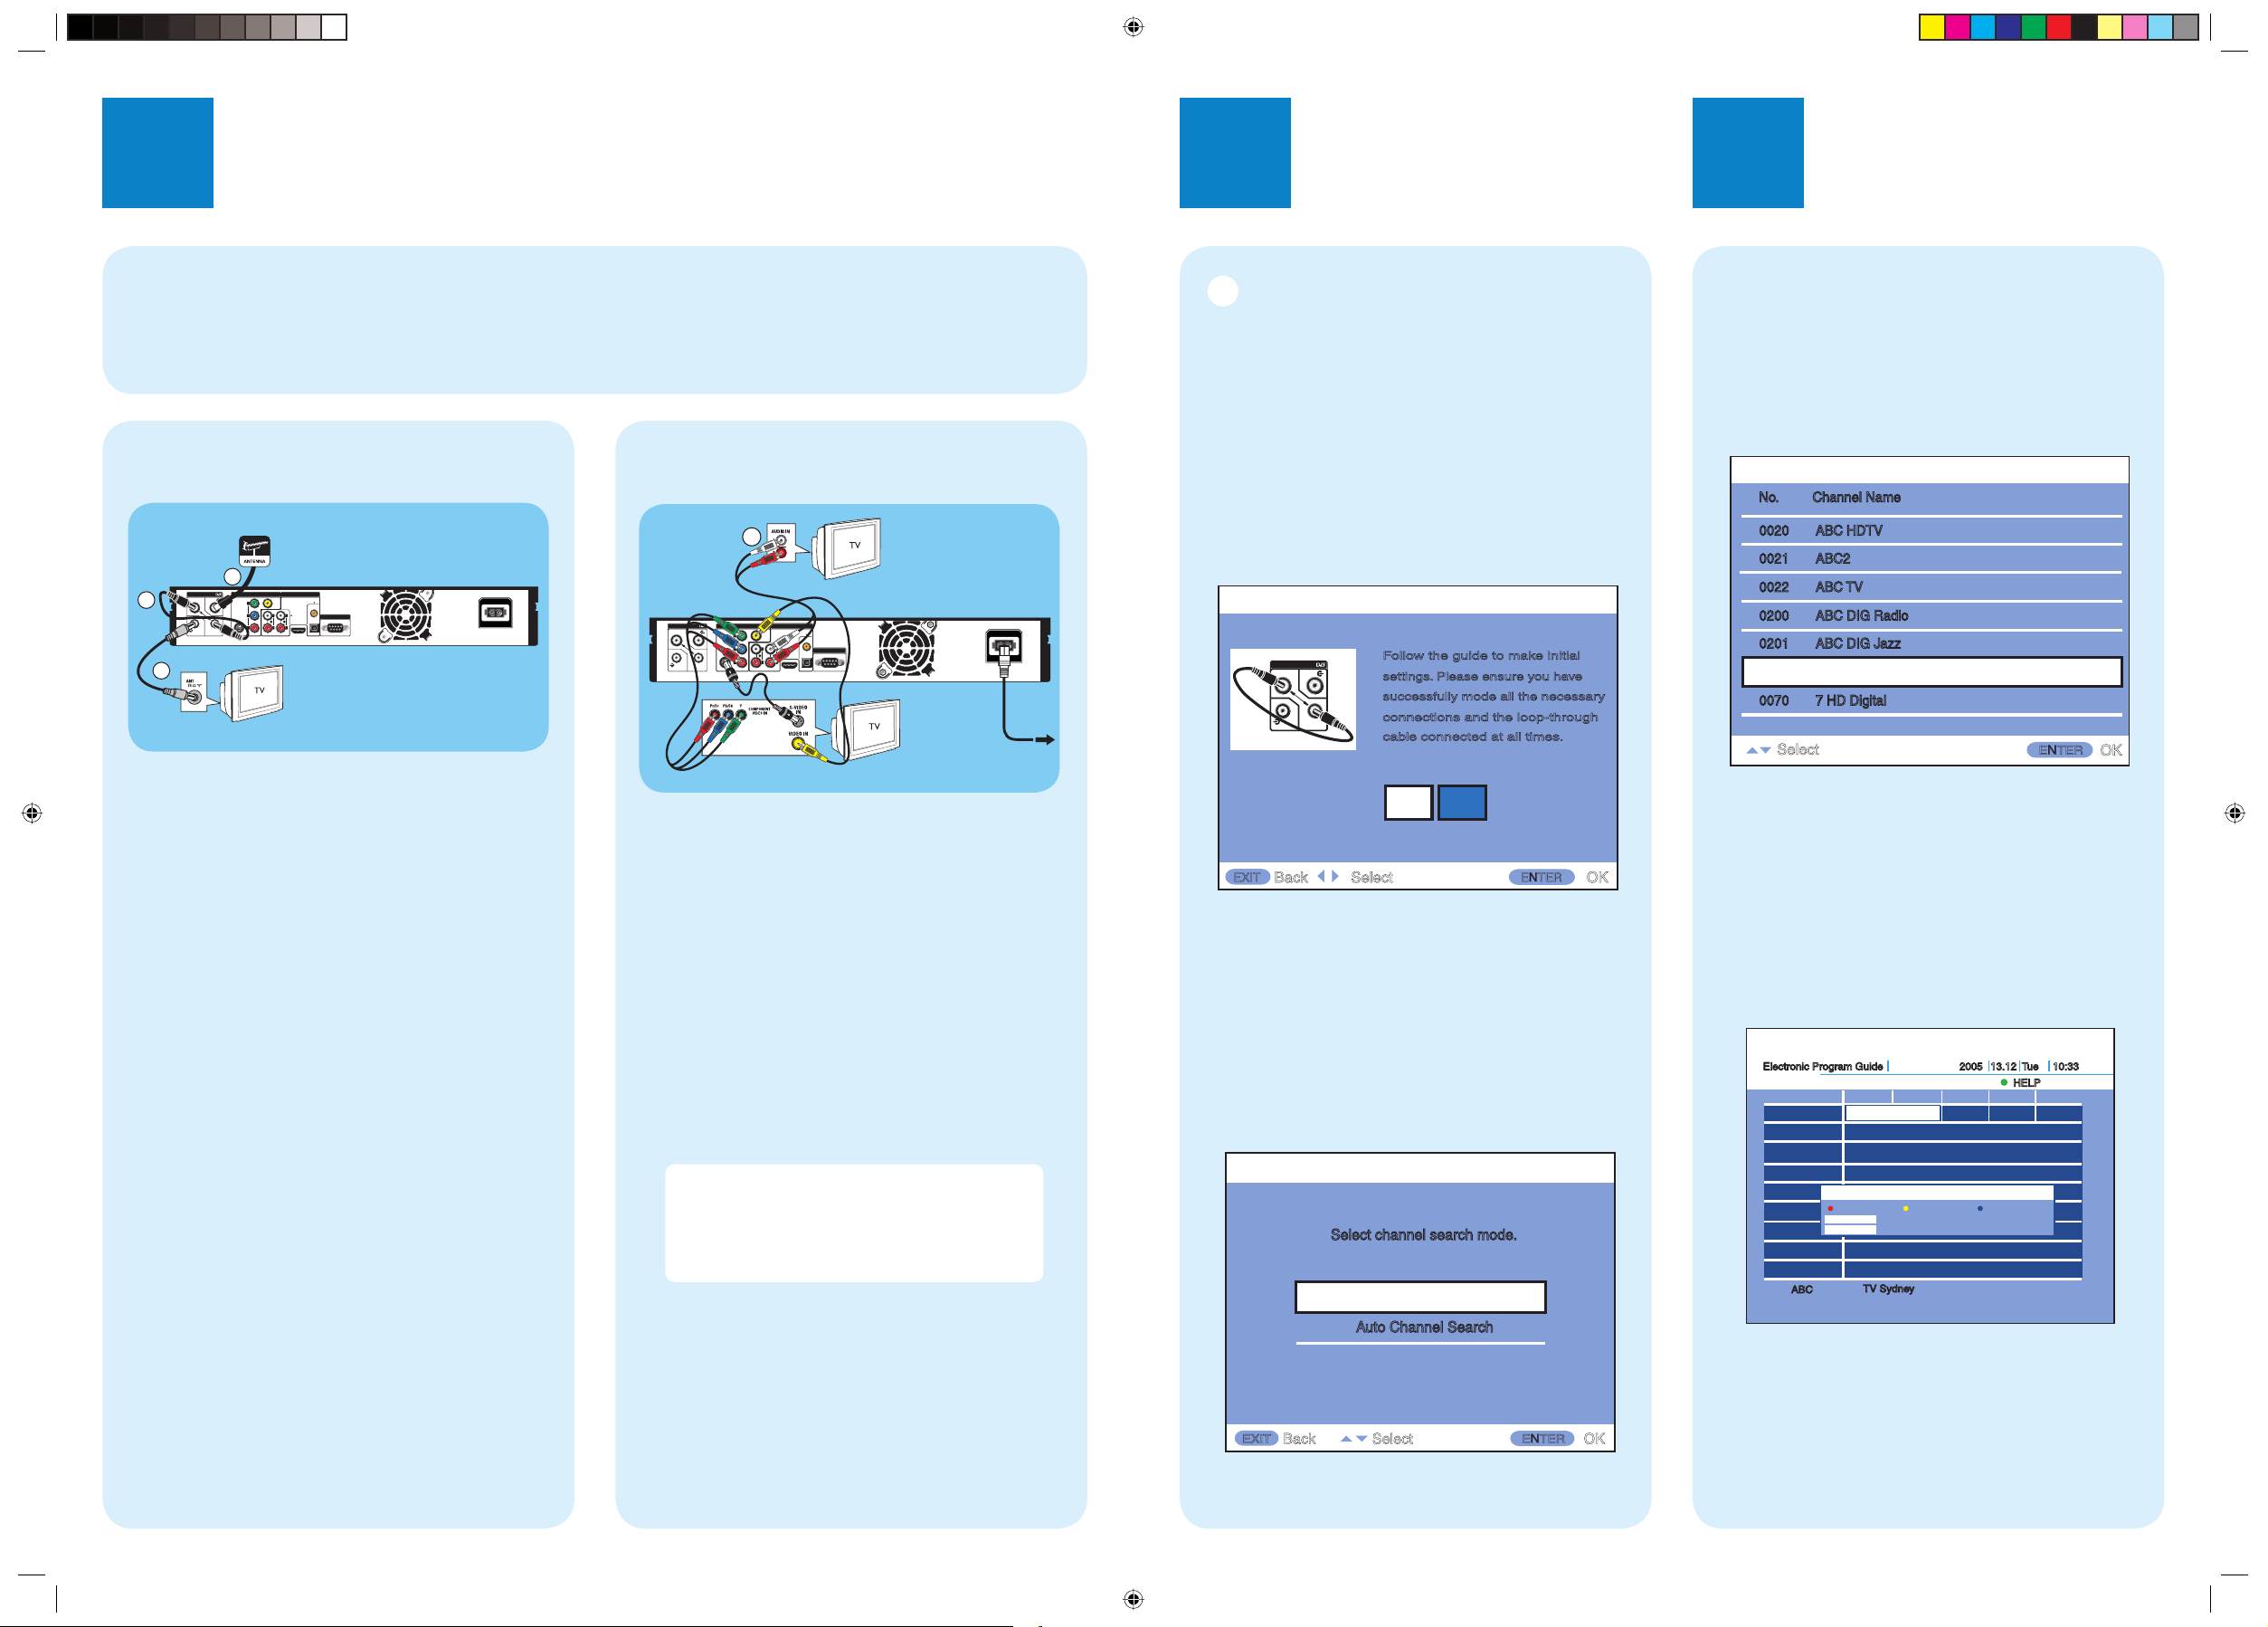
A You can choose one of the options to make
your video connection.
Option 1
– Use the composite video cable to connect the Video
Output-CVBS socket on the recorder to the video input
socket on the TV
Option 2
– Use the S-Video cable to connect the S-Video socket on the
recorder to the S-Video input socket on the TV
Option 3
– Use the component video cables to connect the Video
Output-COMPONENT-Y PB PR sockets on the recorder to
the corresponding component video input sockets on the TV
Note If you have a HDMI TV, connect the
HDMI cable from the recorder to your HDMI
TV set. See the chapter “Basic Connections –
Connecting to a HDMI compatible TV” in the
accompanying user manual.
B Use the audio cable to connect the Audio
Output- L/R 1 or 2 sockets to the audio input
sockets of the connected device.
C Connect the power cable from the recorder to
an AC power outlet.
For additional connection diagrams, see
the accompanying User Manual.
A
Quick Setup
Use the recorder’s remote control and follow the
on-screen instructions to complete the setup.
A Press
2
to turn on the recorder.
B Switch on the TV set and the Quick Setup
menu is displayed.
C In case, you don’t see the recorder’s Quick
Setup menu, press MENU, then select {Quick
Setup} and press OK to enter the setup screen.
Quick Setup
YES
NO
ENTEREXIT
Back Select OK
Follow the guide to make initial
settings. Please ensure you have
successfully mode all the necessary
connections and the loop-through
cable connected at all times.
DIGITAL ANTENNA
RF IN RF IN
RF OUTTO TV
LOOP
THR
OUGH
D You can follow the guide which will help you
throughout the process.
E Select {YES}, and press OK.
F When the Time Zone screen appears, select
your time zone and press OK.
G Select the channel search mode and press OK.
H If you select { Quick Channel Search } select
your city and press OK.
I The Quick Setup is completed now, press OK
to close the menu.
B
Connecting the Video/Audio Cables
A Unplug the antenna cable that is currently
connected to your TV.
B Connect the antenna cable into the Digital
Antenna Input socket on the recorder.
C Connect the To TV Antenna socket with RF
antenna cable to the Antenna In Socket on the
TV.
Helpful Hints :
Use the best quality AV connectors (CVBS/S-Video/
Component Video/HDMI), not the RF connections from
this recorder to the television, to achieve the best video
quality.
D Loop through between RF IN and RF OUT
with supplied antenna interconnected cable.
A
Connecting Recorder and TV
Before connecting
Select the most suitable connection (Options in B) based on your home set up. Refer to the accompanying User
Manual for other possible connections.
Watching TV
A
Watching TV from Channel List
A Press CH List and select the channel you want
to watch by using cursor S T keys.
No. Channel Name
Program List
Select
0021
0022
0200
0201
0007
0070
0020
ABC2
ABC TV
ABC DIG Radio
ABC DIG Jazz
7 Digital
7 HD Digital
ABC HDTV
ENTER
OK
B Press OK to watch your selection channel
B
Watching TV from GUIDE
(Electronic Programme GUIDE)
A Press GUIDE to display the seven channel
programme list covering a two hour period.
B Press cursor S T keys to select a programme
and press OK.
L
R
DIGITAL ANTENNA
RS-232
AUDIO OUTPUTVIDEO OUTPUT
COMPONENT
S-VIDEO
CVBS
PCM / DOLBY DIGITAL
COAXIAL
Manufactured under license from
Dobly Laboratories. “Dolby” and
the double-D symbol are
trademarks of Dolby Laboratories.
OPTICAL
ANALOG
HDMI
Y
L
R
P
b
Pr
1 2
RF IN RF IN
RF OUTTO TV
LOOP
THROUGH
2
4
3
to mains
Option 2
Option 3
Option 1
3
Enjoy
Set up for integrated Digital TV only
2
DIGITAL ANTENNA
RF IN RF IN
COMPONENT
LOOP
TH
ROUGH
S-VIDEO
RF OUTTO TV
Y
P
b
1 2
Pr
AUDIO OUTPUTVIDEO OUTPUT
PCM / DOLBY DIGITAL
CVBS
Manufactured under license from
Dobly Laboratories. “Dolby” and
COAXIAL
the double-D symbol are
trademarks of Dolby Laboratories.
L
L
ANALOG
R
RS-232
R
OPTICAL
HDMI
Quick Setup
Select channel search mode.
Quick Channel Search
Electronic Program Guide
13.12 Tue 10:30
ABC
Seven
Nine
Ten
SBS
ABC
Help
Record
OK
BACK
TV Sydney
TV Sydney
11:00 11:30 12:00 12:30
: Program Info
: EXIT
-24 Hour
2005 13.12 Tu e
ABC-HDTV
ABC TV ABC 2
+24 Hour
10:33
HELP
Auto Channel Search
Back Select OK
ENTEREXIT
dvdr5500_eu_qsg_eng7.indd 2dvdr5500_eu_qsg_eng7.indd 2 4/16/2007 4:35:01 PM4/16/2007 4:35:01 PM
 Loading...