

Philips DTRID200, DTRSA200, DTR200 User Manual
Digital Set Top Box
User Guide

Contents
English
Quick Guide. . . . . . . . . . . . . . . . . . . . . . . . . . 3
Connecting to a Television . . . . . . . . . . . . . . . . . . . . . 3
Connecting to a Television and VCR . . . . . . . . . . . . . 3
Introduction. . . . . . . . . . . . . . . . . . . . . . . . . . 4
About This User Guide . . . . . . . . . . . . . . . . . . . . . . . . 4
What is Freeview? . . . . . . . . . . . . . . . . . . . . . . . . . . . . 4
Safety is Important . . . . . . . . . . . . . . . . . . . . . . . . . . . 4
Safety Considerations . . . . . . . . . . . . . . . . . . . . . . . . . 4
Cleaning . . . . . . . . . . . . . . . . . . . . . . . . . . . . . . . . . . . . 4
Ventilation . . . . . . . . . . . . . . . . . . . . . . . . . . . . . . . . . . 4
Servicing . . . . . . . . . . . . . . . . . . . . . . . . . . . . . . . . . . . 4
Electrical Information . . . . . . . . . . . . . . . . 4
Environmental Markings . . . . . . . . . . . . . . 5
Getting Started . . . . . . . . . . . . . . . . . . . . . . . 6
In the Box . . . . . . . . . . . . . . . . . . . . . . . . . . . . . . . . . . 6
Identification of Parts . . . . . . . . . . . . . . . . . 6
Remote Control . . . . . . . . . . . . . . . . . . . . . . . . . . . . . 6
Digital Set Top Box . . . . . . . . . . . . . . . . . . . . . . . . . . . 7
Mains Adaptor . . . . . . . . . . . . . . . . . . . . . . . . . . . . . . . 7
The Remote Control . . . . . . . . . . . . . . . . . 7
Using the Remote Control . . . . . . . . . . . . . . . . . . . . . 7
Mains adaptor . . . . . . . . . . . . . . . . . . . . . . . 7
Connecting Your Digital Set Top Box to
other equipment . . . . . . . . . . . . . . . . . . . . . 8
Connecting to a Television and DVD . . . . . . . . . . . . . 8
Connecting to a TV and a Stereo System . . . . . . . . . 9
Switching on for the first time . . . . . . . . 10
Additional Functions . . . . . . . . . . . . . . . . 15
Information / Help key . . . . . . . . . . . . . . . . . . . . . . . 15
Volume . . . . . . . . . . . . . . . . . . . . . . . . . . . . . . . . . . . . 16
Mute . . . . . . . . . . . . . . . . . . . . . . . . . . . . . . . . . . . . . . 16
Swap channels . . . . . . . . . . . . . . . . . . . . . . . . . . . . . . 16
Text/MHEG . . . . . . . . . . . . . . . . . . . . . . . . . . . . . . . . 16
TV/STB . . . . . . . . . . . . . . . . . . . . . . . . . . . . . . . . . . . . 16
I-II . . . . . . . . . . . . . . . . . . . . . . . . . . . . . . . . . . . . . . . . 16
APP . . . . . . . . . . . . . . . . . . . . . . . . . . . . . . . . . . . . . . 16
TIMER . . . . . . . . . . . . . . . . . . . . . . . . . . . . . . . . . . . . 16
LIST . . . . . . . . . . . . . . . . . . . . . . . . . . . . . . . . . . . . . . 16
Expert settings . . . . . . . . . . . . . . . . . . . . . 16
Manual channel search . . . . . . . . . . . . . . . . . . . . . . . 16
Clear all settings . . . . . . . . . . . . . . . . . . . . . . . . . . . . 16
Help and Advice . . . . . . . . . . . . . . . . . . . . . 17
Error . . . . . . . . . . . . . . . . . . . . . . . . . . . . . . . . . . . . . 17
Possible cause . . . . . . . . . . . . . . . . . . . . . . . . . . . . . . 17
Remedy . . . . . . . . . . . . . . . . . . . . . . . . . . . . . . . . . . . 17
Technical Data . . . . . . . . . . . . . . . . . . . . . . 18
General . . . . . . . . . . . . . . . . . . . . . . . . . . . . . . . . . . . 18
Base specification . . . . . . . . . . . . . . . . . . . . . . . . . . . . 18
Input /Output . . . . . . . . . . . . . . . . . . . . . . . . . . . . . . 18
Power Supply . . . . . . . . . . . . . . . . . . . . . . . . . . . . . . . 18
Accessories . . . . . . . . . . . . . . . . . . . . . . . . . . . . . . . . 18
Temperature . . . . . . . . . . . . . . . . . . . . . . . . . . . . . . . 18
Guarantee . . . . . . . . . . . . . . . . . . . . . . . . . . 19
Using the Set Top Box . . . . . . . . . . . . . . . . 11
Channel List . . . . . . . . . . . . . . . . . . . . . . . 11
To Watch a channel . . . . . . . . . . . . . . . . . . . . . . . . . 11
To Delete a Channel . . . . . . . . . . . . . . . . . . . . . . . . . 11
To Edit a channel name . . . . . . . . . . . . . . . . . . . . . . . 11
To Lock a channel . . . . . . . . . . . . . . . . . . . . . . . . . . . 12
To Add a channel to your Favourites list . . . . . . . . . 12
Changing Channels . . . . . . . . . . . . . . . . . . . . . . . . . . 13
Channel browse keys . . . . . . . . . . . . . . . . . . . . . . . . 13
Number keys (0-9) . . . . . . . . . . . . . . . . . . . . . . . . . . 13
Channel list . . . . . . . . . . . . . . . . . . . . . . . . . . . . . . . . 13
Configuration . . . . . . . . . . . . . . . . . . . . . . 13
Receiver Upgrade . . . . . . . . . . . . . . . . . . . . . . . . . . . 13
Parental Settings . . . . . . . . . . . . . . . . . . . . . . . . . . . . 14
Audio Language . . . . . . . . . . . . . . . . . . . . 14
Timers . . . . . . . . . . . . . . . . . . . . . . . . . . . . 14
Electronic Program Guide . . . . . . . . . . . . 15
Favourites . . . . . . . . . . . . . . . . . . . . . . . . . 15
2 CONTENTS
Quick Guide
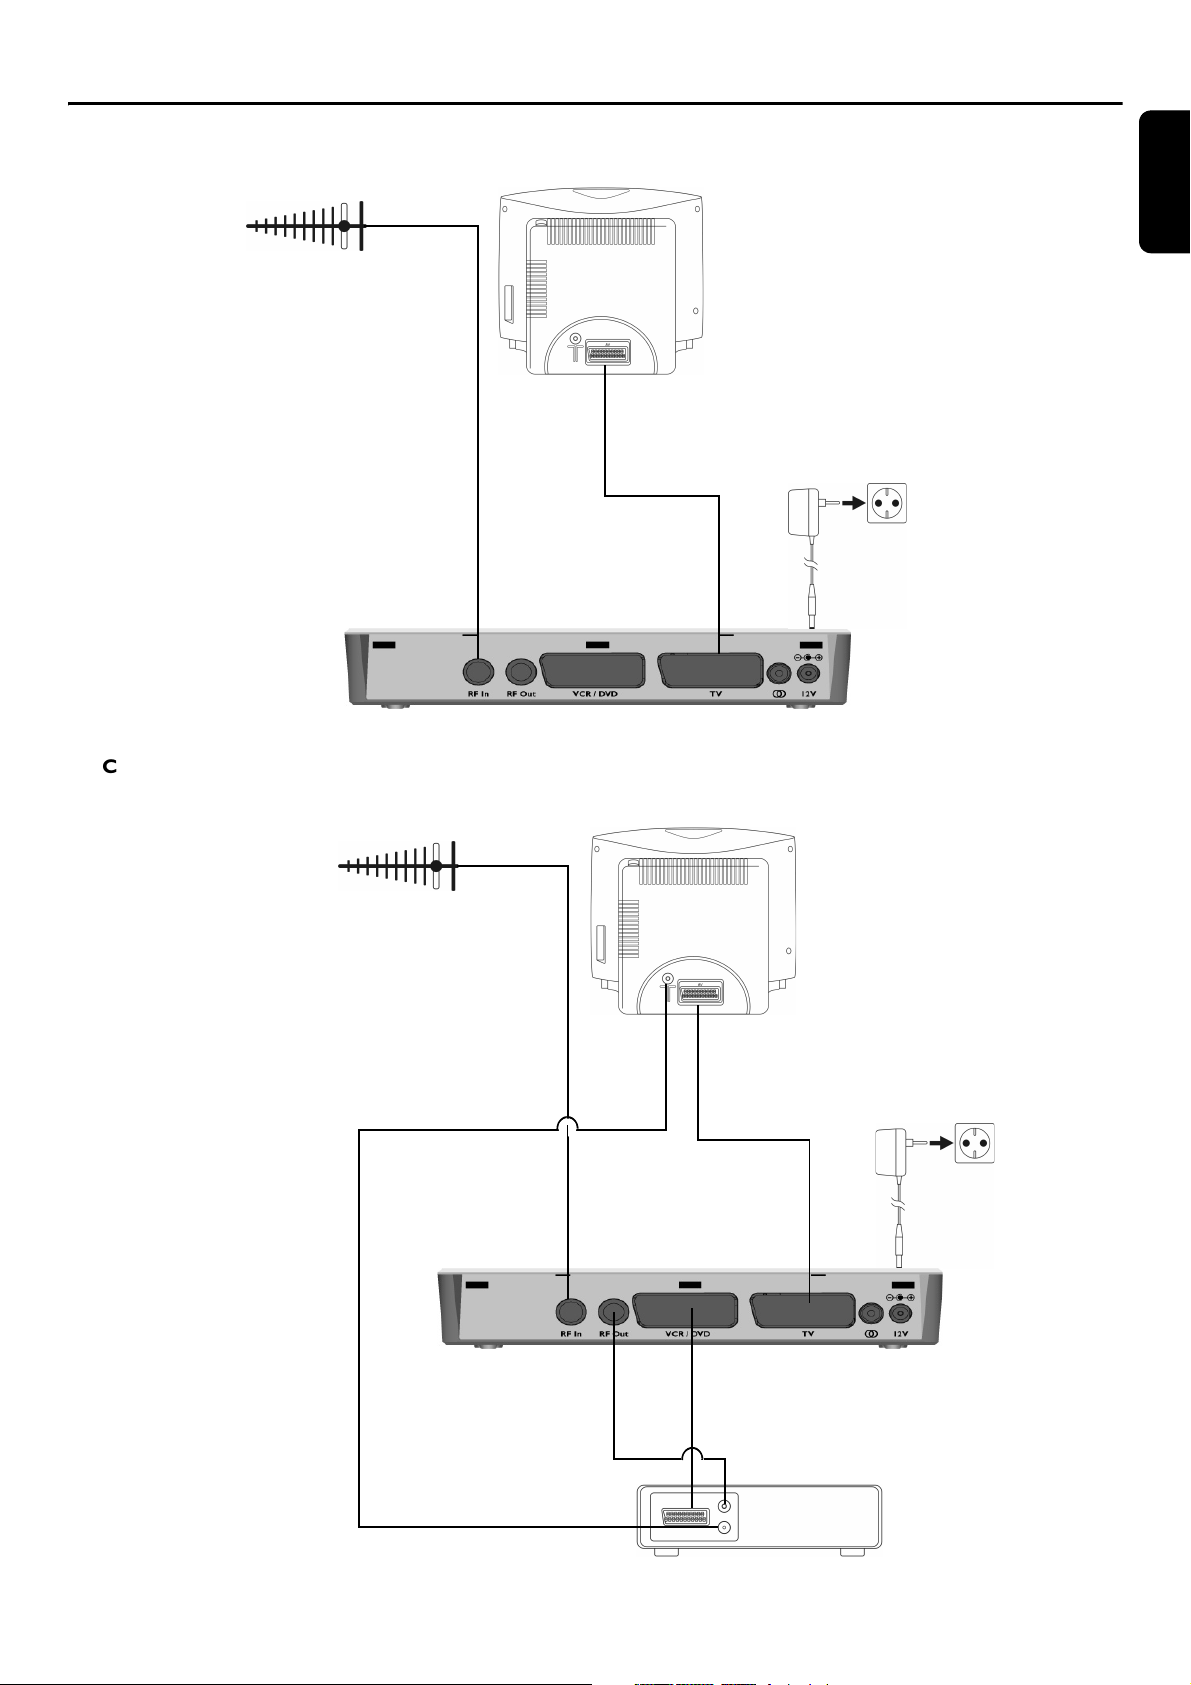
Connecting to a Television
UHF Aerial
RF in connector
Example TV set, rear panel
SCART input on TV
SCART to SCART
cable (supplied)
SCART output
to TV
English
Set Top Box
Power Supply Adaptor
(supplied)
12V DC
Connecting to a Television and VCR
UHF Aerial
Set Top Box rear panel
Example TV set, rear panel
RF In
connector
RF Out
connector
SCART input on TV
SCART to SCART
cable (supplied)
SCART output
to TV
Set Top Box Power
Supply Adaptor
(supplied)
12V DC
Set Top Box rear panel
RF cable
VCR RF Out onnector
SCART
to VCR
SCART to SCART
cable (not supplied)
VCR RF In connector
Example VCR set, rear panel
QUICK QUIDE 3
Introduction
English
Thank you for purchasing this product which has been
designed and manufactured to give you many years of
trouble-free service.
About This User Guide
This user guide contains all the information you need to
know about how to setup and watch available 'Freeview'
channels using your set top box.
What is Freeview?
It is the new, free digital service currently providing up to
30 free digital TV channels, over 20 digital radio stations
plus a whole new world of interactive services. It's broadcast from transmitters and received via a rooftop aerial.
It works like traditional TV, but because the signals are
digital you need a set top box to convert them. This
means more channels can be transmitted with extra features such as interactivity and widescreen pictures.
Safety is Important
To ensure your safety and the safety of others, please
ensure you read the Safety Instructions before you operate this product.
Ventilation
- The slots and openings on the set top box are for ventilation. Do not cover or block them as it may cause
overheating.
- NEVER let children push anything into the holes or slots
on the case.
Servicing
- There are no user serviceable parts in this set top box.
- When servicing, refer to qualified service personnel.
- Consult your dealer if you are ever in doubt about the
installation, operation or safety of this set top box.
Electrical Information
Important information:
Must be read and understood.
War ning:
Read these electrical safety instructions carefully
before connecting the adapter to the mains supply.
Note: Keep this information in a safe place for future reference.
Safety Considerations
Position the cables so that they cannot be walked on or
pinched by items placed on or against them.
- Do not use the set top box in humid or damp conditions.
- Do not allow the set top box to get wet.
- Do not expose the set top box to dripping or splashing.
- Do not place water filled objects such as vases on top of
the set top box.
- Do not place naked flame sources, such as candles, on
top of the set top box.
Cleaning
- ALWAYS unplug the set top box before you clean it.
- Do not use liquid or aerosol cleaners.
- Clean the set top box with a soft, damp (not wet) cloth.
- This digital set top box is supplied with a mains adapter.
- This mains adapter is designed to operate on 230V AC
50Hz supply only. Connecting it to any other power
sources may damage the set top box.
- The mains adapter is designed for indoor use only.
- The mains adapter is a sealed unit. There are no user
serviceable parts inside and it does not require any
electrical adjustments.
- Do not attempt to open the mains adapter.
- If the mains adapter is not suitable for your socket, or
becomes damaged, it must be replaced and disposed of
in a safe and environmentally protective way. Always
refer to qualified personnel.
- Periodically inspect the mains adapter for damage. Do
not use if faults or damage are found. Refer to qualified
personnel.
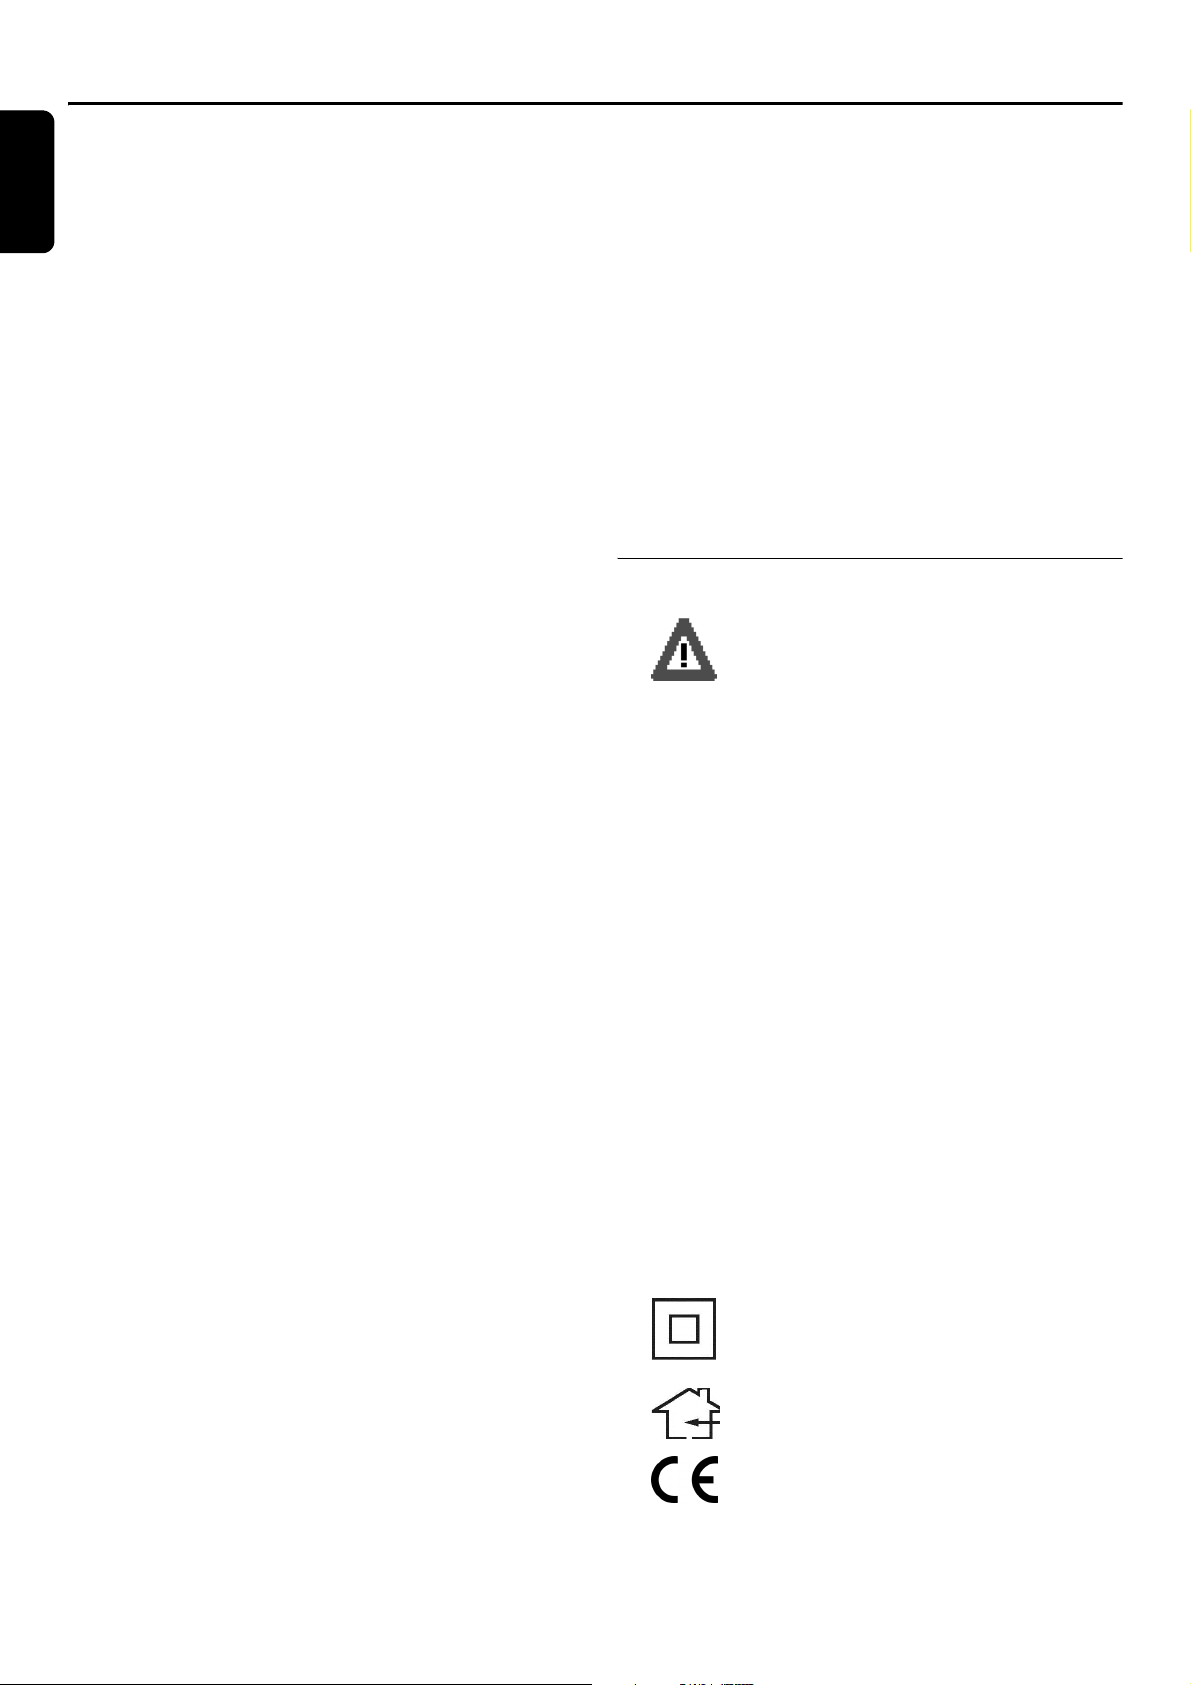
This symbol indicates that the adapter is a
Class II appliance and does not require an earth
connection.
This symbol indicates that the adapter is for
indoor use only.
4 INTRODUCTION
This symbol indicates that the adapter conforms
to CE regulations.

English
Environmental Markings
Your product has been designed and manufactured with high quality materials and components,
which can be recycled and reused.
When this crossed-out wheeled bin symbol is attached to
a product or his packaging, it means the product is covered by European Directive 2002/96/EC.
Please inform yourself about the local separate collection
system for electronic products.
Please act according to your local rules and do not dispose of your old products with your normal household
waste. The correct disposal of your old product will help
prevent potential negative consequences for the environment and human health.
The "Material recyclability symbol " affixed on
package cardboard and user manual means these
parts are recyclable. So do not dispose of them
with your normal household waste.
The "Material recyclability symbol " affixed on
plastic packaging parts means these parts are
recyclable.So do not dispose of them with your
normal household waste.
The "Green Dot" affixed on cardboard means
PHILIPS pays a financial duty to the "Avoidance
and Recovery of Packaging Waste" organization.
5 INTRODUCTION
Getting Started
n
)
English
Remove your Digital Set Top Box carefully from the box,
and remove the packaging from each part.
In the Box
You will find the following items:
- Digital Set Top Box
- Remote Control (AA batteries)
- Power supply 230 V AC/50 Hz to 12 V DC
- SCART-to-SCART cable
(for Digital Set Top Box to SCART input connector on
TV set)
- User Guide (This publication)
If any of these items are damaged or missing,
please contact us at:
Philips CE,
The Philips Centre,Surrey
0906 1010 016
(£ 0.15/min)
Identification of Parts
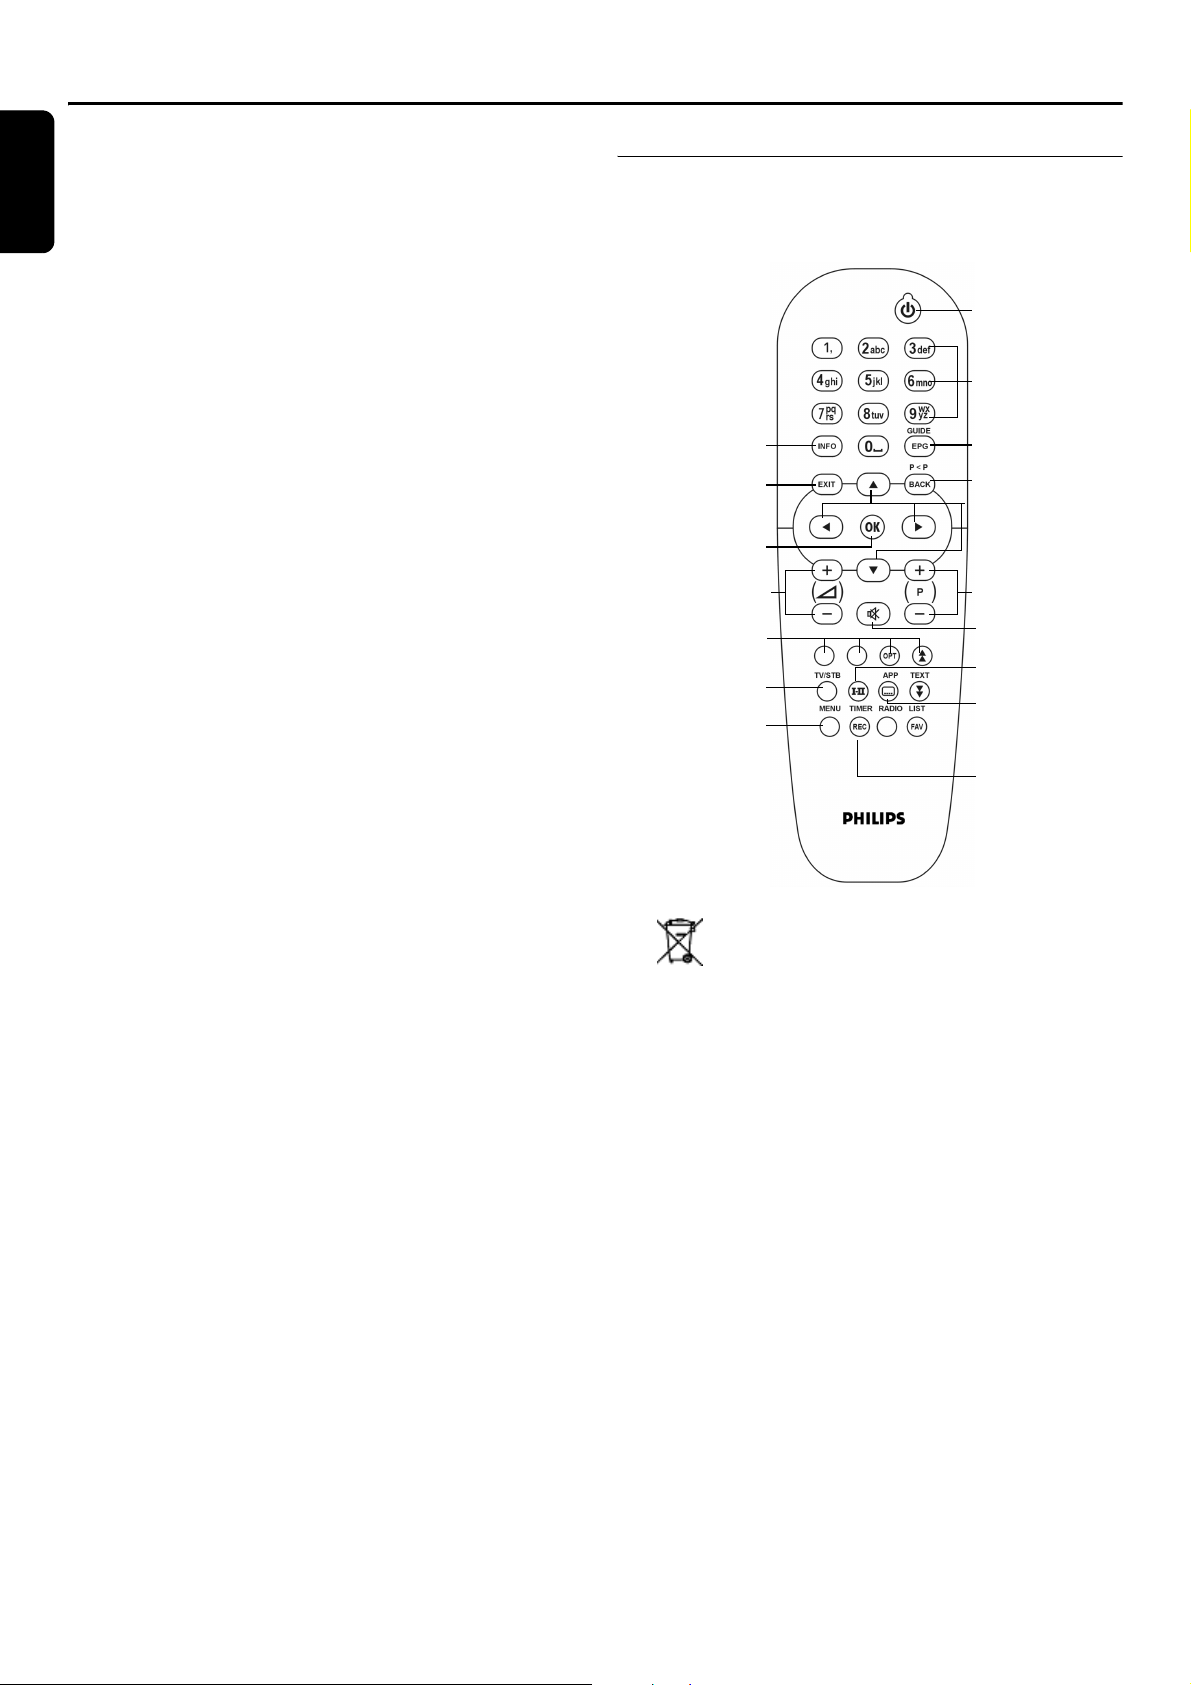
Remote Control
INFO key
EXIT key
OK key
Volume up/down
Colour keys
TV/STB key
MENU key
Power On/Off
(Stand-By)
Number keys
EPG key
BACK / P<P key
Cursor keys
Channel up/dow
Mute key
I-II
key
(Audio selection)
APP key
(subtitle selection
Please make sure that you have the model number of your
set top box, before contacting us. The label showing the
type and serial number is underneath your receiver.
TIMER/REC key
Batteries are removable from the remote using
common household tools (like a screwdriver…)
The batteries supplied do not contain hazardous substances such as Mercury, Cadmium, or Lead.
However, they must not be disposed of with your household waste but to a local separate collection system.
6 GETTING STARTED
 Loading...