

Page 1
Register your product and get support at
www.philips.com/welcome
EN User manual
Docking Entertainment System
DC315
Page 2

h
g
f
m
c
d
i
j
k
l
b
e
a
1
Page 3

Canada
English:
This digital apparatus does not exceed the Class B limits for radio noise
emissions from digital apparatus as set out in the Radio Interference
Regulations of the Canadian Department of Communications.This Class
B digital apparatus complies with Canadian ICES-003.
Français:
Cet appareil numérique n’émet pas de bruits radioélectriques dépassant
les limites applicables aux appareils numériques de Classe B prescrites
dans le Règlement sur le Brouillage Radioélectrique édicté par le
Ministère des Communications du Canada. Cet appareil numérique de
la classe B est conforme à la norme NMB-003 du Canada.
The set complies with the FCC-Rules, Part 15 and with 21 CFR
1040.10. Operation is subject to the following two conditions:
1. This device may not cause harmful interference, and
2. This device must accept any interference received, including
interference that may cause undesired operation.
L’appareil est conforme à la réglementation FCC, section 15, et
à la norme 21 CFR 1040.10. Son utilisation est soumise à deux
conditions :
1. L’appareil ne doit pas provoquer d’interférences nuisibles, et
2. L’appareil doit supporter les interférences reçues, y compris les
interférences empêchant son fonctionnement correct.
Page 4
Page 5

Page 6

EN
1 Important
Safety
Important Safety Instructions
a Read these instructions.
b Keep these instructions.
c Heed all warnings.
d Follow all instructions.
e Do not use t his apparatus near water.
f Clean only with dry cloth.
g Do not block any ventilation openings. Install in accordance
with the manufacturer’s instructions.
h Do not install near any heat sources such as radiators, heat
registers, stoves, or other apparatus (including ampliers)
that produce he at.
i Do not defeat the safety purpose of
the polarized or grounding-type plug. A
polarized plug has t wo blades wit h one
wider than the other. A grounding type
plug has two blades and a third grounding
prong. The wide blade or the third prong are provided for
your safety. If the provided plug does not t into your outlet,
consult an electrician for replacement of the obsolete outlet .
j Protect the power cord from being walked on or pinched,
particularly at plugs, convenience recept acles, and the point
where they exit from the apparatus.
Page 7

k Only use attachments/accessories specied by the
manufacturer.
l Use only with the car t, stand , tripod, bracket, or
table specied by the manufacturer or sold wit h the
appar atus . When a cart is used, use caution when
moving the car t/apparatus combination to avoid
injury from tip-over.
m Unplug this apparatus during lightning storms or when
unused for long periods of time.
n Refer all servicing to qualied service personnel. Ser vicing is
required when the apparatus has been damaged in any way,
such as power-supply cord or plug is damaged, liquid has
been spilled or objects have fallen into the apparatus, the
appar atus has been exposed to rain or moisture, does not
operate normally, or has bee n dropped.
o Apparatus shall not be exposed to dripping or splashing.
p Do not place any sources of danger on the apparatus (e.g.
liquid lled objects, lighted c andles).
q This product may contain lead and mercury. Disposal of
these materials may be regulated due to environmental
considerations. For disposal or recycling information, please
contact your local authorities or the Electronic Industries
Alliance: w ww.eiae.org.
r Where the MAI NS plug or an appliance coupler is used as
the disconnect device, the disconnect device shall remain
readily oper able .
Page 8

Warning
Never r emove the ca sing of this appar atus . •
Never l ubr icate any par t of this apparatu s. •
Never p lace this apparatus on other electrical equipment. •
Keep this apparatus away from direc t sunlight, naked ames or heat. •
Ensur e that you alw ays have easy a ccess to the power cord, plug or •
adaptor to disconnect the apparatus from the power.
Notice
This product complies with the radio inter ference
requirement s of the European Community.
This product complies with the requir ements of the
following directives and guidelines: 2004/108/EC +
2006/95/EC
Any changes or modications made to this device that are not
expressly appr oved by Philips Consumer Lifestyle may void the user’s
authority to operate the equipment.
Recycling the product
Your product is designed and manufactured with high quality materials
and components, which can be recycled and reused.
Never dispose of your product with other household waste. Please
inform yourself about the local rules on the separate collection of
electrical and electronic products and batteries. The correct disposal of
these products helps prevent potentially negative consequences on the
environment and human health.
Please visit www.r ecycle.philips.com for additional information on a
recycling center in your area.
Page 9

Environmental information
All unnecessar y pack aging has been omitted. We have tried to make
the packaging easy to separate into three materials: cardboard (box),
polysty rene foam (buffer) and polyethylene (bags, protective foam
sheet.)
Your system consist s of materials which can be rec ycled and reused
if disassembled by a specialized company. Plea se observe the local
regulations regarding the disposal of packaging materials, exhausted
batteries and old equipment.
2 Your Docking Entertainment
System
Congratulations on your purchase, and welcome to Philips! To fully
benet from the support that Philips offers, register your product at
www.philips.com/welcome.
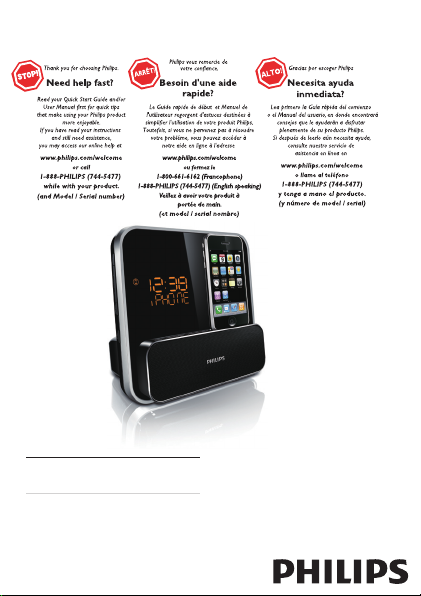
Introduction
With this unit, you can enjoy audio from the iPod, iPhone, other audio
devices, or the radio.
The radio, iPod, or iPhone can be set as the alarm timer. You can set two
alarm timers to go off at different times.
What’s in the box
Check and identify the contents of your package:
Main unit•
Power cord•
1 x AC adaptor•
1 x MP3 link cable•
User manual•
Quick s tart guide•
Page 10

Overview of the main unit (See 1)
a REPE AT ALARM/BRIGHTNESS CONTROL
b ALM 1/ALM 2
c
d SOURCE
e VOL +/-
f Adjuster
g iPod/i Phone dock
h
i POWER
j TUNING +/-
k TIME SET/AUTO SCAN
Repeat the alarm.•
Adjus t the display brightness.•
Set the alar m timer.•
Turn off the alarm tone.•
Star t or pause iPod/iPhone play.•
Select a source: iPod/iPhone, FM tuner or MP3 link.•
Adjus t volume.•
Adjus t the mechanism to t dif ferent iPod/iPhone.•
Load an iPod/iPhone.•
/ /PRESET +/-
Skip to the previous/next audio le.•
Search within an audio le.•
Select a preset r adio station .•
Adjus t time.•
Turn on the unit or switch to standby mode.•
Tune to a radio st ation.•
Adjus t time.•
Set the clock .•
Page 11

Program r adio stations.•
l SLEEP
m Display panel
Set the sleep time r.•
Show curre nt st atus.•
3 Get started
Caution
Use of controls or adjustments or performance of procedures other than •
here in may result in hazard ous radiat ion exposure or other unsafe op era tion.
Always follow the instructions in this chapter in sequence.
If you contact Philips, you will be asked for the model and serial number
of this apparatus. The model number and serial number are on the
bottom of the apparatus. Write the numbers here:
Model No. __________________________
Serial No. ___________________________
Connect power
Caution
Risk of product damage! Ensure th at the p ower voltage corresponds •
to the voltage pri nted on the back or underside of t he appara tus.
•
Risk of elec tric shock! When you u nplug the AC adaptor, always pull
the plug from the socket. Never pull the cord .
•
Befor e connecting the AC adaptor, ensure you have completed all
other connections.
Page 12

Note
The type plate is located on the bottom of the main unit. •
1 Prepare the AC power adaptor.
2 Connect one end of the AC adaptor to the DC IN socket on
the main unit.
3 Connect the other end of t he AC adaptor to the wall outlet.
Page 13

Set time and date
1 In standby mode, press and hold TIME SET/AUTO SCAN for 2
seconds.
The hour digits are displayed and begin to blink. »
2 Press TUNING +/- to set the hour.
3 Press TIME SET/AUTO SCAN to conrm.
The minute digits are displayed and begin to blink. »
4 Repeat steps 2-3 to set the minute, year, month, day and 12/24 hour
format.
Turn on
1 Press POWER.
Switch to standby
1 Press POWER again to switch t he unit to standby mode.
The unit switches to the last selected source. »
The time and date (if set) appear on the display panel. »
Tip
After being idled for 15 minutes in standby mode, the scr een turns •
dim automatically.
•
To light up th e screen, press any button .
Adjust volume
1 During play, pr ess VOL +/- to increase/decrease the volume.
Page 14

4 Play
Play from iPod/iPhone
You can enjoy audio from iPod/iPhone through this unit.
Compatible iPod/iPhone
Apple iPod and iPhone models with a 30 -pin dock connec tor :
iPod classic, iPod touch, iPod nano, iPod 5th gener ation (video), •
iPod with color display, iPod mini.
iPhone, iPhone 3G.•
Load the iPod/iPhone
1 Place the iPod/iPhone in the dock.
Page 15

2 Turn the adjuster to t the iPod/iPhone.
Remove the iPod/iPhone
1 Pull the iPod/iPhone out of the dock.
Listen to the iPod/iPhone
1 Ensur e that the iPod/iPhone is loaded correctly.
2 Press SOURCE repeatedly to select iPod/iPhone source .
The connected iPod/iPhone plays automatically. »
To pause/resume play, press •
To skip to a tr ack , press •
To search during play, press and hold •
release to r esume normal play.
.
/ .
/ , then
Page 16

Charge the iPod/iPhone
When t he unit is connected to power, the docked iPod/iPhone begins to
charge.
Play from an external device
You can also listen to an external audio device through this unit.
1 Press SOURCE repeatedly to select MP3 link source .
2 Connect the supplied M P3 link cable to:
the • MP3 LINK jack (3.5mm) on the back of the uni t.
the headphone jack on an ex ternal device.•
3 Star t to play the device (see the device user manual).
5 Listen to radio
Note
Only FM radio rece ptio n is available on this unit. •
Tune to a radio station
Tip
Position the antenna as f ar as possib le from TV, VCR o r othe r •
radi atio n sour ce.
•
For opt imal r eception, fully extend and adju st th e position of the
antenna.
1 Press SOURCE repeatedly to select FM tuner.
Page 17

2 Press and hold TUNING +/- for more t han 2 seconds .
[Srch] (search) is displayed. »
The radio tunes to a station with strong reception automatically. »
3 Repeat ste p 2 to tune to more stations.
To tune to a weak s tation, press • TUNING +/- repeatedly
until you nd optimal reception.
Program radio stations automatically
You can program a maximum of 20 preset radio stations.
1 In the tuner mode, press and hold TIME SET/AUTO SC AN for
more than 2 seconds to activate automatic program mode.
[AUTO] (auto) is displayed and begins to blink. »
All available stations are programmed in the order of »
waveband reception strength.
The rst programmed radio station is broadcast automatically. »
Program radio stations manually
You can program a maximum of 20 preset radio stations.
1 Tune to a radio st ation.
2 Press TIME SET/AUTO SCAN to ac tivate the program mode.
3 Press PRES ET +/- to selec t a number.
4 Press TIME SET/AUTO SCAN to conrm.
5 Repeat the above steps to progr am other stations.
The preset number and the frequency of the preset station »
are displayed.
Page 18

Note
To overwrite a programmed station, s tore another stati on in its place. •
Select a preset radio station
1 Press PRES ET +/- to selec t a preset number.
6 Other features
Set the alarm timer
You can set two alarms which go off at different time.
1 Ensur e that you have set the clock cor rectly.
2 Press and hold ALM 1 or ALM 2 for 2 seconds.
»
or and hour digits begin to blink.
3 Press TUNING +/- repeatedly to set the hour.
4 Press ALM 1 or ALM 2 to conrm.
»
or and minute digits begin to blink.
5 Repeat ste ps 3- 4 to set the minute.
6 Repeat ste ps 3- 4 to select whether to r ing alarm on weekdays
or at wee kend .
7 Repeat ste ps 3- 4 to select an alarm sound source.
8 Repeat ste ps 3- 4 to set the alarm volume .
Activate and deactivate the alarm timer
1 Press ALM 1 or ALM 2 repeatedly to activate or deac tivate the
ti me r.
If the timer is activated, »
or is displayed.
Page 19

If the timer is deactivated, » or disappears.
Repeat alarm
1 When t he alarm rings , press REPEAT ALARM/BRIGHTNESS
CONTRO L.
The alarm repeats ringing minutes later. »
Tip
You can pre ss • TUNING+/- to adjus t inte rv al to repeat alar m.
Stop alarm ring
1 When the alarm r ings, press the corresponding ALM 1 or ALM
2.
The alarm stops but the alarm settings remain. »
View the alarm settings
1 Press ALM 1 or ALM 2.
Set the sleep timer
This unit can switch to standby automatically after a set period of time.
1 Press SLEEP repeatedly to select a set period of time (in minutes).
When the sleep timer is activated, the display shows »
Tip
When s leep mode is a cti vate d, output volume decr eases gradually. •
.
Page 20

To deactivate sleep timer
1 Press SLEEP repeatedly until [SLP OFF] (SLP off ) is displayed.
When the sleep timer is deactivated, »
display.
disappears on the
Adjust display brightness
1 Press BRIGHTNESS CONTROL repeatedly to select different
levels of display brightness.
7 Product information
Note
Product information is sub jec t to change without prior noti ce. •
Specications
Amplier
Rated Output Powe r 2X4 W RMS
Frequenc y Response 125 Hz - 16 kHz, ±3 dB
Signal to Noise Ratio >55 dB
MP3 link 500mV RMS 10 kohm
Page 21

Tuner
FM
Tuning Range 87.5 - 108 MHz
Tuning grid 100 kHz
Sensitivity
- Mono, 26dB S/N Ratio
- Stereo, 46dB S/N R atio
Search Selectivity <28 dBu
Total Har monic Distor tion <3%
Signal to Noise Ratio >45 dB
<22 dB u
<45 dBu
General information
AC power (power adaptor) Input: 100-240V~, 50/60Hz, 1.0A;
Oper ation Power
Consumption 15W
Standby Power Consumption <2W
Dimensions
- Main Unit (W x H x D) 173 x185 x 144mm
Weight
- Main Unit 0.66 k g
Output: 9.0V
Philips; Model No.:
AS250-090-AQ278)
2.78A; Brand name:
Page 22

8 Troubleshooting
Warning
Never r emove the ca sing of this appar atus . •
To keep the warranty valid, never try to repair the system yourself.
If you encounter problems when using this apparatus, check the
following points before requesting service. If the problem remains
unsolved, go to the Philips web site (www.philips.com/welcome). When
you contact Philips, ensure that the apparatus is nearby and the model
number and serial number are available.
No power
Ensur e that the AC power plug of the unit is connected •
properly.
Ensur e that ther e is powe r at the AC outlet. •
No sound
Adjus t the volume. •
No response from the unit
Disconnec t and reconnect t he AC power plug, then turn on •
the unit again.
Poor radio reception
Increase t he dis tance bet ween the unit and your T V or VCR . •
Fully extend the FM antenna . •
Timer does not work
Set the clock correctly. •
Switch on the timer. •
Page 23

Clock/timer setting erased
Power has been inter rupted or the power plug has been •
disconnec ted.
Reset t he clock/timer. •
Page 24

Philips Consumer Lifestyle
A Division of Philips Electronics North America Corporation
P.O. BOX 671539, Marietta, GA. 30006-0026
Meet Philips at the Internet
www.philips.com/welcome
© Royal Philips Electronics N.V. 2009
All rights reserved.
Specications are subject to change
without notice.Trademarks are the
property of Koninklijke Philips Electronics
N.V. or their respective owners.
Printed in China
DC315_37_UM_V2.2
 Loading...