

Page 1
Register your product and get support at
ba
de
c
a
lk
j
bc
dhi
320Hz
30Hz
SUB
WOOFER
SUBSONIC
ON OFF
REMOTE
LEVEL CONTROL
feg
4 ohm speaker
Динамик 4 Ом
4 ohm speaker 4 ohm speaker
Динамик 4 Ом Динамик 4 Ом
Left speaker
Right speaker
White / Black
White
Grey
Grey / Black
Car audio unit
320Hz
30Hz
SUB
WOOFER
SUBSONIC
ON OFF
REMOTE
LEVEL CONTROL
Левый громкоговоритель
Правый громкоговоритель
Автомобильное
аудиоустройство
Белый
Серый
Белый/черный
Серый/черный
LINE OUT
Car audio unit
320Hz
30Hz
SUB
WOOFER
SUBSONIC
ON OFF
REMOTE
LEVEL CONTROL
Автомобильное
аудиоустройство
Линейный выход
to a metal point of the car
Car audio unit
Remote output
Fuse (60 A)
+12 V car battery
less than 450 mm (18 in)
К металлическому контакту в автомобиле
Выход для пульта ДУ
Автомобильное
аудиоустройство
Менее 450 мм (18 дюймов)
Плавкий предохранитель (60 А)
Автомобильный аккумулятор +12 В
320Hz
30Hz
SUB
WOOFER
SUBSONIC
ON OFF
REMOTE
LEVEL CONTROL
REMOTE
LEVEL CONTROL
www.philips.com/welcome
EN User manual
CMP100
A
B
C E
D
a
b
a
b
F
G
H
RU Руководствопользователя
English
1. Important
Safety
•
Read and understand all instructions before you use the apparatus.
If damage is caused by failure to follow instructions, the warranty does
not apply.
This unit is designed for negative ground (earth) 12 V DC operation only.•
Use only the supplied mounting hardware for a safe and secure installation.•
Do not connect any active speakers (with built-in amplier) to the speaker •
terminals of the unit. Doing so may damage the active speakers.
To ensure safe driving, adjust the volume to a safe and comfor table level.•
To avoid short circuit, do not expose the apparatus to rain or water.•
Never expose the apparatus to direct sunlight, naked ames or heat.•
Clean the apparatus with soft, damp cloth. Never use substances such as •
alcohol, chemicals or household cleaners on the apparatus.
Notice
Environmental information
All unnecessary packaging has been omitted. We have tried to make the
packaging easy to separate into three materials: cardboard (box), polystyrene
foam (buffer) and polyethylene (bags, protective foam sheet.)
Your system consists of materials which can be recycled and reused if disassembled
by a specialized company. Please observe the local regulations regarding the
disposal of packaging materials, exhausted batteries and old equipment.
Any changes or modications made to this device that are not expressly
approved by Philips Consumer Lifestyle may void the user’s authority to
operate the equipment.
2009 © Koninklijke Philips Electronics N.V. All rig hts reser ved.
Specications are subject to change without notice. Trademarks are the property of Koninklijke Philips
Elec tronics N.V. or their respective owners. Philips reserves the ri ght to change pr oduc ts at a ny time
with out be ing obliged to a djus t earlier supplies accor dingly.
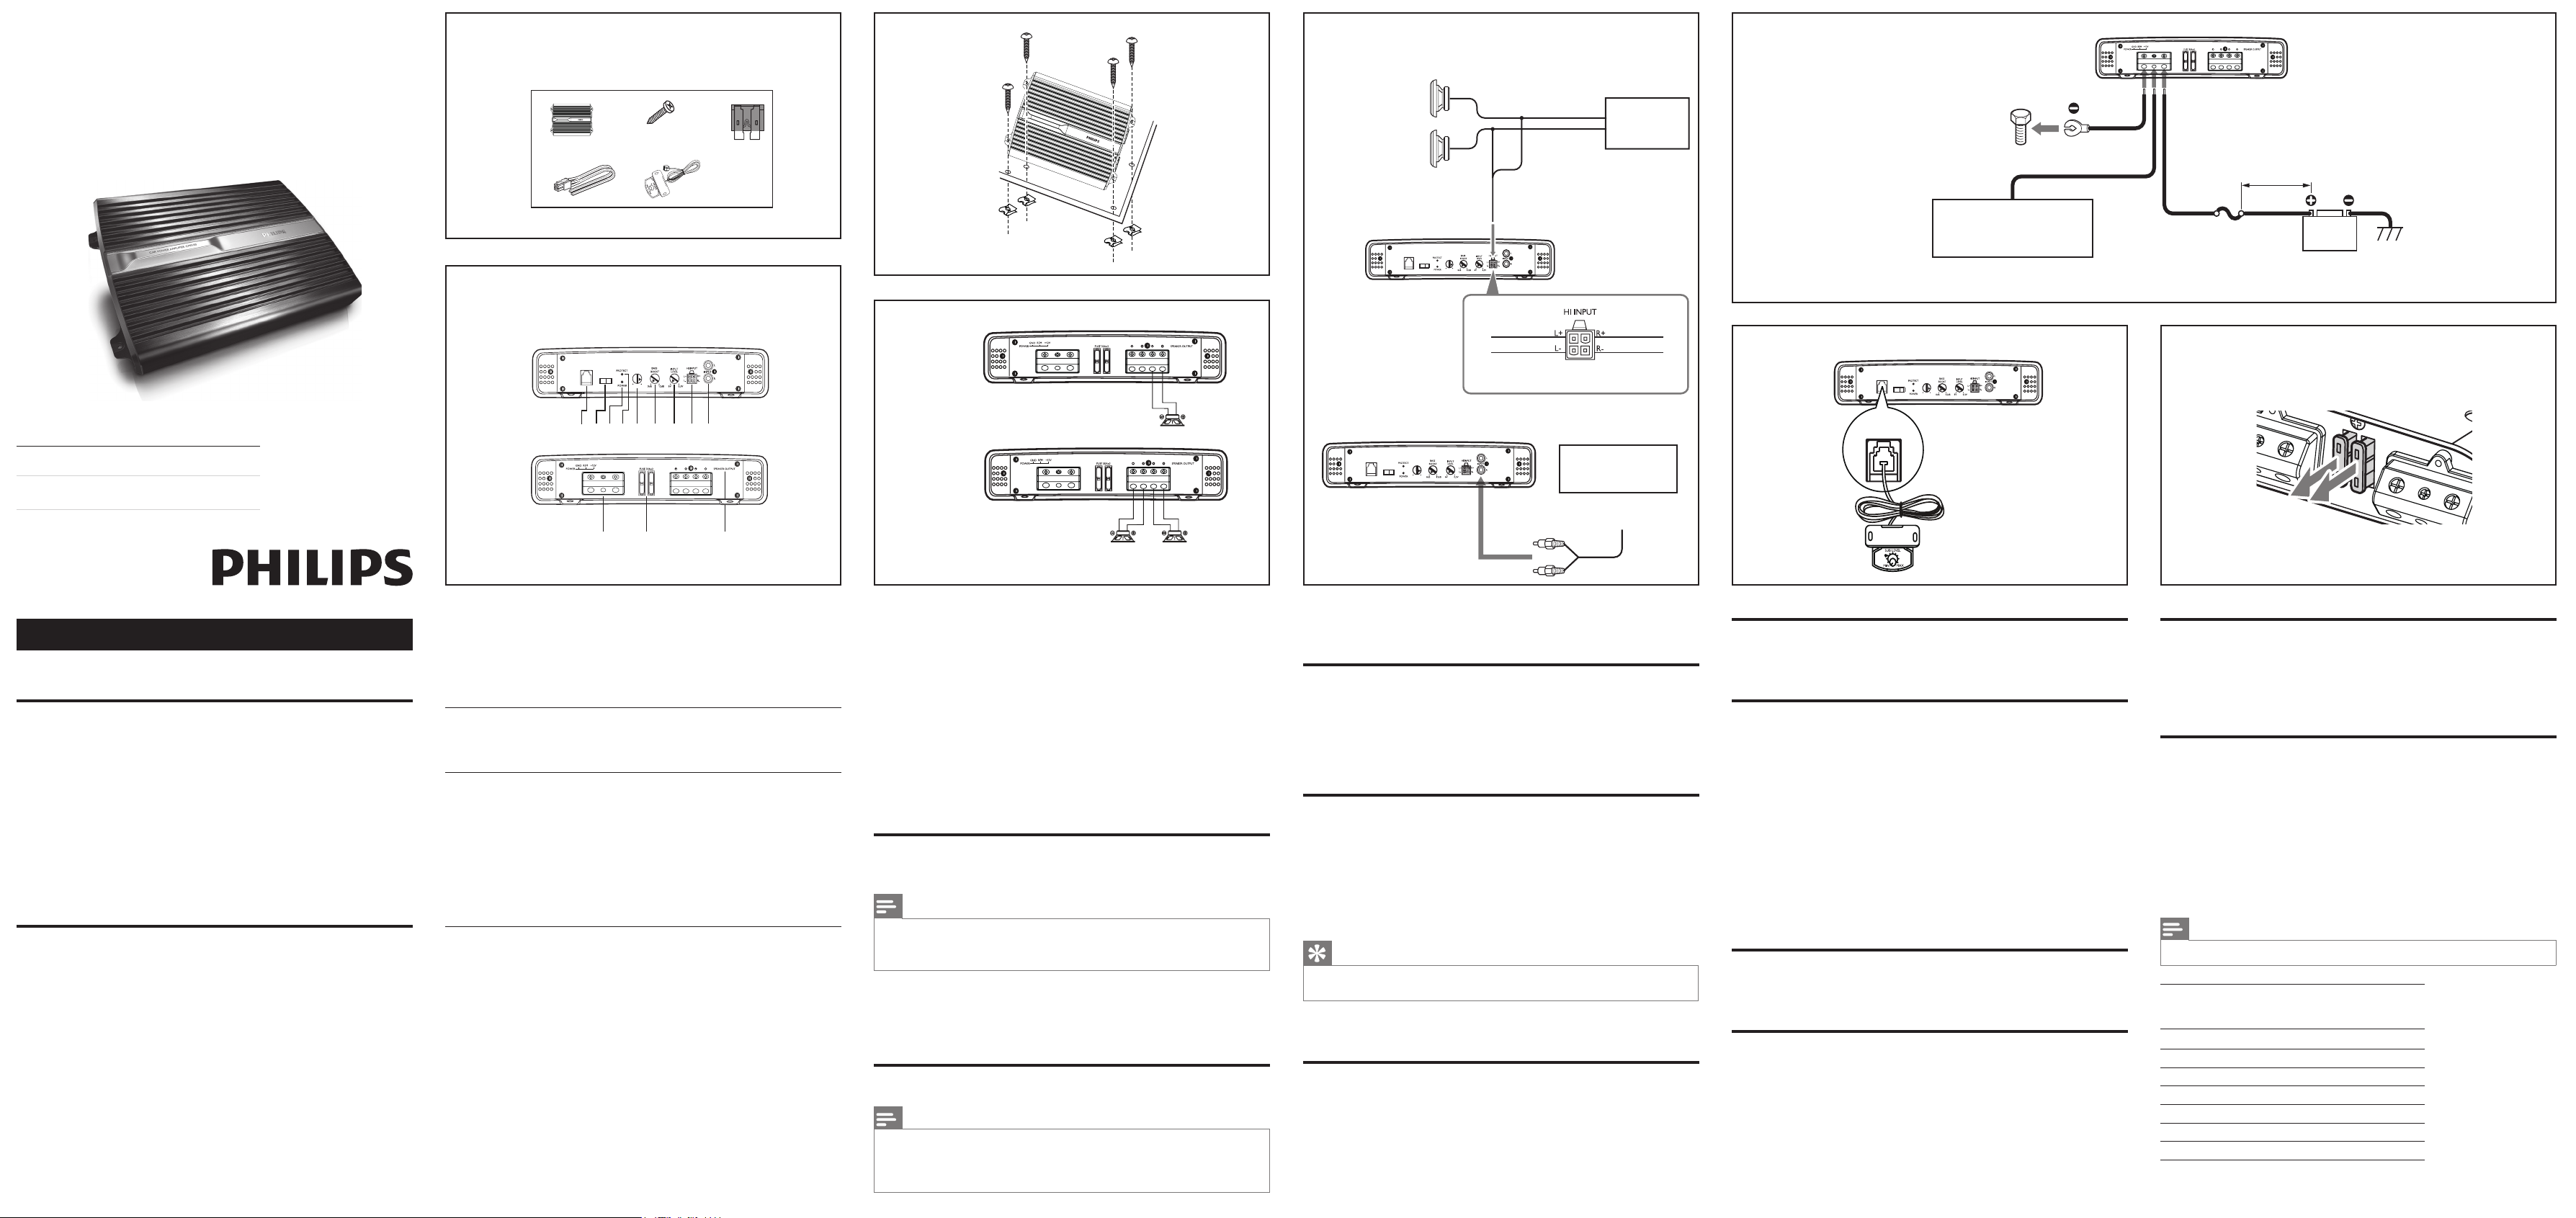
2. Your car power amplier
Congratulations on your purchase, and welcome to Philips! To fully
benet from the support that Philips offers, register your product at
www.philips.com/welcome.
Introduction
With the amplier, you can enjoy high quality sound performance with
powerful bass and beats.
What’s in the box
Check and identify the contents of your package:
a Amplier
b Screw_4x25mm (x4)
c Fuse (x2)
d Hi input connector (x1)
e Volume controller
Overview of the main unit
a INPUT L/R
• Connect car audio with RCA cable.
b HI INPUT
Connect car audio with the supplied high input connector.
•
INPUT LEVEL
c
Adjust input level (0.3V to 6V).
•
BASS BOOST
d
Boost the frequencies at around 45Hz to a maximum of 12dB.
•
SUBWOOFER
e
Adjust low-pass-f
•
f PROTECT
Light in red when the PROTECTOR is activated.
•
POWER
g
Light in blue when power is turned on.
•
A
B
ilter frequency for subwoofer.
h SUBSONIC ON/OFF
Switch on or off the subsonic lter.
•
REMOTE LEVEL CONTROL
i
External remote
• controller for volume level control.
j POWER (GND/REM/+12V)
Connect +12V DC power cable, ground wire and remote wire.
•
k
Fuse: 30Ax2
l SPEAKER OUTPUT
Connect to subwoofers.
•
3. Installation
Installation
You can mount the amplier either under a seat or on the rear tray.
Note
To avoid interference, do not place the amplier too close to the car audio or antenna.
•
The supplied mounting screws are 25mm long. Make sure that the mounting
•
board is thicker than 25mm.
Place the unit on the location for installation.
1
Mark the positions of the four screw holes.
2
Drill the holes with driller of approximately 4mm in diameter.
3
Mount the unit with the supplied screws.
4
Connect speakers
Note
Use speakers with an impedance of 2 to 8 ohm (4 to 8 ohm when used as a •
bridged amplier).
•
Match the “lef t”, “right”, “+” and “-” terminals correctly. Revised polarity may
degrade sound quality.
C
D
Option 1: Mono bridged mode: connect 1 speaker
Option 2: Stereo mode: connect 2 speakers
Connect car audio
Option 1: High level input connection
E
a
a
b
Connect the amplier to your car audio with the supplied High level
input connector.
Option 2: Line input connection
b
Connect the amplier to the car audio with a RCA cable (not supplied).
Connect power
Make the power connection as illustrated below:
1
F
Connect the ground wire from the car to the • GND socket.
• REM socket.
Connect the remote wire from the car audio to the
√ With this connection, you can turn on/off the amplier
with the car audio.
• +12V socket.
Connect the power wire from the car battery to the
Tip
If your car audio does not have remote output, connect the remote input •
terminal (REM) to the accessory power supply.
4. Use your power amplier
Adjust input level
You can adjust the input voltage from 0.3V to 6V.
Rotate INPUT LEVEL to adjust input voltage.
1
Adjust bass boost
You can punch extra bass for 0 to 12dB.
Rotate BASS BOOST to punch for extra bass.
1
About the protector indicator
The amplier has a built-in protection circuit to protect the transistors
and speakers when:
•
The unit is overheated. Or
A DC current is generated. Or•
The battery voltage is over low or over high. Or•
The speaker terminals are short circuited.•
When the PROTECT indicator lights up in red, the unit shuts down
automatically. If this happens, please:
Take out the disc or tape and turn off the car audio.
1
Check the cause of the malfunction (see above).
2
If the amplier has overheated, wait until the unit cools down
3
before use.
Adjust subwoofer frequency
Rotate Subwoofer to adjust low-pass-f ilter frequency for subwoofer.
Rotate SUBWOOFER to adjust frequency: 30Hz to 320Hz.
1
Turn subsonic f ilter on or off
Slide SUBSONIC to ON position.
1
The subsonic is turned on, frequency below 15Hz is f•
To turn off the subsonic lter, slide
• SUBSONIC ON/OFF to
OFF position.
iltered.
Adjust volume
G
You can adjust volume at the front seat via the supplied volume control.
Connect the supplied volume controller to the REMOTE LEVEL
1
CONTROL socket.
Rotate the volume knob to adjust volume.
2
Replace fuse
H
If there is no power, the fuse may be damaged and need to be replaced.
Pull out the damaged fuse.
1
Replace the fuse with the supplied fuses or to buy two fuses
2
that matches the voltage of the damaged fuse (30Ax2).
If the fuse gets damaged immediately after it has been replaced, there
may be an internal malfunction. In such case, consult your Philips dealer.
5. Product information
Note
Product information is subject to change without prior notice.
•
Power Output (RMS)
- 4 ohm
- 2 ohm
Total harmonic distortion 0.08%
Signal to noise ratio 105dB
Frequency response 5-320Hz
Input sensitivity 30 0mV-6V
Input impedance 22k ohm
Fuse rating 30Ax2
Dimensions (DxWxH) 54.4x336.5x240.2mm
250Wx1
400Wx1
Page 2
6. Troubleshooting
ГАРАНТИЙНЫЙ ТАЛОН
НА АВТОМОБИЛЬНЫЕ МУЛЬТИМЕДИЙНЫЕ УСТРОЙСТВА
Модель: Заполнение обязательно
Серийный номер: Заполнение обязательно
Дата продажи: Заполнение обязательно
ПРОДАВЕЦ:
Название торговой организации: Заполнение обязательно
Телефон торговой организации: Заполнение обязательно
Адрес и E-mail: Заполнение опционное
ПЕЧАТЬ
ПРОДАВЦА
Изделие получил в исправном состоянии.
С нижеприведенными гарантийными обязательствами ознакомлен и согласен.
Всё изложенное в инструкции по эксплуатации и гарантийном талоне обязуюсь
выполнять и гарантирую выполнение всеми пользователями изделия.
(подпись покупателя) (ФИО покупателя)
Внимание! Гарантийный талон недействителен при его неправильном или неполном
заполнении и без печати продавца.
To keep the warranty valid, never try to repair the system yourself.
If you encounter problems when using this apparatus, check the
following points before requesting service. If the problem remains
unsolved, go to the Philips web site (www.philips.com/welcome). When
you contact Philips, ensure that the apparatus is nearby and the model
number and serial number are available.
Power indicator does not light up.
The connected car audio is not turned on. •
The fuse is blown. Replace the fuse with a new one. •
The sound is too low.
• The input level is not set correctly (see ‘Adjust input level’).
The sound is interrupted or stopped suddenly.
The thermal protector is activated. Reduce the volume. •
The ventilation outlet is blocked. Remove any obstructions from the outlet. •
Alternate noise is heard.
The power connecting wires are installed too close to the RCA pin cords. •
The ground wire is not securely connected to a metal point of the car. •
Negative speaker wires touch the car chassis. •
The protector indicator lights up in red.
The speaker terminals are short circuited. Check the speaker connections. •
The amplier is overheated. Cool down the amplier before use. •
The amplier is overloaded. •
The unit becomes abnormally hot.
Place the amplier in a well ventilated location. •
Use speakers with suitable impedance: 2-8 ohm (stereo), 4-8 ohm (bridged). •
Русский
1. Важно!
Техникабезопасности
Перед использованием устройства внимательно прочитайте •
все инструкции. Гарантия не распространяется на повреждения,
вызванные несоблюдением инструкции.
Данное устройство предназначено для использования с •
источником постоянного тока с напряжением 12 В и отрицательным
заземлением.
Для безопасной и надежной установки используйте только •
прилагаемые крепежные приспособления.
Запрещается подключать любые активные динамики (со встроенным •
усилителем) к разъемам для динамиков на устройстве. Это может
повредить активные динамики.
В целях повышения безопасности управления автомобилем •
необходимо устанавливать комфортный уровень громкости.
Во избежание короткого замыкания, не подвергайте устройство, •
пульт ДУ или батарейки воздействию дождя или влаги.
Не размещайте устройство под прямыми солнечными лучами, рядом •
с источниками открытого пламени или тепла.
Для очистки устройства пользуйтесь мягкой влажной тканью. Не •
используйте такие вещества, как спирт, химикаты или бытовые
чистящие средства для очистки устройства.
Уведомление
Информацияовлияниинаокружающуюсреду
Продукт не имеет лишней упаковки. Мы попытались сделать так,
чтобы упаковочные материалы легко разделялись на три типа: картон
(коробка), пенополистерол (буфер) и полиэтилен (мешки, защитный
пенопластовый лист).
Материалы, из которых изготовлена система, могут быть
переработаны и вторично использованы специализированными
предприятиями. Соблюдайте местные нормативы по утилизации
упаковочных материалов, выработавших ресурс батареек и
отслужившего оборудования.
Внесение любых изменений, которые должным образом не разрешены
Philips Consumer Lifestyle, может привести к лишению пользователя права
управлять оборудованием.
© Koninklijke Philips Electronics N.V., 2009 Все права защищены.
Характеристики мог ут быть изменены без предварительного уведом ления. Торговые марки
явл яются собственностью Koninklijke Philips Electronics N.V. и других законных владельцев
авторских прав. Компания Philips ос тавляет за собой право в любое время вносить изменения в
изделие без обязательств соответствующим образом изменять ранее поставленные изделия.
2. Автомобильный усилитель
Поздравляем с покупкой и приветствуем Вас в клубе Philips! Для того,
чтобы воспользоваться всеми преимуществами поддержки Philips,
зарегистрируйте ваше изделие на сайте www.philips.com/welcome.
Введение
Благодаря этому усилителю вы можете наслаждаться высоким
качеством звука с мощными басами.
Комплектпоставки
Проверьте комплектацию устройства:
a Усилитель
b Винт_4x25 мм (4 штуки)
c Предохранитель (2 штуки)
d Входной разъем сигнала высокого уровня (Hi input)
e Контроллер громкости
Описаниеосновногоустройства
a INPUT L/R
• Подключение автомобильной аудиосистемы с помощью
кабеля RCA.
b HI INPUT
Подключение автомобильной аудиосистемы с помощью
•
переходника для входного разъема сигнала высокого
уровня (входит в комплект).
A
B
c INPUT LEVEL
Переключение напряжения на входе (0,3 В до 6 В).
•
d
BASS BOOST
Усиление частот в районе 45 Гц до максимальной
•
мощности 12 дБ.
e SUBWOOFER
Настройка фильтра нижних частот сабвуфера.
•
f
PROTECT
Светится красным при срабатывании системы защиты.
•
g
POWER
Светится синим при включенном питании.
•
h
SUBSONIC ON/OFF
Включение и выключение инфразвукового фильтра.
•
REMOTE LEVEL CONTROL
i
Внешний дистанционный контроллер управления громкостью.•
j POWER (GND/REM/+12V)
Подключение кабеля питания +12 В постоянного тока,
•
кабеля заземления и кабеля дистанционного управления.
k 2предохранителя:30А
l SPEAKER OUTPUT
•
Подключение к сабвуферам.
3. Установка
Установка
Усилитель можно установить под сидением или на задней полке.
Примечание
Во избежание помех устанавливайте усилитель на достаточном расстоянии от
•
автомобильной аудиосистемы или антенны.
Длина прилагаемых болтов — 25 мм. Толщина панели для крепления должна
•
быть не менее 25 мм.
C
Разместите устройство в месте установки.
1
Отметьте 4 места крепления болтов.
2
Просверлите отверстия для крепления болтов диаметром
3
около 4 мм.
Закрепите устройство с помощью болтов (входят в комплект).
4
Подключениединамиков
Примечание
Используйте динамики с сопротивлением от 2 до 8 Ом (при использовании •
в “мостовой” схеме — от 4 до 8 Ом).
•
Будьте внимательны при сопоставлении разъемов “левый”, “правый”, “+”
и “-”. Несоблюдение полярности может привести к ухудшению качества
звука.
D
Вариант1.Подключение1динамикавмонорежимев“мостовой”
a
схеме
Вариант2.Подключение2динамиковвстереорежиме
b
Подключениеавтомобильнойаудиосистемы
Вариант1.Подключениевходногосигналавысокогоуровня
Подключите усилитель к автомобильной аудиосистеме с помощью
переходника для входного разъема сигнала высокого уровня
Вариант2.Подключениеклинейномувходу
b
Подключите усилитель к автомобильной аудиосистеме с помощью
кабеля RCA (не входит в комплект)
Подключениепитания
Подключите источник питания указанным ниже способом.
1
F
Подключите провод заземления от автомобиля к •
разъему GND.
a
E
Подключите провод дистанционного управления от •
автомобильной аудиосистемы к разъему REM.
√ Данное подключение позволяет включать и выключать
усилитель через автомобильную аудиосистему.
•
Подключите кабель питания от автомобильного
аккумулятора к разъему +12В.
Совет
Если в автомобильной аудиосистеме не предусмотрен выход дл я •
дистанционного управления, подключите входной разъем удаленного
управления (REM) к дополнительному источнику питания.
4. Использование усилителя
Настройкауровнявходногонапряжения
Напряжение на входе можно настроить в диапазоне от 0,3 В до 6 В.
Для настройки уровня входного напряжения поверните
1
INPUT LEVEL.
НастройкаусиленияНЧ
Можно повысить уровень НЧ от 0 до 12 дБ.
Для усиления уровня НЧ поверните BASS BOOST.
1
Индикаторсистемызащиты
Усилитель оснащен встроенной системой защиты транзисторов и
динамиков при:
•
перегреве устройства Или
возникновении постоянного тока Или•
недостаточном или слишком высоком напряжении заряда •
батарей Или
коротком замыкании в разъеме динамиков.
•
Если индикатор PROTECT светится красным, произошло
автоматическое отключение устройства. В этом случае
необходимо выполнить следующие действия.
Извлеките диск или аудиокассету и выключите радио.
1
Выясните причину возникновения неполадок (см. выше).
2
Если произошло перегревание усилителя, дайте ему остыть
3
перед повторным включением.
Настройкачастоты
Настройка фильтра нижних частот сабвуфера.
Поверните SUBWOOFER для настройки частот от 30 Гц до
1
320 Гц.
Включение/выключениеинфразвукового
фильтра
Передвиньте переключатель SUBSONIC ON/OFF в
1
положение ON.
Инфразвуковой фильтр включен. Фильтр подавляет звук с »
частотой ниже 15 Гц.
Для выключения инфразвукового фильтра передвиньте пере- »
ключатель SUBSONIC ON/OFF в положение OFF.
Регулировкагромкости
Уровень громкости можно регулировать с помощью специального
регулятора.
Подключите контроллер громкости (входит в комплект) к
1
разъему REMOTE LEVEL CONTROL.
Поверните регулятор для настройки уровня громкости.
2
G
Заменапредохранителя
H
Причиной отсутствия питания может быть вышедший из строя
предохранитель. В этом случае его необходимо заменить.
Извлеките вышедший из строя предохранитель.
1
Замените его на новый предохранитель из комплекта или
2
замените оба предохранителя на новые предохранители с
соответствующими характеристиками (30 А x 2 шт.).
Если предохранитель выходит из строя сразу после замены, то
причина кроется во внутренней неисправности усилителя. В этом
случае обратитесь к торговому представителю Philips.
5. Сведения об изделии
Примечание
Информация о продукте может быть изменена без предварительного
•
уведомления.
Выходнаямощность
(среднеквадратичнаямощность)
—4Ом
—2Ом
Общееискажениегармоник 0,08%
Соотношениесигнал/шум 105 дБ
Частотныйотклик 5-320 Гц
Входнаячувствительность 300 мВ — 6 В
Входноесопротивление 22 кОм
Номиналпредохранителя 30 A x 2
Размеры(ГxШxВ) 54,4 x 336,5 x 240,2 мм
250 Вт x 1
400 Вт x 1
6. Устранение неполадок
Для сохранения действия условий гарантии запрещается
самостоятельно ремонтировать систему.
При возникновении неполадок в процессе использования данной
системы перед обращением в сервисную службу проверьте
следующие пункты. Если не удается решить проблему, посетите
веб-сайт Philips (www.philips.com/welcome). При обращении в
компанию Philips устройство должно находиться поблизости,
номер модели и серийный номер должны быть известны.
Несветитсяиндикаторпитания
Подключенная автомобильная аудиосистема не включена. •
Предохранитель вышел из строя. Замените предохранитель на новый. •
Громкостьзвукаслишкоммала.
Неправильно установлен уровень входного напряжения (см. раздел •
“Настройка уровня входного напряжения”).
Звукпрерываетсяиливнезапноотключается.
Сработала система защиты от перегрева. Уменьшите громкость. •
Перекрыто вентиляционное отверстие. Удалите предметы, закрывающие •
вентиляционное отверстие.
Слышныпосторонниешумы.
Кабели питания расположены слишком близко к разъемам RCA. •
Кабель заземления недостаточно плотно соединен с металлическим •
контактом автомобиля.
Кабели отрицательного заряда динамиков касаются шасси автомобиля. •
Индикаторсистемызащитысветитсякрасным.
Короткое замыкание в разъемах динамиков. Проверьте подключения •
динамиков.
Усилитель перегревается. Подождите, пока усилитель остынет. •
Усилитель перегружен. •
Устройствослишкомсильнонагревается.
Поместите усилитель в хорошо вентилируемое место. •
Используйте динамики с сопротивлением 2-8 Ом (стерео), 4-8 Ом •
(в “мостовой” схеме).
УважаемыйПотребитель!
БлагодаримВасзапокупкуАвтомобильного
МультимедийногоУстройства(АМУ)маркиФилипс..
Дополнениекинструкциипользователя.
К АМУ относятся автомагнитолы, автомобильные мультимедийные центры,
автомобильные тюнеры, усилители.
При покупке АМУ убедительно просим проверить правильность
заполнения гарантийного талона. Серийный номер и наименование модели
приобретенного Вами АМУ должны талоне каких быть идентичны записи в
гарантийном талоне. Не допускается внесения в талон каких-либо изменений,
исправлений. В случае неправильного или неполного заполнения гарантийного
талона немедленно обратитесь к продавцу.
АМУ представляет собой технически сложный товар. При бережном
и внимательном отношении и использовании его в соответствии с
правилами пользования оно будет надежно служить Вам долгие годы. В
ходе эксплуатации не допускайте механических повреждений, попадания
вовнутрь посторонних предметов, жидкостей, насекомых и пр., в течение
всего срока службы следите за сохранностью идентификационной наклейки
с обозначением наименования модели и серийного номера изделия. Во
избежание возможных недоразумений, сохраняйте в течение срока службы
документы, прилагаемые к товару при его продаже (данный гарантийный
талон, товарный и кассовый чеки, накладные, данную инструкцию
пользователя и иные документы). Если в процессе эксплуатации изделия
Вы сочтете, что параметры его работы отличаются от изложенных в
инструкции пользователя, рекомендуем обратиться за консультацией в наш
Информационный центр
Купленное Вами изделие требует специальной установки и подключения.
Рекомендуем обратиться в организацию, специализирующуюся на оказании
такого рода услуг.
Лицо (компания), осуществившее Вам установку, несет ответственность за
правильность проведенной работы. Помните, квалифицированная установка
и подключение изделия существенны для его дальнейшего правильного
функционирования и гарантийного обслуживания.
Условиягарантии.
• Срок гарантии на АМУ составляет 12 месяцев с момента передачи товара
Потребителю, но не более 36 месяцев с даты изготовления
• Срок гарантии на составные части* составляет 6 месяцев с момента передачи
товара Потребителю, но не более 36 месяцев с даты изготовления.
* К составным частям изделия относятся: камеры заднего вида, пульты
дистанционного управления (проводные и беспроводные), антенны и
переходники для них, носители информации различных типов, а также
иные части, прилагаемые к основному изделию.
• Срок службы Изделия составляет 24 месяца с передачи товара
Потребителю, но не более 36 месяцев с даты изготовления.
Информацию о дате изготовления изделия Вы можете установить по
серийному номеру (ххххГГННхххххх), (где ГГ – год , а НН номер недели
(например AJ011025123456789 – 25 неделя 2010 года)), либо получить,
позвонив в Информационный Центре Филипс
По окончании срока службы обратитесь в авторизованный сервисный центр
для проведения профилактических работ и получения рекомендаций по
дальнейшей эксплуатации изделия.
Настоящие условия гарантия распространяются только на АМУ, приобретенные
и используемые исключительно для личных, семейных, домашних и иных
нужд, не связанных с осуществлением предпринимательской деятельности.
Гарантийное обслуживание не распространяется на изделия, недостатки
которых возникли вследствие:
1. Нарушения потребителем правил эксплуатации, хранения или
транспортировки товара
2. Действий третьих лиц:
• ремонта неуполномоченными лицами;
• внесения несанкционированных изготовителем конструктивных или
схемотехнических изменений и изменений программного обеспечения
• отклонение от Государственных Технических Стандартов (ГОСТов) и
норм питающих, телекоммуникационных и кабельных сетей;
• неправильной установки и подключения изделия;
3. Действия непреодолимой силы (стихия, пожар, молния и т.п.);
4. Гарантий не распространяется также на расходные материалы и аксессуары,
к примеру, но не только: элементы питания (батарейки), наушники, чехлы,
монтажные приспособления, соединительные кабели и пр.
Любуюинформациюоработеизделия,расположениисервисных
центровиосервисномобслуживанииВыможетеполучитьв
ИнформационномЦентре
Телефон: (495)961-1111, 8800200-0880(бесплатныйзвонокпоРоссии).
Интернет: www.philips.ru
© 2009 Koninklijke Philips Electronics N .V.
All rig hts reserved.
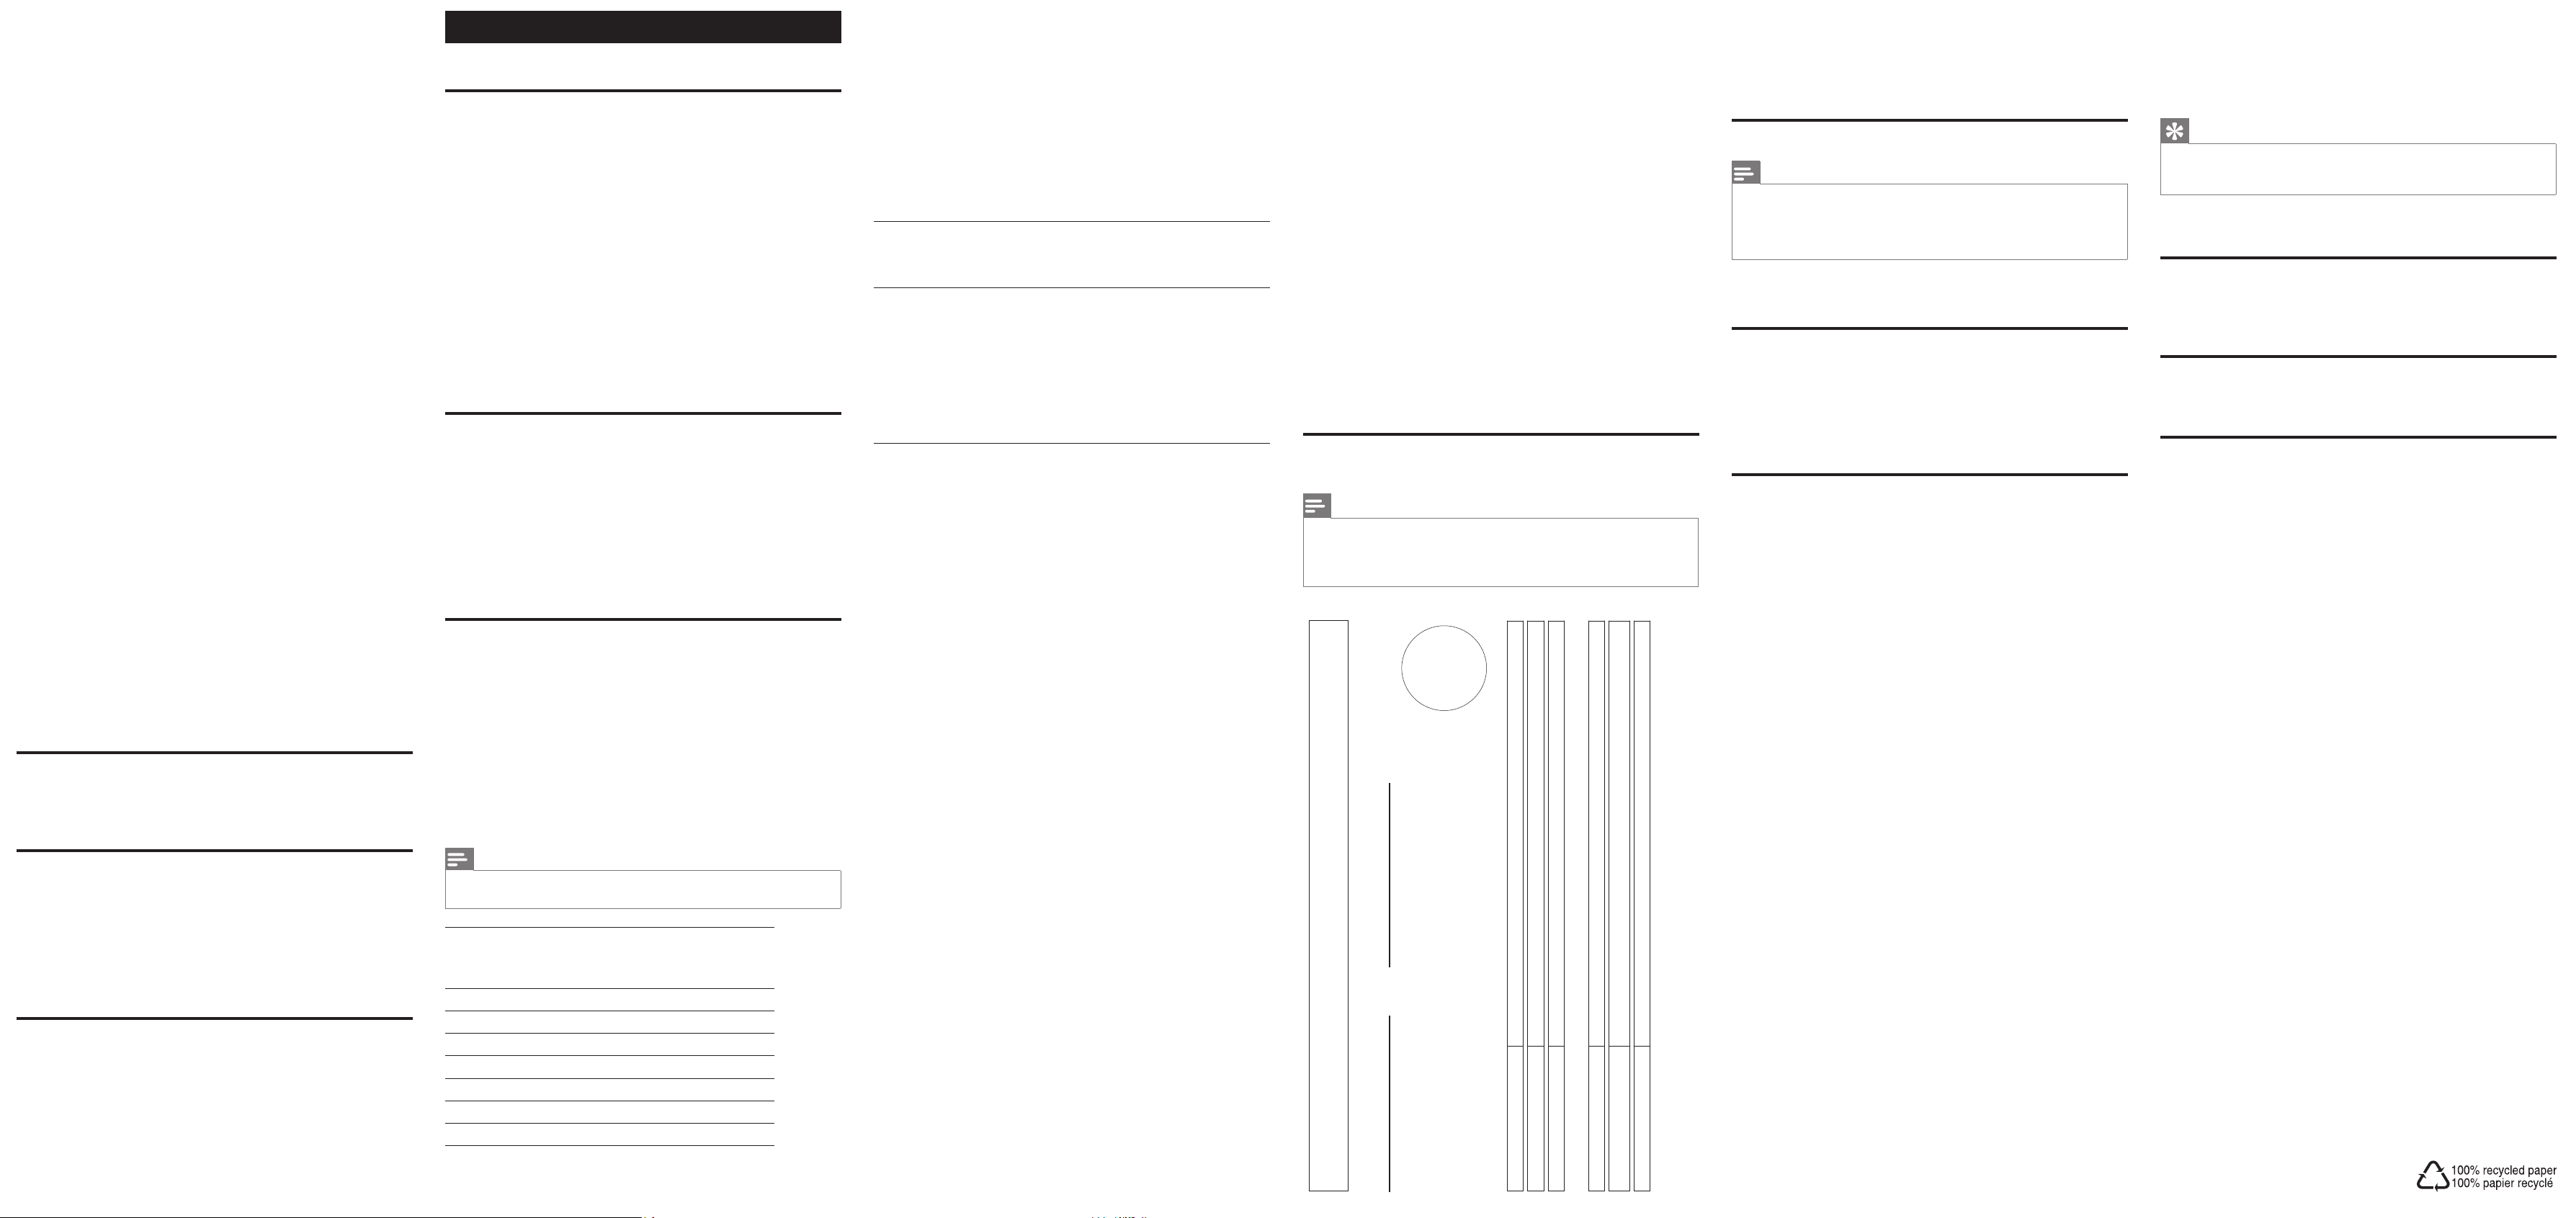
CMP100_51_UM_V2.0
 Loading...